

Go to modelshipwrights.com for the current dynamic site!


1⁄35Building the Revell 1:72 VIIC u-boat
13
Comments
Part 6: deck gun and details...
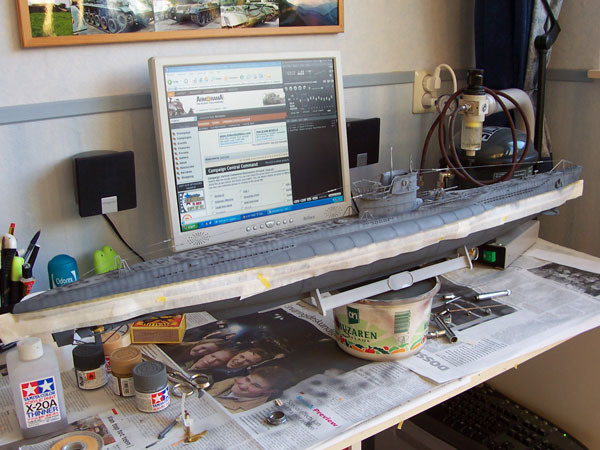
The u-boat now has the shape of an actual u-boat. Time to add some more details! First of all, the deck gun. Like the 20mm, the deck gun is easy to built, and it looks cool on the deck of your u-boat. Soon after the deck gun, the safety railings, the saw at the front of the u-boat, and equipment on the deck followed. Last step is adding the cables that go from the front of the u-boat to the rear. Some patience is needed here. In total, you use 8 pieces of wire, 6 connectors between those wires and 3 points where the wire is connected with the hull. The kit has enough wire to do about 8 u-boats with so you have room for errors here. Just take your time and it will look nice!Part 7: preparing for paint...
Sunday, almost two weeks ago when I received the kit The whole u-boat has been built, and so it's time to paint and weather it. Before I started painting, I sprayed the whole u-boat in Tamiya grey surface primer. Because I had so much fun in building I decided not to paint anything during the built. If this was a good idea or not .Ill come back to that later!Part 8: painting the VIIC (4 weeks later)
After working on some other projects, it was time to continue on the VIIC again. The first thing I had to do was to decide which paints to use. I like to use Tamiya Acrylics, so I ended up with the following colours: XF-63 (German Grey) for the lower hull. XF-53 (Neutral Grey) for the upper hull and tower. XF-24 (Dark Grey) for the deck. XF-1 (Flat Black) for pre-shading. I also used some colours like XF-7 flat red for life jackets, X-10 gun metal for the 20mm AA gun etc. I spray the paints with my Tamiya HG superfine airbrush, a good airbrush which I can recommend. Air comes from my Sil Air 15exp compressor, which I also like a lot! Details are painted by hand. I started with pre-shading. This is my first attempt with this technique. I used flat black for this. After this I began to paint the lower hull with German Grey. To bring some difference in colour (1 large surface in 1 colour looks a bit boring) I sprayed the lower hull a second time, now with a mix of 90% XF-63 German Grey and 10% XF-15 Flat Flesh. The propellers were painted with X-12 Gold Leaf. Once this was done I continued on the upper hull with Neutral Grey. Masking tape was used here to achieve the hard-edge look. I also painted the tower with this colour. Now it was time for the decks. After masking the hull and the tower I sprayed XF-24 Dark Grey on the main deck. The tower deck was hand painted. With all the large pieces of the VIIC painted, it was time to focus on the details. I started with the deck gun and equipment on the main deck. After that I hand painted the interior and details of the tower. The cables were hand painted with X-10 gun metal. To get back on the question: is it smart first to built the whole kit and then paint it .I think its just what you like, but if I would built another VIIC Id paint the turret interior during the assembly, as well as the deck gun and AA gun. That makes things a bit easier.


About the Author


FROM: ZUID-HOLLAND, NETHERLANDS
Hi all, Another scale modeller :) I focus on 1/35 and 1/16 (RC) military modelling. Martin
Comments


Hi
Great job. Your weathering is very well done.
Now my Flower cl corvette is sniffing its nose :-)
Tom
JUN 21, 2005 - 04:23 AM

Now I really need to see this one in real Awesome job on the feature Martin. Congrats!
JUN 21, 2005 - 04:53 AM

A very entertaining read, and a lovely build of the U-boat. The pre-shading came out very well I think. Thanks Martin!
JUN 21, 2005 - 07:32 AM

Martinnn
I've got nothing more to add to the comments of the other guys. Very entertaining read, a lot of info, and very professional pics.
I hope you made a good deal with mr. REvell on this one, cause he'll sure be selling a lot more of these babies now your article is posted.
But, as a marketing graduate, just a small hint:
Everything sells better if you put a nice model holding or slightly touching the object you're trying to sell.
So, in this case, how about a nice model holding your model?
I know you've got both at your disposal....
:-)
just kidding...
great work!
JUN 21, 2005 - 08:12 AM

Martin,
Great job on the build and thanks for taking the time to write an in progress article.
regards,
Robert
JUN 25, 2005 - 10:03 AM


Martin ...... Well done! An interesting read. You did a fine job with the VII C. I'm glad you wrote the article. I will try the pre shading when I build mine. I can't wait to see what you come up with for DDD2.
JUN 25, 2005 - 04:30 PM

Hi Martin,
As someone who is taking a break from 1:32 aircraft, and who has received this kit as a gift, I look forward to using your excellent model to help me build mine! First shipwrighting job ever!
Best Regards,
David.
AUG 25, 2009 - 07:52 AM

Copyright ©2021 by Martin Noorloos. _OPINIONS Model Shipwrights, KitMaker Network, or Silver Star Enterrpises. Images also by copyright holder unless otherwise noted. Opinions expressed are those of the author(s) and not necessarily those of Model Shipwrights. All rights reserved. Originally published on: 2005-06-21 00:00:00. Unique Reads: 92839

WEB HOSTING BY


Copyright ©2021 Model Shipwrights and Kitmaker Network, a subsidiary of Silver Star Enterprises
All Rights Reserved. Please read our Conditions of Use and Privacy Policy.
All Rights Reserved. Please read our Conditions of Use and Privacy Policy.