_GOTOBOTTOM
General Ship Modeling: Contests
Information and posts on site contests.
SOTQ #2 Battleship Orel
wildspear
Visit this Community
Michigan, United States
Joined: April 03, 2007
KitMaker: 960 posts
Model Shipwrights: 901 posts
Posted: Saturday, September 15, 2007 - 05:24 AM UTC
Hello,

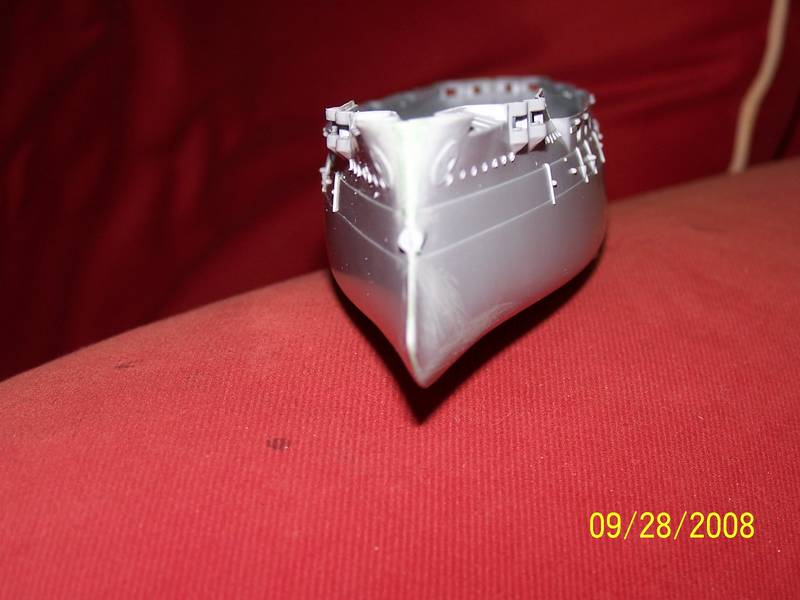
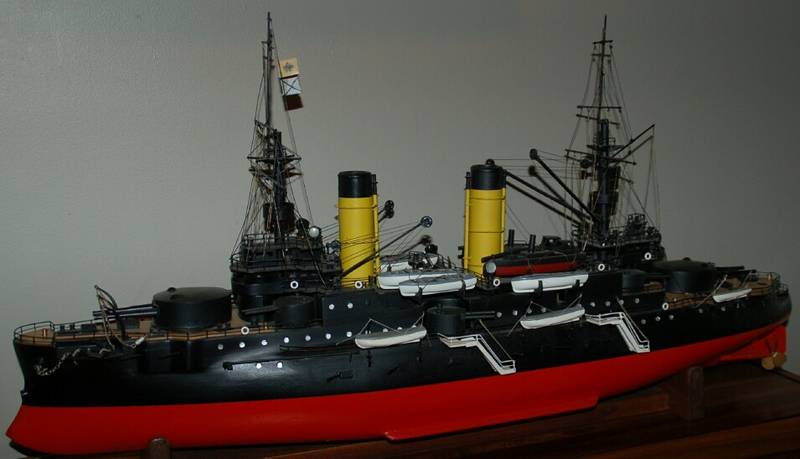
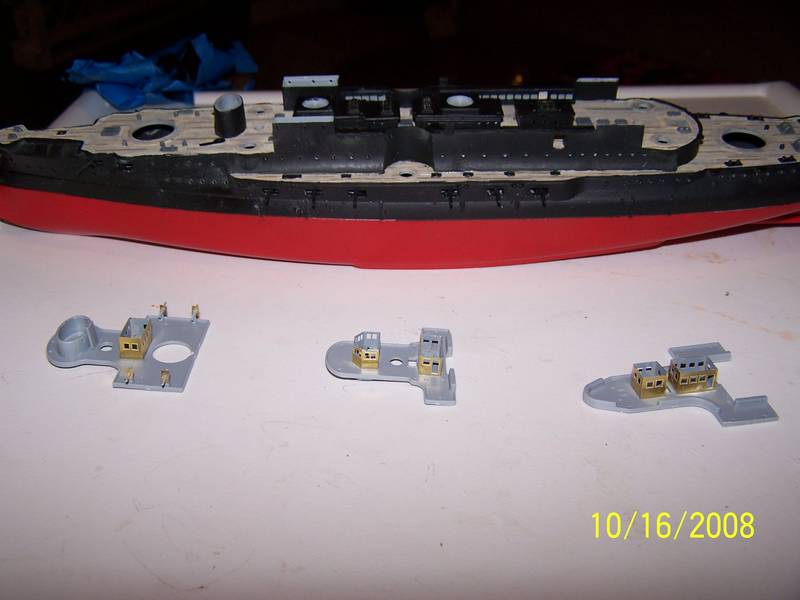
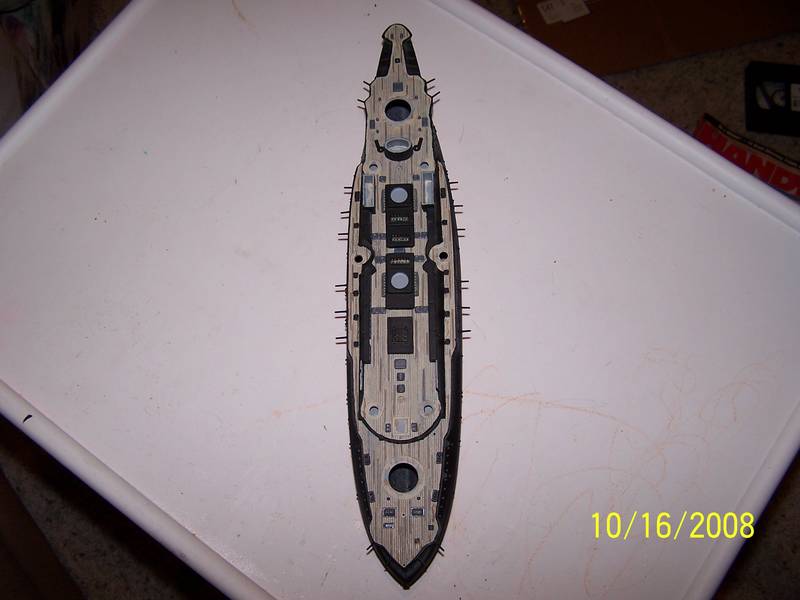
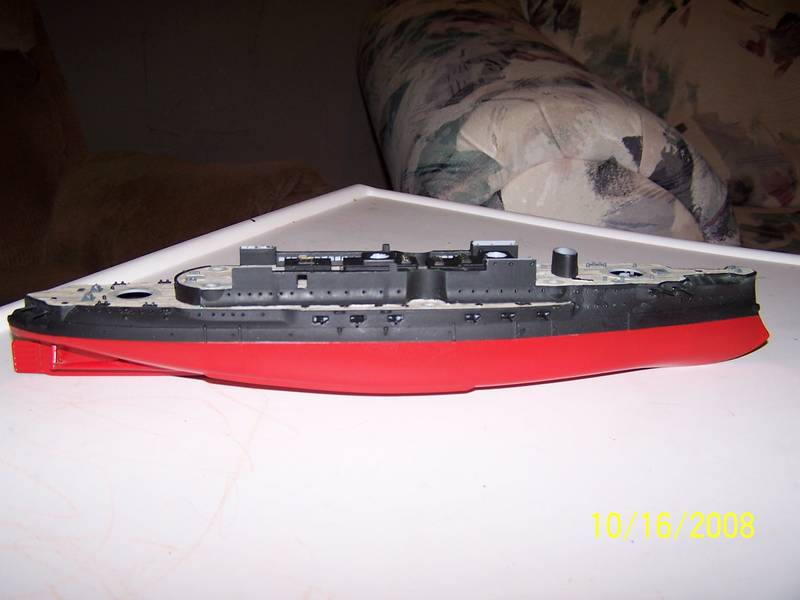
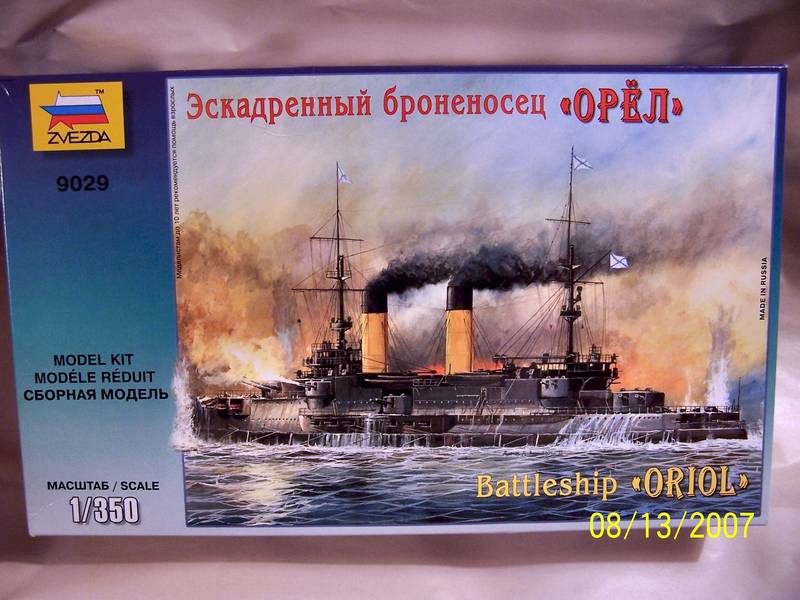
The start of another great contest from our MSW staff. The first contest I built a german torpedo boat, it turned out ok but I learned many things along the way so this build will be the Russian battleship Orel.


MSW Review HERE!

Displacement: 13,516 tons designed, 14151 tons at Tsushima
Length: 397 ft (121 m)
Beam: 76 ft (23.2 m)
Draught: 26 ft (7.9 m)
Armament:
4 × 12 in (305 mm) guns (2 × 2)
12 × 6 in (152 mm) guns (6 × 2)
20 × 75 mm (20 × 1)
20 × 47 mm (20 × 1)
4 × 15 in (381 mm) torpedo tubes
Armour:
Krupp armour - Belt - 7.6 in (193 mm)
Turrets 10 in (254 mm) max
Deck 2 in (51 mm)
1 in (25 mm) anti-torpedo bulkhead
Machinery: 2 shafts , vertical triple-expansion engines, 12 Bellville Boilers, 15,800 hp (12 mW)
Speed: 18 knots (33 km/h)
Endurance: 2,590 miles (4,000 km)
Complement: 28 officers, 754 men

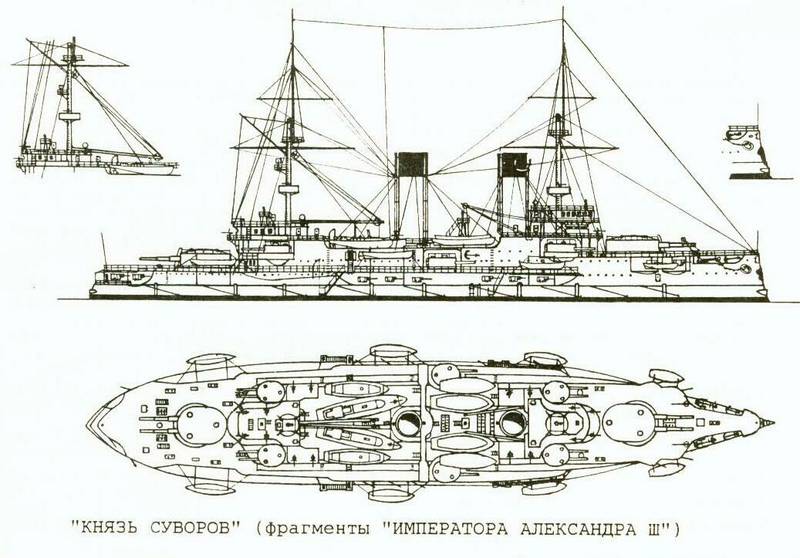
Orel (Орел, Russian: Eagle) was built by Galernii yard, St Petersburg. Laid down 1900, Launched July 1902, completed October 1904. Captured by the Japanese after sustaining heavy damage at Tsushima and extensively re-built. Served as Iwami in the Imperial Japanese Navy and scrapped in 1922.

Russian battleship Orel (Russian: Орёл), and was commissioned into the Imperial Russian Navy's Baltic Fleet. Some naval architects regard the Borodino-class as one of the worst battleships ever built. Based on the battleship Tsesarevich, these ships suffered from instability caused by a high centre of gravity (made worse by overloading). The centre line bulkhead led to a danger of capsizing and the narrow armour belt became submerged due to overloading.

The Orel was the only modern Russian battleship to survive the Battle of Tsushima. She was probably hit by five 12 inch, two 10 inch, nine 8 inch, and 28 6 inch shells, and possibly a number of smaller rounds. She suffered only moderate damage, including two 6 inch turrets disabled by 8 inch hits. Her armor was fairly effective: a 12 inch shell hit the 5 ¾ inch belt obliquely and was repulsed, and a main battery turret resisted a 10 inch shell.

She was substantially rebuilt after her capture by the Japanese, reducing her top weight and removing the smaller guns, and commissioned into the Imperial Japanese Navy as the battleship Iwami, taking her name from an ancient Japanese province, of Iwami now part of Shimane prefecture. The name Iwami was chosen as this province was geographically the closest to the location of the Battle of Tsushima.


blaster76
Visit this Community
Texas, United States
Joined: September 15, 2002
KitMaker: 8,985 posts
Model Shipwrights: 3,509 posts
Posted: Saturday, September 15, 2007 - 06:06 AM UTC
What....no pictures?

Seriously though, if you have access to any old photo's of the ship, I would love to see them....even the boxart would be cool.
wildspear
Visit this Community
Michigan, United States
Joined: April 03, 2007
KitMaker: 960 posts
Model Shipwrights: 901 posts
Posted: Tuesday, September 18, 2007 - 01:13 AM UTC
Blaster,

Looks like some one helped me out and improved on my posting. Here is a pic of the ship;


I have made some progress. I glued up the base and the hull. No pics yet(at work). The base is kind of different.......There is a plastic base with what looks to be bollards that hold the kit in place. I'll provide pics so all of you will know what I'm talking about.
skipper
Visit this Community
Lisboa, Portugal
Joined: February 28, 2002
KitMaker: 5,182 posts
Model Shipwrights: 4,070 posts
Posted: Tuesday, September 18, 2007 - 09:18 AM UTC
Hi Frank

An interesting subject! Please keep us posted
Skipper
wildspear
Visit this Community
Michigan, United States
Joined: April 03, 2007
KitMaker: 960 posts
Model Shipwrights: 901 posts
Posted: Wednesday, September 19, 2007 - 01:08 AM UTC
Hey all,

Sorry no pics yet. Had to reglue the hull last night, I had some rubber bands holding the hull untill the glue dried but when I check on the hull last night I notice the bands created a gap along the bottom(keel?) so I reglued and used some tape so hopefully I'll have better luck. I also applied the first color for the deck.

Also does any one know if there is any threads dealing with painting the deck(any ships deck)? I read a thread dealing with the deck for Hood but I think they were painting it one color. I was wanting to add a few different colors to add contrast.

one other thing.....with dry brushing do you use oil paint for that? Are there any threads dealing with dry brushing.

Sorry I'm at work and I tend to type what ever is going through my head at the time.
C[ ]
MartinJQuinn
Visit this Community
New Jersey, United States
Joined: January 19, 2005
KitMaker: 574 posts
Model Shipwrights: 530 posts
Posted: Thursday, September 20, 2007 - 04:55 AM UTC

Quoted Text

Hey all,

Sorry no pics yet. Had to reglue the hull last night, I had some rubber bands holding the hull untill the glue dried but when I check on the hull last night I notice the bands created a gap along the bottom(keel?) so I reglued and used some tape so hopefully I'll have better luck. I also applied the first color for the deck.

Also does any one know if there is any threads dealing with painting the deck(any ships deck)? I read a thread dealing with the deck for Hood but I think they were painting it one color. I was wanting to add a few different colors to add contrast.

one other thing.....with dry brushing do you use oil paint for that? Are there any threads dealing with dry brushing.

Sorry I'm at work and I tend to type what ever is going through my head at the time.
C[ ]


There is this article by Rusty White over on Steel Navy on painting decks.

I started this kit...the fit is a tricky. Be prepared to use lots of filler when you put the upper hull onto the main deck...
wildspear
Visit this Community
Michigan, United States
Joined: April 03, 2007
KitMaker: 960 posts
Model Shipwrights: 901 posts
Posted: Thursday, September 20, 2007 - 05:00 AM UTC
Martin,

Thanks for the link. I've already used some filler on the hull, my second glueing didn't solve all of the issues I've had with the fit so I used some filler. I'll keep you posted on the upper hull.
wildspear
Visit this Community
Michigan, United States
Joined: April 03, 2007
KitMaker: 960 posts
Model Shipwrights: 901 posts
Posted: Friday, September 21, 2007 - 03:13 AM UTC
I tried looking for the tape the article mentioned but no joy there. I might tkae regular masking tape and cut it to size. It would be lots of work but in will also be a learning experiance.

I noticed on the model that the molding on the planks make the planks full length of the deck.......unless the russians had huge trees this cant be right.

Also where are the coal storage door(where they loaded the coal) located? Does any one have a pic that may show this?

C[ ]
wildspear
Visit this Community
Michigan, United States
Joined: April 03, 2007
KitMaker: 960 posts
Model Shipwrights: 901 posts
Posted: Friday, September 28, 2007 - 08:48 AM UTC
Hey all,


In the pictures I posted, the round area....is that the torpedo tube's???
skipper
Visit this Community
Lisboa, Portugal
Joined: February 28, 2002
KitMaker: 5,182 posts
Model Shipwrights: 4,070 posts
Posted: Sunday, September 30, 2007 - 10:57 AM UTC
Hi Frank!

Sorry for the late reply
As for your question: Yes, it is a forward firing torpedo tube (it probably have a couple more amidship port and starboard and a couple more near the stern).
Hope this helps,
Skipper
gbkirsch
Visit this Community
Ohio, United States
Joined: June 04, 2005
KitMaker: 627 posts
Model Shipwrights: 93 posts
Posted: Monday, October 01, 2007 - 01:09 AM UTC
I can't read Russian but this drawing may be the sistership to the Oriol and Borodino, the Knyaz Suvorov...


Cheers, Gary
#027
Visit this Community
Louisiana, United States
Joined: April 13, 2005
KitMaker: 5,422 posts
Model Shipwrights: 5,079 posts
Posted: Monday, October 01, 2007 - 01:27 AM UTC
Hey Frank,

Here's an easy way to do that rigging. Instead of trying to stretch sprue of fight with fishing line, go get you a cheap set of ear buds for a walkman. There is enough wire in there to do several ships and you can work with something stiff.

Gator
wildspear
Visit this Community
Michigan, United States
Joined: April 03, 2007
KitMaker: 960 posts
Model Shipwrights: 901 posts
Posted: Monday, October 01, 2007 - 04:59 AM UTC
Gary,

Thanks for posting the drawing, it looks to be one of the other ships in the class but any drawings will help in one way or another.

Gator,

I was leaning towards using wire for the rigging. I can never do a very good job with things that can loosen as I'm working with it.
wildspear
Visit this Community
Michigan, United States
Joined: April 03, 2007
KitMaker: 960 posts
Model Shipwrights: 901 posts
Posted: Tuesday, October 02, 2007 - 02:02 AM UTC
Gary,

Question, I'm just a ground pounder so I don't really know but how are the guide wires attached to the stack?
MartinJQuinn
Visit this Community
New Jersey, United States
Joined: January 19, 2005
KitMaker: 574 posts
Model Shipwrights: 530 posts
Posted: Tuesday, October 02, 2007 - 03:51 AM UTC

Quoted Text

Gary,

Question, I'm just a ground pounder so I don't really know but how are the guide wires attached to the stack?


On the real thing, the stays would be tied off on the funnel and someplace on the deck. On my Illinois, I used ceramic thread, which was cut to length and attached to the deck and the funnel with a small drop of super glue. You can see the funnel stays in this photo:
gbkirsch
Visit this Community
Ohio, United States
Joined: June 04, 2005
KitMaker: 627 posts
Model Shipwrights: 93 posts
Posted: Wednesday, October 03, 2007 - 04:50 AM UTC

Quoted Text

Gary,

Question, I'm just a ground pounder so I don't really know but how are the guide wires attached to the stack?


Frank, you're in luck since I have a 1/100th scale model of the sistership to the Orel the Knayaz Suvorov which was scratchbuilt from drawings of the original. I have detailed photos of the rigging that if you want, I can email to you. My email address is on my profile.

Gary
wildspear
Visit this Community
Michigan, United States
Joined: April 03, 2007
KitMaker: 960 posts
Model Shipwrights: 901 posts
Posted: Tuesday, October 16, 2007 - 12:05 PM UTC
Hey all,

I haven't fallen of the end of the earth, just refueling at a nuc plant adds up to 72 hr work weeks and after that and family there tends to be very little bench time. Here are some pics where I'm at right now.


MartinJQuinn
Visit this Community
New Jersey, United States
Joined: January 19, 2005
KitMaker: 574 posts
Model Shipwrights: 530 posts
Posted: Tuesday, October 16, 2007 - 12:36 PM UTC
She really looks great - can't wait to see more pictures. I hope mine comes out as good!
Harry_at_BFM
Visit this Community
Colorado, United States
Joined: February 04, 2007
KitMaker: 594 posts
Model Shipwrights: 556 posts
Posted: Tuesday, October 16, 2007 - 12:49 PM UTC
Looking good, Frank.
How is the PE? I have not started working with mine yet.
Been to busy pouring.
BTW, Did you pick up the turned brass barrels and stacks?
#027
Visit this Community
Louisiana, United States
Joined: April 13, 2005
KitMaker: 5,422 posts
Model Shipwrights: 5,079 posts
Posted: Tuesday, October 16, 2007 - 12:54 PM UTC
Looking good Frank.

Gator
wildspear
Visit this Community
Michigan, United States
Joined: April 03, 2007
KitMaker: 960 posts
Model Shipwrights: 901 posts
Posted: Tuesday, October 16, 2007 - 02:26 PM UTC
Hey all,

Thanks for the kudo's. Harry I didn't get the barrels or mast. The second SOTQ caught me by surprise. I wasn't really ready for it but I like to support the site. The only thing I got extra for the ship was the PE and it's turning out great. The railing looks good and it came with some deck houses so all in all ....looking pretty good.
goldenpony
Visit this Community
Zimbabwe
Joined: July 03, 2007
KitMaker: 3,529 posts
Model Shipwrights: 2,419 posts
Posted: Tuesday, October 16, 2007 - 11:19 PM UTC
Looks great thus far. It is alwyas good to see topis off the beaten path.

One side note, did you notice your camera is set for a year ahead?

skipper
Visit this Community
Lisboa, Portugal
Joined: February 28, 2002
KitMaker: 5,182 posts
Model Shipwrights: 4,070 posts
Posted: Tuesday, October 16, 2007 - 11:35 PM UTC
Well It's nice to see that we have a GOOD EYE around here
Nice catch with the camera date, Jim

Frank, you are a fast learner...
- Deck: You have made a nice rendering and break the even colour with those different colour planks
- PE: You have mastered the technique of folding the PE properly (easier said than done)
- Painting: The black seems very sharp around the deck areas, just take a little atention on the midship area next to the hull red (you can see it in the photos)

Keep up - looking forward to see it completed
Skipper
wildspear
Visit this Community
Michigan, United States
Joined: April 03, 2007
KitMaker: 960 posts
Model Shipwrights: 901 posts
Posted: Wednesday, October 17, 2007 - 01:44 AM UTC
Jim,

LOL! I didn't even notice that with the camera...thanks.

Skipper,

I just took the tape off right before the pics and I noticed that spot on the hull....next day or so will be spent on touch up's and repair-------I was taking my ship to my work area and she fell on the concret basement floor, minor damage was a deck support came loose and a prop got knock off.
goldenpony
Visit this Community
Zimbabwe
Joined: July 03, 2007
KitMaker: 3,529 posts
Model Shipwrights: 2,419 posts
Posted: Wednesday, October 17, 2007 - 02:07 AM UTC
Frank,
Yeah, I notice something like the camera, but would totally miss you using the wrong shade of paint on something.

I like what I see thus far on the ship. The decking it nicely down and your lines are crisp. Very nice overall.

 _GOTOTOP