_GOTOBOTTOM
Campaigns
Want to be part of a group build? This is where to start, plan, and meet about them.
MSW Comm Build - 1/350 USS Ellyson Full Build
DrDull
Visit this Community
Illinois, United States
Joined: February 23, 2006
KitMaker: 133 posts
Model Shipwrights: 128 posts
Posted: Sunday, June 01, 2008 - 05:22 AM UTC
Well, here goes. My entry in the MSW community build is USS Ellyson (DD-454). I'm going to base the model on the newly issued 1/350 Dragon kit of USS Buchanan (DD-484). The first photo below is the kit and its contents, which includes photo-etch.


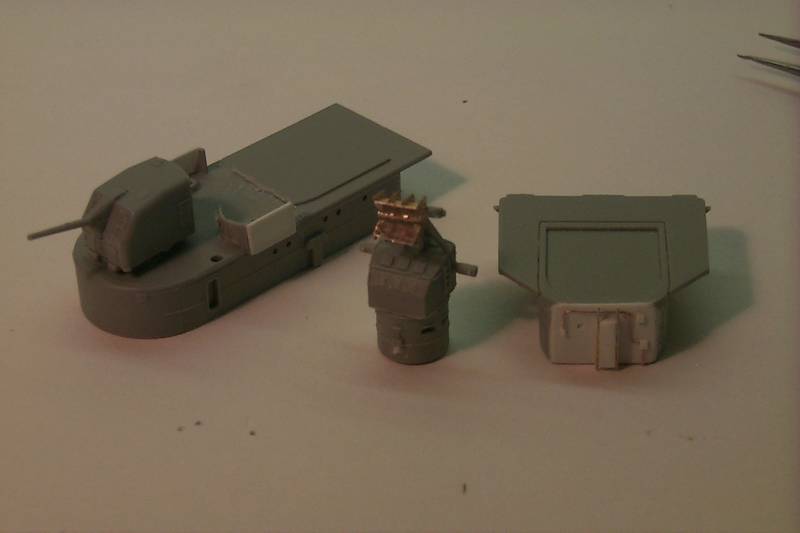
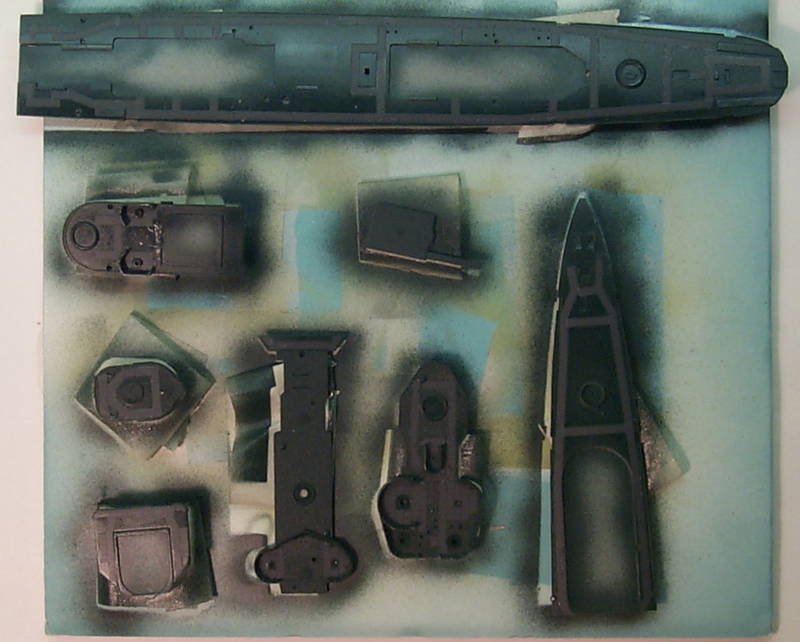
I'm also going to use the Cyberhobbies upgrade photoetch set for this model which is at the bottom edge of the picture (which didn't get rotated as I hoped).

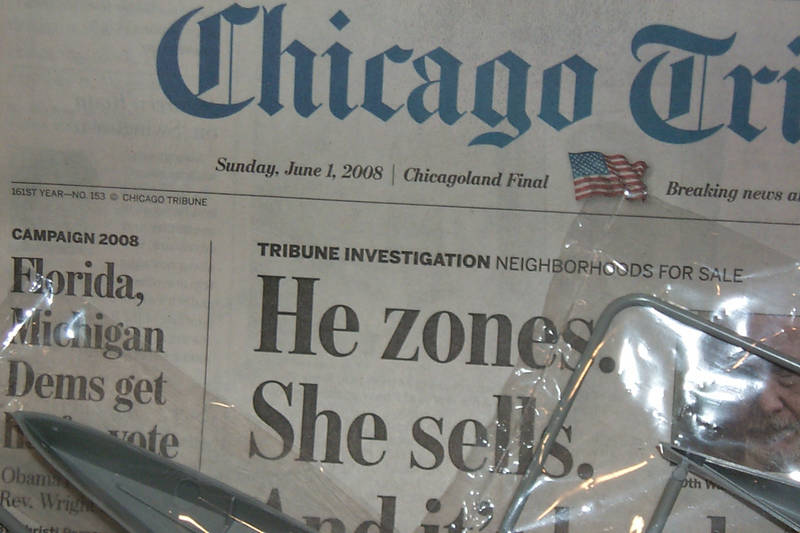
Here is a close up of the newspaper date.


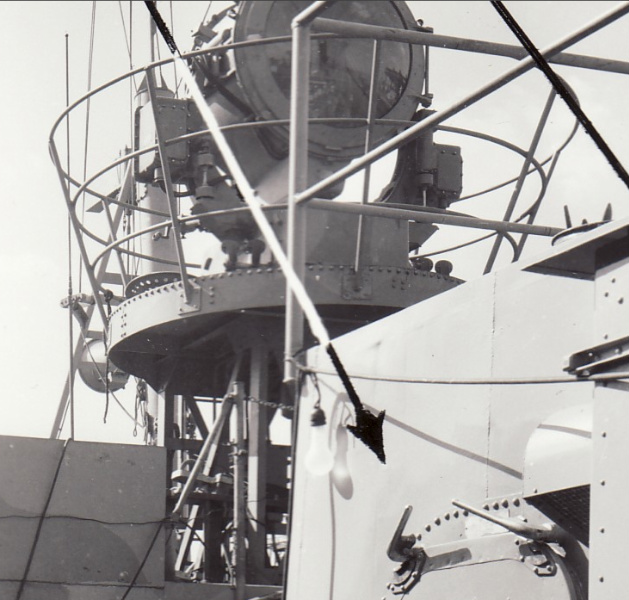
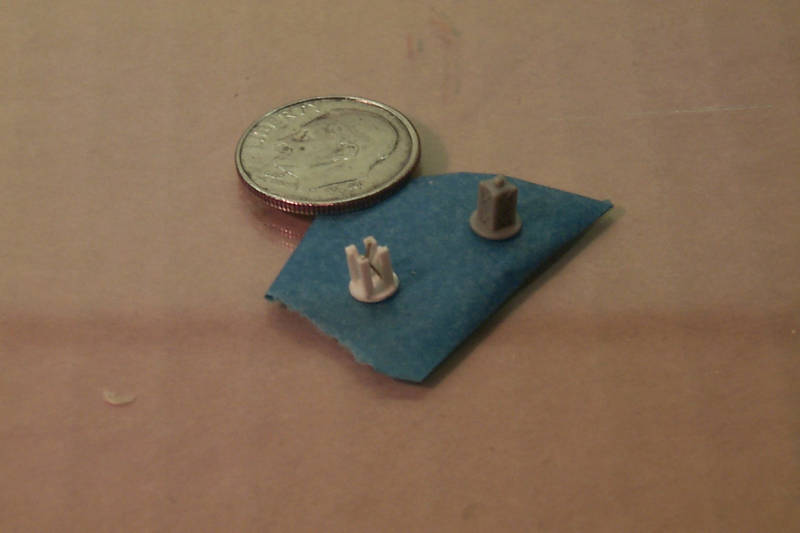
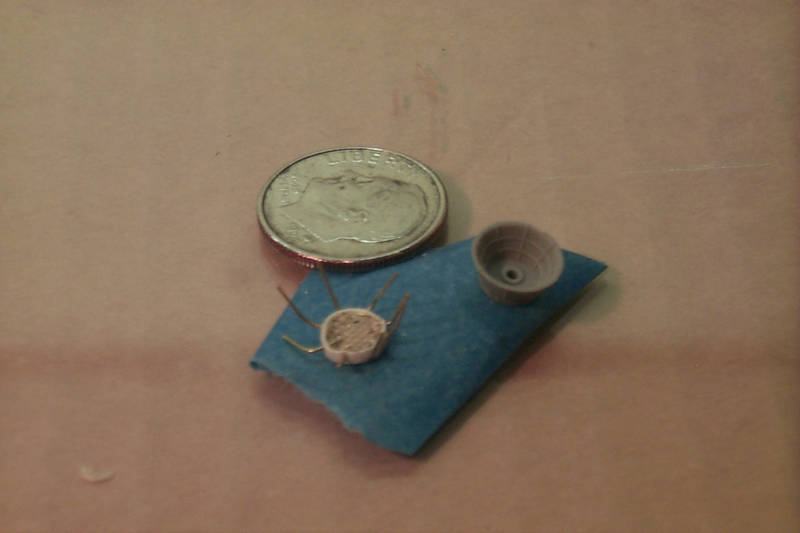
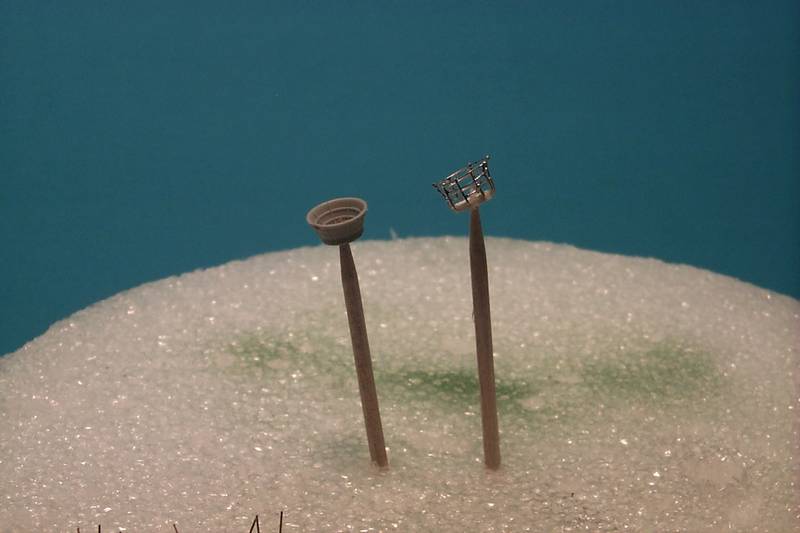
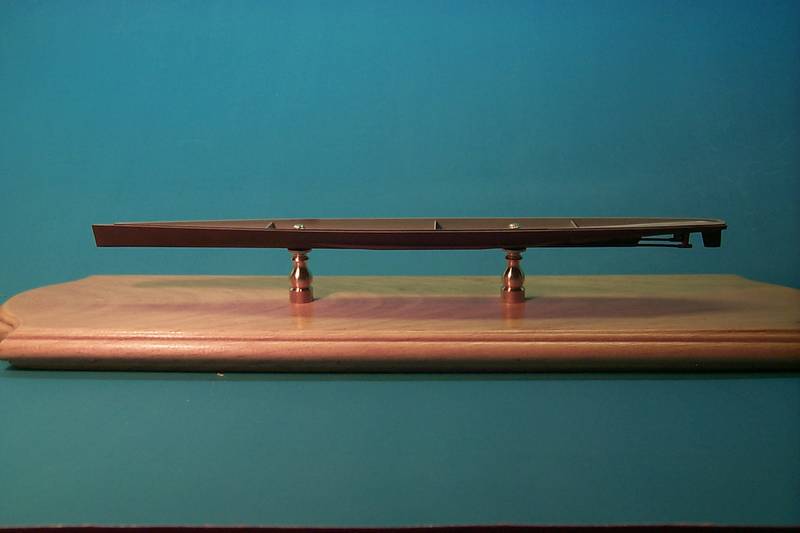
I'm planning on building the model full hull and mounting it on a wooden base. Converting the Buchanan kit to Ellyson is going to require some modest modification and I'm hoping to replace some of the kit parts, particularly the searchlight platform and pedestal with scratchbuilt parts. The third picture shows the wooden base, brass lamp risers, and assorted pieces of brass wire, tubing, and strip styrene - all of which may not be used, but some of which certainly will come in handy.


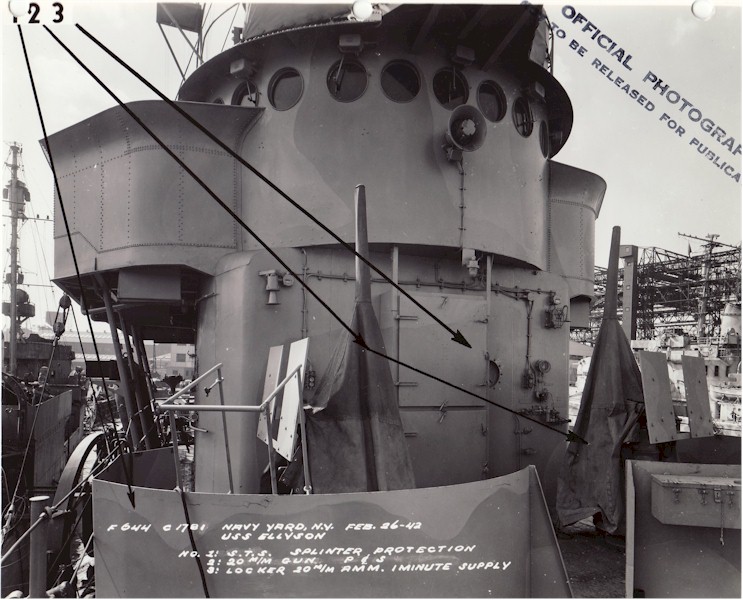
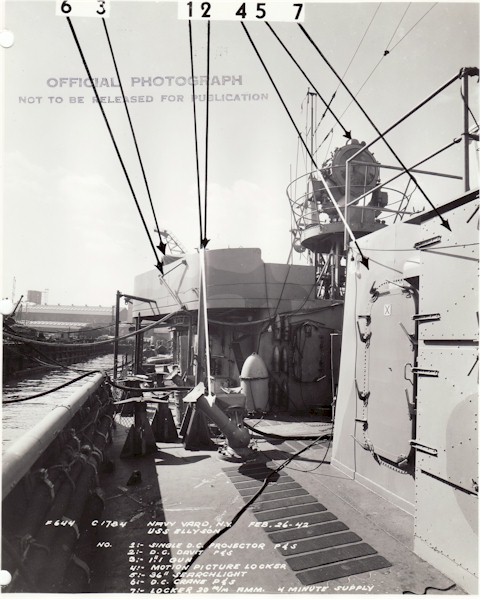
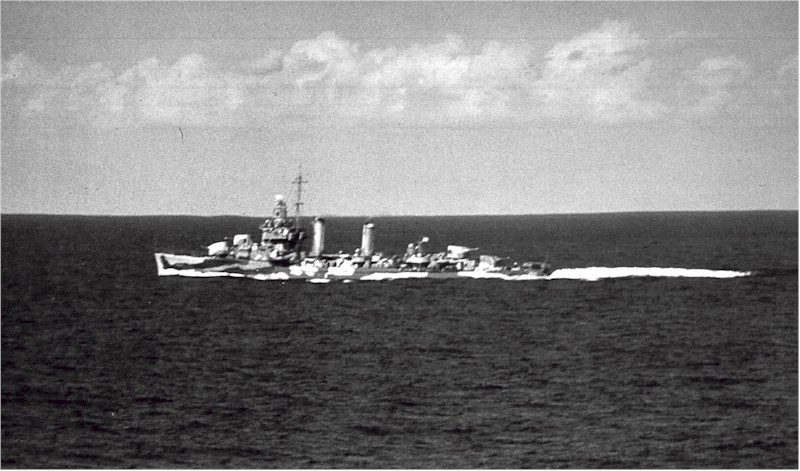
I'm going to model Ellyson as she appeared after fitting out in March, 1942. She was painted in Measure 12 (Modified) as shown in this picture.


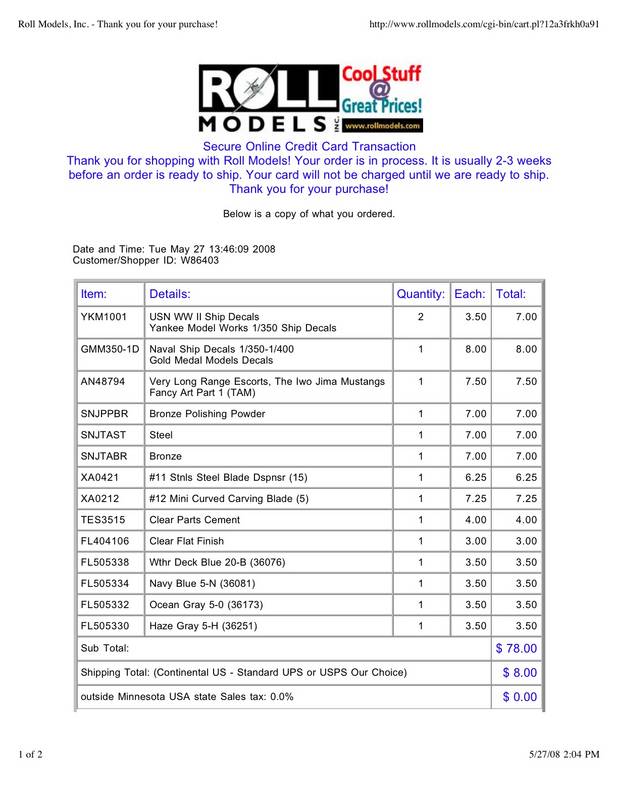
This being my first surface ship model in about 50 years, I didn't have the proper paint on hand, nor did my LHS - so I ordered some along with decals to use for the ship's numerals. Here is a copy of the order (which included stuff for other planned builds).


Finally, why Ellyson? I've very much enjoyed building models for veterans. I have a family friend who served in Ellyson from 1942-1945 and I'd like to surprise him with this as a gift. I had been planning on building a resin version when the Dragon kit was announced. At first glance, the Dragon kit certainly lives up to its billing as the most advanced 1/350 ship kit on the market (though I have little basis for comparison). As far as my copy goes, the only problem I see off the bat is that one of the propeller shafts is bent at the aft support strut. This probably won't be too hard to fix, but I may decide to replace the shafts with brass anyway.

Now - where to start??? I guess I wash the parts! Stay tuned....
redneck
Visit this Community
Pennsylvania, United States
Joined: June 06, 2005
KitMaker: 1,602 posts
Model Shipwrights: 665 posts
Posted: Sunday, June 01, 2008 - 05:42 AM UTC
Looks like a nice kit.
I'm sure your friend will love it once finished.

Best of luck.
Gunny
Visit this Community
Pennsylvania, United States
Joined: July 13, 2004
KitMaker: 6,705 posts
Model Shipwrights: 4,704 posts
Posted: Sunday, June 01, 2008 - 06:24 AM UTC
Great choice, mate, looking forward to watching the progress!
Cheers,
~Gunny
DrDull
Visit this Community
Illinois, United States
Joined: February 23, 2006
KitMaker: 133 posts
Model Shipwrights: 128 posts
Posted: Tuesday, June 03, 2008 - 10:23 AM UTC
June 3: After washing the kit parts on Sunday, I spent a lot of time studying the instructions and thinking about the modifications that will be required. This is my first ship model in too many years and the first time I've worked at 1/350. Clearly painting is going to dictate the order of assembly and since I don't have the paint I've ordered yet, I'll have to find somewhere else to start.

This kit is really beautifully engineered - I'm going to hate taking the pieces off of the sprues and then I'm going to hate carving up the pieces that need to be changed. One thing I can do without damaging the kit parts is to fix the 36" searchlight platform. I guess it would be hard to do anything else in styrene, but the solid pedestal and platform railings really need to be replaced. What I'll be aiming for is this (photo courtesy of Rick Davis):


I built a replacement pedestal using 0.010 strip styrene cut with a circle template, some 3/64 styrene angle that I trimmed down to a little over 1/32 and some brass wire for the cross bracing. Here is an image showing the new pedestal and the original kit price (my camera doesn't have a macro setting, so the photo isn't great). I think the new piece is OK to use.


I've also started to play with replacing the platform and railings. This isn't going quite so well. The platform is easy enough, but getting the stanchions and railings right is going to be a challenge. Here is my version 1.0 replacement piece with the kit original. The stanchions are 0.010 wire- I'm planning on making the rails from 0.008 wire. Exactly how I'm going to get them together is a mystery at this point. Suggestions are certainly welcome!


Barry
#027
Visit this Community
Louisiana, United States
Joined: April 13, 2005
KitMaker: 5,422 posts
Model Shipwrights: 5,079 posts
Posted: Tuesday, June 03, 2008 - 12:00 PM UTC
Nice work Barry.
DrDull
Visit this Community
Illinois, United States
Joined: February 23, 2006
KitMaker: 133 posts
Model Shipwrights: 128 posts
Posted: Tuesday, June 03, 2008 - 12:49 PM UTC
Thanks, Kenny. I'm looking forward to following your Akagi build too. Barry
DrDull
Visit this Community
Illinois, United States
Joined: February 23, 2006
KitMaker: 133 posts
Model Shipwrights: 128 posts
Posted: Saturday, June 14, 2008 - 09:57 AM UTC
June 14: After many unsuccessful attempts, I finally have a replacement 36" searchlight platform for my Ellyson build. Its not perfect (nor exactly what I was hoping for), but I think its an improvement over the kit part. The picture below shows the two together held up by toothpicks.


I also did some work on the wooden base. The lamp finials I have have 1/4" studs which are somewhat bigger than the posts in the kit display stand. Once I build up the nerve to really start carving on the model, I guess I'll go ahead and finish the lower hull and mount it to the stand. I have the hull red and black paint I'll need and don't need to worry about the Measure 12 Mod paint scheme on these parts.

I'm still waiting for my paint order - I want to paint and decal the decks before starting serious assembly.

Looking forward to seeing everyone else's progress.

Barry
Gunny
Visit this Community
Pennsylvania, United States
Joined: July 13, 2004
KitMaker: 6,705 posts
Model Shipwrights: 4,704 posts
Posted: Saturday, June 14, 2008 - 11:33 AM UTC
Aye, Barry,
I agree, mate, your nest is 110% better than the kit part, nice job!

It's the small details such as this that sets models apart...thanks for the update!
skipper
Visit this Community
Lisboa, Portugal
Joined: February 28, 2002
KitMaker: 5,182 posts
Model Shipwrights: 4,070 posts
Posted: Tuesday, June 17, 2008 - 05:24 AM UTC
Looking good Barry
Keep up the good work
Rui
DrDull
Visit this Community
Illinois, United States
Joined: February 23, 2006
KitMaker: 133 posts
Model Shipwrights: 128 posts
Posted: Wednesday, June 25, 2008 - 06:47 AM UTC
June 25: I finally worked up the courage to start carving on the kit. Because I'm still waiting for paint, I decided to begin with the lower hull and full-hull mounting base. The kit comes with a nice plastic base and turned posts but I wanted wood and brass. The problem is the brass is threaded for 1/4" and the kit mount looks like it might be the metric equivalent of a #6 thread. I was a little anxious about drilling holes that large in the hull, but it seemed to work out OK. In the photo below the base is just a pine plaque I picked up at a crafts store that I stained and finished with acrylic gloss. The brass posts are lamp risers or "finials."


I used Tamiya "Hull Red" for the anti-fouling paint on the lower hull. I think the black boot topping spans the joint between the upper and lower hulls, so I'm going to hold off on that. The two pieces don't fill all that well (a disappointment) and I think some filling and sanding is going to be required. I'll do that before I paint the boot topping.

I'm thinking about moving on to the armament - I can build the 20mm, 1.1", and 5" guns now and paint them later. The kit has photoetch parts for these and I don't have that much experience with PE. I've heard that it is best to anneal the PE before using it. Do you all do that?

Barry
grayghost666
#021
Joined: August 02, 2007
KitMaker: 2,458 posts
Model Shipwrights: 1,423 posts
Posted: Wednesday, June 25, 2008 - 08:29 AM UTC
hello Berry,
when you do the PE,i would suggest you get some Gator Glue from Kenny "Gator" Loup here on MSW.i have found it to be the best for attaching any PE.
i have put my PE in vinegar,and letting it soak for awhile,it seeems to attach better.
hope this helps,
Bruce
Gunny
Visit this Community
Pennsylvania, United States
Joined: July 13, 2004
KitMaker: 6,705 posts
Model Shipwrights: 4,704 posts
Posted: Wednesday, June 25, 2008 - 10:32 AM UTC

Quoted Text

The kit has photoetch parts for these and I don't have that much experience with PE. I've heard that it is best to anneal the PE before using it. Do you all do that?

Barry


Hi Barry,
Quite honestly, mate, never annealed a piece of photo-etch in my life...IMO, the cold working properties in most modern photo-etch makes the step unneccessary in most ship building instances...now the armor guys, working with complete fender assemblies in brass, and the like, might have to anneal, but personally, a wasted step...do what Bruce said, dip your PE in a straight white vinegar bath, as the acetic acid will give the brass a microscopic etch to the pores, and will aid in paint adhesion...and I too swear by Gator's Hobby Glue, amazing stuff.... and if you're serious about using alot of PE in the future, pick yourself up a Hold-n-Fold PE workstation.......keep modeling, progress looking good!

DrDull
Visit this Community
Illinois, United States
Joined: February 23, 2006
KitMaker: 133 posts
Model Shipwrights: 128 posts
Posted: Wednesday, June 25, 2008 - 11:08 AM UTC
Thanks, Bruce and Gunny. I've got the PE soaking in a vinegar bath as I type. Sounds like Gator Glue is the way to go. Wonder if I can get it locally? I'll check the Gator's web site. Barry
JMartine
Visit this Community
New Jersey, United States
Joined: October 18, 2007
KitMaker: 1,698 posts
Model Shipwrights: 1,514 posts
Posted: Wednesday, June 25, 2008 - 11:14 AM UTC
Looks great so far, love the detailing! Nest looks gorgeous
DrDull
Visit this Community
Illinois, United States
Joined: February 23, 2006
KitMaker: 133 posts
Model Shipwrights: 128 posts
Posted: Friday, June 27, 2008 - 05:05 AM UTC
June 27: Time for surgery. Tired of waiting for paint, not ready to tackle the photoetch and those tiny parts for the 20mm guns, and inspired by taskforce48's progress on his Buchanan build (modelwarships.com) I decided to go ahead and start the modifications needed to convert the Buchanan kit to a representation of Ellyson. The major difference to deal with is that Ellyson had a flat front in the superstructure below the bridge (behind the #2 5" mount). Here is a picture from Navsource.org


In addition to replacing the round front of the kit piece, the location of the 20mm ready ammunition locker needs to be changed as should the 20mm splinter shields. Here are the kit pieces.


I used a razor saw and removed the rounded front.


Replacing the rounded front with some 0.010 sytrene, its ready for detailing. Not that painful after all.

skipper
Visit this Community
Lisboa, Portugal
Joined: February 28, 2002
KitMaker: 5,182 posts
Model Shipwrights: 4,070 posts
Posted: Friday, June 27, 2008 - 05:29 AM UTC
Hi Barry

It's those small details that make a model unique!
As you have seen it's not that difficult

Be careful with the joint areas

And, btw, about annealing PE parts I only recommend it for big scale parts (1/35 or in some cases 1/72) and when the curves are composite. If you anneal 1/700 or 1/350 PE parts you could damage the part (it happened to me when I was modifying some PE parts for my scratchbuilt NRP Alvares Cabral - and I only did that, because there were no available PE for it!!)

Keep up
Rui
DrDull
Visit this Community
Illinois, United States
Joined: February 23, 2006
KitMaker: 133 posts
Model Shipwrights: 128 posts
Posted: Friday, June 27, 2008 - 07:34 AM UTC
Hi Rui,

Thanks! Yeah, the joints are going to be an issue, I think. The kit is beautifully engineered but I'm finding it difficult to manipulate the small pieces in such a way as to get the plastic to squeeze out of the seams without getting my fingerprints etched into the plastic. There is a lot of molded detail that is going to be hard to sand around too. Careful I will be.

Thanks too for the advice on annealing the photoetch - it makes a lot of sense not to fiddle too much with pieces as tiny as these are. There aren't that many major bends as it turns out.

I'm really enjoying your Texas build. When I first saw the photo of the painted deck I though you had actually planked it! Very nice work.

Barry
Clanky44
Visit this Community
Ontario, Canada
Joined: September 15, 2005
KitMaker: 1,901 posts
Model Shipwrights: 934 posts
Posted: Friday, June 27, 2008 - 10:39 AM UTC
Good looking start Barry, the base looks fantastic. Look forward to further progress.

Frank
DrDull
Visit this Community
Illinois, United States
Joined: February 23, 2006
KitMaker: 133 posts
Model Shipwrights: 128 posts
Posted: Saturday, June 28, 2008 - 04:56 AM UTC
June 28: Last update for a while - I need to help my daughter move from New Orleans to Boston. I'm looking forward to seeing what you all have done when I return.

I finished hacking the 20mm splinter shields - Ellyson's were flat sided and extended farther toward the ship mid-line than those molded in the kit. I played with the idea of removing the originals altogether, but finally settled on cutting off the outboard parts and replacing them with styrene strip. I then spliced parts of the cutoff pieces (which were nicely curved) onto the inboard ends. I also chiseled off the mounting for the 20mm ready ammunition locker and the forward part of the mounting for the rounded bridge face. I finished one of the kit 5" mounts which I just dropped in place to see how it looked. I added some detail (bits of styrene and pieces of telephone wire) to the flat bridge front, including a scratched 20mm ammo locker. Finally, I finished the gun director and radar - the radar came from the extra PE set that Dragon markets. The radar antenna comes already bent into shape, though mine was misshapen somewhat. I tried to straighten it out, though it still isn't quite square. Here's a photo:


Have a great weekend everybody! Barry
Clanky44
Visit this Community
Ontario, Canada
Joined: September 15, 2005
KitMaker: 1,901 posts
Model Shipwrights: 934 posts
Posted: Sunday, June 29, 2008 - 01:24 AM UTC
Good bit of work Barry, I like the "plumbing" you've added.

Have a safe drive to Boston and back.

Frank
skipper
Visit this Community
Lisboa, Portugal
Joined: February 28, 2002
KitMaker: 5,182 posts
Model Shipwrights: 4,070 posts
Posted: Sunday, June 29, 2008 - 02:12 AM UTC
Hi Barry

Looks good, looks good
And while you're in Boston (I've been there in 1991!) don't miss a visit to USS Constitution and especially to USS Cassin Young (although a different class DD, you'll get a good chance to take more details for your built since are common features)

Keep up and have a safe trip


Rui
Gunny
Visit this Community
Pennsylvania, United States
Joined: July 13, 2004
KitMaker: 6,705 posts
Model Shipwrights: 4,704 posts
Posted: Monday, June 30, 2008 - 10:08 PM UTC
First Build Session Closed-Keep Modeling!
peterf
Visit this Community
England - South East, United Kingdom
Joined: November 23, 2007
KitMaker: 426 posts
Model Shipwrights: 424 posts
Posted: Tuesday, July 01, 2008 - 12:44 AM UTC
Nice looking build sequence on your model, Barry, enhamced with top photographical images, and some sharp clean modelling. I'm looking forward to your progress.

Cheers,

Peter F
DrDull
Visit this Community
Illinois, United States
Joined: February 23, 2006
KitMaker: 133 posts
Model Shipwrights: 128 posts
Posted: Monday, July 14, 2008 - 11:21 AM UTC
July 14: Finally got back to a little modeling yesterday. My paint order arrived and I sprayed 20-B deck blue on the horizontal surfaces that eventually will get decals. I also sprayed a base coat of haze gray on the upper part of the hull and the PE doors. I'll post photos when I get the decals on and the first overcoat of camo paint on the hull. In the meantime, I continued with some minor modifications. Ellyson's 36" searchlight was located farther aft than Buchanan's. Here is a picture.


I cut down the kit splinter shield on the aft superstructure to match and filled the hole in the kit part with a styrene disk. I also added the siren horn (styrene) and associated conduit (telephone wire) to the front of the bridge face as shown in the photo above.

I'm trying to do a better job with my pictures, but my camera is a first-generation digital with an offset viewfinder - has to be 10 years old. I did get more light on the subject, but the focus isn't great. I'll keep working at it (and maybe convince my wife that we need a new camera).


Barry
DrDull
Visit this Community
Illinois, United States
Joined: February 23, 2006
KitMaker: 133 posts
Model Shipwrights: 128 posts
Posted: Tuesday, July 15, 2008 - 09:20 AM UTC
July 15: I coated the decks with Future, let them cure overnight and applied the deck decals today. The decals represent the non-skid walkways and are a nice feature of this kit. I had some problems with them, mostly because I figured out too late that it would be better to cut them into small pieces before application rather than trying to apply them whole - some of them are pretty big. Also, there is little visual contrast between the deck blue and the decals, so positioning them was somewhat of a challenge. I'll wait overnight and then overcoat them with Future again before getting to the small deck detail pieces. I taped the pieces to a piece of foam board for painting. Here is a photo - its a little hard to see the decals on all of the pieces.


I also worked on masking the hull for the MS12 (Mod) scheme. I used the ship profile in the instructions as a tracing template and then freehanded the camouflage pattern copied from the Ellyson photos I found onto masking tape laid over the kit instrutions. I then moved the tape to a glass plate for cutting. The photo below show the hull with the first set of masking (the piece of sprue standing up out of the hull is just a paint handle I temporarily glued into the piece), the piece of tape with the starboard side before cutting, and the photo of the ship's port side I used as a guide. According to the ship camouflage database, Ellyson wore MS12 (mod) and the shipyard photos seems to verify this - the full ship photos I have suggest that maybe she was painted in MS15 at some point. I'm sticking with the MS12, however. Because of the masking, I'm going to wait a day between each coat of paint. I did the ocean gray today, I'll do the navy blue tomorrow, and then the boot topping on Friday. This part of the hull is relatively easy - don't know yet how to go about extending the colors to the topside parts.


Barry
 _GOTOTOP