_GOTOBOTTOM
Ships by Class/Type: Carriers
Topics on all types of carriers from the early 20th century to today.
BIG E Hanger Decks "Commission Work"
AngryDog
Visit this Community
Singapore / 新加坡
Joined: March 27, 2004
KitMaker: 1,114 posts
Model Shipwrights: 60 posts
Posted: Monday, December 21, 2009 - 06:37 AM UTC
To get the ball rolling, here's some pics of just some of the hangers in progress..
I'm not sure if it's my camera or my skills.. so sorry they're not very clear, I'll get excellent clear photos taken for full details and progress as soon as possible.

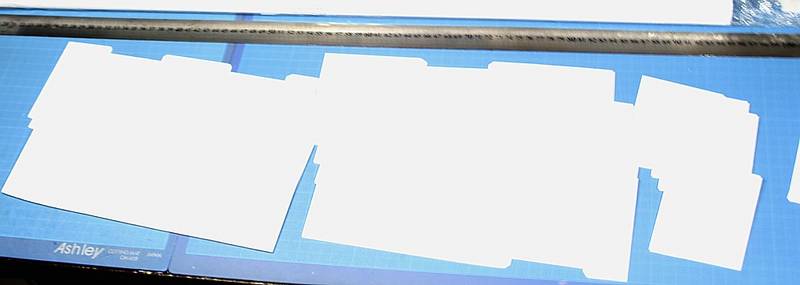
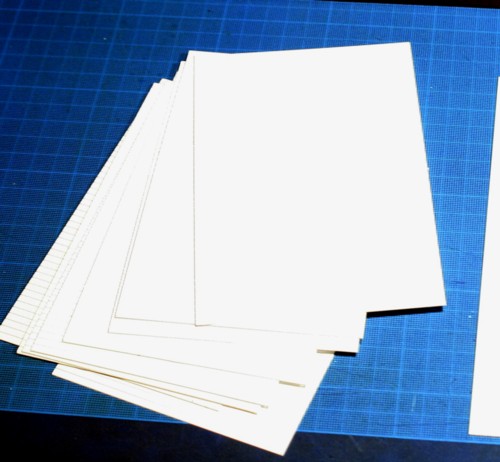
The hanger's Deck is made of 3 parts and each have been cut out and test fitted against all 4 elevator entrances.
I am using various thickness styrene sheets for the appropreiate parts..

4 sets of decks here, 3 pieces each.


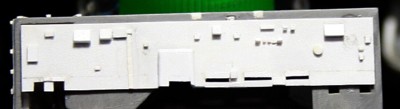
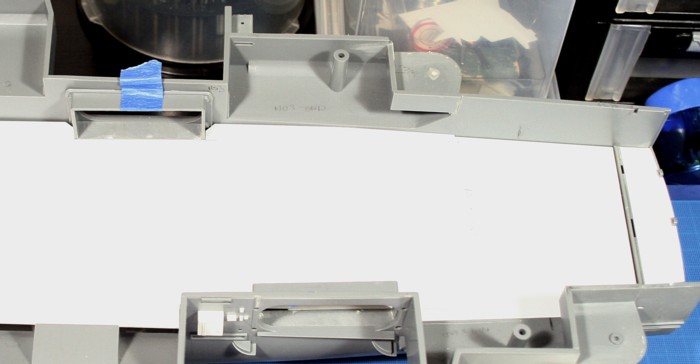
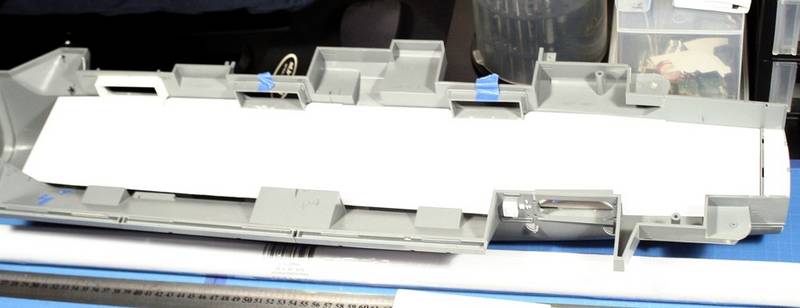
Forward section test fit. You can see a bit of the mid section on the right. The start point of the large blast doors that separate the 2 hangers, have been moved further away from No. 2 elevator...based on new info I acquired.


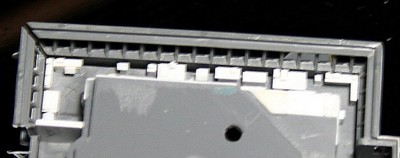
Mid section and Aft end. The hanger extends all the way...


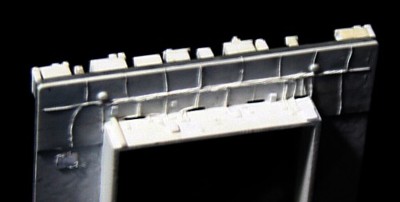
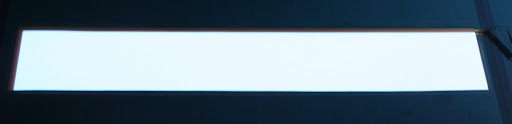
Full deck test fit . Approximately 64cm.
All "decks" have been orientated towards the starbrd side of the ship, making it a bit easy for you guys to "drop & glue" the deck right.


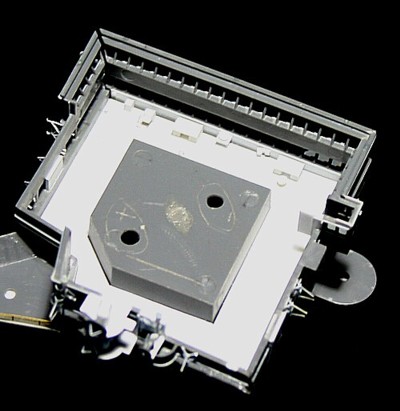
Ceiling sections 4+ per hanger.


Please stay tuned for proper close up pics and full build.. again sorry it's not clear, no point to show the ceiling ribbed detailing and aircraft tiedowns on the deck..until I get my camera sorted out.

I have some nice surprises for further detailing and ease of "assembly"..since Tamiya had neglected certain dimensions. Which will be posted in the next update.

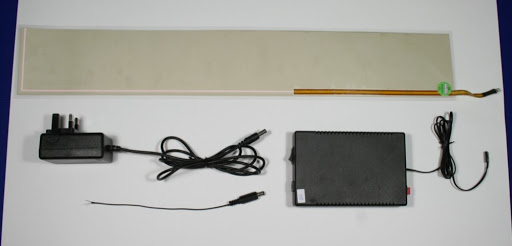
On a side note...If you noticed the roll of paper...it's for the 1:1 templates.. for the DIY kit.

Have a Merry Christmas and Happy New Year
Cuhail
Visit this Community
Illinois, United States
Joined: February 10, 2004
KitMaker: 2,058 posts
Model Shipwrights: 18 posts
Posted: Monday, December 21, 2009 - 08:34 AM UTC

Quoted Text

Please stay tuned for proper close up pics and full build.. again sorry it's not clear, no point to show the ceiling ribbed detailing and aircraft tiedowns on the deck..until I get my camera sorted out.


I will stay tuned! I love a good scratchbuilding! Regardless of the genre.

Photographing the pure white can be maddening. Try turning off the flash and use ambient light from the room, then brighten it with your photo-editing software. If you're using an SLR, look for a diffusing attachment. It mutes the flash a lot, but, still lightens the subject. You can also adjust your current pics with the "Brightening" tool in your photo-editing software. Just darken them a bit and adjust the contrast.

Very cool so far! Watching!
Cuhail
AngryDog
Visit this Community
Singapore / 新加坡
Joined: March 27, 2004
KitMaker: 1,114 posts
Model Shipwrights: 60 posts
Posted: Monday, December 21, 2009 - 03:34 PM UTC
Thank you Murphy for your comments and advise. Photographing "white" was never my strong point.
I'll try your advise once the Christmas & New Year season is over. and will post then.
gtb-red
Visit this Community
United States
Joined: November 17, 2007
KitMaker: 782 posts
Model Shipwrights: 774 posts
Posted: Sunday, December 27, 2009 - 04:54 PM UTC
Looking great Nick.
Gunny
Visit this Community
Pennsylvania, United States
Joined: July 13, 2004
KitMaker: 6,705 posts
Model Shipwrights: 4,704 posts
Posted: Sunday, December 27, 2009 - 11:08 PM UTC
Great topic for a "Build Log", Nick!

We'll be watching as you progress with your project, for sure!!

Cheers,
~Gunny
blaster76
Visit this Community
Texas, United States
Joined: September 15, 2002
KitMaker: 8,985 posts
Model Shipwrights: 3,509 posts
Posted: Monday, December 28, 2009 - 06:59 AM UTC
If I am not mistaken, Nick is putting these sets togethr for sale. Seems i got on the lst for one a while back.
Visit this Community
West Virginia, United States
Joined: June 17, 2004
KitMaker: 398 posts
Model Shipwrights: 292 posts
Posted: Monday, December 28, 2009 - 09:13 AM UTC
Don't forget the incinerator (used for burning classified documents). IIRC located starboard side forward on the hangar deck....

Cheers,
John Snyder
AngryDog
Visit this Community
Singapore / 新加坡
Joined: March 27, 2004
KitMaker: 1,114 posts
Model Shipwrights: 60 posts
Posted: Monday, December 28, 2009 - 03:58 PM UTC
Thanks for your comments guys,

Yes Steve, you're among those on the list for a "partial kit".

This blog is for those who have paid deposits Or are going to pay --- for the Commissioned-Based "Full Hanger Deck" at $260 a kit.
More basic info here :
http://modelshipwrights.kitmaker.net/forums/131615&page=1

I had a ton of request for a DIY version, so these will be done like a "boxed" kit which includes scale plans, resin parts,etc..same as the above, but you do all the work. So those who are on the list for a partial kit......may want to upgrade to the DIY instead.

John, that box like thing with the curved funnel sticking out is the incinerator..? If so, then Yes it's included!
AngryDog
Visit this Community
Singapore / 新加坡
Joined: March 27, 2004
KitMaker: 1,114 posts
Model Shipwrights: 60 posts
Posted: Friday, January 29, 2010 - 06:08 AM UTC
Just a little update. But here's a teaser of the Island's Interior (my clients' version)
The masters are still in works....as I'm sorting out the lighting option.

But you can get an idea of all the goodies that come with this Hanger Kit.

On a note, You can still order my kit. I have put my brains to good use and sped up the process on certain key areas which were oringinally quantity restricted due to the time invloved with labor. However, I'm going some what commercial in certain areas..

Order at [email protected]


gtb-red
Visit this Community
United States
Joined: November 17, 2007
KitMaker: 782 posts
Model Shipwrights: 774 posts
Posted: Monday, February 01, 2010 - 01:28 PM UTC
YOU ARE A MAD SCIENCETIST! GREAT WORK MY FRIEND!
AngryDog
Visit this Community
Singapore / 新加坡
Joined: March 27, 2004
KitMaker: 1,114 posts
Model Shipwrights: 60 posts
Posted: Tuesday, February 09, 2010 - 04:30 AM UTC
Thanks Mardis... !

Sorry I haven't updated this post, there's a lot of work going on, I also visited a source for the hanger's "lighting". Some testing seemed pretty promising on the aspect of realism (not a brightly lit hanger) I will post photos once all the tech details are settled and I collect the materials.

Cheers
Nick
AngryDog
Visit this Community
Singapore / 新加坡
Joined: March 27, 2004
KitMaker: 1,114 posts
Model Shipwrights: 60 posts
Posted: Wednesday, March 03, 2010 - 04:41 AM UTC
Sorry guys this is taking much longer than expected.

FYI, I'll be recieving the lighting system early next week, this is the slightly shorter version for my client's BIG E hanger. But essentially the same properties as the actual mass prod versions which will be collected at a later date.
The entire electronics package will be plug and play.

I will be using Electroluminescent Panel, similar to the stuff that is used in movie special effects sets and props, and in everyday things such as billboards, signage, game consoles,etc.

The set comes with a 12V Inverter with on/off switch. The inverter is 13.5cm x 9cm x 2.6cm.
The system will be connected to a battery pack that I will supply.
For those wanted to use the mains supply, you will have to get an adapter suitable for your country, this is simply plug into the inverter.

The lighting test I did at the company seemed "perfect" in subtle and even illumination. However once I post pics here --- You can see for yourself the instensity. If you want the option of brighter lighting (for further viewing pleasure on the interior) I will also supply additional white LEDs and a separate battery pack, which will also be suppied in the kit for the lighting of the Island.

Please note that EL panel system by the company's default package was designed to be used with it's own power source. Trying to redesign the electronic system would incure additional cost, if at all possible.

Some info:
EL panel is approxmiately 0.4mm thick, fexible, water resistant, and very low thermal emiting /cold light source.
It is basically a capacitor structure with phosphor sealed between 2 electrodes. The AC voltage between the electrodes generates a changing field within the phosphor causing light emition.

Brightness is equivilant to 80cd/m2 to 100cd/m2.
Approximate operating life is 10,000 hrs. So if you switch it on for an hr a day, it will last 27 yrs and 3mths. Not as long as LEDs..but long enough!

As for the hanger deck, and all other details, please be patient, I will update in due time.

Thanks
Nick
AngryDog
Visit this Community
Singapore / 新加坡
Joined: March 27, 2004
KitMaker: 1,114 posts
Model Shipwrights: 60 posts
Posted: Monday, March 08, 2010 - 02:30 AM UTC
Before I have the real thing in my hands...here's what it looks like and very close to what you'll get.

From the company, added my Biz details and removed measurements,etc for my own copyrite.

AngryDog
Visit this Community
Singapore / 新加坡
Joined: March 27, 2004
KitMaker: 1,114 posts
Model Shipwrights: 60 posts
Posted: Thursday, March 25, 2010 - 12:35 AM UTC
FINALLY GOT THE PARTS TODAY!!!

...Electroluminescent Panel , 12V Inverter, Mains Plug and Connection Cable for battery pack which I will get later on and solder.
Please note for that for overseas orders, I will supply a 12V battery pack for 8x "AA" batteries. No Mains plug..different voltage.
Also, the cable from Inverter to Sheet will be much longer.

I shot these photos as close as possible to the illumination properties of my room lighting.. So the illumination "instensity" of the Panel is very very close to what you will get!


All round idiot proof connections..


Lit under ceiling lighting on

...ceiling lighting off..


This Sheet is slightly smaller than to the Production version which is for a full "actual" lenght Hanger Deck..
Also note that a small hole below must be made for the wiring to go through..


Flight Deck installed.....


Removed flight deck, notice little light coming through the Hanger's Ceiling cut outs...


Not too bright and not too dim, I thinks.. This is what I wanted to achieve, hence I opted out LEDs and other EL sheet types..


Ceiling shot..seems a bit brighter of course


Note that I have not painted the ceiling's side that's facing the Sheet, so there will be no light leaks..


Email me or post your comments here.....

I will have a separate LED system for the Island..
Phantom06
Visit this Community
Tennessee, United States
Joined: October 22, 2009
KitMaker: 7 posts
Model Shipwrights: 6 posts
Posted: Friday, March 26, 2010 - 03:55 PM UTC
Nick,
Wow! Looking good, I think that the lighting levels shown in the photos will be just about right. Keep up the good work.

I was wondering if there is a configuration for the electrical setup that can adapt to the 110 voltage of the US? I will have to do some research.
AngryDog
Visit this Community
Singapore / 新加坡
Joined: March 27, 2004
KitMaker: 1,114 posts
Model Shipwrights: 60 posts
Posted: Saturday, March 27, 2010 - 02:32 AM UTC
I had that in my head the day I decided on a lighting kit and asked the company about it...but I was so excited about the project that I forgot to get an answer from the them when I collected it.
Get back to you next week about it.
AngryDog
Visit this Community
Singapore / 新加坡
Joined: March 27, 2004
KitMaker: 1,114 posts
Model Shipwrights: 60 posts
Posted: Monday, August 02, 2010 - 05:35 AM UTC
Sorry for the very late update.....I will have a photo update end of this month.
Thanks for your patience.
Rattler
Visit this Community
Texas, United States
Joined: November 23, 2002
KitMaker: 512 posts
Model Shipwrights: 11 posts
Posted: Monday, August 02, 2010 - 06:11 PM UTC
Hey Nick,

I knew you were a sick puppy with your armor builds but damn Brah !!!!! this is insane......

I LOVE IT !!!!!!!!!!!

I'm working on this kit as well granted I'm not going as far with it as you are, but still I will keep an eye on this one.. Big E is shapen up very NICE !!!!!

keep up with that outstanding work
bigal07
Visit this Community
England - East Anglia, United Kingdom
Joined: January 07, 2009
KitMaker: 887 posts
Model Shipwrights: 575 posts
Posted: Wednesday, August 04, 2010 - 04:07 AM UTC
With an aircraft wing under repair/reloading with that dull but wonderful lighting system, this is looking the dog's bol*****, I suppose the next lage step will be CCTV on the hanger bay ? Looking forward to how this progresses, a huge project by itself, but with added lights and scratch building you're putting in, this is looking good.
gtb-red
Visit this Community
United States
Joined: November 17, 2007
KitMaker: 782 posts
Model Shipwrights: 774 posts
Posted: Friday, August 06, 2010 - 01:45 PM UTC
just outstanding Nick!
AngryDog
Visit this Community
Singapore / 新加坡
Joined: March 27, 2004
KitMaker: 1,114 posts
Model Shipwrights: 60 posts
Posted: Monday, November 08, 2010 - 02:58 AM UTC
HI Guys, thanks for your comments.
It's been a while since i'm back here. And I'm happy to update with the artwork (low low res version) for the Hanger.( Note that I will release the rest of the Fire door images later on).. It's a tough process but I'm getting there. The actual decals will be much nicer! I had to create the artwork myself!
I'm almost done marking all the hundreds of tie-down impressions as well as ceiling and other bits.. I am aiming to complete the physical work by this month end, mid December. And to get the parts and bits sent for production in January. Hopefully that would mean by March, these kits will be in your hands.
I'm very excited to get it all done especially being my 1st multi-media production kit!
I will update with those photos by next month and will fill you guys in with all the details and why the heck it is taking so much time!
Thanks for the Patience!


gtb-red
Visit this Community
United States
Joined: November 17, 2007
KitMaker: 782 posts
Model Shipwrights: 774 posts
Posted: Monday, November 08, 2010 - 01:55 PM UTC
That's great Nick. Glad you didn't fall off a cliff or something. one question think that hangerdeck would work on a scratchbuilted 1/350 Kitty Hawk or Connie?
AngryDog
Visit this Community
Singapore / 新加坡
Joined: March 27, 2004
KitMaker: 1,114 posts
Model Shipwrights: 60 posts
Posted: Monday, November 08, 2010 - 05:10 PM UTC
Hey Mardis,

almost did fall off the planet.

You just need to compare your scratched ships to the Tamiya kit.. if they're the same then the Hanger will "drop in" nicely. I would think the only modifications if any I would need to make would be related to the elevator locations.

Let me know..
gtb-red
Visit this Community
United States
Joined: November 17, 2007
KitMaker: 782 posts
Model Shipwrights: 774 posts
Posted: Thursday, November 11, 2010 - 01:59 AM UTC
almost the same. but can be done.
AngryDog
Visit this Community
Singapore / 新加坡
Joined: March 27, 2004
KitMaker: 1,114 posts
Model Shipwrights: 60 posts
Posted: Thursday, November 11, 2010 - 06:49 AM UTC
I see, So do you intend you scratch build the hanger?
 _GOTOTOP