_GOTOBOTTOM
General Ship Modeling
Discuss modeling techniques, experiences, and ship modeling in general.
USS North Carolina mit PE stuff
warreni
Visit this Community
South Australia, Australia
Joined: August 14, 2007
KitMaker: 5,926 posts
Model Shipwrights: 2,624 posts
Posted: Saturday, November 19, 2011 - 09:12 PM UTC
Hi Everyone out there in the shipping lanes.

I started to show some photos of my Showboat build in another thread, 'USS North Carolina Deck', but seeing as it was turning into a build blog I thought I may as well start a build blog proper.

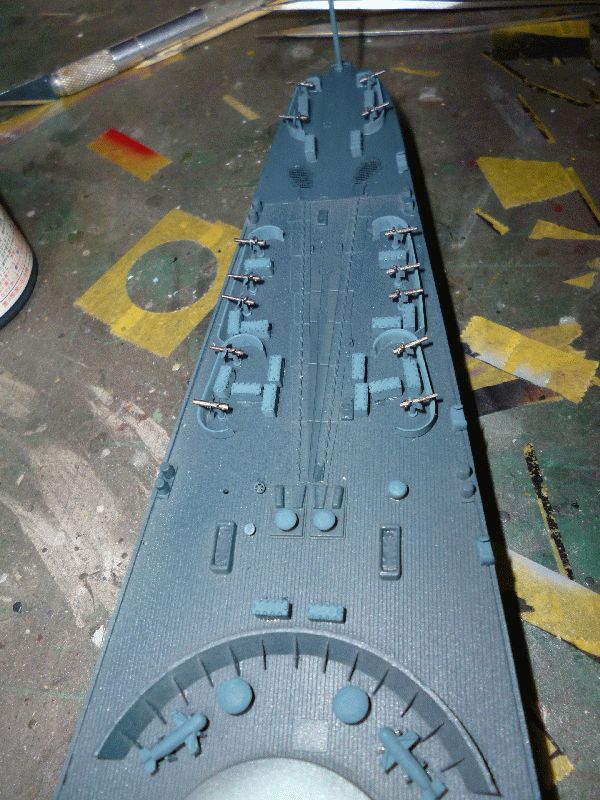
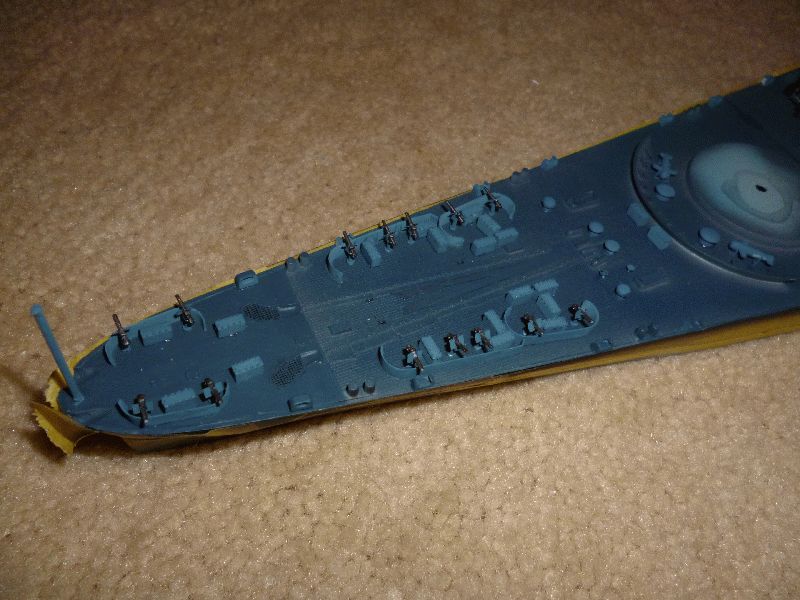
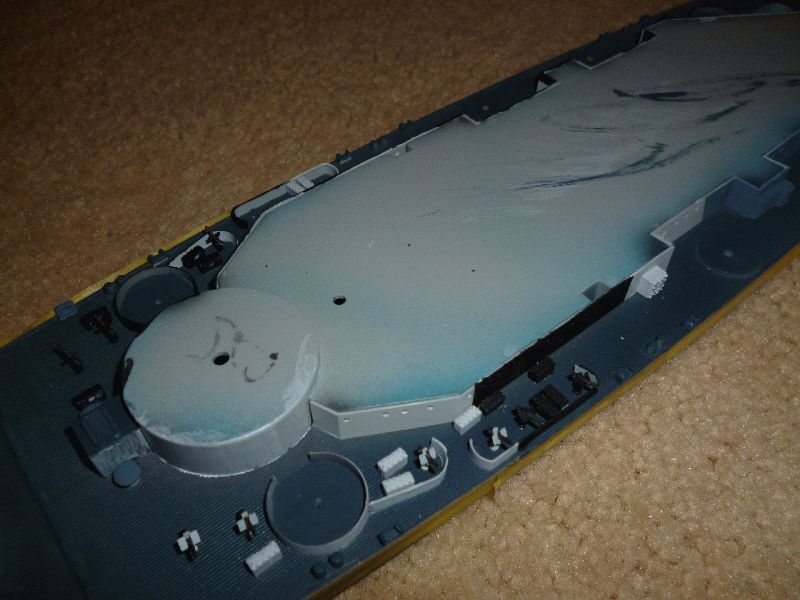
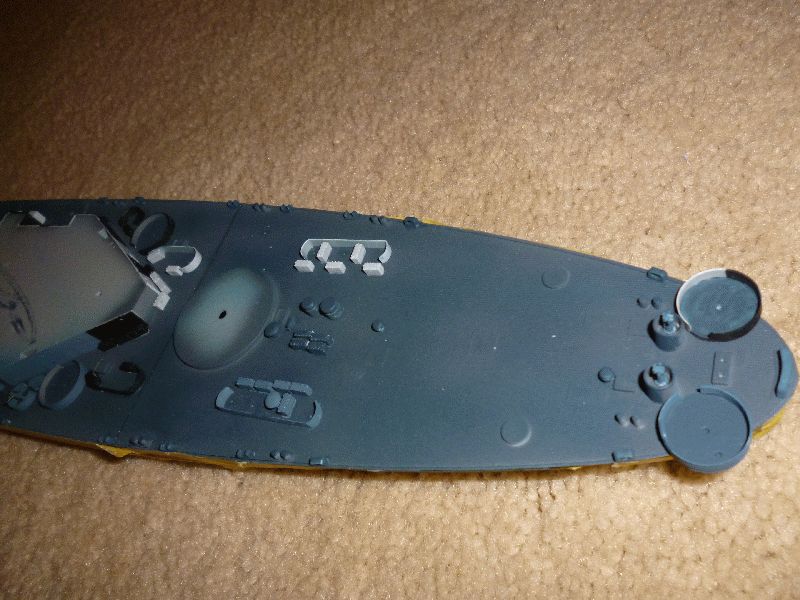
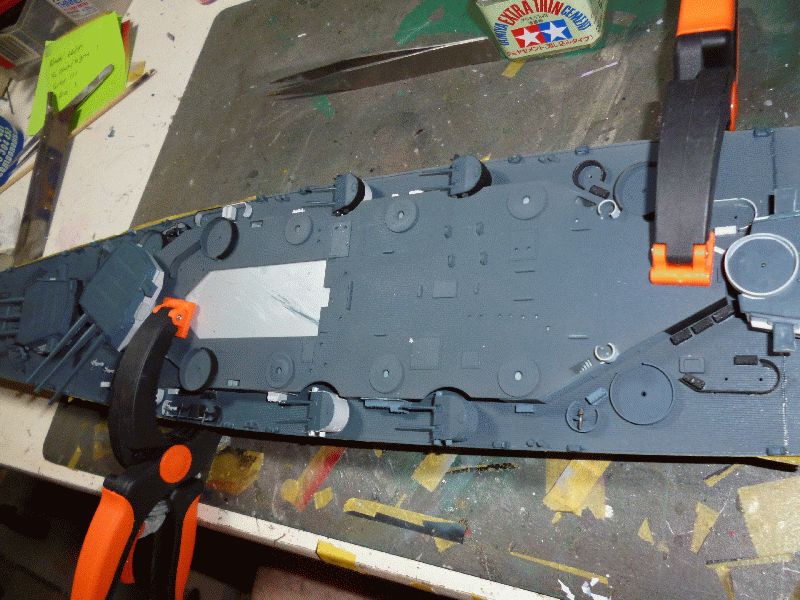
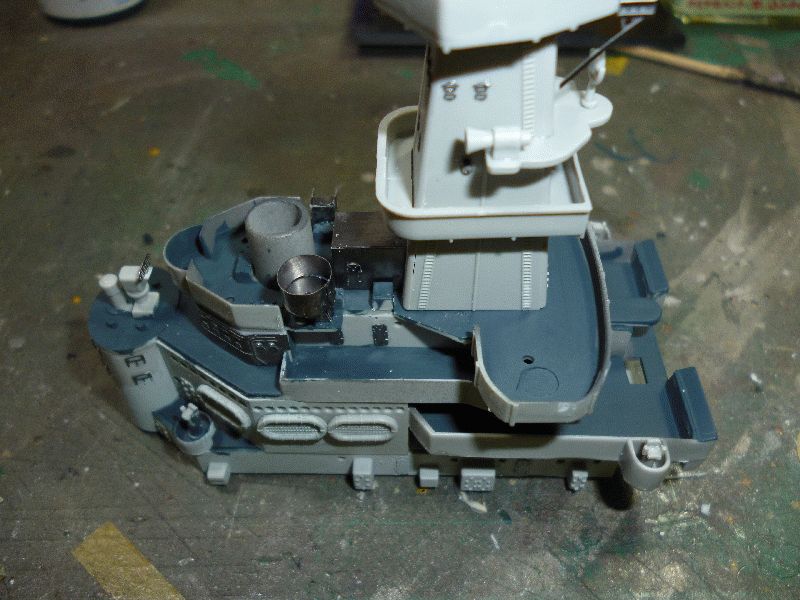
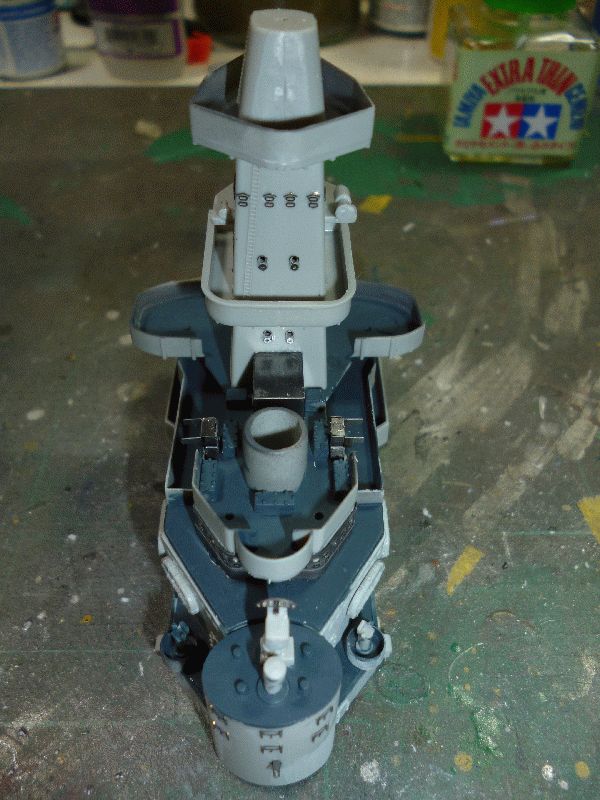
Anyway, as you may or may not know the hul and deck have been joined and painted. The sides have been painted and attached to the first level of the superstructure and the right hand side of the forward deck has been all but finished. Ammo lockers, splinter shields, and other small items attached and painted.

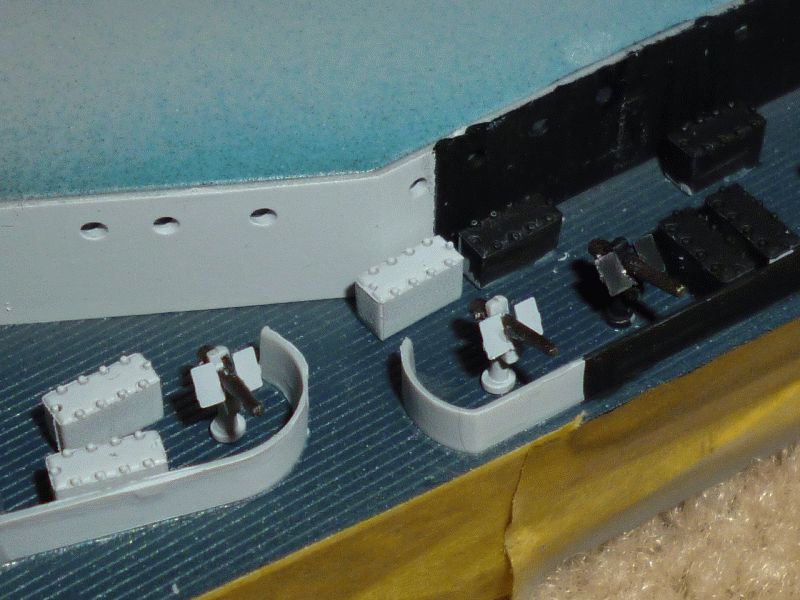
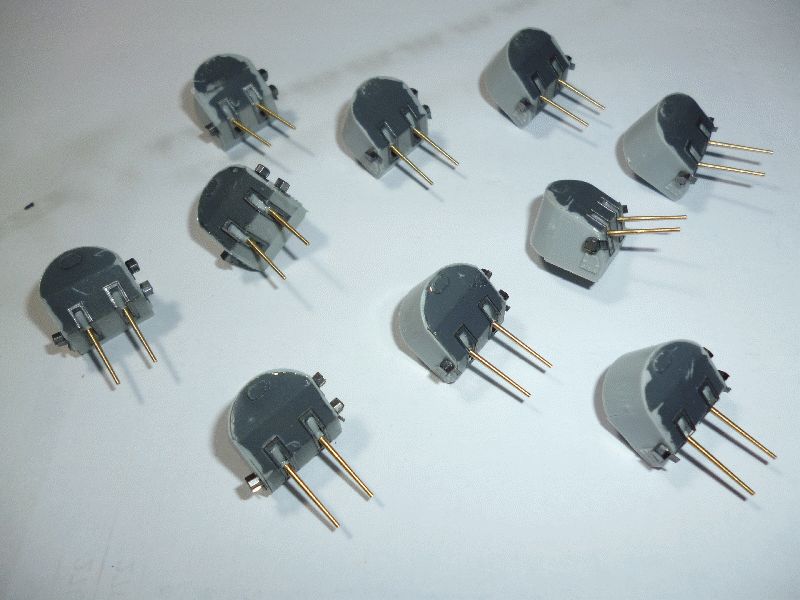
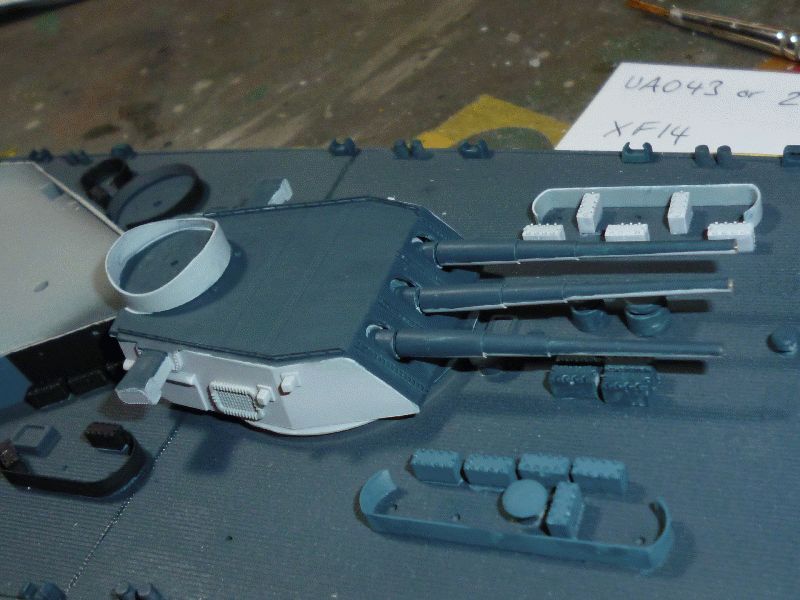
I mentioned I am using a hybrid setup for my 20mms as I think the Eduard PE solution, while well detailed, is just too flat for me. So I am gluing the Eduard splinter shields onto the kit guns after I remove a small tab of metal from the shield. After painting here is the result.

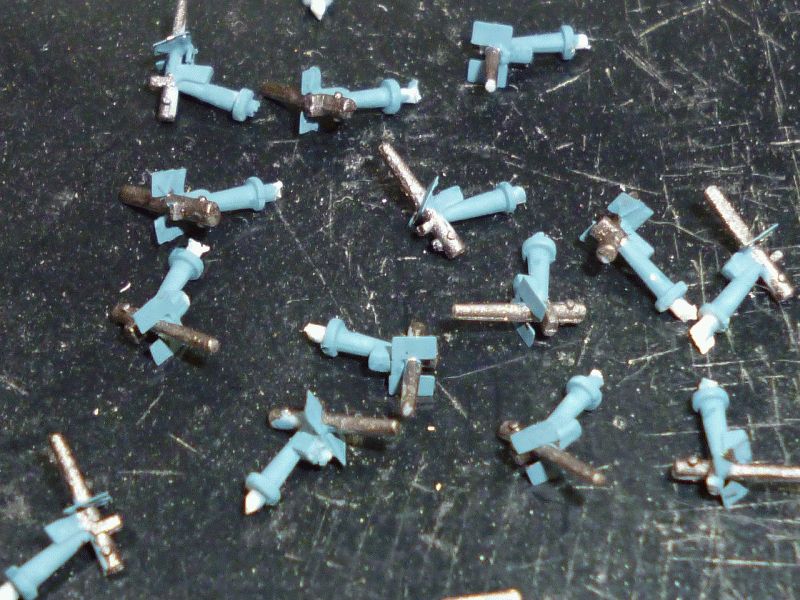
They look so much better in normal size.. 
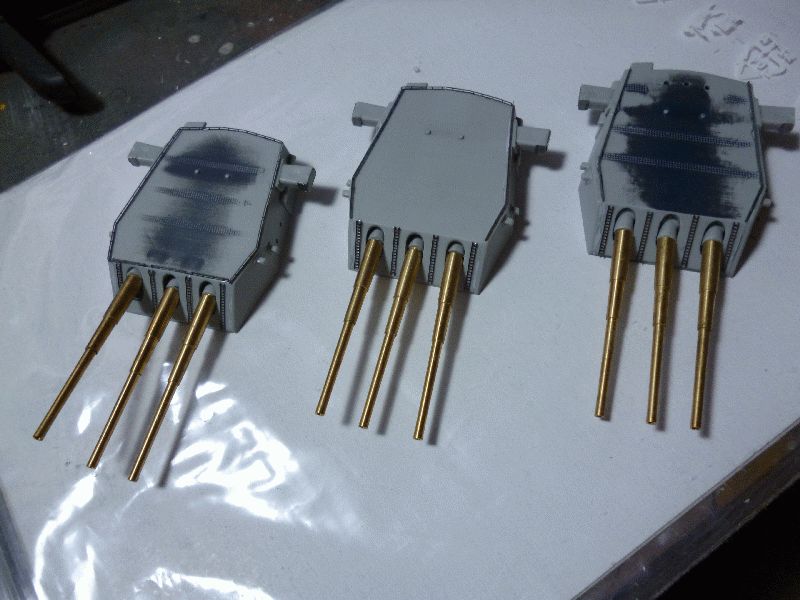
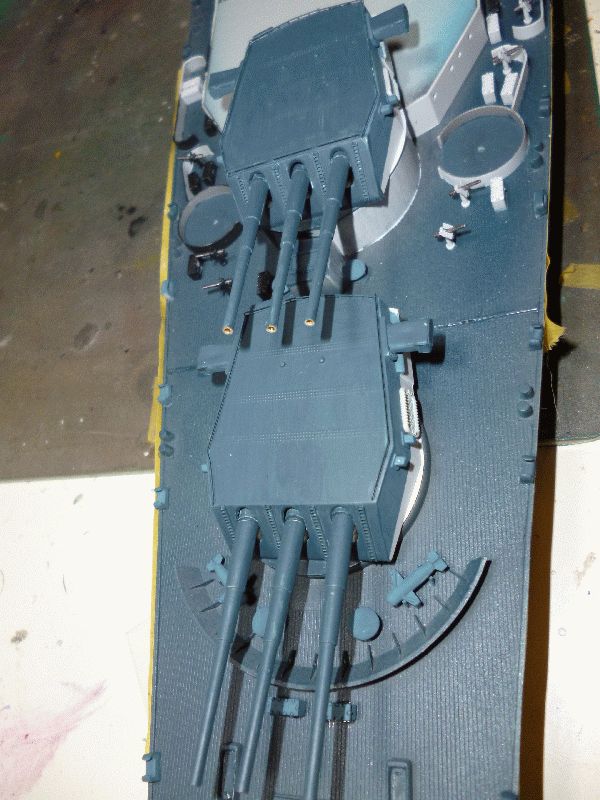
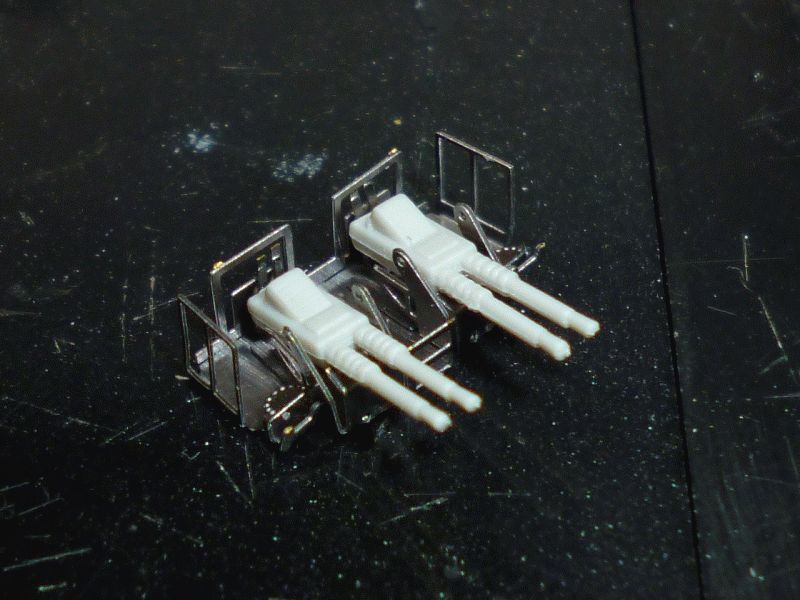
The barrels may be a bit thick, in fact they are bigger than the 40mm barrels, but still it looks better to my eye than the PE ones. I also noticed that early 20mms had a different pedestal to the later ones. So mine are the early ones..
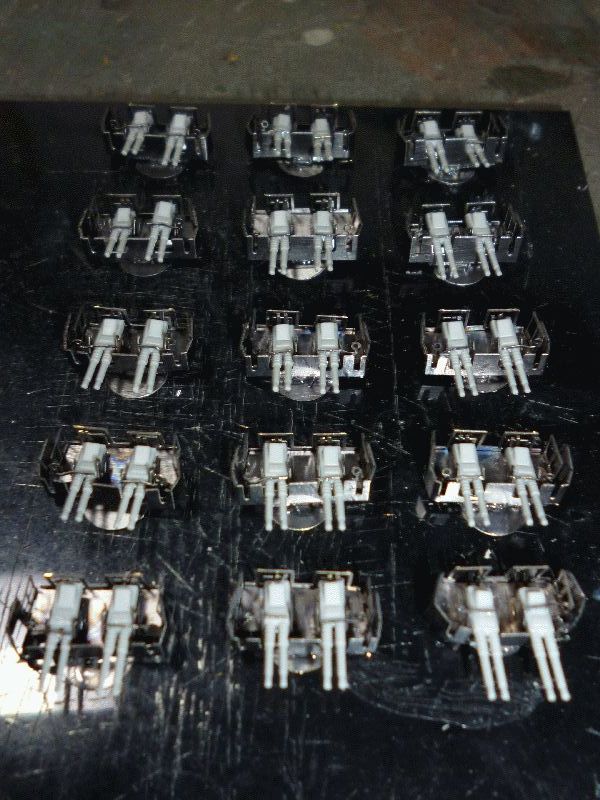
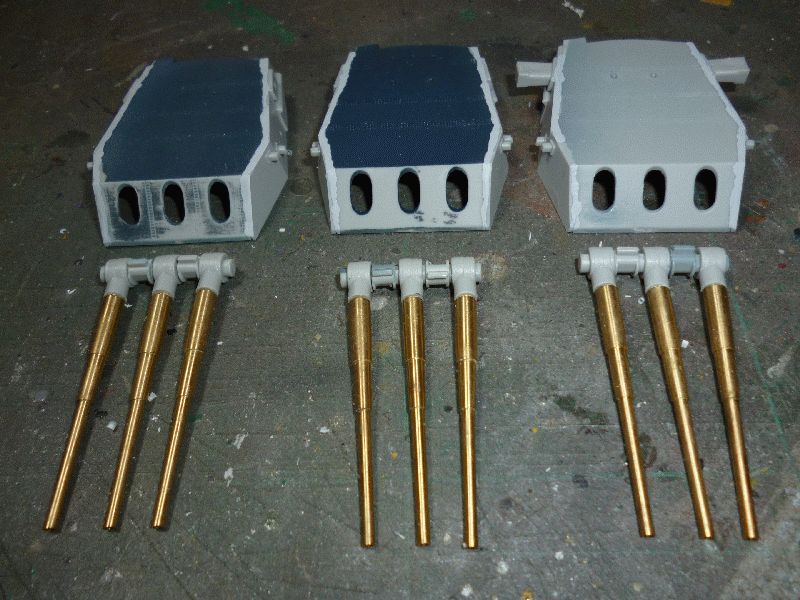
Next is the mini production line for my quad 40mm mounts, all 15 of them.

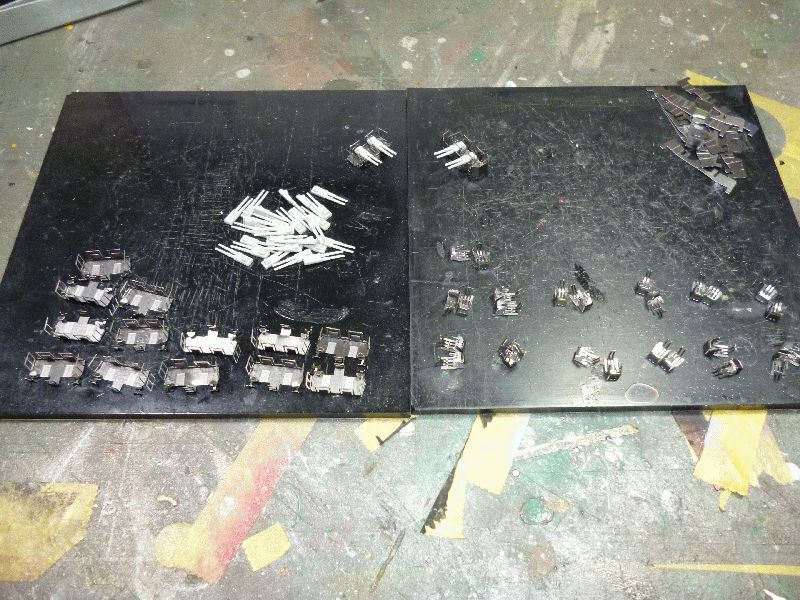
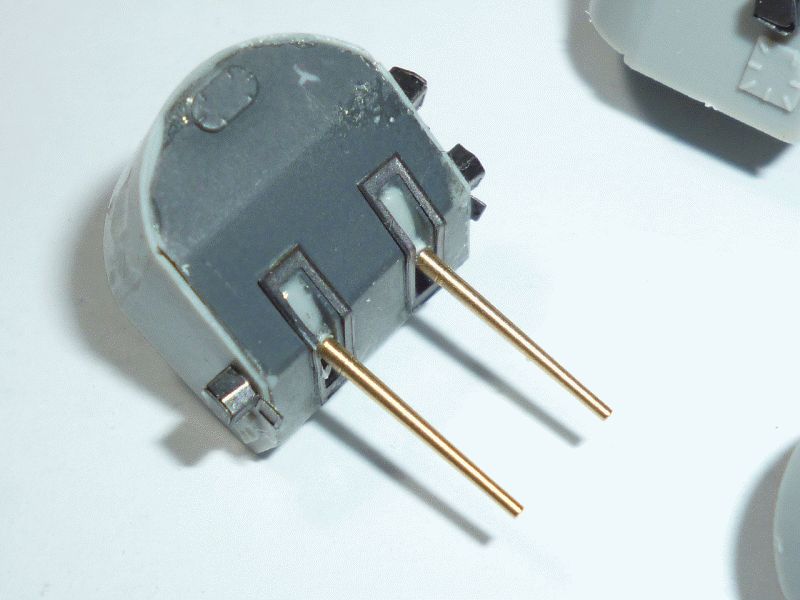
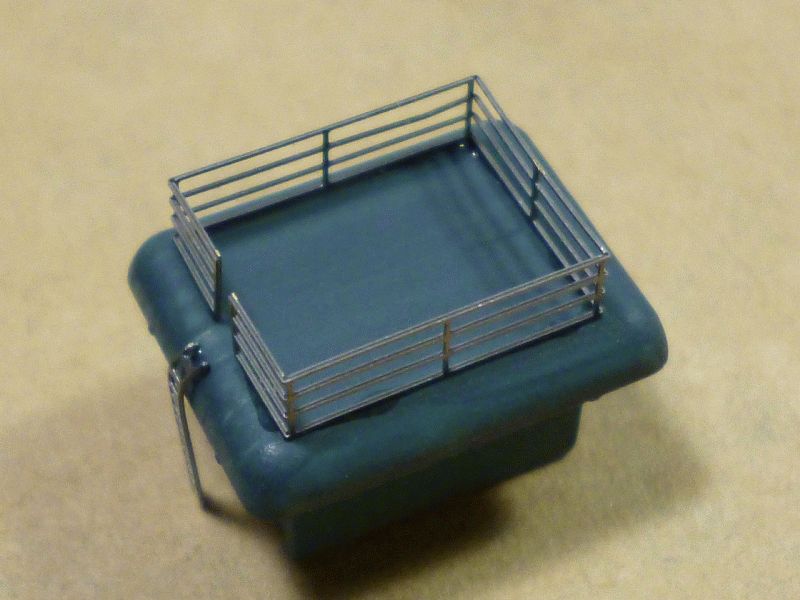
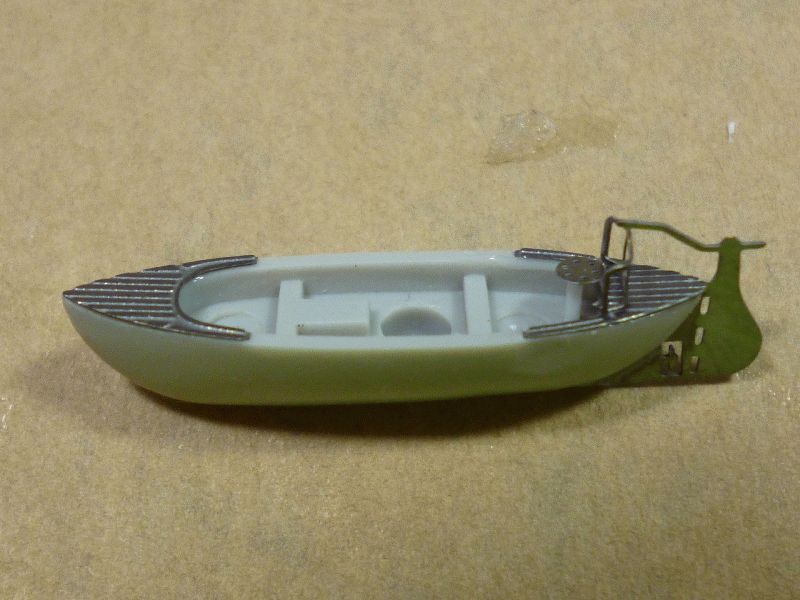
Now, too build a quad 40mm mount using the Eduard PE,

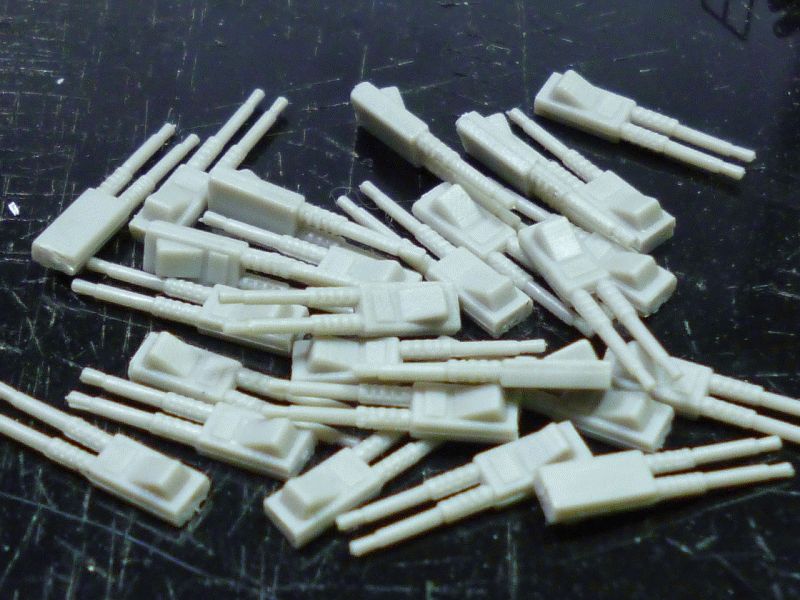
First you take two of the kits 40mm gun mouldings...

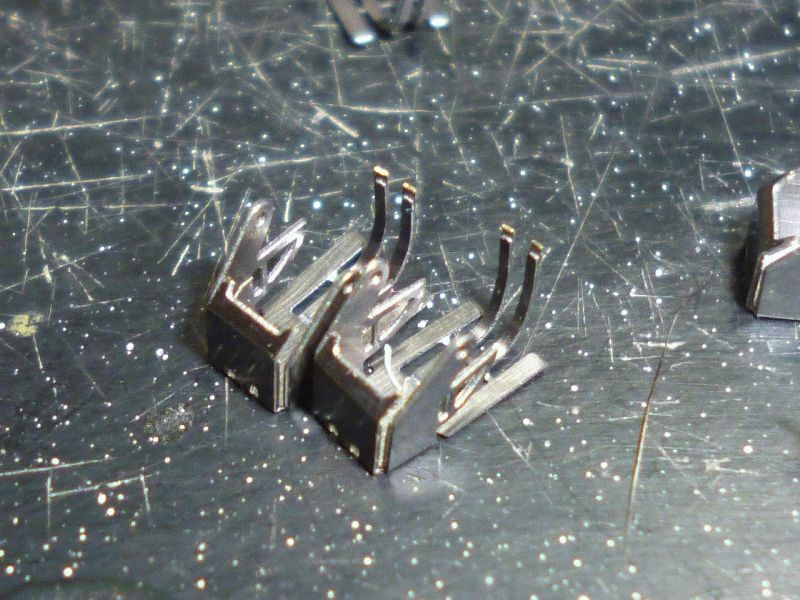
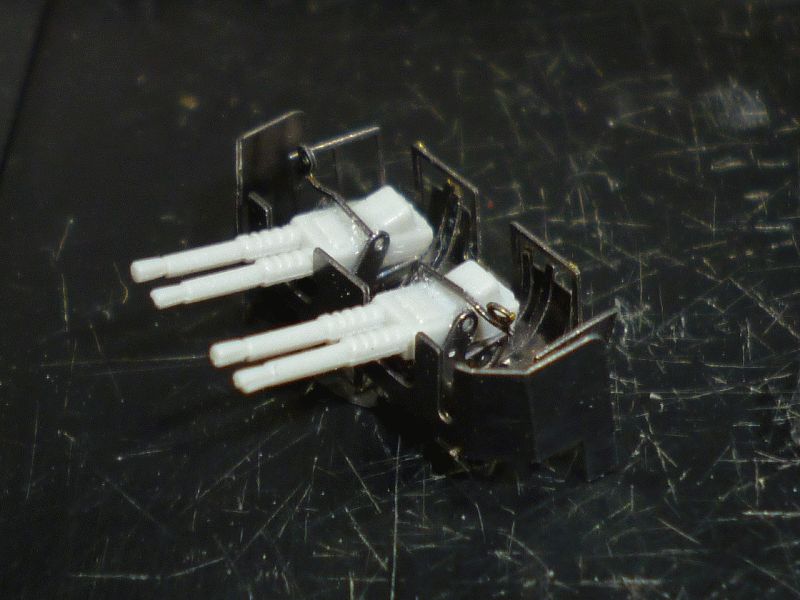
Then you glue one into each of these cradles (that you have bent previously),

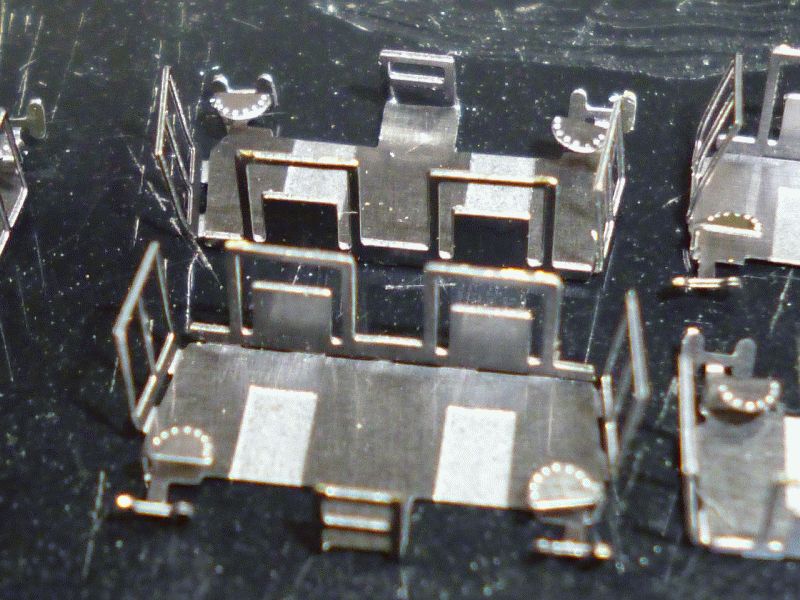
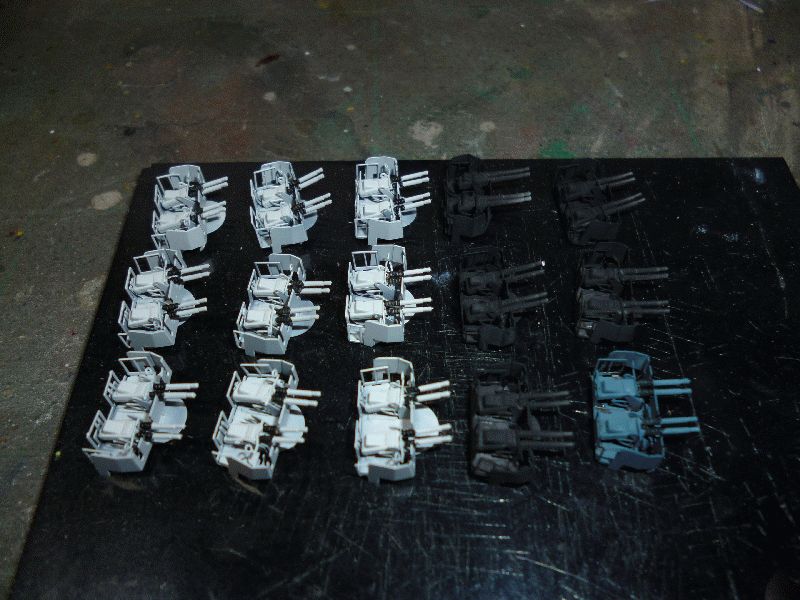
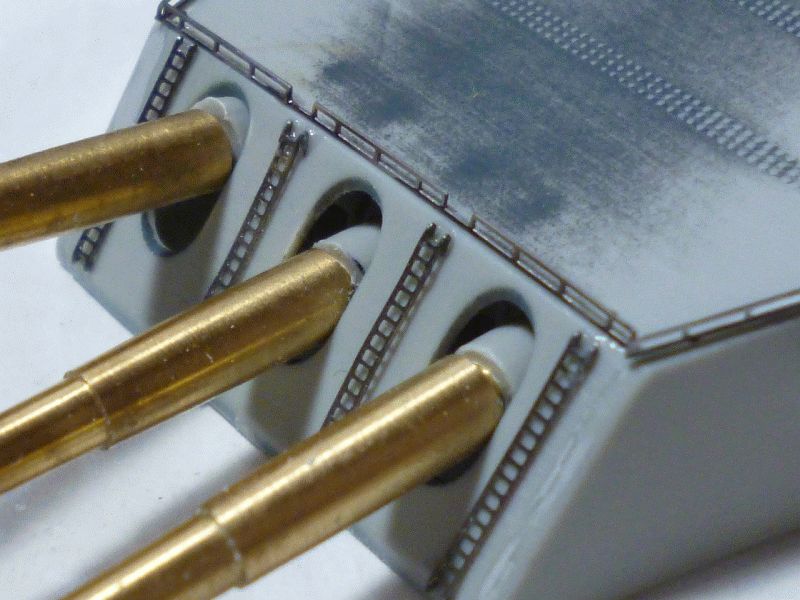
Then you glue those two cradles into this larger frame and you get this..

without splinter shield, or this

with splinter shield.
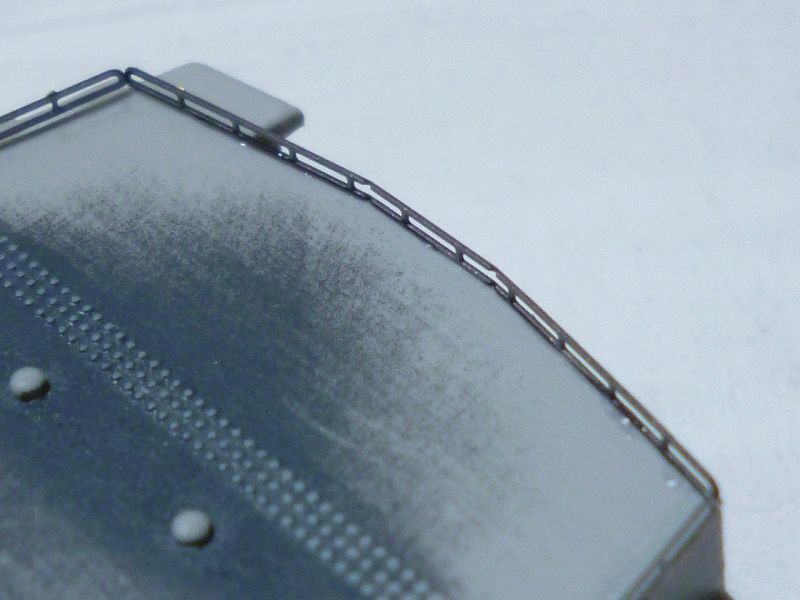
I will be building mine without splinter shields in line with my early 20mms.. And don't forget all the PE needs to be trued up after it is all glued together. I am using Gator Glue for most of mine as I don't like gluing my fingers together..

Hope you enjoyed looking.. More progress picss later.

blaster76
Visit this Community
Texas, United States
Joined: September 15, 2002
KitMaker: 8,985 posts
Model Shipwrights: 3,509 posts
Posted: Monday, November 21, 2011 - 06:11 AM UTC
interesting pics. The only negative comment is because of the close up pix it makes the seam lines on the 40mm guns stand out. I would go with having the splinter shields on the quad 40mm mount my self.
warreni
Visit this Community
South Australia, Australia
Joined: August 14, 2007
KitMaker: 5,926 posts
Model Shipwrights: 2,624 posts
Posted: Monday, November 21, 2011 - 07:06 AM UTC
Hi Steve.
I have to clean the guns up yet before I glue them in place. As for the splinter shields, I have seen some on the NC with shields and some without. I am thinking that they wouldn't have bothered with the shields if they were already behind a shield of some sort. But I will look at the new reference book I have ordered before I make the final yay or nay.
Cheers
Warren
robtmelvin
Visit this Community
Kentucky, United States
Joined: October 05, 2010
KitMaker: 205 posts
Model Shipwrights: 163 posts
Posted: Tuesday, November 22, 2011 - 05:28 AM UTC
Warren, first let me thank you for your kind comments in your "deck" thread. I have to say, though, that I think your work is at least as good as mine, probably better by far.

I really like what you've done with the Bofors mounts. They look very good to my eye. I also think you are making a smart choice to do some of the more tedious tasks early on.

I'm still trying to decide if I'm going for a late war or early war look. That will, as you are well aware, have a big impact on my 20mms, as well as whether or not the Bofors mounts have splinter shields. Still not sure and may not decide until I actually get back hands on with her.

I think you are going in the right direction with the Oerlikons. I agree with you that the straight PE ones just look too flat. I've got a set of the new ones from SeaMaster and I'm going to see if I can master them (no pun intended). I've tried a couple and they are pretty fiddly, but they do have a nice turned brass barrel that looks better than the flat PE barrels. I may well wind up like you simply going with the kit guns. Granted they are over scale, but some sanding might help that. A lot of it is going to depend on how much time/effort I'm willing or have available to do what I'll have to do to use the after market 20s.

I'll be anxious to follow your build. I hope to get back on my Showboat within the next couple of weeks and I'll also post a WIP thread, though I've often found that for me that is a great way to jinx a build for some reason.

Great work so far, Warren.

As an aside, and this is getting a little scary, I've been looking at ordering that Titanic kit! I'm not really interested in civilian vessels, but my mom, who is 82, is fascinated by the Titanic and I think having a really nice model of it that her son had build (she was totally thrilled when I got back into modeling a few years ago, I think she was glad I was doing that instead of some hobbies that could get me killed LOL) would mean more to her than any present I could buy her.

Bob
warreni
Visit this Community
South Australia, Australia
Joined: August 14, 2007
KitMaker: 5,926 posts
Model Shipwrights: 2,624 posts
Posted: Tuesday, November 22, 2011 - 07:15 AM UTC
Hi Bob.

I think you are on the right track with your Mother. I have built the 1/35 Trumpter trains for my father-in-law and he loves them. And looking in the box that kit is a beaut!

Thanks for your kind words. Master also make 1/350 20mm mounts with turned barrels etc using the early style mount, whereas my Eduard ones here use the late mount. You can get 20 of the 20mms from Lucky model for under $20. I have a set coming and will do a quick review of them and put it in here.

Cheers
Warren
warreni
Visit this Community
South Australia, Australia
Joined: August 14, 2007
KitMaker: 5,926 posts
Model Shipwrights: 2,624 posts
Posted: Saturday, November 26, 2011 - 04:01 PM UTC
Quick update and a bit of a roadblock...


Here are the finished quad 40mils waiting for some paint.

After counting the number I would need in each colour four times, cause I kept losing track, I finally painted them, 9 grey, five black and one blue..


I also finished the bow section off, except for the anchors which need a bit of work..

and a few of the things they tie the boat, sorry ship, up with. I have installed them but haven't photographed it again.

The road block I mentioned is a bit of a problem. The Eduard PE set does not give you enough 20mms for the ship, therefore I have not got enough splinter shields for my guns. I am waiting to see what Eduard say about the problem and will go onto all the other sub-assemblies that are waiting for me.

Bye for now.

Gremlin56
Joined: October 30, 2005
KitMaker: 3,897 posts
Model Shipwrights: 3,301 posts
Posted: Saturday, November 26, 2011 - 04:55 PM UTC
Looking good Warren !
Julian
robtmelvin
Visit this Community
Kentucky, United States
Joined: October 05, 2010
KitMaker: 205 posts
Model Shipwrights: 163 posts
Posted: Tuesday, November 29, 2011 - 05:08 AM UTC
Warren, I might be able to help you out with your dilemma/roadblock. I understand that you are short on splinter shields for your 20 mm Oerlikons. When I bought North Carolina I splurged and bought three PE sets, trying to cover all the bases and to give me room to mess up some things, like catapults and cranes. I'm sure I have extra shields like you need and would be happy to let you have some of my extras. Let me know what you need and I'll take a look at the stash to make sure, but I'm certain I have extras I can spare.

I really like what you've done with you Bofors mounts. They look great. Job well done.

Bob
warreni
Visit this Community
South Australia, Australia
Joined: August 14, 2007
KitMaker: 5,926 posts
Model Shipwrights: 2,624 posts
Posted: Tuesday, November 29, 2011 - 07:25 AM UTC
Thanks for the very generous offer Bob. I need a further 20 shields just to be safe. I have been using the Eduard ones but would be grateful for any you can spare.

Thanks again.
robtmelvin
Visit this Community
Kentucky, United States
Joined: October 05, 2010
KitMaker: 205 posts
Model Shipwrights: 163 posts
Posted: Tuesday, November 29, 2011 - 05:00 PM UTC
Warren, let me double check what I have just to make sure, but I don't think that should be a problem at all. Just to be certain what you need, you are looking for the shields for the 20 mm Oerlikon guns, right? If that is what you need, I'm sure I have enough to spare. Just let me know if I'm right about what you are looking for. I should have enough out of three sets to take care of both of us! LOL

Bob
warreni
Visit this Community
South Australia, Australia
Joined: August 14, 2007
KitMaker: 5,926 posts
Model Shipwrights: 2,624 posts
Posted: Tuesday, November 29, 2011 - 07:36 PM UTC
Yep, that's all I need Bob.
warreni
Visit this Community
South Australia, Australia
Joined: August 14, 2007
KitMaker: 5,926 posts
Model Shipwrights: 2,624 posts
Posted: Thursday, December 01, 2011 - 03:45 PM UTC
Am slowly but surely working my way around the main deck putting heaps of ammo lockers and shields in, and all the 20mms I had using the Eduard PE shields. Got most of it finished last night while suffering in silence after a visit to the dentist. I couldn't sleep so I went to the hobby room for most of the night so I wouldn't bother my Wife. I am paying for it t work today by being just a little tired after about an hours sleep last night..

Will leave the 20mm spots blank until I source the extra shields I need, but will try and post some photos over the weekend, if I survive my heavy fishing program I have planned...
robtmelvin
Visit this Community
Kentucky, United States
Joined: October 05, 2010
KitMaker: 205 posts
Model Shipwrights: 163 posts
Posted: Friday, December 02, 2011 - 04:31 AM UTC
Warren, sorry, but its been a very busy week. For some reason weeks following a holiday seem to be unusually hectic in my profession. I'll look at my PE sets for North Carolina this weekend and confirm that I have what you need (20 shields for the 20 mm Oerlikons). I'm pretty sure I do, but let me check just to make sure. I'll let you know over the weekend for sure and if I can meet your needs I can get them out to you on Monday. Is that alright?

Bob
warreni
Visit this Community
South Australia, Australia
Joined: August 14, 2007
KitMaker: 5,926 posts
Model Shipwrights: 2,624 posts
Posted: Monday, December 05, 2011 - 01:29 PM UTC
Ah!! It is good to have the site back up and running, and seemingly running a lot better than iot was, Well done Jim and Co.
Anyway, back to the build!

Here is the foredeck of the ship. That flag pole does look a bit over scale doesn't it.. Oh well. All that is required here are some railings, but they will come last.

Here is the centre of the deck. Notice I haven't put the quad 40mm mounts in yet as I don't want to risk damaging them.

And finally the stern. No cranes or catapults as yet, and the 40mms and 20mms are missing. Don't know if the colour scheme is 100% the way it was but colour photos of the ship from that period don't show very much of this scheme.

Next time I will be using finer barrels for the 20mms. But for this build I will use the original Trumpeter ones so as too be consistent, consistently wrong maybe, but consistent..
I also covered the painted hull with masking tape to stop damaging the camo scheme.

I have started the main turrets and have filled the small gaps left when the sides have been glued on. The replacement barrels have been installed,
I have already got the small railings, ladders , and rangefinder bits on the turrets since I took these photos and will put a photo up later.
Eduard PE set is a joy to work with with all the fold marks in just the right places. And Gator Glue is working very well so far.
That's it for now. More pictures tomorrow maybe.

warreni
Visit this Community
South Australia, Australia
Joined: August 14, 2007
KitMaker: 5,926 posts
Model Shipwrights: 2,624 posts
Posted: Wednesday, December 07, 2011 - 02:15 PM UTC
Hi Everyone.

Welcome to another exciting installment of 'The Showboat'.

In this exciting episode we have a look at the completed main turrets with there mighty 16 in guns.

Here are the three of them. Each is different. A turret has a fewer railings than B turret, and C turret will have a quad 40mm ion it when it is finished.

After shaving off the original moulded on ladders on the front of the turrets PE ones were glued in place. Have a little to do with the guns yet. No blast bags to cover the join. I also have to tidy up the railings.

This is the rear railing. The Eduard PE has been a joy to use so far.
I have started on the 5 inch turrets and have glued the plastic parts together,have applied a couple of the what I presume are external sights to one so far. These little sight boxs have six folds each and can be left with the front flap open or closed.
I have also cut all the gun opening surrounds off the PE sprues but haven't
glue any on yet. I still have to work out how, or if, I am going to use brass barrels for the 5 inch guns as well.
Thanks for looking!

warreni
Visit this Community
South Australia, Australia
Joined: August 14, 2007
KitMaker: 5,926 posts
Model Shipwrights: 2,624 posts
Posted: Saturday, December 10, 2011 - 08:16 PM UTC
Hi everyone.

Not lots of progress but it took a few days to get as far as I did. No photos yet as the gallery is down at the moment, but I got the 5 in turrets finished. I didn't use all the PE in the Eduard set for them but the doors looked fine to me.

And here they are!! (Gallery fixed)


As you can see they need a bit more cleaning up and some doors added to the rear (which you can't see) but the PE does improve the kit turrets as well as correcting them as the kit turrets only have one sighting thingy on the left of the turret rather than two, which the Eduard PE provides.
If I am lucky I will get them painted this evening.
Thanks for looking...

warreni
Visit this Community
South Australia, Australia
Joined: August 14, 2007
KitMaker: 5,926 posts
Model Shipwrights: 2,624 posts
Posted: Friday, December 16, 2011 - 10:13 PM UTC
Hi Everyone.

Well I finally got all those pesky 5 in turrets finished. The 16in turrets are mostly finished as well. Just a little touch up required.


I got some dental work done about 2 weeks ago and it is still aching like an SOB, and it is funny how you can get very distracted by the pain. I was thinking I had to paint the first level deck before I attached it, little realising I had already painted it. Idiot...
That it for now. Am off to bed and some pain killers again.
Cheers
Warren
Gremlin56
Joined: October 30, 2005
KitMaker: 3,897 posts
Model Shipwrights: 3,301 posts
Posted: Friday, December 16, 2011 - 11:02 PM UTC
Nice work Warren, the brass barrels are a huge improvement on the kit supplied ones.
Cheers,
Julian
warreni
Visit this Community
South Australia, Australia
Joined: August 14, 2007
KitMaker: 5,926 posts
Model Shipwrights: 2,624 posts
Posted: Saturday, December 17, 2011 - 07:07 AM UTC
I agree Julian. They are the first ones i have used bu Master and learned a few things. I would like blast bags on them but can't seem to find any. Oh well, maybe I will find them for the USS Alabama I have in the stash.

My Wasp should be here in a few days as well. And the Yamato arrived last week.

Stash grows.. Has anyone seen a review on the Fujimi 1/350 Fuso or her sister ship?

Gremlin56
Joined: October 30, 2005
KitMaker: 3,897 posts
Model Shipwrights: 3,301 posts
Posted: Saturday, December 17, 2011 - 07:42 AM UTC
Have you seen the itsy bitsy stanchions you have to thread fine wire through on the Yamato? You will be wearing glasses thick enough to burn holes in the Hubble telescope from your back yard after rigging them
Actually I am rather tempted to buy the new Tamiya Yamato were it not for the fact that I have the old one plus Eduard PE plus brass barrels etc. in my stash.

Julian
warreni
Visit this Community
South Australia, Australia
Joined: August 14, 2007
KitMaker: 5,926 posts
Model Shipwrights: 2,624 posts
Posted: Saturday, December 17, 2011 - 02:07 PM UTC
I bought the Musashi instead, and a Wooden deck and GMM PE..

Will be interesting to compare the two when (if?) they are finished.

I already wear magnifying thingies, but those stanchions may be a bit over the top... Will see how I go.
warreni
Visit this Community
South Australia, Australia
Joined: August 14, 2007
KitMaker: 5,926 posts
Model Shipwrights: 2,624 posts
Posted: Saturday, December 17, 2011 - 09:09 PM UTC
Greetings one and all.
I have found the best way to keep my mind off my toof ache is to build my NC, so here are a few pictures showing a bit more progress. As well as finishing off most of the fittings on level one (not sure of the official name) I started building some of the PE parts I will be using.

That is some kind of shed that goes in the middle of the deck. Not sure what it is for.

I am pretty sure this is a 26ft motor boat, with the PE bits added. There are two of these on this deck. I am not replacing the boat supports with PE as you win't see them once the boats are in place.

And that is the crane used for raising and lowering the Kingfishers at the stern. The three small parts at the back gave a bit of trouble for a while but I worked it out eventually.
For the PE, I have found that Gator glue is best for railings and large flat bits, but Thick CA is better for some things that need to have their drying time accelerated so you don't have to sit there holding the parts together for 10 minutes while they dry.
That's it for now.
warreni
Visit this Community
South Australia, Australia
Joined: August 14, 2007
KitMaker: 5,926 posts
Model Shipwrights: 2,624 posts
Posted: Tuesday, December 20, 2011 - 09:30 PM UTC
Hello again.
Just a small update. I have been folding up the PE catapaults. I was having trouble working out where the small bits went then I found a 1/72 scale P-6 catapault made by Attack Squadron. This proved very helpful as they have CAD drawings of the catapault on their site and it answered all my questions about the locations of various parts.
I will upload some pictures later as whenever I try and upload pictures at the moment it comes up saying :Server busy, try again later'. Haven't seen that message before..
I have also found that my Small Shop PE folder is actually too small for some of the PE for this kit. I am going to have to get myself one of the '5-Speed' ones sooner than later.
Cheers and Merry Christmas to all if I don't get back on beforehand.

OK. Server is working again..
This is one of the catapaults after two folds.

And here are a couple of pics of a completed catapault.


Notice the non-slip diamond pattern markings on the walkways. This Eduard set is a beauty!
Till next time.. same bat time, same bat channel..
warreni
Visit this Community
South Australia, Australia
Joined: August 14, 2007
KitMaker: 5,926 posts
Model Shipwrights: 2,624 posts
Posted: Friday, December 23, 2011 - 08:34 PM UTC
Now that the catapults are out of the way it is on to the two ships cranes mounted midships.

I thought I would put in an Exacto knife for a little scale.

Hmmm Makes it look like the hook is not on straight.. but I assure you it is..
I used either fishing line or fine piano wire to assemble the cranes along with CA glue and Gator glue.
That's all for now.
Merry Christmas everyone.
warreni
Visit this Community
South Australia, Australia
Joined: August 14, 2007
KitMaker: 5,926 posts
Model Shipwrights: 2,624 posts
Posted: Sunday, December 25, 2011 - 08:19 PM UTC
Some more progress over the last few days.


As you can see I have started on the forward area and have almost finished it. Just needs some railings, a gun director and paint .. oh and I forgot that huge radar dish that goes on the top...
It's amazing how macro pictures can make things look as though they are out of allignment..
Oh, and I forgot to add earlier that I painted the lower hull and masked it up and painted that annoying boot line. Maybe I should google why they painted it there.
Enough for now. More tomorrow if I am lucky, the good Lord willin' and the cricks don't rise..
Cheers
Warren
 _GOTOTOP