Ships by Class/Type: Carriers
Topics on all types of carriers from the early 20th century to today.
Hasegawa USS Gambier Bay CVE-73
warreni
Visit this Community
South Australia, Australia
Joined: August 14, 2007
KitMaker: 5,926 posts
Model Shipwrights: 2,624 posts
Posted: Tuesday, January 17, 2012 - 12:00 PM UTC
Hi there Bob.
Thanks for the compliments again. You are obviously correct about great minds..
I think my camera hides lots of faults..
Some of the PE in the Super Set is extremely small. This makes it a little difficult to manipulate but just takes patience I suppose. One thing to look out for is that the fold lines are not necessarily on the side of the PE where you have to fold it, if you know what I mean. With Eduard PE the fold lines are normally in the side toward which you fold the PE. This doesn't seem to be the case with the Hasegawa PE..
But the general fit etc is great. I have a feeling that the tiny PE cables to hold up the boats may not be up to the task as the attachment points are so tiny.
But that is a long way off yet. I am building small plastic/PE assemblies until the weekend when I will paint the camo on the hull.
Thanks for dropping by Sir.
warreni
Visit this Community
South Australia, Australia
Joined: August 14, 2007
KitMaker: 5,926 posts
Model Shipwrights: 2,624 posts
Posted: Tuesday, January 17, 2012 - 10:08 PM UTC
Hi Everyone.
No pictures tonight but I have been trying a couple of my options for the 20mms.
Option 1. Hasegawa kit guns with PE from the Hasegawa set. On problem I have found with this idea is that the Hasegawa splinter shields end up being too think after you fold them up to install them. The look about as thick as the plastic ones in the kit. Fail..
Option 2. Full brass Master 20mm guns with turned barrels and stand. Six parts per gun and they are very tiny parts. Don't know if my eyes will last for 20 of them! Will see how the second one goes tomorrow.
Option 3. Just use the kit plastic. Not quite as detailed but a lot easier to use.
Will see how the rest of the Option 1 and 2 builds go, but I don't like the thick spinter shields on the Option 1 version much.
Lucky there is only twenty of them...
robtmelvin
Visit this Community
Kentucky, United States
Joined: October 05, 2010
KitMaker: 205 posts
Model Shipwrights: 163 posts
Posted: Wednesday, January 18, 2012 - 03:46 AM UTC
Warren, I know exactly what you mean about the SeaMaster's 20mm mounts. Talk about "fiddly bits". I've got a couple of packs of them and so far I've buggered about a half dozen of them trying to master the necessary technique. Good to know too about the etches in the Hasegawa PE. Like you, I'm used to the etch being on the side where the bend is to be, not the reverse. Sounds like a bit of bad engineering/design to me.

Looking forward to update pics.

Bob
warreni
Visit this Community
South Australia, Australia
Joined: August 14, 2007
KitMaker: 5,926 posts
Model Shipwrights: 2,624 posts
Posted: Wednesday, January 18, 2012 - 09:30 AM UTC
Hi Bob.
It may only be on those two parts (rudder/prop and hanging decides for boats). Problem is when the parts to bend are so small it makes it difficult. But it is a good idea to increase the attachment area.
I actually completed one of the Master guns before I came to work, except the tiny, tiny handwheel got the Mach 1 syndrome and pinged off somewhere. Don't you just love it when you pick up a tiny parts and the tweezers seem to twist a bit and it is gone. I use top grade tweezers made of stainless steel but they still seem to twist occaisionally. The hand wheel is so tiny I doubt whether I will ever find it..
More news as it comes to hand...
warreni
Visit this Community
South Australia, Australia
Joined: August 14, 2007
KitMaker: 5,926 posts
Model Shipwrights: 2,624 posts
Posted: Friday, January 20, 2012 - 06:47 PM UTC
Hello everyone.
I thought I would do a mini-build-blog on the 20mm Oerlikons that I am using on this build. These are all brass guns from Master and are readily available, and not too hard to build if you take your time and have the necessary tools..
Brass 20mm Oerlikon 101

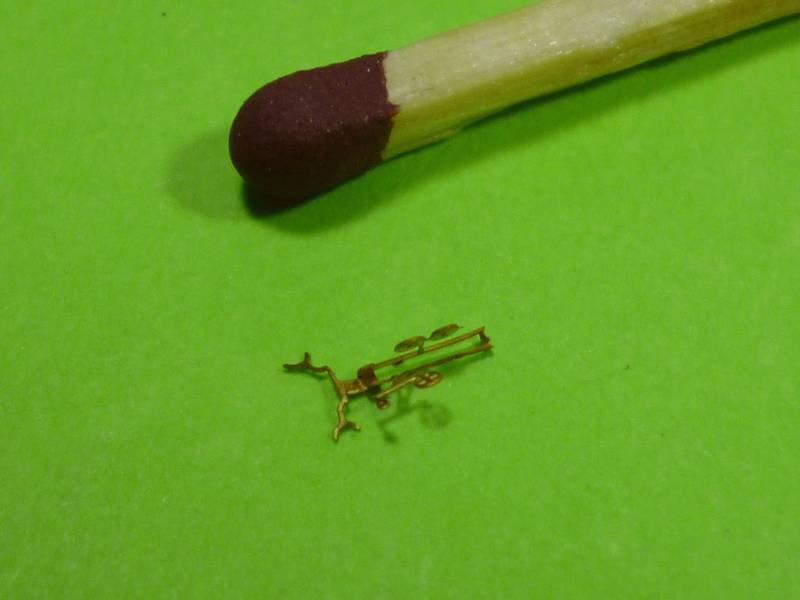
First up you remove the parts from the sprue and clean them up as necessary. They come off the sprue extremely easily and be careful you don't have any parts fly off into another dimension.
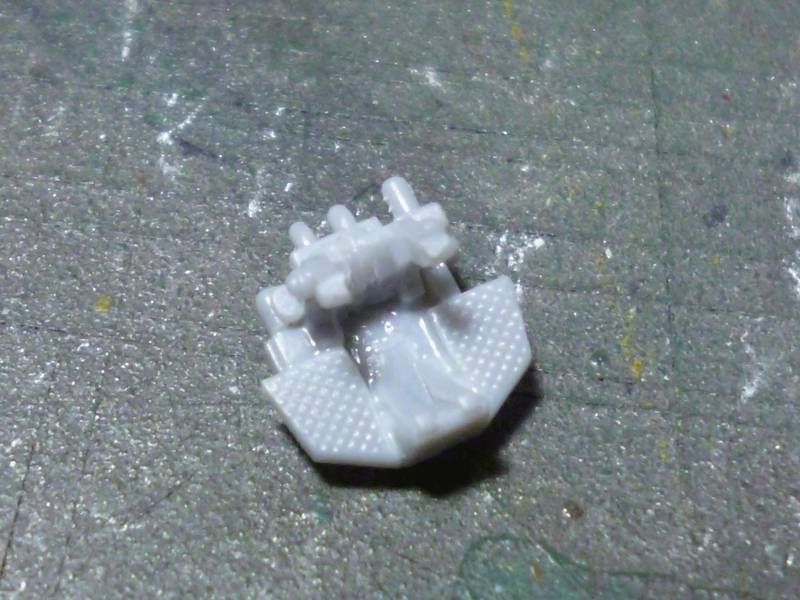
You start with the base of the gun and shield mount. This picture shows it after the two sides have been bent up.

Then you bend the ends outwards to form the mounts for the splinter shield.

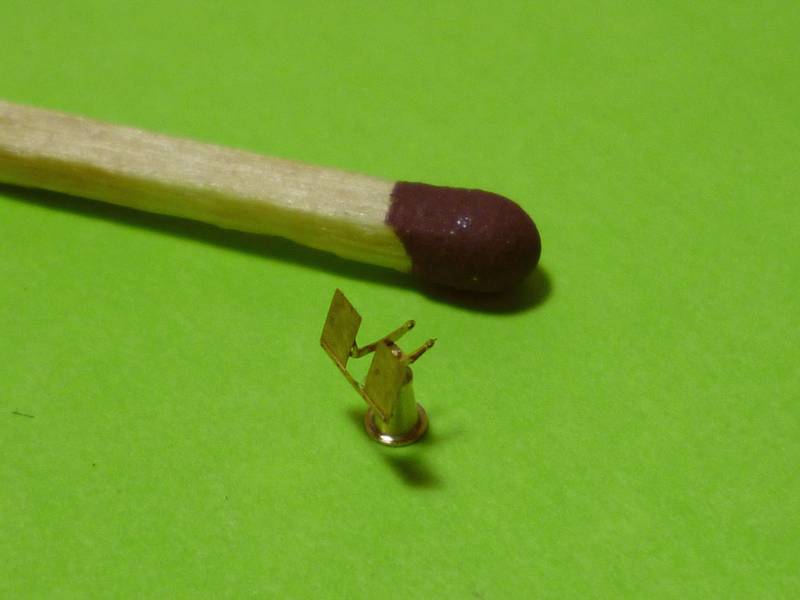
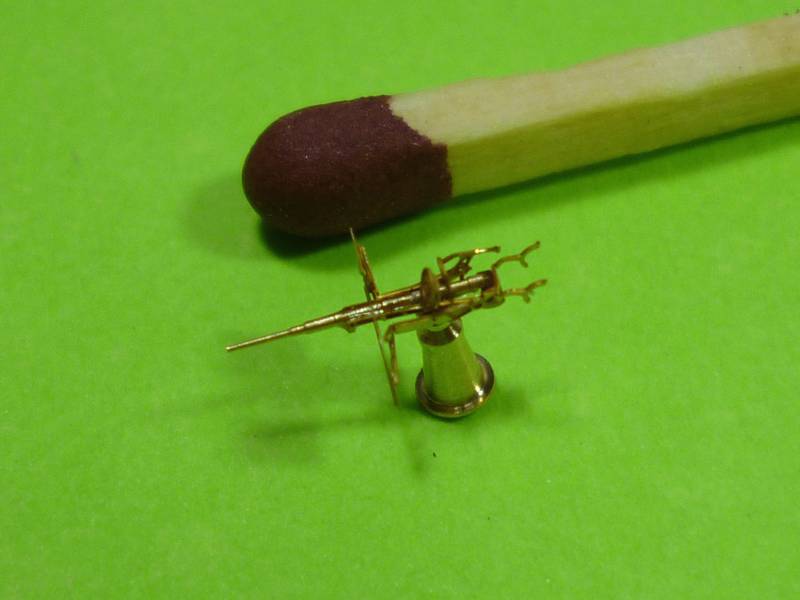
Then you glue the shield to the mount and then that assembly too the turned brass base. Sorry I missed a photo of the step where you glue the sheild on.. oh well...

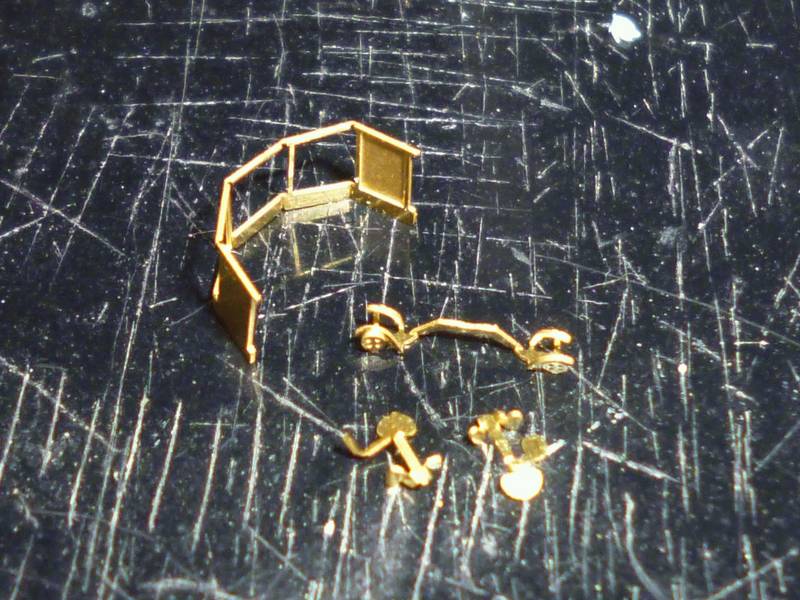
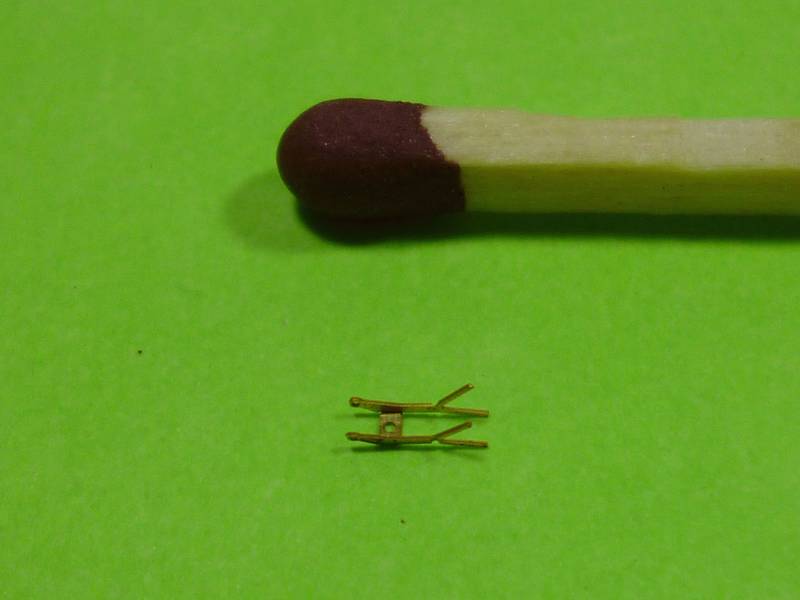
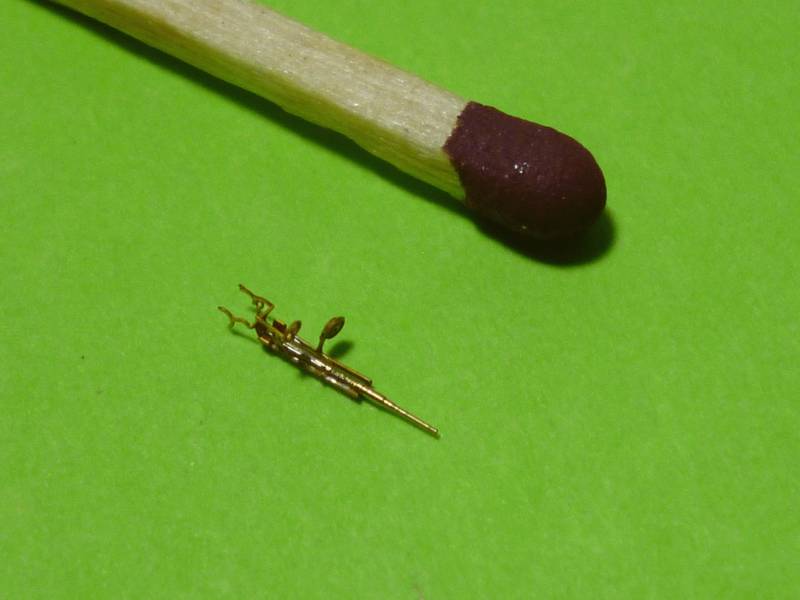
Next up you grab the other flat assembly and bend the sides up.

Then you bend the end up and the shoulder supports out. Then the ammo holder and sights are twisted and bent out slightly.

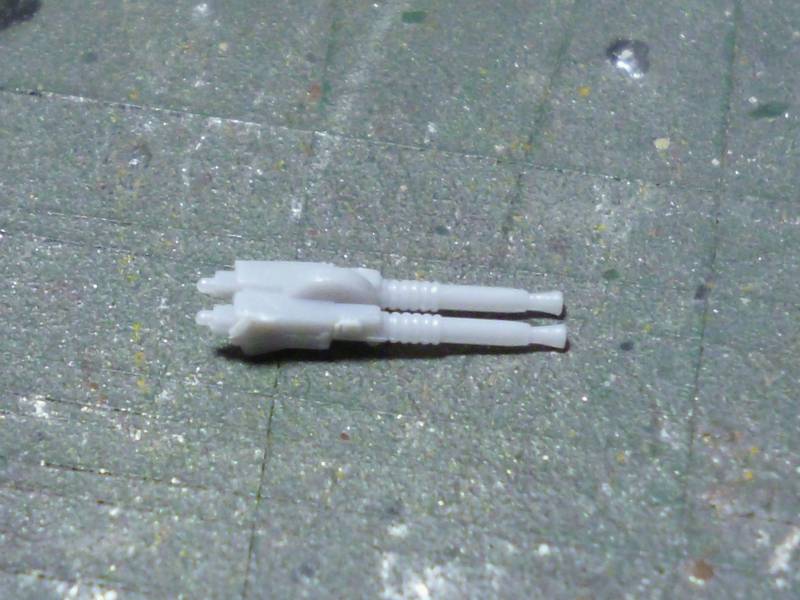
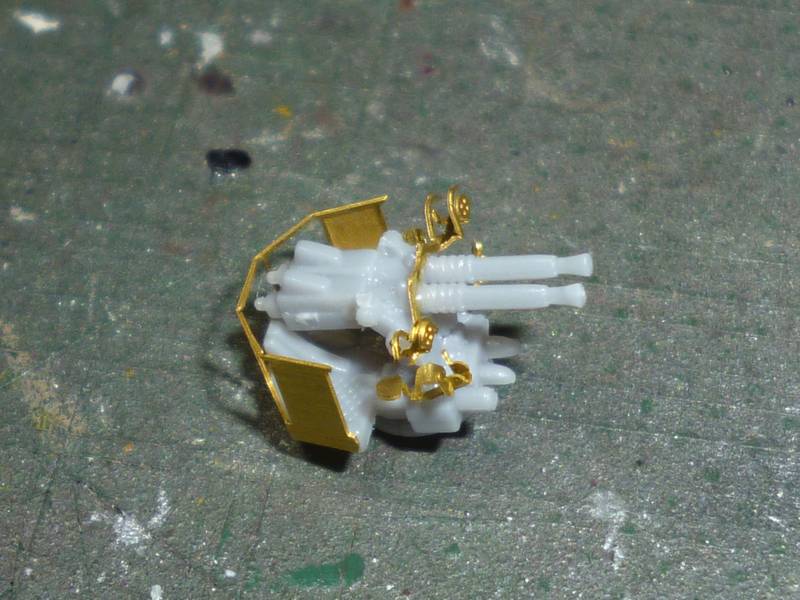
Next step is to glue the barrel into the cradle. Looking more like a gun now.. Repeat 20 times and you have enough for CVE-73.

And finally you glue the barrel and cradle into the mount and voila, a much better looking Oerlikon than provided by the kit or the kit and Hasegawa PE as shown here..

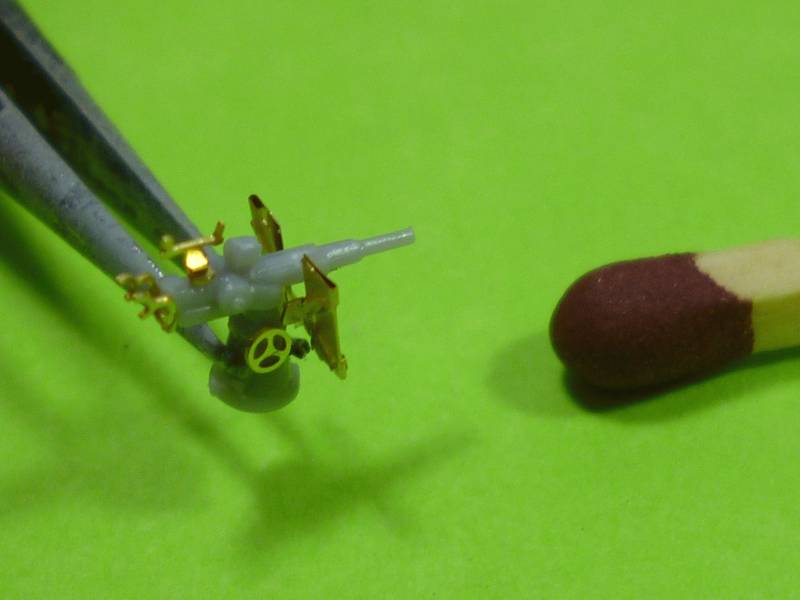
Notice how the gun shield will look too thick even if I had bent it a bit tighter.. and the shoulder supports are a bit thick as well. I will use these 20mms on another kit with rubbish guns.
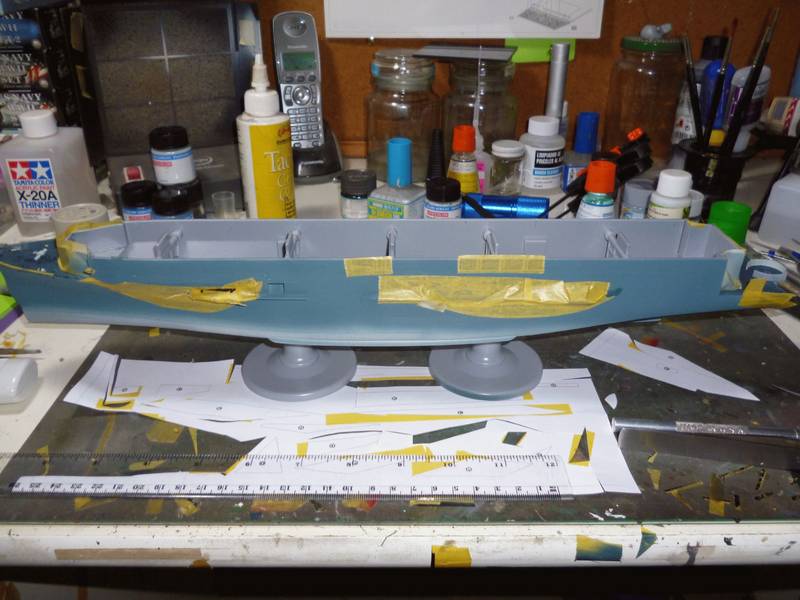
After all that PE bending I finally broke the code for Life Color paints and sprayed the first colour of the camo scheme on the hull successfully.

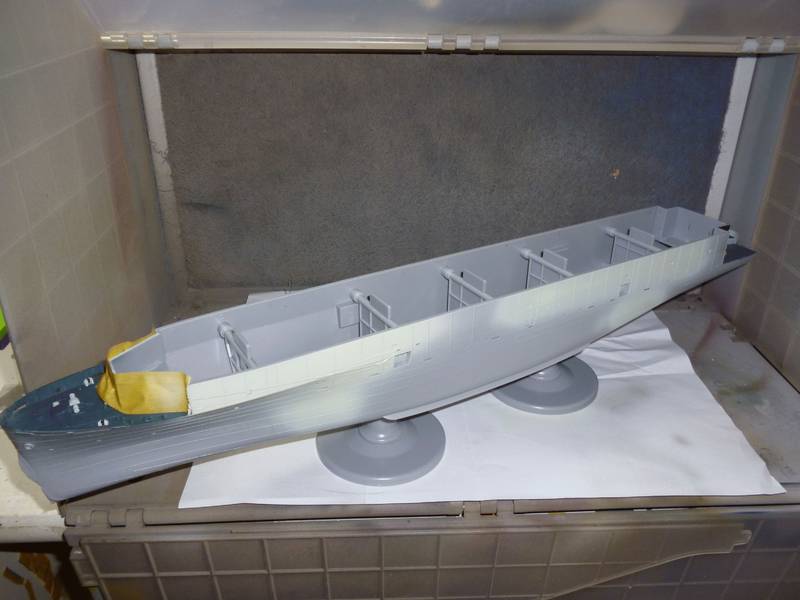
So that is where we leave CVE-73 for the moment with her first coat of paint touch dry, but I like to give them at least 24 hours before I do any masking.


Gremlin56
Joined: October 30, 2005
KitMaker: 3,897 posts
Model Shipwrights: 3,301 posts
Posted: Friday, January 20, 2012 - 07:11 PM UTC
Nice work on the Oerlikon Warren. Looks a lot better than the kit supplied example. Also see that you are getting to grips with Lifecolour; what did you use to thin it?
Julian
warreni
Visit this Community
South Australia, Australia
Joined: August 14, 2007
KitMaker: 5,926 posts
Model Shipwrights: 2,624 posts
Posted: Friday, January 20, 2012 - 07:34 PM UTC

Quoted Text

Nice work on the Oerlikon Warren. Looks a lot better than the kit supplied example. Also see that you are getting to grips with Lifecolour; what did you use to thin it?
Julian


Greetings Julian.
I used Tamiya Thinners. I always have a bottle on my desk and it appears to work fine. You don't need much , probably about 20$ thinners and 80% paint.
Cheers
Warren
Gremlin56
Joined: October 30, 2005
KitMaker: 3,897 posts
Model Shipwrights: 3,301 posts
Posted: Friday, January 20, 2012 - 08:40 PM UTC
Tamiya thinners? Okay, I'll get a jerrycan of that next week
Cheers !
Julian
warreni
Visit this Community
South Australia, Australia
Joined: August 14, 2007
KitMaker: 5,926 posts
Model Shipwrights: 2,624 posts
Posted: Friday, January 20, 2012 - 09:17 PM UTC

Quoted Text

Tamiya thinners? Okay, I'll get a jerrycan of that next week
Cheers !
Julian


Go for it Julian. Lets see that Wasp rock!!
surfsup
Visit this Community
Queensland, Australia
Joined: May 20, 2010
KitMaker: 1,230 posts
Model Shipwrights: 1,212 posts
Posted: Saturday, January 21, 2012 - 05:27 PM UTC
She is strating to come together well now Warren. Look forward to some of her soon.....Cheers Mark
Dangeroo
#023
Visit this Community
Zurich, Switzerland
Joined: March 13, 2009
KitMaker: 2,058 posts
Model Shipwrights: 163 posts
Posted: Sunday, January 22, 2012 - 12:43 AM UTC
Warren, those 20mm are impressive! I'm thinking of getting a magnifying glass soon... Fortunately the DML Oerlikons are much better than Hasegawa's...

Thanks for the Tamiya thinner tip, will try to get my hands on a bottle. I've heard it doesn't work... I usually use (isopropyl?) alcohol for Tamiya paints but it doesn't work very well with lifecolor...

Cheers!
Stefan
warreni
Visit this Community
South Australia, Australia
Joined: August 14, 2007
KitMaker: 5,926 posts
Model Shipwrights: 2,624 posts
Posted: Sunday, January 22, 2012 - 04:49 AM UTC
Thanks for dropping in again Mark.


Quoted Text

Warren, those 20mm are impressive! I'm thinking of getting a magnifying glass soon... Fortunately the DML Oerlikons are much better than Hasegawa's...

Thanks for the Tamiya thinner tip, will try to get my hands on a bottle. I've heard it doesn't work... I usually use (isopropyl?) alcohol for Tamiya paints but it doesn't work very well with lifecolor...

Cheers!
Stefan


Hi Stefan.
I tried water and I tried Methylated spirits but neither of them worked. Then I someone alerted me to the fact that Tamiya thinners works with Life Color, just after I ordered a bottle of Life Color thinners from the UK..
You don't need much thinner, about 80% paint and 20% thinner. Goes on well and gets a nice flat finish. If you have trouble getting it in Switzerland you can always order it over the internet. X-20A is the one I use and Luckymodel have it for just US$5.09 for the 250ml size. Don't bother with the 10ml as it won't last very long at all.
One problem I have found is that one of my bottles of grey seems to have quite a few solids in it and I will have to strain it before I use it from now on. Anyone have any idea what I can use to strain the paint? Old stocking or something like that?
Thanks in advance.
warreni
Visit this Community
South Australia, Australia
Joined: August 14, 2007
KitMaker: 5,926 posts
Model Shipwrights: 2,624 posts
Posted: Saturday, January 28, 2012 - 07:37 PM UTC
Hello Everyone.
Finally got back from Sydney after an hour long detour around the back blocks of Northern New South Wales due to road closures caused by flooding. Shades of last year...
Anyway, Next up is the twin 40 mounts of which the GBay carried 8 mounts in this configuration. First of all you glue together the two mounts to the base and you get this..

Then you glue the barrels in place..

Then you add these four PE pieces I prepared earlier..

And you end up with this..

Look a bit better with the minimal PE provided for them.
Meanwhile, back at the spray booth, the hull has received its third coat..

Please excuse the messy bench.
I am using the mask pieces supplied by Hasegawa but using them a different way to any way I have done it before. I am applying the Tamiya masking tape directly to a photocopy of the masks. Then I cut the mask out while it is still on the paper. You can see straight through the Tamiya tape and it makes it easy to cut out the mask. Then I remove the tape from the paper and apply it to the model. First up I sprayed the pale grey, applied the appropriate masks, then painted the next darker colour, applied the mask, and have a few hours ago sprayed the final colour before the matt black. In theory, in the end I just remove all the masking tape and the Measure camo should be finished... But we will have to see how it turns out..
At the end of the session I removed all the arrestor wire gear etc from the deck in preparation for the wooden deck and PE, and glued the deck supports to the bottom of the deck.
Thanks for dropping by.
Cheers
Warren
Gremlin56
Joined: October 30, 2005
KitMaker: 3,897 posts
Model Shipwrights: 3,301 posts
Posted: Saturday, January 28, 2012 - 08:11 PM UTC
What messy bench? looks extremely clean compared to mine.
Nice work on the twin 40, really worth the extra effort.
Got my jerry can of Tamiya thinner, haven't tried it yet though.
Cheers,
Julian
warreni
Visit this Community
South Australia, Australia
Joined: August 14, 2007
KitMaker: 5,926 posts
Model Shipwrights: 2,624 posts
Posted: Saturday, January 28, 2012 - 08:24 PM UTC
Hey there Julian.
Good to hear you got your thinners. My Lifecolor thinners that I ordered before finding out about Tamiya thinners working, arrived from England while I was away. I will give them a try and report back later. Four wooden decks also arrived..
Gremlin56
Joined: October 30, 2005
KitMaker: 3,897 posts
Model Shipwrights: 3,301 posts
Posted: Saturday, January 28, 2012 - 08:35 PM UTC
The Lifecolour thinners bear a remarkable similarity to plain tap water, ( i get better effects with distilled water actually). That is why I ordered the Tamiya thinner.
Mind you it gets rather weird if look at what works with what:
Iso Alcohol works better with Tamiya acrylics than Tamiya thinner.
Lifecolour thinner doesn't do much with any sort of paint.
Tamiya thinner works with Lifecolour paint.
Distilled water works better than Lifecolour thinner with Lifecolour paints.
Mind boggling really
Julian
warreni
Visit this Community
South Australia, Australia
Joined: August 14, 2007
KitMaker: 5,926 posts
Model Shipwrights: 2,624 posts
Posted: Saturday, January 28, 2012 - 09:00 PM UTC
Lol.. I think.. Bloody expensive tap water.. I just opened the bottle and it smells like tap water contaminated with Metho..

Anyway, I use Methylated Spirits (Alcohol) with Gunze paints, Metho or Tamiya thinner with Tamiya stuff, and Tamiya thinners with Lifecolor. Will see what happens...

Cheers
Warren
TracyWhite
Visit this Community
Washington, United States
Joined: January 18, 2005
KitMaker: 527 posts
Model Shipwrights: 464 posts
Posted: Sunday, January 29, 2012 - 05:31 PM UTC
Be aware that some of the Hasegawa masking pieces are wrong and may need to be double checked for accuracy.
warreni
Visit this Community
South Australia, Australia
Joined: August 14, 2007
KitMaker: 5,926 posts
Model Shipwrights: 2,624 posts
Posted: Sunday, January 29, 2012 - 05:45 PM UTC
Bit of imagination and it will all be OK mate.
Just need to do a few hand painted touch ups in the smaller patches and around the stern.
TracyWhite
Visit this Community
Washington, United States
Joined: January 18, 2005
KitMaker: 527 posts
Model Shipwrights: 464 posts
Posted: Monday, January 30, 2012 - 08:18 AM UTC
I wound up free-handing (the masking) mine and it worked out fine. If you are doing Gambier Bay herself, there are some differences in "placement" of the lines anyway, so the masks are pretty much a non-starter unless you're just looking for a quick build. It's not the difficult to do otherwise.
warreni
Visit this Community
South Australia, Australia
Joined: August 14, 2007
KitMaker: 5,926 posts
Model Shipwrights: 2,624 posts
Posted: Monday, January 30, 2012 - 01:28 PM UTC
Except for the PE, barrels and wooden decks I like OOB builds...
I am not a person who has heaps of reference books or anything like that. I prefer to save my money to buy kits rather than reference stuff.
Thanks for the info though Tracy.
Thanks for dropping by again.
RedDuster
Visit this Community
England - South East, United Kingdom
Joined: March 01, 2010
KitMaker: 7,078 posts
Model Shipwrights: 6,649 posts
Posted: Monday, January 30, 2012 - 09:46 PM UTC
Hi Warren,

Thanks for the great master class on the master 20mm, don't look so scary now.

Rest of the build looking good too, following with interest

Si
warreni
Visit this Community
South Australia, Australia
Joined: August 14, 2007
KitMaker: 5,926 posts
Model Shipwrights: 2,624 posts
Posted: Tuesday, January 31, 2012 - 10:26 AM UTC

Quoted Text

Hi Warren,

Thanks for the great master class on the master 20mm, don't look so scary now.

Rest of the build looking good too, following with interest

Si


Anytime Simon.

Just shows even a numpty like me can build a PE 20mm Cannon..

All I got done last night was apply one small piece of masking to the port side of the hull. Slack eh!

Thanks for dropping by.
Warren
warreni
Visit this Community
South Australia, Australia
Joined: August 14, 2007
KitMaker: 5,926 posts
Model Shipwrights: 2,624 posts
Posted: Wednesday, February 01, 2012 - 08:37 PM UTC
Hi Everyone.
After a few hours of masking the GBay is ready for her final camo coat of flat black..


Most of the tape that was already on there was painted blue so you can't see it. I cut all the masks direct from the plans and with a little touching up hopefully all will be well.
I am still not sure about the top of the hull though.. I can't visualise how it goes together yet so no painting up there except overspray at the moment.
Cheers
Warren
TracyWhite
Visit this Community
Washington, United States
Joined: January 18, 2005
KitMaker: 527 posts
Model Shipwrights: 464 posts
Posted: Saturday, February 04, 2012 - 04:11 AM UTC

Quoted Text

I am not a person who has heaps of reference books or anything like that. I prefer to save my money to buy kits rather than reference stuff.


Completely understandable, and I wasn't trying to fault you; my warning was as much for the builder who may read this thread five years from now as for current builders. Nice to see yours coming along, I haven't been able to do much more than look at mine longingly as I glance at the workbench when I pass by.