_GOTOBOTTOM
Ships by Class/Type: Battleships
Topics from the Dreadnaught era to modern day.
Hosted by Steve Joyce
Tamiya 1/350 IJN Musashi
warreni
Visit this Community
South Australia, Australia
Joined: August 14, 2007
KitMaker: 5,926 posts
Model Shipwrights: 2,624 posts
Posted: Sunday, April 01, 2012 - 07:06 PM UTC
Hello Everyone.
While I wait for the railings for my Cerberus I thought I may as well start a new build. You may think that would have been easy gentle reader, but alas when ones stash gets a bit larger it gets difficult to choose what to build next. First up I thought this one

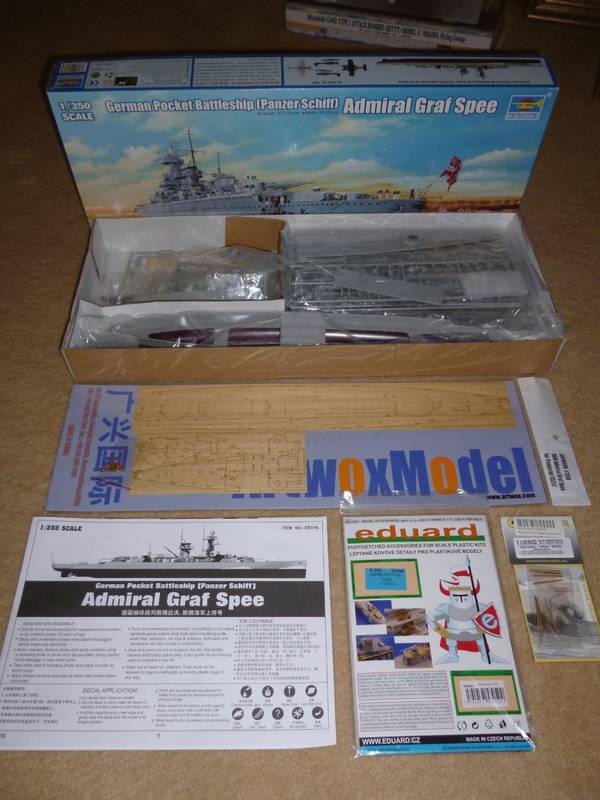
Only problem is I discovered that the PE isn't the correct set for the Trumpeter version but is for the Academy version. I ordered the PE set off Evilbay and put the Graf Spee back in the stash.
Then I thought why not the Academy version

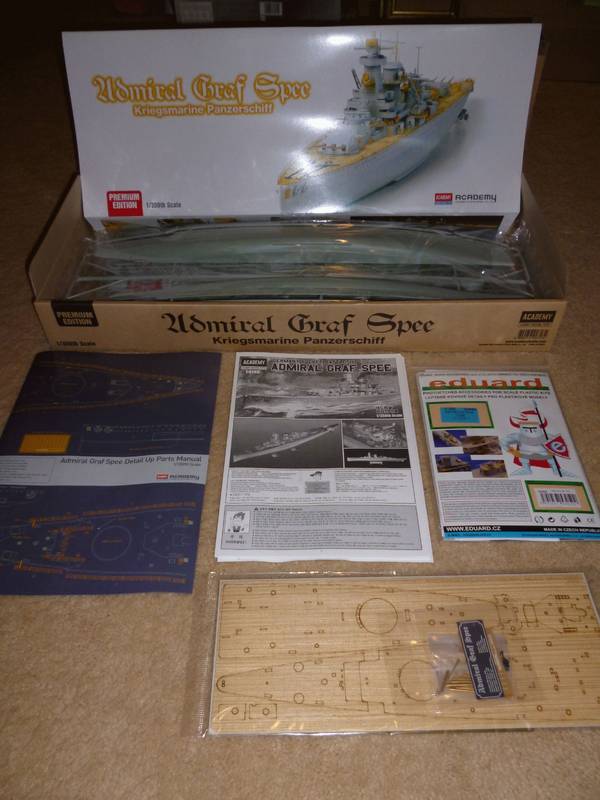
(Notice the same PE set with this one) Only problem with that one was I thought I want to build one of these as the sister ship to the Graf Spee and need some more info one them.. back in the stash with you..
Then this one..

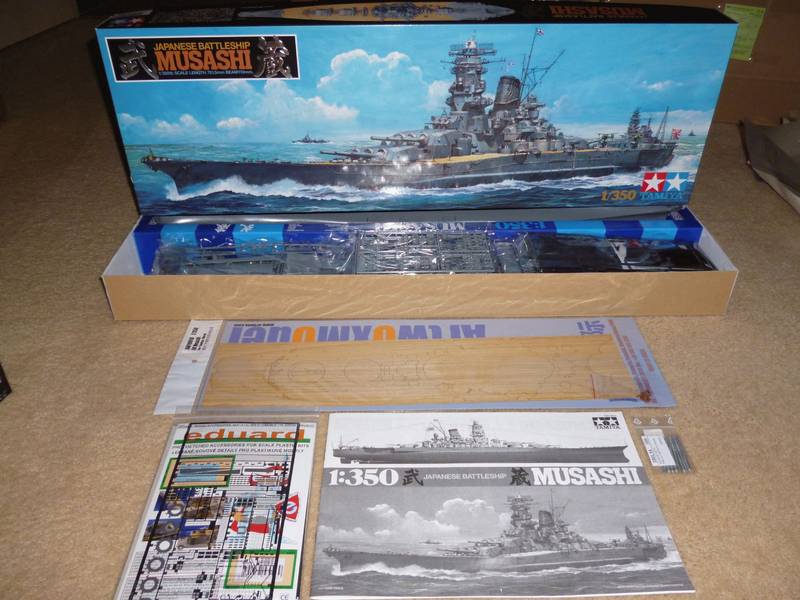
'Yep, this is the one' I thought but something made me stop and think a bit more.. Then I got peed off and stuck a number next to all the builds I had ready to go and got a random number generator to choose for me, and it came up with this one..
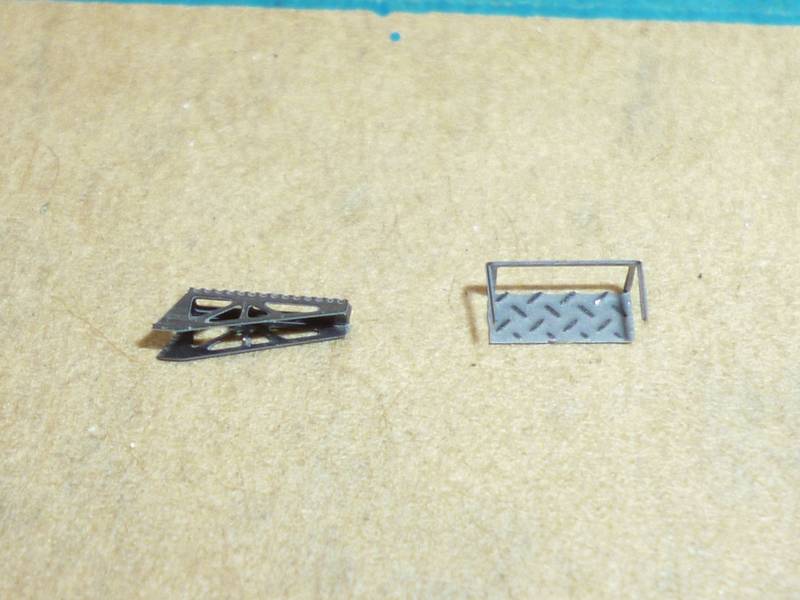
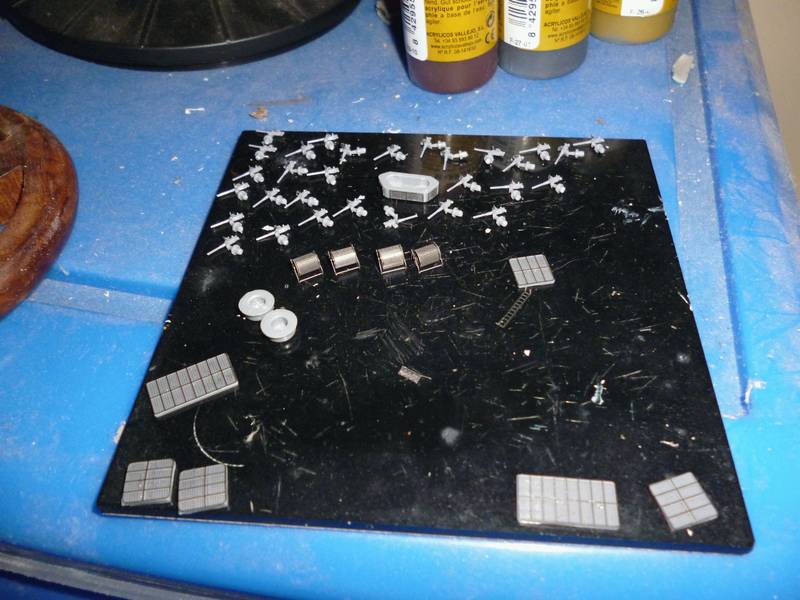
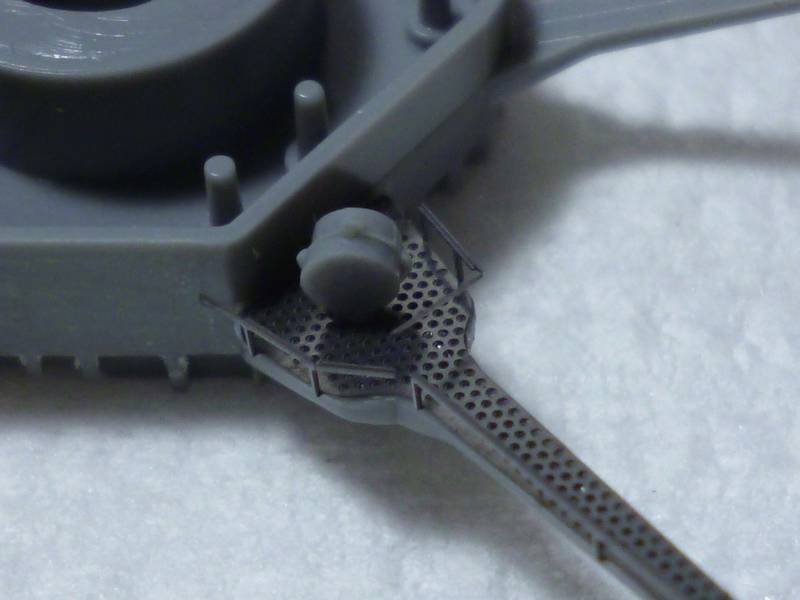
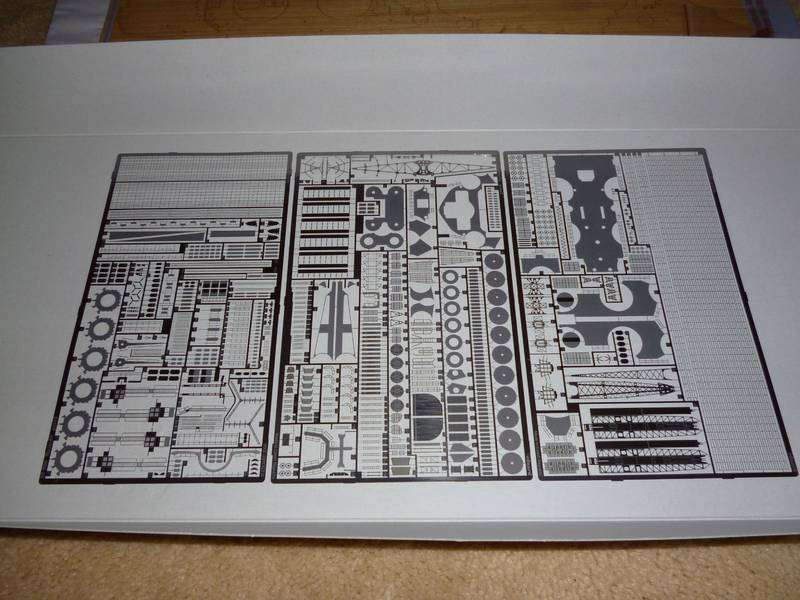
Eduard PE set

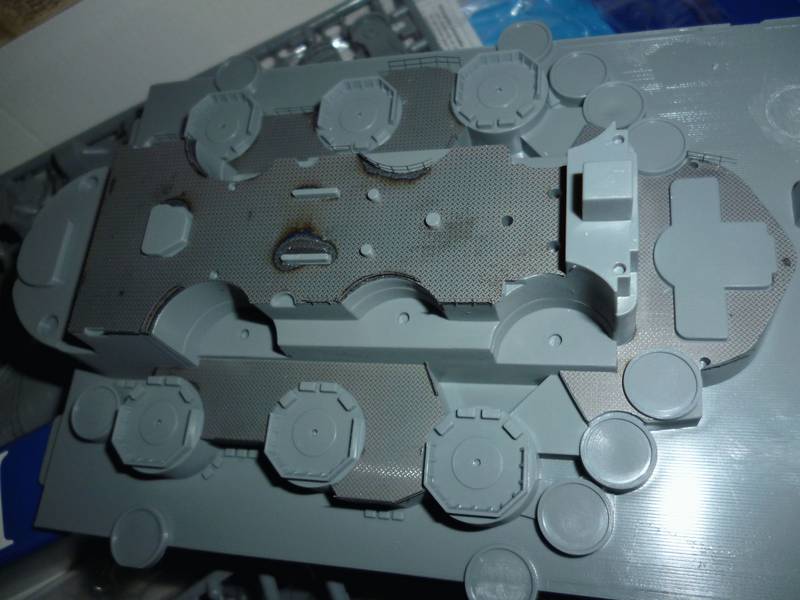
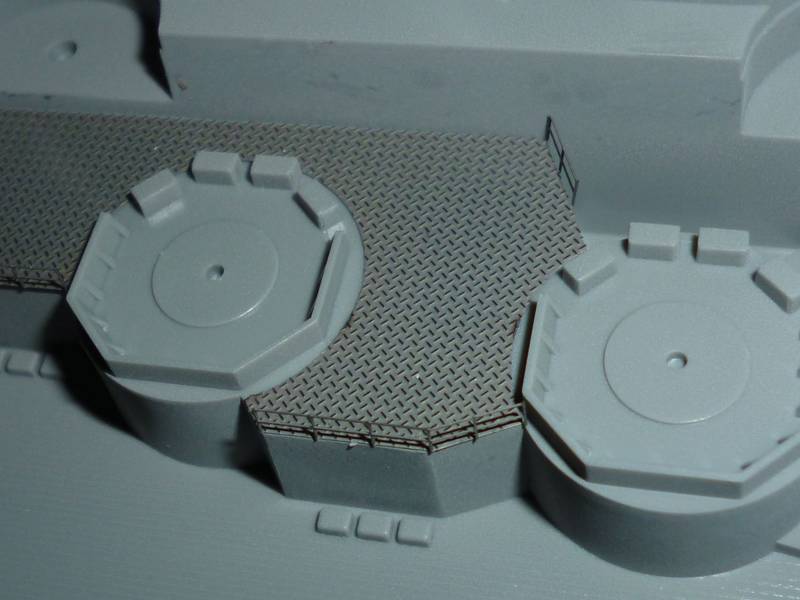
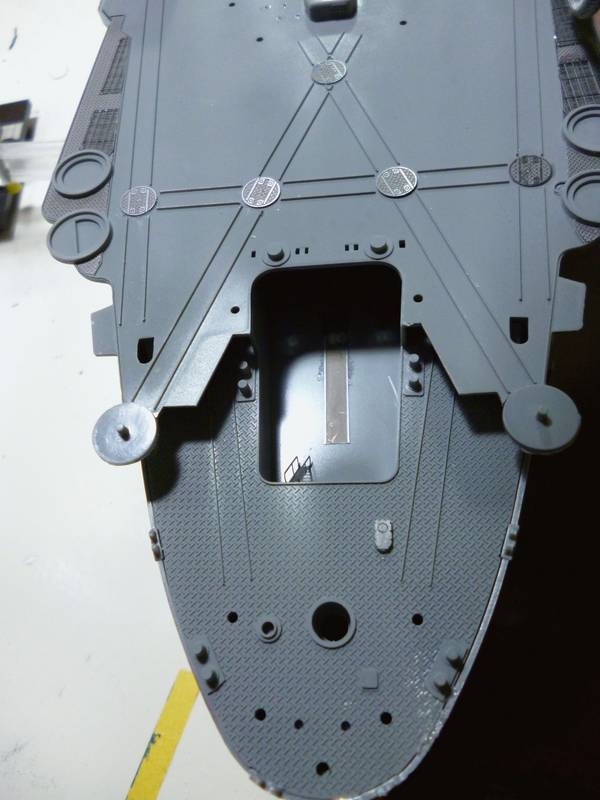
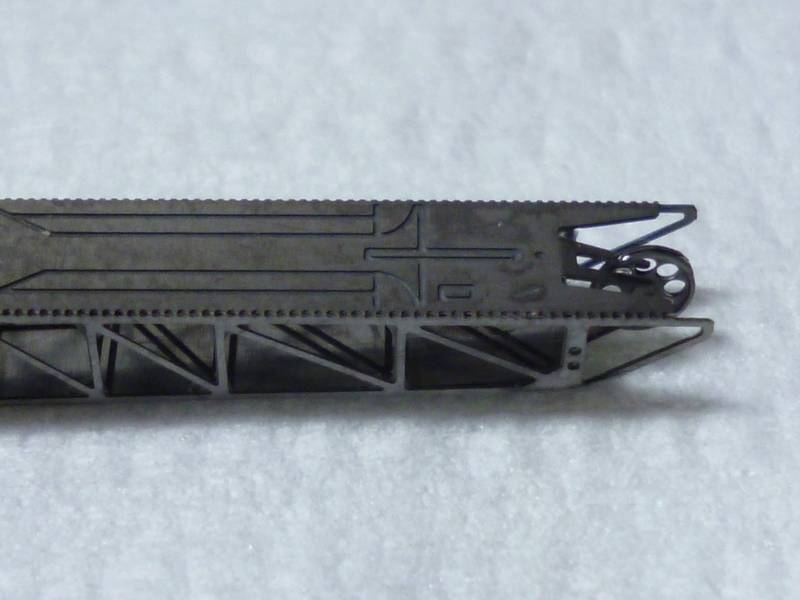
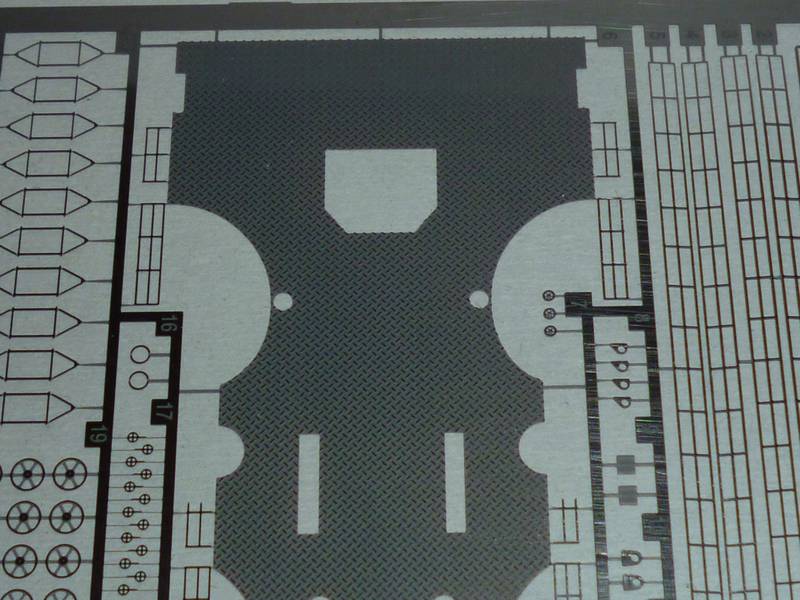
A close up of some of the decking.

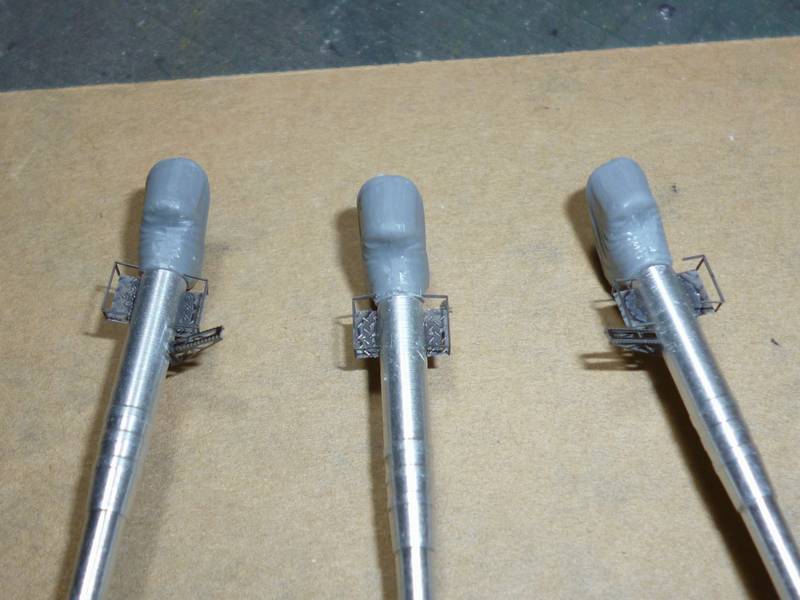
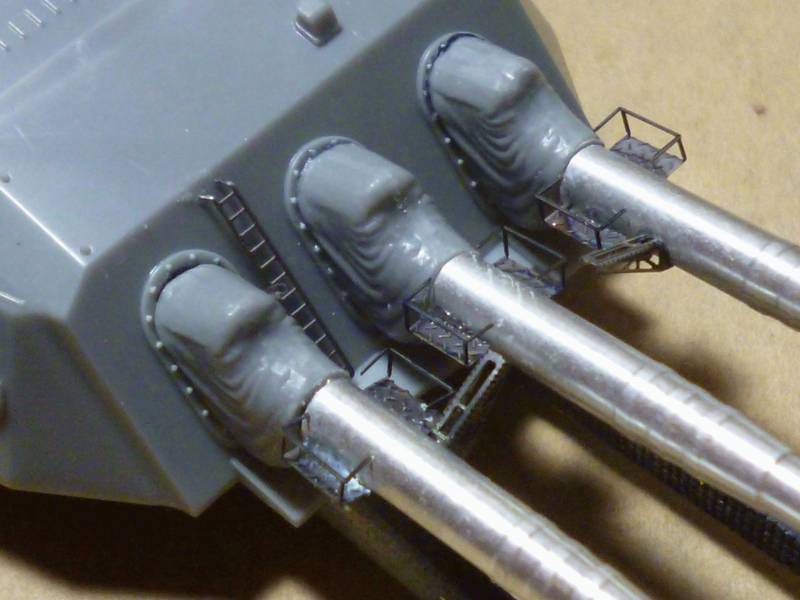
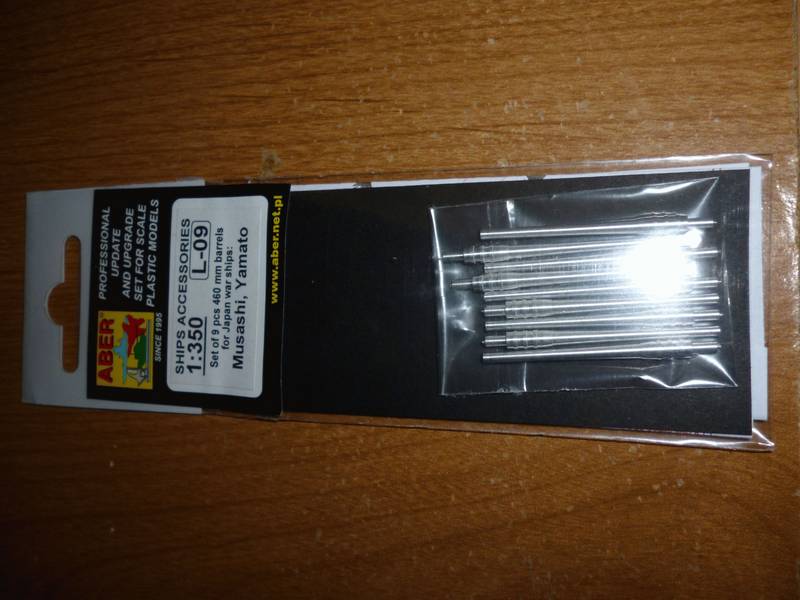
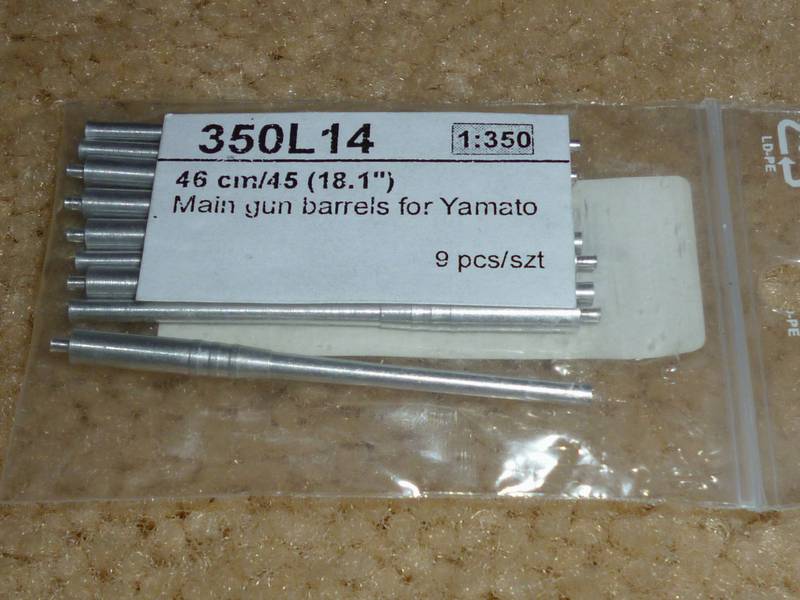
Replacement barrels for the 18 in guns.

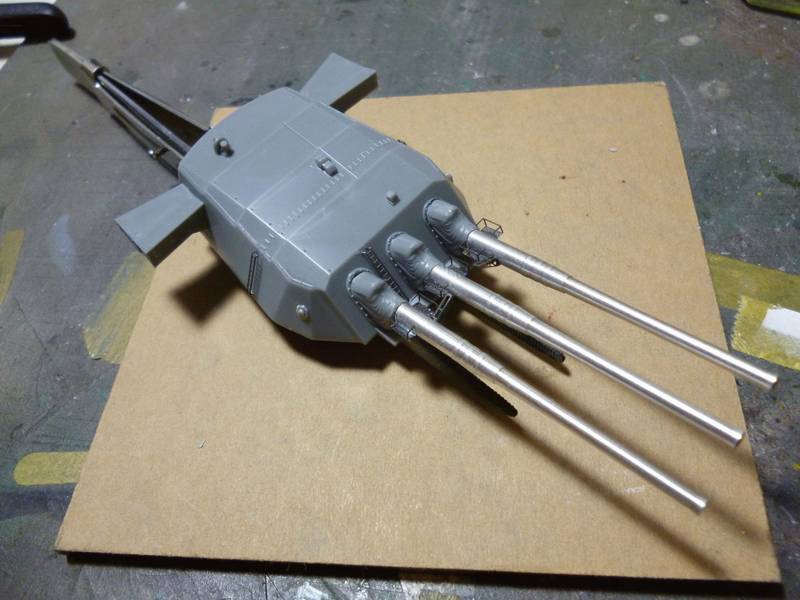
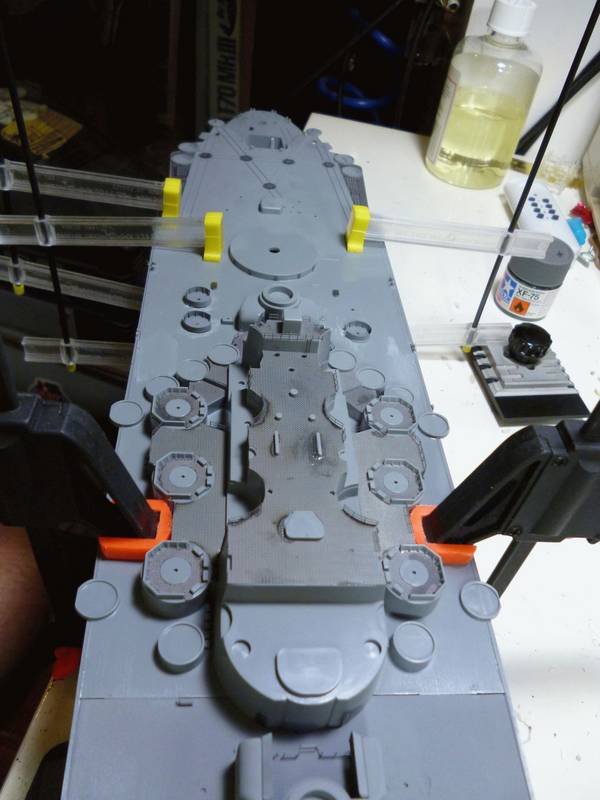
So it is all there and I think it will make an interesting comparison with the new tool Yamato I have in the stash.
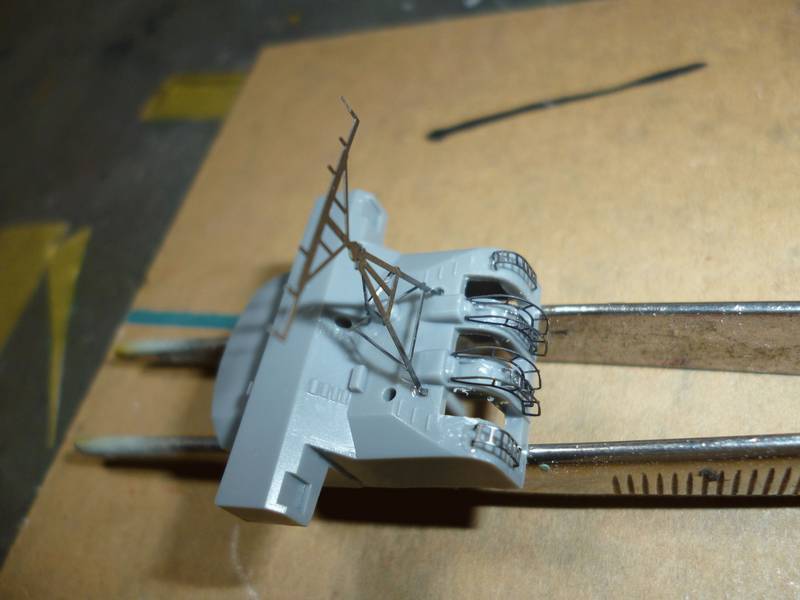
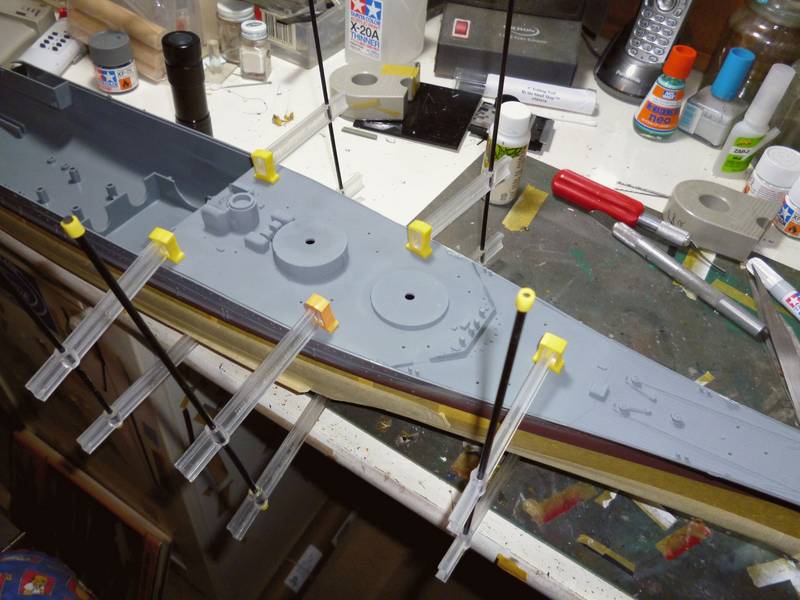
So it is full steam ahead with the Musashi. It might be old but the mouldings are still marvellous and it should fall together. But after much wailing and gnashing of teeth I am finally underway..
surfsup
Visit this Community
Queensland, Australia
Joined: May 20, 2010
KitMaker: 1,230 posts
Model Shipwrights: 1,212 posts
Posted: Sunday, April 01, 2012 - 07:38 PM UTC
Will enjoy watching you build this one Warren.....Cheers Mark
Gremlin56
Joined: October 30, 2005
KitMaker: 3,897 posts
Model Shipwrights: 3,301 posts
Posted: Monday, April 02, 2012 - 04:52 AM UTC
Are you running on Red Bull or Speed Warren? you are churning out one model after the other faster than Volkswagen produces cars
This will be interesting though because nearly everyone goes for the Yamato and hardly ever for her sister. Nice choice
Cheers,
Julian
robtmelvin
Visit this Community
Kentucky, United States
Joined: October 05, 2010
KitMaker: 205 posts
Model Shipwrights: 163 posts
Posted: Monday, April 02, 2012 - 07:40 AM UTC
Warren, given what you've done with Gambier Bay and the North Carolina (big congratulations on that one, BTW), I can't wait to see what you do with Musashi. I can only take one thing for granted - that it will be a show piece!

Bob
warreni
Visit this Community
South Australia, Australia
Joined: August 14, 2007
KitMaker: 5,926 posts
Model Shipwrights: 2,624 posts
Posted: Monday, April 02, 2012 - 10:46 AM UTC

Quoted Text

Are you running on Red Bull or Speed Warren? you are churning out one model after the other faster than Volkswagen produces cars
This will be interesting though because nearly everyone goes for the Yamato and hardly ever for her sister. Nice choice
Cheers,
Julian


Neither Julian, just don't have a life. The PE set is not quite as extensive as the one I have for the Revell Bismarck from LionRoar. I needed a bit of a break after the Gambier Bay. One interesting thing, I do have a 1966 VW Beetle in the man cave in totally original condition.. Coindidence?
warreni
Visit this Community
South Australia, Australia
Joined: August 14, 2007
KitMaker: 5,926 posts
Model Shipwrights: 2,624 posts
Posted: Monday, April 02, 2012 - 10:49 AM UTC

Quoted Text

Warren, given what you've done with Gambier Bay and the North Carolina (big congratulations on that one, BTW), I can't wait to see what you do with Musashi. I can only take one thing for granted - that it will be a show piece!

Bob


Thanks for that Bob. Will try and live up to your expectations.
warreni
Visit this Community
South Australia, Australia
Joined: August 14, 2007
KitMaker: 5,926 posts
Model Shipwrights: 2,624 posts
Posted: Friday, April 06, 2012 - 09:27 AM UTC
Onto the second page of the instructions and I have come up with a dilemma already..
The replacement barrels for the 46cm guns are much longer than the ones in the kit. Is this a known problem with the kit or are the replacement RB barrels just too long?
warreni
Visit this Community
South Australia, Australia
Joined: August 14, 2007
KitMaker: 5,926 posts
Model Shipwrights: 2,624 posts
Posted: Saturday, April 07, 2012 - 08:51 PM UTC
Dilemma solved, I will use the new barrels and not worry about the moulded on stuff as most is replaced with PE anyway.. so here we go for today's update...

First up, how to convert the OOB Tamiya guns to more detailed items. On the left we have the complete Tamiya barrel. Next along is the same barrel but the barrel has been removed from the blast bag.Next up is the new aluminium barrel which has a ridge on the locating lug that I removed from each one. Then you CA glue the barrel to the blast bag. Do that nine times and that step is finished.

Then you fold up these PE parts, six of the support ones and eighteen of the platform ones.

Then you glue the PE onto the barrels in various permutates et voila, much more detailed guns ready to glue onto the turrets.

.. like so. The turrets also had some PE applied including 4 ladders, a door, a step and a rain shelter awning.

And here is one of the main turrets in its unpainted, but finished, form.
Then there are the secondary armament turrets..

Here is one of the two with the Eduard PE applied. Much better than stock.
That's it for now. I did get the propeller shaft supports attached to the hull etc but I thought that wasn't very exciting so I didn't bother with a photo.
More news as it comes to hand! Now, back to the football..
robtmelvin
Visit this Community
Kentucky, United States
Joined: October 05, 2010
KitMaker: 205 posts
Model Shipwrights: 163 posts
Posted: Sunday, April 08, 2012 - 05:15 AM UTC
Looking very good, Warren. You are a true artist with that PE! I'm following this one with great interest. I'd love to build one of these kits as they fit right in with my particular interest in the '42 - '43 period of the Pacific War.

What are you using to attach your PE, white glue, Gator's Glue, or CA?

Looking forward to your next update.

Bob
warreni
Visit this Community
South Australia, Australia
Joined: August 14, 2007
KitMaker: 5,926 posts
Model Shipwrights: 2,624 posts
Posted: Sunday, April 08, 2012 - 08:08 AM UTC

Quoted Text

Looking very good, Warren. You are a true artist with that PE! I'm following this one with great interest. I'd love to build one of these kits as they fit right in with my particular interest in the '42 - '43 period of the Pacific War.

What are you using to attach your PE, white glue, Gator's Glue, or CA?

Looking forward to your next update.

Bob


Hi Bob.

I use either Gator Glue or CA depending on how quickly I want the part to 'set-up'. You can use accelerator on CA glue and it dries instantly, which means I don't have to sit holding parts together for ages like I would have to with the Gator Glue. But Gator glue is actually good as it doesn't leave messes behing when it dries, it is easy to remove excess after it dries, and it is a flexible bond which means you can bump things like railings and they won't snap off like CA-glued stuff may.

Will try and remember to mention which type of glue I used on each part from now on mate.

Cheers
Warren
surfsup
Visit this Community
Queensland, Australia
Joined: May 20, 2010
KitMaker: 1,230 posts
Model Shipwrights: 1,212 posts
Posted: Sunday, April 08, 2012 - 11:35 AM UTC
Very nicely done Warren. Look forward to seeing some more of your work.....Cheers Mark
robtmelvin
Visit this Community
Kentucky, United States
Joined: October 05, 2010
KitMaker: 205 posts
Model Shipwrights: 163 posts
Posted: Monday, April 09, 2012 - 02:47 AM UTC
Warren, thanks for the information. Like you, the adhesive I use depends on whether I want/need and immediate set up, or if I can hold the part till the white glue/Gators Glue sets. Have you tried craft glue? Its like an extra sticky white glue. Holds a bit faster in my experience than either regular white glue or Gator's Glue.

Again, great work on your PE.

Bob
warreni
Visit this Community
South Australia, Australia
Joined: August 14, 2007
KitMaker: 5,926 posts
Model Shipwrights: 2,624 posts
Posted: Tuesday, April 10, 2012 - 08:21 PM UTC
Thanks Mark. If it turns out as well as your projects I will be happy!


Quoted Text

Warren, thanks for the information. Like you, the adhesive I use depends on whether I want/need and immediate set up, or if I can hold the part till the white glue/Gators Glue sets. Have you tried craft glue? Its like an extra sticky white glue. Holds a bit faster in my experience than either regular white glue or Gator's Glue.

Again, great work on your PE.

Bob


You might not believe this Bob but I have some of that tacky PVA glue sitting on my hobby desk, I sometimes use it for filling seams etc but haven't used it for PE. I have had it for more than 10 years. I bought it to do a wooden ship which is still sitting waiting to be started..

I tried it on some PE and it worked fine.

I am currently working my way through Page 2 of the Eduard PE set. You can have a look online if you are interested. I am up to the gun tubs and remembered at the last second that annealing the PE would make it easier to work/. The only problem is the little tiny ribs that go inside of the tubs tend to break off the wall of the tub before you can bend them into position. So I am having to go back and glue in the ribs seperately.. there are 10 or so per tub and at least 9 tubs.. fun..

As the Hash Run people used to say.. on, on, on, on..

Cheers
Warren
TimReynaga
Staff MemberAssociate Editor
MODEL SHIPWRIGHTS
Visit this Community
California, United States
Joined: May 03, 2006
KitMaker: 2,500 posts
Model Shipwrights: 1,830 posts
Posted: Wednesday, April 11, 2012 - 01:25 AM UTC

Quoted Text

Onto the second page of the instructions and I have come up with a dilemma already..
The replacement barrels for the 46cm guns are much longer than the ones in the kit. Is this a known problem with the kit or are the replacement RB barrels just too long?


Warren, Great job on the photoetch, your Musashi build is coming along nicely!

...but I think your concern about the main barrels being too long may be on target. According to Januz Skulski’s Anatomy of the Ship: The Battleship Yamato, Tamiya had the barrel lengths just about right. I think your replacement barrels are right too, but they were intended to be mounted by being inserted completely through the blast bags. I think they should be inserted to the point where the first of the three little bands on the barrels almost touch the bags. These bands were clamping rings for exercise aiming devices mounted on top of each barrel (those little cylinders on the tops of the Tamiya parts). The small platforms were for the purpose of accessing the testing instruments, so it would make sense that they should be near the bands as depicted by Tamiya.

Take a look at your references, though, I may be all wet here. Hope I am... my absolute LEAST FAVORITE modeling task is redoing already completed work!

regards,
Tim
Gremlin56
Joined: October 30, 2005
KitMaker: 3,897 posts
Model Shipwrights: 3,301 posts
Posted: Wednesday, April 11, 2012 - 06:27 AM UTC
Tim might have a point here Warren:


Hope Janusz Skulski doesn't mind this drawing appearing here for a short while.
Bought his excellent book "Anatomy of the ship: Battleship Yamato" as a reference source for my Yamato with Eduard etch etc.
Cheers,
Julian
warreni
Visit this Community
South Australia, Australia
Joined: August 14, 2007
KitMaker: 5,926 posts
Model Shipwrights: 2,624 posts
Posted: Wednesday, April 11, 2012 - 07:05 AM UTC
Hmm.. so those platforms wouldn't have been there when they were in combat..

Thinking... I just found some barrels that are shorter and should go into the blast bags as advertised. Like many problems, if you throw money at the they go away.
Only $13.50 to my door..

Platforms may have to wait for another day as will the support bracket looking thingies.

Thanks heaps for pointing out the problem Tim and Julian.
warreni
Visit this Community
South Australia, Australia
Joined: August 14, 2007
KitMaker: 5,926 posts
Model Shipwrights: 2,624 posts
Posted: Wednesday, April 11, 2012 - 08:36 PM UTC
Greetings!
Hope you all had a nice Easter.
Thought I would post a couple more progress piccies. Remember that final bending etc will happen later on so please excuse some of the tubs that need more bending. Here is a flock of tubs, a brace of hose reels and a part of the forward decks superstructure (in other words I don't know what it is.)

Then we have the structure that holds up the forward triple 155mm turret. PE fits perfectly and the railings are already attached to it. Dead simple!
"http://gallery.kitmaker.net/data/500/1tyt6.jpg" />
Enough for now.
Cheers
warreni
Visit this Community
South Australia, Australia
Joined: August 14, 2007
KitMaker: 5,926 posts
Model Shipwrights: 2,624 posts
Posted: Friday, April 13, 2012 - 06:54 PM UTC
Greetings All.
Well after getting the news that the gun barrels were not quite right I ordered another set without the extra length. And then this morning, while I was walking past the one of the bookshelves in the hobby room I just happened to notice a small pile of barrel sets on one of the shelves.. and guess what one of the sets was.. Yep, 460mm naval guns for Japanese Ships. So I got the turrets and removed the too-long barrels and installed the right length ones. All I had to do was drill the holes out to 2mm and the Aber set went in great. I have since painted the turrets in Tamiya XF-75 Kure Arsenal Grey.

Yesterday afternoon I did some of the tedious PE, putting gun sight rings on the light AA guns. These are passable, much better than Trumpeters 20mm Oerlikons.

Then I started on the superstructure PE..

Is amazing how the CA glue discolours the PE.

A closer look at the non-slip texturing and some railings. I know the non-slip is way out of scale, but it looks better than a slab of shiny plastic with no texture at all..
I also got the Hull Red applied and will mask it up tomorrow and spray the rest of the hull XF-75
Another update tomorrow.

Gremlin56
Joined: October 30, 2005
KitMaker: 3,897 posts
Model Shipwrights: 3,301 posts
Posted: Friday, April 13, 2012 - 08:11 PM UTC
Did you use accelerator to dry the CA faster? It can do some funky things to PE depending on the brand of CA, ( IMHO).
Nothing a coat of paint won't hide.
Nice barrels as well, Mush is coming along nicely.
Cheers,
Julian
warreni
Visit this Community
South Australia, Australia
Joined: August 14, 2007
KitMaker: 5,926 posts
Model Shipwrights: 2,624 posts
Posted: Friday, April 13, 2012 - 10:56 PM UTC

Quoted Text

Did you use accelerator to dry the CA faster? It can do some funky things to PE depending on the brand of CA, ( IMHO).
Nothing a coat of paint won't hide.
Nice barrels as well, Mush is coming along nicely.
Cheers,
Julian


No Sir. No accelerator as they are large, flat pieces of PE. I used gel CA and the plates are going nowhere now..
I have never had accelerator do anything to anything so far. May depend on the type of accelerator you use.
warreni
Visit this Community
South Australia, Australia
Joined: August 14, 2007
KitMaker: 5,926 posts
Model Shipwrights: 2,624 posts
Posted: Saturday, April 14, 2012 - 08:34 PM UTC
Well it's Sunday night and time for an update on today's activities in the Inman Dockyard.

Lots of clamps to hold the large deck piece in position. Fit of the deck is good but the part that goes on the bow with the Crysanthenum symbol will need some coaxing into position.

A little more PE in one of the tunnel entrances at the stern of the ship. I later had to trim the top of one of the tunnels as the rear deck wouldn't fit. It would appear I had made a boo boo and the tunnel part had been glued in too high.

Here is the rear deck in position. That is eucalyptus oil in the bottle, not the thing you thought it was.. It is used for removing sticky residue from the sticky tape that was holding the front and rear decks together in the box. No need to worry about the deck join as the wooden deck will cover it nicely. Makes the cost of the deck seem tiny in relation to the time you save having to fill the gap!

Here is a closer view of the superstructure showing lots of unpainted PE. Most of it fit very well but some had to be 'coaxed' into position..

Here is the stern, just to show what it looks like.

Finally we have what I believe is one of six anti-aircraft turrets...

Oooo look they are breeding.. Only four pieces of PE per turret so far but it all helps make the ship look much more intricate.
That's enough for now. Better go and pay some attention too Mrs Warreni before the weekend is over.


RedDuster
Visit this Community
England - South East, United Kingdom
Joined: March 01, 2010
KitMaker: 7,078 posts
Model Shipwrights: 6,649 posts
Posted: Sunday, April 15, 2012 - 10:22 PM UTC
Nice work Warren, and nice to see the Musashi, rather than the Yamato.

Si
surfsup
Visit this Community
Queensland, Australia
Joined: May 20, 2010
KitMaker: 1,230 posts
Model Shipwrights: 1,212 posts
Posted: Sunday, April 15, 2012 - 10:54 PM UTC
Ditto. She is coming along rather nicely Warren.....Cheers mark
warreni
Visit this Community
South Australia, Australia
Joined: August 14, 2007
KitMaker: 5,926 posts
Model Shipwrights: 2,624 posts
Posted: Wednesday, April 18, 2012 - 07:29 PM UTC
A quick mid-week update.
Started on the PE for the air-defence centre (Tamiya's term)..
Not showing the detail on the little searchlight, but the catwalk out along the boom has perforations in it and a railing. I don't bother with the final bends until final assy as they always get moved..

The surface detailing on the end of one of the catapaults.

As you can see I have not bent up the railings at the sides of this catwalk, and I have to put on a railing that goes around the outside of said catwalk.. The gloss look is the CA accelerator that is drying.


I also put much PE onto the superstructure that is already glued to the hull. Will try and remember to take piccies later.
Till next time, thanks for looking.
TimReynaga
Staff MemberAssociate Editor
MODEL SHIPWRIGHTS
Visit this Community
California, United States
Joined: May 03, 2006
KitMaker: 2,500 posts
Model Shipwrights: 1,830 posts
Posted: Friday, April 20, 2012 - 12:27 AM UTC
Outstanding work Warren! The photoetch sure dresses up that old 1970s gem!
 _GOTOTOP