New Brunswick, Canada
Joined: March 17, 2011
KitMaker: 137 posts
Model Shipwrights: 135 posts
Posted: Sunday, April 08, 2012 - 11:17 PM UTC
New Brunswick, Canada
Joined: March 17, 2011
KitMaker: 137 posts
Model Shipwrights: 135 posts
Posted: Sunday, April 08, 2012 - 11:24 PM UTC
New Brunswick, Canada
Joined: March 17, 2011
KitMaker: 137 posts
Model Shipwrights: 135 posts
Posted: Monday, April 09, 2012 - 12:39 PM UTC
England - East Anglia, United Kingdom
Joined: January 07, 2009
KitMaker: 887 posts
Model Shipwrights: 575 posts
Posted: Tuesday, April 10, 2012 - 08:39 AM UTC
My only comment would be OMG, quickly followed by, very, very nice work !
New Brunswick, Canada
Joined: March 17, 2011
KitMaker: 137 posts
Model Shipwrights: 135 posts
Posted: Tuesday, April 10, 2012 - 11:09 AM UTC
TimReynaga
 Associate Editor
California, United States
Joined: May 03, 2006
KitMaker: 2,500 posts
Model Shipwrights: 1,830 posts
Posted: Tuesday, April 10, 2012 - 12:21 PM UTC
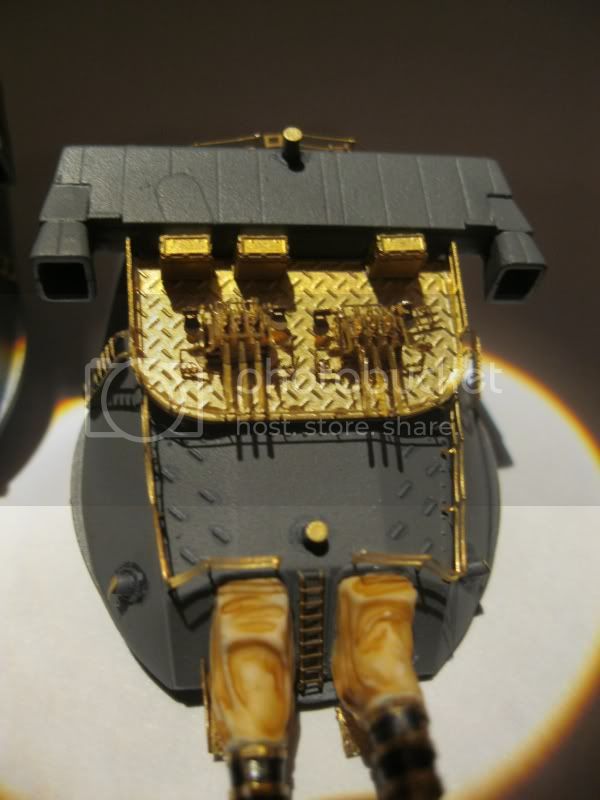
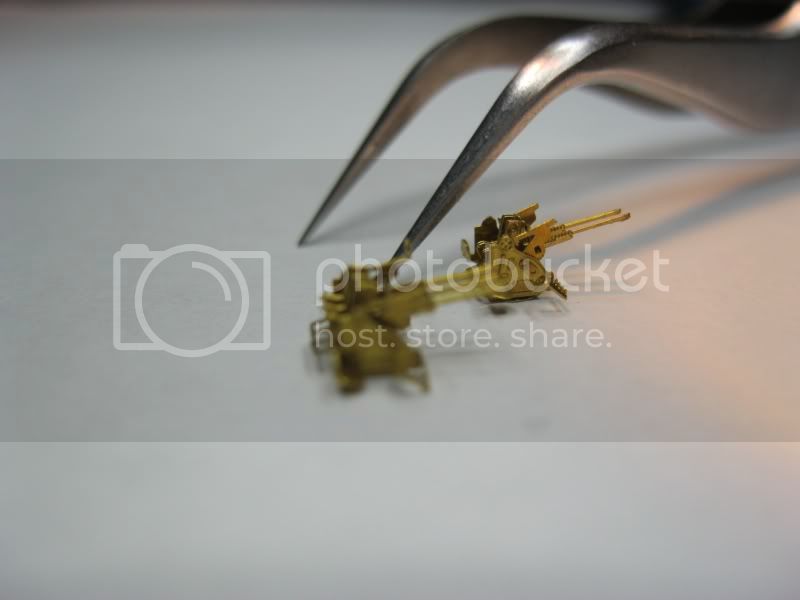
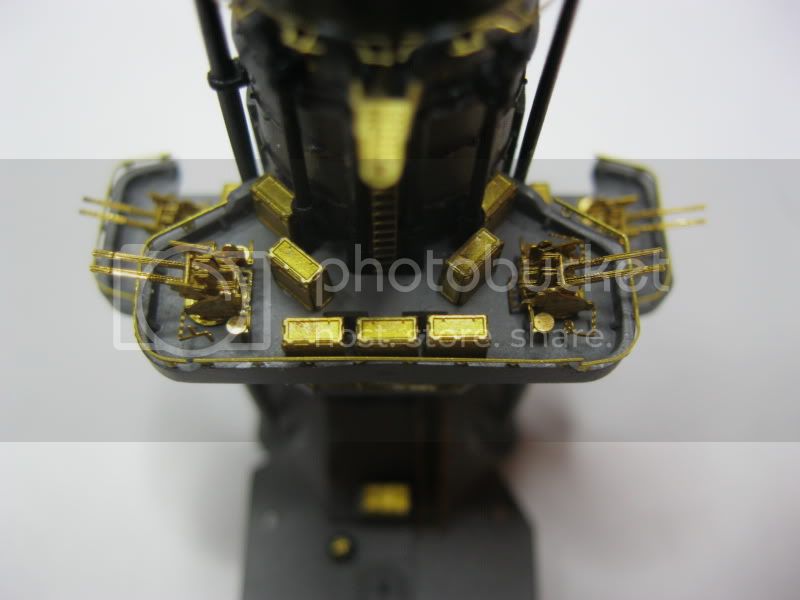
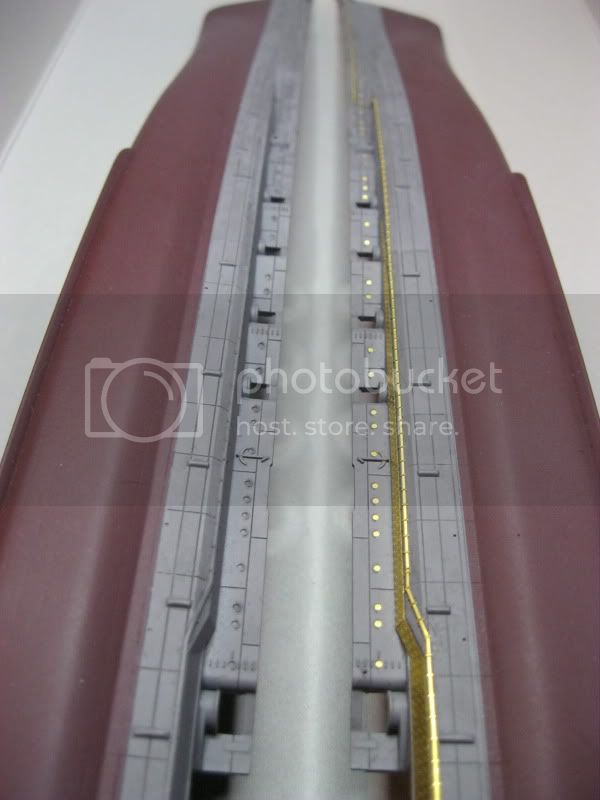
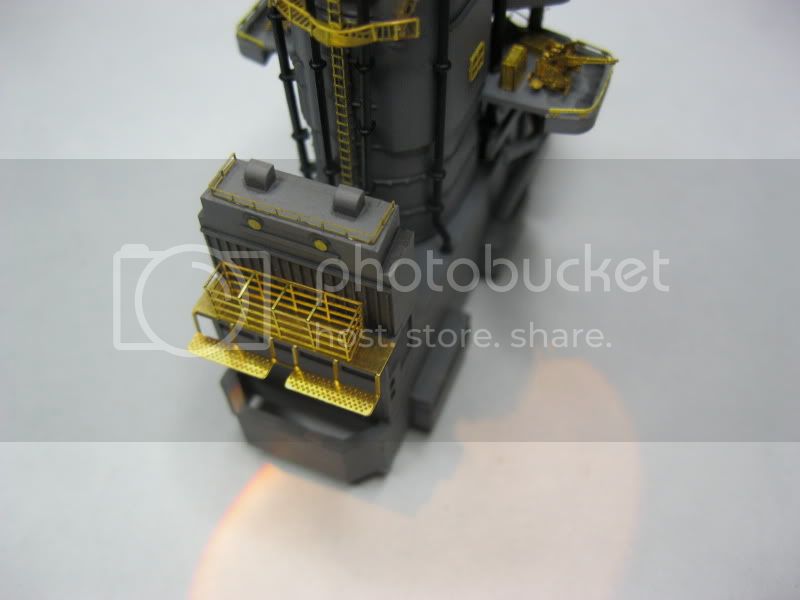
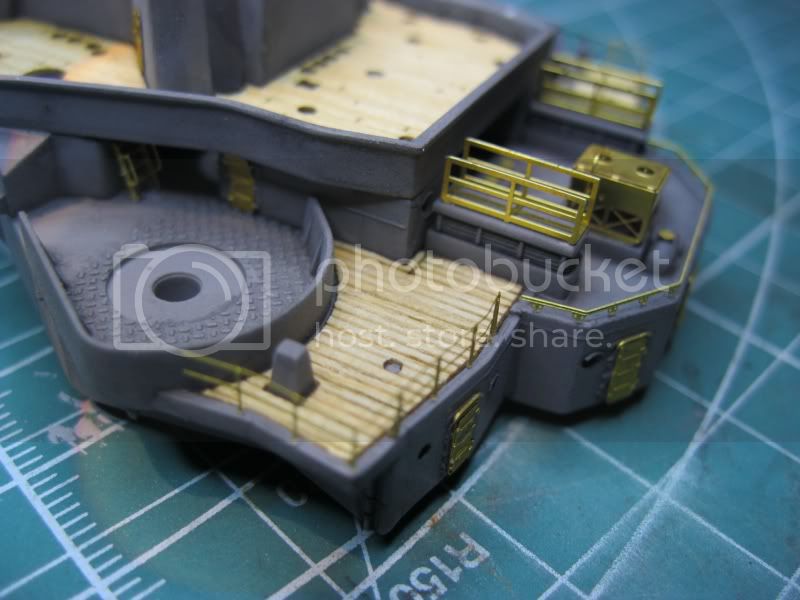
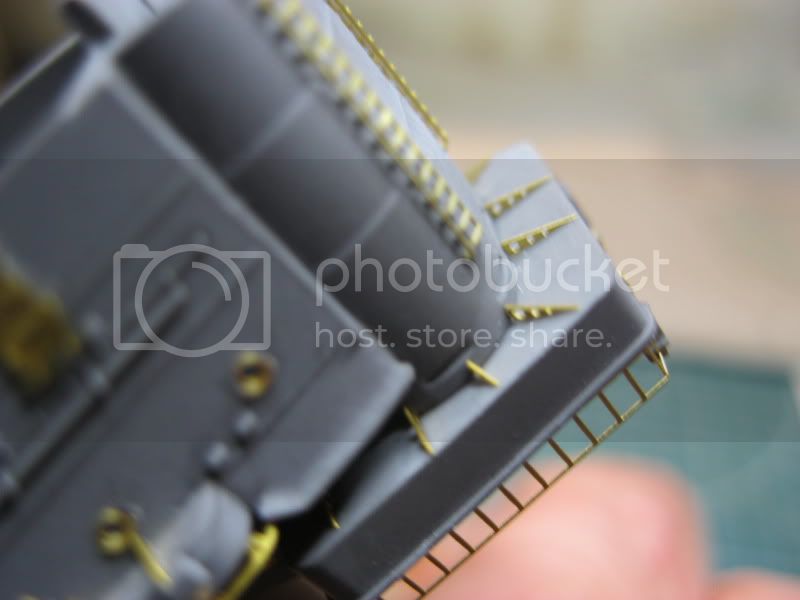
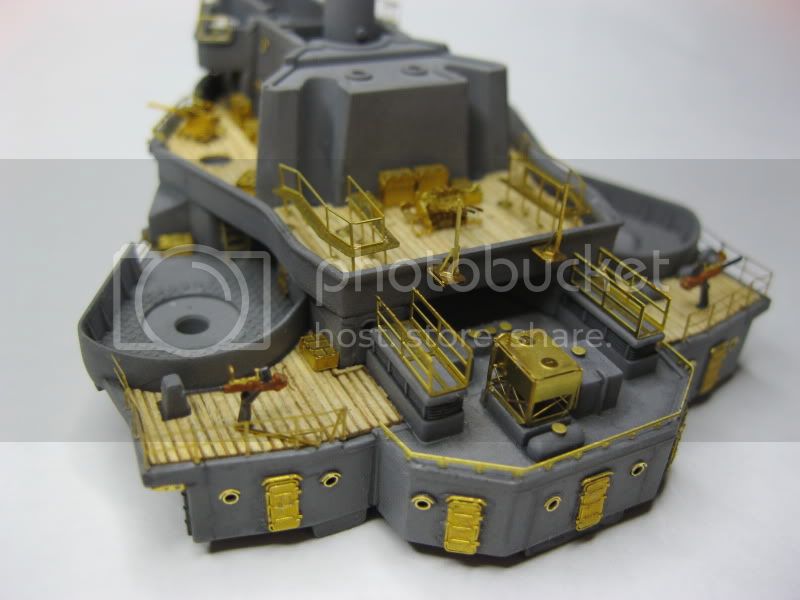
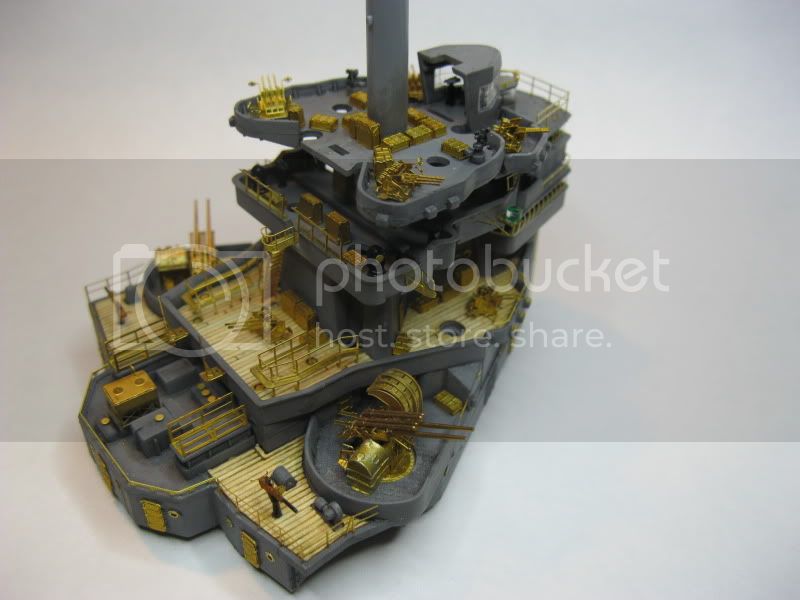
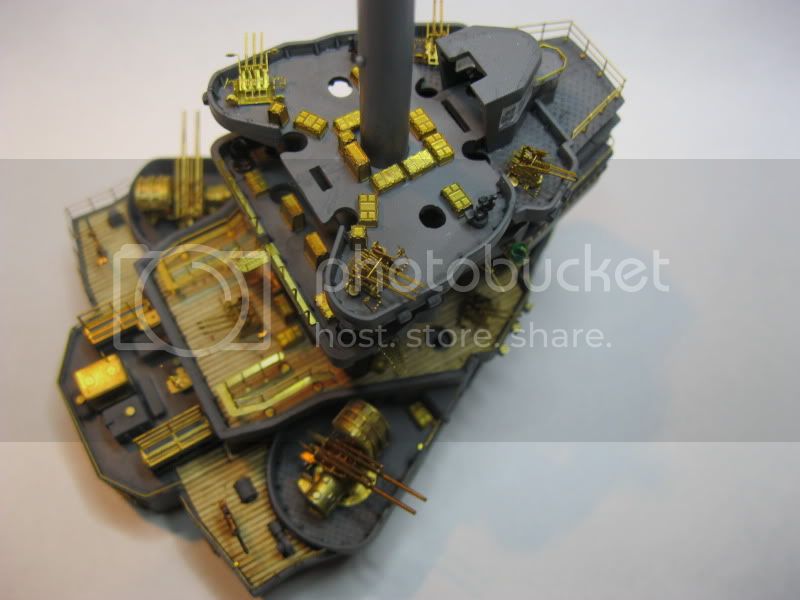
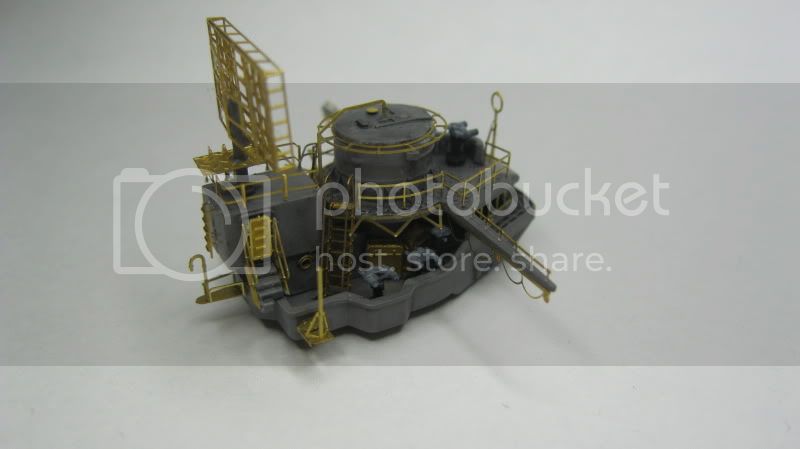
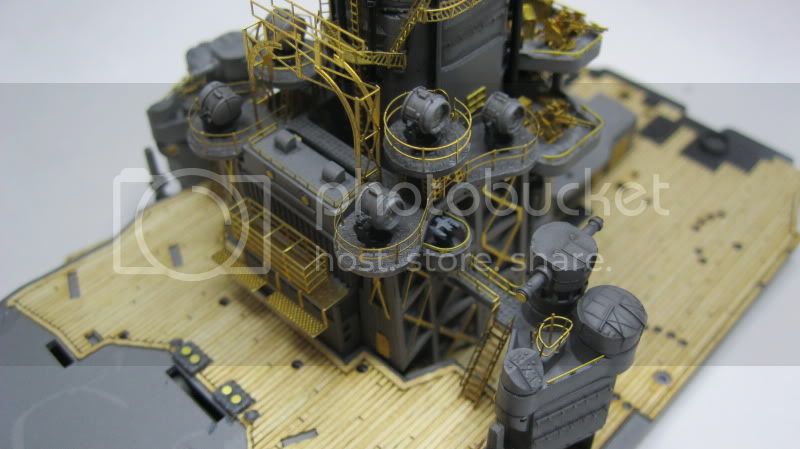
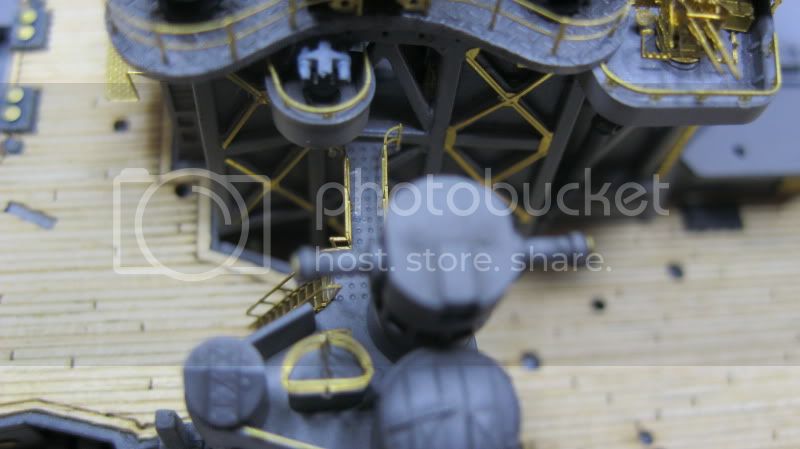
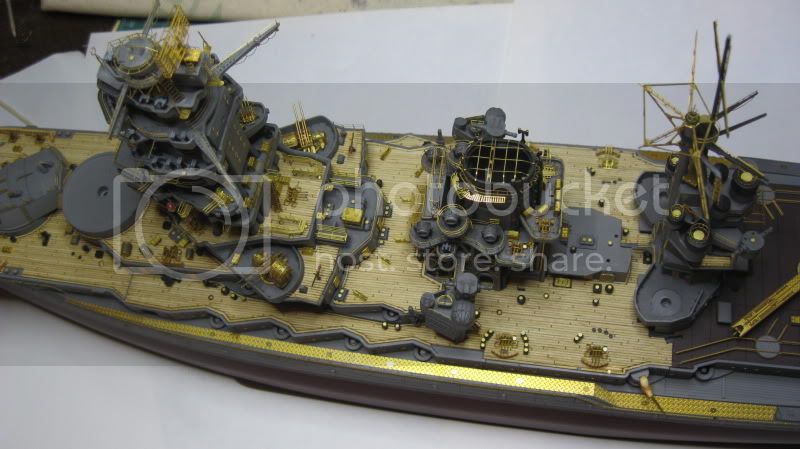
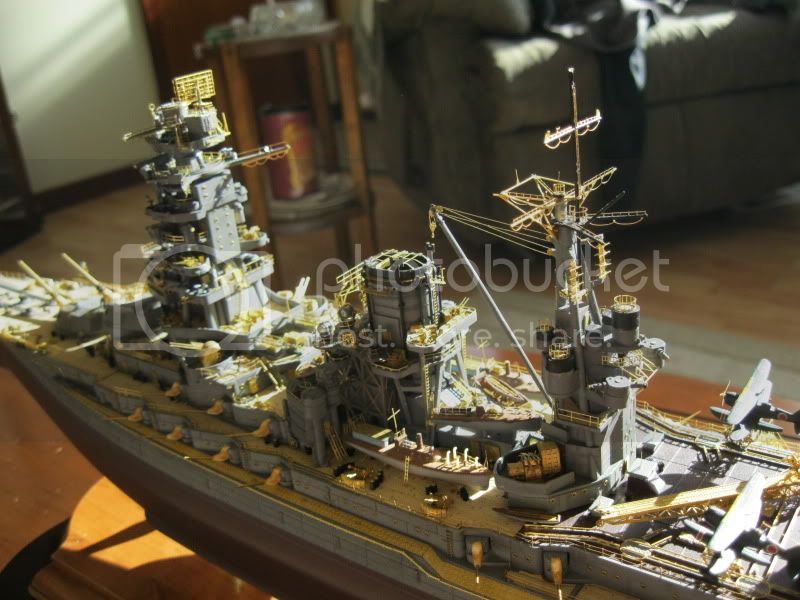
Wow Tim, absolutely stunning PE work!
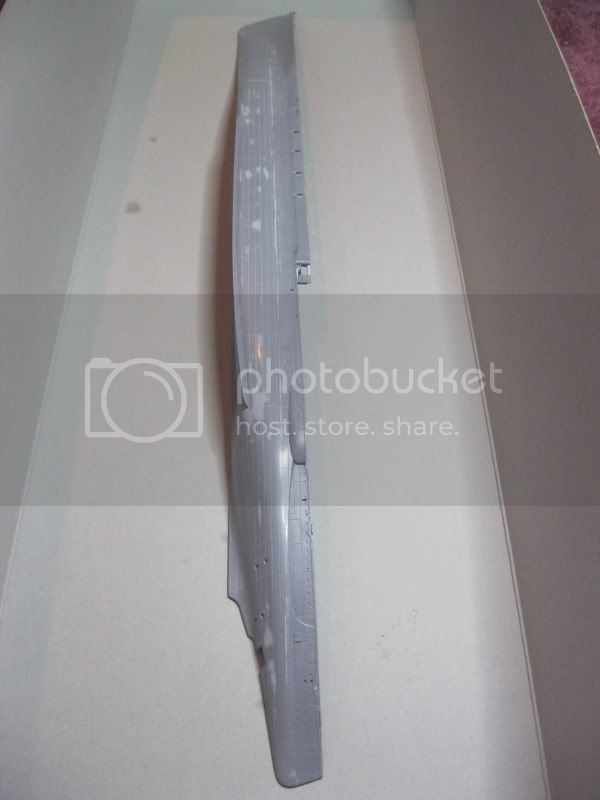
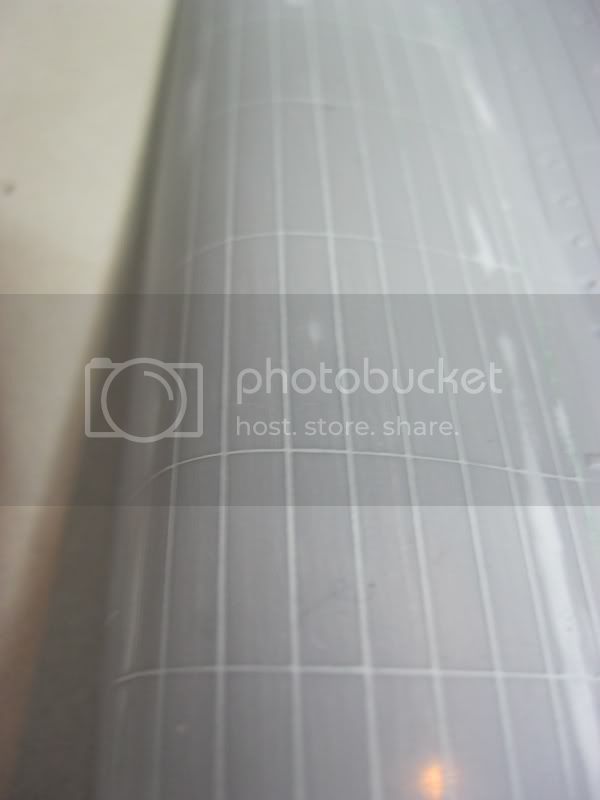
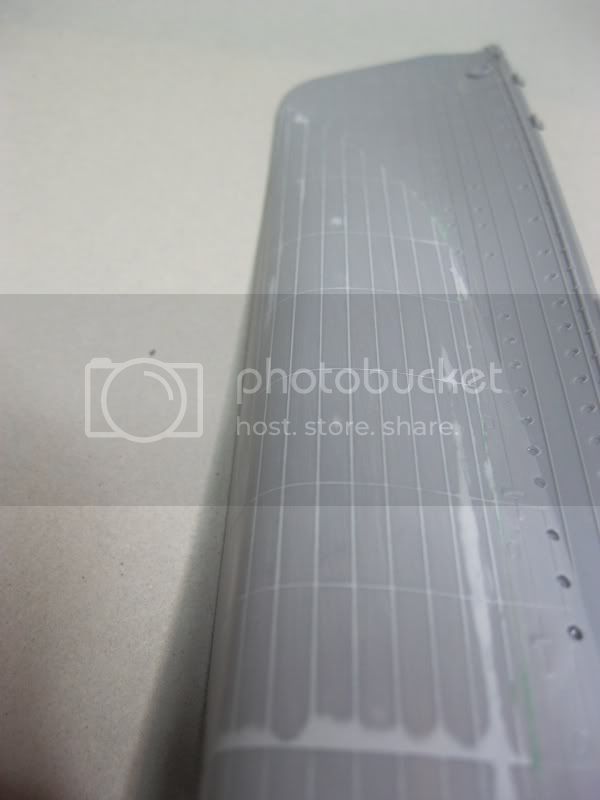
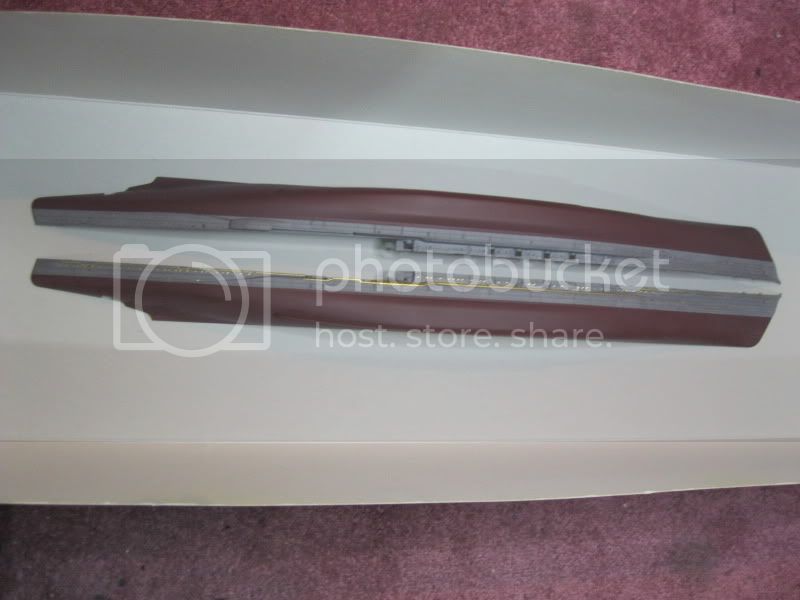
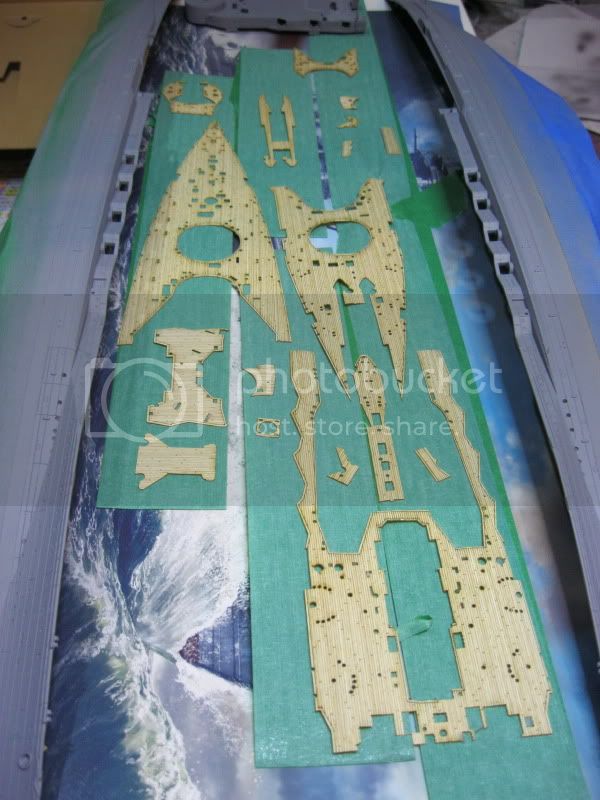
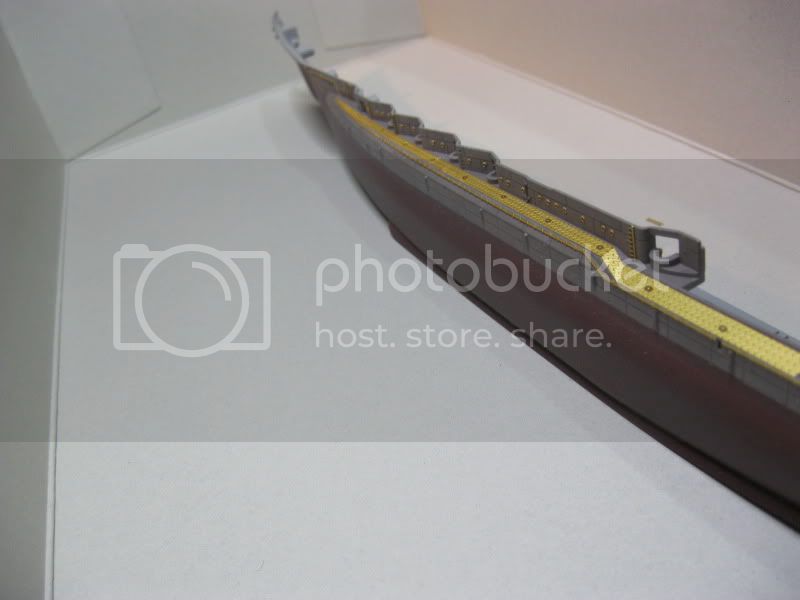
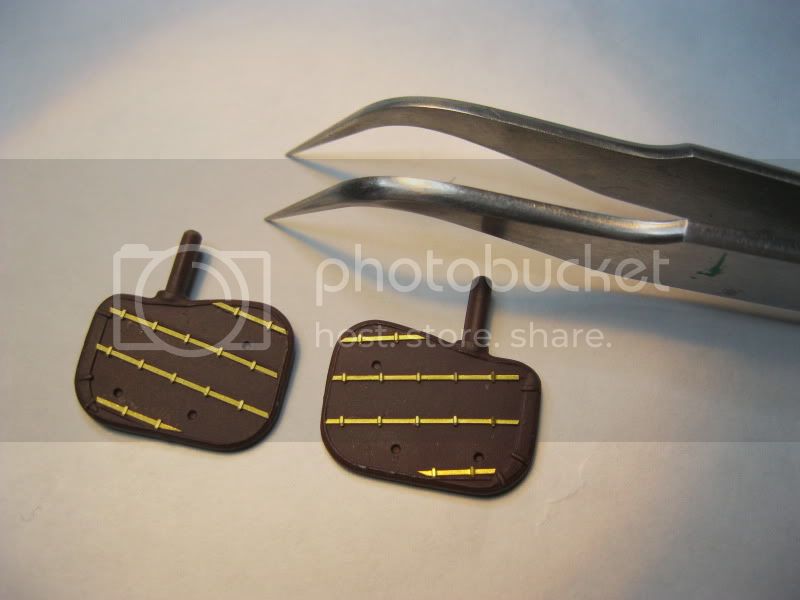
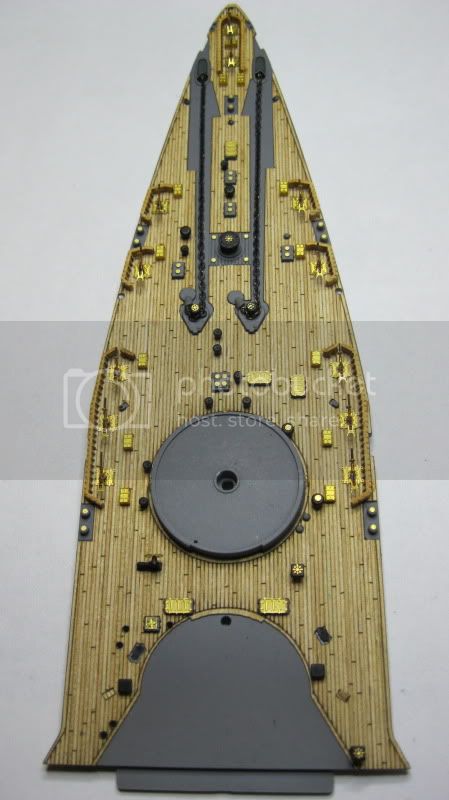
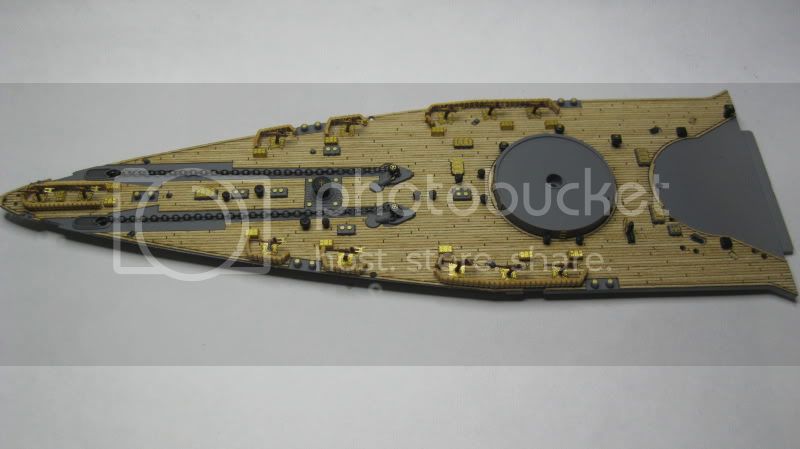
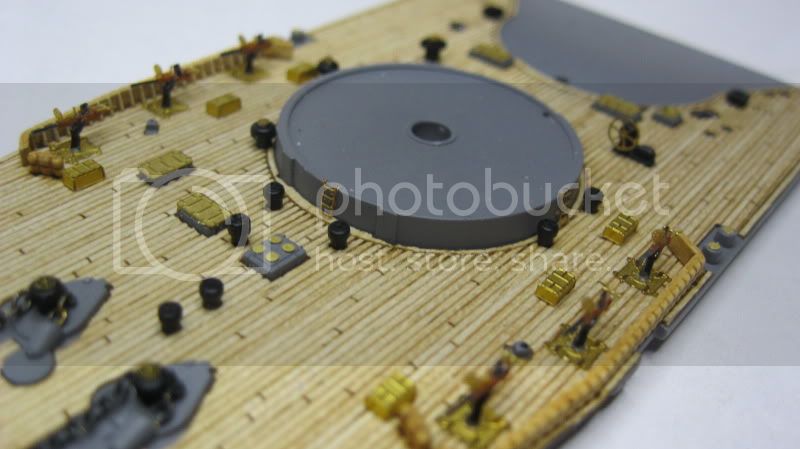
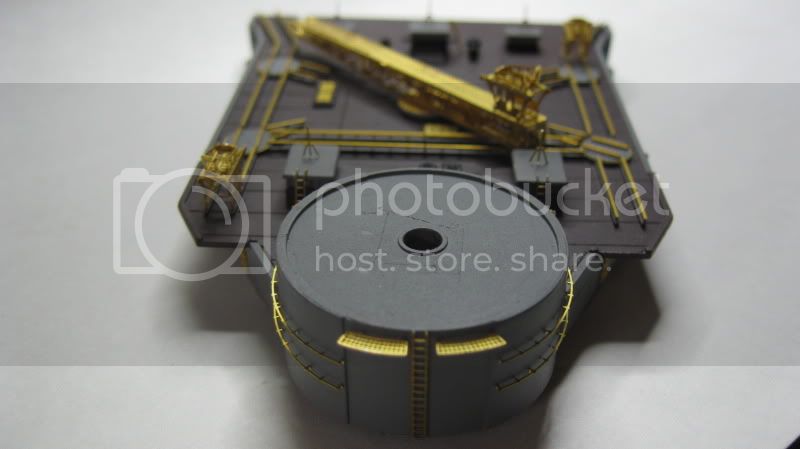
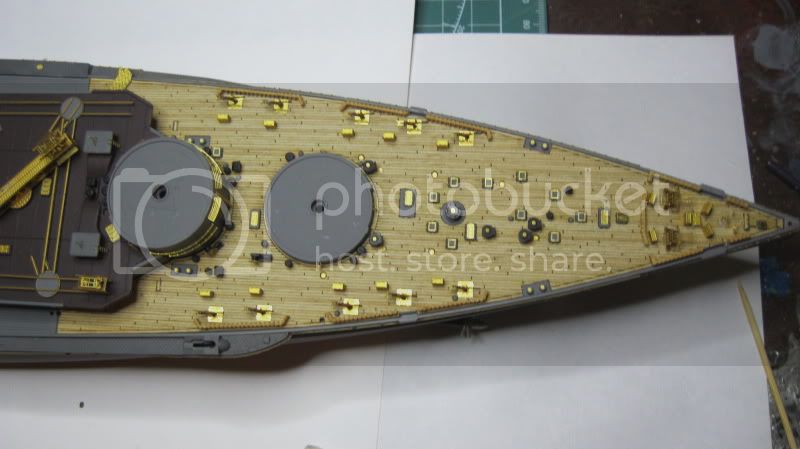
I also like how you dealt with those stupid excel spreadsheet engraved lines on the hull. Super job!

New Brunswick, Canada
Joined: March 17, 2011
KitMaker: 137 posts
Model Shipwrights: 135 posts
Posted: Wednesday, April 11, 2012 - 03:08 AM UTC
England - South East, United Kingdom
Joined: March 01, 2010
KitMaker: 7,078 posts
Model Shipwrights: 6,649 posts
Posted: Wednesday, April 11, 2012 - 08:57 PM UTC
Hi Tim,
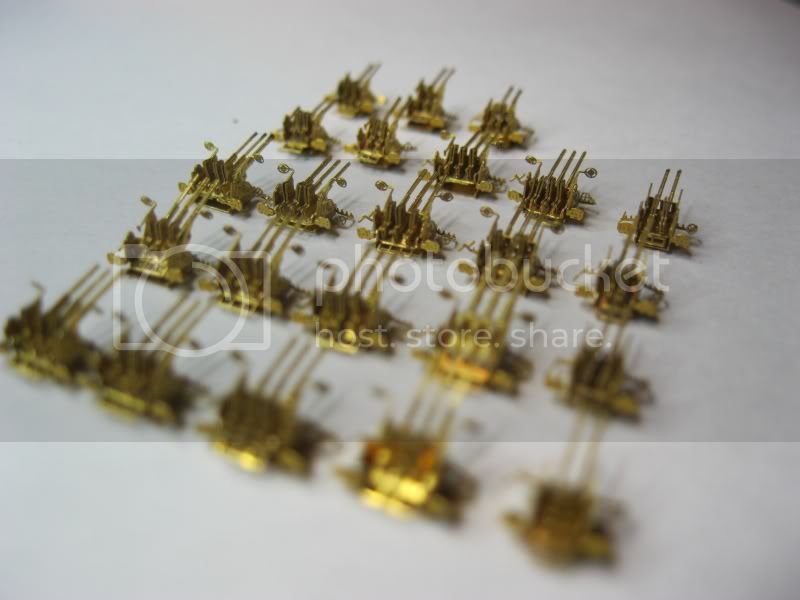
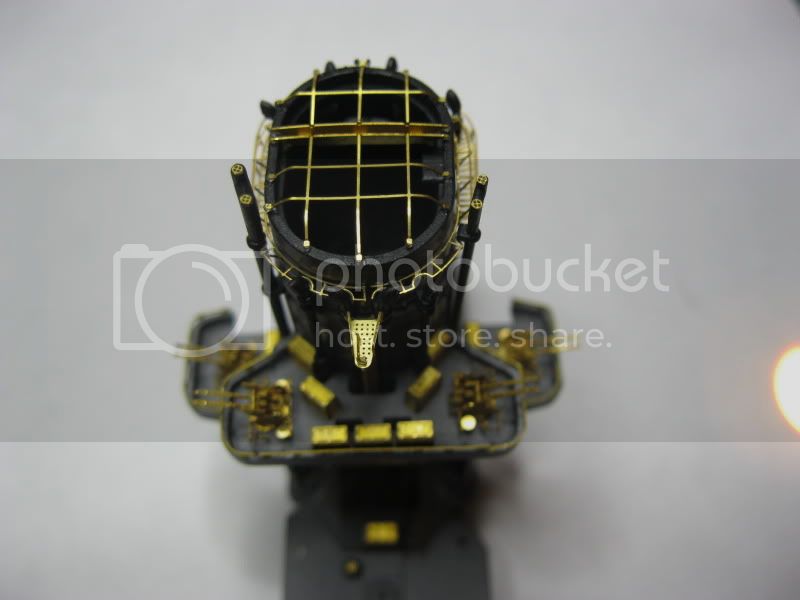
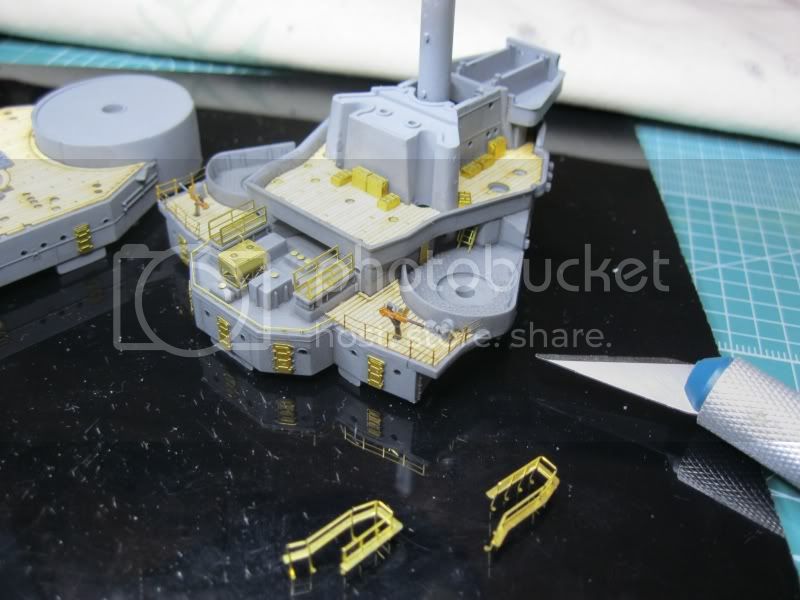
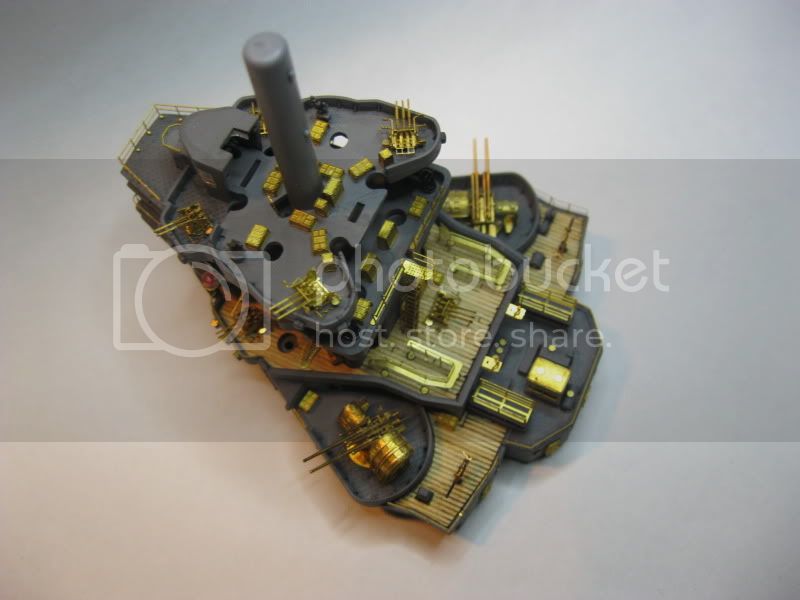
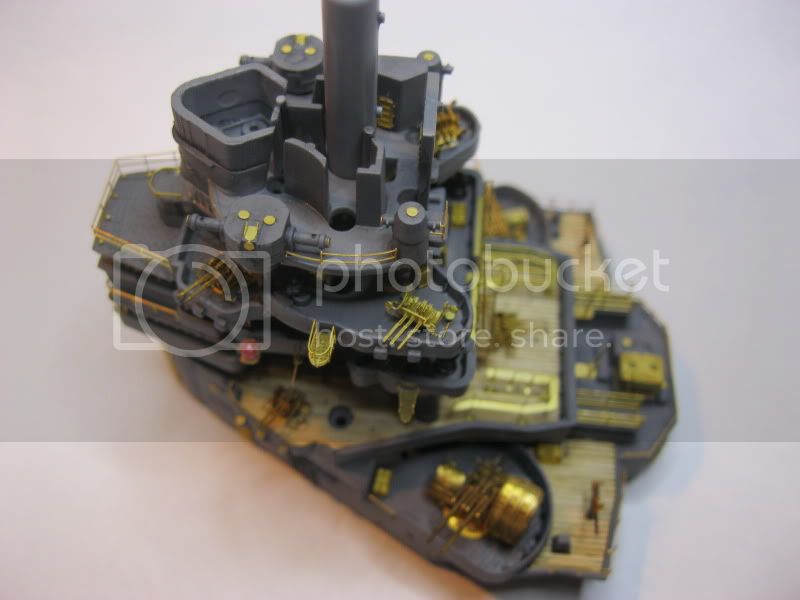
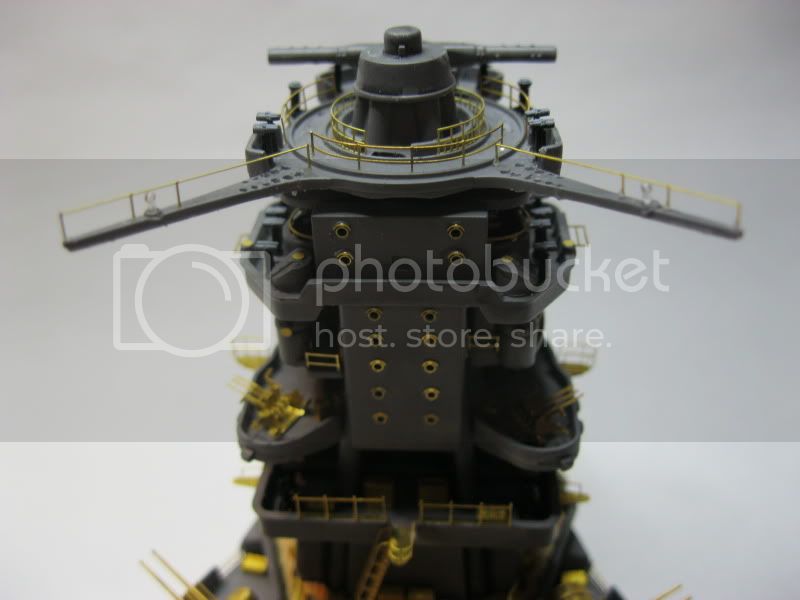
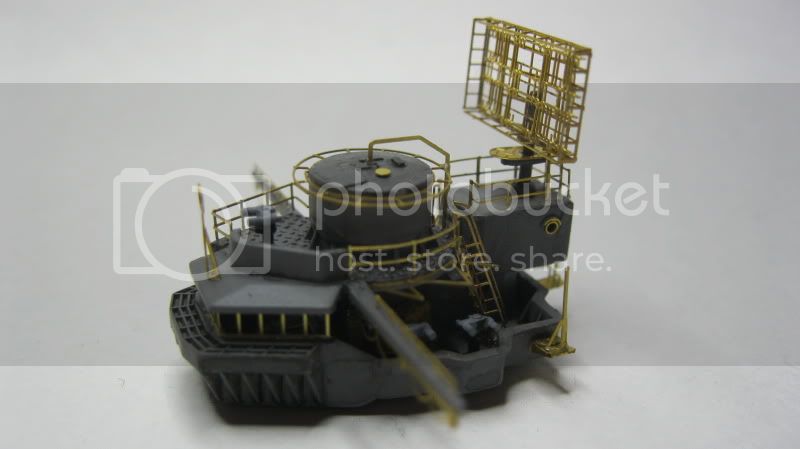
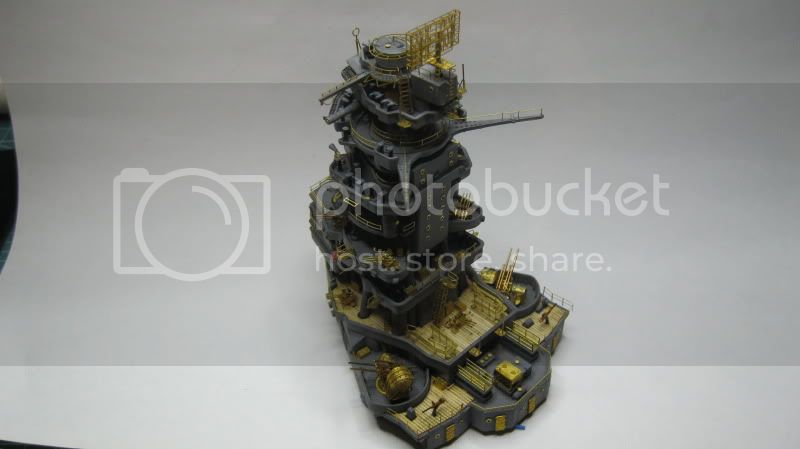
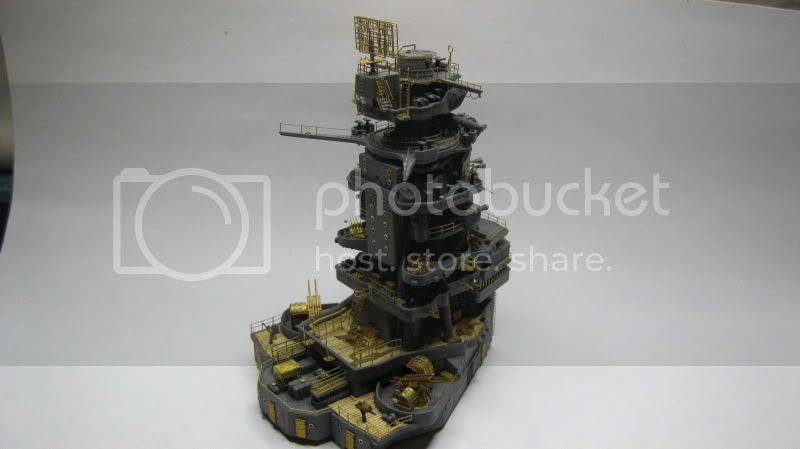
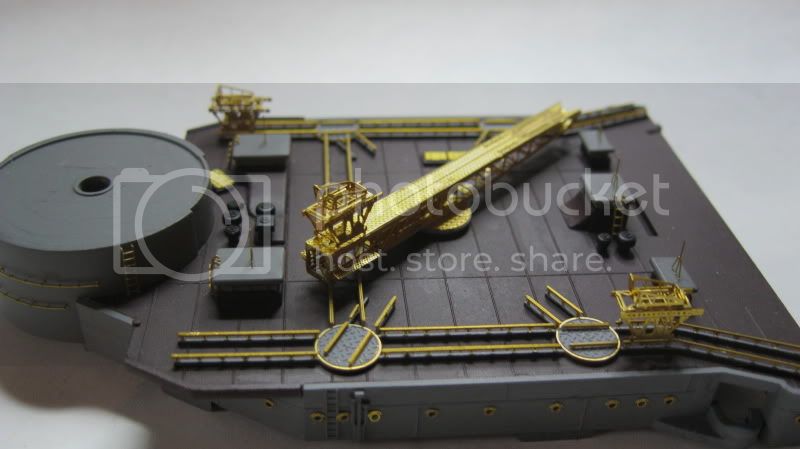
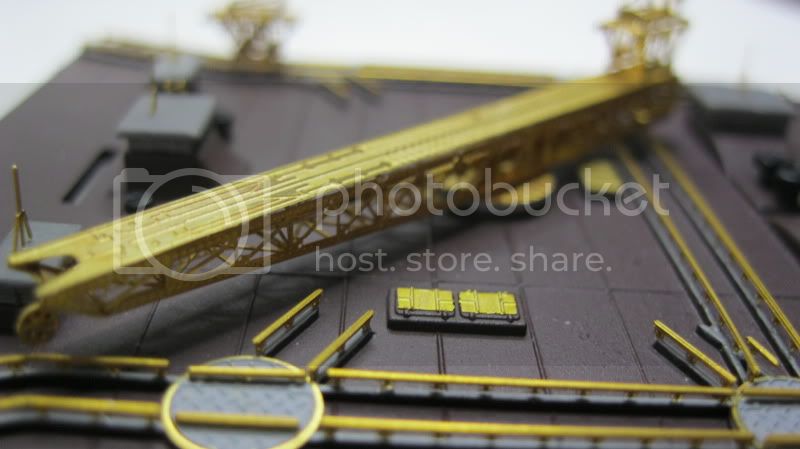
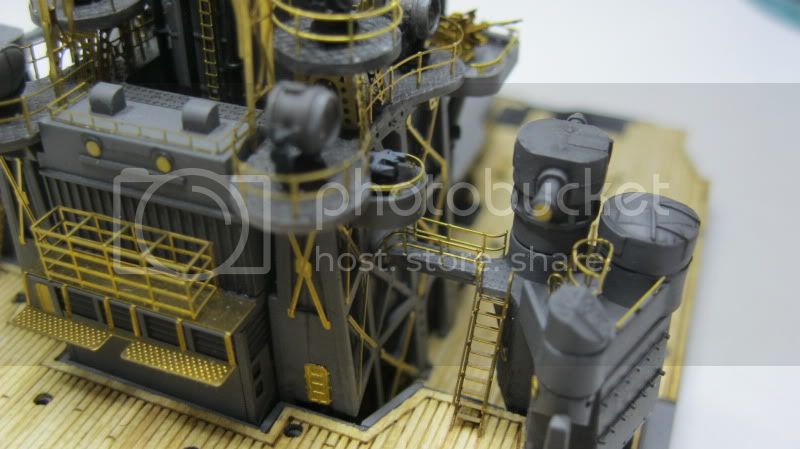
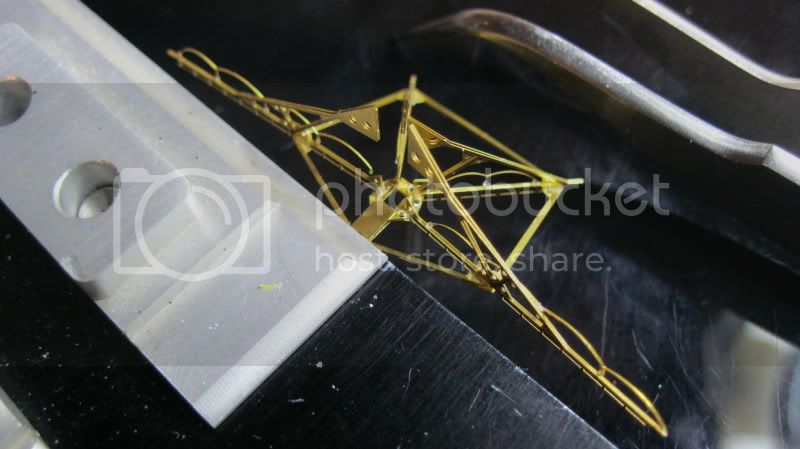
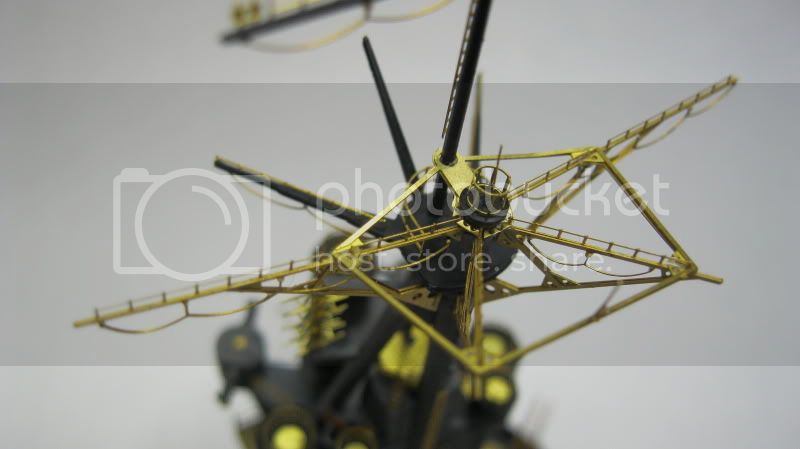
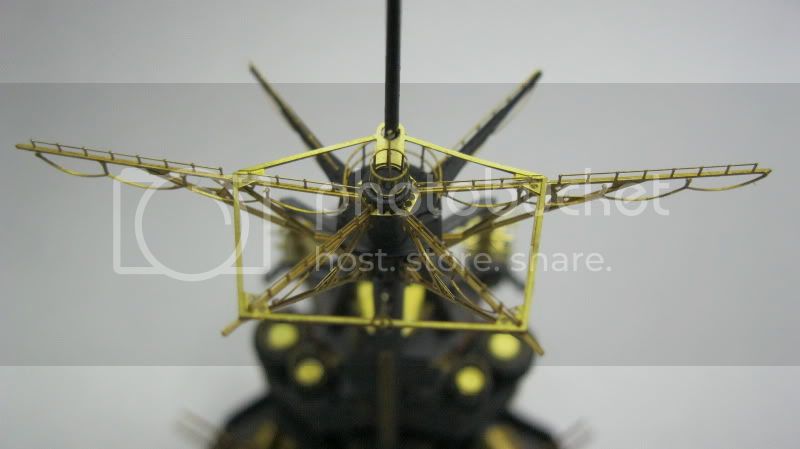
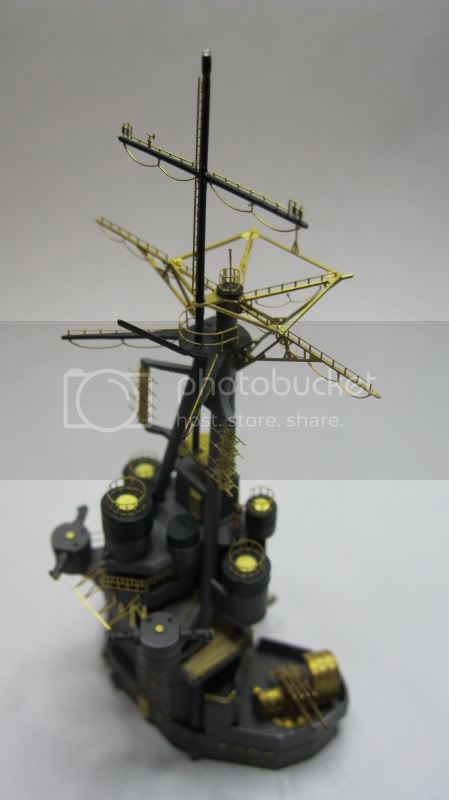
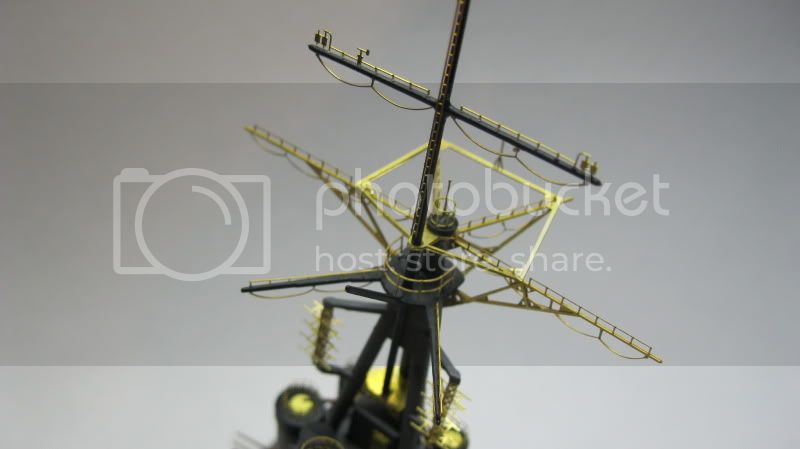
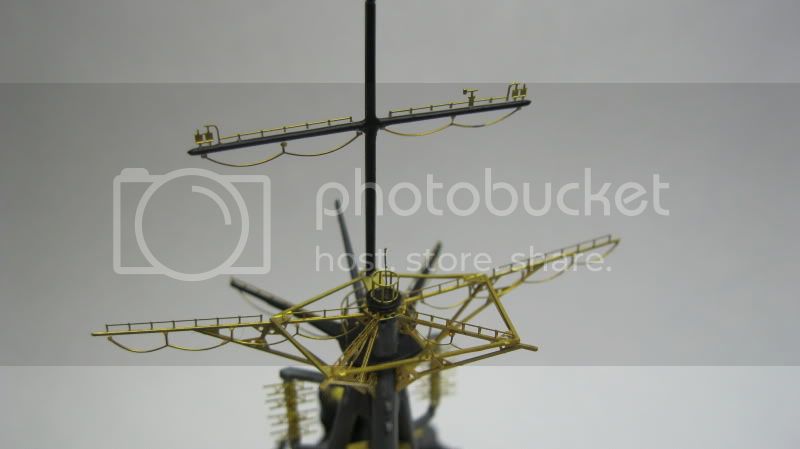
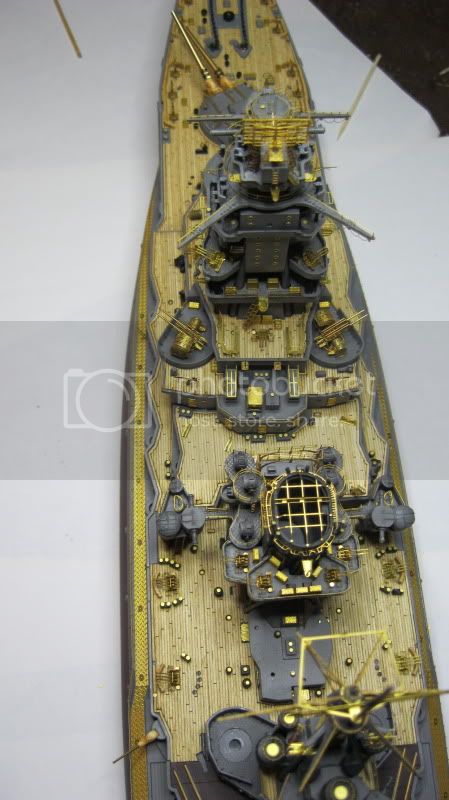
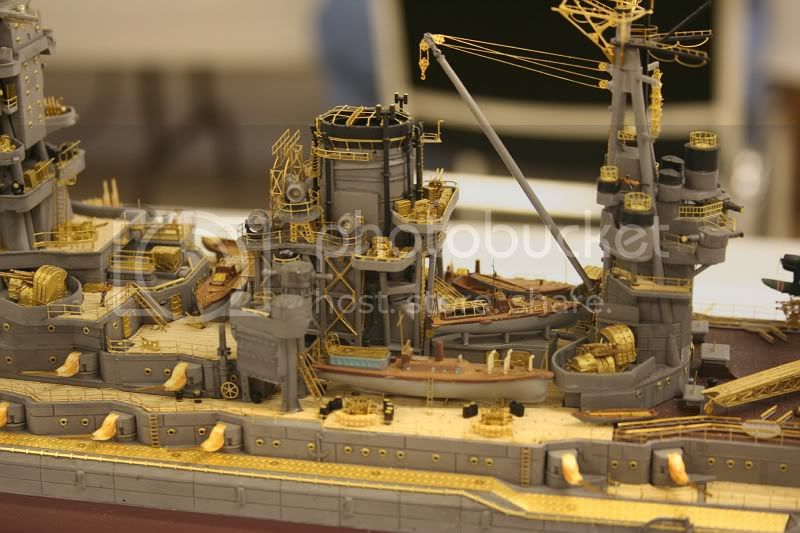
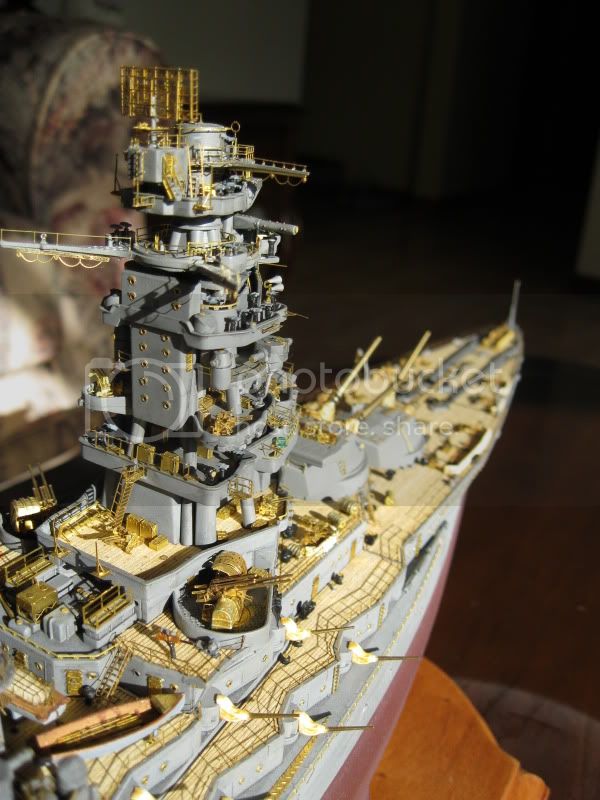
Impressive etch work, especially the mainmast, that looks very intricate.
Following with interest.
Si
Joined: October 30, 2005
KitMaker: 3,897 posts
Model Shipwrights: 3,301 posts
Posted: Friday, April 13, 2012 - 08:21 PM UTC
Absolutely amazing Tim, just like your Yamato. Looking at your PE work makes me want to chuck mine in the bin.
Cheers,
Julian

South Australia, Australia
Joined: August 14, 2007
KitMaker: 5,926 posts
Model Shipwrights: 2,624 posts
Posted: Saturday, April 14, 2012 - 10:55 AM UTC
Very well done Tim. Only question I have is why didn't you make it a progressive blog rather than posting everything at once?

You may be right, I may be crazy.
Kentucky, United States
Joined: October 05, 2010
KitMaker: 205 posts
Model Shipwrights: 163 posts
Posted: Sunday, April 15, 2012 - 06:02 AM UTC
Quoted Text
Absolutely amazing Tim, just like your Yamato. Looking at your PE work makes me want to chuck mine in the bin.
Cheers,
Julian
I couldn't have said it better myself! I look at how my PE work comes out, even the simple stuff, and I marvel at what you have accomplished with yours. Absolutely amazing, clean and exact. I wish I thought that I could ever get to the point that I could be half that good at working with PE, which at this stage in my development as a modeler, usually bedevils me.
Bob
Building: Revell 1/72 S-100 Schnelboot
Dragon 1/350 U.S.S. Laffey
Just Launched: Hasegawa IJN Yakakuze (1940)
New Brunswick, Canada
Joined: March 17, 2011
KitMaker: 137 posts
Model Shipwrights: 135 posts
Posted: Sunday, April 22, 2012 - 05:38 AM UTC
England - South East, United Kingdom
Joined: March 01, 2010
KitMaker: 7,078 posts
Model Shipwrights: 6,649 posts
Posted: Sunday, April 22, 2012 - 09:11 PM UTC
Hi Tim,
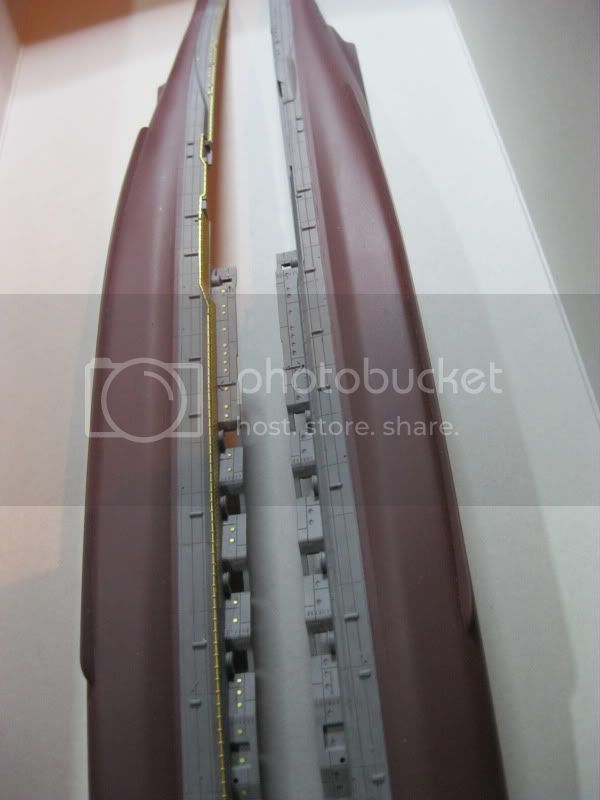
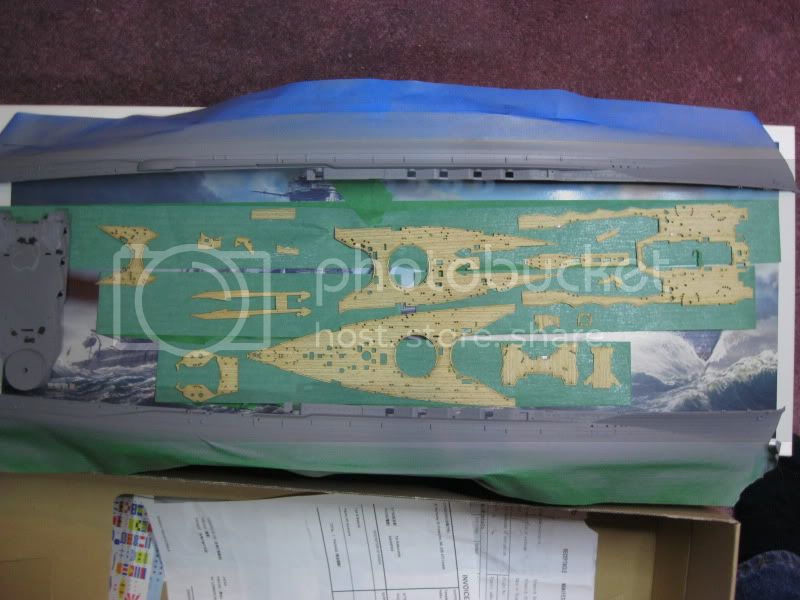
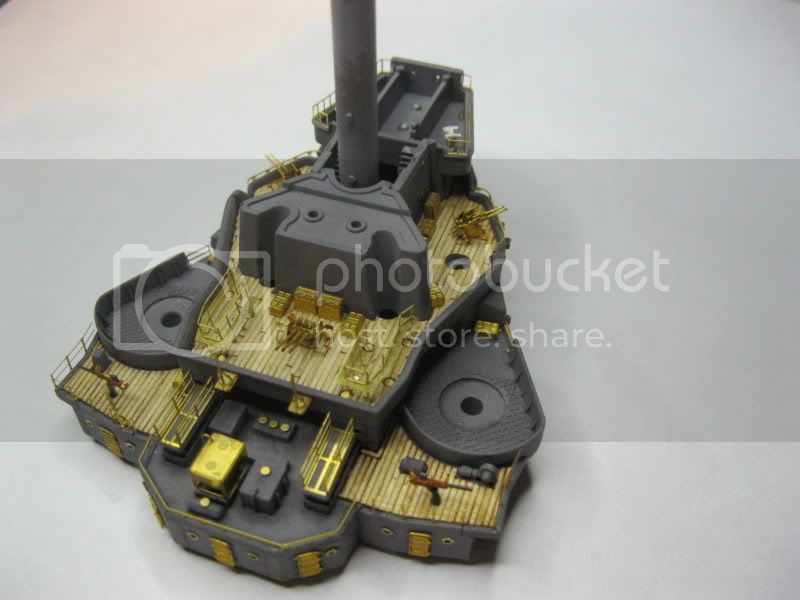
looking very impressive, what are your plans for painting? Being a clumsy I would be feared of getting paint on that beautifully fitted wooden deck.
Si
Texas, United States
Joined: September 15, 2002
KitMaker: 8,985 posts
Model Shipwrights: 3,509 posts
Posted: Monday, May 07, 2012 - 09:01 PM UTC
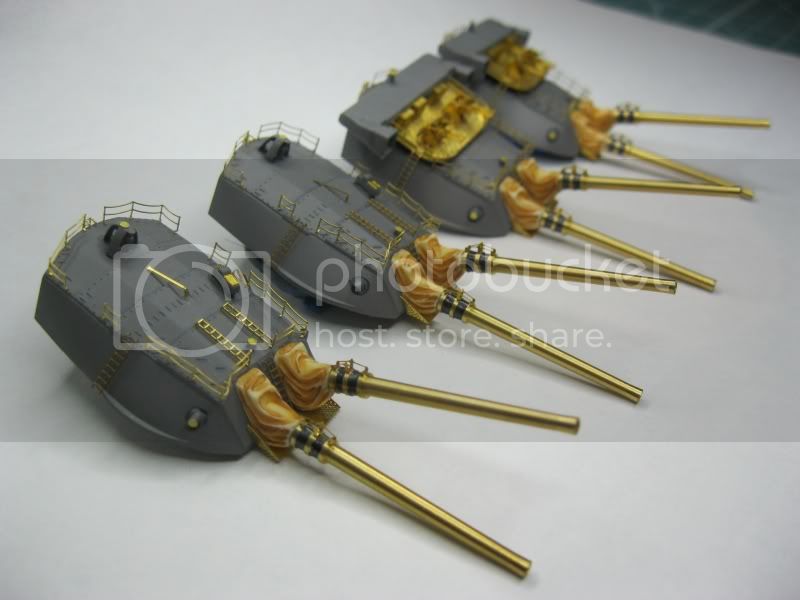
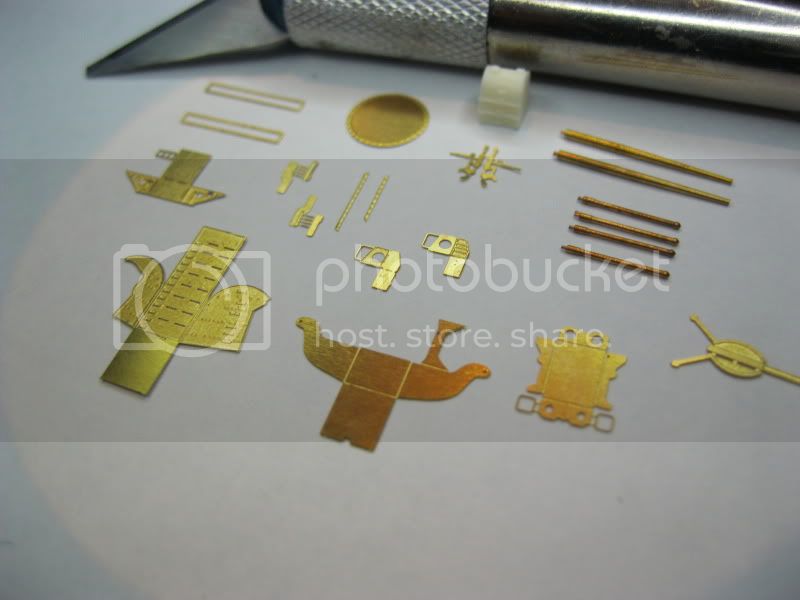
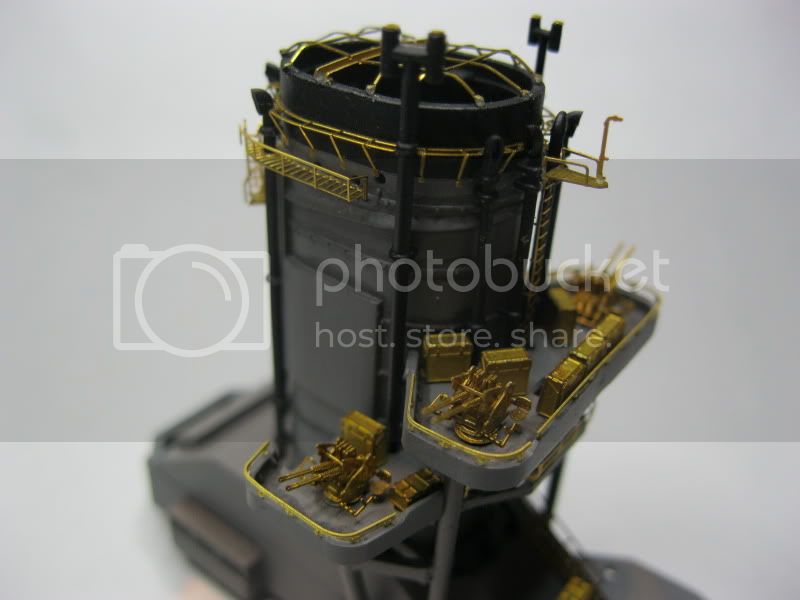
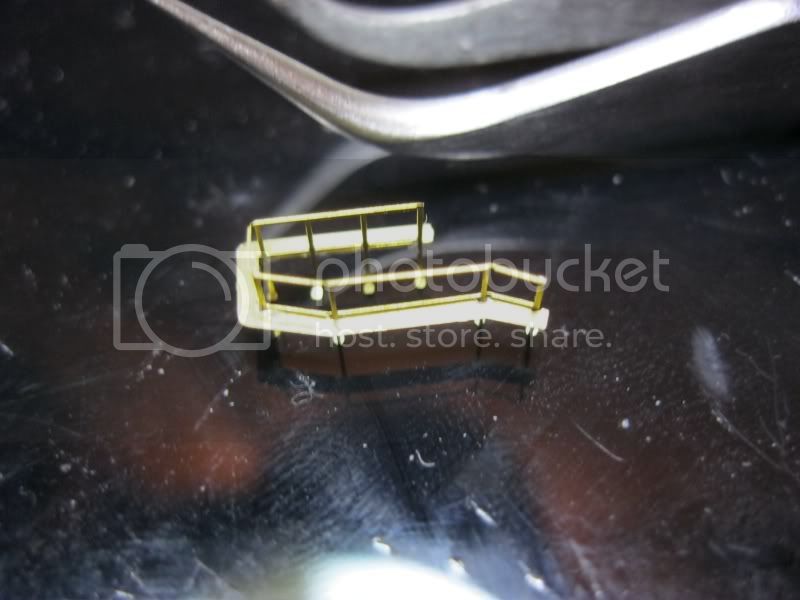
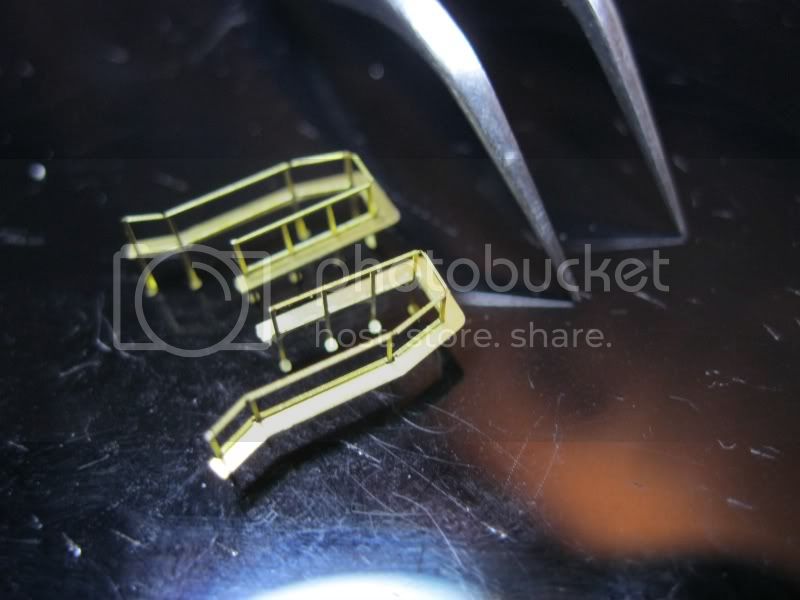
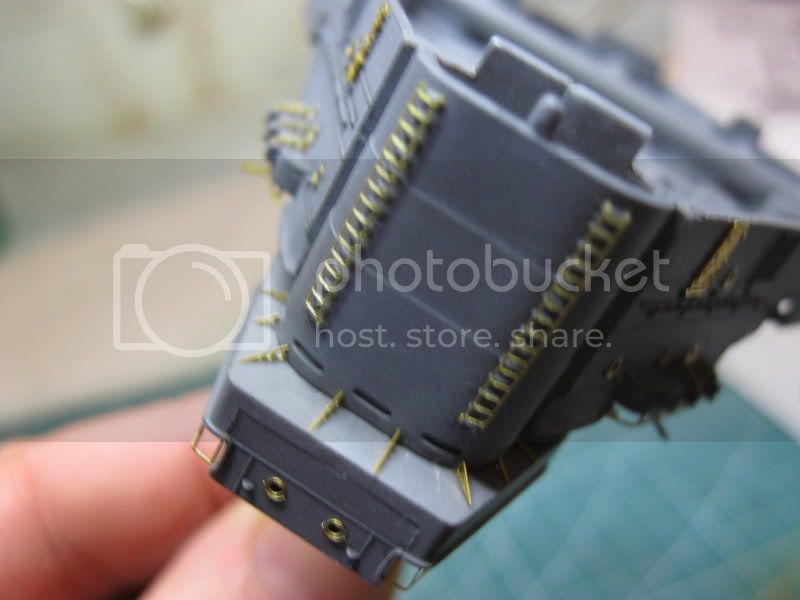
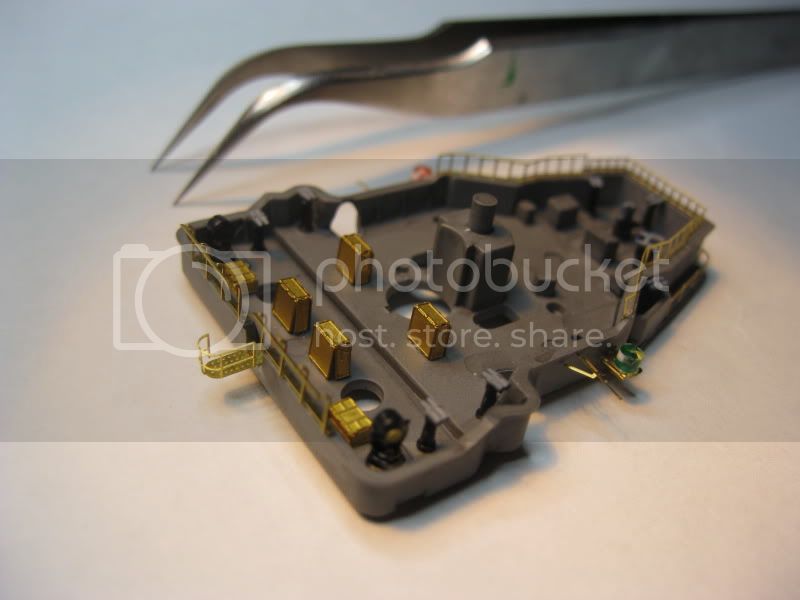
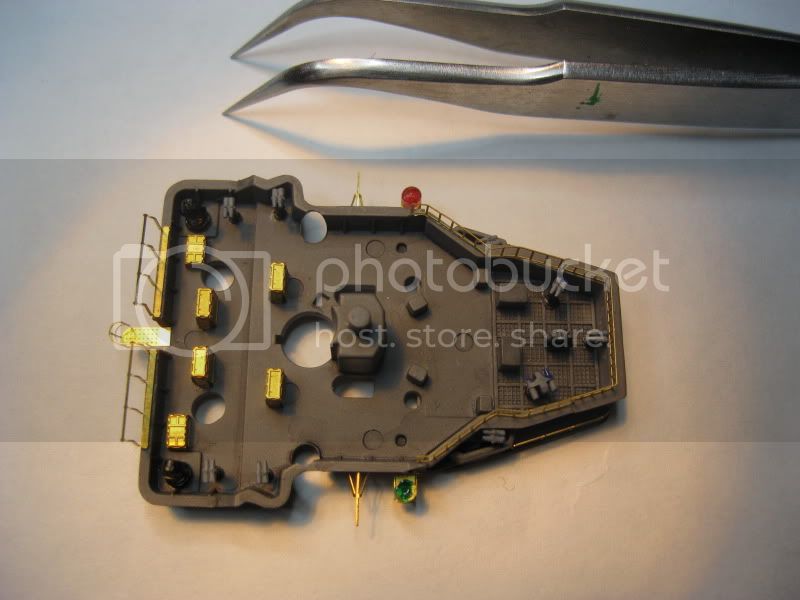
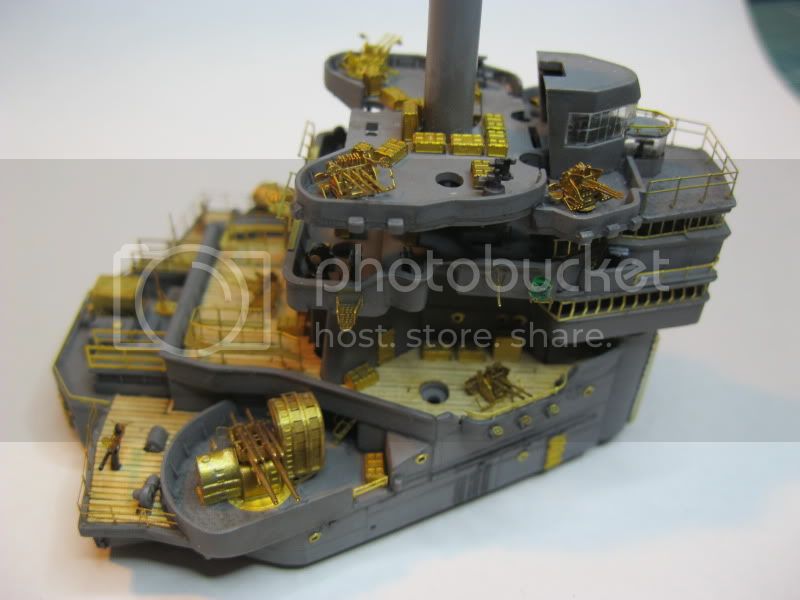
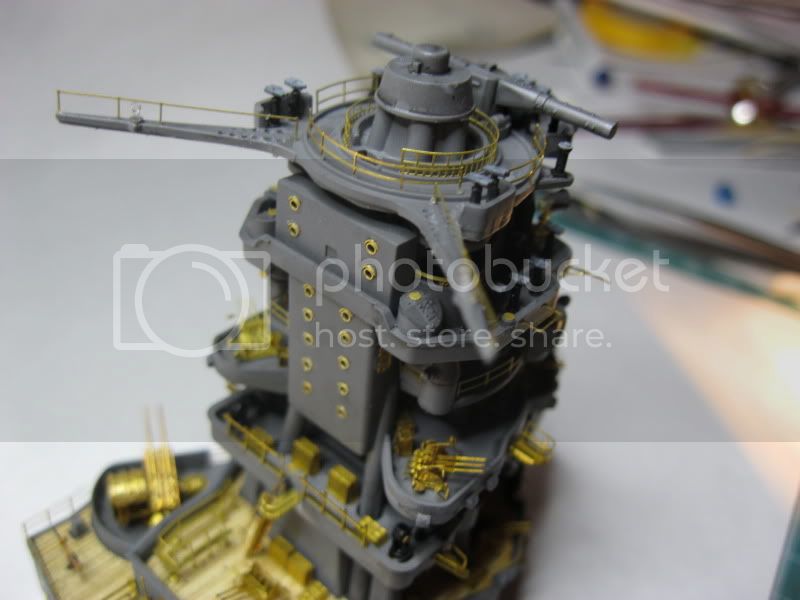
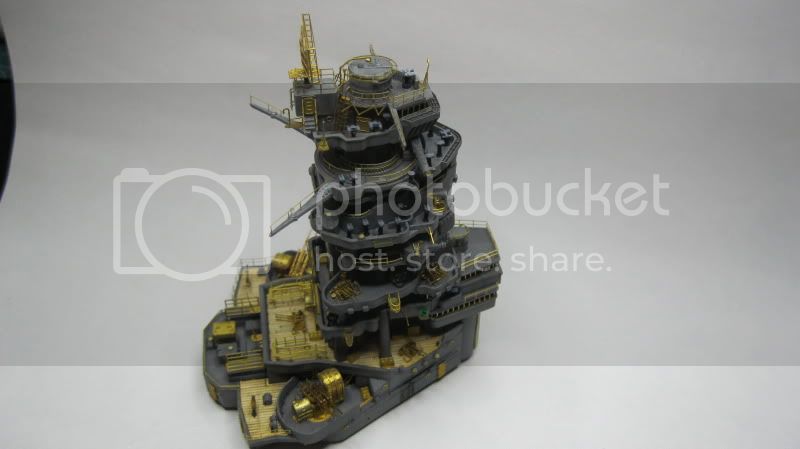
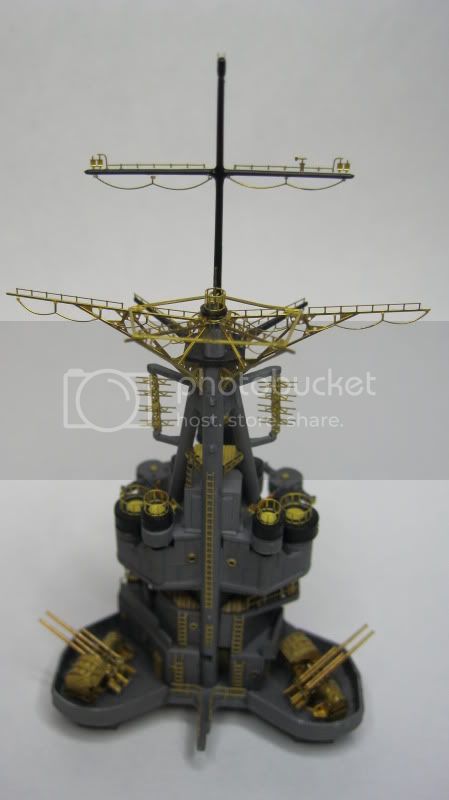
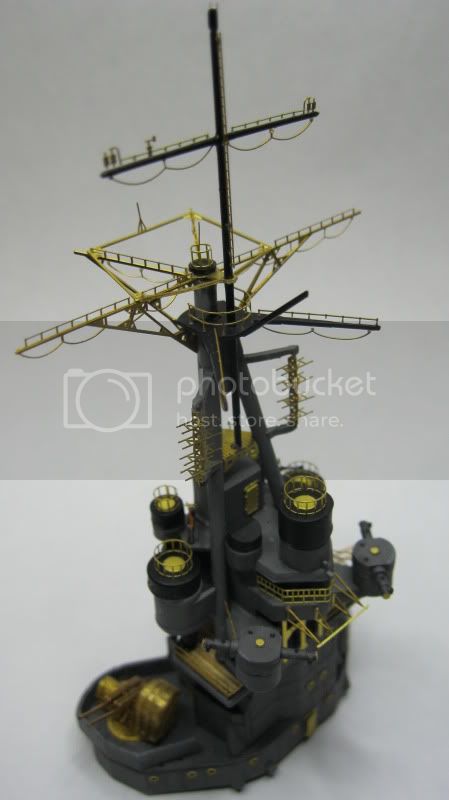
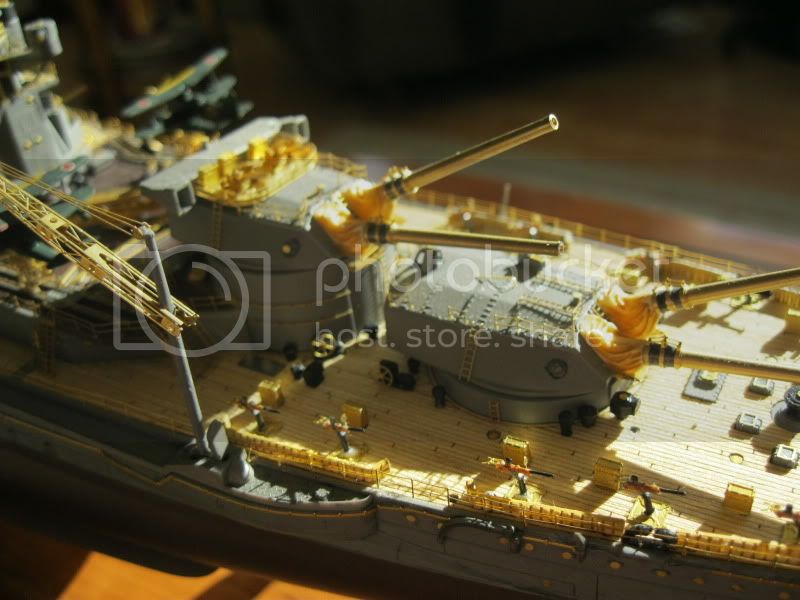
it would almost be a shame to cover up all that beautiful brass. Wish I could get mine to bend and fit like yours. I bend the stuff and it seems to go every way but the way i want it
Those who don't learn from history are doomed to repeat it
VMI "76
Order of the Red Nose Plug
Blue Volute Bumper Spring Award
California, United States
Joined: August 08, 2008
KitMaker: 1,274 posts
Model Shipwrights: 1,236 posts
Posted: Wednesday, May 09, 2012 - 04:20 AM UTC
Quoted Text
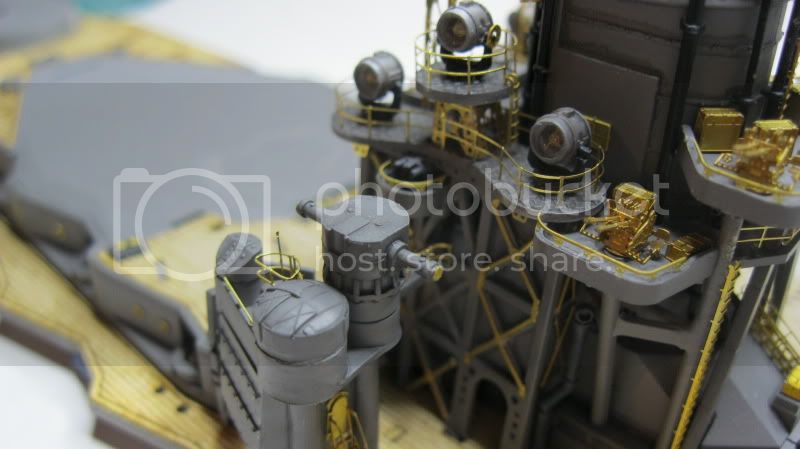
it would almost be a shame to cover up all that beautiful brass...
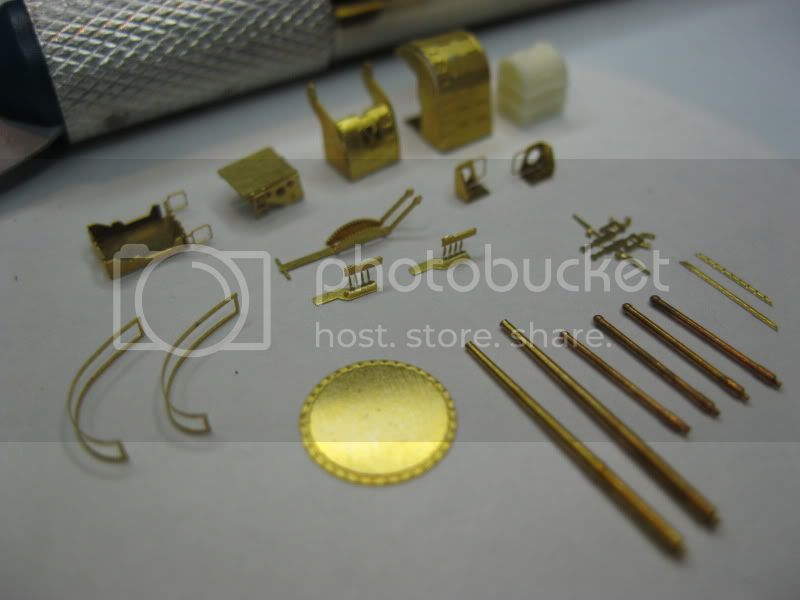
You know, there is something to be said for the artistic look of leaving a multimedia work like this unpainted.

--Karl
On the ways:
1:96 USS Constitution
1:96 USS Richmond (1862)
Launched:
1:96 USS Cumberland (1862)
Mississippi, United States
Joined: August 28, 2008
KitMaker: 106 posts
Model Shipwrights: 92 posts
Posted: Tuesday, May 29, 2012 - 10:50 AM UTC
Quoted Text
Quoted Text
it would almost be a shame to cover up all that beautiful brass...
You know, there is something to be said for the artistic look of leaving a multimedia work like this unpainted.
--Karl
I had the same sentiment myself it lends the viewer to all the extra effort afforded in the build.
England - South East, United Kingdom
Joined: March 01, 2010
KitMaker: 7,078 posts
Model Shipwrights: 6,649 posts
Posted: Tuesday, May 29, 2012 - 08:05 PM UTC
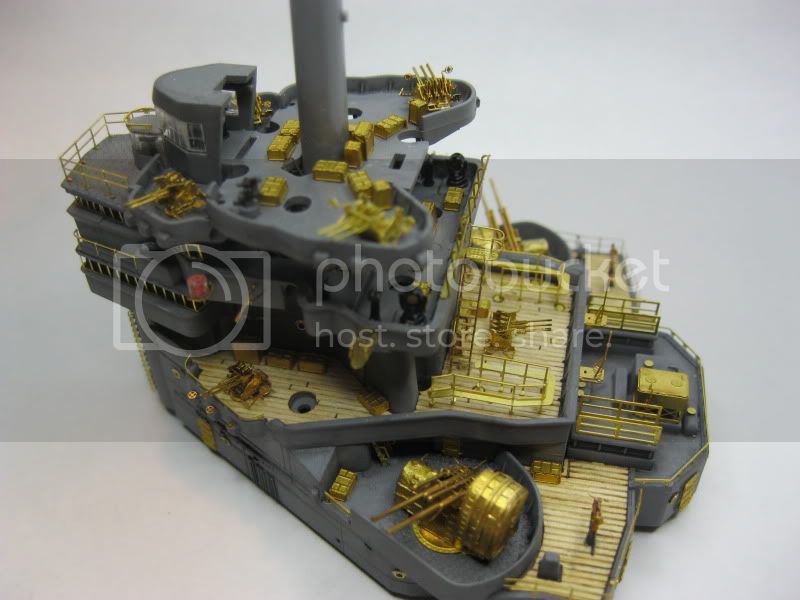
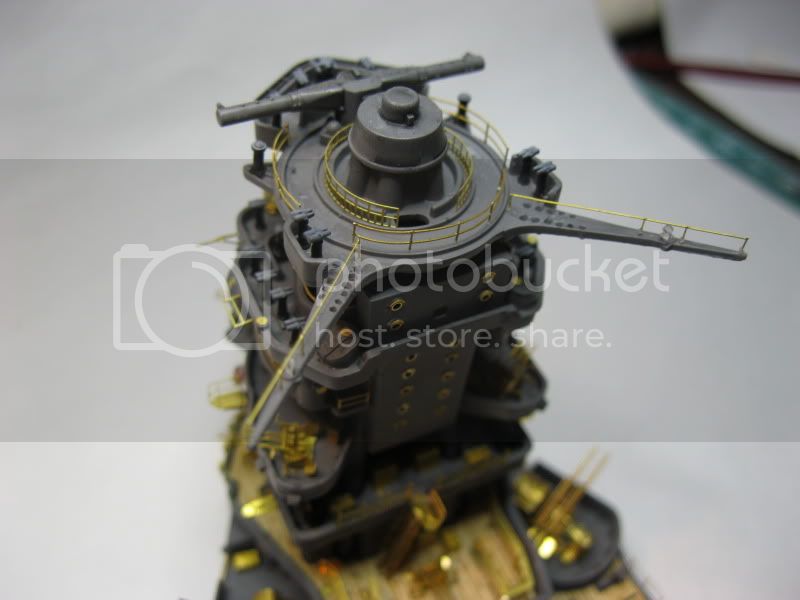
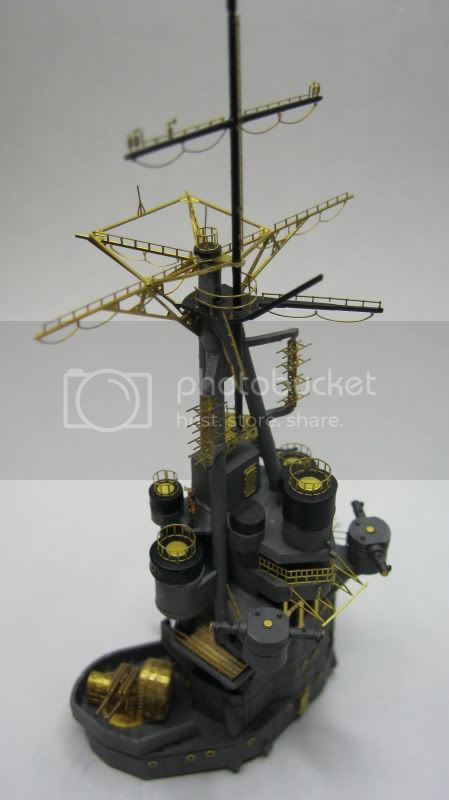
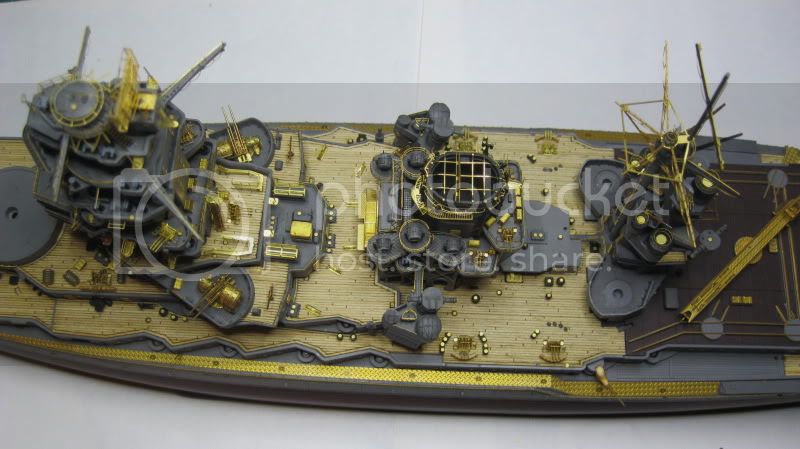
When I worked for a shipowning company we had a builders model of one of the fleet in our office, all the railings and some deck fittings were brass and left unpainted, in strange way it add to the beauty of the model. Odd because normally I find that sort of thing grates on the eye.
Again I think with Tim's Nagato, because of the finess of the Brass, and the quality of the workmanship the unpainted brass adds rather than detracts fro the model.
Si
New Brunswick, Canada
Joined: March 17, 2011
KitMaker: 137 posts
Model Shipwrights: 135 posts
Posted: Saturday, June 02, 2012 - 06:19 PM UTC
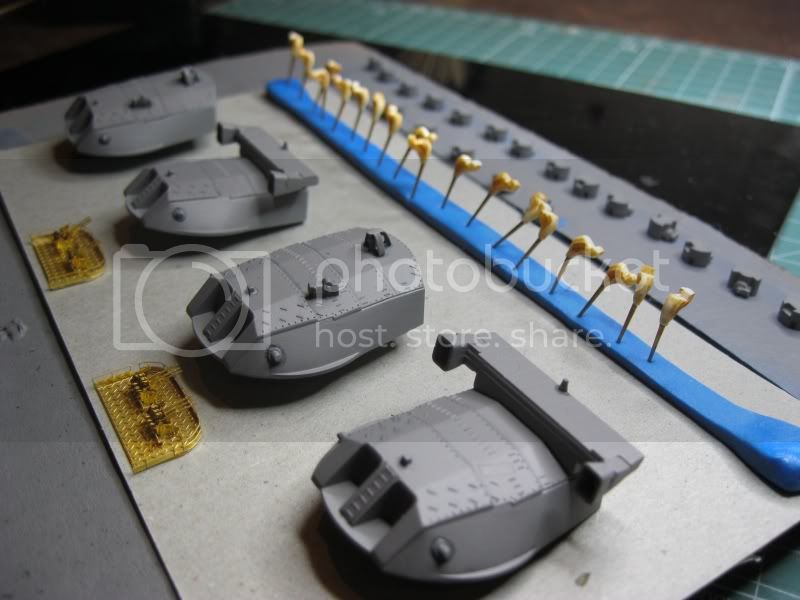
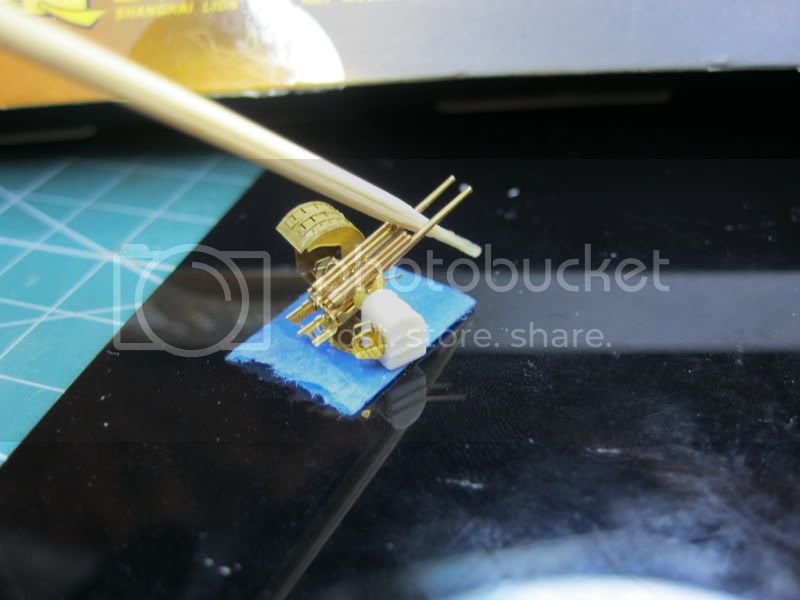
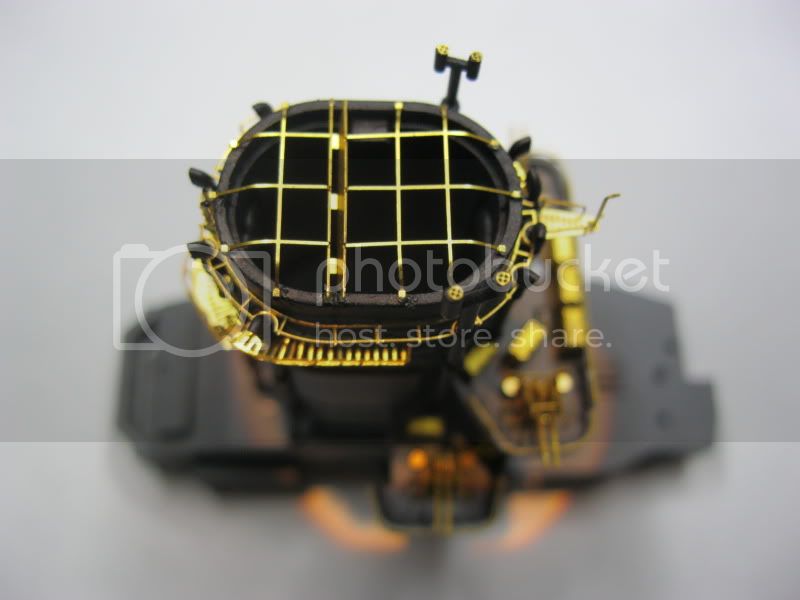
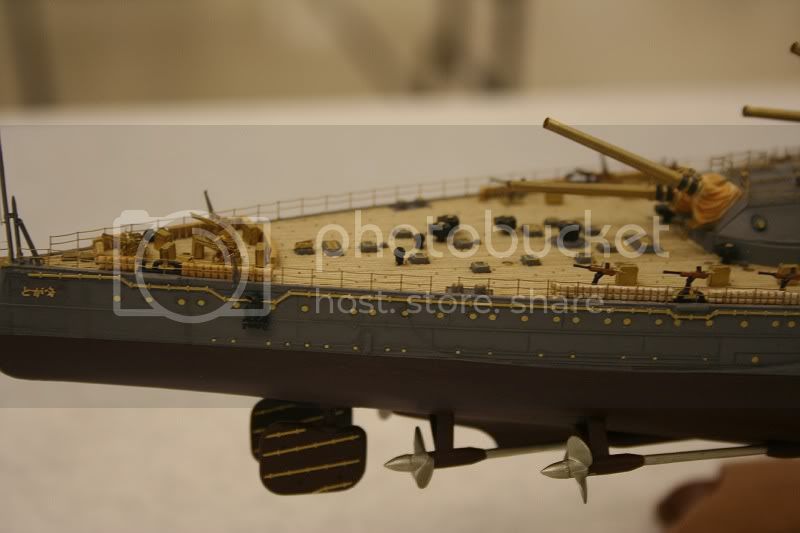
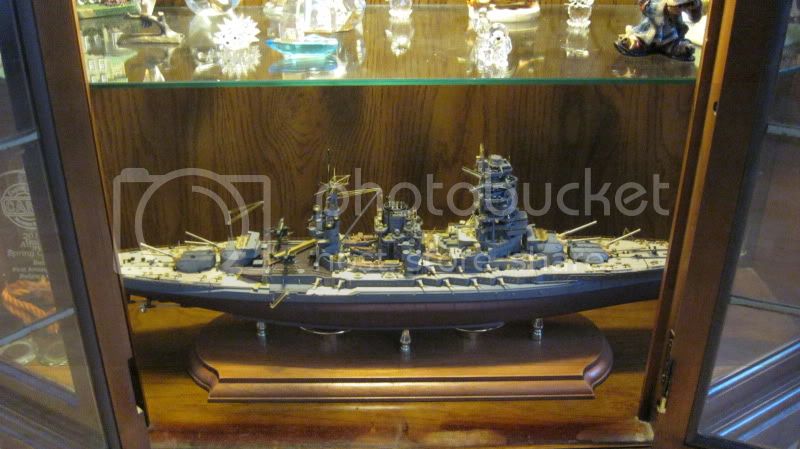
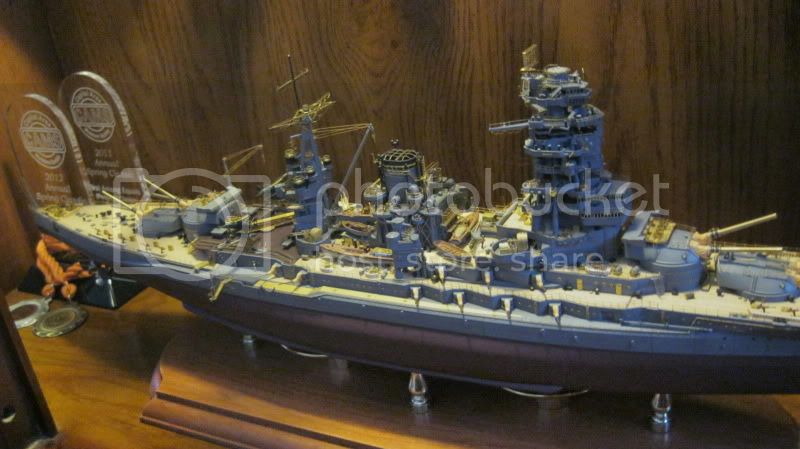
Thanks for the comments guys, I appreciate the support!....small update (better pics to follow tomorrow)
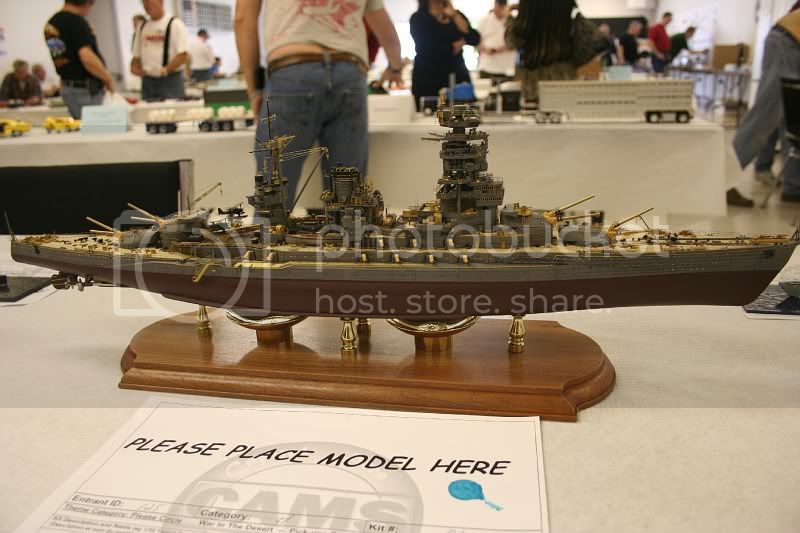
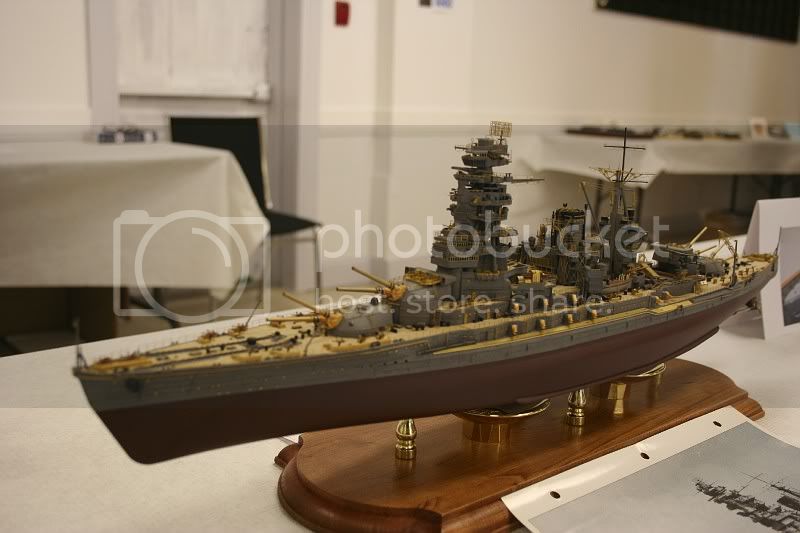
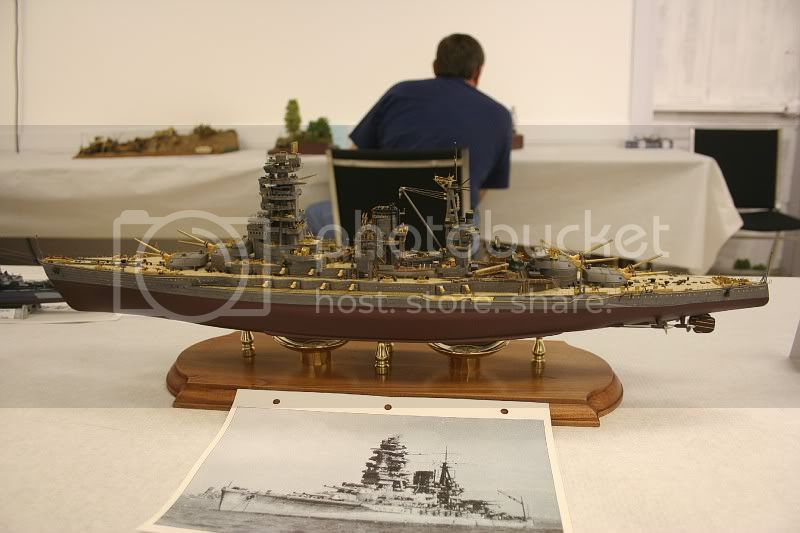
Taken at CAMS show by a friend...I will post some pics of my own tomorrow. Thanks for viewing my post! -Tim
New Brunswick, Canada
Joined: March 17, 2011
KitMaker: 137 posts
Model Shipwrights: 135 posts
Posted: Sunday, July 29, 2012 - 12:18 AM UTC
New Brunswick, Canada
Joined: March 17, 2011
KitMaker: 137 posts
Model Shipwrights: 135 posts
Posted: Friday, November 09, 2012 - 04:38 AM UTC
(AP) WASHINGTON
Parties Compromise on Cabinet Reshuffle! -Female CEO retains upper shelf; claims Congress could learn from example
Next project: 1/350 USS Iwo Jima
Thx for viewing my post, cheers to all on modelshipwrights! -Tim/Canada
-Tim/Canada
New Brunswick, Canada
Joined: March 17, 2011
KitMaker: 137 posts
Model Shipwrights: 135 posts
Posted: Thursday, December 19, 2013 - 04:41 AM UTC
Joined: October 30, 2005
KitMaker: 3,897 posts
Model Shipwrights: 3,301 posts
Posted: Thursday, December 19, 2013 - 06:06 AM UTC
England - South East, United Kingdom
Joined: March 01, 2010
KitMaker: 7,078 posts
Model Shipwrights: 6,649 posts
Posted: Friday, December 20, 2013 - 05:16 AM UTC
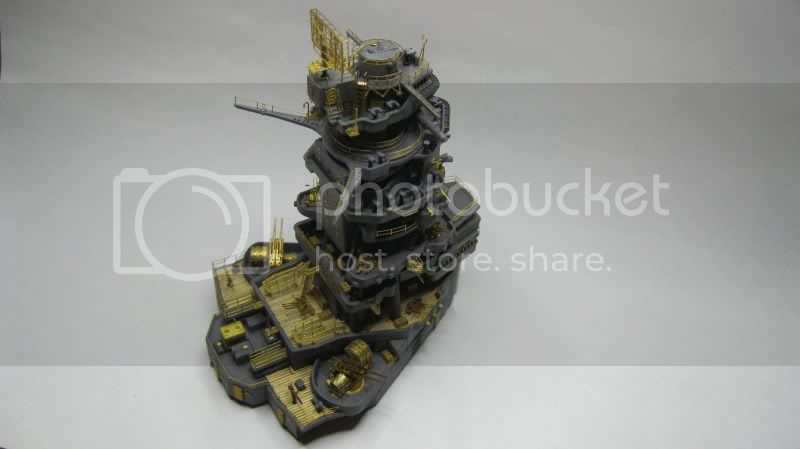
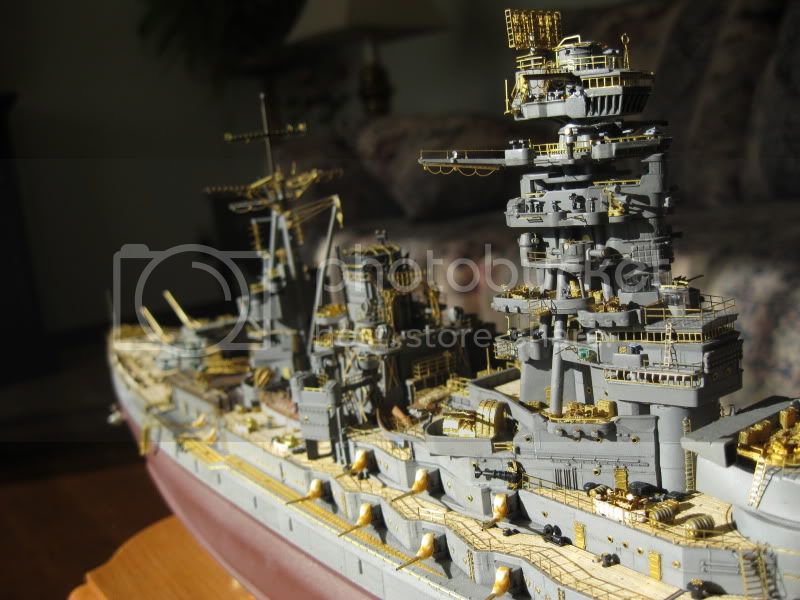
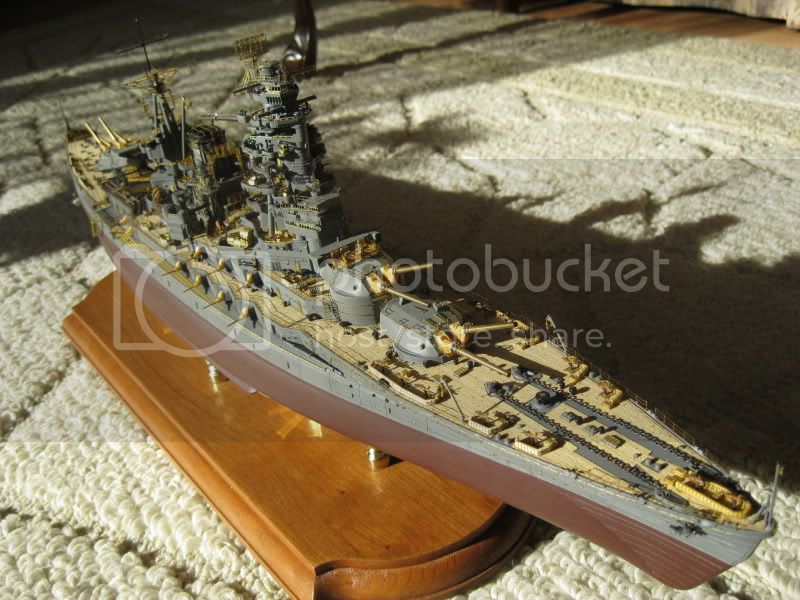
Outstanding Tim,
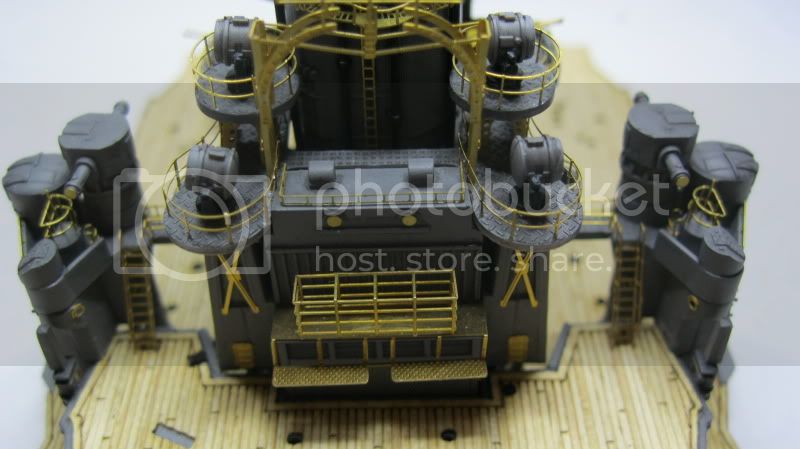
Really impressive build, looks great showing all that brass and wood.
Si
Quebec, Canada
Joined: April 19, 2008
KitMaker: 595 posts
Model Shipwrights: 14 posts
Posted: Sunday, December 22, 2013 - 03:43 PM UTC
Absolutley lovely work!
I have this kit and I have to say it is my favourite ship kit in the scale, even if my Akitsushima was quite a bit pricier and better detailed in the hull.
I plan on delineating the torpedo bulge with tape, and using a heavy coat of primer to mute the panel lines. I actually do not mind the panel lines that much, especially outside the torpedo belt where they look "right" on the hull itself.
I compared it to photos and absolutely love this kit. I think it is much better than either the Aoshima or Fujimi Kongo cass, which don't look "right" to me. The Fujimi Fuso and Yamashira are comparable in accurate appearance, and don't have the engraved lines so they could be considered better, but these kits might not go together as well as this one is reputed to: I was one of the ones put off by the hull "panels", but if you use matte paint they should not stick out as badly as some models might suggest when they have a slightly glossy hull appearance.
Gaston
South Australia, Australia
Joined: August 14, 2007
KitMaker: 5,926 posts
Model Shipwrights: 2,624 posts
Posted: Sunday, December 22, 2013 - 09:26 PM UTC
Quoted Text
Absolutley lovely work!
I have this kit and I have to say it is my favourite ship kit in the scale, even if my Akitsushima was quite a bit pricier and better detailed in the hull.
I plan on delineating the torpedo bulge with tape, and using a heavy coat of primer to mute the panel lines. I actually do not mind the panel lines that much, especially outside the torpedo belt where they look "right" on the hull itself.
I compared it to photos and absolutely love this kit. I think it is much better than either the Aoshima or Fujimi Kongo cass, which don't look "right" to me. The Fujimi Fuso and Yamashira are comparable in accurate appearance, and don't have the engraved lines so they could be considered better, but these kits might not go together as well as this one is reputed to: I was one of the ones put off by the hull "panels", but if you use matte paint they should not stick out as badly as some models might suggest when they have a slightly glossy hull appearance.
Gaston
One large problem with this kit Gaston, the secondary armament casements are all the wrong shape. The Aoshima ones are correct. I am surprised you didn't pick that up...
Cheers
Warren
You may be right, I may be crazy.