_GOTOBOTTOM
Ships by Class/Type: Carriers
Topics on all types of carriers from the early 20th century to today.
Enterprise vs.Kamikaze!
TimReynaga
Staff MemberAssociate Editor
MODEL SHIPWRIGHTS
Visit this Community
California, United States
Joined: May 03, 2006
KitMaker: 2,500 posts
Model Shipwrights: 1,830 posts
Posted: Friday, November 29, 2013 - 04:05 PM UTC
(I began this build as a late entry to the Enterprise campaign, but rather than clog that thread up with updates I’ll be posting them here as a build log.)

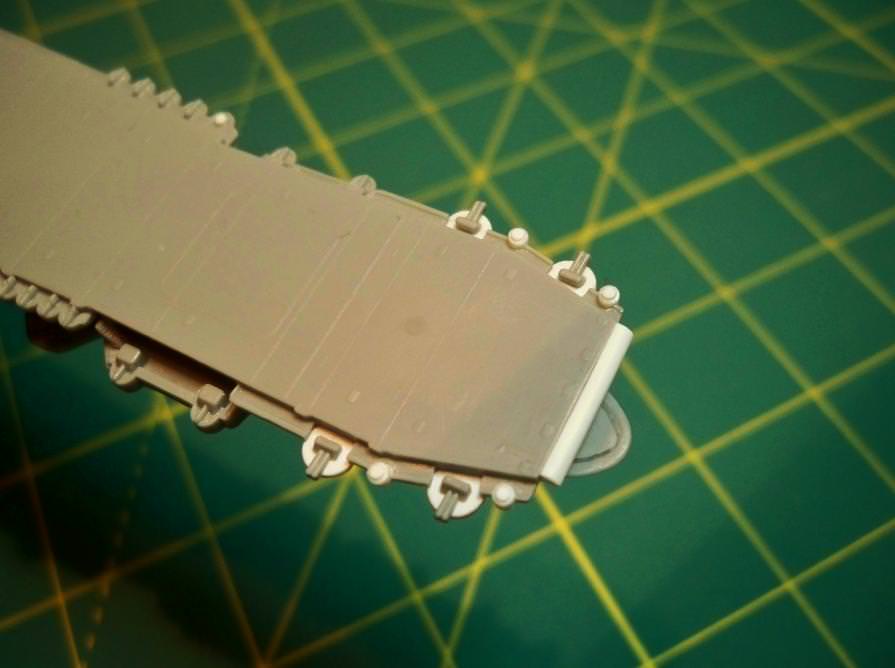
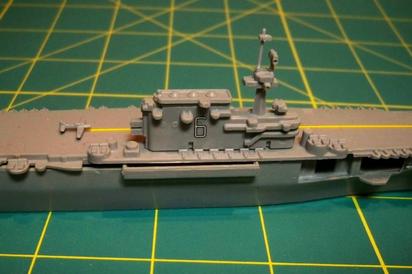
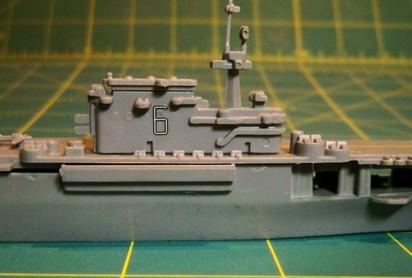
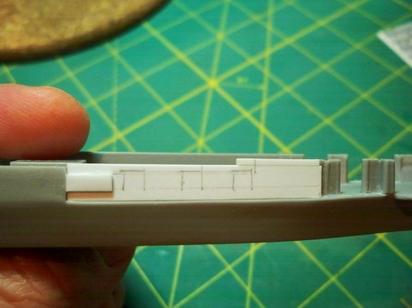
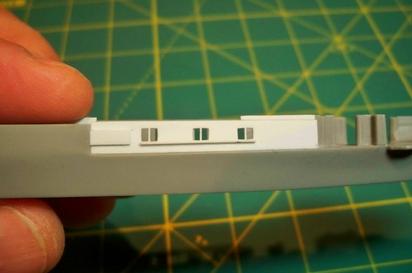
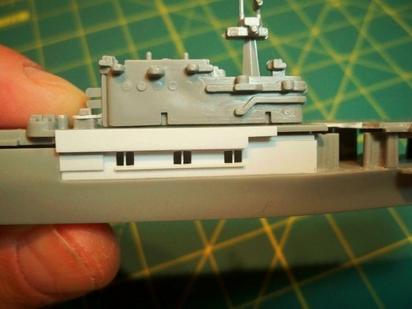
Ok, my Enterprise arrived yesterday and I'm ready to start on her. This one is the very simple Revell 1/1200 scale kit. I intend to build the model out of the box with minimal, if any, modifications—since I have only have a month to finish!
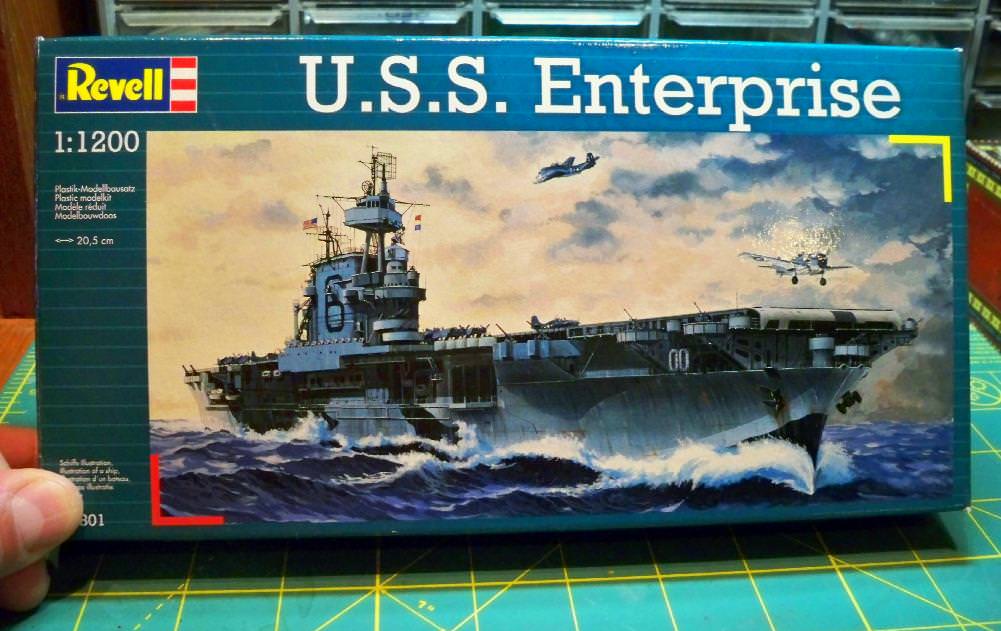
There’s a 2004 date on the Revell Germany instructions, but this little Enterprise is actually a repop of a much older molding. The model first appeared as a pre-assembled "Mini-Ships" toy by the Italian company Casadio in the early 1970s:

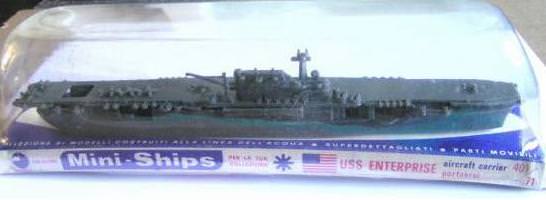
It has has also been marketed variously over the years by ESCI (Italy), Almark (England), Sablon (France), Model Power, MPC (USA), and probably others. It is a very simplified, snap-together model/toy intended for quick building, probably with wargamers in mind. Interestingly, it was designed to be issued as Enterprise's near-sisters Yorktown (CV-5) and Hornet (CV-8) as well, with a number of differences in each issue such as alternate airplanes, armament, different islands, even differently positioned elevators. I built the Hornet version with B-25s a few years ago, had a lot of fun with it.


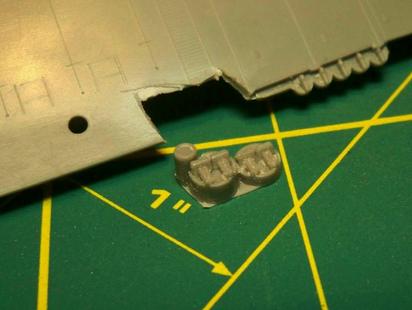
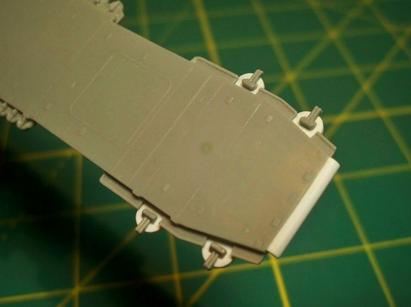
The model is quite simple, so I was able to test fit the basic hull, hangar, flight deck, and island pieces together pretty quickly. Like the related Yorktown and Hornet kits, Casadio’s old Enterprise has a mix of features from all three sisters, and so none of the kits is entirely correct for any one ship. Also, while the detail that is present is generally correct, much of it is a bit mushy. That’s ok, though, as it will help me to not worry about getting every detail right and just have fun with it!

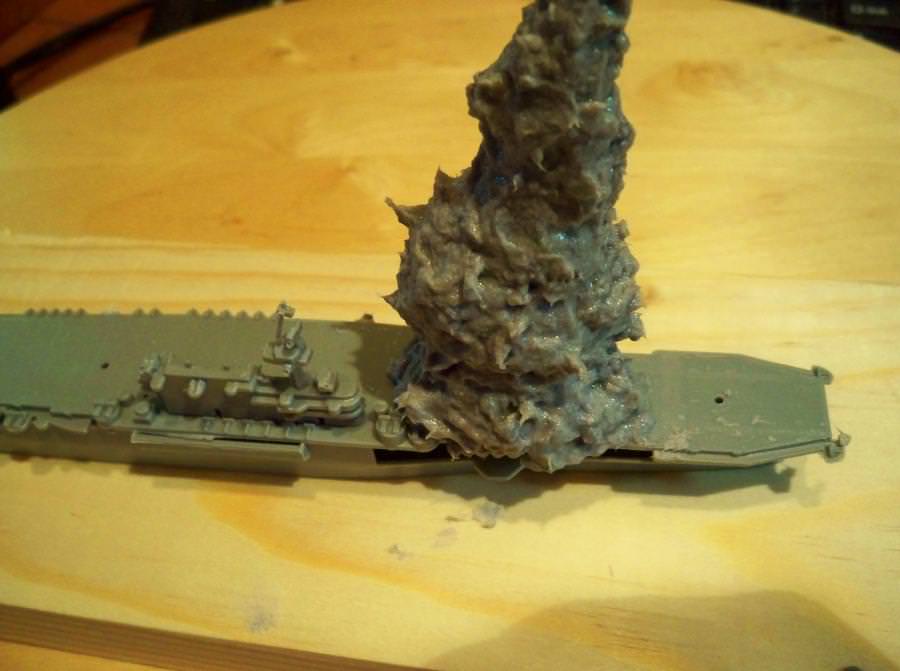
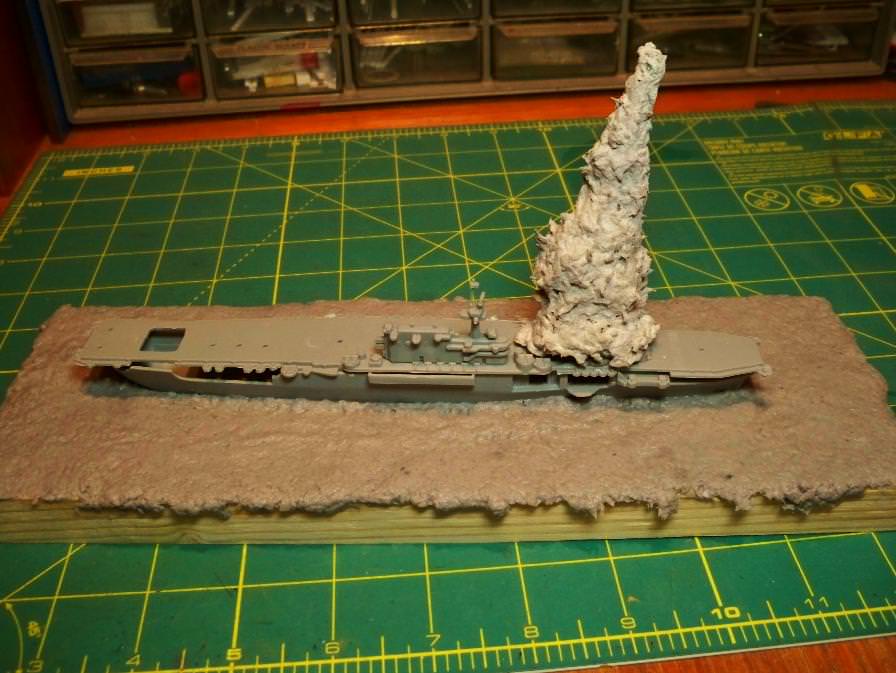
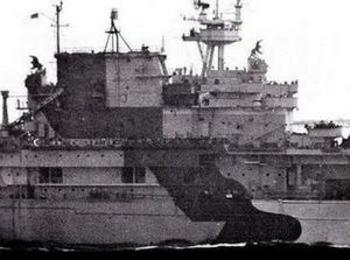
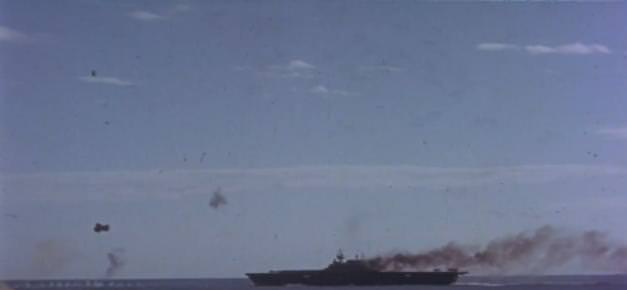
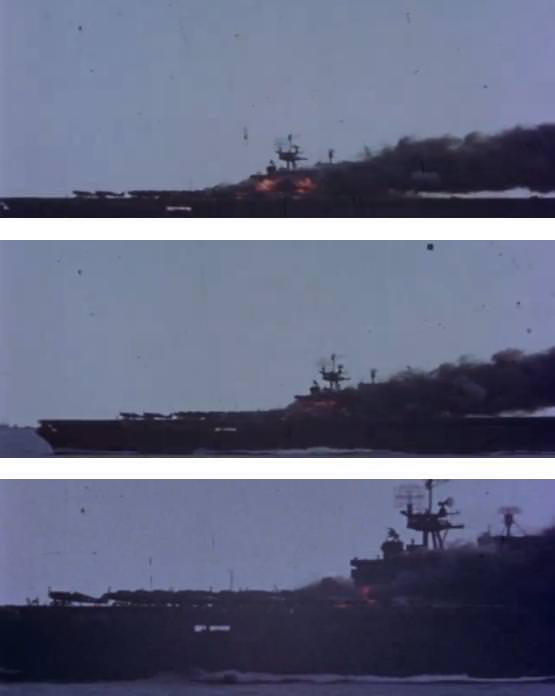
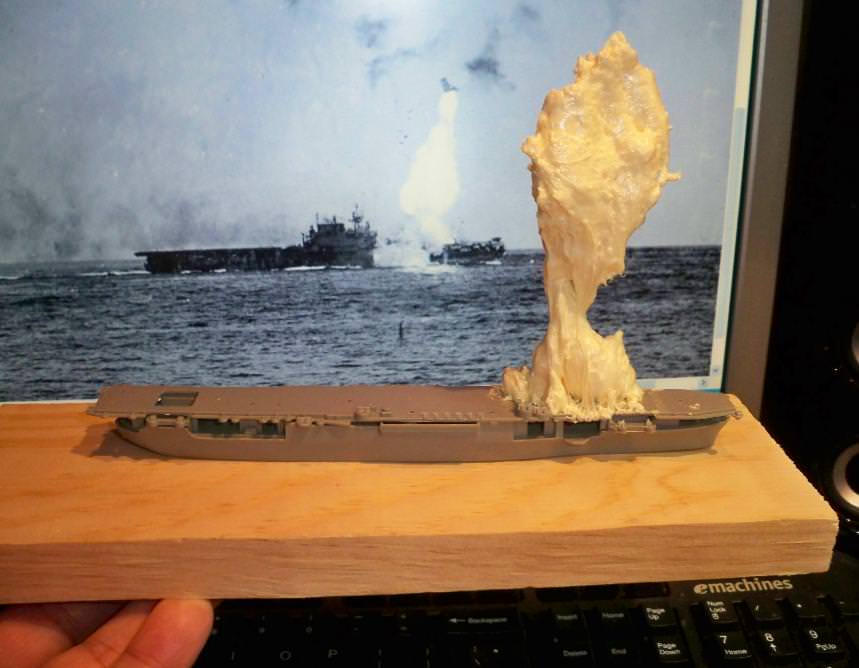
Having resolved to avoid the superdetailing trap, I still want to do something interesting with the model. I thought it might be cool to make a diorama depicting the famous May 14, 1945 Kamikaze strike that took Enterprise out of the war.

According to the USS Enterprise - The Most Decorated Ship of the Second World War website:

“On April 11, 1945, for the second time in less than a month, Enterprise was again attacked. Two Kamikazes crashed within yards of her, wrenching her hull, killing one, and wounding 18. Again Enterprise withdrew to Ulithi for repairs: again, three weeks later, she returned to combat off Okinawa. On May 11, the Kamikazes returned, this time catching Admiral Marc Mitscher's flagship Bunker Hill CV-17 with a deckload of planes. Bunker Hill was still afire when Mitscher transferred his Flag to Enterprise. Striving to end the Kamikaze attacks - costing the Navy "a ship and a half a day," in Admiral Nimitz's words - on May 12 Enterprise launched a night strike against Kyushu, targeting air fields and port facilities.

"Two days later, however, inbound Kamikazes once more began filling the fleet's radar screens shortly after sunrise. One of the planes penetrated the destroyer screen, hopping from cloud to cloud, carefully avoiding the anti-aircraft barrage and patrolling fighters. Shortly before 0700, the bomber dove on Enterprise, flipped over and plunged through Enterprise's flight deck just aft of the forward elevator.”

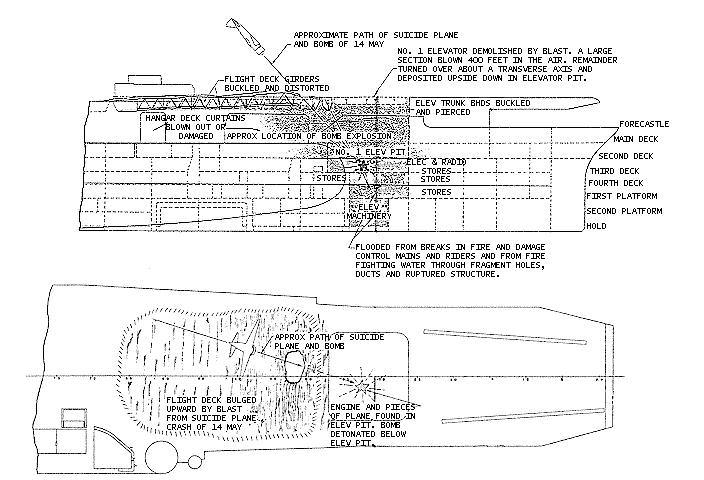
USS Enterprise 14 May 1945 Damage Report


Now I just need to figure out a way to replicate that dramatic explosion plume. Any ideas...?


TAFFY3
Visit this Community
New York, United States
Joined: January 21, 2008
KitMaker: 2,531 posts
Model Shipwrights: 1,244 posts
Posted: Saturday, November 30, 2013 - 03:03 AM UTC
[Quoted] Now I just need to figure out a way to replicate that dramatic explosion plume. Any ideas...?

I've seen that expanding foam insulation, that comes in an aerosol can, used to good effect for replicating explosions. Al
TimReynaga
Staff MemberAssociate Editor
MODEL SHIPWRIGHTS
Visit this Community
California, United States
Joined: May 03, 2006
KitMaker: 2,500 posts
Model Shipwrights: 1,830 posts
Posted: Saturday, November 30, 2013 - 03:21 AM UTC

Quoted Text

[Quoted] Now I just need to figure out a way to replicate that dramatic explosion plume. Any ideas...?

I've seen that expanding foam insulation, that comes in an aerosol can, used to good effect for replicating explosions. Al


Interesting idea Al... I actually have a can of that stuff in the garage; Hilti Grip Filler Foam that "fills voids and penetrations, seals gaps in concrete forming."
I'll give it a shot this afternoon.
grayghost666
#021
Joined: August 02, 2007
KitMaker: 2,458 posts
Model Shipwrights: 1,423 posts
Posted: Saturday, November 30, 2013 - 01:05 PM UTC
Hello Tim,
I would suggest using a cone of some sort when you use the foam. afterwards I would use a foam cutter to form your "cloud" to shape it the way you think it should look.
Just my .05 worth,
Cheers,
Bruce
warreni
Visit this Community
South Australia, Australia
Joined: August 14, 2007
KitMaker: 5,926 posts
Model Shipwrights: 2,624 posts
Posted: Sunday, December 01, 2013 - 12:02 PM UTC

Quoted Text

Now I just need to figure out a way to replicate that dramatic explosion plume. Any ideas...?


Cotton wool and white glue...
TimReynaga
Staff MemberAssociate Editor
MODEL SHIPWRIGHTS
Visit this Community
California, United States
Joined: May 03, 2006
KitMaker: 2,500 posts
Model Shipwrights: 1,830 posts
Posted: Monday, December 02, 2013 - 01:50 AM UTC
I tried out the Hilti Grip Filler Foam for the explosion plume, but the result was disappointing. The “urethane prepolymer with diphemylmethane diisocyanate” went on easily enough and looked promising at first, but as it kept expanding I found it impossible to control. In the end I couldn’t decide if it looked more like a pretty good representation of a plume–or like taffy!

Expanding foam material has potential and with some practice I might be able to use it for some future project, but for this one I want a medium that I can shape to more closely match that famous photo. Back to the drawing board...
CaptSonghouse
Visit this Community
California, United States
Joined: August 08, 2008
KitMaker: 1,274 posts
Model Shipwrights: 1,236 posts
Posted: Tuesday, December 03, 2013 - 09:31 AM UTC
Hi Tim!

I replicated that very scene 20 years ago with the Revell 1/400-something scale kit. In the near future I intend to do it again now that there is a 1/350 kit. For this much smaller scale, it would be tricky, but still possible.

I used plastic rod as an armature both vertically emerging from the deck and horizontally as crosstrees to support the mushroom head beneath the soaring elevator platform. The smoke material I used was synthetic cotton used for stuffing pilows and teddy bears because it doesn't clump and shrivel up when painted like natural cotton balls do.

The trick to working with smoke effects is to use small coils to build up a column. Since smoke roils, this method works better than simply stretching the cotton lengthwise for the full height. Please see my features "Retribution" and "The Greyhound and the Flea" for examples.

To finish my scene, I placed a light source underneath the elevator and gave it a yellow-orange cover.

Don't forget the smoke jetting sideways from the hangar deck opening. There are photos from other angles of this incident on the net.

Good luck!

--Karl
TimReynaga
Staff MemberAssociate Editor
MODEL SHIPWRIGHTS
Visit this Community
California, United States
Joined: May 03, 2006
KitMaker: 2,500 posts
Model Shipwrights: 1,830 posts
Posted: Tuesday, December 03, 2013 - 05:20 PM UTC
Karl,
Thanks for the advice. I checked out your builds, and I can see that you clearly know what you are talking about - your smoke effects look great! I had considered using cotton for this project too, but was concerned that the scale is so small that the synthetic fibers might be too visible. I have an idea that something more solid may be called for in this very small scale... maybe sculpted spackle or paper maché. Guess I'll have to experiment further.
melonhead
Visit this Community
Wisconsin, United States
Joined: July 29, 2010
KitMaker: 662 posts
Model Shipwrights: 67 posts
Posted: Wednesday, December 04, 2013 - 08:33 AM UTC
you may have better luck with cotton, or other types of synthetic stuffing material. you can use it in conjunction with other materials such as putty, or somethign else formable, that can be used to create most of it, and use whatever stuffing material to create the outer laters, which will look like smoke. paint can be applied to created different effects like smoke/fire. it can also support debris, and would work well to hide a supporting wire or whatever you plan on doing for the elevator door.
TimReynaga
Staff MemberAssociate Editor
MODEL SHIPWRIGHTS
Visit this Community
California, United States
Joined: May 03, 2006
KitMaker: 2,500 posts
Model Shipwrights: 1,830 posts
Posted: Thursday, December 05, 2013 - 03:30 PM UTC
My next attempt at the explosion starts with florist’s foam, which I carved down to the basic shape of the plume. The stuff is cheap, lightweight and easy to work – although after I roughed out this shape, my daughter asked me why I had put a Christmas tree on tp of my model..!
]
Actually, the plan is to use Celluclay, a common paper maché product I’ve often used in the past for oceans. The stuff works well enough for relatively horizontal sea surfaces, but forming it into the tall pointed plume would have been like trying to stack oatmeal. The florist's foam will, I hope, serve as a solid, lightweight armature on which to sculpt the sodden Celluclay pulp.
melonhead
Visit this Community
Wisconsin, United States
Joined: July 29, 2010
KitMaker: 662 posts
Model Shipwrights: 67 posts
Posted: Friday, December 06, 2013 - 05:06 AM UTC
only suggestion i have is to make sure that you coat the foam with something. as you probably have noticed already, it tends to create dust and creates dusty/gritty material. This will probably give you fits with trying to get things to adhere to it. You may want to test it on a scrap piece to see how it is going to react to what you plan on doing to it.
CaptSonghouse
Visit this Community
California, United States
Joined: August 08, 2008
KitMaker: 1,274 posts
Model Shipwrights: 1,236 posts
Posted: Friday, December 06, 2013 - 05:50 AM UTC
Hi Tim!

You may also want to test how the foam deals with water as well--it would be a shame to have it dissolve underneath the celluclay.

--Karl
melonhead
Visit this Community
Wisconsin, United States
Joined: July 29, 2010
KitMaker: 662 posts
Model Shipwrights: 67 posts
Posted: Friday, December 06, 2013 - 01:36 PM UTC

Quoted Text

Hi Tim!

You may also want to test how the foam deals with water as well--it would be a shame to have it dissolve underneath the celluclay.

--Karl

definately this. the foam is going to soak up anything that contains liquid.
TimReynaga
Staff MemberAssociate Editor
MODEL SHIPWRIGHTS
Visit this Community
California, United States
Joined: May 03, 2006
KitMaker: 2,500 posts
Model Shipwrights: 1,830 posts
Posted: Friday, December 06, 2013 - 05:20 PM UTC
Jesse and Karl,

Thank you both for your thoughtful advice for working with the florist’s foam, but before I read your posts tonight I had already charged ahead and applied the Celluclay. Fortunately, the gritty texture didn’t seem to create any adherance problems, and the foam doesn’t have any problem with water – at least so far!


I shaped the Celluclay around the foam core in my best imitation of the plume in the photograph. There is quite a lot of water in the stuff, but the foam doesn't appear to be affected by the moisture. I’ll let it dry overnight before proceeding further. Hope I don’t wake up to a melted mess...
CaptSonghouse
Visit this Community
California, United States
Joined: August 08, 2008
KitMaker: 1,274 posts
Model Shipwrights: 1,236 posts
Posted: Saturday, December 07, 2013 - 08:31 AM UTC
Hi Tim!

Looks like its coming along in texture--the challenge will be the coloring.

Also, as you get towards completion, don't forget there was a tail-less F6F on its nose at the forward edge of the missing elevator.

--Karl
TimReynaga
Staff MemberAssociate Editor
MODEL SHIPWRIGHTS
Visit this Community
California, United States
Joined: May 03, 2006
KitMaker: 2,500 posts
Model Shipwrights: 1,830 posts
Posted: Saturday, December 07, 2013 - 03:26 PM UTC
The plume has dried ok, no problems so far; the florist’s foam and the Celluclay seem to be compatible. As for the colors, well, I’ll figure that out later. For now I’ve applied the Celluclay that will make up the ocean base.


While the sea base dries I’ve removed the ship in order to add more material to fill out the plumes blowing out the sides of the hangar deck.
Unlike their Japanese counterparts with their hangar decks fully enclosed within the ship’s structures, American carriers had open hangar sides that were were enclosed with lightweight, roll type doors. These openings tended to dissipate the force of bomb hits in combat. As a result, Enterprise fared much better than Japanese carriers suffering similar hits. In the picture, while the elevator is thrown hundreds of feet in the air, it is evident that much of the force of the blast is also vented harmlessly out the sides through the hangar doors.
TAFFY3
Visit this Community
New York, United States
Joined: January 21, 2008
KitMaker: 2,531 posts
Model Shipwrights: 1,244 posts
Posted: Saturday, December 07, 2013 - 03:56 PM UTC
Great start, Tim. I think it's looking very convincing. Al
Gremlin56
Joined: October 30, 2005
KitMaker: 3,897 posts
Model Shipwrights: 3,301 posts
Posted: Monday, December 09, 2013 - 05:30 AM UTC
Magic Tim, looks very convincing.
TimReynaga
Staff MemberAssociate Editor
MODEL SHIPWRIGHTS
Visit this Community
California, United States
Joined: May 03, 2006
KitMaker: 2,500 posts
Model Shipwrights: 1,830 posts
Posted: Tuesday, December 10, 2013 - 05:51 PM UTC
Having made a good start on the plume, I turn now to the ship. I plan to make this build simple and quick, since it has to be completed by the end of this month for the Enterprise campaign. I had resolved to build it out of the box without making time consuming modifications. Of course, this resolve broke down almost right away!

This old Casadio kit from the early 1970s (now made by Revell Germany) is very simple; it was actually first marketed as a pre-assembled game piece for wargamers. It can still be snapped together entirely without glue. Still, it is basically accurate, at least in a general way, and most of the kit’s shortcomings I can live with for a quick build. The one flaw that really bothers me though, is that awful, blunt bow.

The kit bow looks more like that of some fat tanker than the sharp, sleek fast carrier bow sported by Enterprise, so I decided to improve it a little. Before starting, I filled the inside of the part forward with cyanoacrylate – because the amount of material that needed to be removed actually exceeded the thickness of the plastic! Then it was just a few minutes of carving and sanding.

It still isn’t perfect, but it is at least a little better.

CaptSonghouse
Visit this Community
California, United States
Joined: August 08, 2008
KitMaker: 1,274 posts
Model Shipwrights: 1,236 posts
Posted: Wednesday, December 11, 2013 - 05:25 AM UTC
Nice corrective work, Tim! Would you be prepared to do that on the bow of the Merit Hornet?

--Karl
TimReynaga
Staff MemberAssociate Editor
MODEL SHIPWRIGHTS
Visit this Community
California, United States
Joined: May 03, 2006
KitMaker: 2,500 posts
Model Shipwrights: 1,830 posts
Posted: Wednesday, December 11, 2013 - 01:59 PM UTC

Quoted Text

Nice corrective work, Tim! Would you be prepared to do that on the bow of the Merit Hornet?

--Karl


My little CV-6 from the 1970s can be had for less than ten bucks retail, so making a few basic corrections is no big deal—but I'd be seriously annoyed to have to make this kind of fix on a new, $350 plus kit!

TimReynaga
Staff MemberAssociate Editor
MODEL SHIPWRIGHTS
Visit this Community
California, United States
Joined: May 03, 2006
KitMaker: 2,500 posts
Model Shipwrights: 1,830 posts
Posted: Friday, December 13, 2013 - 04:15 PM UTC
The flight deck is next. I’ve been striving to keep modifications to a minimum, but the kit aft elevator is in the down position, which is wrong for the moment I want to depict. None of the available photographic evidence documents the elevator’s position when the ship was hit on 14 May 1945, but U.S. carrier doctrine at the time was to keep all elevators in the up position in combat when they weren't in use. That way if the ship was hit and the elevator rendered unable to move, flight operations could still continue. This scenario actually happened off Guadalcanal in 1942, when Enterprise’s number one elevator was jammed in the up position following a jarring near miss, leaving her for a time the only operating U.S. carrier in the Pacific. So it is a pretty sure bet that the elevators were up as Enterprise secured to fend off Kamikaze attacks in 1945. I filled in the hole with .030 inch plactic sheet to show an “up” after elevator.

The kit shows the ship before her 1943 refit when the AA was upgraded, so the 30 additional 40mm guns along the deck edge that distinguished the Enterprise from her sisters would be absent. I had decided to ignore the partially inaccurate configuration of the 20mm gun galleries along the deck edges, but all those missing 40mm mounts were just too much! The tubs would be no problem; simple .160 inch discs of plastic would serve. The 40mm twins I would steal from quad mounts. I cut off the 40mm quads on the flight deck in front of the island (they would be hidden under the explosion plume anyway). From these I cut the 40mm twins to be mounted to the forward deck edges.

So far so good... but now I was out of 40mms. I had planned to only replace those most visible 40mms forward and ignore the others since I could do this with just the contents of the kit; but of course, once I started I couldn’t leave the job half done!

So it was off to Hobby Lobby, and twelve bucks later (on sale) I was in possession of two extra kits to raid for parts! This yielded all the 40mm twins I needed, so the mounts aft and the one behind the island went on easily. In fact, I now had so many surplus parts that I went ahead and fixed up the 20mm galleries and directors as well. This went quickly, with the only modifications being removing a few of the 20mms from their tubs and replacing them with “directors” made from .039 inch plastic discs. On the forward end, I also cut the flight deck back a bit and replaced the round down so the 40mm twins to come on the forecastle deck below later could bear.

The forward 40mm director discs were placed on plastic cylinder tubs next to the gun mounts.

These simple modifications, along with moving some of the imperfectly placed kit 20mm galleries around a bit, bring the flight deck to a configuration closer to that of the 1945 Enterprise.
TimReynaga
Staff MemberAssociate Editor
MODEL SHIPWRIGHTS
Visit this Community
California, United States
Joined: May 03, 2006
KitMaker: 2,500 posts
Model Shipwrights: 1,830 posts
Posted: Tuesday, December 17, 2013 - 01:43 PM UTC
As with the flight deck the kit hull is generally accurate, but there are some issues. The worst problem is of course the blunt bow, but the starboard side area under the island needs help too. I assembled one of the spare kits out of the box without modifications as a comparison; the hull on the model is very plain, and the exaggerated boxy structure under the island looks like some sort of giant horse trough or planter or something.


On the real thing that rectangular structure was a little less prominent, and there was quite a lot of other detail:


I could live with the box, maybe reduce it some, but the kit also lacks the three highly visible intakes and the recessed section on the hull sides. The simplest solution was to cut out the offending area and replace it all with sheet plastic.
Removed by original poster on 12/18/13 - 17:01:22 (GMT).
TimReynaga
Staff MemberAssociate Editor
MODEL SHIPWRIGHTS
Visit this Community
California, United States
Joined: May 03, 2006
KitMaker: 2,500 posts
Model Shipwrights: 1,830 posts
Posted: Thursday, December 19, 2013 - 04:00 PM UTC
The next item on the hull was the hangar doors. Were Enterprise’s hangar exterior roll doors open or closed when she was hit?

It is not clear from photos of the attack how the doors were positioned, but the Enterprise’s Operations Manual (Chapter 43 – Damage Control) refers to “air-tight integrity” as part of “Material Condition Afirm” which was set when the ship was at General Quarters: “Procedure: Condition Afirm represents the maximum water-tight integrity of the ship. Access and living conditions are secondary to the requirements of water-tight and air-tight integrity”. From this and other references to “air-tight” and “gas-tight” integrity in the U.S.S. Enterprise General Organization and Ship’s Regulations, I surmised that the hangar roll doors would have been closed in combat to assure some degree of air-tight integrity to the hangar spaces with all those stowed aircraft. It wouldn’t do to have a fireball from a near-miss ignite those flammable airplanes inside the ship, right?

The kit comes with the forward and after hangar roll doors shown open, and there is no depiction at all of the doors on the port side amidships. Since it would seem that the hangars would have been secured when the ship was under attack, my plan was to close up the open hangar doors with sheet plastic and simply represent the closed doors amidships with paint. Too bad really, because I liked the look of those open hangars, but I had to go with the historical evidence!

Then I came across some interesting color movie footage on You Tube of the Big E under air attack off Kyushu 20 March 1945 (http://www.youtube.com/watch?v=zJ6QOR0JQrY):


These harrowing images clearly show both the forward and after hangar doors open during the attack – you can see daylight through the hangar. The ship would have been at general quarters under Material Condition Afirm at the time.


In addition, there is other movie film (http://www.youtube.com/watch?v=neovIdK7Iko) taken the following month (11 April 1945) of Kamikaze attacks on Enterprise and the Bunker Hill which shows Enterprise to have had her hangar doors open during combat then as well. Apparently the air and gas-tight integrity referenced in the operations manual didn’t include the hangar.

Anyway, this worked out well for my project, since I think those open hangars look cool!
 _GOTOTOP