_GOTOBOTTOM
Ships by Class/Type: Cruisers
Topics covering cruisers both past and present.
Trumpeter HMS Belfast & WEM PE Set
warreni
Visit this Community
South Australia, Australia
Joined: August 14, 2007
KitMaker: 5,926 posts
Model Shipwrights: 2,624 posts
Posted: Wednesday, December 25, 2013 - 06:48 PM UTC
Hello Everyone.

Late last year I received a couple of review samples in the post, one direct from Big Boss Jim and one direct from the lovely people at White Ensign Models who had only just released the set which was developed by Peter Hall, aka Mad Pete.

Both these items have been reviewed by either myself or Jim so I thought I would do something I had been wanting to do for a long time that will show up the good and the bad of the two kits, do a naked build.. No paint, no filler just hopefully nice, clean construction showing off where the WEM PE enhances the detail on the Belfast, and how the kit looks naked.. Parental Guidance not required..

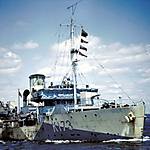
But first up a little background on the Belfast. It was launched just before UU UU 2 and spent the first part steaming around madly after German ships until a mine inconvieniently got in the way and sent her back to port for major repairs. After that she started madly chasing again and helped sink the Scharnhorst during the Battle of North Cape. All that from memory so please excuse anything that is wrong..

OK, over to the important bits...

What's in the box? Well as I said before the reviews have already been done but here are a series of photos of the plastic and brass to show what each is like before being ravaged ..


Now some more detail shots of the PE set..
First the Walrus and 8 barrel pom pom PE,

Another pom pom set,

Then one of the two Walrus sets

Some relief etched parts

Catapults and cranes


OK then time to look at some of the plastic..
The hull

I am not sure why Trumpeter changed over two this style of hull construction from the waterline method. I liked it as it was easy to do a waterline model if you wanted. This way it will be hard and there is no indent etc to guide you through the waterlining process.
I am sure the function of thise two little holes at the bottom of the bow will become clear..

Just behind the bow

Near the stern..

When I first saw this I thought there had been a moulding problem but looking at photo of the actual ship they are there as well. Well done Trumpeter detail and moulding wise, both are excellent.
Then we have the sprue with all the internal bracing for the hull

Detail of one of the braces

Next we have some more parts including various decks etc showing the planking moulded into the decks..


Right, first step in the construction process is..


While removing the hull from its sprues I noticed that Trumpeter had used a different type of sprue attachment point on the bottom og the hull to the top..

I have seen these before and they make it much easier to remove the part from the sprue and not mar the surface detail by accident.

After removing the sprues and doing a small amount of clean up required I put the supports in the hull and the fit is so good you don't need any glue for them to stay firmly in place. In fact I put the two hull halves together and theven with no glue or clamping the fit was like this..


I then went ahead and using Tamiya Extra Thin Liquid Cement I ran it around the seam inside the hull and applied some clamps in strategic positions..


Then after it had sat around for an hour drying I went back and applied cement to all the supports. Fit is excellent . When I do a little sanding etc I will take some more pictures to show the resulting seam, or lack thereof..

Cheers for now
Warren


Longshanks8
Visit this Community
England - South West, United Kingdom
Joined: July 04, 2013
KitMaker: 430 posts
Model Shipwrights: 390 posts
Posted: Wednesday, December 25, 2013 - 08:51 PM UTC
Hi Warren,

Seasons greetings!


Will be watching with interest

Cheers Kev
warreni
Visit this Community
South Australia, Australia
Joined: August 14, 2007
KitMaker: 5,926 posts
Model Shipwrights: 2,624 posts
Posted: Wednesday, December 25, 2013 - 09:10 PM UTC

Quoted Text

Hi Warren,

Seasons greetings!


Will be watching with interest

Cheers Kev


Season's Greetings to you as well my friend.

Welcome aboard for the voyage.

Cheers
Warren
Gremlin56
Joined: October 30, 2005
KitMaker: 3,897 posts
Model Shipwrights: 3,301 posts
Posted: Wednesday, December 25, 2013 - 09:27 PM UTC
Gidday Warren,
The WEM PE set looks good, would appear to be slghtly thicker metal sheet than some of the sets I have bought from them but that is difficult to judge from a photo. I think you will find the holes under the bow have something to do with how the paravanes were deployed.
Cheers,
warreni
Visit this Community
South Australia, Australia
Joined: August 14, 2007
KitMaker: 5,926 posts
Model Shipwrights: 2,624 posts
Posted: Wednesday, December 25, 2013 - 09:45 PM UTC

Quoted Text

Gidday Warren,
The WEM PE set looks good, would appear to be slghtly thicker metal sheet than some of the sets I have bought from them but that is difficult to judge from a photo. I think you will find the holes under the bow have something to do with how the paravanes were deployed.
Cheers,


As an old ad said, not as thick as some..

The thickest I have found is some Trumpeter stuff that almost needed as gas-axe to remove it from the sprue! The attachment points are nice and thin which means it is easy to remove from the fret with the normal method I use, a larger hobby knife.

Cheers Julian
Warren
warreni
Visit this Community
South Australia, Australia
Joined: August 14, 2007
KitMaker: 5,926 posts
Model Shipwrights: 2,624 posts
Posted: Thursday, December 26, 2013 - 07:05 PM UTC
Welcome to another update in the build log for Trumpeter's 1/350 HMS Belfast using a WEM PE Set.

First up we have the start of the PEing of the ship with a couple of water-proof doors at the front of the aft deck, below the foredeck overhang.

Here is a picture of what the waterproof doors look like on the fret..


And here we have the door as moulded on the bulkhead by Mr Trumpeter..


And here is the replacement PE door in position..


Then to better illustrate where the part goes..


Then I glued the foredeck in position and let it dry overnight.


So here are some views of the hull so far with decks glued in position..


After removing the clamps this morning I decided to complete Step 1 by attaching the prop shafts and supports to the hull. This turned into a bit of a pain as the fit of the supports isn't that great. First u I tried gluing the supports to the hull then sliding the shafts through them, but the shafts were too thick and wouldn't go through the supports. First one I trimmed the shaft's diameter a little by scraping it until it went through. The other three I out the shafts through the supports first then glued the whole assembly to the hull. Much easier.


If I was doing a normal build at this point I would be tempted to paint the hull and then mask it up until I was finished.

But with no painting for this build it is on to Step 2!


warreni
Visit this Community
South Australia, Australia
Joined: August 14, 2007
KitMaker: 5,926 posts
Model Shipwrights: 2,624 posts
Posted: Thursday, December 26, 2013 - 08:32 PM UTC


Yep, step 2 of the build covers the light AA, 20mm, and part of the catapult.

First up he AA. The Trumpeter versions of the single and twin 20mm Oerlikons look like this when assembled..


Easy to assemble and you do have 3D barrels and support for the single 20mm.
Then we have the assembled WEM versions..


Lots more detail in both but they have the perceived problem of being a little 2D instead of the plastic 3D. All you really need to do to make them more 3D is put a few coats of liquid putty on the barrels and they will look much more 3D then with nothing. Them you could cut the cannon off the PE stand and attach it to the plastic stand you have removed the cannon from and you will get the 3D base as well. Mix and match can work quite well with PE.

But nothing like that is happening on this build my son! Straight OOB with Trumpeter and WEM bits..

Will get to the catapult tomorrow with any luck.

Cheers for now
Warren
Gremlin56
Joined: October 30, 2005
KitMaker: 3,897 posts
Model Shipwrights: 3,301 posts
Posted: Thursday, December 26, 2013 - 08:41 PM UTC
You must have big brass ones to do this without painting Mr. Inman Looking good so far though, nice clean work.
warreni
Visit this Community
South Australia, Australia
Joined: August 14, 2007
KitMaker: 5,926 posts
Model Shipwrights: 2,624 posts
Posted: Thursday, December 26, 2013 - 08:52 PM UTC

Quoted Text

You must have big brass ones to do this without painting Mr. Inman Looking good so far though, nice clean work.


I have to be really really careful whenever I sit down...
RedDuster
Visit this Community
England - South East, United Kingdom
Joined: March 01, 2010
KitMaker: 7,078 posts
Model Shipwrights: 6,649 posts
Posted: Friday, December 27, 2013 - 05:48 AM UTC
Hi Warren,

Following with interest, nice comparison between etched and moulded 20mm, reckon for the singles the kit pedestal with the WEM gun & shield.

If I may be a little critical, looks like the shield is on the wrong way round on the single, I may be wrong, but the mounting frame detail should be on the back of the shield.

Keep up the goos work

Si
warreni
Visit this Community
South Australia, Australia
Joined: August 14, 2007
KitMaker: 5,926 posts
Model Shipwrights: 2,624 posts
Posted: Friday, December 27, 2013 - 08:52 AM UTC
I think you may be right Simon.. I shouldn't rush things should I...
warreni
Visit this Community
South Australia, Australia
Joined: August 14, 2007
KitMaker: 5,926 posts
Model Shipwrights: 2,624 posts
Posted: Friday, December 27, 2013 - 07:32 PM UTC
Hello again.
Welcome back to the latest update on this build. After fixing up the splinter shield on the single 20,, that Simon so kindly pointed out I had installed the wrong way I returned to Step 2 and started the depth charge launchers. Trumpeter supplies a mixture of PE parts for the launchers and plastic for the depth charges themselves which makes sense in 1/350 scale

Each launcher consistes of a PE part you need to bend like so..


And then a track for the depth charges to roll down..


Then you insert the depth charges and all is well.. only problem is that the depth charges are a bit too big to slide into the cage and you have to sand them down a bit. With the second one I tied a different methof where I glued the charges into the cage then the track to the bottom of the charges. This made it much easier and you didn't need to hope and pray the track stayed in position while the glue dried..


After they were finished I started the catapult which bent very nicely after removal from the fret..


The piece on the right is supposed to be glued into the frame but I couldn't get it to stay in place to let me glue it, so I made some right angle brackets out of part of the PE fret and glued them on the inside of the frame..


Then after they dried the bottom piece sat in the frame perfectly and the brackets also provided a much more positive fixing point or six.

After that 16 brackets needed to be glued on the outside of the frame..

And a couple of small PE parts on the opposite side supposedly replicating hydraulic cylinders.. but they look very 2 dimensional. Is I wasn't building OOB I would probably replace them with round stock.

After that was done it was onto Step 3

This step covers the fixing of various pieces of deck equipment to the fore and aft decks, I got a few things attached.


To be continued....
warreni
Visit this Community
South Australia, Australia
Joined: August 14, 2007
KitMaker: 5,926 posts
Model Shipwrights: 2,624 posts
Posted: Saturday, December 28, 2013 - 02:35 PM UTC
Does anyone out there have a picture of the rear of the Belfast showing the depth charge racks etc?
warreni
Visit this Community
South Australia, Australia
Joined: August 14, 2007
KitMaker: 5,926 posts
Model Shipwrights: 2,624 posts
Posted: Saturday, December 28, 2013 - 08:11 PM UTC
Progress report dated 29/12/13..

Work continues on HMS Belfast project..

View of catapult in place with extensions also deployed..


WEM have not supplied cut to length ladders for any position but long runs that you have to measure and cut. I am used to most other companies idea od moulding ladders for specific positions.

Here is the plastic ladder on the side of the forward superstructure..


Then we have the replacement WEM ladder in place..


An improvement but why not supply ladders custom made for each spot?

Then we have nice brass hanger doors..


I have also finished most of the rest of that part of the superstructure and will post pics tomorrow. I did not want to rush the radar antennas before they are dry.

Cheers for now
Warren
Shanghaied
Visit this Community
Schleswig-Holstein, Germany
Joined: June 30, 2011
KitMaker: 189 posts
Model Shipwrights: 106 posts
Posted: Saturday, December 28, 2013 - 08:39 PM UTC
Hi Warren

Do you have the Anatomy of the Ship of the HMS Belfast. I think could be very helpful

Greetings from Shanghai
warreni
Visit this Community
South Australia, Australia
Joined: August 14, 2007
KitMaker: 5,926 posts
Model Shipwrights: 2,624 posts
Posted: Saturday, December 28, 2013 - 08:58 PM UTC
No Sir I do not have that book.
Guy_Tombs
Visit this Community
England - East Anglia, United Kingdom
Joined: November 25, 2013
KitMaker: 19 posts
Model Shipwrights: 14 posts
Posted: Saturday, December 28, 2013 - 11:27 PM UTC
Looking good so far, my dads got this kit but does all of his OOTB

warreni
Visit this Community
South Australia, Australia
Joined: August 14, 2007
KitMaker: 5,926 posts
Model Shipwrights: 2,624 posts
Posted: Sunday, December 29, 2013 - 07:55 AM UTC

Quoted Text

Looking good so far, my dads got this kit but does all of his OOTB


Smart man!

If he is smart he will stay that way and not catch PE disease like I have..

Cheers
Warren
RedDuster
Visit this Community
England - South East, United Kingdom
Joined: March 01, 2010
KitMaker: 7,078 posts
Model Shipwrights: 6,649 posts
Posted: Sunday, December 29, 2013 - 08:21 AM UTC
Looking good Warren, the catapult really does look the part.

Si
warreni
Visit this Community
South Australia, Australia
Joined: August 14, 2007
KitMaker: 5,926 posts
Model Shipwrights: 2,624 posts
Posted: Sunday, December 29, 2013 - 12:08 PM UTC

Quoted Text

Looking good Warren, the catapult really does look the part.

Si


Thanks Simon
warreni
Visit this Community
South Australia, Australia
Joined: August 14, 2007
KitMaker: 5,926 posts
Model Shipwrights: 2,624 posts
Posted: Sunday, December 29, 2013 - 09:53 PM UTC
This update comes from a land Downunder... Reminds me of a song..

Well I got some more of the stern finished last night before I made my request for some Belfast info, and thanks to Julian I will put it too good use tomorrow.


This close they look a bit two dimensional, but under a coat of paint and maybe a coat of Mr Surface or Mr Putty I am sure the PE guns would look fine.

Then I continued on the bridge superstructure..


90% of the day was taken up with the paravanes. They are about as good as I could get them. The surface are for the tail fins is so small the fins wouldn't stay in place so I had to make a slice in the tail and insert the horizontal tails in that then the vertical tail on top.

That's it for now

Cheers
Warren
warreni
Visit this Community
South Australia, Australia
Joined: August 14, 2007
KitMaker: 5,926 posts
Model Shipwrights: 2,624 posts
Posted: Monday, December 30, 2013 - 06:48 PM UTC
Well it doesn;t look like much got done but there are quite a few hours in these three photos..

The bridge deck is now waiting for the stuff that gets installed AFTER it is glued to the deck, like the mast and railings.


Then we have the start of the Centre decks..


If you were wondering why some doors have been replaced but not others it is because only one size door is supplied in the WEM set and not all doors are that size.

And there is yet a third type of door that Trumpeter provide PE for but the plastic doors are so good it is not worth replacing them.

CHeers
Warren
warreni
Visit this Community
South Australia, Australia
Joined: August 14, 2007
KitMaker: 5,926 posts
Model Shipwrights: 2,624 posts
Posted: Monday, December 30, 2013 - 07:23 PM UTC
Sorry Guys and Gals I forgot to post the steps of the build I was up too..


This next step with the mast has been skipped until the end..


WEM supplies only the two sets of torpedo doors in that area of the ship. Use Trumpeter plastic for the rest.

WEM supplies a small amout of PE for the 4in HA guns but it is not easy to see once everything is assembled.

Next step is Step 14 which I will carry out tomorrow.. maybe..


There is lots of PE in that step to replicate the boat storage supports far more accurately than the Trumpeter version.

Cheers
Warren

RedDuster
Visit this Community
England - South East, United Kingdom
Joined: March 01, 2010
KitMaker: 7,078 posts
Model Shipwrights: 6,649 posts
Posted: Tuesday, December 31, 2013 - 02:56 AM UTC
Looking good so far Warren,

Following with much interest.

Si
warreni
Visit this Community
South Australia, Australia
Joined: August 14, 2007
KitMaker: 5,926 posts
Model Shipwrights: 2,624 posts
Posted: Tuesday, December 31, 2013 - 08:01 AM UTC

Quoted Text

Looking good so far Warren,

Following with much interest.

Si


Thanks Simon. At east someone is watching...
 _GOTOTOP