

Hi Dave,
Looking great so far! The exta deck you had was from a ship with the Barbara anti-aircraft fit. With the Barbara program, the class gave up one of the after 15cm guns for a great augmentation in anti-aircraft armament. The Z32 never got this upgrade.
If you get any of the Dragon kits that had the Barbara fit, you'll be spending a lot more time with tiny parts.
Gary


Go to modelshipwrights.com for the current dynamic site!
Hosted by Jim Starkweather
DRAGON 1/350 GERMAN Z32 DESTROYER

GazzaS

#424

Joined: April 23, 2015
KitMaker: 4,648 posts
Model Shipwrights: 249 posts

Posted: Wednesday, December 23, 2015 - 09:31 AM UTC

berndm

Joined: March 26, 2014
KitMaker: 844 posts
Model Shipwrights: 151 posts

Posted: Monday, December 28, 2015 - 02:39 PM UTC
Good work so far and the amount of details right out of the box is impressive as well.
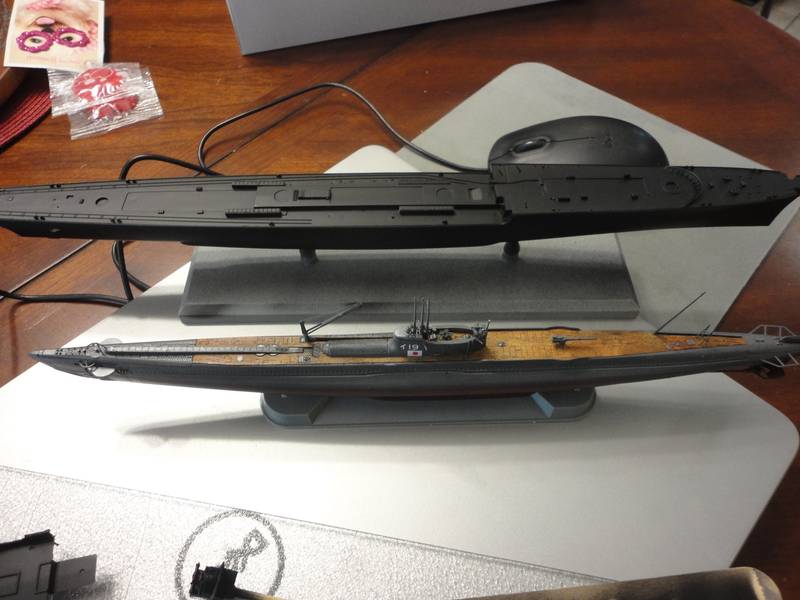
The difference, comparing the Dragon kit with my Trumpeter Z-30 kit is telling.
Guess that will be a head turner with this interesting camo scheme.
The difference, comparing the Dragon kit with my Trumpeter Z-30 kit is telling.
Guess that will be a head turner with this interesting camo scheme.

rolltide31
#377

Joined: June 27, 2010
KitMaker: 1,481 posts
Model Shipwrights: 1,332 posts

Posted: Monday, December 28, 2015 - 06:50 PM UTC
Gents,
Thanks for the kind comments. I continue to work on this fine kit and will have some updates with pictures this afternoon.
Gary - The Z-32 has a lot of small parts. Other kits with more is a little mind boggling.
Bernd, I am taking a different approach to this build by holding off on the paint until all of the sub assemblies are built. I should be laying some paint soon and tackling that interesting camo pattern. I just hope I can do it justice.
Thanks for stopping in, more soon.
Dave
rolltide31
#377
Joined: June 27, 2010
KitMaker: 1,481 posts
Model Shipwrights: 1,332 posts
Posted: Tuesday, December 29, 2015 - 12:58 AM UTC
Hi everyone,
Well the holidays have provided me with some opportunity to spend more time on the Z32. It is truly a great little kit.
I continued with building up the sub assemblies. I am taking a different approach to this build by building the sub assemblies before I lay down any paint.
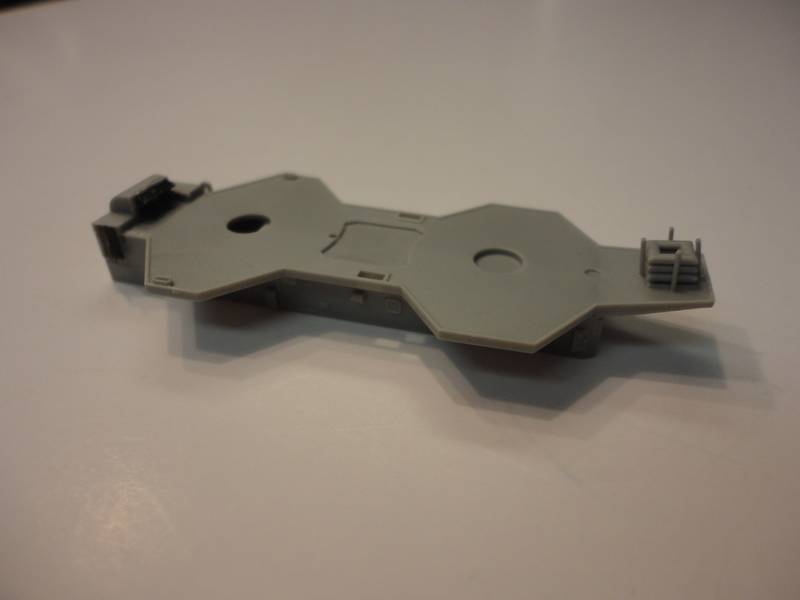
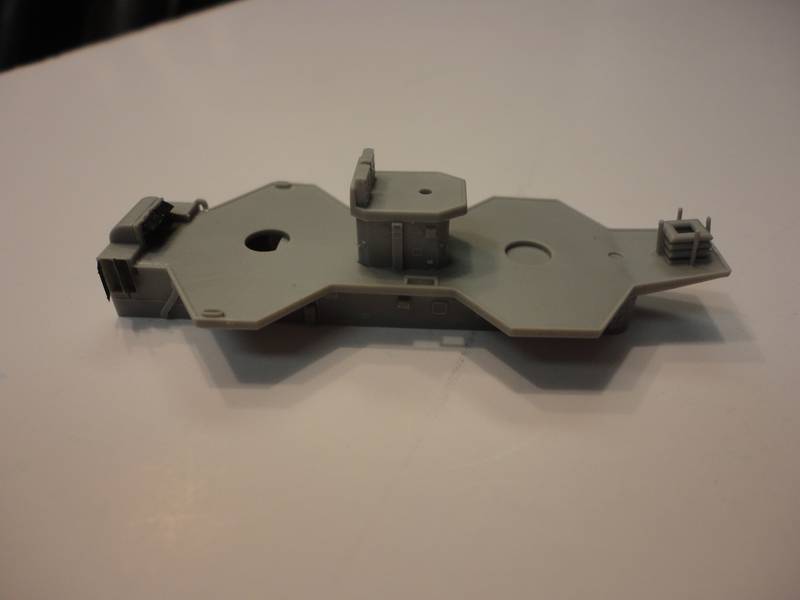
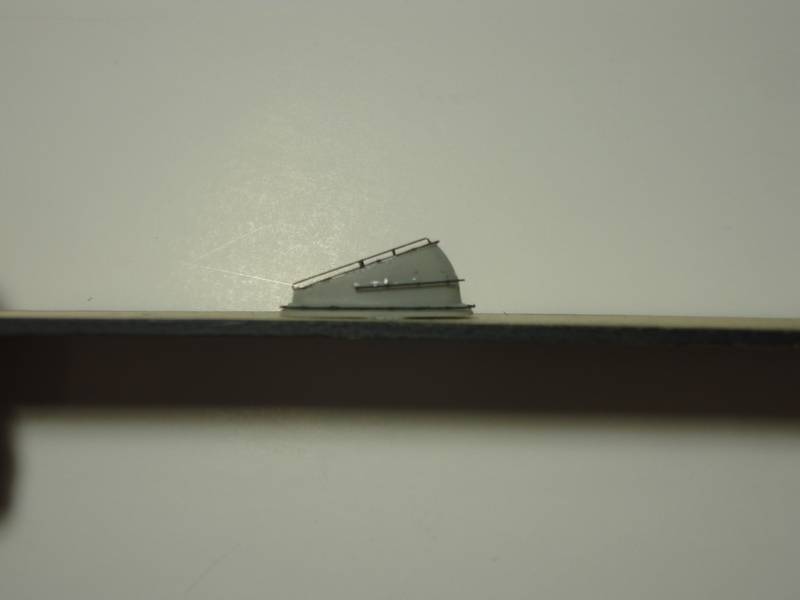
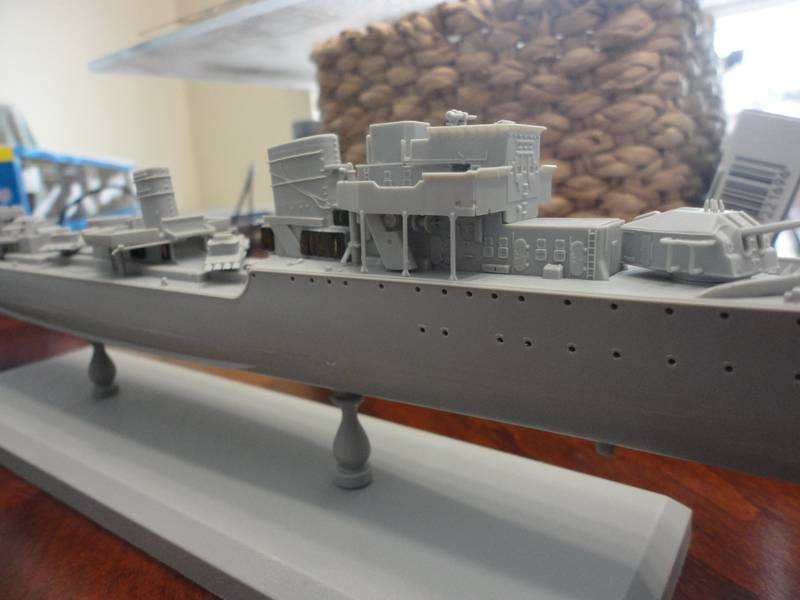
With that I continue to work on the bridge sub assembly. There is a enclosed stairwell that link the main deck with the bridge. Easily build and connected.
from the next picture you can see there is a little gap between the deck and the stairwell. I removed the reel on the bulkhead and shifted it right to see if this would resolve the gap, it did...a little. So I will fix with a little styrene shortly.
The next step was going back and applying the kit PE to the mid and aft housings.
as you can see the application of the correct decking was successful along with adding the life rafts.
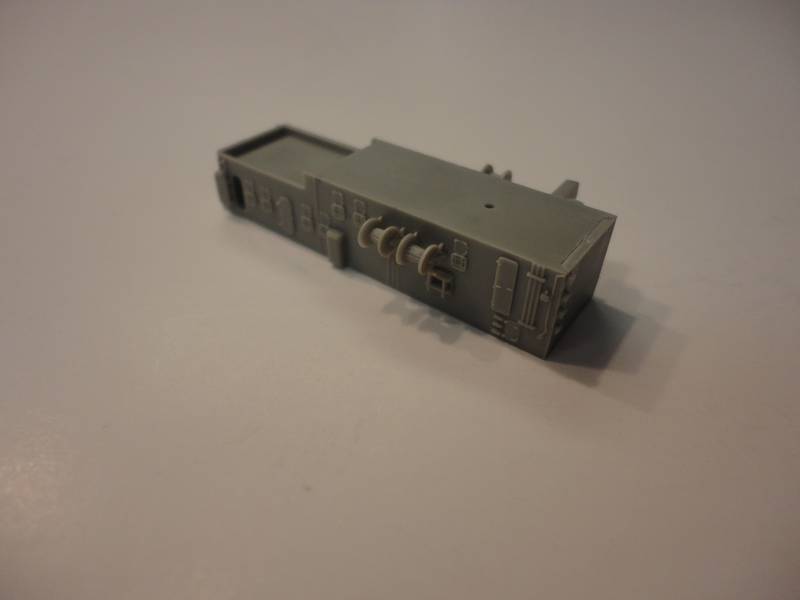
the next step was adding little details such as the reels on the side of the mid deck housing.
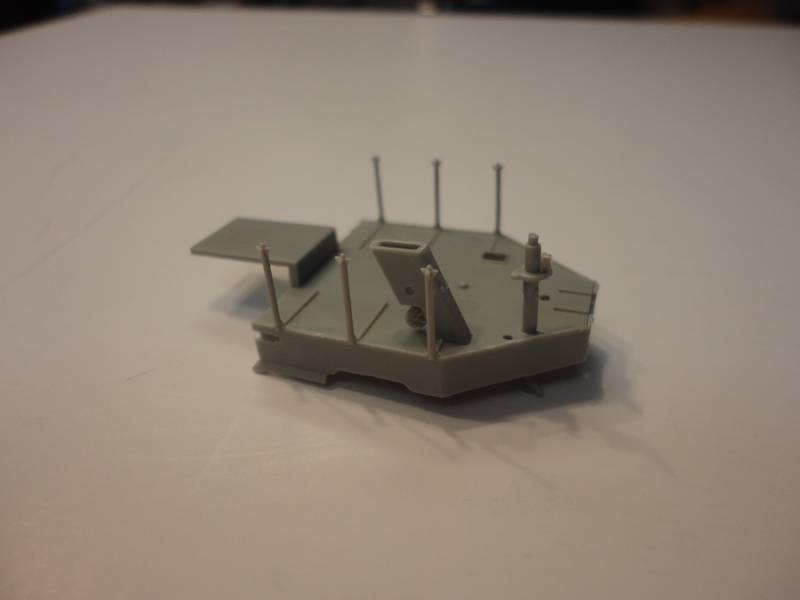
I also went a ahead and added the AA deck to the mid deck housing.
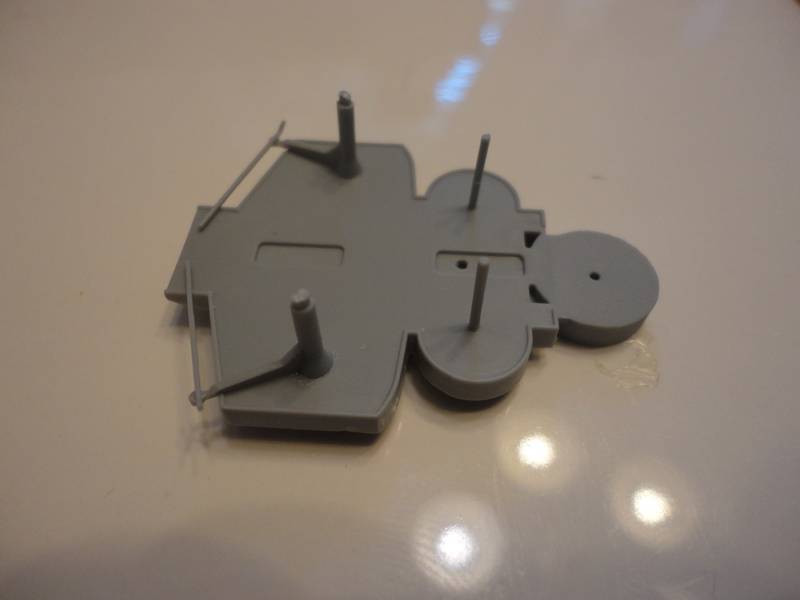
I also built up the torpedo tubes. I apologize for not providing a picture. Sometimes I get a little too focused and forget to snap away.
One word of caution for those who purchase and build this kit. The torpedo tubes comprise of 5 parts. The part that goes underneath and include the deck mounting has three slots and two pins for correct placement.
I originally mounted the part leaving the pins in place which forced the front of the tubes to point at a downward angle. I wasn't happy with that so I removed the mount, cut off the pins and reapplied. The three slots provide the correct positioning of the part without the pins so have no worries. They look much better now.
I had intended to take a picture of the instructions which clearly illustrates what I am referring to but alas again, I forgot. Will take a picture and provide soon.
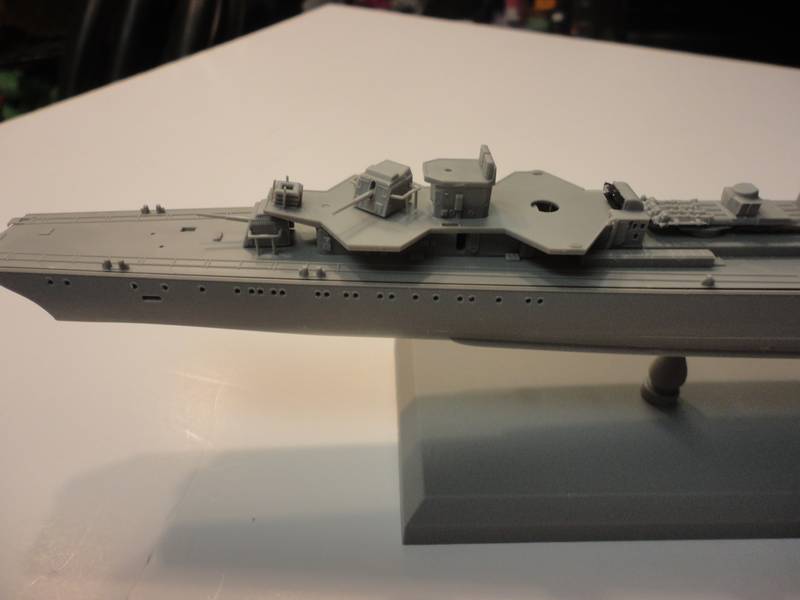
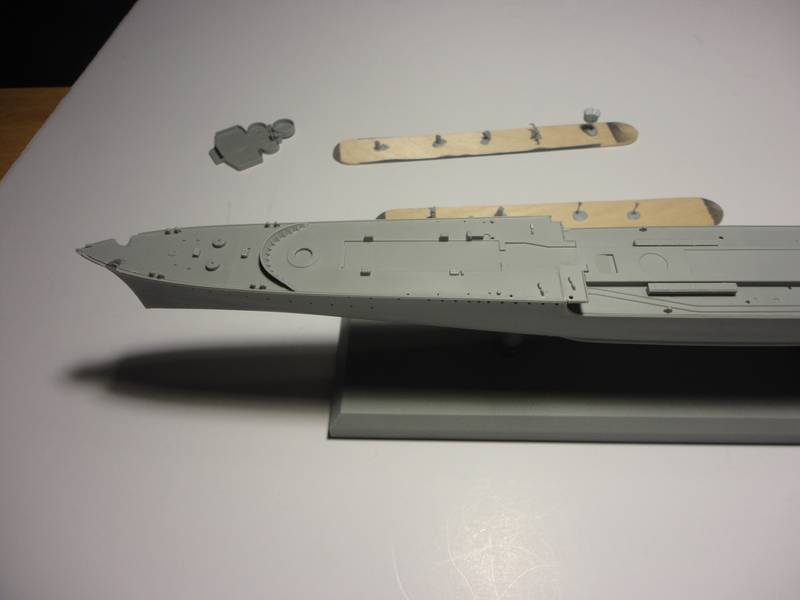
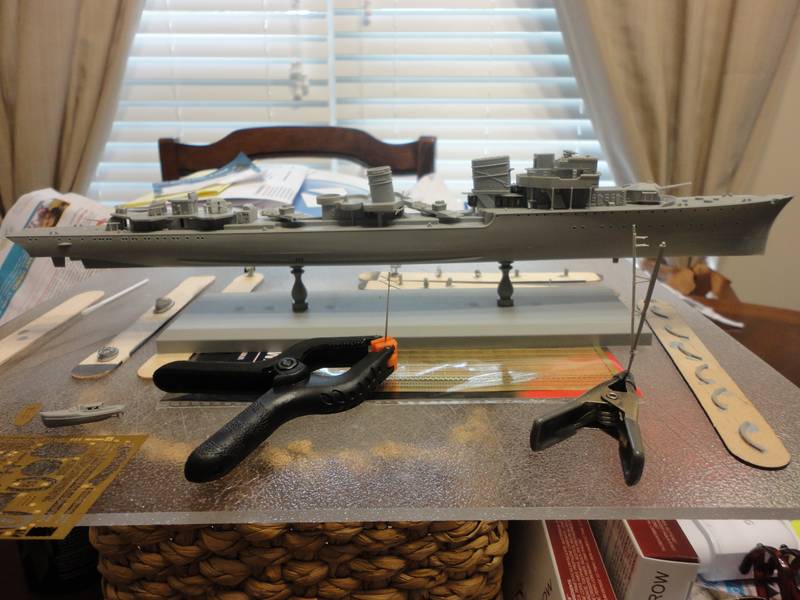
With that I have dry fitted everything so here is an overview of the project.
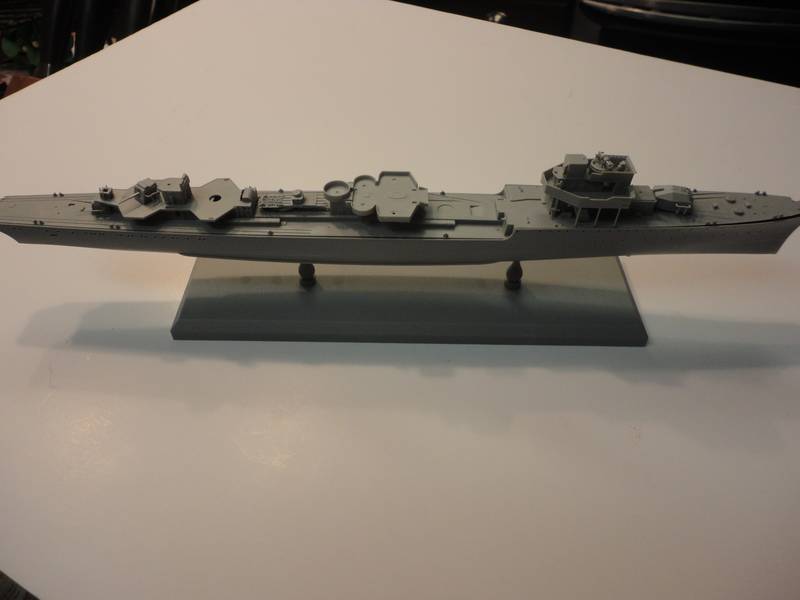
That is it for now. I plan on finishing up soon and will be applying the primer hopefully this weekend.
Thanks for stopping in and as always, comments, suggestions, and criticism is always welcome.
Dave
Well the holidays have provided me with some opportunity to spend more time on the Z32. It is truly a great little kit.
I continued with building up the sub assemblies. I am taking a different approach to this build by building the sub assemblies before I lay down any paint.
With that I continue to work on the bridge sub assembly. There is a enclosed stairwell that link the main deck with the bridge. Easily build and connected.
from the next picture you can see there is a little gap between the deck and the stairwell. I removed the reel on the bulkhead and shifted it right to see if this would resolve the gap, it did...a little. So I will fix with a little styrene shortly.
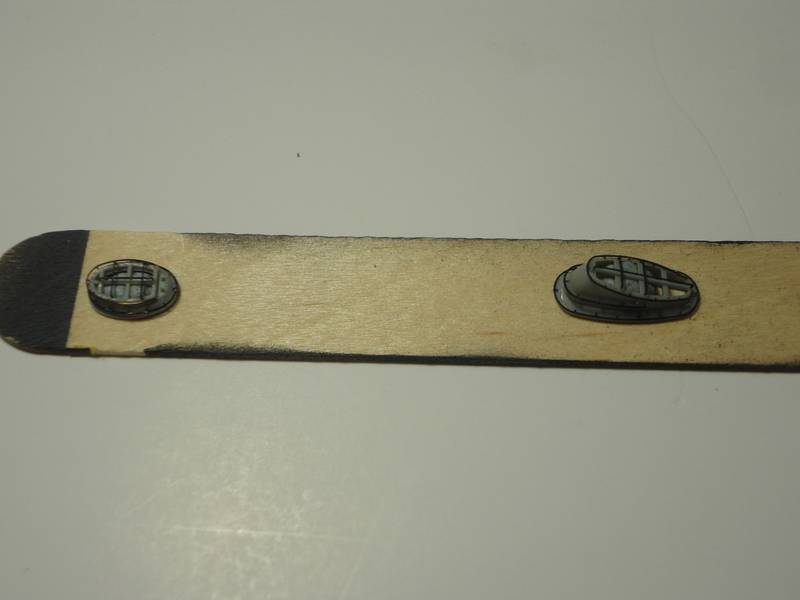
The next step was going back and applying the kit PE to the mid and aft housings.
as you can see the application of the correct decking was successful along with adding the life rafts.
the next step was adding little details such as the reels on the side of the mid deck housing.
I also went a ahead and added the AA deck to the mid deck housing.
I also built up the torpedo tubes. I apologize for not providing a picture. Sometimes I get a little too focused and forget to snap away.
One word of caution for those who purchase and build this kit. The torpedo tubes comprise of 5 parts. The part that goes underneath and include the deck mounting has three slots and two pins for correct placement.
I originally mounted the part leaving the pins in place which forced the front of the tubes to point at a downward angle. I wasn't happy with that so I removed the mount, cut off the pins and reapplied. The three slots provide the correct positioning of the part without the pins so have no worries. They look much better now.
I had intended to take a picture of the instructions which clearly illustrates what I am referring to but alas again, I forgot. Will take a picture and provide soon.
With that I have dry fitted everything so here is an overview of the project.
That is it for now. I plan on finishing up soon and will be applying the primer hopefully this weekend.
Thanks for stopping in and as always, comments, suggestions, and criticism is always welcome.
Dave

surfsup
Joined: May 20, 2010
KitMaker: 1,230 posts
Model Shipwrights: 1,212 posts

Posted: Tuesday, December 29, 2015 - 02:18 PM UTC
Looks like she is coming together quite nicely....CHeers Mark

RedDuster

Joined: March 01, 2010
KitMaker: 7,078 posts
Model Shipwrights: 6,649 posts

Posted: Tuesday, December 29, 2015 - 09:03 PM UTC
Nice progress Dave,
They are great kits, I do fancy building another, but after the Scharnhorst, in an early war fit.
Cheers.
Si
They are great kits, I do fancy building another, but after the Scharnhorst, in an early war fit.
Cheers.
Si
berndm
Joined: March 26, 2014
KitMaker: 844 posts
Model Shipwrights: 151 posts
Posted: Wednesday, December 30, 2015 - 02:09 AM UTC
Hi Dave, great progress on this one. Looks like a typical Dragon kit, excellent details, "intersting" fit and probably an easy to follow instruction sheet.
Happy modelling
Bernd
Happy modelling
Bernd
rolltide31
#377
Joined: June 27, 2010
KitMaker: 1,481 posts
Model Shipwrights: 1,332 posts
Posted: Thursday, January 07, 2016 - 03:50 AM UTC
Hi All,
Thank you all for the kind comments. I am almost at a point that I can begin applying some color to this great kit.
I did have some time to work on the Z-32 this weekend.
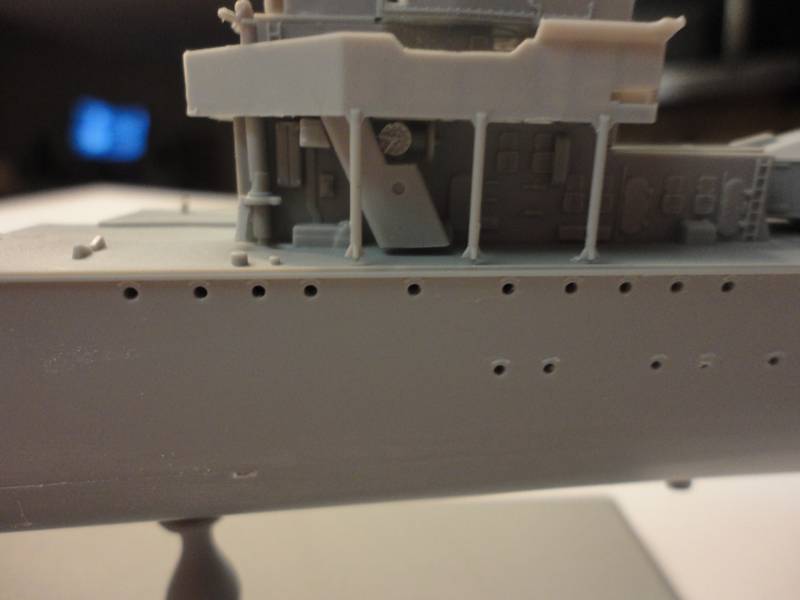
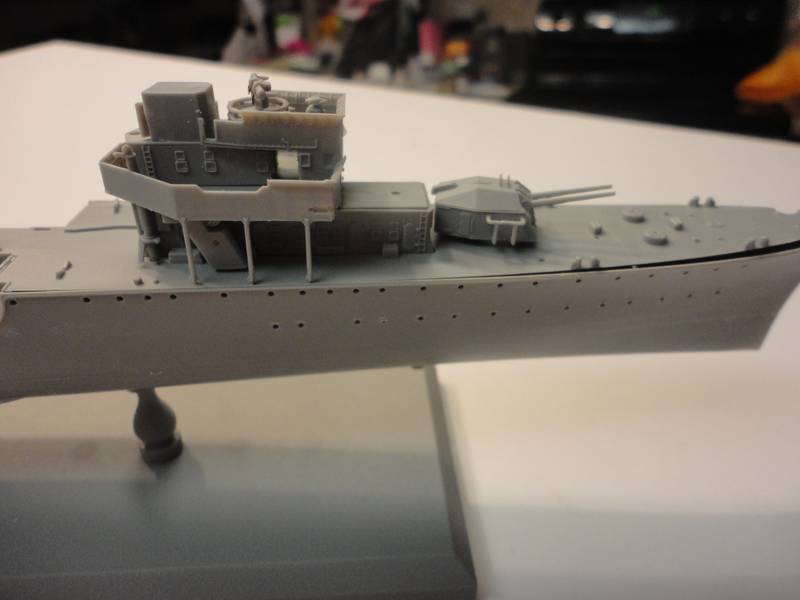
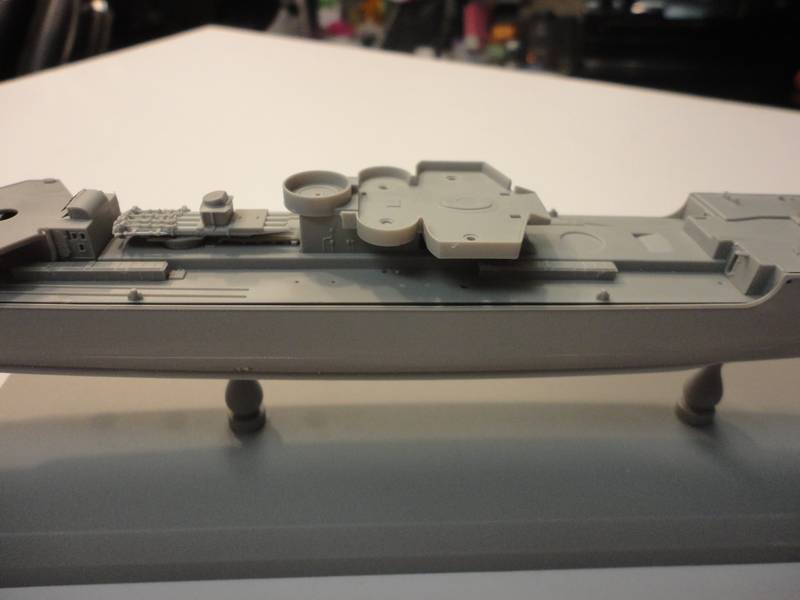
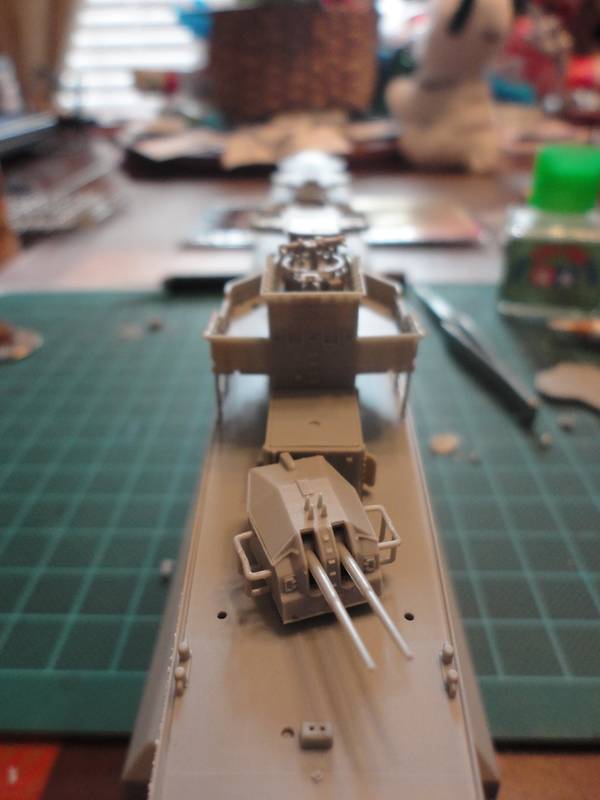
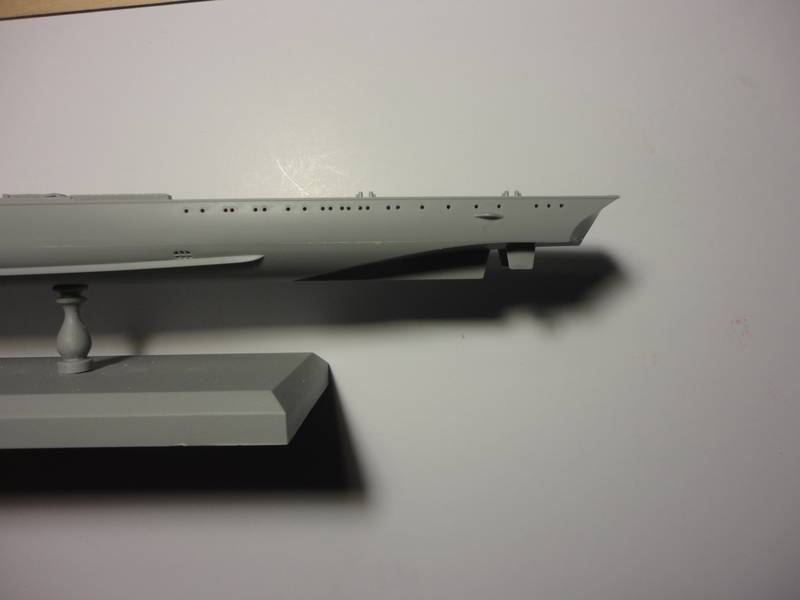
Here is a frontal shot that I forgot to add during a previous posting.
I went ahead and permanently attached the deck to the hull. The overall fit was good. There is a little underlap at the anchor points which will require some sanding.
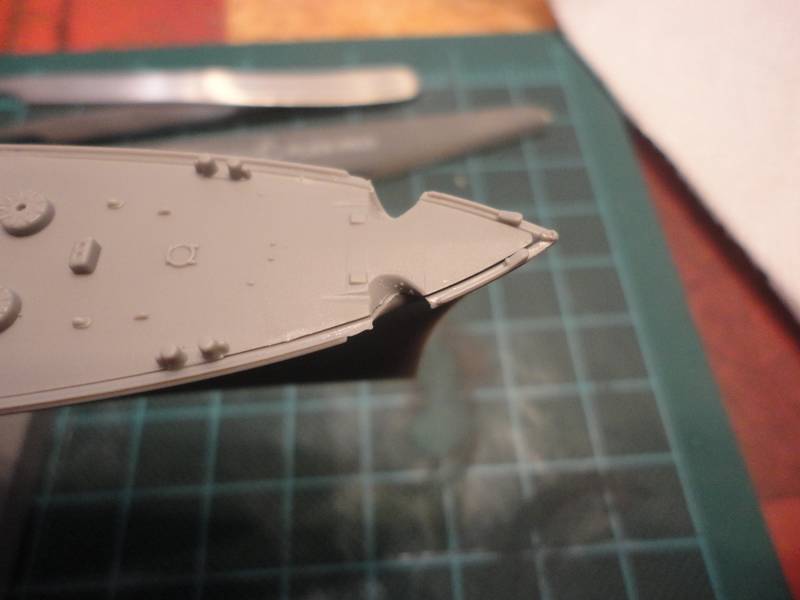
and as you can see in the picture there is some gapping around the deck and the hull. Nothing that cannot be fixed easily with a little Mr Surfacer. That will come this up coming weekend.
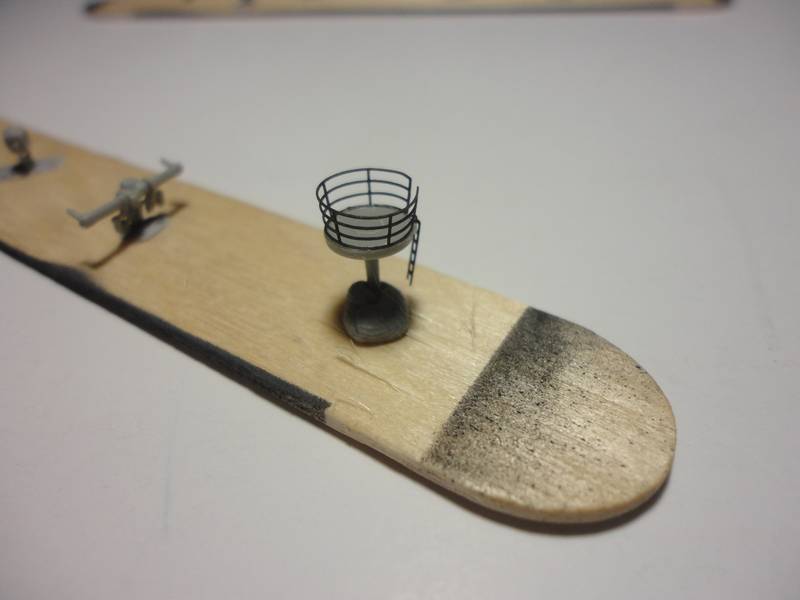
After that I began working on a but of the fiddly parts such as the observation scopes, the searchlight platform. and small searchlights.
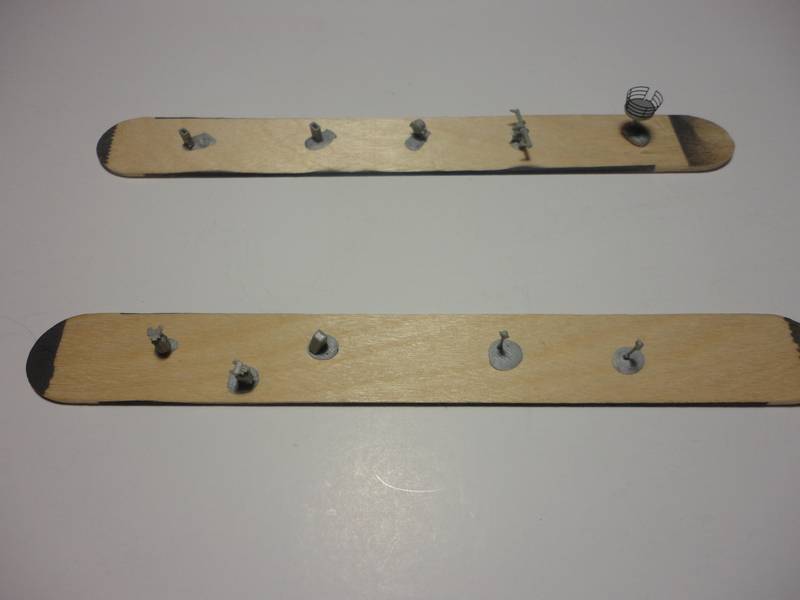
All will be painted and then mounted to the bridge or their respective locations.
The last application was adding the screw protection on the rear of the hull and the rudders.
I did add a couple of items to the deck such as the breakwater and other odds and ends. Nothing major.
That is about it for now. More to come this weekend when I tackle the two funnels.
thanks for stopping in, as always comments, suggestions, and criticism are always welcome.
Dave
Thank you all for the kind comments. I am almost at a point that I can begin applying some color to this great kit.
I did have some time to work on the Z-32 this weekend.
Here is a frontal shot that I forgot to add during a previous posting.
I went ahead and permanently attached the deck to the hull. The overall fit was good. There is a little underlap at the anchor points which will require some sanding.
and as you can see in the picture there is some gapping around the deck and the hull. Nothing that cannot be fixed easily with a little Mr Surfacer. That will come this up coming weekend.
After that I began working on a but of the fiddly parts such as the observation scopes, the searchlight platform. and small searchlights.
All will be painted and then mounted to the bridge or their respective locations.
The last application was adding the screw protection on the rear of the hull and the rudders.
I did add a couple of items to the deck such as the breakwater and other odds and ends. Nothing major.
That is about it for now. More to come this weekend when I tackle the two funnels.
thanks for stopping in, as always comments, suggestions, and criticism are always welcome.
Dave

TRM5150
Joined: January 03, 2010
KitMaker: 2,159 posts
Model Shipwrights: 1,400 posts

Posted: Thursday, January 07, 2016 - 05:54 AM UTC
Very nice Dave! Love the gun assembly!! Clean work! Things are shaping up nicely!! 

Cosimodo
#335

Joined: September 03, 2013
KitMaker: 1,808 posts
Model Shipwrights: 871 posts

Posted: Thursday, January 07, 2016 - 03:36 PM UTC
It's looking great Dave. A lot of nice detail in this kit. The deck gap doesn't look too much of a hurdle. Looking forward to seeing some colour on this.
cheers
Michael
cheers
Michael

JJ1973
#345
Joined: August 22, 2011
KitMaker: 1,835 posts
Model Shipwrights: 1,832 posts

Posted: Sunday, January 10, 2016 - 10:36 AM UTC
Very nice progress here, Dave!  Really looks like a great little kit, and you are doing here justice!!
Looking forward to see some color coming on!!
Cheers,
Jan
Really looks like a great little kit, and you are doing here justice!! Looking forward to see some color coming on!!
Cheers,
Jan
rolltide31
#377
Joined: June 27, 2010
KitMaker: 1,481 posts
Model Shipwrights: 1,332 posts
Posted: Monday, January 18, 2016 - 02:04 AM UTC
Hi everyone, thanks for the support. I apologize for the long delay, I promise I have been working just have not had the chance to update the build log.
So with that off we go.
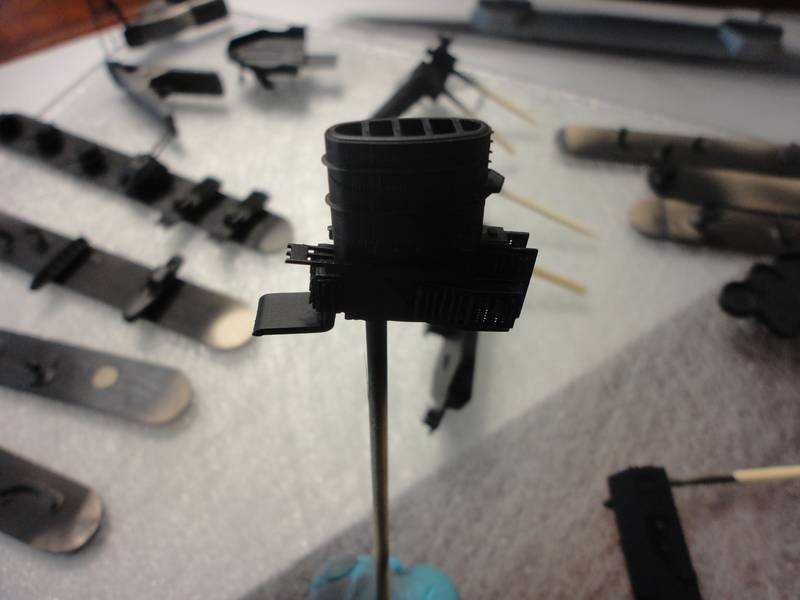
The main funnel has required some extensive work, not in a bad way it is a complex build.
All of the parts fit great and there was little clean up required. There is quite a bit of PE that goes on the kit. The small vents are a little too delicate so take care when being up the vent covers.
Here is the funnel prior to adding the PE.
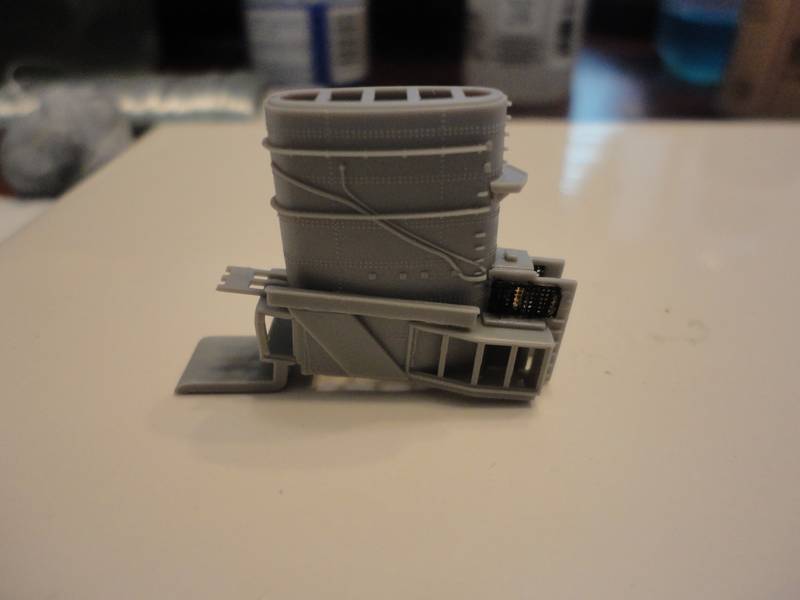
now after the PE
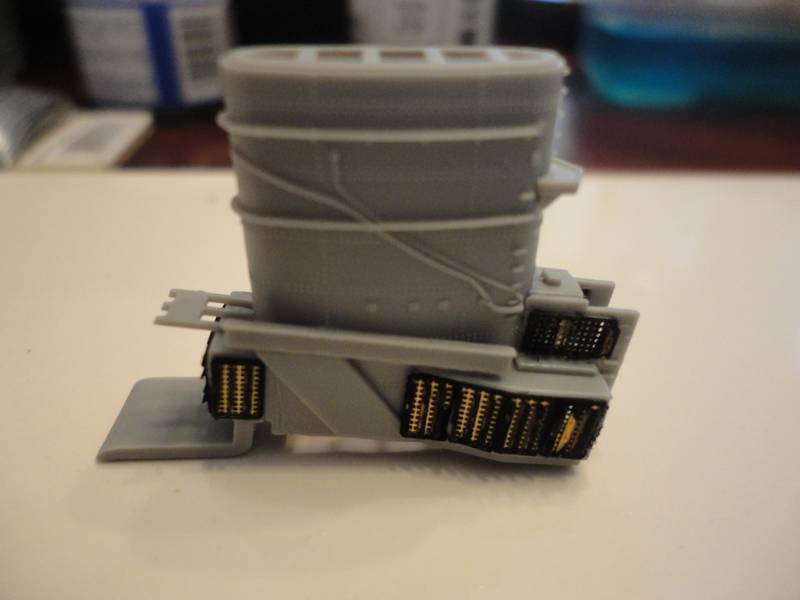
As you can see from the photos I have begun using a blackening agent from Master Models and while it does work great it has trouble getting into the little cracks. Not sure why since the parts are completely immersed.
While the PE was drying I moved onto the supports for the mid deck.
The front two are a little challenging as they are straight sticks so I had to dry fit the deck to the hull to make sure I had the right height. It all worked in the end.
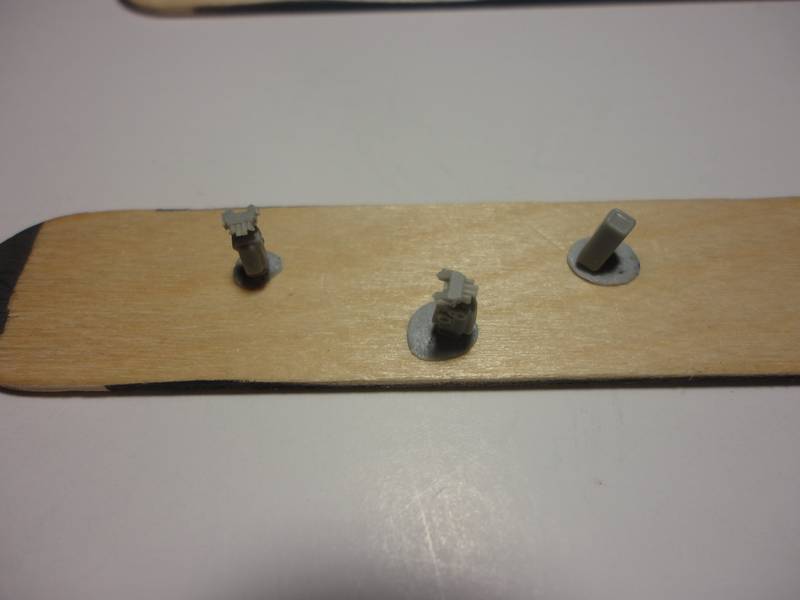
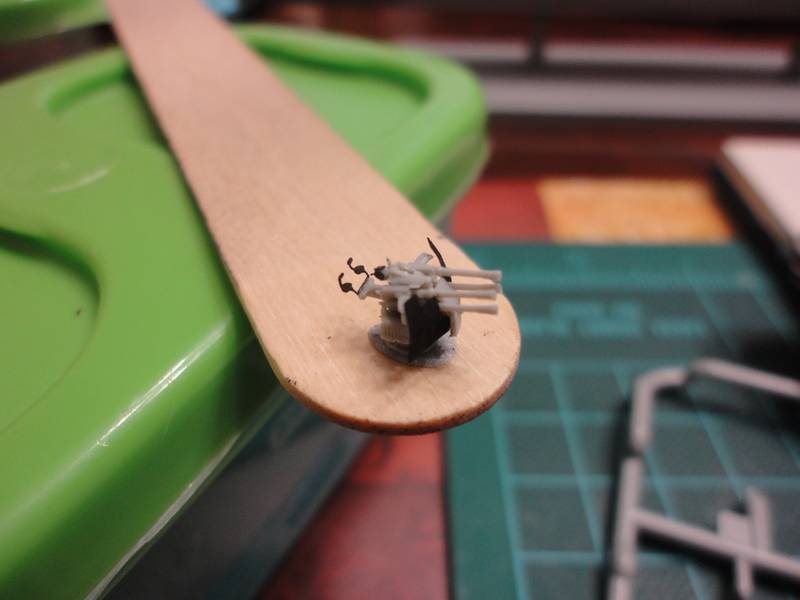
The last project was beginning one of two 37mm AA guns.
sorry about the quality of the photo, the part is small and the camera had issues.
Well there are more updated but I seem to have deleted the pictures. Will take them later and post.
thanks it for now, the dockworkers should be moving her to the paint shed soon.
Now all I need to do is resource some figures
well thanks for stopping in, as always comments, suggestions, and criticism are always welcome.
Dave
So with that off we go.
The main funnel has required some extensive work, not in a bad way it is a complex build.
All of the parts fit great and there was little clean up required. There is quite a bit of PE that goes on the kit. The small vents are a little too delicate so take care when being up the vent covers.
Here is the funnel prior to adding the PE.
now after the PE
As you can see from the photos I have begun using a blackening agent from Master Models and while it does work great it has trouble getting into the little cracks. Not sure why since the parts are completely immersed.
While the PE was drying I moved onto the supports for the mid deck.
The front two are a little challenging as they are straight sticks so I had to dry fit the deck to the hull to make sure I had the right height. It all worked in the end.
The last project was beginning one of two 37mm AA guns.
sorry about the quality of the photo, the part is small and the camera had issues.
Well there are more updated but I seem to have deleted the pictures. Will take them later and post.
thanks it for now, the dockworkers should be moving her to the paint shed soon.
Now all I need to do is resource some figures
well thanks for stopping in, as always comments, suggestions, and criticism are always welcome.
Dave
JJ1973
#345
Joined: August 22, 2011
KitMaker: 1,835 posts
Model Shipwrights: 1,832 posts
Posted: Monday, January 18, 2016 - 10:23 AM UTC
Looking really great Dave!! Very nice work on the funnel!!
This really seems to be a fun kit - glad I have some of the German Destroyers from Dragon in my stash...
One question - the small AA gun you started, isn't that one of the 20 mm quads?
Looking forward to see more pictures!!
Cheers,
Jan
This really seems to be a fun kit - glad I have some of the German Destroyers from Dragon in my stash...
One question - the small AA gun you started, isn't that one of the 20 mm quads?
Looking forward to see more pictures!!
Cheers,
Jan
GazzaS
#424
Joined: April 23, 2015
KitMaker: 4,648 posts
Model Shipwrights: 249 posts
Posted: Monday, January 18, 2016 - 10:42 AM UTC
Quoted Text
Hi everyone, thanks for the support. I apologize for the long delay, I promise I have been working just have not had the chance to update the build log.
So with that off we go.
The main funnel has required some extensive work, not in a bad way it is a complex build.
All of the parts fit great and there was little clean up required. There is quite a bit of PE that goes on the kit. The small vents are a little too delicate so take care when being up the vent covers.
Here is the funnel prior to adding the PE.
now after the PE
As you can see from the photos I have begun using a blackening agent from Master Models and while it does work great it has trouble getting into the little cracks. Not sure why since the parts are completely immersed.
While the PE was drying I moved onto the supports for the mid deck.
The front two are a little challenging as they are straight sticks so I had to dry fit the deck to the hull to make sure I had the right height. It all worked in the end.
The last project was beginning one of two 37mm AA guns.
sorry about the quality of the photo, the part is small and the camera had issues.
Well there are more updated but I seem to have deleted the pictures. Will take them later and post.
thanks it for now, the dockworkers should be moving her to the paint shed soon.
Now all I need to do is resource some figures
well thanks for stopping in, as always comments, suggestions, and criticism are always welcome.
Dave
Hi Dave,
I've been following along and enjoying your progress. When I kitbashed the Dragon Z39 into the Z32, I got four sets of Northstarmodels figures. I put some 80 crewmen on the deck at action stations.
Most of the German figures that Northstar has are in standing positions, but most of the AA has seats. The only seated figures I could find were from the American boxing match set. They worked well, but the best surprise was cheering crewnen who fit perfectly into the role of gunnery officers operating the range finders.
Painting all of those little dudes will test your patience, but I'm glad I did it. It looked better than a few token figures scattered about. They're so small, that the uniform differences between the two forces aren't readily apparent.
Best Wishes,
Gary
RedDuster
Joined: March 01, 2010
KitMaker: 7,078 posts
Model Shipwrights: 6,649 posts
Posted: Tuesday, January 19, 2016 - 02:23 AM UTC
Nice work Dave,
Those funnel vents are real fun, and you have done a very tidy job indeed.
keep up the good work.
Si
Those funnel vents are real fun, and you have done a very tidy job indeed.
keep up the good work.
Si
rolltide31
#377
Joined: June 27, 2010
KitMaker: 1,481 posts
Model Shipwrights: 1,332 posts
Posted: Monday, February 01, 2016 - 09:05 AM UTC
Gentlemen,
Thank you for the kind comments.
I have continued working on the Z32, I apologize for the delayed posting.
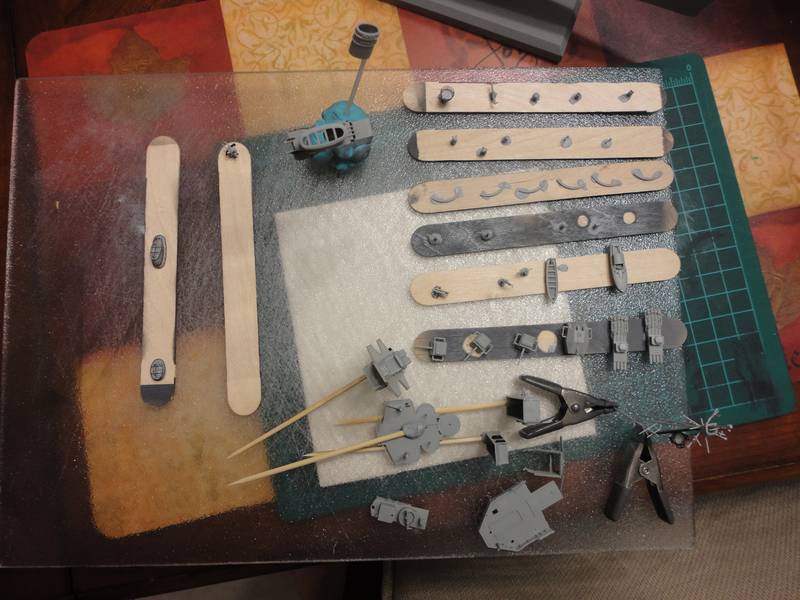
I have continued to work on the fiddly parts in preparation for laying a coat of primer on, hopefully soon.
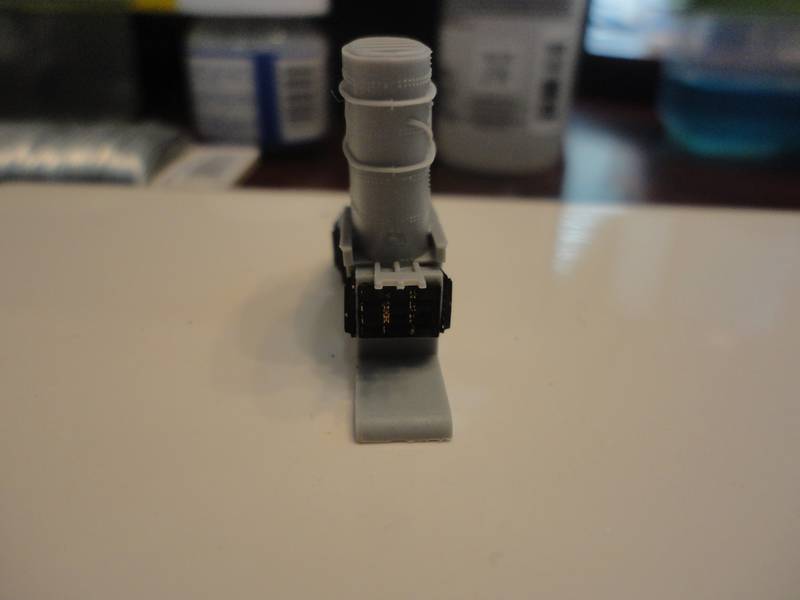
Here are the tops of the funnels.

The PE provided with the kit was a very good fit. I have to admit that these funnel grates and detail was the easiest I have ever had.
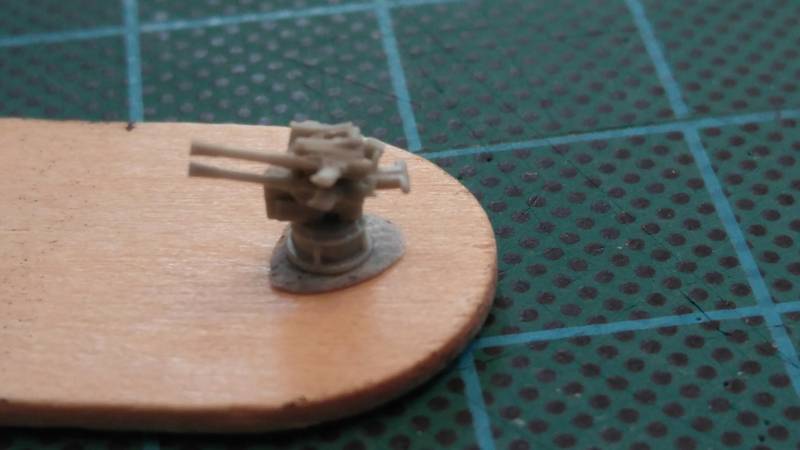
Here is the first 37mm AA gun completed.
It was little challenging due to the small parts but not too bad.
The next was building one of the life boats.
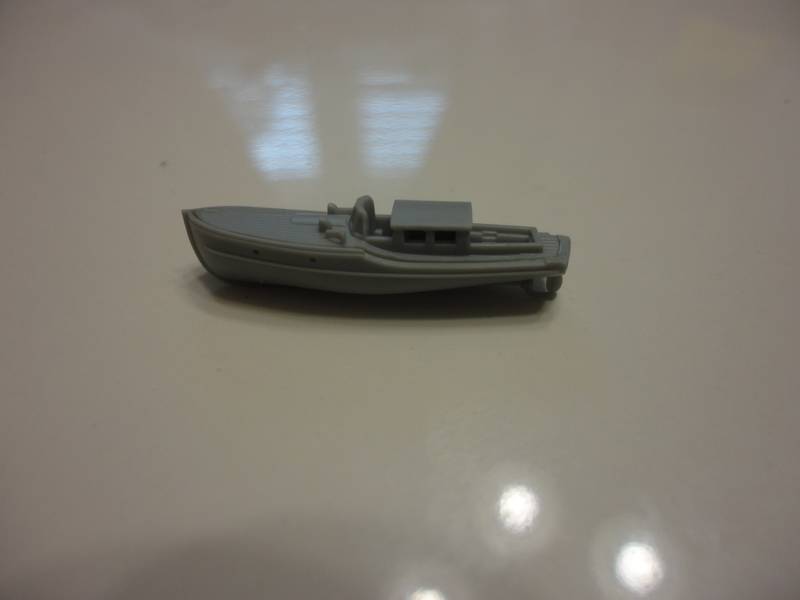
I think Dragon missed the mark here also. With all of the PE provided for the remainder of the kit they could have added a few bits for the life boat.
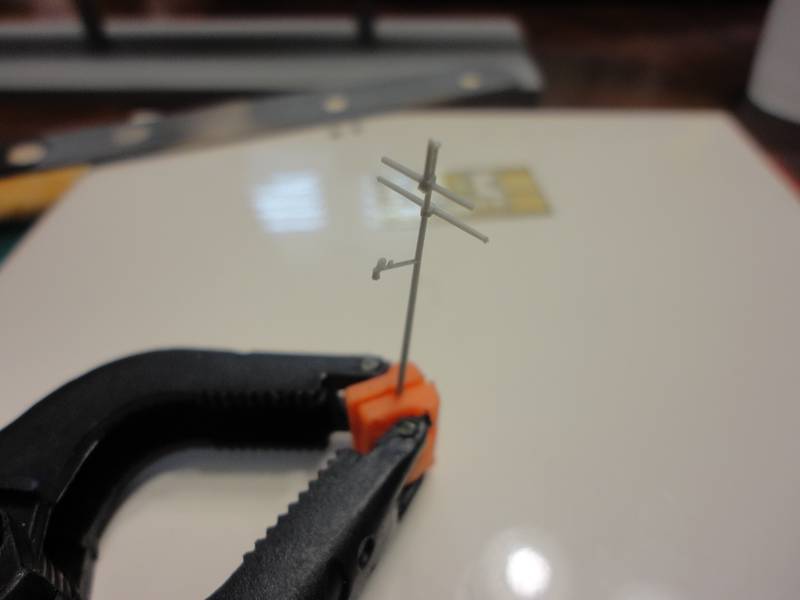
I also began to work on the masts.
Here is the rear mast.
and here is the beginning of the main mast. The rear support struts are thin and delicate. I broke one.
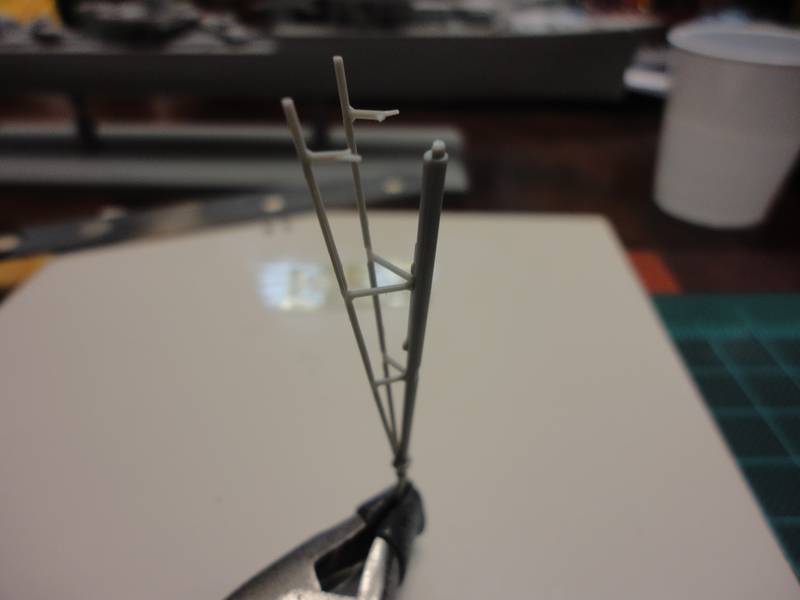
More to come on the main mast this weekend. A lot of PE to add.
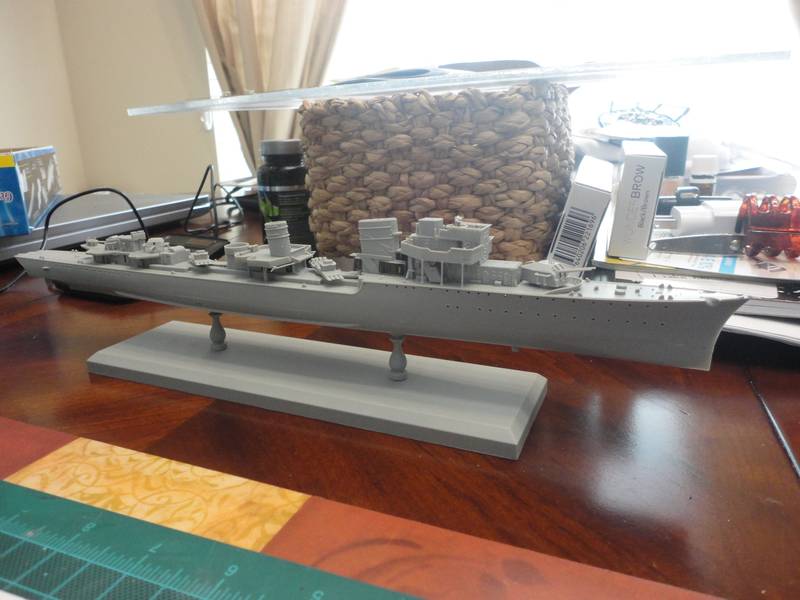
and I will leave you with some overall shots of the subassemblies dry fitted to the hull.
Thanks for looking in and as always, comments, suggestions and criticism are always welcome.
Dave
Thank you for the kind comments.
I have continued working on the Z32, I apologize for the delayed posting.
I have continued to work on the fiddly parts in preparation for laying a coat of primer on, hopefully soon.
Here are the tops of the funnels.
The PE provided with the kit was a very good fit. I have to admit that these funnel grates and detail was the easiest I have ever had.
Here is the first 37mm AA gun completed.
It was little challenging due to the small parts but not too bad.
The next was building one of the life boats.
I think Dragon missed the mark here also. With all of the PE provided for the remainder of the kit they could have added a few bits for the life boat.
I also began to work on the masts.
Here is the rear mast.
and here is the beginning of the main mast. The rear support struts are thin and delicate. I broke one.
More to come on the main mast this weekend. A lot of PE to add.
and I will leave you with some overall shots of the subassemblies dry fitted to the hull.
Thanks for looking in and as always, comments, suggestions and criticism are always welcome.
Dave

RussellE
#306
Joined: June 27, 2010
KitMaker: 3,959 posts
Model Shipwrights: 2,777 posts
Posted: Tuesday, February 02, 2016 - 03:09 PM UTC
Stirling effort so far my friend!

JJ1973
#345
Joined: August 22, 2011
KitMaker: 1,835 posts
Model Shipwrights: 1,832 posts
Posted: Tuesday, February 02, 2016 - 11:36 PM UTC
Dave,
really nice work!! Wow, those funnel caps look quite tiny...
Very nice seeing the ship take shape, this is really a fine model!! Looking at all the molded-on details, it seems pretty difficult when it comes to some filling and sanding at the joints of e.g. the forward superstructure parts. But than it looks as if the fit is pretty good??
Nice job!
Cheers,
Jan
really nice work!!
Wow, those funnel caps look quite tiny... Very nice seeing the ship take shape, this is really a fine model!! Looking at all the molded-on details, it seems pretty difficult when it comes to some filling and sanding at the joints of e.g. the forward superstructure parts. But than it looks as if the fit is pretty good??
Nice job!
Cheers,
Jan
berndm
Joined: March 26, 2014
KitMaker: 844 posts
Model Shipwrights: 151 posts
Posted: Monday, February 15, 2016 - 02:46 AM UTC
The detail work looks fantastic, Dave. And its coming together.
rolltide31
#377
Joined: June 27, 2010
KitMaker: 1,481 posts
Model Shipwrights: 1,332 posts
Posted: Monday, February 22, 2016 - 05:16 AM UTC
Gentlemen,
thanks for the kind comments and the support. It has been a little while since I was able to update the build but I assure you progress has been made.
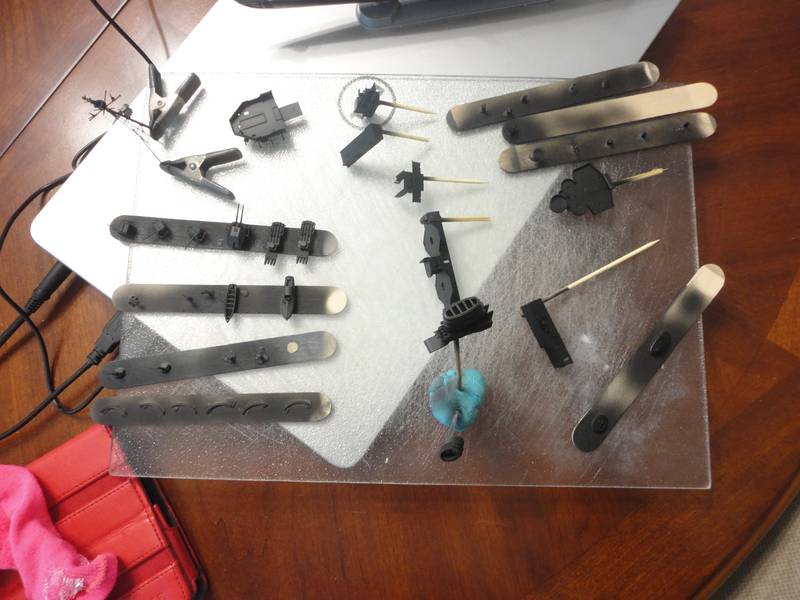
I continued to work on the masts and arrived at a point where it was time for the primer to be applied.
Here is the Z32 prepping for the paint shop.
and here he is after an application of Vallejo Black Primer.
I am awaiting for a couple bottles of paint to move on to the next step. But for now I continue to work on the fiddly parts.
More to come soon.
thanks for stopping in.
Dave
thanks for the kind comments and the support. It has been a little while since I was able to update the build but I assure you progress has been made.
I continued to work on the masts and arrived at a point where it was time for the primer to be applied.
Here is the Z32 prepping for the paint shop.
and here he is after an application of Vallejo Black Primer.
I am awaiting for a couple bottles of paint to move on to the next step. But for now I continue to work on the fiddly parts.
More to come soon.
thanks for stopping in.
Dave
JJ1973
#345
Joined: August 22, 2011
KitMaker: 1,835 posts
Model Shipwrights: 1,832 posts
Posted: Monday, February 22, 2016 - 10:14 AM UTC
Good to see her going into the paint shop - even if it's just primer for the time being
I do know the 'time'-issue very well myself - was not able to get much done or an update during the last weeks as well. But it's always good to see some progress! Nice job!
Cheers,
Jan
I do know the 'time'-issue very well myself - was not able to get much done or an update during the last weeks as well.
But it's always good to see some progress! Nice job!Cheers,
Jan
RussellE
#306
Joined: June 27, 2010
KitMaker: 3,959 posts
Model Shipwrights: 2,777 posts
Posted: Monday, February 22, 2016 - 02:19 PM UTC
nice progress Dave 
yes, Jan, you've been very quiet lately
yes, Jan, you've been very quiet lately
berndm
Joined: March 26, 2014
KitMaker: 844 posts
Model Shipwrights: 151 posts
Posted: Monday, February 22, 2016 - 04:25 PM UTC
Its great to see this project is still underway. Your detail work looks impresseive and a good paint job will make it shine.
What colors are you using for KM subjects ?
What colors are you using for KM subjects ?
rolltide31
#377
Joined: June 27, 2010
KitMaker: 1,481 posts
Model Shipwrights: 1,332 posts
Posted: Monday, February 22, 2016 - 11:50 PM UTC
hi all,
It has been quiet all across the board lately. I am missing my updates from what my wife calls my "porn"..LOL
Anyway, Bernd as for the colors I will be using RAL 7001 Silbergrau for the upper structure, RAL 7016 Anthrazitgrau for the lower hull and camo stripes, and RAL 7024 Graphitgrau for the decking.
I am waiting on RAL 7024 and 7016 to arrive in the mail.
Dave
RussellE
#306
Joined: June 27, 2010
KitMaker: 3,959 posts
Model Shipwrights: 2,777 posts
Posted: Tuesday, February 23, 2016 - 01:23 AM UTC
Quoted Text
hi all,
It has been quiet all across the board lately. I am missing my updates from what my wife calls my "porn"..LOL
Anyway, Bernd as for the colors I will be using RAL 7001 Silbergrau for the upper structure, RAL 7016 Anthrazitgrau for the lower hull and camo stripes, and RAL 7024 Graphitgrau for the decking.
I am waiting on RAL 7024 and 7016 to arrive in the mail.
Dave
Hi Dave! I agree-it's been weirdly quiet!
 I thought the site might've been down, but not so
I like that your wife calls MSW your "porn"
 I think my wife would have to agree
  She calls herself a "model widow" aka a "styrene widow"
I like to remind her it could be worse though: I could be out playing golf or fishing (golf widow, fish widow
) or worse down the pub 
 But somehow that doesn't seem to settle her down
  |

WEB HOSTING BY


Copyright ©2021 Model Shipwrights and Kitmaker Network, a subsidiary of Silver Star Enterprises
All Rights Reserved. Please read our Conditions of Use and Privacy Policy.
All Rights Reserved. Please read our Conditions of Use and Privacy Policy.