


Go to modelshipwrights.com for the current dynamic site!
Hosted by Jim Starkweather
Dragon Gearing Class Odyssey

md72

#439

Joined: November 05, 2005
KitMaker: 4,950 posts
Model Shipwrights: 248 posts

Posted: Wednesday, March 30, 2016 - 05:45 AM UTC
Me thinks you need another barrel or two of the red for this question.


JJ1973
#345

Joined: August 22, 2011
KitMaker: 1,835 posts
Model Shipwrights: 1,832 posts

Posted: Thursday, March 31, 2016 - 01:05 AM UTC
Hi Damian!
Very nice project and a great start!! I'm definitely in and will be following, a very entertaining blog so far, just read it from the beginning.
I can't be of much help with this kits, but maybe for more general questions of yours.
Most was answered already. Maybe my five cent - be careful in 'simply' following instructions! If you just end up building subassemblies that are not needed for the next weeks or month, so what. But sometimes there are steps that simply don't work, or entirely mislead you when you try to follow. That is no speciality of Dragon, it is the same with Trumpeter, most aftermarket producers, Heller...
Consider at what point you paint stuff. That may deviate from the wings side, as well. Many subassemblies must be painted before they are installed on the ship, otherwise you can't reach them. Others should be painted after installation, to blend in. There is not the 'one way'.
And the 'spare' guns and parts you see, that's just 'laziness' on part of the manufacturers. Or it might even be more economical. When a base kit is sold in different versions (as yours!) you'll likely find the number of guns etc... required for the version of the ship the needs most. It's probably cheaper than having different types of sprues with two or three items.
And I don't start with the big guns - I do like them too, very much so. BUT - when you do all the fun stuff early on and find yourself with all those parts left to do that you don't like that much, you're likely to lose motivation towards the end of a build...just my approach
Cheers,
Jan
Very nice project and a great start!!
I'm definitely in and will be following, a very entertaining blog so far, just read it from the beginning.I can't be of much help with this kits, but maybe for more general questions of yours.
Most was answered already. Maybe my five cent - be careful in 'simply' following instructions! If you just end up building subassemblies that are not needed for the next weeks or month, so what. But sometimes there are steps that simply don't work, or entirely mislead you when you try to follow. That is no speciality of Dragon, it is the same with Trumpeter, most aftermarket producers, Heller...
Consider at what point you paint stuff. That may deviate from the wings side, as well. Many subassemblies must be painted before they are installed on the ship, otherwise you can't reach them. Others should be painted after installation, to blend in. There is not the 'one way'.
And the 'spare' guns and parts you see, that's just 'laziness' on part of the manufacturers. Or it might even be more economical. When a base kit is sold in different versions (as yours!) you'll likely find the number of guns etc... required for the version of the ship the needs most. It's probably cheaper than having different types of sprues with two or three items.
And I don't start with the big guns - I do like them too, very much so. BUT - when you do all the fun stuff early on and find yourself with all those parts left to do that you don't like that much, you're likely to lose motivation towards the end of a build...just my approach
Cheers,
Jan

AussieReg

#007

Joined: June 09, 2009
KitMaker: 8,156 posts
Model Shipwrights: 154 posts
Posted: Thursday, March 31, 2016 - 02:30 AM UTC
Hello Jan. Thanks for checking in, and thanks so much for the feedback and advice!
I always take note of where and when the sub-assemblies are to be fitted to the major build, and look at what difficulties might arise around painting and decaling if they are installed too early. Following along with a few of the builds on these forums has given me (hopefully) a good insight into the timing of painting the various stages, and I have printed a couple of online build reviews of these kits to refer to as well. Fingers crossed I won't get myself into too much trouble down the track
Cheers, D

AussieReg
#007
Joined: June 09, 2009
KitMaker: 8,156 posts
Model Shipwrights: 154 posts
Posted: Saturday, April 02, 2016 - 07:13 AM UTC
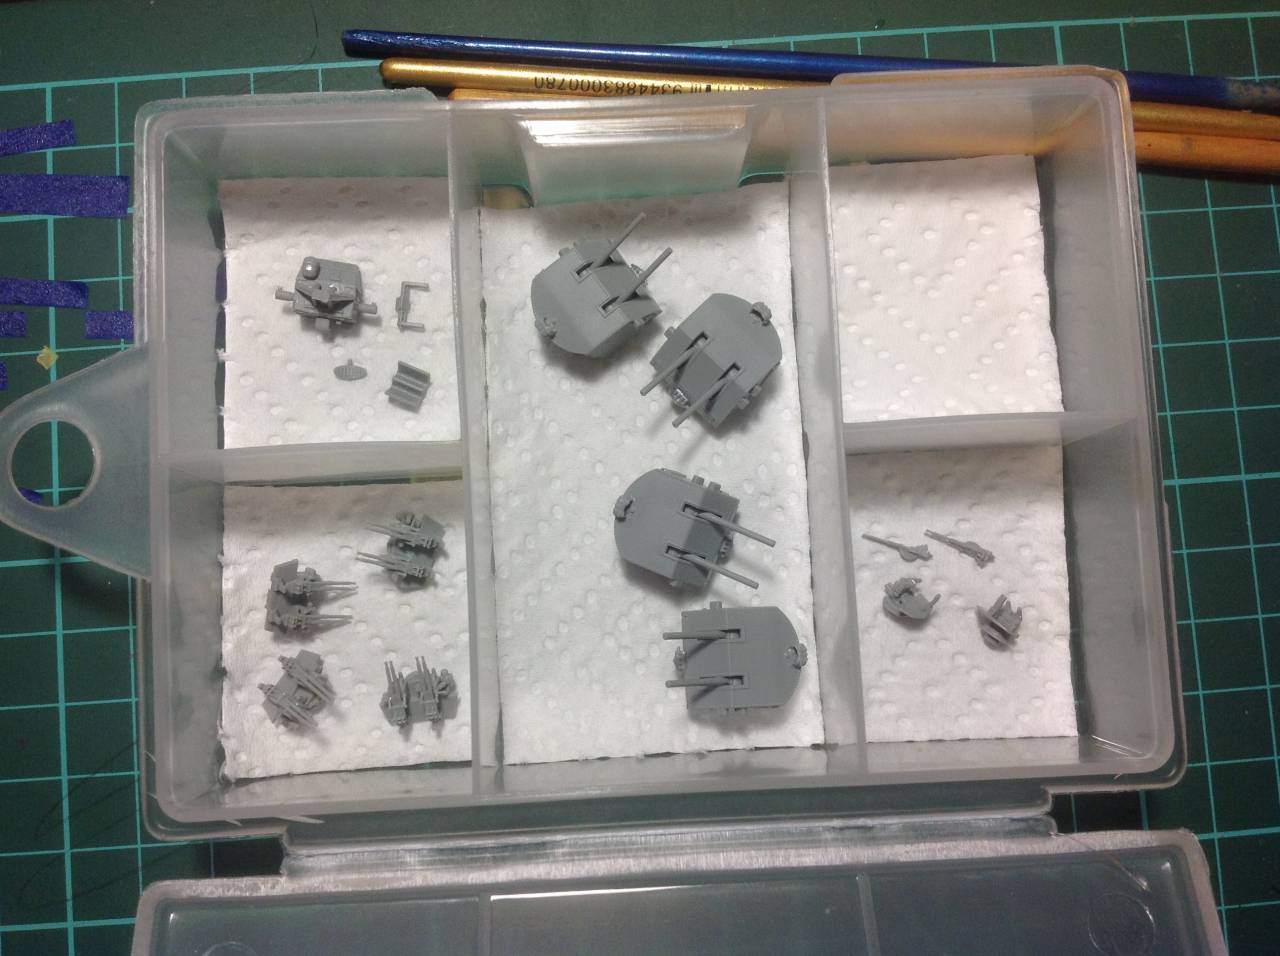
A small progress update, I have the 4 x quad 40mm assemblies together (sans PE) and started to assemble the radar and director assembly (look at me throwing around naval terminology like I know what I'm talking about!), and this is how I have decided to store the subassemblies until they are required.
Cheers, D
Cheers, D

Naseby

Joined: October 15, 2010
KitMaker: 825 posts
Model Shipwrights: 97 posts

Posted: Sunday, April 03, 2016 - 01:20 AM UTC
Hi Damian. Great to see that You listened to the "Calling Of The Sea". Maybe just a one small advices - assemble the hull first, then paint and weather the red bottom. Mask it up and dont remove the mask untill the built is finished. In doing so You will get a surface where You can hold and handle the model nicely while not damaging the paint. Works for me every time.

AussieReg
#007
Joined: June 09, 2009
KitMaker: 8,156 posts
Model Shipwrights: 154 posts
Posted: Sunday, April 03, 2016 - 11:26 AM UTC
Naseby, thanks for looking in on my adventure, and thanks for the advice. The more threads that investigate and the more I look over the instructions, it becomes more obvious that I need to get the hull together and painted before I go too much further. The gun assemblies that I have worked on to this point just need PE, so I might just pause the first stage and jump in to the hull assembly.
The Automodeler "Big Fins and Chrome" Group Build for cars from the '50s has just started and my '59 Cadillac Eldorado Biarritz has driven across the bow of the Gearing and brought it to a stop!
Cheers, D
The Automodeler "Big Fins and Chrome" Group Build for cars from the '50s has just started and my '59 Cadillac Eldorado Biarritz has driven across the bow of the Gearing and brought it to a stop!
Cheers, D
JJ1973
#345
Joined: August 22, 2011
KitMaker: 1,835 posts
Model Shipwrights: 1,832 posts
Posted: Sunday, April 03, 2016 - 10:15 PM UTC
Hi Damian,
your guns look really good!!
And the way you are storing them, with the additional paper in your box, should be 110% proof I never had any interaction between any kit's parts and a plastic box, and I tend to work more than a year on a single model...but better safe than sorry
Cheers,
Jan
your guns look really good!!
And the way you are storing them, with the additional paper in your box, should be 110% proof
I never had any interaction between any kit's parts and a plastic box, and I tend to work more than a year on a single model...but better safe than sorry Cheers,
Jan

RedDuster

Joined: March 01, 2010
KitMaker: 7,078 posts
Model Shipwrights: 6,649 posts

Posted: Sunday, April 03, 2016 - 11:50 PM UTC
Nice storage solution for sub assemblies mate.
looking forward to seeing ore progess.
Cheers.
Si
looking forward to seeing ore progess.
Cheers.
Si

RussellE
#306
Joined: June 27, 2010
KitMaker: 3,959 posts
Model Shipwrights: 2,777 posts
Posted: Monday, April 04, 2016 - 03:07 PM UTC
Nice one D! 
I'm watching
I'm watching

AussieReg
#007
Joined: June 09, 2009
KitMaker: 8,156 posts
Model Shipwrights: 154 posts
Posted: Thursday, April 07, 2016 - 09:18 PM UTC
Thanks Russ, nice to have you on board.
Ok guys, you talked me into it!

Cheers, D
Ok guys, you talked me into it!
Cheers, D
AussieReg
#007
Joined: June 09, 2009
KitMaker: 8,156 posts
Model Shipwrights: 154 posts
Posted: Friday, April 08, 2016 - 07:45 PM UTC
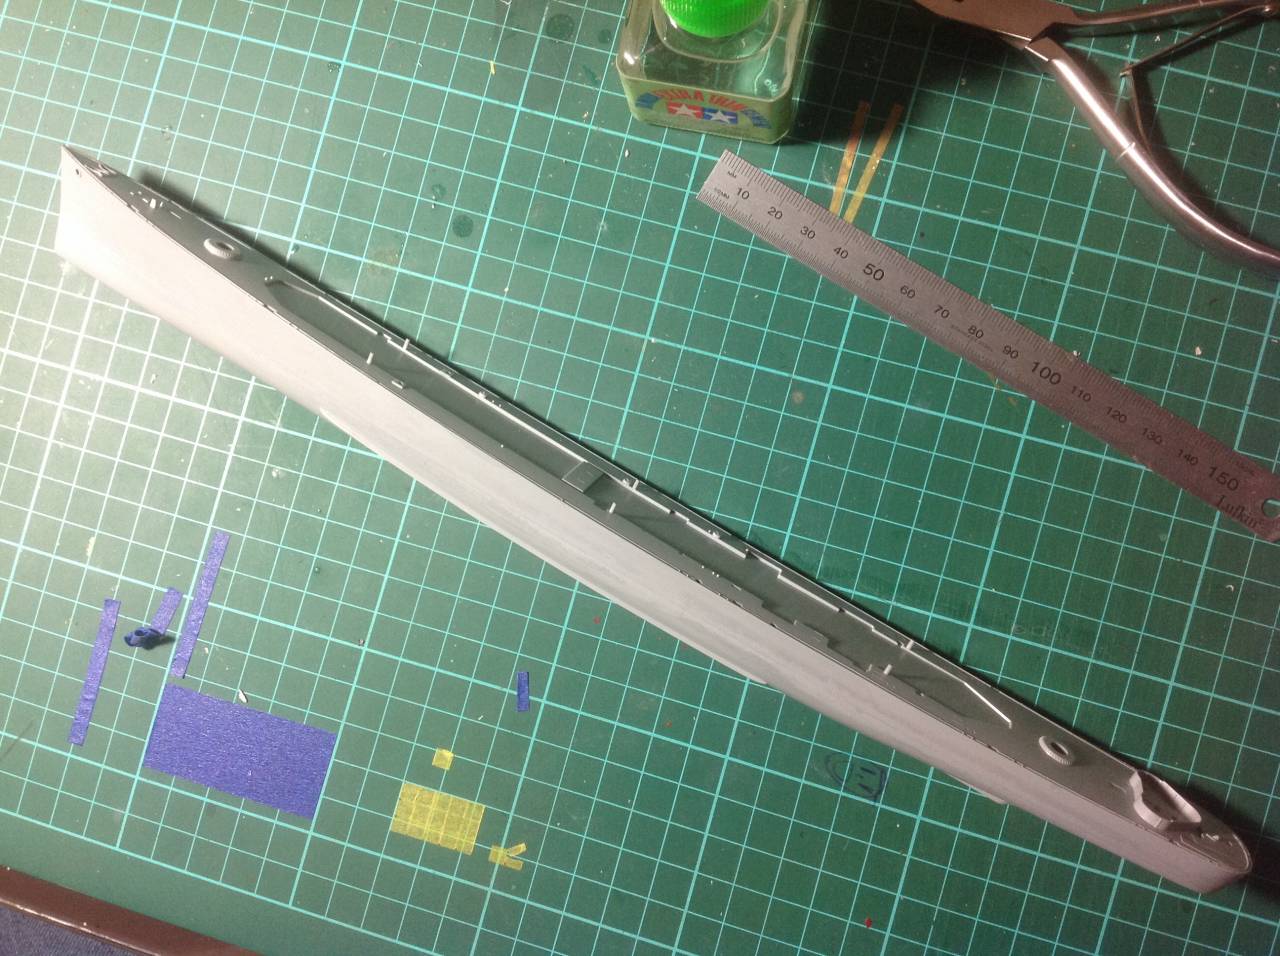
The hull is assembled, minor putty work along the join has been cleaned up, main deck installed. I have just noticed that in my enthusiasm to get this together I forgot to drill out the mounting holes for the stand
I will grab the hull from one of the other kits and drill it out, then use this as a template to drill the holes in the Gearing from underneath.
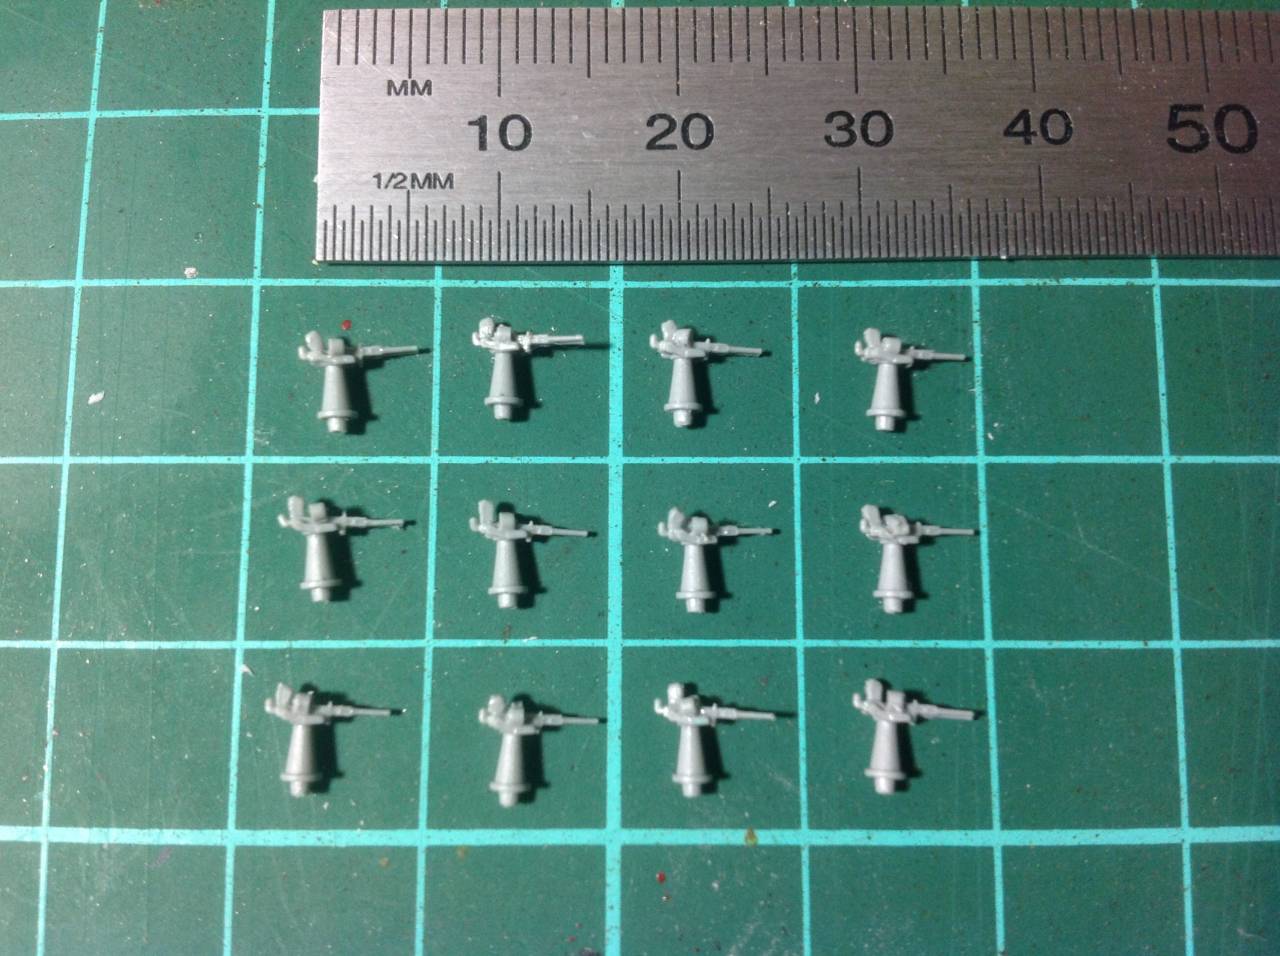
I also assembled the 12 twin 20mm guns. Only 10 are required for this build but given their size it is entirely likely that I will lose a couple! There are 6 styrene parts in each of these assemblies, and still 3 more PE parts to add as well.
Cheers, D
I will grab the hull from one of the other kits and drill it out, then use this as a template to drill the holes in the Gearing from underneath.
I also assembled the 12 twin 20mm guns. Only 10 are required for this build but given their size it is entirely likely that I will lose a couple! There are 6 styrene parts in each of these assemblies, and still 3 more PE parts to add as well.
Cheers, D
RedDuster
Joined: March 01, 2010
KitMaker: 7,078 posts
Model Shipwrights: 6,649 posts
Posted: Friday, April 08, 2016 - 11:36 PM UTC
The hull looks good together Damian, been there done that, forgetting to drill out the stand holes. One tip to assist once you have your template, build up the stand, you should find subtle stress or sink marks around the hole locations.
twin 20's look good too mate.
Cheers.
Si
twin 20's look good too mate.
Cheers.
Si
AussieReg
#007
Joined: June 09, 2009
KitMaker: 8,156 posts
Model Shipwrights: 154 posts
Posted: Saturday, April 09, 2016 - 10:53 AM UTC
Thanks Si. I had a good close look at the bottom of the hull and there was no sign of any stress marks or sink holes. Typical, always there in the most obvious and unwanted places, but when you need them, not a chance!
I grabbed the hull from the Frank Knox and drilled the holes out, then measured off a couple of fixed points to give the hole centres. Job done!
Cheers, D
I grabbed the hull from the Frank Knox and drilled the holes out, then measured off a couple of fixed points to give the hole centres. Job done!
Cheers, D
RedDuster
Joined: March 01, 2010
KitMaker: 7,078 posts
Model Shipwrights: 6,649 posts
Posted: Saturday, April 09, 2016 - 12:22 PM UTC
Looks good the right way up Damian.
Nice recovery
Si
Nice recovery
Si
JJ1973
#345
Joined: August 22, 2011
KitMaker: 1,835 posts
Model Shipwrights: 1,832 posts
Posted: Sunday, April 10, 2016 - 09:30 AM UTC
Nice work Damian,
looks good seeing the hull come together!
Cheers,
Jan
looks good seeing the hull come together!
Cheers,
Jan
AussieReg
#007
Joined: June 09, 2009
KitMaker: 8,156 posts
Model Shipwrights: 154 posts
Posted: Sunday, April 10, 2016 - 11:43 AM UTC
Thanks for the feedback guys, much appreciated.
A quick question for those more learned than I. I have been checking out a couple of build reviews of this kit and on one build the main propellor shafts and supports were painted hull red with just the prop being gold or brass. The instructions call for hull red supports but gold for the shaft as well as the prop.
Which is correct?
Cheers, D
RussellE
#306
Joined: June 27, 2010
KitMaker: 3,959 posts
Model Shipwrights: 2,777 posts
Posted: Sunday, April 10, 2016 - 03:59 PM UTC
Nice work D! 
Great to see some Styrene go together.
I'm very dubious of 'gold' prop shafts. Myself, prefer either the hull red or steel. But could be totally wrong too
Great to see some Styrene go together.
I'm very dubious of 'gold' prop shafts. Myself, prefer either the hull red or steel. But could be totally wrong too
JJ1973
#345
Joined: August 22, 2011
KitMaker: 1,835 posts
Model Shipwrights: 1,832 posts
Posted: Sunday, April 10, 2016 - 10:29 PM UTC
I definitiv agree with Russ here - golden prop shafts - NO WAY!!
They can be either hull red or steel. I tend to do them steel, actually, they often appear to be pretty dark colored. That depends from shipyard to shipyard - whether they get some kind of coating and if, what kind. If you go with either hull red, steel or 'dark steel', you can't really be all to wrong...
Cheers,
Jan
AussieReg
#007
Joined: June 09, 2009
KitMaker: 8,156 posts
Model Shipwrights: 154 posts
Posted: Monday, April 11, 2016 - 08:25 AM UTC
Thanks for the feedback Russ, Jan. I think you have confirmed my suspicions, I couldn't see a bare gold or brass prop shaft lasting long without some sort of protection.
Cheers, D
Cheers, D
AussieReg
#007
Joined: June 09, 2009
KitMaker: 8,156 posts
Model Shipwrights: 154 posts
Posted: Thursday, April 14, 2016 - 04:22 AM UTC
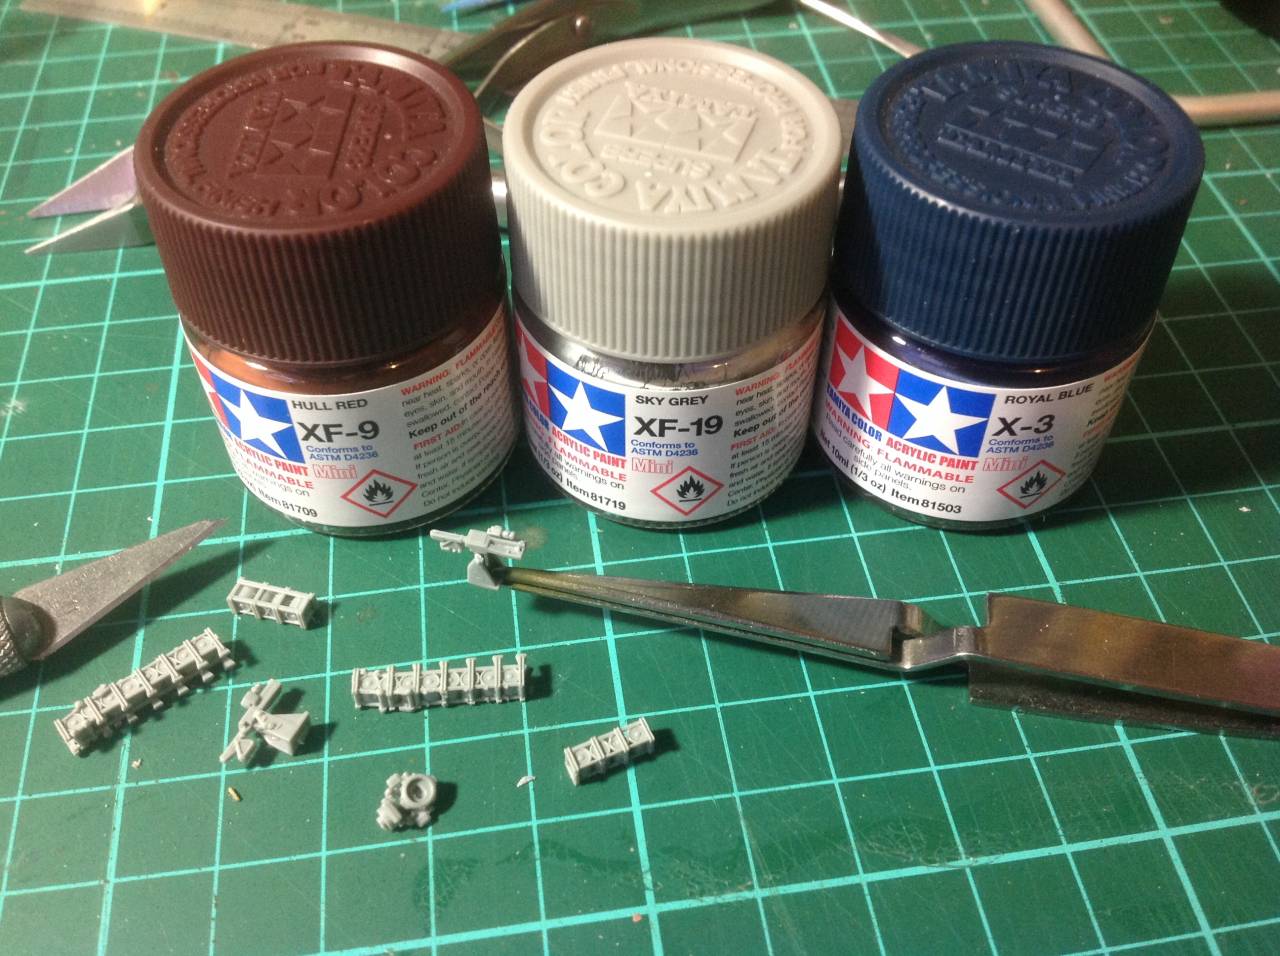
Next dilemma is colour! Tamiya Acrylic is my weapon of choice, so I need to identify the best options for Haze Grey and Deck Blue. I am happy to do a bit of mixing and matching, but the call-outs in the instructions involve up to 4 different Gunze colours mixed in different ratios. In the Tamiya Acrylic line, XF-9 Hull Red seems to look ok, possibly a bit on the dark or brown side, but a drop of red will sort that. I have read a few opinions on the Haze Grey, XF-19 Sky Grey appears to be a reasonable match. For the Deck Blue I have options of X-3 Royal Blue or XF-8 Flat Blue. Once again I can tweak these colours as necessary.
Has anybody gone down this path and found a good solution?
Cheers, D
Has anybody gone down this path and found a good solution?
Cheers, D
AussieReg
#007
Joined: June 09, 2009
KitMaker: 8,156 posts
Model Shipwrights: 154 posts
Posted: Monday, April 18, 2016 - 11:18 AM UTC
Small update, put together a few more little sub assemblies and made a call on the paint.
Oops, forgot, also got the shafts and rudders installed.
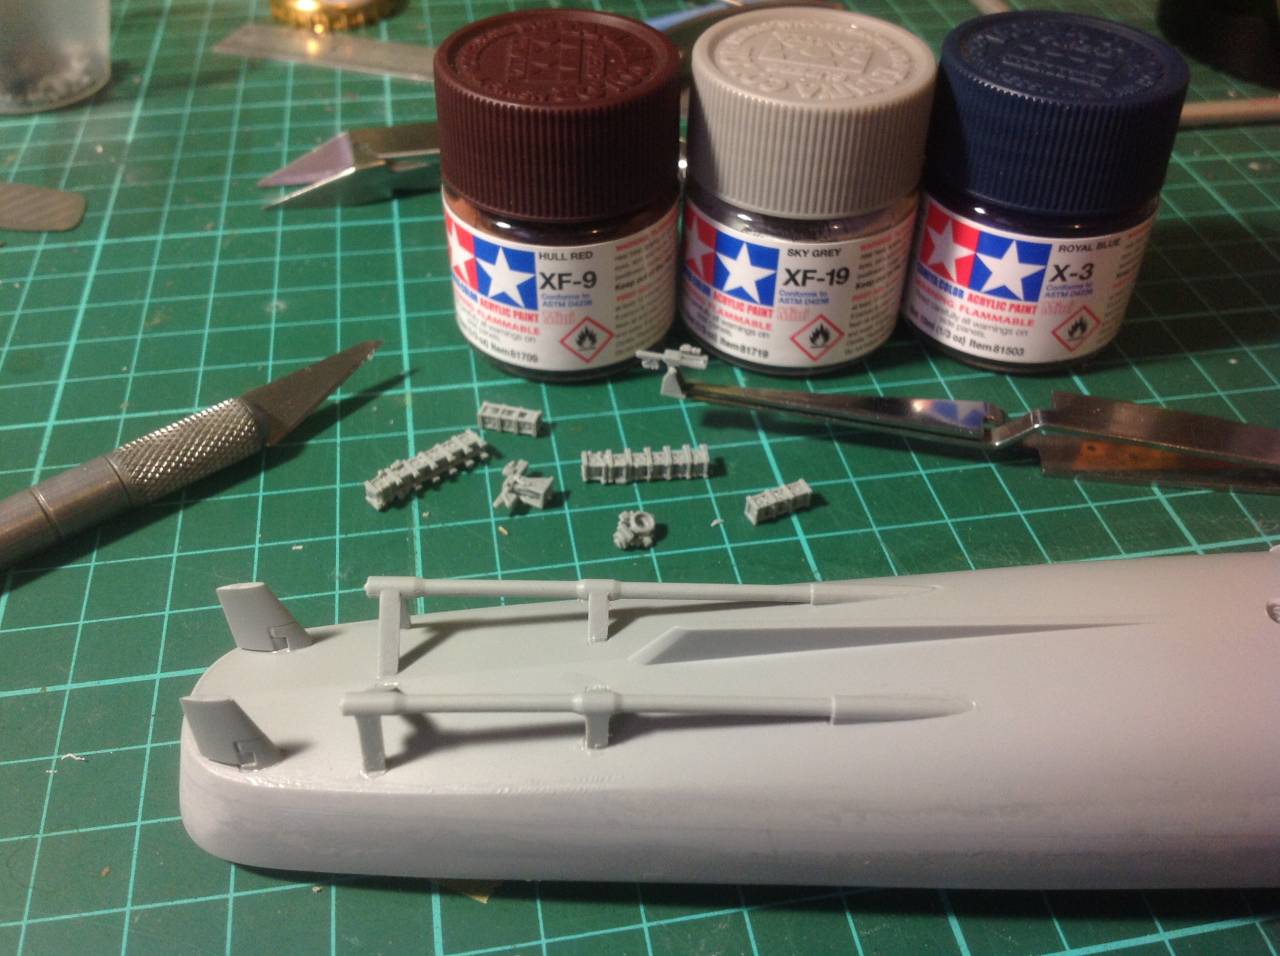
Cheers, D
Oops, forgot, also got the shafts and rudders installed.
Cheers, D
AussieReg
#007
Joined: June 09, 2009
KitMaker: 8,156 posts
Model Shipwrights: 154 posts
Posted: Monday, April 18, 2016 - 07:27 PM UTC
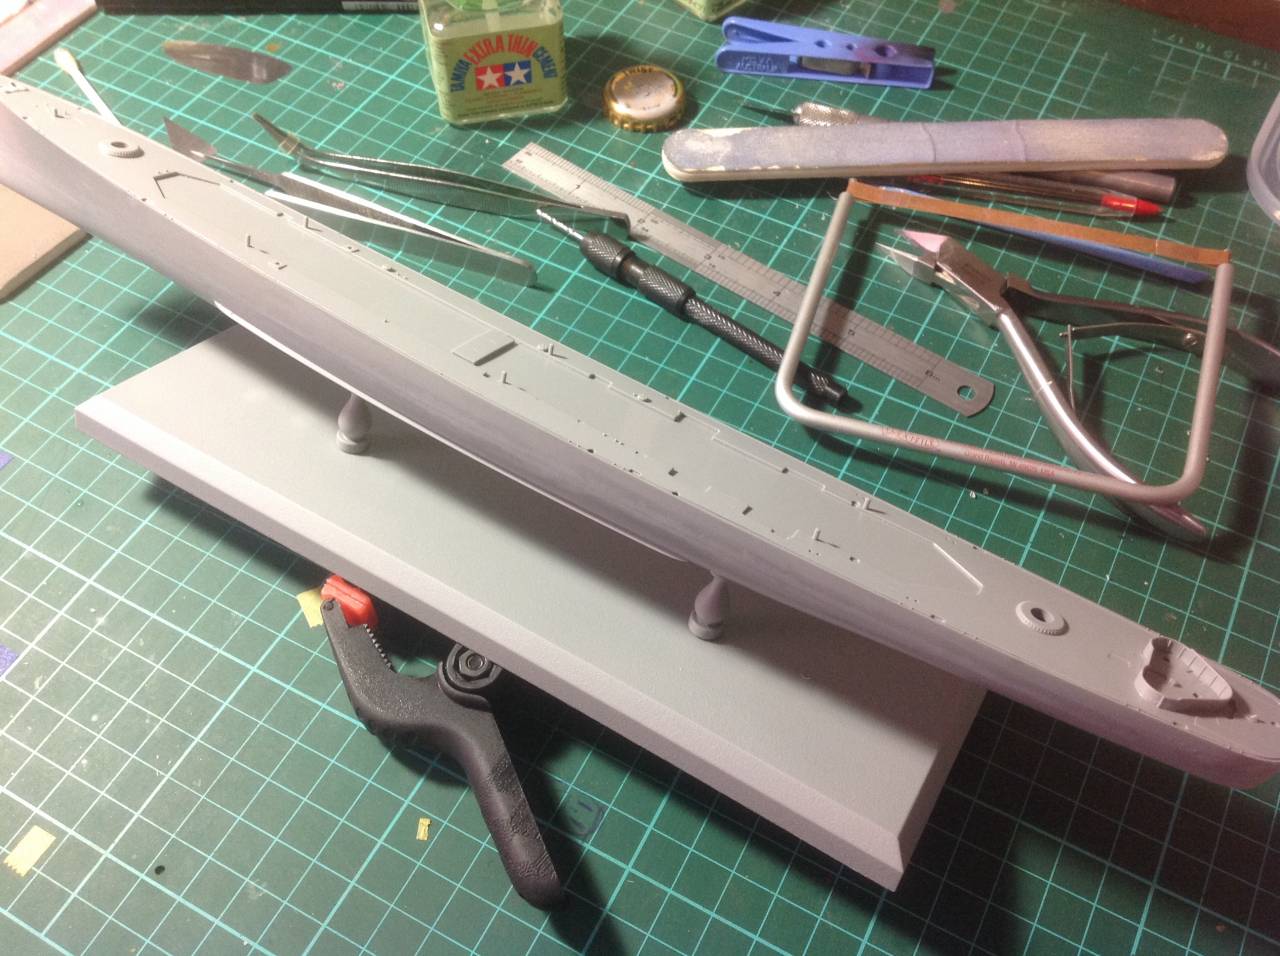
On a bit of a roll tonight, main superstructure assembled. There are 14 parts to this assembly. I trimmed them off the sprue with a razor saw, minor cleanup of the attachment points with the Xacto, and they fitted together perfectly! I am extremely impressed with the engineering on this kit I must say. The sweep of this assembly matches the hull and this sits in the recess of the main deck beautifully. My plan is to paint these assemblies separately and apply the anti skid walkway decals before any of the sub assemblies are attached and put in peril from my ham-fistedness

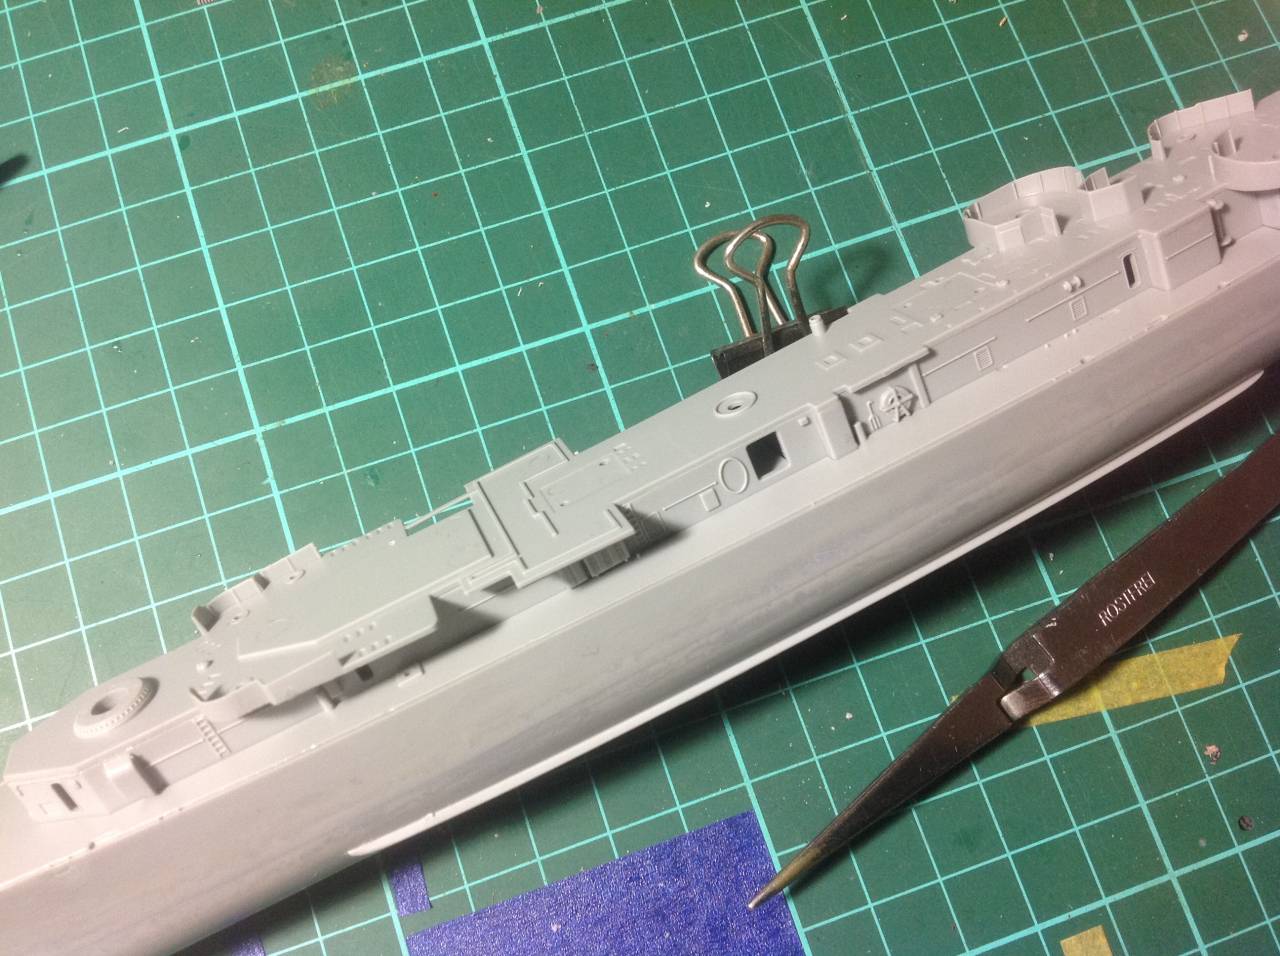
The detail molded on to these walls is great, a wash of highly thinned black enamel after the Haze Grey will highlight them and make them stand out nicely.
Cheers, D
The detail molded on to these walls is great, a wash of highly thinned black enamel after the Haze Grey will highlight them and make them stand out nicely.
Cheers, D
RedDuster
Joined: March 01, 2010
KitMaker: 7,078 posts
Model Shipwrights: 6,649 posts
Posted: Tuesday, April 19, 2016 - 01:24 AM UTC
Coming on very nicely Damien.
The detail on the superstructure is impressive.
Will you using the decals for the anti slip walkways? I used them on my USS Laffey, they did silver a bit, but they looked good; so if you are I would recommend a good gloss coat on the deck.
Cheers.
Si
The detail on the superstructure is impressive.
Will you using the decals for the anti slip walkways? I used them on my USS Laffey, they did silver a bit, but they looked good; so if you are I would recommend a good gloss coat on the deck.
Cheers.
Si
AussieReg
#007
Joined: June 09, 2009
KitMaker: 8,156 posts
Model Shipwrights: 154 posts
Posted: Tuesday, April 19, 2016 - 02:42 AM UTC
Thanks for checking in Si.
I will probably use the local equivalent of Future, called Pledge One-Go, and brush it on the decks before I apply the decals.
Another quick question to the followers, what is the preferred tool for trimming the small PE parts from the frames? I have several sprue cutters, do you guys use these on the soft brass as well? My experience to now with PE has been mostly on larger parts for my aircraft builds and I have used a chisel blade in the Xacto, but I am concerned that this might bend the tiny parts on this build.
Cheers, D

GazzaS
#424
Joined: April 23, 2015
KitMaker: 4,648 posts
Model Shipwrights: 249 posts

Posted: Tuesday, April 19, 2016 - 11:09 AM UTC
Hey Damian,
For your fine pieces of PE I recommend a sharp blade on a hard surface. You don't want to bend it into a soft surface while you're trying to cut.
Also, a little blue tack on a toothpick to hold it down while your cutting will prevent it from flying into infinity.
Best wishes,
Gaz
For your fine pieces of PE I recommend a sharp blade on a hard surface. You don't want to bend it into a soft surface while you're trying to cut.
Also, a little blue tack on a toothpick to hold it down while your cutting will prevent it from flying into infinity.
Best wishes,
Gaz
 |

WEB HOSTING BY


Copyright ©2021 Model Shipwrights and Kitmaker Network, a subsidiary of Silver Star Enterprises
All Rights Reserved. Please read our Conditions of Use and Privacy Policy.
All Rights Reserved. Please read our Conditions of Use and Privacy Policy.