Ships by Class/Type: Cruisers
Topics covering cruisers both past and present.
IJN anti-aircraft cruiser Isuzu 1944 1:350
GrantGoodale
Visit this Community
Ontario, Canada
Joined: April 26, 2015
KitMaker: 99 posts
Model Shipwrights: 99 posts
Posted: Tuesday, February 13, 2018 - 06:37 AM UTC

Quoted Text

Which color did have the Japanese torpedoes within their cruisers?


Try www.combinedfleet.com. You should be able to find the answer there.

HTH
d6mst0
#453
Visit this Community
Texas, United States
Joined: August 28, 2016
KitMaker: 1,925 posts
Model Shipwrights: 1,298 posts
Posted: Tuesday, February 13, 2018 - 07:41 PM UTC
Thomas,

Nice work on those AA guns.

Mark
Cadeus
Visit this Community
Indiana, United States
Joined: September 01, 2015
KitMaker: 144 posts
Model Shipwrights: 139 posts
Posted: Wednesday, February 14, 2018 - 05:09 AM UTC
Looking good, you're etch skills are superb, love the AA guns and I don't blame you for not using the microscopic parts, I flung some off into the ether last night on a tamiya kagero build, keep it up.
JJ1973
#345
Visit this Community
Niedersachsen, Germany
Joined: August 22, 2011
KitMaker: 1,835 posts
Model Shipwrights: 1,832 posts
Posted: Saturday, February 17, 2018 - 01:00 AM UTC
Moin Thomas!

I'm not joining late...I'm just late with my first comment here sorry mate, busy times. But I have been watching and of course I'm in! Fantastic work so far, it's really fun to follow your progress! You are really doing a great job with your attention to details and your really crisp work, especially your paint job (torpedo tubes) and PE work is excellent!

Cheers, Jan
Black_sheep
Visit this Community
Bayern, Germany
Joined: December 11, 2009
KitMaker: 823 posts
Model Shipwrights: 551 posts
Posted: Sunday, February 18, 2018 - 01:18 AM UTC
@ Grant: Thank you for the hint to combinedfleet.com - actually I didn´t knew this site bevor. Will be very helpful and interesting to read.

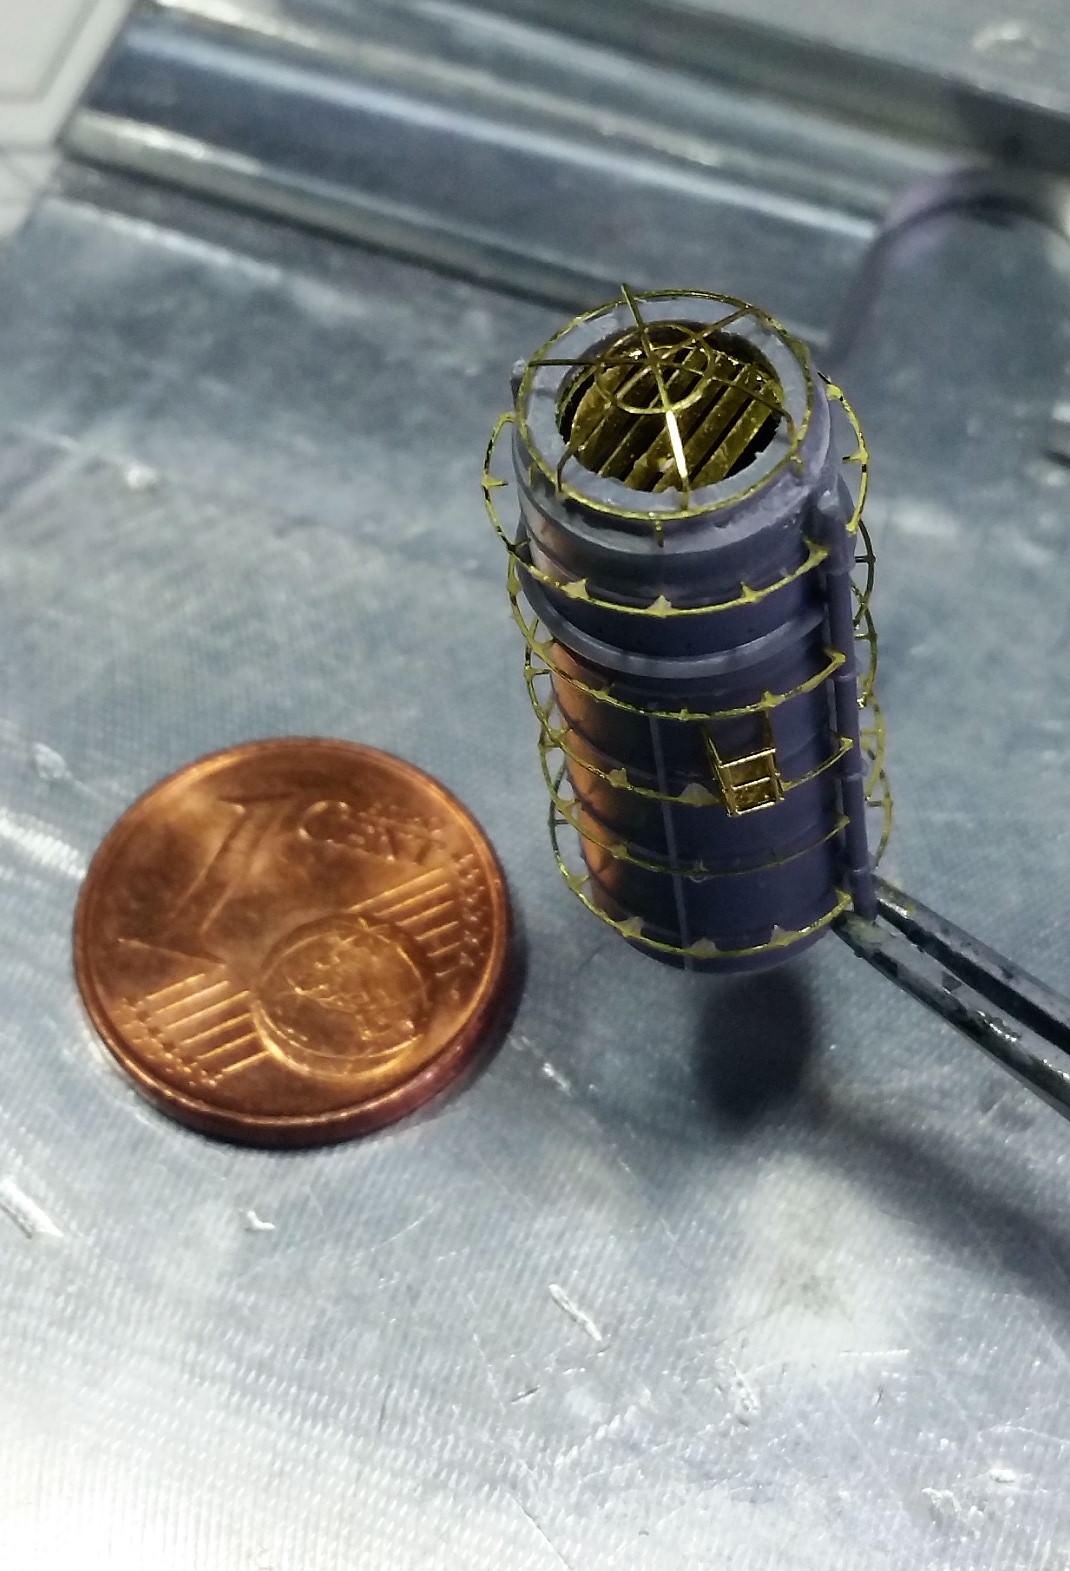
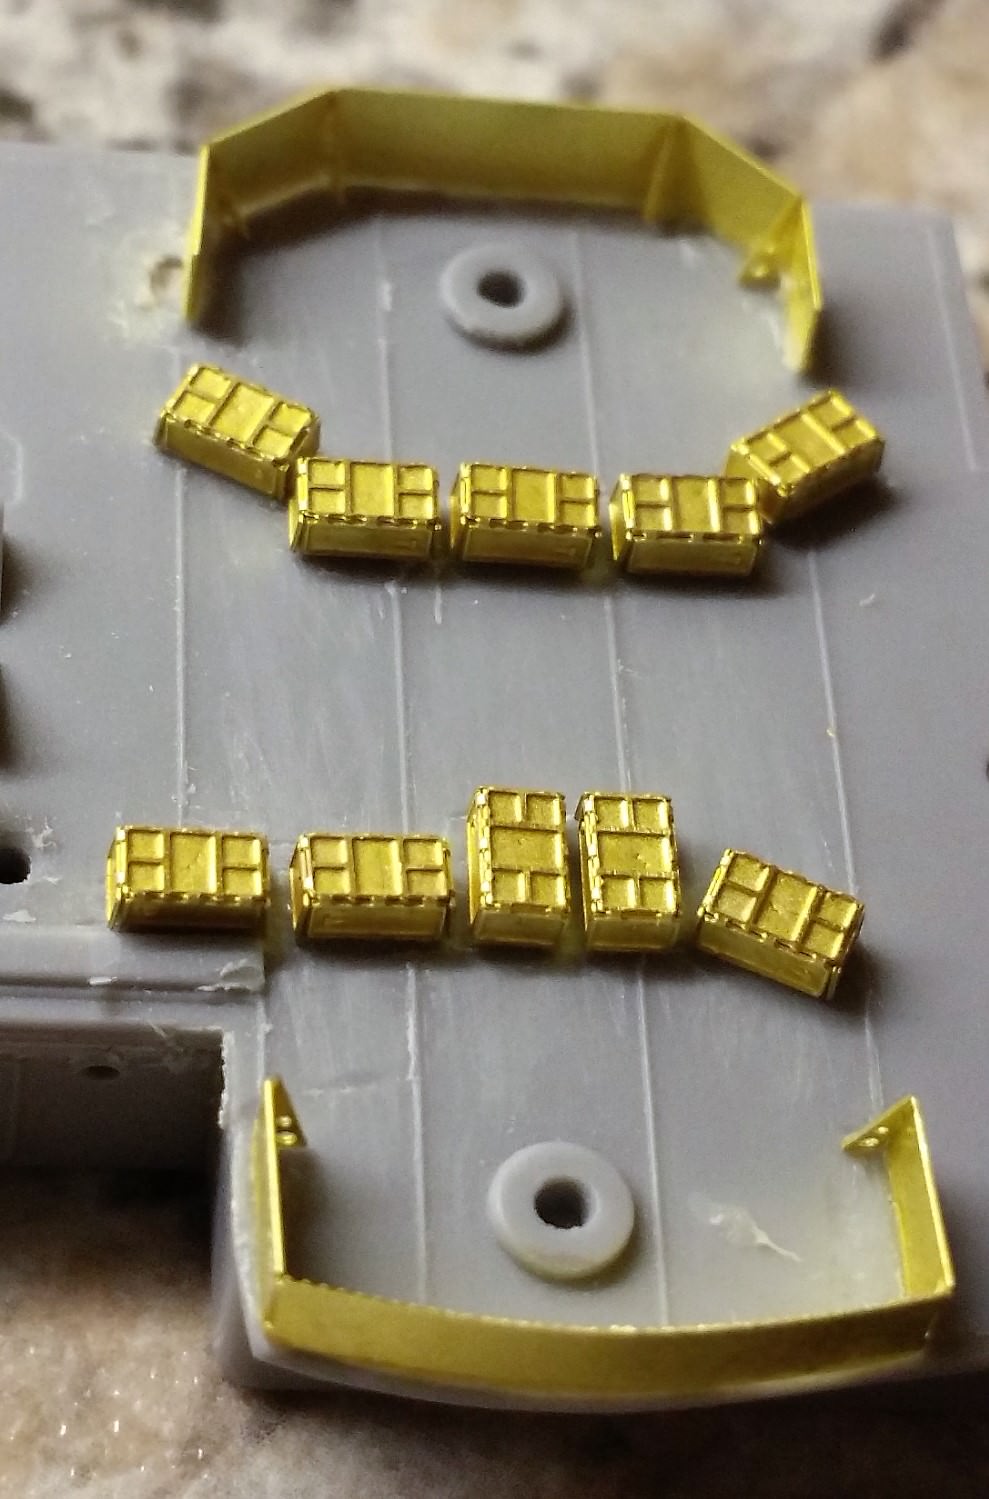
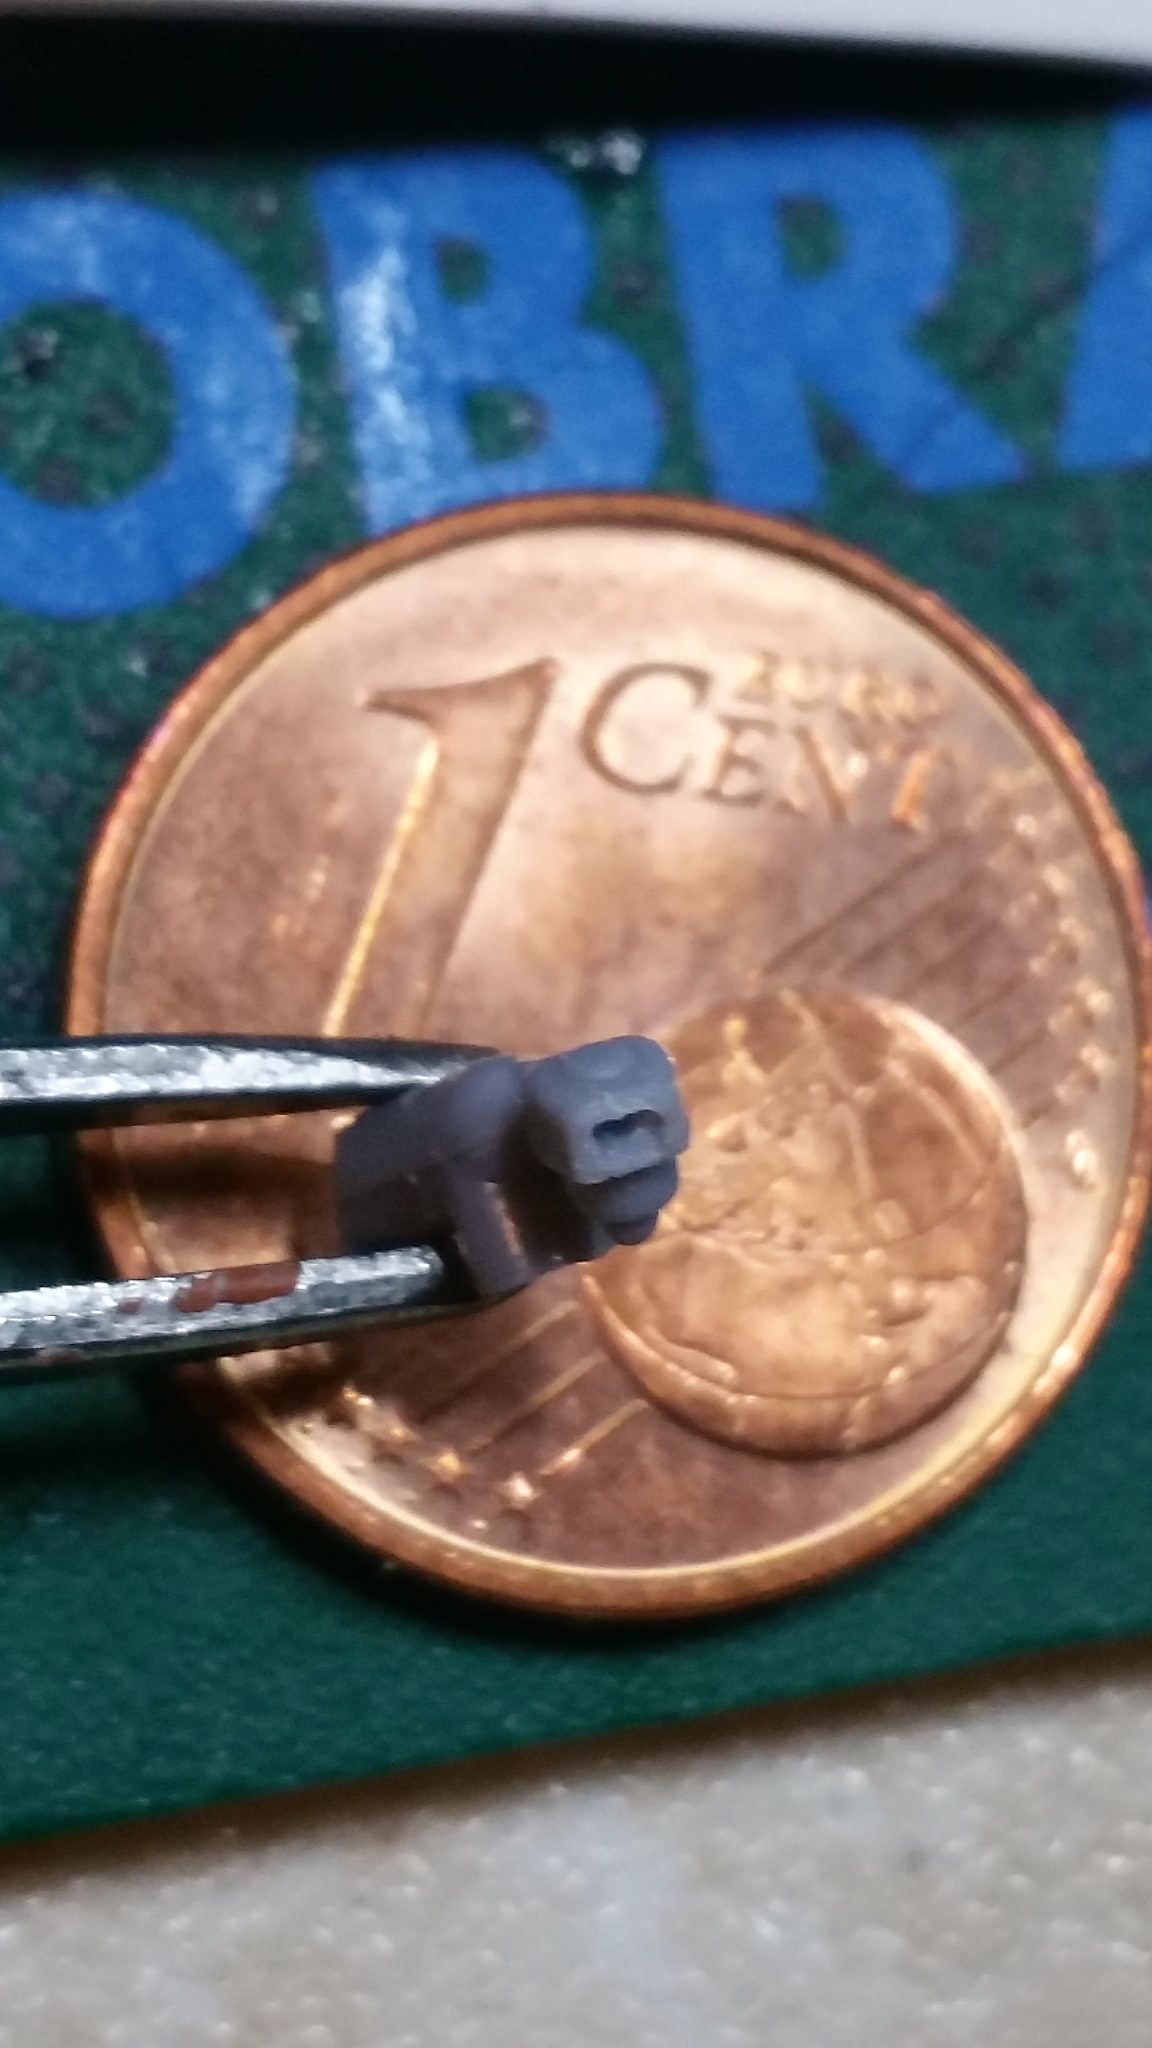
@ Mark: Thank you, actually I did finished just one of three of these big AA-guns and this one already let me lost some hairs. Some parts are just too small to hold and/or to glue. Sometimes the tweezers also kept sticked together with the part...

@ Norman: Flunged away parts I do know well, too! It is sometimes strange when your wife come into the room and you´re crawling around at the Floor with magnifier lenses and a flashlight on

@ Jan: Herzlich Willkommen wieder an Bord! Thanks for your great compliments. Nice to see that so much people here like what I am doing - good feeling

This weekend was not much modelling time for me so the update is very small:
As I am still waiting for the wooden base and some new vents and bollards from Alliance Models (yes I decided to spend even more money on this project...) I decided to start with the funnel 1. This was a very tedious and difficult work for me as the tiny parts are just impossible to glue. Flyhawk also has a mistake about the Installation here: they show the funnel flaps (correct Designation?) on top of the funnel - but actually they have to be below the top part 4. If someone want to know what I mean I can show it in a later post to you all:


After Installation I immediately spraypainted this part with Gunze IJN Maizuru color to give the small parts more stability. But still: DON´T TOUCH IT WITH BARE FINGERS!!!


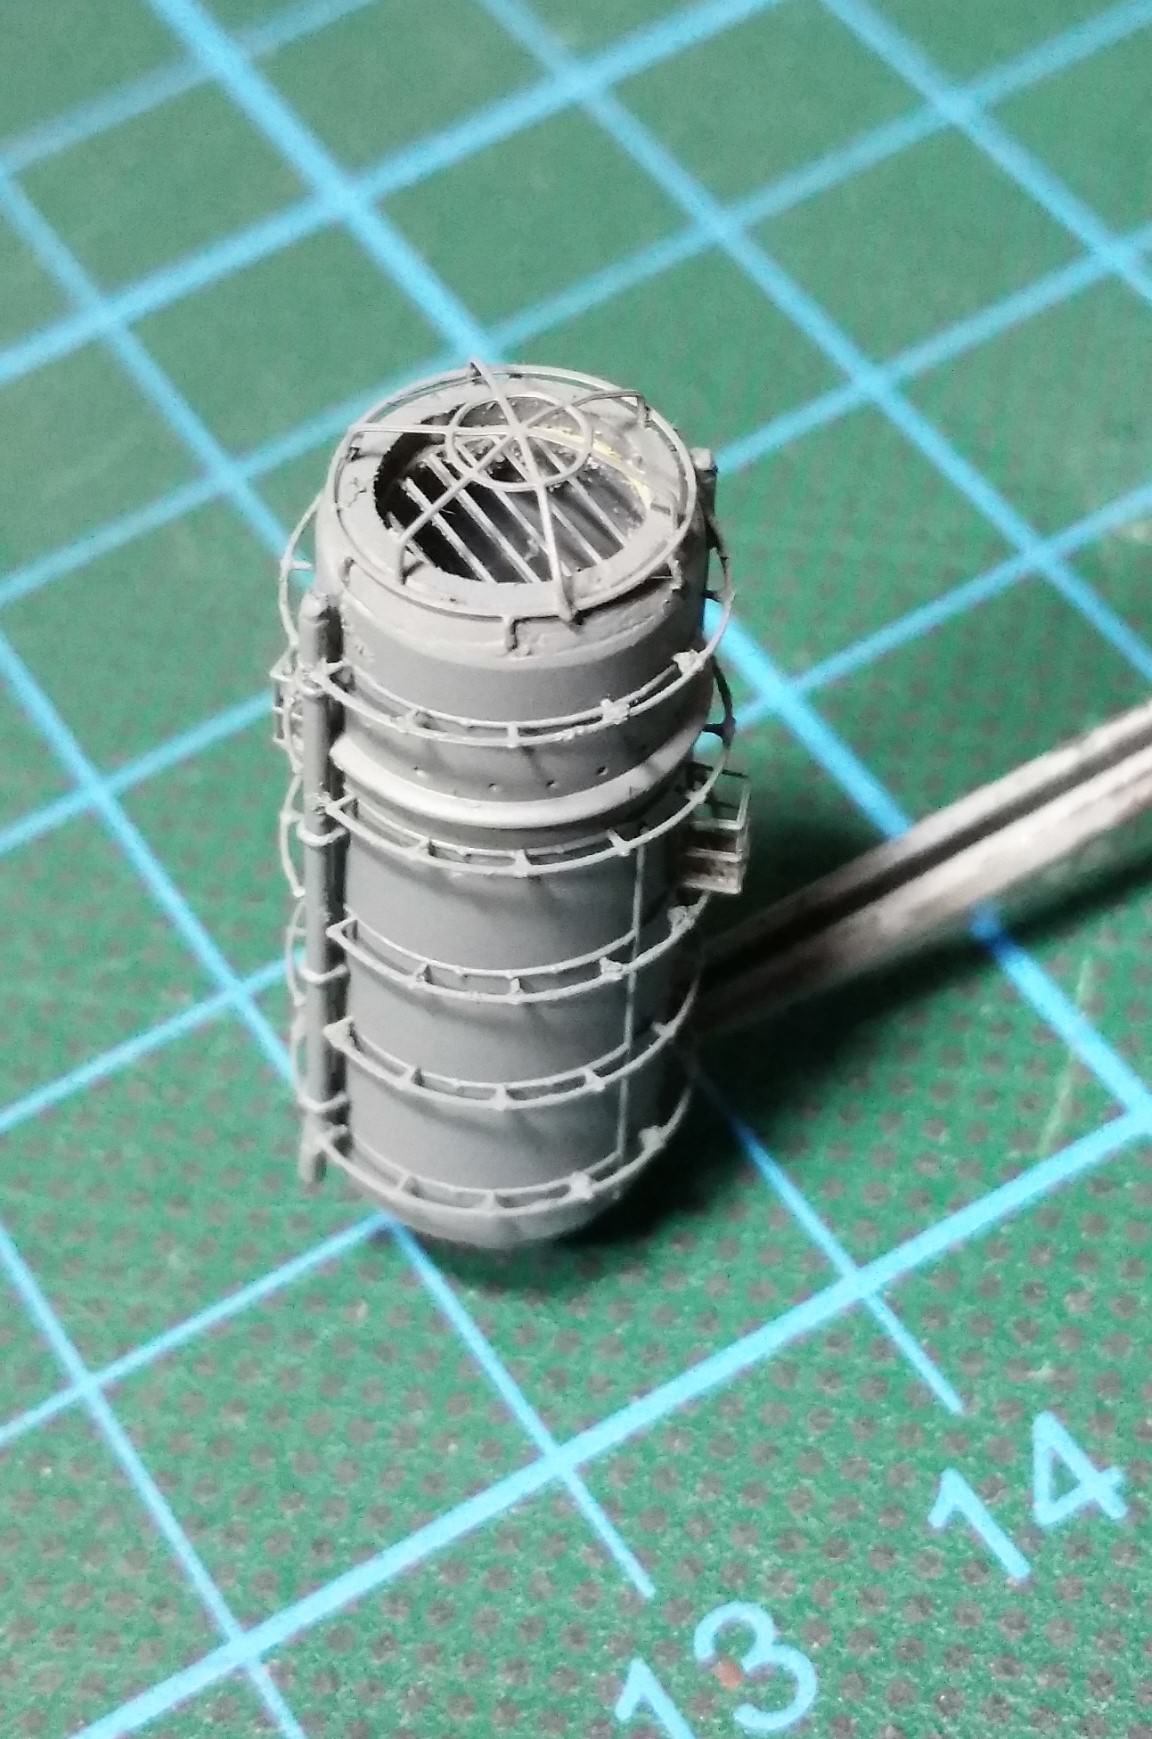
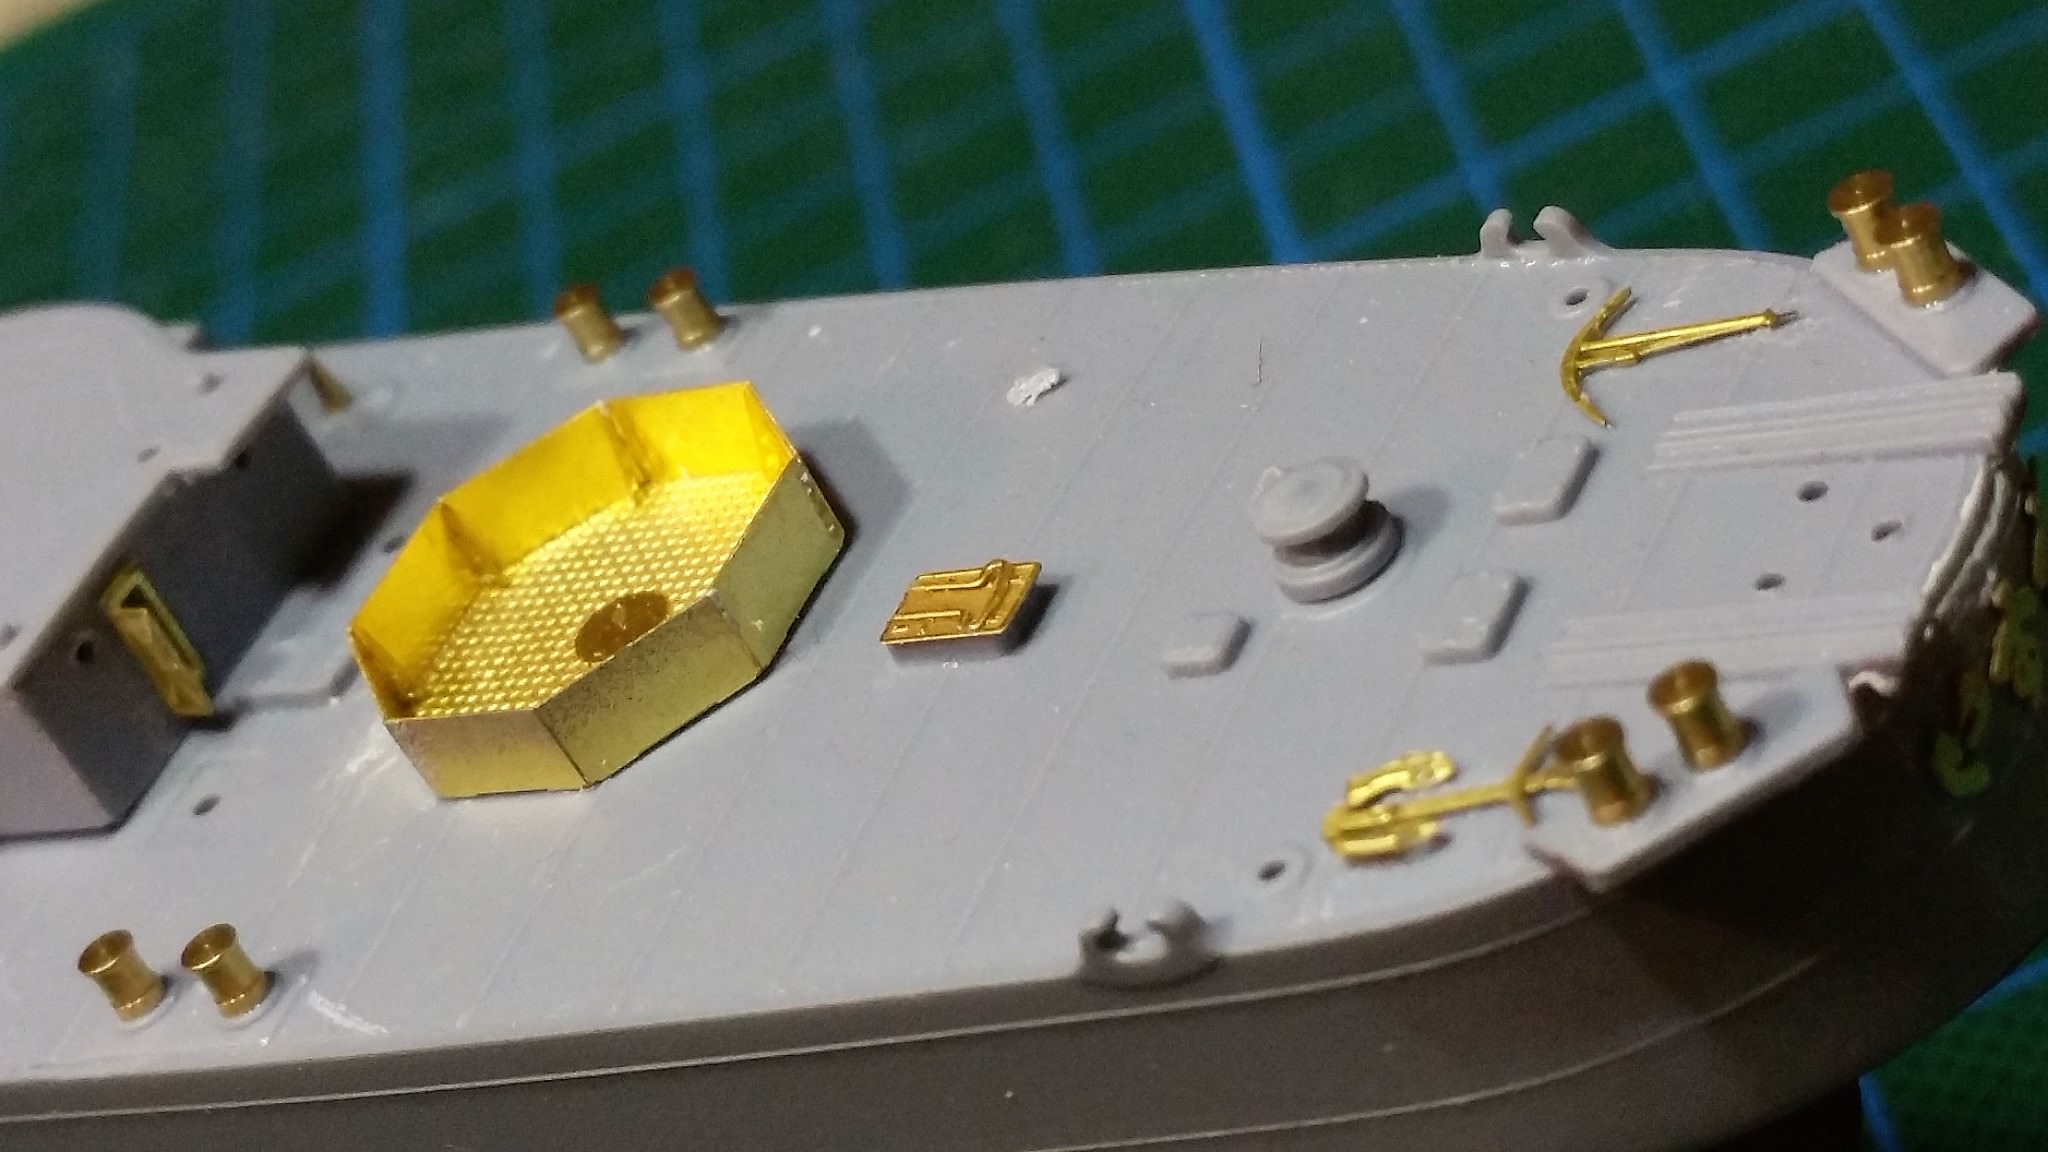
After I started to spraypaint I also primed the lonely AA-gun


and all AA-barbettes


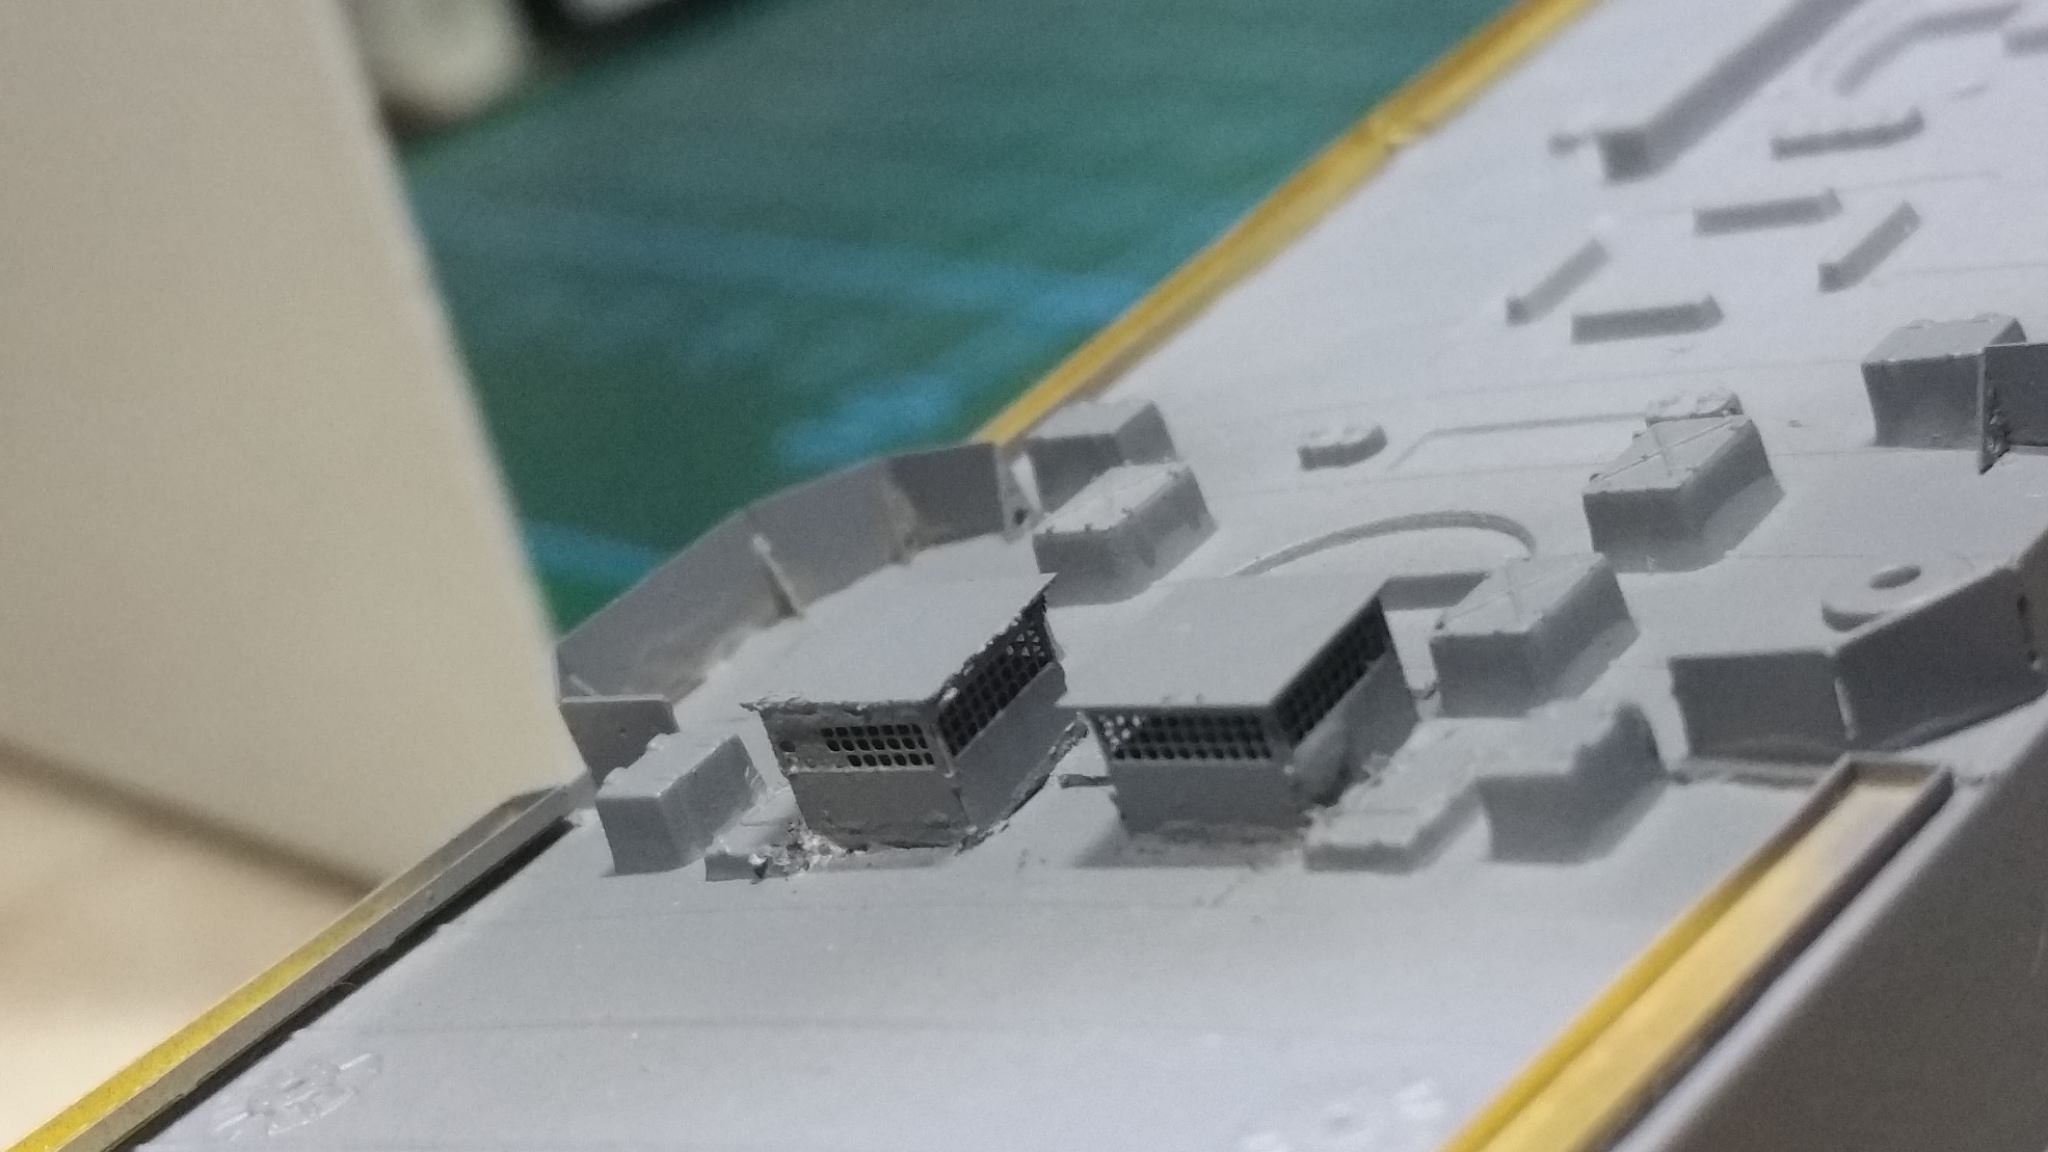
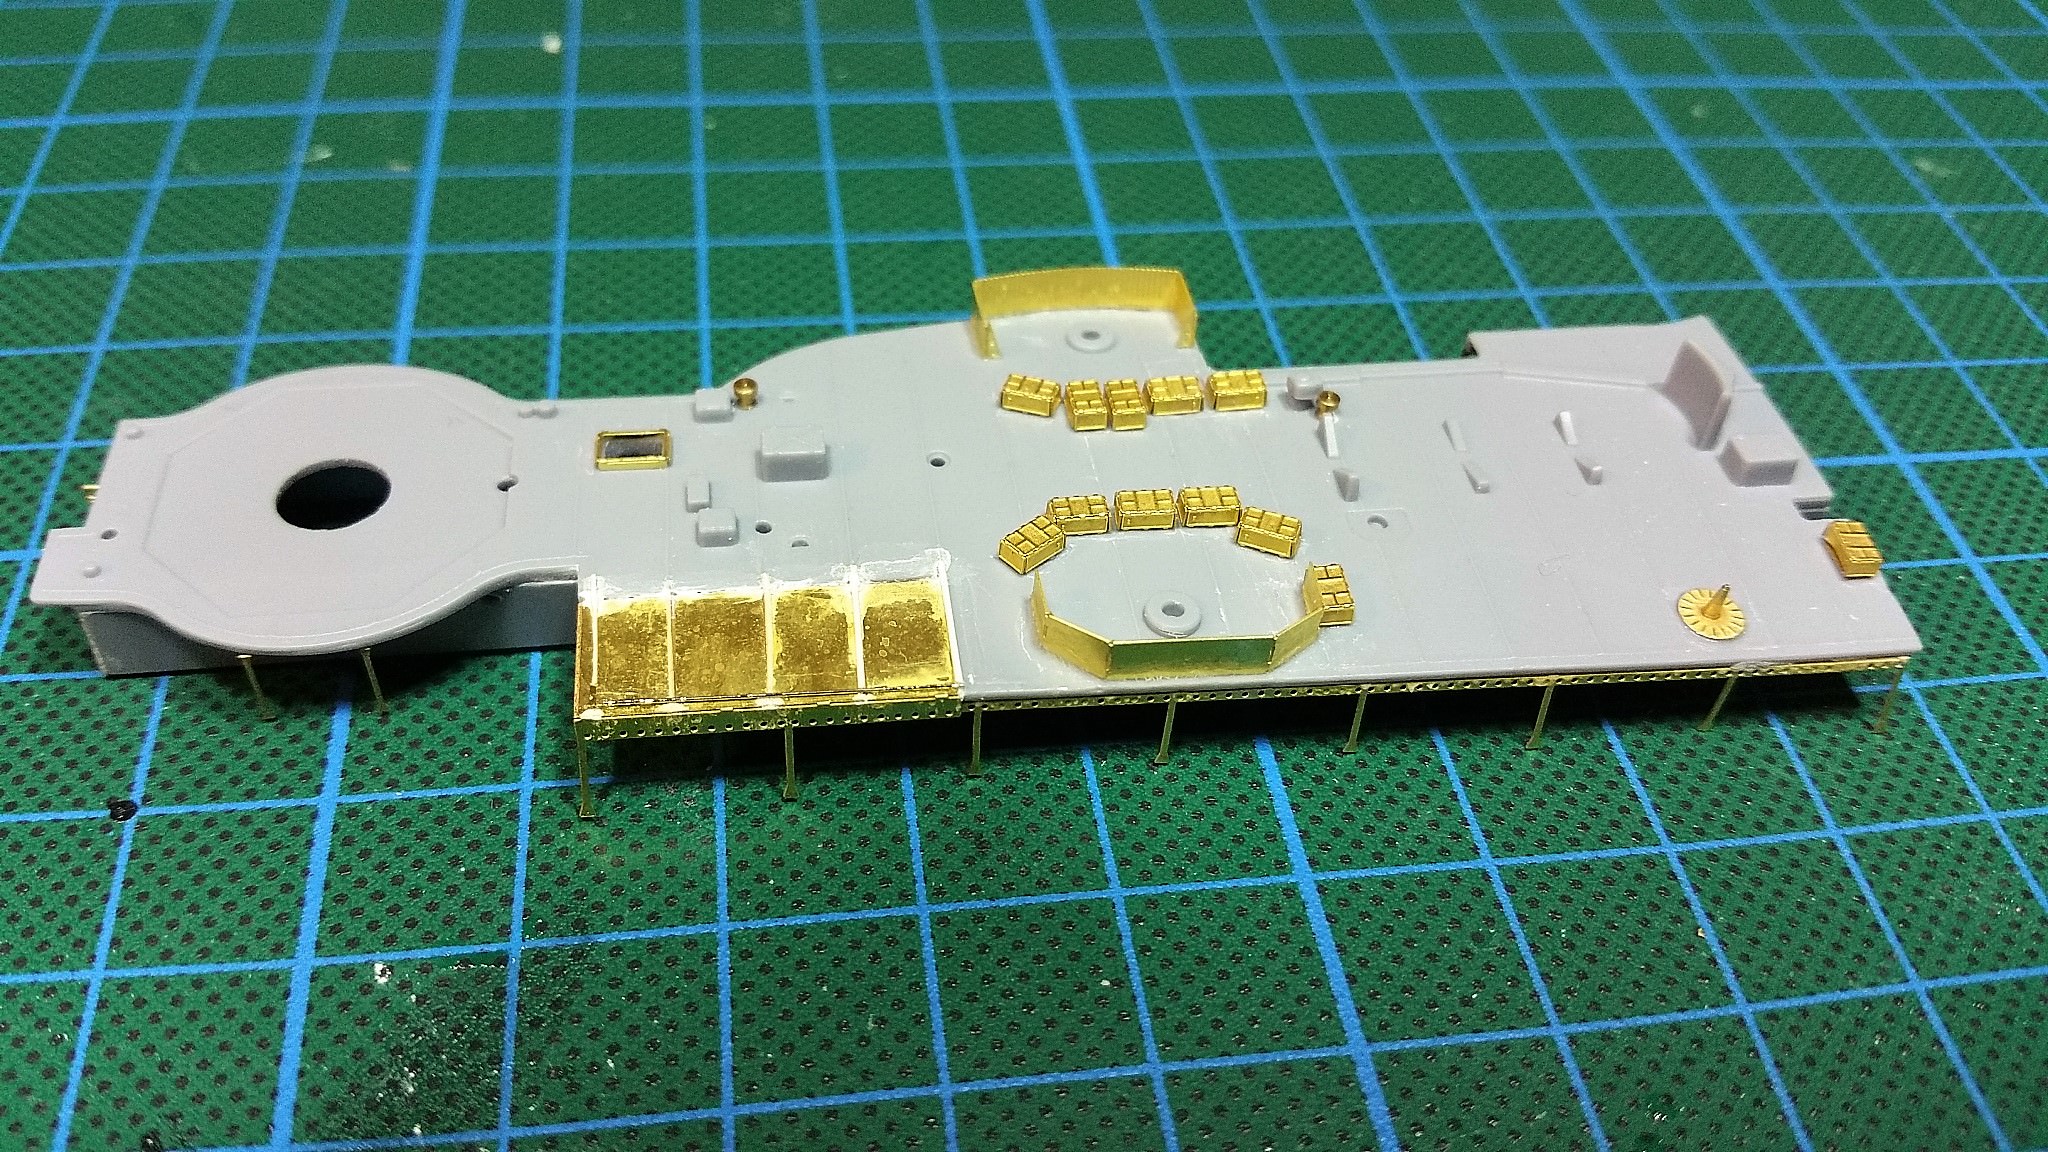
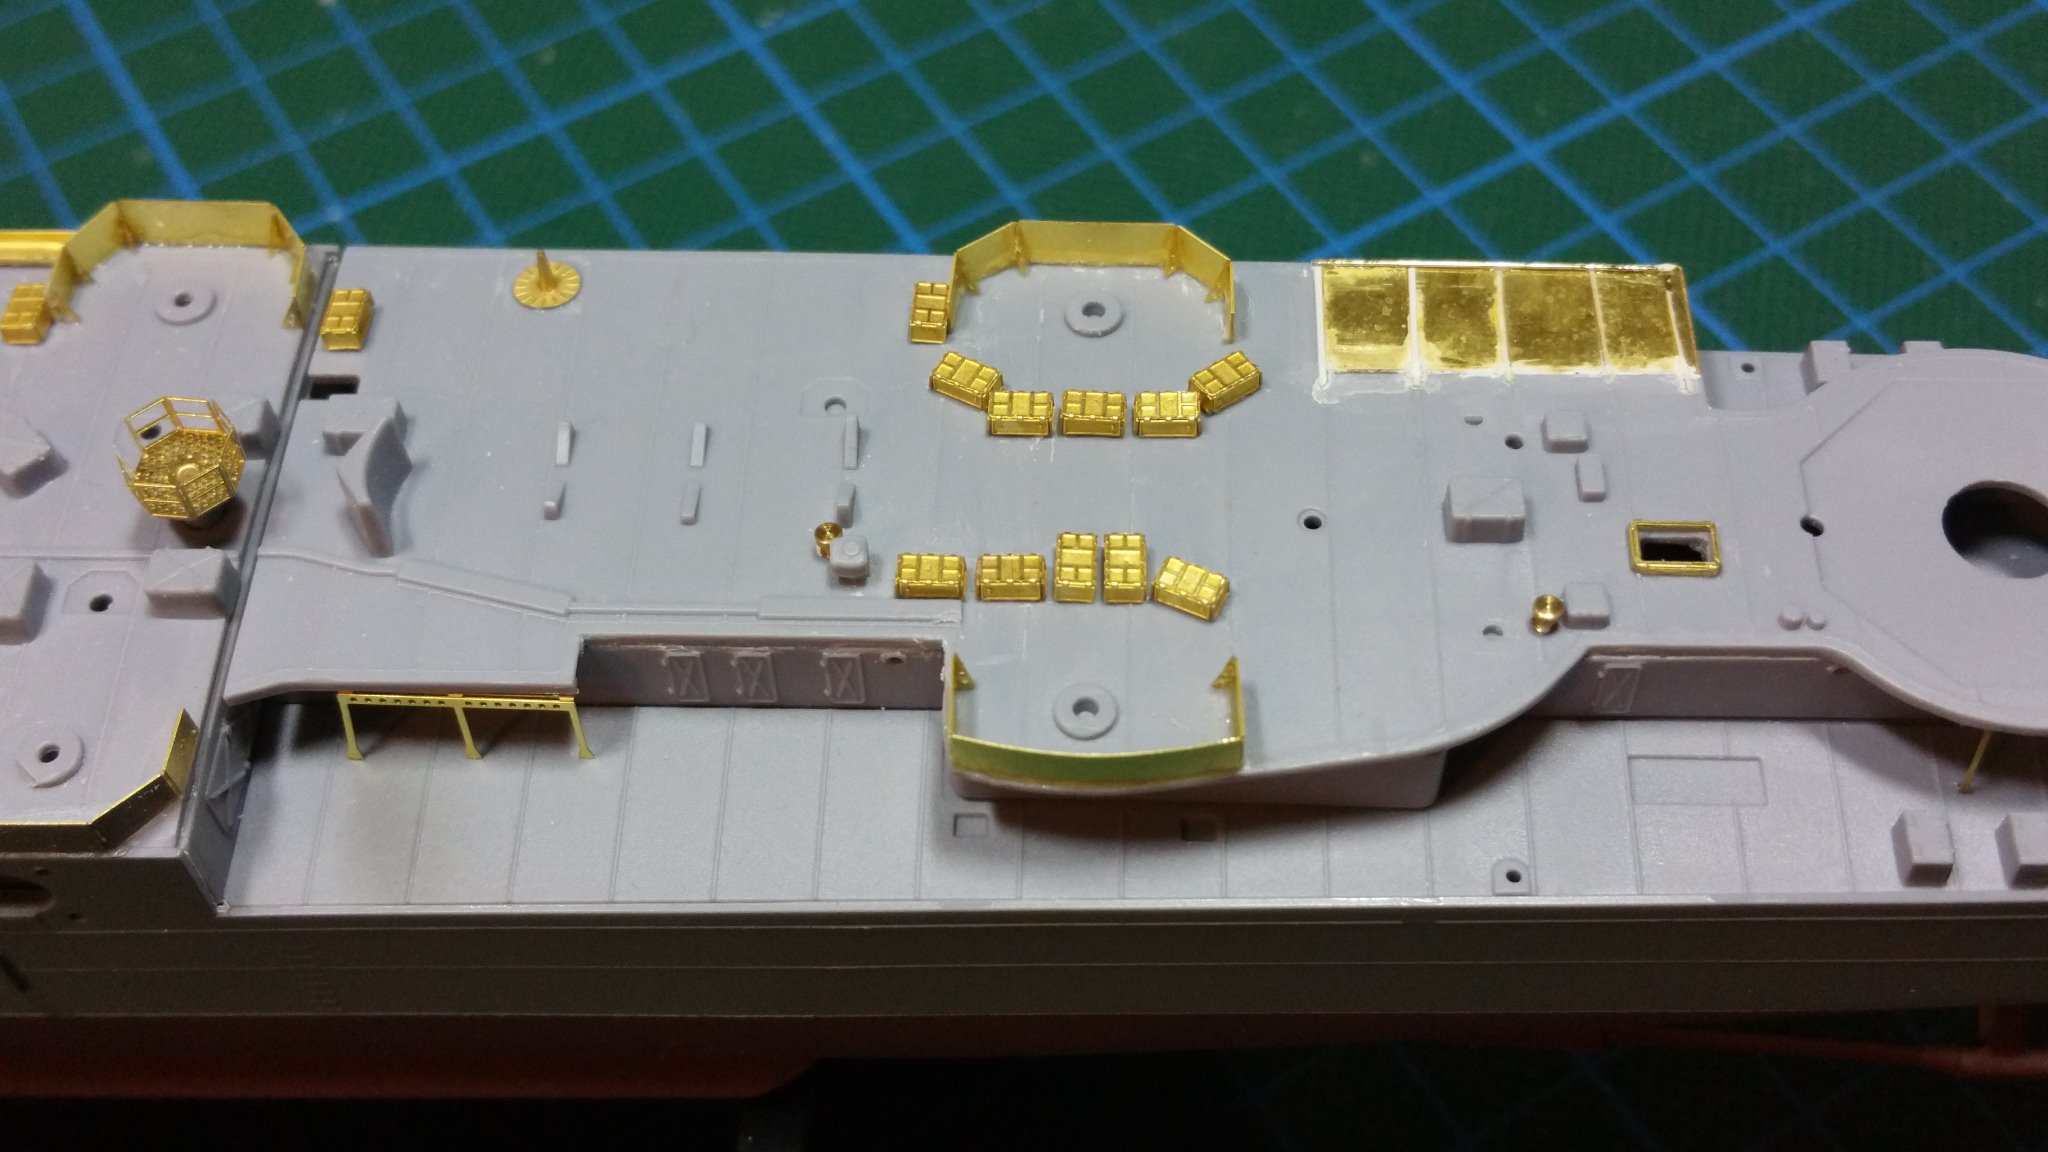
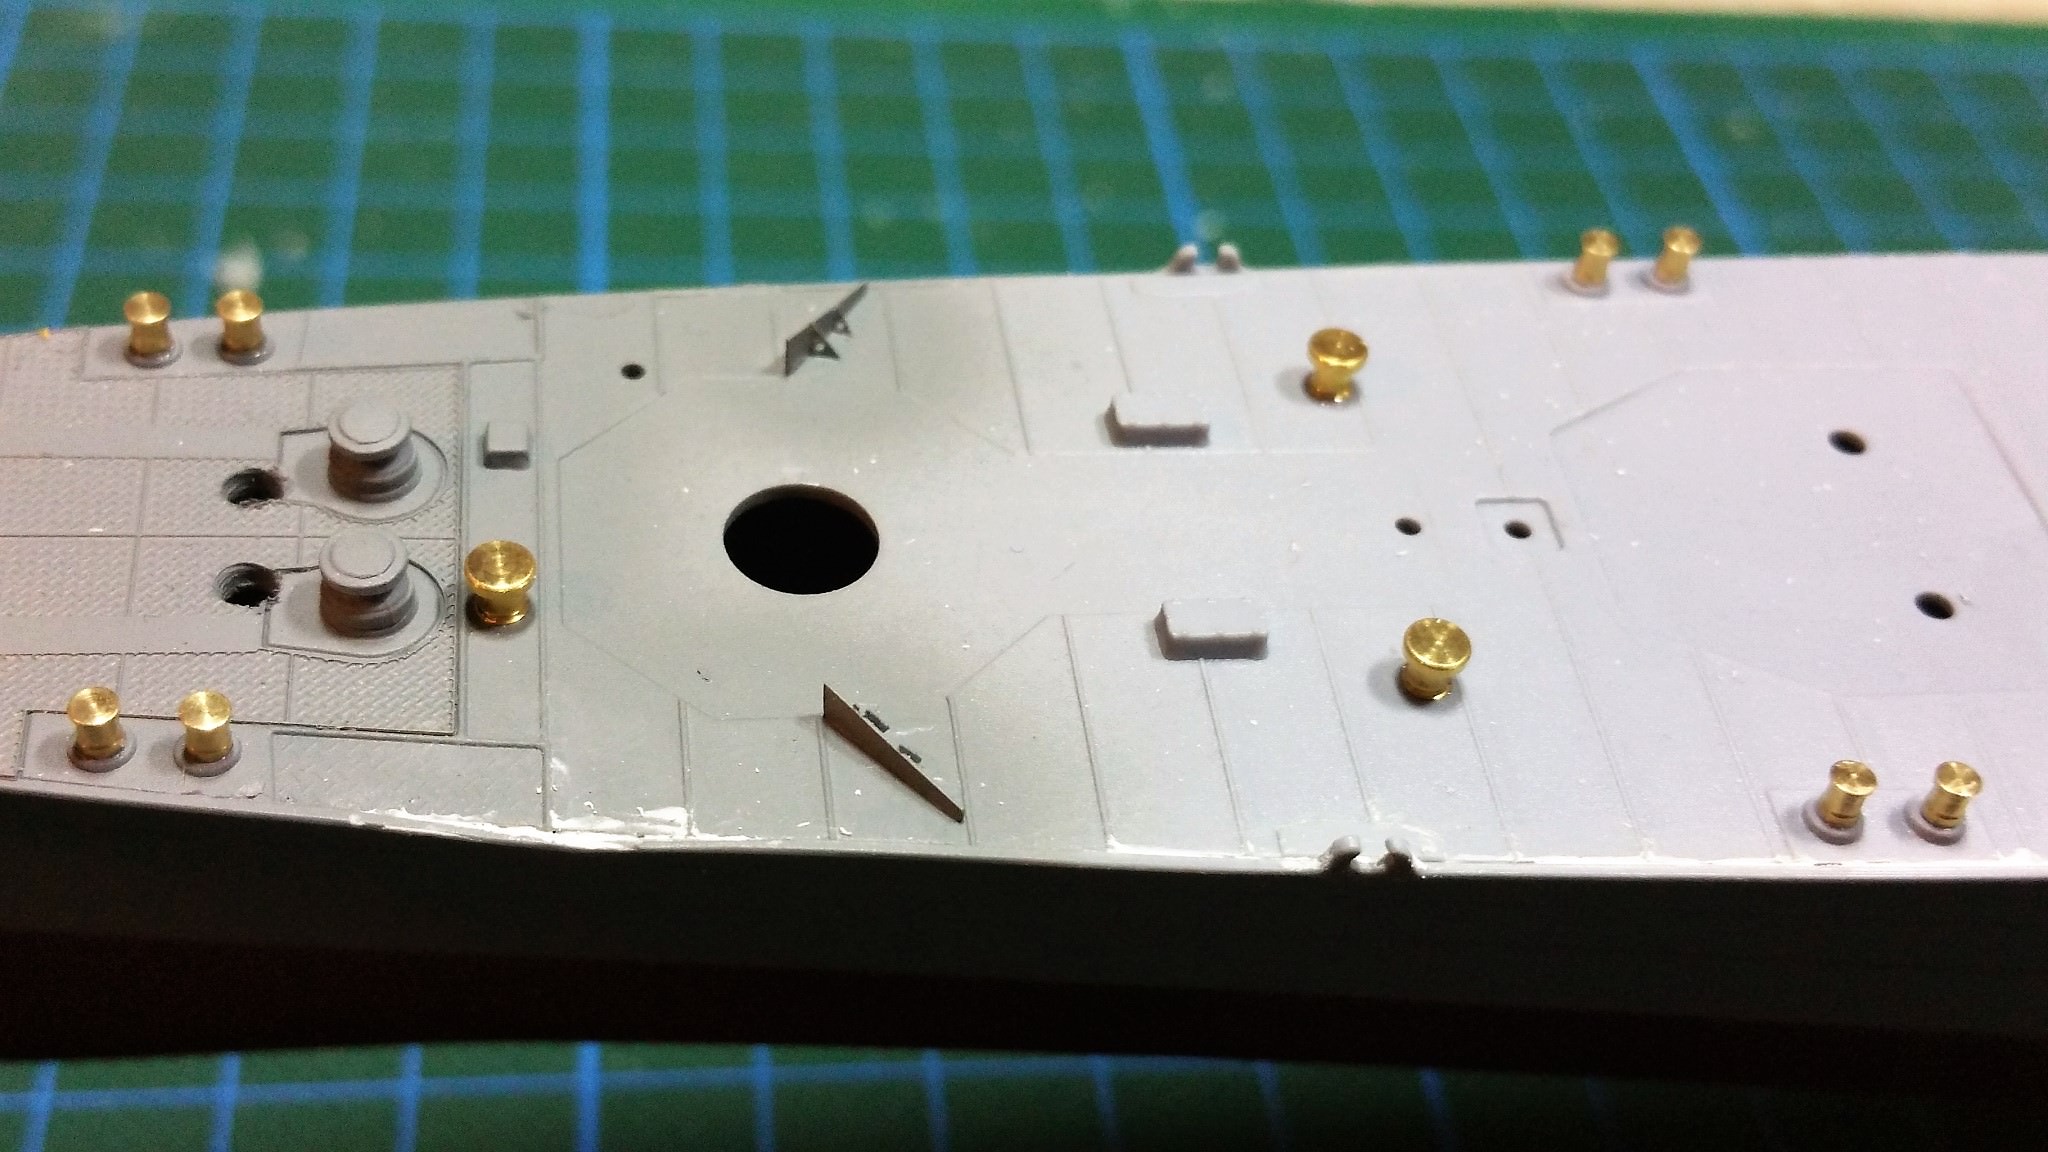
I did found out that two venthousings at midship are within Flyhawks pe set included to replace the kit´s plastic ones. I did thinked about if I replace them as I already cleaned up the plastic ones but decided to use the PE ones as they are open and look better. I just need to clean them up a bit later


Midship barbette primed and some small PE-platfom installed


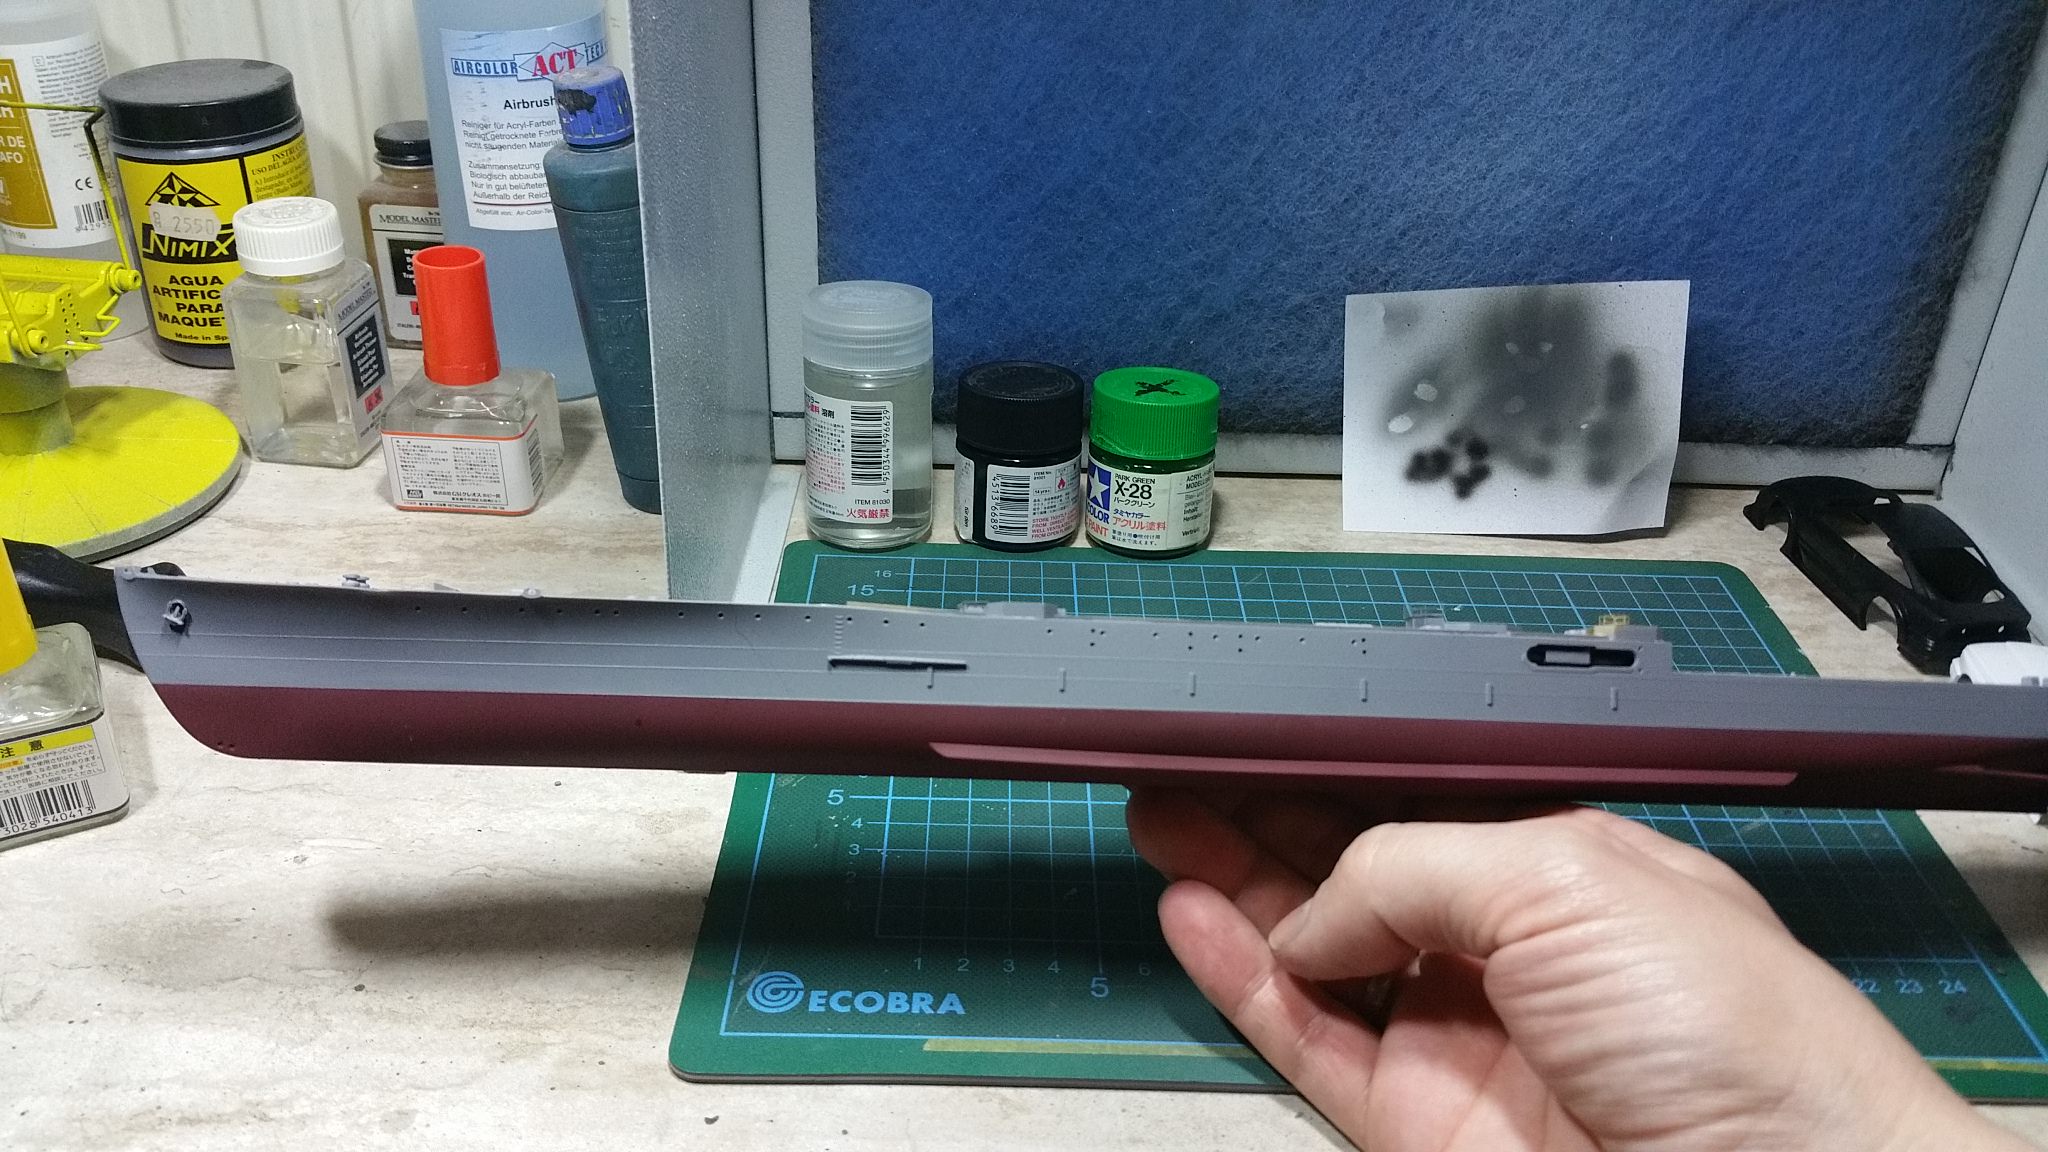
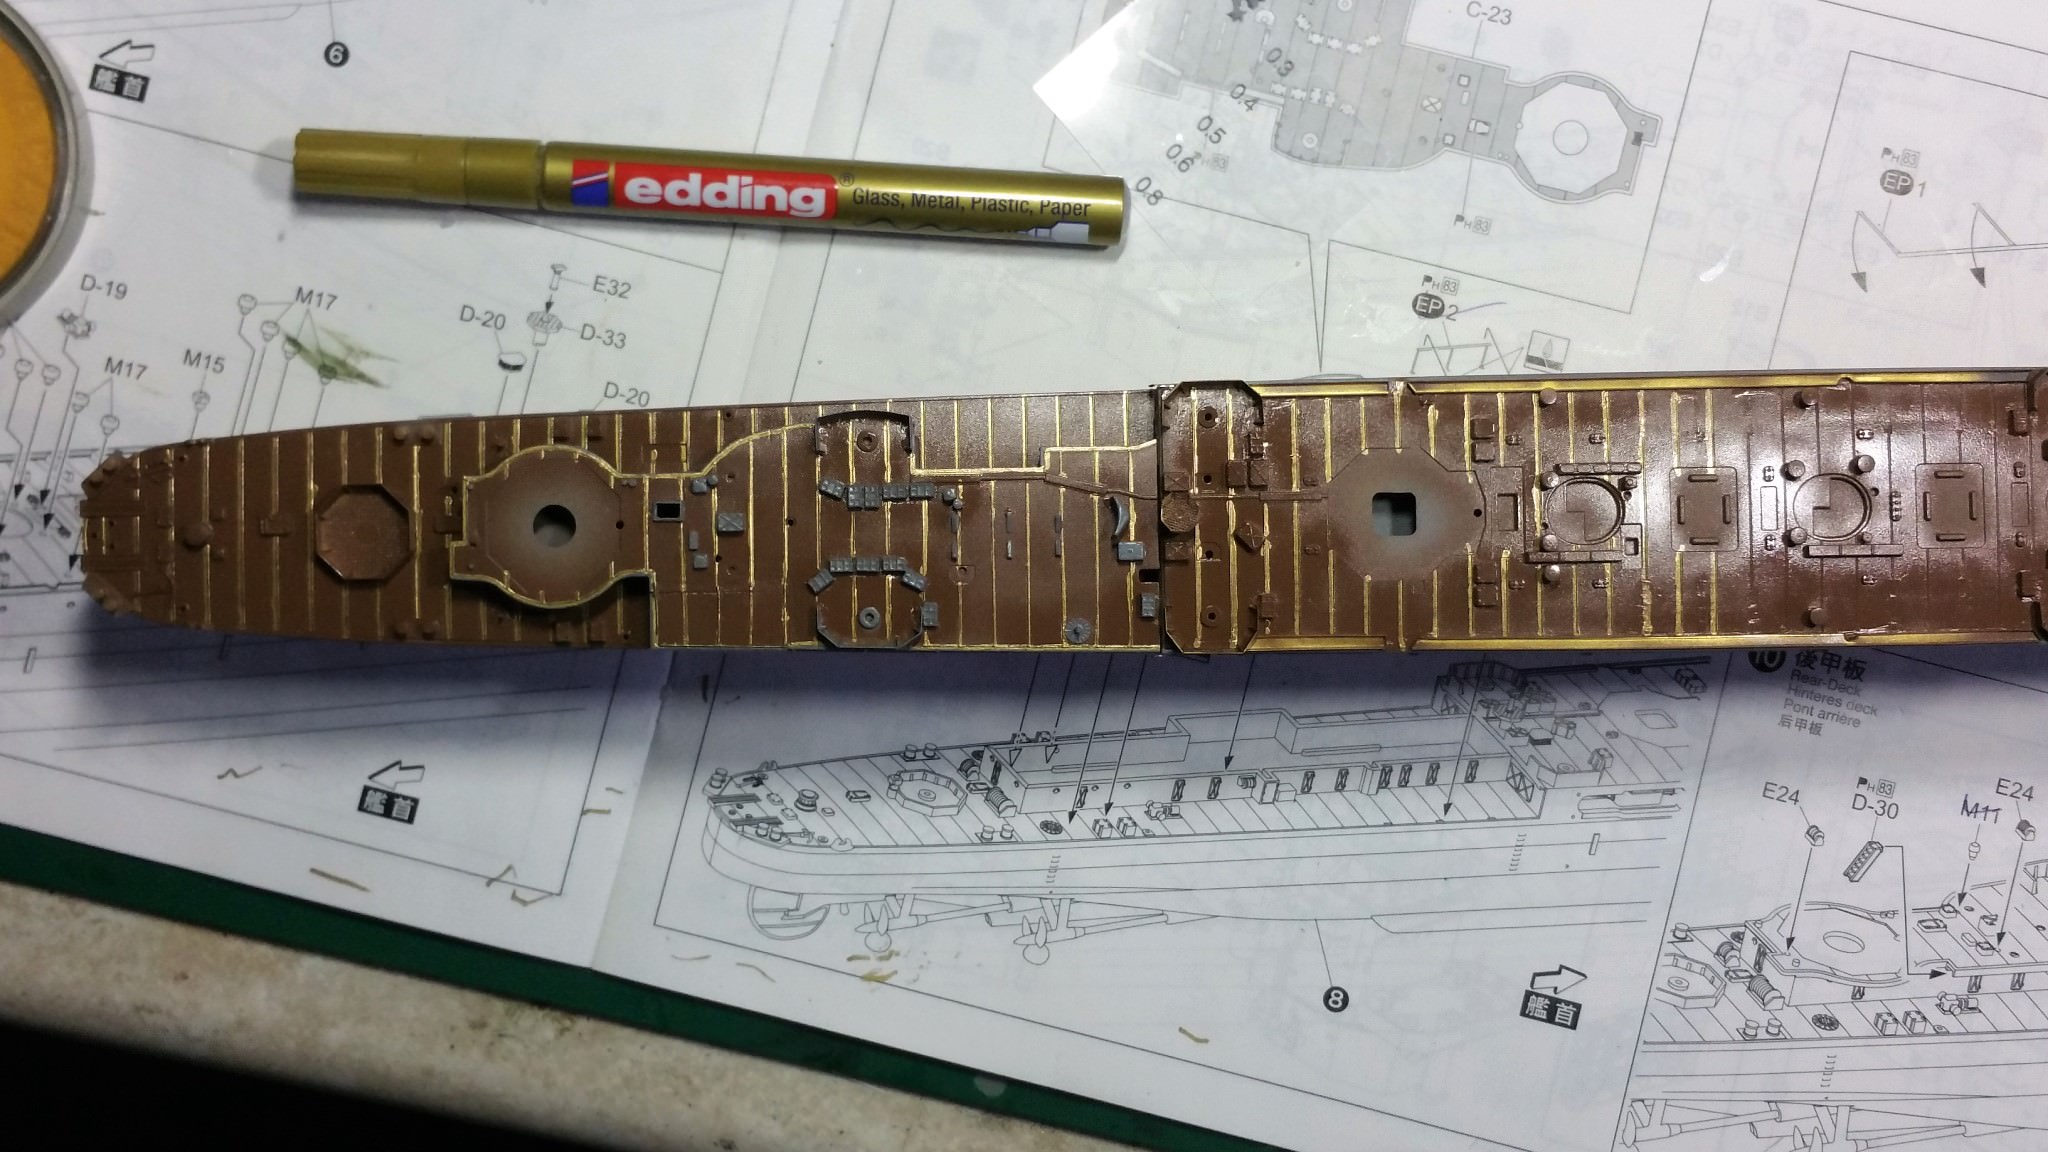
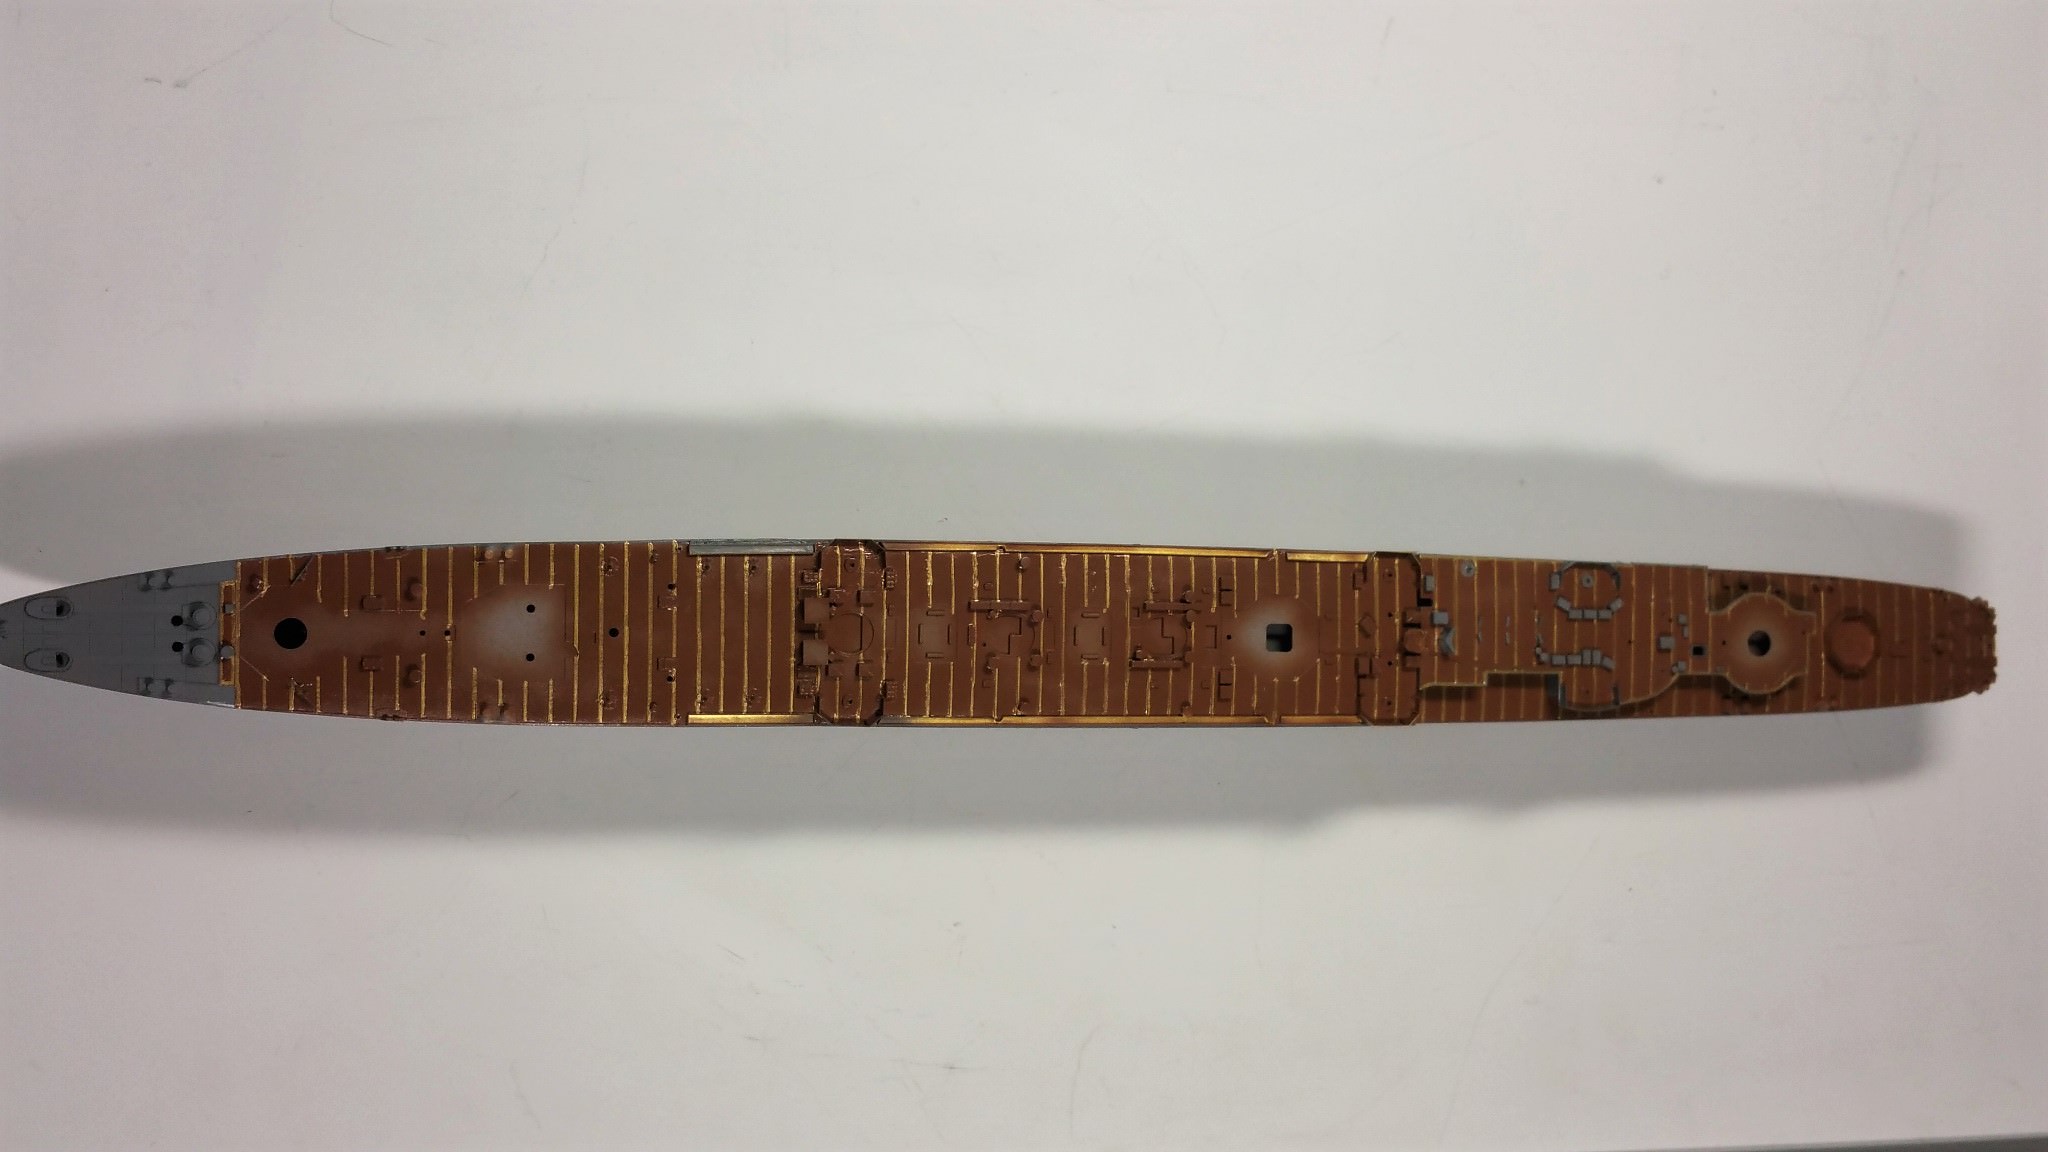
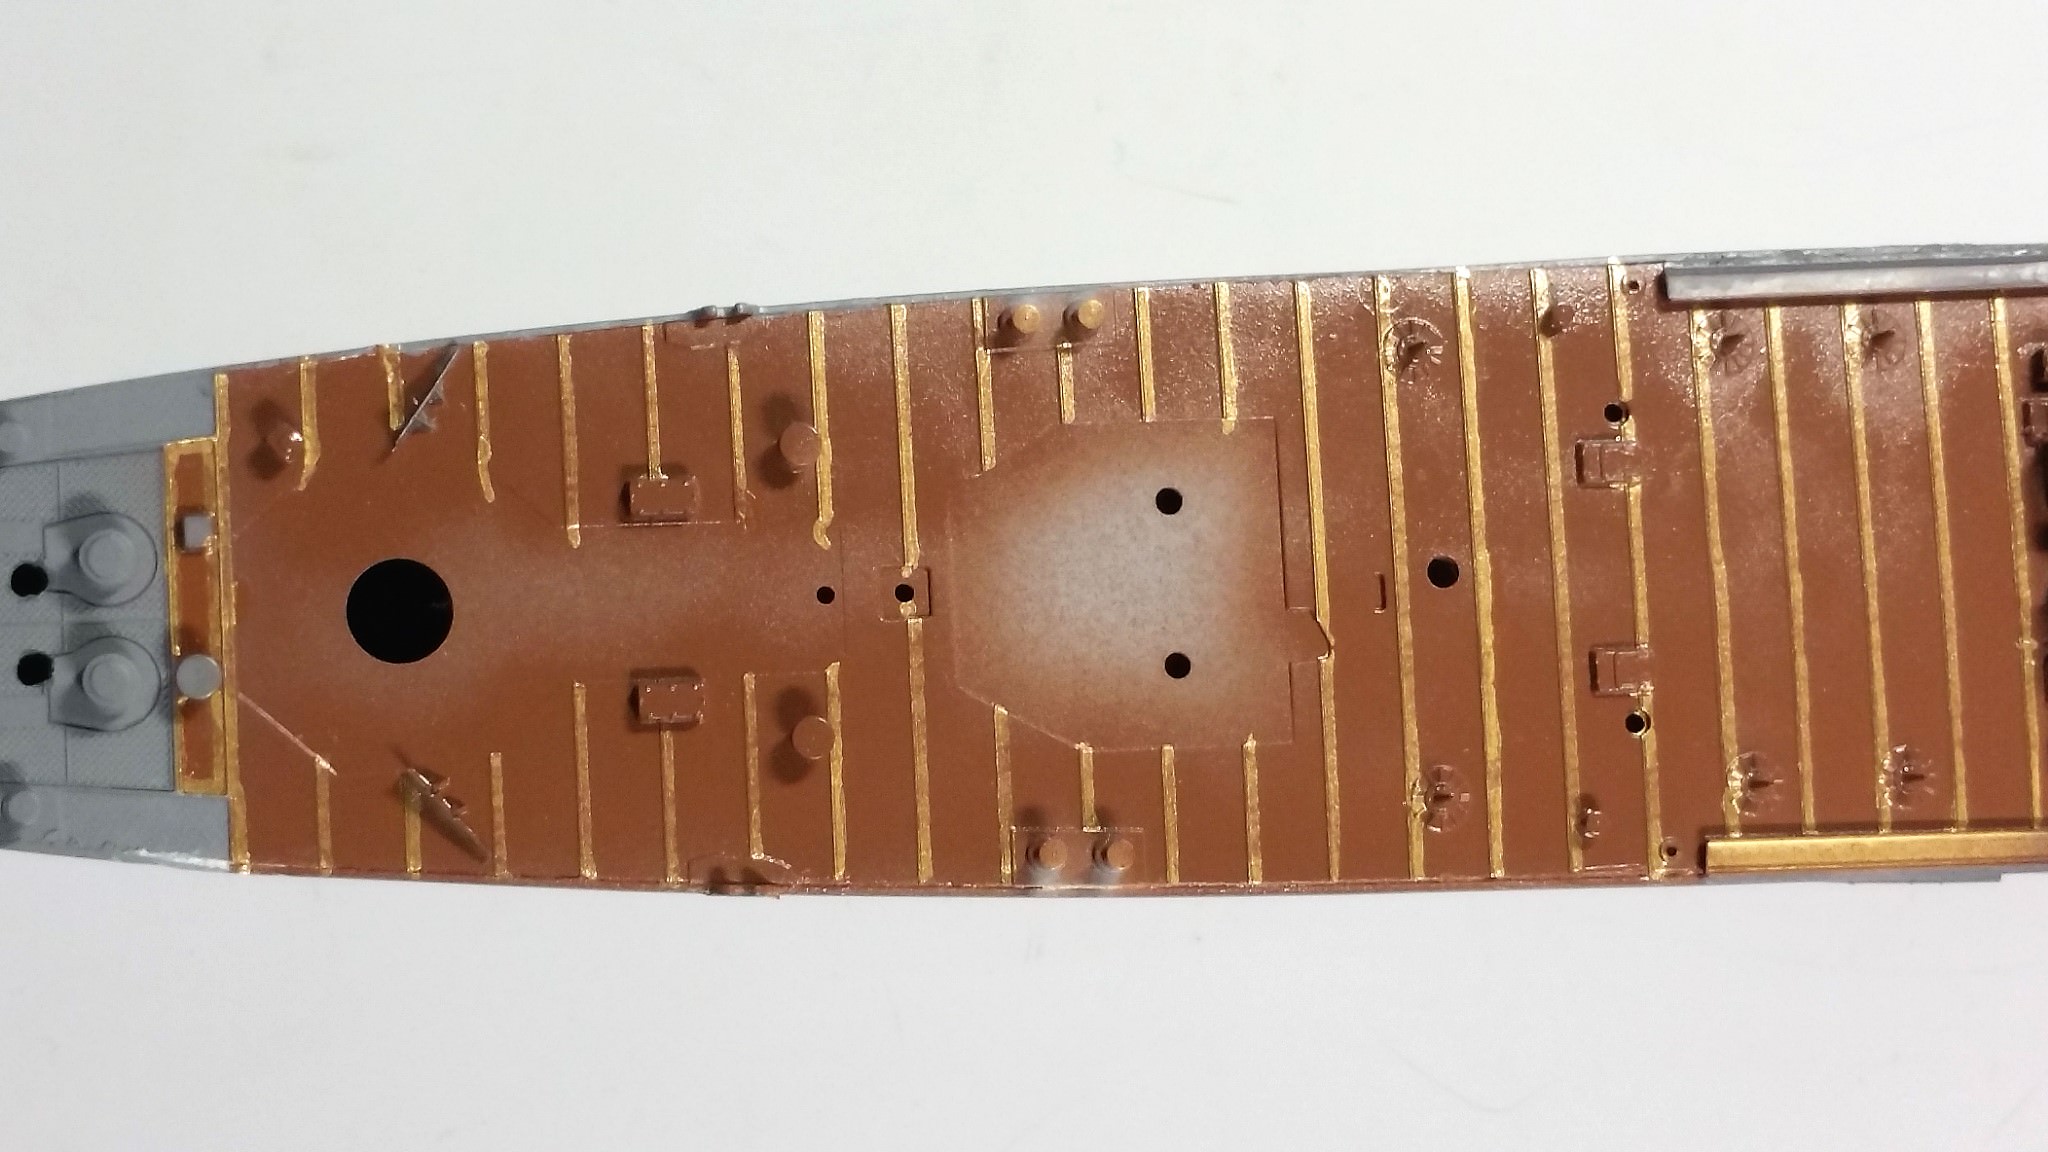
I sprayed she hull bottom with GUNZE original IJN hull red Color. AOSHIMA calls it cocoa brown and indeed the red is very dark, almost brown.


I do hope the ordered parts will come early this upcoming week so I can continue with the ship itself

Cheers
RedDuster
Visit this Community
England - South East, United Kingdom
Joined: March 01, 2010
KitMaker: 7,078 posts
Model Shipwrights: 6,649 posts
Posted: Sunday, February 18, 2018 - 02:07 AM UTC
Very nice progress Thomas.

The funnel looks superb with all that etch really adds depth.

The etched midships vents do look the business too.

Following along with interest,

cheers

Si
RussellE
#306
Visit this Community
Victoria, Australia
Joined: June 27, 2010
KitMaker: 3,959 posts
Model Shipwrights: 2,777 posts
Posted: Sunday, February 18, 2018 - 02:46 AM UTC
Wow! You are a brave man adding grab rail PE to the funnel Thomas! Looks great though, especially under paint!

Very crisp PE otherwise!

And, no, there is no limit to the amount of money we could spend on these things If only our "better halves" understood why
Fordboy
Visit this Community
Auckland, New Zealand
Joined: July 13, 2004
KitMaker: 2,169 posts
Model Shipwrights: 1,597 posts
Posted: Monday, February 19, 2018 - 10:59 PM UTC
Ahoy Thomas

Superb update - dont sneeze near that funnel!

Cheers


Sean
Cosimodo
#335
Visit this Community
Auckland, New Zealand
Joined: September 03, 2013
KitMaker: 1,808 posts
Model Shipwrights: 871 posts
Posted: Friday, February 23, 2018 - 10:35 AM UTC
I agree with all those PE comments but you're doing a great job with Thomas. The progress to date is looking very sharp.

cheers
Michael
JJ1973
#345
Visit this Community
Niedersachsen, Germany
Joined: August 22, 2011
KitMaker: 1,835 posts
Model Shipwrights: 1,832 posts
Posted: Monday, February 26, 2018 - 09:42 PM UTC
Thomas,

as the others already pointed out, that's really impressive PE work, but overall very nice and crisp work and progress, too!

Cheers,
Jan
Black_sheep
Visit this Community
Bayern, Germany
Joined: December 11, 2009
KitMaker: 823 posts
Model Shipwrights: 551 posts
Posted: Saturday, March 03, 2018 - 01:26 AM UTC
Hello mates, thanks for following and commenting my blog - very encouraging for me

Today it´s time again for an update: First I have to say that Flyhawks instructions are very rudimentary and many parts are just not listed at their pictures. This way you are forced to think carefully which parts can be replaced on the model with parts from the PE-fret.

First I decided to replace the molded on ammunition boxes with etched ones as they just look much better defined:


Then I worked on the upper rear deck:


Later, after prepainting there will be a huge gap between the reardeck and the main hull deck - I will fix that later with an Evergreen Strip


I did received the bollards and ventilation domes from Alliance Models and they really look very nicely on the ship - a huge improvement over the molded plastic parts


Maximum zoom:


Some ellipsoid ventilation domes I opened up with a very fine drill for a more realistic look


Then it was time for my very first of many more to come single 25 mm Type 95 AA-gun in 1:350. I had to make one just out of curiosity. For me it was at the edge of my abilities because of the tiny size and all the small parts but it look very nice though. A huge improvement over the kits and even Flyhawk´s set (as their barrels are not turned and just look too flat).
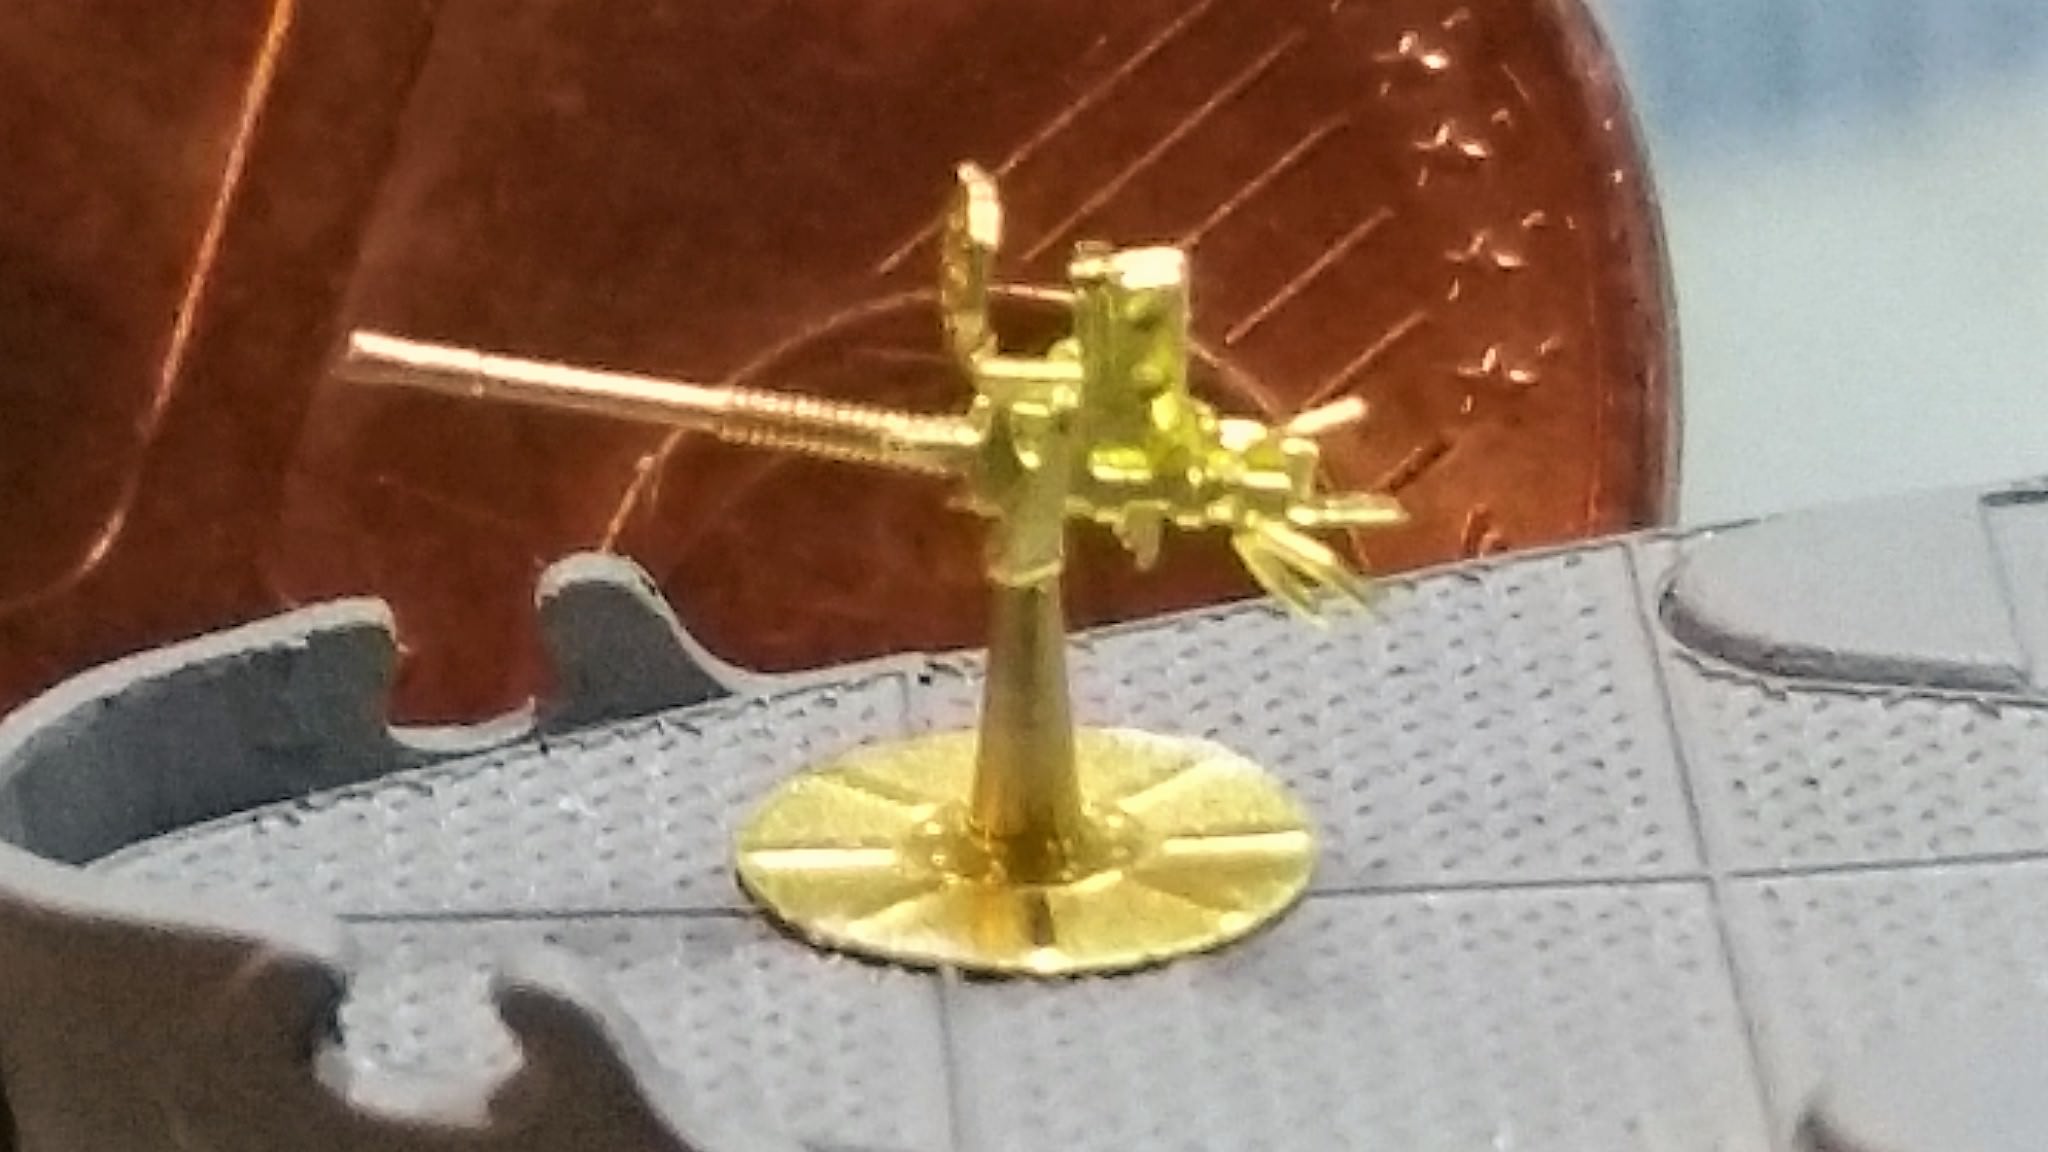

Then the wooden baseplate (made out of african afzelia wood) and the ship´s identification plate did arrived; I can fix the ship now firmly at the baseplate for better handling after painting the hull.


Next steps will be painting the hull and the linoleum Floor and fix everything onto the baseplate.

To be continued
RedDuster
Visit this Community
England - South East, United Kingdom
Joined: March 01, 2010
KitMaker: 7,078 posts
Model Shipwrights: 6,649 posts
Posted: Saturday, March 03, 2018 - 01:37 AM UTC
Great stuff Thomas,

Really enjoying your work, the brass is look really good.


Cheers

Si
Cadeus
Visit this Community
Indiana, United States
Joined: September 01, 2015
KitMaker: 144 posts
Model Shipwrights: 139 posts
Posted: Saturday, March 03, 2018 - 09:14 AM UTC
Looks great, that funnel must have been a pain. I wish my pe would come out that neat. Looking foreword to more.
JJ1973
#345
Visit this Community
Niedersachsen, Germany
Joined: August 22, 2011
KitMaker: 1,835 posts
Model Shipwrights: 1,832 posts
Posted: Saturday, March 03, 2018 - 11:29 PM UTC
Hi Thomas,

that's quite an extensive update, and your brass work is top quality, hands down!! Nice job on the 25mm, I think I have an idea what you are talking about, after quite a few Mater 20mm Oerlikons...

She's coming along really nice!!

Cheers,
Jan
Fordboy
Visit this Community
Auckland, New Zealand
Joined: July 13, 2004
KitMaker: 2,169 posts
Model Shipwrights: 1,597 posts
Posted: Saturday, March 03, 2018 - 11:32 PM UTC
Ahoy Thomas

Superb update.

I love all the upgrades both small and large that you are doing.

Cheers


Sean
RussellE
#306
Visit this Community
Victoria, Australia
Joined: June 27, 2010
KitMaker: 3,959 posts
Model Shipwrights: 2,777 posts
Posted: Sunday, March 04, 2018 - 01:58 AM UTC
Thomas!

This is 'nano' engineering for sure!

Great work, especially on the 25mm!

The brass nameplate will make for a nice effect!
Black_sheep
Visit this Community
Bayern, Germany
Joined: December 11, 2009
KitMaker: 823 posts
Model Shipwrights: 551 posts
Posted: Monday, March 05, 2018 - 12:51 AM UTC
Thank you guys

After recovering from my "nano-Engineering" with that single 25 mm gun I sprayed the brown color for the linoleum deck and finished the baseplate for the vessel. I did used Gunze´s Mr. Metal Color 219 brass - this color can be polished after it is thoroughly dried and look like the real deal

I did fix the sockets at the designated spots at the ship´s bottom and it look a bit off-balanced at the moment but it is actually very closely in the mid. Maybe the it will look more balanced if the superstructures are all placed later.

RedDuster
Visit this Community
England - South East, United Kingdom
Joined: March 01, 2010
KitMaker: 7,078 posts
Model Shipwrights: 6,649 posts
Posted: Tuesday, March 06, 2018 - 01:52 AM UTC
Looks good on the base Thomas

Cheers

Si
Cadeus
Visit this Community
Indiana, United States
Joined: September 01, 2015
KitMaker: 144 posts
Model Shipwrights: 139 posts
Posted: Tuesday, March 06, 2018 - 08:30 PM UTC
The nano stuff always gets me too, the eyes are fine, it’s the cow like movements of me being not that coordinated that gets me, either way the pe looks fantastic. The base looks good too. I find that when mounting the ship to the base it will never look straight to me. Even with perfect measuring it still looks off when I mount them. I usually have to ignore it until it looks right. Eventually after awhile it grows on me. To me it looks great and right on. This build is coming along nicely. Looking foreword to more. This ship has been on my list for awhile.
Fordboy
Visit this Community
Auckland, New Zealand
Joined: July 13, 2004
KitMaker: 2,169 posts
Model Shipwrights: 1,597 posts
Posted: Wednesday, March 07, 2018 - 12:56 AM UTC
Ahoy Thomas

This is just looking better and better.

Cheers


Sean
RussellE
#306
Visit this Community
Victoria, Australia
Joined: June 27, 2010
KitMaker: 3,959 posts
Model Shipwrights: 2,777 posts
Posted: Thursday, March 08, 2018 - 01:18 AM UTC
Looks good on its base Thomas and the brass name plate is a nice touch!
Black_sheep
Visit this Community
Bayern, Germany
Joined: December 11, 2009
KitMaker: 823 posts
Model Shipwrights: 551 posts
Posted: Saturday, March 10, 2018 - 01:05 PM UTC
I had birthday yesterday and there wasn´t much time for modelling. Therefore just a small update today:

I wanted to continue with the ships deck. I tried to replicate the brass Linoleum fixture strips as easily as possible. Masking and painting with brush or airbrush is a PITA as there are too much obstructions there to finish this in a reasonable scale of time. I had the idea just to paint These stripes with an brass colored EDDING pen. This is still not really easy and I have a lot mistakes to correct but this is the result of about just one careful hour of work.


What do you think? Can I continue that way with a pen?
RussellE
#306
Visit this Community
Victoria, Australia
Joined: June 27, 2010
KitMaker: 3,959 posts
Model Shipwrights: 2,777 posts
Posted: Saturday, March 10, 2018 - 02:05 PM UTC
Always tricky to do the brass strips Thomas!

I say continue and see how it goes when you touch up the paint!
Black_sheep
Visit this Community
Bayern, Germany
Joined: December 11, 2009
KitMaker: 823 posts
Model Shipwrights: 551 posts
Posted: Saturday, March 10, 2018 - 02:56 PM UTC
Indeed tricky Russel Here is a lot patience needed. But the other choice would have been to do completelely new etched strips but I wanted to avoid that...
Black_sheep
Visit this Community
Bayern, Germany
Joined: December 11, 2009
KitMaker: 823 posts
Model Shipwrights: 551 posts
Posted: Saturday, March 10, 2018 - 03:20 PM UTC
Ok I call these linoleum fixture strips finished! Painting was fast, correction not so fast. Now it Looks like this


in detail:


I can live with that result. Now it is time to paint all the grey upper structures at the deck