HMS MALCOLM SCOTT CLASS FLOTILLA LEADER 1/
England - South East, United Kingdom
Joined: March 01, 2010
KitMaker: 7,078 posts
Model Shipwrights: 6,649 posts
Posted: Monday, August 06, 2018 - 08:59 AM UTC
TLAR Camouflage.
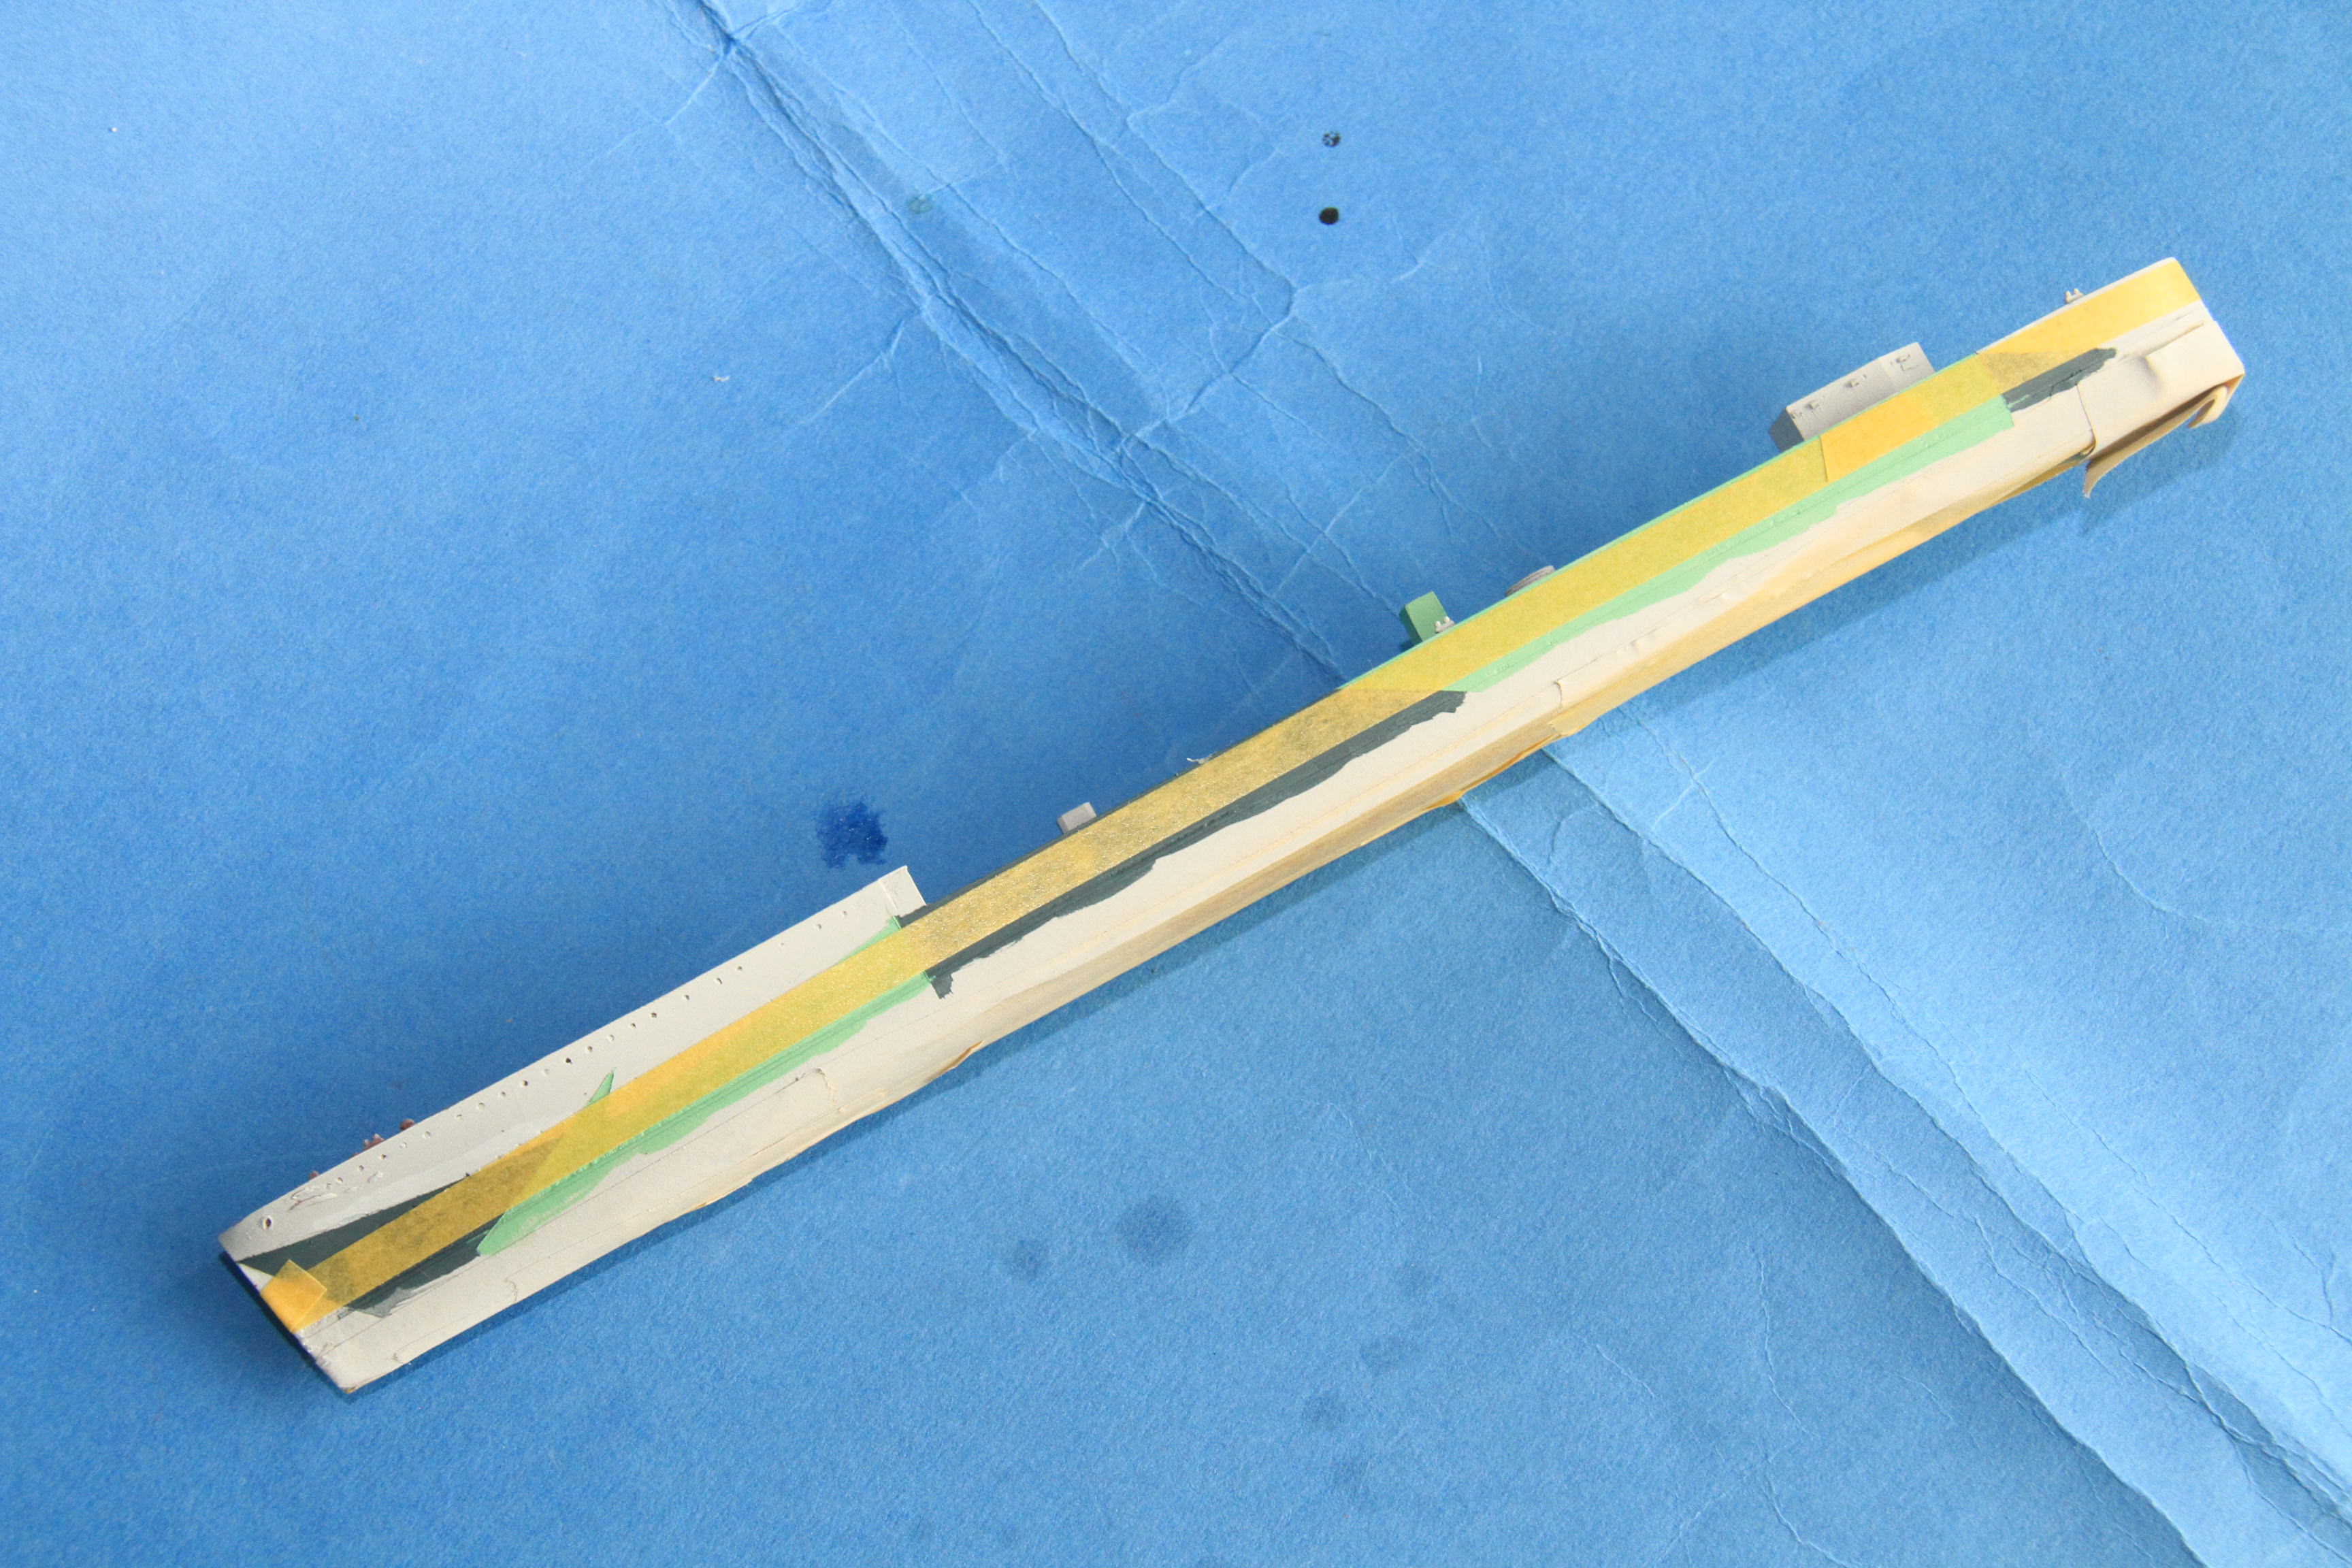
Lower hull masked at the bottom of the boot topping.
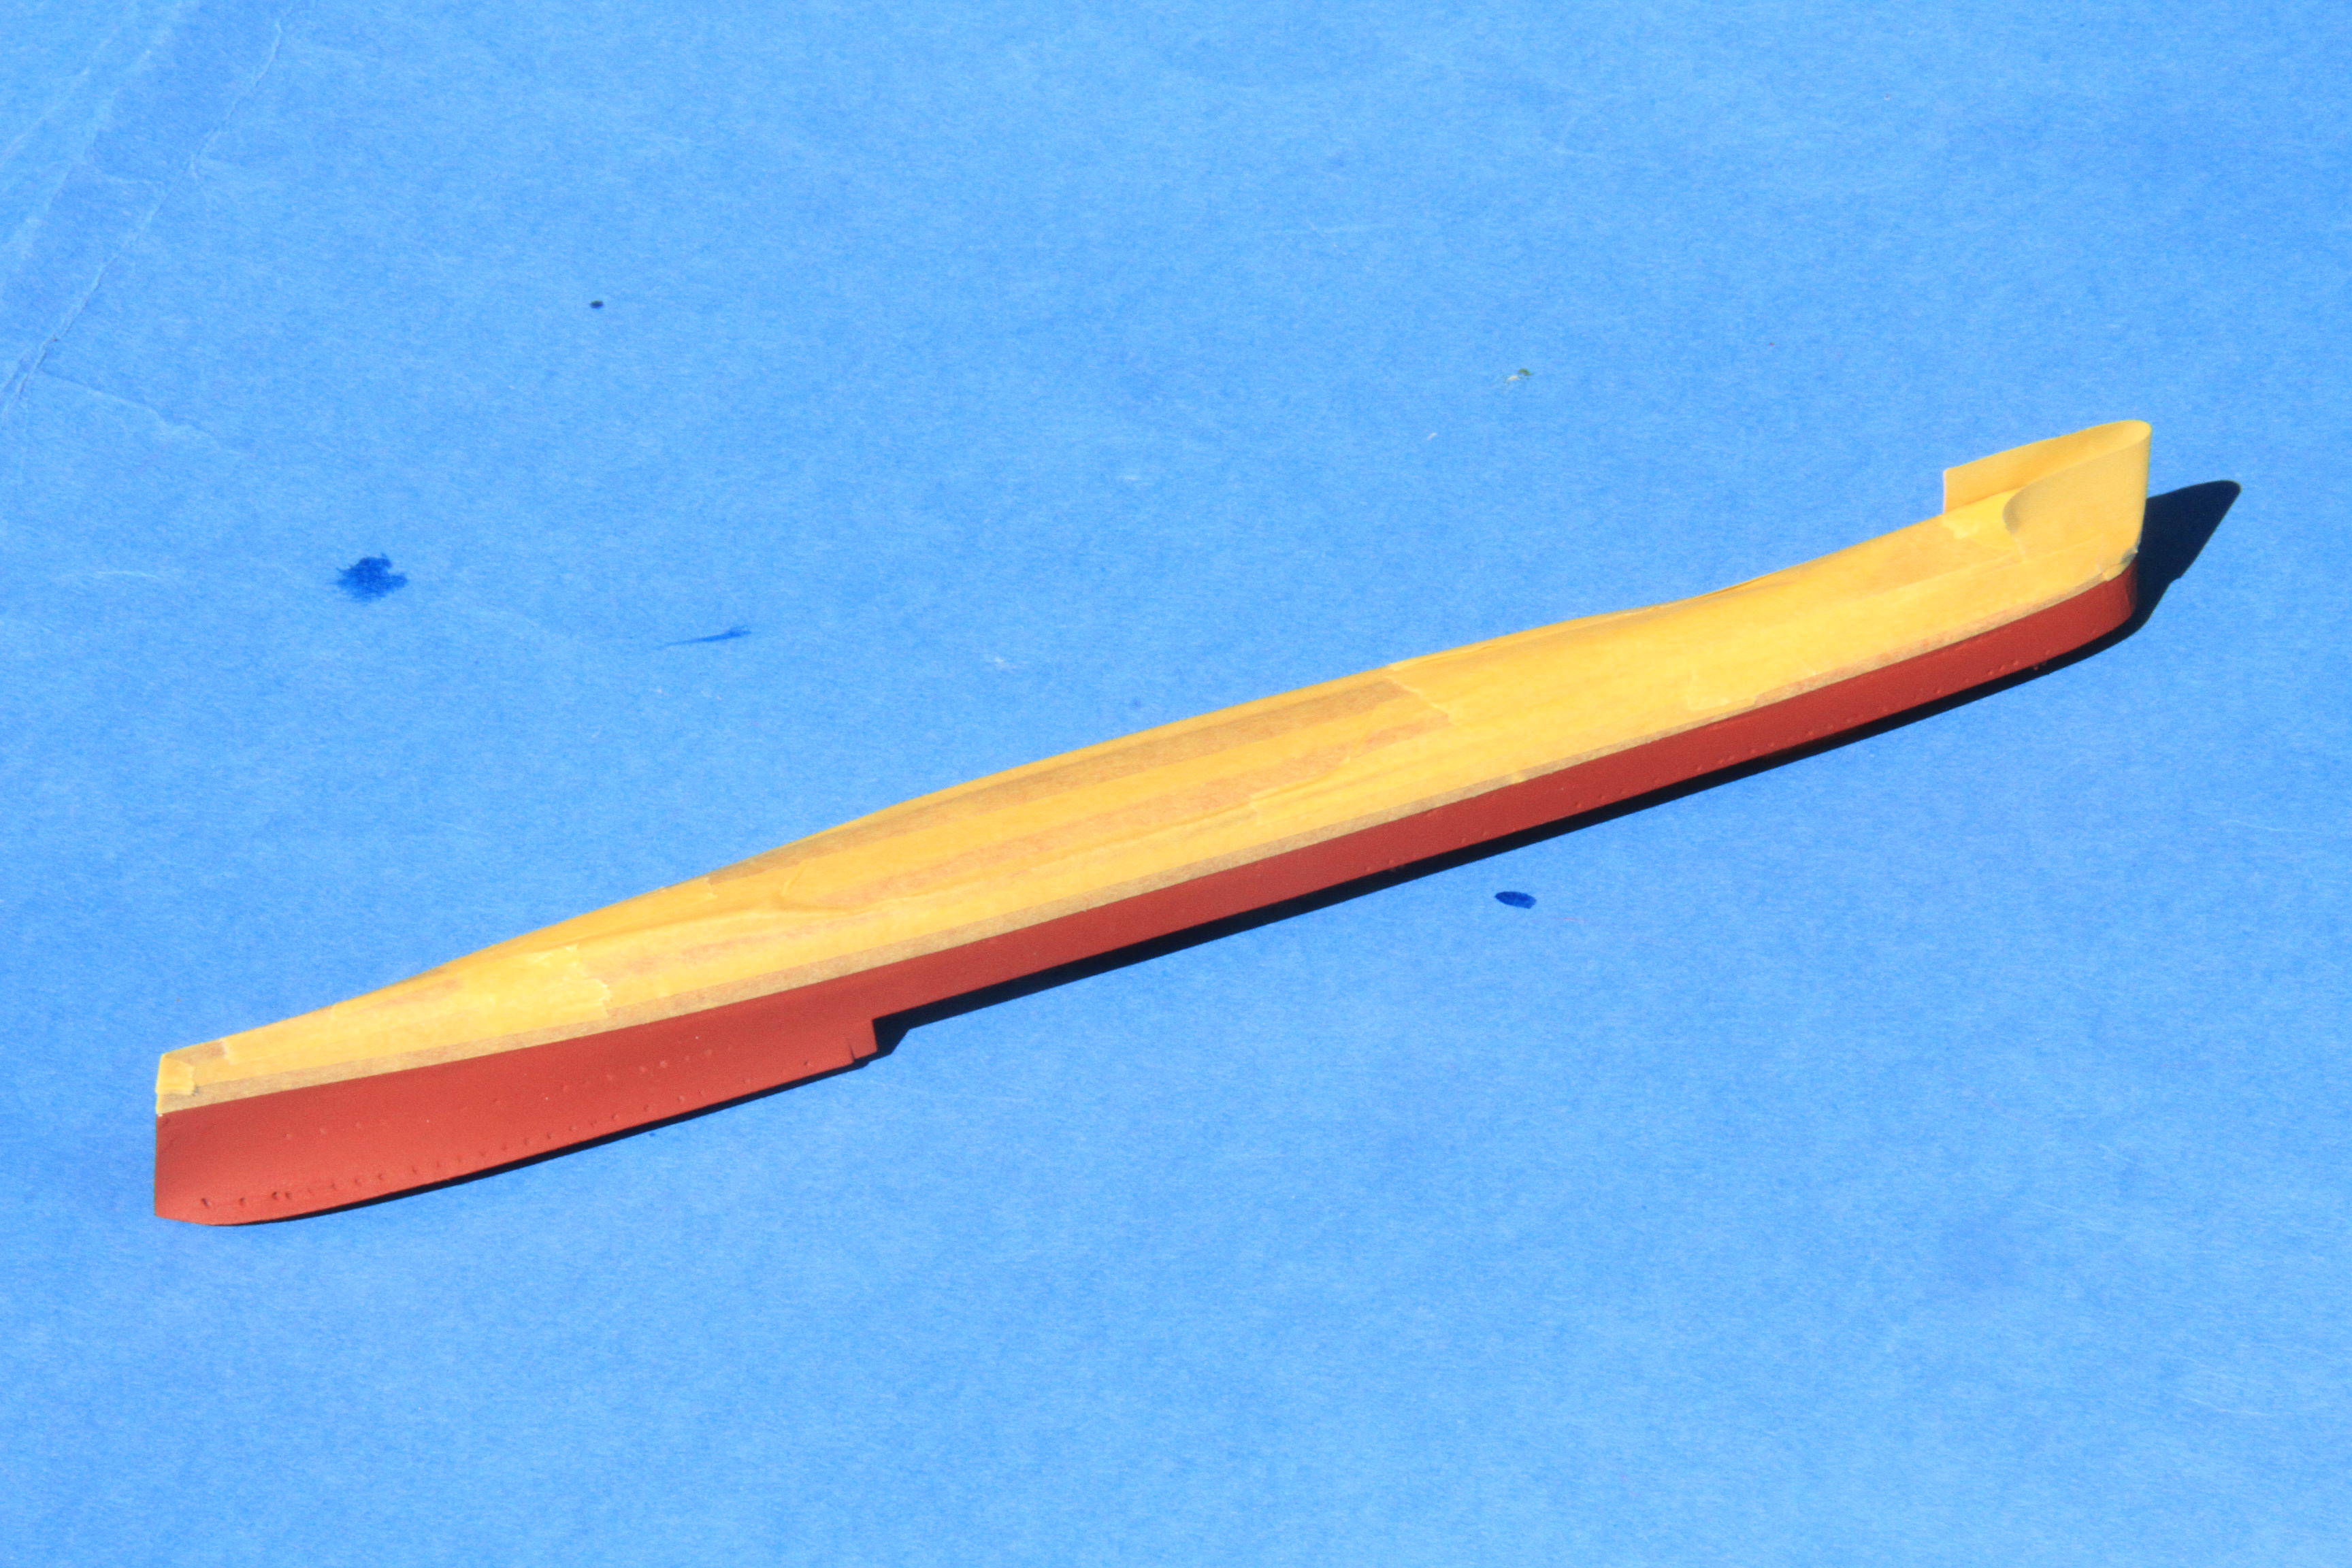
Upper hull sprayed Citadel Corax white, rattlecan, it is an off white base coat, covers well, and makes a decent WA White.

B5 areas masked.
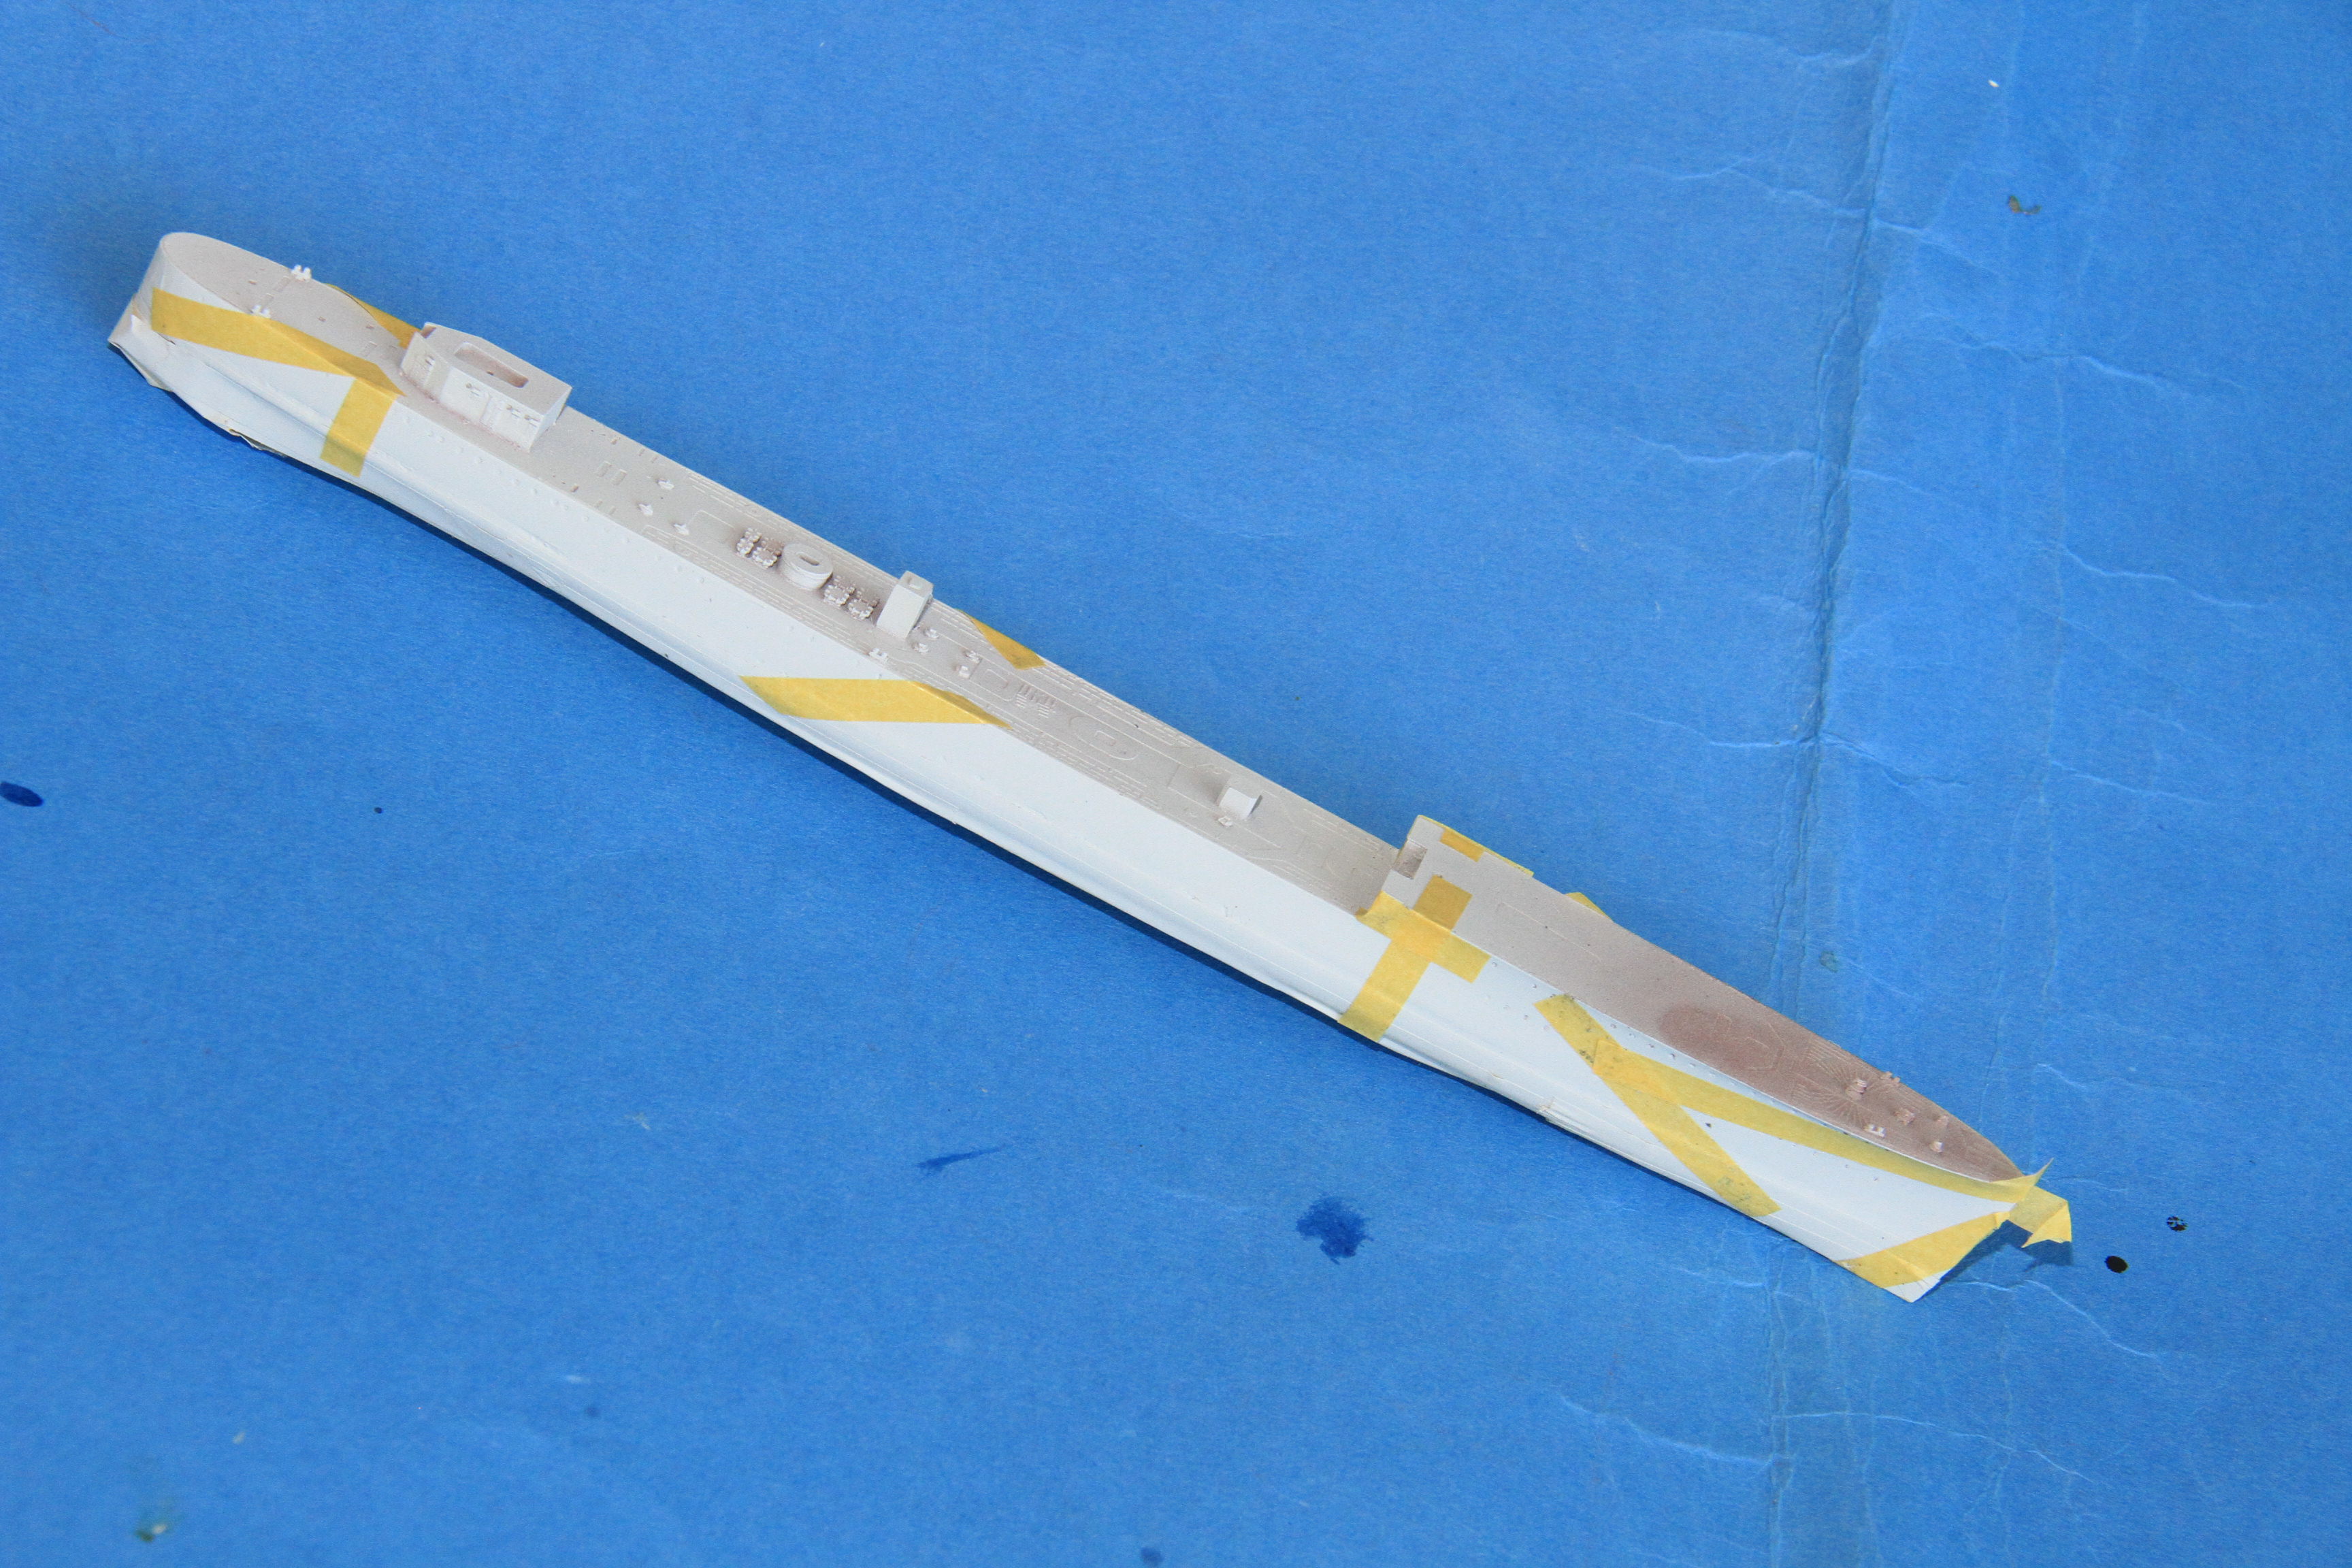
And painted in, on small ships, I go old school and use the hairy stick, Lazyness - avoids airbrush cleaning. Tamiya XF18 Medium Blue is used for B5.

And masking off.
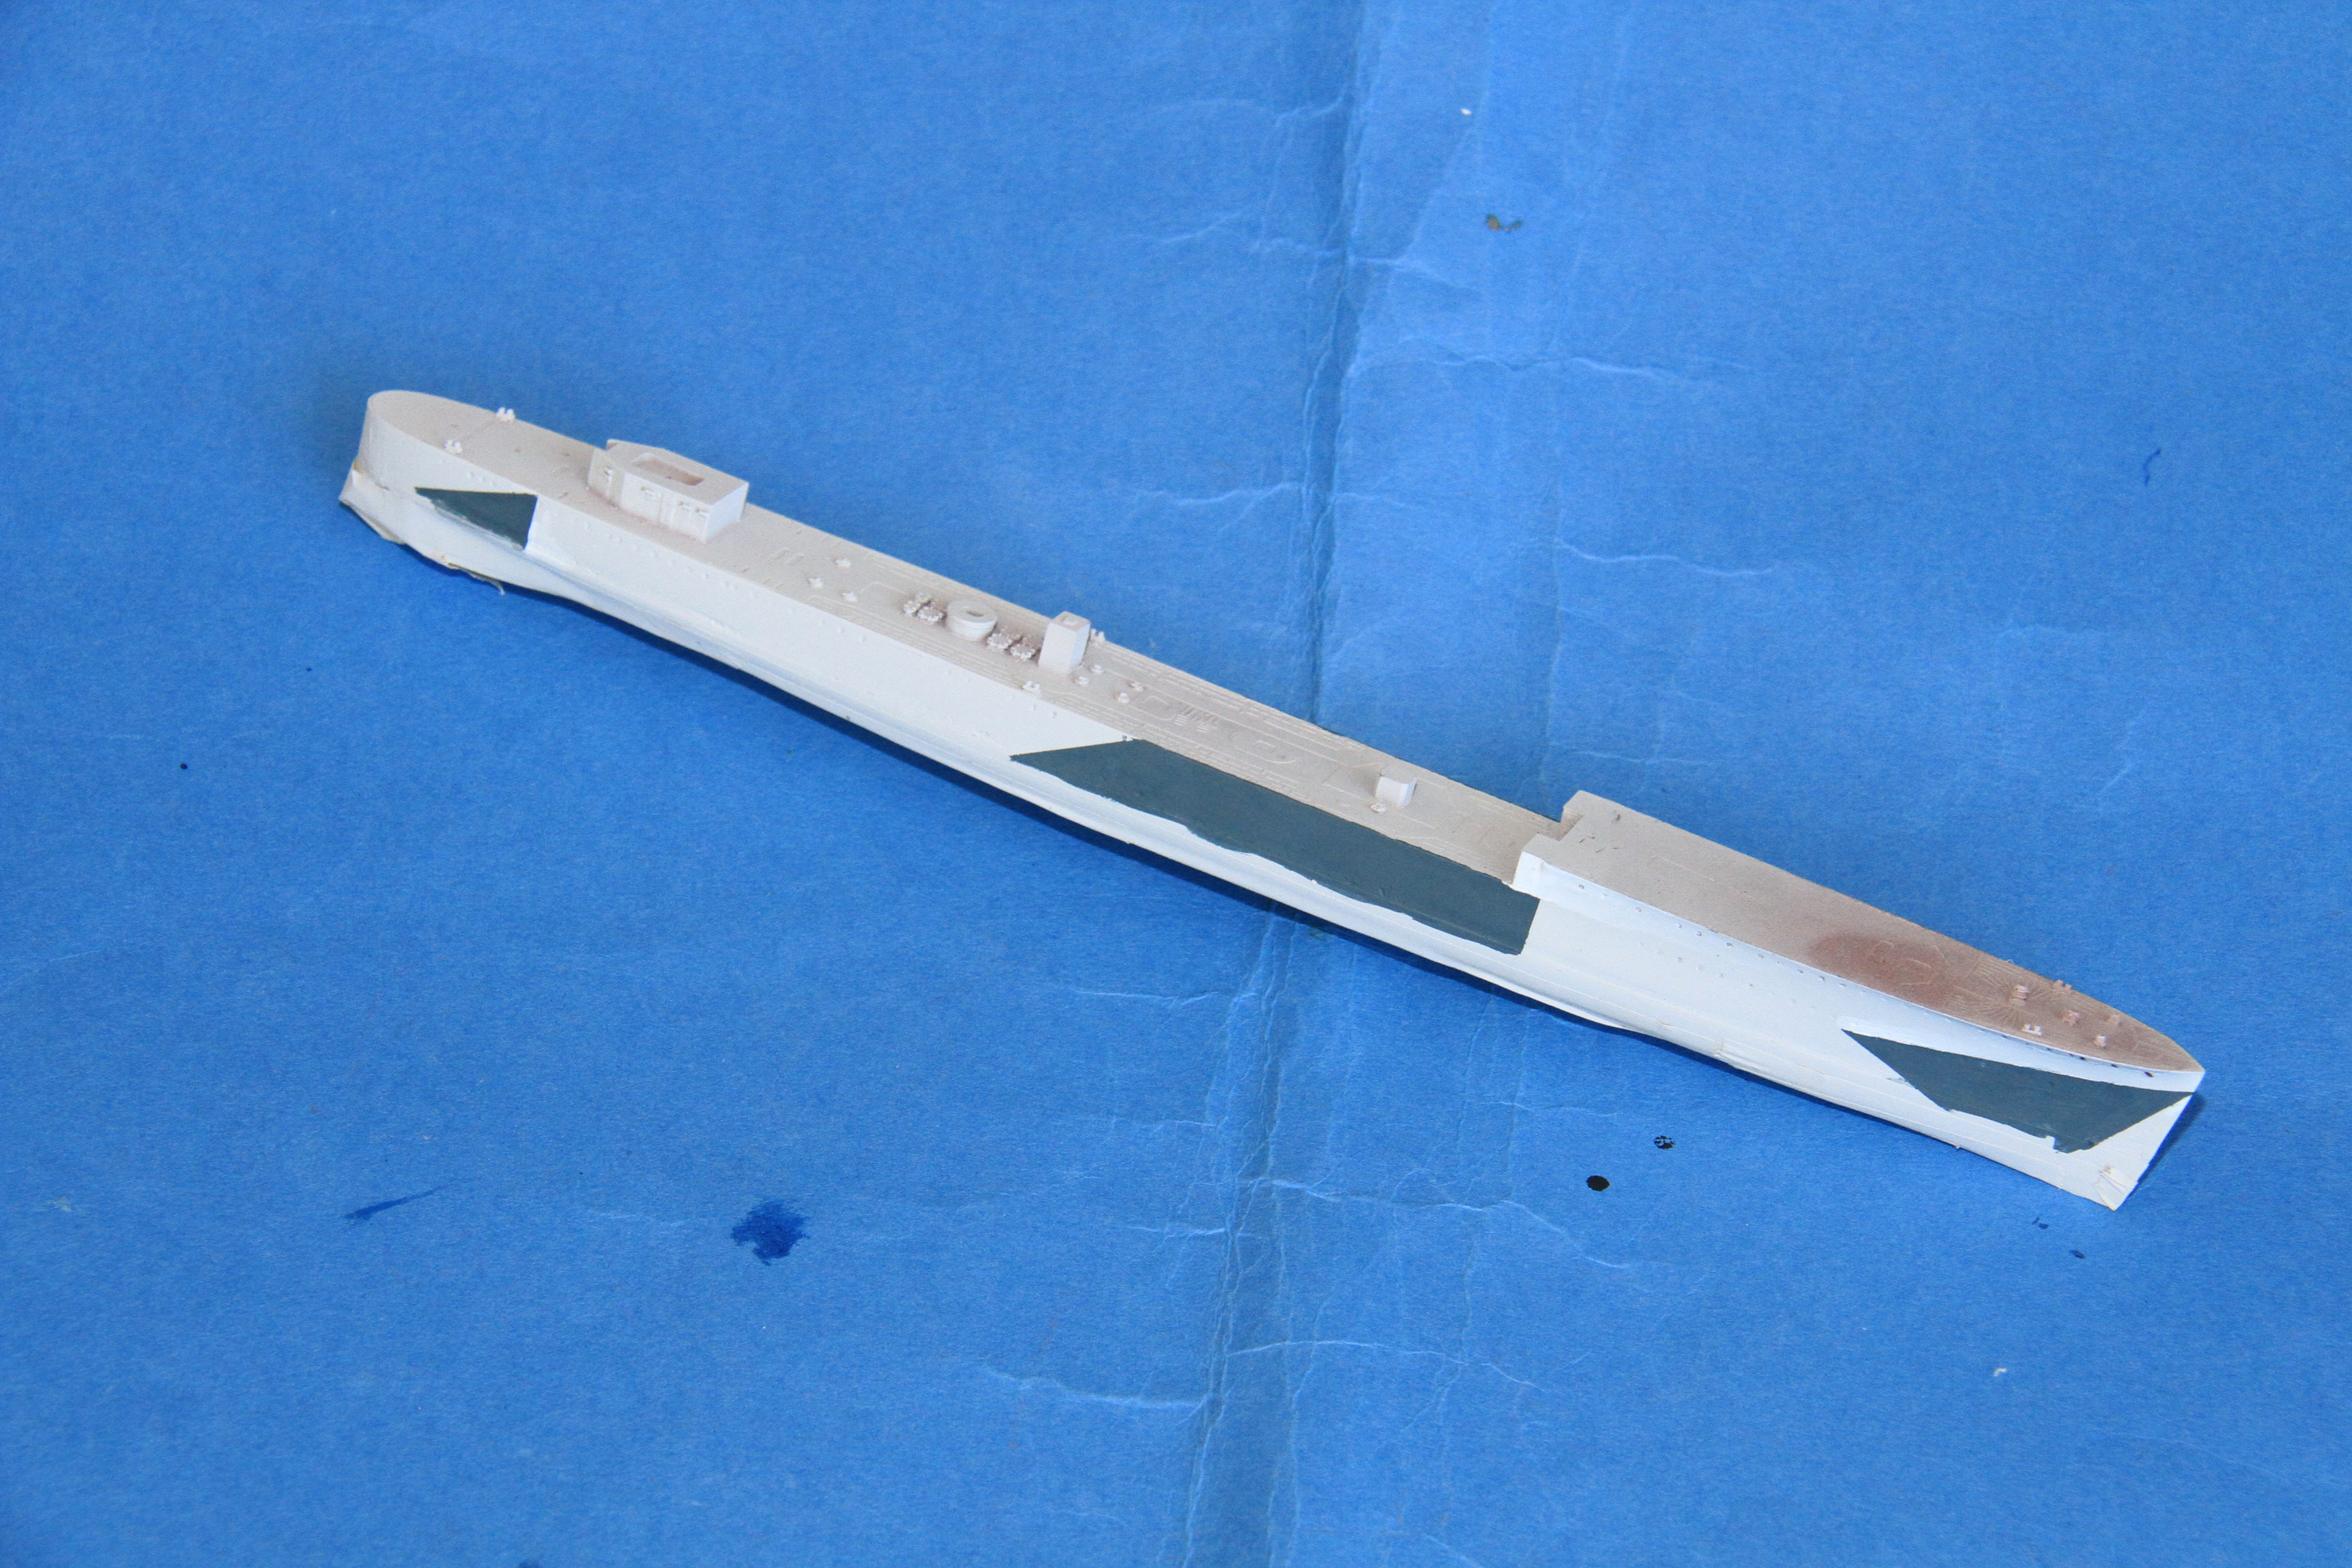
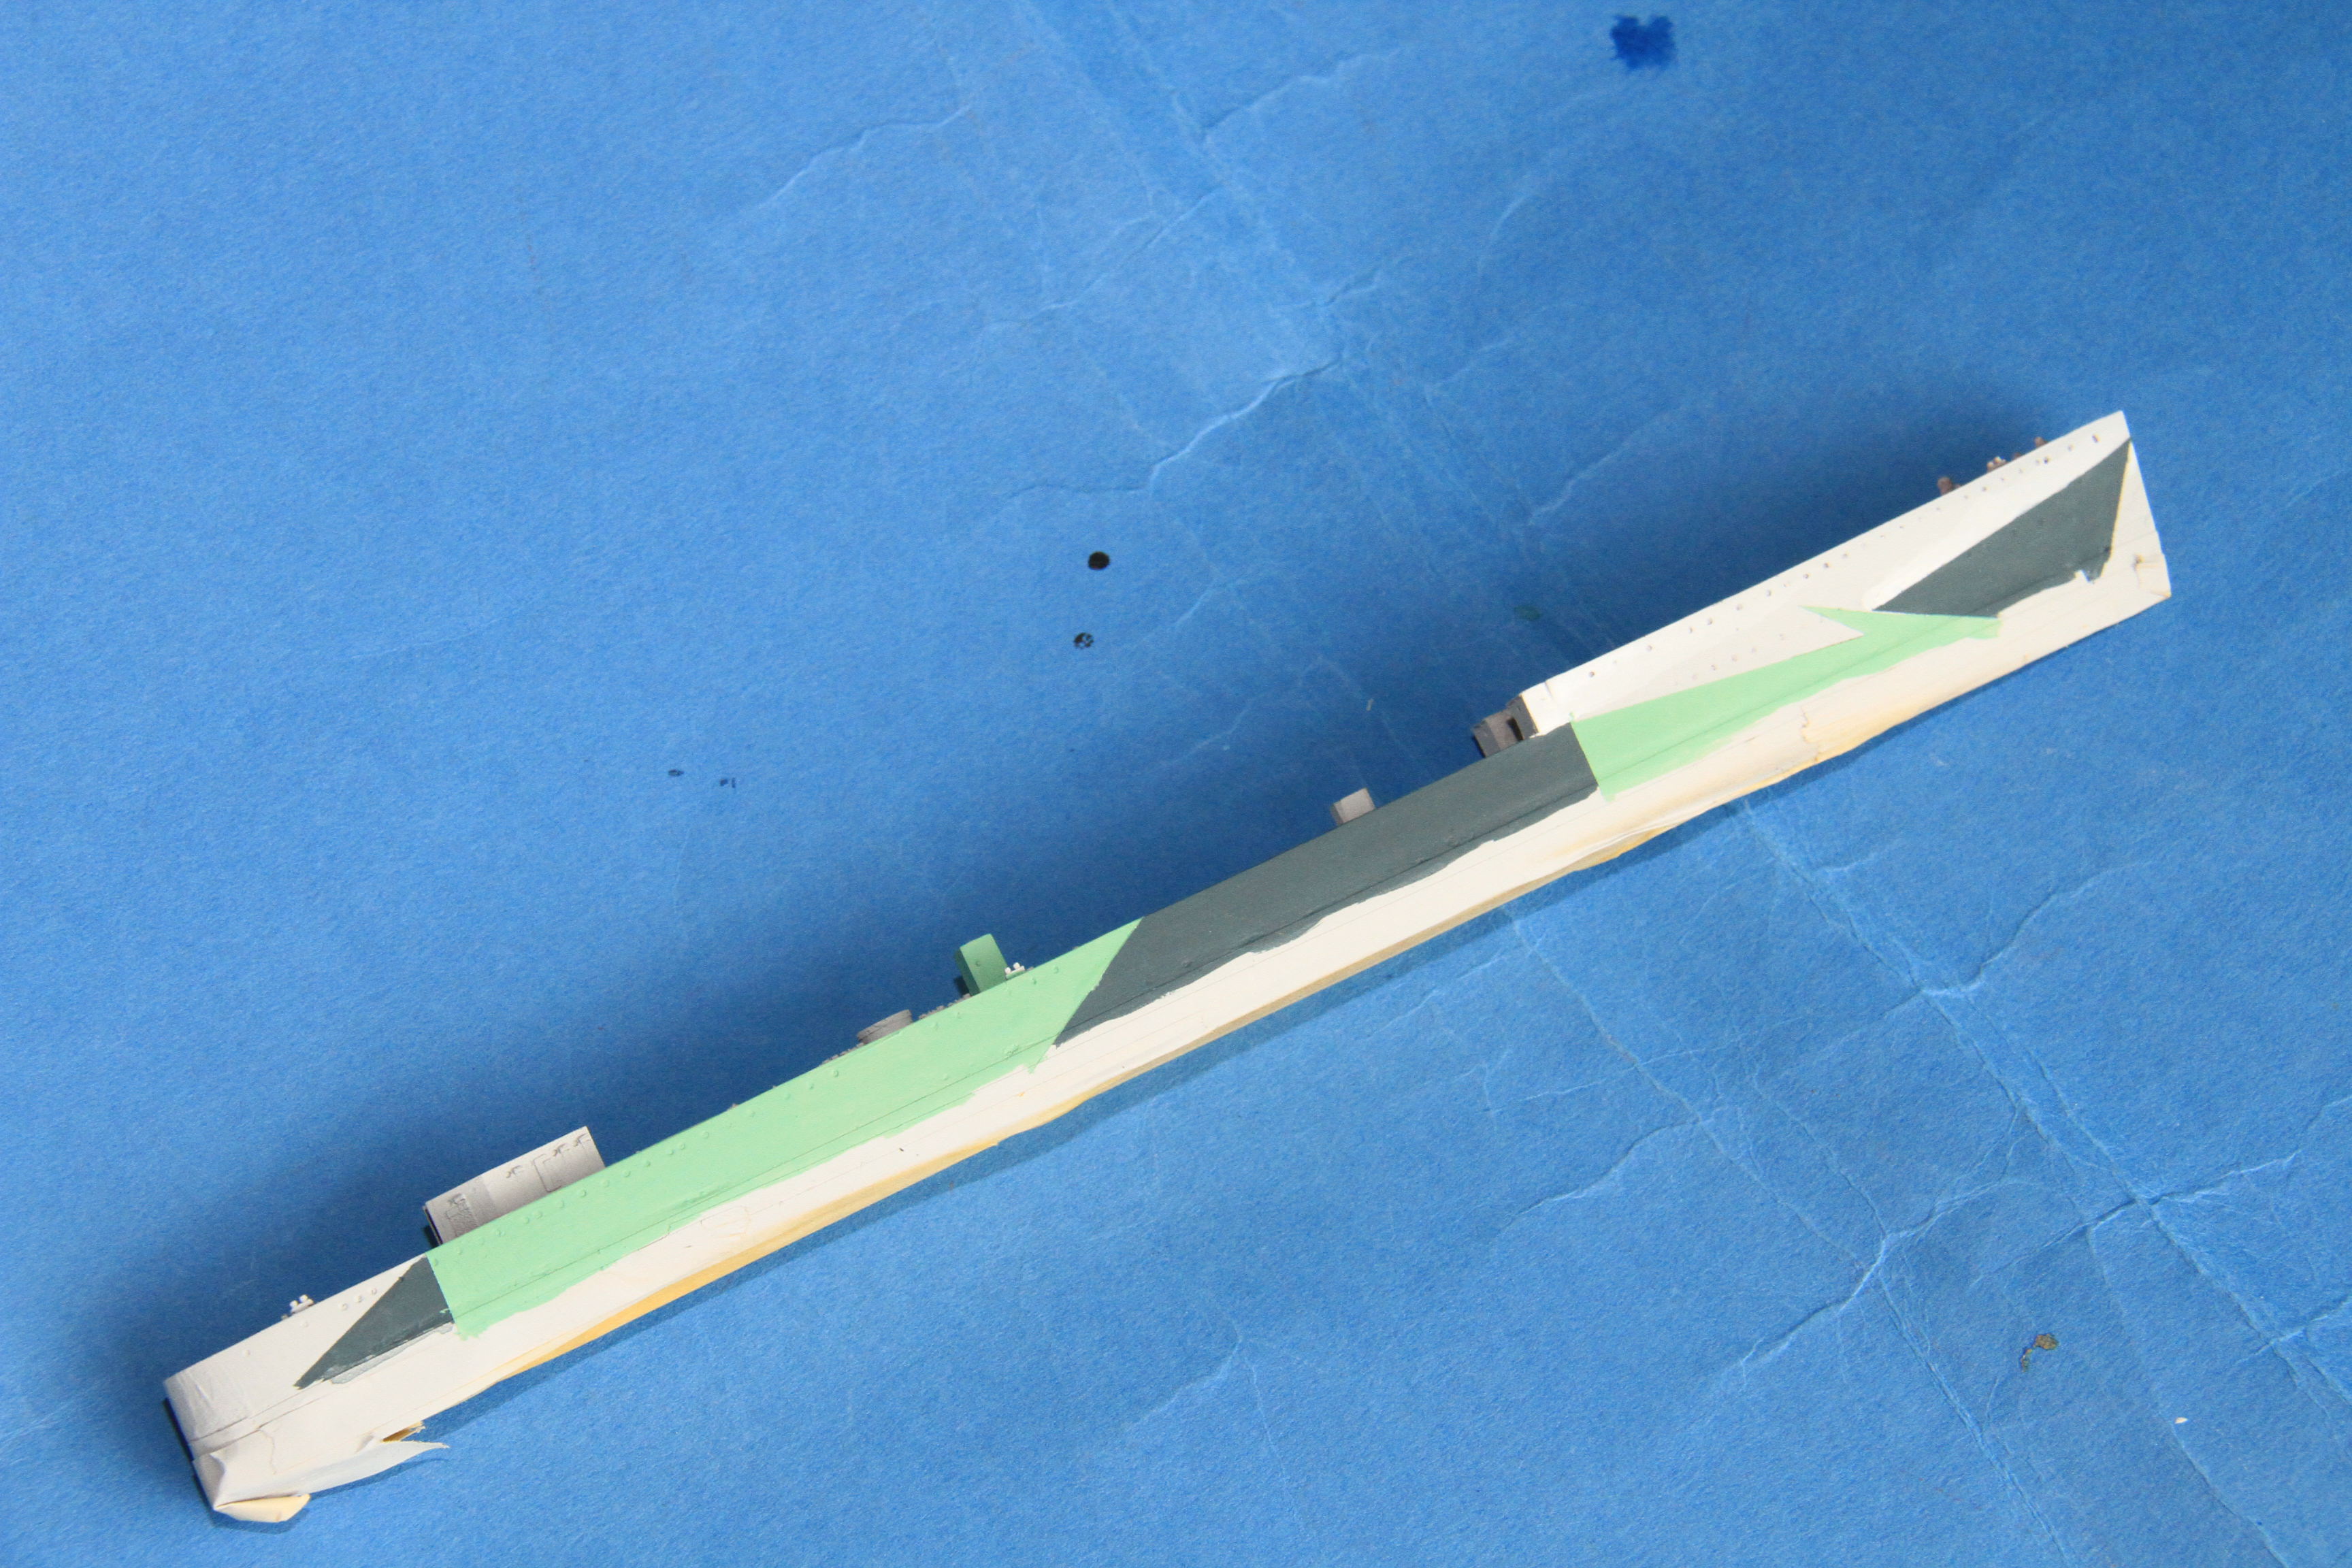
WA green next.
Cheers.
Si
Colorado, United States
Joined: June 22, 2018
KitMaker: 275 posts
Model Shipwrights: 273 posts
Posted: Tuesday, August 07, 2018 - 04:26 AM UTC
Simon: I am going to assume that the white paint is a general purpose paint, one not necessarily used for modeling. I am not at all familiar with the paint brands available in the UK. Set me straight here.
The Tamiya XF18 is one that I have not had much success with brushing. I think it may be me though in not having thinned it enough. The paint seems to drag over the surface when I brush it.
England - South East, United Kingdom
Joined: March 01, 2010
KitMaker: 7,078 posts
Model Shipwrights: 6,649 posts
Posted: Tuesday, August 07, 2018 - 08:32 AM UTC
Quoted Text
Simon: I am going to assume that the white paint is a general purpose paint, one not necessarily used for modeling. I am not at all familiar with the paint brands available in the UK. Set me straight here.
The Tamiya XF18 is one that I have not had much success with brushing. I think it may be me though in not having thinned it enough. The paint seems to drag over the surface when I brush it.
Hi Chuck,
The white comes from Games workshop, they are a fantasy / Sci Fi wargaming store, it is designed to cover plastic / resin / white metal & etch. I like their paints. The rattlecans are very forgiving, and their ordinary paints are brush friendly, cover well and their metallics' are very good.
Little trick brushing Tamiya, I lay down a couple of slightly thinned coats to get colour density, then when dry but not cured, put a water thinned almost wash coat, that seems to get rid of the brush marks and level everything odd.
Cheers
Si
Colorado, United States
Joined: June 22, 2018
KitMaker: 275 posts
Model Shipwrights: 273 posts
Posted: Tuesday, August 07, 2018 - 08:53 AM UTC
Taking copious notes. Thanks Simon. I am inspired. Actually I am following your methods on a Tamiya Fletcher as you post them. Different colors of course but same methodology.

#306
Victoria, Australia
Joined: June 27, 2010
KitMaker: 3,959 posts
Model Shipwrights: 2,777 posts
Posted: Tuesday, August 07, 2018 - 09:34 AM UTC
Will be looking in to see that camo when it's finished

Stay home and build models!
In 1/72
Gloster Gladiator MkII for the Bi-planes Campaign
In 1/350
Airfix 1:350 Type 45 Destroyer
England - South East, United Kingdom
Joined: March 01, 2010
KitMaker: 7,078 posts
Model Shipwrights: 6,649 posts
Posted: Thursday, August 09, 2018 - 08:11 AM UTC
Quoted Text
Taking copious notes. Thanks Simon. I am inspired. Actually I am following your methods on a Tamiya Fletcher as you post them. Different colors of course but same methodology.
You are very welcome Chuck,
Good luck with the Fletcher, wouldn't mind seeing how it turns out.
Cheers
Si
England - South East, United Kingdom
Joined: March 01, 2010
KitMaker: 7,078 posts
Model Shipwrights: 6,649 posts
Posted: Thursday, August 09, 2018 - 08:14 AM UTC
Quoted Text
Will be looking in to see that camo when it's finished
Thanks for looking in this time mate.
WA green should be laid down on Saturday. The boot topping on Sunday, lifecolor paints can take a little time to cure to take masking tape for the boot toping.
Cheers
Si
Colorado, United States
Joined: June 22, 2018
KitMaker: 275 posts
Model Shipwrights: 273 posts
Posted: Thursday, August 09, 2018 - 12:52 PM UTC
This Fletcher will not be completed Simon. It is a hull left over from blending a Tamiya round bridge, with a Trumpeter hull, (waterlined), and portions of the superstructure, into a mid war round bridge, which I am doing, with a bit of struggle as USS Nicholas, named for the first naval officer, and first Marine commissioned by the Continental Congress.
When you have some time I would be happy to tell you about Nicholas recruiting our first Marines at Tun's Tavern in Philadelphia, and the Corps' birthday 10 November 1775. That of course if you are in the mood to revisit that little misunderstanding we had with the King and Mother Country.
So I am just using the hull to see if I can mirror your technique.
England - South East, United Kingdom
Joined: March 01, 2010
KitMaker: 7,078 posts
Model Shipwrights: 6,649 posts
Posted: Friday, August 10, 2018 - 07:02 AM UTC
Quoted Text
This Fletcher will not be completed Simon. It is a hull left over from blending a Tamiya round bridge, with a Trumpeter hull, (waterlined), and portions of the superstructure, into a mid war round bridge, which I am doing, with a bit of struggle as USS Nicholas, named for the first naval officer, and first Marine commissioned by the Continental Congress.
When you have some time I would be happy to tell you about Nicholas recruiting our first Marines at Tun's Tavern in Philadelphia, and the Corps' birthday 10 November 1775. That of course if you are in the mood to revisit that little misunderstanding we had with the King and Mother Country.
So I am just using the hull to see if I can mirror your technique.
Hi Chuck,
Good luck with the hull anyway mate. Experimenting is never a bad idea.
That is one period and campaign, outside the Royal Navy's moderately poor performance, I know very little about. Always willing to learn, even about the ones we lost.
Cheers
Si
England - South East, United Kingdom
Joined: March 01, 2010
KitMaker: 7,078 posts
Model Shipwrights: 6,649 posts
Posted: Saturday, August 11, 2018 - 07:47 AM UTC
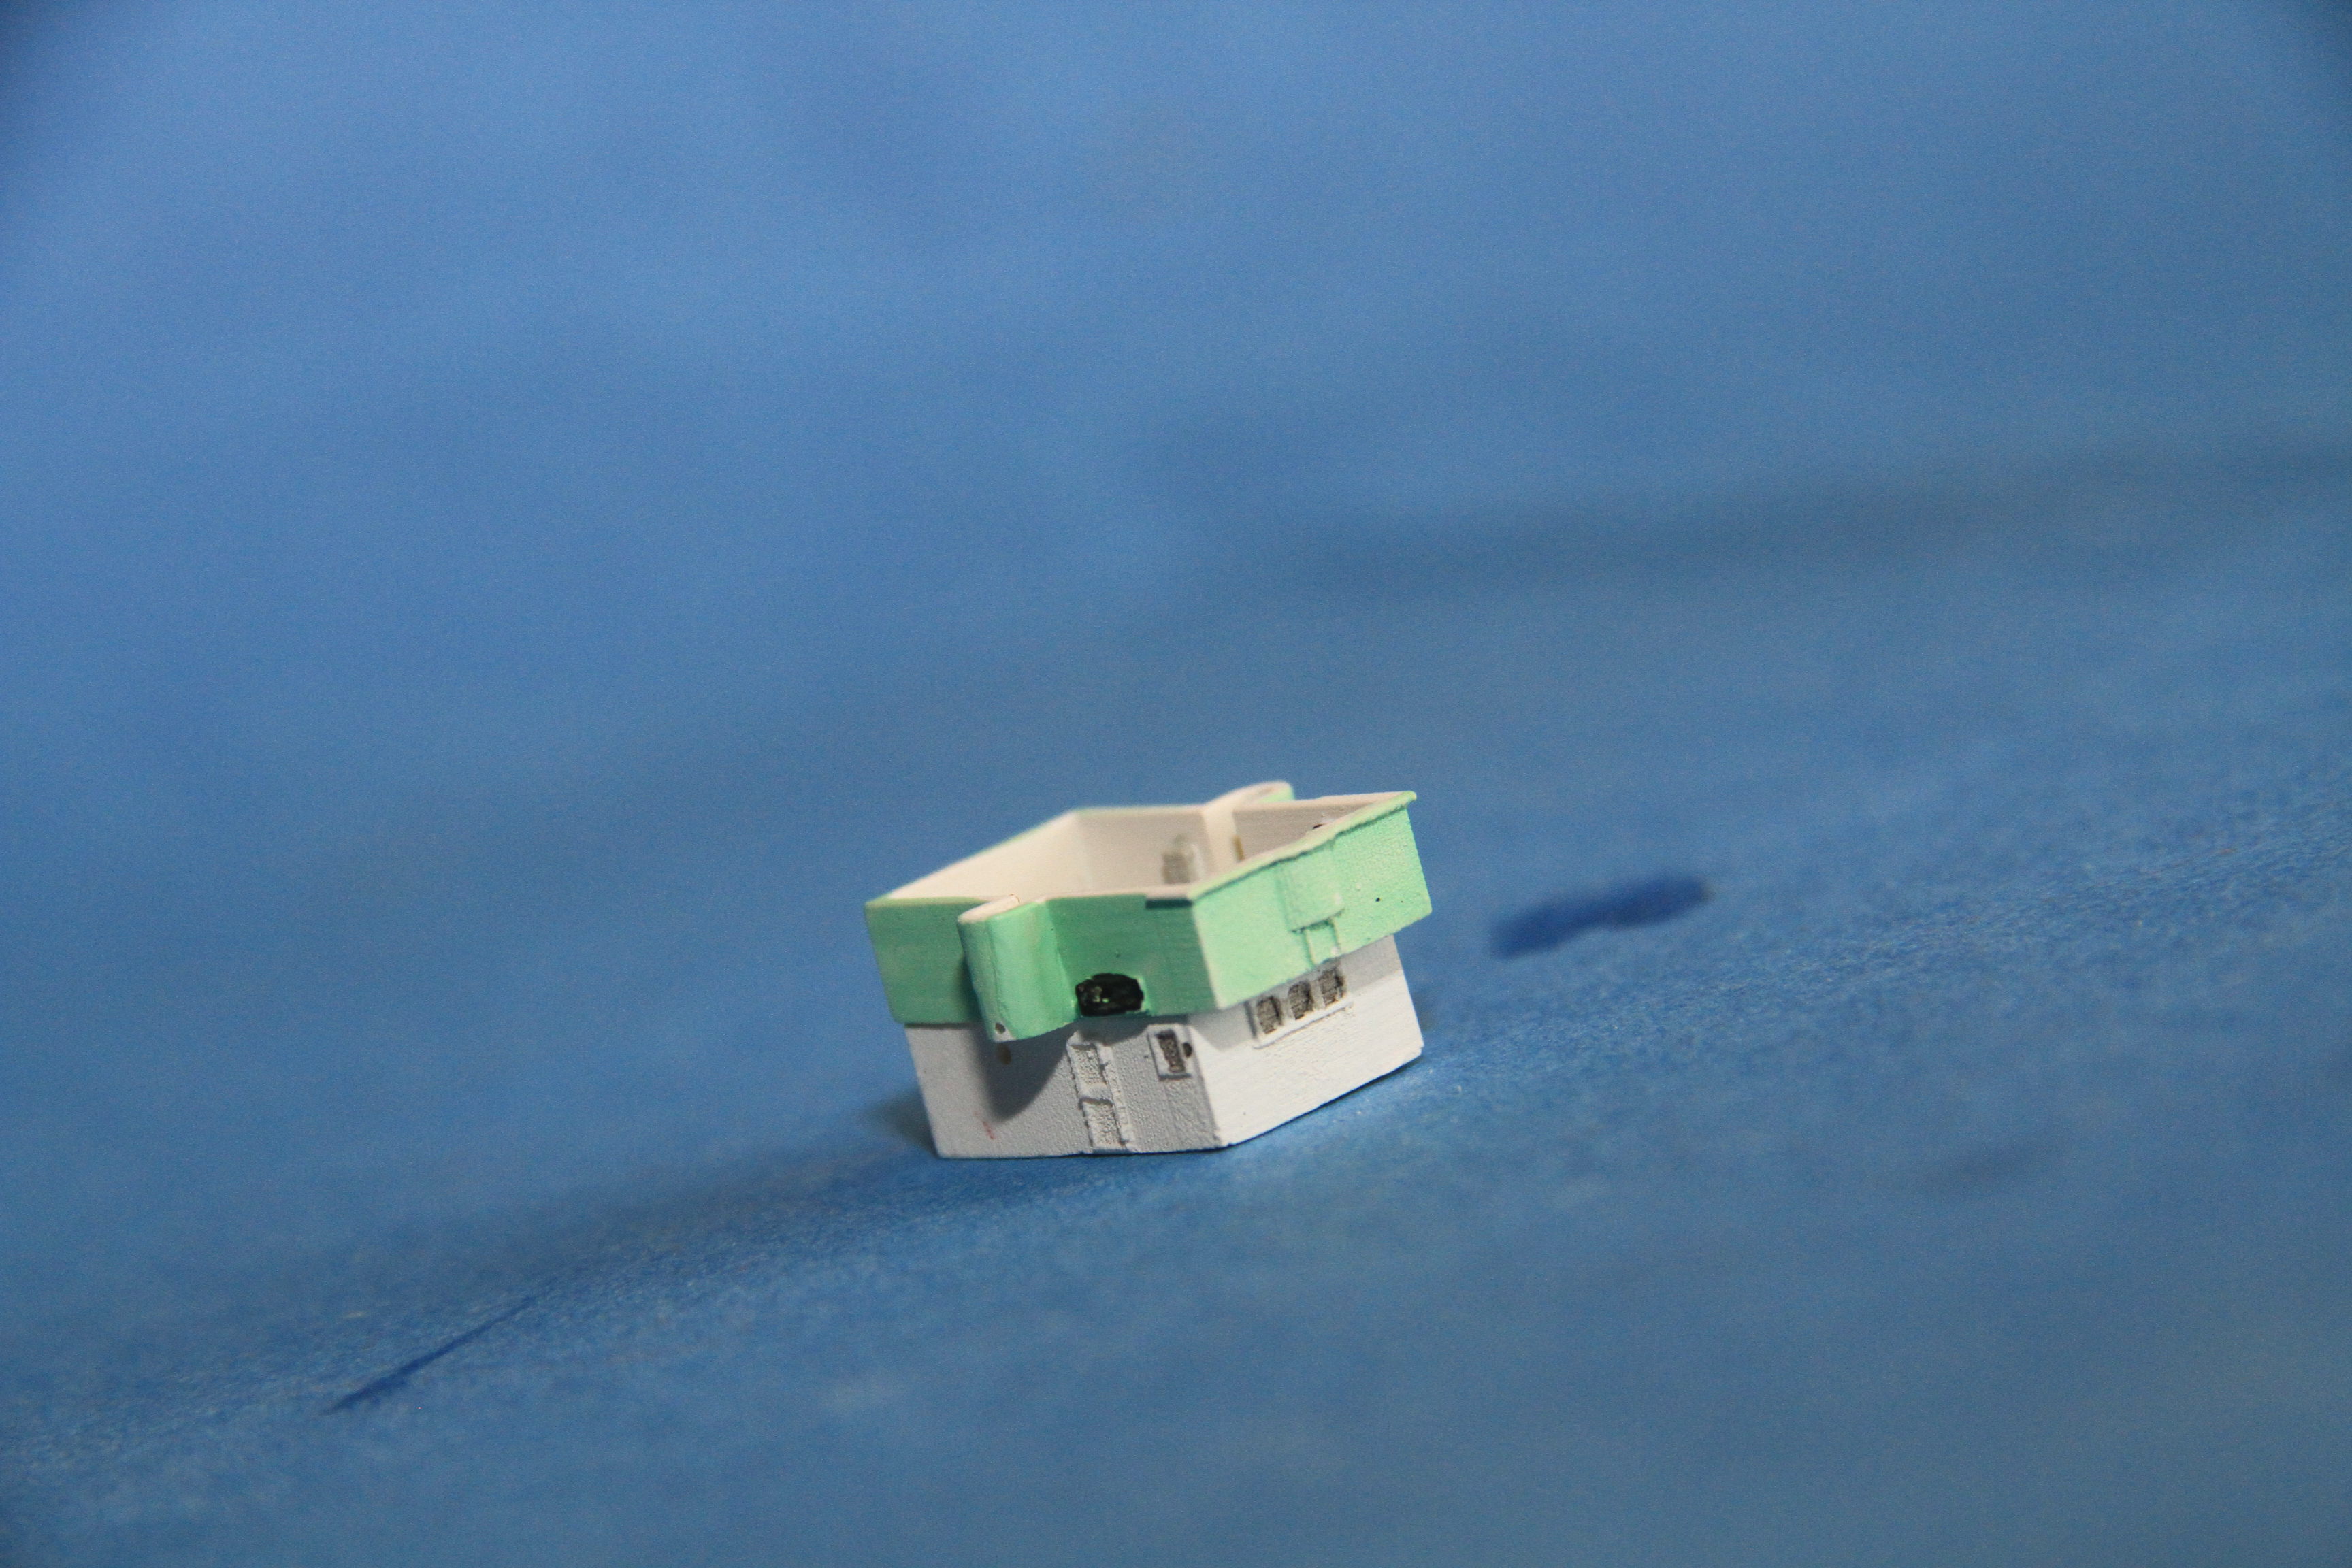
On with the painting.
The shape on bow is quite "interesting", all the tape in place, but not trimmed.
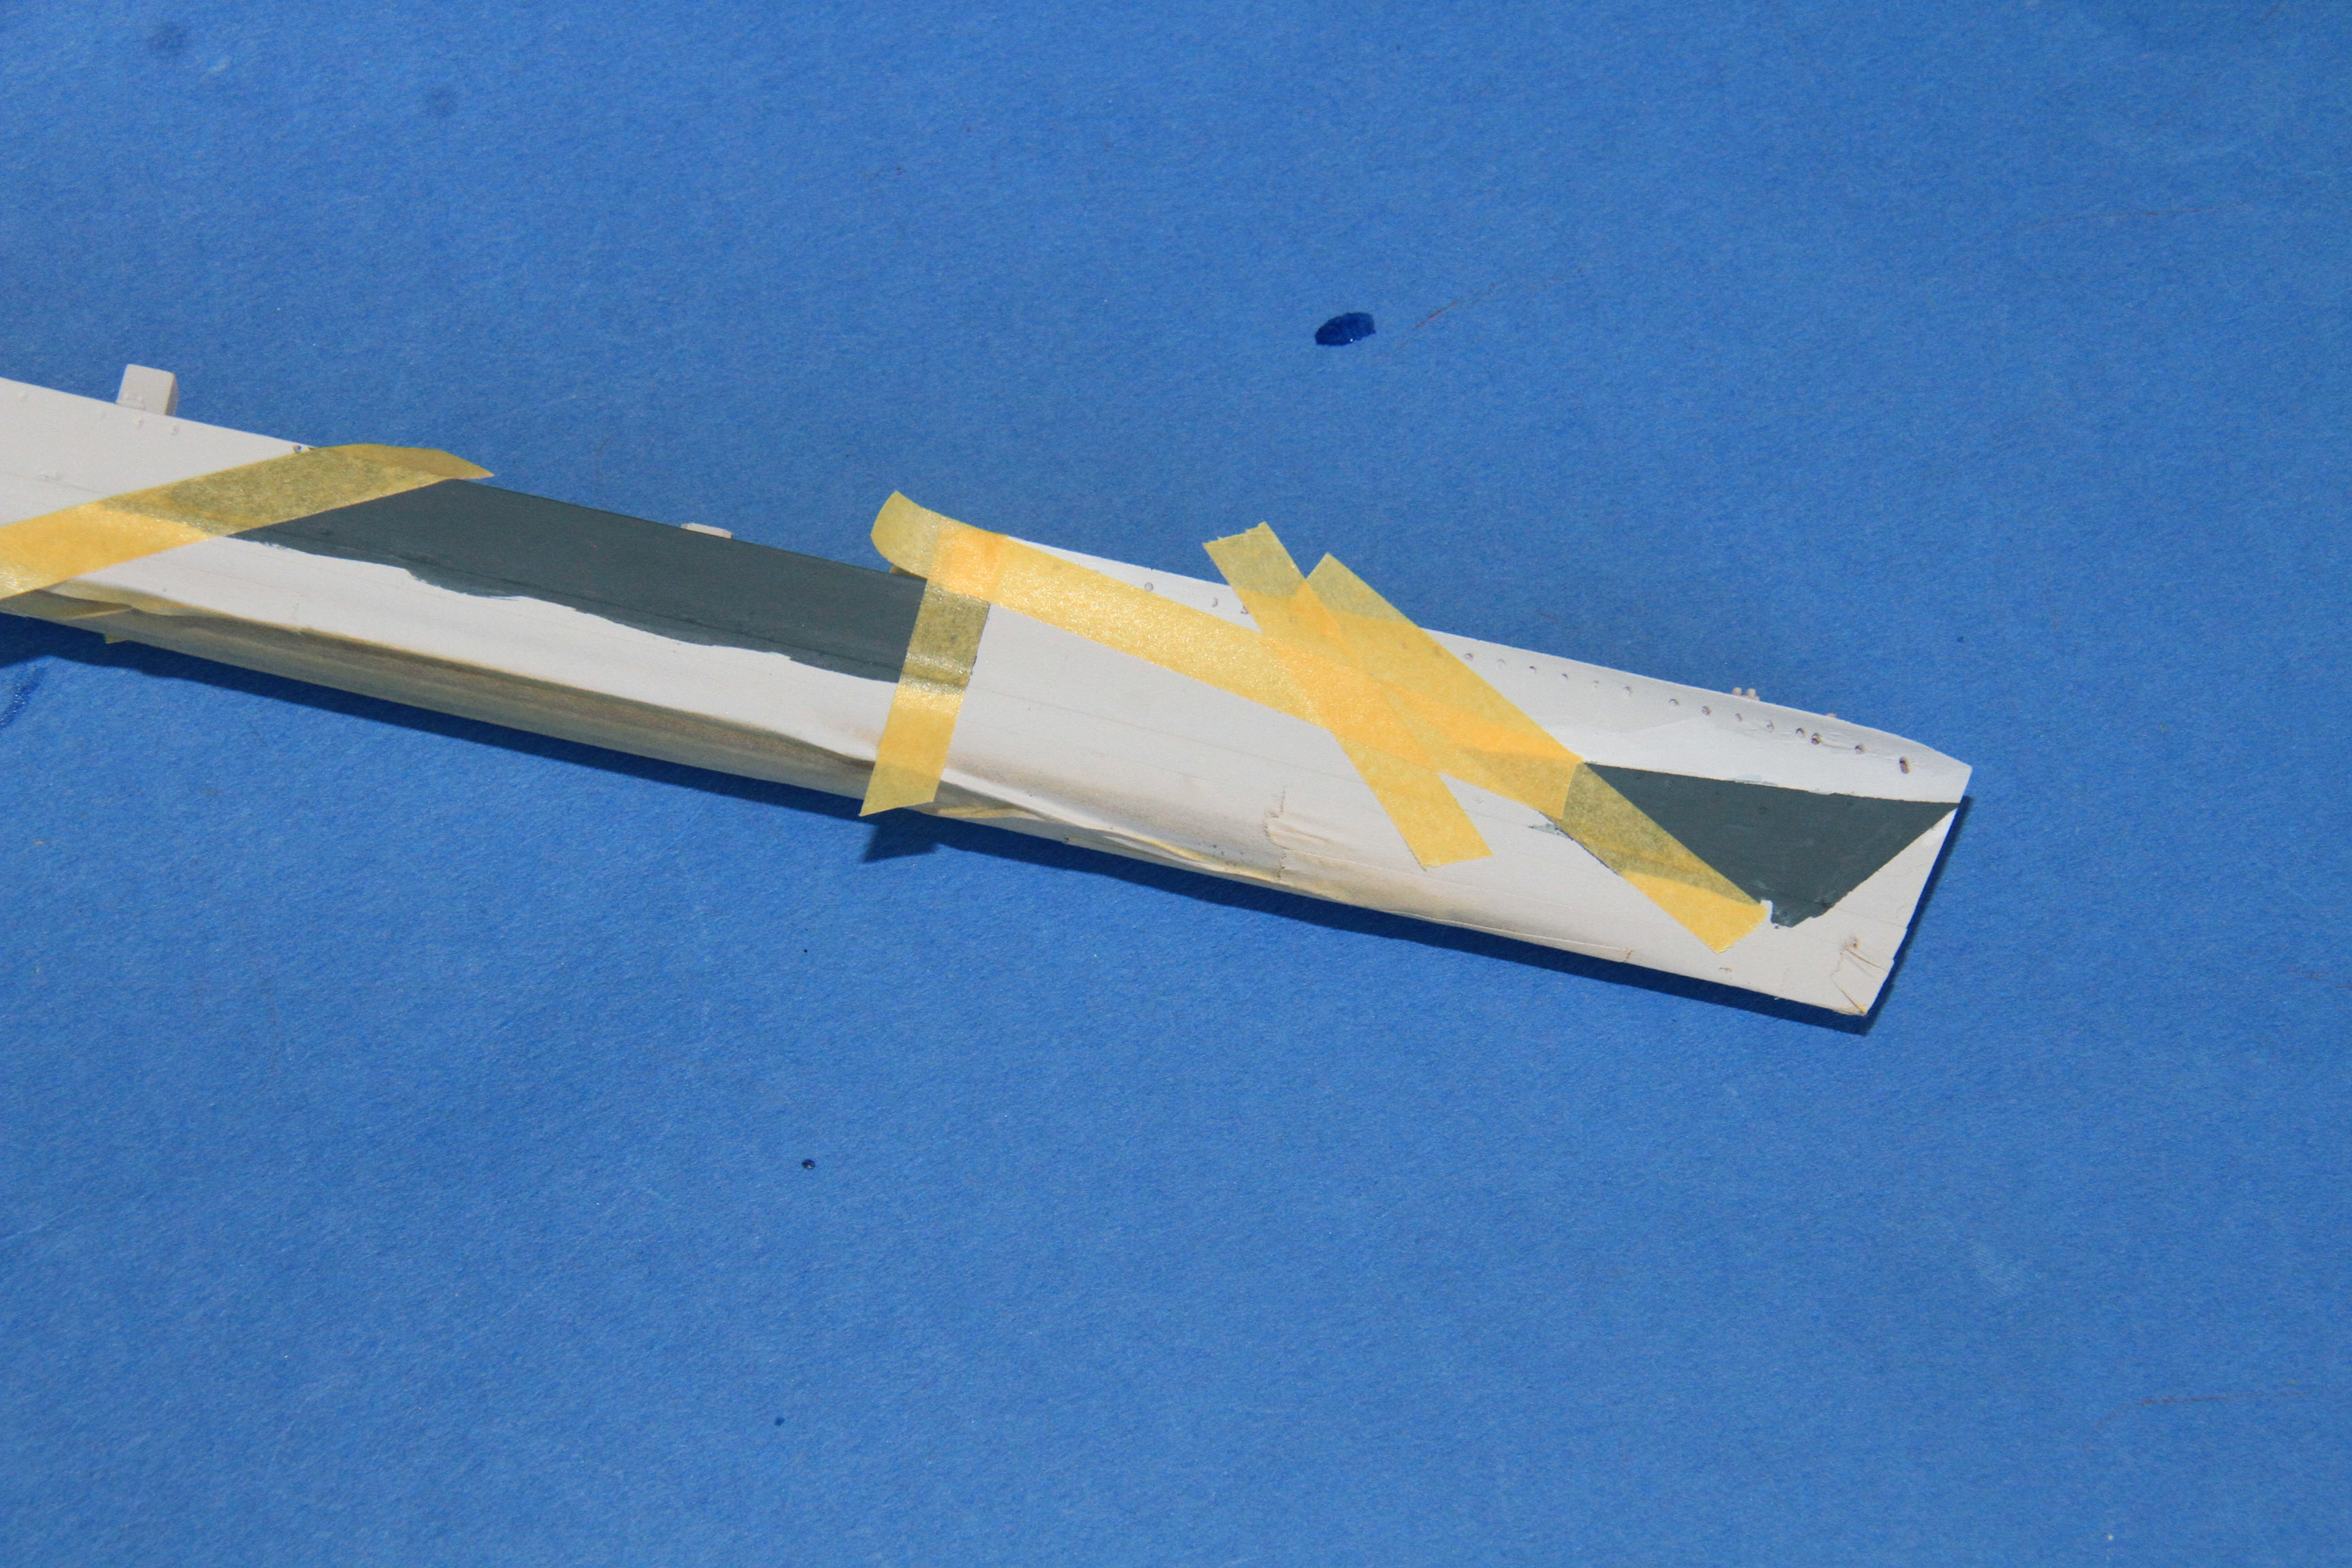
Trimmed and ready for paint.

Green on, there is on patch that need to be repainted white, that will be done after the boot topping.
More soon.
Si
Colorado, United States
Joined: June 22, 2018
KitMaker: 275 posts
Model Shipwrights: 273 posts
Posted: Sunday, August 12, 2018 - 03:17 AM UTC
I think I may be fortunate in that the three colors I am using, are Haze Gray, Ocean Gray, and Black, and I plan to do the boot top, at the same time I apply the black portion of the camouflage.
What color by brand and name is the green? I presume you air brushed the green on?
England - South East, United Kingdom
Joined: March 01, 2010
KitMaker: 7,078 posts
Model Shipwrights: 6,649 posts
Posted: Monday, August 13, 2018 - 08:13 AM UTC
Quoted Text
I think I may be fortunate in that the three colors I am using, are Haze Gray, Ocean Gray, and Black, and I plan to do the boot top, at the same time I apply the black portion of the camouflage.
What color by brand and name is the green? I presume you air brushed the green on?
Hi Chuck,
Good plan, will save on the masking.
The Green is Lifecolor Western Approaches Green. It came out of a jar that I have had for a while. It was applied with a hairy stick. I have found this paint does not airbrush well if it has been opened for a while.
I did finish the camo job on Sunday, will update later in the week, when I have a bit of time.
Cheers
Si
Colorado, United States
Joined: June 22, 2018
KitMaker: 275 posts
Model Shipwrights: 273 posts
Posted: Monday, August 13, 2018 - 04:21 PM UTC
Outstanding. Can't wait to see the finished work.
I was satisfied with my experiment. So much so I may have to find a deck and superstructure to go with it. I used the camouflage depicted on the top and bottom of the Tamiya Cushing box in 1/700.
What I will say is that I do like your bottom up approach over what I had previously done which was top down.
England - South East, United Kingdom
Joined: March 01, 2010
KitMaker: 7,078 posts
Model Shipwrights: 6,649 posts
Posted: Thursday, August 16, 2018 - 08:22 AM UTC
Quoted Text
Outstanding. Can't wait to see the finished work.
I was satisfied with my experiment. So much so I may have to find a deck and superstructure to go with it. I used the camouflage depicted on the top and bottom of the Tamiya Cushing box in 1/700.
What I will say is that I do like your bottom up approach over what I had previously done which was top down.
Thanks Chuck,
The advantage, well to me anyway, of going from the keel up with the primer, is not only do I have my anti fouling on, but a top notch base coat, and way less chance of the masking tape pulling paint off.
Pics to be added shortly.
Cheers
Si
England - South East, United Kingdom
Joined: March 01, 2010
KitMaker: 7,078 posts
Model Shipwrights: 6,649 posts
Posted: Thursday, August 16, 2018 - 08:52 AM UTC
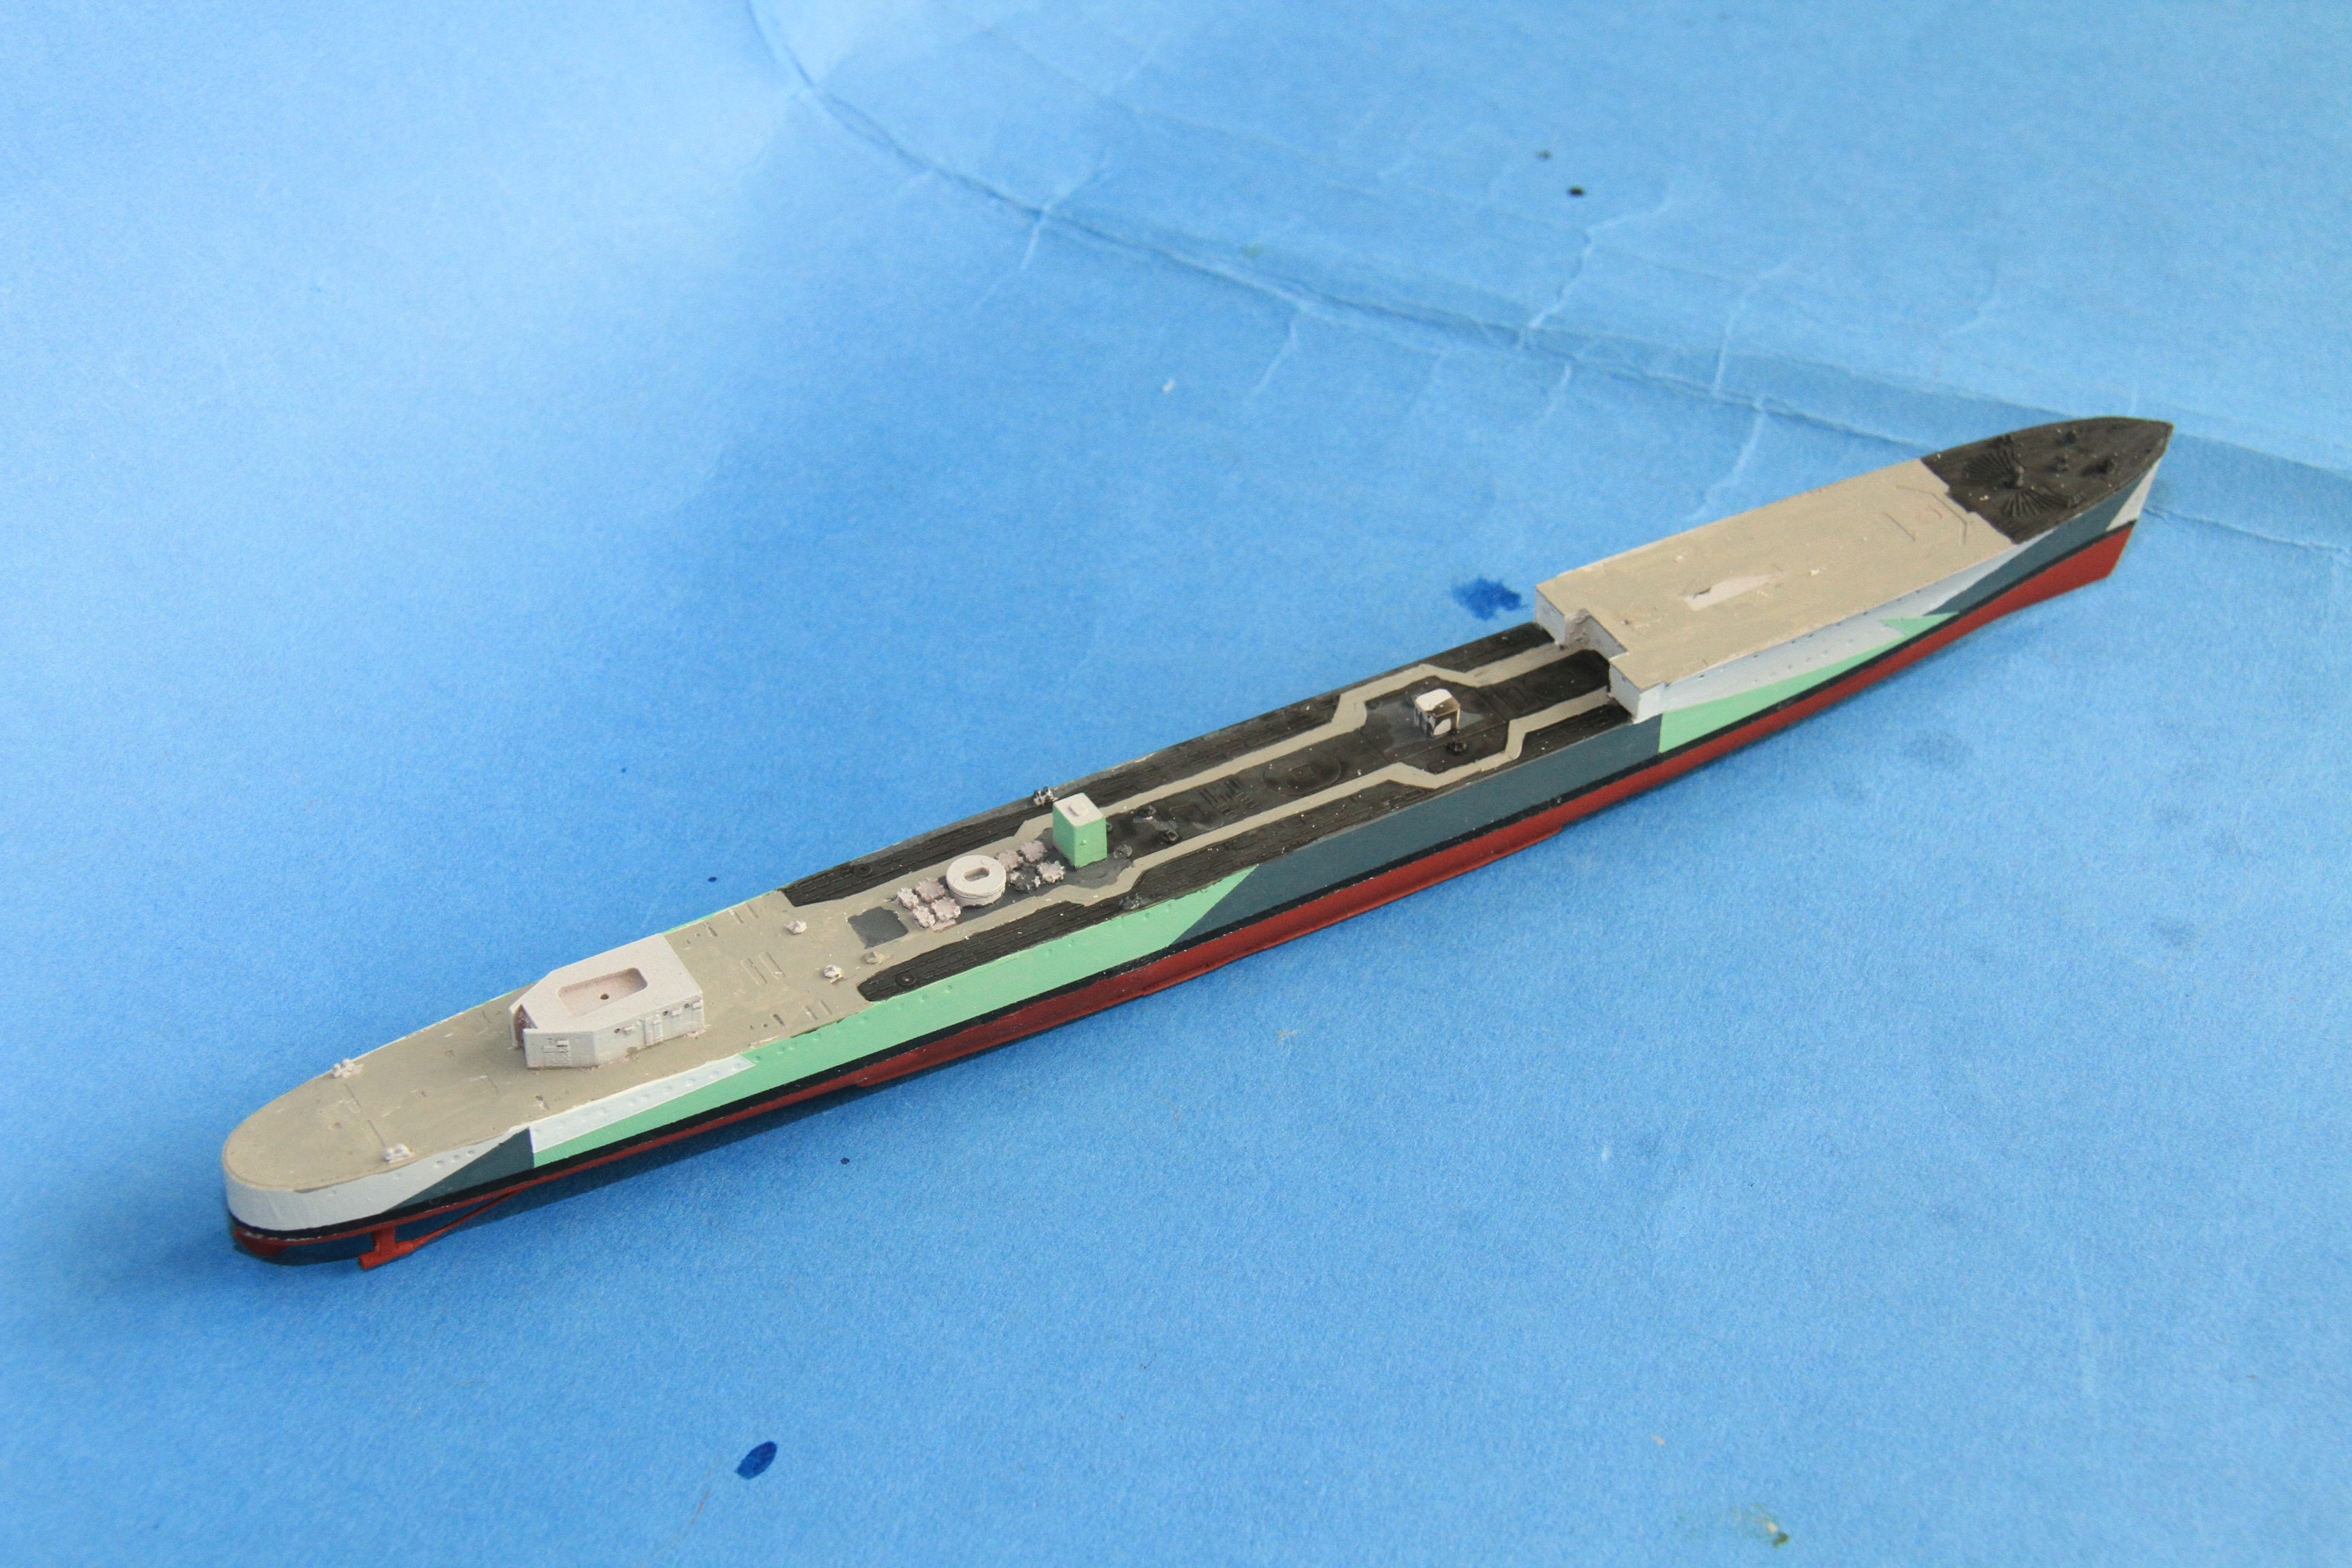
The final bits of the hull & camo.
The top of the boot topping masked.
masking removed.

Final panel masked.

Camouflage done.
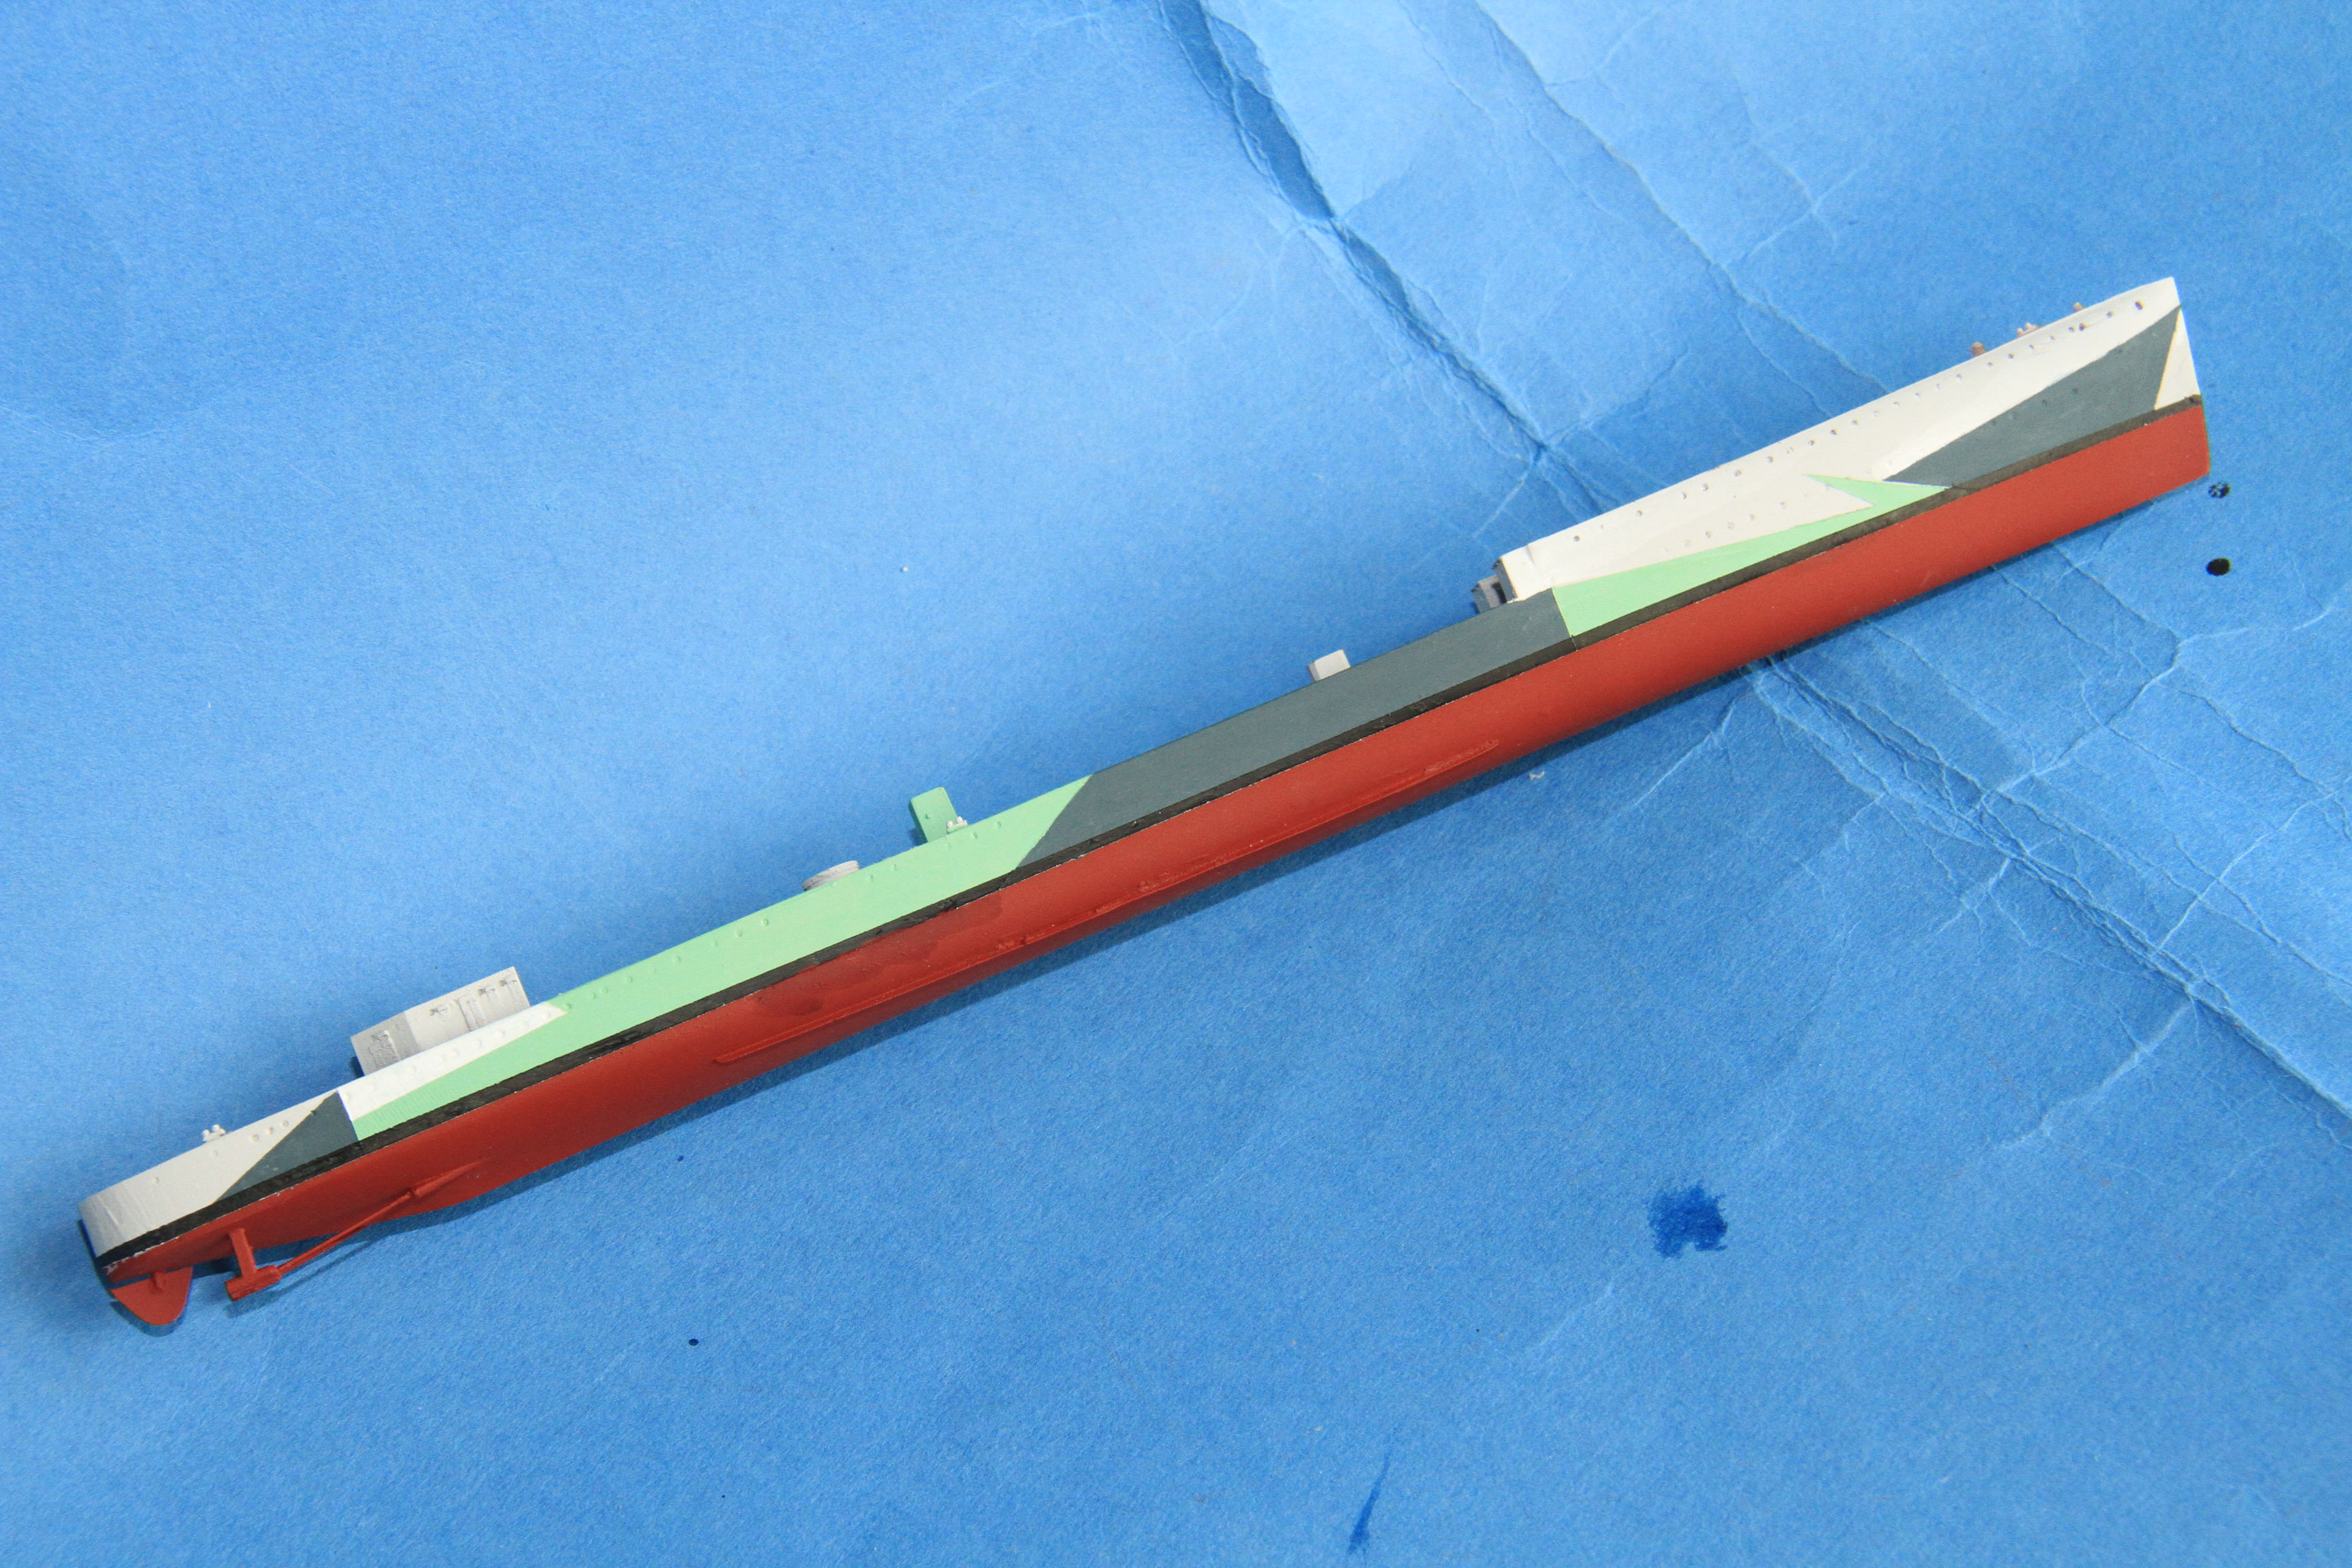
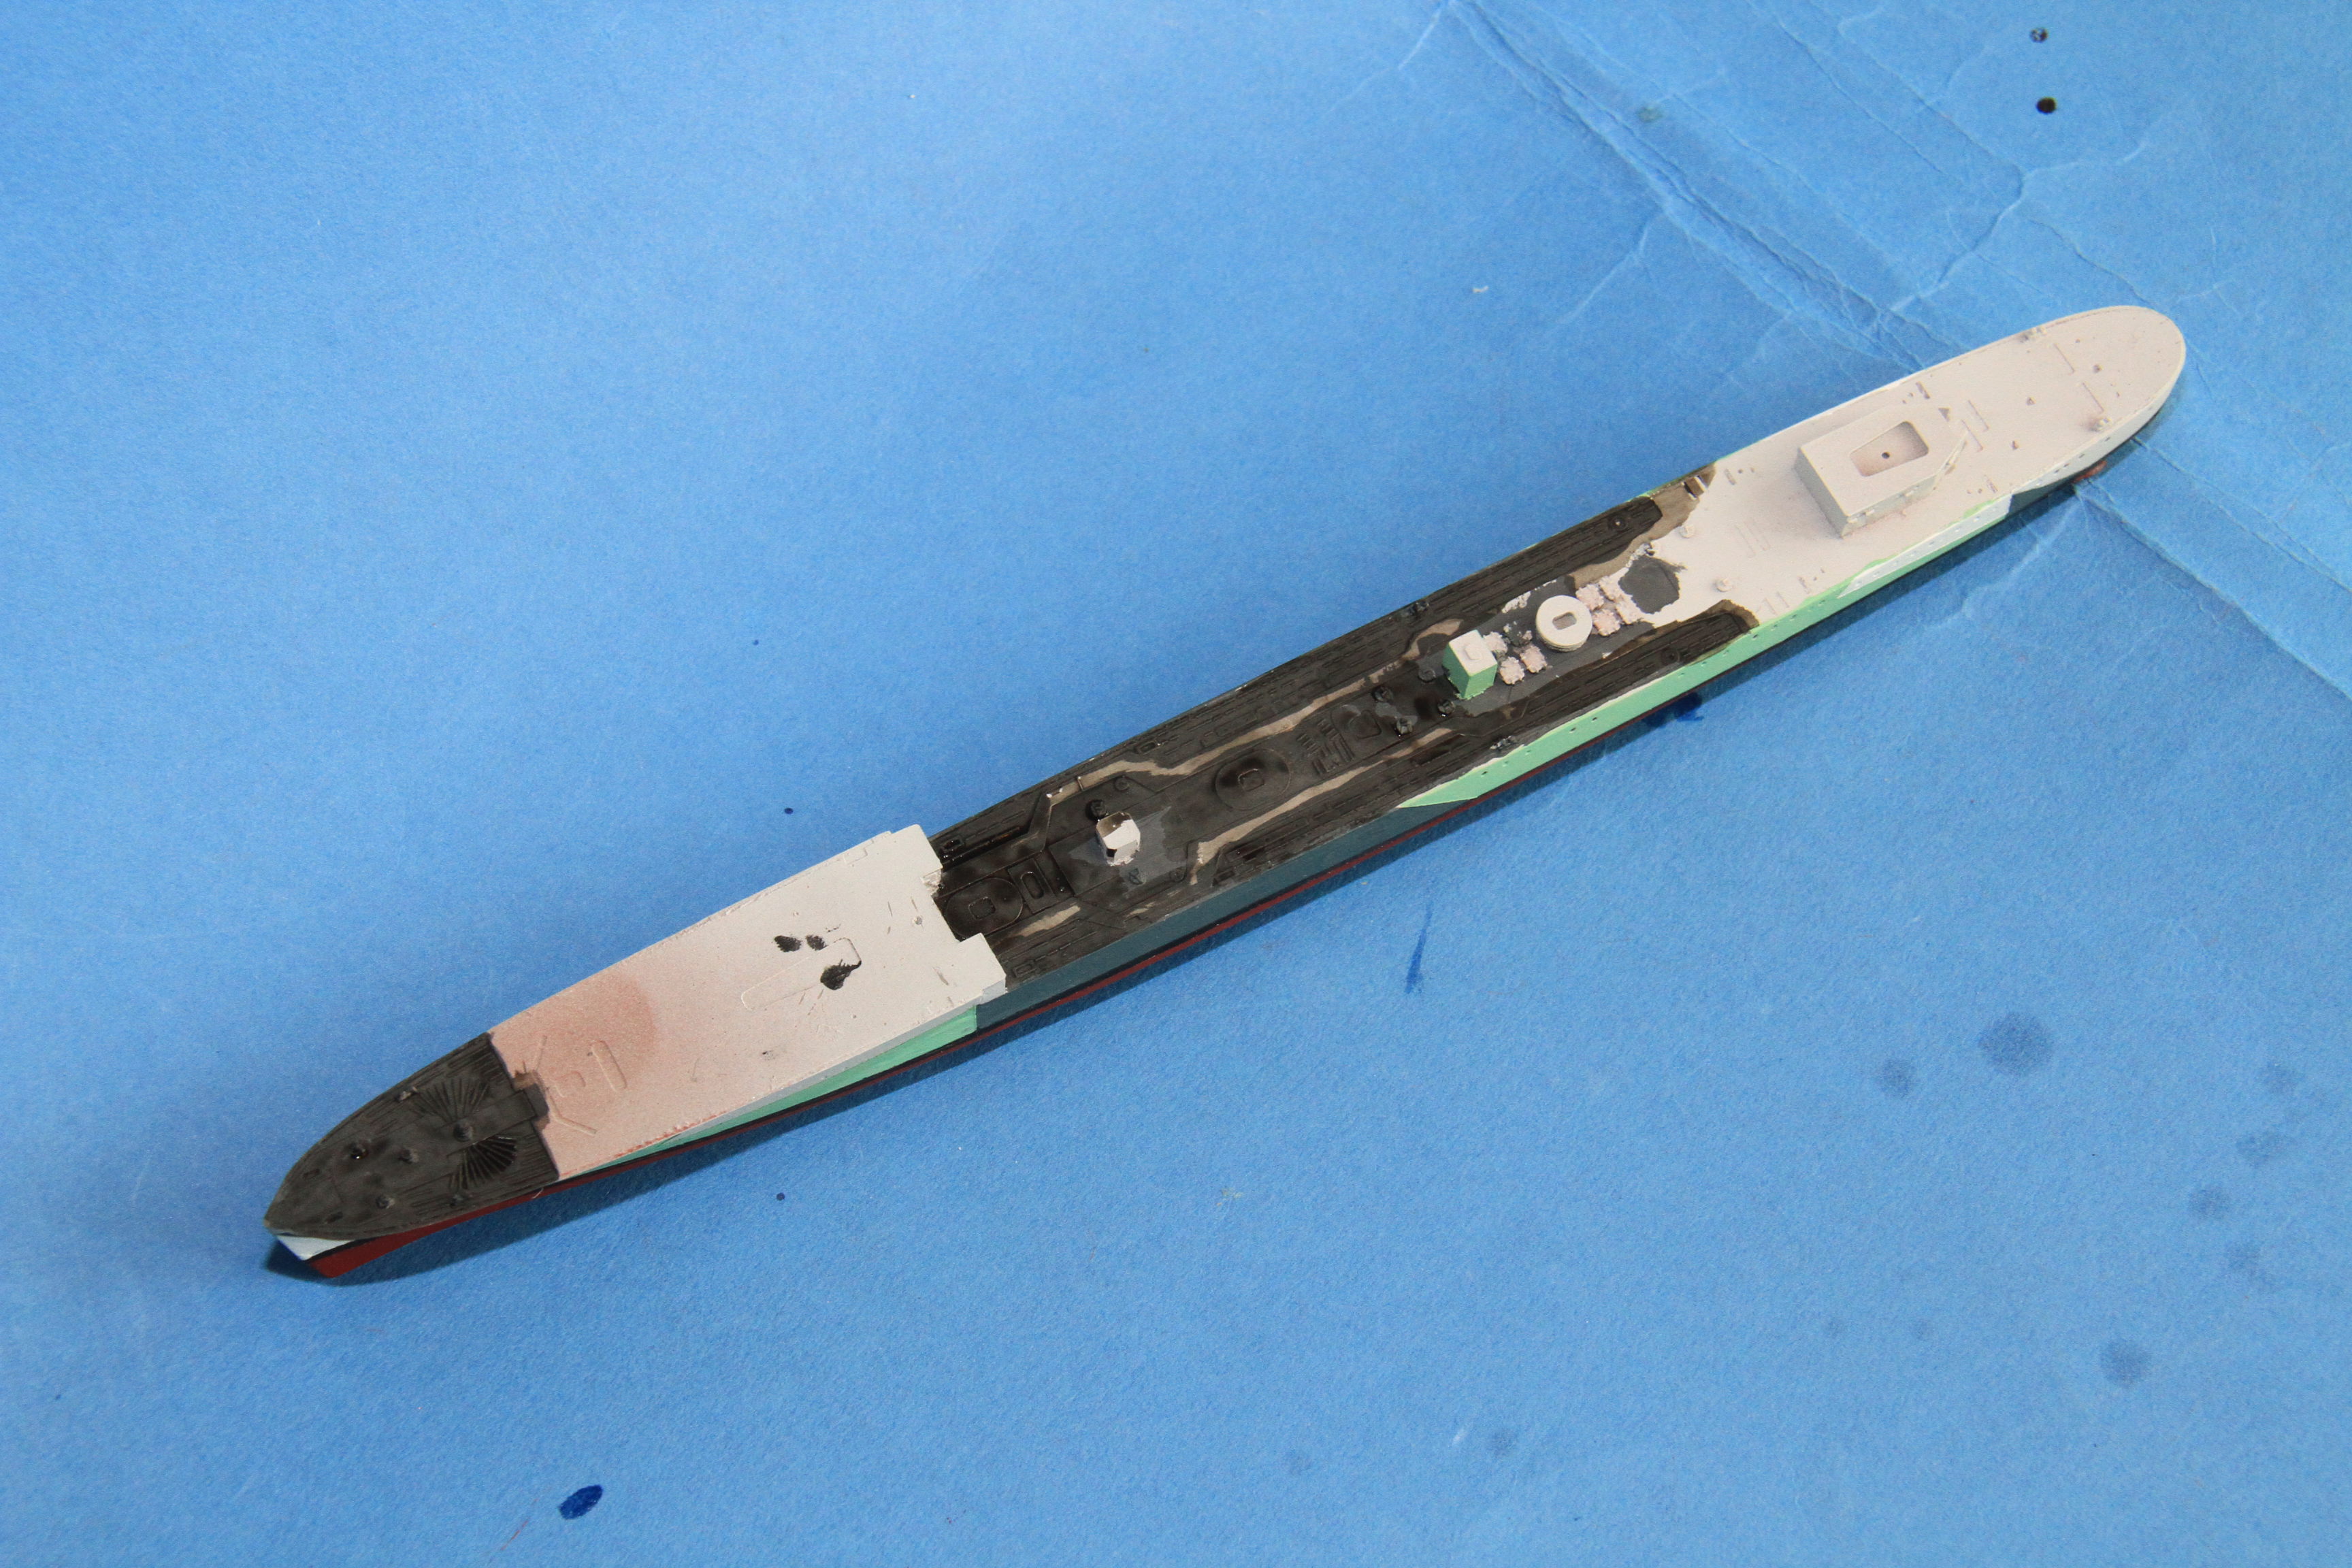
Steel grey areas on the deck painted and washed.
slightly concerning air bubbles in the bottom of B gundeck.
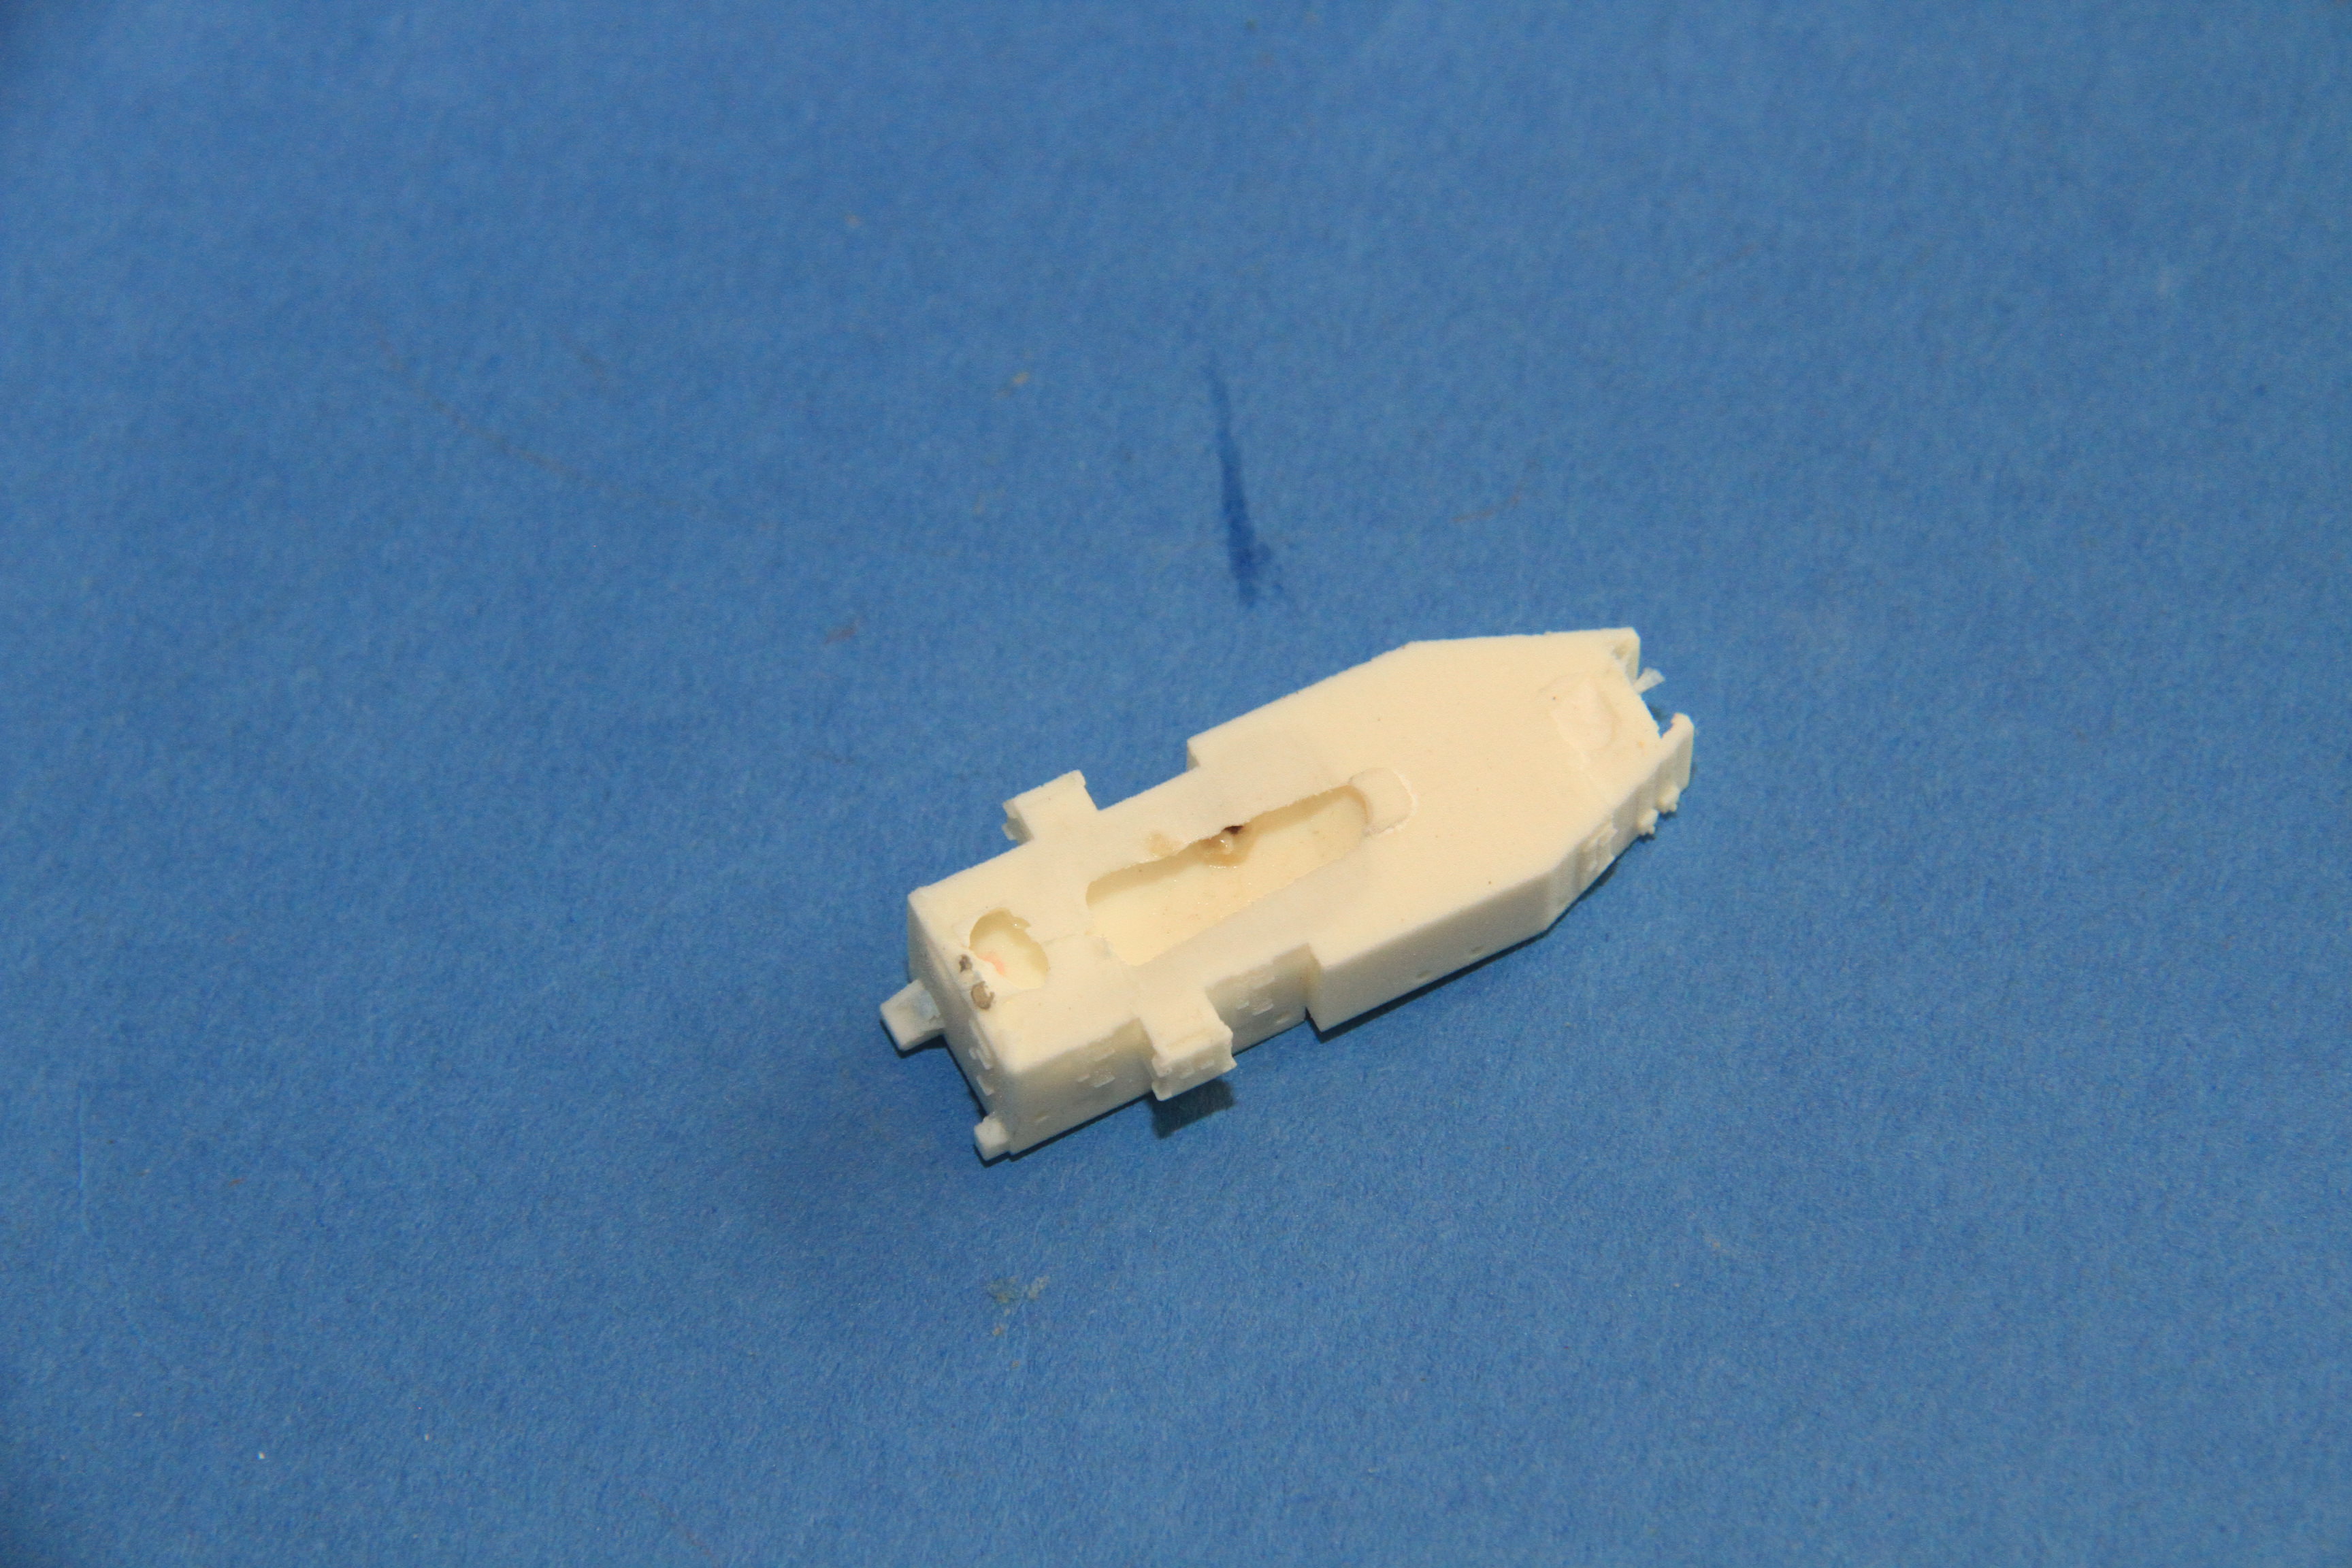
B gun deck assembled, ready for paint.
More soon,
Si
Colorado, United States
Joined: June 22, 2018
KitMaker: 275 posts
Model Shipwrights: 273 posts
Posted: Thursday, August 16, 2018 - 09:16 AM UTC
#306
Victoria, Australia
Joined: June 27, 2010
KitMaker: 3,959 posts
Model Shipwrights: 2,777 posts
Posted: Thursday, August 16, 2018 - 09:56 AM UTC
She looks good in all her Candy Colours Si!
Always liked the WA schemes along with some of the colourful designs applied to the Flower Class corvettes...
Stay home and build models!
In 1/72
Gloster Gladiator MkII for the Bi-planes Campaign
In 1/350
Airfix 1:350 Type 45 Destroyer
#453
Texas, United States
Joined: August 28, 2016
KitMaker: 1,925 posts
Model Shipwrights: 1,298 posts
Posted: Thursday, August 16, 2018 - 11:41 PM UTC
That color scheme must have been picked by a interior decorator because that color green goes very well with the gray. Nice work.
Mark

England - South East, United Kingdom
Joined: March 01, 2010
KitMaker: 7,078 posts
Model Shipwrights: 6,649 posts
Posted: Friday, August 17, 2018 - 05:26 AM UTC
Thanks Chuck, very kind of you to say so
It is quite a striking scheme, all straight lines do make it easier to handle.
Cheers
Si
England - South East, United Kingdom
Joined: March 01, 2010
KitMaker: 7,078 posts
Model Shipwrights: 6,649 posts
Posted: Friday, August 17, 2018 - 05:35 AM UTC
Quoted Text
She looks good in all her Candy Colours Si!
Always liked the WA schemes along with some of the colourful designs applied to the Flower Class corvettes...
Thanks Russ,
Likewise, colourful warships are a nice change. would really like to do a WW1 dazzle on something one of these days.
Cheers
Si
England - South East, United Kingdom
Joined: March 01, 2010
KitMaker: 7,078 posts
Model Shipwrights: 6,649 posts
Posted: Friday, August 17, 2018 - 05:40 AM UTC
Quoted Text
That color scheme must have been picked by a interior decorator because that color green goes very well with the gray. Nice work.
Mark
Hi Mark,
Strangely it was a naturalist, Sir Peter Scott who is credited with designing these schemes.
Thanks for your kind comment, It is an attractive scheme.
Cheers
Si
England - South East, United Kingdom
Joined: March 01, 2010
KitMaker: 7,078 posts
Model Shipwrights: 6,649 posts
Posted: Thursday, August 23, 2018 - 07:45 AM UTC
Main & fo'c's'le decks paint job done.
Base parts of the pompom platform fitted in place.

Pompom platform in place, it takes two single 2 pdrs.
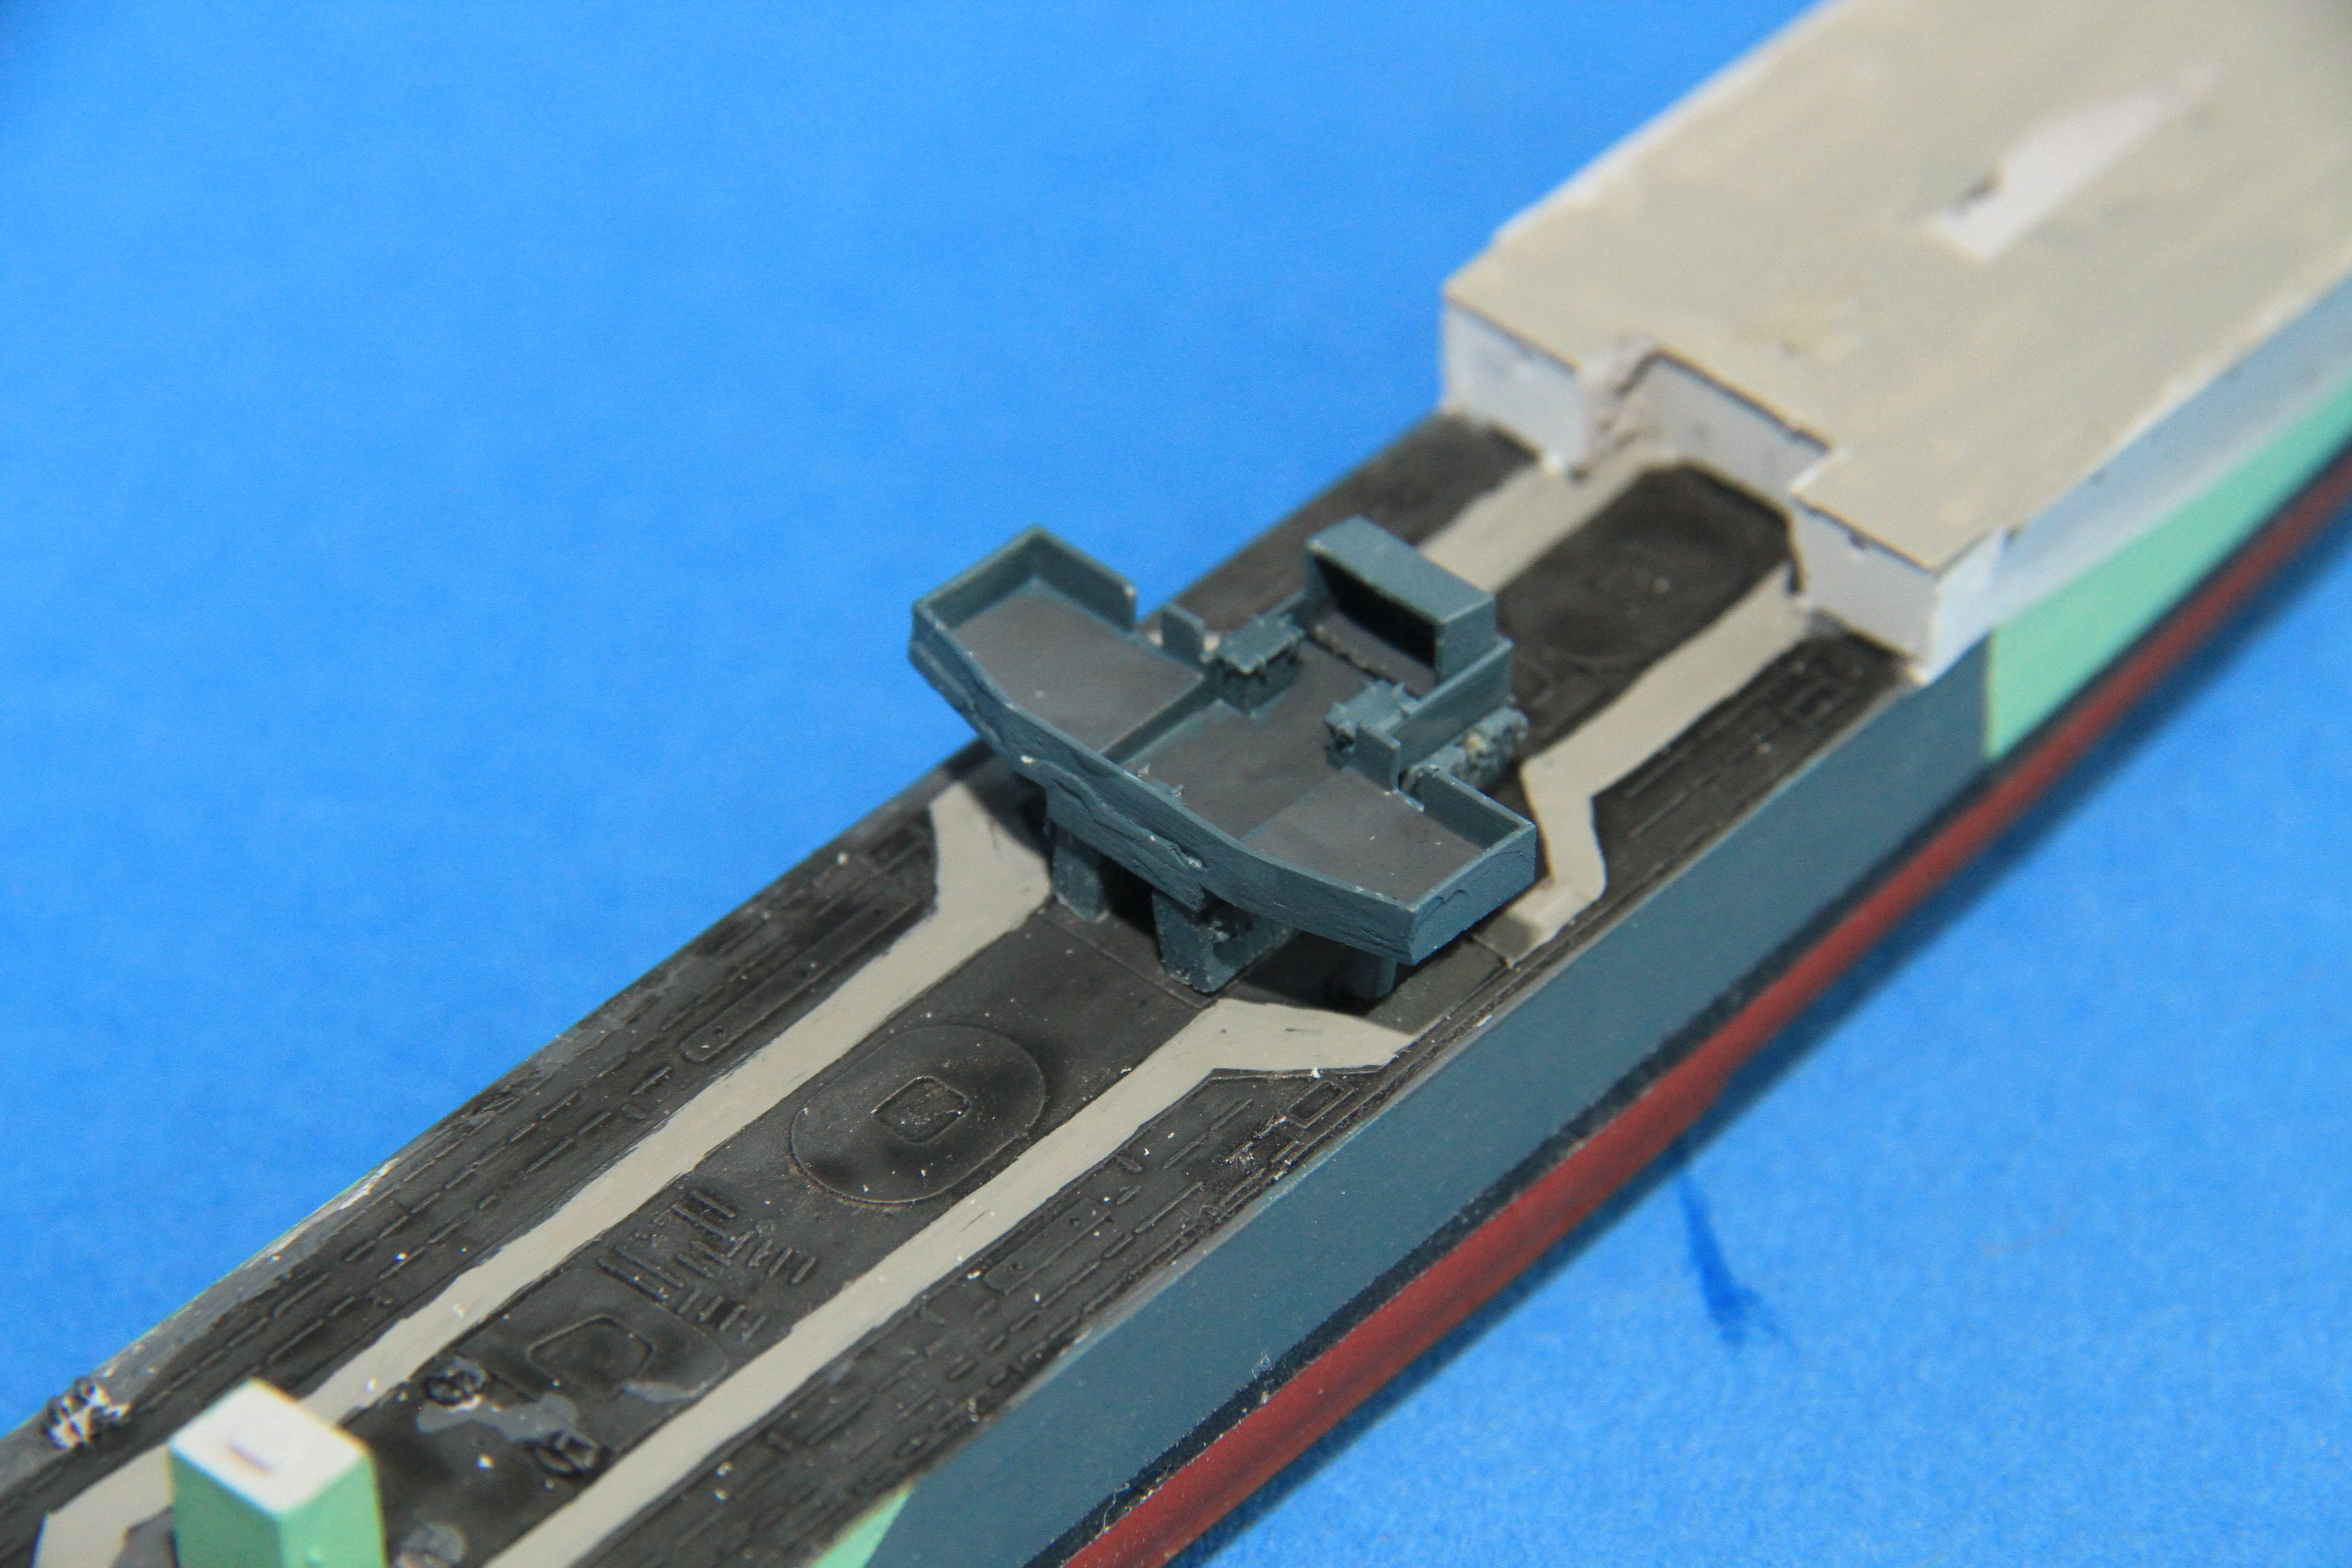
The upper part of the bridge assembled and test fitted on to B gun.

More soon
Si
#453
Texas, United States
Joined: August 28, 2016
KitMaker: 1,925 posts
Model Shipwrights: 1,298 posts
Posted: Thursday, August 23, 2018 - 08:06 AM UTC
Nice progress. I always like it when I finish all of the hull and deck painting. It always seems like a lot of work for so little progress. Looking forward to your next post.
Mark
England - South East, United Kingdom
Joined: March 01, 2010
KitMaker: 7,078 posts
Model Shipwrights: 6,649 posts
Posted: Friday, August 24, 2018 - 07:13 AM UTC
Thanks Mark
I know what you mean, especially when it is an interesting camo job.
I must not forget to find a stand and get the props on before I get too much done on the superstructure.
Cheers
Si
England - South East, United Kingdom
Joined: March 01, 2010
KitMaker: 7,078 posts
Model Shipwrights: 6,649 posts
Posted: Sunday, August 26, 2018 - 06:52 AM UTC
Quick update on today's progress.
B gundeck and the Bridge base coated, the support legs for lower bridgewings have also been fitted.

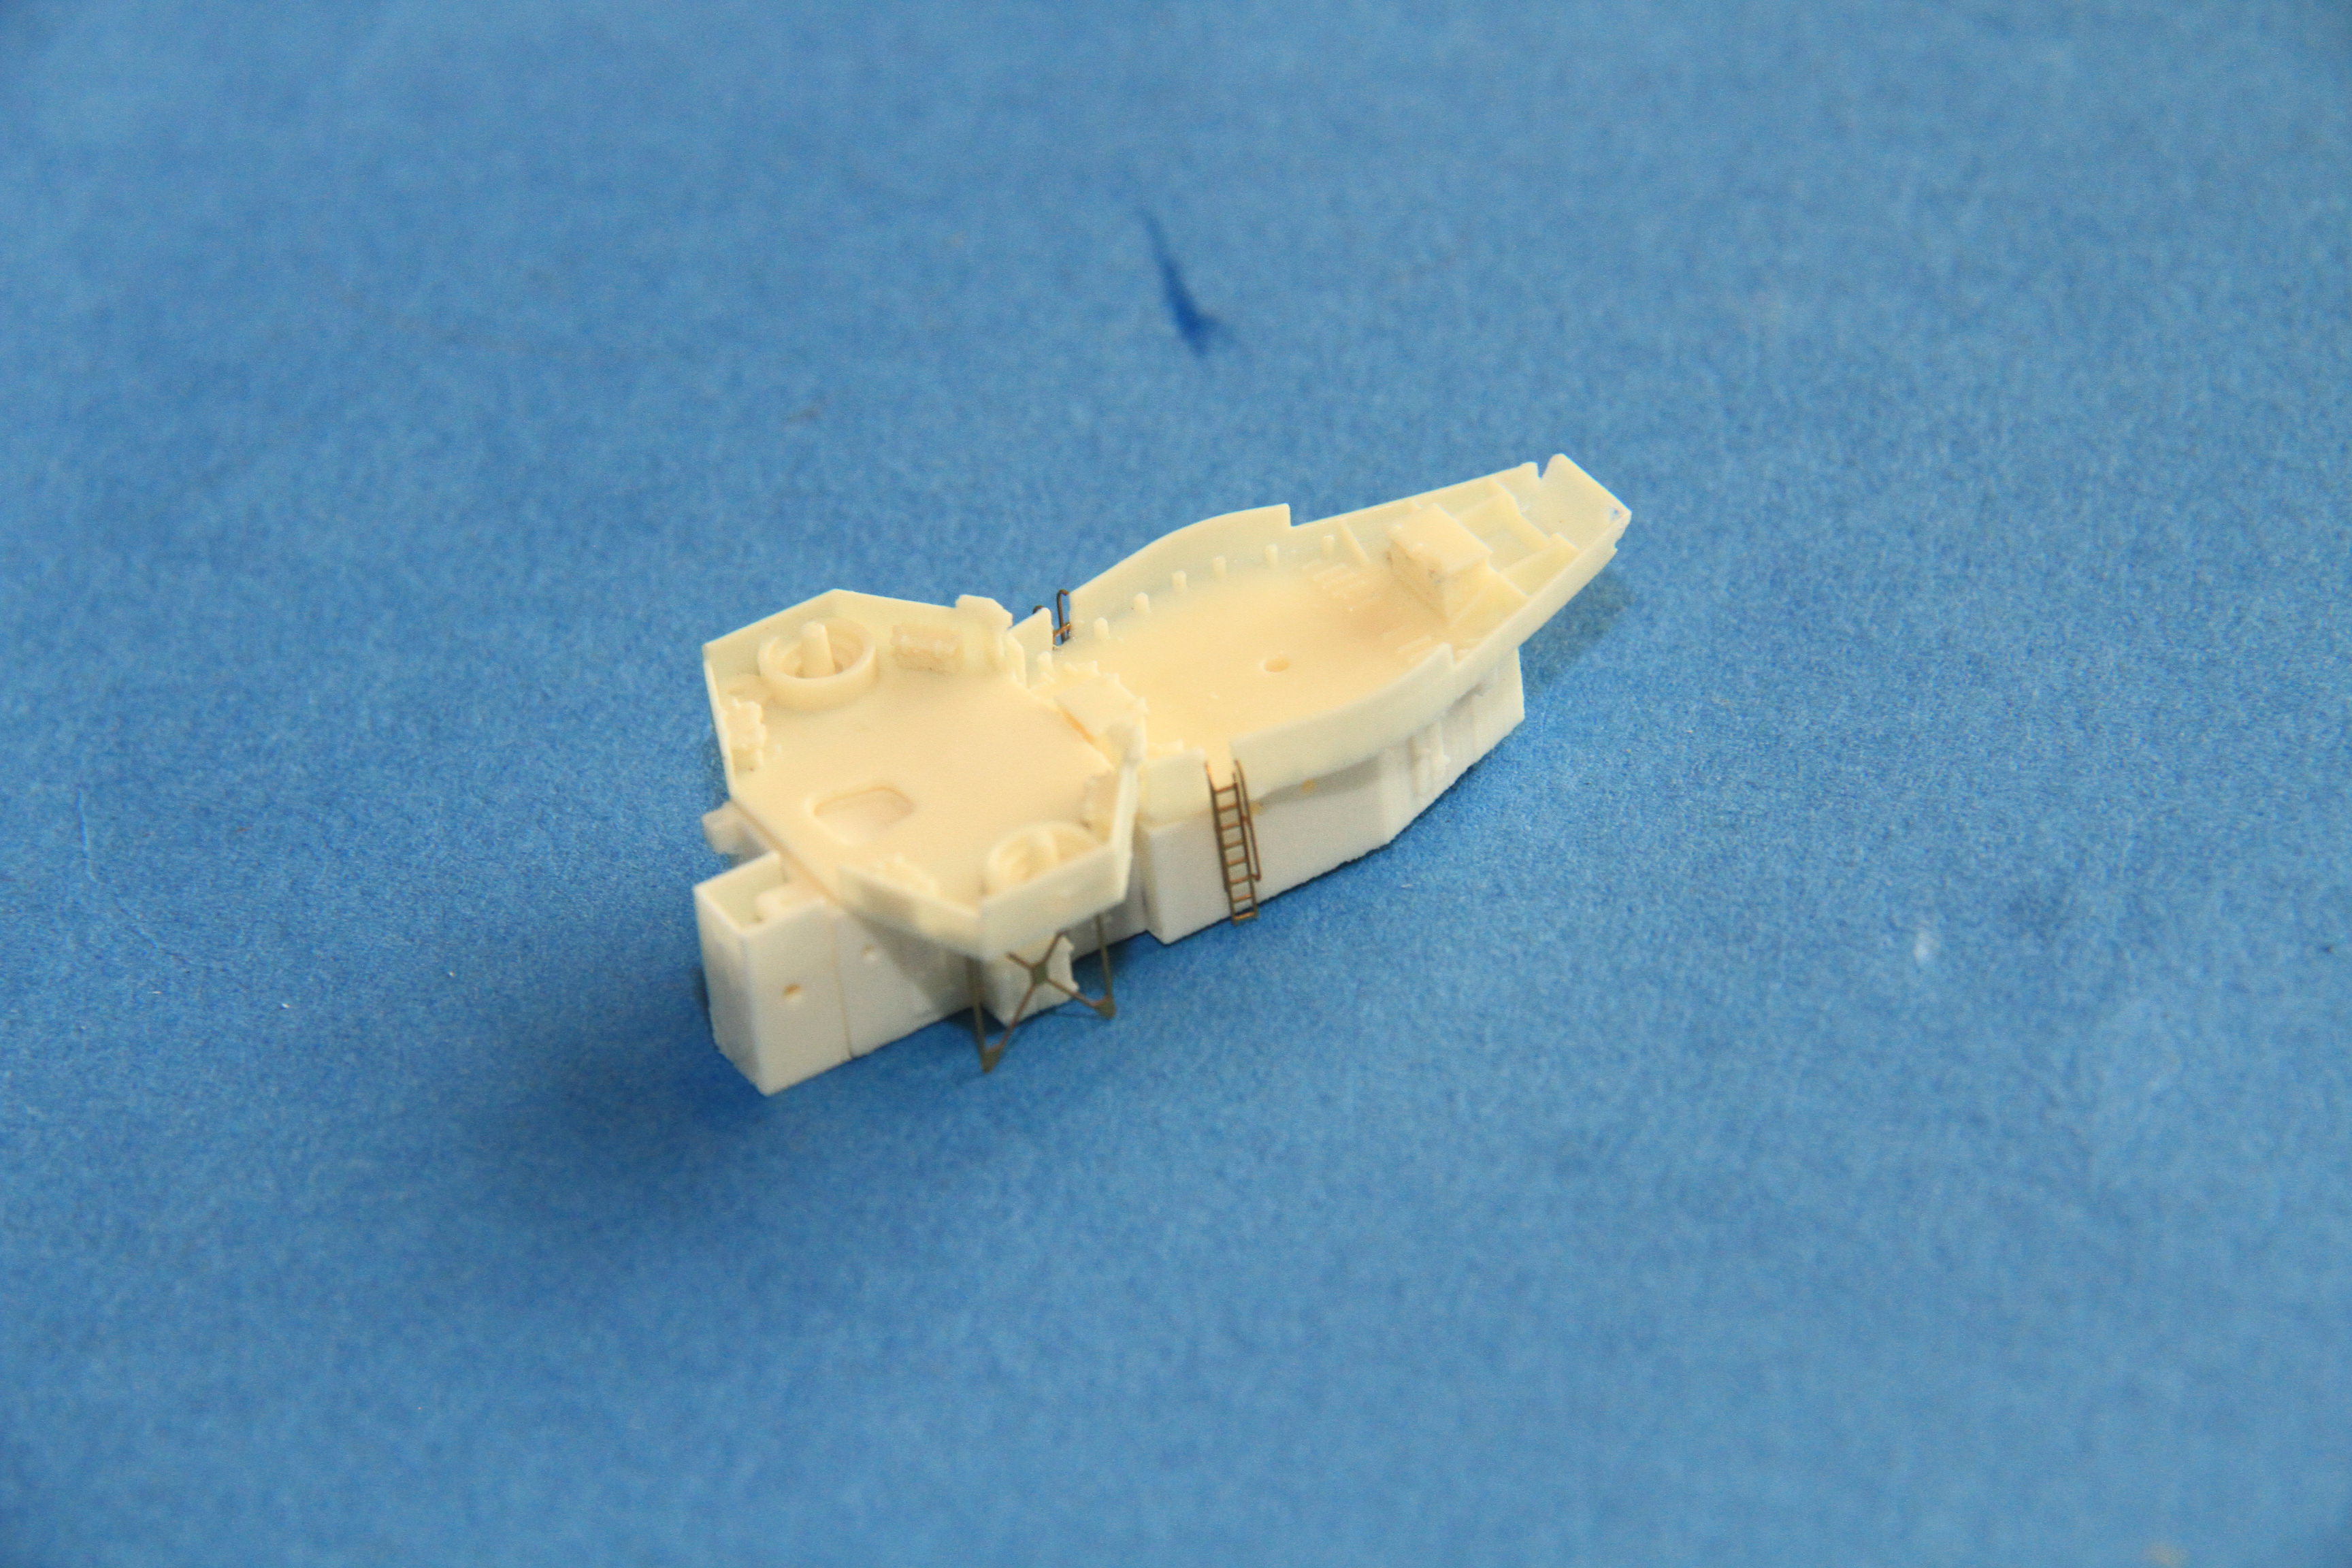
The ready use ammunition locker for Hedgehog has some very nice etched detail for the doors.

B gundeck in place, WA green camo along the lower front painted in.

The moulded on detail on the compass platform painted in, and very nice it is too.

The camo strip along the top done & the Nav lights picked out.
More soon.
Cheers
Si


