Artesania Latina Cutty Sark
United Kingdom
Joined: December 20, 2013
KitMaker: 1,179 posts
Model Shipwrights: 427 posts
Posted: Monday, September 30, 2019 - 07:30 AM UTC
Michigan, United States
Joined: June 10, 2008
KitMaker: 230 posts
Model Shipwrights: 136 posts
Posted: Monday, September 30, 2019 - 07:48 AM UTC
Interesting project. I've done a couple of rebuilds of started ships from estate sales. It can be a bit frustrating in the beginning, but once you get it straitened out and start the build again, things usually go quite well.
I'll be following with interest.
EJ
Fair Winds and Following Seas
EJ
United Kingdom
Joined: December 20, 2013
KitMaker: 1,179 posts
Model Shipwrights: 427 posts
Posted: Saturday, October 05, 2019 - 04:27 AM UTC

#453
Texas, United States
Joined: August 28, 2016
KitMaker: 1,925 posts
Model Shipwrights: 1,298 posts
Posted: Saturday, October 05, 2019 - 10:30 AM UTC
You could talk to a professional restorer for suggestions.
Marcus

Ontario, Canada
Joined: April 26, 2015
KitMaker: 99 posts
Model Shipwrights: 99 posts
Posted: Sunday, October 06, 2019 - 10:24 AM UTC
You could always cut them away, make new ones and glue them in the proper position. Wood is very forgiving for stuff like this and all that internal structure will be hidden by planking. A site that might be of interest is modelshipworld.com
Grant Goodale
Peel Scale Modellers
RobinNilsson
 TOS Moderator
Stockholm, Sweden
Joined: November 29, 2006
KitMaker: 6,693 posts
Model Shipwrights: 70 posts
Posted: Sunday, October 06, 2019 - 06:48 PM UTC
If I were to do this I would get a set of hull lines and check all of those frames and make new ones as needed.
If there is only a little missing from a frame I would glue strips of wood to the edge and then file/sand down to the correct shape.
Cutting away the whole frame as suggested by Grant above is probably easier than messing around with fixing big errors.
/ Robin
In memory of Al Superczynski:
"Build what YOU want, the way YOU want to....
and the critics will flame you every time"
United Kingdom
Joined: December 20, 2013
KitMaker: 1,179 posts
Model Shipwrights: 427 posts
Posted: Monday, October 07, 2019 - 07:14 AM UTC
#345
Niedersachsen, Germany
Joined: August 22, 2011
KitMaker: 1,835 posts
Model Shipwrights: 1,832 posts
Posted: Thursday, October 10, 2019 - 05:57 AM UTC
Hi Ken,
another special project of yours.
This certainly looks like a tough start - I've never done anything in wood, so I can't give any advice, but I'll be following your work!
Cheers
Jan
#453
Texas, United States
Joined: August 28, 2016
KitMaker: 1,925 posts
Model Shipwrights: 1,298 posts
Posted: Thursday, October 10, 2019 - 09:43 AM UTC
Ken,
Glad to hear you resolve the problem with the supports. How did you manage to get them unglued? Would be nice to know in case I get a case of the crazies and start building one of these.
Mark
United Kingdom
Joined: December 20, 2013
KitMaker: 1,179 posts
Model Shipwrights: 427 posts
Posted: Friday, October 11, 2019 - 07:50 AM UTC
I didn't unglue them I reduced the last bulkhead and increased it 2nd to last which had the same effect of swapping them round.
United Kingdom
Joined: December 20, 2013
KitMaker: 1,179 posts
Model Shipwrights: 427 posts
Posted: Saturday, October 12, 2019 - 05:12 AM UTC
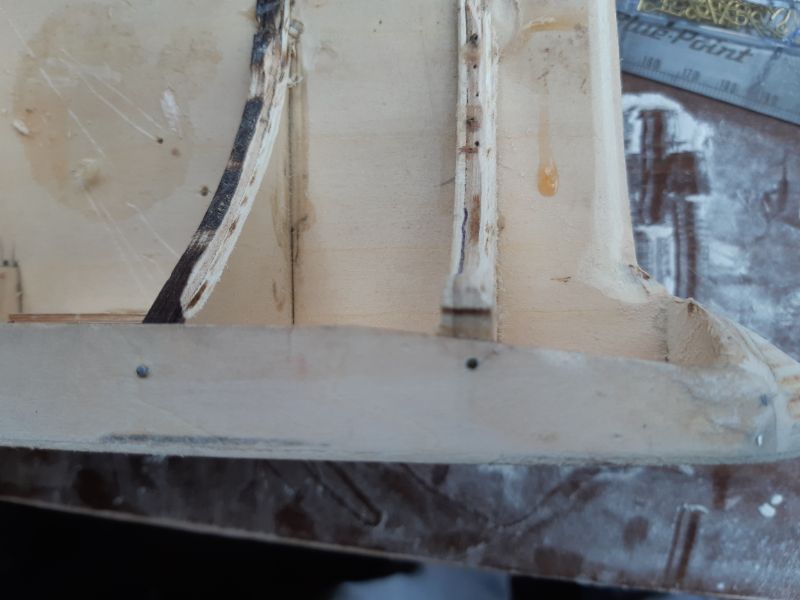
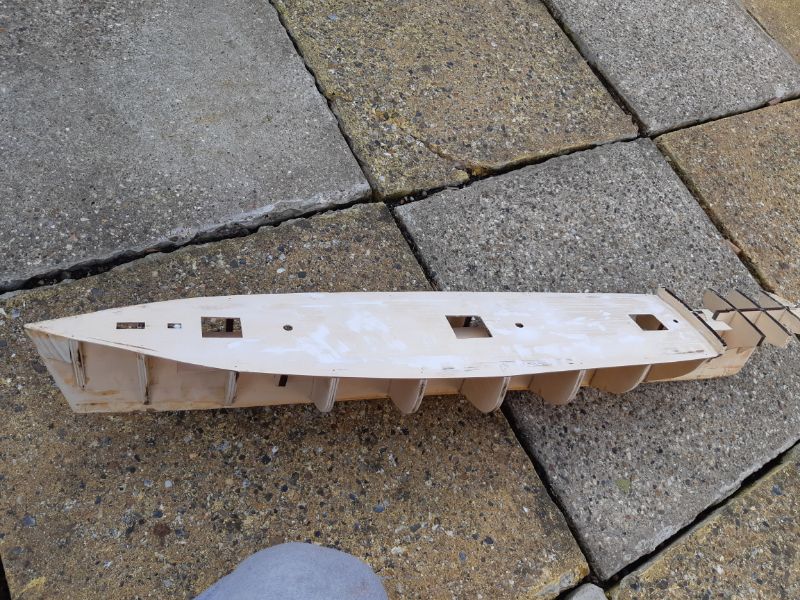
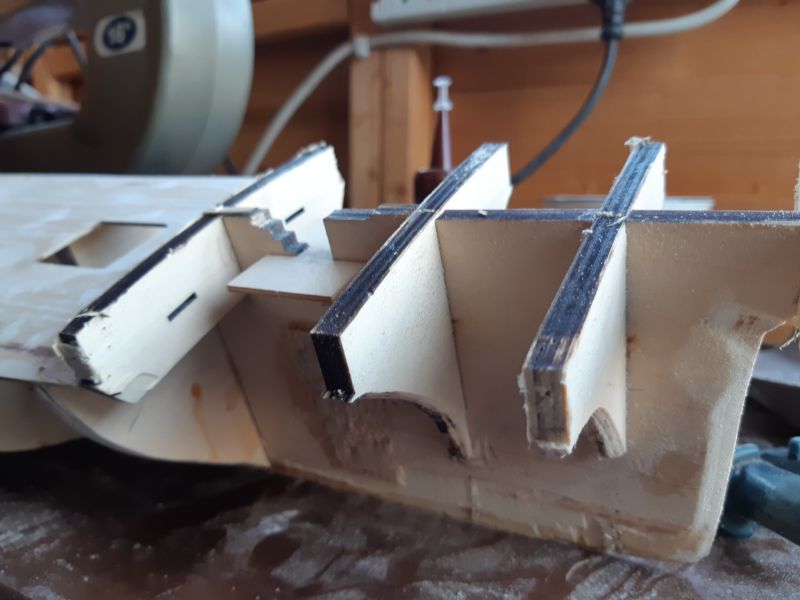
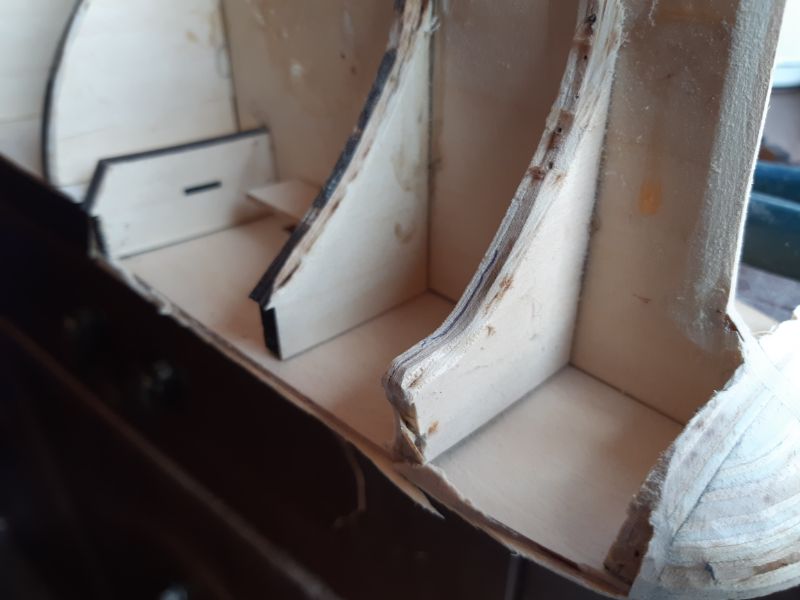
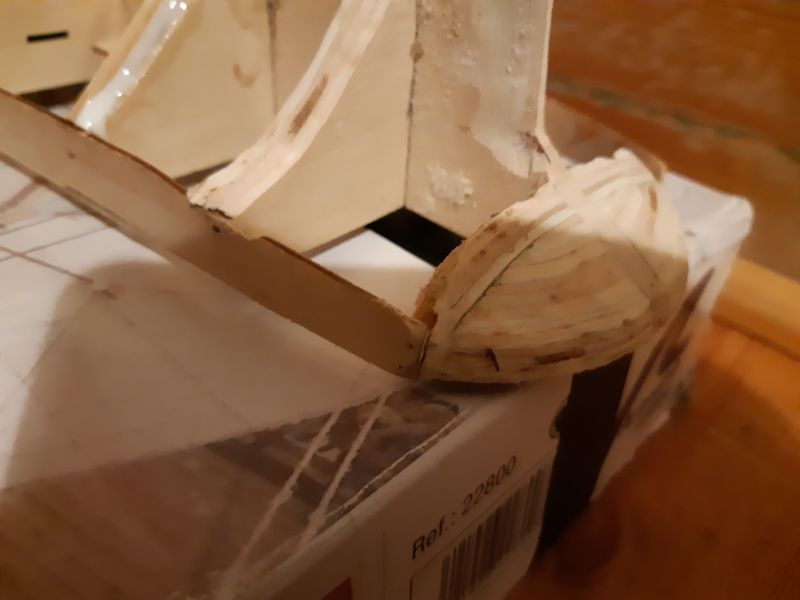
Well 1 step backwards leads to another step backwards, deck had to come off again. I was about to start planking it again and I thought surely that hump shouldn't be there.


Also I dont know if you can see it from the photo but there is a gap between the bulkhead and the deck (I thought the small oblong hole in the decking was a hatch or something at first but now I see it is a locating peg for the decking) another wrongly glued bulkhead.
I managed to get the bulkhead off (it wasn't fully home due to wood dust and glue formed at the bottom of the joint) (all nicely held in place with dried glue) took ages to cut it all away, anyway as you can see it's all nicely flush and fitted now.


Hopefully I can now proceed as if it were a new kit (apart from the splits in all the bulkheads due to where it was planked before cant think of anything to do about that, if I glue them back together I think it will make it too hard to put new pins in) I'm hoping when its replanked I can drill holes for the pins (they will only be for show anyway)
#453
Texas, United States
Joined: August 28, 2016
KitMaker: 1,925 posts
Model Shipwrights: 1,298 posts
Posted: Saturday, October 12, 2019 - 11:41 AM UTC
Ken,
The deck does look flat now in the picture, nice recovery.
Mark
United Kingdom
Joined: December 20, 2013
KitMaker: 1,179 posts
Model Shipwrights: 427 posts
Posted: Sunday, October 13, 2019 - 07:43 AM UTC
#453
Texas, United States
Joined: August 28, 2016
KitMaker: 1,925 posts
Model Shipwrights: 1,298 posts
Posted: Sunday, October 13, 2019 - 09:02 PM UTC
Ken,
Sounds like a very workable plan. I bet it must feel better to be building than repairing. With all the bad things I heard about Artesania models your build will either confirm the stories or put them to bed.
Mark
United Kingdom
Joined: December 20, 2013
KitMaker: 1,179 posts
Model Shipwrights: 427 posts
Posted: Tuesday, October 15, 2019 - 08:04 AM UTC
#453
Texas, United States
Joined: August 28, 2016
KitMaker: 1,925 posts
Model Shipwrights: 1,298 posts
Posted: Tuesday, October 15, 2019 - 08:54 AM UTC
Ken,
Very nice work on the assembly and great idea about using a pencil to simulate the calking.
Mark
#345
Niedersachsen, Germany
Joined: August 22, 2011
KitMaker: 1,835 posts
Model Shipwrights: 1,832 posts
Posted: Thursday, October 17, 2019 - 03:20 AM UTC
Ken,
very nice work indeed, looks really good!
Cheers
Jan
United Kingdom
Joined: December 20, 2013
KitMaker: 1,179 posts
Model Shipwrights: 427 posts
Posted: Saturday, October 19, 2019 - 06:02 AM UTC
Hi all I have done some of the planking I've cut the planks at 70mm which I think in this equates to 10 yards at this scale (although the planking supplied is I think is over scale at about 12"wide ) I'm not going to add the nail heads as I've seen on the printed decks available in this scale as I dont believe a nail with a head diameter of 6 mm would be visible at this scale at.
The planking is very slow going but quite satisfying.


#453
Texas, United States
Joined: August 28, 2016
KitMaker: 1,925 posts
Model Shipwrights: 1,298 posts
Posted: Saturday, October 19, 2019 - 08:46 AM UTC
Ken,
Nice work on the planking, the boards are looking uniform.
Mark
TimReynaga
Associate Editor California, United States
Joined: May 03, 2006
KitMaker: 2,500 posts
Model Shipwrights: 1,830 posts
Posted: Sunday, October 20, 2019 - 02:07 AM UTC
Ken,
My hat is off to you taking on this challenge. I recently started a U.S. brig Syren wood kit for my dad and WOW, the skills needed are so different from my accustomed plastic models!
Anyway, your efforts on the Cutty Sark are looking better and better!
United Kingdom
Joined: December 20, 2013
KitMaker: 1,179 posts
Model Shipwrights: 427 posts
Posted: Sunday, October 20, 2019 - 07:56 AM UTC
Hi all well this is as far as the decking can go at the moment as I've used all the wood left in the kit for this (they were very generous with wood as it was already fully planked so they nearly give you double what you need) I just hope when the new stuff comes it's similar coloured unlike the last bit (for the waterways which were completely different colours) I realise wood is a natural product so can differ I just hope it's not too much different.


#453
Texas, United States
Joined: August 28, 2016
KitMaker: 1,925 posts
Model Shipwrights: 1,298 posts
Posted: Sunday, October 20, 2019 - 11:34 PM UTC
Quoted Text
Ken,
My hat is off to you taking on this challenge. I recently started a U.S. brig Syren wood kit for my dad and WOW, the skills needed are so different from my accustomed plastic models!
Anyway, your efforts on the Cutty Sark are looking better and better!
Tim, Is the Syren at 1/2000 scale as the others?
Mark
United Kingdom
Joined: December 20, 2013
KitMaker: 1,179 posts
Model Shipwrights: 427 posts
Posted: Friday, October 25, 2019 - 08:00 AM UTC
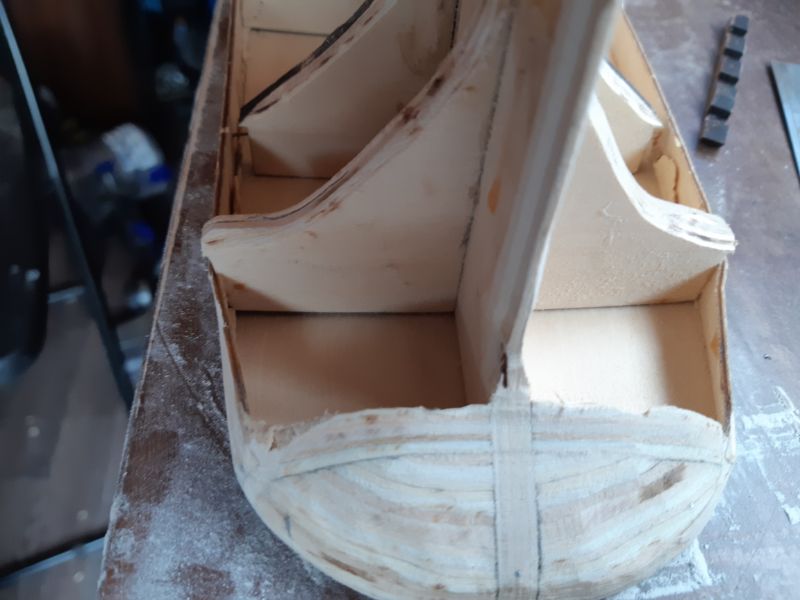
Hi all well the planks arrived and I was happy the colour was the same but they must have used the other 3mm because these are narrower also they are not 1mm thick either ( not that that matters much once sanded down) I managed to get a knife under a few of the stuck planks and shave some off the inner sides and squashed them together I'm hoping it will be enough so the thinness of the new planks won't notice.
While I was waiting for these planks I planked some of the sides (I must say I'm quite pleased with the results.
I bought a sprung pin pusher for inserting the pins, I intend to drill the holes for the pins first as the ply on the bulkheads is all split and separated from all the pins used to plank it the first time (I would have glued and clamped them but figured it would make them harder and therefore make putting the pins in harder) I think it's all starting to come together.


#453
Texas, United States
Joined: August 28, 2016
KitMaker: 1,925 posts
Model Shipwrights: 1,298 posts
Posted: Friday, October 25, 2019 - 01:24 PM UTC
Ken,
The planking on the deck is looking good. I really can't tell the difference between the old and new.
The planking you have done on the hull looks great. Did you already pulled the pins as I don't see any or did you glue and clamp these in?
Mark
United Kingdom
Joined: December 20, 2013
KitMaker: 1,179 posts
Model Shipwrights: 427 posts
Posted: Friday, October 25, 2019 - 08:00 PM UTC
I haven't pinned it yet just glued and clamped, I dont know why the previous owner used so many pins(it was almost like a test for him to see how many he could fit in the smallest space) I've not used a single pin to hold planks in place to give you an idea look at the last pic in the first post, why so many pins just to hold the deck on, I mean there's 6 just in the prow ?