_GOTOBOTTOM
Ships by Class/Type: Carriers
Topics on all types of carriers from the early 20th century to today.
USS Iwo Jima LHD-7
McRunty
#491
Visit this Community
Missouri, United States
Joined: April 06, 2016
KitMaker: 602 posts
Model Shipwrights: 349 posts
Posted: Wednesday, November 06, 2019 - 02:31 AM UTC
This is the Trumpeter 1/350 USS Iwo Jima. I have started building this for a campaign over on, of all places, the Aeroscale forum. This will be my full WIP thread.


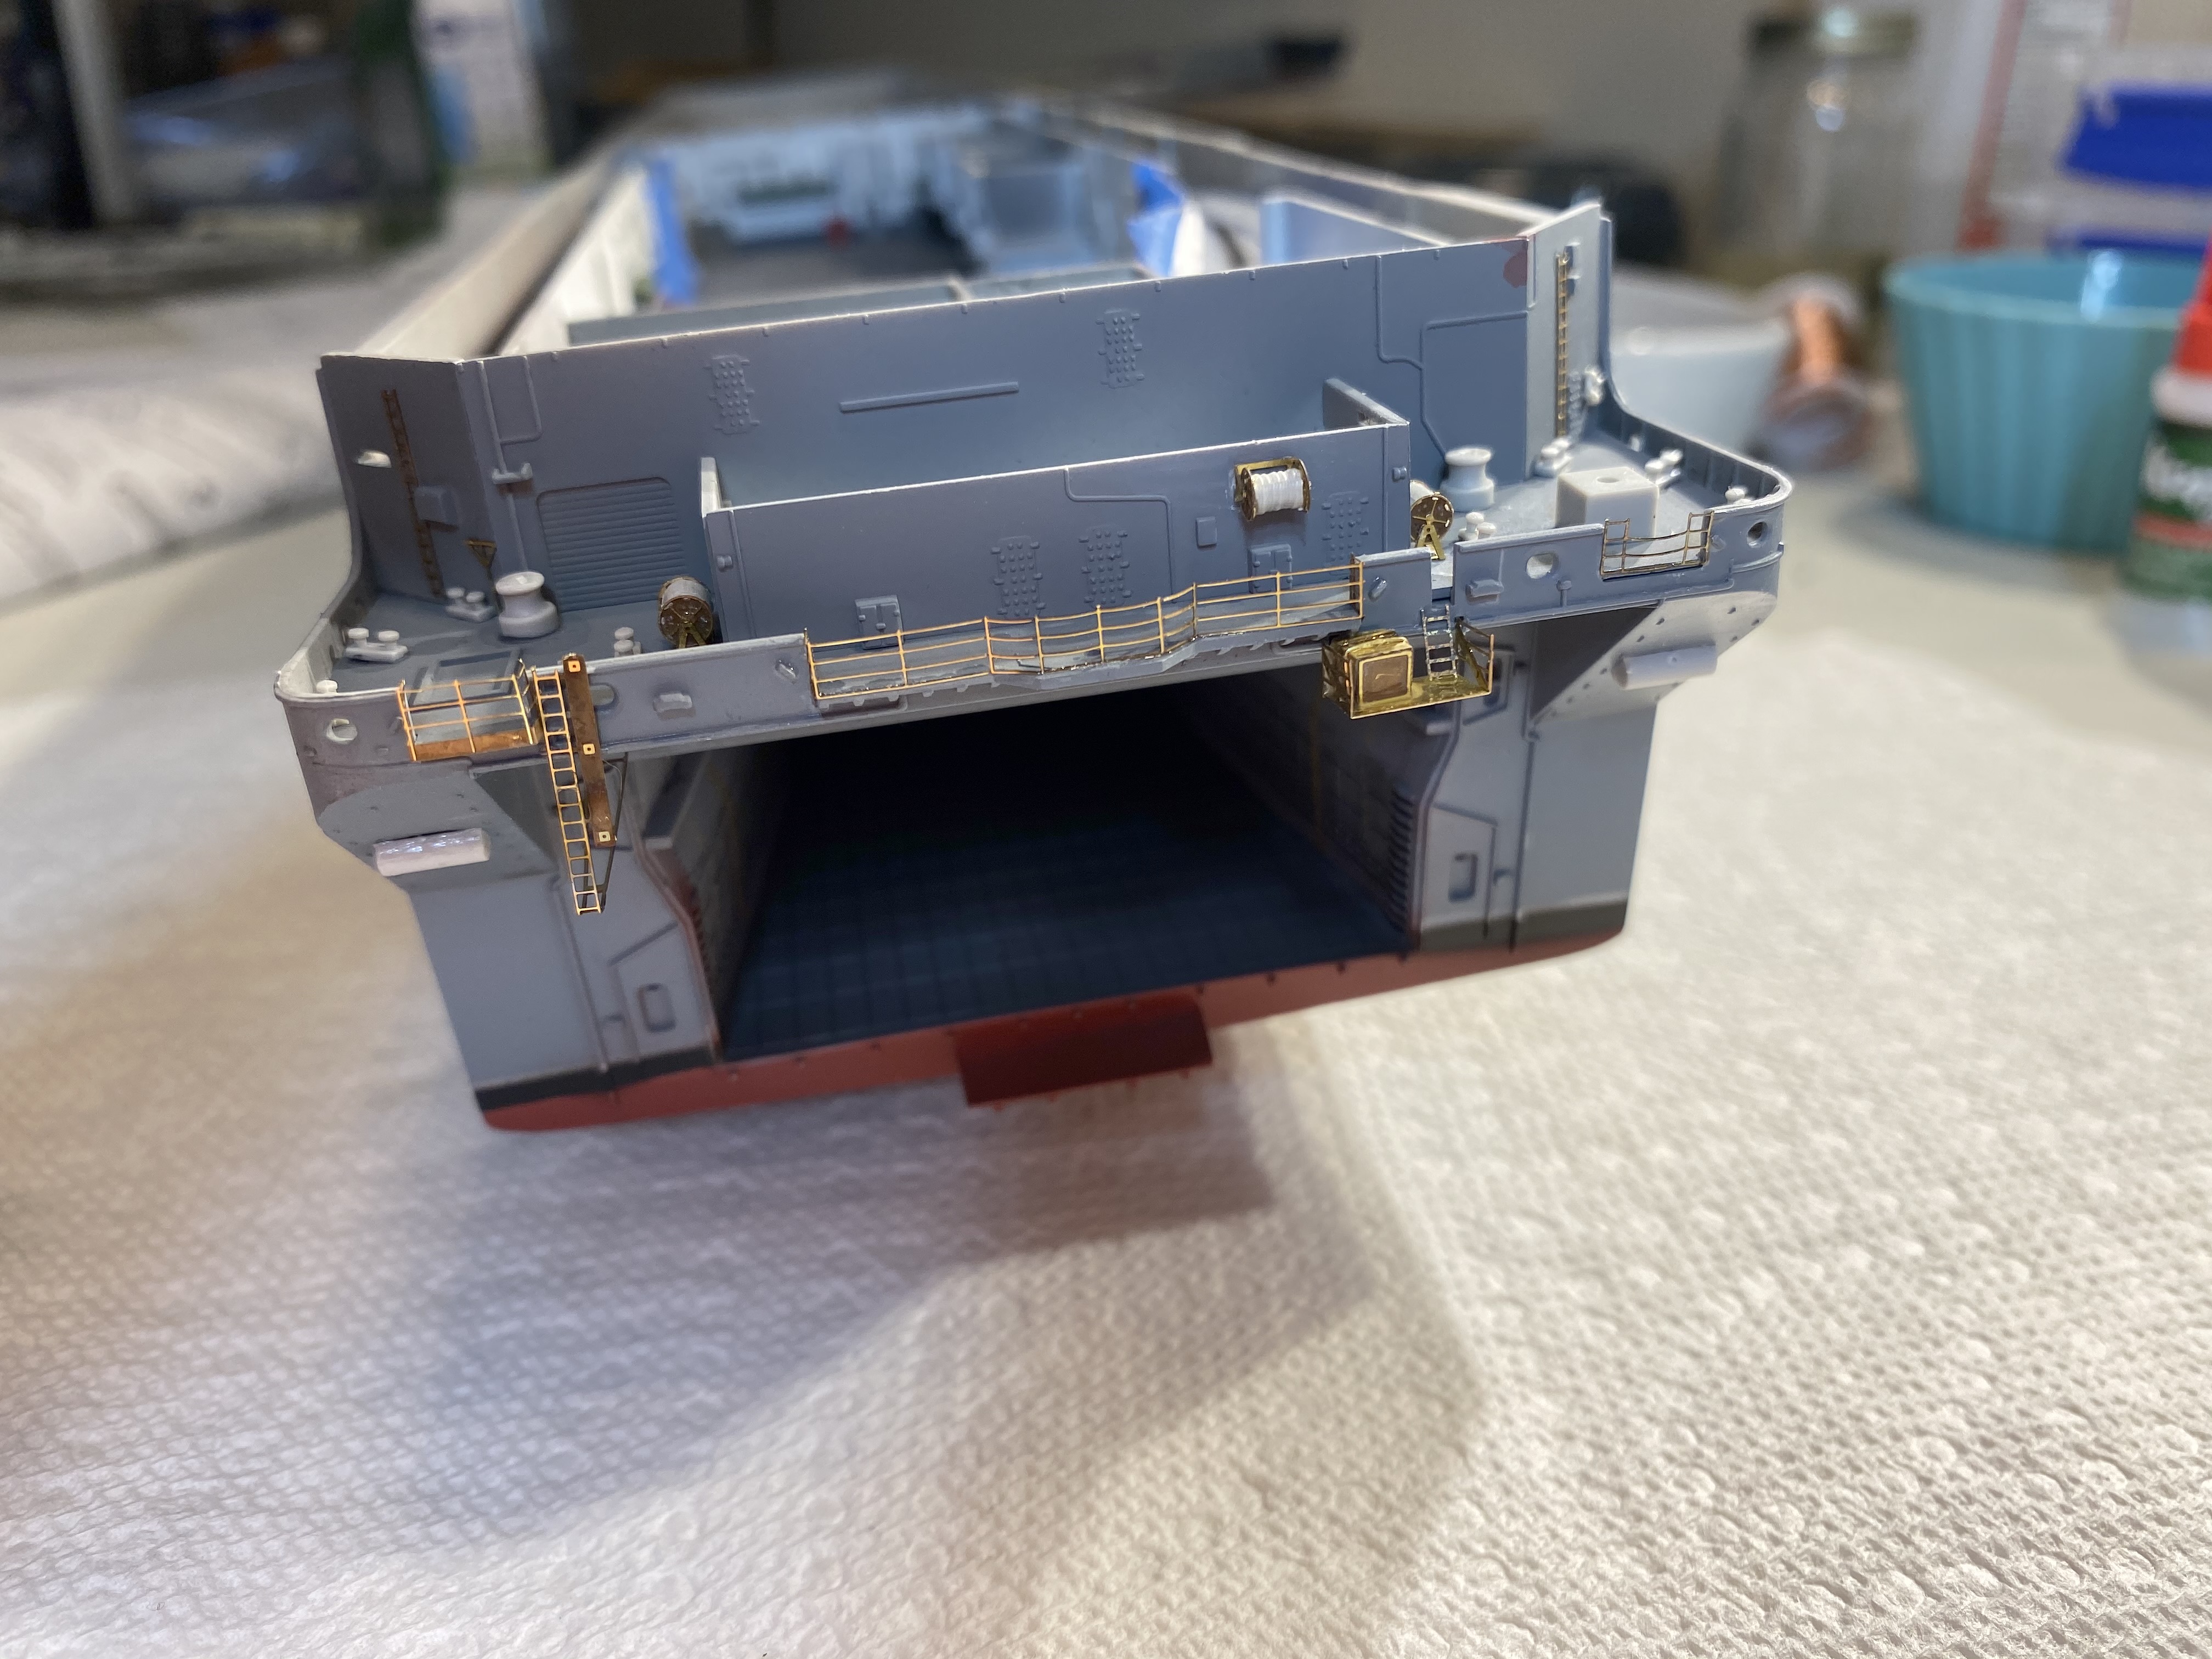
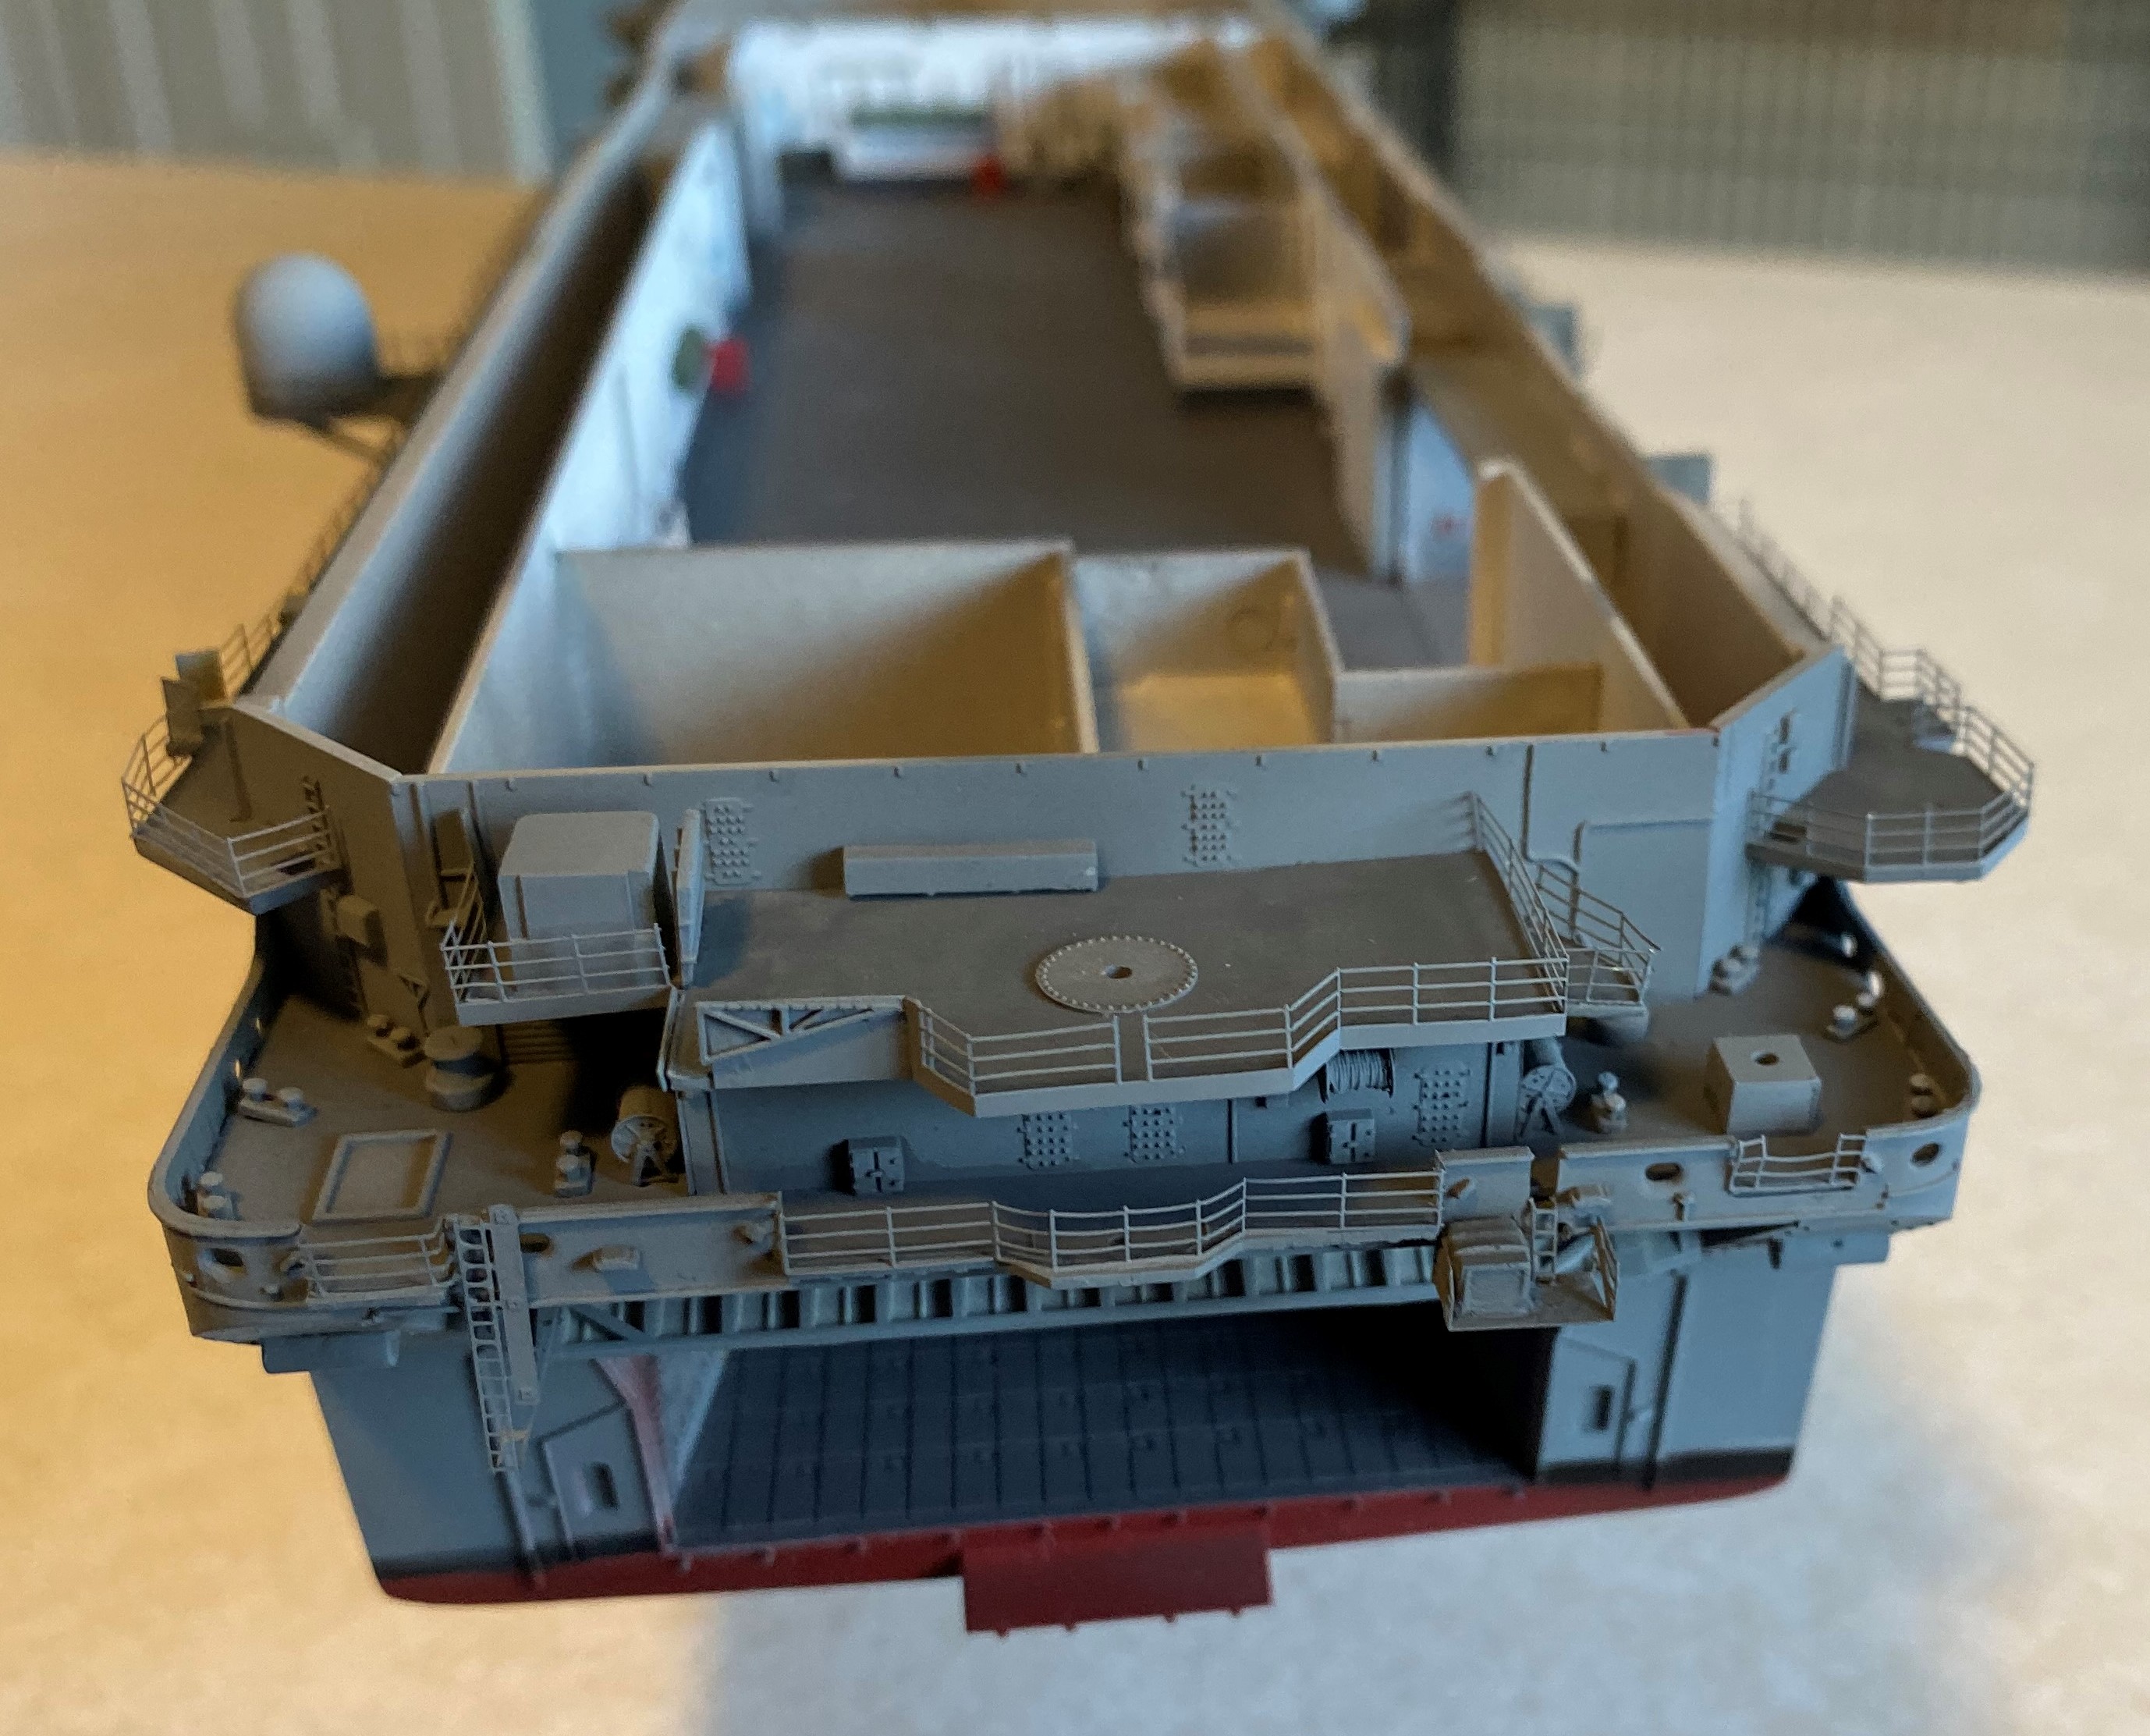
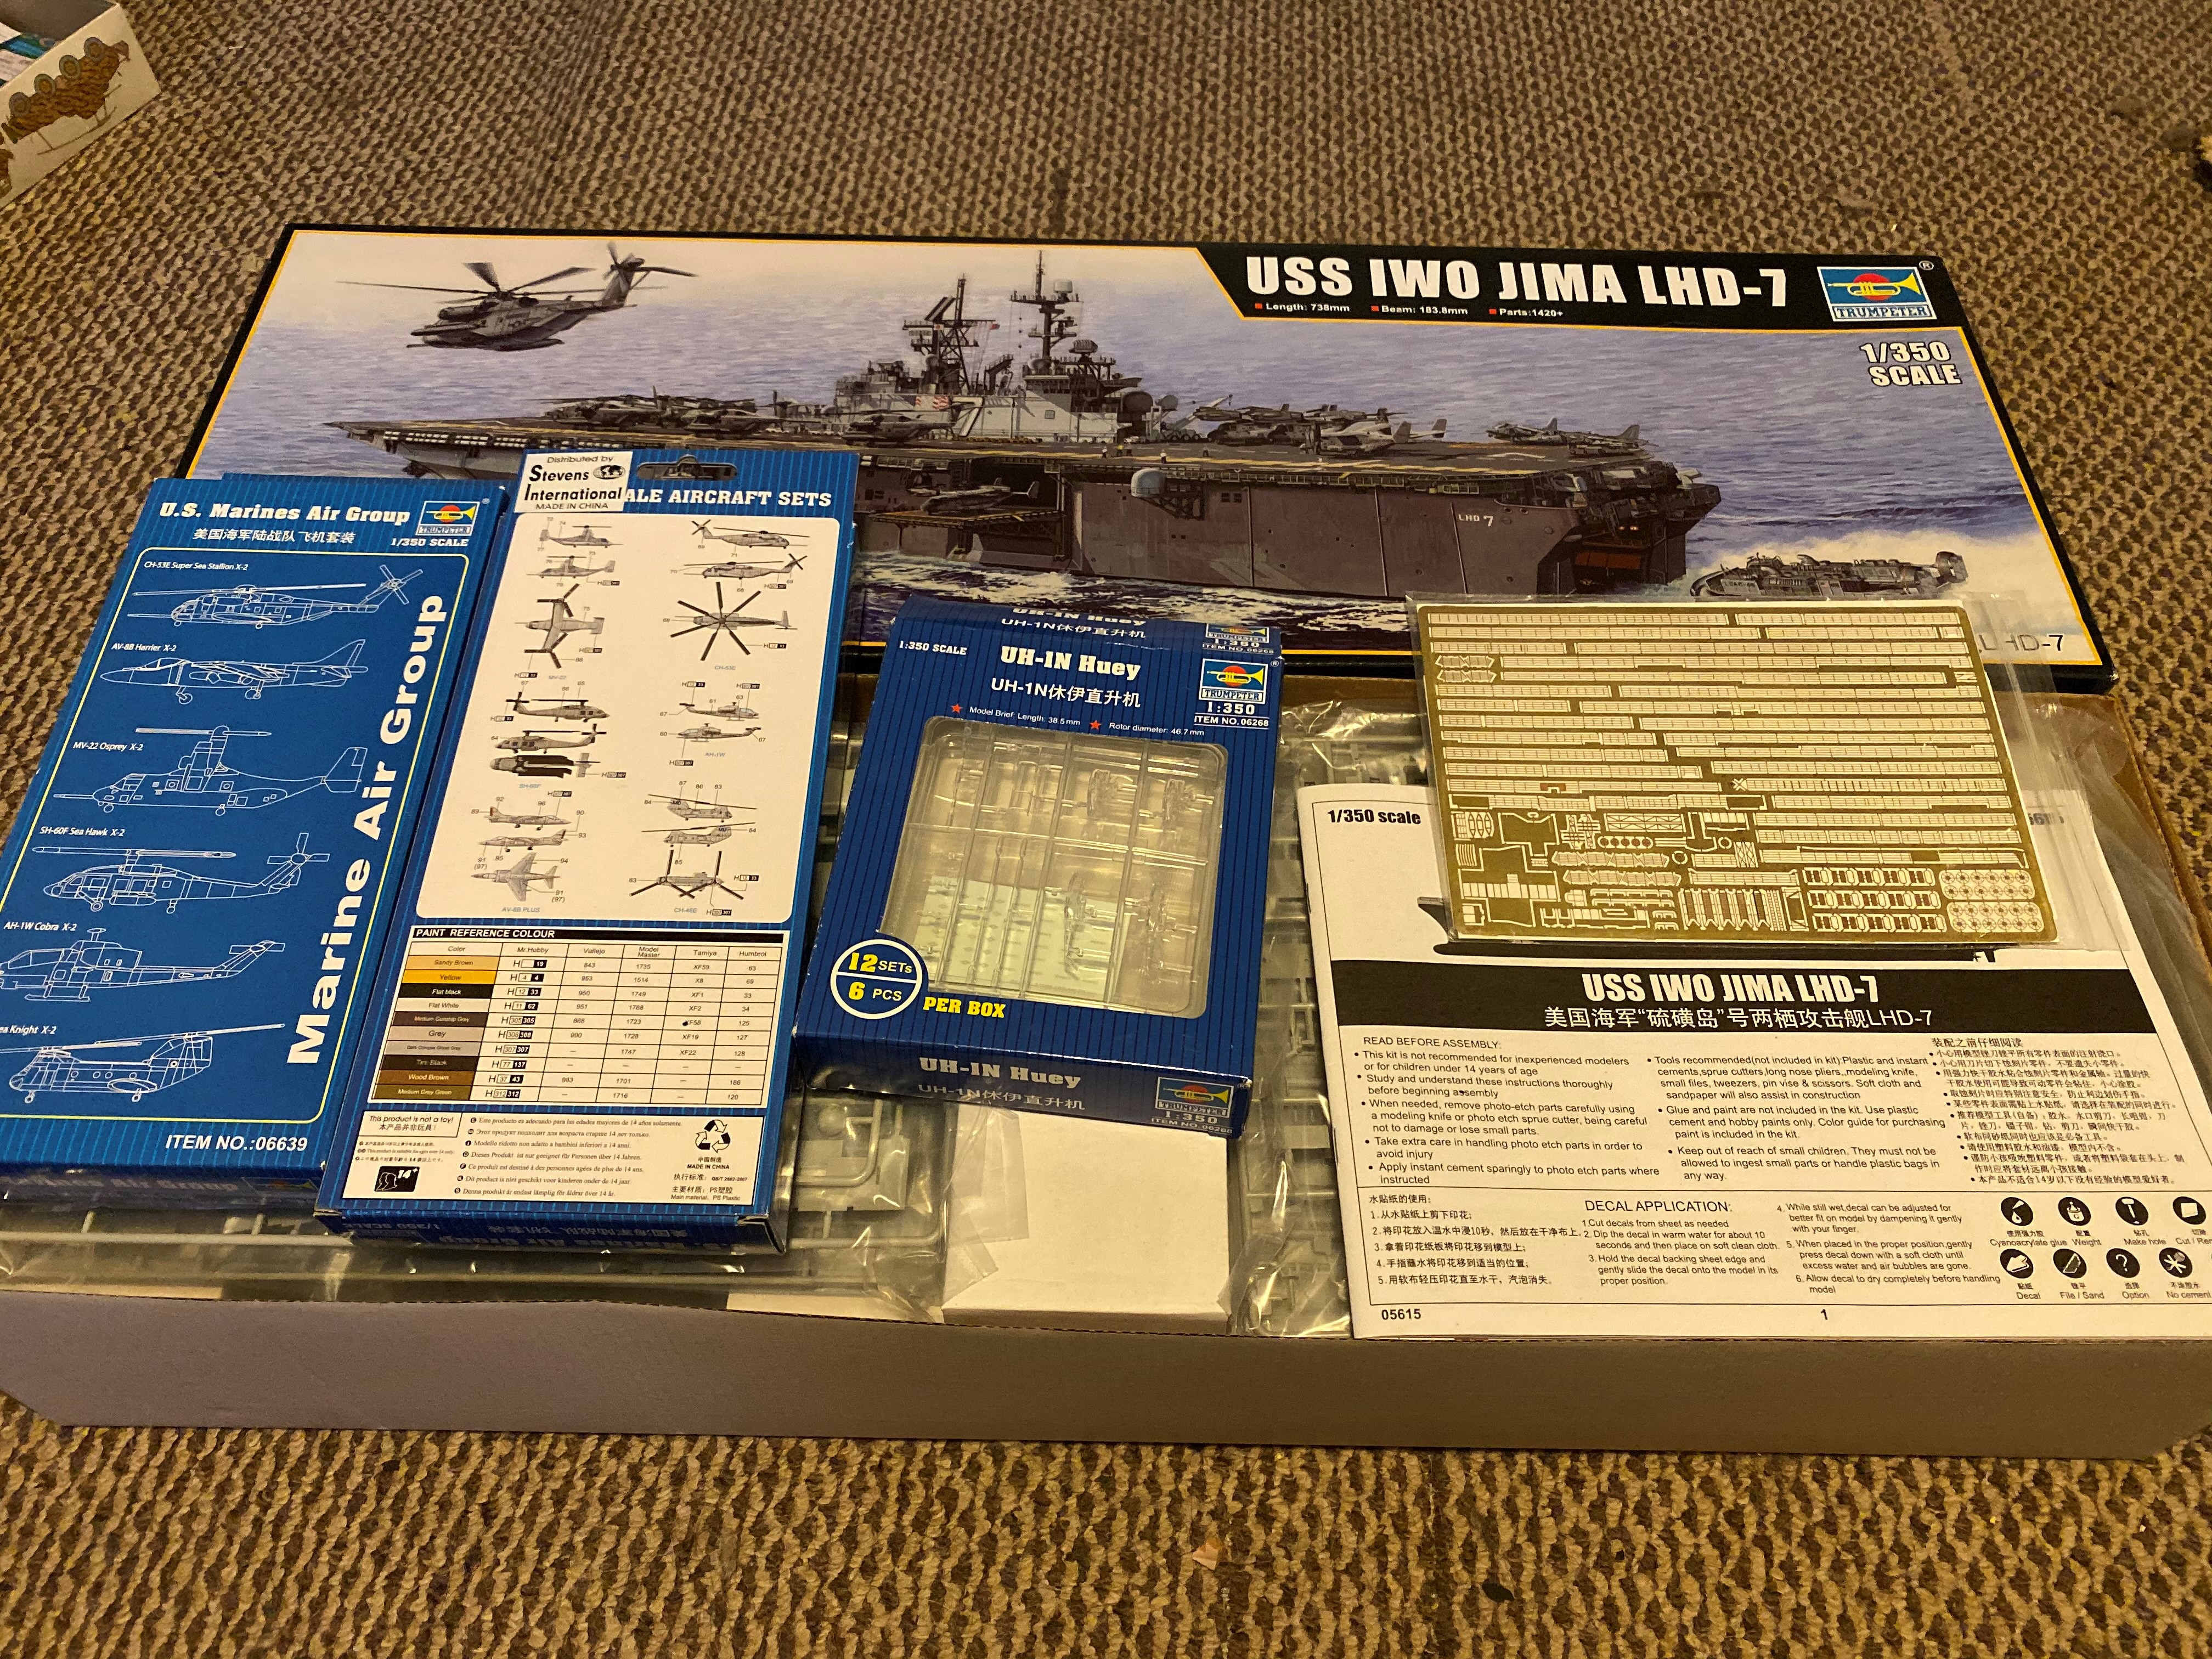
I have bought some Eduard PE Railings for the hull and flight deck. Still debating on getting the Superstructure set from Eduard. Also have some additional aircraft for the airwing.


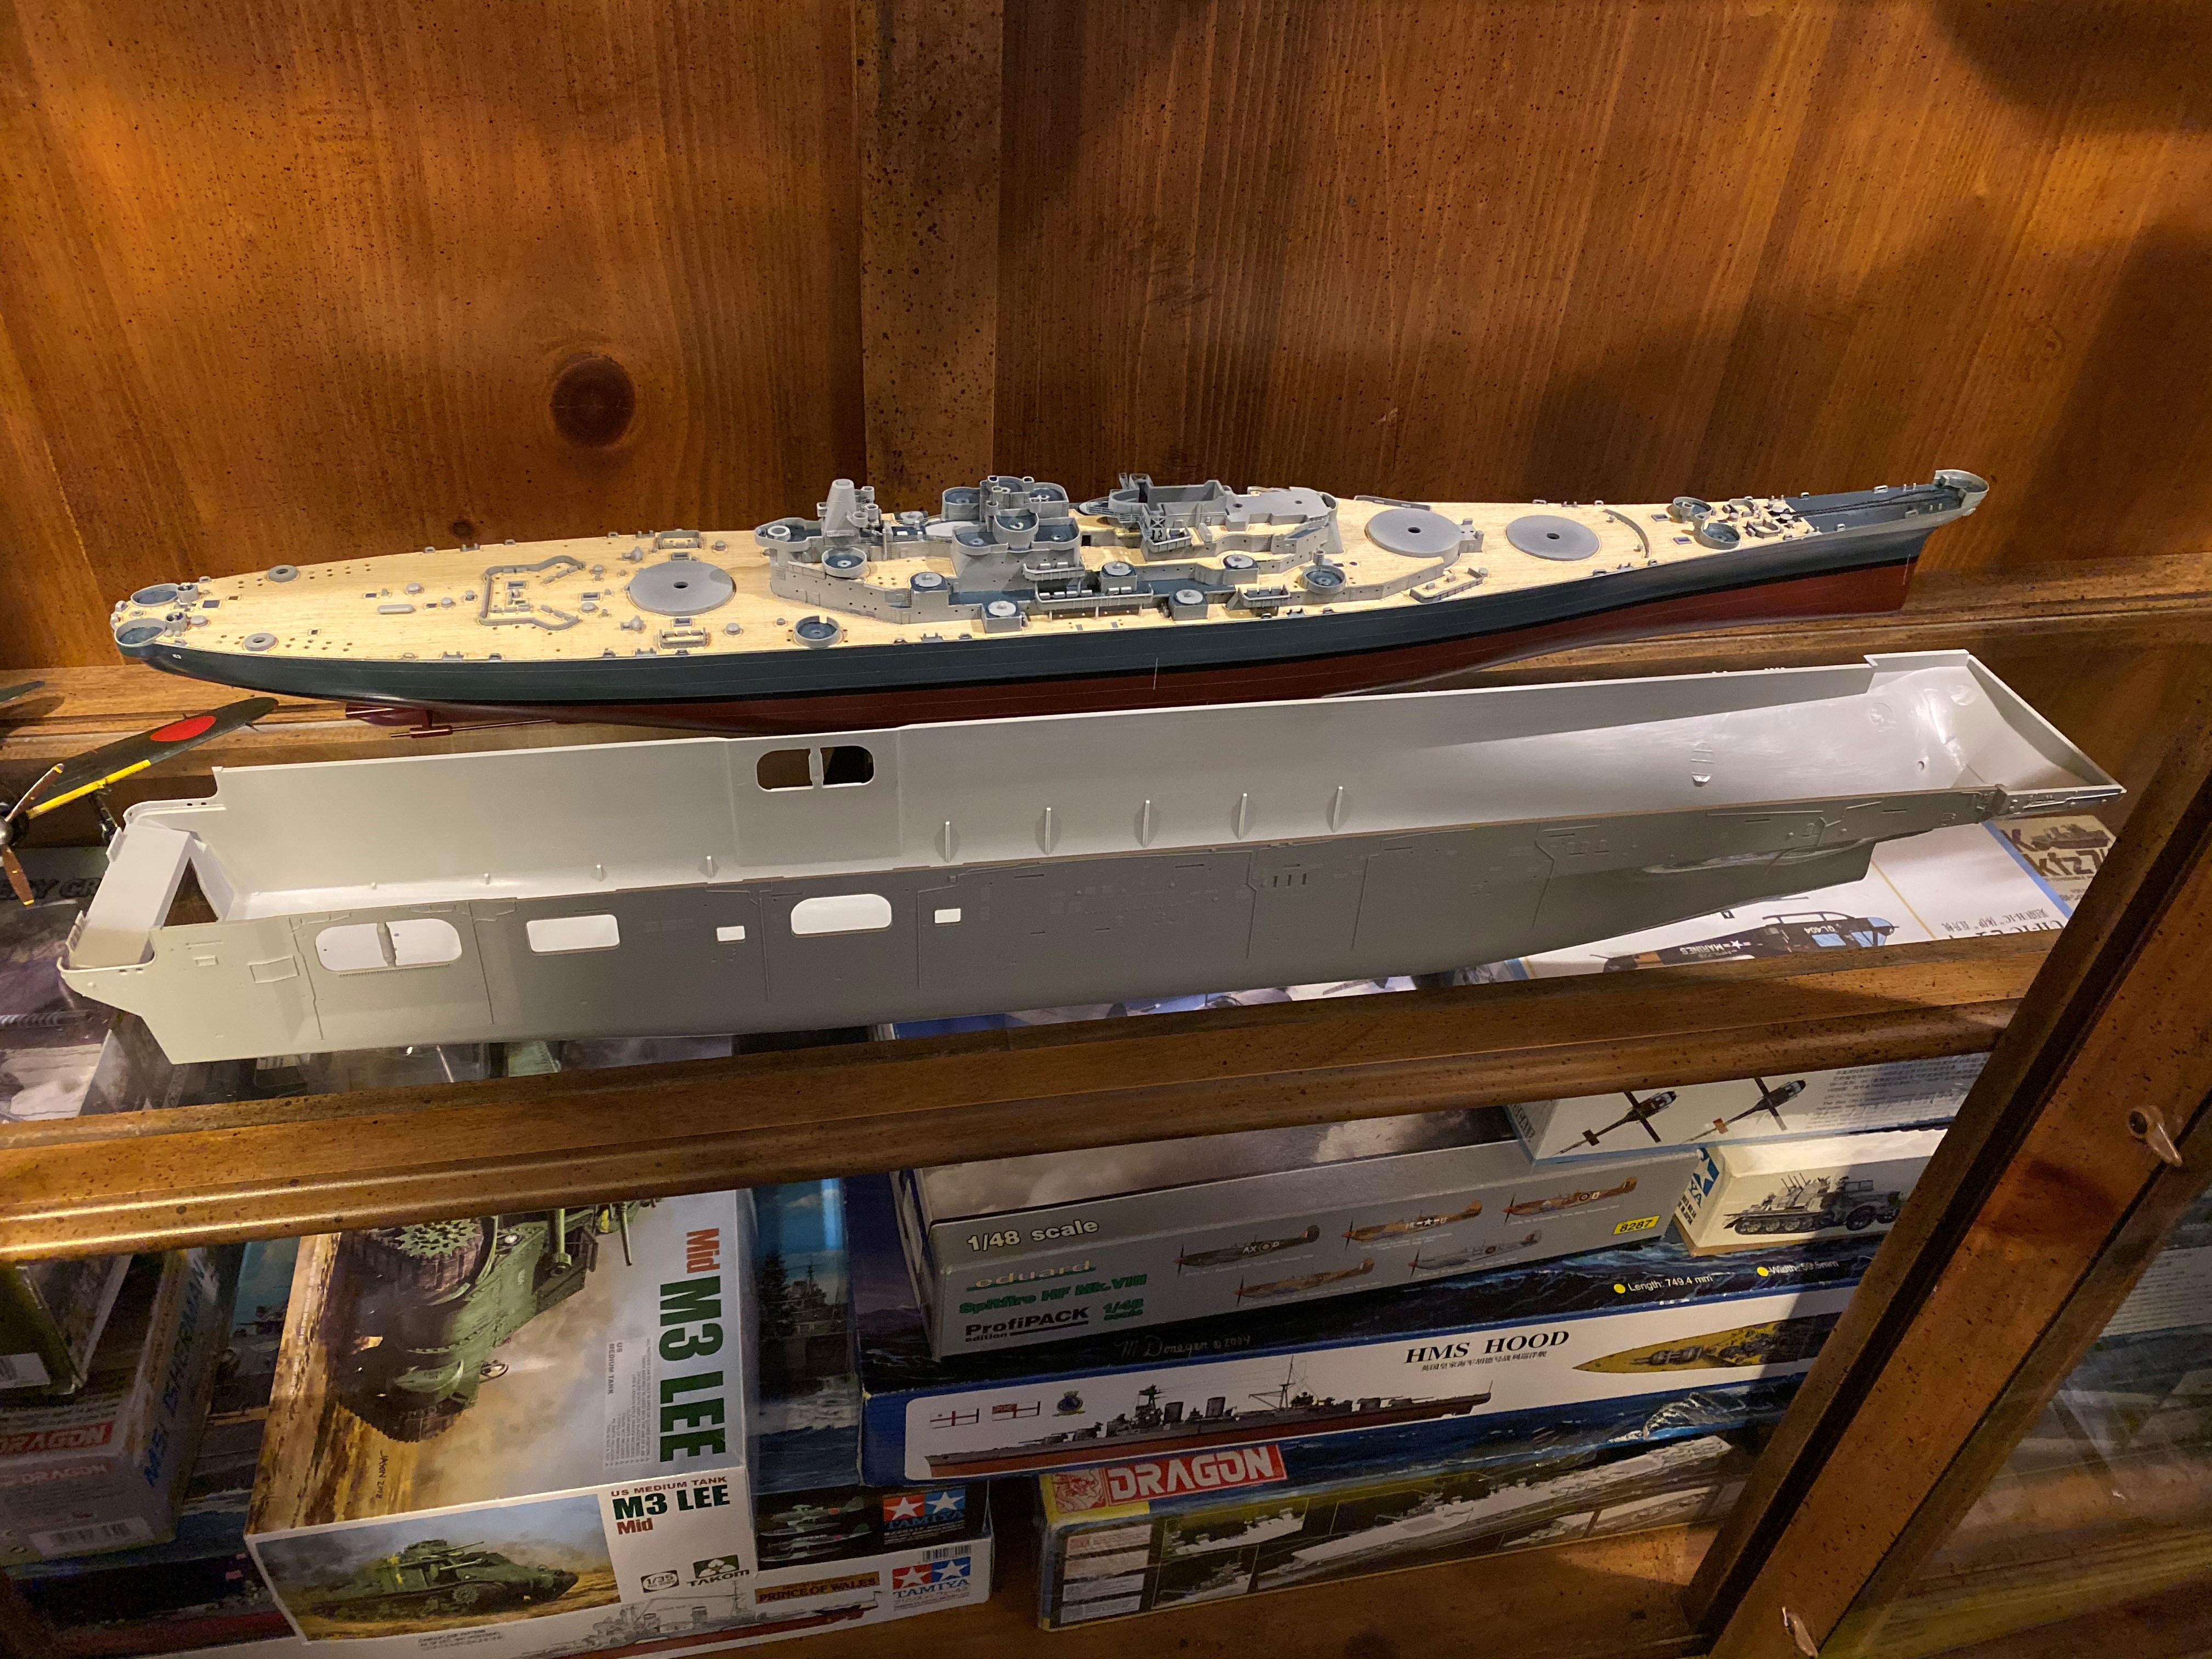
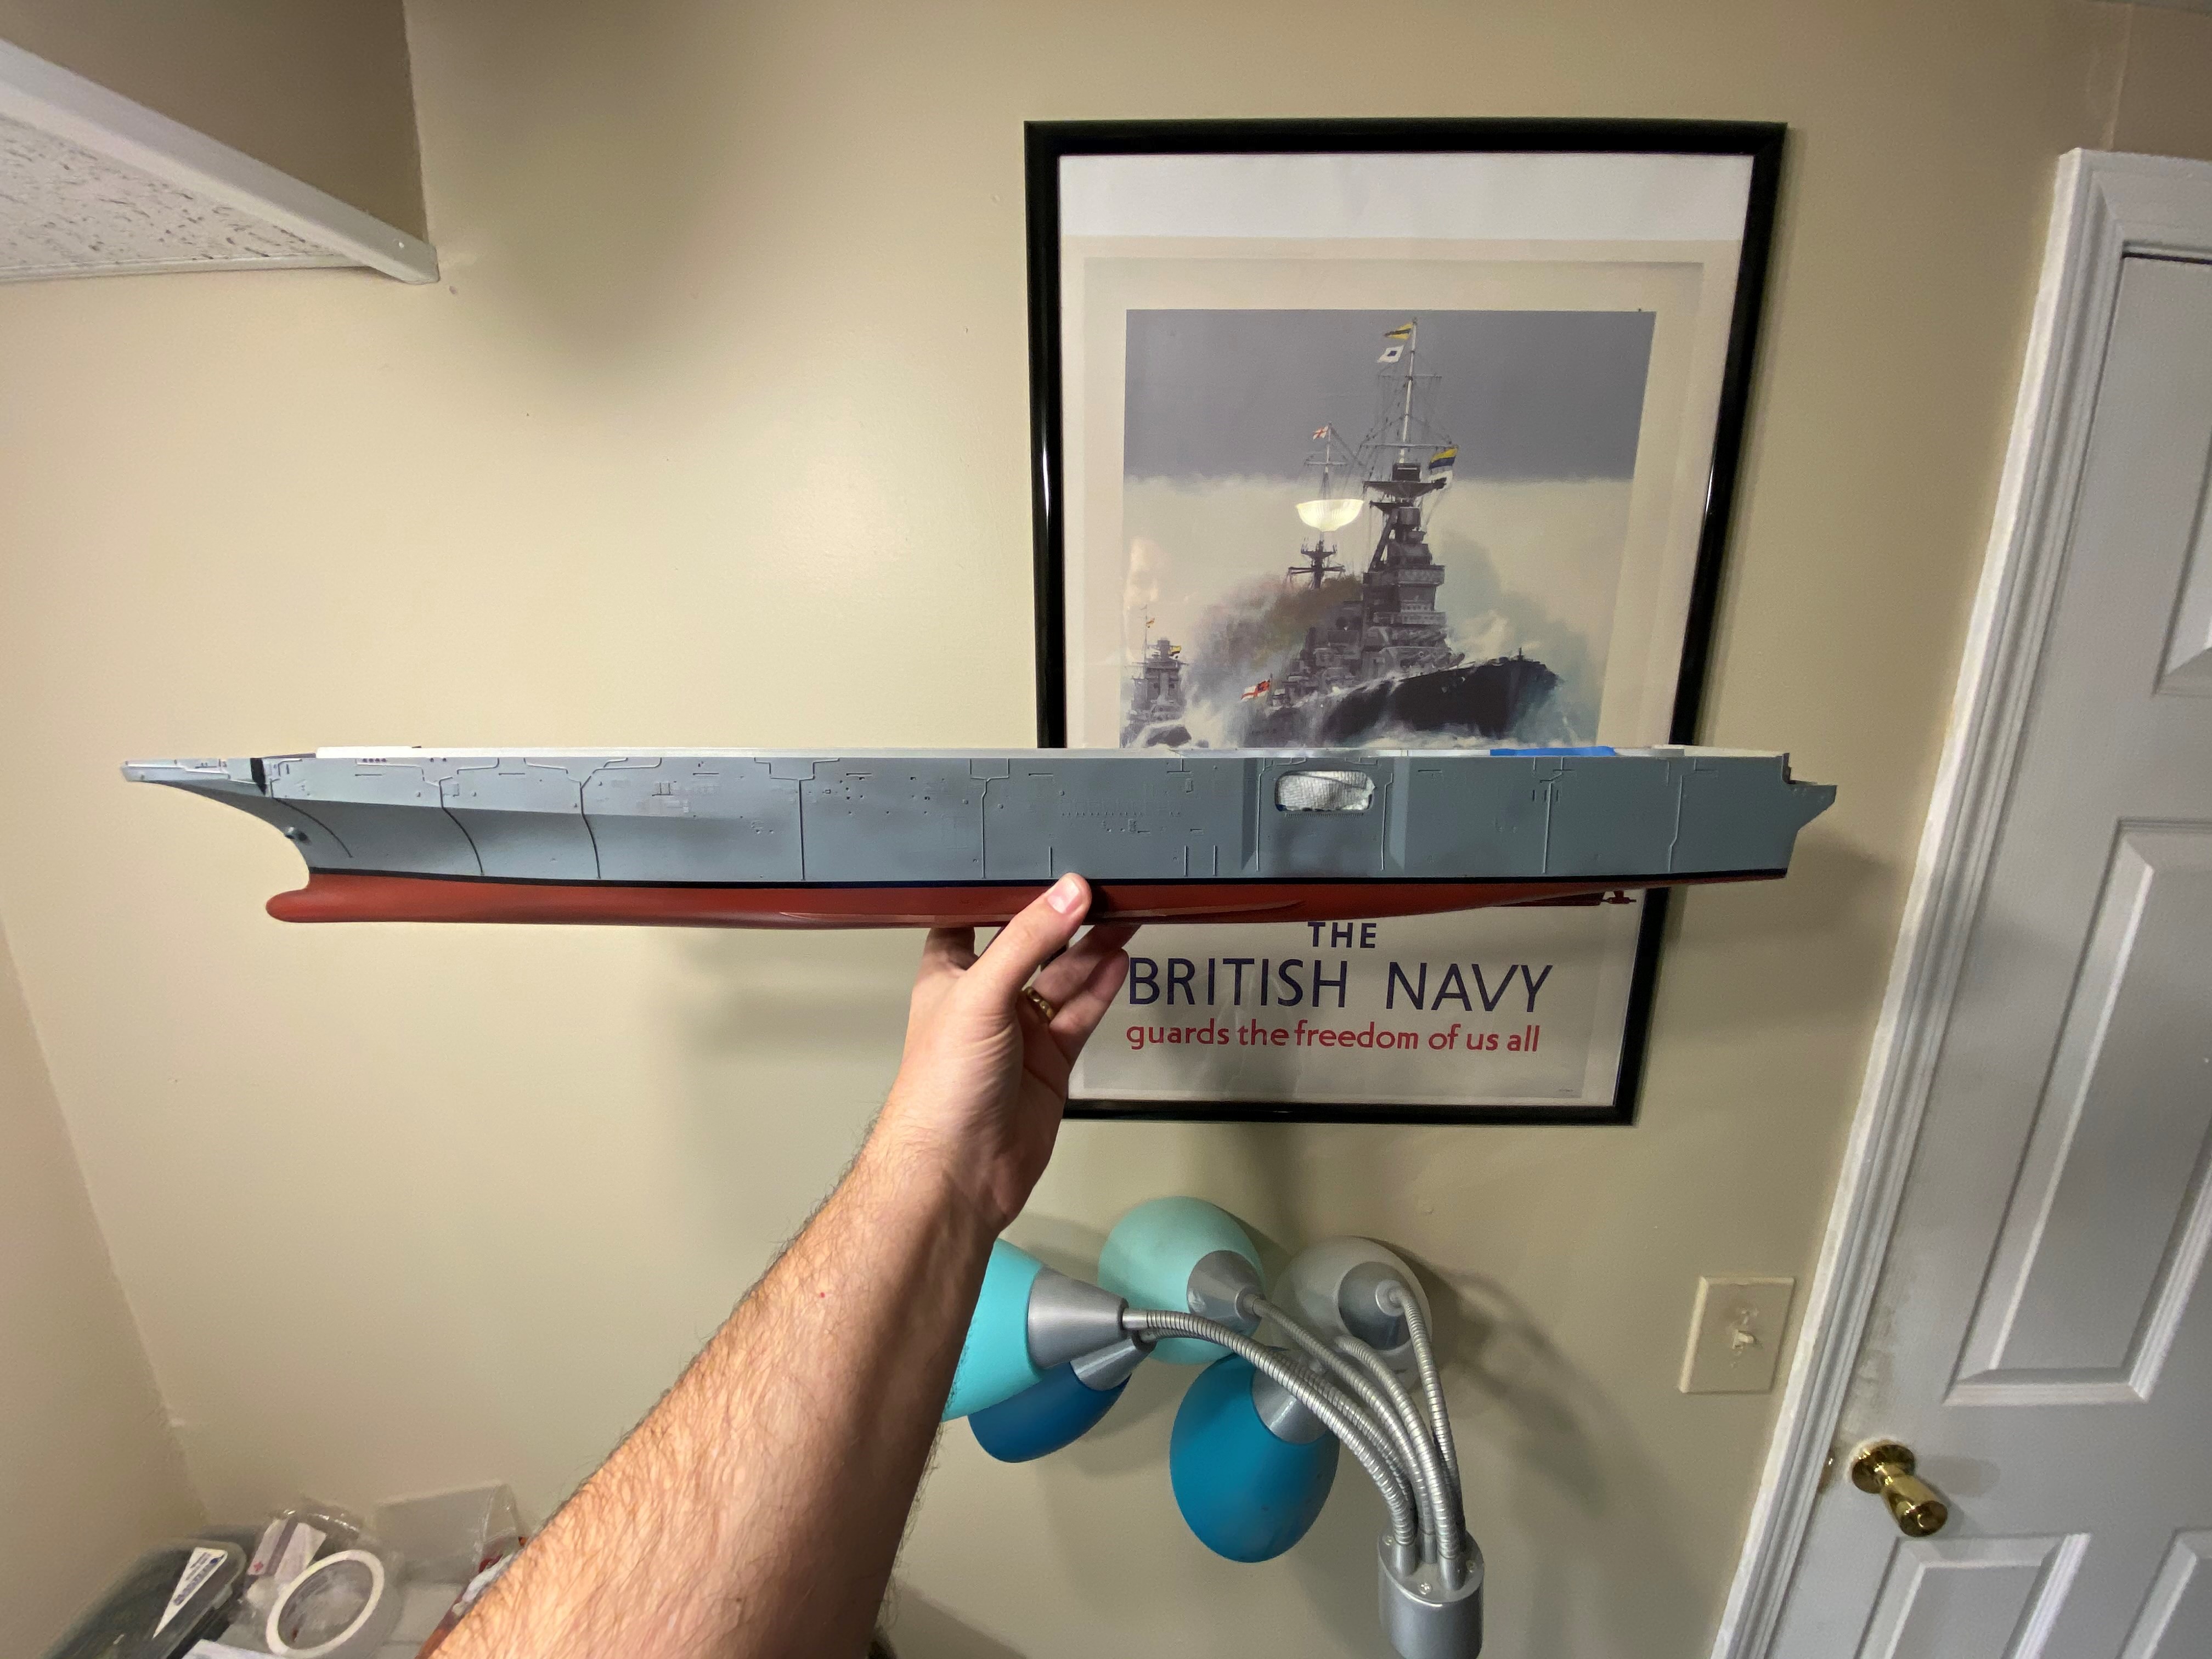
Size comparison next to my in-progress USS Missouri. This is going to be a big ship!


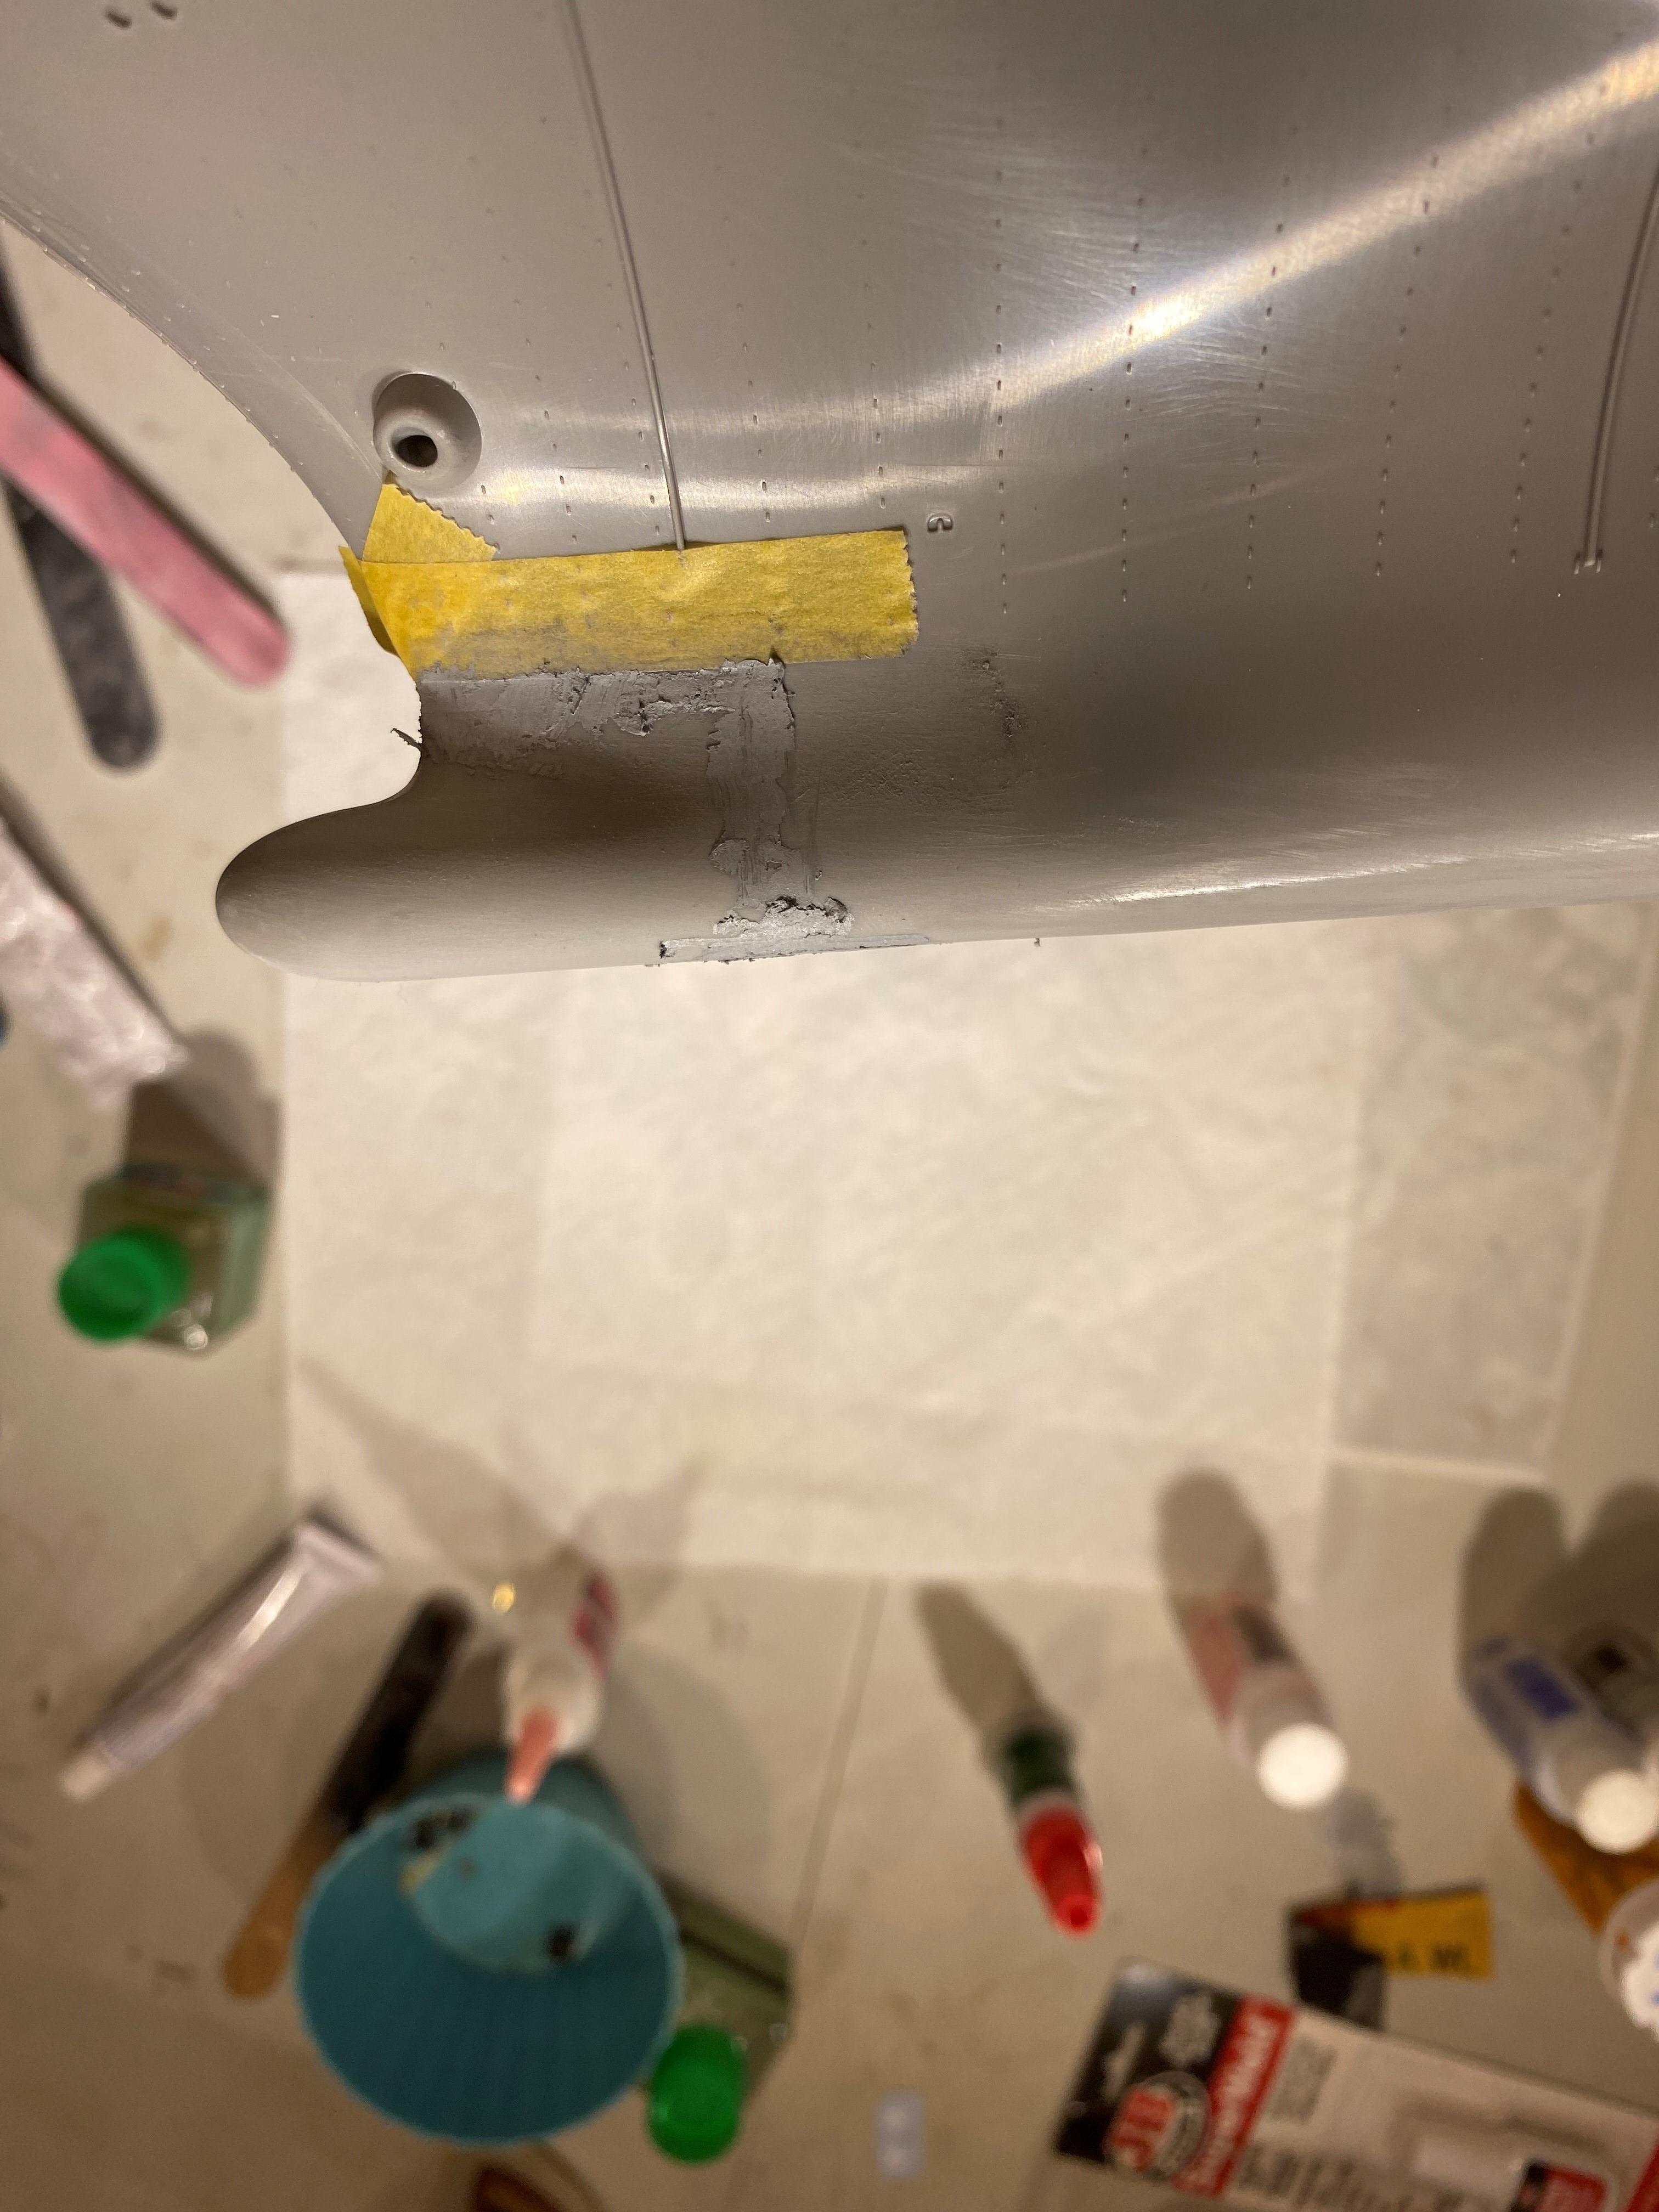
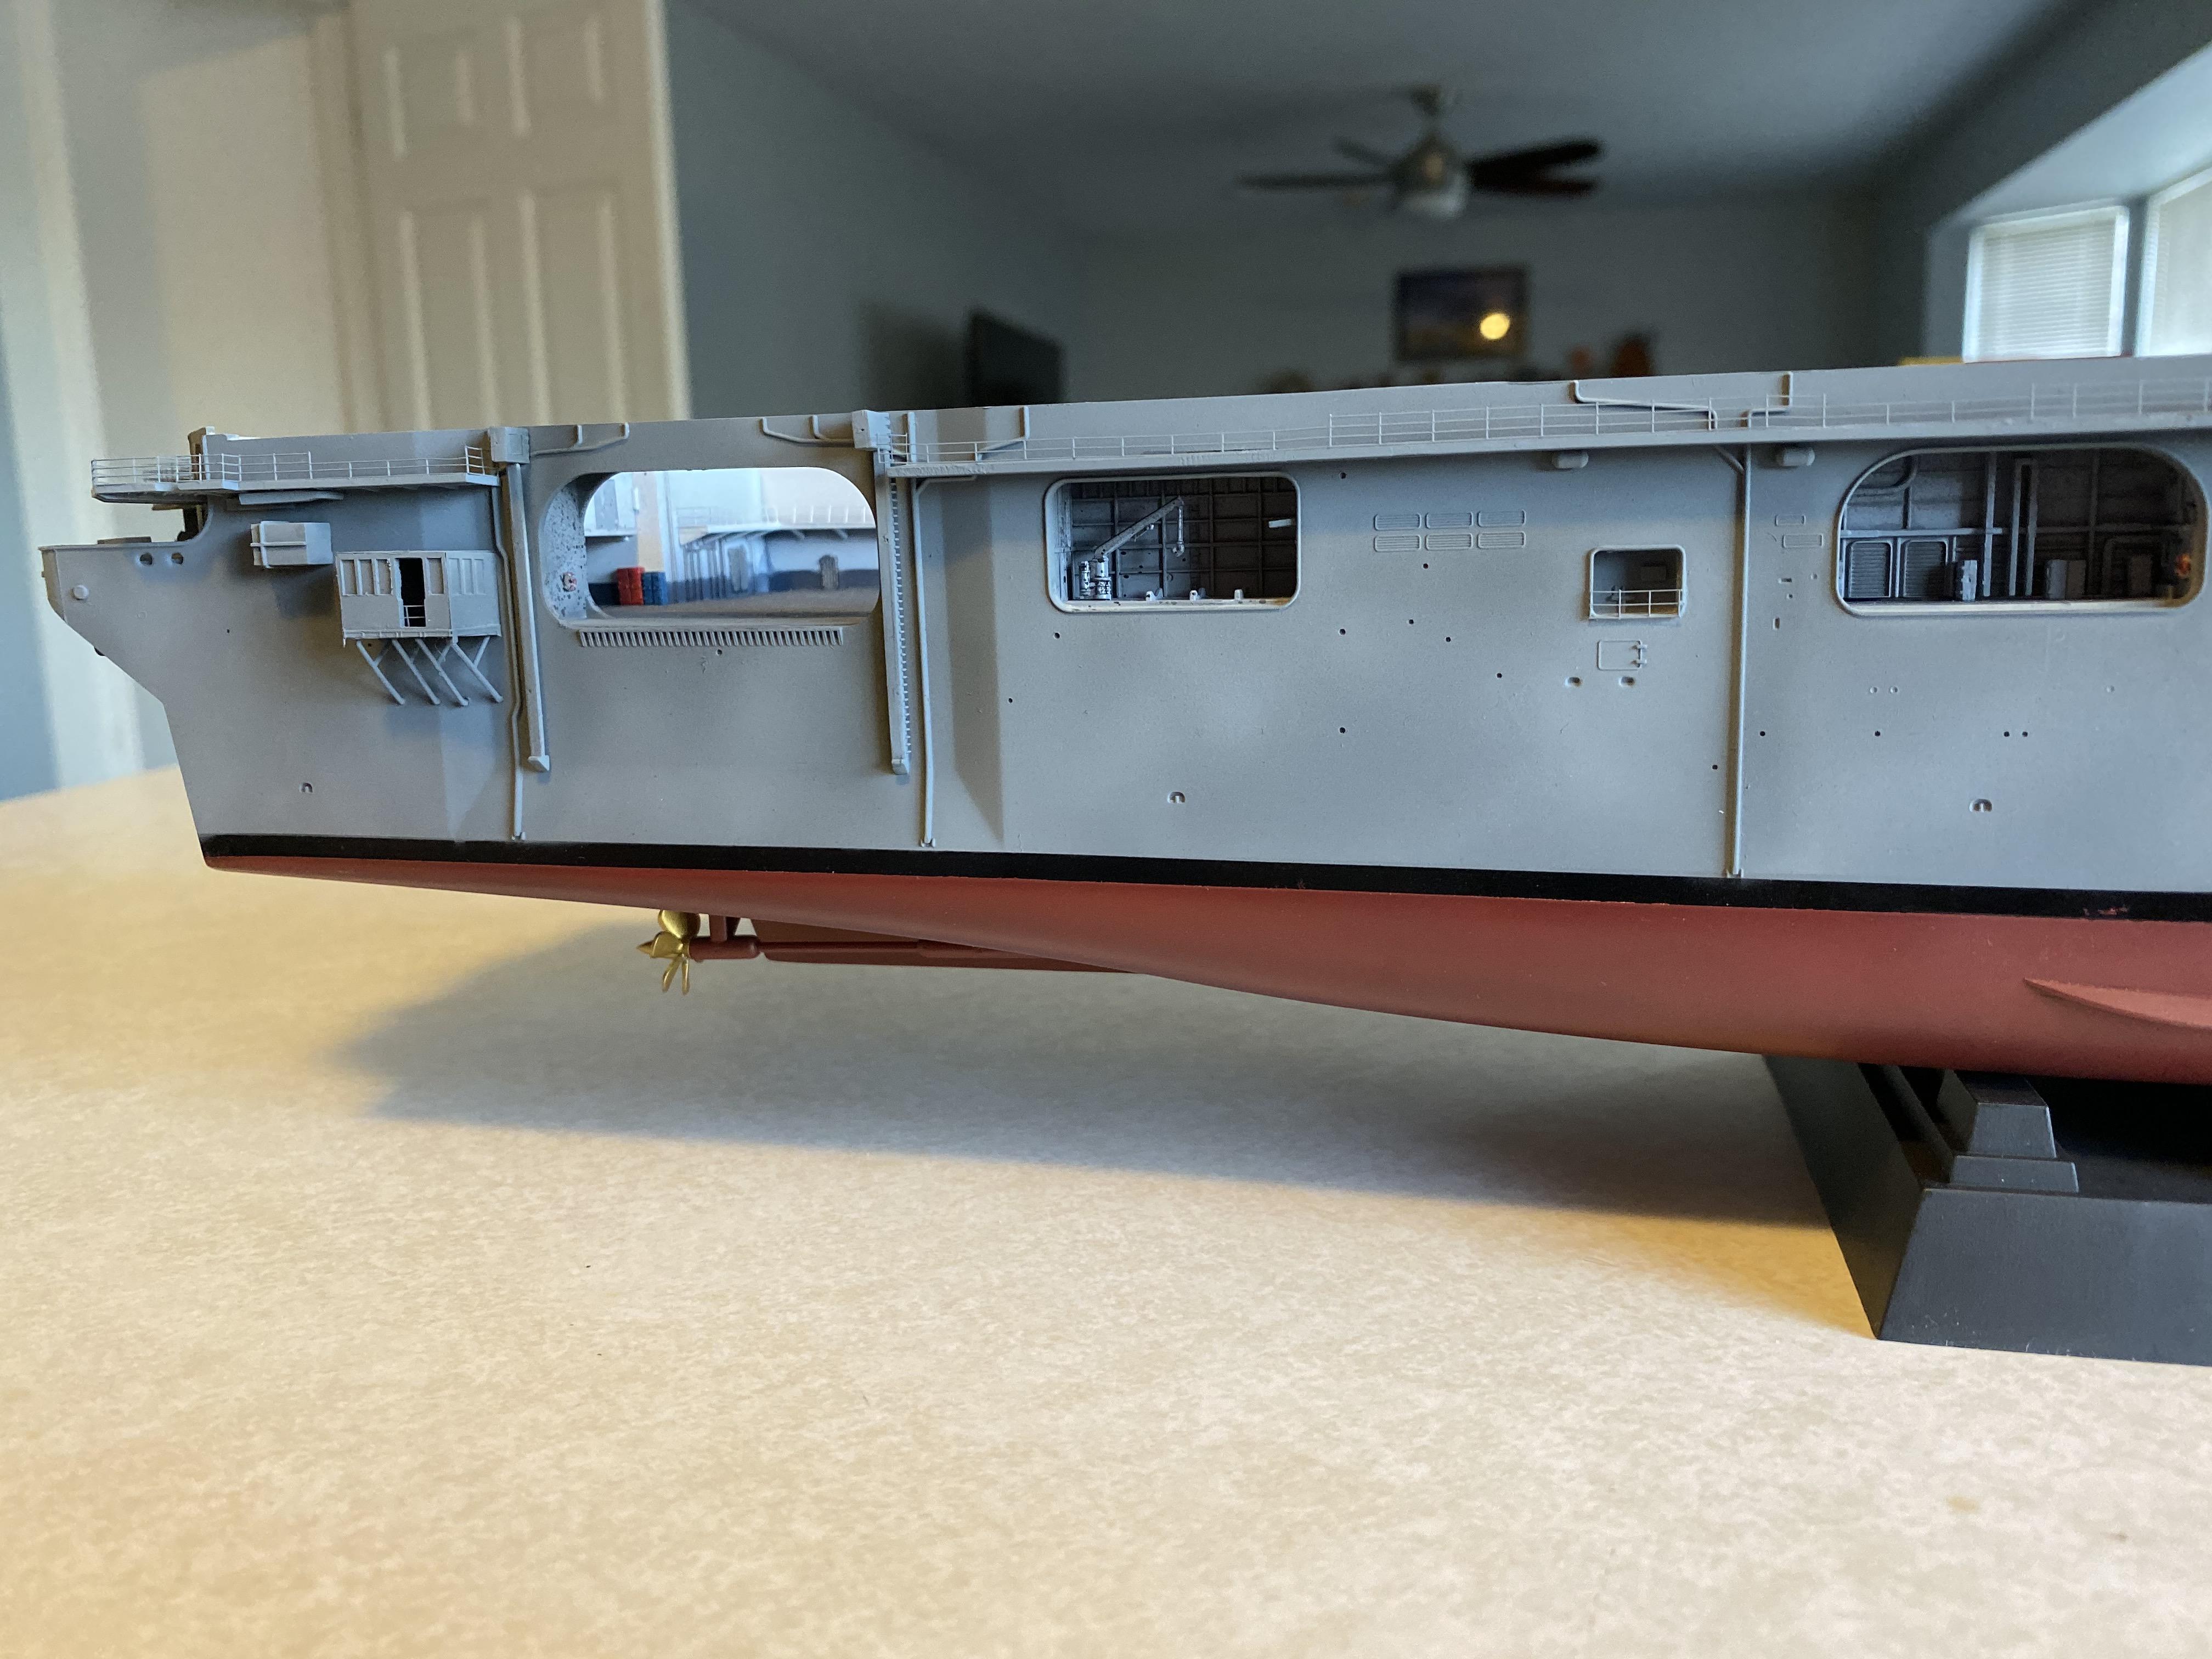
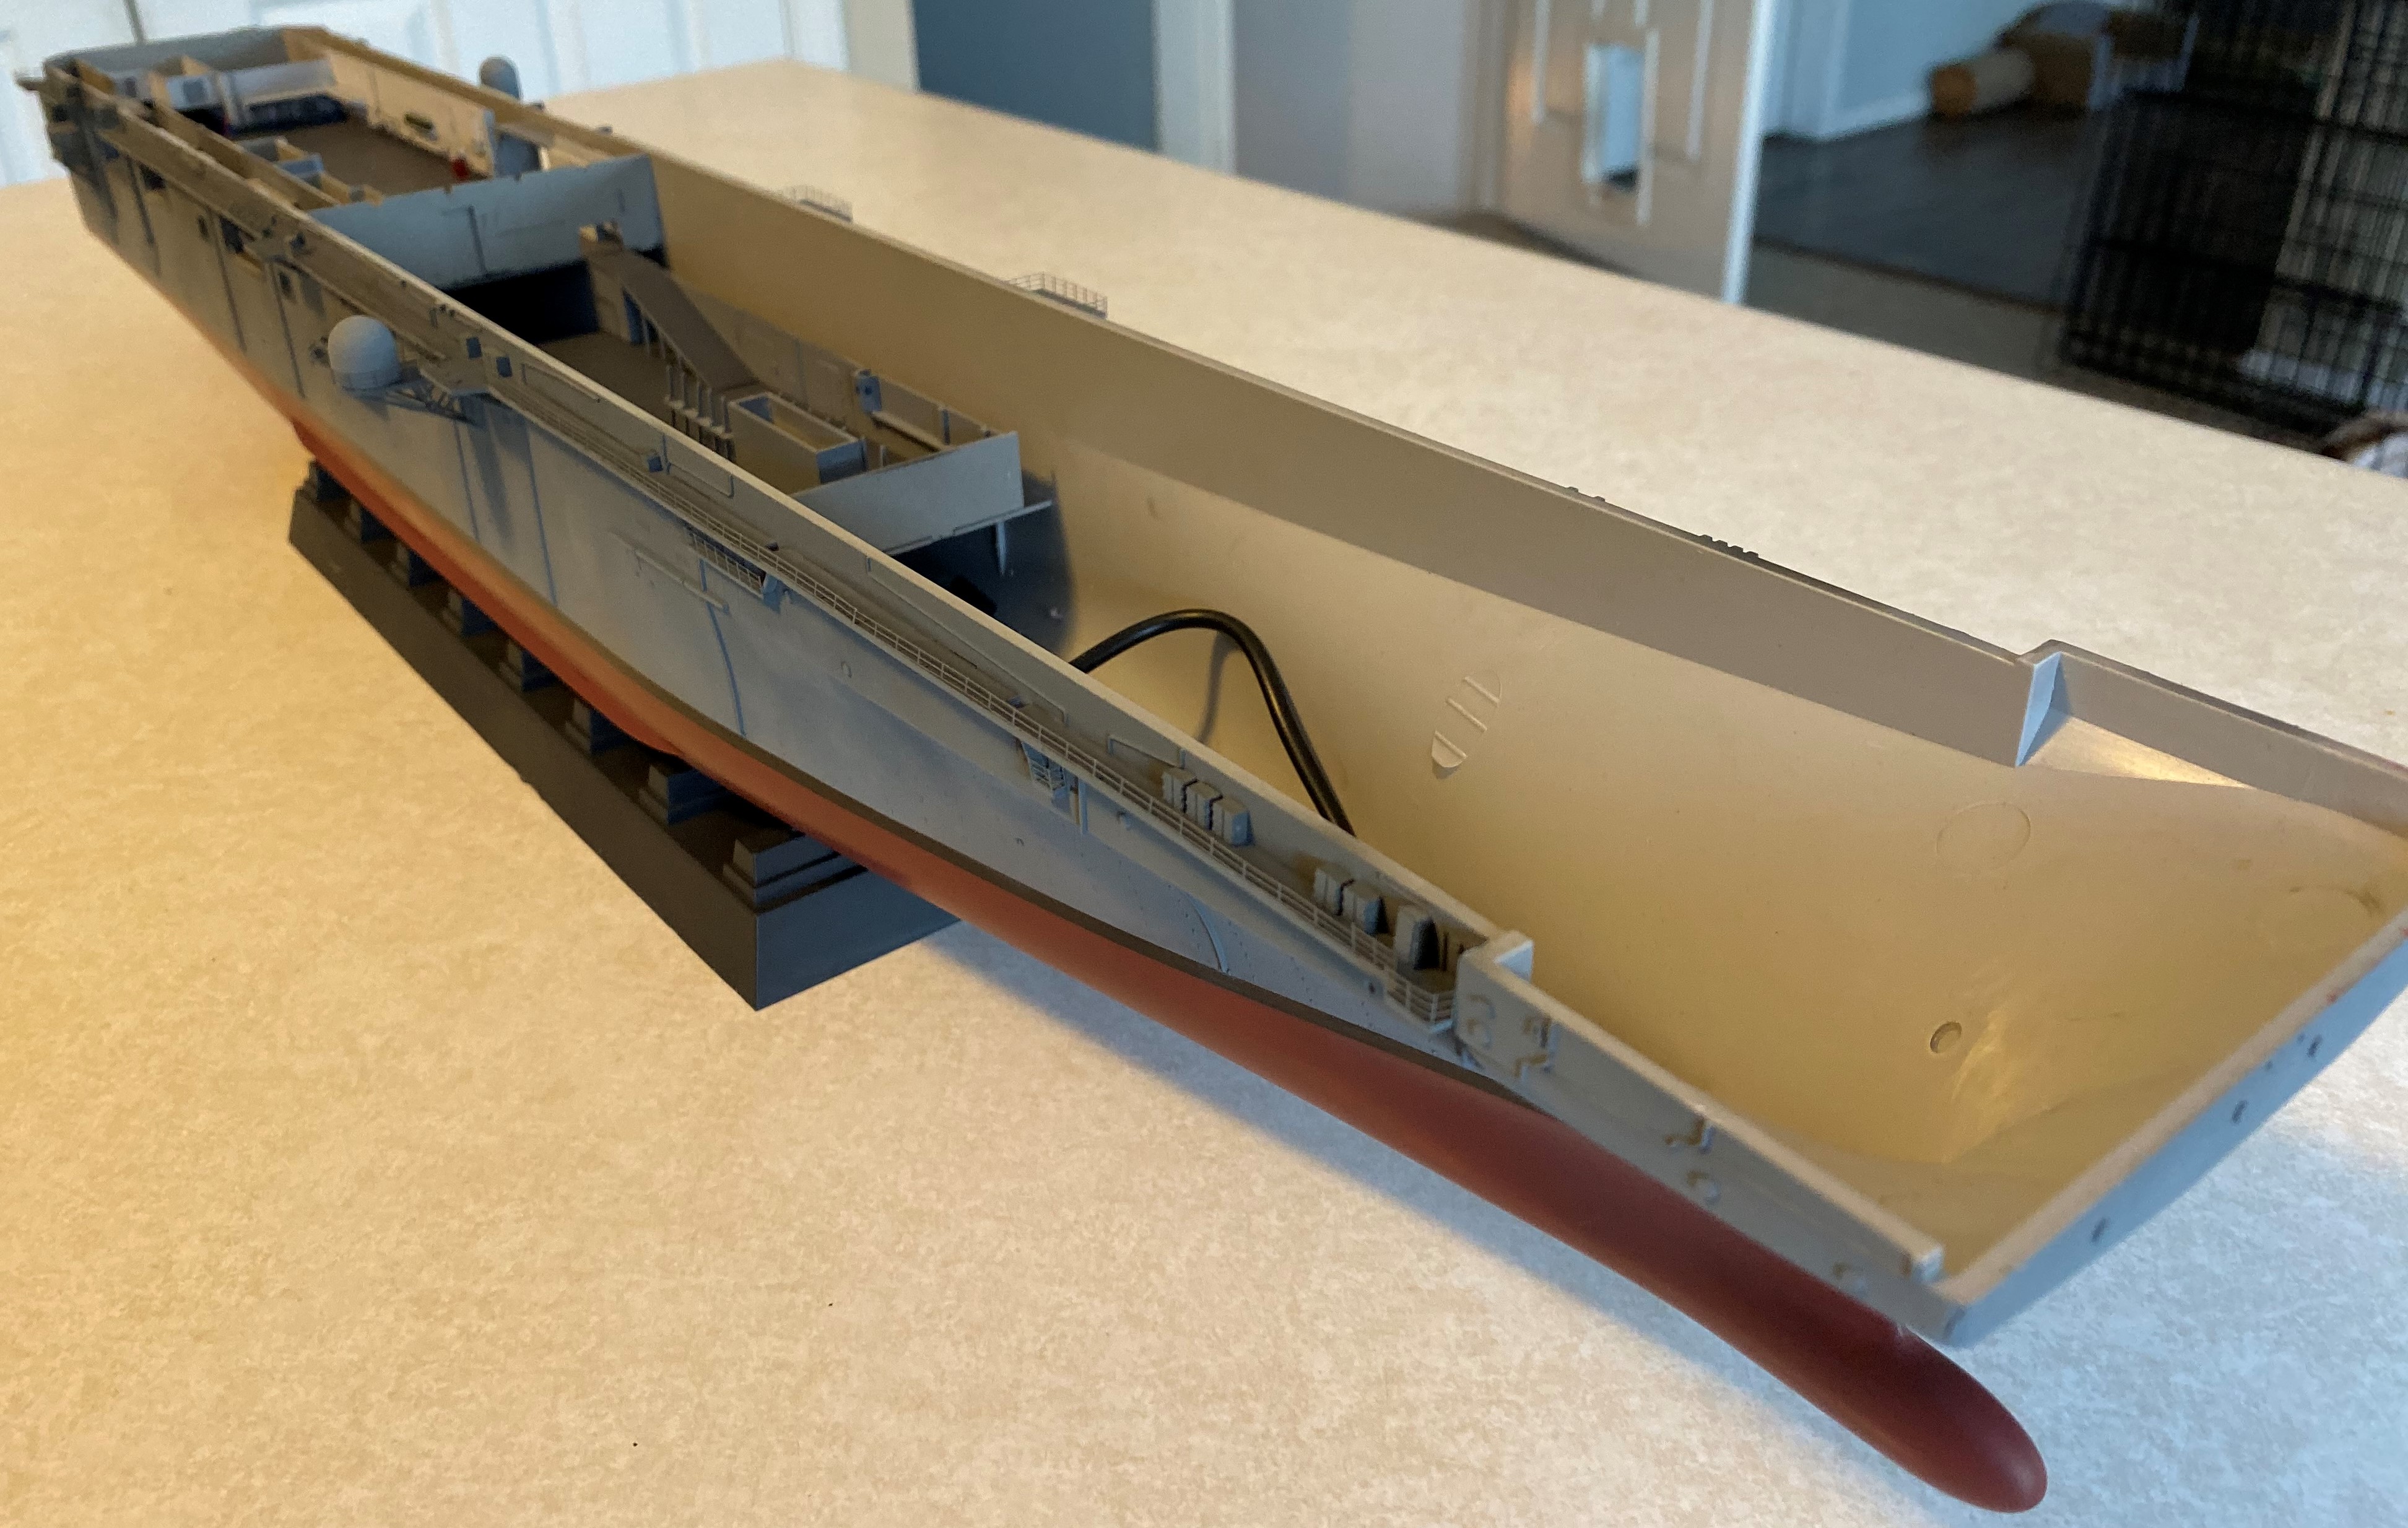
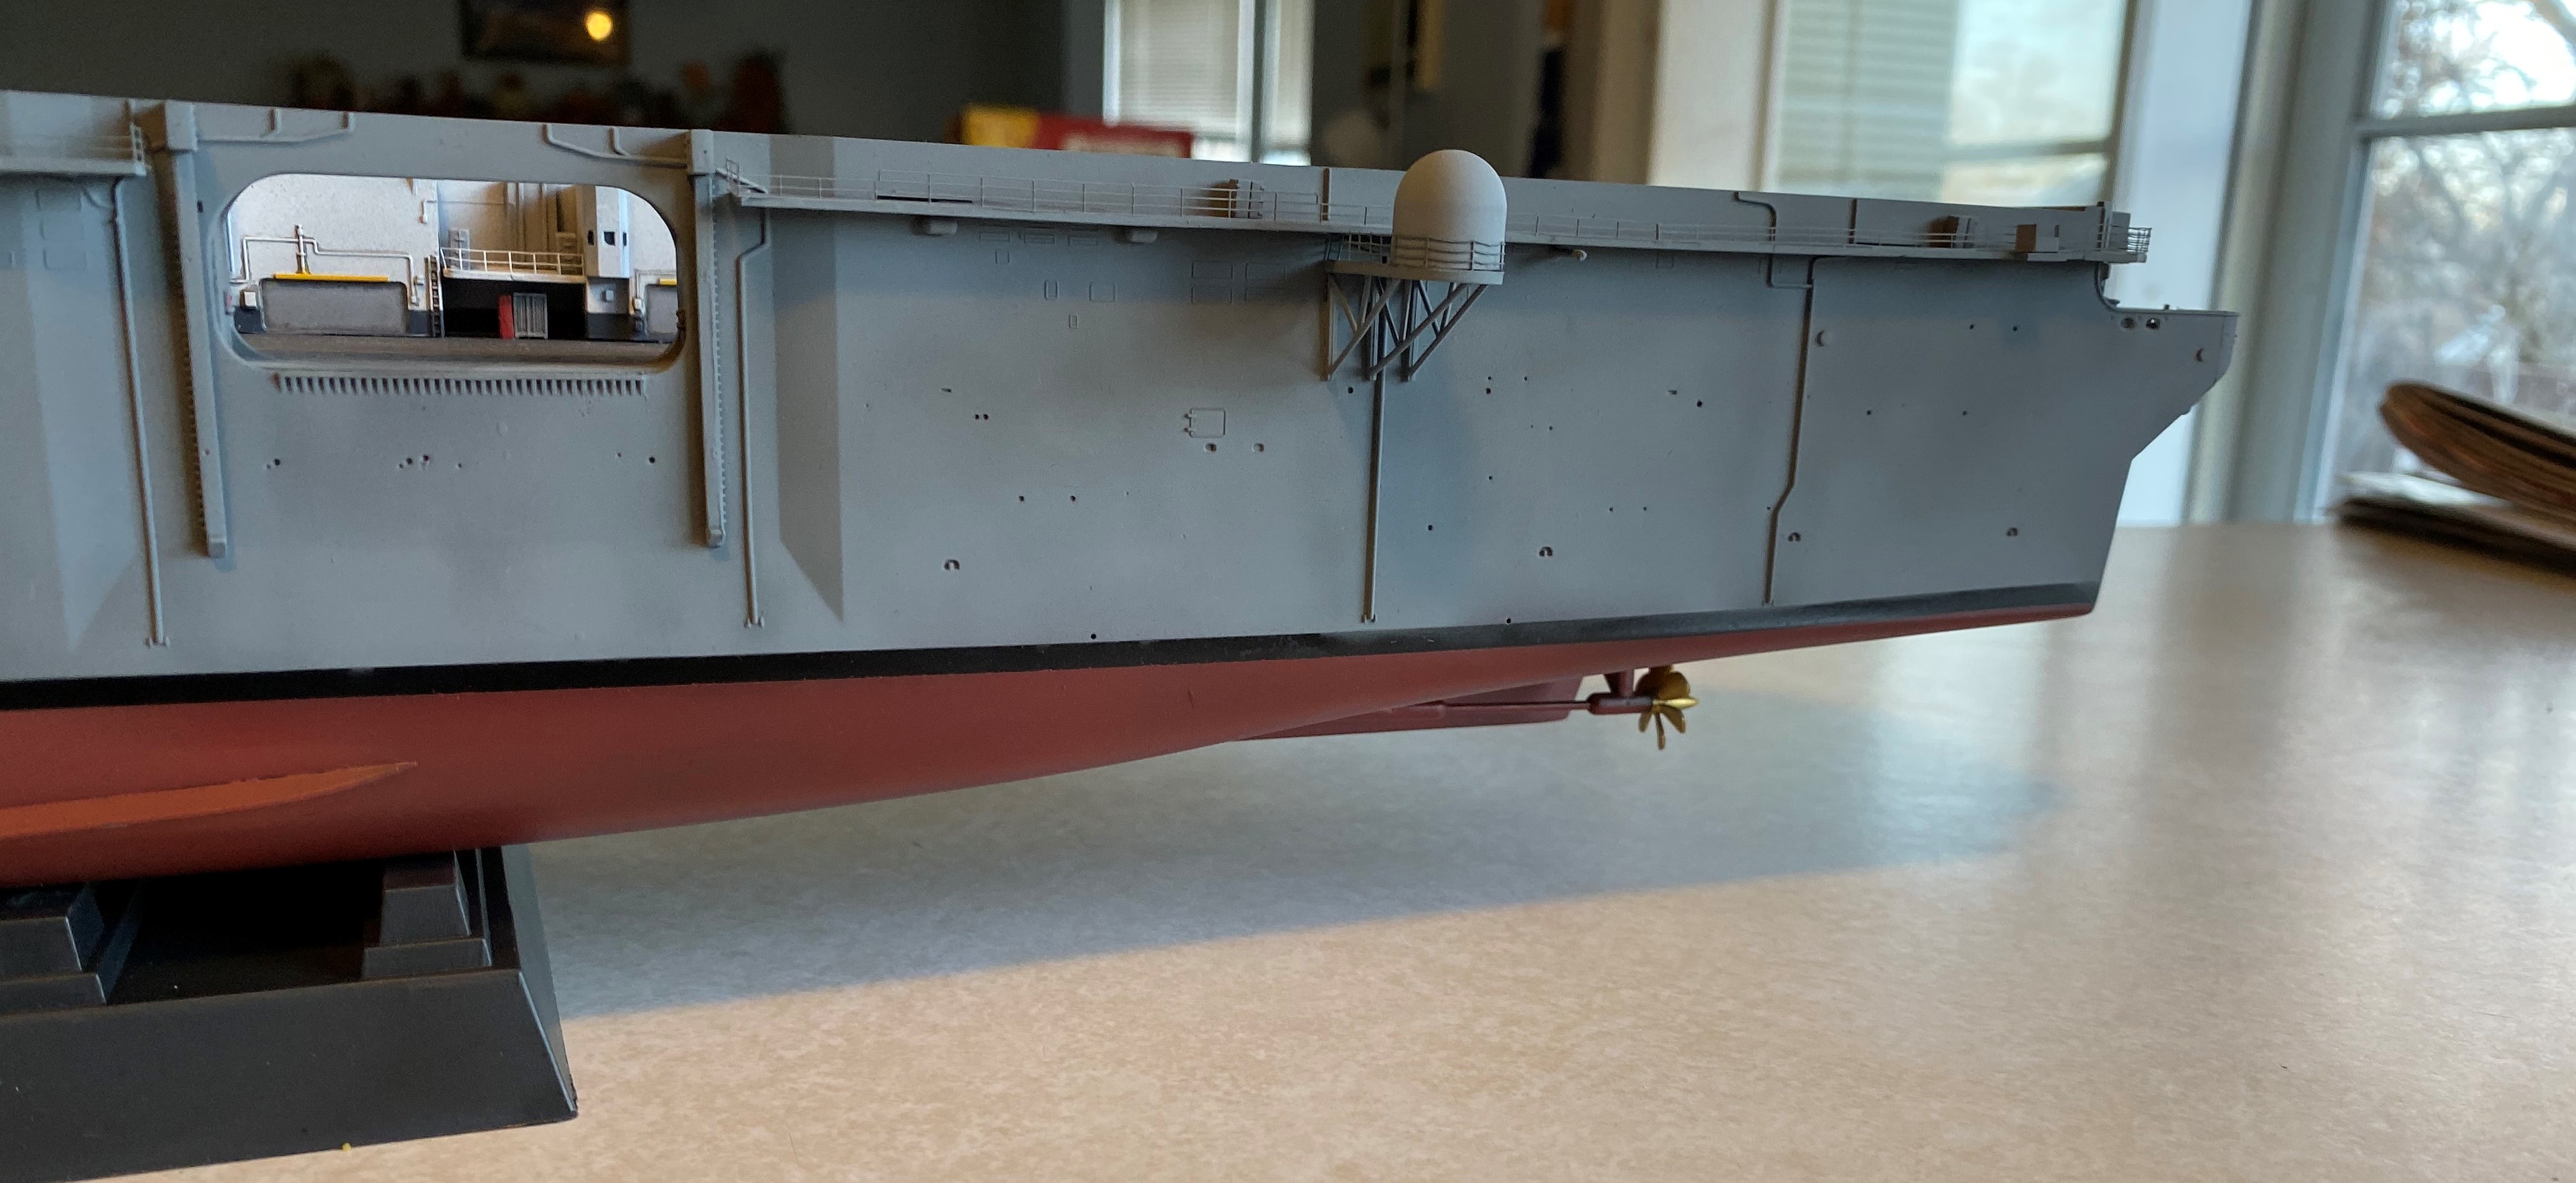
First bit of work. Adding the bulge to the bow. Did leave a bit of a gap so working to fill and sand it. I highly recommend gluing the bulge in place as the first thing you do since it will require work to get looking right. Trumpeter have you do it on Step 23 after adding a ton of detail to the hull.


I plan to model her airwing on the above loadout so CH-46's instead of V-22's. I also have some UH-1N's to replace the kit supplied SH-60's
rolltide31
#377
Visit this Community
Texas, United States
Joined: June 27, 2010
KitMaker: 1,481 posts
Model Shipwrights: 1,332 posts
Posted: Wednesday, November 06, 2019 - 03:59 AM UTC
Rory,

Looks like a great project. A friend of mine is the current skipper of LHD-6 USS Bonn Homme Richard.

Look forward to watching this build.

Dave
d6mst0
#453
Visit this Community
Texas, United States
Joined: August 28, 2016
KitMaker: 1,925 posts
Model Shipwrights: 1,298 posts
Posted: Wednesday, November 06, 2019 - 09:43 AM UTC
Wow, that is going to be one big ship! I never realize how large those landing ships are. Looks like you have a lot of goodies to add to her. This should be an interesting build.

Mark
RussellE
#306
Visit this Community
Victoria, Australia
Joined: June 27, 2010
KitMaker: 3,959 posts
Model Shipwrights: 2,777 posts
Posted: Saturday, November 09, 2019 - 10:08 PM UTC
Wow, what a kit Rory!

Following with interest!

Interesting size comparison with Missouri. Just goes to show so much of the displacement of the old battle wagons was taken up by amour, where in comparison, modern vessels have done away with it.
McRunty
#491
Visit this Community
Missouri, United States
Joined: April 06, 2016
KitMaker: 602 posts
Model Shipwrights: 349 posts
Posted: Monday, November 11, 2019 - 03:00 AM UTC
Worked on this some over the weekend. I focused entirely on the well and hanger decks because of course it has both

Both went together really well and I am very happy with the result.

Well Decks where the LCAC and LCU operate from.


I did take some creative liberties with the paint scheme. The bottom half of the walls are supposed to be black however given this will be all enclosed and dark, I decided a dark wash would be sufficient to darken the walls it but still retain some lightness.

The main hanger deck. This was a real jigsaw puzzle to put together. Its also one of those areas where it paid to do some research. The instructions would have you paint the bottoms of the walls a dark grey but photos show it as a bluish grey. Instructions also made no mention of the fact the hatches and rollup doors are in grey as well. The instructions also did not mention what colour the tool boxes were. Luckily photos showed them to be a combination of red and dark blue.

I had a long internal debate about adding some lighting to this since its a shame to paint it all and then cover it up however, if I am honest, the ship will spend 99.99% of its life on my shelf. I can shine a torch light into it if I need to.


Added some railing from the spares box onto the platforms.


More railing added.


And what you will see when you look in through the hanger.

Looking at the blown up photos I do see a few spots in need to touch up
RussellE
#306
Visit this Community
Victoria, Australia
Joined: June 27, 2010
KitMaker: 3,959 posts
Model Shipwrights: 2,777 posts
Posted: Monday, November 11, 2019 - 08:23 AM UTC
mighty fine work Rory!
trahe
Visit this Community
Virginia, United States
Joined: April 03, 2006
KitMaker: 1,158 posts
Model Shipwrights: 117 posts
Posted: Tuesday, November 12, 2019 - 12:45 AM UTC

Quoted Text

I had a long internal debate about adding some lighting to this since its a shame to paint it all and then cover it up however, if I am honest, the ship will spend 99.99% of its life on my shelf. I can shine a torch light into it if I need to.


You can use LED strip lighting fairly inexpensively and fairly easily. Here's the interior of my Wasp under construction.

McRunty
#491
Visit this Community
Missouri, United States
Joined: April 06, 2016
KitMaker: 602 posts
Model Shipwrights: 349 posts
Posted: Tuesday, November 12, 2019 - 05:49 AM UTC

Quoted Text

You can use LED strip lighting fairly inexpensively and fairly easily. Here's the interior of my Wasp under construction.


You have convinced me I have a cheapo set on order as we speak. The flight deck at the very least will be lit.

Unfortunately your picture filled me with horror as I realize I forgot to add the deck decals to the well deck. That line that runs down the right hand side. I am trying to figure out how to get it in there since the flight deck is glued in place. Not a whole bunch of room to work
McRunty
#491
Visit this Community
Missouri, United States
Joined: April 06, 2016
KitMaker: 602 posts
Model Shipwrights: 349 posts
Posted: Wednesday, November 13, 2019 - 04:16 AM UTC
Small update. This lady now has some makeup on


I will have to go back and do touchups, especially on the gray since there is still a ton of stuff to be glued on. I figured it would be easier to touch up than to try paint the whole hull around finicky PE etc.
d6mst0
#453
Visit this Community
Texas, United States
Joined: August 28, 2016
KitMaker: 1,925 posts
Model Shipwrights: 1,298 posts
Posted: Wednesday, November 13, 2019 - 01:10 PM UTC
Sweet!
RedDuster
Visit this Community
England - South East, United Kingdom
Joined: March 01, 2010
KitMaker: 7,078 posts
Model Shipwrights: 6,649 posts
Posted: Friday, November 15, 2019 - 11:33 PM UTC
Hi Rory,

Just picked up on this, being a bit absent of late, nice work.

I have the USS Wasp in the Revell box in the stash, which is basically the same kit (I think).

Will be following along with interest,

Cheers

Si
surfsup
Visit this Community
Queensland, Australia
Joined: May 20, 2010
KitMaker: 1,230 posts
Model Shipwrights: 1,212 posts
Posted: Saturday, November 16, 2019 - 01:47 PM UTC
Love the work you have done on her so far. She is certainly a Biggn.....Cheers Mark
McRunty
#491
Visit this Community
Missouri, United States
Joined: April 06, 2016
KitMaker: 602 posts
Model Shipwrights: 349 posts
Posted: Sunday, November 17, 2019 - 08:30 AM UTC
Have not done a lot to her this weekend. I did manage to get a bit done on her fine American bum so that's a plus.


Also on her well deck door. See if you can see the subtle differences between the kit part and the aftermarket etch...


To be fair, 1 of them only has 2 parts, the other has 28. This is definitely one of those times where the photo etch part is far superior to kit supplied. That being said, there are already parts of this build where I have opted for plastic since it looks just fine!
d6mst0
#453
Visit this Community
Texas, United States
Joined: August 28, 2016
KitMaker: 1,925 posts
Model Shipwrights: 1,298 posts
Posted: Sunday, November 17, 2019 - 09:05 AM UTC
Man that is a lot of PE for the Well Deck Door but does look great.

Mark
rolltide31
#377
Visit this Community
Texas, United States
Joined: June 27, 2010
KitMaker: 1,481 posts
Model Shipwrights: 1,332 posts
Posted: Sunday, November 17, 2019 - 09:30 AM UTC
The new Well Deck Door does look pretty impressive compared to the molded part!!!
Choowy
Visit this Community
Victoria, Australia
Joined: April 17, 2015
KitMaker: 125 posts
Model Shipwrights: 125 posts
Posted: Sunday, November 17, 2019 - 02:17 PM UTC

Quoted Text

This is definitely one of those times where the photo etch part is far superior to kit supplied. That being said, there are already parts of this build where I have opted for plastic since it looks just fine!


Wow that's a huge improvement, well worth the effort. That's what I found also, some of the plastic parts were fine and some even better than the PE attempt.
RussellE
#306
Visit this Community
Victoria, Australia
Joined: June 27, 2010
KitMaker: 3,959 posts
Model Shipwrights: 2,777 posts
Posted: Monday, November 18, 2019 - 11:19 AM UTC
looking good with some colour on Rory.

Nice work on the etch. It's a massive improvement on the kit part
JJ1973
#345
Visit this Community
Niedersachsen, Germany
Joined: August 22, 2011
KitMaker: 1,835 posts
Model Shipwrights: 1,832 posts
Posted: Sunday, November 24, 2019 - 12:57 AM UTC
Rory,

I'm board and watching, too! Very nice start and progress, she looks really fine already! Very nice PE work!

Cheers,
Jan
McRunty
#491
Visit this Community
Missouri, United States
Joined: April 06, 2016
KitMaker: 602 posts
Model Shipwrights: 349 posts
Posted: Tuesday, November 26, 2019 - 02:05 AM UTC
Update time!

A busy week was had working on Iwo Jima. For the most part I have completed the hull of the ship though there are still a few gubbins to be added i.e. The rudders which I find have a tendency to get knocked off. They are painted and ready to go, just need to be added.

Also not attached is the well deck lower door. Another of the things I am worried will be knocked off.

Everything else is equipment and will be added last such as the weapons systems, ships boats, anchors etc.


For the most part this was an easy build. Even the railings went on well.


The observant will notice a wire sitting in the hull. I wonder what that could be for?


Curving railing around round edges has never been my strong suit. These were no exception. Many a strong word was uttered.


I ended up using the kit inclined ladders. They don't look anywhere near as good as the AM Eduard ladders but they had one massive pro going for them. They Fit. The Eduards were way too big and looked out of place, they also didn't go through the holes between decks.


Still a lot to do before I can put the flight deck on. Deck supports to install, panel washes to be done to enhance detail and small details to be painted.

Shipyard will be closed this week due to travelling for the holidays (off to the in-laws for Turkey day )
rolltide31
#377
Visit this Community
Texas, United States
Joined: June 27, 2010
KitMaker: 1,481 posts
Model Shipwrights: 1,332 posts
Posted: Tuesday, November 26, 2019 - 03:49 AM UTC
Rory, looking really good. I know the pain you feel when adding railings, defiantly one of my weak areas myself. I have come to the conclusion that Eduard is good but does have an issue with correct size and completeness of their kits.

I have actually opted out and look for other sets or cobble together the PE.

Cant wait to see me.

Dave
McRunty
#491
Visit this Community
Missouri, United States
Joined: April 06, 2016
KitMaker: 602 posts
Model Shipwrights: 349 posts
Posted: Tuesday, November 26, 2019 - 04:24 AM UTC
David,

I agree on some of the issues you have with Eduard as I have them too but I will still use them for a few reasons. Primarily that they cover a wide range of models and they are reasonably cheap and readily available.

But my most important criteria for getting it is that its solid and robust Photo etch. I am thick fingered and heavy handed and I have had real issues in the past with some other PE makers due to how fine and delicate it was, especially the railings. (Don't even get me started on the issues I had with the railings on my Bronco LCS-1, USS Freedom)
d6mst0
#453
Visit this Community
Texas, United States
Joined: August 28, 2016
KitMaker: 1,925 posts
Model Shipwrights: 1,298 posts
Posted: Tuesday, November 26, 2019 - 05:41 AM UTC
Rory,

I hope my work with railings look half as good as yours, nice job.

Mark
RedDuster
Visit this Community
England - South East, United Kingdom
Joined: March 01, 2010
KitMaker: 7,078 posts
Model Shipwrights: 6,649 posts
Posted: Tuesday, November 26, 2019 - 06:22 AM UTC
Hi Rory,

Excellent progress, with the wire I guess the lighting is going ahead.

Eduard etch for ships can be a bit hit and miss, particularly the earlier sets, some of their more recent stuff is much improved.

Cheers

Si
RussellE
#306
Visit this Community
Victoria, Australia
Joined: June 27, 2010
KitMaker: 3,959 posts
Model Shipwrights: 2,777 posts
Posted: Tuesday, November 26, 2019 - 11:07 PM UTC
Great progress Rory

Looking forward to seeing the effect that wire has
timmyp
Visit this Community
Virginia, United States
Joined: May 18, 2008
KitMaker: 496 posts
Model Shipwrights: 404 posts
Posted: Wednesday, November 27, 2019 - 09:19 AM UTC
Superb work! I'm always amazed at how fast some people can work on their builds, and still have it looking fantastic. Keep up the good work, and I look forward to see the well deck door installed!

Tim
 _GOTOTOP