_GOTOBOTTOM
Ships by Class/Type: Military Small Craft
For topics on PT boats, landing craft, Vietnam riverine, etc.
K98 HMS Zinnia 1/350 Mirage + WEM
RedDuster
Visit this Community
England - South East, United Kingdom
Joined: March 01, 2010
KitMaker: 7,078 posts
Model Shipwrights: 6,649 posts
Posted: Sunday, December 29, 2013 - 08:53 AM UTC
With two largish builds underway I fancied having some thing small to tinker with as well. So here it is.


The contents of the box, the WEM fret as well.


A closer look at the sprues, the moulding is good although a little chunky the detail certainly has potential.


The hull halves had a slight warp.


But a little time and a little clamping it was fixed.


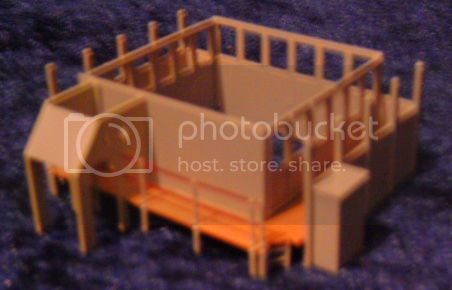
The decks test fitted, the maindeck was a perfect fit, but the fo'c'sle deck not so good, again should not be difficult to cure.


The Hull has been sprayed Halford's red plastic primer, The instructions show black for the lower hull, from my research anti fouling red is more likely, and this is a good match. The deck again I am not conviced by the camo carrying across it, I can find no evidence to support either that or dark grey, but I think dark grey more likely.


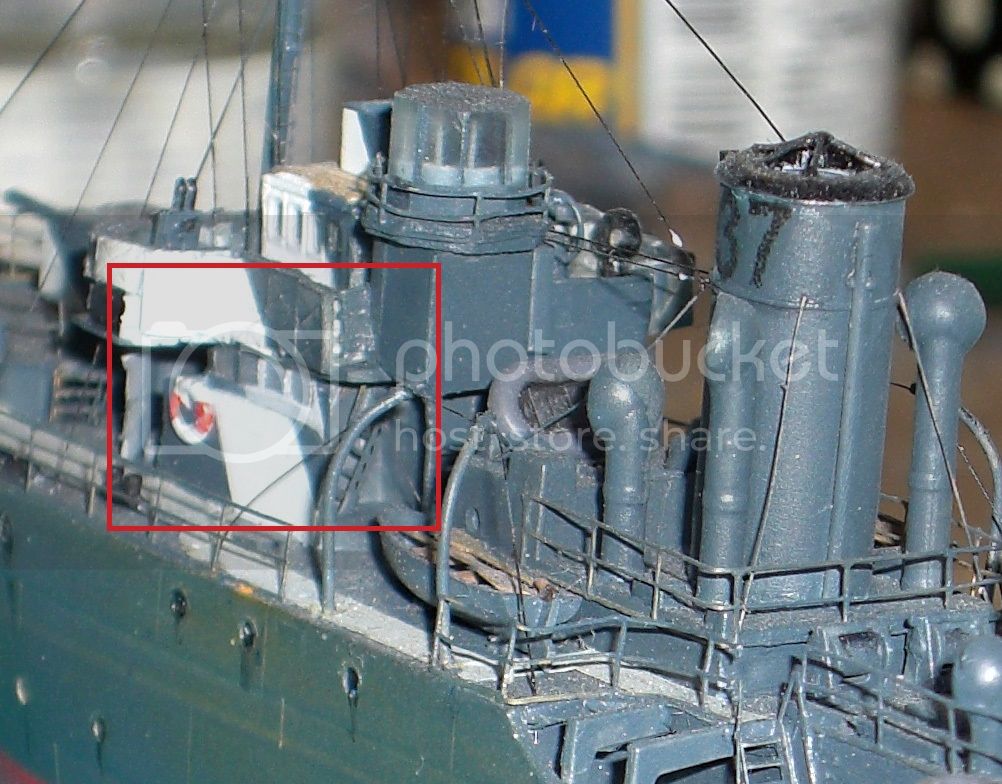
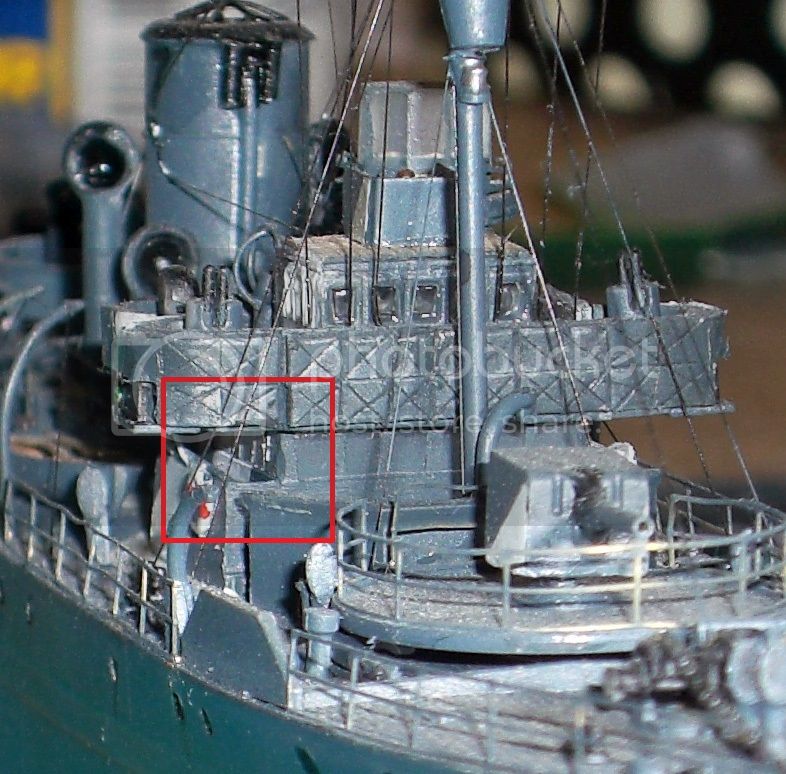
I have some waste sections from wood decks used on other kits, which I intend to have a go at cutting the wood sections for this deck from. in light of that I have already removed the moulded breakwater, WEM kindly provide a replacement on their fret.

more soon

Si
Longshanks8
Visit this Community
England - South West, United Kingdom
Joined: July 04, 2013
KitMaker: 430 posts
Model Shipwrights: 390 posts
Posted: Sunday, December 29, 2013 - 11:33 AM UTC
I shall enjoy watching this. . .

Cheers Kev
RedDuster
Visit this Community
England - South East, United Kingdom
Joined: March 01, 2010
KitMaker: 7,078 posts
Model Shipwrights: 6,649 posts
Posted: Monday, December 30, 2013 - 02:31 AM UTC
Thanks Kev.

Si
Shanghaied
Visit this Community
Schleswig-Holstein, Germany
Joined: June 30, 2011
KitMaker: 189 posts
Model Shipwrights: 106 posts
Posted: Monday, December 30, 2013 - 03:05 AM UTC
Hi Simon

The Flowers are addictive, be careful!. Done already two but run temporarily out of kits
When you need some references ask me. Unfotunately Zinnia is one of the least documented due to her early loss.
BTW try to fit the deck on top of the aft deckhouse. There will be most probably a gap in the side, but its easier to fit before everything is together.

Greetings from Shanghai
RedDuster
Visit this Community
England - South East, United Kingdom
Joined: March 01, 2010
KitMaker: 7,078 posts
Model Shipwrights: 6,649 posts
Posted: Monday, December 30, 2013 - 06:17 AM UTC
Hi Tom,

Thanks for the tip, I will try that before I install the maindeck.

Si
RussellE
#306
Visit this Community
Victoria, Australia
Joined: June 27, 2010
KitMaker: 3,959 posts
Model Shipwrights: 2,777 posts
Posted: Monday, December 30, 2013 - 11:51 AM UTC
Great choice of build, Si
Gremlin56
Joined: October 30, 2005
KitMaker: 3,897 posts
Model Shipwrights: 3,301 posts
Posted: Monday, December 30, 2013 - 07:16 PM UTC
A very tempting model Simon, I took a peek on Jadar Hobby and the price is very reaasonable too
RedDuster
Visit this Community
England - South East, United Kingdom
Joined: March 01, 2010
KitMaker: 7,078 posts
Model Shipwrights: 6,649 posts
Posted: Tuesday, December 31, 2013 - 02:52 AM UTC
Thanks Russell, I have always had a soft spot for the flowers.

Hi Julian, it is nice little kit, not exactly Dragon or Trumpeter but looks buildable, and the WEM etch should bring it up to scratch.

Si
RedDuster
Visit this Community
England - South East, United Kingdom
Joined: March 01, 2010
KitMaker: 7,078 posts
Model Shipwrights: 6,649 posts
Posted: Tuesday, December 31, 2013 - 06:01 AM UTC
a new years eve update,

The AP507A painted on (with the good old hairy stick)


And the and the G20, the best match for which I have found is citadel "Elysian Green". The masking has also been removed from the lower hull.


Having taken Tim's advise re the fit of the after upper deck section I was very careful cleaning up, note the right hand of the ejector pin marks, this sits right on top of on the cross braces on the deckhouse (last two pics of my first post), so it was sanded to oblivion.


Finaly the deck was fitted, not bad just needs a little cleaning up, but no real gaps.


Thanks for the heads up Tim.

Si
vonHengest
Visit this Community
Texas, United States
Joined: June 29, 2010
KitMaker: 5,854 posts
Model Shipwrights: 350 posts
Posted: Tuesday, December 31, 2013 - 03:13 PM UTC
These really are cool little kits Si, I'm looking forward to seeing the WEM upgrades on them.
RedDuster
Visit this Community
England - South East, United Kingdom
Joined: March 01, 2010
KitMaker: 7,078 posts
Model Shipwrights: 6,649 posts
Posted: Tuesday, December 31, 2013 - 10:10 PM UTC
Hi Jeremy,

I am impressed with them, they do pack a lot of detail in, the WEM fret is great, lots of options for different bridge types, weapons etc.

I am looking forward to getting to grips with it.

Si
RedDuster
Visit this Community
England - South East, United Kingdom
Joined: March 01, 2010
KitMaker: 7,078 posts
Model Shipwrights: 6,649 posts
Posted: Thursday, January 02, 2014 - 08:27 AM UTC
Onward and upward

The bulkhead under the break of the fo'c'sle has some rather dodgy watertight doors integrally moulded.


These were replaced with some spares from an old etched fret, the WEM fret does not include any.


The hull with the after deckhouse camo'd and all the decks test fitted, fore deck is not a good fit.


Npw for the big experiment, can I fabricate the wood section of the deck from scrap sections of a laser cut deck.

Here is measuring the foredeck section.


This was cut out and the hole for the base of the windlass measured and cut out. (I did try doing a "plastic rubbing" of the deck to find the cut outs, but I culd not make it work).


The mounting holes for the bits were carefully found with the tip of No.11 blade and rectangles cut round them. I know there is a hatch and a base for a cable drum, but these will be replaces with etched parts. the half of the base of the gun mount was also cut out.

The decks glued in and taped down.


A better view with the tape removed.


Not perfect, but a start. now I have the confidence to take this further.

More soon.

Si
Shanghaied
Visit this Community
Schleswig-Holstein, Germany
Joined: June 30, 2011
KitMaker: 189 posts
Model Shipwrights: 106 posts
Posted: Thursday, January 02, 2014 - 04:10 PM UTC
Looks very good Simon!

I did in my HMS Campion only the 2 small wooden parts besides the depth throwers.

Before you start the lower bridge you should consider if you want to correct it. Mirage got it a bit wrong. The lower deckouse is a bit narrower and has 2 wings with rails. However they molded it as if the deckhouse is covered over the complete width. Can get you a pic if you like.

Greetings from Shanghai
RedDuster
Visit this Community
England - South East, United Kingdom
Joined: March 01, 2010
KitMaker: 7,078 posts
Model Shipwrights: 6,649 posts
Posted: Thursday, January 02, 2014 - 08:16 PM UTC
Thanks Tom, would appreciate seeing the pic if possible, so I can see what needs doing.

I certainly intent to remove the solid bullwalks around the bridge and replace them with etch,

Thanks for looking in.

Si
Shanghaied
Visit this Community
Schleswig-Holstein, Germany
Joined: June 30, 2011
KitMaker: 189 posts
Model Shipwrights: 106 posts
Posted: Friday, January 03, 2014 - 02:34 AM UTC
Hi Simon,

here it is:


The early long foc'sle corvettes had a bridge like the short foc'sle type. The short bridgewings are a remainder of the earlier type.
Easy to fix: You cut off one window of the front bulkhead to make it slightly narrower. Then you remove the inside "support cube" on the deck. You can put together all bulkheads without that "blob" and automatically get the small wings. You can add a rail or a thin plastic strip. In reality they rail was sometimes replaced by a wooden bulwark.
BTW, do you know these links?:

http://theflowerclasscorvetteforums.yuku.com/directory#.UsbJlbSn7zx

http://www.cbrnp.com/RNP/Flower/ARTICLES/index.htm

Unfortunately not much about Zinnia due to her short lifetime, but a lot pics about the early types

Hope it helps

Greetings from Shanghai
RedDuster
Visit this Community
England - South East, United Kingdom
Joined: March 01, 2010
KitMaker: 7,078 posts
Model Shipwrights: 6,649 posts
Posted: Friday, January 03, 2014 - 10:42 AM UTC
ThanksTom,

Very interesting. Like you I have found no images of HMS Zinnia, but from searching through a lot of images of early long Fo'c'sle Flowers, the bridge arrangements were not all identical.

On HMS Clover, it appears the upper bridge is enlarged to the width of the bridge wings, the lower bridge appears to be as per the kit, with "wings going out to the width of the supports.

http://www.navyphotos.co.uk/clvr%20fgt1b.jpg

Pennywort, again completely different structure.

http://www.navyphotos.co.uk/pennywort2b.jpg

I think this one HMS Convunculs shows what you mean, from the side anyway.

http://www.navyphotos.co.uk/convolvulus1b.jpg

I can't find a front on or good angle view, but I may well have ago.

Might be tempted to get another one and convert into HMS Clover,

As if need any more ideas!

Thanks again

Si
Shanghaied
Visit this Community
Schleswig-Holstein, Germany
Joined: June 30, 2011
KitMaker: 189 posts
Model Shipwrights: 106 posts
Posted: Friday, January 03, 2014 - 04:17 PM UTC
Hi Simon,

I think Clover and Convulvulus have the same solution. If you look at the pic of Clover where the people looking out from the lower bridge, it lookss to me that it is open space with some stanchions. However it can be that in a few ships this area was enclosed by windows later. However I d not think in Zinnia because of her short lifespan.
I have studied a lot of pic, have also the Anatomy of the ship of Agassiz and th Ensign book. Seems the ships were altered slightly every few months. That's why I chose for my first built the Campion, because there are pics from bow and stern and even a contemporary painting. For the other one, HMCS Brandon I have pics with a short foc'sle with different camouflage and Radar configuration and a long foc'sle another different. And of course you need to be careful with the minesweepers...
BTW I found a pic from a 1/72 built (not mine) which explains the layout more clearly


Hope it helps.

Greetings from Shanghai
RedDuster
Visit this Community
England - South East, United Kingdom
Joined: March 01, 2010
KitMaker: 7,078 posts
Model Shipwrights: 6,649 posts
Posted: Friday, January 03, 2014 - 09:38 PM UTC
Hi Tom

They certainly are interesting ships, I have the AOTS on Agassiz, so I shall give that another study, before I go in with the razor saw.

All the best

Si
Removed by original poster on 01/04/14 - 10:38:31 (GMT).
RedDuster
Visit this Community
England - South East, United Kingdom
Joined: March 01, 2010
KitMaker: 7,078 posts
Model Shipwrights: 6,649 posts
Posted: Thursday, January 09, 2014 - 07:11 AM UTC
Not a lot of progress on the build, a lot of time studying pics and the AOTS, and to be honest whilst I think Tom, you are probably right, the Agassiz certainly had seven windows across the front of the lower bridge in her short fo'c'sle form, as does the kit bridge front, which sit aligned with the five windows on the upper bridge. Now to make that fir would involve scratchbuilding a new lower bridge. I am still thinking about that, but frankly I am tempted to leave as is.

All I have practically achieved is removing the solid bulwarks from the upper bridge.


More soon.

Si
Shanghaied
Visit this Community
Schleswig-Holstein, Germany
Joined: June 30, 2011
KitMaker: 189 posts
Model Shipwrights: 106 posts
Posted: Thursday, January 09, 2014 - 06:14 PM UTC
Hi Simon

No problem, your boat, just wanted to share some research.
I had an additional problem. Because the Campion is painted int eh very dark AP 507A I needed a bit contrast and decided to graze the windows. I rebuild the lower bridge out of clear plastic sheet and just masked the windows before painting.
The upper bridge i sanded from the back very thin and used Kristal Klear, because I did not want to destroy the paneling.
But I do not want to hijack your log....

Greetings from Shanghai
RedDuster
Visit this Community
England - South East, United Kingdom
Joined: March 01, 2010
KitMaker: 7,078 posts
Model Shipwrights: 6,649 posts
Posted: Friday, January 10, 2014 - 08:30 AM UTC
Hi Tom,

Appreciate your input, always welcome comments and additional information, do not feel you are hi-jacking this build log in any way.

In the end I have decided to stick with the kit lower bridge as is, I shall however use the WEM etch for the enclosed section of the upper bridge. Before the upper bridge deck goes on the instructions show the Navigation lights added to the ends of the bridge wings. The kit offerings were a bit crude, plan A was to remove the lamp shields and replace with plastic strip, I then found I had some the same width as the base plates, so the whole lot is being replaced.


Above shows the replacement bases, and the originals, one with the detail removed.

The Lower bridge superstructure built up, the moulded on "Aztec" stairs have been removed.


Next a lesson on think first, cut second. I knew the hole in the bridge deck through which the etched ladder would fit needed to be enlarged. I assumed the existing hole was in the right place. It isn't, now I have a larger filling job. The deck is just test fitted here.


The lower bridge camo'd along with the funnel base, and the deck supports.


More soon.

Si
Shanghaied
Visit this Community
Schleswig-Holstein, Germany
Joined: June 30, 2011
KitMaker: 189 posts
Model Shipwrights: 106 posts
Posted: Friday, January 10, 2014 - 05:50 PM UTC
Hi Simon

I think the same thing with the stairs happened to me too
But its even worse when you build Anchusa, because the upper bridge deck is tapering to the rear narrower than the lower bridge.
Are you going make a wooden deck on the upper bridge too? AFIK the early Flowers had the upper bridge and wheelhouse planked.

Greetings from Shanghai
RussellE
#306
Visit this Community
Victoria, Australia
Joined: June 27, 2010
KitMaker: 3,959 posts
Model Shipwrights: 2,777 posts
Posted: Friday, January 10, 2014 - 06:57 PM UTC
Looks like a fun little biuld there Si... coming along very nicely
RedDuster
Visit this Community
England - South East, United Kingdom
Joined: March 01, 2010
KitMaker: 7,078 posts
Model Shipwrights: 6,649 posts
Posted: Friday, January 10, 2014 - 10:01 PM UTC
Hi Tom,

I am going to plank the upper bridge too, it will help to hide the issue with the opening for the companionway. I have the Anchusa in the loft, I saw your comments on your build, and I intend to use the WEM enlarged bridge on that on.

Thanks for looking in Russell, not without issues, but non that are difficult to deal with so far, so yes I am having real fun with it.

Si.
 _GOTOTOP