

Go to modelshipwrights.com for the current dynamic site!


Seam Line Removal, 101
3
Comments

Sand away until the glue has gone and the seam cannot be felt when you rub your fingernail against it (sometimes seams can be still seen but are properly filled in). You might notice that the sanding has damaged the part a little. Don't worry as this will be fixed in the next step.
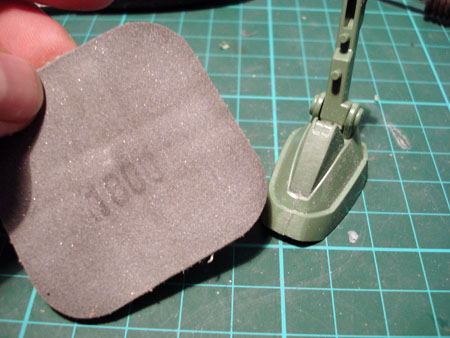
Take a finer grit (1200/1800x) sandpaper and sand the same part again until smooth. The ultra-fine abrasives will buff out most of the deeper scratches made from the initial sanding.
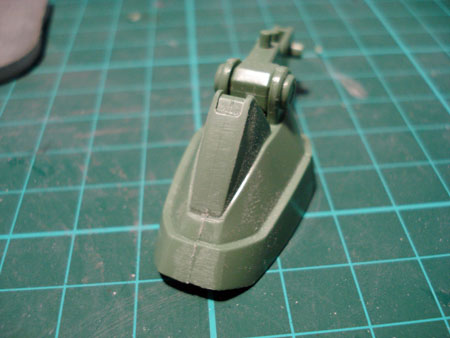
Below is a picture of what my piece ended up like. You will notice that there are still a few light scratches from the first round of sanding. Once primer is applied, it will fill these scratches and they will disappear from view altogether.
About the Author


Comments

Good stuff for a 101 series. Nice and clean and direct, well done (and good website, "Ghost")
APR 28, 2008 - 12:28 AM

Excellent article and photos! You made the process very clear and easy to follow!
APR 28, 2008 - 10:57 AM

Very nicely done, and good for hobby re-turnees or newbies. Bookmarked and looking forward to more! Thanks for posting, cheers
APR 28, 2008 - 01:42 PM
Copyright ©2021 by Scott Taylor. _OPINIONS Model Shipwrights, KitMaker Network, or Silver Star Enterrpises. Images also by copyright holder unless otherwise noted. Opinions expressed are those of the author(s) and not necessarily those of Model Shipwrights. All rights reserved. Originally published on: 2008-04-28 00:00:00. Unique Reads: 11485

WEB HOSTING BY


Copyright ©2021 Model Shipwrights and Kitmaker Network, a subsidiary of Silver Star Enterprises
All Rights Reserved. Please read our Conditions of Use and Privacy Policy.
All Rights Reserved. Please read our Conditions of Use and Privacy Policy.