You are viewing the archived version of the site.
Go to modelshipwrights.com for the current dynamic site!
Go to modelshipwrights.com for the current dynamic site!
1⁄700Build Up of the Tamiya 1:700 IJN Yamato
8
Comments
Hull Painting and Finishing
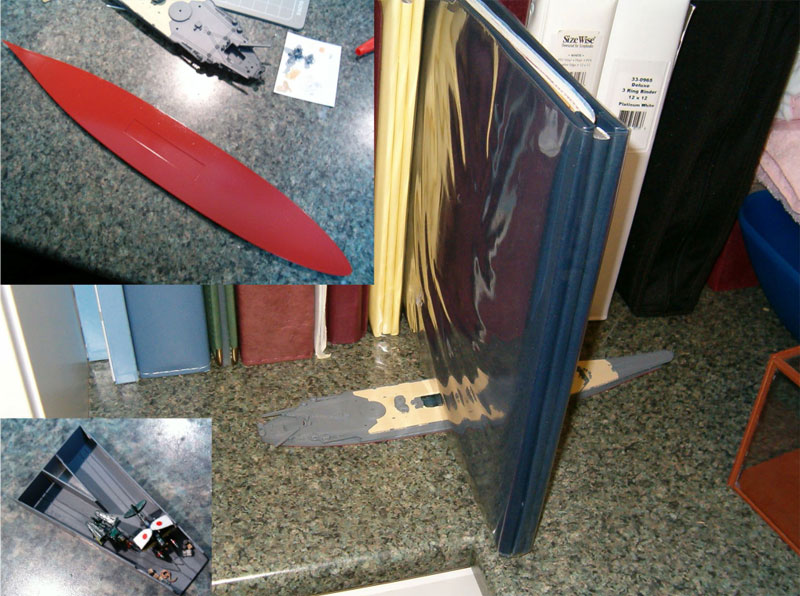
The hull was painted with Tamiya IJN Kure Grey. Using pliers, I held the hull by the center bar and sprayed a light coat on from several different angles. After two hours I repeated the process. After several more hours of dry time, I examined the model closely, removed any debris and made notes of were more paint was needed to cover certain areas. A third coat was applied and allowed to dry for several hours. I checked the final paint coat and was satisfied. Being careful, I took a hobby knife and removed the mask over the wood deck and brushed and blew the debris off.Already, the model was looking very good. I then painted the same hull color and finished the internal plane hanger and glued it in place. Iíll cover planes and cargo details in another section. The red base is pretty self explanatory as to what needs done. I cut off the sprues, trimmed and sanded these areas and painted the bottom and sides ColorPlace Fire Red and after it dried added the metal weights. I glued the base onto the hull. The hull is bowed a bit so a thin book was rested in the center between the rails, until the glue dried.
After the glue dried, the hull was placed on a spare piece of wood with looped painters tape. From this stage on the model should only be picked up by this wood block and not touched if it can be avoided.
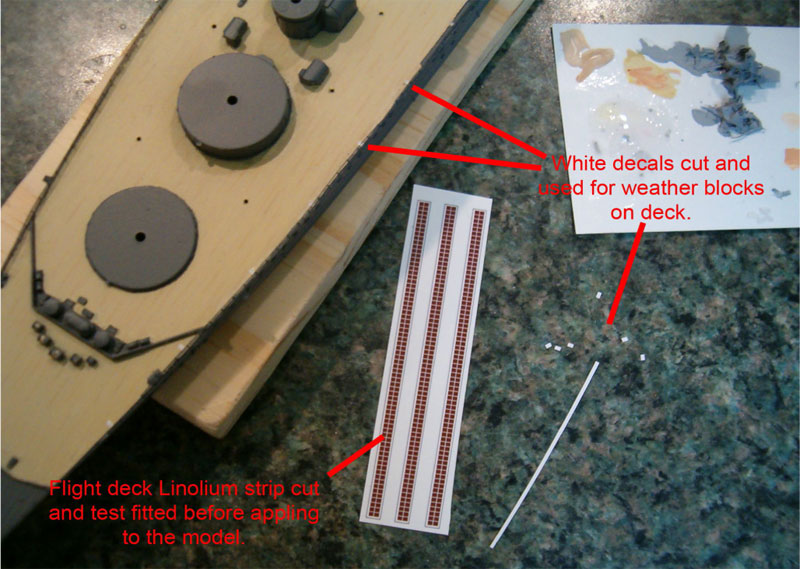
The decals for the linoleum strips on the flight deck that came with the kit were nice but the wrong color. I made my own decals using Microsoft Publisher and Testors Custom Decal Kit with the white decal paper.
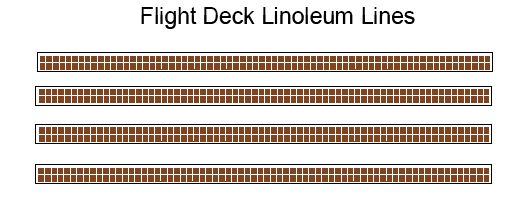
Small rectangles of the white decal paper were cut out for the white weather blocks. These were placed on the deck per the bookís reference. The flight deck linoleum decals were added to the model. I then touched up paint were needed and painted the rope section on the deck reels a flat tan. The hull was then set aside.
Armament
Main Guns: First I removed the guns from the sprue and trimmed them. I trimmed the poles down a bit to ease the placements into their poly caps on the hull. I drilled holes in two for the AA platforms and glued paper underneath them to fill in the part that would overhang the deck mounts.This paper was soaked with super glue then, when dry, sanded. I also trimmed off the square portion of the platform on the front of each gun, being careful to keep the round portion looking round as it should. Tomís Modelworks ladders were added to the sides of the guns per the bookís reference. I used a thin wire for a target box cable on the tops.
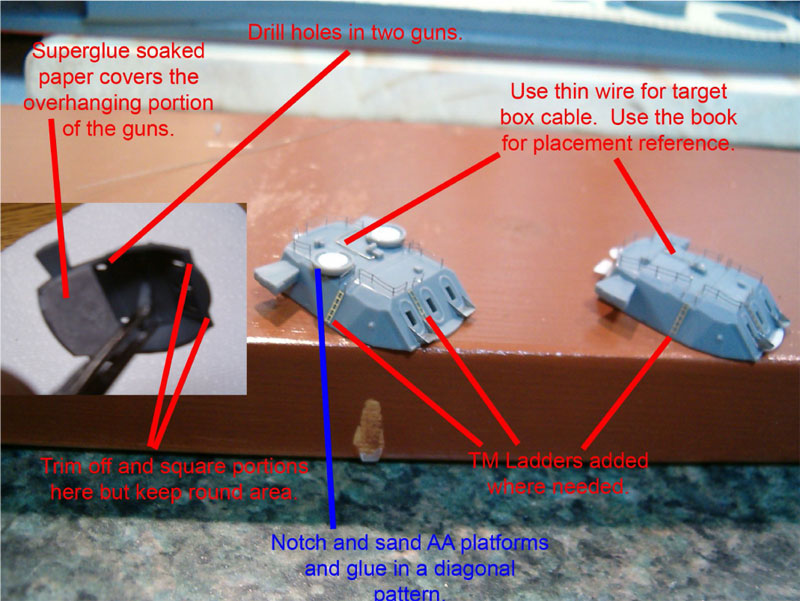
I then glued on the side wings and AA platforms notching them before and placing them as shown in the book and gluing a circle of tread plate. I added Gold Medal Modelís Main Gun Railings and Lion Roarís platforms. I cut and shaped paper and tread plate for the platforms on the rear of the gun. Then I removed each gun barrel and ran a hobby knife along the top of the blast bag to remove the seam. I then carefully cut the barrel of, drilled a hole in the end of the remaining blast bag and glued the Lion Roar barrels on. I used a spare piece of wood with holes drilled in it for assembly and painting the guns. After both the main body and barrels are painted IJN Kure grey, I painted the blast bags by hand then glued them to the guns.
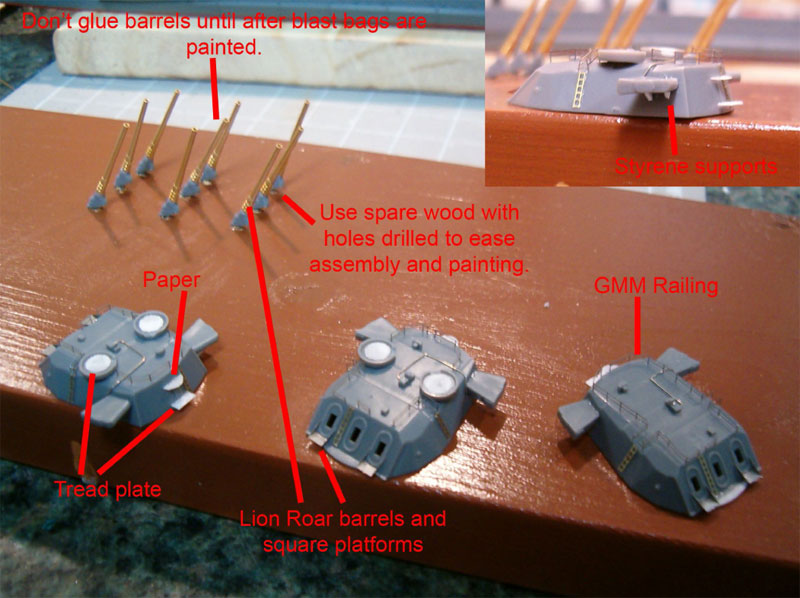
Afterthought: After I finished painting the main guns, I decided I was not happy with the AA platforms, and decided to make my own and carefully removed the kit ones I had glued on the main guns. Iíll describe how they were made later in this section.
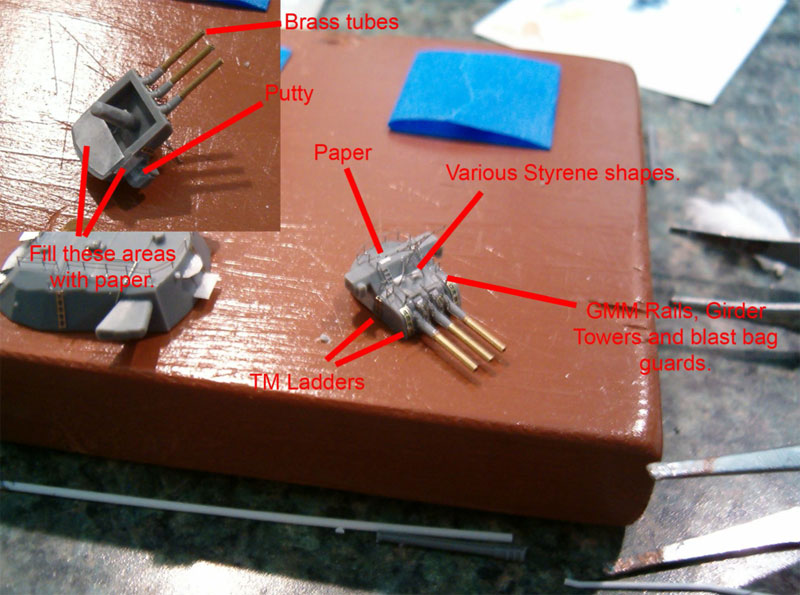
Secondary Guns: As with the main guns, paper soaked with superglue was put underneath to fill in the space. I then filled in the wing bottoms with putty and sanded them. I also filled in the sides with paper to help hide the mold indent. I then cut off the plastic gun barrels and replaced them with brass tube. They are slightly over scale but look better. I added Tomís Modelworks ladders to the front of the guns in four places.
I then added square and half circle styrene shapes and some paper to make the various devices on top of the gun. I next added Gold Medal Modelís railing and some small ladder to the top. I also added their blast bag guards as well. I next folded their antenna towers. Note that they are different for each gun and should be placed off center just like the real Yamato. I finished the guns by adding Tomís Modelworks ladders to the sides. There were complicated photoetch parts for these guns but they looked good with all the items on them.
I painted both types of these guns first by placing them upside down on looped painters tape and applied a coat of Tamiya IJN Kure Grey spray paint. After they dried I returned them to their holes in the wood block and painted the tops with two coats of the same paint. When that was dry I painted the blast bags on all guns ModelMaster Light Gull grey, and glued the barrels to the main guns.
Comments
Thank you Anthony for sharing this incredible build with us. This is one of the finest ship models I've ever seen and in 700th scale no less! Your step by step instructions are much appreciated. There are enough construction tips there to keep me coming back over and over.
Thanks again Anthony for a majestic build and thanks Mark for posting.
Frank
JUL 20, 2008 - 02:36 AM
Hi Anthony
Thanks for writing this future reference great article!
I know that it is supposed to be used with the AOTS book (just "sitting" there looking at me), but I must say that you already have cut the path through the jungle - if I might use this way of expression!
Also I would like to make a small correction on a little thing and a challenge...
correction: you called the wooden thing on the stern a raft. It isn't, it is a emergency rudder;
challenge: you have gone the extra mile on this beauty, and although I could accept the water base for other model, in this particular case, I would say that it deserves a better one
Congratulations Anthony!!!
Rui
JUL 20, 2008 - 09:12 AM
Simply one of the best I've seen in a long time.
Thank you for sharing!
JUL 20, 2008 - 02:50 PM
Amazing workmanship there Anthony. Thanks for sharing and giving up all those tips and tricks. I know where I am going to be looking when I start working on my Musashi and Yamato models. One heck of a build and shows just what can be accomplished with the divine scale and some careful work.
JUL 20, 2008 - 04:51 PM
instant bookmark... just gorgeous,, hope my 350 nagato comes out 1/10th a s good as this one... will be watching and going over this one a long time, thanks for sharing!
JUL 22, 2008 - 11:24 AM
Thank you all for your replies. I really enjoy reading full buildup articles and thought I'd write one of a model I had a reference book and several sets of photoetch for. To spite several revisions I still can see alot of spelling/grammer errors I made in the document.
This model also recently won First place, Judges grand and several other awards in a local IPMS show, I was very pleased. Your right that I took the easy way out on the water and perhappes I'll practice and try one day on giving it a better base.
A reason this looked so good is that the kit itself is awesome. It comes with peices to build all versions of the Yamato. I'm going to be using it to build a 1944 Musashi in the future. If you want a good looking kit out of the box this is it. I highly recommend it.
JUL 22, 2008 - 12:59 PM
Indeed Anthony (I have both the Yamato and Musashi in the stash, waiting for better skills)
Thanks again
Rui
JUL 23, 2008 - 12:54 AM
Copyright ©2021 by Anthony Kochevar. _OPINIONS Model Shipwrights, KitMaker Network, or Silver Star Enterrpises. Images also by copyright holder unless otherwise noted. Opinions expressed are those of the author(s) and not necessarily those of Model Shipwrights. All rights reserved. Originally published on: 2008-07-20 00:00:00. Unique Reads: 39630


