

Go to modelshipwrights.com for the current dynamic site!


1⁄700Build Up of the Tamiya 1:700 IJN Yamato
8
Comments
more details...
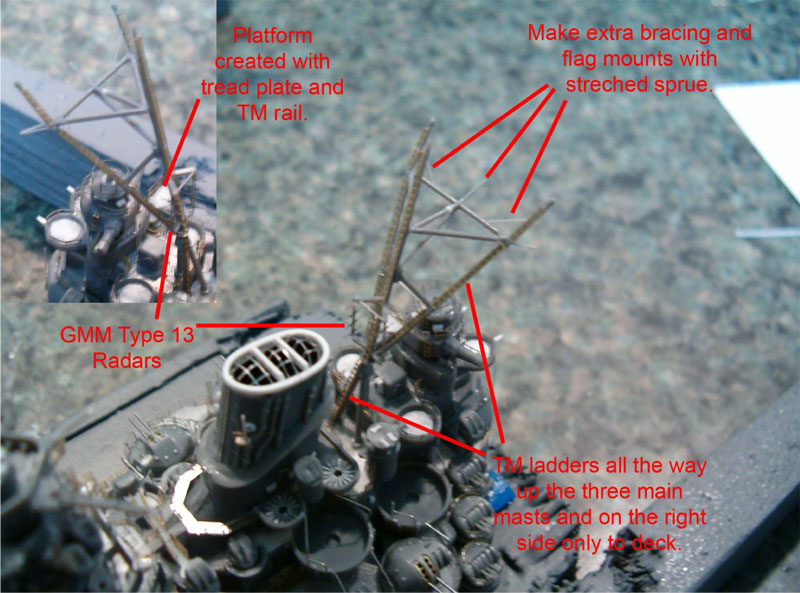
Mast: The mast was assembled and the type 13 radars removed. Toms Modelworks ladders were placed per instructions and book references. The platform was created with tread plate. Due to the scale of the ship it needed placed higher than was originally on the real ship. The smaller braces were made with stretched sprue. Part A21 was omitted and the bottom portion of it was made with styrene.
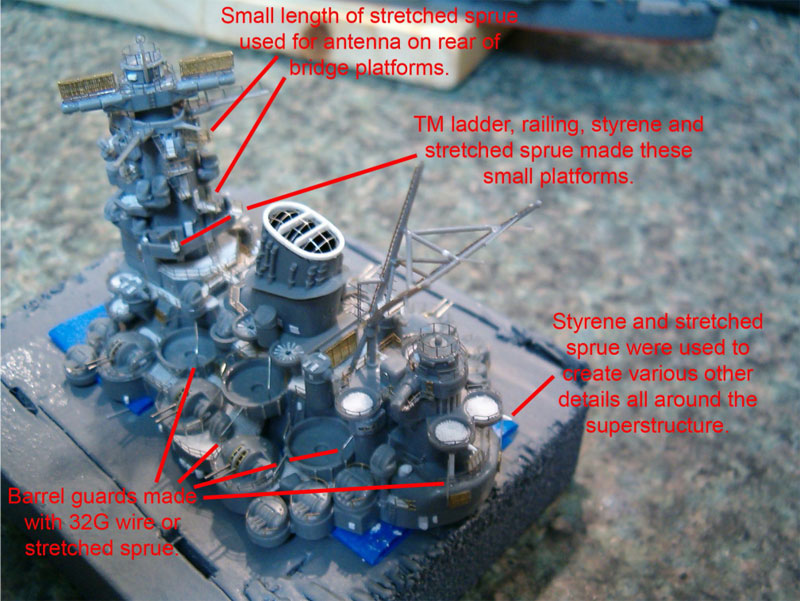
Finishing up: Now that all the main components were completed I went through and created several small details using various materials. Wire was used for the barrel guards. These were to prevent the guns from maneuvering to a position that would allow them to fire into the ship itself. They were test fitted several times before gluing. Various platforms, antennas and other items were fabricated using stretched sprue, styrene or paper. All shielded AA guns were completed then glued in place.
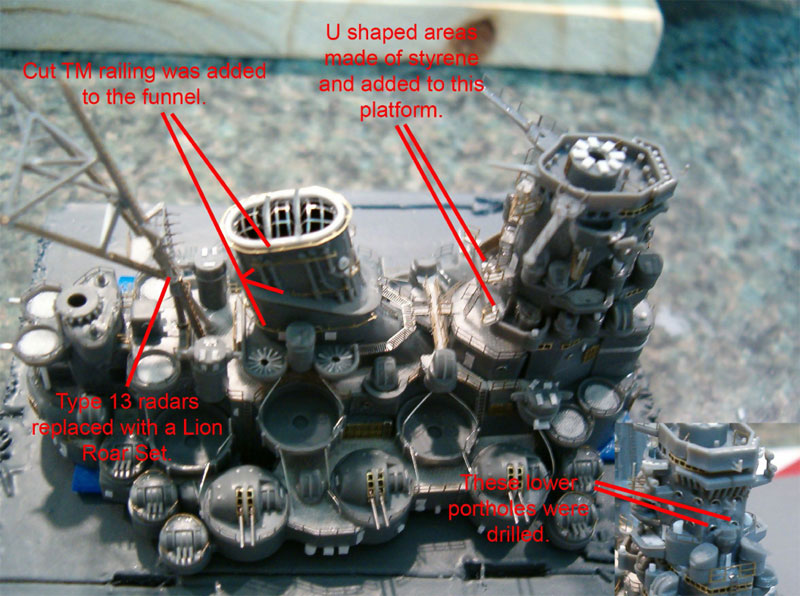
I had originally intended to have this be the finished superstructure but after a close examination of the book I was using for reference, I decided to make some more improvements. I noticed I had missed two portholes on ether side of the front molded-on fire control tower and added them. I also created the U shaped areas on the rear bridge platform out of styrene strips and added them. The funnel also looked a bit plain. I took the top part of some Toms Modelworks railing off leaving some of the poles on it and curved it then glued it into areas of the funnel to simulate the one bar rails that cover sections of it. It was over scale but still looked good.
The Gold Medal type 13 radar was also removed and a Lion Roar version that comes with several of these radars was added in their place. They had a more three dimensional look to them. At this point the superstructure was ready to be painted.
Other Deck Details
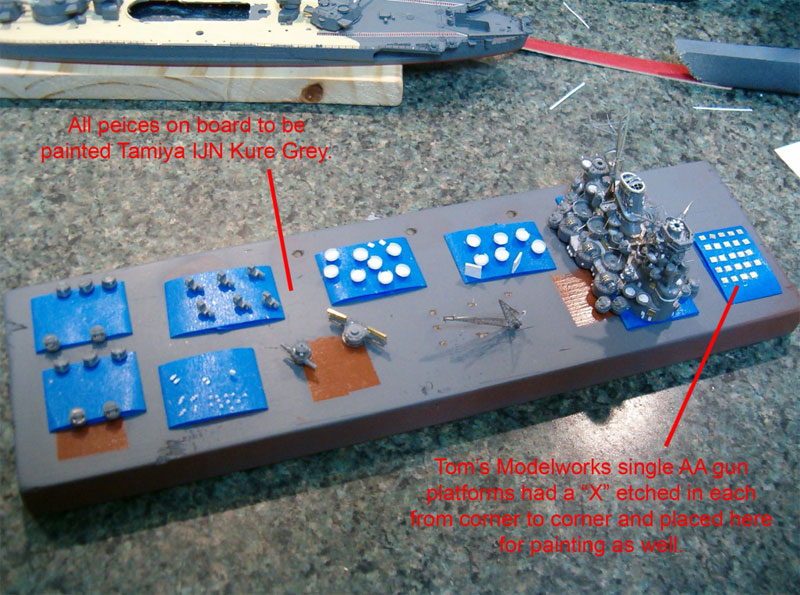
A few other deck details were crafted at this time. The most notable is the pipe that sits between the rear secondary turret and Main Turret No. 3. Various shapes and sizes of styrene and paper were used for all these details. Everything was then mounted in drill holes or on looped painters tape for painting with Tamiya IJN Kure Grey spray paint.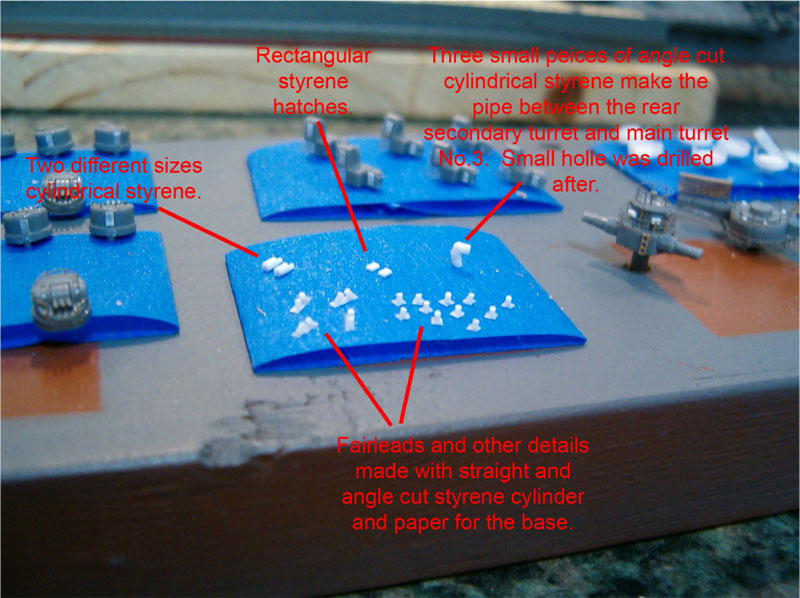
About the Author


FROM: UTAH, UNITED STATES
I've modeled ships as a teen and started the hobby again in 2005. For some reason I got into the history of the Japanese Navy at this time and started building ships of this navy. I also do N Scale model railroading, reef aquariums and a few video games.
Comments

Thank you Anthony for sharing this incredible build with us. This is one of the finest ship models I've ever seen and in 700th scale no less! Your step by step instructions are much appreciated. There are enough construction tips there to keep me coming back over and over.
Thanks again Anthony for a majestic build and thanks Mark for posting.
Frank
JUL 20, 2008 - 02:36 AM

Hi Anthony
Thanks for writing this future reference great article!
I know that it is supposed to be used with the AOTS book (just "sitting" there looking at me), but I must say that you already have cut the path through the jungle - if I might use this way of expression!
Also I would like to make a small correction on a little thing and a challenge...
correction: you called the wooden thing on the stern a raft. It isn't, it is a emergency rudder;
challenge: you have gone the extra mile on this beauty, and although I could accept the water base for other model, in this particular case, I would say that it deserves a better one
Congratulations Anthony!!!
Rui
JUL 20, 2008 - 09:12 AM


Simply one of the best I've seen in a long time.
Thank you for sharing!
JUL 20, 2008 - 02:50 PM

Amazing workmanship there Anthony. Thanks for sharing and giving up all those tips and tricks. I know where I am going to be looking when I start working on my Musashi and Yamato models. One heck of a build and shows just what can be accomplished with the divine scale and some careful work.
JUL 20, 2008 - 04:51 PM

instant bookmark... just gorgeous,, hope my 350 nagato comes out 1/10th a s good as this one... will be watching and going over this one a long time, thanks for sharing!
JUL 22, 2008 - 11:24 AM

Thank you all for your replies. I really enjoy reading full buildup articles and thought I'd write one of a model I had a reference book and several sets of photoetch for. To spite several revisions I still can see alot of spelling/grammer errors I made in the document.
This model also recently won First place, Judges grand and several other awards in a local IPMS show, I was very pleased. Your right that I took the easy way out on the water and perhappes I'll practice and try one day on giving it a better base.
A reason this looked so good is that the kit itself is awesome. It comes with peices to build all versions of the Yamato. I'm going to be using it to build a 1944 Musashi in the future. If you want a good looking kit out of the box this is it. I highly recommend it.
JUL 22, 2008 - 12:59 PM
Indeed Anthony (I have both the Yamato and Musashi in the stash, waiting for better skills)
Thanks again
Rui
JUL 23, 2008 - 12:54 AM
Copyright ©2021 by Anthony Kochevar. _OPINIONS Model Shipwrights, KitMaker Network, or Silver Star Enterrpises. Images also by copyright holder unless otherwise noted. Opinions expressed are those of the author(s) and not necessarily those of Model Shipwrights. All rights reserved. Originally published on: 2008-07-20 00:00:00. Unique Reads: 39630

WEB HOSTING BY


Copyright ©2021 Model Shipwrights and Kitmaker Network, a subsidiary of Silver Star Enterprises
All Rights Reserved. Please read our Conditions of Use and Privacy Policy.
All Rights Reserved. Please read our Conditions of Use and Privacy Policy.