

Go to modelshipwrights.com for the current dynamic site!


1⁄35Building the Beast!
7
Comments
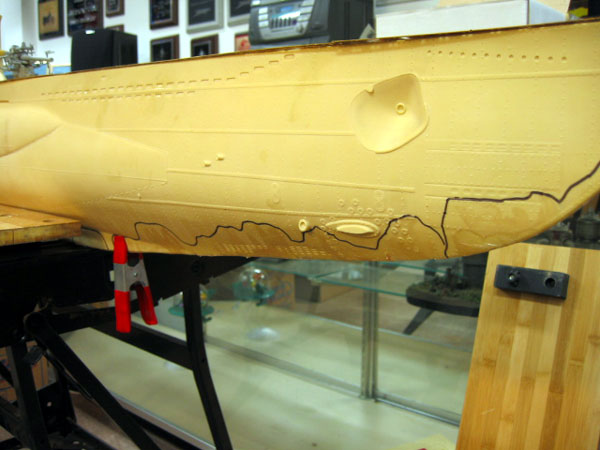
After approximately a week, I returned to find the epoxy had set up rock hard and the hull of the big boat felt and sounded bullet-proof. Now it was time to address the mis-match in the hull halves. Using Aves two part Apoxy I began to add it to the keel area to fill out the mismatched shape. I also added it to the bow of the boat to correct that shape. Again I set the hull aside to dry for a few days. I began going thru the different parts and pieces for the sub cleaning and fixing them as I went. All of the diving and bow planes were rough, as were their attachment points. I cleaned them up, drilled holes and inserted brass rod to act as a pivot for them and to aid attachment, when the time comes. There is a resin plug that goes to the rear of the hull for the rudders. This was over sized and needed some severe trimming to fit correctly. I test fit everything and it is about as close as I am going to get at this point. Once the boat is complete and sitting in its cradle, it will be hard to see any of these errors.
At this point the sub got shelved for the better part of six months. I play baseball and my season started so time was at a premium. The owner said he was in no hurry to get it back. Also, we decided to move somewhere in the middle of all this. Well, six months later, in an even a smaller work area, I decided it was time to get the show on the road again and geter done as it were. I started on the conning tower which was already partially assembled. I began by attempting to construct the railing that is aft of the conning tower. This proved to be an extreme exercise in patience as no matter what glue I tried, super, epoxy etc. nothing would hold. As soon as I tried to pick up the five pieces that make up the railing, they would simply fall apart. I opted to use .040 styrene rod instead. I wrapped this around a paint bottle and hit it with some heat. The shape held and it was close enough for government work.
For the angled supports from the platform to the railing, I used .020 rod. Where the main railing rises to meet the main structure of the coning tower, I was faced with a problem. How to get those distinctive curves? I simply hand formed some more .040 rod to shape or as close as I could get them, super glued them in place on top, ( I later realized they were in the wrong place, but they werent coming up) and then snipped them at the bottom. I cut the excess railing to meet the upper down-rails then hit it with some Weld-On, a little filler and it looked right. The seats are the kit parts and are cast in the same white metal. They seemed to hold better though than the railing pieces. Finally, it was starting to look like a conning tower.
I laid in the photo etch decking around the gun and found that I was one short. Luckily, the missing piece was one that was at the very forward position inside the tower. I fudged the missing piece from sheet styrene and called it even. Once painted in dark gray, it wouldnt be that noticeable. I drilled out all the holes for the ladders and lower railings using a small drill bit and my hand drill. The resulting holes were perfect matches for the .020 styrene rod I planned to use instead of the brass wire that came with the kit. The rods were then cut a little longer and then super glued into their respective holes. I then took some .030 rod and bent it to conform around the conning tower. I glued it on one end with Weld-On and then proceeded to glue it around the conning tower.


About the Author


FROM: CALIFORNIA, UNITED STATES
After a several year break from the hobby I have happily returned to it. Slowly, but surely getting my mojo back.
Comments

Hi
I loved reading part one of this build. I enjoyed the authors style of writing and presentation.
I can't wait to see part two.
Well done Matthew.
Plus I can't wait to see what he does to Revell's 1/72nd U Boat in the future.
Regards
Sean
JAN 04, 2006 - 07:19 PM

Thanks for the great Feature, Matthew, can't wait to read the following also...man, what a beast!
Gunny
JAN 04, 2006 - 07:38 PM

Great article Matt, Interesting about the glues not holding. Now for the $100,000 dollar question. Are you glad it's done and would you ever do another?
JAN 05, 2006 - 12:30 AM

Great article Matt. Proud to have you as a modler in the 'Springs.
Guys I've seen this "Beast." No pictures can do it justice. Matt should load this puppy up and take her on the road and charge addmission to it.
JAN 05, 2006 - 03:37 AM

Thanks for all of the kind words guys. Steve, if I had the chance to build one again, I know where I would change a lot of things. Do I want to build one again...not no, but hell no. Just too large to handle. I had more near death experiences with this thing that I wanted. Its nice to have it under my belt though. If I hear somebody talking about it, I will know and feel their pain...lol. Glad you all liked the first article. Hope you enjoy the second installment. "Q"
JAN 05, 2006 - 04:30 AM

good lord you must be mental :-) :-)
that is a really, really incredible project and a massive undertaking - It looks amazing what you've shown so far and I take my hat off to you !!
JAN 06, 2006 - 05:53 PM

I really enjoyed part one of the article.
Now that is one AWESOME u-boat!
Joe
JAN 09, 2006 - 06:19 AM
Copyright ©2021 by Matthew Quiroz. _OPINIONS Model Shipwrights, KitMaker Network, or Silver Star Enterrpises. Images also by copyright holder unless otherwise noted. Opinions expressed are those of the author(s) and not necessarily those of Model Shipwrights. All rights reserved. Originally published on: 2006-01-05 00:00:00. Unique Reads: 25866

WEB HOSTING BY


Copyright ©2021 Model Shipwrights and Kitmaker Network, a subsidiary of Silver Star Enterprises
All Rights Reserved. Please read our Conditions of Use and Privacy Policy.
All Rights Reserved. Please read our Conditions of Use and Privacy Policy.