

Go to modelshipwrights.com for the current dynamic site!


1⁄35Building the Beast!
7
Comments
I sprayed the entire piece with Krylon Primer from a rattle can and let it dry for a day. If I had to do it over again I would have used a lighter gray primer as it was a major effort to shoot the light gray, almost white, paint over the dark gray. Lesson learned. I used Gunze Light Gull Gray for the main structures sides and RLM 66 for the deck area and inside the tower. I picked out the various pieces that needed to be painted black and painted those using Vallejo colours. The primer ensured they went down with no problems.
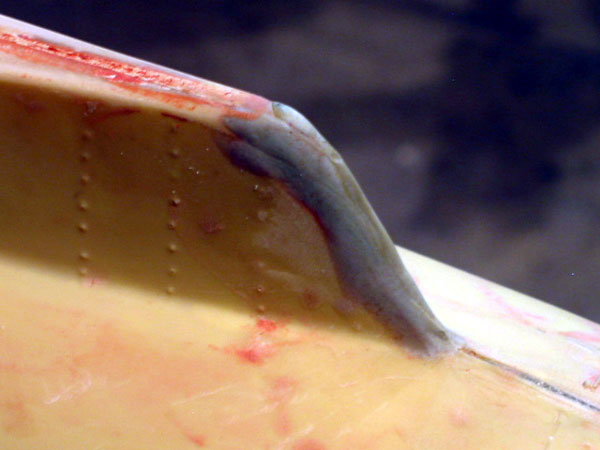
After I had painted all of the areas, and they were dry, I sprayed a good even coat of Future to prepare the surface for the coming oil washes. Using Burnt Umber, and Raw Sienna I set about applying the washes. After almost 2 hours I had the wash colours laid in. I wanted to do this boat in a winter scheme so the resulting washes and weathering would really stand out. Unfortunately for me, the detail is spotty on the conning tower. In some areas the rivet detail is nice and crisp, while in other areas, it is barely noticeable. I faked it in these areas by just applying the paint as if the rivets were there. After they had set up a little bit, I used a wide flat brush and carefully streaked them in a downward motion to achieve the desired streaking effect. My initial results were a little harsh, but being as I used oils, it was simply a matter of going back and stroking the paint some more to blend it in a little better. I am much happier with these results. I sealed the tower with several flat coats from my Badger 150 and let it dry over night.
Bright and early the following morning, I was back at the conning tower. Using some Humbrol Matte Black and some Grumbacher Titanium White straight from the tube, I mixed up a nice dark gray to use for the chipping. Since the railings were probably the most likely area for men to congregate on deck, I chipped this area more. Random jabs and pokes produced the results I was looking for. The seats around the gun railing were made of painted wood. I subsequently painted these in the same dark yellow as the wood portions in the forward portion of the tower. I again jabbed and poked my brush around the seats to achieve the look I was after. I still needed to add some wood grain effects to it, but it looked pretty good thus far.
Next was the 20mm gun just aft of the conning tower. Once again, I disassembled the gun entirely, cleaned it up, and reassembled it. The barrel had been bent at some point, so I needed to straighten that. The gun, its cradle and the mount are white metal. The pedestal is resin. Where the mount attaches to the pedestal, there wasnt a lot of material to attach them. I filed the groove deeper in hopes of providing more contact area. I used CA glue and everything held fine. I painted the pedestal and gun in a dark gray primer. The gun itself was then painted flat black using Vallejo Colours and then dry brushed using Humbrol #11 silver to achieve a gun metal look. I sealed everything once again with several coats of flat thru my airbrush. On to the main hull!!


About the Author


FROM: CALIFORNIA, UNITED STATES
After a several year break from the hobby I have happily returned to it. Slowly, but surely getting my mojo back.
Comments

Hi
I loved reading part one of this build. I enjoyed the authors style of writing and presentation.
I can't wait to see part two.
Well done Matthew.
Plus I can't wait to see what he does to Revell's 1/72nd U Boat in the future.
Regards
Sean
JAN 04, 2006 - 07:19 PM

Thanks for the great Feature, Matthew, can't wait to read the following also...man, what a beast!
Gunny
JAN 04, 2006 - 07:38 PM

Great article Matt, Interesting about the glues not holding. Now for the $100,000 dollar question. Are you glad it's done and would you ever do another?
JAN 05, 2006 - 12:30 AM

Great article Matt. Proud to have you as a modler in the 'Springs.
Guys I've seen this "Beast." No pictures can do it justice. Matt should load this puppy up and take her on the road and charge addmission to it.
JAN 05, 2006 - 03:37 AM

Thanks for all of the kind words guys. Steve, if I had the chance to build one again, I know where I would change a lot of things. Do I want to build one again...not no, but hell no. Just too large to handle. I had more near death experiences with this thing that I wanted. Its nice to have it under my belt though. If I hear somebody talking about it, I will know and feel their pain...lol. Glad you all liked the first article. Hope you enjoy the second installment. "Q"
JAN 05, 2006 - 04:30 AM

good lord you must be mental :-) :-)
that is a really, really incredible project and a massive undertaking - It looks amazing what you've shown so far and I take my hat off to you !!
JAN 06, 2006 - 05:53 PM

I really enjoyed part one of the article.
Now that is one AWESOME u-boat!
Joe
JAN 09, 2006 - 06:19 AM
Copyright ©2021 by Matthew Quiroz. _OPINIONS Model Shipwrights, KitMaker Network, or Silver Star Enterrpises. Images also by copyright holder unless otherwise noted. Opinions expressed are those of the author(s) and not necessarily those of Model Shipwrights. All rights reserved. Originally published on: 2006-01-05 00:00:00. Unique Reads: 25866

WEB HOSTING BY


Copyright ©2021 Model Shipwrights and Kitmaker Network, a subsidiary of Silver Star Enterprises
All Rights Reserved. Please read our Conditions of Use and Privacy Policy.
All Rights Reserved. Please read our Conditions of Use and Privacy Policy.