

Hi Gunny,
Might be fun to join once I get more done on my Ellyson for the community build (not too much room on the modeling desk). Anyone know if there is a 1/350 injection kit that could be build as USS Northampton (CA-26)? I know there are resin kits available, but I'm not sure I'm ready for resin yet.
Thanks, Barry


Go to modelshipwrights.com for the current dynamic site!
Campaigns
Want to be part of a group build? This is where to start, plan, and meet about them.
Want to be part of a group build? This is where to start, plan, and meet about them.
Hosted by Jim Starkweather
Cruisers of the 20th Century

DrDull

Joined: February 23, 2006
KitMaker: 133 posts
Model Shipwrights: 128 posts

Posted: Monday, July 07, 2008 - 03:30 AM UTC
TheDiggs
Joined: April 25, 2008
KitMaker: 338 posts
Model Shipwrights: 160 posts

Posted: Saturday, July 12, 2008 - 11:47 AM UTC
I usually don't attach the bottom hull plate because I never found it necessary unless I was doing something different (I once made a 1/700 Yamato into an incense burner). But for this build I figured I would do it just to try something new.
I am attaching the hull and the bottom plate with just puty (so there will be no gaps). The puty should hold it all together. I have never tried using puty as a cement before so we'll see how it goes.

I am attaching the hull and the bottom plate with just puty (so there will be no gaps). The puty should hold it all together. I have never tried using puty as a cement before so we'll see how it goes.

treadhead1952
Joined: June 12, 2008
KitMaker: 552 posts
Model Shipwrights: 493 posts

Posted: Saturday, July 12, 2008 - 03:11 PM UTC
Hi Dave,
Good luck with your Putty idea, hope it works out. With my luck, after getting it finished, painted, rigged and ready to go, I would sneeze and it would come loose.
I do like the incense burner idea for those old hull bottoms, sort of a novel approach.
Good luck with your Putty idea, hope it works out. With my luck, after getting it finished, painted, rigged and ready to go, I would sneeze and it would come loose.
I do like the incense burner idea for those old hull bottoms, sort of a novel approach.
TheDiggs
Joined: April 25, 2008
KitMaker: 338 posts
Model Shipwrights: 160 posts
Posted: Monday, August 11, 2008 - 04:23 PM UTC
Well gents I have to take a break for a month or so. I am moving to a new base and need to spend my free time constructing an apparatus to safely move my fleet with me.
My puddy idea seems to be working though it is too early to tell. I did cheat a little bit by using some glue spot welds along the inside of the hull just in case.
My puddy idea seems to be working though it is too early to tell. I did cheat a little bit by using some glue spot welds along the inside of the hull just in case.

Roy

Joined: April 21, 2003
KitMaker: 230 posts
Model Shipwrights: 41 posts

Posted: Tuesday, August 12, 2008 - 04:49 AM UTC
Hello,
Here is my entry for the campaign: IJN Kumano & IJN Ayanami.
My inspiration for this scene dates back to 1 April 1942 Operation C the raids in the Indian Oceans where this light cruiser and destroyer departs Mergui and steam into the Bay of Bengal.
1/700 Scale. Tamiya: IJN Kumano, Ayanami, PE: Eduard, Gold Medal Models, LionRoar.
Summer vacation is great!
Cheers,
Christer

gator
Vendor

#027
Joined: April 13, 2005
KitMaker: 5,422 posts
Model Shipwrights: 5,079 posts

Posted: Tuesday, August 12, 2008 - 07:13 AM UTC
Awesome stuff Christer!
Kenny
Kenny

TheDiggs
Joined: April 25, 2008
KitMaker: 338 posts
Model Shipwrights: 160 posts
Posted: Tuesday, August 12, 2008 - 03:51 PM UTC
Very nice, what did you use for the water?
Roy
Joined: April 21, 2003
KitMaker: 230 posts
Model Shipwrights: 41 posts
Posted: Tuesday, August 12, 2008 - 10:00 PM UTC
Thanks guys!
The "water" is made of ready-mixed filler for interior wall repairs.
The colours I used was mainly Phthalo Green and som Paynes Grey (Windsor&Newton) and varnish.
Cheers,
Christer
The "water" is made of ready-mixed filler for interior wall repairs.
The colours I used was mainly Phthalo Green and som Paynes Grey (Windsor&Newton) and varnish.
Cheers,
Christer

JMartine
Joined: October 18, 2007
KitMaker: 1,698 posts
Model Shipwrights: 1,514 posts

Posted: Wednesday, August 13, 2008 - 10:54 AM UTC
great work Christer..ditto on the water and build quality
treadhead1952
Joined: June 12, 2008
KitMaker: 552 posts
Model Shipwrights: 493 posts
Posted: Friday, September 05, 2008 - 12:03 PM UTC
Ahoy Mates,
After fiddling about, tinkering earnestly, and having entirely too much fun, I finished off the USS Baltimore CA 68 this afternoon. I am planning on doing some base work in the near future, Christer is just too much of an inspirerer, but for the moment, this is how it will sit in the display case for a while.

I used Model Master Acrylic Paint, 5N Navy blue for the sides and 20B Deck Blue for the flat parts doing it down and dirty by spraying from the sides with the airbrush overall then shooting the 20B straight down on the deck and tops of everything holding the model sideways duct taped to the bottom of the box.

I must admit to now being a fan of Gators' Grip Acrylic Hobby Glue for things PE. I managed to get my shipment from Kenny in time to do the hull railings and it was probably the easiest time of doing that particular task I have ever had. Laying a bead of the stuff down with the little syringe and then slapping the rail down in place was about all there was to it. Working between GMM Models US Navy Cruiser/Destroyer and Toms' Model Works PE sets provided all the required nice bits as far as cranes, catapults, rails radars, and yardarms. The rigging such as it is is stretched sprue attached with CA. Decals are courtesy of Trumpeter. Although I am pretty sure that the ship would have had a pair of tri colored painted aircraft at the time, the decals provided were more for a pair of dark blue painted ones, so that is what I did. I also added a few bits to the quad towers, Pilot House, and engineering deck house sides mostly from sheet styrene and sprue with a little PE tossed in for good measure.

So this is my entry into the Cruisers of the 20th Century, The end.

After fiddling about, tinkering earnestly, and having entirely too much fun, I finished off the USS Baltimore CA 68 this afternoon. I am planning on doing some base work in the near future, Christer is just too much of an inspirerer, but for the moment, this is how it will sit in the display case for a while.
I used Model Master Acrylic Paint, 5N Navy blue for the sides and 20B Deck Blue for the flat parts doing it down and dirty by spraying from the sides with the airbrush overall then shooting the 20B straight down on the deck and tops of everything holding the model sideways duct taped to the bottom of the box.
I must admit to now being a fan of Gators' Grip Acrylic Hobby Glue for things PE. I managed to get my shipment from Kenny in time to do the hull railings and it was probably the easiest time of doing that particular task I have ever had. Laying a bead of the stuff down with the little syringe and then slapping the rail down in place was about all there was to it. Working between GMM Models US Navy Cruiser/Destroyer and Toms' Model Works PE sets provided all the required nice bits as far as cranes, catapults, rails radars, and yardarms. The rigging such as it is is stretched sprue attached with CA. Decals are courtesy of Trumpeter. Although I am pretty sure that the ship would have had a pair of tri colored painted aircraft at the time, the decals provided were more for a pair of dark blue painted ones, so that is what I did. I also added a few bits to the quad towers, Pilot House, and engineering deck house sides mostly from sheet styrene and sprue with a little PE tossed in for good measure.
So this is my entry into the Cruisers of the 20th Century, The end.
JMartine
Joined: October 18, 2007
KitMaker: 1,698 posts
Model Shipwrights: 1,514 posts
Posted: Saturday, September 06, 2008 - 02:34 AM UTC
very nicely done Jay! The rigging looks great, crisp construction, cheers!
treadhead1952
Joined: June 12, 2008
KitMaker: 552 posts
Model Shipwrights: 493 posts
Posted: Sunday, September 07, 2008 - 09:46 AM UTC
Thanks James,
Trumpeter makes some nice kits that go together well with few surprises to raise up and bite you.
Trumpeter makes some nice kits that go together well with few surprises to raise up and bite you.

goldenpony

Joined: July 03, 2007
KitMaker: 3,529 posts
Model Shipwrights: 2,419 posts

Posted: Monday, September 08, 2008 - 01:14 AM UTC
Nice looking cruiser Jay!

treadhead1952
Joined: June 12, 2008
KitMaker: 552 posts
Model Shipwrights: 493 posts
Posted: Monday, September 08, 2008 - 06:04 AM UTC
Thanks Jim,
I had a lot of fun with this one. Digging up ideas to add to decent kits is my favorite part of any build and the Baltimore did not disappoint.
I had a lot of fun with this one. Digging up ideas to add to decent kits is my favorite part of any build and the Baltimore did not disappoint.

PolarBear
Joined: February 23, 2005
KitMaker: 820 posts
Model Shipwrights: 16 posts

Posted: Monday, September 08, 2008 - 10:07 PM UTC
Hi guys!
I hope to join your campaign. I'm an aircraft builder, and participate in quite a few campaigns over at Aeroscale. I've never built a ship before, but have become quite inspired lately - having seen quite a few excellent builds. I received the Kirov Soviet Cruiser in 1/700 from Trumpeter as a gift (with some PE from White Ensign). Would that be ok for this camaign?
Cheers! // PolarBear
Ps. Is there any good "beginners' page" out there for building ship models? I know my way around paints and glues, but there are some steps in ship building that seem quite different. What's the best way to mask of the deck when painting all the small odds and ends that sticks out, btw... (You might detect that I do not know the exact vocabulary for details on the ships! All help is welcome! )
I hope to join your campaign. I'm an aircraft builder, and participate in quite a few campaigns over at Aeroscale. I've never built a ship before, but have become quite inspired lately - having seen quite a few excellent builds. I received the Kirov Soviet Cruiser in 1/700 from Trumpeter as a gift (with some PE from White Ensign). Would that be ok for this camaign?
Cheers! // PolarBear
Ps. Is there any good "beginners' page" out there for building ship models? I know my way around paints and glues, but there are some steps in ship building that seem quite different. What's the best way to mask of the deck when painting all the small odds and ends that sticks out, btw... (You might detect that I do not know the exact vocabulary for details on the ships! All help is welcome!
) 

Gunny
Joined: July 13, 2004
KitMaker: 6,705 posts
Model Shipwrights: 4,704 posts
Posted: Monday, September 08, 2008 - 10:45 PM UTC
Quoted Text
Hi guys!
I hope to join your campaign. I'm an aircraft builder, and participate in quite a few campaigns over at Aeroscale. I've never built a ship before, but have become quite inspired lately - having seen quite a few excellent builds. I received the Kirov Soviet Cruiser in 1/700 from Trumpeter as a gift (with some PE from White Ensign). Would that be ok for this camaign?
Cheers! // PolarBear
Ah yes, and another shipwright is born...

Ahoy, Bjorn!
I would have to say that the Kirov most definitely would fit into the scope of age for this campaign (according to the Gregorian calendar!
), and should be a good subject to break the ice into ship-building...and judging from your gallery photo's, your modeling skills are quite good (nice batch of wings, there, mate!), so building a quality ship model should be a great experience for you, and who knows, this first may lead to another, and another, and another.... Quoted Text
Ps. Is there any good "beginners' page" out there for building ship models? I know my way around paints and glues, but there are some steps in ship building that seem quite different. What's the best way to mask of the deck when painting all the small odds and ends that sticks out, btw... (You might detect that I do not know the exact vocabulary for details on the ships! All help is welcome!
Shipbuilding is much like any other genre, my friend, same techniques, different fiddly bits! One of the best books on the market for basic ship building is by Mike Ashey, and just your luck, Mike has taken a leap into the future and is now providing all of his writings FREE on his new website, which can be accessed here!
Check out the entire site, mate, it's a FANTASTIC modelers recource for all! And, welcome to the fine world of shipbuilding!
Cheers,
~Gunny

Clanky44

Joined: September 15, 2005
KitMaker: 1,901 posts
Model Shipwrights: 934 posts

Posted: Saturday, September 13, 2008 - 12:16 PM UTC
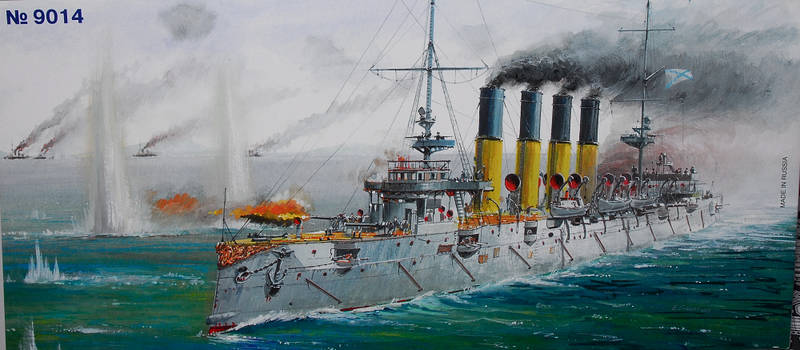
I'm finally getting started with my Cruiser. Just to backtrack a bit, I'm building the Zvezda Varyag. I've no reference on this ship and will build her with the box art as colour reference. I'm using White Ensign Models PE set, which looks great on the fret.

The instructions are clear and concise. My first task will be to mate the hull and the deck and then to water line it using the dremel tool. Joining the hull halves and the 3 deck sections shows the quality of this kit. I've built plenty of Zvezda armour kits, and this by far is the finest quality Zvezda kit I've come across. A bit of putty and/or CA glue will be needed to fill in the few gaps that are present.


The instructions are clear and concise. My first task will be to mate the hull and the deck and then to water line it using the dremel tool. Joining the hull halves and the 3 deck sections shows the quality of this kit. I've built plenty of Zvezda armour kits, and this by far is the finest quality Zvezda kit I've come across. A bit of putty and/or CA glue will be needed to fill in the few gaps that are present.
Clanky44
Joined: September 15, 2005
KitMaker: 1,901 posts
Model Shipwrights: 934 posts
Posted: Saturday, September 13, 2008 - 03:20 PM UTC
The waterline cut is made 3 to 5mm below the waterline as when she's ready to be placed in water effects, it will sit lower.
Using the existing waterline mark on the hull, I first make light marks on the hull with the dremel, and then make successive passes, bypassing the inner hull supports.

Gotten to this stage, it's a simple task to carve out the hull supports with the dremel. I strongly urge anyone using a dremel tool to wear eye protection. Here's a few shots of the completed cut.


Using the existing waterline mark on the hull, I first make light marks on the hull with the dremel, and then make successive passes, bypassing the inner hull supports.
Gotten to this stage, it's a simple task to carve out the hull supports with the dremel. I strongly urge anyone using a dremel tool to wear eye protection. Here's a few shots of the completed cut.
Clanky44
Joined: September 15, 2005
KitMaker: 1,901 posts
Model Shipwrights: 934 posts
Posted: Saturday, September 13, 2008 - 03:34 PM UTC
Looking at the photo-etch details on the funnels, and the plastic parts they will replace, it will be very open looking straight down the funnels. Does anyone have any detail, reference on the inner workings of the funnels? Something that I might use to scratch build the details with.
Frank
Frank
Clanky44
Joined: September 15, 2005
KitMaker: 1,901 posts
Model Shipwrights: 934 posts
Posted: Sunday, September 14, 2008 - 03:37 AM UTC
Starting with the photo-etch, and the replacement of double doors at the deck level. The top part is loosely placed to allow the painting of the deck.


Karybdis
Joined: December 27, 2006
KitMaker: 846 posts
Model Shipwrights: 740 posts

Posted: Sunday, September 14, 2008 - 03:57 AM UTC
Hey Frank, is it too late to put Vector Cut's wood deck on that bad boy? I'm really curious to know what their product is like. C'mon, take one for the team! 
http://modelshipwrights.kitmaker.net/news/2917
I'm really curious to know what their product is like. C'mon, take one for the team! http://modelshipwrights.kitmaker.net/news/2917

Clanky44
Joined: September 15, 2005
KitMaker: 1,901 posts
Model Shipwrights: 934 posts
Posted: Sunday, September 14, 2008 - 04:07 AM UTC
Wow, that does look good!!
Unfortunately I'm building this one with stock already in hand... It shows how out of touch I am to recent releases that I completely missed this one, it would of been purchased had I known.
Frank
Unfortunately I'm building this one with stock already in hand... It shows how out of touch I am to recent releases that I completely missed this one, it would of been purchased had I known.
Frank
treadhead1952
Joined: June 12, 2008
KitMaker: 552 posts
Model Shipwrights: 493 posts
Posted: Monday, September 15, 2008 - 10:53 AM UTC
Hi Frank,
With the waterlining of the hull and opening up those double doors it looks like you have a pretty excellent start on the Varyag. Can't wait to watch as you proceed with this one.
With the waterlining of the hull and opening up those double doors it looks like you have a pretty excellent start on the Varyag. Can't wait to watch as you proceed with this one.
PolarBear
Joined: February 23, 2005
KitMaker: 820 posts
Model Shipwrights: 16 posts
Posted: Tuesday, September 16, 2008 - 02:33 AM UTC
Hi all,
Thanks for the hearty welcome, Gunny!
It's nice to see that you also build ships, Frank! I notice that you've decided to start at a completely different end of the 20th century than me! That Varyag ship looks beautiful, and I look forward to seeing what you can accomplish with that kit!
Personally, I've just enlisted to this campaign and started working on my very first ship!!! I will probably ask a lot of questions during this build. Ship modelling already strikes me as quite different than aircraft dito. One key factor seems to be "planning ahead". I'm not certain which will be the best sequence to do things. All the detail and all the PE... More on that later!
My subject is the USSR Kirov battle cruiser. I have the Trumpeter kit in 1/700 (it's quite big, albeit the small scale!), and the WEM PE.

I'm planning to do a diorama of the Kirov in Baltic waters in the mid-80's, possibly being over-flown and photographed by a couple of Swedish maritime reconnaissance SAAB SH37 Viggens.

I know, I just love building Swedish aircraft! But I haven't figured out how to do the camo in 1/700 yet!
When researching the subject I noticed how dissimilar different ships of a particular class were to one another (antennas, armament etc). Captions on the web often omit to mention which particular ship that is depicted. Adding the fact that the ships have changed configuration over time, it becomes quite difficult for a newbie to get everything 100% correct. I've decided that I'm not going to take historical accurracy too seriously, given that it is my first ship model, and concentrate on the building techniques instead. However, should you notice I am completely barking up the wrong mast, I would be pleased if you let me know!

Not the Kirov, but the Frunze...
I'm using WEM "colorcoats" paints (Baltic fleet grey and Russian Navy deck brown). I usually work with acrylics, and had totally forgotten about the looooong drying times of enamel paints. On the other hand, I believe that ship building should be a rather protracted process...
I'm not sure about the "correct" sequence for building. I decided to paint the primary deck sections separately before attaching them to the hull. I sprayed the deck with red, covered it with highly diluted Maskol (allowing for winches and bollards and cleats and 'what have you'* to stick up), and then adding the grey. The result was pretty good, albeit that a lot of touch-ups had to be made with a small brush.

Close-up of the fo'c'sle deck. Too me, this area is in dire need of some railings and a nice wash (especially in order to highlight the hatches for the cruise missile and SAM launchers). Maybe a little dry brushing as well, in order to liven things up a litte? Perhaps you ship builders have some secret methods that you like to share?
I was surprised to see the rather big seam that appeared between the deck sections! All over sudden, I regretted having painted the deck sections first. The initial painting would be destroyed...

I used putty and nail polish remover to fill it. A couple of layers of paint later, the result was ok.

This is where I'm at right now...
So, what's next?!? Should I go for the outer railing already, or should build and attach the bridges and funnels first?
All and any input is most welcome!
Cheers! // PolarBear
* I'm not very familiar with nautical terms (yet)!
Thanks for the hearty welcome, Gunny!
It's nice to see that you also build ships, Frank! I notice that you've decided to start at a completely different end of the 20th century than me! That Varyag ship looks beautiful, and I look forward to seeing what you can accomplish with that kit!
Personally, I've just enlisted to this campaign and started working on my very first ship!!! I will probably ask a lot of questions during this build. Ship modelling already strikes me as quite different than aircraft dito. One key factor seems to be "planning ahead". I'm not certain which will be the best sequence to do things. All the detail and all the PE... More on that later!
My subject is the USSR Kirov battle cruiser. I have the Trumpeter kit in 1/700 (it's quite big, albeit the small scale!), and the WEM PE.
I'm planning to do a diorama of the Kirov in Baltic waters in the mid-80's, possibly being over-flown and photographed by a couple of Swedish maritime reconnaissance SAAB SH37 Viggens.
I know, I just love building Swedish aircraft! But I haven't figured out how to do the camo in 1/700 yet!
When researching the subject I noticed how dissimilar different ships of a particular class were to one another (antennas, armament etc). Captions on the web often omit to mention which particular ship that is depicted. Adding the fact that the ships have changed configuration over time, it becomes quite difficult for a newbie to get everything 100% correct. I've decided that I'm not going to take historical accurracy too seriously, given that it is my first ship model, and concentrate on the building techniques instead. However, should you notice I am completely barking up the wrong mast, I would be pleased if you let me know!
Not the Kirov, but the Frunze...
I'm using WEM "colorcoats" paints (Baltic fleet grey and Russian Navy deck brown). I usually work with acrylics, and had totally forgotten about the looooong drying times of enamel paints. On the other hand, I believe that ship building should be a rather protracted process...
I'm not sure about the "correct" sequence for building. I decided to paint the primary deck sections separately before attaching them to the hull. I sprayed the deck with red, covered it with highly diluted Maskol (allowing for winches and bollards and cleats and 'what have you'* to stick up), and then adding the grey. The result was pretty good, albeit that a lot of touch-ups had to be made with a small brush.
Close-up of the fo'c'sle deck. Too me, this area is in dire need of some railings and a nice wash (especially in order to highlight the hatches for the cruise missile and SAM launchers). Maybe a little dry brushing as well, in order to liven things up a litte? Perhaps you ship builders have some secret methods that you like to share?
I was surprised to see the rather big seam that appeared between the deck sections! All over sudden, I regretted having painted the deck sections first. The initial painting would be destroyed...
I used putty and nail polish remover to fill it. A couple of layers of paint later, the result was ok.
This is where I'm at right now...
So, what's next?!? Should I go for the outer railing already, or should build and attach the bridges and funnels first?
All and any input is most welcome!
Cheers! // PolarBear
* I'm not very familiar with nautical terms (yet)!
Clanky44
Joined: September 15, 2005
KitMaker: 1,901 posts
Model Shipwrights: 934 posts
Posted: Tuesday, September 16, 2008 - 09:11 AM UTC
Hi Bjorn,
Great start with your Kirov. Being a ship newbie myself, I tend to fall back to methods that I'm comfortable with and that have been successful in my Aircraft and Armour models. You will need all the skills that you've used in building aircraft (and then some) as you will find that building ships can be much more challenging. With aircraft, there's a certain methodology in building,... cockpit followed by fuselage/wing root fit, and then once the aircraft is almost completely assembled and masked, paint and decal. Ships are completely different, they do not have simple preset steps, every ship is different and must be studied prior to starting. With the Kirov, I would try and work in sub-assemblies, build up the funnels and the bridge attaching fragile photo-etch and painting them and then at the end, unifying the sub-assemblies, followed by the external railings.
I'm sure other, more experienced ship modellers will offer you better (and simpler) advice, but the best way to learn is to build and to learn from your builds.
Looking forward to your Kirov build,
Frank
 |

WEB HOSTING BY


Copyright ©2021 Model Shipwrights and Kitmaker Network, a subsidiary of Silver Star Enterprises
All Rights Reserved. Please read our Conditions of Use and Privacy Policy.
All Rights Reserved. Please read our Conditions of Use and Privacy Policy.