"Big Guns" Campaign Thread
England - South East, United Kingdom
Joined: November 23, 2007
KitMaker: 426 posts
Model Shipwrights: 424 posts
Posted: Friday, May 21, 2010 - 02:17 AM UTC
Cheers, guys, the scale is 700 - see my review of the kit on this site.
Also, I had never seen this before or knew of it - something new every day?
Peter F

Lisboa, Portugal
Joined: February 28, 2002
KitMaker: 5,182 posts
Model Shipwrights: 4,070 posts
Posted: Friday, May 21, 2010 - 02:55 AM UTC
Hi Peter!!!
The Fort Drum turned out very very good!
I know that this model makes a big fuss around it - and I know what I am talking about:

(guilty of charge!!!)
BZ Peter!!
Congratulations on another jewel in your collection
Rui
EDIT: Peter, there are no color guide in the kit instructions... did you follow the photos on the book? (waiting to arrive)
Ship Modelers of the World Unite!
England - South East, United Kingdom
Joined: March 01, 2010
KitMaker: 7,078 posts
Model Shipwrights: 6,649 posts
Posted: Sunday, May 23, 2010 - 11:03 PM UTC
Excellent work on Fort Drum Peter, the water & concrete look very real.
Hope you had a good day at Lancing, Hendon was a good show, but a bit light on ships, but did meet some MSW shipmates.
because of shows, very little progress on HMS Roberts, just the boot topping, touched up the camoflage & painted in the AA / director tubs


Si
England - South East, United Kingdom
Joined: November 23, 2007
KitMaker: 426 posts
Model Shipwrights: 424 posts
Posted: Monday, May 24, 2010 - 12:47 AM UTC
Quoted Text
Hi Peter!!!
The Fort Drum turned out very very good!
I know that this model makes a big fuss around it - and I know what I am talking about:
(guilty of charge!!!)
BZ Peter!!
Congratulations on another jewel in your collection
Rui
EDIT: Peter, there are no color guide in the kit instructions... did you follow the photos on the book? (waiting to arrive)
Thank you very much, guys, and to Mark Smith (Gunny) for cropping the pictures for me which makes them look even better than the original presentation.
The concrete is the WEM paint I had shown in a previous post, however I go over it, and over it again using MIG powders, as a powder, and as a wash. MIG also came out with some liquid stains, and I have used their "spilled oil" colour to "grime up" the "used" areas. This is particularly used on the bollards abaft.
The guns, and cage are WEM tyre black however Rob K recommended a dark US Navy blue which I guess is correct although the WEM colour has blue in it. Again I used the MIG powders to buff down the intenseness of the black until I thought it looked right.
Also, I am continuing with the build adding on buildings, and extra detail which wasn't in the box - anyone interested, I'll give you the details.
Peter F

Texas, United States
Joined: September 15, 2002
KitMaker: 8,985 posts
Model Shipwrights: 3,509 posts
Posted: Thursday, May 27, 2010 - 08:09 AM UTC
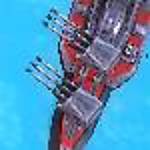
Well !!!! A week ahead of projection. i have completed my Trumpeter 350 scale Graf Spee for the Big Guns campaign. NOw I will try to post. I went with the intial paint scheme because i did not want topaint over my wooden decks. They are just to gorgeous.

" BORDER="0">

" BORDER="0">

" BORDER="0">
Those who don't learn from history are doomed to repeat it
VMI "76
Order of the Red Nose Plug
Blue Volute Bumper Spring Award
Illinois, United States
Joined: April 25, 2008
KitMaker: 338 posts
Model Shipwrights: 160 posts
Posted: Thursday, May 27, 2010 - 10:51 AM UTC
Looks very nice, well done
England - South East, United Kingdom
Joined: March 01, 2010
KitMaker: 7,078 posts
Model Shipwrights: 6,649 posts
Posted: Monday, May 31, 2010 - 11:57 PM UTC
Nice work on the Graf Spee Steve, good clean job. I have the same kit on the go except doing mine waterline, camo & weathered, sort of just prior the battle.
England - South East, United Kingdom
Joined: March 01, 2010
KitMaker: 7,078 posts
Model Shipwrights: 6,649 posts
Posted: Tuesday, June 01, 2010 - 12:10 AM UTC
More Progress on HMS Roberts, have decided to push the envelope, well for me anyway, on the detailing. cleaned off the cast detail on the paravanes & added the etch. (left to right cast paravane as supplied, cleaned off, part built & finished)

Did loose one of the "wing supports" along the way (Port side fwd of the breakwater) The single 20mm are from Master, with turned barrels. I am struggling a bit with folding the carrage for the barrel, but I hope I will have cracked it by the time I get to the eighth one


and finally one quad pom pom assembled, again with master barrels & awaiting painting.

getting there slowly but surely.
Si
Illinois, United States
Joined: April 25, 2008
KitMaker: 338 posts
Model Shipwrights: 160 posts
Posted: Friday, June 04, 2010 - 05:07 PM UTC
Looking good, and you are getting there way faster than I am. Right now I am just hoping to start on my own campaign

.
Crazy how fast stuff piles up.

#372
United Kingdom
Joined: March 10, 2010
KitMaker: 2,568 posts
Model Shipwrights: 220 posts
Posted: Wednesday, June 16, 2010 - 09:43 AM UTC
With one campaign now finished and under my belt I can get to do some work on the Arizona.
I will be building it OOB for a couple of reasons. Firstly, its the first ship I will have built for a few years so I need a bit of practice (the last and only was the airfix HMS Ajax that I cocked up) and I'm a little out of the loop as far as aftermarket accesories go. I'm not even sure if a PE or resin set has been released for it yet. Also, I hope it will be of some use to anyone who wants to get this kit, sort of a review and build up. I'm sure many of you will spot things that need improving or replacing.
There are lot of very good builds here so far!
On the bench: 1/72 Mosquito, Lightning F.6, DH.2,
AMT Vulcan Shuttle Surak.
Cyber-Hobby 1:35 Sherman Firefly IC - still stalled.
England - South East, United Kingdom
Joined: March 01, 2010
KitMaker: 7,078 posts
Model Shipwrights: 6,649 posts
Posted: Saturday, July 10, 2010 - 07:25 AM UTC
Well after 5 weeks away from my workbench, Family commitments & stuff with my son's new school finally added a bit more to The Roberts,
The 1st quad pom pom has been painted and added along with the 2 fwd type 282 yaggi director antenna. I have also assnebled the main turret, just to get a feel for what the old girl is going to look like finished,

England - South East, United Kingdom
Joined: March 01, 2010
KitMaker: 7,078 posts
Model Shipwrights: 6,649 posts
Posted: Sunday, July 11, 2010 - 07:28 AM UTC
A bit more progress today, I have started the base. Not having any good photographs of either Roberts or Abercrombie under way, and what their wake patterns are like I have decided to wimp out and show her at anchor in a calm sea.
I have covered a base with kitchen foil & sprayed it dark blue,

Both 4 barrel pom poms & the searchlights have been installed, and the eight barreled pom pom built ready for istallation. Also I have assembled the starfish for thre foretop.


I know the foretop starfish needs cleaning up in places and that will be dealt with.
One comment on the pom pom assembly, the instructions would have you fit the ammo box deails first then the side frames. I followed that and then found the side frames didn't fit. This may have been me, but nest time I will add the side frames first.
Next job, fit the pom pom, make up & fit the rest of the yaggi aireals, the rest of the 20mm and life rafts. Then I have to work out how to make the windows for the foretop.
still lost to fo.
Si
#372
United Kingdom
Joined: March 10, 2010
KitMaker: 2,568 posts
Model Shipwrights: 220 posts
Posted: Sunday, July 11, 2010 - 10:21 AM UTC
Looking great! I like the base. I've messed about with some putty, filler, plaster, air-set clay trying to get a realistic sea with mixed results. Using foil never crossed my mind but looks like it works well. Would you reccomend crumpling up the foil first or adding crease while its glued down?
Anyway, Ive got the main turrets, masts and couple of other things finished on my Arizona. Hoping to add further updates and pics of those this week as well as make a start on the hull. Its going well but isn't without its problems. Only minor but irritating!
On the bench: 1/72 Mosquito, Lightning F.6, DH.2,
AMT Vulcan Shuttle Surak.
Cyber-Hobby 1:35 Sherman Firefly IC - still stalled.
England - South East, United Kingdom
Joined: March 01, 2010
KitMaker: 7,078 posts
Model Shipwrights: 6,649 posts
Posted: Sunday, July 11, 2010 - 09:19 PM UTC
Hi Stephen,
I crumple the foil before glueing it down, but don't try scrunching it up in a ball and unfolding it, I find that way it is almost certain you will tear the foil, just scrunch it between your finger tips.
Once I have secured the model to the base I will add several layers of blue/green/grey mixed up from Tamiya clear acryilics and brushed on. This gives the ship a feel of sitting in the water rather than on it, and makes the water look, well more "watery"
I will post more pics as I go along.
Si
#372
United Kingdom
Joined: March 10, 2010
KitMaker: 2,568 posts
Model Shipwrights: 220 posts
Posted: Monday, July 12, 2010 - 12:27 AM UTC
Cheers. I know those paints I usually use them to paint in formation lights on aircraft but they would be great for sea effects. I'm part way through a tamiya O-class destroyer that I'll give this a go with.
On the bench: 1/72 Mosquito, Lightning F.6, DH.2,
AMT Vulcan Shuttle Surak.
Cyber-Hobby 1:35 Sherman Firefly IC - still stalled.
#027
Louisiana, United States
Joined: April 13, 2005
KitMaker: 5,422 posts
Model Shipwrights: 5,079 posts
Posted: Saturday, July 17, 2010 - 09:37 AM UTC
"Hark, now hear the sailors cry
Smell the sea and feel the sky
Let your soul and spirit fly into the mystic
New Jersey, United States
Joined: January 19, 2005
KitMaker: 574 posts
Model Shipwrights: 530 posts
Posted: Saturday, July 17, 2010 - 10:13 AM UTC
Oooh - I like the look of that Kenny.
#027
Louisiana, United States
Joined: April 13, 2005
KitMaker: 5,422 posts
Model Shipwrights: 5,079 posts
Posted: Saturday, July 17, 2010 - 03:10 PM UTC
"Hark, now hear the sailors cry
Smell the sea and feel the sky
Let your soul and spirit fly into the mystic
England - South East, United Kingdom
Joined: March 01, 2010
KitMaker: 7,078 posts
Model Shipwrights: 6,649 posts
Posted: Sunday, July 18, 2010 - 07:33 AM UTC
Cool looking ship Kenny
Bit more progress on HMS Roberts
Main turret painted & added, 8bbl pom pom added, Bridge detailing started, I have added 4 sky lookouts a couple of pelori. The wires sprouting from thr bridgefront will be cut down, bent and the ends painted black to represent voice pipes. I have also added wome plastic strip to the sides og the bridge to represent whee the nav lights will go.


view¤t=014.jpg"
SI
Illinois, United States
Joined: April 25, 2008
KitMaker: 338 posts
Model Shipwrights: 160 posts
Posted: Sunday, July 18, 2010 - 02:48 PM UTC
Looking great gents.
My Washington still sits in her box

New Jersey, United States
Joined: October 18, 2007
KitMaker: 1,698 posts
Model Shipwrights: 1,514 posts
Posted: Friday, July 23, 2010 - 06:30 AM UTC
Weird, first time I posted my replies to this (and other) campaigns, they did not show up on the board
So, forgive me if you are reading this yet again!
Peter Great project as usual! Love the PE work, and the concrete weathering is fantastic. The water hues surrounding the fort is a fantastic detail. Top notch photography as usual! BZ mate!
Simon great work! Love the camo paint job. Great detailing, really adds to the build.
Stephen Look forward to your build; I have the Dragon 1:700 Premium edition of the Arizona. Not sure how the details compare since I have yet to open that box
.
Steve congrats on the finish!
Kenny- nice to see the next iteration of Gators Navy ! look forward to the rest.
David dont fret. Im hopelessly behind on my campaign build schedule, but hope to catch up in the summer months. My entry still sits on the shelf; I am still leaning towards Hasegawas 1:700 IJN Battleship Hyuga High Grade Full Hull Version, which means it comes with a PE fret, metal barrels and a wooden base.
Cheers all!
England - South East, United Kingdom
Joined: March 01, 2010
KitMaker: 7,078 posts
Model Shipwrights: 6,649 posts
Posted: Sunday, July 25, 2010 - 11:13 PM UTC
Some progress over the weekend on HMS Roberts. Having played with the Master etched & turned brass single 20mm and whilst having successfully built 2, and I admit they are by far the best looking single 20's in that scale I have built, they are bit beyond my skills level at the moment, so I have gone back to my old favourite L'Arsenal ones. I have also tidied up the voucepipes on the bridge & the finished off the Nav Lights.

two things didn't go quite as planned. In fitting the single 20's I knocked the starboard fwd 282 yaggi aerial off, and it has totally disappeared. fortunately I have a spare "285" which I will cut down to make a replacement. also started work on the opened out control top & got a bit carried away. went all the way round the starfish, instead of sqaring off the end. Again curable, but slightly anoying.

Si
England - South East, United Kingdom
Joined: March 01, 2010
KitMaker: 7,078 posts
Model Shipwrights: 6,649 posts
Posted: Sunday, August 08, 2010 - 07:07 AM UTC
Quite a bit of progress on HMS Roberts, after struggling on and off over the last couple of weeks with the window frames on the control top, I decided to use the kit supplied part. I just could not get them looking good enough. I will persevere with the project, but just not for this build.
Progressing with the Kit, one thing I found was the measurements given for the tripod legs were short, 43mm given in the instructions, I cut a peice of plastic rod to that length and it was too short.

I ended up using 51mm lengths

The top is now in place along with all of the Yaggi antenna (I fond the one that fell off on bench, unsual occourance, but it does happen).
Will post some pics of that when I have them off the camera,
Si
England - South East, United Kingdom
Joined: March 01, 2010
KitMaker: 7,078 posts
Model Shipwrights: 6,649 posts
Posted: Sunday, August 08, 2010 - 09:42 PM UTC
A couple more pics of where I am at. The control top has been added, as has the lower portion of the mainmast.


order of progress will be, finish adding horizontal braces to mainmast, lower ones are in place. paint mainmast, add 4" guns then affix to base.
The plan is to show the ship at anchor on a stop on her way to Alexandria late 41 early 42, so accomodation ladder down, a couple of boats in the water, and obviously tropical, as officers & crew will be depicted in tropical uniform. I have got a couple of Officers on the bridge keeping anchor watch, and will add the "Gangway watch as well plus some other figures round and about.
Si
England - South East, United Kingdom
Joined: March 01, 2010
KitMaker: 7,078 posts
Model Shipwrights: 6,649 posts
Posted: Sunday, August 15, 2010 - 11:52 PM UTC
Work on the Roberts has progressed.
Lower section of the mainmast has been completed & starfish added, as have the twin 4" mounts. The kit mounts arre quite good, but next time I would add some more detail.
The Cutter and one Whaler has been added sat on ther chocks. the other Whaler will be swung out. and the motor boat will in the water alongside the accomodation ladder. Having no clear photos of either Roberts or Abercrombie with the accomodation ladder rigged, I am not going to add any rigging, and just assume that was secured at main deck level and on the top of the bulge with nothing external. also have started adding railings, which all go on before securing to base.


Si