


Go to modelshipwrights.com for the current dynamic site!
Campaigns
Want to be part of a group build? This is where to start, plan, and meet about them.
Want to be part of a group build? This is where to start, plan, and meet about them.
Hosted by Jim Starkweather
CAMPAIGN Search and Rescue Campaign

beefy66

Joined: October 22, 2007
KitMaker: 971 posts
Model Shipwrights: 645 posts

Posted: Monday, May 02, 2011 - 02:58 AM UTC
Sal and Simon Wow what speed both of your builds looking great. Simon good idea using wire rod for the wake that,s another little tip for the note book

ltb073

Joined: March 08, 2010
KitMaker: 3,662 posts
Model Shipwrights: 45 posts

Posted: Monday, May 02, 2011 - 03:13 PM UTC
Hi guys thanks for the positive comments
@ Simon, you little dio is looking good
Here is my up date, coat of gloss has been added


The insignia on the top of the wing got attacked by gremlins and has been repaired with paint
Needs a few pieces of clear and then it will be a wrap should get to that tomorrow
@ Simon, you little dio is looking good
Here is my up date, coat of gloss has been added


The insignia on the top of the wing got attacked by gremlins and has been repaired with paint

Needs a few pieces of clear and then it will be a wrap should get to that tomorrow

beefy66
Joined: October 22, 2007
KitMaker: 971 posts
Model Shipwrights: 645 posts
Posted: Tuesday, May 03, 2011 - 09:18 AM UTC
Really striking looking plane you have got yourself there sal great stuff first to finnish 

Tailor

Joined: May 26, 2008
KitMaker: 1,168 posts
Model Shipwrights: 676 posts

Posted: Tuesday, May 03, 2011 - 07:47 PM UTC
That plane looks excellent! nice to see bright colours on that particluar type of aircraft! It really mkaes me want to break out my Catalina... but there's too much much other stuff to do.
.... very inspiring work though!
Cheers,
Guido
.... very inspiring work though!
Cheers,
Guido
ltb073
Joined: March 08, 2010
KitMaker: 3,662 posts
Model Shipwrights: 45 posts
Posted: Wednesday, May 04, 2011 - 10:33 AM UTC
Hey guys thanks for the positive feedback, I had fun with this campaign and learned some new things as well. This was only the 2nd wingy Thingy that I have done since getting back into the hobby last year. I may have to do some more like a Catalina but like Simon said to may other things going on right now 
beefy66
Joined: October 22, 2007
KitMaker: 971 posts
Model Shipwrights: 645 posts
Posted: Thursday, May 05, 2011 - 04:42 AM UTC
While out on a day trip to the local beauty spot beach Seahouses near Holy island I was having a look around the RNLI boat house and got some photos unfortunatly the bigger Mersey class was not out and it was a bit cramped inside but did get a good shot of the inshore ribbed boat being launched for a call-out


RedDuster

Joined: March 01, 2010
KitMaker: 7,078 posts
Model Shipwrights: 6,649 posts

Posted: Sunday, May 08, 2011 - 04:09 AM UTC
A bit more progress. The base has been sprayed, as the scene is intended to be in the English Channel / North Sea I have used Tamiya TS68 Field Grey as a base.
The life raft has been cleaned up, attached to the base and painted a mix of yellow and Khaki.
The boat is just places to set the scene, I am still searching through my decal stash to find something suitable

Si
The life raft has been cleaned up, attached to the base and painted a mix of yellow and Khaki.
The boat is just places to set the scene, I am still searching through my decal stash to find something suitable
Si
Dermo245

Joined: April 07, 2010
KitMaker: 42 posts
Model Shipwrights: 12 posts

Posted: Sunday, May 08, 2011 - 08:50 AM UTC
Sal That's a super build and impressive SB-17; must have been some sight to see one of them overhead if you were awaiting rescue
Simon Nice update and like the "wire for a wake" too....very effective.
Simon Nice update and like the "wire for a wake" too....very effective.
beefy66
Joined: October 22, 2007
KitMaker: 971 posts
Model Shipwrights: 645 posts
Posted: Sunday, May 08, 2011 - 11:12 PM UTC
Nice work on the base so far Simon. Here is my update have painted hull and some of the cabin deck masked off and hull on the inshore launch painted

Please remember to add some in-progess photos to the gallery aswell as just your finnished builds to show your build skills off to those who want to find out info later
Cheers Keith
Please remember to add some in-progess photos to the gallery aswell as just your finnished builds to show your build skills off to those who want to find out info later
Cheers Keith
ltb073
Joined: March 08, 2010
KitMaker: 3,662 posts
Model Shipwrights: 45 posts
Posted: Monday, May 09, 2011 - 01:54 AM UTC
Quoted Text
Please remember to add some in-progess photos to the gallery aswell as just your finnished builds to show your build skills off to those who want to find out info later
Cheers Keith
Keith, is that a requirement to post in progress photos in the gallery, I posted them in the tread and then posted a photo of my completed project in the gallery

If so I have to figure out how to get the in progress photos out of my Photobucket page
beefy66
Joined: October 22, 2007
KitMaker: 971 posts
Model Shipwrights: 645 posts
Posted: Monday, May 09, 2011 - 02:13 AM UTC
Sal it is NOT a requirment of the campaign but we do have the in-progress gallery with the Kitmaker network to use to store photos aswell. Just seems a shame not use it after it has been so kindly set up for us to use. It is up to you if you choose to use it or not it just means that other folk can acsess it at a later date if they want to look through our work.
On another note we have 22 signed up for this campain and only four building at the moment come on guys let,s see some other work going on here
Cheers Keith
On another note we have 22 signed up for this campain and only four building at the moment come on guys let,s see some other work going on here
Cheers Keith

SGTJKJ

#041

Joined: July 20, 2006
KitMaker: 10,069 posts
Model Shipwrights: 228 posts

Posted: Tuesday, May 10, 2011 - 01:52 AM UTC
Great build, Sal. It looks great in that colourful scheme. Maybe a few exhaust stains? The B-17s were notorious for staining the wings with exhaust.
Nice little diorama, Simon. Coming along nicely.
I am gettting ready to get started on my old trusty Matchbox 1/72 Walrus. More to follow...
Nice little diorama, Simon. Coming along nicely.
I am gettting ready to get started on my old trusty Matchbox 1/72 Walrus. More to follow...


vonHengest
Joined: June 29, 2010
KitMaker: 5,854 posts
Model Shipwrights: 350 posts
Posted: Tuesday, May 10, 2011 - 03:10 PM UTC
Sal: Nice work bud! You need to build aircraft more often, just sayin 
Simon: Watching with interest. How well would your water technique work for 1/700?
Keith: I'm currently playing catch up with the other campaigns I'm involved in. Sadly will have to drop a few because of life circumstances so that I can focus on campaigns that I can actually finish such as this one. Will let you know as soon as I get started on my Catalina
beefy66
Joined: October 22, 2007
KitMaker: 971 posts
Model Shipwrights: 645 posts
Posted: Tuesday, May 10, 2011 - 09:25 PM UTC
Jesper nice to here from you looking forward to your build
Jeremy understand about the life things hope to here from you soon when you are sorted
Cheers Keith
Jeremy understand about the life things hope to here from you soon when you are sorted
Cheers Keith
RedDuster
Joined: March 01, 2010
KitMaker: 7,078 posts
Model Shipwrights: 6,649 posts
Posted: Tuesday, May 10, 2011 - 10:21 PM UTC
Hi Jeremy,
The Fairmile is 1/350th. I did cut my teeth on the tinfoil method of water in 1/700th, before I fell to the dark side. the only real difference in technique is finer wrinkles & the wake tends to more paint effect than structure,
Si
The Fairmile is 1/350th. I did cut my teeth on the tinfoil method of water in 1/700th, before I fell to the dark side. the only real difference in technique is finer wrinkles & the wake tends to more paint effect than structure,
Si
Removed by original poster on 05/17/11 - 09:31:33 (GMT).

studiocityslicker
Joined: May 26, 2008
KitMaker: 74 posts
Model Shipwrights: 9 posts

Posted: Monday, May 16, 2011 - 10:35 PM UTC
Gents,
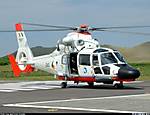
I've enlisted in the campaign with a 1/72 Fujimi KV-107 helicopter with markings for the 30th anniversary of Hamamatsu Air Rescue Squadron.
Here's some pics of what I've done: I airbrushed the interior last night and tonight I hand painted the seats and the control panels using Vallejo paints. They dry super fast so you can move along quickly.
I began putting parts onto the fuselage halves and put together the sponsons/fuel tanks, and the winch. Then I added some Eduard seatbelts from a Sea King Mk 41 set, did some more detail painting, and glued the interior parts together.
This campaign is great, it got me back into doing some modeling and I happy for that!
Michael Smith
hope the pics come out OK, #1 haven't uploaded pics here before so not sure how it works, #2 took the pics with my Blackberry, my camera was 3 flights up from me when I got done, too lazy to go get it!


[img][IMG]
I've enlisted in the campaign with a 1/72 Fujimi KV-107 helicopter with markings for the 30th anniversary of Hamamatsu Air Rescue Squadron.
Here's some pics of what I've done: I airbrushed the interior last night and tonight I hand painted the seats and the control panels using Vallejo paints. They dry super fast so you can move along quickly.
I began putting parts onto the fuselage halves and put together the sponsons/fuel tanks, and the winch. Then I added some Eduard seatbelts from a Sea King Mk 41 set, did some more detail painting, and glued the interior parts together.
This campaign is great, it got me back into doing some modeling and I happy for that!
Michael Smith
hope the pics come out OK, #1 haven't uploaded pics here before so not sure how it works, #2 took the pics with my Blackberry, my camera was 3 flights up from me when I got done, too lazy to go get it!
[img][IMG]

studiocityslicker
Joined: May 26, 2008
KitMaker: 74 posts
Model Shipwrights: 9 posts
Posted: Monday, May 16, 2011 - 10:39 PM UTC
2 more pics, think I've got the hang of posting images now 


ltb073
Joined: March 08, 2010
KitMaker: 3,662 posts
Model Shipwrights: 45 posts
Posted: Tuesday, May 17, 2011 - 02:17 AM UTC
Quoted Text
Great build, Sal. It looks great in that colourful scheme. Maybe a few exhaust stains? The B-17s were notorious for staining the wings with exhaust.
Thanks again guy the positive feed back is encouraging
@ Jasper you always have great suggestions after I have completed my built so I use them on the next build

@ Jeremy, I build mostly planes in my youth so its sorta like riding a bike, I'm looking into some more aircraft
@Mike, great looking cockpit and nice bright blue color, i like it
beefy66
Joined: October 22, 2007
KitMaker: 971 posts
Model Shipwrights: 645 posts
Posted: Tuesday, May 17, 2011 - 03:24 AM UTC
Michael Good to have you with us, Great detail on the cockpit nice work with the seatbelts
Cheers Keith
Cheers Keith
studiocityslicker
Joined: May 26, 2008
KitMaker: 74 posts
Model Shipwrights: 9 posts
Posted: Tuesday, May 17, 2011 - 02:23 PM UTC
Thanks Keith. This should be an "interesting" build , what with learning how to paint those bubble observation windows half green and half clear, plus masking them off...never done that before....if I make it past that point, it should be pure enjoyment, painting and decaling are my favorite things. Let's hope the Fujimi decals have held up over the years, they're still sealed and look good, but you never know till they hit the water.
Michael Lee
Michael Lee
studiocityslicker
Joined: May 26, 2008
KitMaker: 74 posts
Model Shipwrights: 9 posts
Posted: Tuesday, May 17, 2011 - 10:31 PM UTC
I found this picture from the model show that was held at the same time the Shizuoka Hobby Show was going on in Japan this year.
I thought it might be inspiring for anyone doing a rescue scene for this campaign. I think this has to be the best modeled water I've ever seen...even a dolphin jumping out of the sea.
I might try to feebly emulate this with a helicopter hovering above creating that circular spray pattern from the rotors....
RedDuster
Joined: March 01, 2010
KitMaker: 7,078 posts
Model Shipwrights: 6,649 posts
Posted: Sunday, May 22, 2011 - 11:17 PM UTC
A bit more progress. I found some decals, from the Hawk 1/350 RN/RCN escort carrier sheet. The roundel is about the right size, maybe a fraction small & I know the number should be yellow, but the white numbers on that sheet were about the right size and the right font.

The base has had the first layer of the wake airbushed. this is the first time I have tried that & I am quite pleased with the result.

I have also fitted the barrels to the two bow 20mm, and adjusted the angle of the port one to cover the raft.
next jobs painting the crew of the fairmile and the airman for the raft and more layers on the sea.
Si
The base has had the first layer of the wake airbushed. this is the first time I have tried that & I am quite pleased with the result.
I have also fitted the barrels to the two bow 20mm, and adjusted the angle of the port one to cover the raft.
next jobs painting the crew of the fairmile and the airman for the raft and more layers on the sea.
Si
studiocityslicker
Joined: May 26, 2008
KitMaker: 74 posts
Model Shipwrights: 9 posts
Posted: Monday, May 23, 2011 - 04:56 AM UTC
Looks good, never recreated water in my modeling, I'll be following your progress.
All I've added to mine since last post has been to dip all the clear parts in Future. More progress this week hopefully.
All I've added to mine since last post has been to dip all the clear parts in Future. More progress this week hopefully.
beefy66
Joined: October 22, 2007
KitMaker: 971 posts
Model Shipwrights: 645 posts
Posted: Monday, May 23, 2011 - 05:16 AM UTC
Michael nice photo cool water effect
Simon looking good have you thought of using clear yellow to go over the white decals or are they too small
Cheers Keith
Simon looking good have you thought of using clear yellow to go over the white decals or are they too small
Cheers Keith
 |

WEB HOSTING BY


Copyright ©2021 Model Shipwrights and Kitmaker Network, a subsidiary of Silver Star Enterprises
All Rights Reserved. Please read our Conditions of Use and Privacy Policy.
All Rights Reserved. Please read our Conditions of Use and Privacy Policy.