Ships by Class/Type: Battleships
Topics from the Dreadnaught era to modern day.
Hosted by Steve Joyce
Doug Hallets 1/350 Yamato build
Budgie
Visit this Community
Washington, United States
Joined: November 02, 2010
KitMaker: 163 posts
Model Shipwrights: 162 posts
Posted: Sunday, December 19, 2010 - 04:55 PM UTC
Hello folks, I'm going to take a stab at doing an ongoing blog for my Yamato build. I am not normally a rivet counter or AMS-type person, but this kit is going to be something of an exception and I thought it would be fun to document it. It will also serve as impetus to keep up progress, moody builder that I am. Never having done this before, I will start from the beginning with a few preliminaries. In addition to the kit itself, I will be using four different PE sets for the build.

The first and primary one will be the brand new Lionroar Super-detail set, sent to me via Guido Hopp as a gift in exchange for doing reviews both here and on MWS. Since I like the set quite a lot, hopefully Lionroar was pleased with the review and it resulted in some additional sales for them. The second set is the original Lionroar Yamato set, also sent to me by Guido in a package exchange, after he obtained it in China directly from Lionroar's Shanghai store, where it goes for the equivalent of $25 or so in Chinese currency.

Finally, I purchased both the Eduard and WEM sets myself. Both sets have additional pieces which will come in handy in the build. A few of the WEM pieces are also superior to both Lionroar equivalents, but it is not anywhere near as extensive as either of them. I also purchased some additional smaller PE and injection parts and will discuss those later during the build. All three of the "secondary" PE sets will also yield parts not originally intended for the purpose I'm putting them to, so I expect to use up more of them than you might think on first glance. OK, second entry will discuss a few reference materials and sources.

Pictures to come eventually...cheers, Doug.
Tailor
Visit this Community
Nordrhein-Westfalen, Germany
Joined: May 26, 2008
KitMaker: 1,168 posts
Model Shipwrights: 676 posts
Posted: Sunday, December 19, 2010 - 11:25 PM UTC
Hi, Doug!
Welcome to the wonderful realm of blogging. It is about as adictive as buying models. I know you have been quite successful in not buildig an uncontrollable stash; let's see if you can withstand the adictive properties blogging!
Good luck in your undertaking!
I'll be watching you!
Cheers,
Guido
Angeleyes
Visit this Community
Drama, Greece / Ελλάδα
Joined: December 14, 2008
KitMaker: 154 posts
Model Shipwrights: 149 posts
Posted: Sunday, December 19, 2010 - 11:51 PM UTC
Hi Doug.It will be interesting to see your build unfolding as i have started a similar build as well (Yamato 1/350). And having build already the smaller 1/700 i , like you, wanted to add some extra detailing which is achievable in larger scales only.
So i went out and bought as many extras i could find since the Tamiya kit can use a lot of that.
Now i just wanted to bring to your attention a few extra resin bits i found , suddly only available in the Japanese market .This set is resin specifically cast for the Tamiya Yamato and includes some very handy replacements, namely the large vents at the front breakwater , the bow crest along with some other smaller details , often overlooked by major manufacturers.So in the end if you can somehow grab your hands in one of these sets you Yamato will be even more accurate .


Budgie
Visit this Community
Washington, United States
Joined: November 02, 2010
KitMaker: 163 posts
Model Shipwrights: 162 posts
Posted: Monday, December 20, 2010 - 04:32 AM UTC
Thanks for the support gang. Kostas, those resin pieces are an absolute must-have - if you have any sources for them, please let me know. I will search myself. If you have the packaging available from them, please shoot my a pic of it. My wife speaks and reads Japanese and she should be able to track down a mail order source for me if the main ones (HLJ, etc.) don't carry it. I was anticipating having to scratch build all those parts and actually had a few items from my parts box picked out to use as a starting point. I am actually already started on Yamato, hull is water-lined, new deck built and some parts sanded down. Before I get to those processes, I wanted to do a little more backdating on preliminaries, so please bear with me. I will put something more up later today, after morning chores. Cheers, Doug
Angeleyes
Visit this Community
Drama, Greece / Ελλάδα
Joined: December 14, 2008
KitMaker: 154 posts
Model Shipwrights: 149 posts
Posted: Monday, December 20, 2010 - 04:57 AM UTC
I got them via a friend .They are selling in Yahoo Japan (the equivalent of Ebay for rest of the world).They are no name as far as i could tell as they come in small white boxes with no brand name etc.So your best bet is finding someone with access to Yahoo (need an account) and becoming very good friends with him

Or you could try subscribing to one of the services available for people who dont or cant have access to Yahoo Japan auctions ,and basically they will buy and sell on their behalf for a small added cost.
Budgie
Visit this Community
Washington, United States
Joined: November 02, 2010
KitMaker: 163 posts
Model Shipwrights: 162 posts
Posted: Monday, December 20, 2010 - 05:14 AM UTC
Perhaps I can work something out with my aunt-in-law who lives in Osaka. She did accompany us to the Yamato movie display at the Toei studios theme park in Kyoto.
Budgie
Visit this Community
Washington, United States
Joined: November 02, 2010
KitMaker: 163 posts
Model Shipwrights: 162 posts
Posted: Monday, December 20, 2010 - 11:32 AM UTC
OK folks, here is Part 2, once again taking care of a few preliminaries. This is a collection of web sites with ongoing build articles by other modelers, completed kits, and reference photos of Yamato and Musashi. It is by no means exhaustive, but there may be a few here you are not familiar with. Early on, I came across the trick of translating words into Japanese or Chinese, then running the translations through Google search, which allows you to come up with sites you would not normally find on a search in English. Anyway, in no particular order:

http://sea.ap.teacup.com/applet/shin1966musashi/archive?b=0

This is an outstanding build of the 1/200 Nichimo kit by ":Shin1996" as Musashi, in which almost every part is done over.

http://astralscooter.com/mygallery/photo.plx?dir=Modelling/In%20the%20Works/Yamato

A build by a modeler from Norway. Although his progress is slow, there are a few items of interest here.

http://ultimatebattleshipyamatosite.tripod.com/the_ultimate_battles/

This is "Bucklefoot Al's" collection of every known photo of Yamato and Musashi, for which I've contributed a few myself.

http://www1.bbiq.jp/seasky/Friend31.htm

Another nice build from Japan

http://www.geocities.jp/dancyou3/yamato0.html

Outstanding build from a Japanese modeler including the best weathered decks I've seen to date.

http://nabeck.web.fc2.com/

One of the first build articles I came across using the Lionroar set. A little too clean for me, but nice ideas to be gleaned.

http://picasaweb.google.com/tounnkai/Yamato1945WithBlackDeck#

Very good 1/700 build of a "black deck" Yamato.

http://blog.roodo.com/santos/archives/76400.html

Very good kit from a Taiwanese modeler, heavily influenced by the Otoko Tachi movie. The use of bed rolls as splinter shields is a nice touch.

http://www.geocities.jp/yamato_model_guide/index.html

This is a collection of links to modelers working on the Woody Joe 1/250 kit, which, like a paper kit, requires you to build the basic hull frame from the keel up.

http://news.webshots.com/album/550418549pWgDkE

A link to a 100+ high quality set of photos from the Yamato museum in Kure. You can spend hours looking over these pics and still find stuff to learn from them.

http://www.geocities.jp/nakano_syaji/

Outstanding kit done entirely in 1/144 scale using nothing but brass.

http://blog.daum.net/_blog/BlogTypeView.do?blogid=04osk&articleno=9165664#ajax_history_home

Nicely done kit by a Korean modeler using the WEM set, although no attempt at corrections.

http://upload.wikimedia.org/wikipedia/commons/0/08/Yamato1945.png

Good reference drawings that appear on the Wikipedia entry for Yamato. There is some controversy over the placement of the foremost 25 mm mount, but most everything else is per most recent thinking.

http://forum.modelship.com.tw/phpBB2/

Under the Ships work progress forum, go to the Japan (ongoing) entry to see a well done kit closely paralleling what I am going to try to attempt.

http://www.modelshipgallery.com/gallery/bb/ijn/yamato-350-lc/lc-index.html

This is Louis Carabot's excellent build. I would disagree on the deck color, but am following Louis's lead re: redoing the deck pieces.

http://www.modelshipgallery.com/gallery/bb/ijn/yamato-350-kk/kk-index.html

Kim Knight's nice build with lots and lots of little IJN sailors.

http://www.modelshipgallery.com/gallery/bb/ijn/yamato-350-pvb/pvb-index.html

Peter Van Buren's build. Peter threw a few non-historical additions onto the kit but it certainly is busy and impressive.

http://www.modelfleetcn.com/file/images/shipmodel/3b/yamato2/yamato2_3b.html

An outstanding 1/700 build from a Chinese modeler with black decks.

http://modelshipwrights.kitmaker.net//features/3578

Kostas' own outstanding 1/700 build.

http://www.modelwarships.com/features/current/yamato-35-dh/index.html

This is the collection of photos I took of the Otoko Tachi movie model (the one they used to superimpose digital sailors and movement upon) while visiting Kyoto Japan. My Aunt in law and daughter make a cameo in the pic of the gift store.

http://www.kartonbau.de/wbb2/thread.php?threadid=9941

An unbelievably excellent build by a German card modeler of Musashi in 1/200, using every medium except plastic. Much portrayed here that can be found no where else (e.g., PA speakers).

OK, that's it for this section. Next part will deal with a few published resources that I recommend. Cheers, Doug
Removed by original poster on 12/21/10 - 03:16:39 (GMT).
Removed by original poster on 12/21/10 - 03:22:00 (GMT).
Removed by original poster on 12/21/10 - 03:29:18 (GMT).
Budgie
Visit this Community
Washington, United States
Joined: November 02, 2010
KitMaker: 163 posts
Model Shipwrights: 162 posts
Posted: Monday, December 20, 2010 - 03:52 PM UTC
OK, after several attempts to figure out how to post pictures (note deletes), I'm ready to move on to Part 3, which is a brief discussion of publications I've found useful.


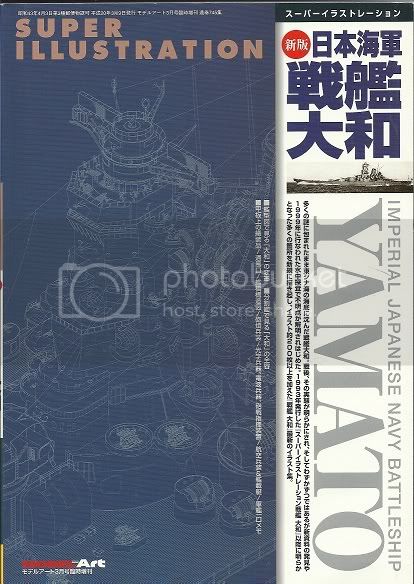
The venerable Skulski book is still highly useful, although locations and shapes of open mount AA guns have since been updated in other sources.


An outstanding reference book, updated regularly. Drawings are shown from an angle for better 3D perspective.


A little more dated than Skulski, but still useful, especially for a view on hull plating arrangements. Nice picture gallery too.


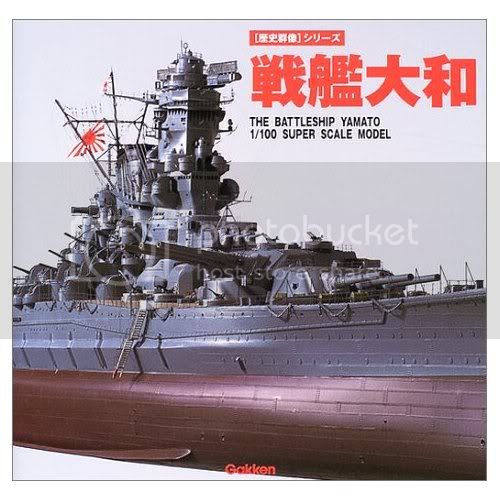
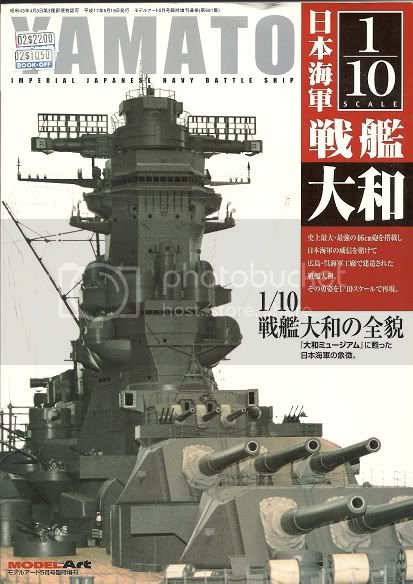
This is basically a review of the Kure museum 1/10 model, but if you don't have your computer right next to your work station, its a handy book to have around.


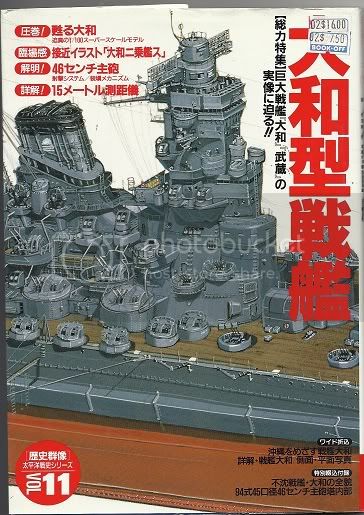
An older book that has a few interesting drawings.


Although the Otokotachi no Yamato movie took a few artistic liberties with the ship layout, its still useful in understanding how various battle stations interrelated and operated.

There are numerous other picture books available as well as a number of other serious tomes. Try visiting your local Japanese language book store (most large Western cities have one) and you should find them available. OK, on to the kit itself next.
goldenpony
Visit this Community
Zimbabwe
Joined: July 03, 2007
KitMaker: 3,529 posts
Model Shipwrights: 2,419 posts
Posted: Tuesday, December 21, 2010 - 03:05 AM UTC
It seems as though you have tons of good sources. Looking forward to this project.

Budgie
Visit this Community
Washington, United States
Joined: November 02, 2010
KitMaker: 163 posts
Model Shipwrights: 162 posts
Posted: Tuesday, December 21, 2010 - 03:48 AM UTC
Thanks Jim. OK, moving on from sources, here's a quick review of the original parts. First, the deck pieces:


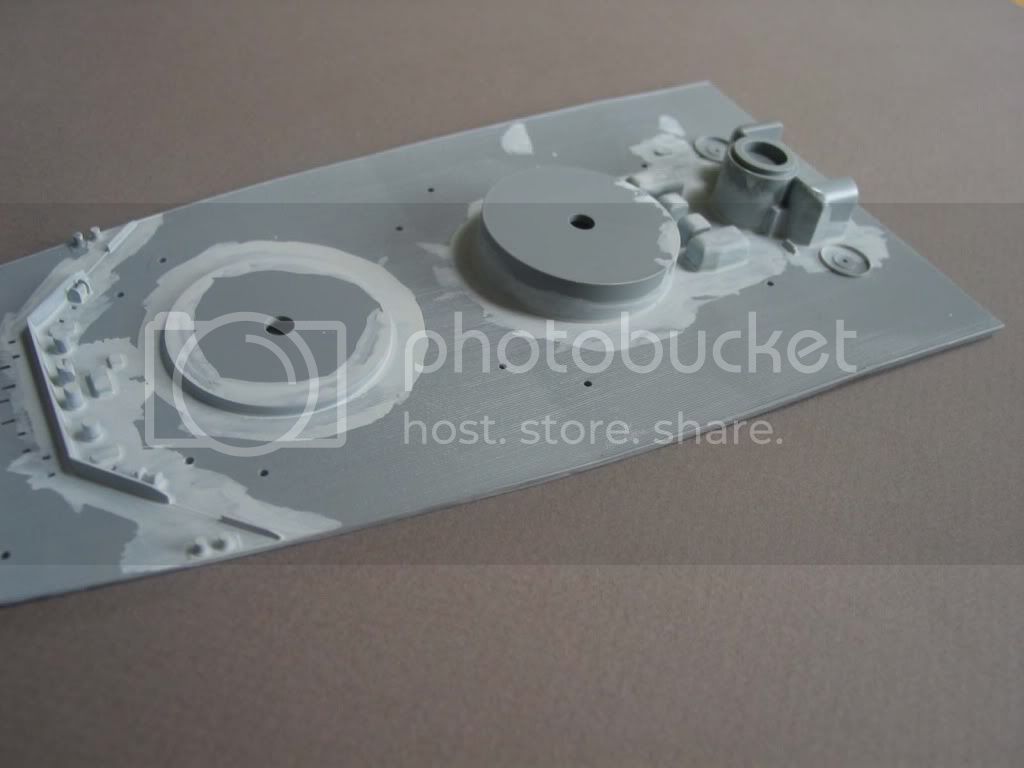
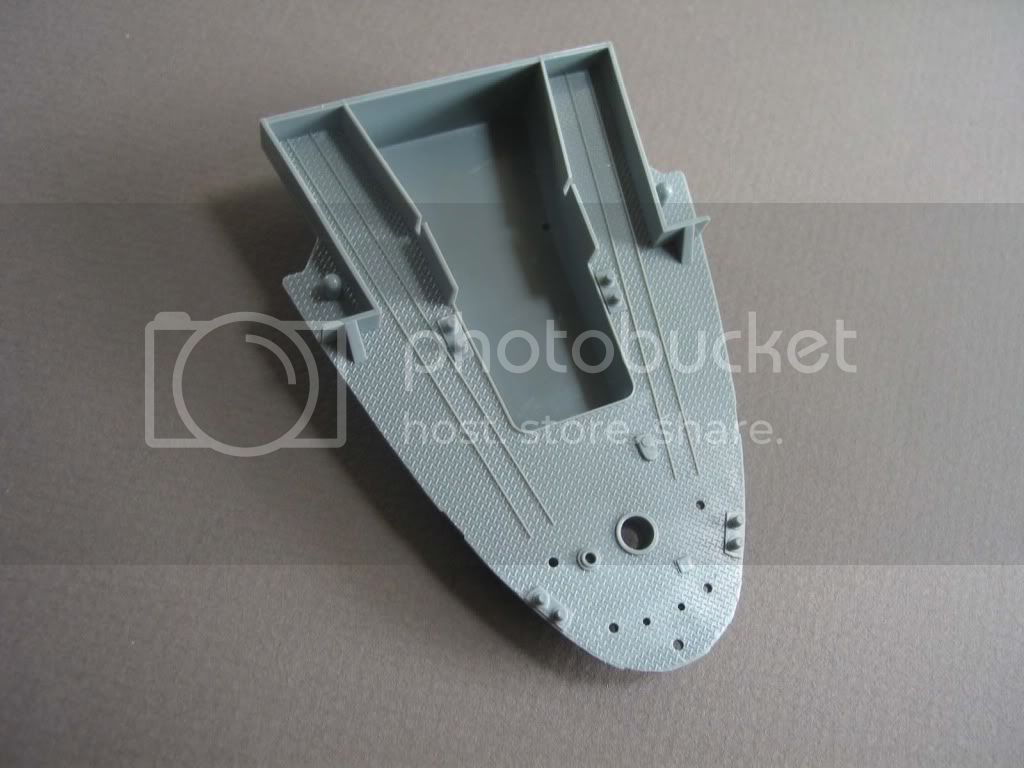
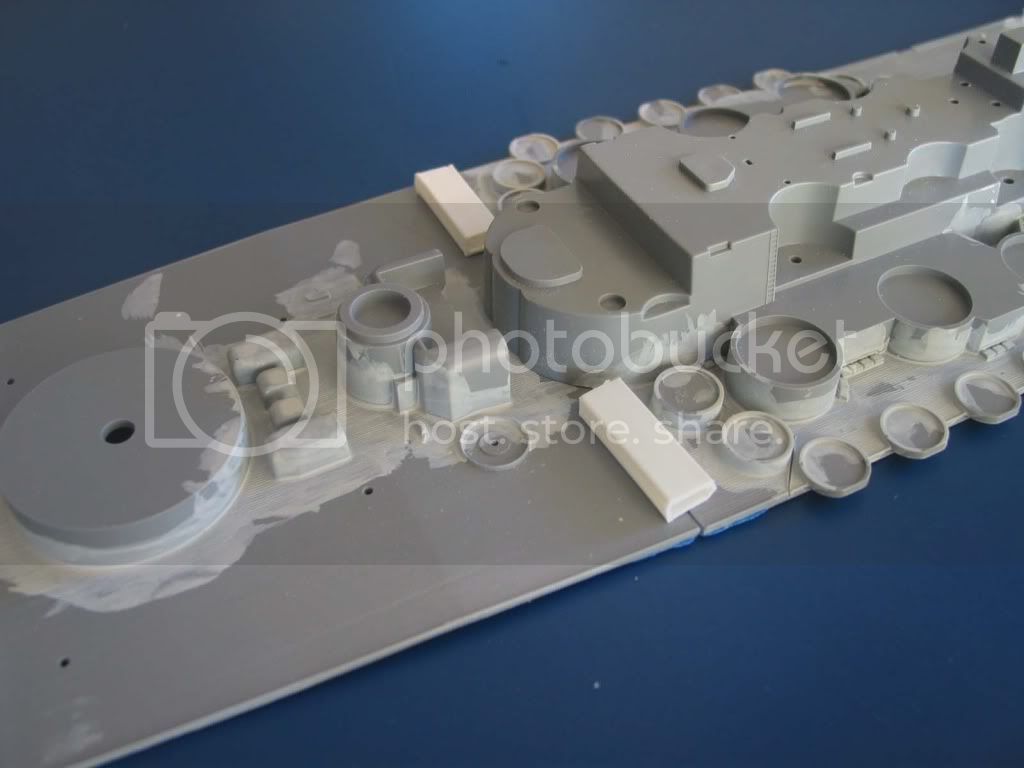
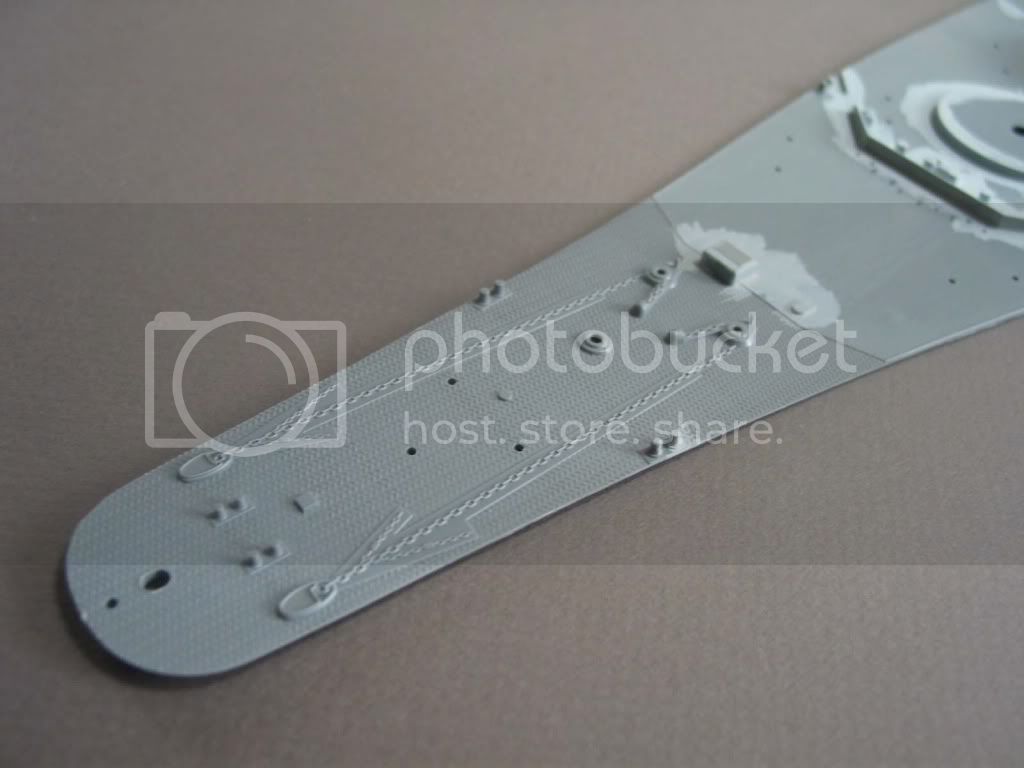
Tamiya's bow has a nice non-skid pattern molded onto it. Unfortunately, the molded-on anchor chain will need to be removed, and the adjacent non-skid pattern on the deck requires care to avoid being damaged. The small platform to the right, most famous as the place where the Yamato's captain addressed the crew prior to the Okinawa sortie, is actually a series of small vents, all of which are included in the Lionroar set. The hole in the bow is for a communications cable that would come up from a buoy for ship-to-shore phone lines. The base for the capstan actually stood on a trapezoidal metal plate, so this one needs to be removed as part of the build process. Like the aircraft handling deck, the bow consisted of a series of rectangular welded metal plates. I am not decided yet whether to portray this, as some modelers have done.


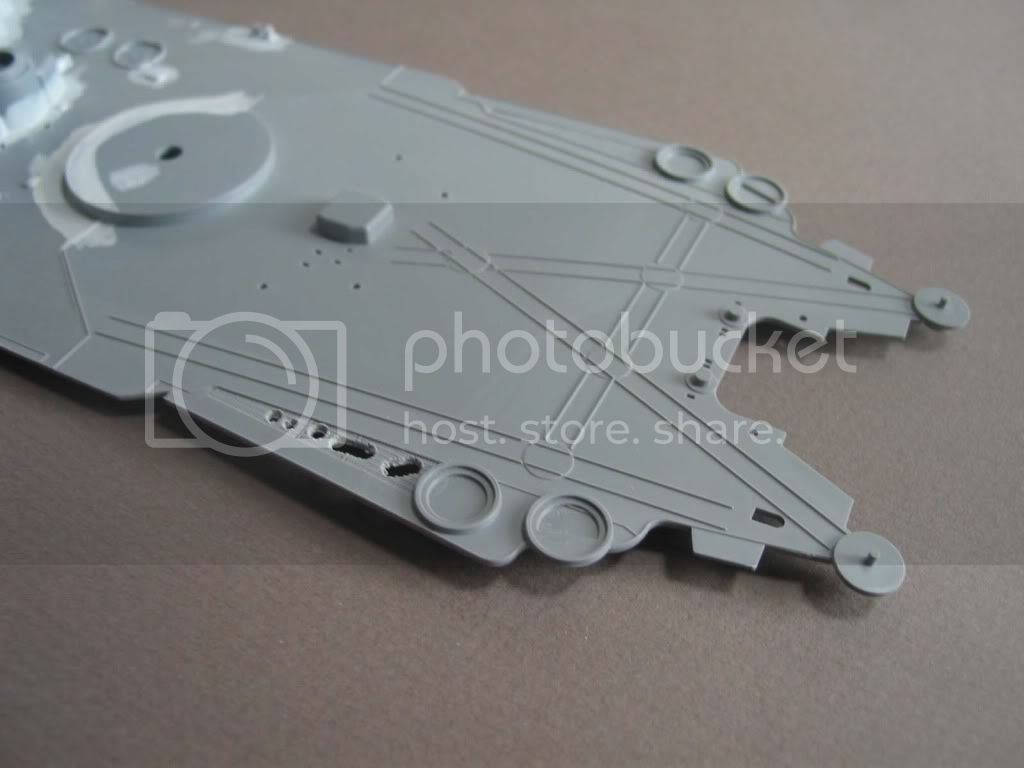
The breakwater actually scales a little lower in reality. the mushroom vents located behind it are way over scale and actually had two cowls, one on top of the other, and extended through the breakwater in some depictions. The reels located in front of the breakwater are actually situated in a straight line. Note - the breakwater appears to have a piece missing on both the starboard and port sides. This was actually there but was removable and could be put back into place when the ship was under way. Finally, note holes in the deck. These are for single-mount 25MM machines guns which are accurate for 10/44, but which had been removed by April. You will need to fill in these holes if you are not replacing the deck as I am.


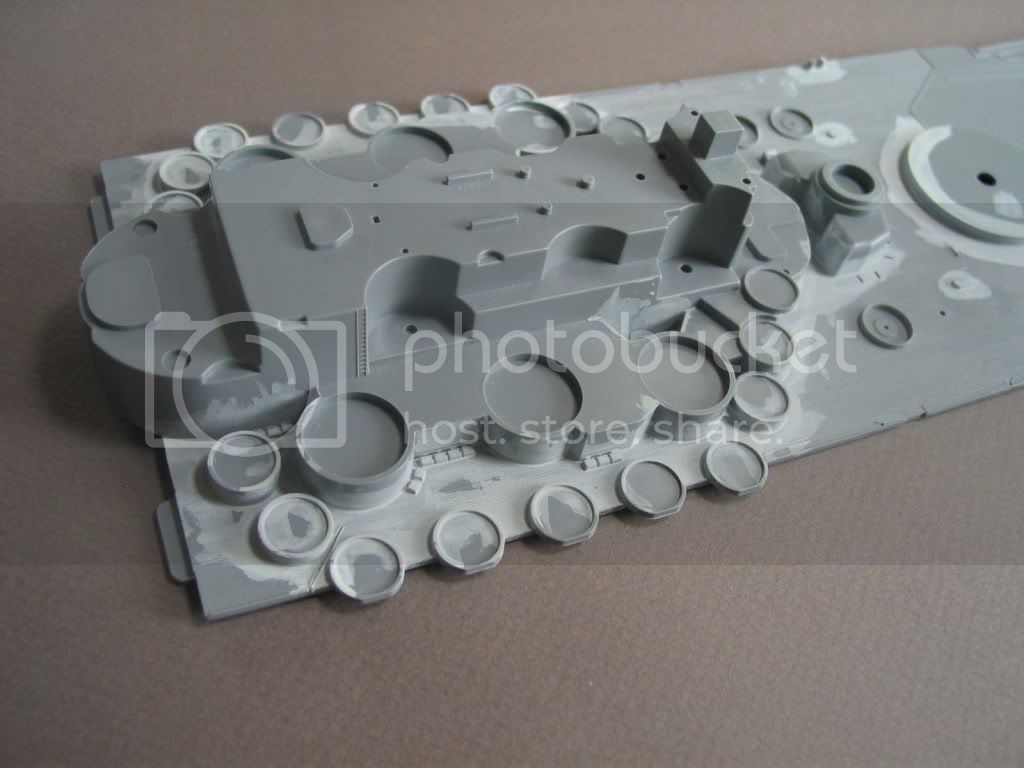
The main superstructure part. This was designed to be removable for access to the battery compartment for folks using this as a sailing toy. The white paint is my visual aid for sanding "up" the bottoms of the superstructure pieces after cutting them from the main deck. The small rectangles are ammunition boxes for the 25mm mounts. However, these locations are probably incorrect since they block known doorways and are unlikely to have been used in conjunction with the shielded mounts, due to the difficulty of access by the ammunition resupply crews.


The aircraft handling deck, which will be removed from the main deck piece, sanded smooth, and used as support for the very large Lionroar brass replacement piece. Although I originally left the rear barbette attached, the barbette circumference is actually under scale and will need to be increased, so removal of the rear one will also be necessary as part of that process.


Budgie
Visit this Community
Washington, United States
Joined: November 02, 2010
KitMaker: 163 posts
Model Shipwrights: 162 posts
Posted: Tuesday, December 21, 2010 - 05:29 AM UTC
Moving on to a review of Tamiya's original hull piece(s).


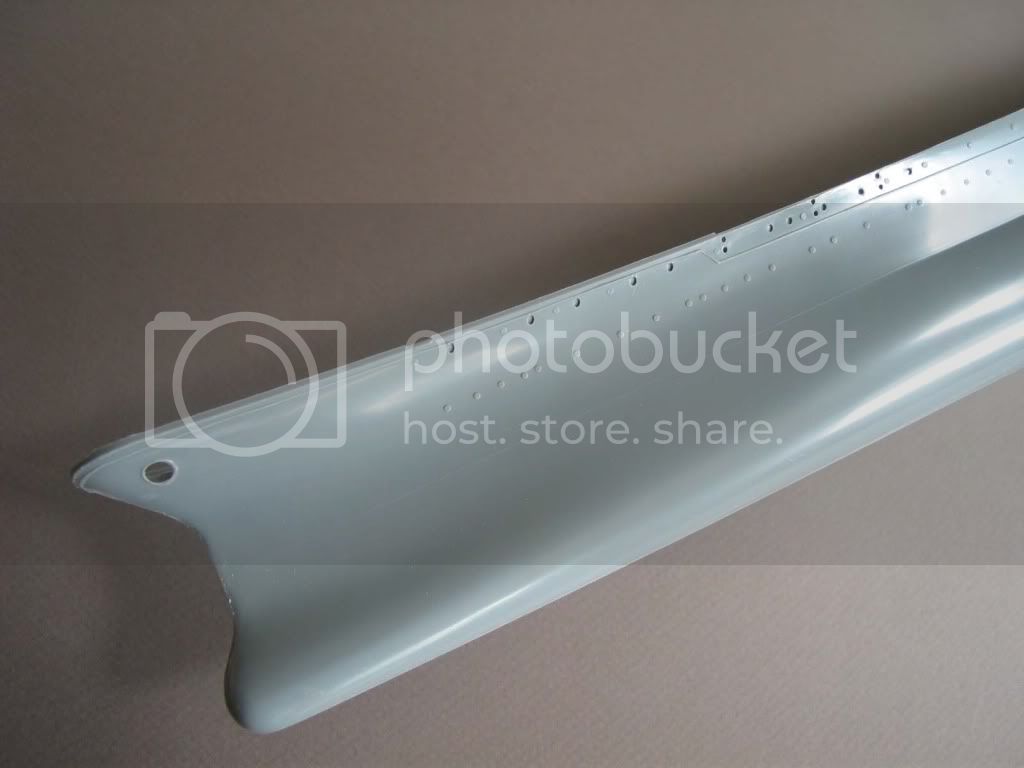
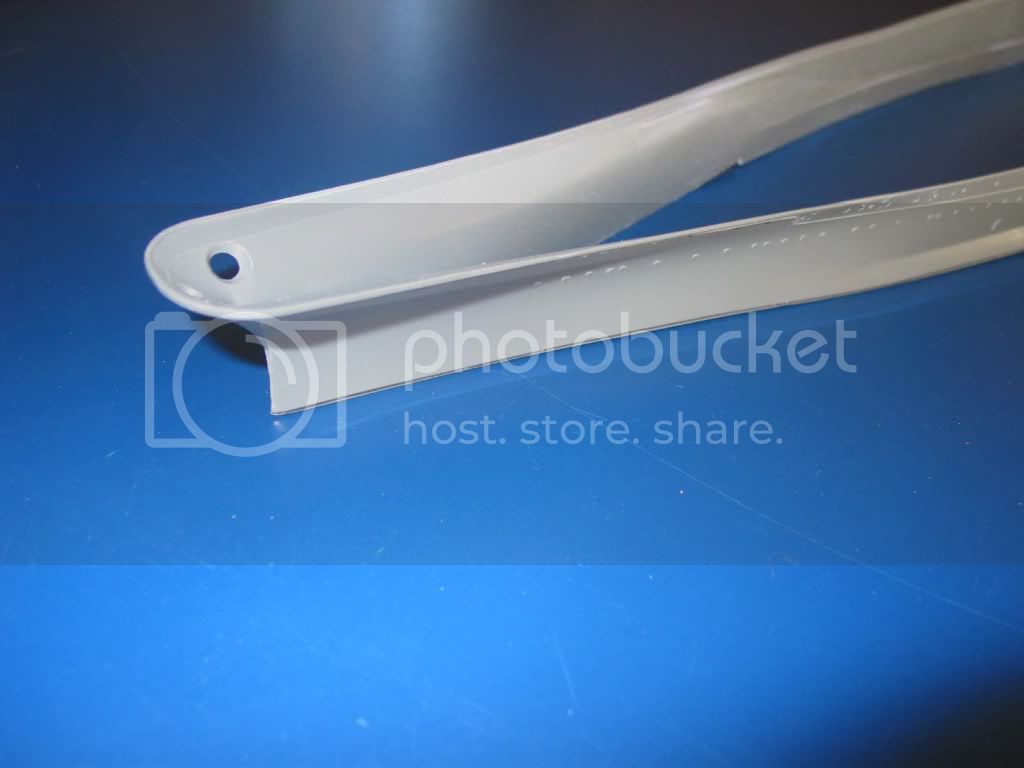
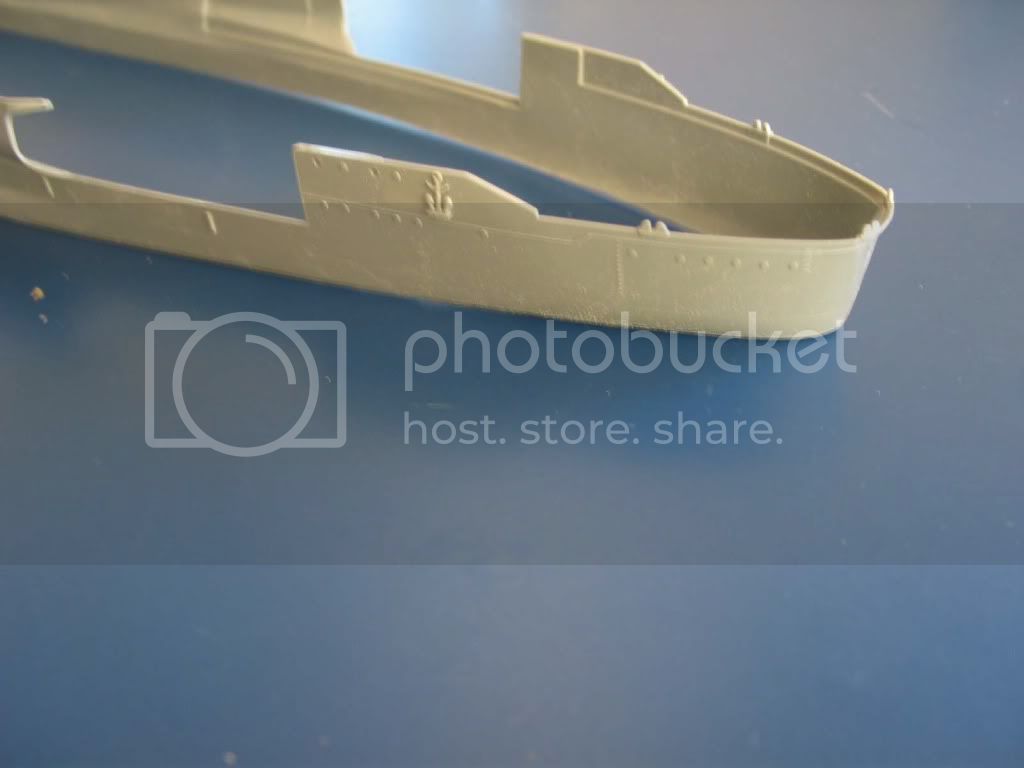
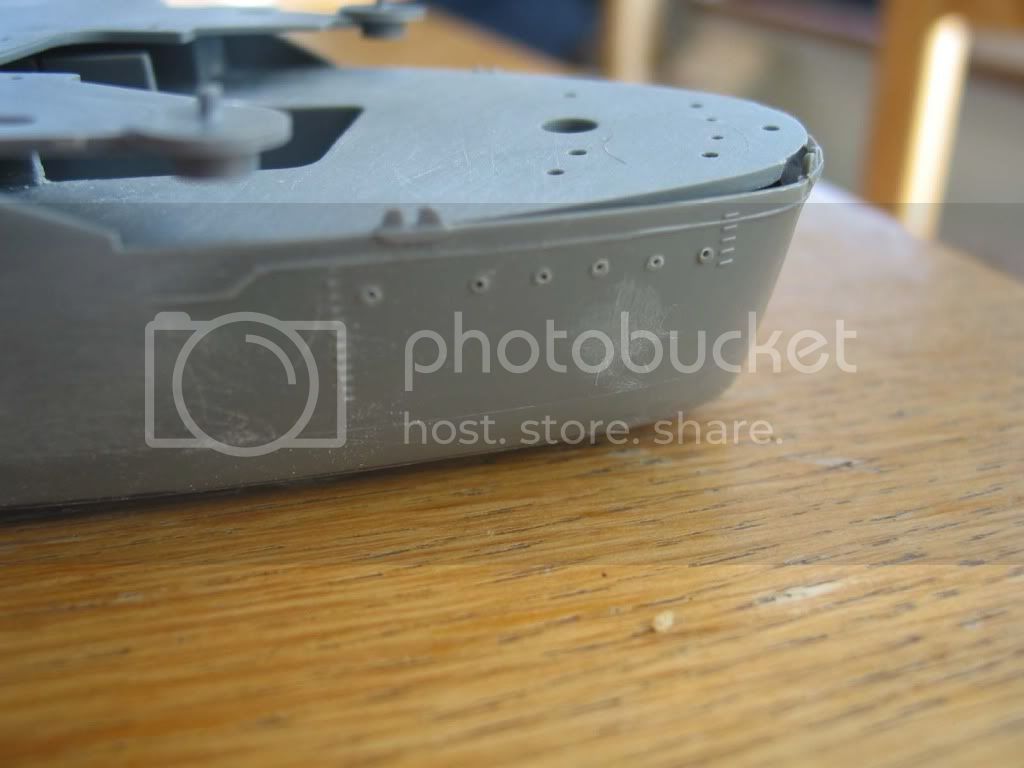
The lip around the anchor chain port is grossly under scale and will need to be enhanced. There is a row of capped portholes close to the waterline that will need to be added. The top row of portholes and capped portholes follows the sheer of the bow but should (I think) be parallel to the one s portrayed below it. Note the complete lack of any hull plating. Although Yamato pioneered the use of welding in Japanese ship building, the hull still had a traditional, 20s-30s look. This will need to be simulated to some extent. The bulbous bow area beneath the waterline should extend out more, but this is irrelevant in my case since I am water lining the kit.


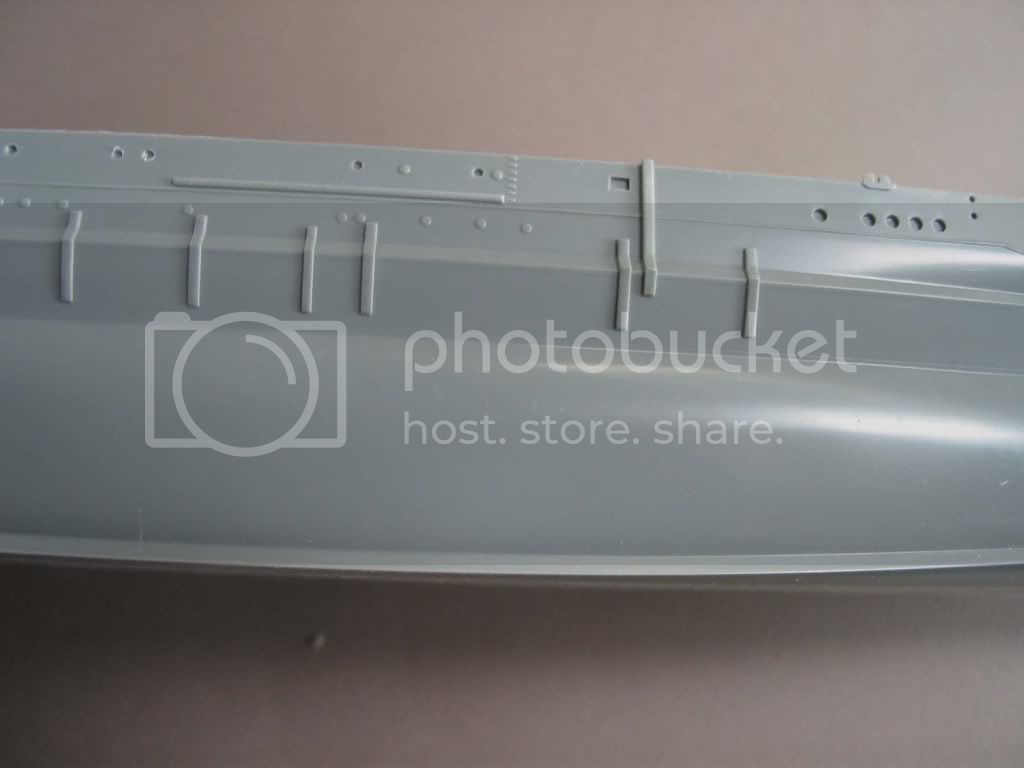
View of the hull midships. The boat boom will be sanded off and replaced. Note the larger round portholes. These are actually vents for the aircraft and boat hangars and were rectangular. Replacement parts are included in the new Lionroar set. The double holes to the right are locators for the davits. These will need to be filled in as Lionroar includes the actual brackets that their own davits are attached to.


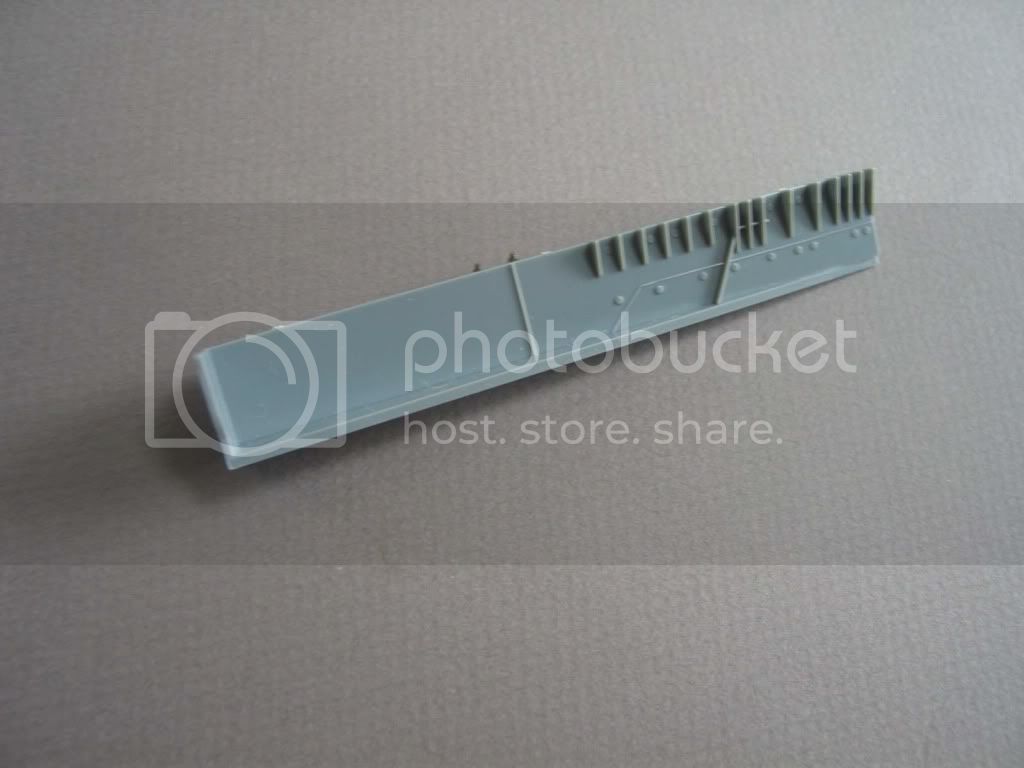
This piece represents the part of the hull where it extends inward to allow access to the hangars for the ship's motor launches. All detail will be sanded off.


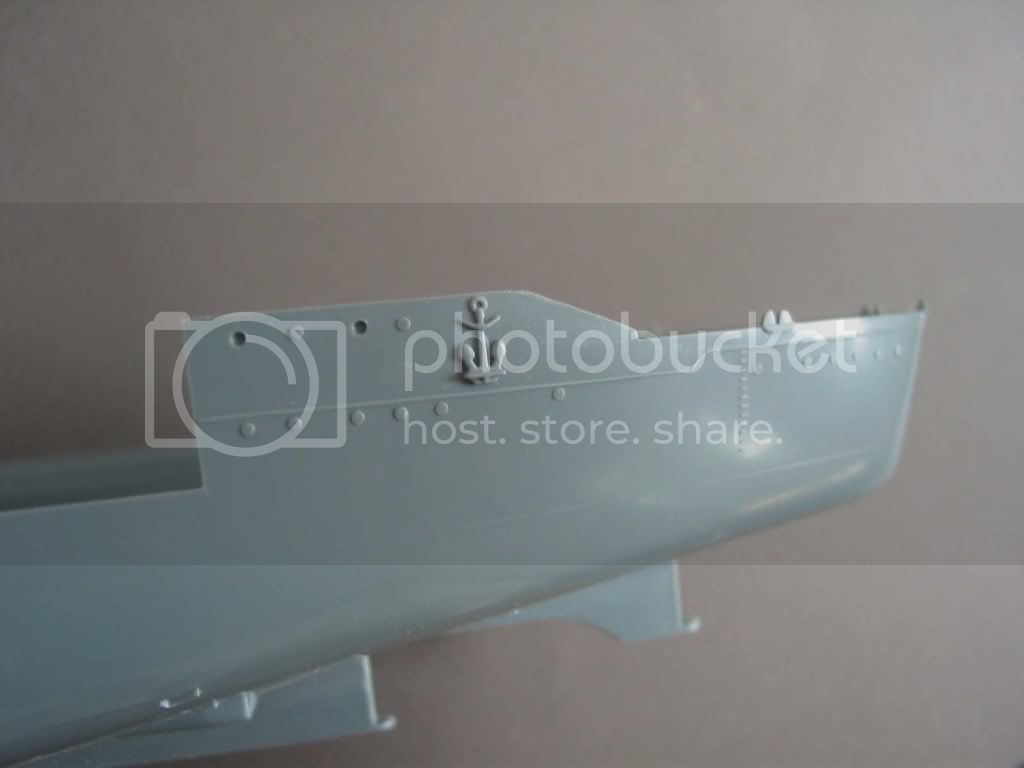
View of the stern. Although the auxiliary anchor is nice, it will be sanded off. There is a replacement piece in the Lionroar set. There was an additional row of capped portholes close to the waterline that will need to be added here.


Although technically a deck piece, I've included the aircraft hangar and stern piece here, since it needs to be constructed early on in the build process in conjunction with the hull assembly. All detail needs to be sanded off. Lionroar includes deck non-skid for both the stern deck and hangar well locations. It is unlikely that the 4/45 Yamato ever carried aircraft in this hangar, as they would have been landed shortly after her return from Singapore and shore based until immediately prior to the sortie to Okinawa, at which point they would have been spotted on deck. However, the area was frequently used for crew gatherings and leaving the door to the hangar open would probably not be unrealistic. The sloping area is supposed to be an inclined ladder leading up to the aircraft handling deck and should be removed. The slots cut into the aircraft hangar sides are intended to serve as locators for the hangar doors and will be filled in. There is a safety screen running along the top of the back half of the hangar well which will need to be scratch-built.


Budgie
Visit this Community
Washington, United States
Joined: November 02, 2010
KitMaker: 163 posts
Model Shipwrights: 162 posts
Posted: Wednesday, December 22, 2010 - 01:29 AM UTC
All right, I'm now ready to start talking about the build process, which I actually started back in October. Unfortunately it's not quite as well documented as I would like since I was unsure I would actually do this article. Anyway, these first steps are: water-lining the hull and building a new "wood" deck, both of which were initiated simultaneously.


I used a piece of Tamiya masking tape to draw a line below the faint molded waterline that Tamiya included in the kit and removed the bottom half with a Dremel. Originally, I was anticipating the kit lying in a Styrofoam base, so the actual length of this area was not terribly important and I gave myself plenty of room. On reflection, I'm now thinking of going straight to a wooden base with a minimum of built-up water effect, and will go back and reduce this margin. My intent is to show Yamato at anchor in calm water on one of the days immediately prior to the sortie, so very little wave action will be necessary.


After completing the water-lining, I used a micro-drill to put small locator holes through the middle of all the capped portholes, prior to initiating the sanding process on the hull. This hole was deliberately smaller than the circumference of the open port holes to help differentiate between the two.


Budgie
Visit this Community
Washington, United States
Joined: November 02, 2010
KitMaker: 163 posts
Model Shipwrights: 162 posts
Posted: Wednesday, December 22, 2010 - 02:10 AM UTC
Represented by raised lines, the Tamiya deck is one of the less attractive features of this kit. It is further complicated by having the main superstructure and many other features (AA barbettes, etc.) directly molded onto the deck, making smooth and crisp painting in the many small recesses very difficult. Finally, it has a very ugly line running through the middle where the deck splits to allow access to the motor and batteries. Even if you fill in this gap, the raised nature of the lines makes seeing this area unavoidable. Although several Japanese firms sell laser-cut real-wood replacement decks, the problem with them is that they simulate brand new Hinoki Cypress, with a bright yellow hue. This was almost certainly not the color seen on the decks of Yamato by April 1945. Hinoki Cypress (actually harvested on Taiwan) will fade to a dark gray color with age. With the IJN making super human efforts to disguise their aircraft carriers as merchant ships, having the world's most top secret naval weapon gleaming in the sun like a sore thumb was certainly not what the Imperial Command intended, and I think it highly unlikely that Hollystoning or other restorative processes were undertaken. . The deck, which was probably still the original one installed in 1941, would therefore have faded to gray by this time. There is further documentation that Yamato's deck was painted a dark gray-black sometime after the return to Singapore in 12/44 (it was temporarily camouflaged for the Leyte campaign). So, rather than waste money on a laser deck that I would only have to paint over, I've opted for a replacement deck made from Evergreen 1 mm grooved sheeting.


Budgie
Visit this Community
Washington, United States
Joined: November 02, 2010
KitMaker: 163 posts
Model Shipwrights: 162 posts
Posted: Wednesday, December 22, 2010 - 02:43 AM UTC
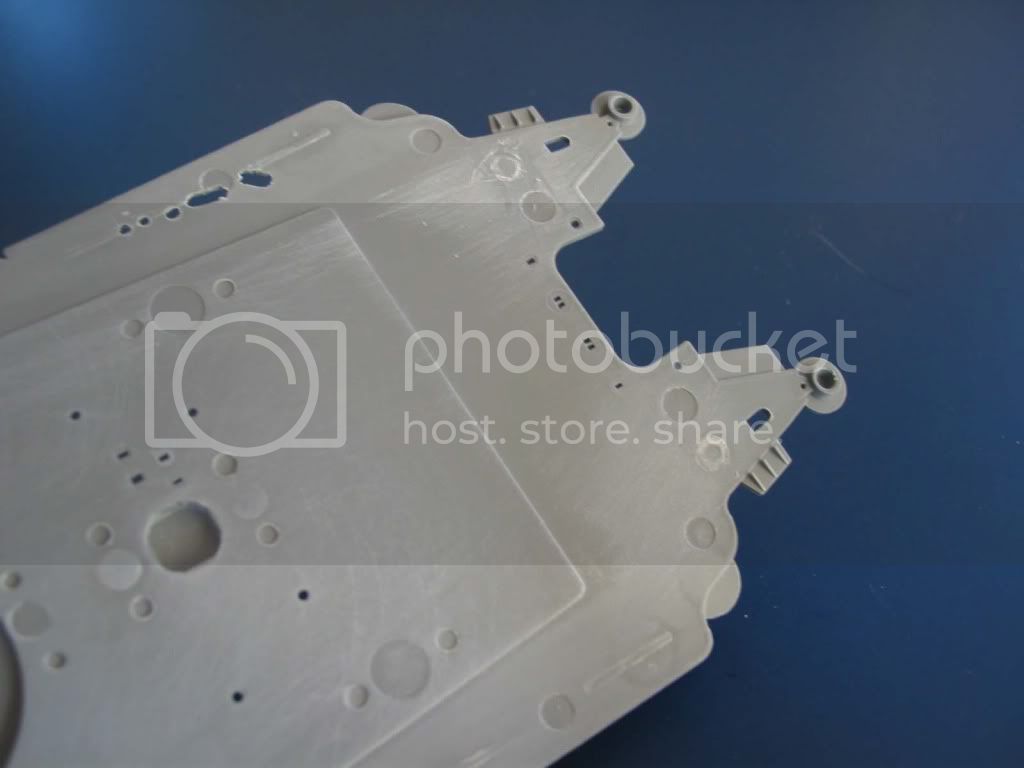
The first step in making a new deck was to create a stencil from the original deck pieces.


This required temporarily gluing them together,


and sanding down all protrusions on the bottom sides of the pieces, including the two locator pins which secure the deck to the hull for sailing versions. I then connected the two sheets of styrene together (not shown, unfortunately), placed the original pieces on top, and drew an outline of the deck onto the sheeting, keeping the grooves parallel to the hull sides.


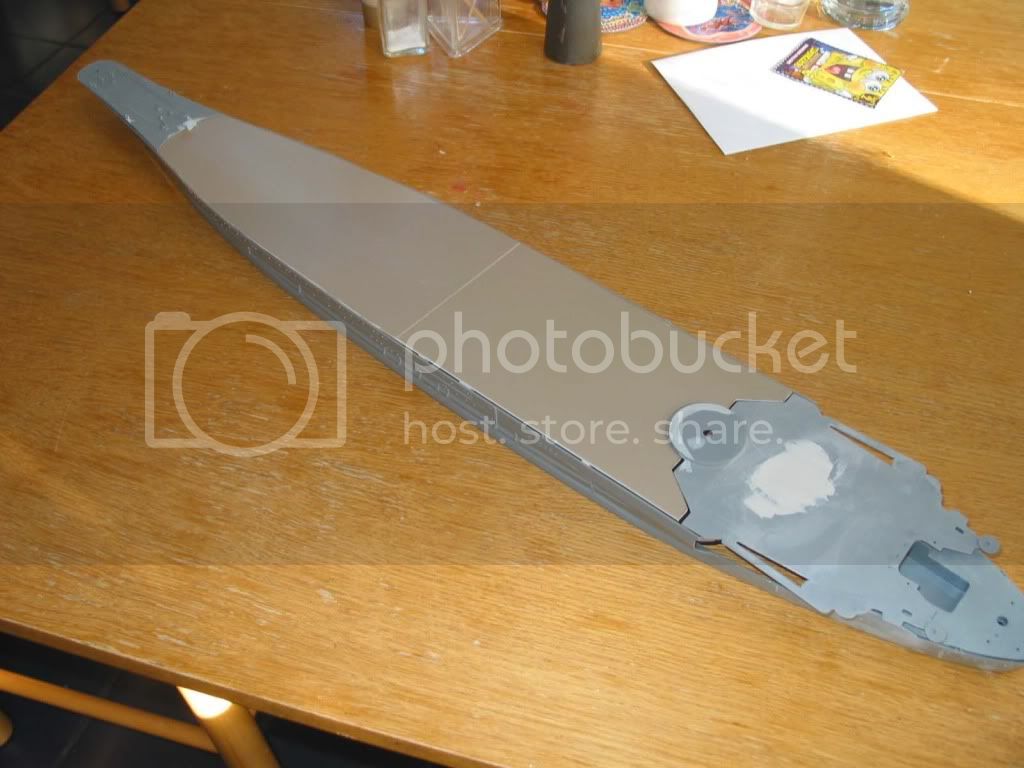
The deck was then cut to the proper shape, test fitted to the hull, and sanded into final shape. The sheeting actually comes in the brown color shown here. Most of the line where two pieces connect will be obscured under the superstructure piece (I deliberately moved the line from the location on the original deck pieces) and the remaining portion filled with putty and scored to create a continuous plank effect.


Budgie
Visit this Community
Washington, United States
Joined: November 02, 2010
KitMaker: 163 posts
Model Shipwrights: 162 posts
Posted: Wednesday, December 22, 2010 - 07:52 AM UTC


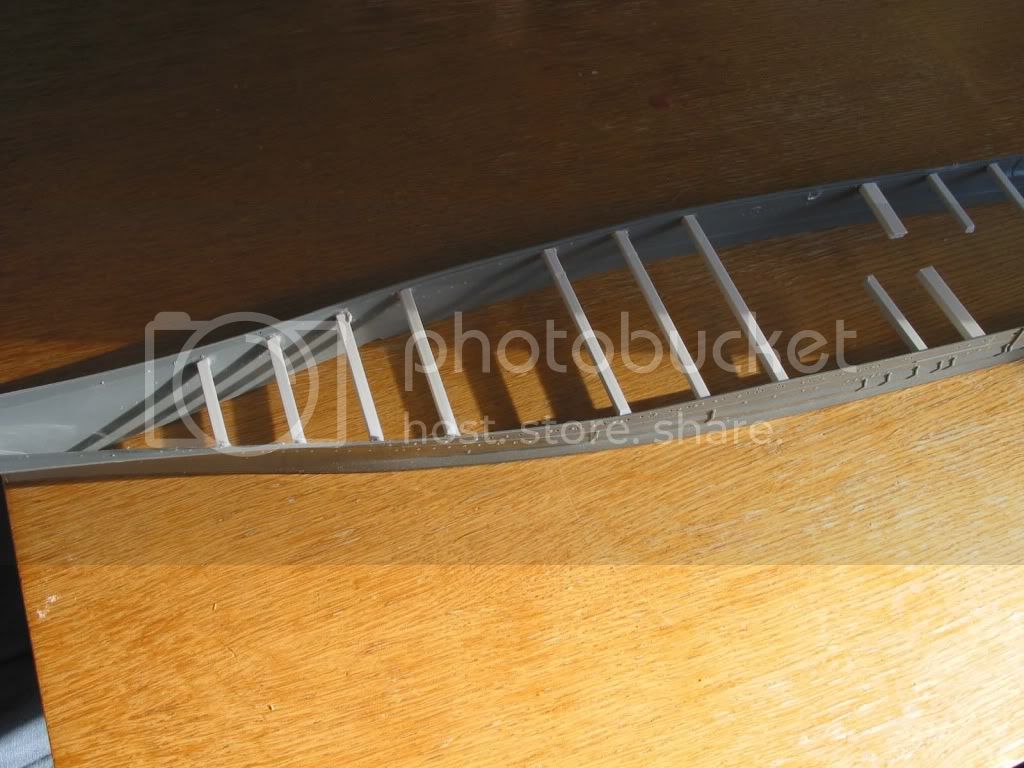
I then fitted a series of braces under the deck, both for strengthening the hull and to act as a bed for the deck to lie on. This was done while the deck was temporarily taped into position to get the right lengths. However, the braces towards the stern of the hull pulled the hull width out a little too far, creating a gap which was not practical to correct with putty, so I ended up cutting out the middles to make sure the deck piece fit snugly, which it now did. The "hanging" portions of the braces will be glued onto the bottom of the deck piece after final fitting, so they will still serve their original purpose.
Budgie
Visit this Community
Washington, United States
Joined: November 02, 2010
KitMaker: 163 posts
Model Shipwrights: 162 posts
Posted: Wednesday, December 22, 2010 - 08:01 AM UTC
Guido, you are certainly right about this being addictive. Looks like I may have to check in to De Boei after all, if I can find out where its moored now...

Kostas, I checked with HLJ and they (not unexpectedly) had no sources for the resin parts or leads. I also looked through yahoo.jp auctions myself, but did not see it currently listed. Will keep trying.
Angeleyes
Visit this Community
Drama, Greece / Ελλάδα
Joined: December 14, 2008
KitMaker: 154 posts
Model Shipwrights: 149 posts
Posted: Wednesday, December 22, 2010 - 01:32 PM UTC
Doug i had a look myself.
It seems a bit unfortunate but here is the link with the listings from the same seller.It seems the only one missing right now is the one with the Yamato bits.You can always try sending him a request for that set .

http://openuser.auctions.yahoo.co.jp/jp/user/chaostice
Budgie
Visit this Community
Washington, United States
Joined: November 02, 2010
KitMaker: 163 posts
Model Shipwrights: 162 posts
Posted: Wednesday, December 22, 2010 - 02:06 PM UTC
Kostas, this is great news. I can certainly contact him since I do have an in-house translation service. Just got done sanding off all remaining detail from the hull...will be ready to actually start building something shortly. Already found one issue with the PE, re:fit of the tracking down in the aircraft hangar. Easy solution, however. Will detail soon. Cheers, Doug

Budgie
Visit this Community
Washington, United States
Joined: November 02, 2010
KitMaker: 163 posts
Model Shipwrights: 162 posts
Posted: Thursday, December 23, 2010 - 04:49 AM UTC
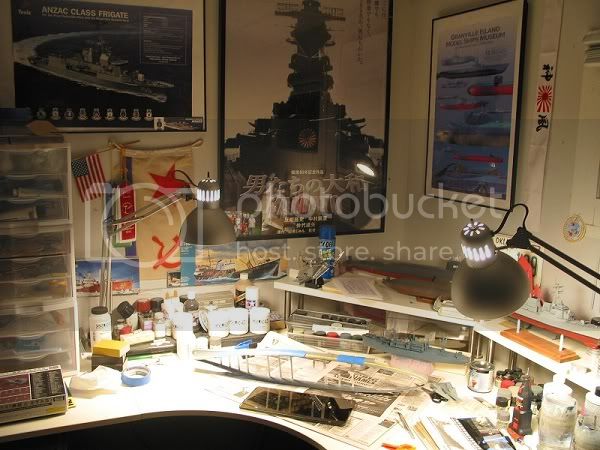
OK, I have now gotten to the point where my build progress has caught up with the present time, so entries will be less frequent as I complete various sub-assemblies. Last night I made considerable progress sanding down the rest of the hull of all molded-on detail (except for the water-line marker), and actually started on a couple of build items, namely, adding vertical ribbing inside the motor launch hangars and a safety screen around the top edges of the aircraft hangar well. However I have (literally) nothing to show for my efforts, as I will wait to post pics of them until a little later in the build process. In the meantime, here's a quick shot of my workbench, brought to you courtesy of IKEA ...


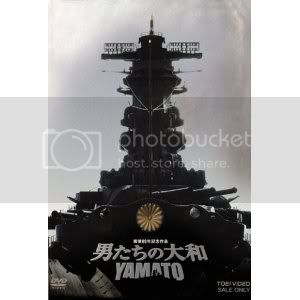
The poster of Yamato came from the gift store at the Toei Studios theme park. That Russian naval ensign is real - intended for use on submarine sails, but apparently never issued as the production date is 1996. Apparently the firm with the contract kept churning them out 4 years after the SU collapsed (such is bureaucracy). The Granville Island Ship model museum (in Vancouver BC) was a magical place that we builders can only dream would appear in our towns. Unfortunately, it closed up a couple of years ago and the collection of kits have gone back to meet their makers (pun intended).


Budgie
Visit this Community
Washington, United States
Joined: November 02, 2010
KitMaker: 163 posts
Model Shipwrights: 162 posts
Posted: Thursday, December 23, 2010 - 06:52 PM UTC
OK, finally, a few build processes to report:


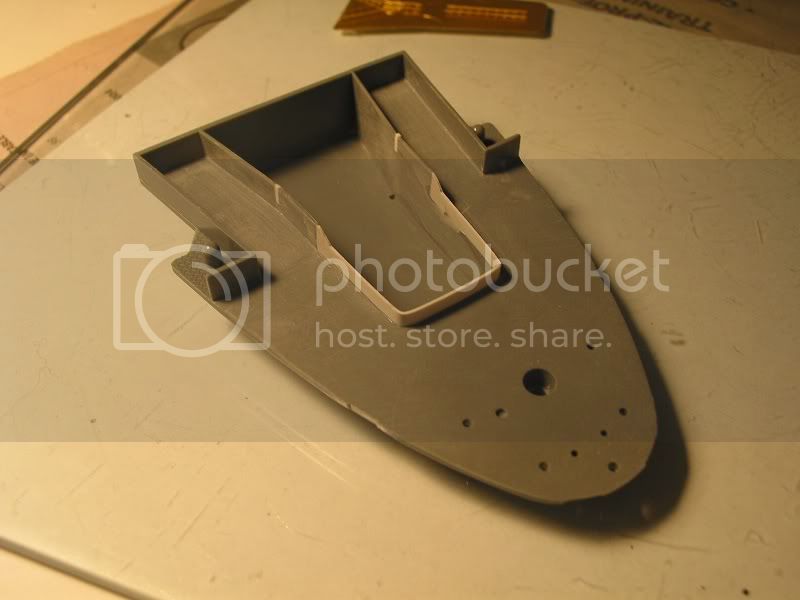
One of the first areas that needs to be constructed is the aircraft hangar well at the stern of Yamato, since much of this area will be difficult to access once the deck is attached. My first task was to build a safety wall around the hangar well, as shown on most depictions of the ship. I used a piece of Evergreen strip styrene and bent it around a dowel to get the curved corners on the stern sides, then trimmed and sanded a couple of small gaps. I suspect there may have been some gussets around this wall to hold it in place, but no drawings of Yamato depict them.


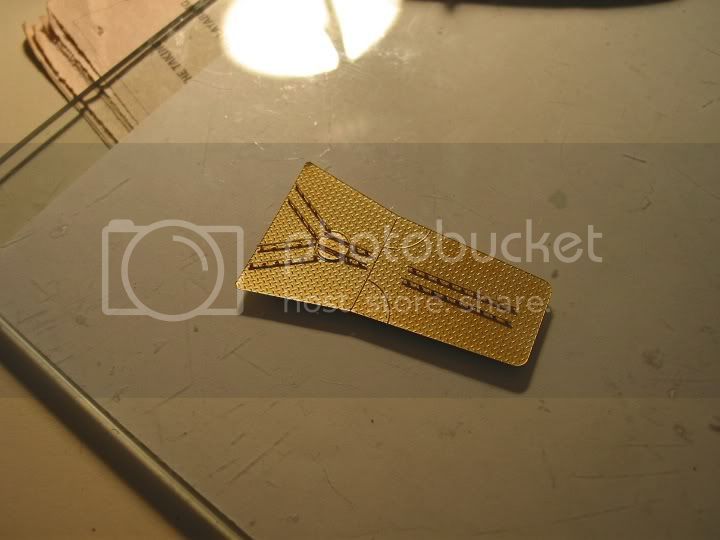
Next is the non-skid deck of the hangar well itself, which extends into an abbreviated hangar area. The actual hangar was about three times the size of the one Tamiya includes, but doing that would require additional decking and would hardly be visible in any case. A trial fit of this piece into the well showed a very tight fit, with the pointed corners at the far ends bending a bit, so I clipped off the tips just a bit to allow it to fall into place. I was interested to find that there are microscopic locator holes punched into the metal to allow fitting of the tracking pieces, which all have corresponding pins. After checking on how well they worked (problematical at best) , I took the tip of an Exacto knife and twirled it around in the holes for a couple of turns to widen them just a bit. I then removed the eight track parts and folded them over to allow for their double sided appearance and glued very carefully, with minuscule amounts of super glue, using standard two-razor blade techniques. The glue should be added when the pieces are half-folded. One problem came up almost right away - track pieces K19 go all the way from the outside hangar well to the inside of the hangar until they reach the circular turntable which allows planes to be spotted left or right. However, the frame for the hangar doors (piece B12) is supposed to intersect the tracks, but cannot as designed by Lionroar. The solution came from history - in actuality, the tracking had a removable piece to allow the hangar doors to be closed. So, I cut off a portion of this tracking in the middle and glued the piece into position in two different sections. There are now minuscule pins extending below the level of the non-skid piece, but I don't think these will interfere noticeably with getting this piece to lie horizontally.


Budgie
Visit this Community
Washington, United States
Joined: November 02, 2010
KitMaker: 163 posts
Model Shipwrights: 162 posts
Posted: Friday, December 24, 2010 - 04:43 AM UTC
Kostas, I was able to get in touch with the seller, a Mr. Ishida, directly via email. He says they will sell directly and can ship overseas but are temporarily out of stock. They will be working up another batch in March, in conjunction with another new component for the set (he didn't mention what it was). So, looks like your lead will be very helpful, and I will need to adjust the build process to anticipate the arrival then. Several other items he has, such as the lanterns, should be very useful too. If your friend didn't get those for you previously, I can always order a set for you too. Cheers, Doug
Budgie
Visit this Community
Washington, United States
Joined: November 02, 2010
KitMaker: 163 posts
Model Shipwrights: 162 posts
Posted: Friday, December 24, 2010 - 06:45 AM UTC


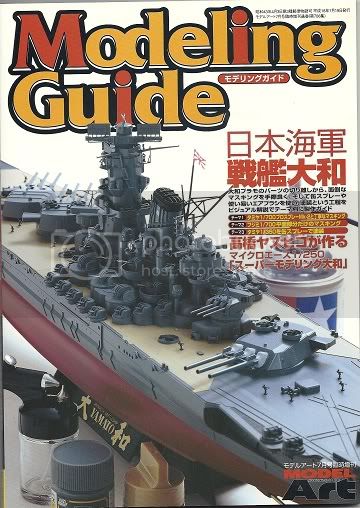
One side note - many of you may have noticed this book from Japan, which is devoted entirely to the making of various Yamato kits, including a fairly extensive section on the Tamiya 1/350. Written entirely in Japanese but profusely illustrated in color, this serves more as a review of basic modeling techniques as applied to Yamato and does not review any scratch building issues for the kit. Discussion of photo-etch is rudimentary and more in the nature of reviewing various sets available, not including the Lionroar sets. Most of the hobby products recommended in the text are made by Tamiya, so I would not be surprised to discover they helped fund the publication. Bottom line, if you still need any of this information, you should not be attempting a build with the Lionroar sets at this time. For the rest of us, your $20 will be better spent on some additional add-on parts.