

Go to modelshipwrights.com for the current dynamic site!


Hosted by Harry
Liberty ship, SS Jeremiah O'Brien

surfsup

Joined: May 20, 2010
KitMaker: 1,230 posts
Model Shipwrights: 1,212 posts

Posted: Friday, March 22, 2013 - 07:19 PM UTC
You are doing a really nice job on her so far russell.....Cheers mark

RussellE

#306
Joined: June 27, 2010
KitMaker: 3,959 posts
Model Shipwrights: 2,777 posts

Posted: Sunday, March 24, 2013 - 08:47 PM UTC
Thank you Mark  I'm currently in fierce negotiations between ejector pin marks, poor joint matching, sink marks and stop putty and sand paper!
 Seems to be a trait with this kit for some reason!
I'm currently in fierce negotiations between ejector pin marks, poor joint matching, sink marks and stop putty and sand paper! Seems to be a trait with this kit for some reason! 
RussellE
#306
Joined: June 27, 2010
KitMaker: 3,959 posts
Model Shipwrights: 2,777 posts
Posted: Sunday, March 31, 2013 - 10:08 PM UTC
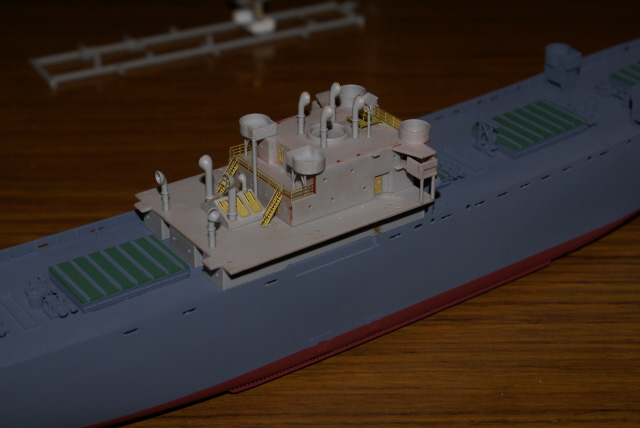
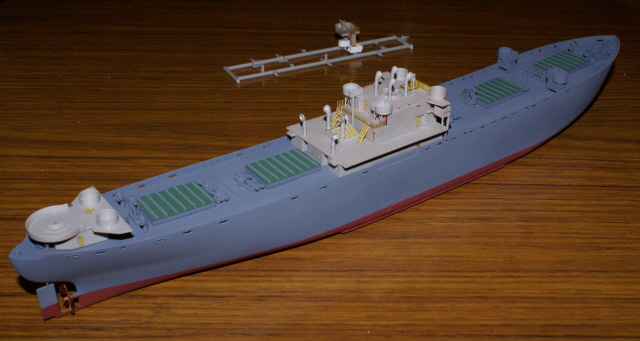
Update time!  Contrary to my usual habit of painting and then assembling to allow for different colours, I'm trying something different with this kit: I'm going to build up larger assemblies and then paint as a whole. Here's the main superstructure.
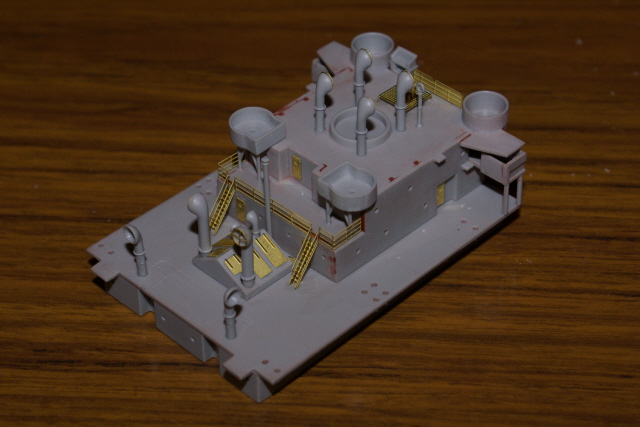
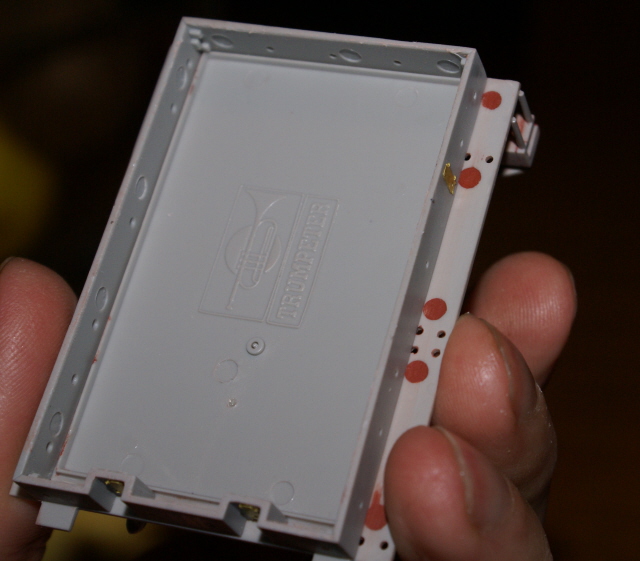
I've removed all the riff raff added by trumpeter ready for the PE. On the under side you can see all the ejector pin holes which needed filling.
Although the bridge wing cabs snuggled down nicely, the support posts sit too wide to allow the railing to be fitted. I think I'm going to need to cut them out and reposition them.
I've partially assembled the bridge housing as it's a nightmare to hold whilst painting. This is as far as I will take the bridge housing though, as I need to get in and paint the deck planks a timber colour.
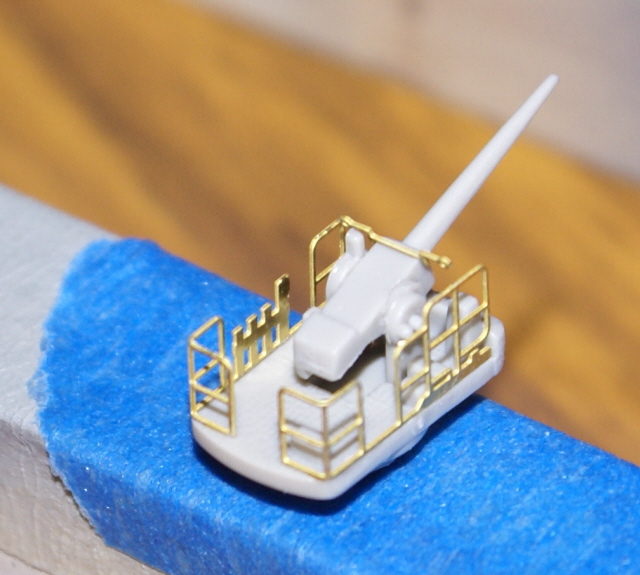
The 3" gun and platform are finished ready for paint.
The rear gun platform
all the ejector pin holes filled
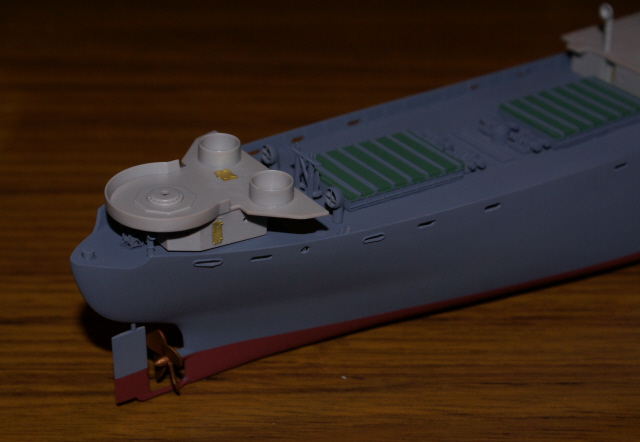
mast house and funnels
some test dry fittings
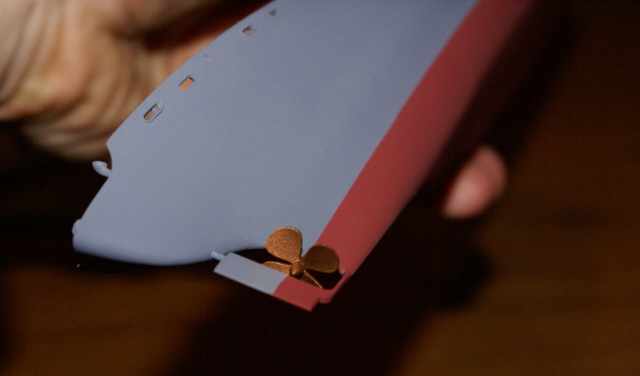
and a bronze propellor
More soon. Hopefully
Contrary to my usual habit of painting and then assembling to allow for different colours, I'm trying something different with this kit: I'm going to build up larger assemblies and then paint as a whole. Here's the main superstructure. I've removed all the riff raff added by trumpeter ready for the PE. On the under side you can see all the ejector pin holes which needed filling.
Although the bridge wing cabs snuggled down nicely, the support posts sit too wide to allow the railing to be fitted. I think I'm going to need to cut them out and reposition them.
I've partially assembled the bridge housing as it's a nightmare to hold whilst painting. This is as far as I will take the bridge housing though, as I need to get in and paint the deck planks a timber colour.
The 3" gun and platform are finished ready for paint.
The rear gun platform
all the ejector pin holes filled
mast house and funnels
some test dry fittings
and a bronze propellor
More soon. Hopefully

RedDuster

Joined: March 01, 2010
KitMaker: 7,078 posts
Model Shipwrights: 6,649 posts

Posted: Sunday, March 31, 2013 - 10:30 PM UTC
Looking Good Russell, very tidy work with the etch.
Si
Si
RussellE
#306
Joined: June 27, 2010
KitMaker: 3,959 posts
Model Shipwrights: 2,777 posts
Posted: Monday, April 01, 2013 - 09:55 PM UTC
Thank you Si
I find photo etch to be the most challenging part, but this is turning out quite nicely.
I find photo etch to be the most challenging part, but this is turning out quite nicely.

vonHengest

Joined: June 29, 2010
KitMaker: 5,854 posts
Model Shipwrights: 350 posts
Posted: Friday, April 05, 2013 - 12:38 PM UTC
It definitely is, both challenging and turning out well. I still have a very hard time with stairs/ladders, although I do tend to attempt it in 1/700 rather than a... more friendly... scale. What's next Russell?
RussellE
#306
Joined: June 27, 2010
KitMaker: 3,959 posts
Model Shipwrights: 2,777 posts
Posted: Friday, April 05, 2013 - 06:10 PM UTC
I'll second that Jeremy-1/700 is much less forgiving a scale, especially with my butter fingers.
Next up: well, I'm on the finishing lap of the 3 aircraft currently on the bench so I'll be relieved to see them finished up. On the Liberty I need to remove the bridge wing cab support posts, and reposition them to allow the railing to be fitted to the deck. In hind sight I think i should have left off the wing cabs, to allow the air brush to paint those areas, but live and learn. I'll add the rest of the railings and the boat davits and cranes and side plating, then it's onto painting. I'll need to finish off the rear gun platform too, and paint the bridge assy, gun platforms and the mast houses too! Onwards and Upwards as they say!
Next up: well, I'm on the finishing lap of the 3 aircraft currently on the bench so I'll be relieved to see them finished up.
On the Liberty I need to remove the bridge wing cab support posts, and reposition them to allow the railing to be fitted to the deck. In hind sight I think i should have left off the wing cabs, to allow the air brush to paint those areas, but live and learn. I'll add the rest of the railings and the boat davits and cranes and side plating, then it's onto painting. I'll need to finish off the rear gun platform too, and paint the bridge assy, gun platforms and the mast houses too! Onwards and Upwards as they say! 
Gremlin56
Joined: October 30, 2005
KitMaker: 3,897 posts
Model Shipwrights: 3,301 posts
KitMaker: 3,897 posts
Model Shipwrights: 3,301 posts
Posted: Friday, April 05, 2013 - 07:19 PM UTC
Its a treat to watch this build progress Russel,
beautiful job on the PE. Will you be doing any weathering on this build?
Julian
beautiful job on the PE. Will you be doing any weathering on this build?
Julian
surfsup
Joined: May 20, 2010
KitMaker: 1,230 posts
Model Shipwrights: 1,212 posts
Posted: Saturday, April 06, 2013 - 10:31 AM UTC
Lovely job you are doing on her Russell.....Cheers mark

AlanL

Joined: August 12, 2005
KitMaker: 14,499 posts
Model Shipwrights: 1,919 posts
Posted: Saturday, April 06, 2013 - 07:59 PM UTC
Hi Russell,
Excellent work, looking good so far.
Al
Excellent work, looking good so far.
Al

AussieReg

#007
Joined: June 09, 2009
KitMaker: 8,156 posts
Model Shipwrights: 154 posts
Posted: Saturday, April 06, 2013 - 10:22 PM UTC
G'day Russell.
I have taken the plunge and committed to my first ship build for the MSW Contest II, so now I need to do a bucketload of reading to find out what sort of trouble I've got myself into. I have read through this thread a few times now and picked up some really valuable tips every time.
Great work mate, keep on posting please.
Cheers, D

RussellE
#306
Joined: June 27, 2010
KitMaker: 3,959 posts
Model Shipwrights: 2,777 posts
Posted: Saturday, April 06, 2013 - 11:06 PM UTC
Thank you all so much. Very humbled, I am. 
I will be finishing off those 3 pesky planes tomorrow so I can put all my efforts into getting this build completed.
Julian: no weathering on this one Im afraid, as Im committed to the museum style on this piece.
Damian: welcome to the salty side of the hobby! Good to see a fellow Victorian on MSW! Glad to hear that some of my bungling can be of assistance! Looking forward to seeing your posts in the MSW Contest II!
AussieReg
#007
Joined: June 09, 2009
KitMaker: 8,156 posts
Model Shipwrights: 154 posts
Posted: Saturday, April 06, 2013 - 11:20 PM UTC
What aircraft are you building Russell, and where are you located in Victoria? 
I can see that they are Spits and a Hurricane, but what kits?
I can see that they are Spits and a Hurricane, but what kits?
RussellE
#306
Joined: June 27, 2010
KitMaker: 3,959 posts
Model Shipwrights: 2,777 posts
Posted: Saturday, April 06, 2013 - 11:28 PM UTC
Hi Damian,
All three are Airfix! I've a bit of a soft spot for Airfix in planes, but I tend to stick to the newer tools (of which the're doing a pretty good job of) and keep it in 1/72 for space restrictions. These are my sanity relief when the ships get a bit intense and I need a break. I've a few more in the stash but will probably leave them til the Liberty's finished.
Down south east Melbourne sir
All three are Airfix! I've a bit of a soft spot for Airfix in planes, but I tend to stick to the newer tools (of which the're doing a pretty good job of) and keep it in 1/72 for space restrictions. These are my sanity relief when the ships get a bit intense and I need a break.
I've a few more in the stash but will probably leave them til the Liberty's finished.Down south east Melbourne sir
AussieReg
#007
Joined: June 09, 2009
KitMaker: 8,156 posts
Model Shipwrights: 154 posts
Posted: Sunday, April 07, 2013 - 12:33 AM UTC
You should jump onto Aeroscale and post some pics of you triple build, we are always interested to hear opinions on kits and see how different builders do what they do.
I live up in Eltham, but work is based in a Noble Park. Doing sales work in the construction industry has me travelling around a lot, so I always make time to visit the Hobby Shops .
Thanks again, D
I live up in Eltham, but work is based in a Noble Park. Doing sales work in the construction industry has me travelling around a lot, so I always make time to visit the Hobby Shops .
Thanks again, D
RussellE
#306
Joined: June 27, 2010
KitMaker: 3,959 posts
Model Shipwrights: 2,777 posts
Posted: Sunday, April 07, 2013 - 11:56 PM UTC
Quoted Text
You should jump onto Aeroscale and post some pics of you triple build, we are always interested to hear opinions on kits and see how different builders do what they do.
I live up in Eltham, but work is based in a Noble Park. Doing sales work in the construction industry has me travelling around a lot, so I always make time to visit the Hobby Shops .
Thanks again, D
No worries D!
I'm nowhere near the skill level when it comes to planes that you fly boys are.
but I'll try to get a pic up in the next few days on this thread and see what you think and if they're up to scratch... 
My LHS is Brunel Hobbies in Cheltenham, they have a pretty good range and I can spend hours in there just browsing, but of course these days nothing compares with the internet...
Then of course there's the IPMS show at sandown each year in June which I try to get along to, but i'm not sure if it's on this year?

AussieReg
#007
Joined: June 09, 2009
KitMaker: 8,156 posts
Model Shipwrights: 154 posts
Posted: Monday, April 08, 2013 - 10:45 AM UTC
Looking forward to seeing your wingy-thingy work Russell.
I've been to Brunel a few times, a well stocked little LHS for sure. My regular haunts are Metro Hobbies in Box Hill and Models&Hobbies in Boronia, but I get around to them all when I can to check out what's on special (much to the ire of the Minister for War and Finance!)
I am a member of ESSMC, and we are putting together a nice little display for the IPMS show this year, hopefully we can catch up there.
Enough chat, more progress pics please mate
RussellE
#306
Joined: June 27, 2010
KitMaker: 3,959 posts
Model Shipwrights: 2,777 posts
Posted: Wednesday, April 10, 2013 - 11:56 PM UTC
Okay some wingy thingy pics! Not sure they're up to the par of you fly boys though
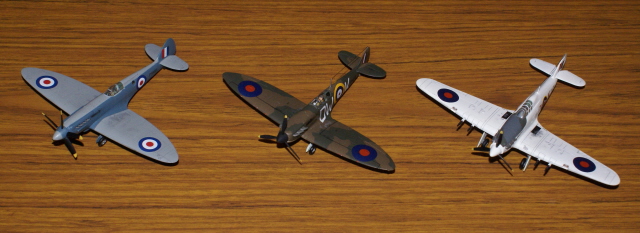
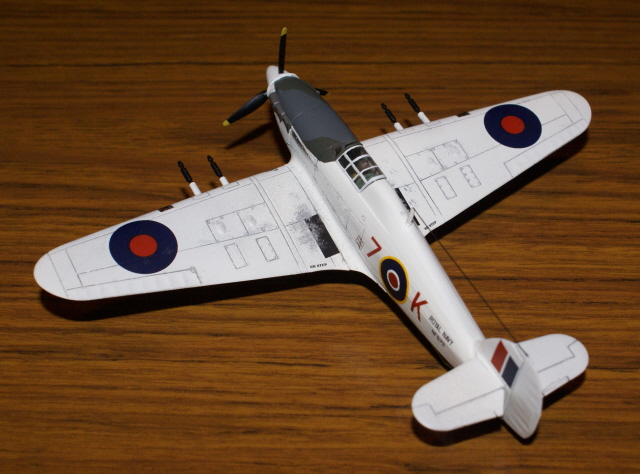
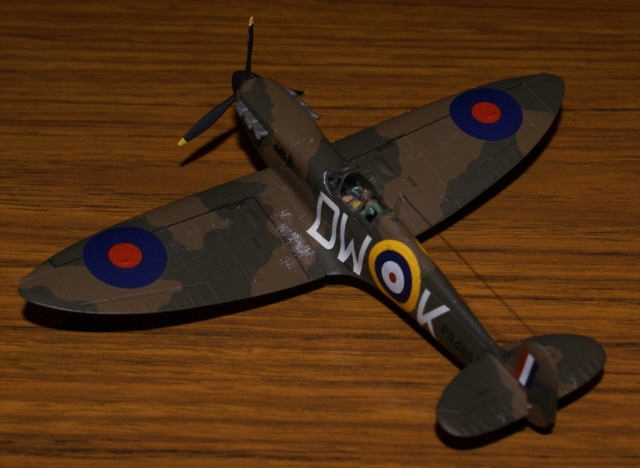
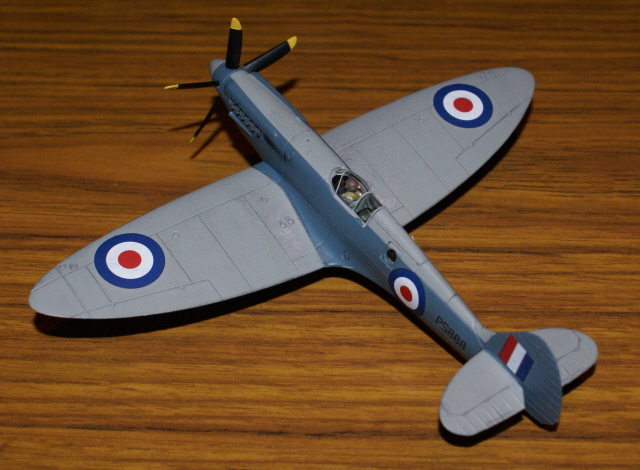
These were a whole lotta fun to build, and really good value for money!
Had a look at the ESSMC website! Wow you guys have done some great work! I'll be along to your stand in June to have a look!!!
More Liberty pics very soon!!!
These were a whole lotta fun to build, and really good value for money!
Had a look at the ESSMC website! Wow you guys have done some great work! I'll be along to your stand in June to have a look!!!
More Liberty pics very soon!!!
RussellE
#306
Joined: June 27, 2010
KitMaker: 3,959 posts
Model Shipwrights: 2,777 posts
Posted: Thursday, May 02, 2013 - 08:25 PM UTC
Hi folks, time for an update
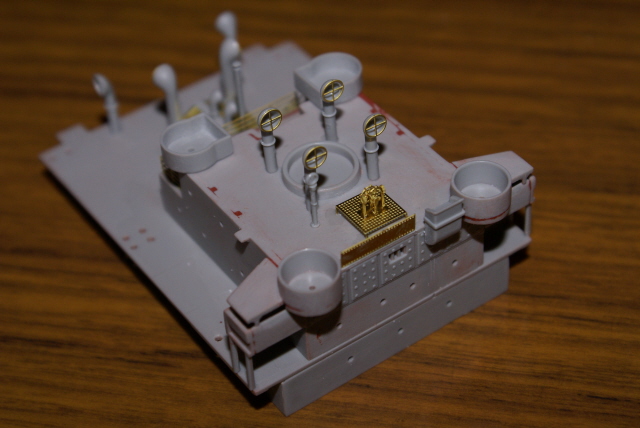
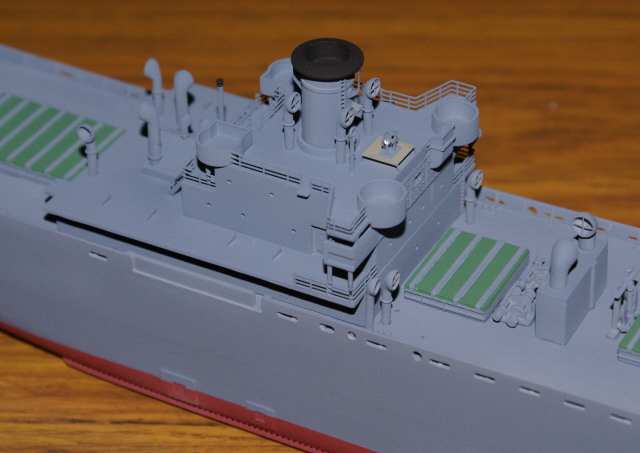
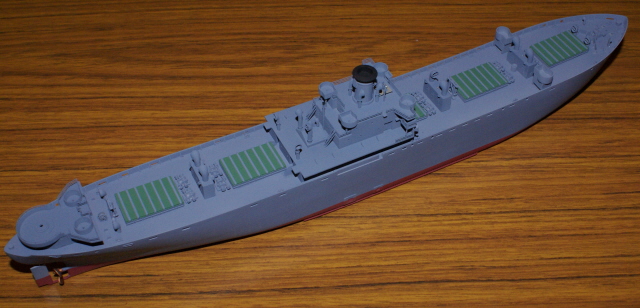
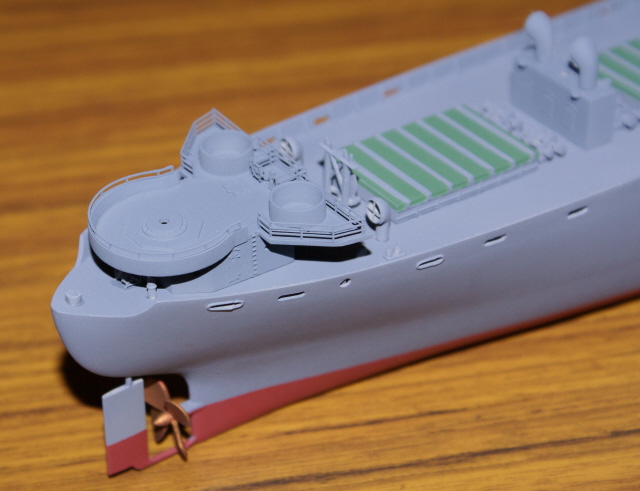
Slight oversight on behalf of myself here. I forgot to remove the moulded on ribs (just visible forward of the cargo hatch) which trumpeter added to locate their plastic ladders. I should have removed them prior to painting, but have now had to remove them and touch the area up with paint via a brush. Here's a shot showing them prior to removal.

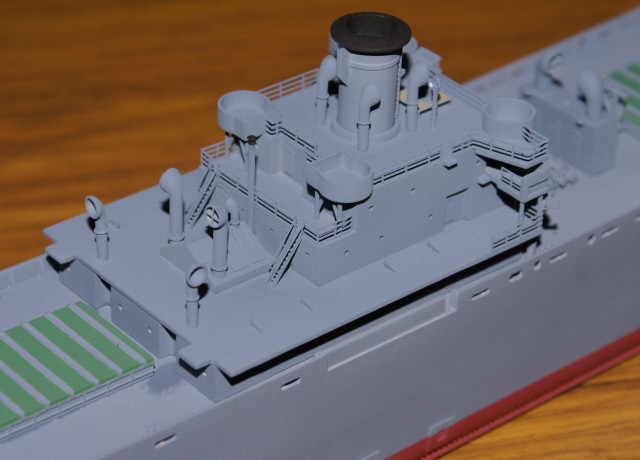
With the original posts removed from beneath the bridge wing cabs and news styrene rod posts added I was able to add the PE railing around the front and side of the boat deck.
I did however forget the fire hose which I'll have to add later
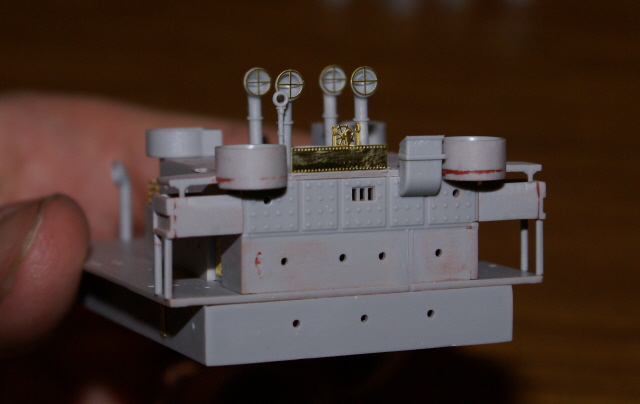
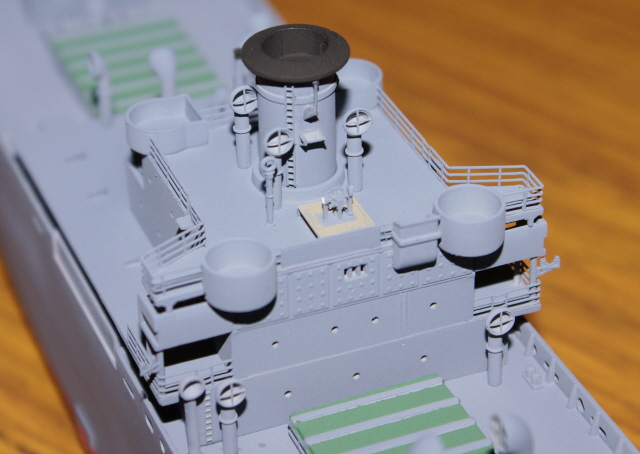
Having now painted those sub assemblies I've been able to add the bridge assembly, mast houses, and rear gun platform
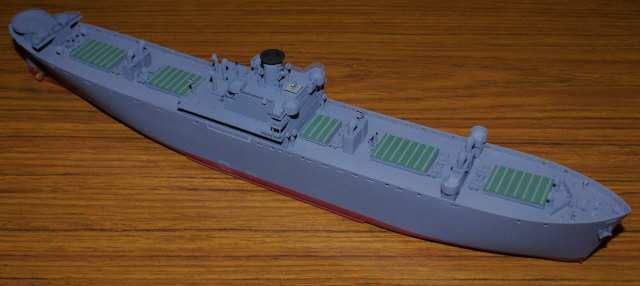
The deck of the wheel house is painted to represent timber and the white you can see is meant to represent the dial instruments
More soon folks. I'll be working on some of the smaller details to finish off the assemblies added here, before moving on to finishing off the mast arrays.
Slight oversight on behalf of myself here. I forgot to remove the moulded on ribs (just visible forward of the cargo hatch) which trumpeter added to locate their plastic ladders. I should have removed them prior to painting, but have now had to remove them and touch the area up with paint via a brush. Here's a shot showing them prior to removal.
With the original posts removed from beneath the bridge wing cabs and news styrene rod posts added I was able to add the PE railing around the front and side of the boat deck.
I did however forget the fire hose which I'll have to add later
Having now painted those sub assemblies I've been able to add the bridge assembly, mast houses, and rear gun platform
The deck of the wheel house is painted to represent timber and the white you can see is meant to represent the dial instruments
More soon folks.
I'll be working on some of the smaller details to finish off the assemblies added here, before moving on to finishing off the mast arrays.
Tojo72
Joined: June 06, 2006
KitMaker: 4,691 posts
Model Shipwrights: 258 posts

Posted: Friday, May 03, 2013 - 02:56 AM UTC
beautiful work,looking real good
RussellE
#306
Joined: June 27, 2010
KitMaker: 3,959 posts
Model Shipwrights: 2,777 posts
Posted: Saturday, May 04, 2013 - 11:37 PM UTC
Thankyou Anthony
Not far off finishing now...
Not far off finishing now...
Gremlin56
Joined: October 30, 2005
KitMaker: 3,897 posts
Model Shipwrights: 3,301 posts
KitMaker: 3,897 posts
Model Shipwrights: 3,301 posts
Posted: Sunday, May 05, 2013 - 12:04 AM UTC
Certainly is a looker Russell, meticulous work on the PE.
Really very good
Cheers,
Julian
Really very good
Cheers,
Julian
RussellE
#306
Joined: June 27, 2010
KitMaker: 3,959 posts
Model Shipwrights: 2,777 posts
Posted: Sunday, May 05, 2013 - 10:06 PM UTC
Thank you Julian PE has always been a challenge and sometimes it makes me say things that would make a sailor blush, but I've found slowing down when handling it has really helped 
PE has always been a challenge and sometimes it makes me say things that would make a sailor blush, but I've found slowing down when handling it has really helped RussellE
#306
Joined: June 27, 2010
KitMaker: 3,959 posts
Model Shipwrights: 2,777 posts
Posted: Monday, May 20, 2013 - 09:35 PM UTC
Hi Folks!
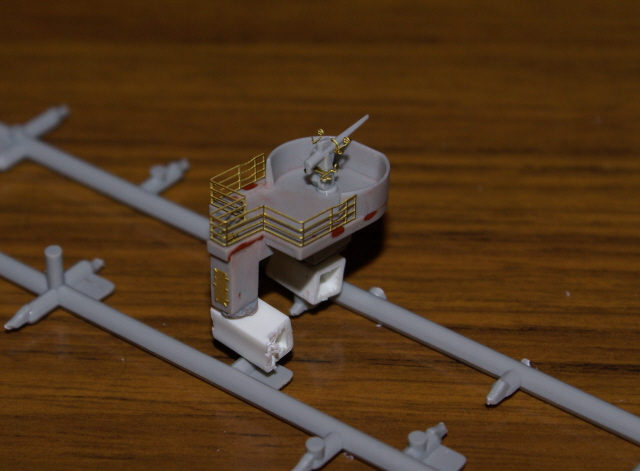
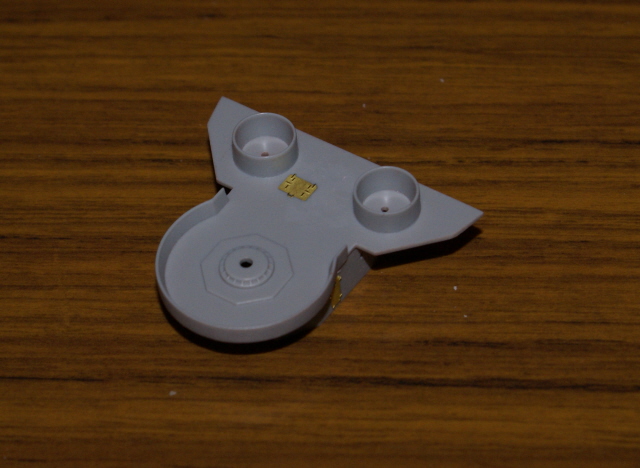
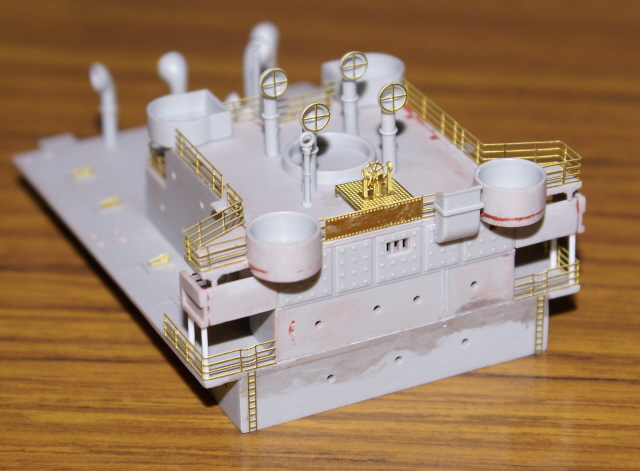
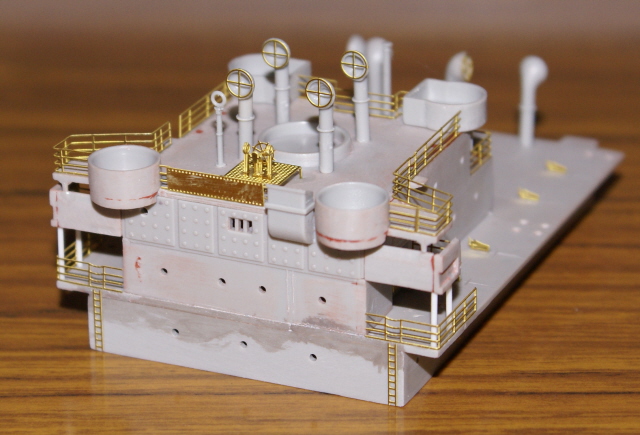
I've been battling a bit with the GMM PE. In general the instructions have been pretty vague and confusing. But there's one area where the instructions indicate that the platform in the wheel house should have its legs folded down, and then the sides are to be folded square and fitted over the top. Well, there was no way that that was going to happen! The platform with the legs folded down was way too large for the sides to fit over once it was folded square!
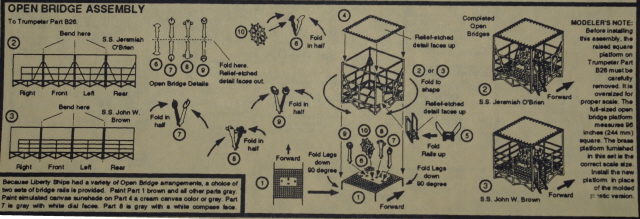
I had to resort to pulling the platform off the bridge, and cutting the legs off. Once i did that I had to lightly sand the platform to reduce its size and then glue the legs well underneath the platform.
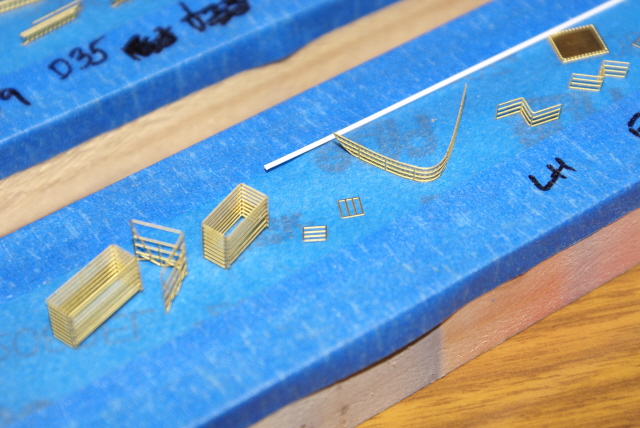
As for the sides of the platform, instead of leaving it in one piece, I had to cut it in half, so that i can bring them together as one around the platform. Here's the sides cut in half.
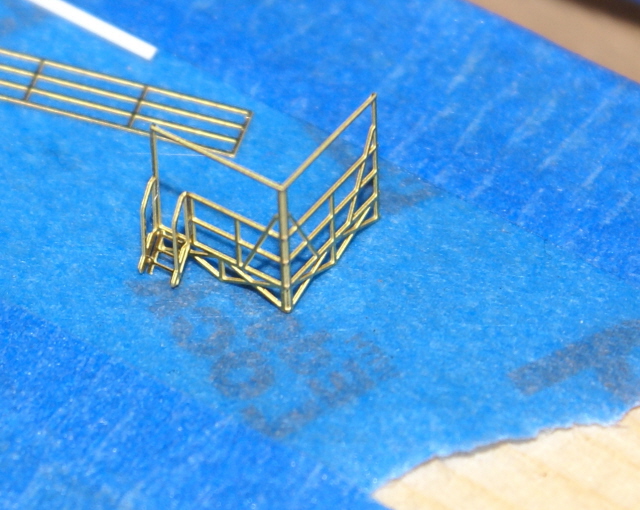
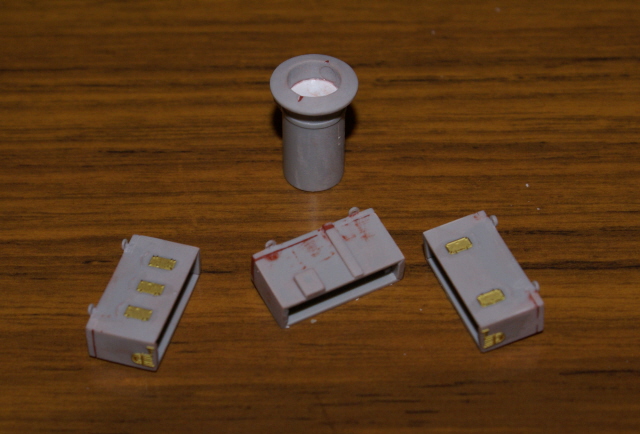
You can also see here the potato bins. I think there's a sadist working at GMM because everyone of the slats on the access side needs to be added to close the box!
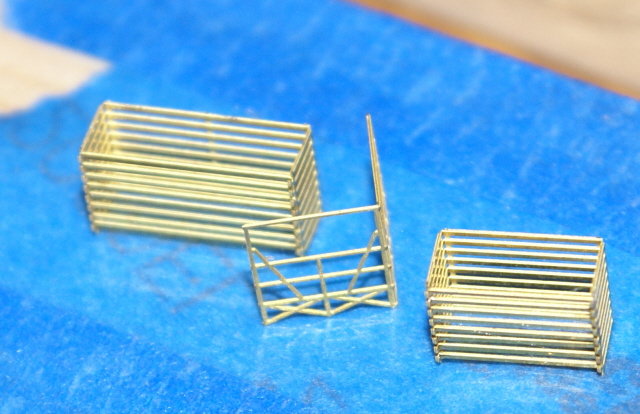
So onto some items ready for painting
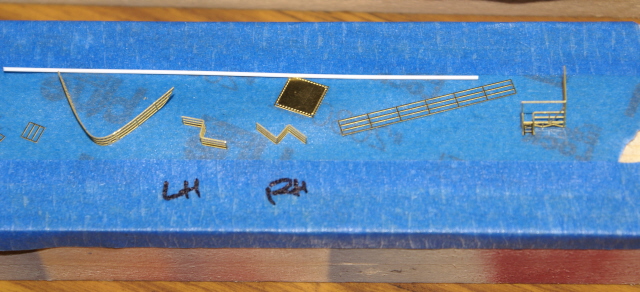
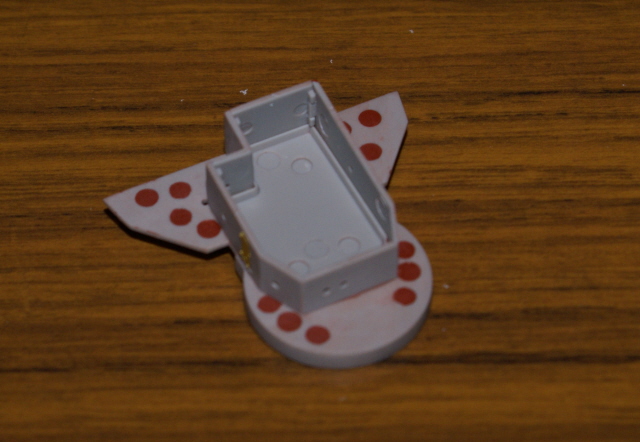
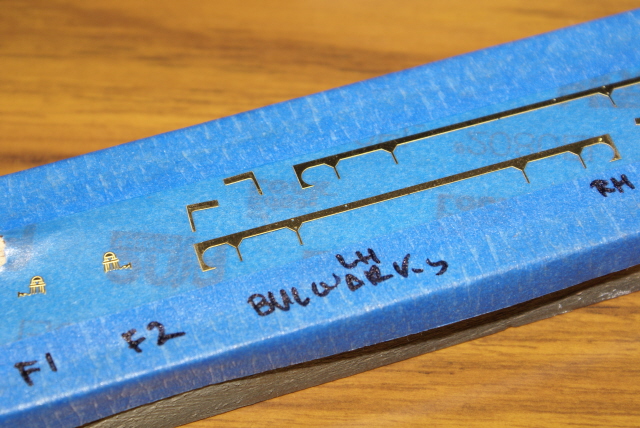
Here again the GMM PE has been fickle. The bulwarks are supposed to be one single piece, but they're way too long for the boat deck (0.3-0.5mm - massive in the modelling world ) So I had to cut them instead of folding them, allowing me to reduce the length once they're painted
ladders and other fittings
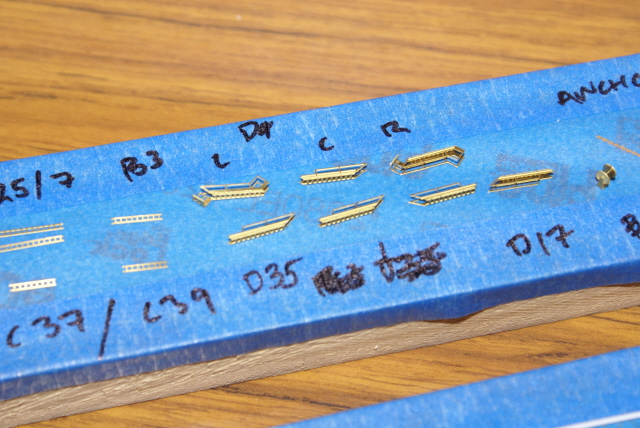
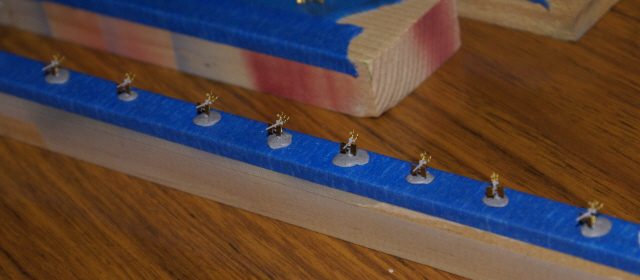
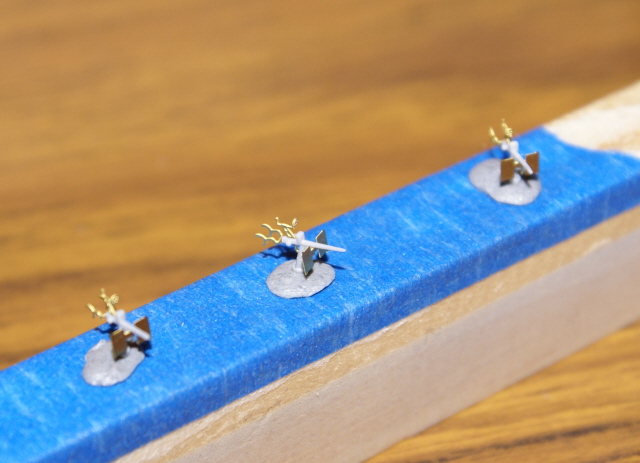
lining all the ducks up in a row
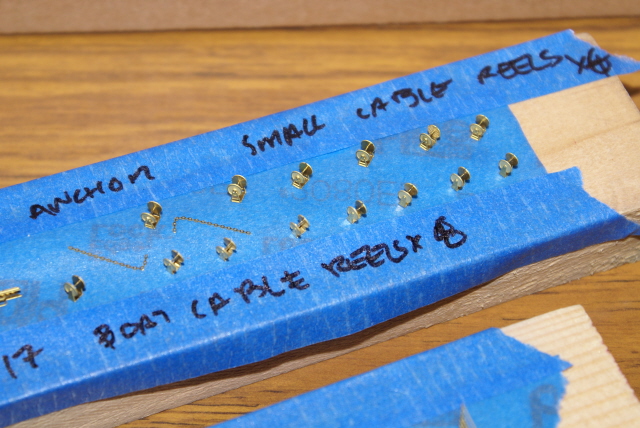
more ducks
next, onto painting. Pics to follow soon folks.
I've been battling a bit with the GMM PE. In general the instructions have been pretty vague and confusing. But there's one area where the instructions indicate that the platform in the wheel house should have its legs folded down, and then the sides are to be folded square and fitted over the top. Well, there was no way that that was going to happen! The platform with the legs folded down was way too large for the sides to fit over once it was folded square!
I had to resort to pulling the platform off the bridge, and cutting the legs off. Once i did that I had to lightly sand the platform to reduce its size and then glue the legs well underneath the platform.
As for the sides of the platform, instead of leaving it in one piece, I had to cut it in half, so that i can bring them together as one around the platform. Here's the sides cut in half.
You can also see here the potato bins. I think there's a sadist working at GMM because everyone of the slats on the access side needs to be added to close the box!
So onto some items ready for painting
Here again the GMM PE has been fickle. The bulwarks are supposed to be one single piece, but they're way too long for the boat deck (0.3-0.5mm - massive in the modelling world
) So I had to cut them instead of folding them, allowing me to reduce the length once they're paintedladders and other fittings
lining all the ducks up in a row
more ducks
next, onto painting. Pics to follow soon folks.
surfsup
Joined: May 20, 2010
KitMaker: 1,230 posts
Model Shipwrights: 1,212 posts
Posted: Tuesday, May 21, 2013 - 10:19 PM UTC
Oh the fun of Photo Etch. It can send you mad but you are doing a great job on it Russell.....Cheers mark
 |

WEB HOSTING BY


Copyright ©2021 Model Shipwrights and Kitmaker Network, a subsidiary of Silver Star Enterprises
All Rights Reserved. Please read our Conditions of Use and Privacy Policy.
All Rights Reserved. Please read our Conditions of Use and Privacy Policy.