

The PE work you've done looks great Russell, keep the updates coming so this MSW noob can keep learning!
Great work on the wings-thingies too mate, a very impressive little display you have there.
Cheers, D


Go to modelshipwrights.com for the current dynamic site!
Hosted by Harry
Liberty ship, SS Jeremiah O'Brien

AussieReg

#007

Joined: June 09, 2009
KitMaker: 8,156 posts
Model Shipwrights: 154 posts

Posted: Tuesday, May 21, 2013 - 11:05 PM UTC


RedDuster

Joined: March 01, 2010
KitMaker: 7,078 posts
Model Shipwrights: 6,649 posts

Posted: Wednesday, May 22, 2013 - 08:51 AM UTC
Great stuff Russell, good to see you back on this one
Si
Si

warreni
Joined: August 14, 2007
KitMaker: 5,926 posts
Model Shipwrights: 2,624 posts

Posted: Wednesday, May 22, 2013 - 02:10 PM UTC
Looking good Russell.

RussellE

#306
Joined: June 27, 2010
KitMaker: 3,959 posts
Model Shipwrights: 2,777 posts
Posted: Wednesday, May 22, 2013 - 10:49 PM UTC
Thank you guys! 
Currently all that PE's in the paint shop. Should be ready to install in a few days, then it's on the masts!
Currently all that PE's in the paint shop. Should be ready to install in a few days, then it's on the masts!

RussellE
#306
Joined: June 27, 2010
KitMaker: 3,959 posts
Model Shipwrights: 2,777 posts
Posted: Thursday, June 13, 2013 - 10:18 PM UTC
a little more progress 
all those ducks are now painted
and shipped.
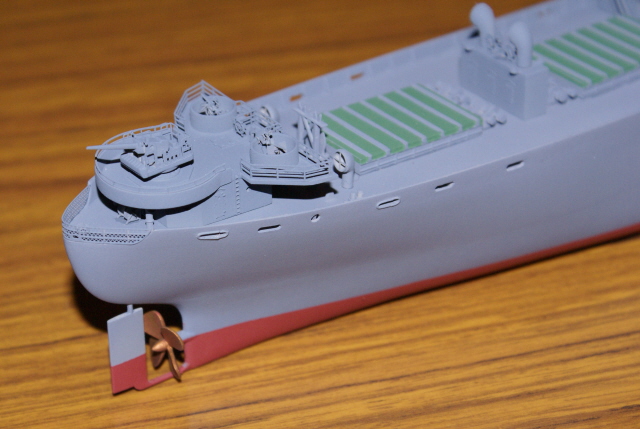
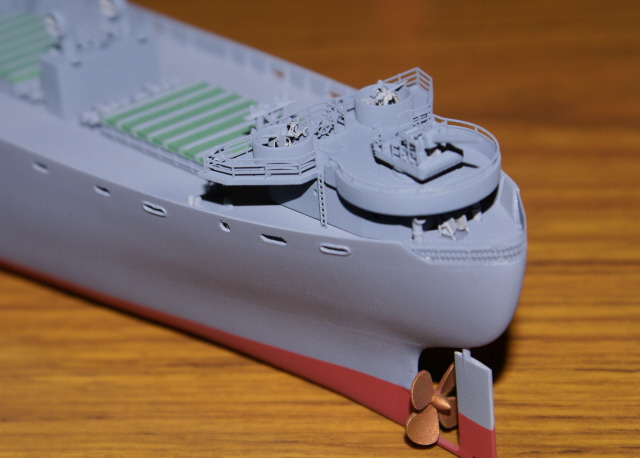
more soon
all those ducks are now painted
and shipped.
more soon

TAFFY3

Joined: January 21, 2008
KitMaker: 2,531 posts
Model Shipwrights: 1,244 posts

Posted: Friday, June 14, 2013 - 02:46 AM UTC
Hello Russell, very nice work. The result makes the battle with PE parts worth the effort. Al
Al
Gremlin56
Joined: October 30, 2005
KitMaker: 3,897 posts
Model Shipwrights: 3,301 posts
KitMaker: 3,897 posts
Model Shipwrights: 3,301 posts
Posted: Friday, June 14, 2013 - 04:34 AM UTC
Immaculate work Russell, not a fault to be found.
Beautiful,
Julian
Beautiful,
Julian
RussellE
#306
Joined: June 27, 2010
KitMaker: 3,959 posts
Model Shipwrights: 2,777 posts
Posted: Friday, June 14, 2013 - 11:51 PM UTC
Thank, you Al, thank you, Julian. I'm currently trying a new way to replace the masts, as I'm not a big fan of kit masts-too soft & never quite round.
Ps Julian, the camera does hide a lot
I'm currently trying a new way to replace the masts, as I'm not a big fan of kit masts-too soft & never quite round. Ps Julian, the camera does hide a lot

surfsup
Joined: May 20, 2010
KitMaker: 1,230 posts
Model Shipwrights: 1,212 posts

Posted: Saturday, June 15, 2013 - 09:07 PM UTC
You are doing one sweet job on this one Russell. Very good indeed.....Cheers mark
warreni
Joined: August 14, 2007
KitMaker: 5,926 posts
Model Shipwrights: 2,624 posts
Posted: Sunday, June 16, 2013 - 11:55 AM UTC
Hi Russell.
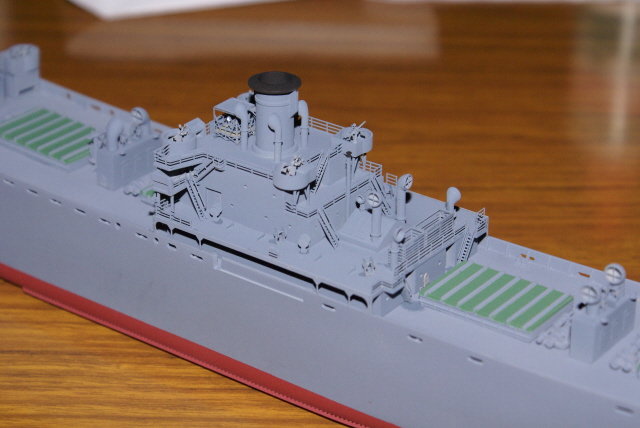
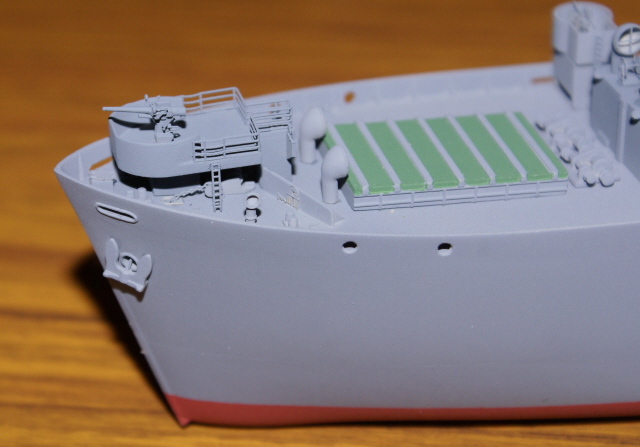
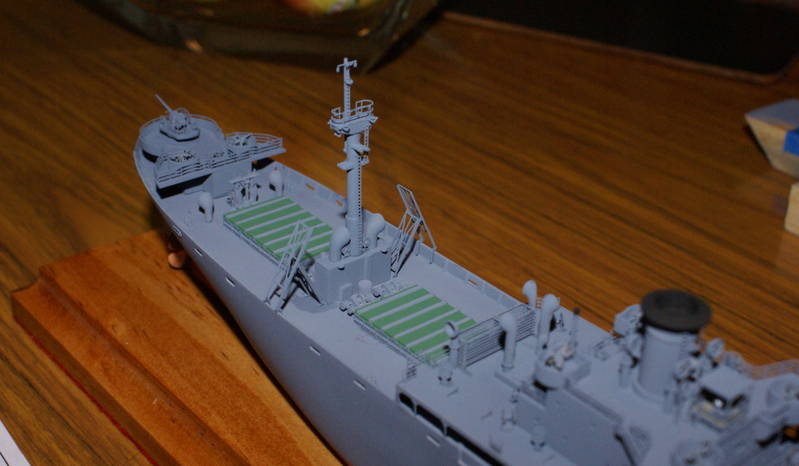
Not wanting to be picky or anything but I noticed on the picture of the bow area that a ladder there is going up to a railing but there is no break in the railing to let people climb onto the platform. I had a look at the Eduard plans and there is supposed to be a break there.
Looking much more detailed than the OOB one I built back in 2005.
Cheers mate
Warren
RussellE
#306
Joined: June 27, 2010
KitMaker: 3,959 posts
Model Shipwrights: 2,777 posts
Posted: Sunday, June 16, 2013 - 10:28 PM UTC
Thank you Mark
That's okay Warren. To be honest I've not been overly impressed with the GMM PE so I wouldn't be surprised. However, in their defence they have put a 'sag' in the areas where you're referring to, so I wonder if that's meant to be a removable area of chain rail? This would seem logical since there's an access hatch at the rear of the platform and a watertight door just below it, allowing 'jack' to scupper down internally rather that using the external ladders?
That's okay Warren. To be honest I've not been overly impressed with the GMM PE so I wouldn't be surprised. However, in their defence they have put a 'sag' in the areas where you're referring to, so I wonder if that's meant to be a removable area of chain rail? This would seem logical since there's an access hatch at the rear of the platform and a watertight door just below it, allowing 'jack' to scupper down internally rather that using the external ladders?

Shanghaied

Joined: June 30, 2011
KitMaker: 189 posts
Model Shipwrights: 106 posts

Posted: Monday, June 17, 2013 - 01:15 AM UTC
Hi Russel,
have a look here:
http://inphotos.org/files/2012/10/289315809_9fbb78a6c9_o.jpg
looks like chains which can be removed.
Greetings from Shanghai
have a look here:
http://inphotos.org/files/2012/10/289315809_9fbb78a6c9_o.jpg
looks like chains which can be removed.
Greetings from Shanghai

strongarden
Joined: May 14, 2012
KitMaker: 730 posts
Model Shipwrights: 11 posts

Posted: Monday, June 17, 2013 - 07:29 AM UTC
Russell this is absolutely impressive! Even though you're keeping it simple you're doing a nice job sharing your progress and all the detail mind-crampers as well. I've begun minor work on a sea dio and was hoping to use the O'Brien - but in 1/700 - so thanks for this - Dave
warreni
Joined: August 14, 2007
KitMaker: 5,926 posts
Model Shipwrights: 2,624 posts
Posted: Monday, June 17, 2013 - 08:15 PM UTC
Quoted Text
Thank you Mark
That's okay Warren. To be honest I've not been overly impressed with the GMM PE so I wouldn't be surprised. However, in their defence they have put a 'sag' in the areas where you're referring to, so I wonder if that's meant to be a removable area of chain rail? This would seem logical since there's an access hatch at the rear of the platform and a watertight door just below it, allowing 'jack' to scupper down internally rather that using the external ladders?
I couldn't see the sag before mate. You may be right.
RussellE
#306
Joined: June 27, 2010
KitMaker: 3,959 posts
Model Shipwrights: 2,777 posts
Posted: Saturday, June 29, 2013 - 10:40 PM UTC
Thanks again guys!
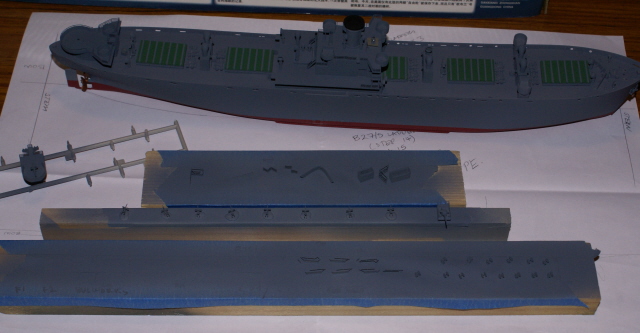
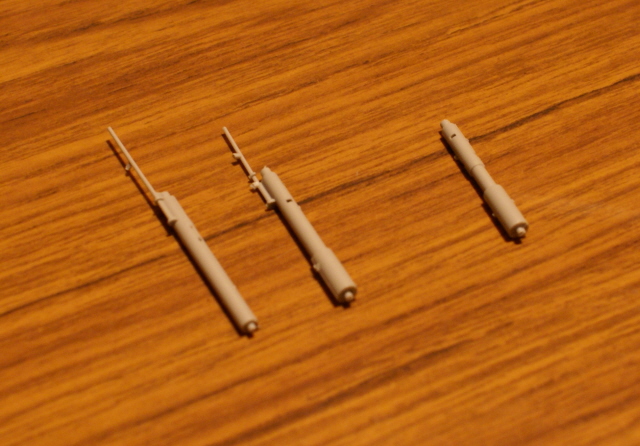
Just a small update today to show you what I've been up to. Now, I might have mentioned before I'm not a big fan of moulded round parts (masts, barrels etc). This is nothing against the kit manufacturers as they do a pretty good job within the limits of what can be achieved with plastic. But you'll always end up with a not quite round mast, and weak spars etc that can never stand up to the tensions placed on them with rigging. Here's the moulded kit masts:
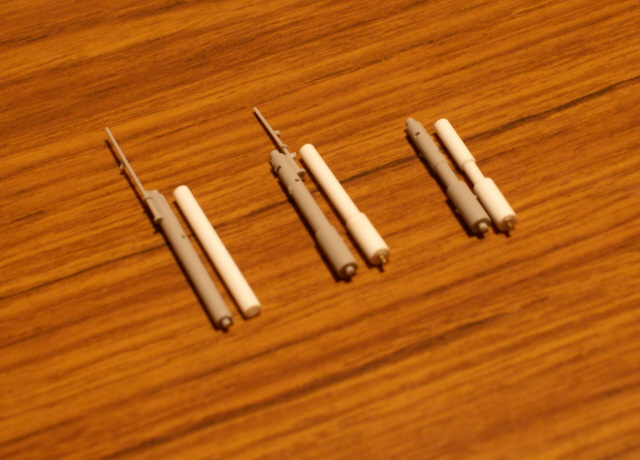
For years I have been replacing these kind of masts with different diameters of plastic tube and brass rod. This can be a pretty expensive exercise given all the different diameters required.
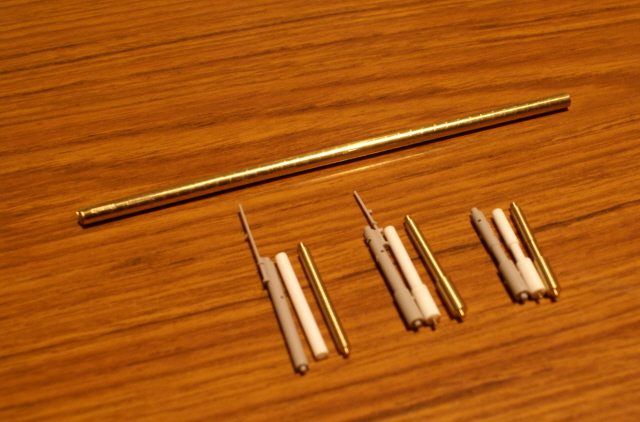
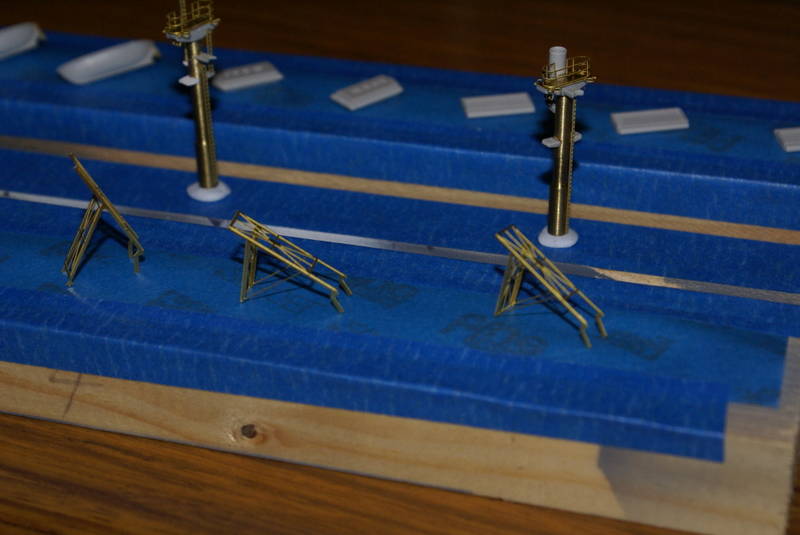
So I've been toying with the idea of buying a small lathe. This would give me the opportunity to turn up my own masts from brass stock which is relatively inexpensive. To that end I thought why not give it a try. So here we go. These were turned up by friend to the dimensions I supplied.
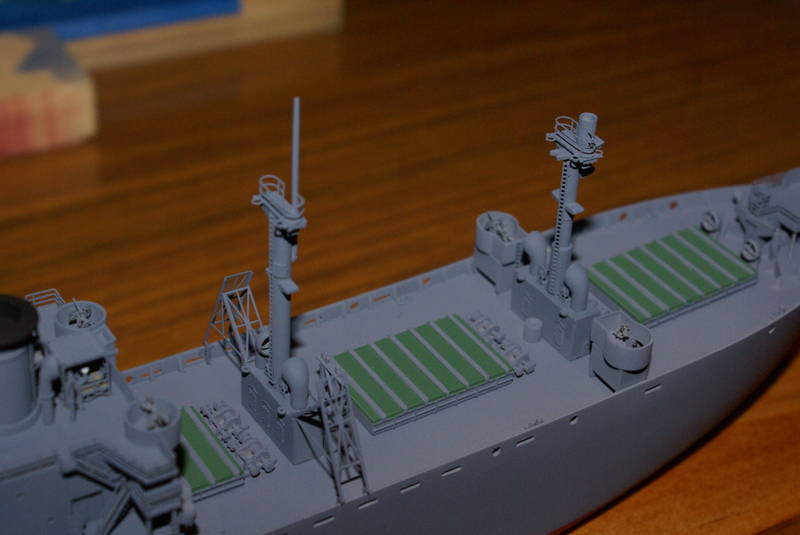
And now I'm starting to add the details:
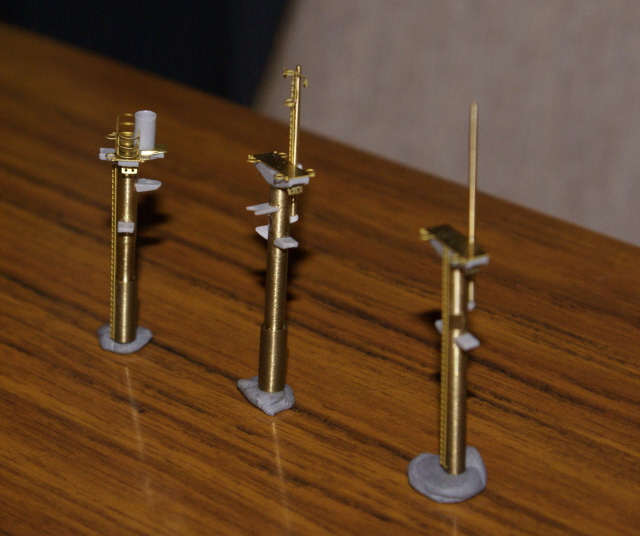
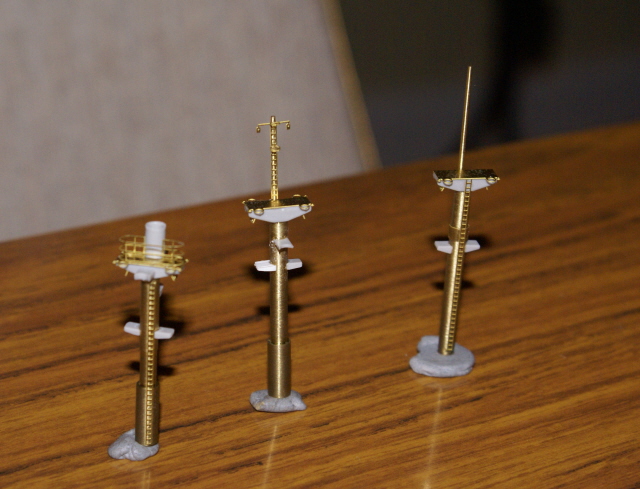
There's still a few details left to add but there's no comparison to the plastic parts supplied in the kit or the plastic tube. The top mast is brass rod I inserted into a micro chuck in the dremel then tapered them on sand paper, using a block of wood to apply pressure.
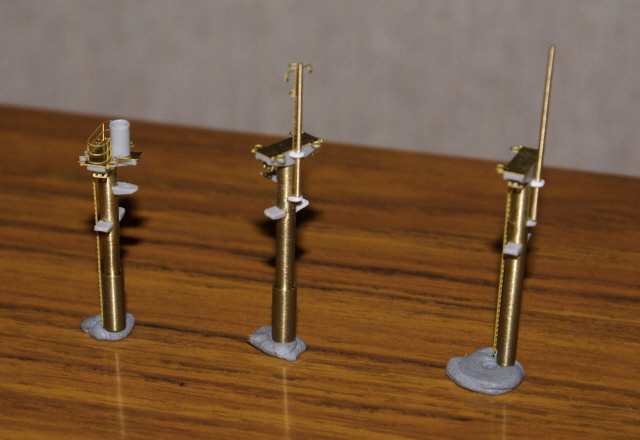
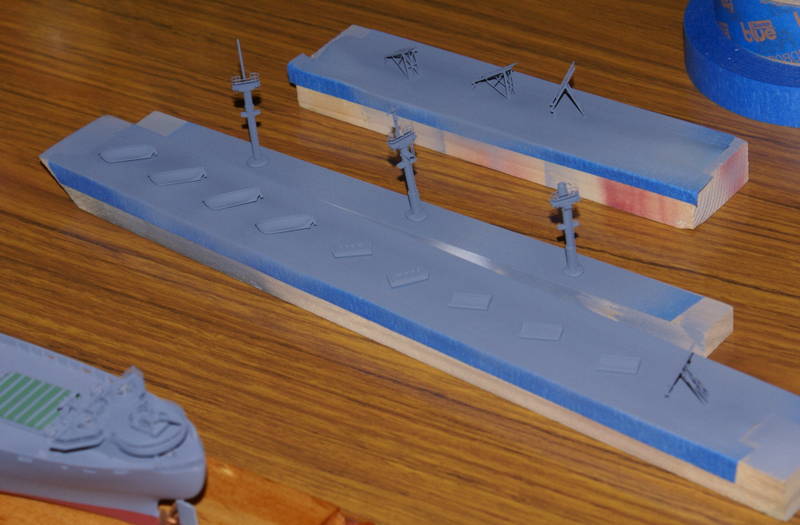
And the base is now ready too.
Guess I'm buying a lathe! More soon
Just a small update today to show you what I've been up to. Now, I might have mentioned before I'm not a big fan of moulded round parts (masts, barrels etc). This is nothing against the kit manufacturers as they do a pretty good job within the limits of what can be achieved with plastic. But you'll always end up with a not quite round mast, and weak spars etc that can never stand up to the tensions placed on them with rigging. Here's the moulded kit masts:
For years I have been replacing these kind of masts with different diameters of plastic tube and brass rod. This can be a pretty expensive exercise given all the different diameters required.
So I've been toying with the idea of buying a small lathe. This would give me the opportunity to turn up my own masts from brass stock which is relatively inexpensive. To that end I thought why not give it a try. So here we go. These were turned up by friend to the dimensions I supplied.
And now I'm starting to add the details:
There's still a few details left to add but there's no comparison to the plastic parts supplied in the kit or the plastic tube. The top mast is brass rod I inserted into a micro chuck in the dremel then tapered them on sand paper, using a block of wood to apply pressure.
And the base is now ready too.
Guess I'm buying a lathe!
More soon 
Naseby

Joined: October 15, 2010
KitMaker: 825 posts
Model Shipwrights: 97 posts

Posted: Thursday, July 11, 2013 - 07:32 AM UTC
Outstanding job Russell. Keep those pictures coming.

Gremlin56
Joined: October 30, 2005
KitMaker: 3,897 posts
Model Shipwrights: 3,301 posts
KitMaker: 3,897 posts
Model Shipwrights: 3,301 posts
Posted: Thursday, July 11, 2013 - 07:42 AM UTC
I missed your latest post Russell, that is stellar work on the masts. Compliments sir
cheers,
Julian
cheers,
Julian
warreni
Joined: August 14, 2007
KitMaker: 5,926 posts
Model Shipwrights: 2,624 posts
Posted: Thursday, July 11, 2013 - 07:55 AM UTC
Great idea on those masts Russell and well executed. I was thinking of getting my own photo-etch maker to see how that went. But I need a job first...
Luckily most of my detail sets come with pre-made masts, well the Pontos ones do anyway.
Cheers
Warren
Luckily most of my detail sets come with pre-made masts, well the Pontos ones do anyway.
Cheers
Warren
RussellE
#306
Joined: June 27, 2010
KitMaker: 3,959 posts
Model Shipwrights: 2,777 posts
Posted: Friday, July 12, 2013 - 09:54 PM UTC
Naseby, Thank you
Julian, Thank you There's a few threads i don't receive emails on, even though I've subscribed to them-this one included.
Warren, Thank you I'd love to see how one of those photo etch makers works.
Julian, Thank you
There's a few threads i don't receive emails on, even though I've subscribed to them-this one included.Warren, Thank you
I'd love to see how one of those photo etch makers works.RussellE
#306
Joined: June 27, 2010
KitMaker: 3,959 posts
Model Shipwrights: 2,777 posts
Posted: Wednesday, July 17, 2013 - 10:28 PM UTC
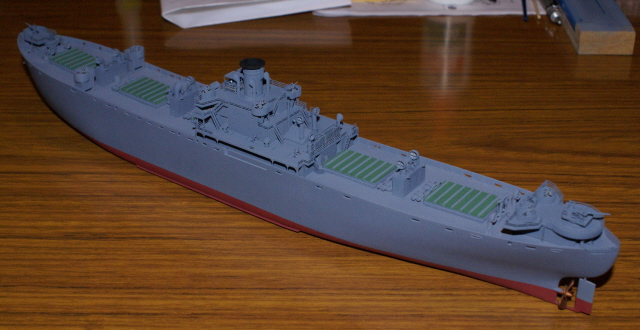
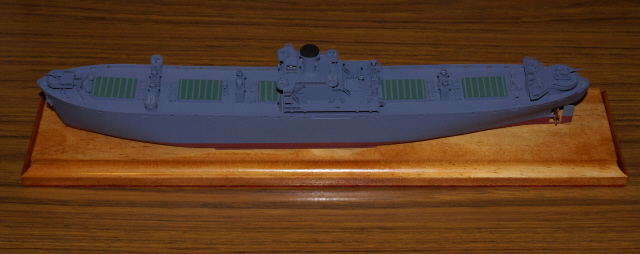
Ok, masts all painted as are the life raft slides. Lots of grey here so all pretty monotone, but she's starting to look like a real ship now... well, almost 
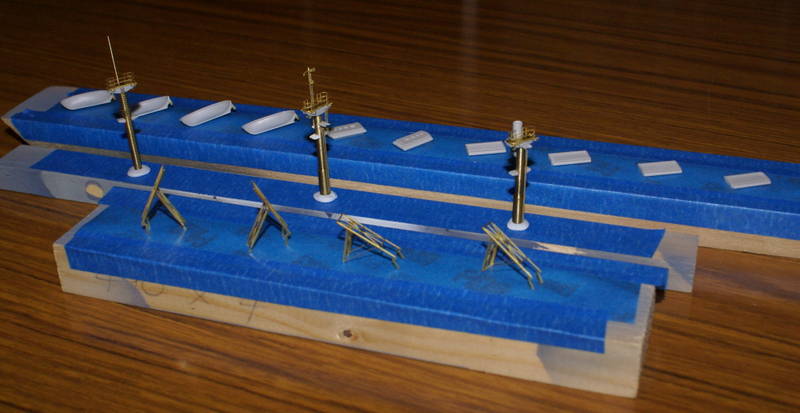
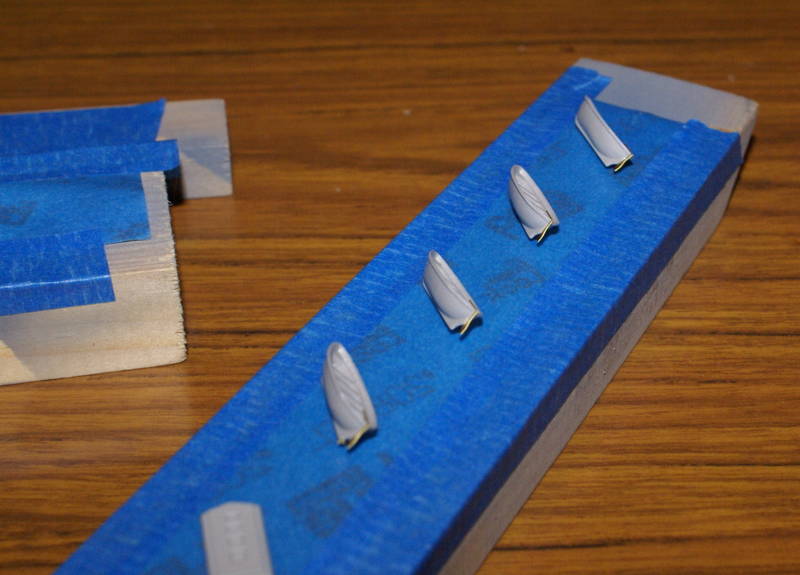
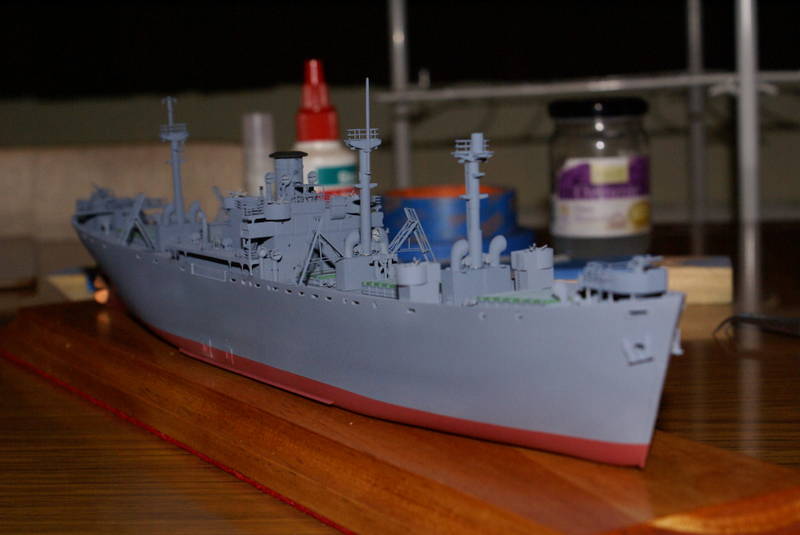
more soon
more soon
TAFFY3
Joined: January 21, 2008
KitMaker: 2,531 posts
Model Shipwrights: 1,244 posts
Posted: Thursday, July 18, 2013 - 01:19 AM UTC
Hello Russell, Really nice work, the masts and slides look great. Al
Al
TimReynaga
Joined: May 03, 2006
KitMaker: 2,500 posts
Model Shipwrights: 1,830 posts
Posted: Thursday, July 18, 2013 - 02:05 AM UTC
Russell,
I'm with you about the expense of brass rod/tube for masts, it bugs me every time. The lathe idea is interesting... and you get more precise control over diameters, taper, etc. Anyway, it is really paying off for you - your Liberty masts look fantastic!
Tim
I'm with you about the expense of brass rod/tube for masts, it bugs me every time. The lathe idea is interesting... and you get more precise control over diameters, taper, etc. Anyway, it is really paying off for you - your Liberty masts look fantastic!
Tim

RussellE
#306
Joined: June 27, 2010
KitMaker: 3,959 posts
Model Shipwrights: 2,777 posts
Posted: Thursday, July 18, 2013 - 11:50 PM UTC
Many thanks Guys.
Tim, I know what you mean. The trick is trying to find a lathe cheap enough so that doesn't give 'her indoors' any reason to put me in the 'dog house' 
Tim, I know what you mean. The trick is trying to find a lathe cheap enough so that doesn't give 'her indoors' any reason to put me in the 'dog house'
surfsup
Joined: May 20, 2010
KitMaker: 1,230 posts
Model Shipwrights: 1,212 posts
Posted: Friday, July 19, 2013 - 12:31 AM UTC
She is really getting there Russell and looking Fab......Cheers mark
RussellE
#306
Joined: June 27, 2010
KitMaker: 3,959 posts
Model Shipwrights: 2,777 posts
Posted: Friday, July 19, 2013 - 01:48 PM UTC
Thank you Mark
I just bought this from ebay, 6 tools in one, so hopefully it'll come in handy!
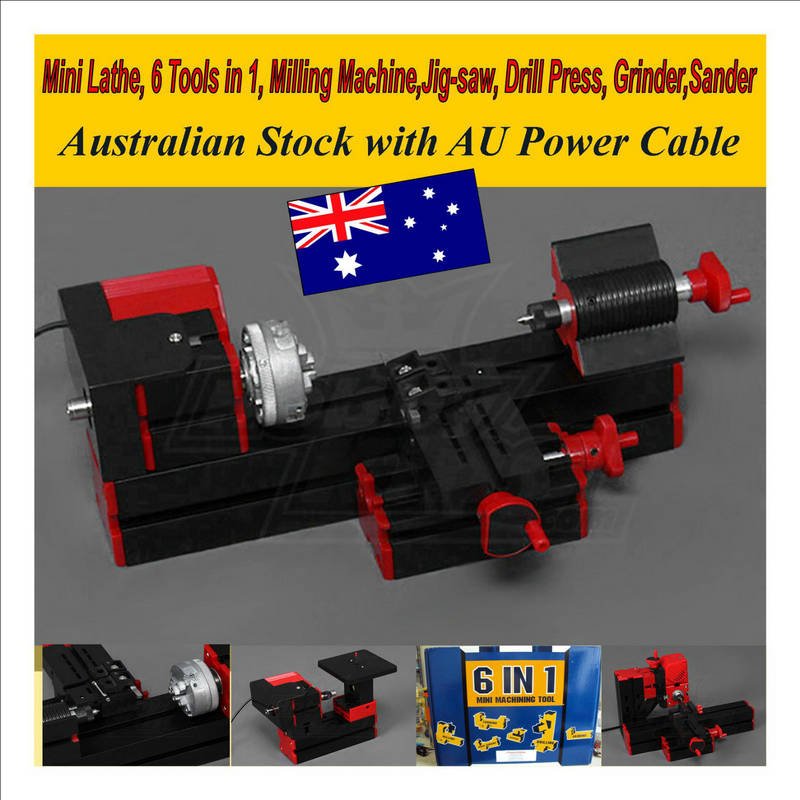
I just bought this from ebay, 6 tools in one, so hopefully it'll come in handy!
 |

WEB HOSTING BY


Copyright ©2021 Model Shipwrights and Kitmaker Network, a subsidiary of Silver Star Enterprises
All Rights Reserved. Please read our Conditions of Use and Privacy Policy.
All Rights Reserved. Please read our Conditions of Use and Privacy Policy.