Ships by Class/Type: Military Support Vessels
Non-combat support vessels of any type and post-sail.
Hosted by Harry
Liberty ship, SS Jeremiah O'Brien
RussellE
#306
Visit this Community
Victoria, Australia
Joined: June 27, 2010
KitMaker: 3,959 posts
Model Shipwrights: 2,777 posts
Posted: Saturday, September 14, 2013 - 11:29 PM UTC
Well, after several weeks, faffing about with the 6 in 1 lathe, I can honestly say, that it's the most dissappointing purchase I have ever made. I would not recomend it to anyone considering its purchase for turning up masts from brass. I'm going to save my pennies for a real lathe, whilst much more expensive, i know it'll work! 
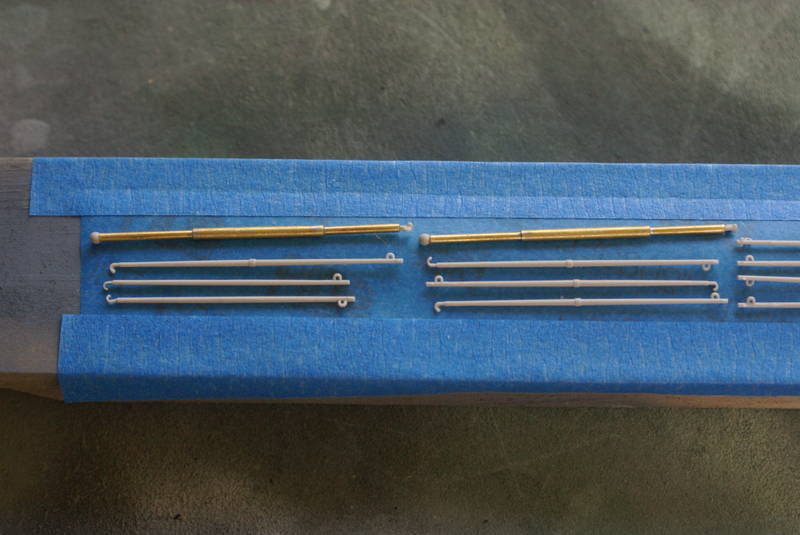
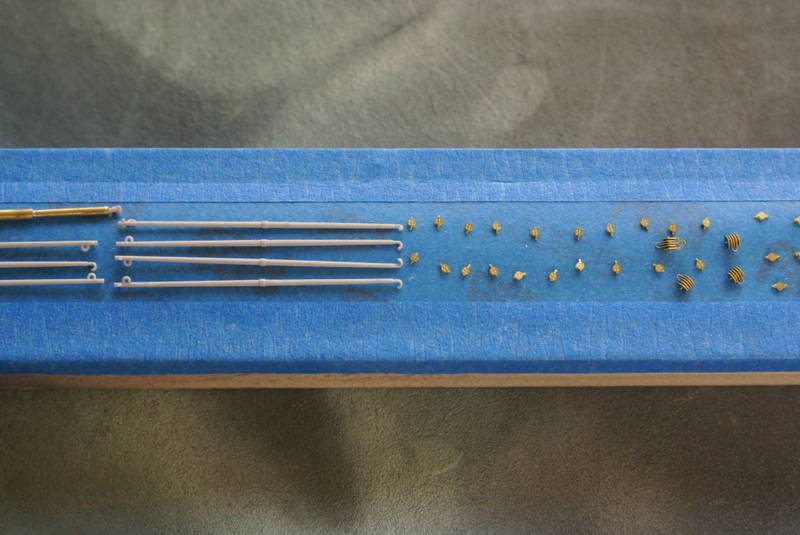
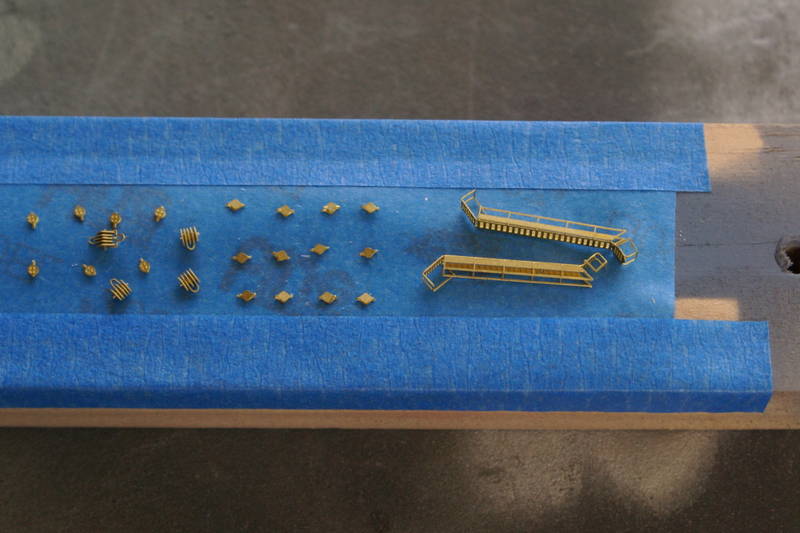
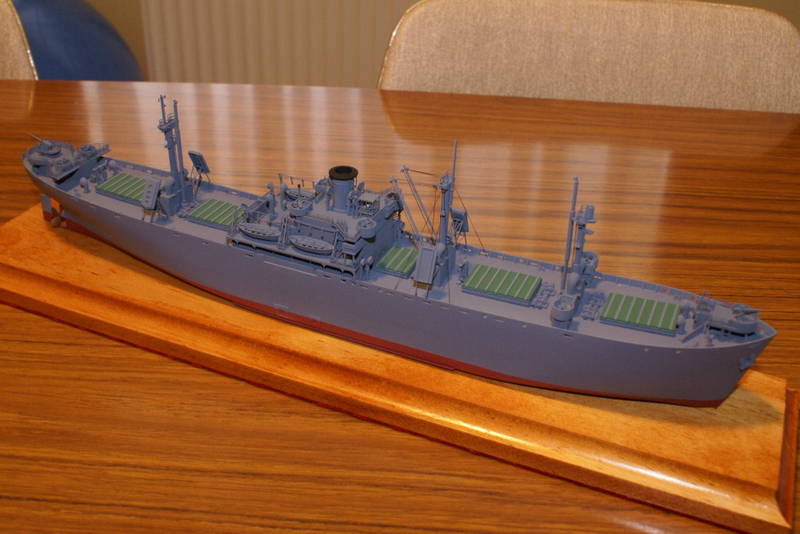
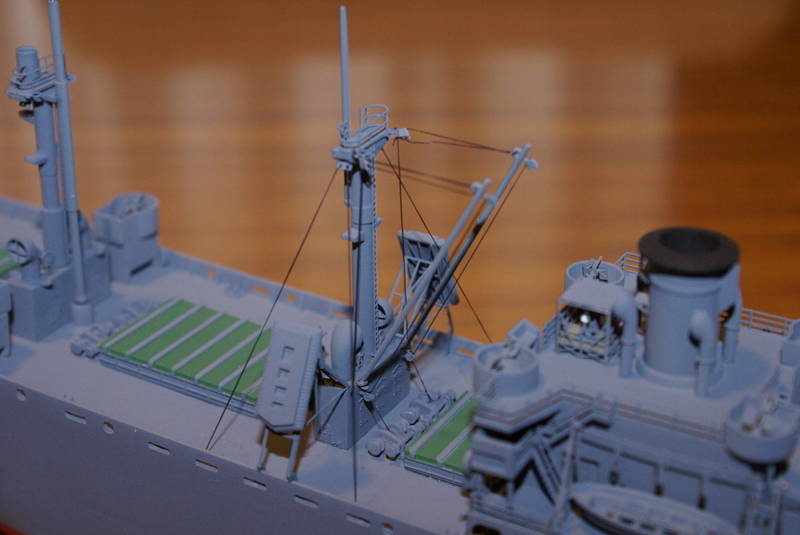
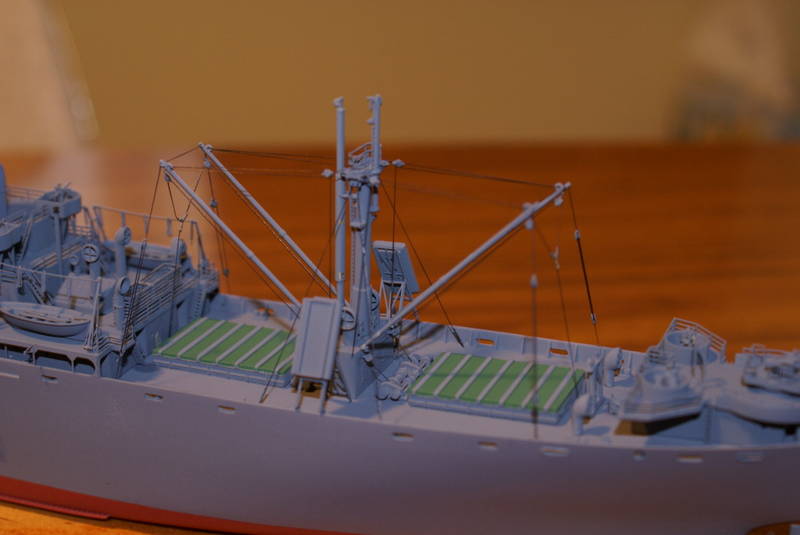
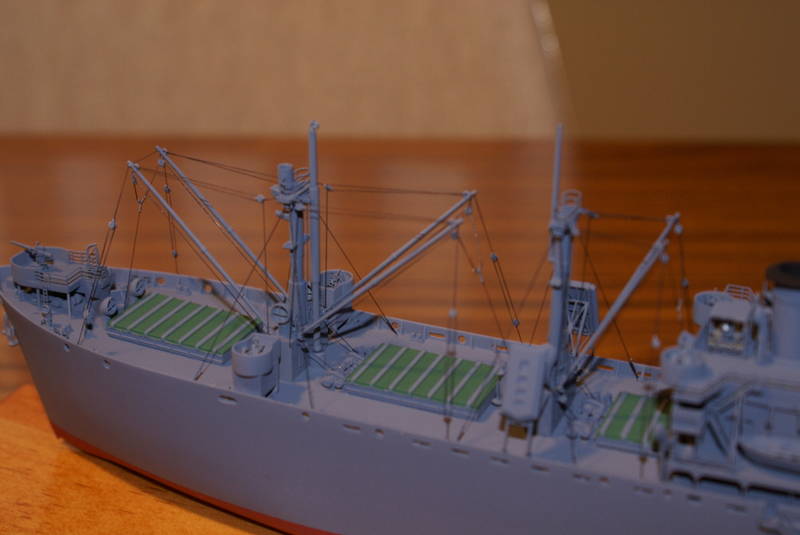
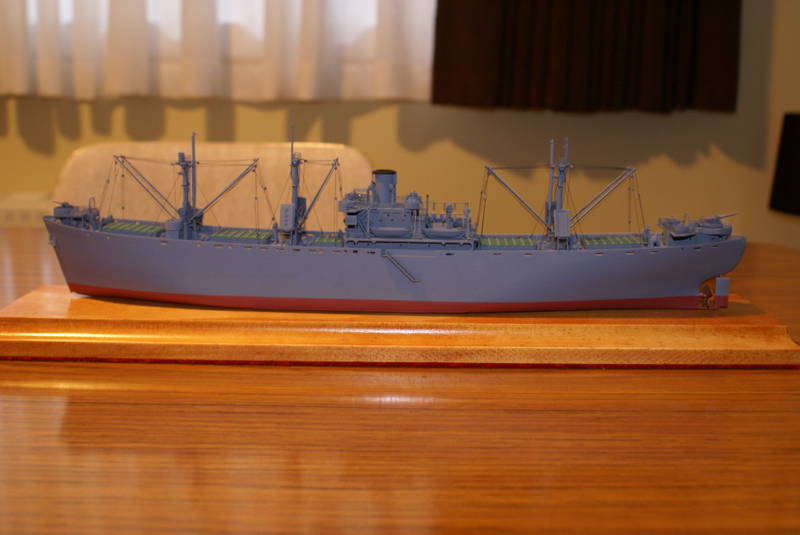
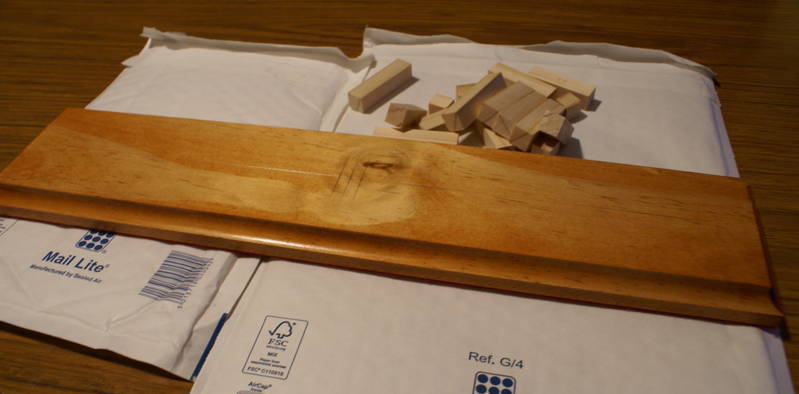
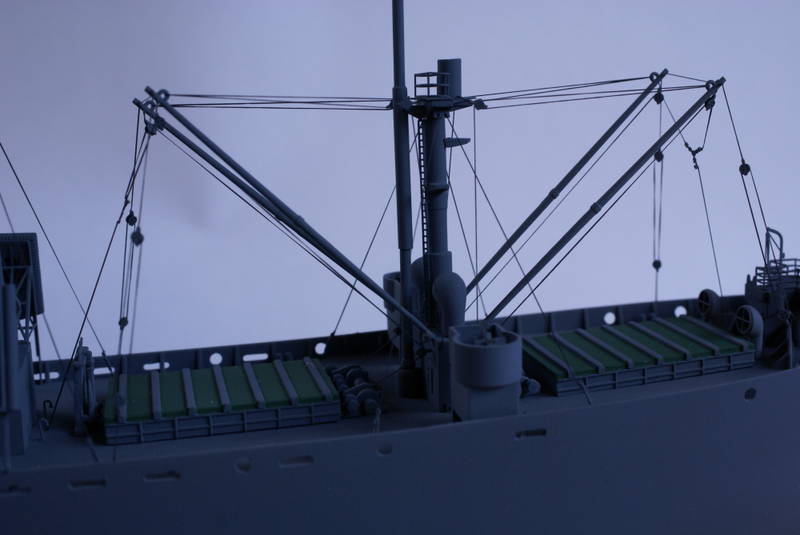
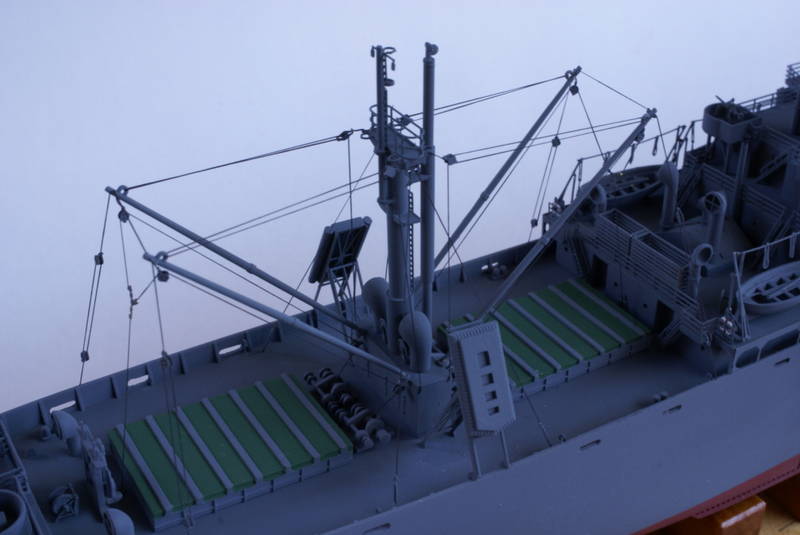
In the mean time it's back to the old school method of using off the shelf stock to create masts... Pics to follow soon, which hopefully will finish this beasty off!
RussellE
#306
Visit this Community
Victoria, Australia
Joined: June 27, 2010
KitMaker: 3,959 posts
Model Shipwrights: 2,777 posts
Posted: Sunday, November 03, 2013 - 06:46 PM UTC
It's been a little while since my last post, but I'm still pottering along on the Liberty...

Having giving up hope on using the mini lathe to turn up Brass components, I've gone back to the old school of soldering together differing diameters.

And I've built up the final PE assemblies for painting: pulleys and accom ladders


At the final stages of assembly there's usually lots of itzy bits of PE to paint and add, so rather than removing every one and placing it on masking tape, i tend to tape the sheet to a used part sprue from the kit and spray first, then remove and fix to the model. Any exposed brass from cutting or folding i touch up by brush.

And some shots as I start to add all those itzy bitsy bits of PE


This is the first time I've tried Ezy Line for the rigging and I'm reallyhappy with the result. Drill a small hole in the deck, and apply accelorator to the hole. Dip the line into CA and place it in the hole. You can then stretch it up to 7 times it's original length!

Althougth I gotta say adding all those pulleys is the most difficult bit of the kit so far!


More soon! Hopefully the next post will be of a completed Liberty ship!!!
RedDuster
Visit this Community
England - South East, United Kingdom
Joined: March 01, 2010
KitMaker: 7,078 posts
Model Shipwrights: 6,649 posts
Posted: Sunday, November 03, 2013 - 09:01 PM UTC
Looking great Russel,

Much respect on the work with those pulleys, they look totally superb.

Si
warreni
Visit this Community
South Australia, Australia
Joined: August 14, 2007
KitMaker: 5,926 posts
Model Shipwrights: 2,624 posts
Posted: Monday, November 04, 2013 - 05:22 AM UTC
Looking great Russell.
I had never thought of attaching the Ezyline that way... I mean putting the accelerator in the hole..
Cheers
Warren
RussellE
#306
Visit this Community
Victoria, Australia
Joined: June 27, 2010
KitMaker: 3,959 posts
Model Shipwrights: 2,777 posts
Posted: Monday, November 04, 2013 - 08:34 AM UTC
Thank you Si. I think I'm using a fair bit of artistic licence on the pulleys, but if it upholds the illusion, then ill be happy

Thank you too Warren. Yup, gotta say this being the first time trying the ezy line and accelerator that the results are encouraging! I find rigging the most challenging part of any model. Caenis is great, but too fine for this scale, and I'm a ham fist when it comes to stretched sprue, so I think the ezy line is a winner!

Even if you happen to knock it, because it stretches it stays attached and it won't fly off into the ether ruining a days work!
Naseby
Visit this Community
Slovakia
Joined: October 15, 2010
KitMaker: 825 posts
Model Shipwrights: 97 posts
Posted: Sunday, January 05, 2014 - 12:18 PM UTC
Its looking very good. Do You perhaps have a link for this Ezy line product ? I tried to google it, but came up with all sort of strange results which have nothing to do with this.
Grauwolf
#084
Visit this Community
Quebec, Canada
Joined: September 14, 2005
KitMaker: 2,485 posts
Model Shipwrights: 1,157 posts
Posted: Sunday, January 05, 2014 - 04:46 PM UTC
Naseby,

Here is a link to the product. It is exclusive to them.

http://www.berkshirejunction.com/ezline.html

Cheers,
Joe
RussellE
#306
Visit this Community
Victoria, Australia
Joined: June 27, 2010
KitMaker: 3,959 posts
Model Shipwrights: 2,777 posts
Posted: Sunday, January 05, 2014 - 09:40 PM UTC
Thanks Naseby.

Nearly finished now... haven't posted anything for a while as it's really only very small steps that's taking a long while to complete.

You're right Joe, Berkshire junction do make the Ezy line. If you have no luck with them Try Redroo Models as they also supply it

RedRoo
Naseby
Visit this Community
Slovakia
Joined: October 15, 2010
KitMaker: 825 posts
Model Shipwrights: 97 posts
Posted: Monday, January 06, 2014 - 12:34 AM UTC
Thank You for the link, I just placed the order
RussellE
#306
Visit this Community
Victoria, Australia
Joined: June 27, 2010
KitMaker: 3,959 posts
Model Shipwrights: 2,777 posts
Posted: Monday, January 06, 2014 - 02:37 PM UTC
Well I thought I should upload some photos to show that I haven't been slacking off

I have rigged, dismantled, rigged again, dismantled again, and rigged for a third time. Hopefully the third time's a charm! As a kit this is one of the most deceiving in terms of difficutly when rigging. Battleships are easy compared to pulleys and booms etc!

These pics were taken in poor light so my apologies if they're a bit blurry...


Thanks go to Julian for the advice on the rigging too!
RedDuster
Visit this Community
England - South East, United Kingdom
Joined: March 01, 2010
KitMaker: 7,078 posts
Model Shipwrights: 6,649 posts
Posted: Wednesday, January 08, 2014 - 04:23 AM UTC
Hi Russell,

Great job Russell. The rigging really does look the part.

Si
Gremlin56
Joined: October 30, 2005
KitMaker: 3,897 posts
Model Shipwrights: 3,301 posts
Posted: Thursday, January 09, 2014 - 07:53 AM UTC
I had the easy part Russell, you did the actual rigging. That is absolutely fantastic. This will bring tears of joy to the eyes of the pre-containership generation of sailors. You got it 100% right. My most sincere compliments mate,
Julian
RussellE
#306
Visit this Community
Victoria, Australia
Joined: June 27, 2010
KitMaker: 3,959 posts
Model Shipwrights: 2,777 posts
Posted: Thursday, January 09, 2014 - 09:19 PM UTC
Thank you Si and Julian! Very kind of you both and I really appreciate your comments

I had been sweating on the rigging for a while now. It's been quite cool down here, but summer's arrived with a bang so now i'm sweating 'cos its so hot all of a sudden! That of course means I may not get the chance to do any more work for a couple of weeks on her.

Next step is to add the life preservers. If anyone knows of their location on the ship that would be a great help, as the GMM instructions give no indication what so ever.
Naseby
Visit this Community
Slovakia
Joined: October 15, 2010
KitMaker: 825 posts
Model Shipwrights: 97 posts
Posted: Friday, January 10, 2014 - 10:52 AM UTC
Well, not an expert, but I think the rigging looks great. It gives the whole model that extra something and makes it so much more interesting.
AussieReg
Staff MemberAssociate Editor
AUTOMODELER
#007
Visit this Community
Victoria, Australia
Joined: June 09, 2009
KitMaker: 8,156 posts
Model Shipwrights: 154 posts
Posted: Friday, January 10, 2014 - 01:03 PM UTC
Super job Russell, the rigging looks great and really brings it to life.

Cheers, D
TimReynaga
Staff MemberAssociate Editor
MODEL SHIPWRIGHTS
Visit this Community
California, United States
Joined: May 03, 2006
KitMaker: 2,500 posts
Model Shipwrights: 1,830 posts
Posted: Friday, January 10, 2014 - 01:14 PM UTC
Agreed. Russell, all that delicate rigging brings the chunky old duckling to life. Nice job!

RussellE
#306
Visit this Community
Victoria, Australia
Joined: June 27, 2010
KitMaker: 3,959 posts
Model Shipwrights: 2,777 posts
Posted: Friday, January 10, 2014 - 07:04 PM UTC
Many thanks everyone! Nearly there now, just decals and life preservers, then a coat of clear to seal it all in!
RussellE
#306
Visit this Community
Victoria, Australia
Joined: June 27, 2010
KitMaker: 3,959 posts
Model Shipwrights: 2,777 posts
Posted: Saturday, January 18, 2014 - 10:45 PM UTC
Final stages now: I didn't want to leave the stand as is and have decided to add some chocks. I thought it looked pretty plain without some kind of elevation for the old gal, and brass pedestals would have looked a bit too tall...


and here they are spaced out to see how they look, ready for a coat of clear.


Finished pics soon!!!
Gremlin56
Joined: October 30, 2005
KitMaker: 3,897 posts
Model Shipwrights: 3,301 posts
Posted: Sunday, January 19, 2014 - 12:00 AM UTC
A magnificent Job, Russell, congrats
RussellE
#306
Visit this Community
Victoria, Australia
Joined: June 27, 2010
KitMaker: 3,959 posts
Model Shipwrights: 2,777 posts
Posted: Sunday, January 26, 2014 - 06:55 PM UTC
Well friends, I'm calling this one done

a couple of quick shots as i finished up the base:


and the finished photos!


for lack of a 'reference' on the life rings, I took the "liberty" of painting them as shown. (Pun intended )


Thanks go to everyone who has posted their help and advice. Hopefully I have done the ol' girl justice and the crews who braved conditions we can only read about.

Thanks to, to everyone who took the time to look in.

On reflection, the Trumpeter kit is great value, providing many hours of enjoyment. The WEM paints performed great too. The only gripe I had was the instructions on the PE. The GMM instructions are all squashed onto 2 A4 pages, and as such aren't really clear at times. It would be good if they produced a more detailed booklet a la WEM's instuctions.

And last but not least, a shot with a Type 7 alongside for size comparison...

AussieReg
Staff MemberAssociate Editor
AUTOMODELER
#007
Visit this Community
Victoria, Australia
Joined: June 09, 2009
KitMaker: 8,156 posts
Model Shipwrights: 154 posts
Posted: Sunday, January 26, 2014 - 07:20 PM UTC
This has been a great thread to follow Russ, and a real education for this newby to the land of shipwrights.

Thanks for sharing so much detail, and congrats on a great build!

Cheers, D
Shanghaied
Visit this Community
Schleswig-Holstein, Germany
Joined: June 30, 2011
KitMaker: 189 posts
Model Shipwrights: 106 posts
Posted: Sunday, January 26, 2014 - 11:06 PM UTC
Hi Russel,

Very nice and clean built!
Always need to weather mine t cover the mistakes

Greetings from Shanghai
RussellE
#306
Visit this Community
Victoria, Australia
Joined: June 27, 2010
KitMaker: 3,959 posts
Model Shipwrights: 2,777 posts
Posted: Monday, January 27, 2014 - 05:08 PM UTC
Thanks D and Tom!

D: Hope you can share some of your maritime adventures with us soon.

Tom: I reckon if i tried to weather my ships i'd never finish-being the slow builder that i am
Fordboy
Visit this Community
Auckland, New Zealand
Joined: July 13, 2004
KitMaker: 2,169 posts
Model Shipwrights: 1,597 posts
Posted: Tuesday, January 28, 2014 - 06:32 AM UTC
Ahoy Russell

I have watched this build with very keen interest.

A very nice result indeed. I love your base its very simple but effective.

Well done.


Cheers


Sean
TimReynaga
Staff MemberAssociate Editor
MODEL SHIPWRIGHTS
Visit this Community
California, United States
Joined: May 03, 2006
KitMaker: 2,500 posts
Model Shipwrights: 1,830 posts
Posted: Thursday, January 30, 2014 - 01:44 AM UTC
Russell,

I've enjoyed watching this build develop, and you have a fine, clean result. Nice work!

Tim