

Great stuff Michael,
The fo'c's'le is looking the business, and the hanger bulkheads too.
Your etch work really is first class.
Si


Go to modelshipwrights.com for the current dynamic site!
Ships by Class/Type
For discussions on ships by class and type.
For discussions on ships by class and type.
Hosted by Jim Starkweather
USS Hornet (CV-8) - 1/200 by Merit, Tetra ...

RedDuster

Joined: March 01, 2010
KitMaker: 7,078 posts
Model Shipwrights: 6,649 posts

Posted: Monday, April 21, 2014 - 06:47 AM UTC

DanielMoscatelli

Joined: August 22, 2011
KitMaker: 998 posts
Model Shipwrights: 941 posts

Posted: Monday, April 21, 2014 - 07:13 AM UTC
 Hello Michael!!! Tremendous other one works like us has of custom!! Congratulations and I continue looking-
Cgeers Daniel


dcook11

Joined: November 28, 2012
KitMaker: 216 posts
Model Shipwrights: 84 posts

Posted: Monday, April 21, 2014 - 07:59 AM UTC
I was Navy for 6 years...Some things just stick with you. Call them what you want, we know what you mean...

elmarriachi

Joined: December 26, 2009
KitMaker: 813 posts
Model Shipwrights: 304 posts

Posted: Monday, April 21, 2014 - 09:35 PM UTC
HI at all..
thanks a lot for your interest. Pleasure that you like it so far!
Reg. the floors.... then let's say the German word... Deck.... in this particular case... "Zwischendeck" .... I hope you know what I mean 
BR
Michael
thanks a lot for your interest. Pleasure that you like it so far!
Reg. the floors.... then let's say the German word... Deck.... in this particular case... "Zwischendeck" .... I hope you know what I mean
BR
Michael
Lionfish

Joined: April 14, 2014
KitMaker: 35 posts
Model Shipwrights: 31 posts

Posted: Monday, April 21, 2014 - 09:57 PM UTC
lol... no matter what they are called i am admiring the modelling anyhow..
great work!!
great work!!

elmarriachi
Joined: December 26, 2009
KitMaker: 813 posts
Model Shipwrights: 304 posts
Posted: Sunday, April 27, 2014 - 05:16 AM UTC
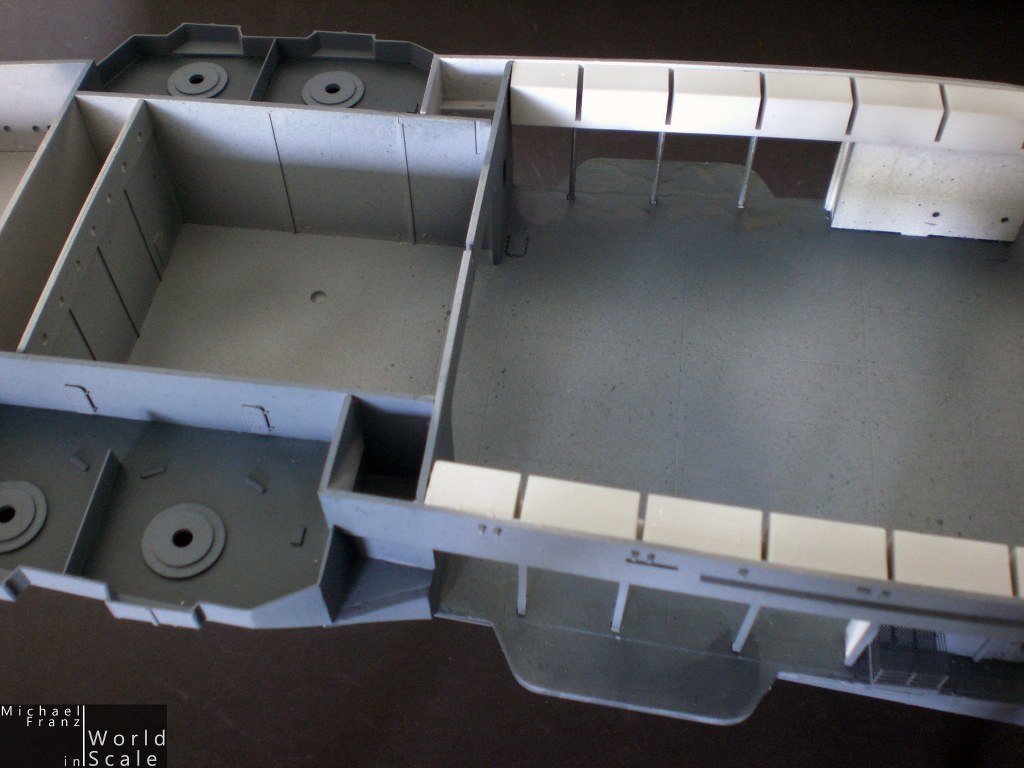
Hello at all...
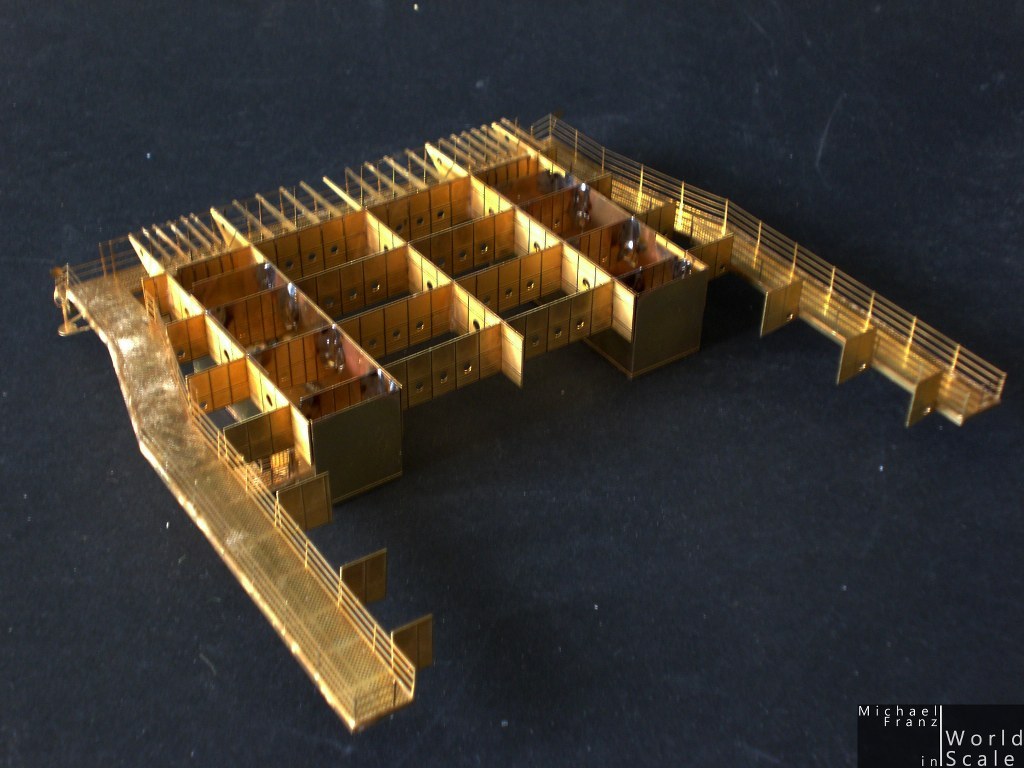
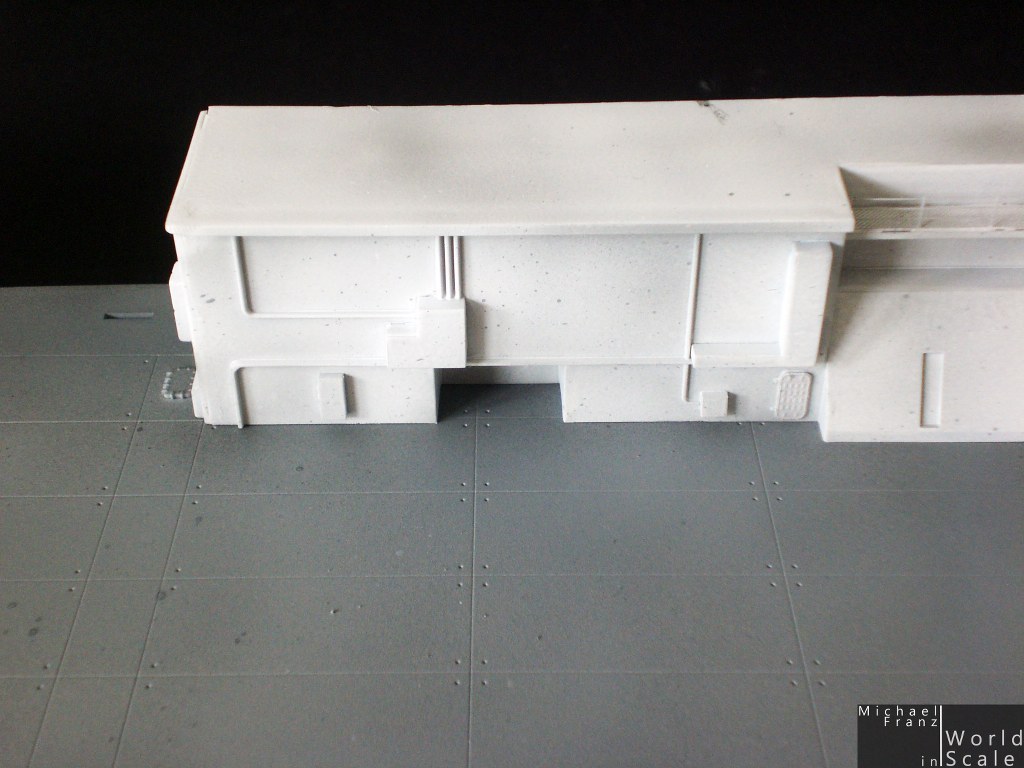
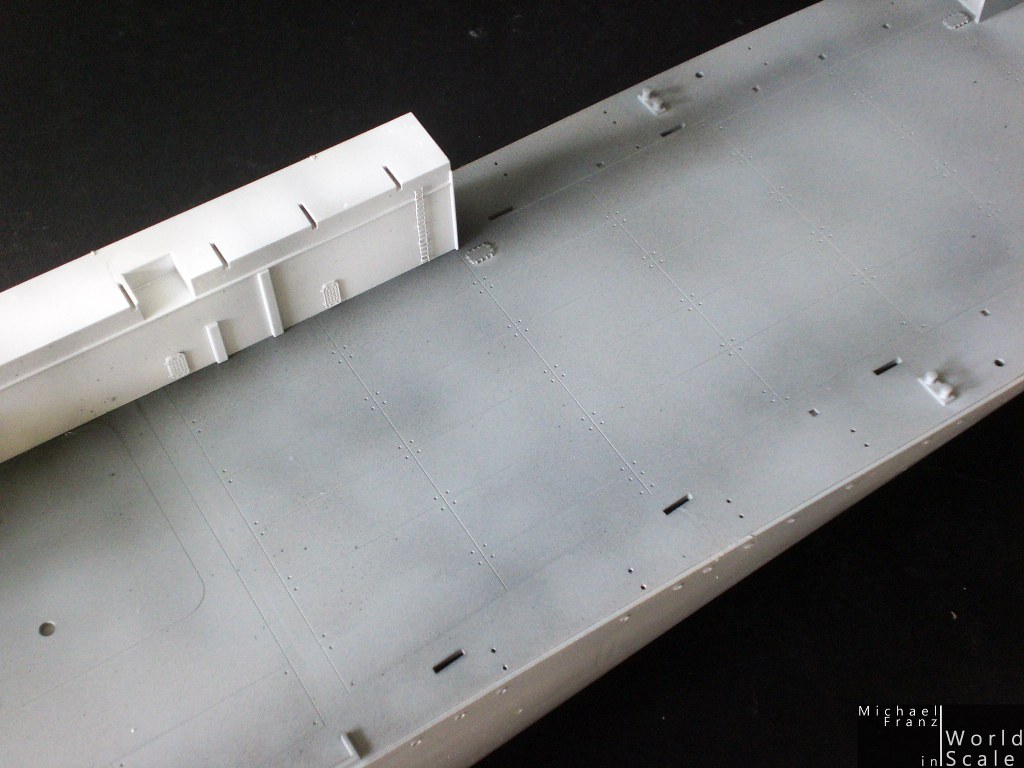
here are some pictures of each part of the side panels for the hangar deck. Each completed with all necessary kit parts, plus the first PE-parts of the Tetra Model Works detail set. Some further ladders, stairways will follow after the mounting of the big parts to the hull (after the painting). Also the long catwalks on top which will go from the front to the rear will follow later as it would be too risky to damage these during the installation of the walls to the hull.
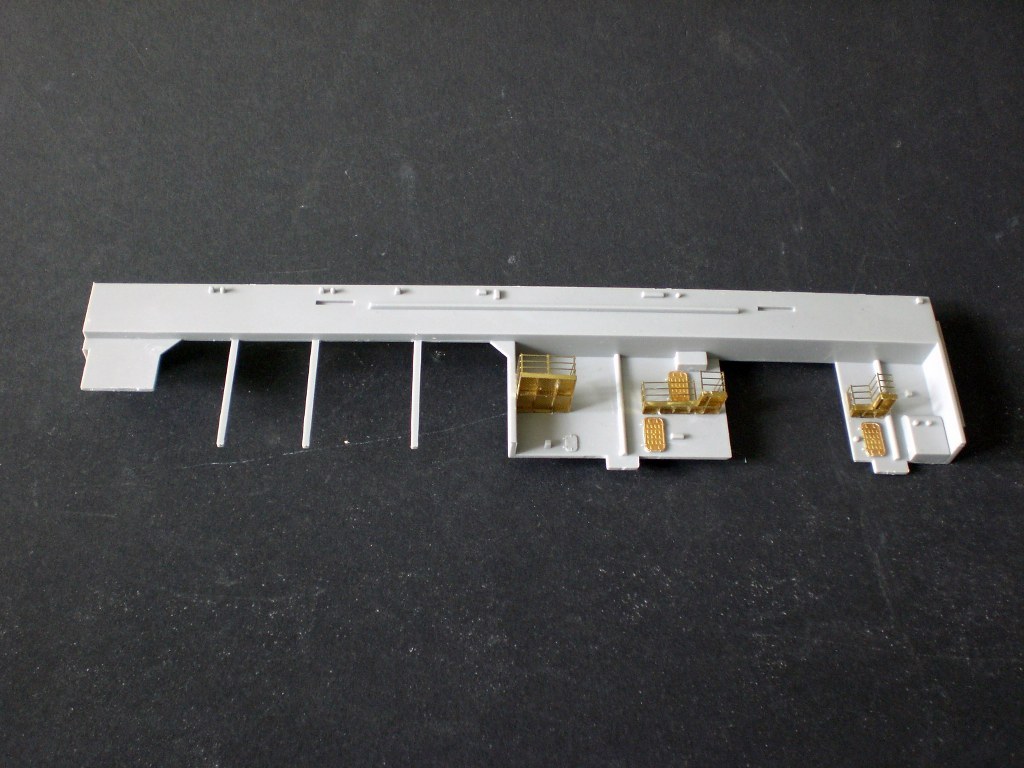
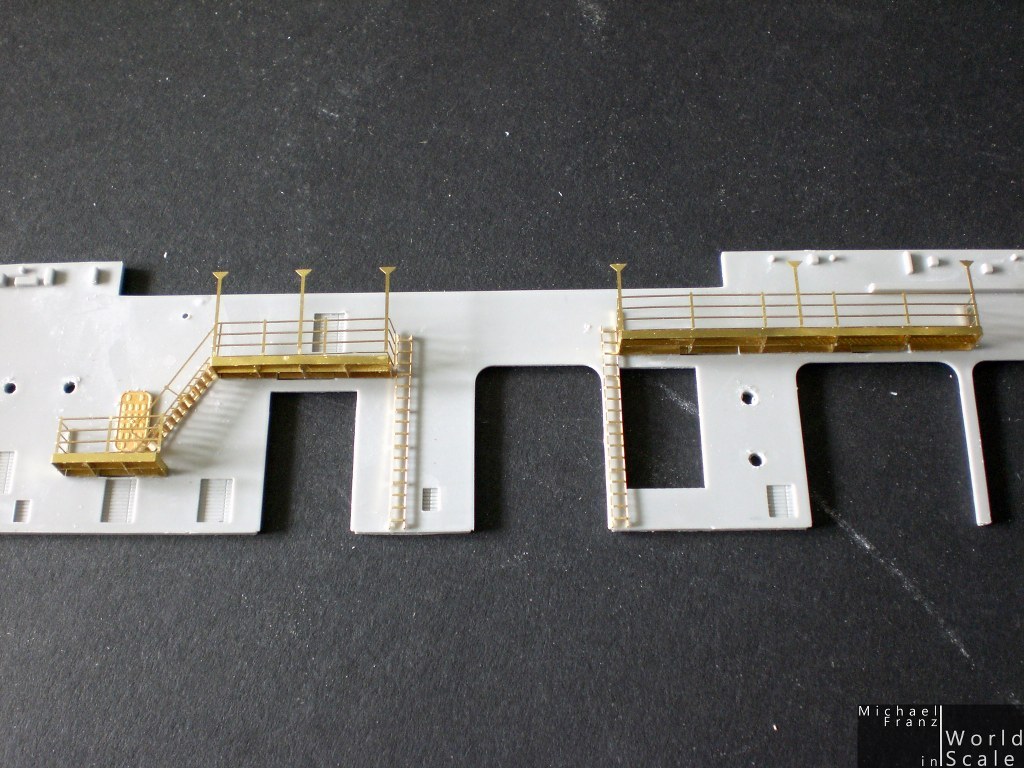
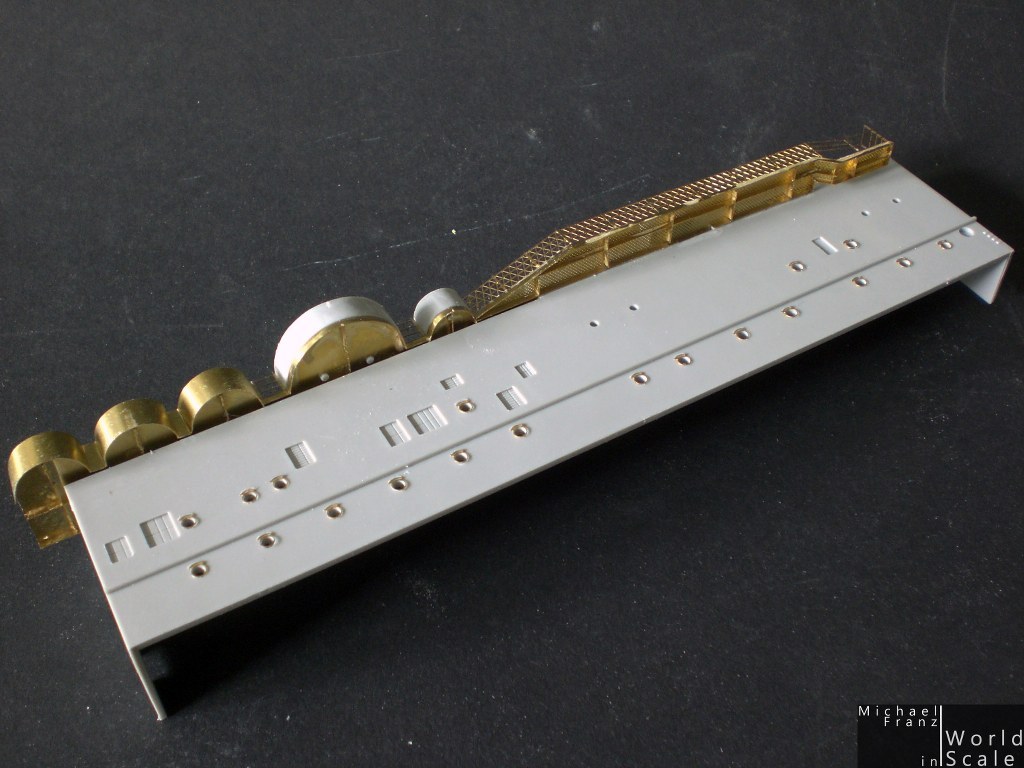
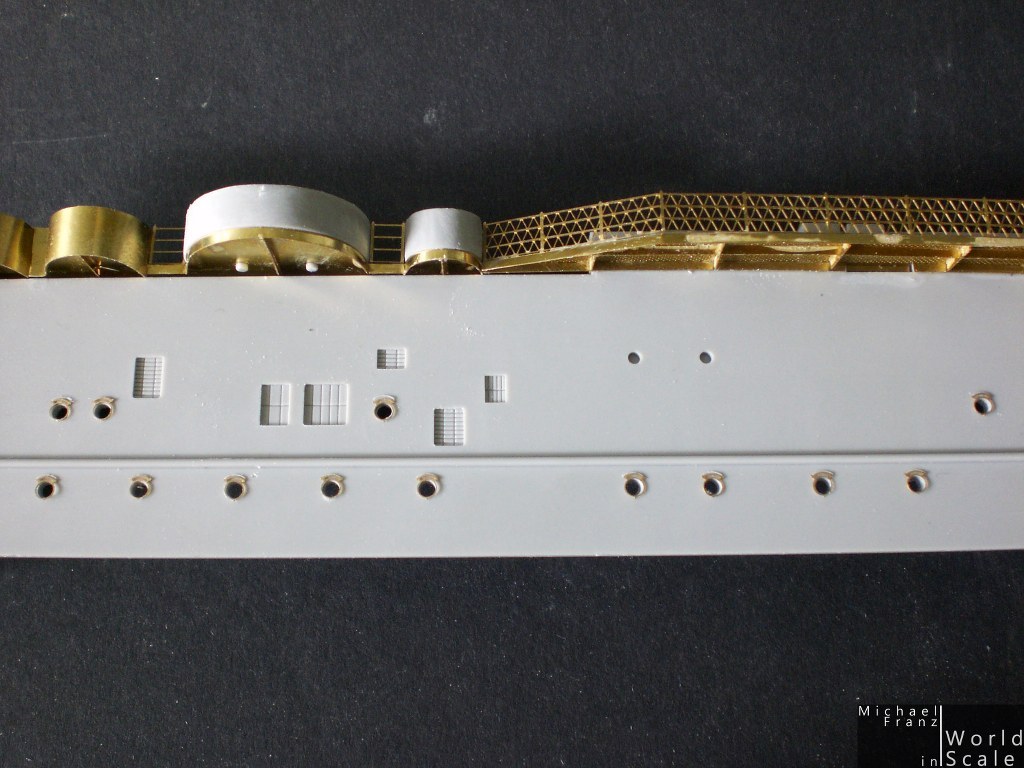
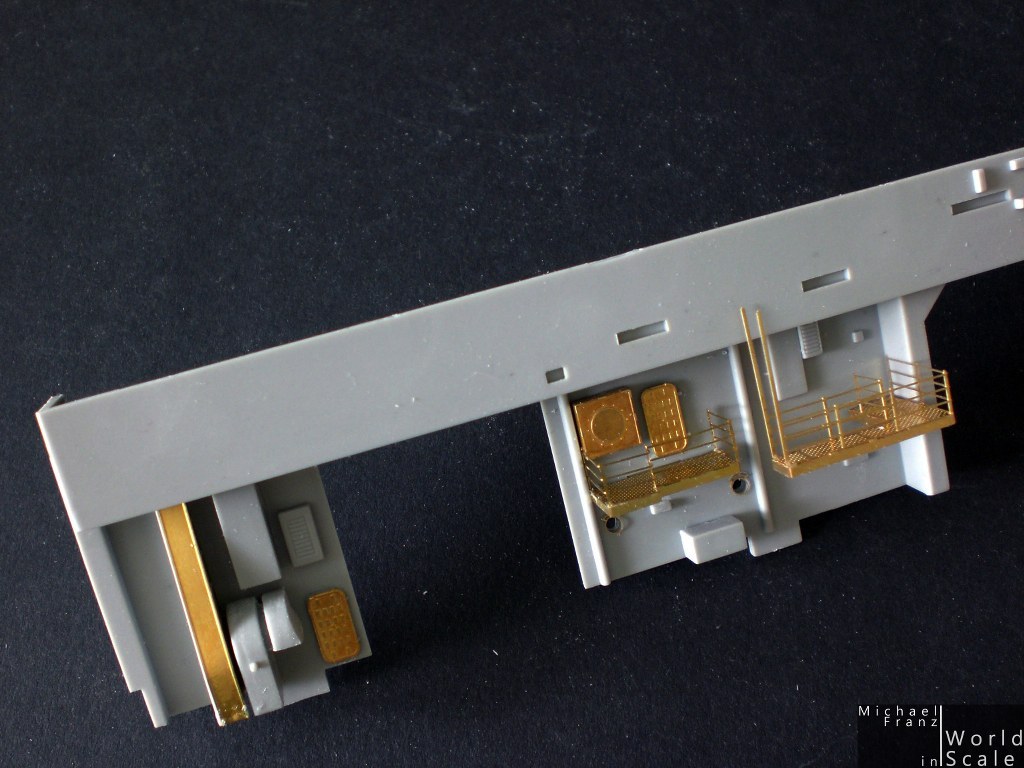
These parts are ready for painting now.... all missing parts follow later
Cheers
Micha
here are some pictures of each part of the side panels for the hangar deck. Each completed with all necessary kit parts, plus the first PE-parts of the Tetra Model Works detail set. Some further ladders, stairways will follow after the mounting of the big parts to the hull (after the painting). Also the long catwalks on top which will go from the front to the rear will follow later as it would be too risky to damage these during the installation of the walls to the hull.
These parts are ready for painting now.... all missing parts follow later
Cheers
Micha
elmarriachi
Joined: December 26, 2009
KitMaker: 813 posts
Model Shipwrights: 304 posts
Posted: Sunday, April 27, 2014 - 05:24 AM UTC
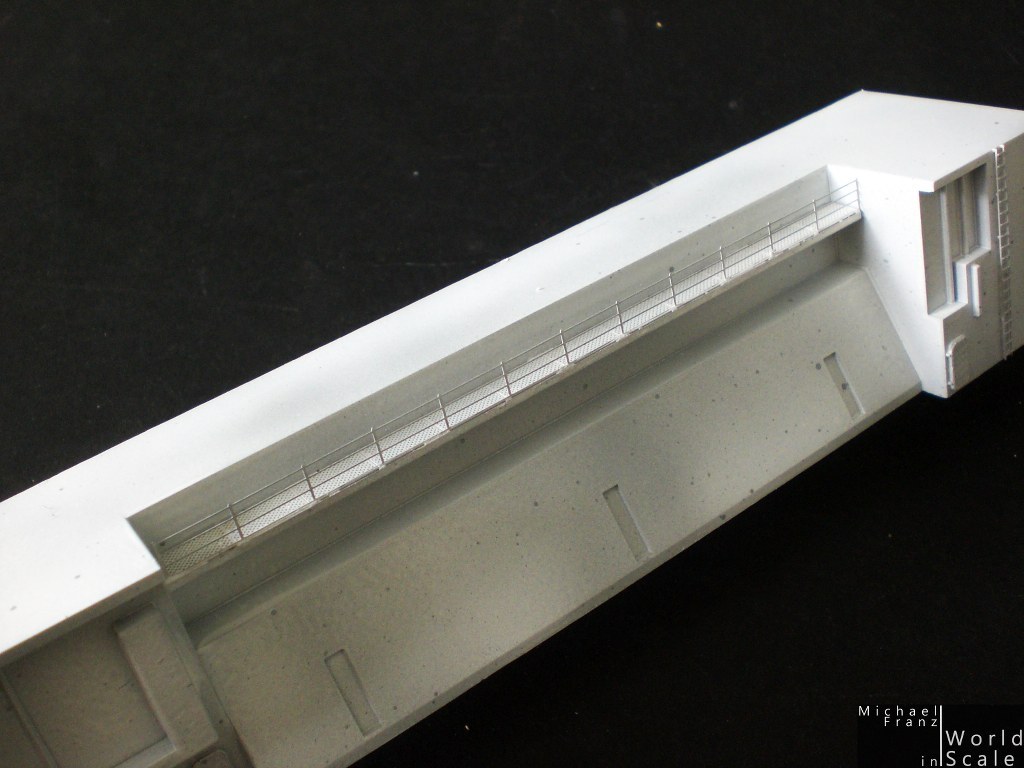
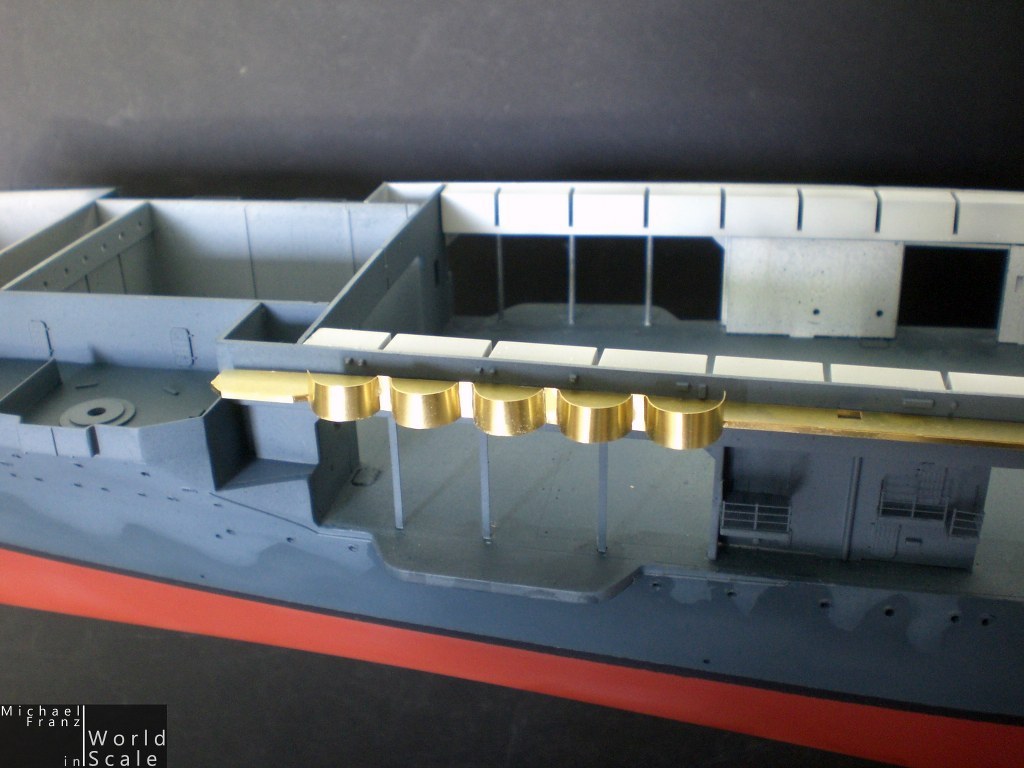
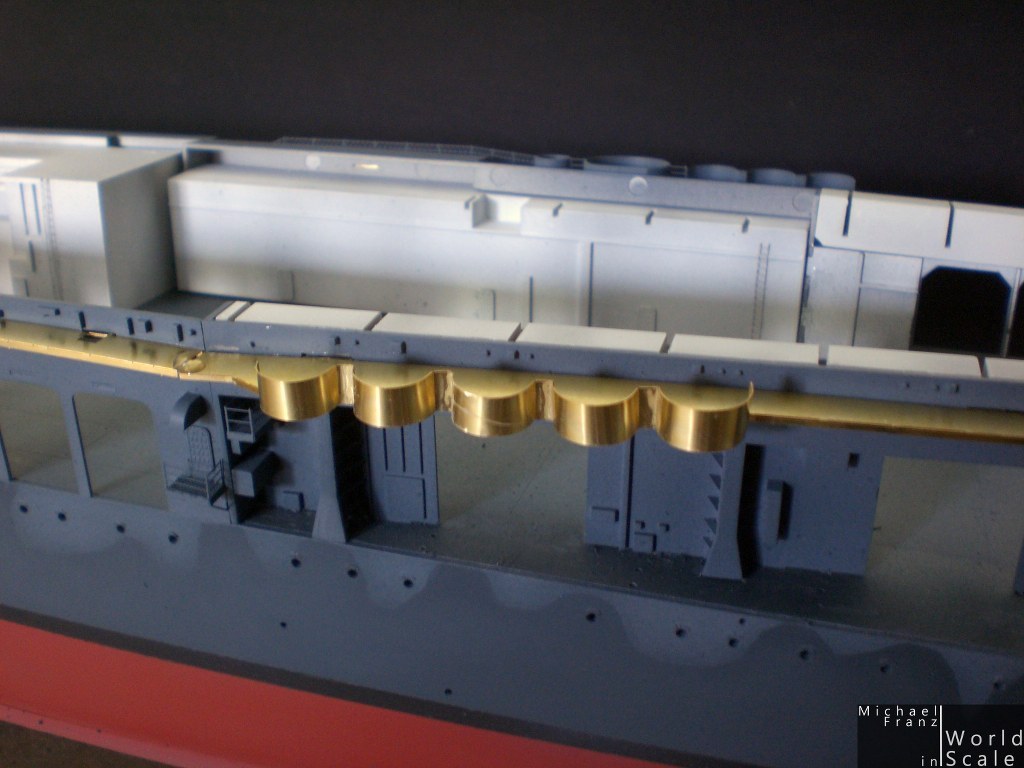
.... and let's go on a little bit...
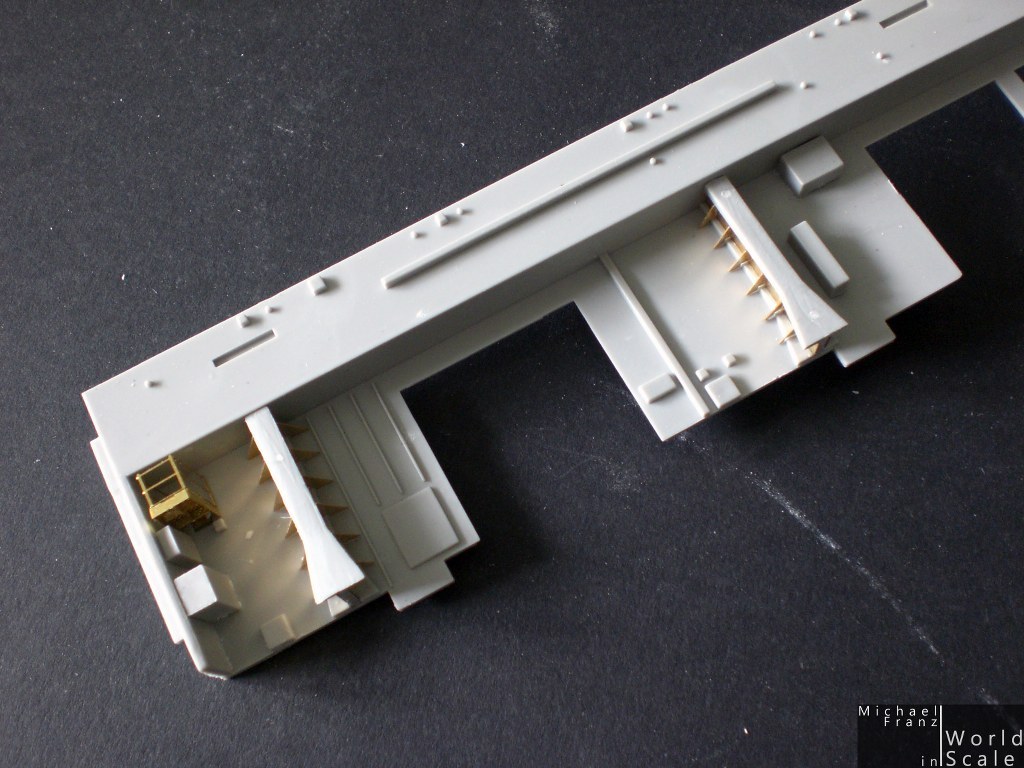
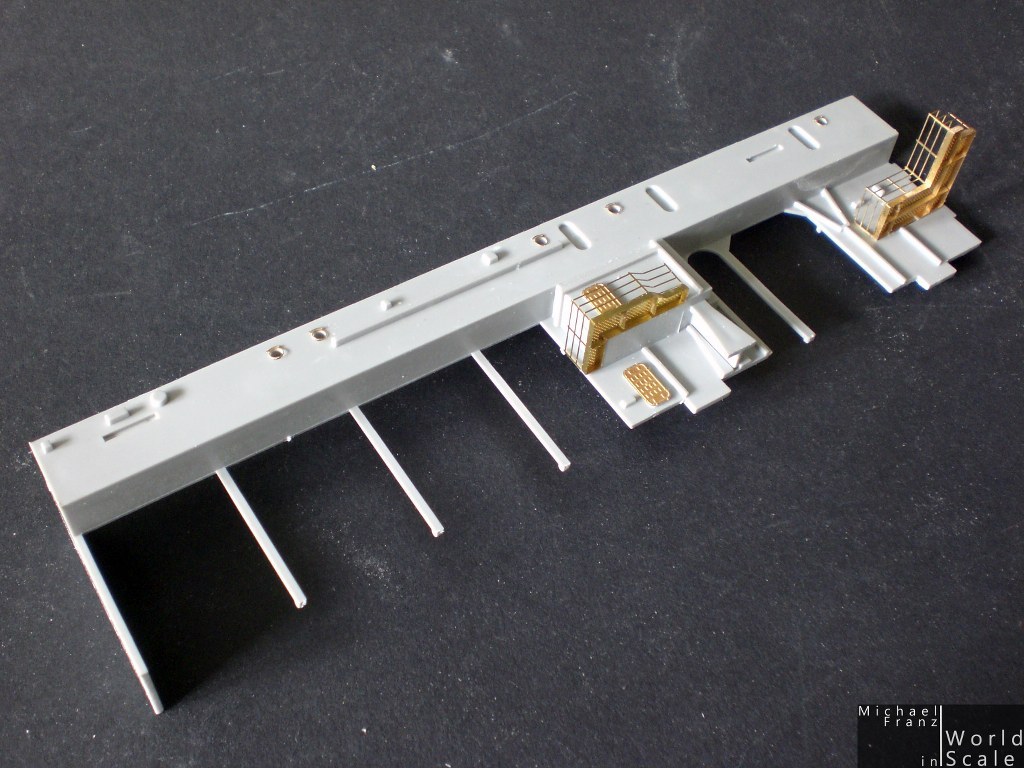
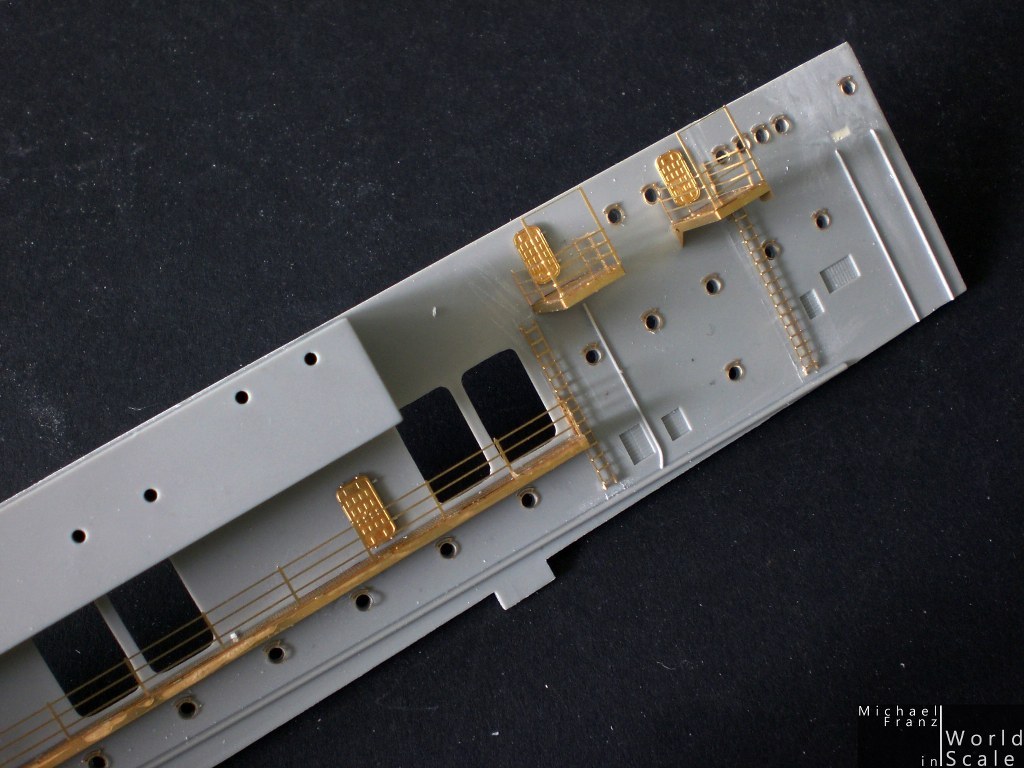
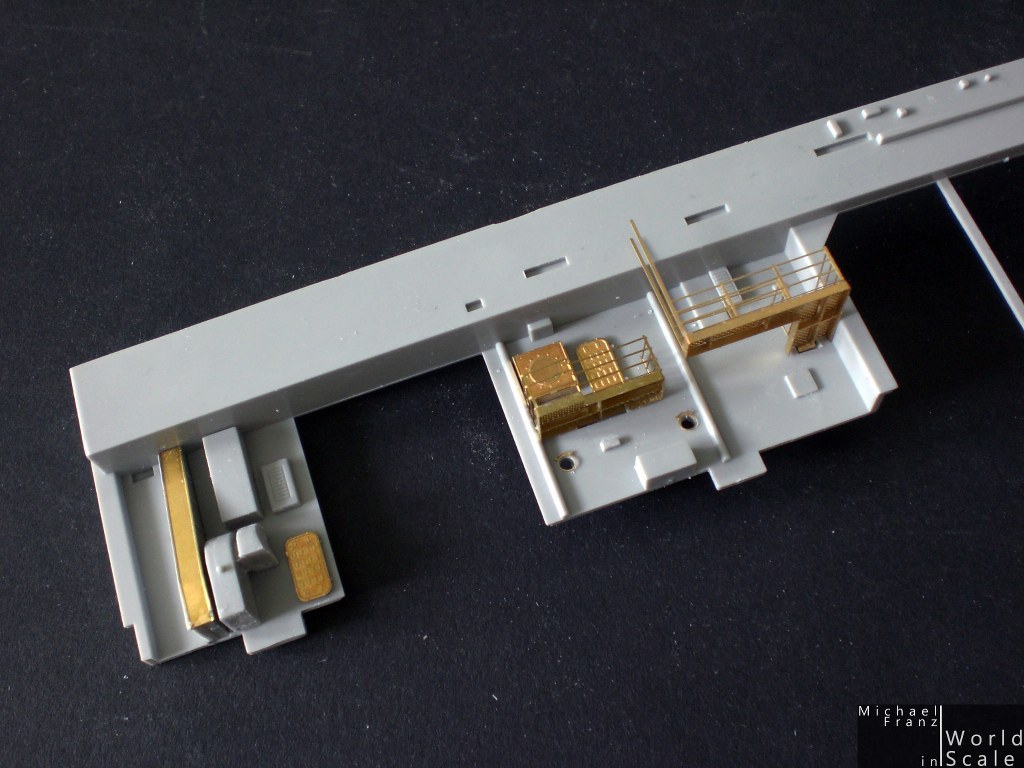
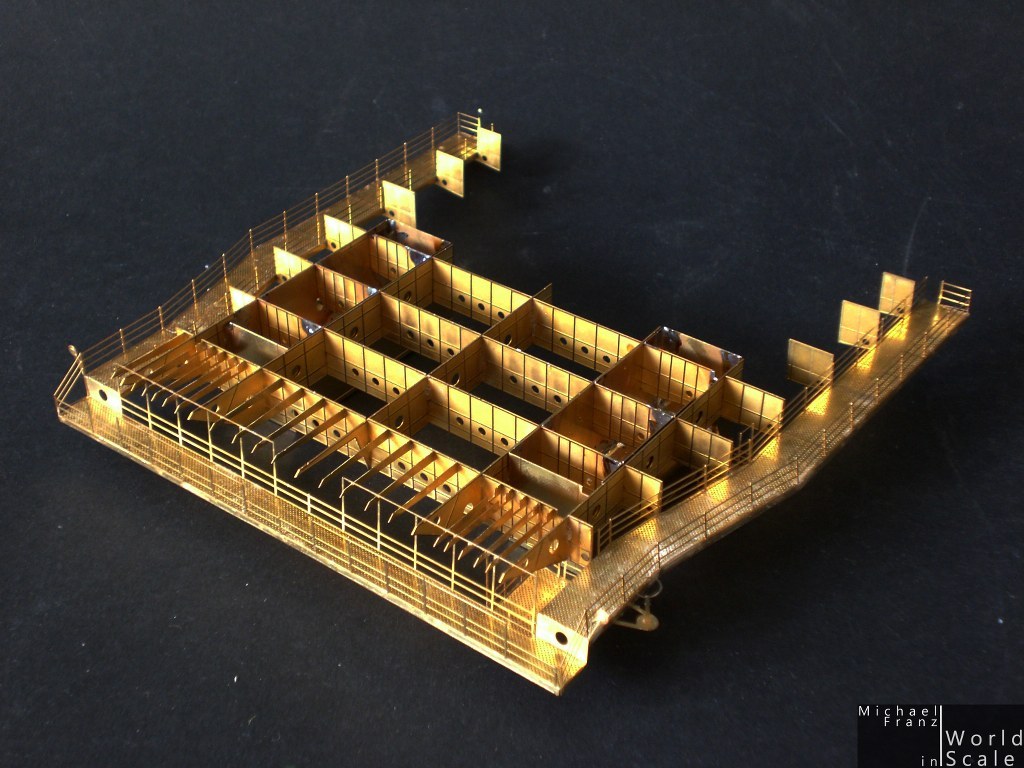
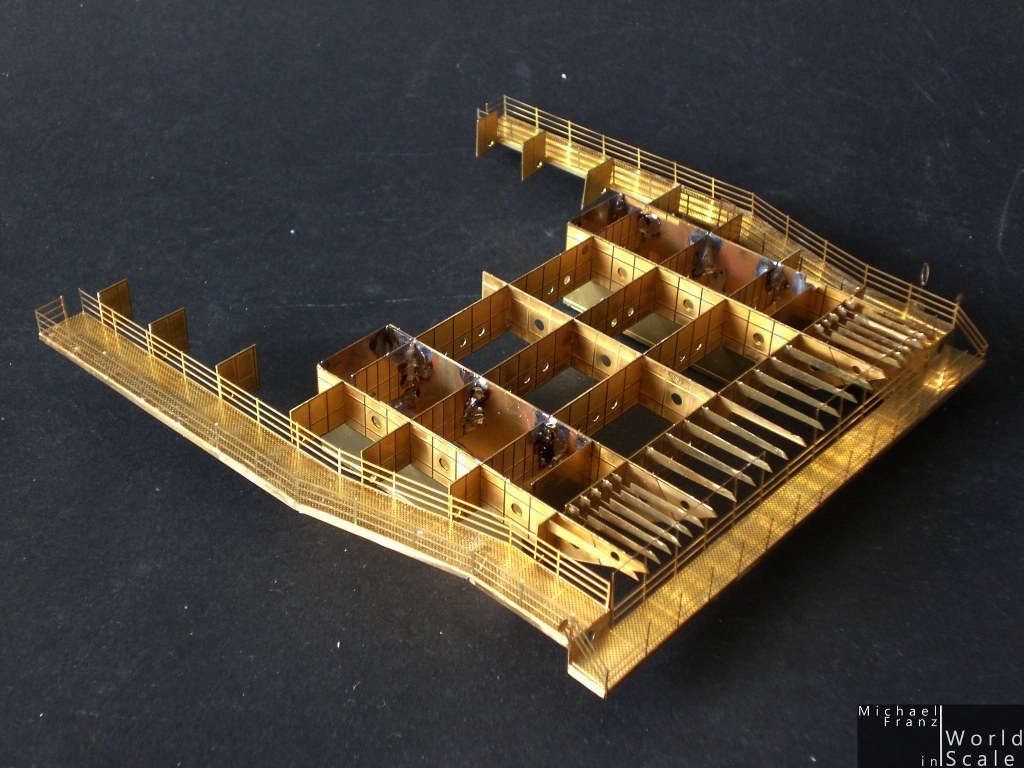
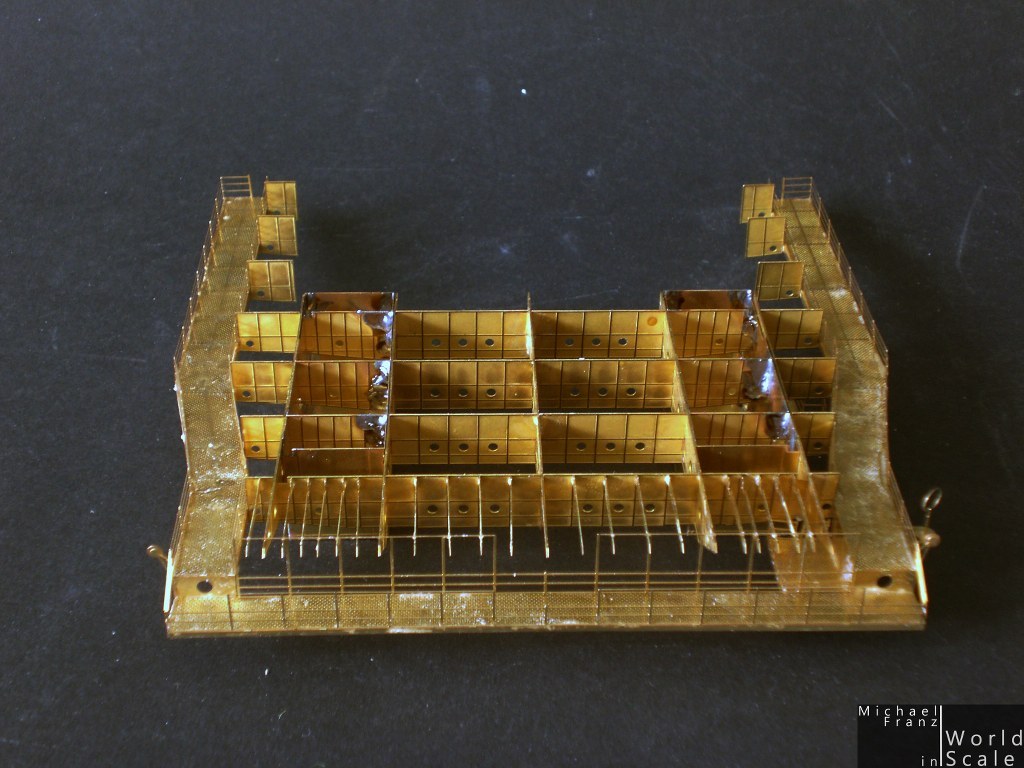
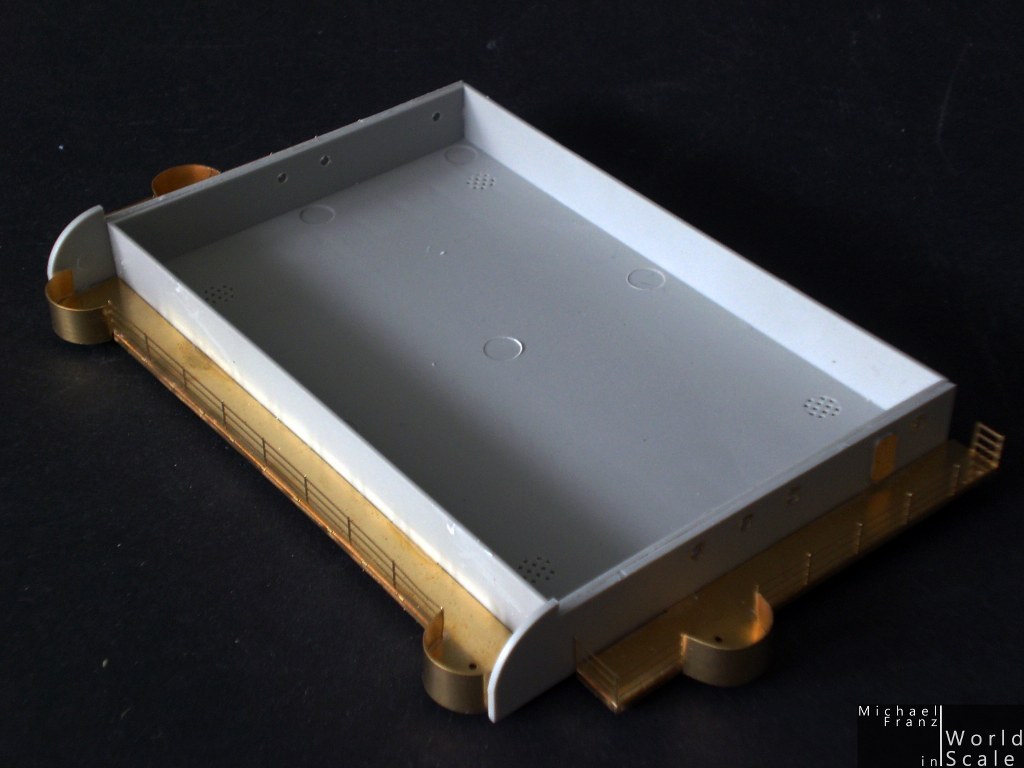
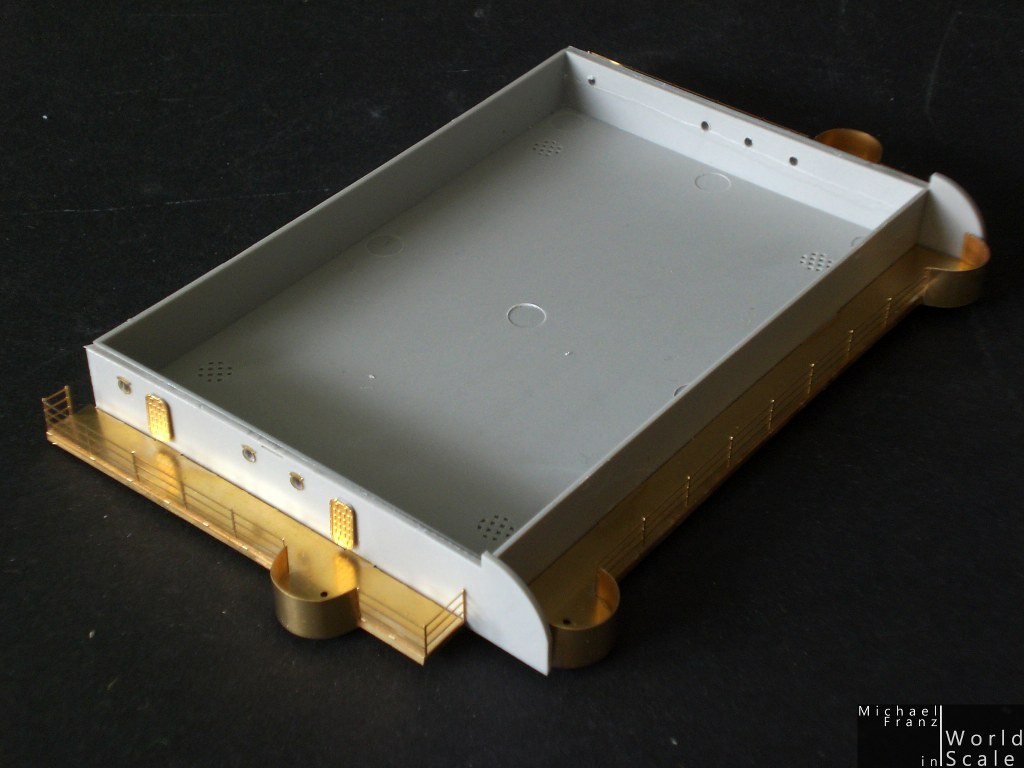
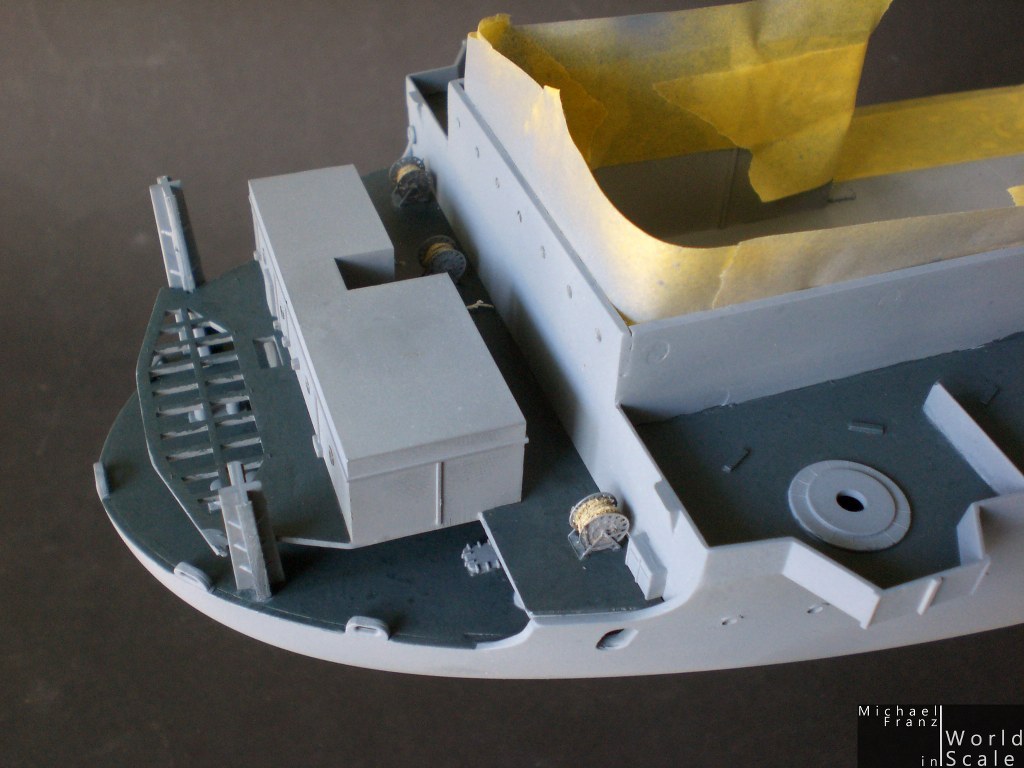
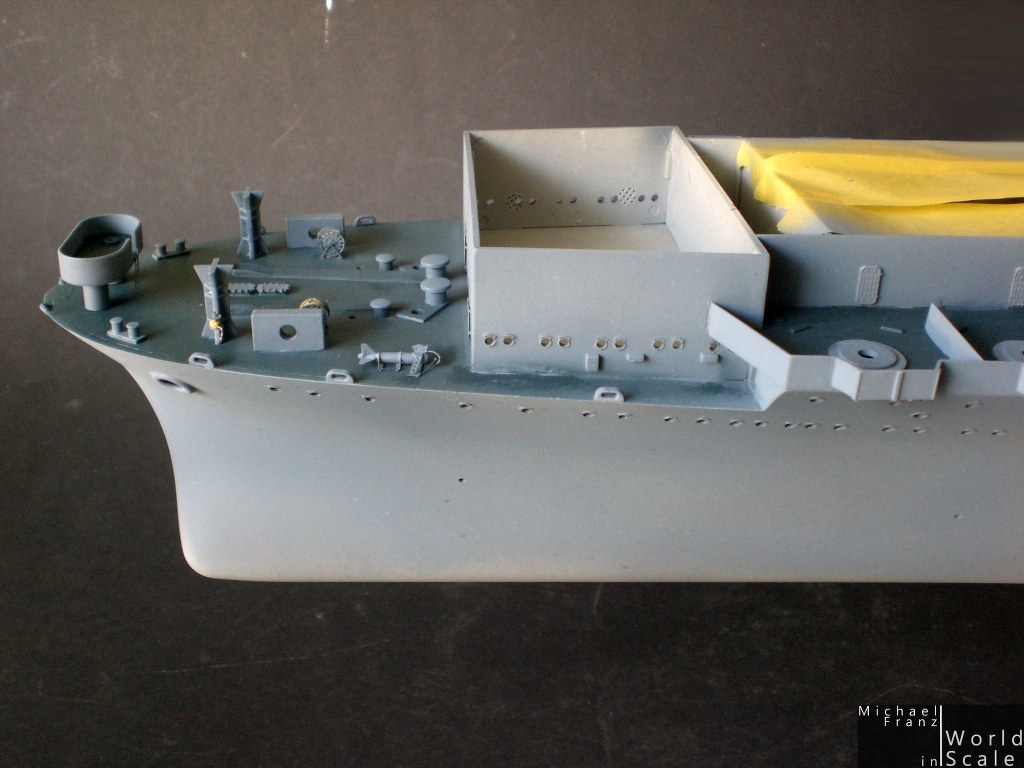
The complete front part under the flight deck is provided by Merit as a simple plastic box with some plastic walkways around it.... looking simple and not very originally.....
Tetra Model Works offers a complete new part for that.... a lot of parts.... and my absolutly favourite of the whole detail set..... and the following pictures are only the beginning of this part-group....
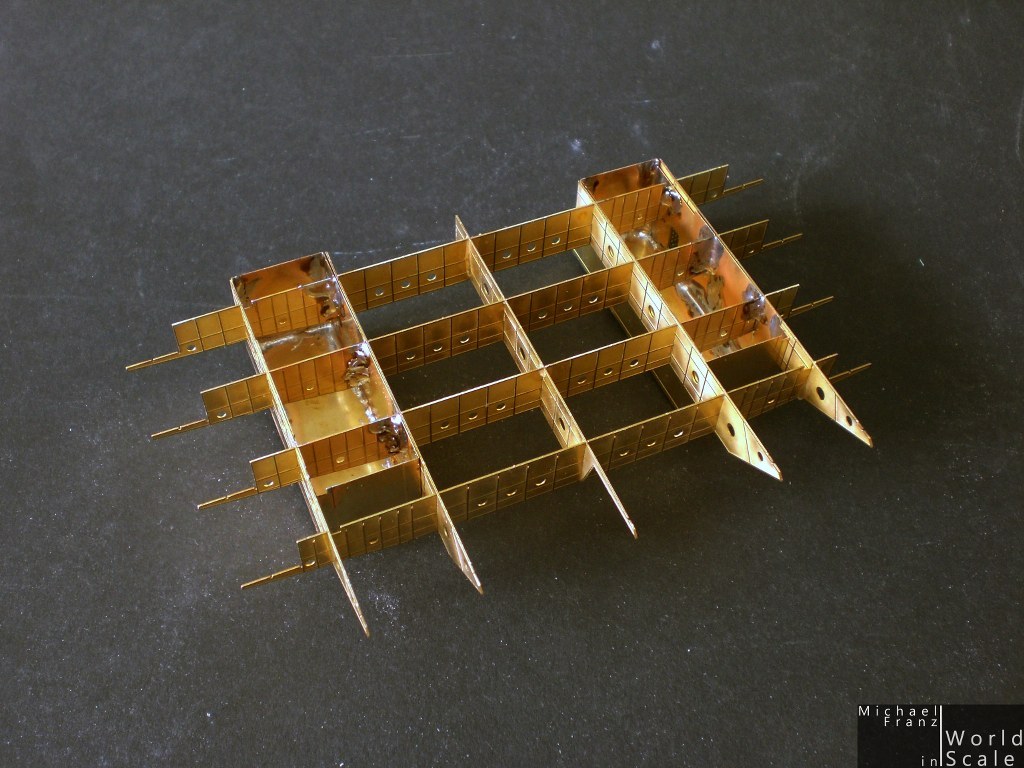

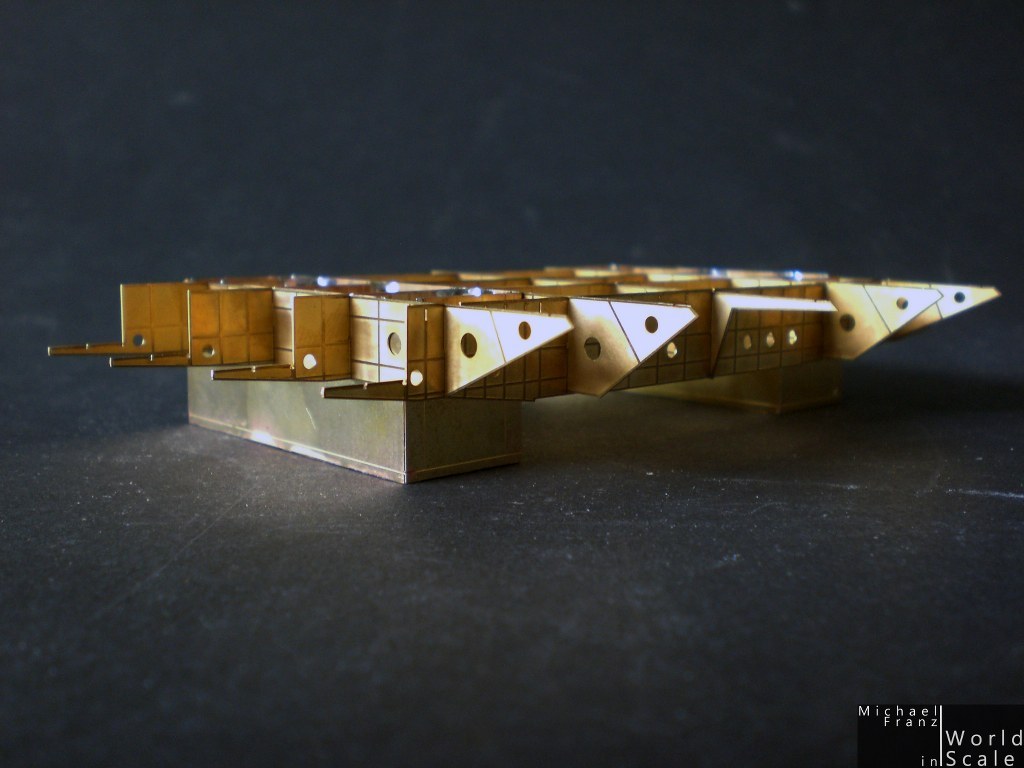

... and that's only the beginning ....
Micha
The complete front part under the flight deck is provided by Merit as a simple plastic box with some plastic walkways around it.... looking simple and not very originally.....
Tetra Model Works offers a complete new part for that.... a lot of parts.... and my absolutly favourite of the whole detail set..... and the following pictures are only the beginning of this part-group....
... and that's only the beginning ....
Micha

Gremlin56
Joined: October 30, 2005
KitMaker: 3,897 posts
Model Shipwrights: 3,301 posts
KitMaker: 3,897 posts
Model Shipwrights: 3,301 posts
Posted: Sunday, April 27, 2014 - 06:09 AM UTC
Looking good Micha, a very interesting construction. Not sure you will see much of it once the flightdeck is fitted but it is nicely etched.
RedDuster
Joined: March 01, 2010
KitMaker: 7,078 posts
Model Shipwrights: 6,649 posts
Posted: Sunday, April 27, 2014 - 06:46 AM UTC
Brilliant Etchwork Michael, will look stunning.
keep up the good work,
Si
keep up the good work,
Si

Fordboy

Joined: July 13, 2004
KitMaker: 2,169 posts
Model Shipwrights: 1,597 posts

Posted: Sunday, April 27, 2014 - 09:39 AM UTC
Ahoy Michael
Really nice work.
Well done!
Cheers
Sean
Really nice work.
Well done!
Cheers
Sean

RussellE

#306
Joined: June 27, 2010
KitMaker: 3,959 posts
Model Shipwrights: 2,777 posts
Posted: Sunday, April 27, 2014 - 10:29 PM UTC
very nice work Michael!


Cosimodo
#335
Joined: September 03, 2013
KitMaker: 1,808 posts
Model Shipwrights: 871 posts

Posted: Sunday, April 27, 2014 - 10:39 PM UTC
Hi Micha it looking very good. With the amount of "steel" work you've got going on there you would require a Boilermakers licence to assemble that in NZ! 
elmarriachi
Joined: December 26, 2009
KitMaker: 813 posts
Model Shipwrights: 304 posts
Posted: Friday, May 02, 2014 - 02:49 AM UTC
Hi @ all...
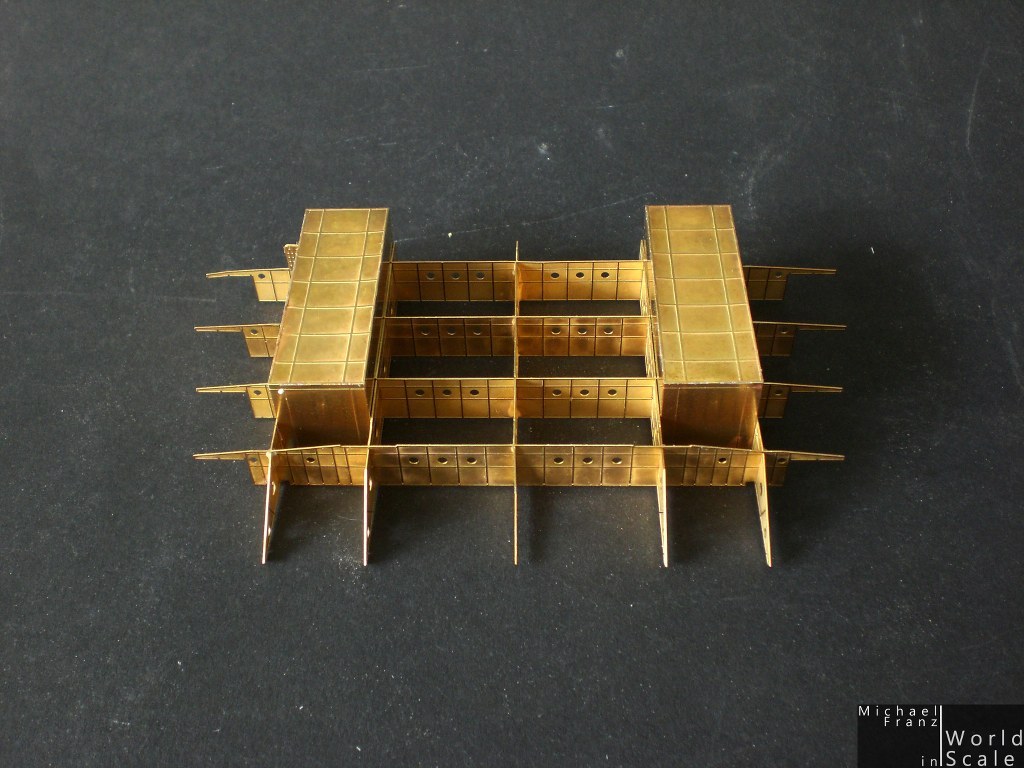
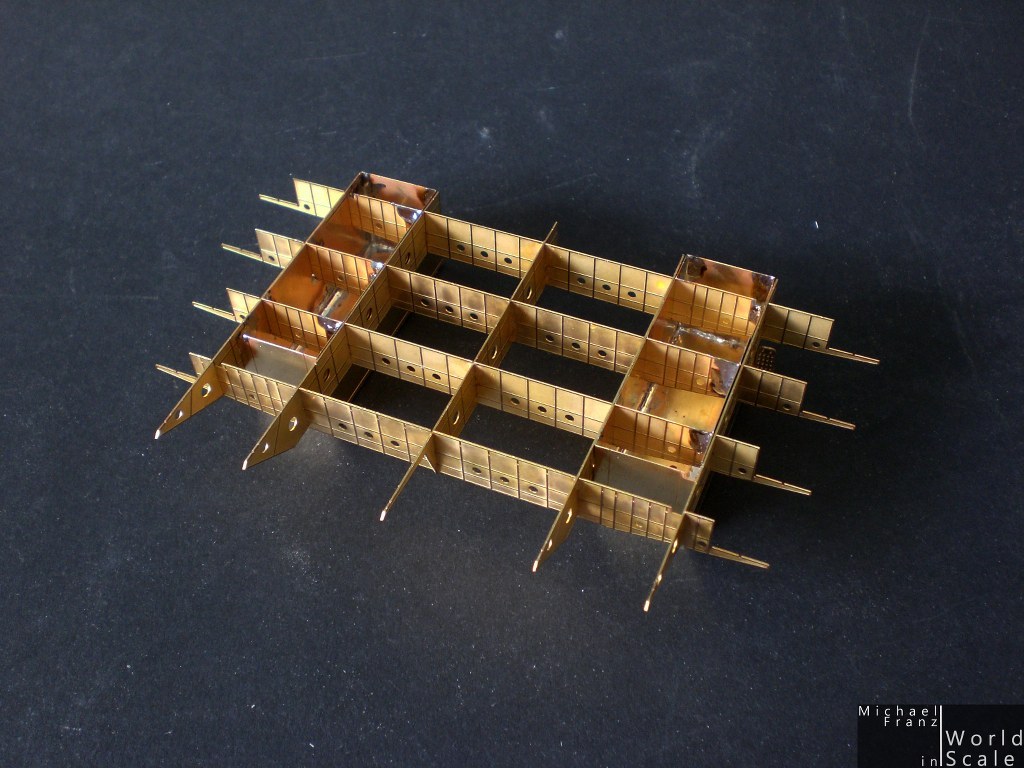
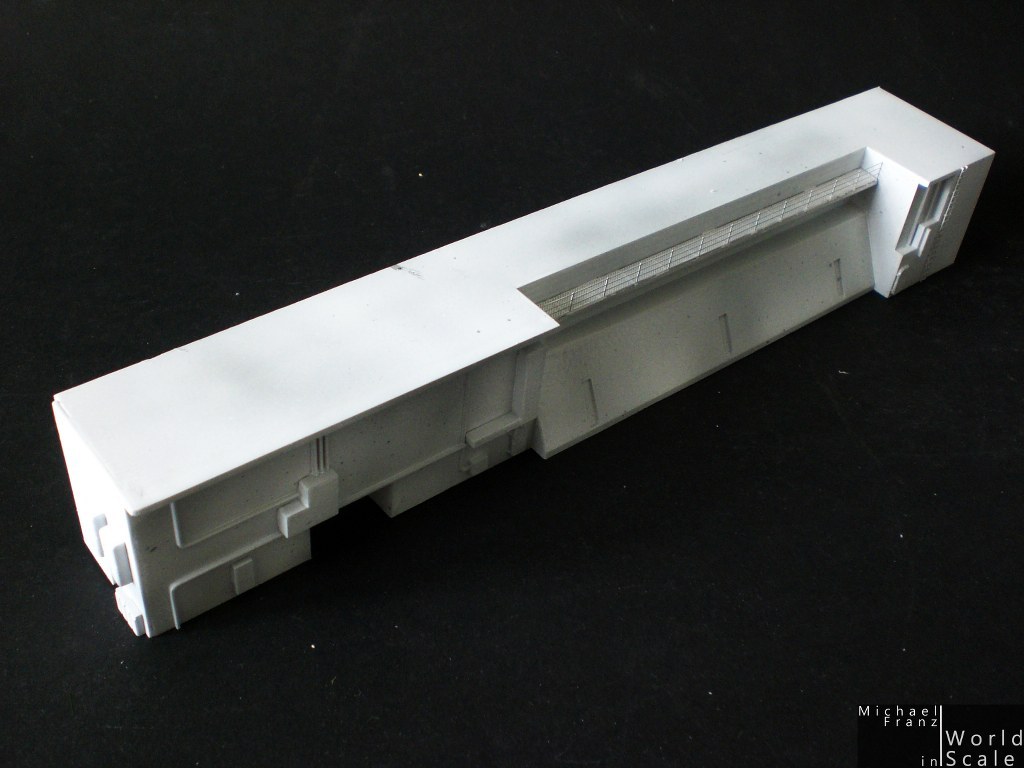
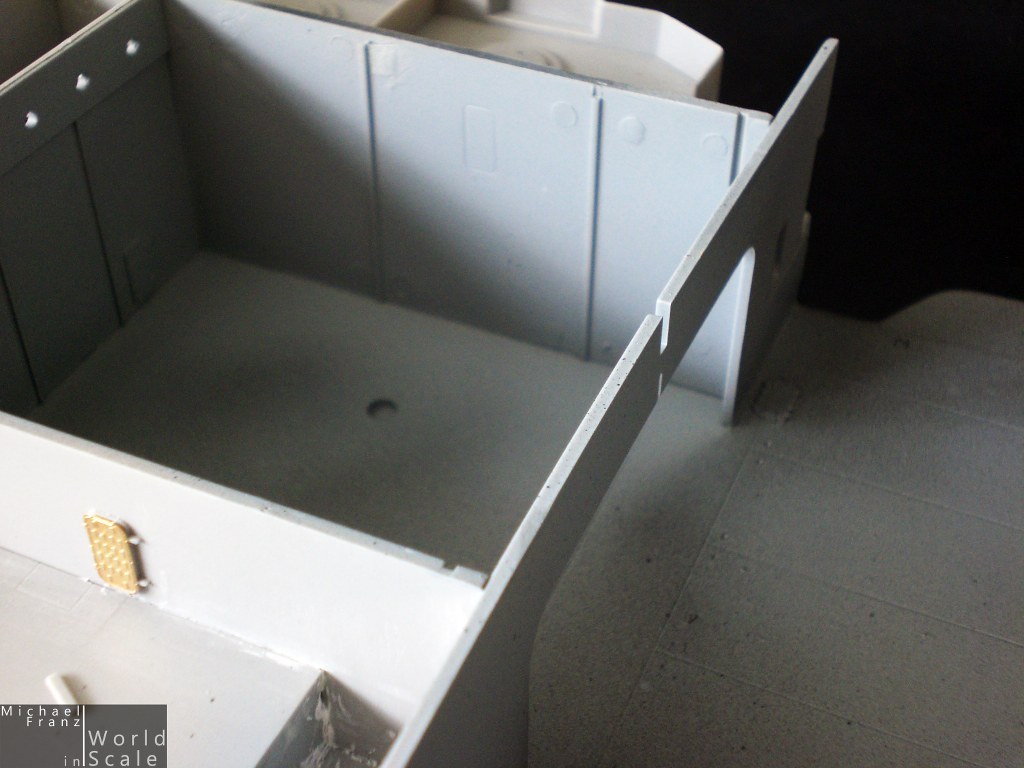
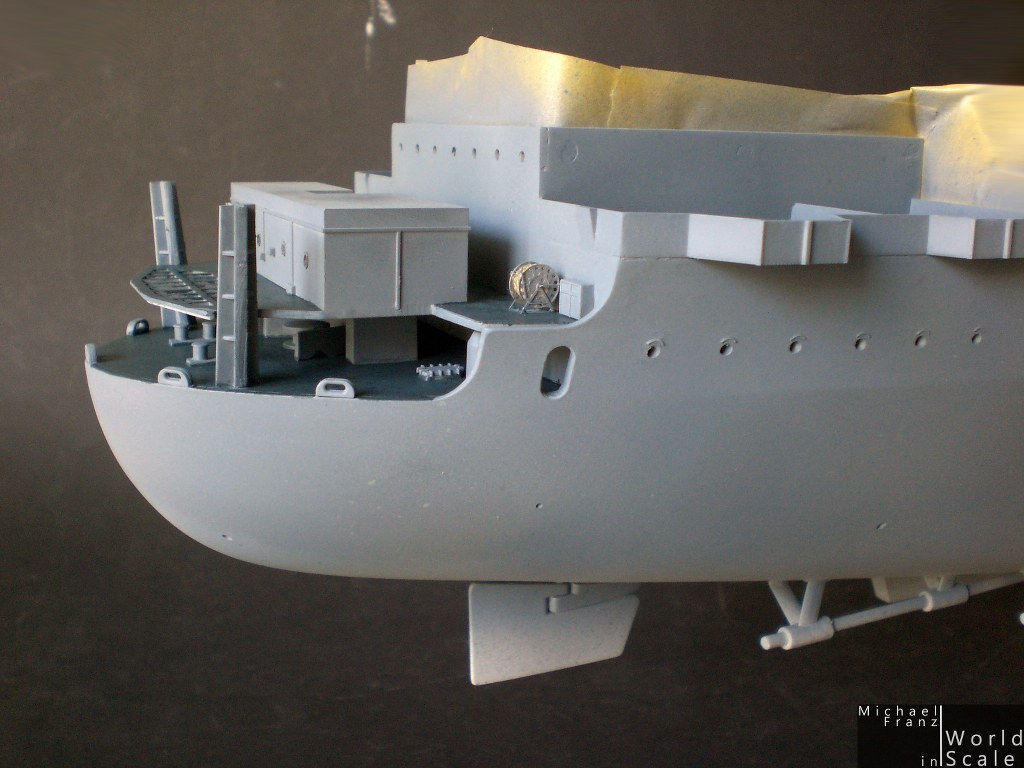
the most complex pe-part is finished.... lot of parts, lot of small parts, but perfect fitting and perfect details. Thanks to Tetra Models for this fantastic kit.... it is perfect made!
At the rear under the flight deck the plastic-"box" is used and modified with opend bulleyes, new walkways, doors and handrails.
.... and now the biggest fun beginns.... the painting of the hull and all parts finished so far.....
At first I have painted in the inside of the hangarwalls in white by Lifecolor. With light- and dark grey I made some shadows and more on it....
The hangar deck was painted in grey primer by Valleyo, then painted in darker grey and lighter grey for a more used sufrace.
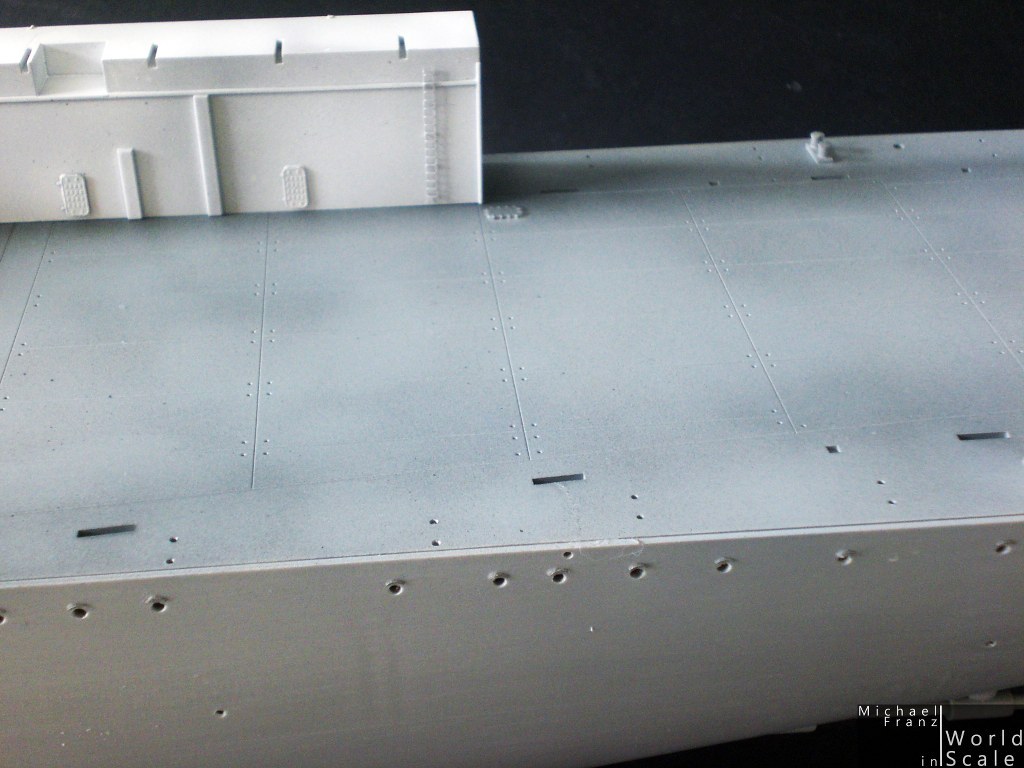
So far for today.... the next thing will be the outside of the hull, the foredeck and rear deck, as well as the hangarwalls at the outside, several shadows on it.... then the wave pattern on the hull with shadows as well, then the red under water part of the hull.... then the waterline in black.... then clear coat, decals, then weatherings with several oil colors, rust, watermarks, scratches, ..... oh yes, the further walkways and other small parts...... and so on
BR
Micha
the most complex pe-part is finished.... lot of parts, lot of small parts, but perfect fitting and perfect details. Thanks to Tetra Models for this fantastic kit.... it is perfect made!
At the rear under the flight deck the plastic-"box" is used and modified with opend bulleyes, new walkways, doors and handrails.
.... and now the biggest fun beginns.... the painting of the hull and all parts finished so far.....
At first I have painted in the inside of the hangarwalls in white by Lifecolor. With light- and dark grey I made some shadows and more on it....
The hangar deck was painted in grey primer by Valleyo, then painted in darker grey and lighter grey for a more used sufrace.
So far for today.... the next thing will be the outside of the hull, the foredeck and rear deck, as well as the hangarwalls at the outside, several shadows on it.... then the wave pattern on the hull with shadows as well, then the red under water part of the hull.... then the waterline in black.... then clear coat, decals, then weatherings with several oil colors, rust, watermarks, scratches, ..... oh yes, the further walkways and other small parts...... and so on
BR
Micha
Gremlin56
Joined: October 30, 2005
KitMaker: 3,897 posts
Model Shipwrights: 3,301 posts
KitMaker: 3,897 posts
Model Shipwrights: 3,301 posts
Posted: Friday, May 02, 2014 - 04:52 PM UTC
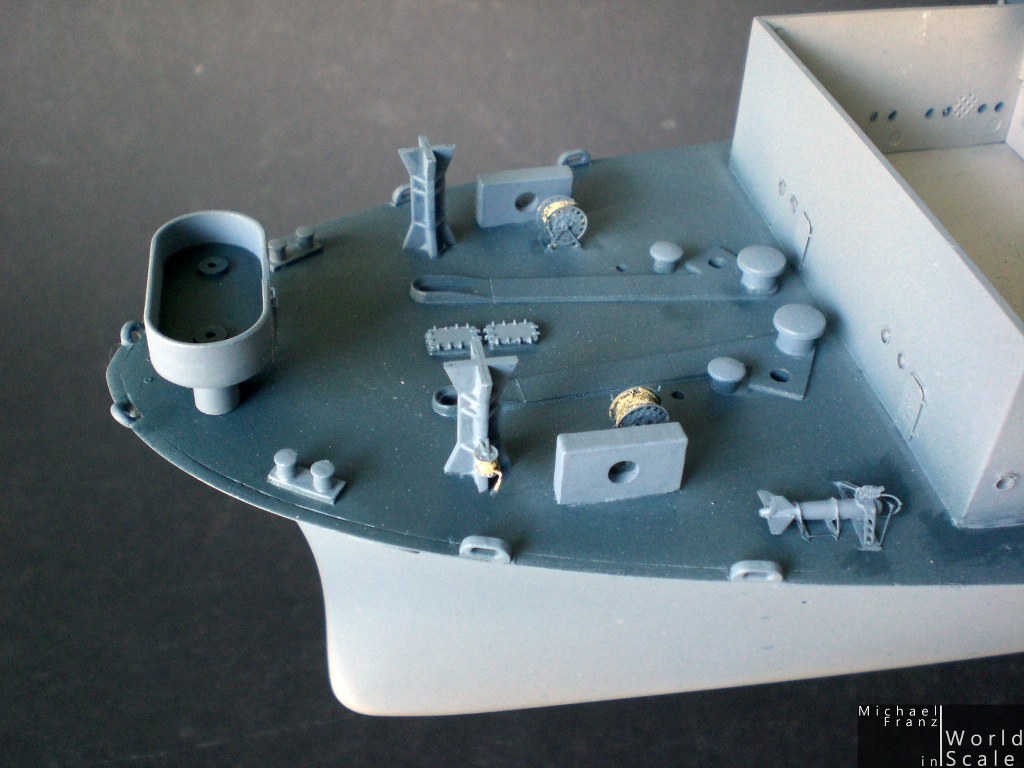
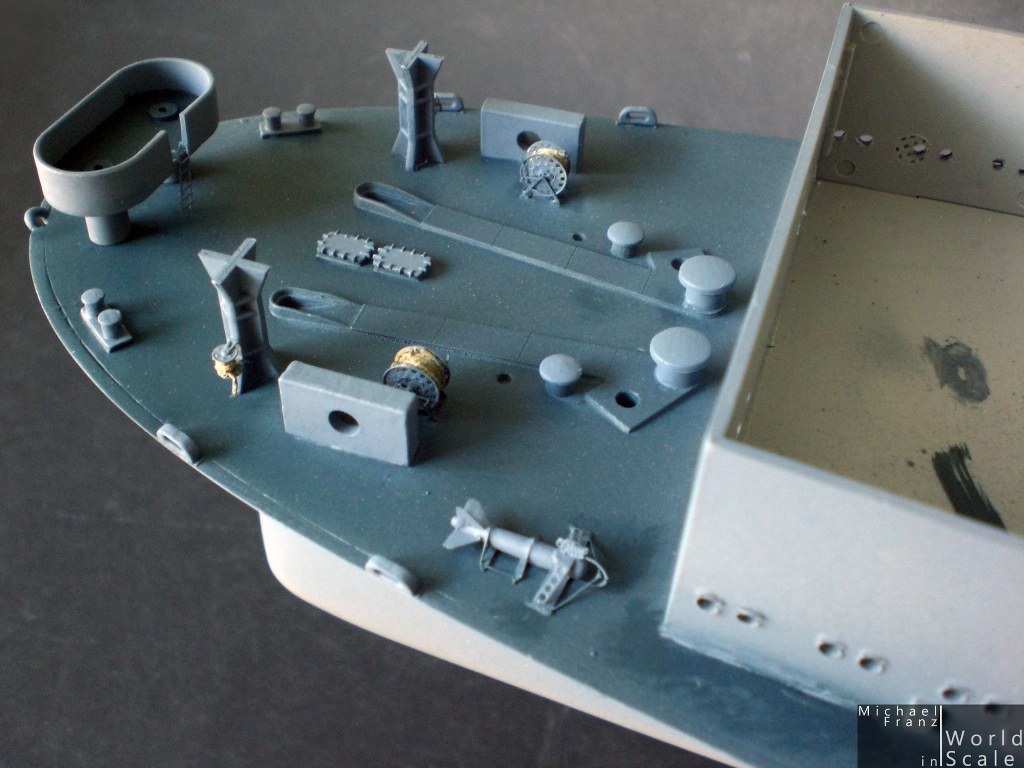
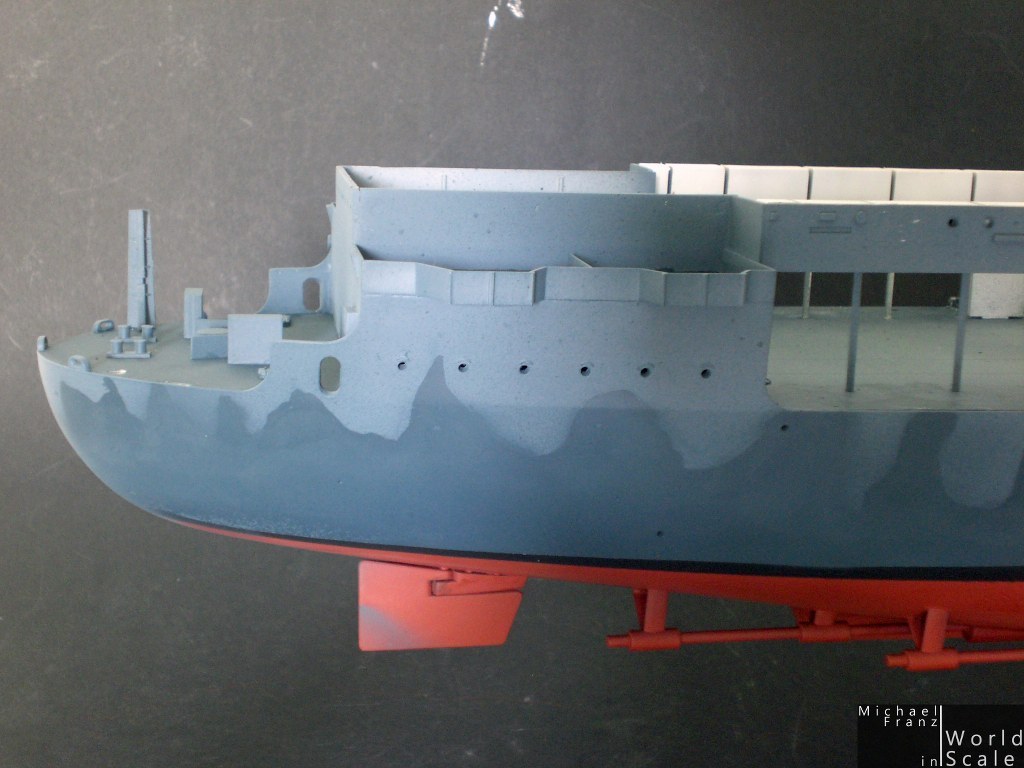
The focsle flightdeck support structure is absolutely amazing Michael, brilliant work but rather intimidating
What are the small parts on the corners? On the portside there seems to be a platform with a RDF loop on it and on the starboardside there is what looks like an old fashion train signal, (which of course it can't be ) Do you have any information on what these parts are?
What are the small parts on the corners? On the portside there seems to be a platform with a RDF loop on it and on the starboardside there is what looks like an old fashion train signal, (which of course it can't be
) Do you have any information on what these parts are? RedDuster
Joined: March 01, 2010
KitMaker: 7,078 posts
Model Shipwrights: 6,649 posts
Posted: Friday, May 02, 2014 - 08:55 PM UTC
Fantastic work Michael,
The major etched structures look really good. looking forward to seeing them all come together,
Si
The major etched structures look really good. looking forward to seeing them all come together,
Si
elmarriachi
Joined: December 26, 2009
KitMaker: 813 posts
Model Shipwrights: 304 posts
Posted: Sunday, May 04, 2014 - 05:32 AM UTC
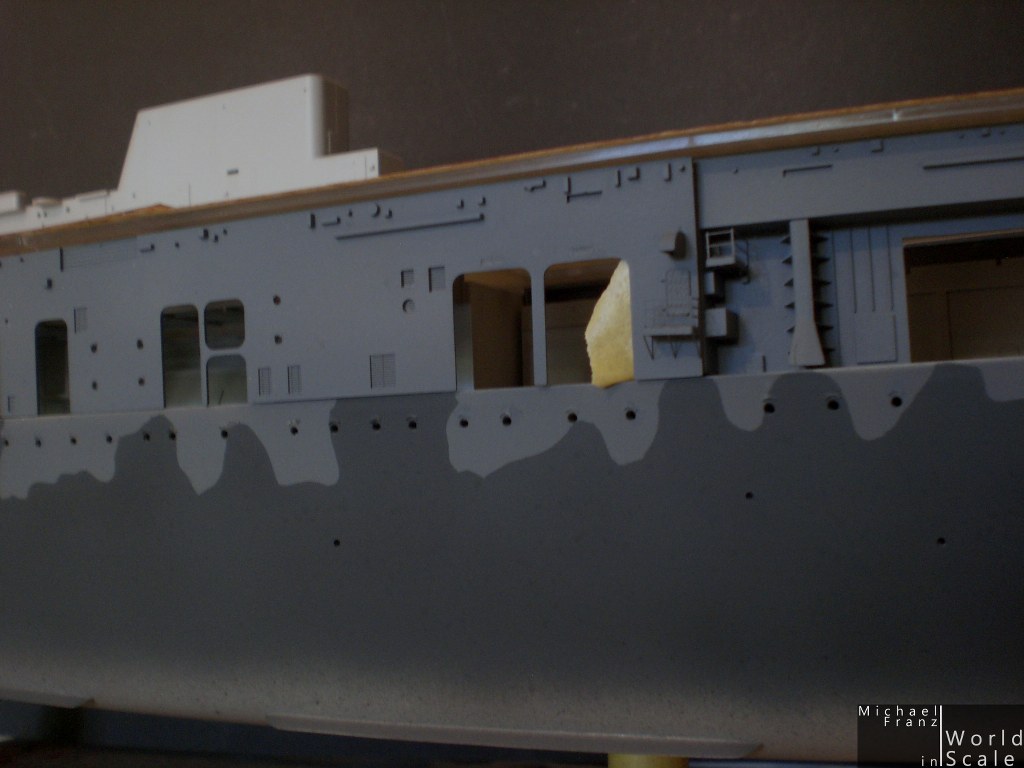
The hull upper part is painted and received an overspray with darkend / lightend base color. The decks af the front and rear were painted as well, just have to make some corrections on the deck and on the walls, also on the 2nd deck at the rear at the place were the life boat will be.
Also some first details were on the decks were painted.
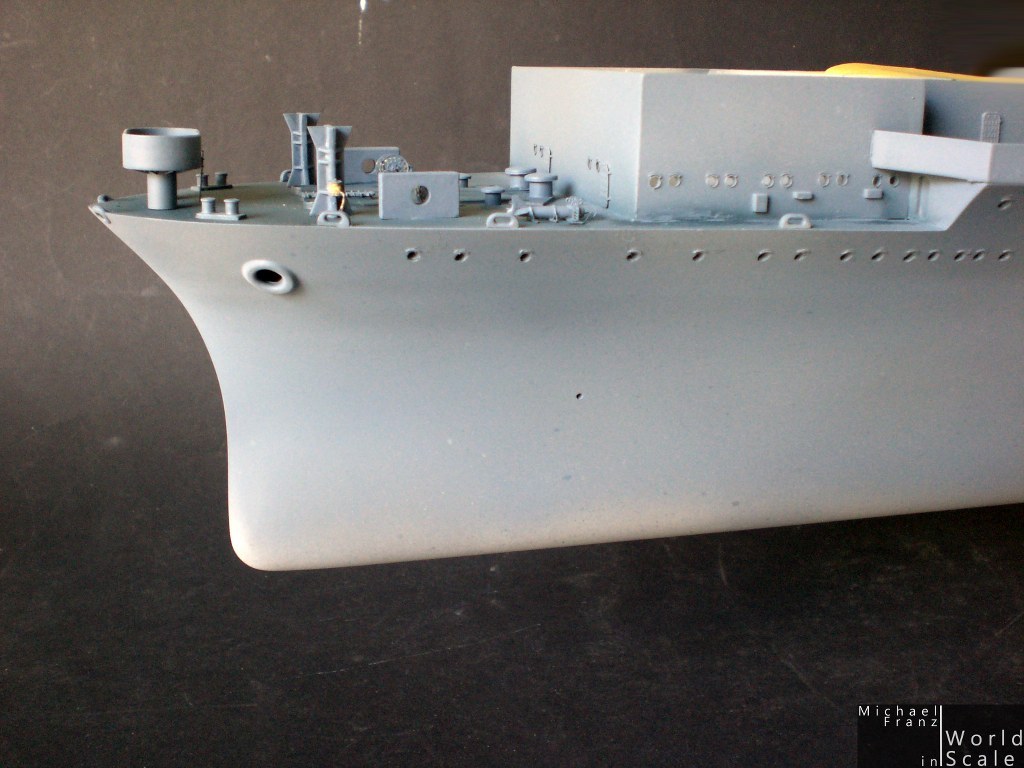
When the corrections were done, then I will make the masks for the waves on the hull, ....
BR
Micha
Also some first details were on the decks were painted.
When the corrections were done, then I will make the masks for the waves on the hull, ....
BR
Micha
justsendit
Joined: February 24, 2014
KitMaker: 3,033 posts
Model Shipwrights: 36 posts

Posted: Sunday, May 04, 2014 - 05:54 AM UTC
Aaaaah -- all of the PE is blinding me!!!
Nice work. I very much enjoy following the progress.
--mike
Nice work. I very much enjoy following the progress.
--mike
RedDuster
Joined: March 01, 2010
KitMaker: 7,078 posts
Model Shipwrights: 6,649 posts
Posted: Sunday, May 04, 2014 - 07:50 AM UTC
Great stuff Michael,
coming on splendidily.
Si
coming on splendidily.
Si
elmarriachi
Joined: December 26, 2009
KitMaker: 813 posts
Model Shipwrights: 304 posts
Posted: Wednesday, May 07, 2014 - 07:37 AM UTC
The masking of the waves.....
I have scaled the painting plan from Merit to the size of the ship and transferred the waves to a masking tape, cut it out and put it on the hull.... the area over the waterline at the bow and stern was masked with salt.....
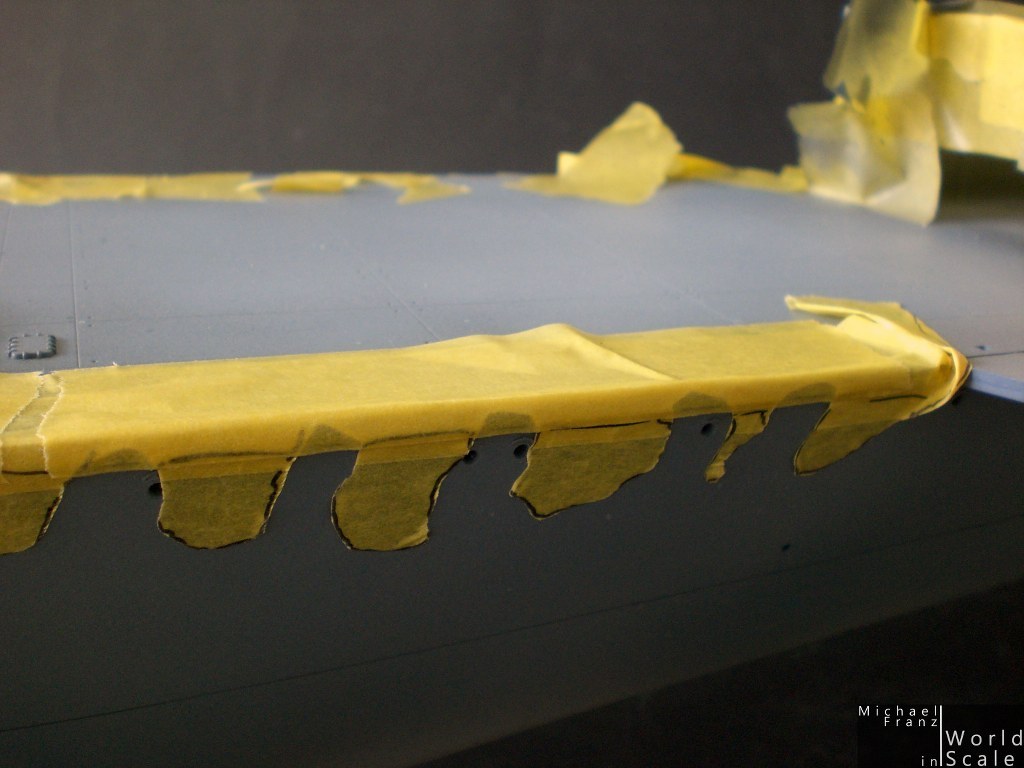
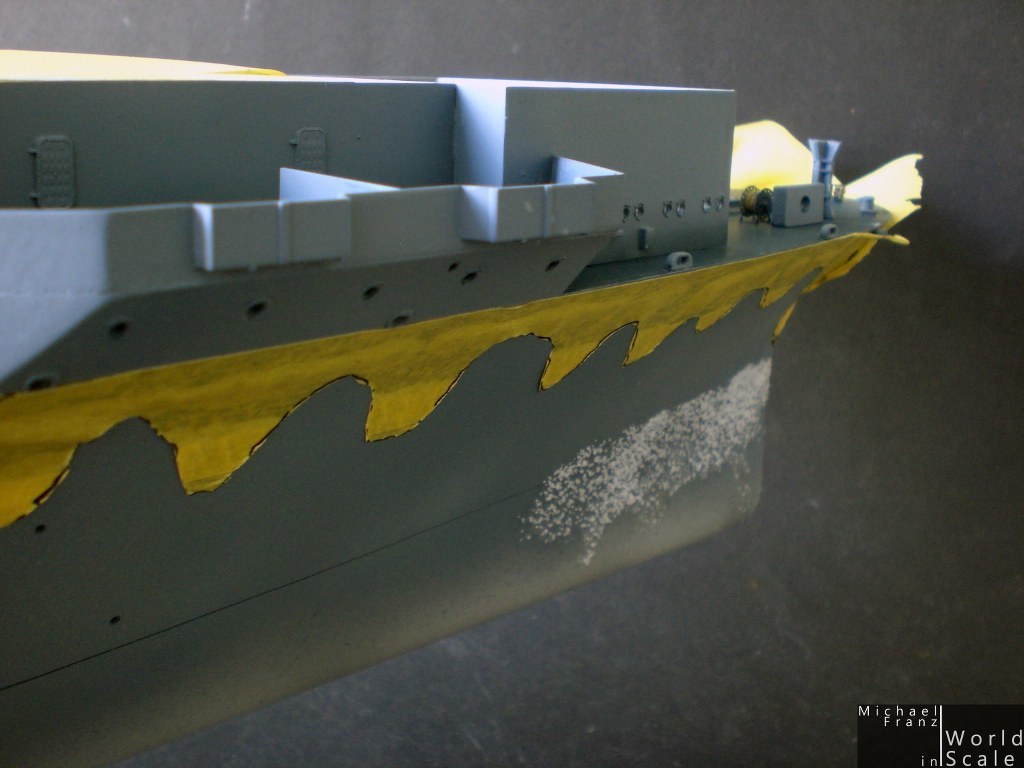
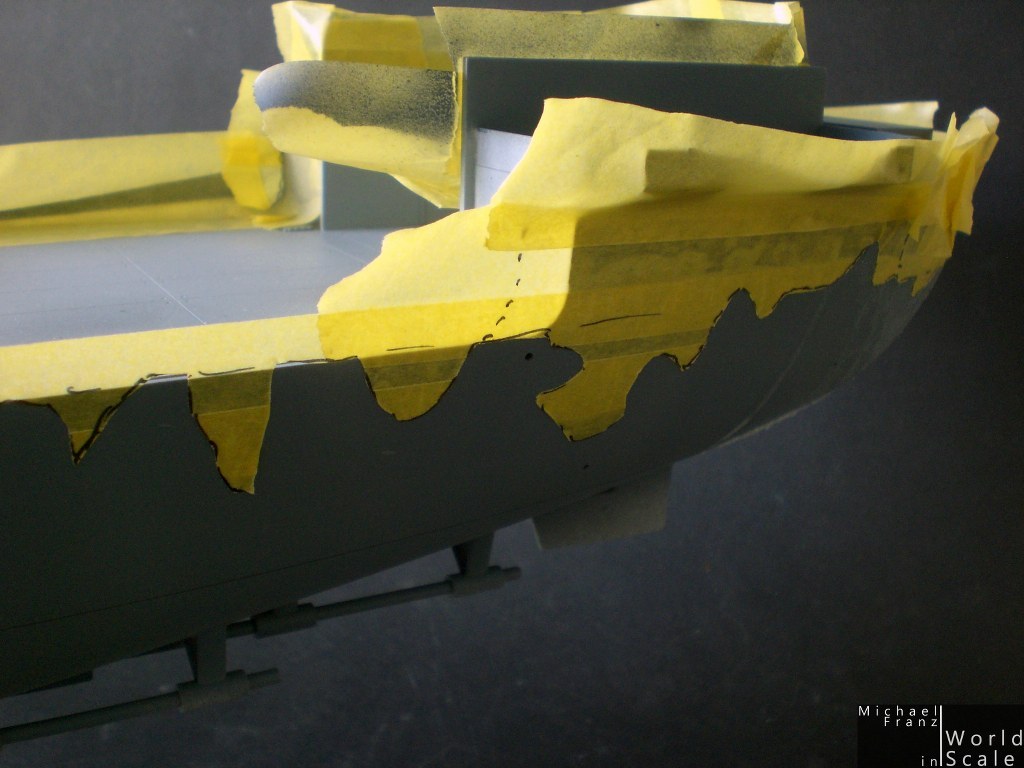
Then everything was painted in 5-N Navy Blue for the dark parts of the hull..... (on the following pictures with the walls of the hangar put on, but not glued yet)

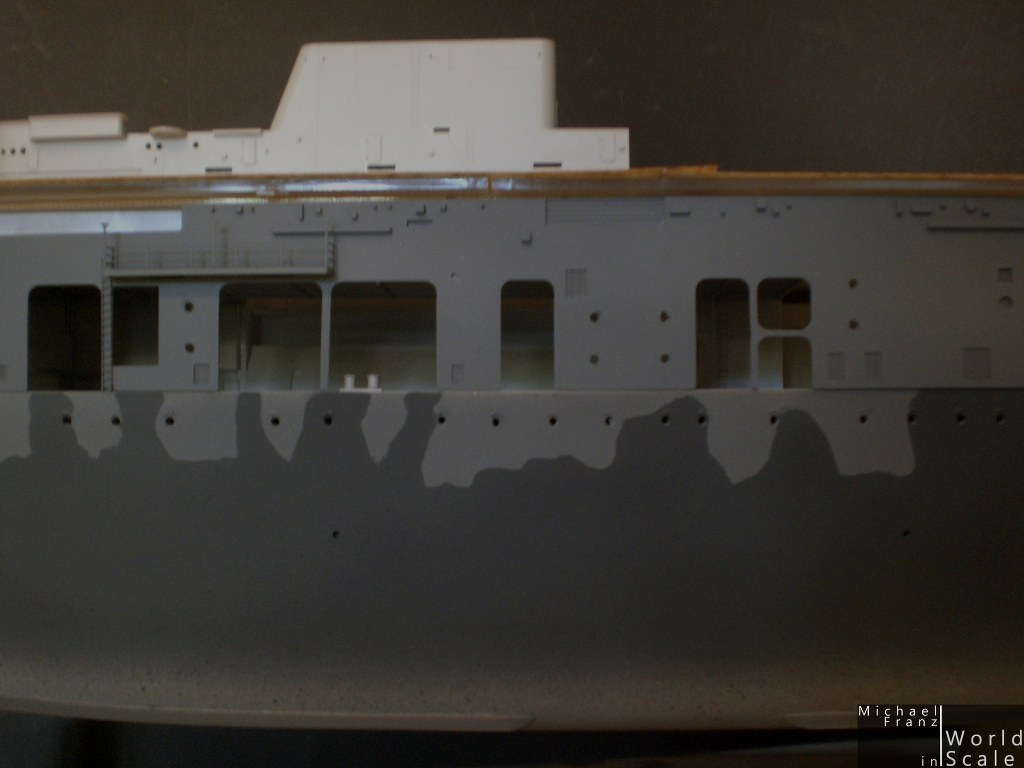
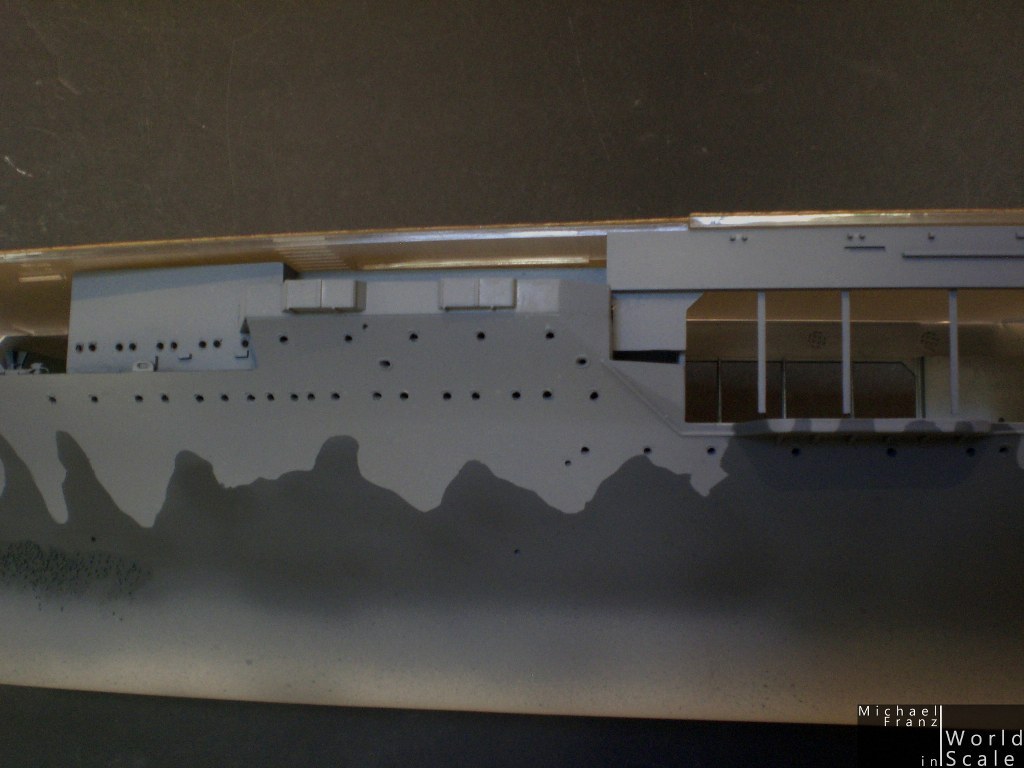
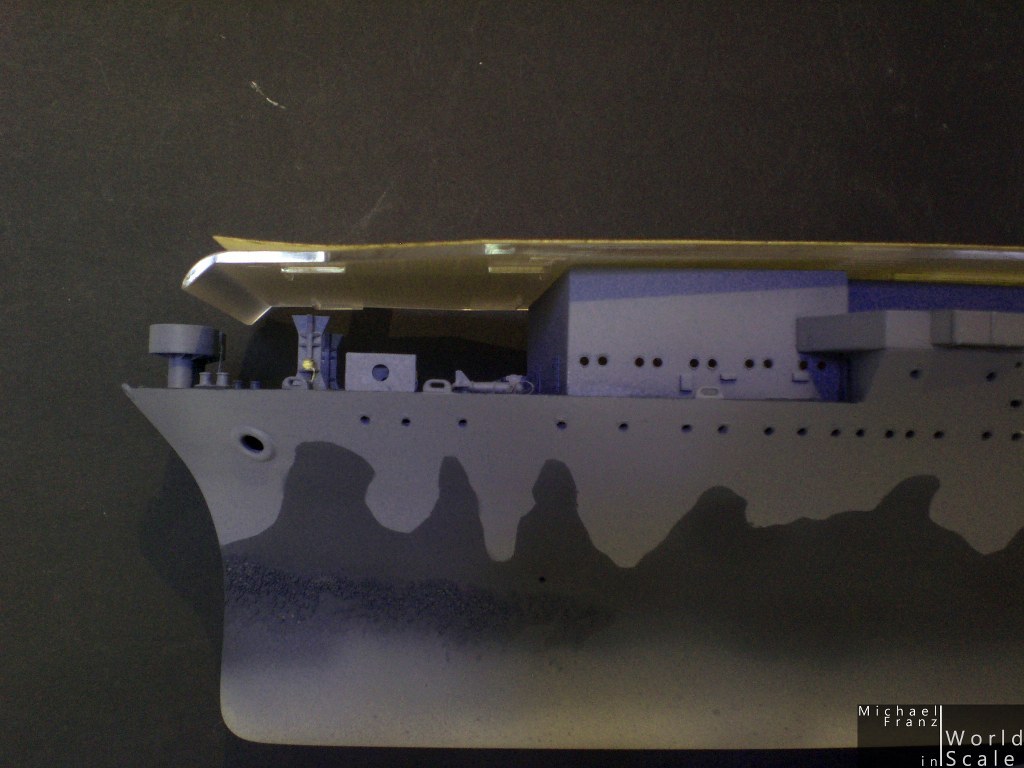
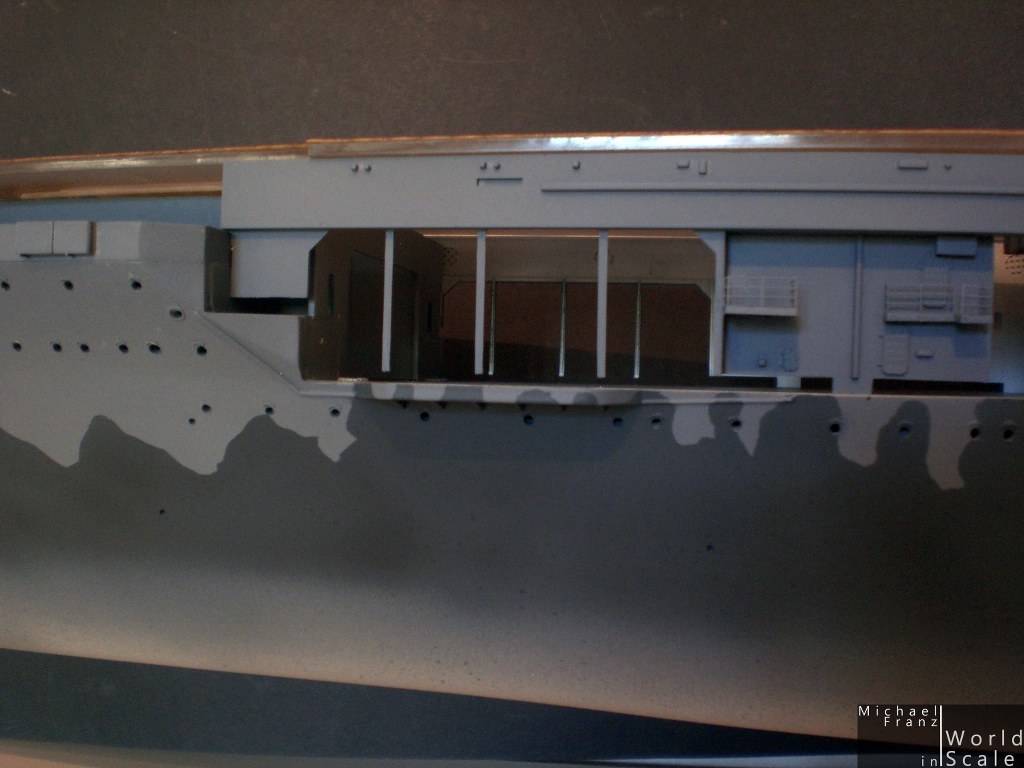
After some time for drying I will wash away the salt, then mask the bow one more times as there is one last dark part missing which I decided before that it would be easier to mask and paint later separately. Then everything will be masked for painting of the under water part.... then the black waterline.... then adding the hangar walls to the hull... then the further parts mounting together, painting then adding (walkways, stairways, ...), then clear coat, decals, clear coat, wasing with oil colors, rust, rainmarks, clear coat matt..... and then one day later finished .)
Micha
I have scaled the painting plan from Merit to the size of the ship and transferred the waves to a masking tape, cut it out and put it on the hull.... the area over the waterline at the bow and stern was masked with salt.....
Then everything was painted in 5-N Navy Blue for the dark parts of the hull..... (on the following pictures with the walls of the hangar put on, but not glued yet)
After some time for drying I will wash away the salt, then mask the bow one more times as there is one last dark part missing which I decided before that it would be easier to mask and paint later separately. Then everything will be masked for painting of the under water part.... then the black waterline.... then adding the hangar walls to the hull... then the further parts mounting together, painting then adding (walkways, stairways, ...), then clear coat, decals, clear coat, wasing with oil colors, rust, rainmarks, clear coat matt..... and then one day later finished .)
Micha
Fordboy
Joined: July 13, 2004
KitMaker: 2,169 posts
Model Shipwrights: 1,597 posts
Posted: Wednesday, May 07, 2014 - 07:59 AM UTC
Nice progress Michael.
I can only imagine masking and painting something this large.
Cheers
Sean
I can only imagine masking and painting something this large.
Cheers
Sean
elmarriachi
Joined: December 26, 2009
KitMaker: 813 posts
Model Shipwrights: 304 posts
Posted: Thursday, May 08, 2014 - 12:47 AM UTC
Thanks a lot
Yes, I think a compelte round of masking tape for this ship...
BR
Michael
Yes, I think a compelte round of masking tape for this ship...
BR
Michael
Gremlin56
Joined: October 30, 2005
KitMaker: 3,897 posts
Model Shipwrights: 3,301 posts
KitMaker: 3,897 posts
Model Shipwrights: 3,301 posts
Posted: Thursday, May 08, 2014 - 05:36 AM UTC
Looking good Michael, you are really burning up the track on this build
Camo is looking good though
Camo is looking good though
Gremlin56
Joined: October 30, 2005
KitMaker: 3,897 posts
Model Shipwrights: 3,301 posts
KitMaker: 3,897 posts
Model Shipwrights: 3,301 posts
Posted: Thursday, May 08, 2014 - 05:40 AM UTC
Quoted Text
Nice progress Michael.
I can only imagine masking and painting something this large.
Cheers
Sean
Masking the flight deck on my build took nearly a whole roll of Tamiya tape so Michael's estimate is not too far off
elmarriachi
Joined: December 26, 2009
KitMaker: 813 posts
Model Shipwrights: 304 posts
Posted: Monday, May 12, 2014 - 05:58 AM UTC
I have painted the underwater part of the hull in Norfolk 65-A Antifouling Red next, then masked everything and painted the waterline in black.
Lot of masking tape later... a little overspray of the upper part in several dark grey colors to harmonize the colors a little bit.... I don't like the hard contrast...
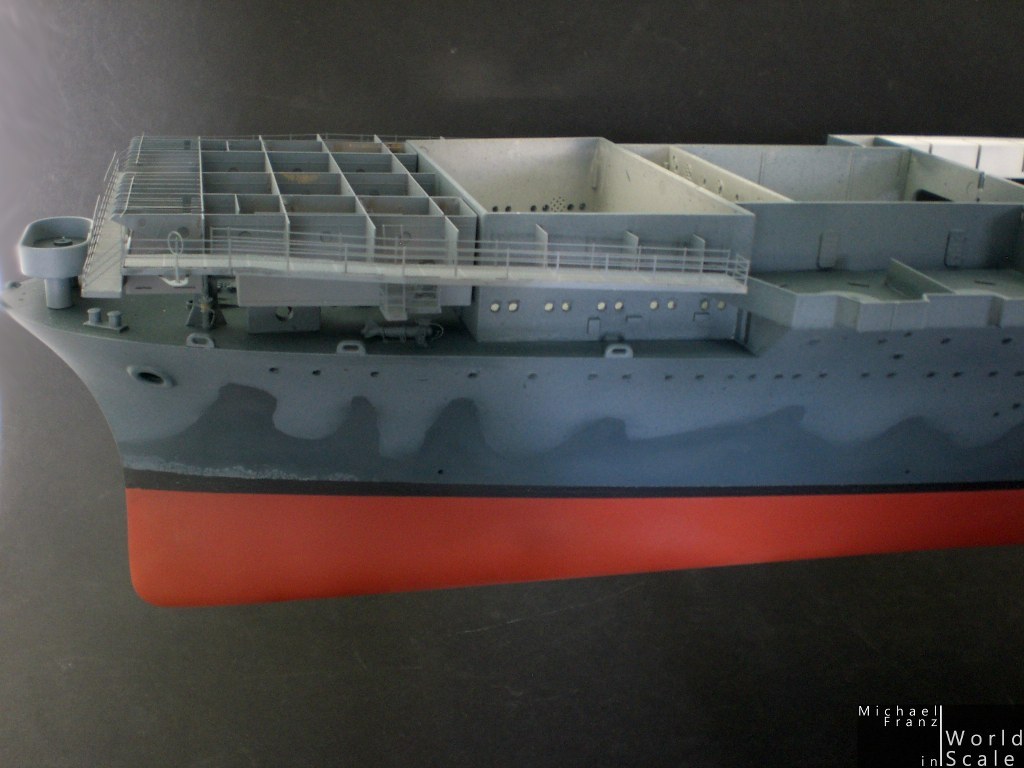

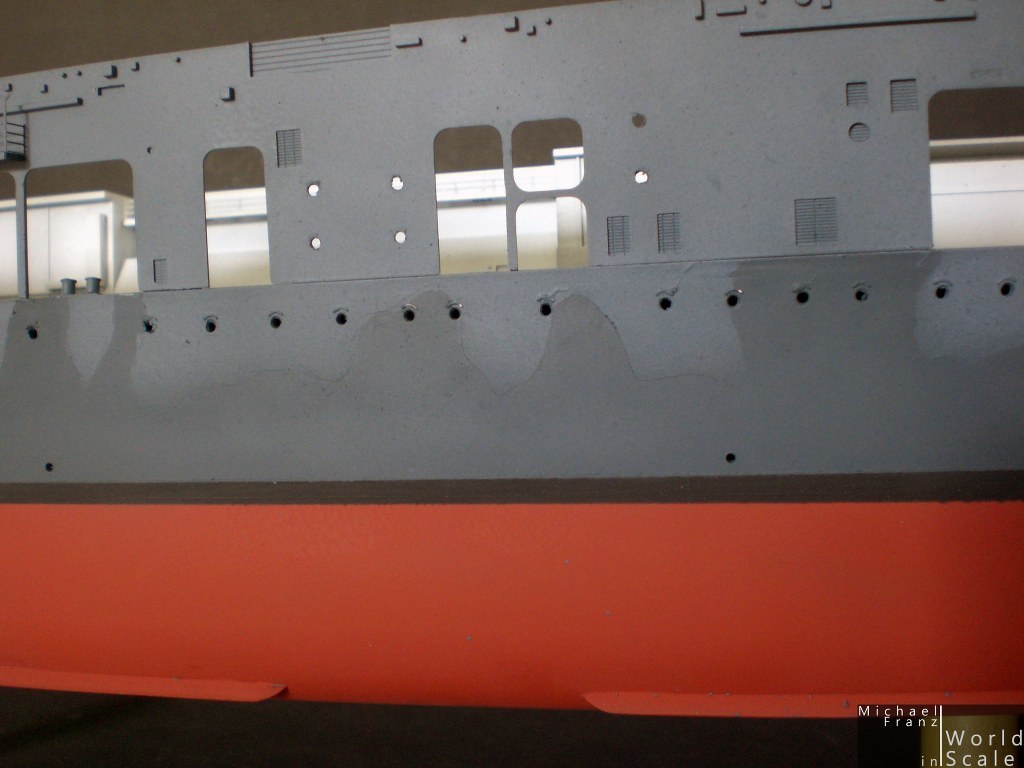
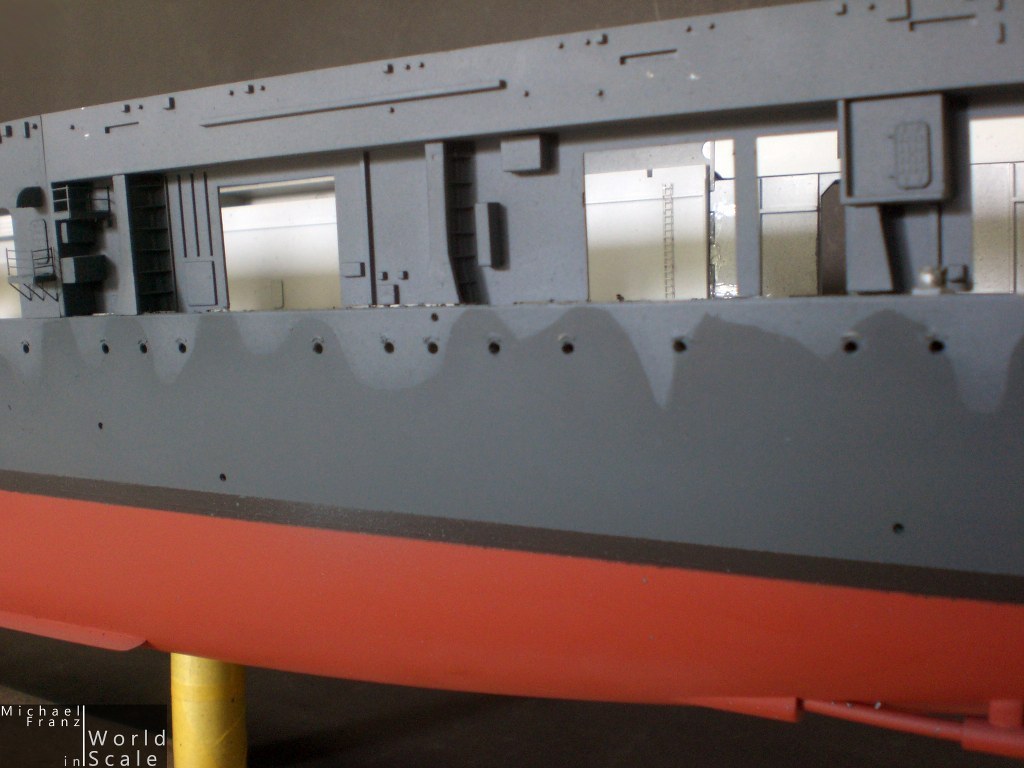
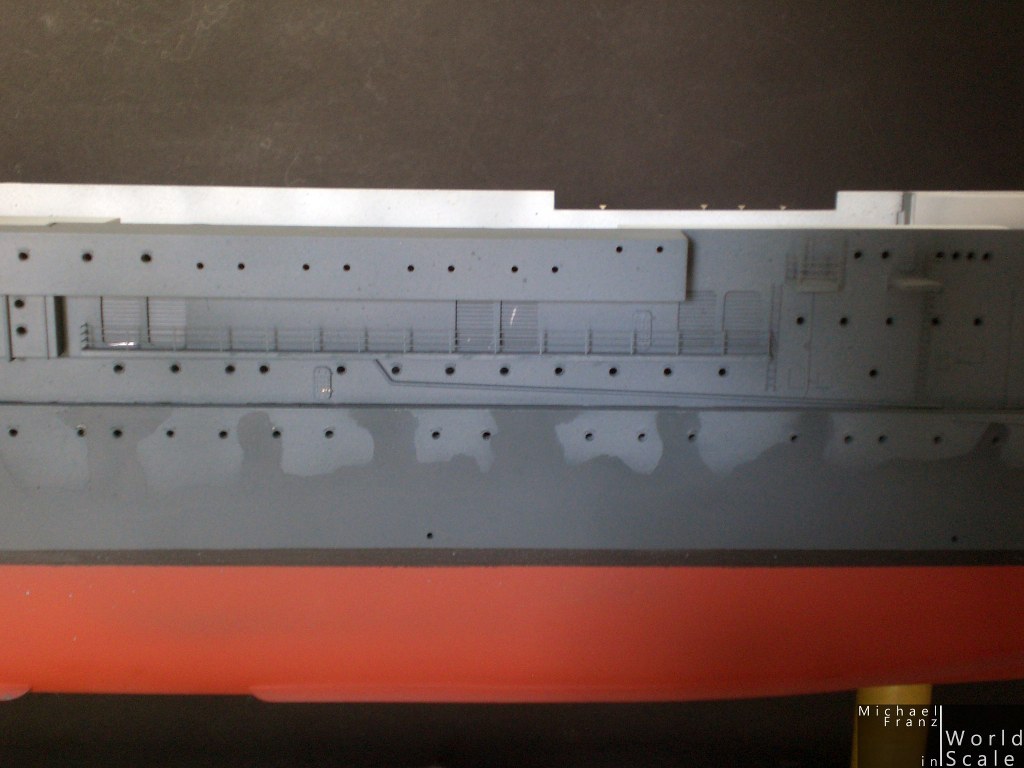

Next I will mount all further parts to the hull... walkways, stairways, cranes, boats and other small stuff.... then paint (or paint before fixing to the hullI), then I will go on with clear coat, decals, weathering etc....
Cheers
Micha
Lot of masking tape later... a little overspray of the upper part in several dark grey colors to harmonize the colors a little bit.... I don't like the hard contrast...
Next I will mount all further parts to the hull... walkways, stairways, cranes, boats and other small stuff.... then paint (or paint before fixing to the hullI), then I will go on with clear coat, decals, weathering etc....
Cheers
Micha
RedDuster
Joined: March 01, 2010
KitMaker: 7,078 posts
Model Shipwrights: 6,649 posts
Posted: Monday, May 12, 2014 - 08:12 AM UTC
Nice paint job Michael,
Coming really well.
Si
Coming really well.
Si
 |

WEB HOSTING BY


Copyright ©2021 Model Shipwrights and Kitmaker Network, a subsidiary of Silver Star Enterprises
All Rights Reserved. Please read our Conditions of Use and Privacy Policy.
All Rights Reserved. Please read our Conditions of Use and Privacy Policy.