USS Hornet (CV-8) - 1/200 by Merit, Tetra ...
Baden-Württemberg, Germany
Joined: December 26, 2009
KitMaker: 813 posts
Model Shipwrights: 304 posts
Posted: Sunday, April 06, 2014 - 07:26 AM UTC
Hello at all... and welcome to my new big project.
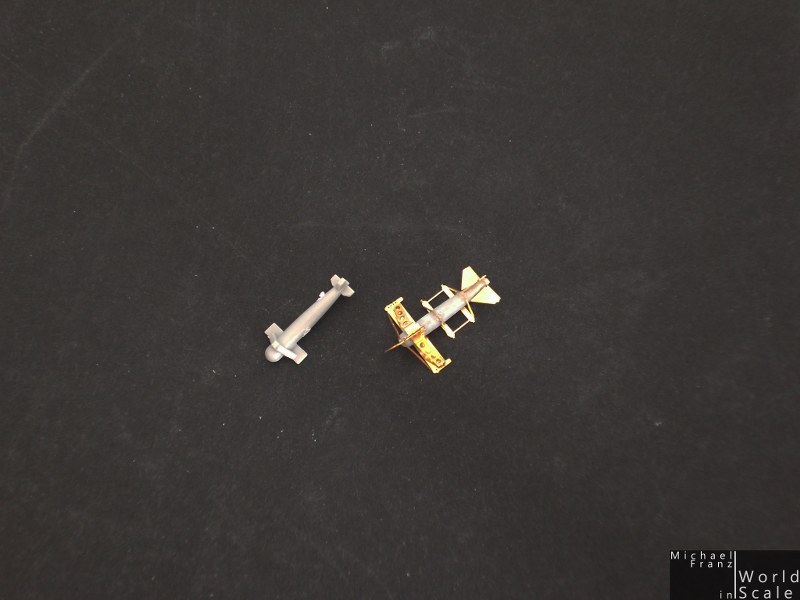
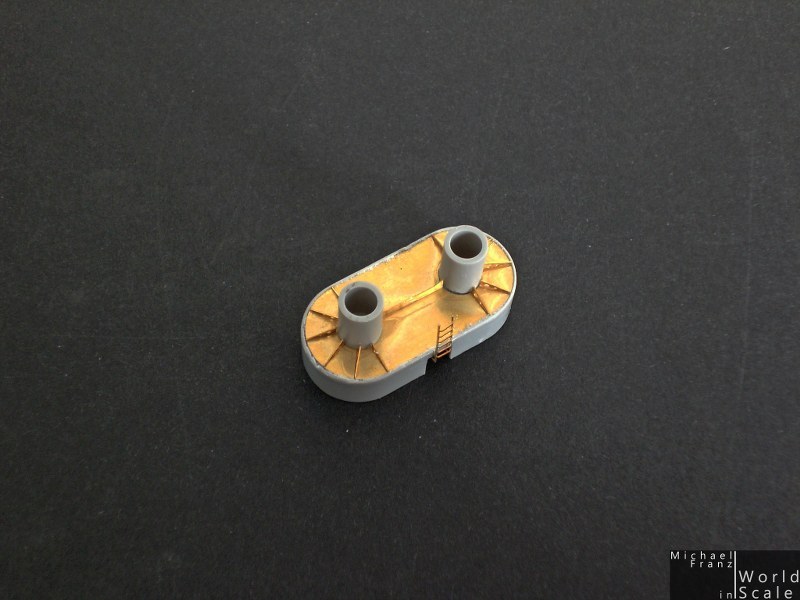
I will do the USS Hornet (CV-8) in 1/200 scale by Merit International. Additionally I will use the big detail set by Tetra Model Works, consisting of lot of photo etched parts, brass parts for the guns and masts, chain and a hose. Furthermore the woode deck from Nautilus Models will be used as well.
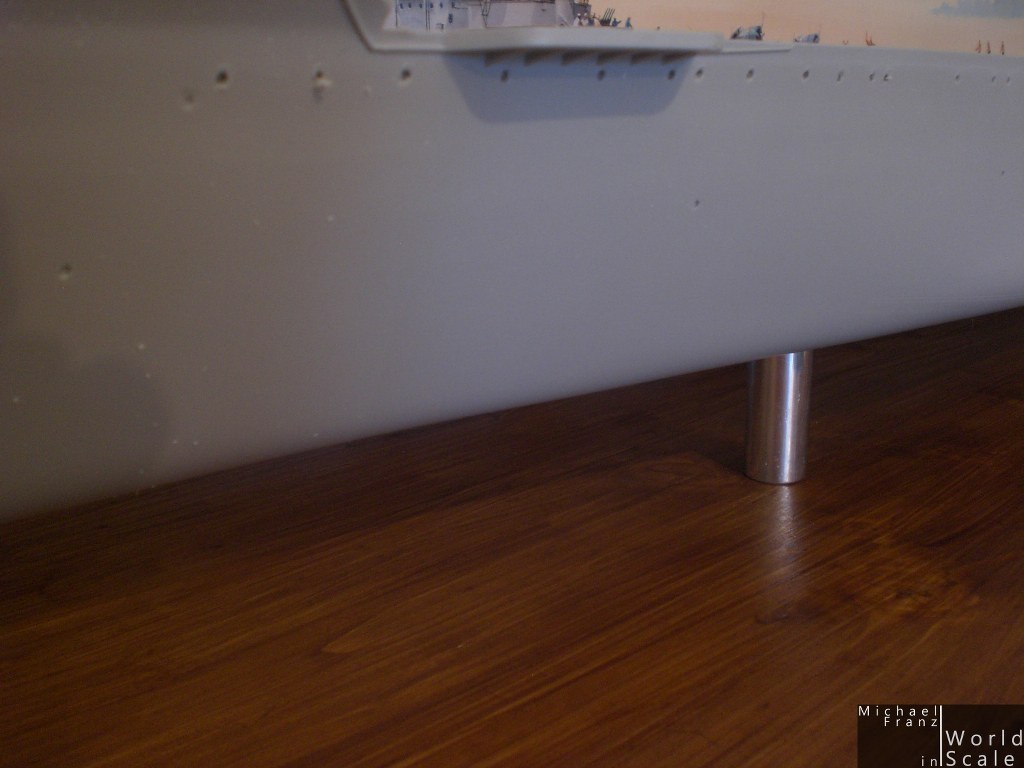
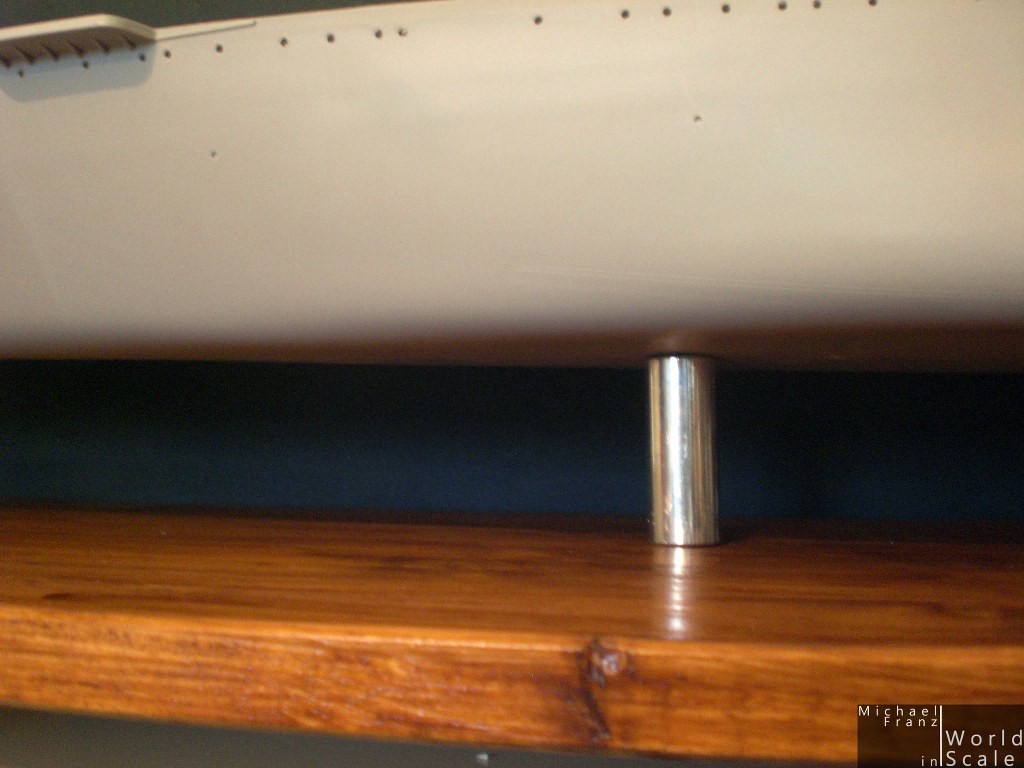
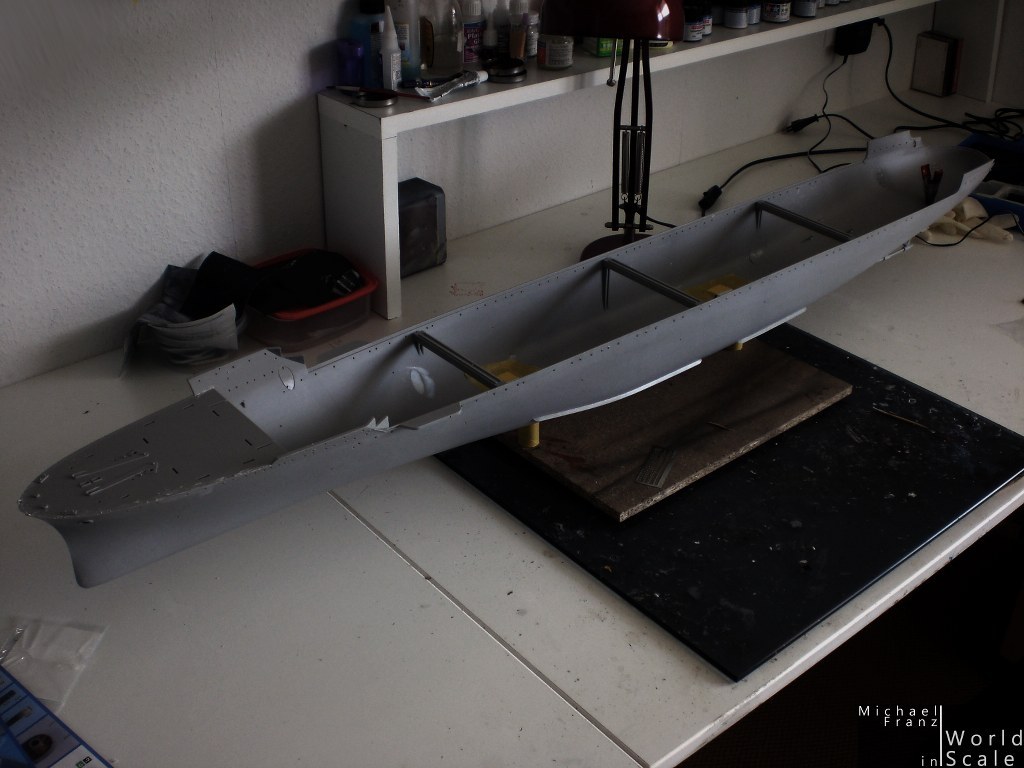
For the beginning I started with the display for the ship. I drilled two holes in the fuselage for screws which go into the aluminium pipes. The pipes are screwed on a wooden plate which will get some dark wooden color, glossy clear coat as next steps. The two screws in the fuselage of the ship get glued in position and will be used to hold the ship already during the working on it....
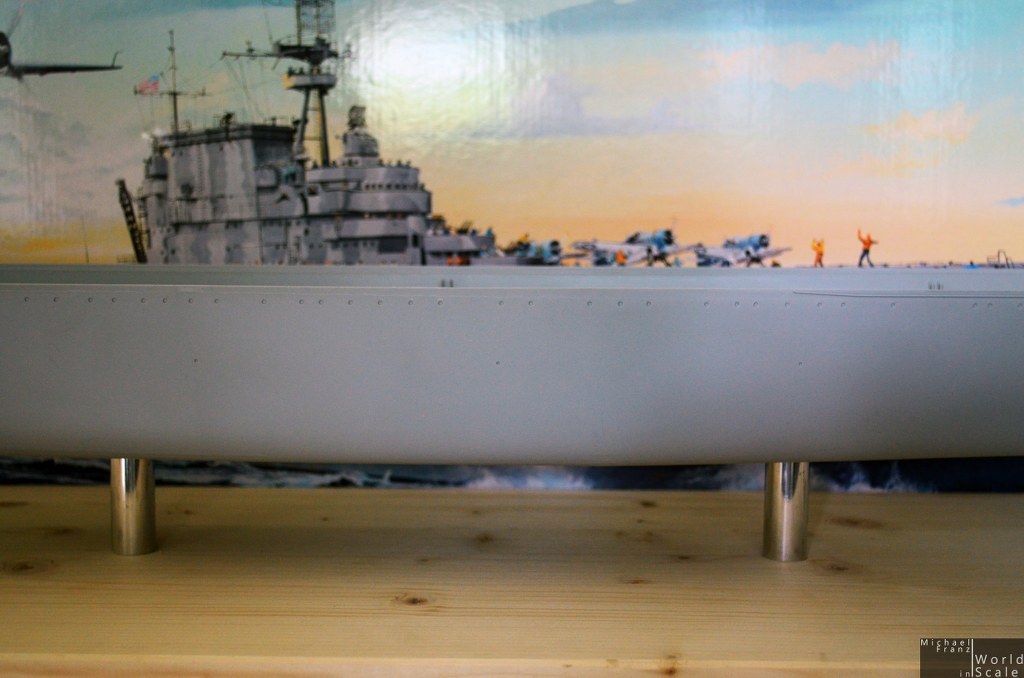
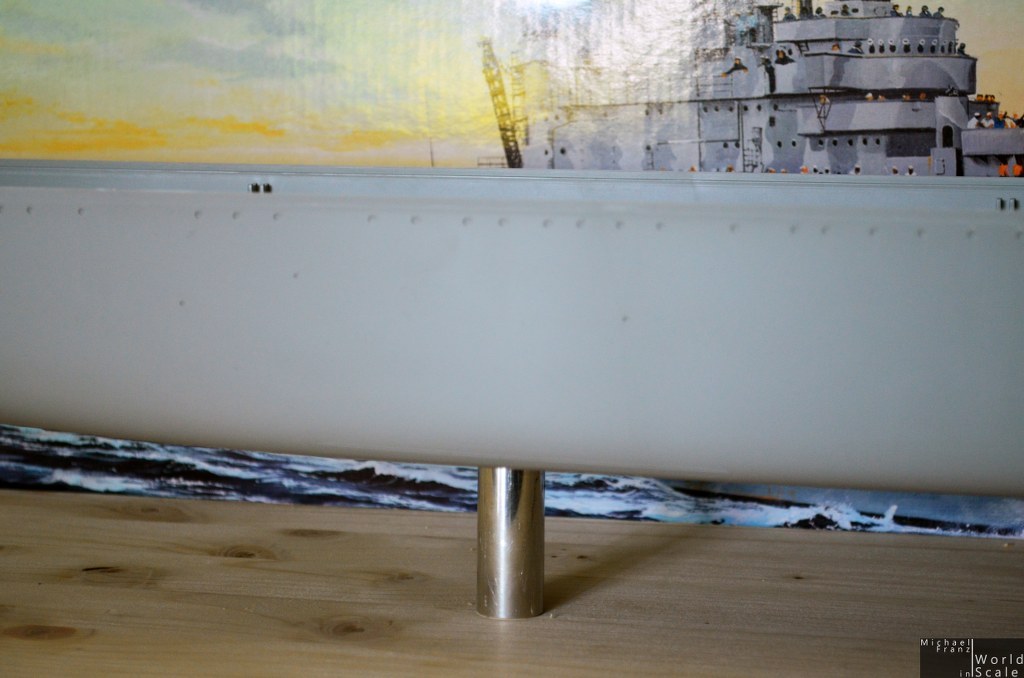
The first steps are made..... let's move on with the painting of the display plate ...
BR
Micha
regards,
Michael
http://www.world-in-scale.de
Michigan, United States
Joined: June 10, 2008
KitMaker: 230 posts
Model Shipwrights: 136 posts
Posted: Sunday, April 06, 2014 - 08:09 AM UTC
1/200 - that thing must be huge. How long is the finished model?
EJ
Fair Winds and Following Seas
EJ
Baden-Württemberg, Germany
Joined: December 26, 2009
KitMaker: 813 posts
Model Shipwrights: 304 posts
Posted: Sunday, April 06, 2014 - 06:14 PM UTC
Hi EJ,
the final model is about 122cm long .... a really huge thing

The wooden base is 150cm ....
BR
Michael
regards,
Michael
http://www.world-in-scale.de

#335
Auckland, New Zealand
Joined: September 03, 2013
KitMaker: 1,808 posts
Model Shipwrights: 871 posts
Posted: Sunday, April 06, 2014 - 10:18 PM UTC
Hi Michael,
Good luck with this. It looks like a big challenge. I would love to see some pictures of the Tetra set and the Nautlius deck to see what you get for your money.
cheers
Michael
Campaign:
Strip, Track and Trail - Porsche 917/20 - On the bench
Phantoms at 60 - F-4J Marines
Below 1000 tons - M50 minesweeper - Sailed for duty
Baden-Württemberg, Germany
Joined: December 26, 2009
KitMaker: 813 posts
Model Shipwrights: 304 posts
Posted: Sunday, April 06, 2014 - 10:54 PM UTC
Hi Michael,
check this out:
ADD ON PARTS Scroll a little bit down, there you find pictures of the Tetra Model Works detail set, and the wooden deck
BR
Michael
regards,
Michael
http://www.world-in-scale.de
Joined: October 30, 2005
KitMaker: 3,897 posts
Model Shipwrights: 3,301 posts
Posted: Monday, April 07, 2014 - 04:18 AM UTC
Hi Michael,
nice to see your build has started up online. I am very curious how much difference the PE will make. The base looks good already.

England - South East, United Kingdom
Joined: March 01, 2010
KitMaker: 7,078 posts
Model Shipwrights: 6,649 posts
Posted: Monday, April 07, 2014 - 07:07 AM UTC
Nice start Michael,
All that etch looks very interesting, looking forward to seeing it tackled.
Si
Baden-Württemberg, Germany
Joined: December 26, 2009
KitMaker: 813 posts
Model Shipwrights: 304 posts
Posted: Wednesday, April 09, 2014 - 06:51 AM UTC
Hello,
thanks a lot for your interest!
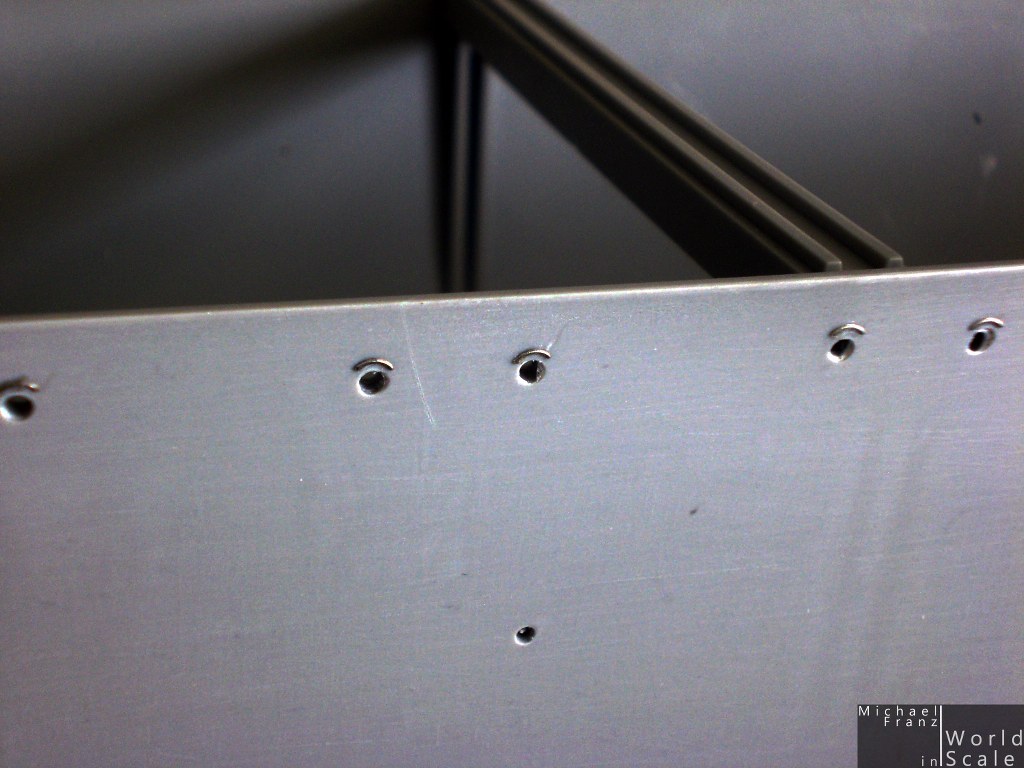
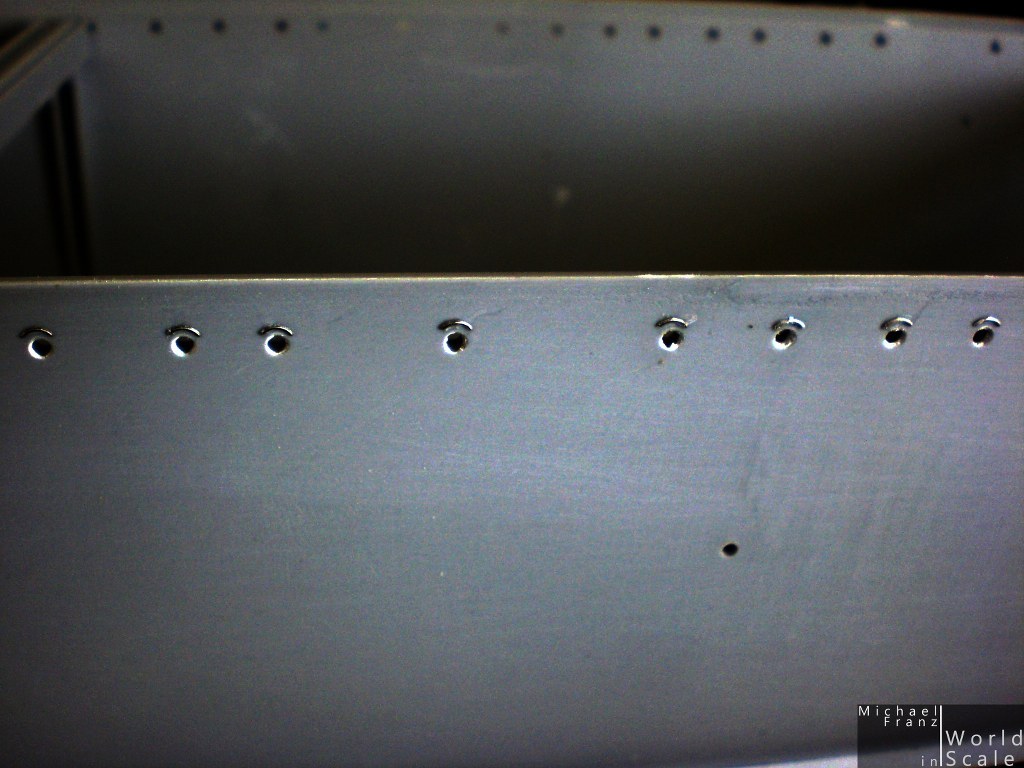
The first steps on the hull were the portholes. I have opened each one with the small hand drill.... what an ugly work.... but it is done... and much better then before. After the painting I will give each porthole a "glass" made of Mirco Crystal Clear.
The display is also painted already.... clear coat still missing on it.
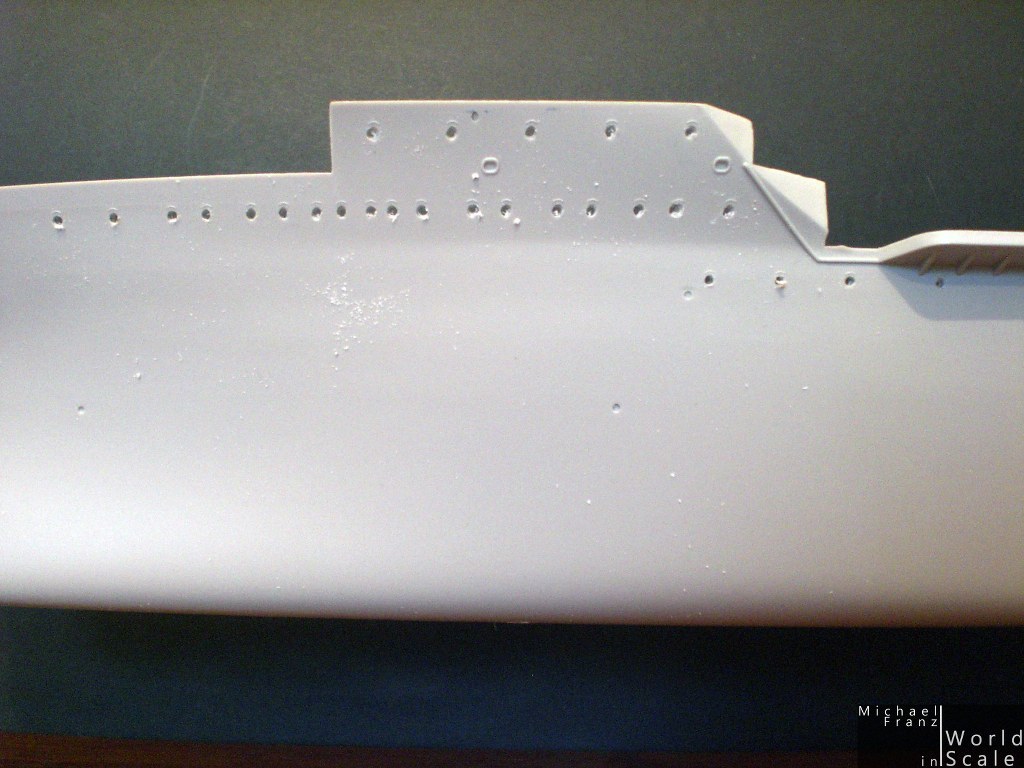
Next step... sanding.... sanding .... sanding .... then next parts on the hull ....
Cheers...... Micha
regards,
Michael
http://www.world-in-scale.de
England - South East, United Kingdom
Joined: March 01, 2010
KitMaker: 7,078 posts
Model Shipwrights: 6,649 posts
Posted: Wednesday, April 09, 2014 - 07:27 AM UTC
Nice work on a tedious job Micha,
I think in that scale it will be noticeable and worth the effort.
Following with interest.
Si
Joined: October 30, 2005
KitMaker: 3,897 posts
Model Shipwrights: 3,301 posts
Posted: Friday, April 11, 2014 - 06:32 PM UTC
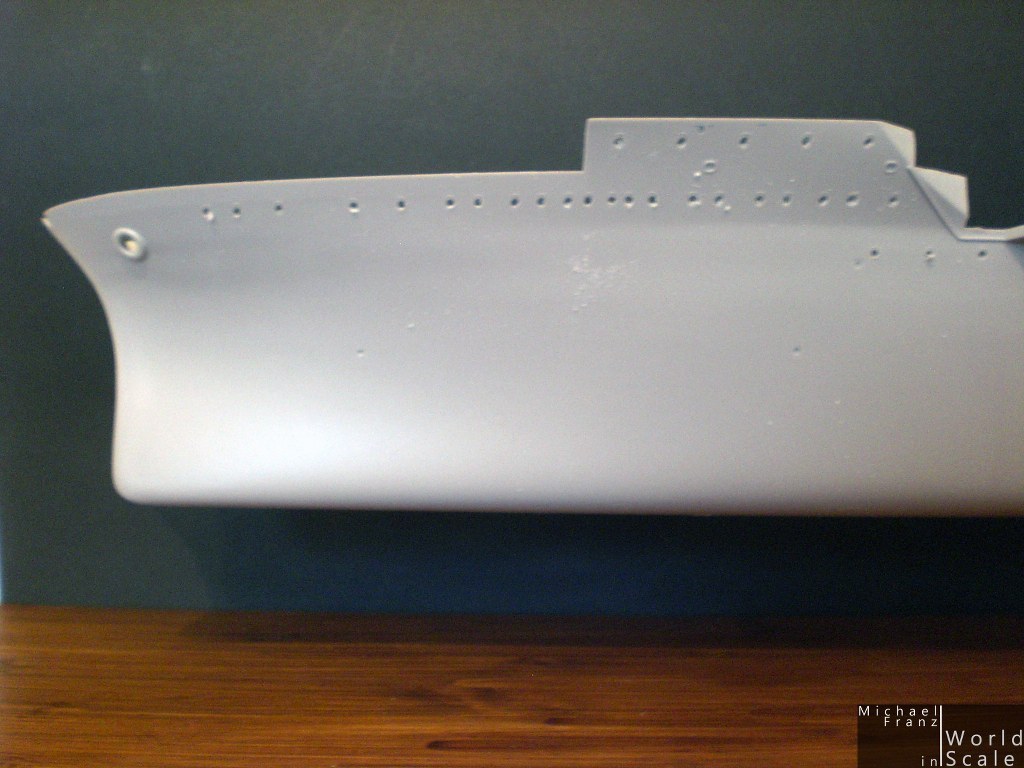
Looking good Michael, the oval details with the raised edge around them would appear to fairleads. Are you going to open them as well?
Baden-Württemberg, Germany
Joined: December 26, 2009
KitMaker: 813 posts
Model Shipwrights: 304 posts
Posted: Friday, April 11, 2014 - 10:18 PM UTC
Hi Julian,
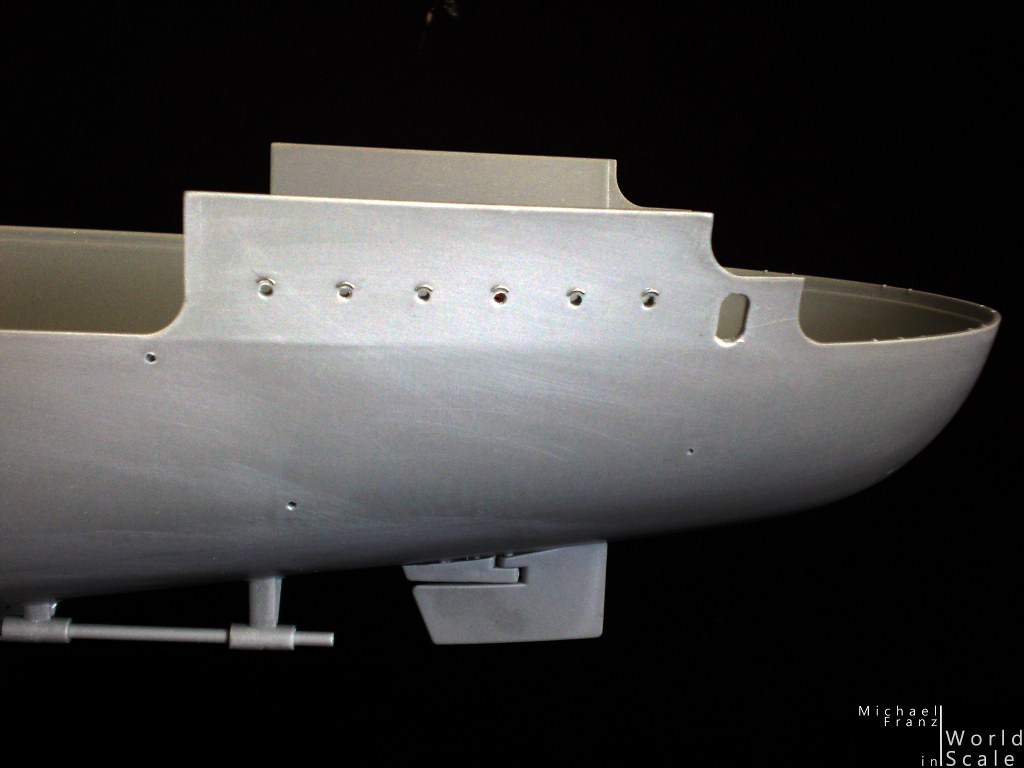
yes, these will be opened as well.... and the two big "holes" ar the rear left / right too...
Actually I am waiting for the pe-parts for the portholes.... all portholes will receive framed of PE-parts.... don't like the molded frames on the hull....
BR
Michael
regards,
Michael
http://www.world-in-scale.de
Baden-Württemberg, Germany
Joined: December 26, 2009
KitMaker: 813 posts
Model Shipwrights: 304 posts
Posted: Friday, April 11, 2014 - 10:29 PM UTC
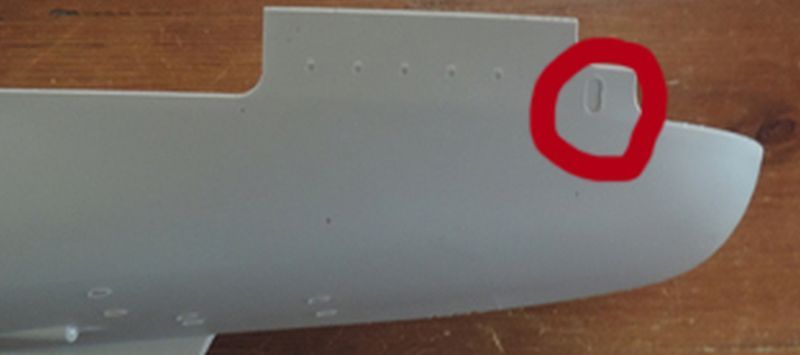
Hello,
does anybody know, if this marked "opening" was open at the original one?
Thank you!
Micha
regards,
Michael
http://www.world-in-scale.de
Joined: October 30, 2005
KitMaker: 3,897 posts
Model Shipwrights: 3,301 posts
Posted: Friday, April 11, 2014 - 10:35 PM UTC
Yes, those are supposed to be open too Michael,
Baden-Württemberg, Germany
Joined: December 26, 2009
KitMaker: 813 posts
Model Shipwrights: 304 posts
Posted: Sunday, April 13, 2014 - 01:03 AM UTC
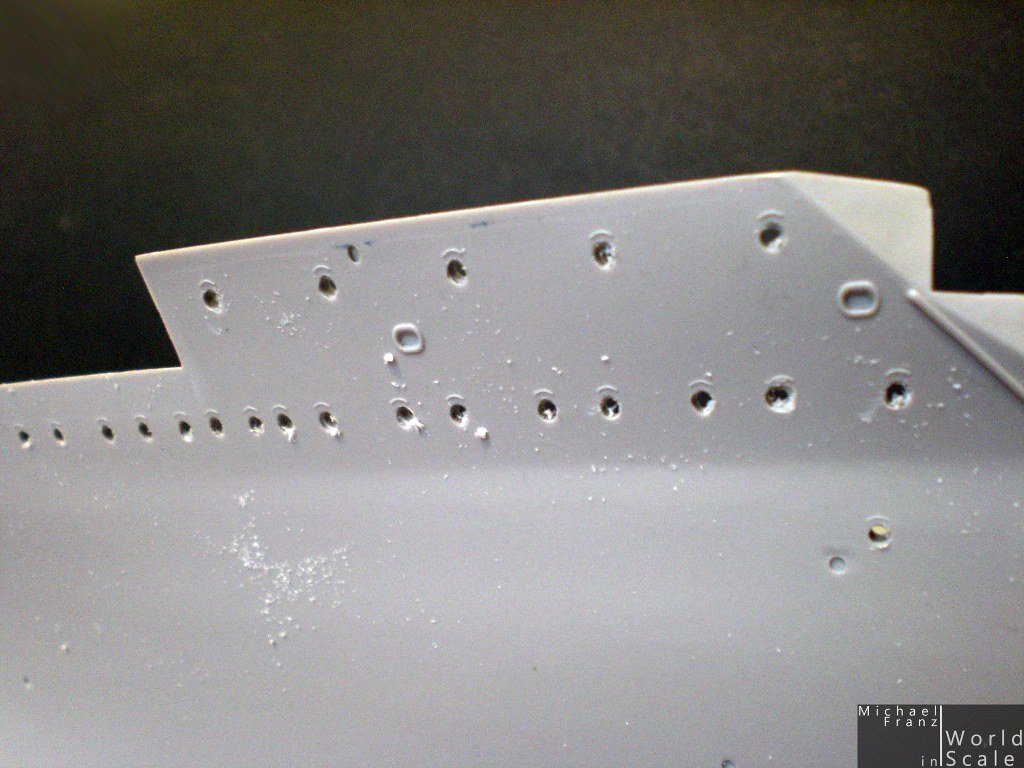
Now lot of photoetched eyebowes on each porthole... funny job... very funny job ... One side done, one side left to go ...
... and the Hornet in it's fully size... my desk is too small ...
BR
Michael
regards,
Michael
http://www.world-in-scale.de
Joined: October 30, 2005
KitMaker: 3,897 posts
Model Shipwrights: 3,301 posts
Posted: Sunday, April 13, 2014 - 02:42 AM UTC
The PE eyebrows are a big improvement Michael.
"Desk too small" ? Yeah, tell me about it......

England - South East, United Kingdom
Joined: March 01, 2010
KitMaker: 7,078 posts
Model Shipwrights: 6,649 posts
Posted: Sunday, April 13, 2014 - 05:26 AM UTC
Good luck with the PE eyebrows Michael, they are most definitely worth the effort.
Coming on really well, following with interest.
Si
Baden-Württemberg, Germany
Joined: December 26, 2009
KitMaker: 813 posts
Model Shipwrights: 304 posts
Posted: Thursday, April 17, 2014 - 05:53 AM UTC
Hello ...
now the biggest parts on the hull were mounted, the floor of the hangar, the parts for the elevators - all the bigger parts of the hull.
Then I have closed some gaps with putty (see the pictures), then later I will sand everything before adding the first photo etched parts to the hull...
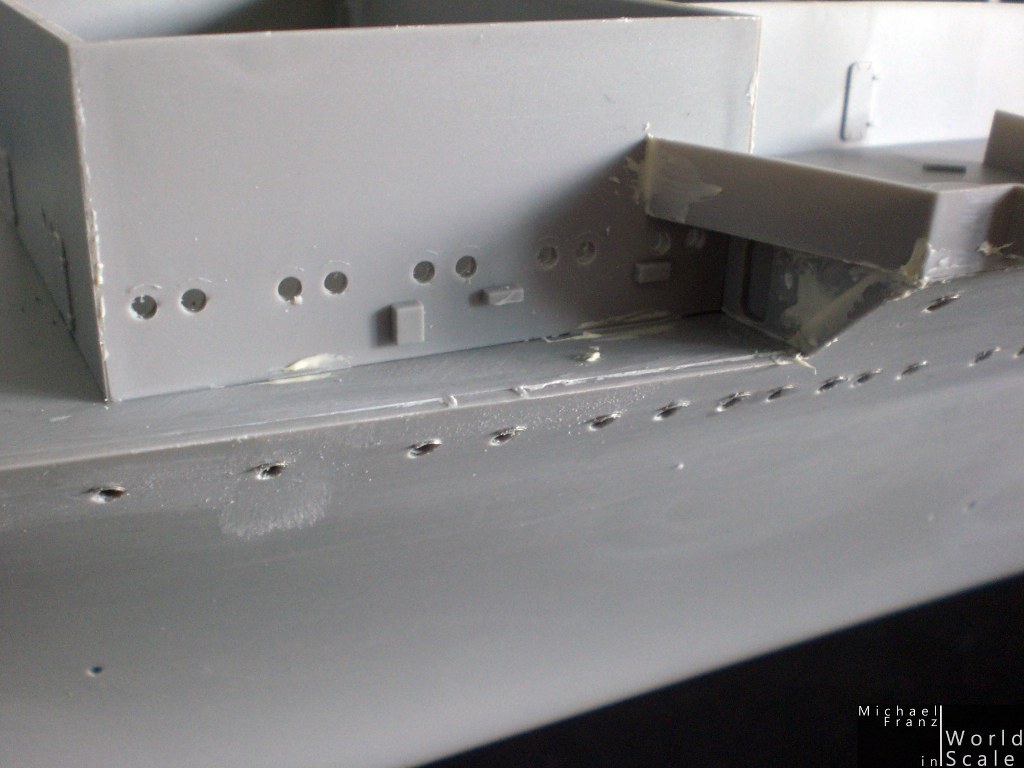
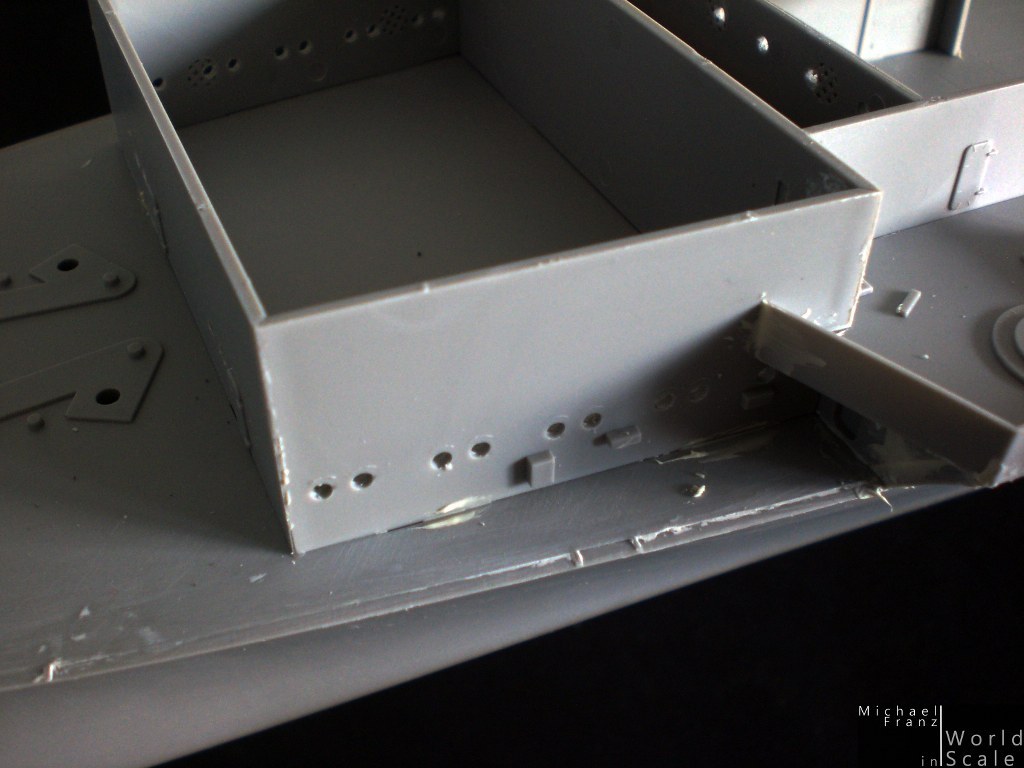
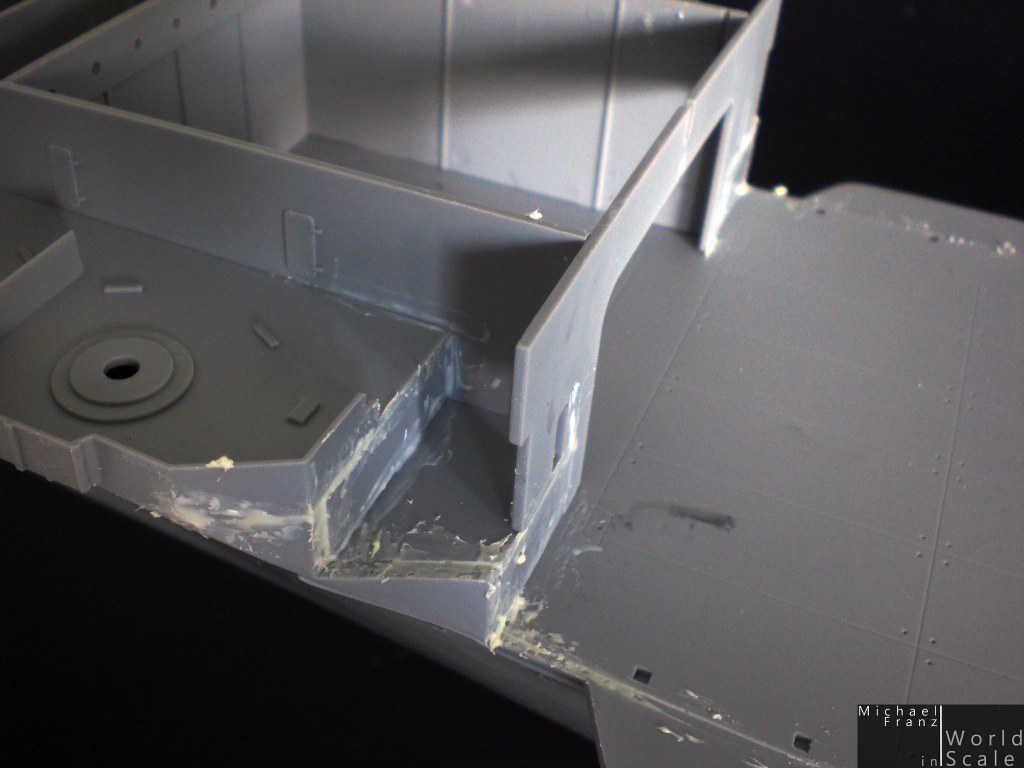
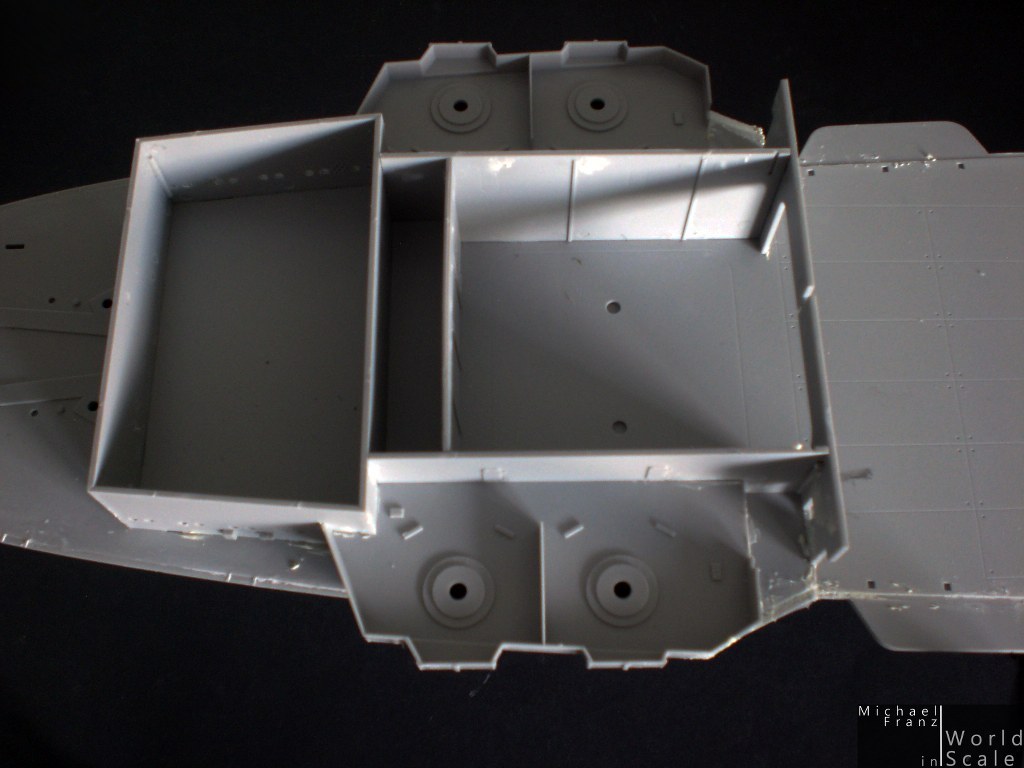
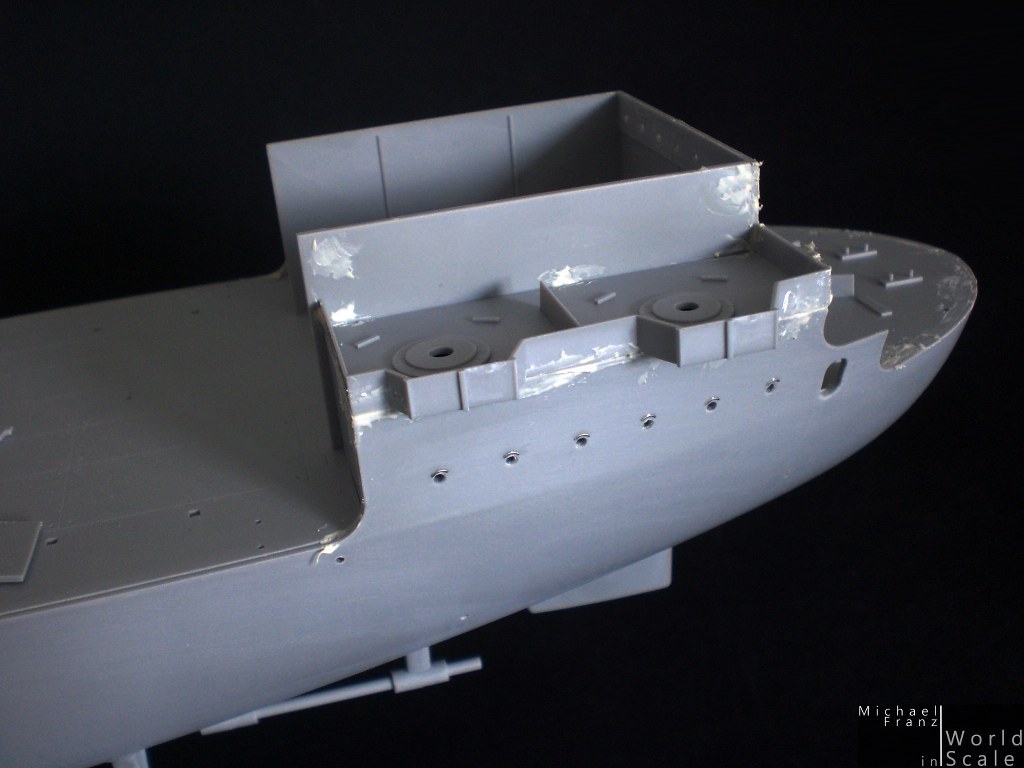
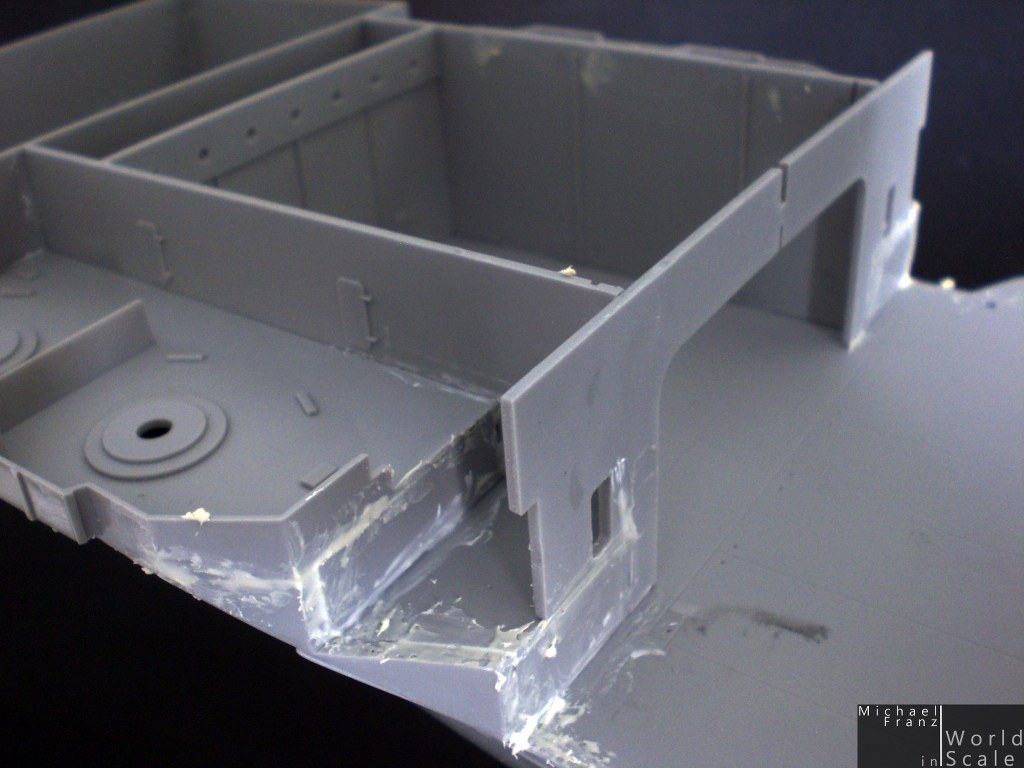
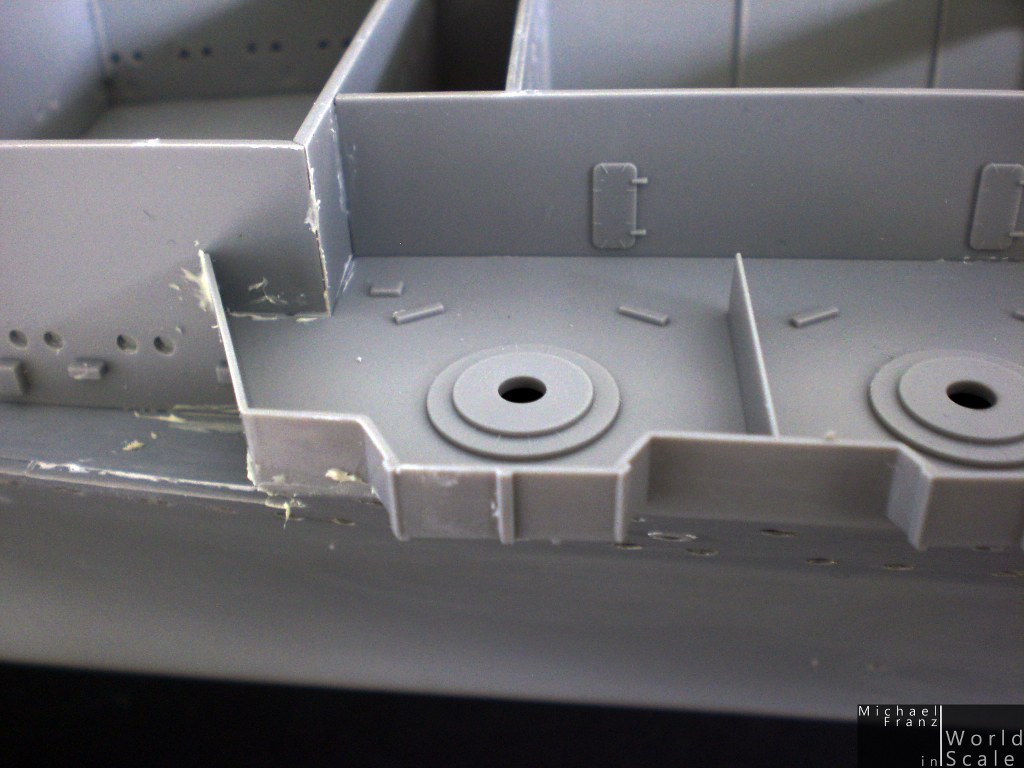
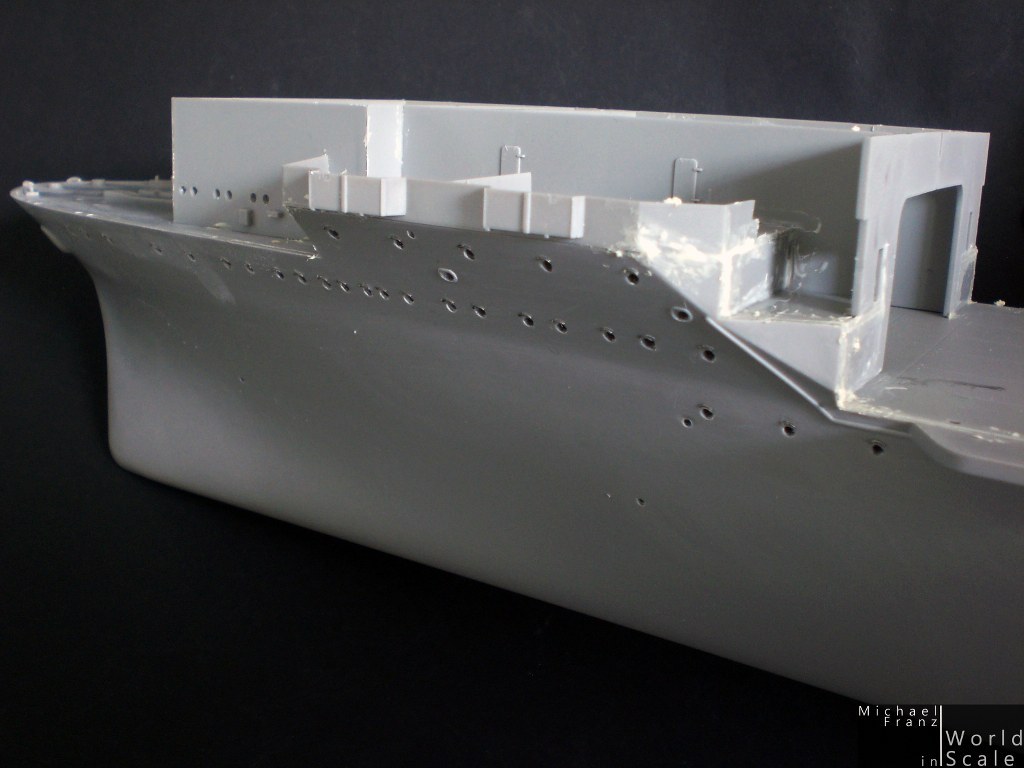
Now the next step is sanding everything before the first PE parts will follow...
BR
Micha
regards,
Michael
http://www.world-in-scale.de
England - South East, United Kingdom
Joined: March 01, 2010
KitMaker: 7,078 posts
Model Shipwrights: 6,649 posts
Posted: Thursday, April 17, 2014 - 07:53 AM UTC
Hi Micha,
Looking good, following with interest.
Si
#335
Auckland, New Zealand
Joined: September 03, 2013
KitMaker: 1,808 posts
Model Shipwrights: 871 posts
Posted: Thursday, April 17, 2014 - 01:35 PM UTC
Hi Michael,
It's looking very good with the extras already. I admire your patience to replace all the moulded on parts for the portholes but the effect looks much better. Looking forward to the next update.
Cheers
Michael
Campaign:
Strip, Track and Trail - Porsche 917/20 - On the bench
Phantoms at 60 - F-4J Marines
Below 1000 tons - M50 minesweeper - Sailed for duty
Baden-Württemberg, Germany
Joined: December 26, 2009
KitMaker: 813 posts
Model Shipwrights: 304 posts
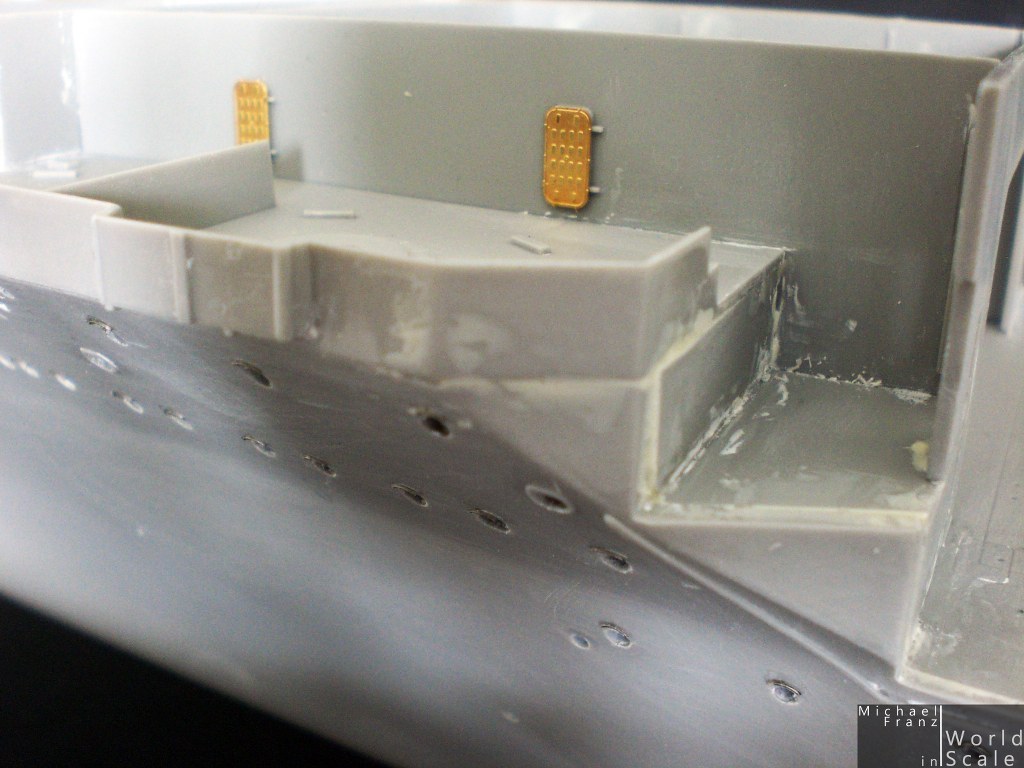
Posted: Friday, April 18, 2014 - 04:59 AM UTC
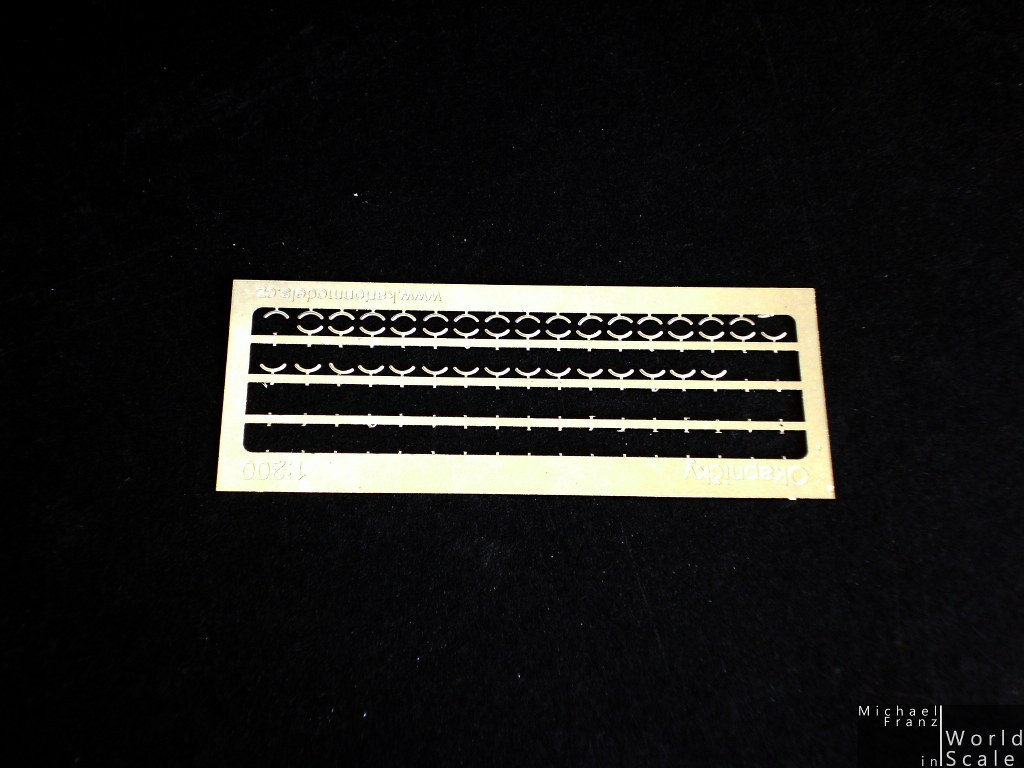
After the sanding of everything I have started with the first PE parts of the Tetra Model Works Detail-Set. The parts are highest quality, top fitting and an ingredible look. I love the parts already now and makes lot of fun working with it. Good work by Tetra!
Micha
regards,
Michael
http://www.world-in-scale.de
England - South East, United Kingdom
Joined: March 01, 2010
KitMaker: 7,078 posts
Model Shipwrights: 6,649 posts
Posted: Friday, April 18, 2014 - 07:35 AM UTC
Nice to see the etch going on,
Keep up the good work
Si
Baden-Württemberg, Germany
Joined: December 26, 2009
KitMaker: 813 posts
Model Shipwrights: 304 posts
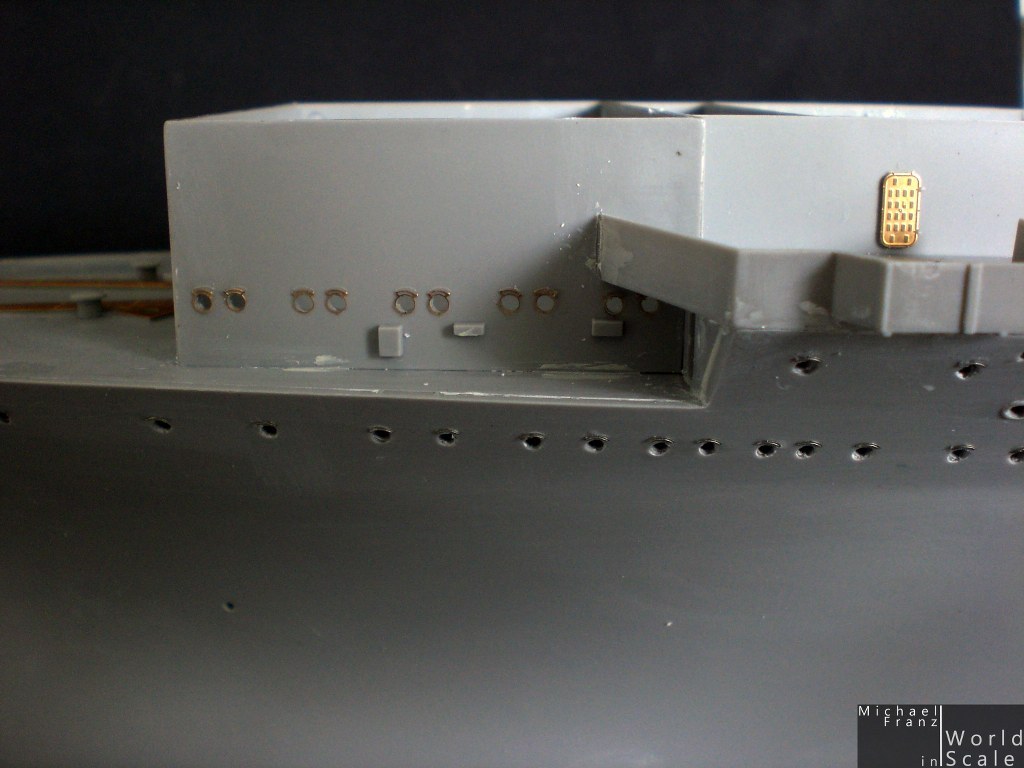
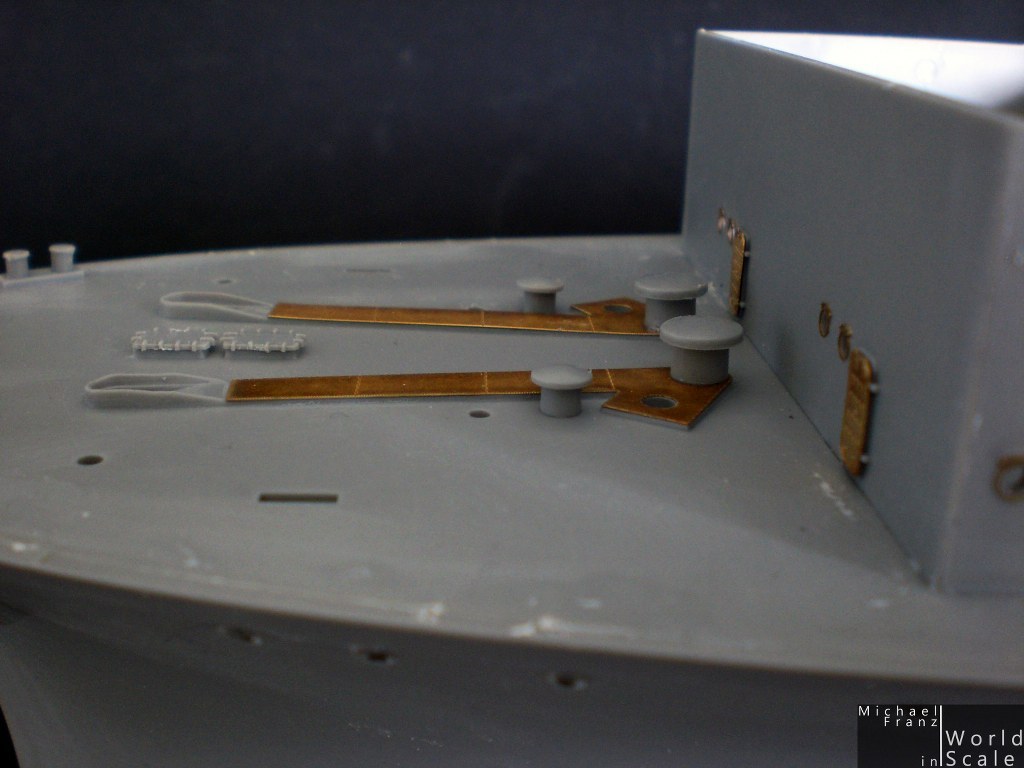
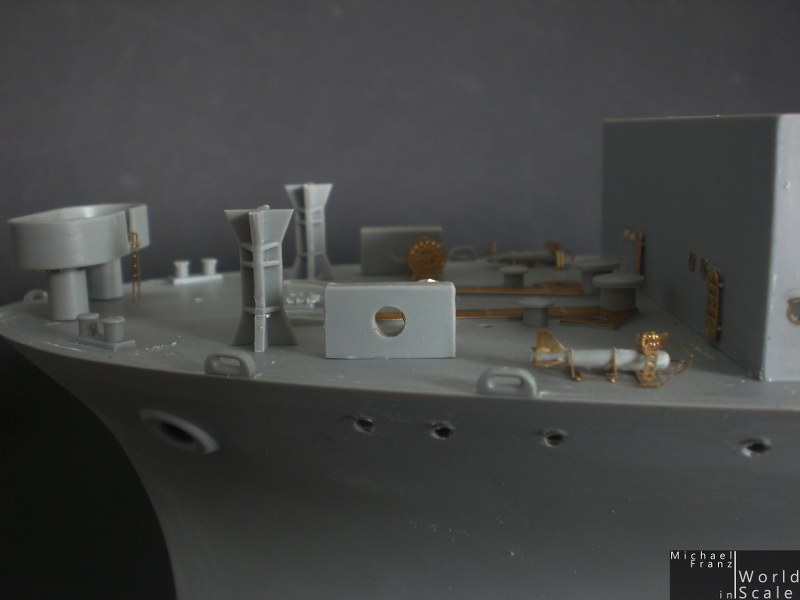
Posted: Monday, April 21, 2014 - 02:56 AM UTC
Hello,
time for the next update.
The PE parts from the Tetra Model set are fantastic. 100% fitting, great details, absolutly wonderful.
At the front I have added mostly of the parts now, the missing ones follow after the painting. On the rope drums I have added some rope which will receive painting later. The railing and some other PE parts follow after the painting of the hull.


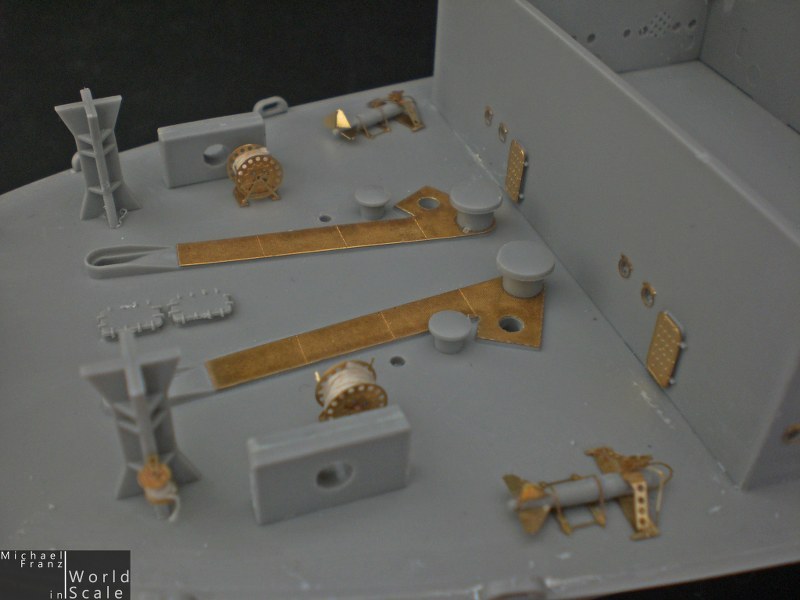
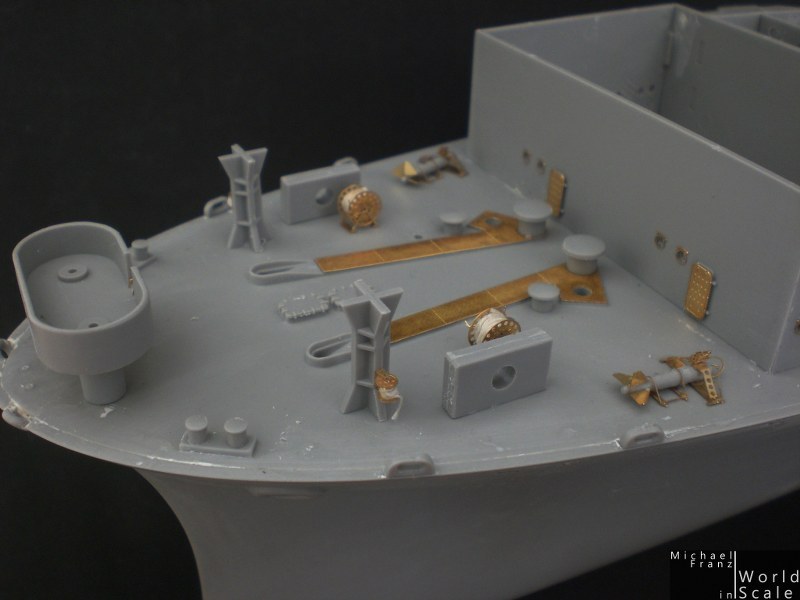
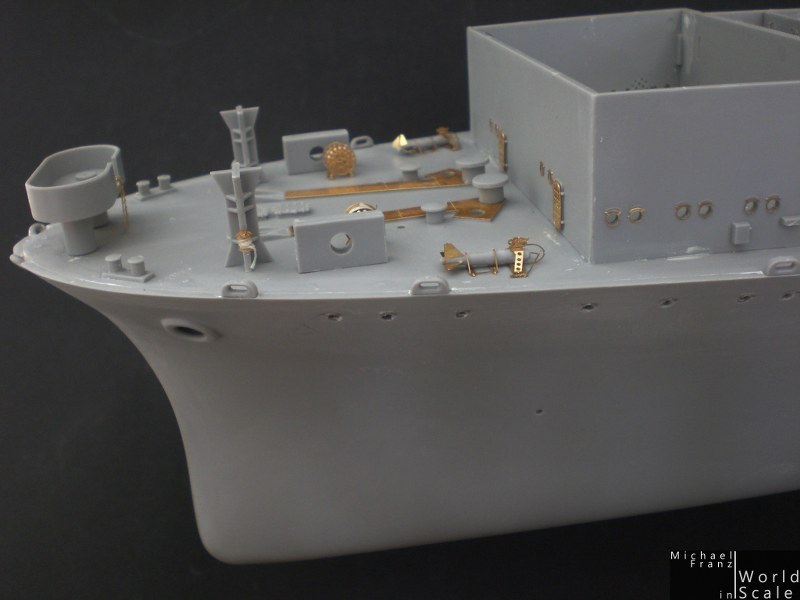
At the rear the 2nd floor received a new brass floor, and also some rope drums as at the front.
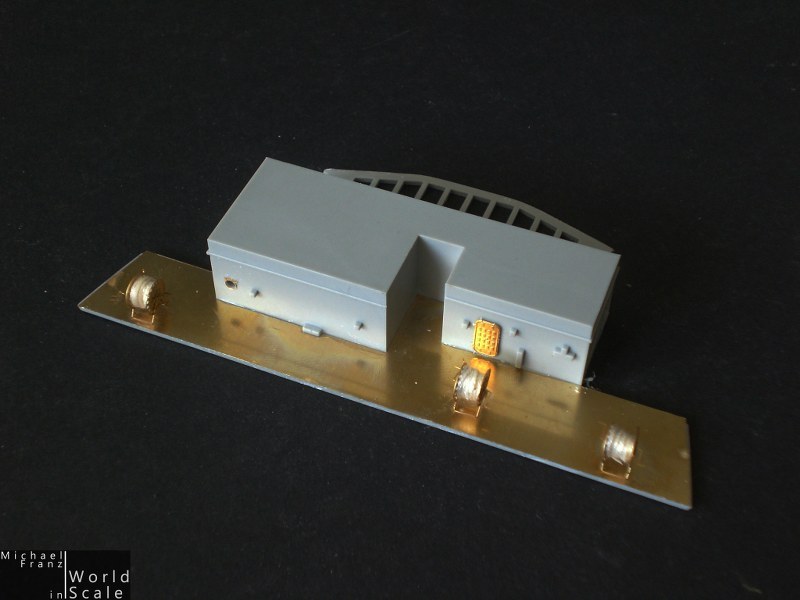
The next steps are the side walls of the hangar. The biggest part received some new catwalk, ladder and doors...
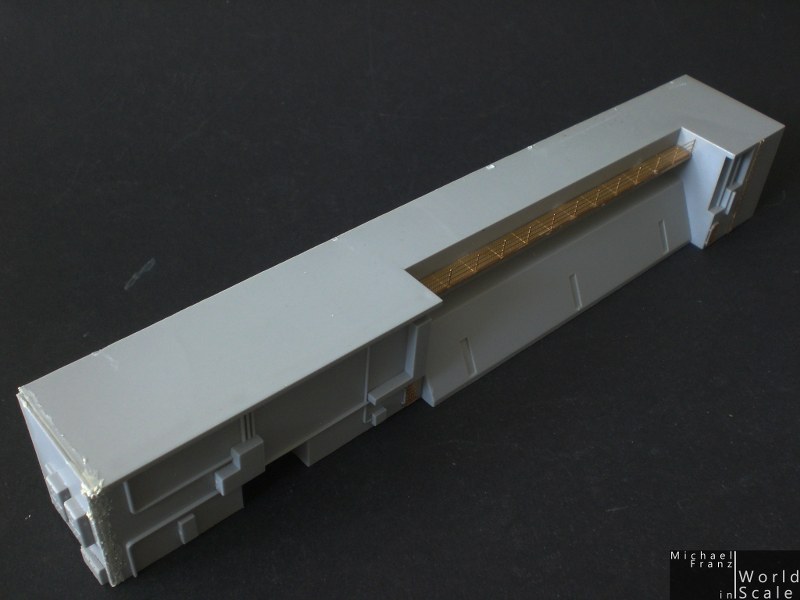
The front part (left side) received new plattforms with rails, doors, and later one long catwalk on the top and several stairways. The upper catwalk and the stairway will be painted separately and mounted later when the big side walls were mounted on the hull.
All the hangar gates will stay open so that you could see the inside of the hangar later.
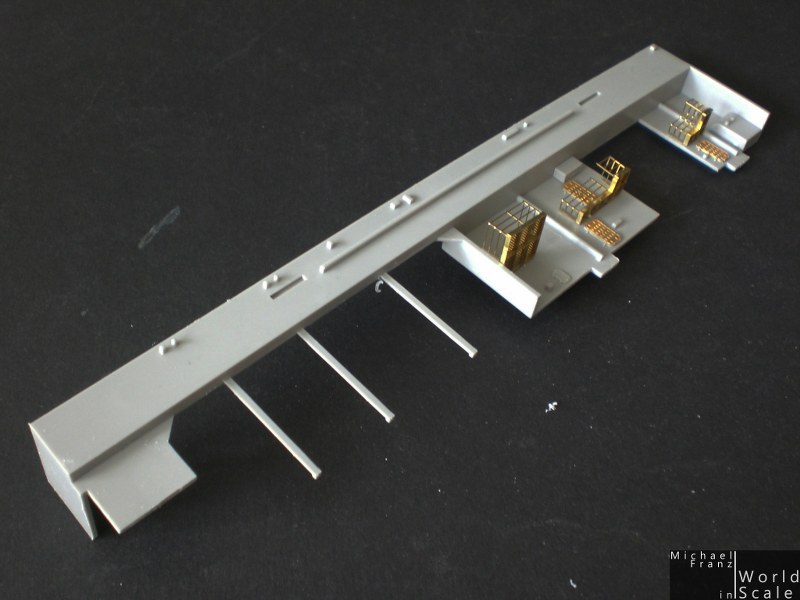
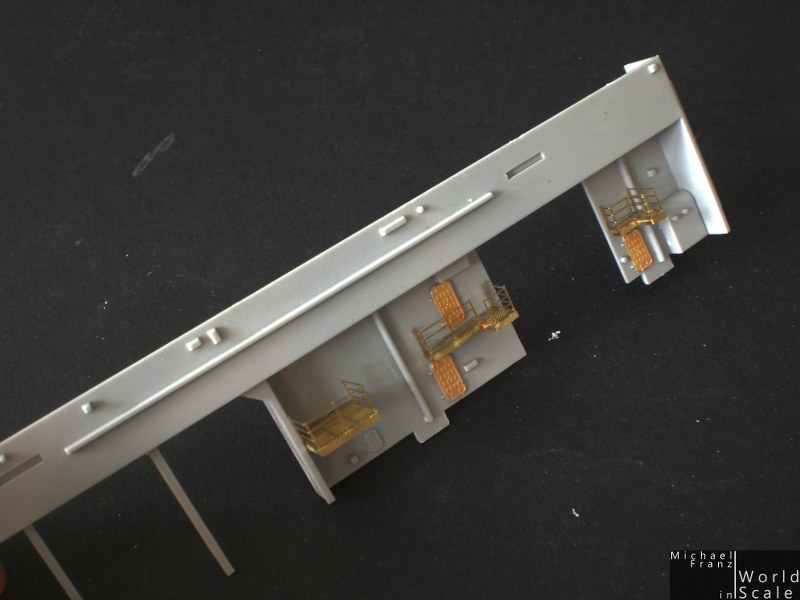
That's it for now ....
Micha
regards,
Michael
http://www.world-in-scale.de
Joined: October 30, 2005
KitMaker: 3,897 posts
Model Shipwrights: 3,301 posts
Posted: Monday, April 21, 2014 - 04:42 AM UTC
Nice progress Michael,
The storage reels on the focsle were a big ommission by Merit/Trumpeter. I still had some spares lying around so I used those. The PE watertight doors are a big improvement on the OOB offering. Looking good
Georgia, United States
Joined: November 28, 2012
KitMaker: 216 posts
Model Shipwrights: 84 posts
Posted: Monday, April 21, 2014 - 04:50 AM UTC
Looking really good. And ships d
on't have "floors". lol
Joined: October 30, 2005
KitMaker: 3,897 posts
Model Shipwrights: 3,301 posts
Posted: Monday, April 21, 2014 - 04:53 AM UTC