Vosper 73' MTB Type 1 (Airfix 1/72)
Joined: October 30, 2005
KitMaker: 3,897 posts
Model Shipwrights: 3,301 posts
Posted: Friday, May 09, 2014 - 08:05 PM UTC
Quoted Text
Don't laugh been out to the shed and found some 
I haven't got a clue how to use it lol
Went to Telford with a mate, an experienced modeller and as we went around it was need that, got to have that etc
He's currently on holiday, alright for some
Cheers Kev
Apply it in several thin layers, it levels out beautifully. When the gap is filled and the Mr. DP is dry lightly sand it. I love the stuff.
England - South West, United Kingdom
Joined: July 04, 2013
KitMaker: 430 posts
Model Shipwrights: 390 posts
Posted: Sunday, May 11, 2014 - 01:06 AM UTC
Right Julian I'm now playing with Mr DP ( Ummmm! ). . . All hints and tips gratefully received.
Meanwhile insanity prevails . . . .
I was sat there looking at the bits I wasn't happy with and had to be chewed off, then smoothed, filled and replaced etc etc ......
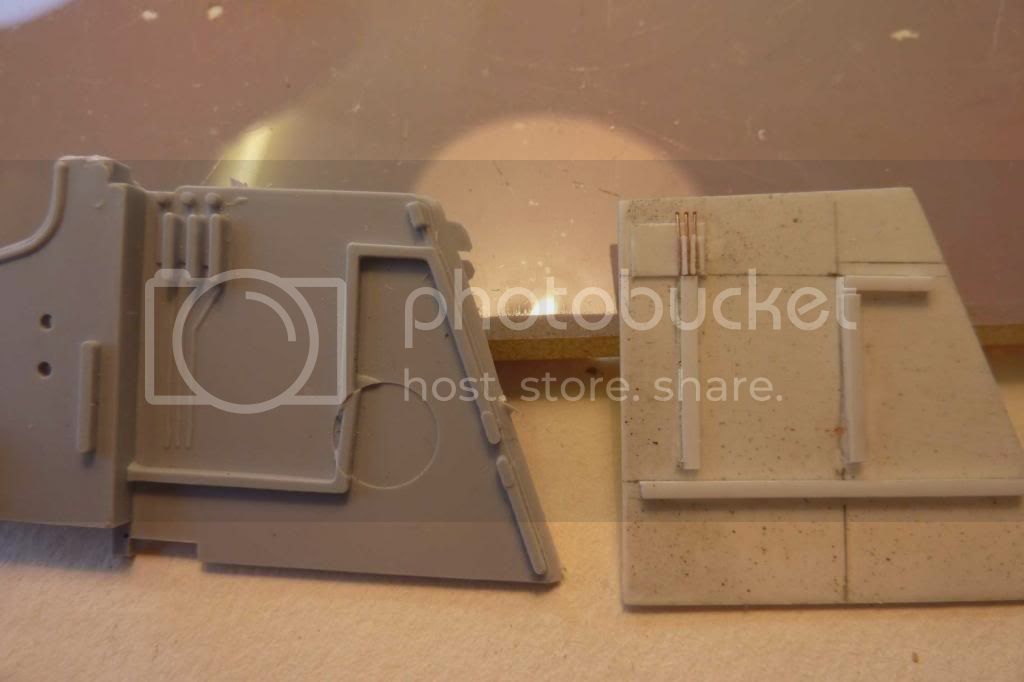
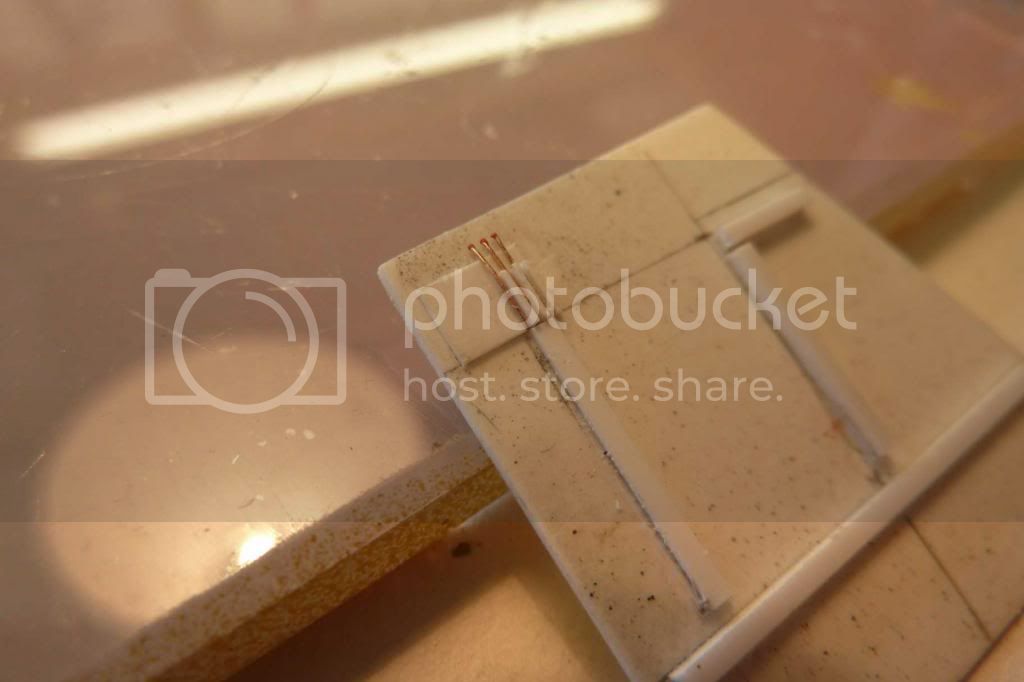
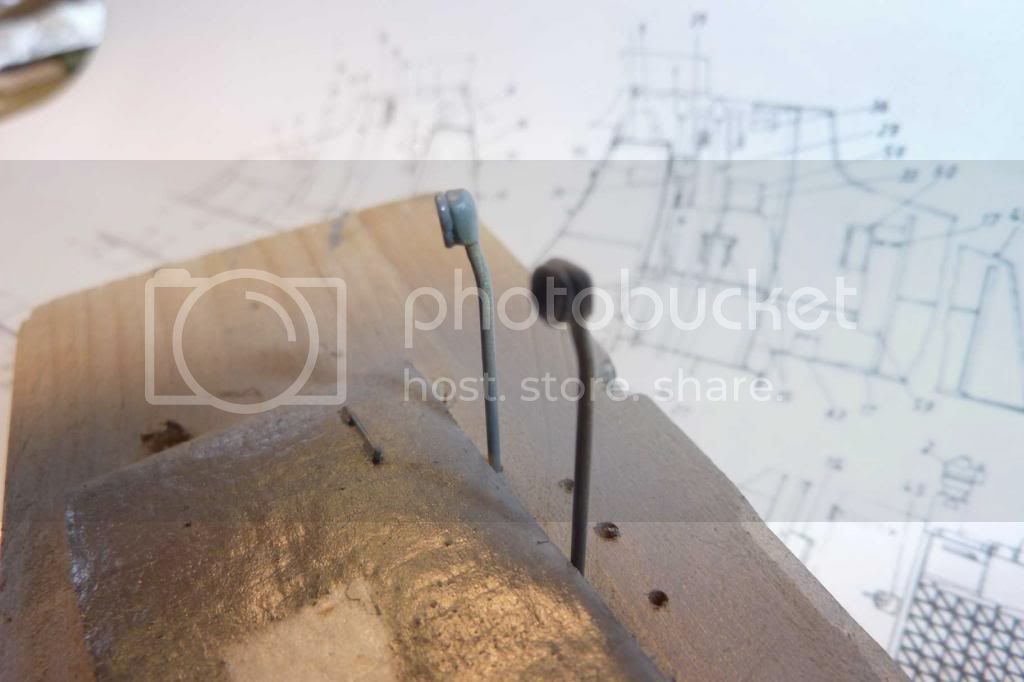
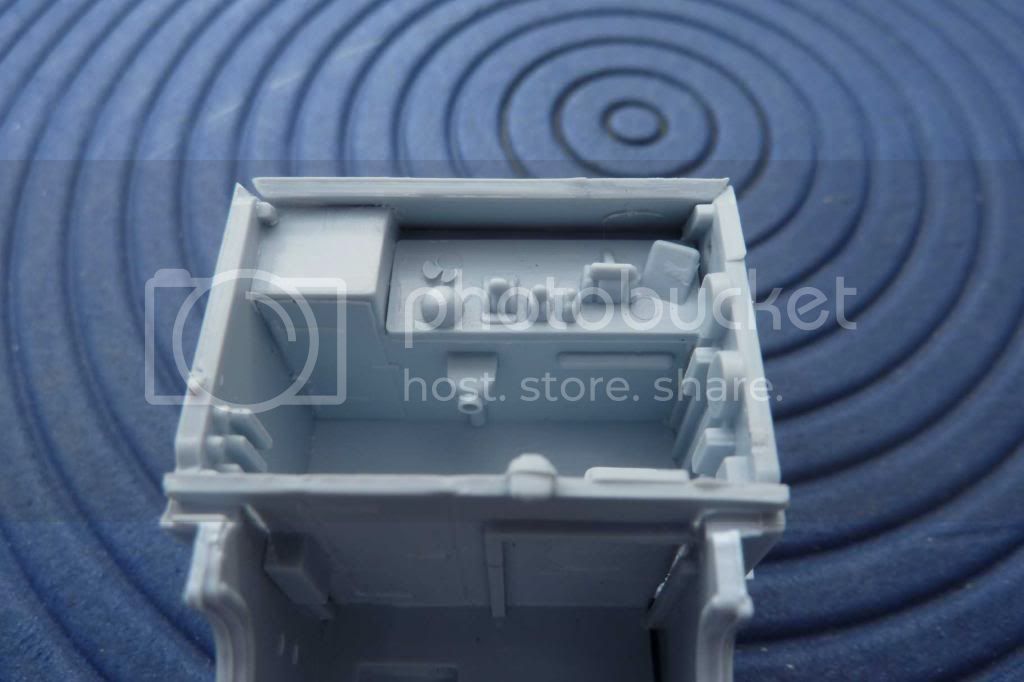
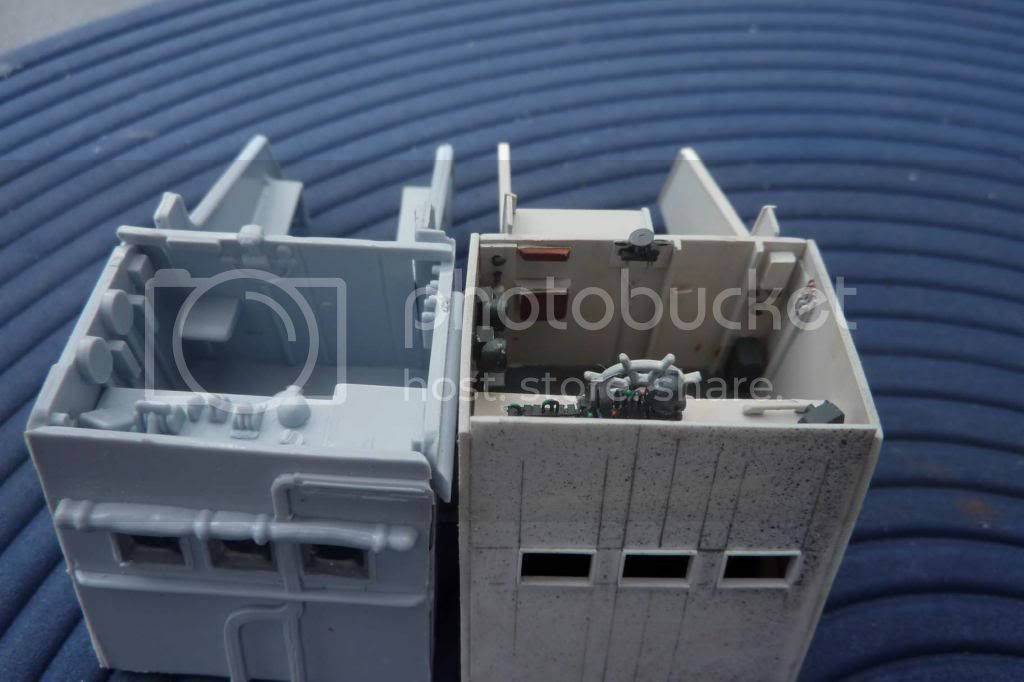
The final straw was when I realised the bridge wind deflectors were moulded solid and would look so much better if they stood off !
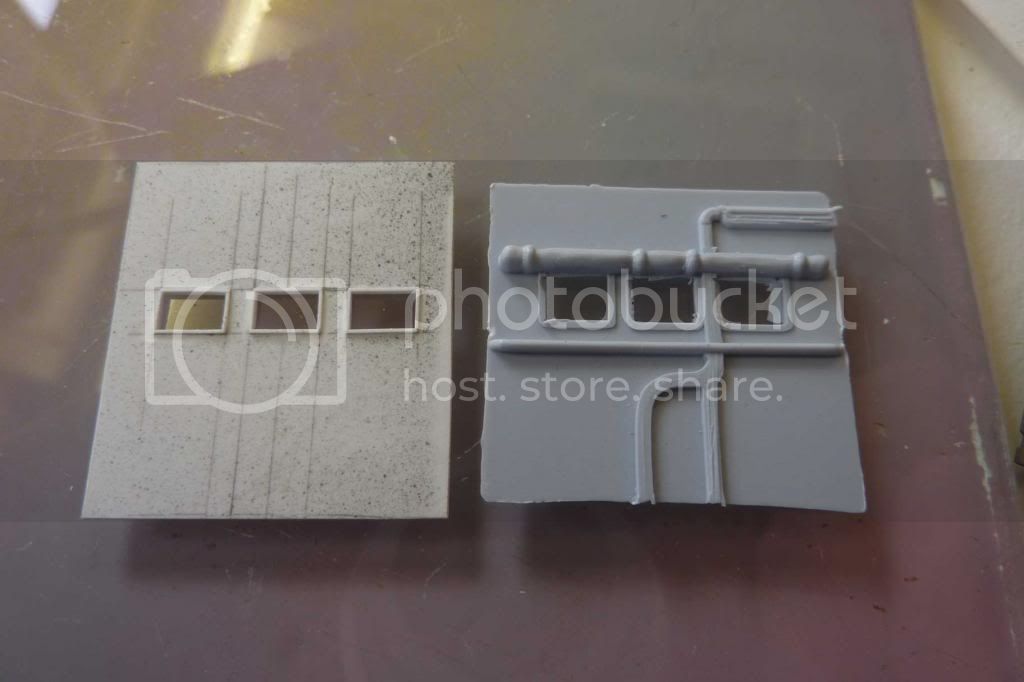
The difference in height is due to wind deflector.
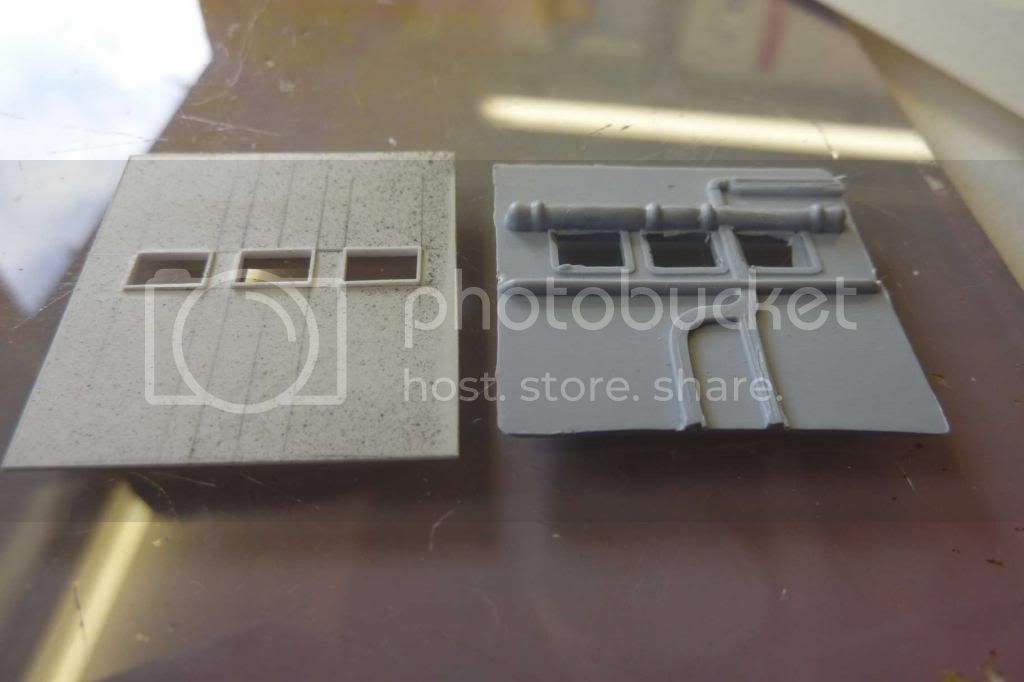
Dont know if its possible but you dont know until . .. . . . . and I've still got the original pieces

Cheers Kev
Joined: October 30, 2005
KitMaker: 3,897 posts
Model Shipwrights: 3,301 posts
Posted: Sunday, May 11, 2014 - 03:20 AM UTC

Doh...............................missed that abbreviation.

England - South West, United Kingdom
Joined: July 04, 2013
KitMaker: 430 posts
Model Shipwrights: 390 posts
Posted: Wednesday, May 14, 2014 - 01:05 AM UTC
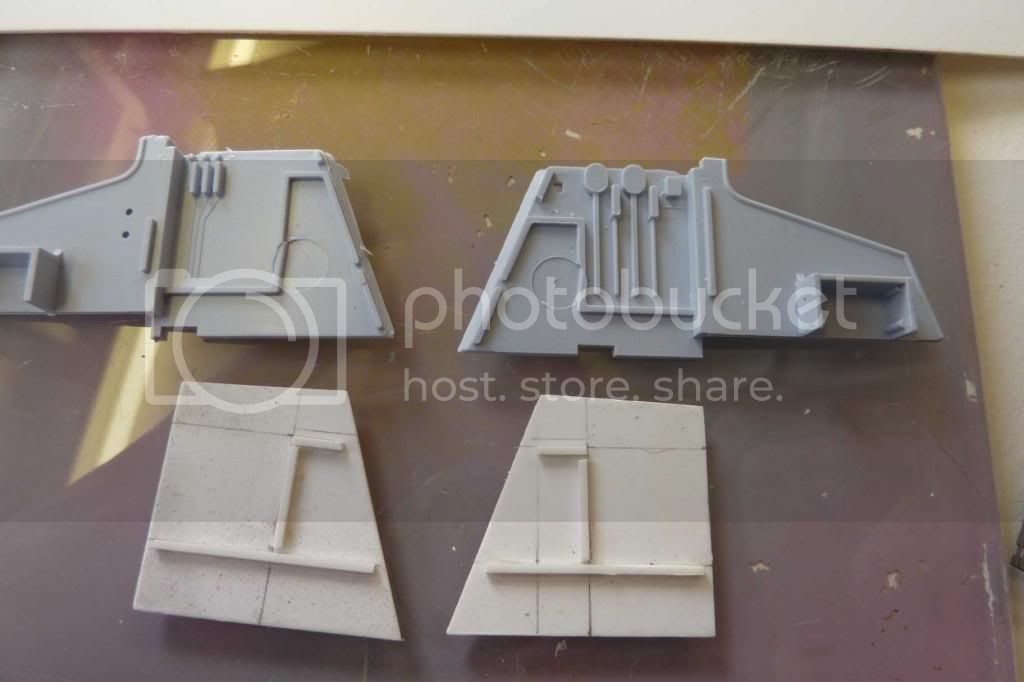
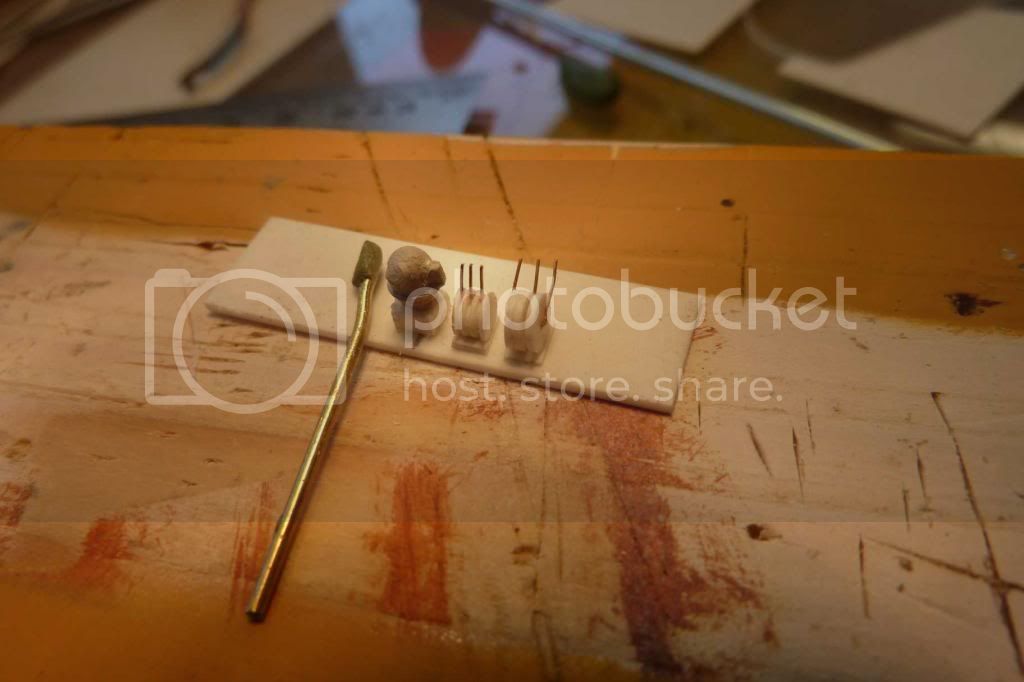
Been making slow (eye watering) but steady progress
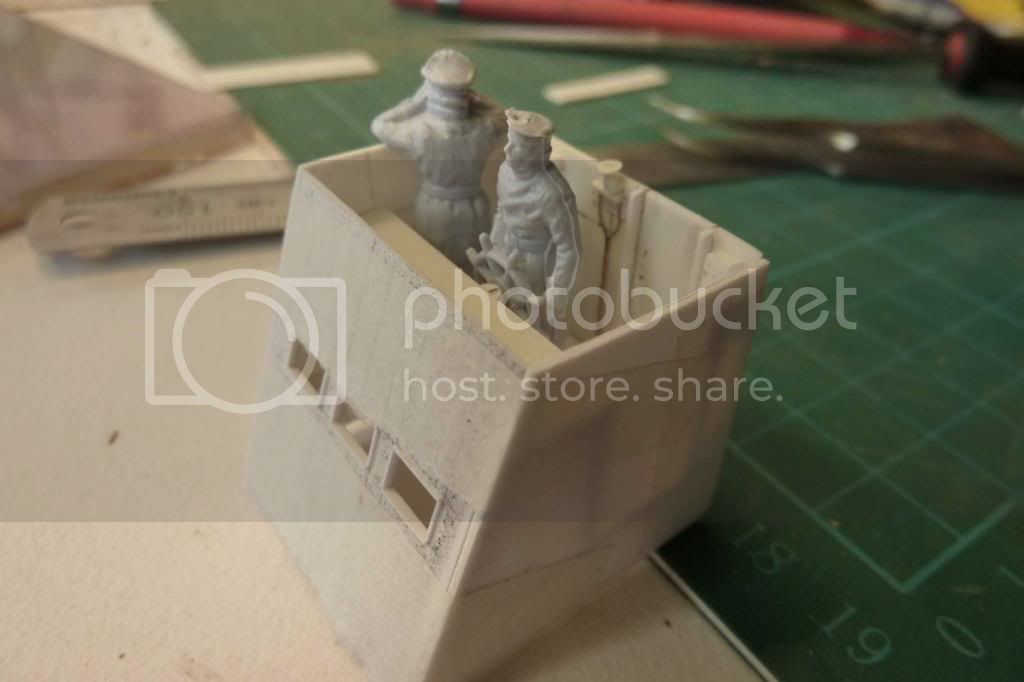
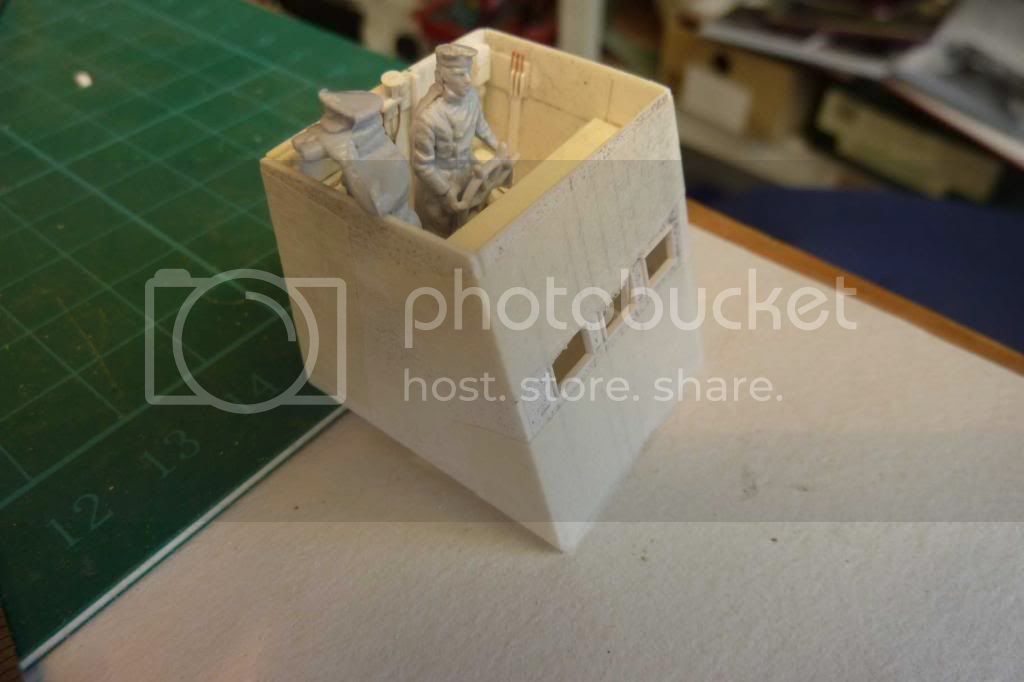
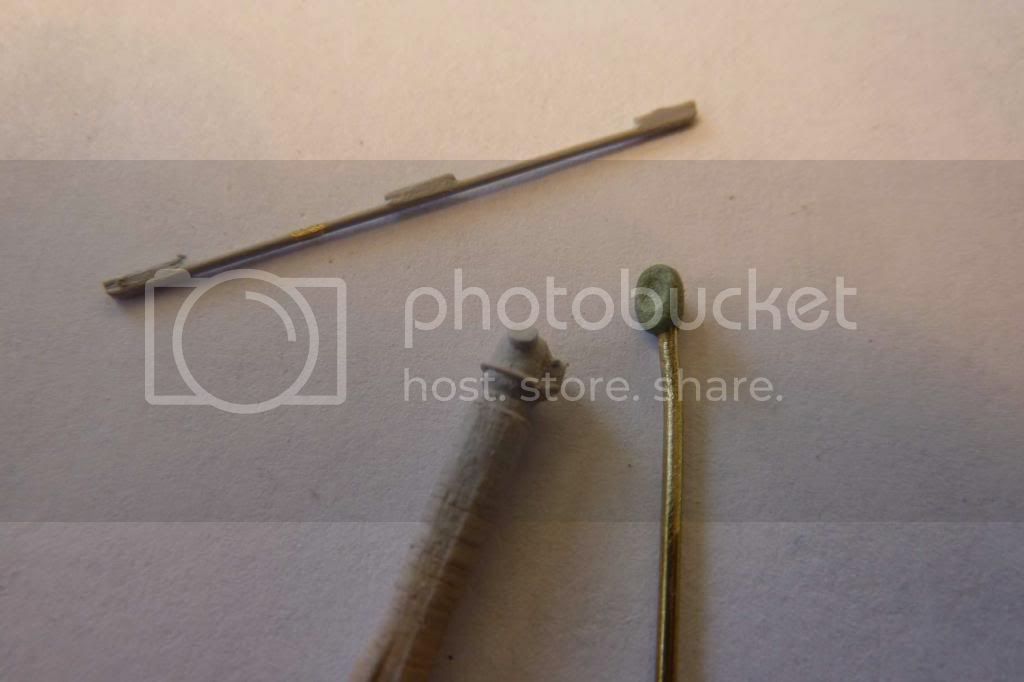
Grab rail made with soldered 0.4mm brass wire
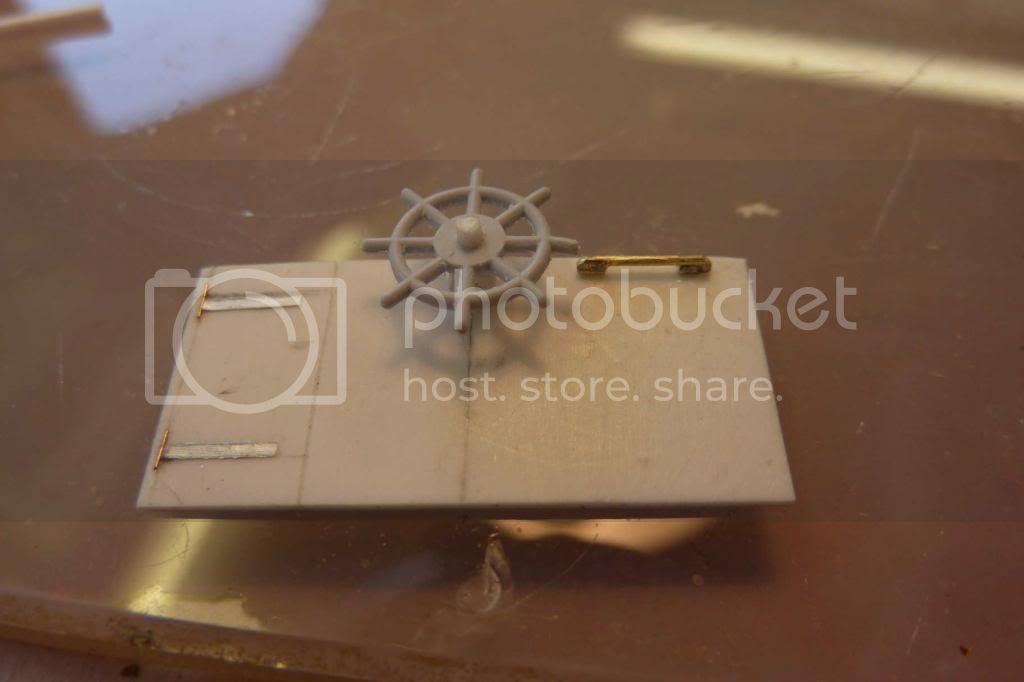
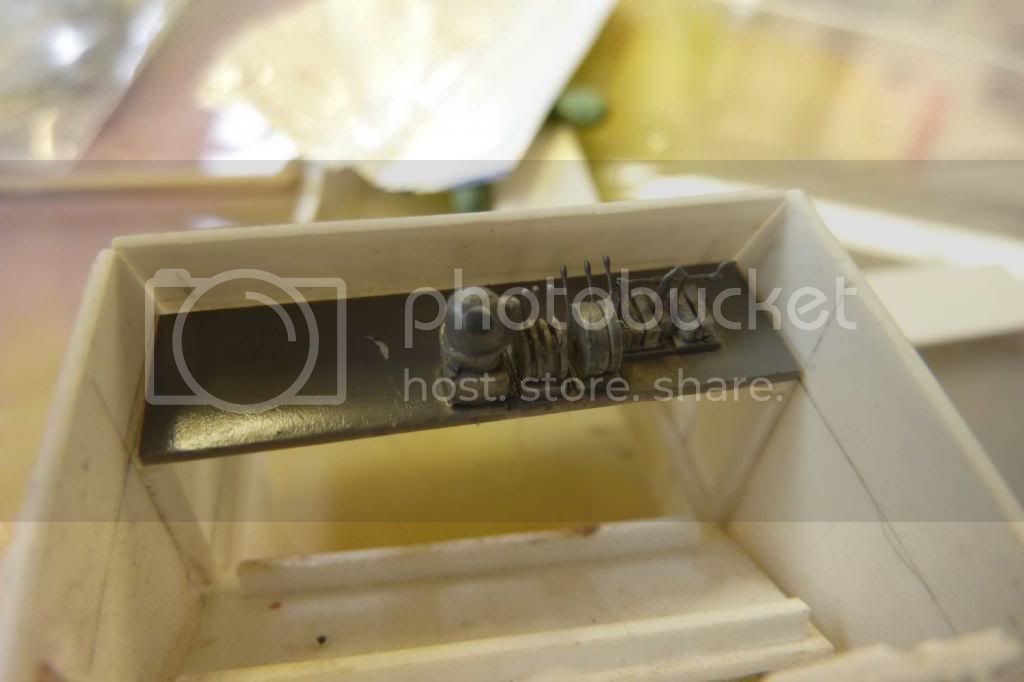
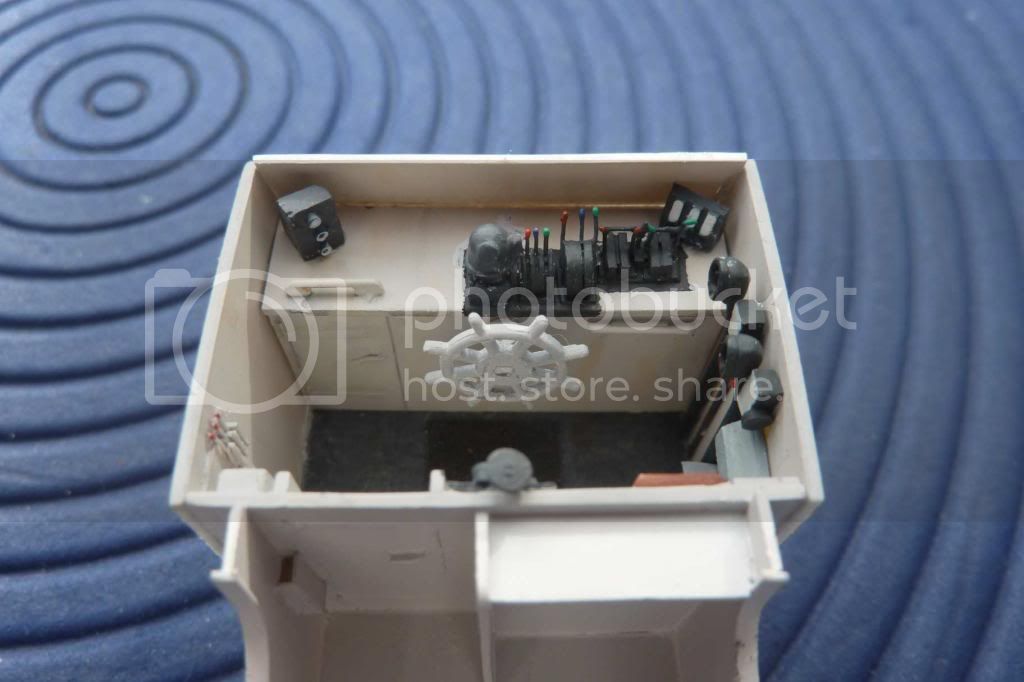
Note rudder indicator on top of steering gear
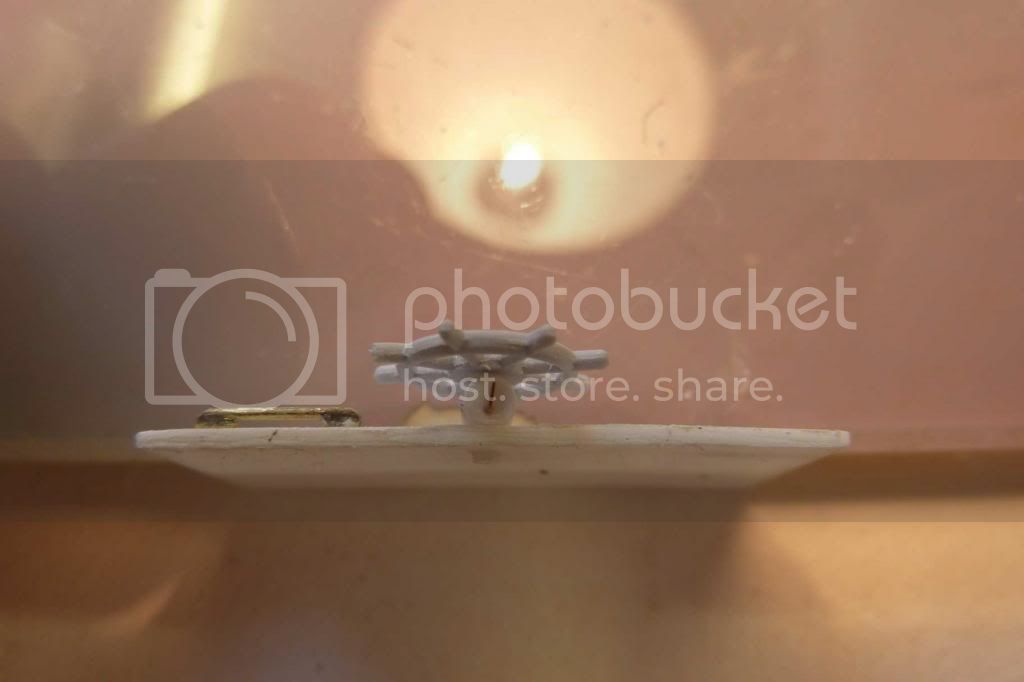

The piece of equipment in the centre with wheel on top is believed to be the remote for the smoke discharge
Remote for fire extinguishers
Thanks for looking, your comments welcome as always
Cheers Kev
New York, United States
Joined: January 21, 2008
KitMaker: 2,531 posts
Model Shipwrights: 1,244 posts
Posted: Wednesday, May 14, 2014 - 01:28 AM UTC
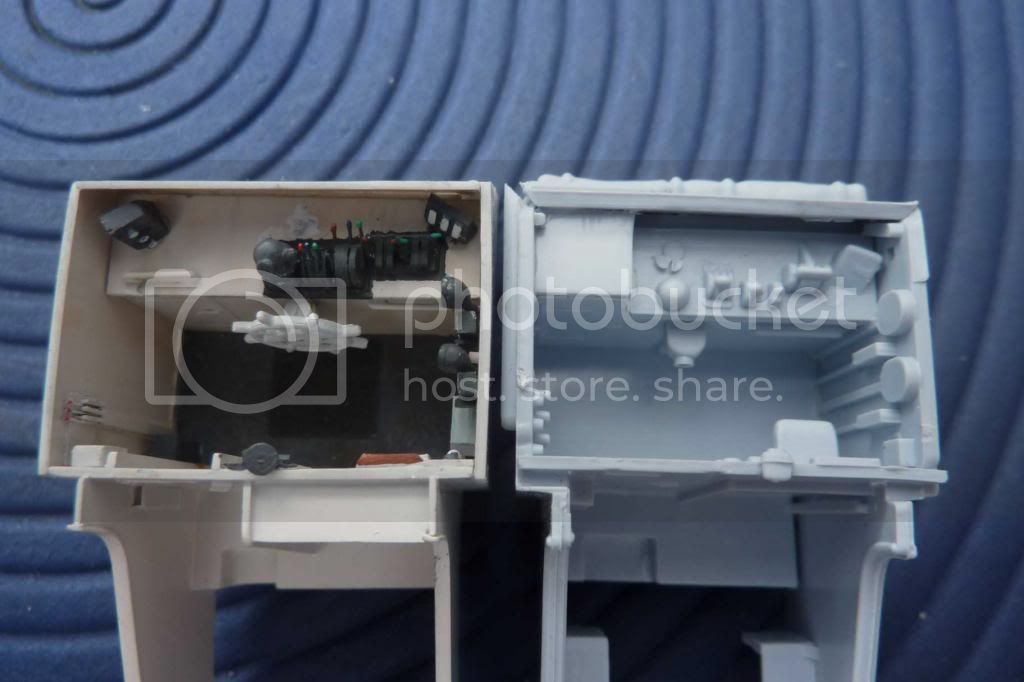
Very impressive scratch-building skills, Kev. That's a big improvement in looks over the kit provided parts.


Al
Joined: October 30, 2005
KitMaker: 3,897 posts
Model Shipwrights: 3,301 posts
Posted: Wednesday, May 14, 2014 - 02:42 AM UTC
A great improvement on the OOB parts Kev, excellent work

Connecticut, United States
Joined: August 03, 2008
KitMaker: 875 posts
Model Shipwrights: 872 posts
Posted: Wednesday, May 14, 2014 - 09:47 AM UTC
Very nice work, sir ... be proud of it.
England - South West, United Kingdom
Joined: July 04, 2013
KitMaker: 430 posts
Model Shipwrights: 390 posts
Posted: Thursday, May 15, 2014 - 06:11 AM UTC
Thanks Guys
Pleased with progress so far :thumbsup: in 1/72, how the hell you work 1/350 or 1/700. I take my hat off to you.
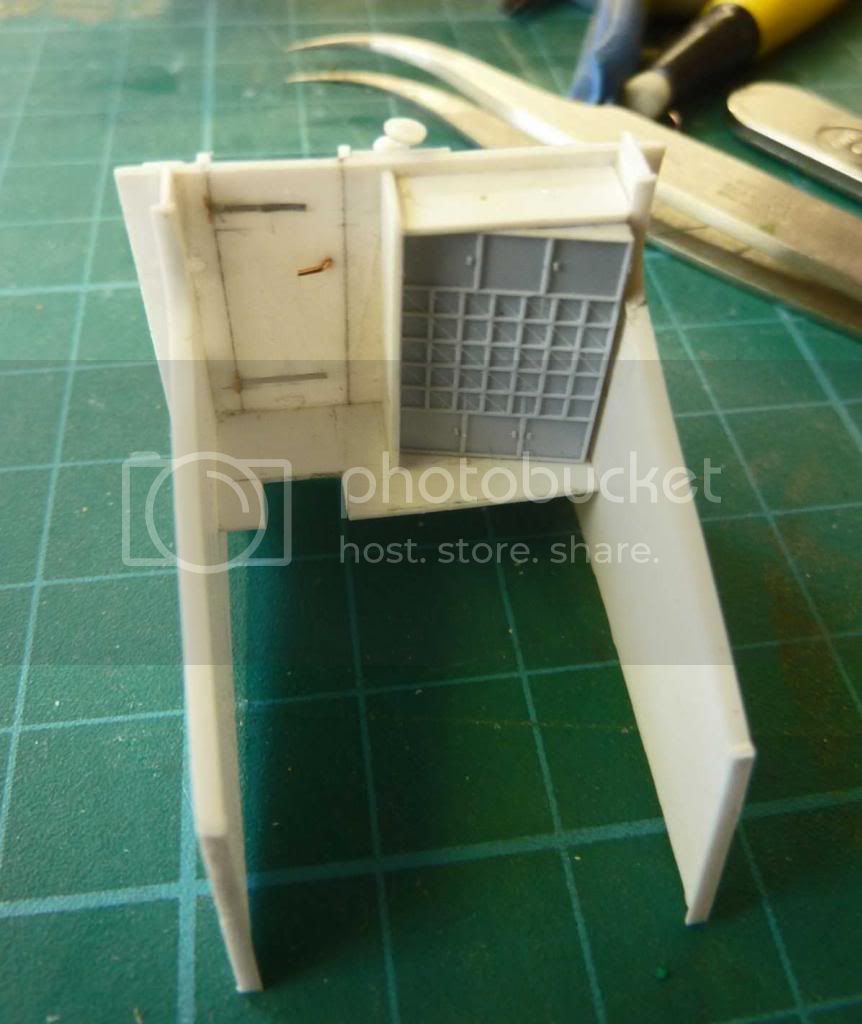
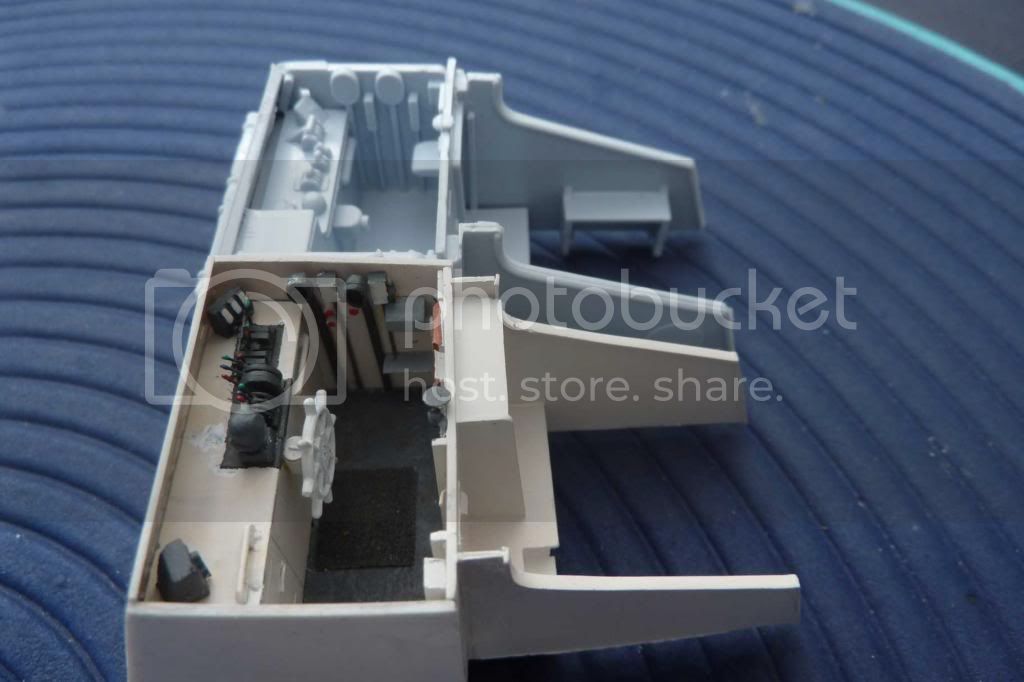
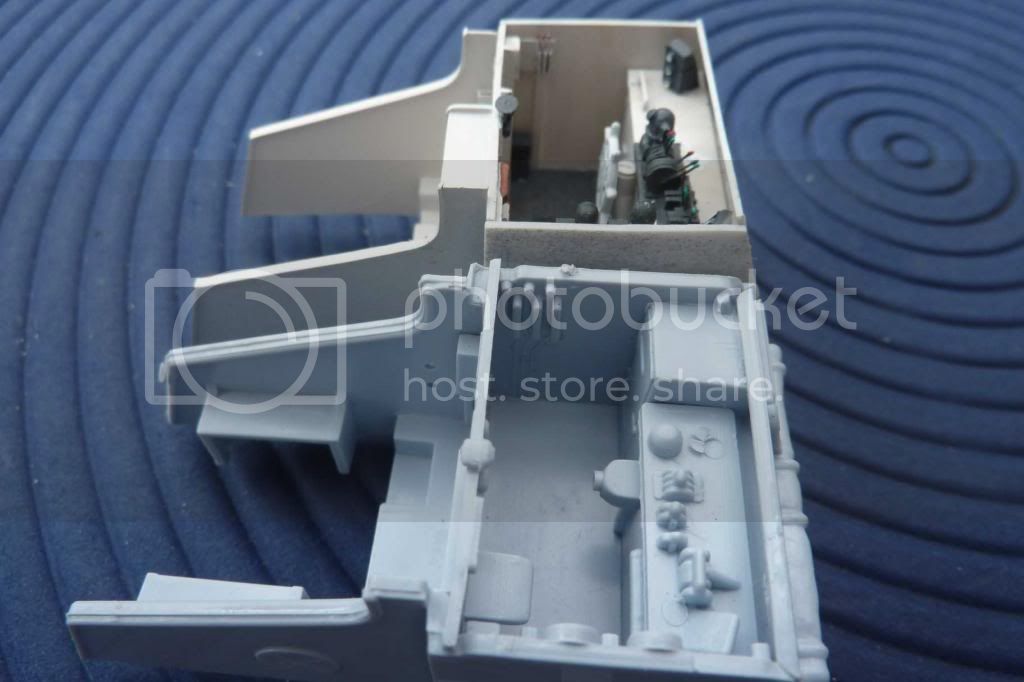
Taped the bridge together . . . you certainly have to be good friends especially with a third officer present.
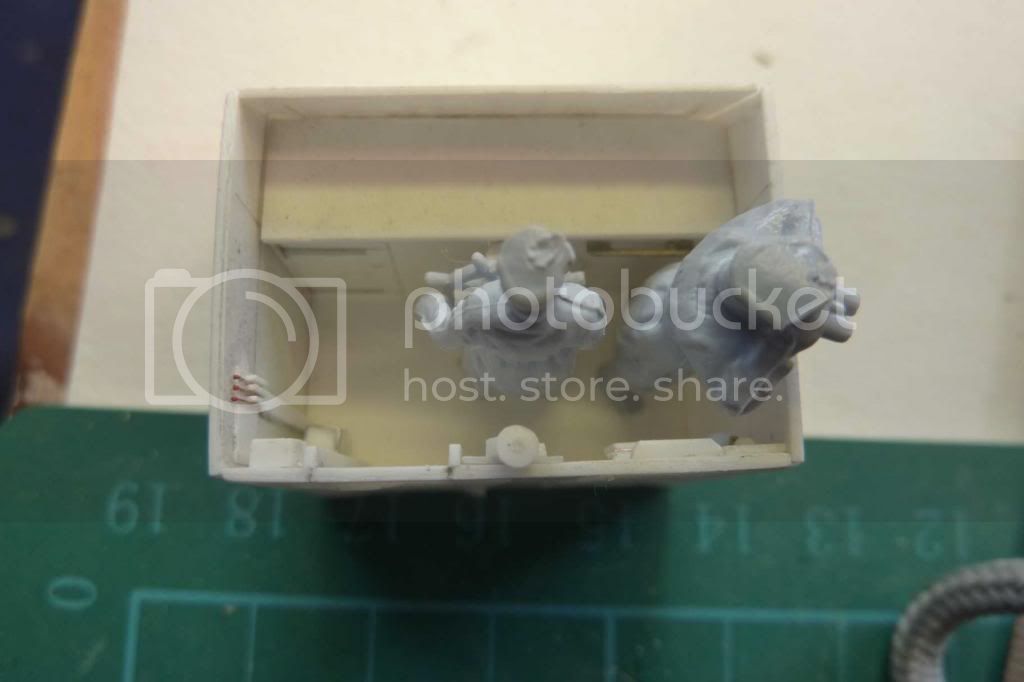
I'm trying to keep the sides separate as long as possible to aid painting the interior.
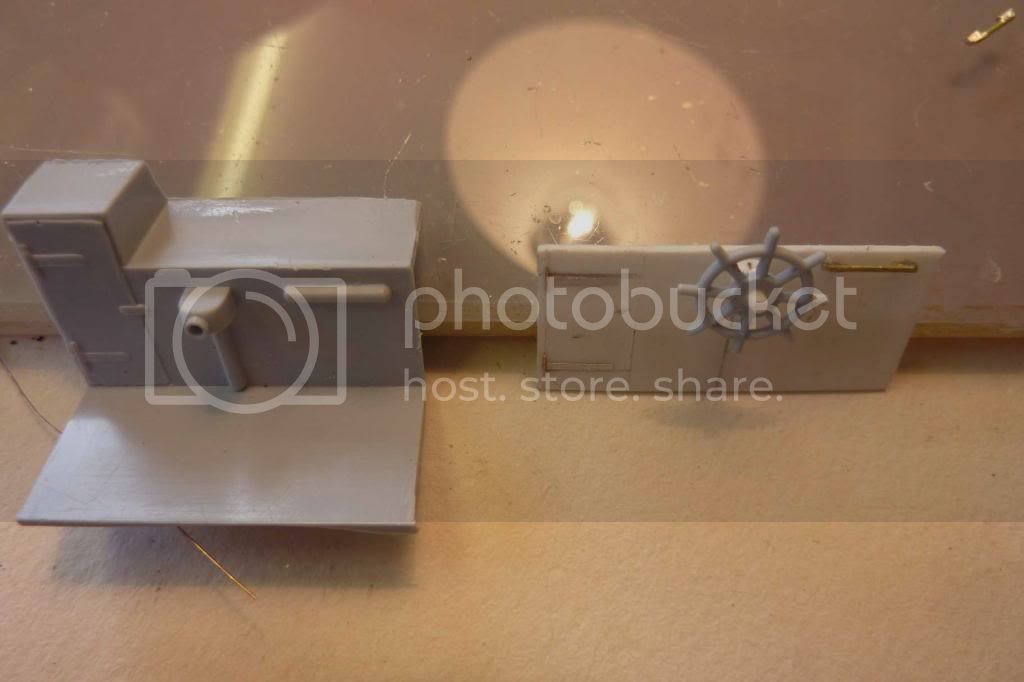
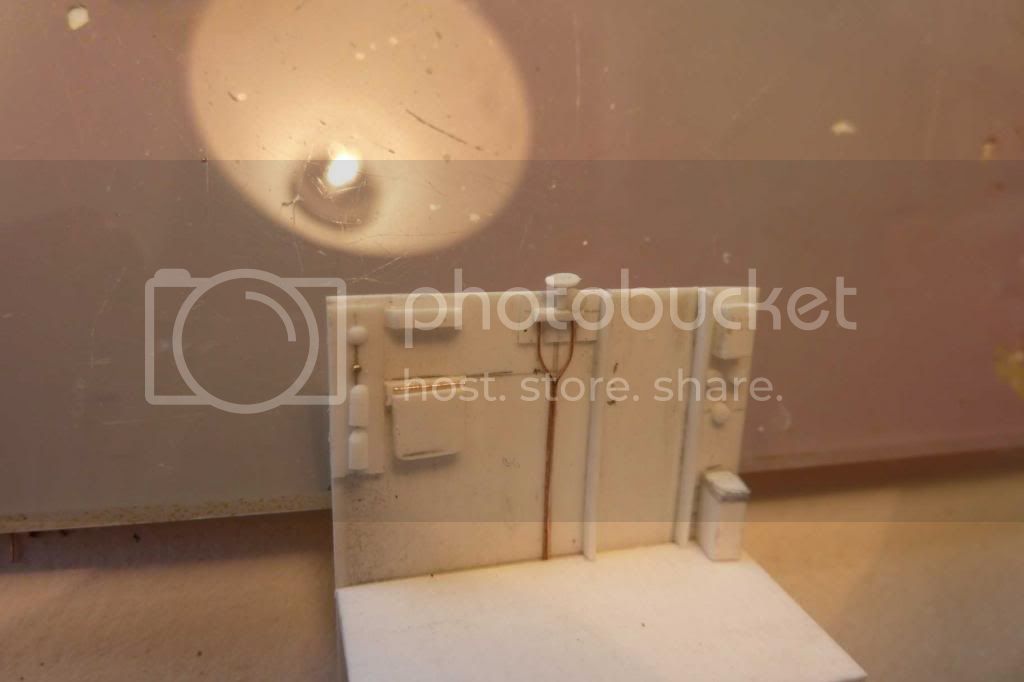
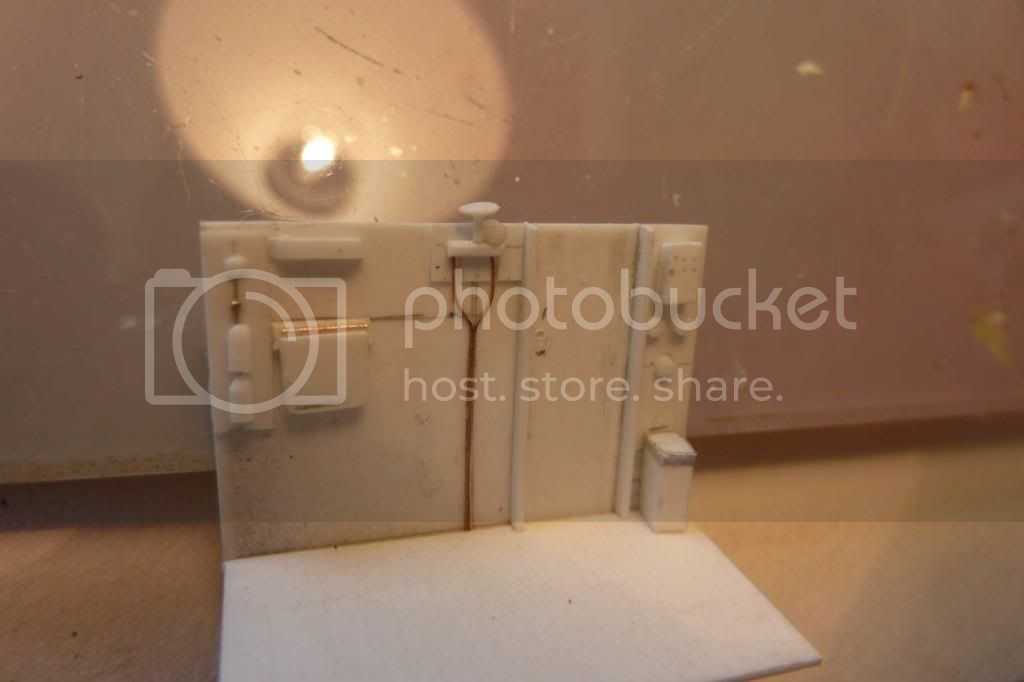
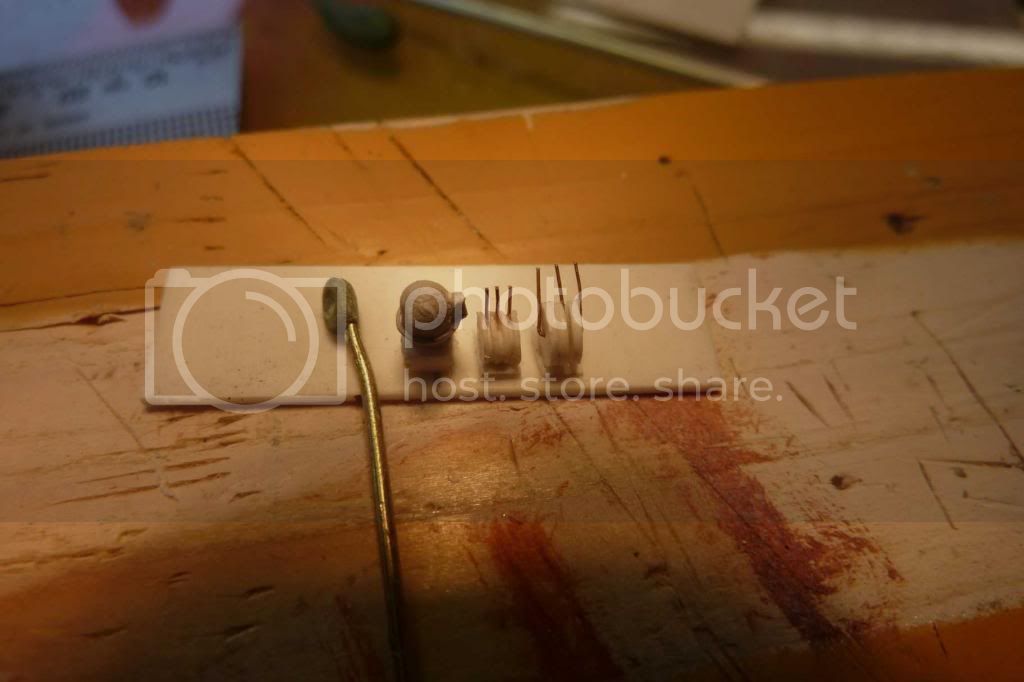
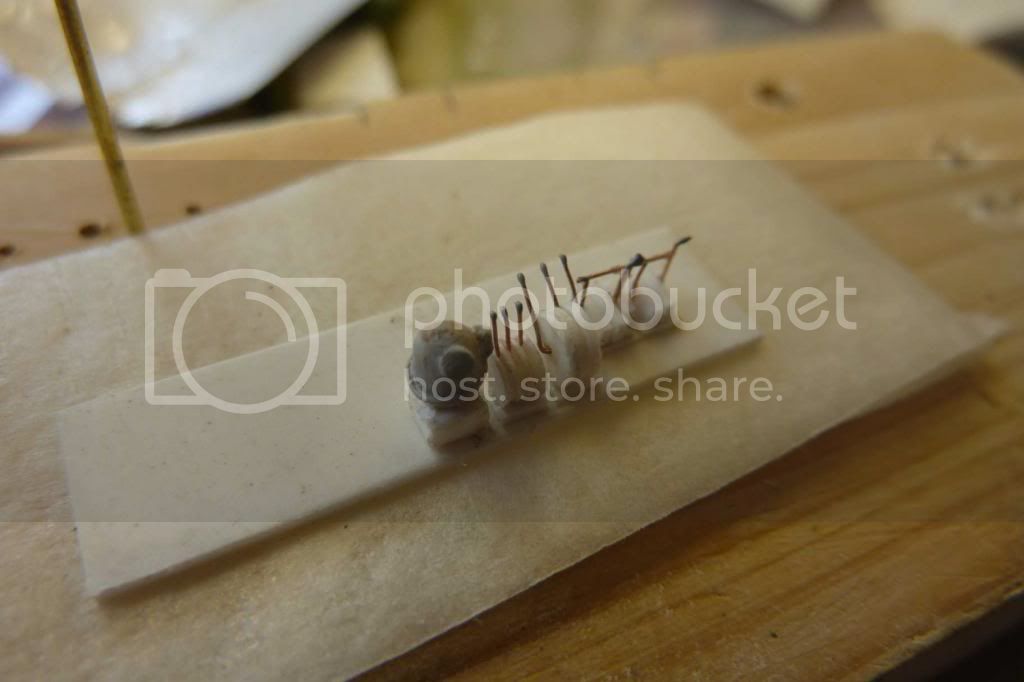
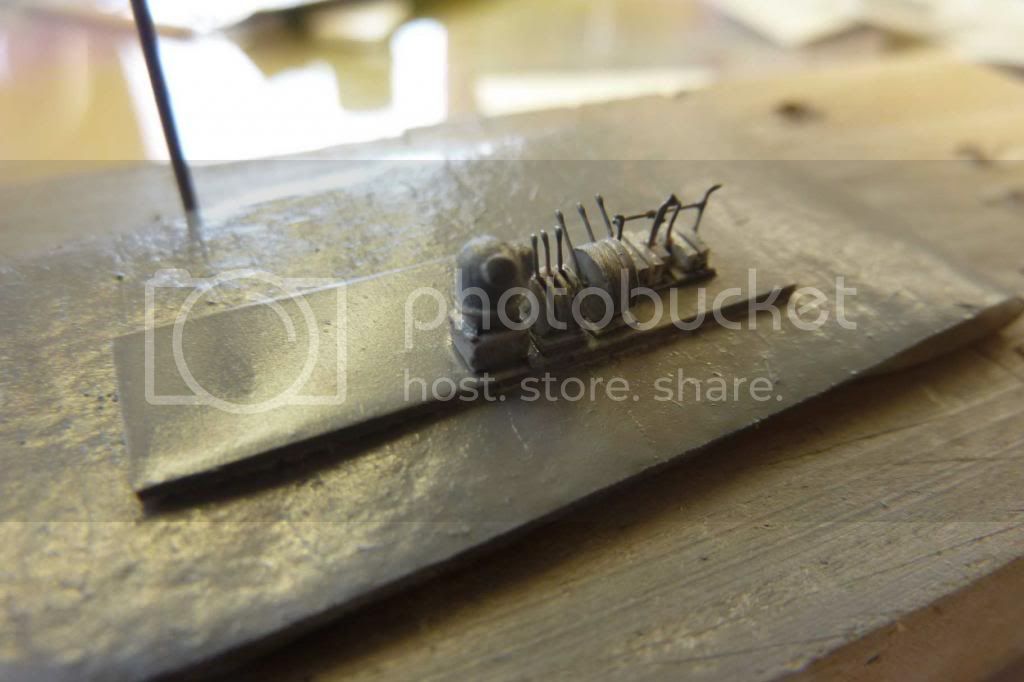
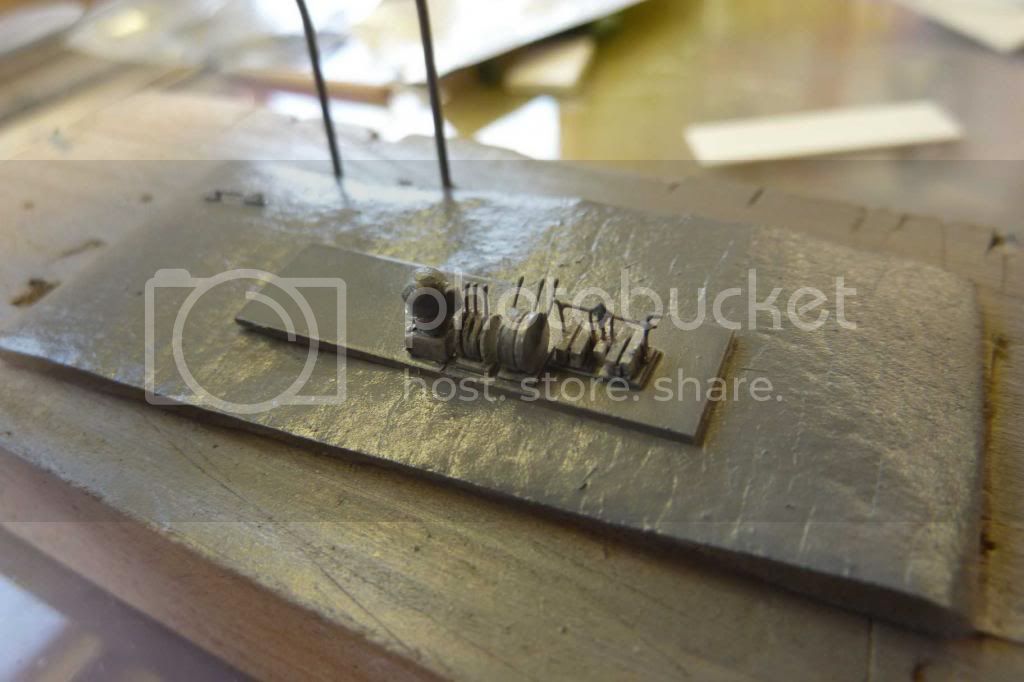
A few more fittings coming together. Front of bridge hand rail, compass binacle (macro showing it needs cleaning up) and voice pipe. I'm waiting on some lead wire to finish the padded leather cushioning.
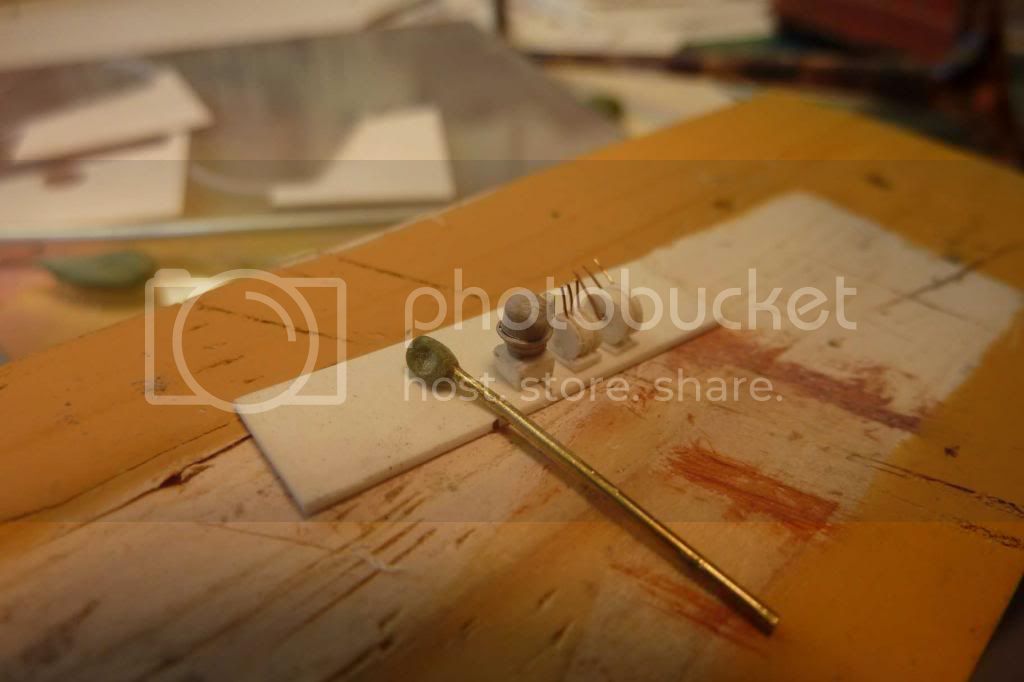
Compass binacle, throttles and engine telegraph.
Thanks for looking
Cheers Kev
Joined: October 30, 2005
KitMaker: 3,897 posts
Model Shipwrights: 3,301 posts
Posted: Thursday, May 15, 2014 - 06:15 AM UTC
Nifty work on the throttles Kev, this is going to be a great improvement on the bog standard Airfix Vosper mate

England - South West, United Kingdom
Joined: July 04, 2013
KitMaker: 430 posts
Model Shipwrights: 390 posts
Posted: Sunday, May 18, 2014 - 12:04 AM UTC
Cheers Julian
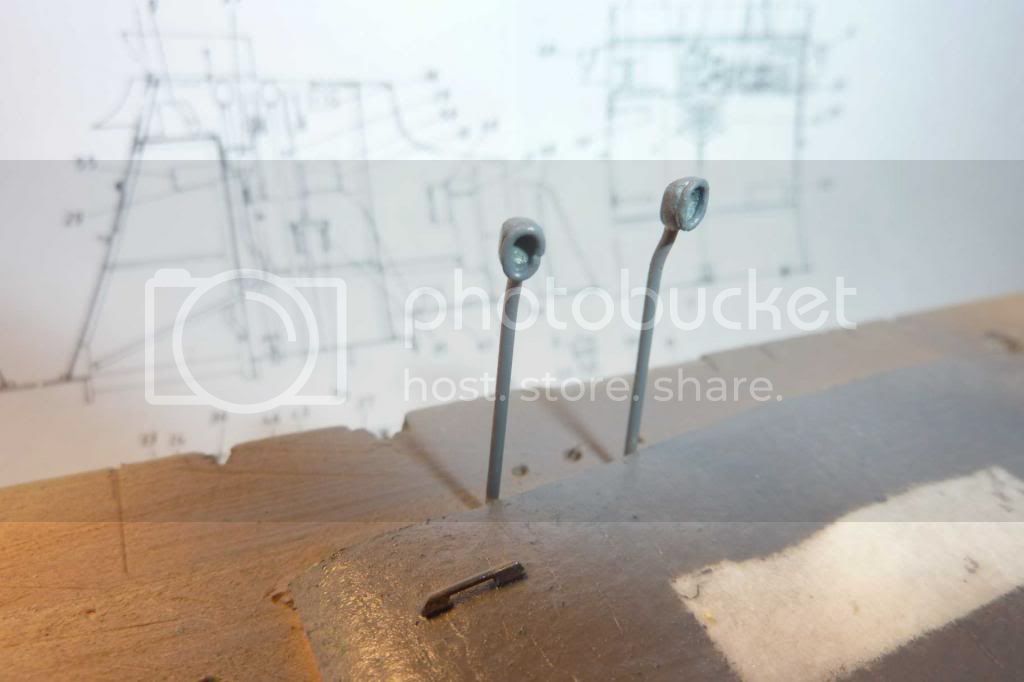
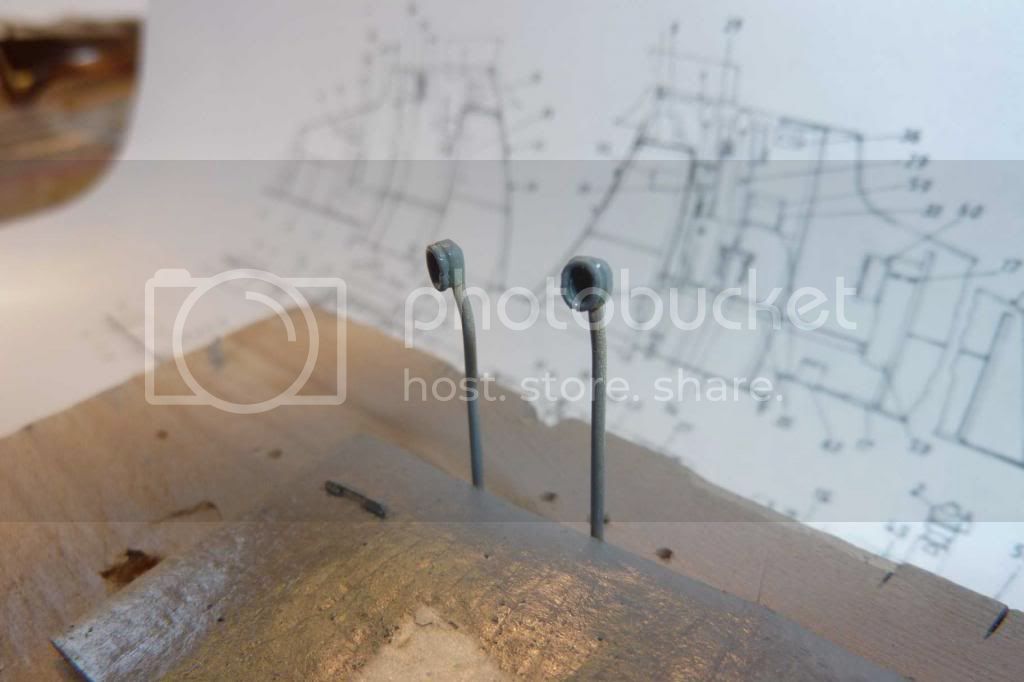
Latest progress remote torpedo launch. The ' T ' bar in centre was so that all four could be launch together . . . . now that would make a loud noise !
Tip for anyone working with wire and need to get it straight. Roll the wire across flat surface with the flat of a ruler. (Hope I'm not teaching you to suck eggs)
Wire used for controls 0.2mm
Tacked in position
Making up the wings for the bridge. Flag locker was to shallow and bracing web missing. Locker not fixed to enable painting
Final for today - think the voice pipes have turned out OK with the addition of 0.4mm lead wire for padding.
Lead wire in various sizes arrived from liitle cars going to be great for scratch building.
Thanks for looking, your comments as always welcome
Cheers Kev
Joined: October 30, 2005
KitMaker: 3,897 posts
Model Shipwrights: 3,301 posts
Posted: Sunday, May 18, 2014 - 01:37 AM UTC
All these parts will make a huge improvement Kev, looks really great,
England - South West, United Kingdom
Joined: July 04, 2013
KitMaker: 430 posts
Model Shipwrights: 390 posts
Posted: Monday, May 26, 2014 - 09:42 AM UTC
Hi Folks,
I discovered on the plans that there was stowage for 4 x carbines in the rear bridge area. Asking around it seems the favourirte was the Lanchester. Hunted high & low and couldn't find any so . . . . .
I scratch built one
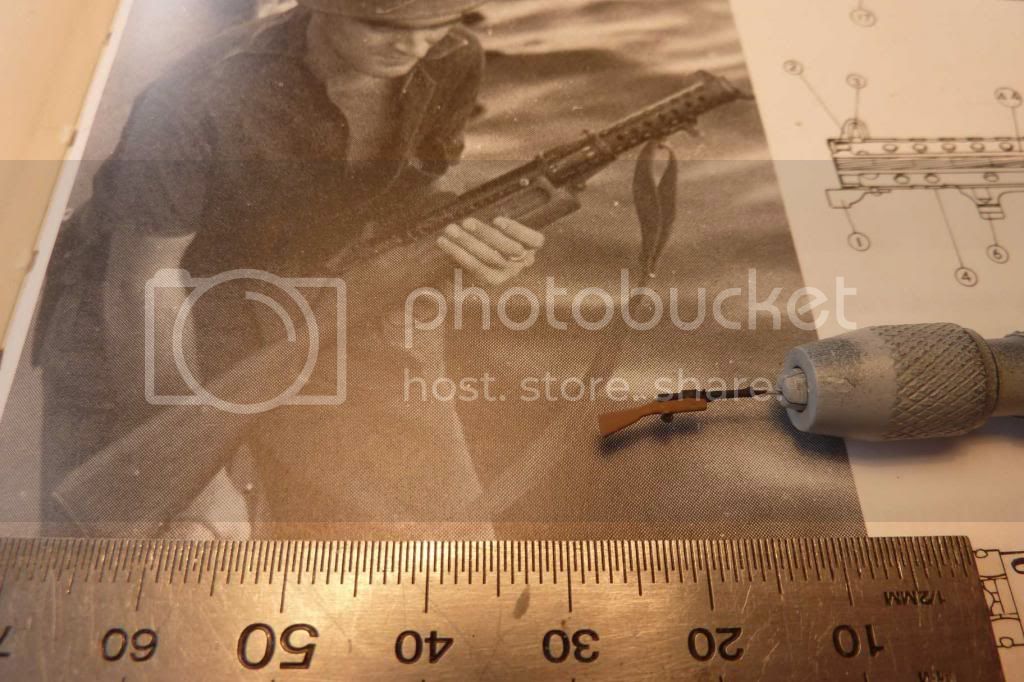
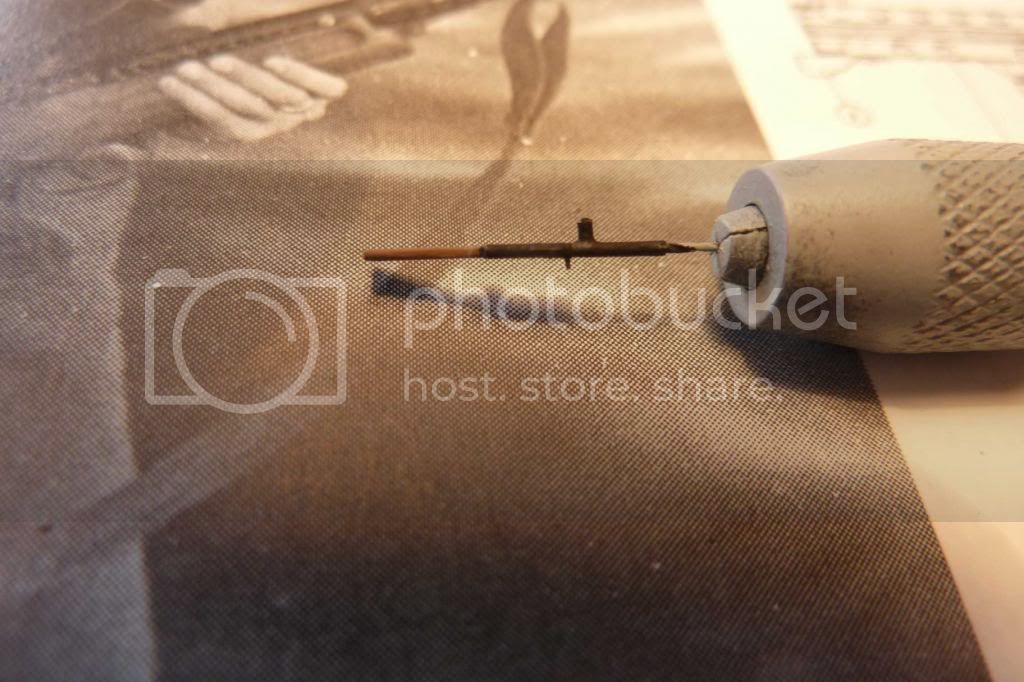
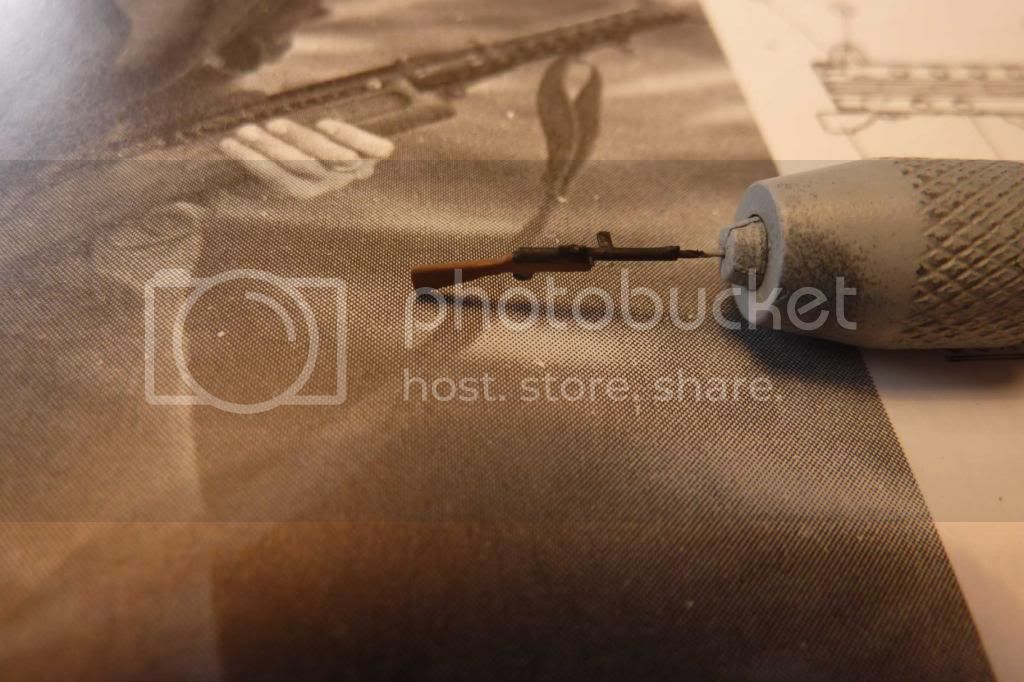
After all I have to maintain my reputation . . . . as an idiot
Cheers Kev

#084
Quebec, Canada
Joined: September 14, 2005
KitMaker: 2,485 posts
Model Shipwrights: 1,157 posts
Posted: Monday, May 26, 2014 - 12:33 PM UTC
Excellent work, she is really looking great.
I just love to see modelers make a gem out of a plain rock!
Cheers,
Joe
Joined: October 30, 2005
KitMaker: 3,897 posts
Model Shipwrights: 3,301 posts
Posted: Monday, May 26, 2014 - 04:16 PM UTC
Montevideo, Uruguay
Joined: August 22, 2011
KitMaker: 998 posts
Model Shipwrights: 941 posts
Posted: Tuesday, May 27, 2014 - 03:13 AM UTC
Friend Kev .... this you giving chair of Scrath build!!! What time do they begin the classes??

Cheers Daniel
" My bigger dread is to look at the history of my life and to ask me what I did with her "
England - South West, United Kingdom
Joined: July 04, 2013
KitMaker: 430 posts
Model Shipwrights: 390 posts
Posted: Tuesday, May 27, 2014 - 03:53 AM UTC
Thank you gentlemen !
Julian, your right . . fast becoming an addict
Daniel, when I'm 10% as good as you I may give one class . .
Cheers Kev
England - South East, United Kingdom
Joined: March 01, 2010
KitMaker: 7,078 posts
Model Shipwrights: 6,649 posts
Posted: Tuesday, May 27, 2014 - 08:14 AM UTC
Cracking job Kev,
The scratchbuilt Lanchester in that scale is really cool.
Si
England - South West, United Kingdom
Joined: July 04, 2013
KitMaker: 430 posts
Model Shipwrights: 390 posts
Posted: Wednesday, May 28, 2014 - 05:12 AM UTC
Finally got to put some pieces together today, I think (hope) there's a slight improvment
Started with this
Story so far . . . .
Thanks for looking
Cheers Kev
Joined: October 30, 2005
KitMaker: 3,897 posts
Model Shipwrights: 3,301 posts
Posted: Wednesday, May 28, 2014 - 06:04 AM UTC
love it, that is a huge improvement over the basic kit!
England - South West, United Kingdom
Joined: July 04, 2013
KitMaker: 430 posts
Model Shipwrights: 390 posts
Posted: Thursday, May 29, 2014 - 01:10 AM UTC
Thanks Julian,
The old learning curve is still quite steep !
Lessons learnt this week
You can't glue painted plastic with Plasweld !
You can't do an oil wash on colourcoats enamel if its only had 18 hours to set.
Oh well . . . onwards and slightly upwards
Cheers Kev
England - South West, United Kingdom
Joined: July 04, 2013
KitMaker: 430 posts
Model Shipwrights: 390 posts
Posted: Tuesday, June 03, 2014 - 06:47 PM UTC
Right here we go . . .
Just to remind you, started with this
Bit of plastic
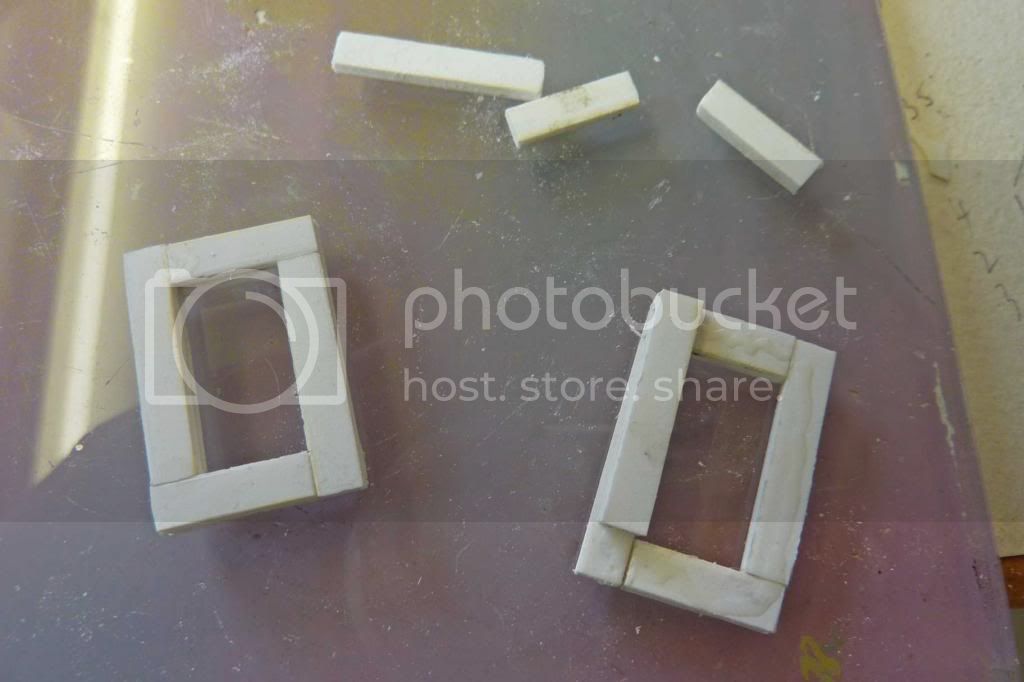
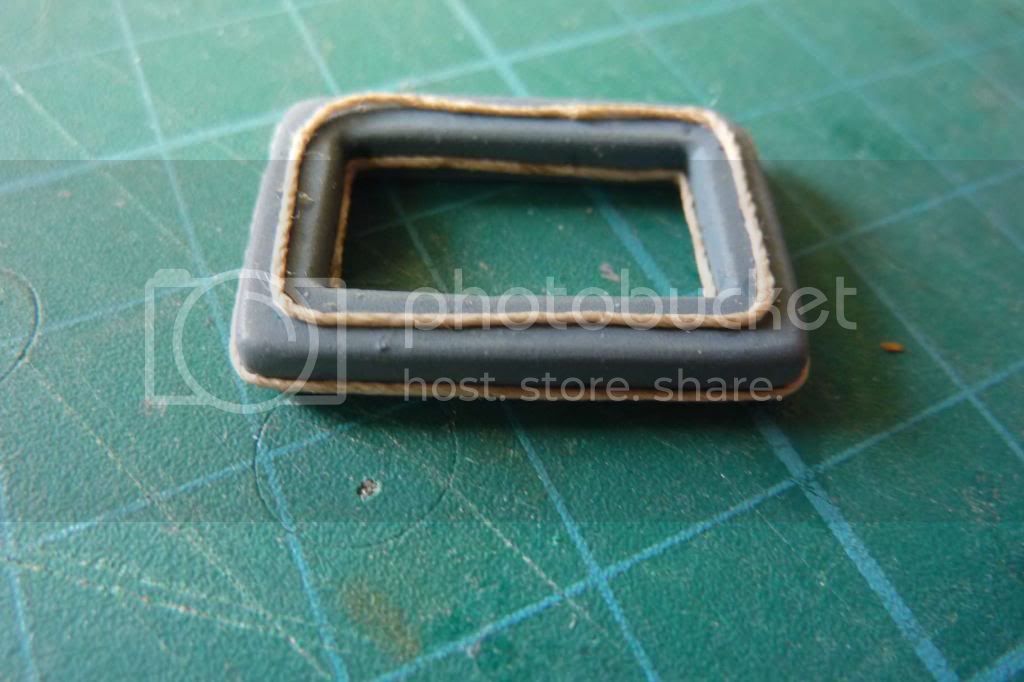
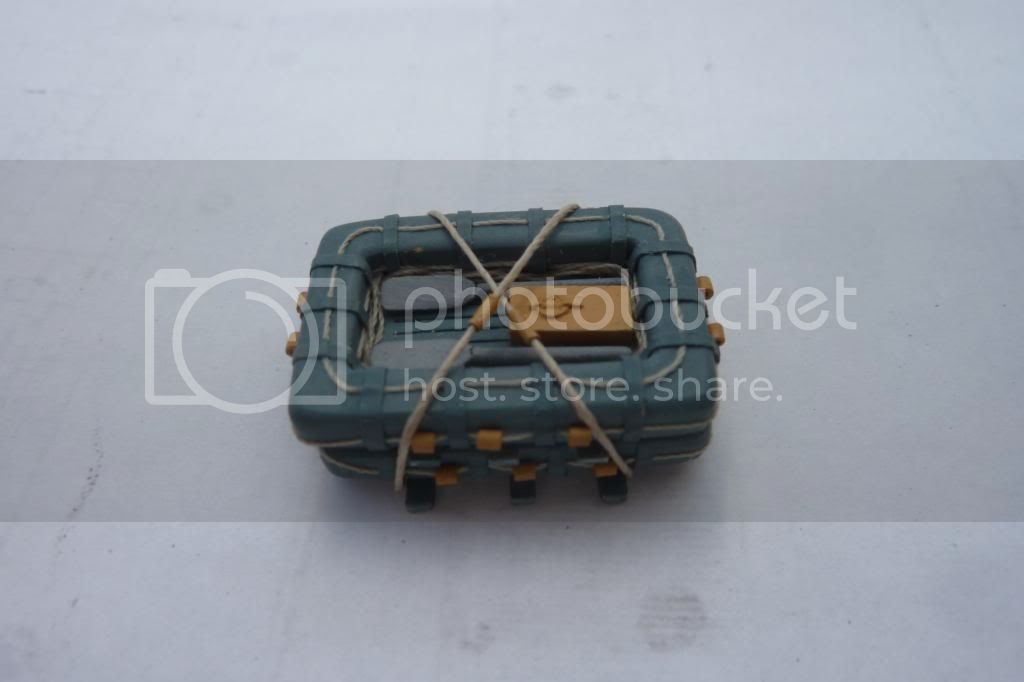
Keep thinking the thread is a tad overscale but its 0.25mm dia which scales out at 18mm so I reckon its ok.
Bands are self adhesive label sprayed and touched in with superglue
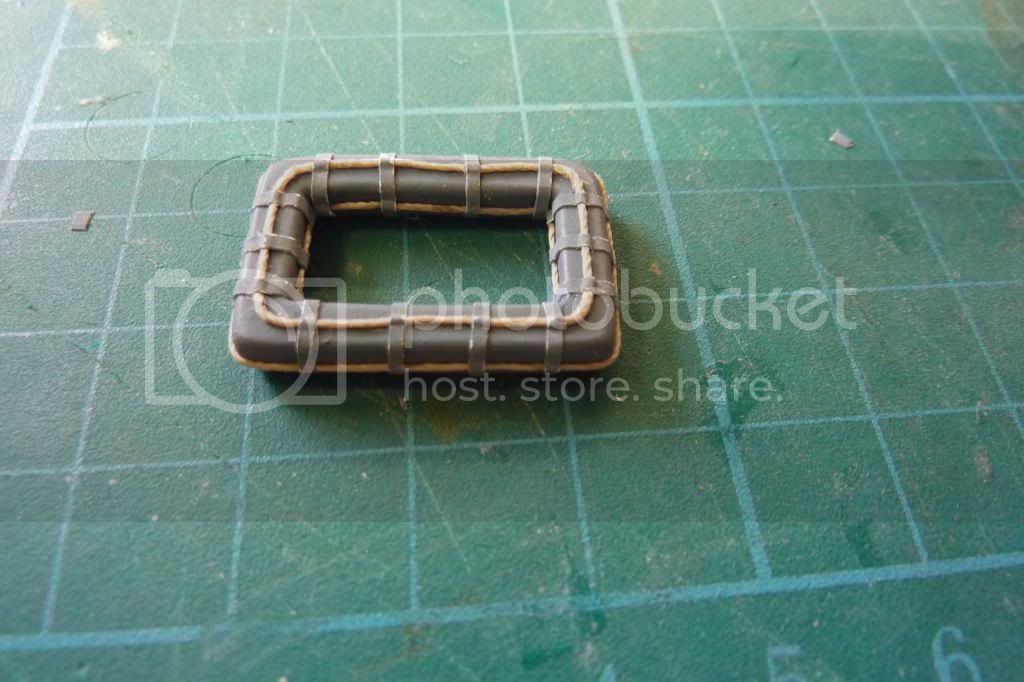
Floating floor
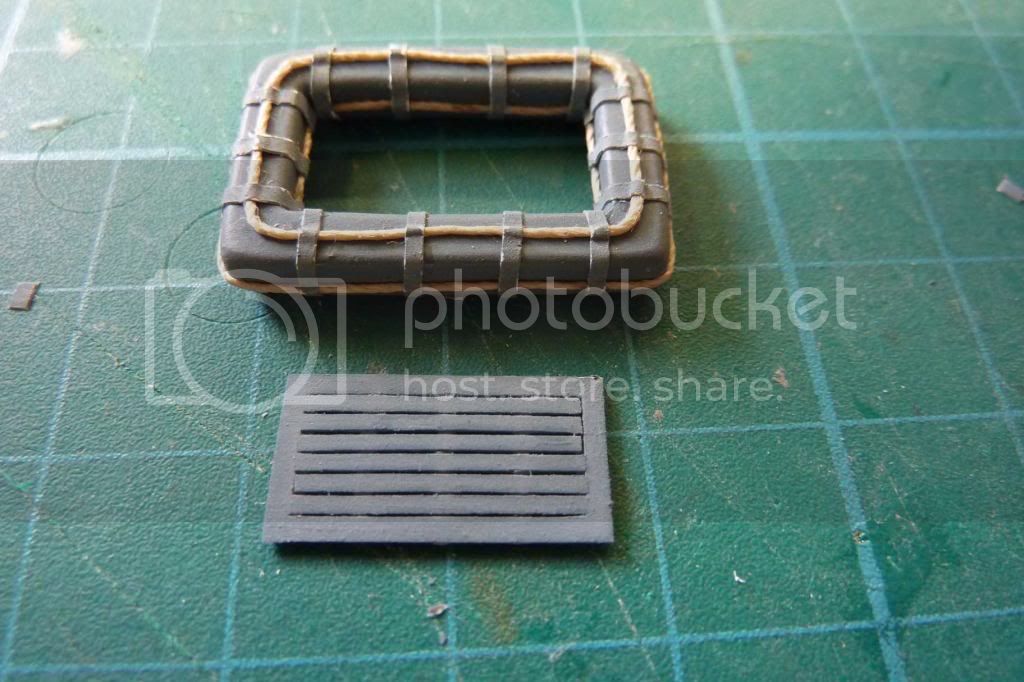
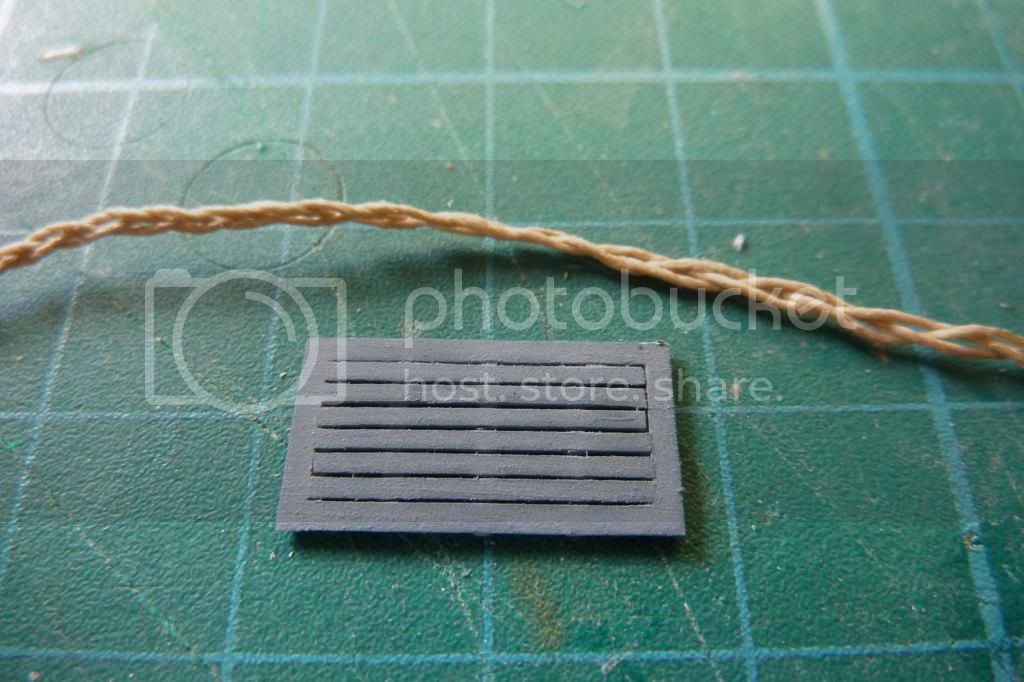
Spent ages trying to reproduce the netting - either over scale, to bulky etc. Finally settled on a simple platt
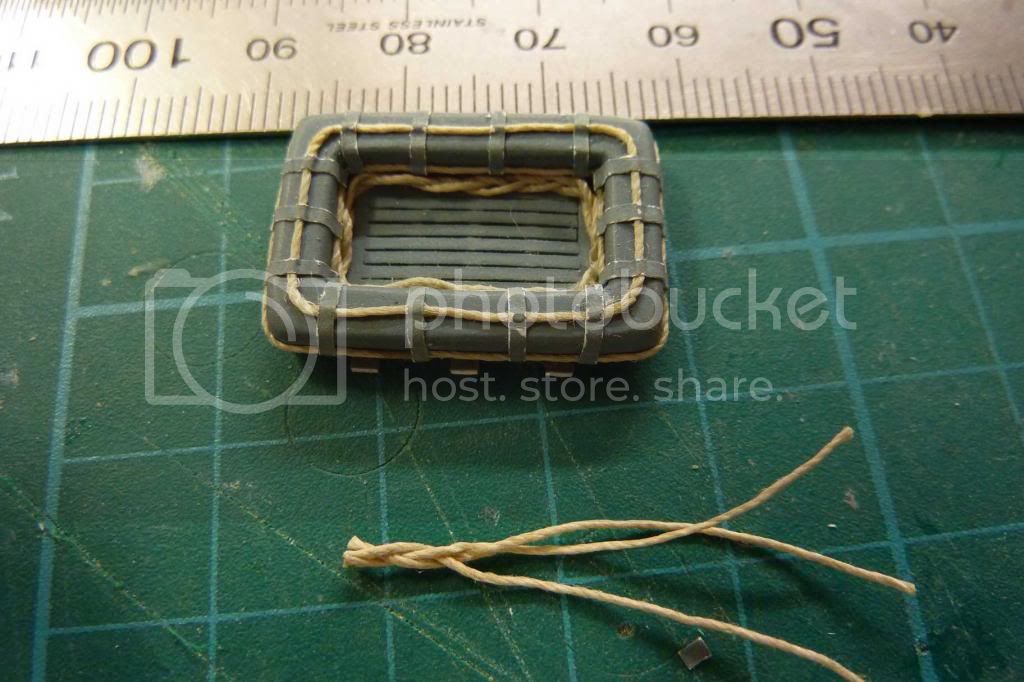
Addition of some paddles ans container with water and safety equipment and were there !
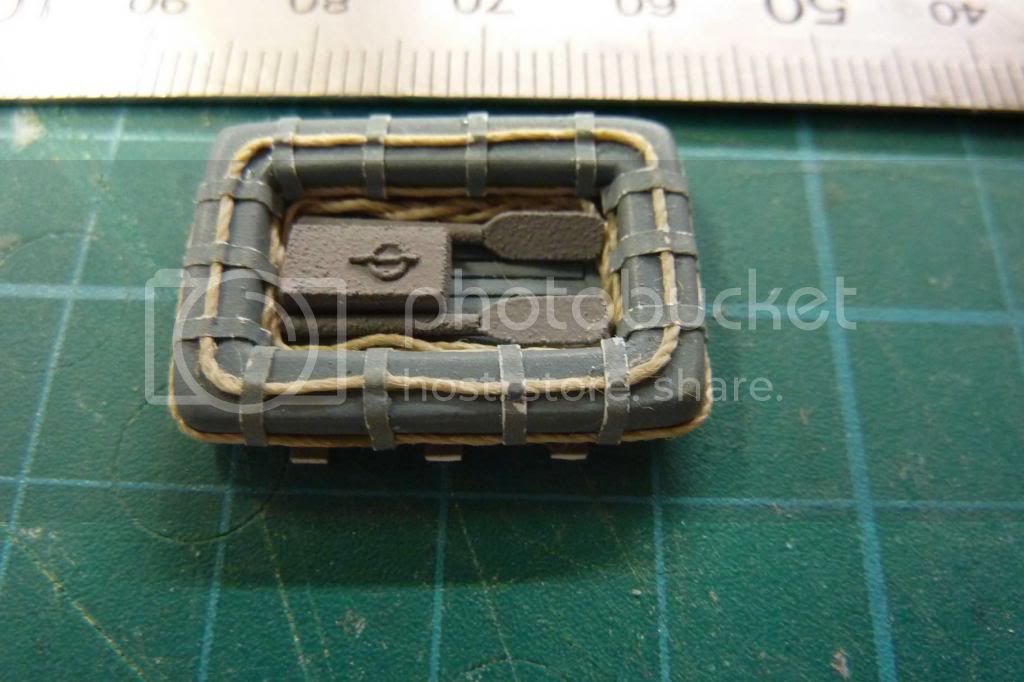
Just need to tidy up the paint and start the second one
They are stacked on top of each other so it only needs the basic shell
Thanks for looking
Cheers Kev
England - North East, United Kingdom
Joined: October 22, 2007
KitMaker: 971 posts
Model Shipwrights: 645 posts
Posted: Wednesday, June 04, 2014 - 03:50 AM UTC
Great work so far Kev vast improvements on the old kit mouldings
Keith

Joined: October 30, 2005
KitMaker: 3,897 posts
Model Shipwrights: 3,301 posts
Posted: Wednesday, June 04, 2014 - 05:10 AM UTC
Looking good Kev, nice work.
England - South East, United Kingdom
Joined: March 01, 2010
KitMaker: 7,078 posts
Model Shipwrights: 6,649 posts
Posted: Wednesday, June 04, 2014 - 07:27 AM UTC
The Bridge and raft are superb Kev, a huge advance on the kit parts.
great stuff
Si
England - South West, United Kingdom
Joined: July 04, 2013
KitMaker: 430 posts
Model Shipwrights: 390 posts
Posted: Wednesday, June 25, 2014 - 10:00 AM UTC
Thanks guys for your kind comments, much appreciated.
Right back to business . . . holidays are great but when you go away you can't do any modelling
Then the router packs up so no internet

Gave it alot of thought and finished up with Carley Float mark 2
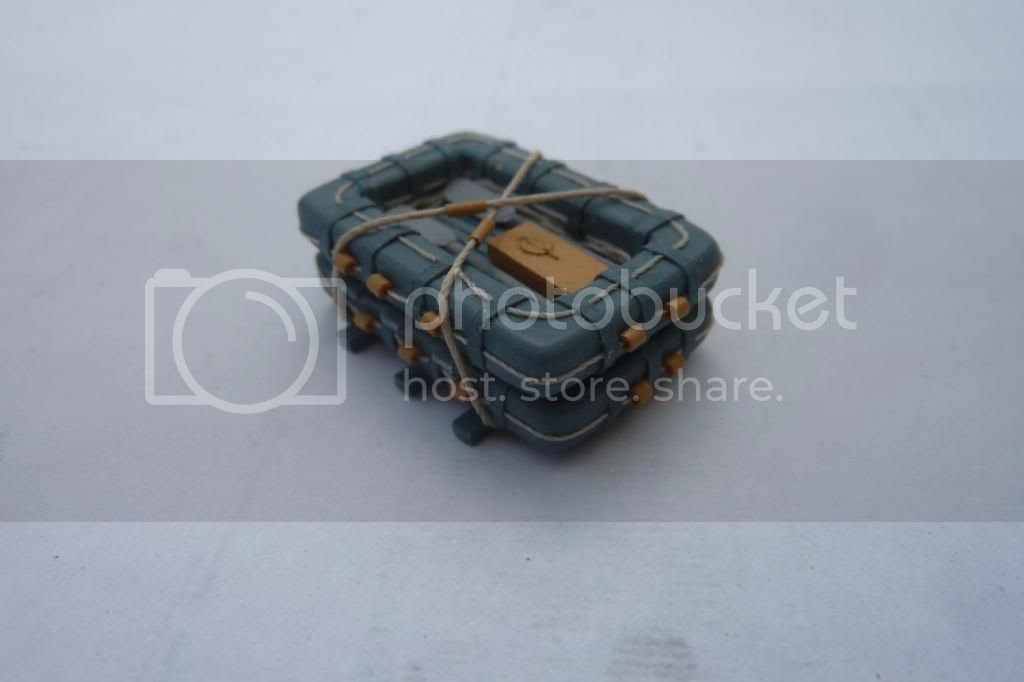
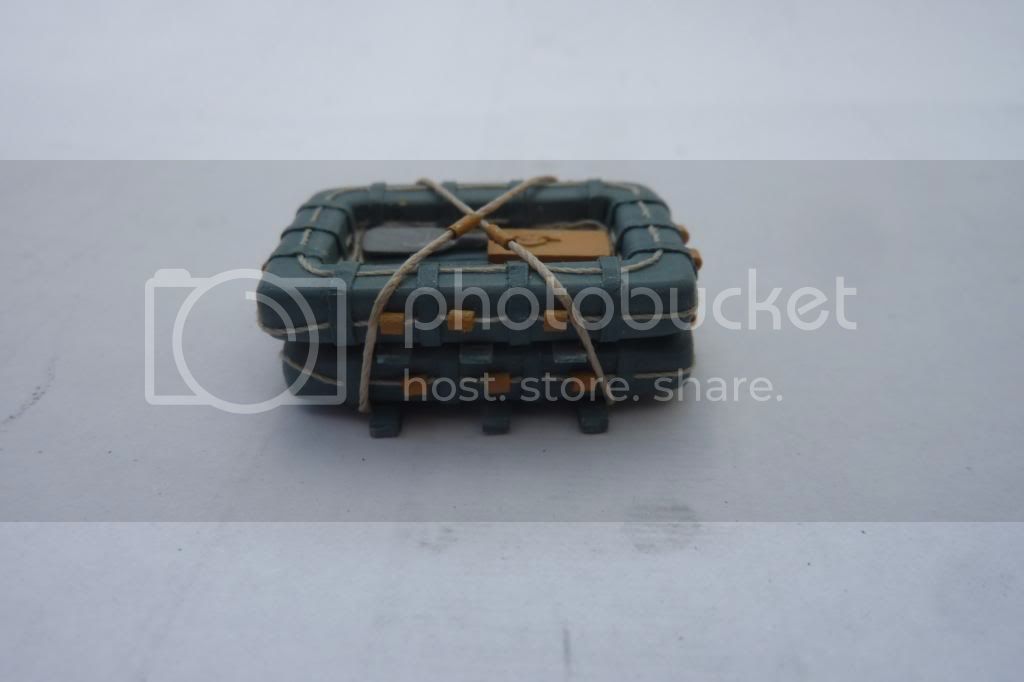
Now I'm happy
This is the first subassembly completed

Thanks for looking
Cheers Kev