Ships by Class/Type: Cruisers
Topics covering cruisers both past and present.
Aoshima 1/350 IJN Maya 1944
RussellE
#306
Visit this Community
Victoria, Australia
Joined: June 27, 2010
KitMaker: 3,959 posts
Model Shipwrights: 2,777 posts
Posted: Monday, December 22, 2014 - 02:38 PM UTC
Hi Dave!

Good news! The name change has worked and now we can be sure we won't miss any updates on your progress!

Looking good so far mate!

I wish you (& everyone at MSW) a very Merry Christmas and a happy New Year!

May the man in the red suit leave something saltworthy under your tree!

Russ
rolltide31
#377
Visit this Community
Texas, United States
Joined: June 27, 2010
KitMaker: 1,481 posts
Model Shipwrights: 1,332 posts
Posted: Thursday, January 01, 2015 - 11:16 PM UTC
hi all and Happy New Year. I hope the spirits flowed heavily and endlessly during your celebrations. Unfortunately for me the big man in the red suit did not provide any plastic but I was able to score the battleships IJN Kongo and IJN Haruna from Ebay on Christmas day so it wasn't a complete loss.

Well now that the holidays have ended the dockworkers got back to work.

Here is the bow main deck being secured to the hull.


and here it is without the clamps. Not too bad a fit, minor gaps that will be fixed soon.


Here are the main guns with the PE coolant shields attached.


You can see the original kit part on the left hand side of the photo. Here is a clearer picture of the original piece.


The PE is definitely an upgrade from the original.


still have a couple to complete which should be done this week. While the FlyHawk PE kit is great I would have preferred if they had made these pieces either a single piece. It would have prevented the gap issues in the front and back.

Here is some progress on the bridge.


Since this bridge is used in all versions it requires covering the middle port windows with putty. Unfortunately the bridge face provides another fit issue in this kit.


The bridge face should be flush with the sides of the bridge. As you can see I began to sand down the overlap. Not sure how I will approach the lower area as it will destroy some molded detail.

Well that's it for now. I am going to try and reduce wording and provide more pictures in my future updates.

Even with the fit issues this is a great kit.

Thanks for looking in and as always comments and criticism is always appreciated.

Dave
Naseby
Visit this Community
Slovakia
Joined: October 15, 2010
KitMaker: 825 posts
Model Shipwrights: 97 posts
Posted: Friday, January 02, 2015 - 02:31 AM UTC
The fit of the face of the bridge is really a disaster, but seeing what You accomplished so far, I have no doubts You will handle also this issue.
RussellE
#306
Visit this Community
Victoria, Australia
Joined: June 27, 2010
KitMaker: 3,959 posts
Model Shipwrights: 2,777 posts
Posted: Saturday, January 03, 2015 - 10:19 AM UTC
Hi and happy new year Dave!

for the bridge, why don't you break the join, then re-glue the sides, but pack them out first so that they sit flush to the front, rather than having them sit on the stand off ribs on the interior?

Russ
rolltide31
#377
Visit this Community
Texas, United States
Joined: June 27, 2010
KitMaker: 1,481 posts
Model Shipwrights: 1,332 posts
Posted: Sunday, January 04, 2015 - 08:00 PM UTC
@Naseby, thanks for the vote of confidence, lets see how it goes.

@Russ, I didnt think of that, thanks for the idea. My only concern is that the sides would be pushed out and not align with where they need to be on the deck. Something to investigate though, thanks

Dave
RussellE
#306
Visit this Community
Victoria, Australia
Joined: June 27, 2010
KitMaker: 3,959 posts
Model Shipwrights: 2,777 posts
Posted: Monday, January 05, 2015 - 05:17 AM UTC
Hi Dave

it may be worth checking. I've found nearly all trumpy kits have the same issue and I find it much easier to match the outside of the seam, than sitting the sides on the stand offs and then trying to blend them out to the front.

Worse comes to worse after resetting the join, it would be easier to skim the sides down to fit in any kind of groove on the deck. If it fits over a small island on the deck then there shouldn't be a problem as it will just be a little oversize.

PS. Hope i'm not butting in too much mate.

Russ
rolltide31
#377
Visit this Community
Texas, United States
Joined: June 27, 2010
KitMaker: 1,481 posts
Model Shipwrights: 1,332 posts
Posted: Monday, January 05, 2015 - 07:29 AM UTC
Russ

Never worry about butting in brother, I'm always open to suggestions that will make me a better shipwright. I'm gonna give your suggestion a shot and see how it works. Thanks.

Dave
RedDuster
Visit this Community
England - South East, United Kingdom
Joined: March 01, 2010
KitMaker: 7,078 posts
Model Shipwrights: 6,649 posts
Posted: Monday, January 05, 2015 - 05:33 PM UTC
Hi Dave,

Very neat etch work on the main turrets, they do look impressive.

good luck with fixing the superstructure problem, will be watching with interest.

Si
rolltide31
#377
Visit this Community
Texas, United States
Joined: June 27, 2010
KitMaker: 1,481 posts
Model Shipwrights: 1,332 posts
Posted: Tuesday, January 06, 2015 - 05:19 AM UTC

Quoted Text

Hi Dave

it may be worth checking. I've found nearly all trumpy kits have the same issue and I find it much easier to match the outside of the seam, than sitting the sides on the stand offs and then trying to blend them out to the front.

Worse comes to worse after resetting the join, it would be easier to skim the sides down to fit in any kind of groove on the deck. If it fits over a small island on the deck then there shouldn't be a problem as it will just be a little oversize.

PS. Hope i'm not butting in too much mate.

Russ


Russ you are a genius. It worked like a charm. I have very minimal cleanup now. Thanks you saved my bacon

Dave
RussellE
#306
Visit this Community
Victoria, Australia
Joined: June 27, 2010
KitMaker: 3,959 posts
Model Shipwrights: 2,777 posts
Posted: Tuesday, January 06, 2015 - 10:15 AM UTC
Good to hear mate!

Glad i could be of assistance

Russ
rolltide31
#377
Visit this Community
Texas, United States
Joined: June 27, 2010
KitMaker: 1,481 posts
Model Shipwrights: 1,332 posts
Posted: Tuesday, February 03, 2015 - 06:14 AM UTC
Hi all,

Well after a brief delay here are some updates regarding the IJN Maya.

First I have finally applied the degaussing cable. This was after a copious amount of sanding to make the Torpedo bay sides flush with the hull.


I have also finished placing the heat shielding on all four 8" guns and installed the main barrels on two. Here is where I ran into some issues. The Blast Bags fit fine on one side but appear too wide for the other side. In the picture you can see the Heat Shielding pinched.


I have not removed them or figured out how to address the problem. I though about sanding down the side of the blast bag but thought it would make it too thin and it would remove the detail. Not sure yet so I moved on to the flight deck.


Here I ran into a problem with the Fly Hawk instructions.


It was an easily identified problem and resolved quickly.

Here is the flight deck dry fitted to the hull.


I have also added all the deck hatches and the sky lights


This lays the ground work to begin prepping for initial paint. Hope to lay at least the primer in the next couple of weeks.

I have also worked on the bridge.

before


After


And her is where into a problem with the Aoshima instructions. As you can see, the part is listed twice. Again, it was easily noticed and rectified.


And finally, I have installed the fore anchors.


Not the best fit but I think it works.

So far, this is a great kit but there are definitely fit issues. Also, the Fly Hawk P/E is a very comprehensive kit but still lacks in some detail. As you can see on the bridge photo, the kit provide the gussets under the gun platform but misses out on replacing some of the molded gussets. Not sure why this was done, especially since other parts with molded gussets require them being removed. Also the Fly Hawk kit requires fabrication of support beams instead of providing them in either brass or PE. Not much of an issue other than the instructions only provide the width required not the length.

Still both are great kits and Im excited to continue this build.

Thanks for looking in and as always comments, recommendations, and criticism are always welcome.

Dave
TRM5150
Visit this Community
Massachusetts, United States
Joined: January 03, 2010
KitMaker: 2,159 posts
Model Shipwrights: 1,400 posts
Posted: Monday, February 09, 2015 - 06:56 AM UTC
Hey Dave!! Found it!! All caught up here on this fine build!! This one is making me want to crack something new open...LOL!! Must...be.....strong!!!
rolltide31
#377
Visit this Community
Texas, United States
Joined: June 27, 2010
KitMaker: 1,481 posts
Model Shipwrights: 1,332 posts
Posted: Monday, February 09, 2015 - 09:05 PM UTC
Todd,

Thanks for looking in. I valuea all comments and suggestions. I know what you mean about seeing a new build and wanting to open something new. As much as I love this build I want to finish it so I can start on the Kongo and Samuel B. Roberts diorama I am visioning. Patience is a virtue I lack at times.

Dave
TRM5150
Visit this Community
Massachusetts, United States
Joined: January 03, 2010
KitMaker: 2,159 posts
Model Shipwrights: 1,400 posts
Posted: Monday, February 09, 2015 - 10:57 PM UTC
LOL...we all lack it in one way or another!! I pulled out an Arizona last night and went through the kit...sniffing the parts, gazing at the brass...LOL!! Resistance might be futile!!
JJ1973
#345
Visit this Community
Niedersachsen, Germany
Joined: August 22, 2011
KitMaker: 1,835 posts
Model Shipwrights: 1,832 posts
Posted: Saturday, February 14, 2015 - 09:52 PM UTC
Hi Dave,

as with so many others, have been watching and now catching up with comments...

That's certainly a great build! I am not really knowledgable about IJN, but those ships surely are amazing subjects, so different from RN, German and US Navy!

I'll definitely be following, even if sometimes slacking with comments...

Cheers

Jan
rolltide31
#377
Visit this Community
Texas, United States
Joined: June 27, 2010
KitMaker: 1,481 posts
Model Shipwrights: 1,332 posts
Posted: Monday, February 16, 2015 - 05:42 AM UTC
Todd, your right, resistance is futile.

Jan, thanks for the comments and welcome along for the ride.

So I have had a long weekend here and was able to get cracking on the Maya.

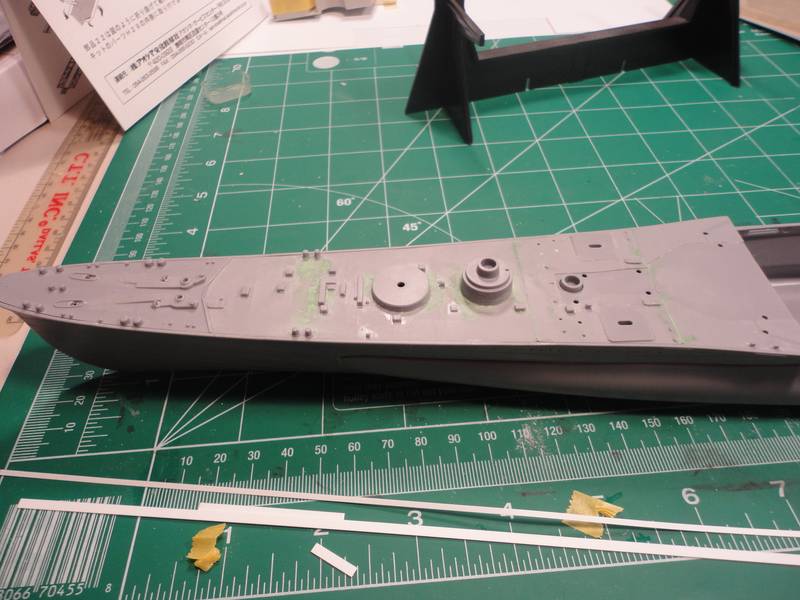
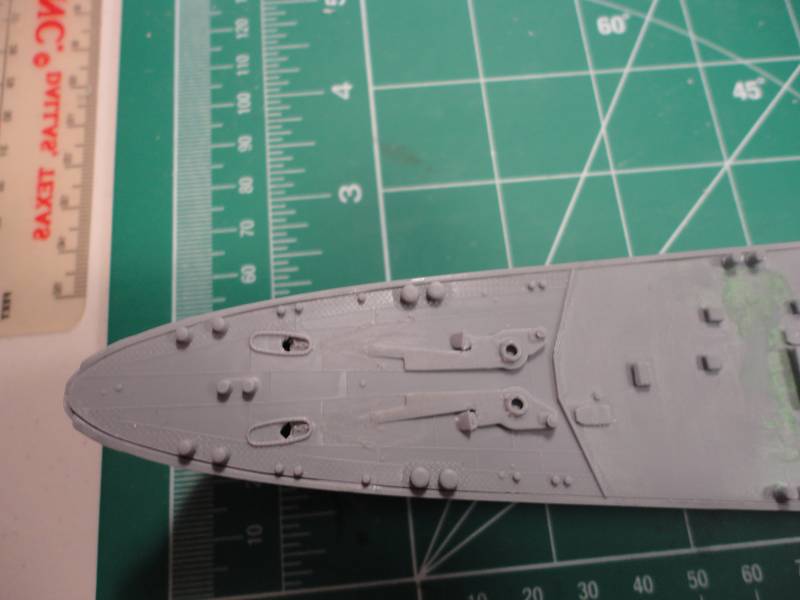
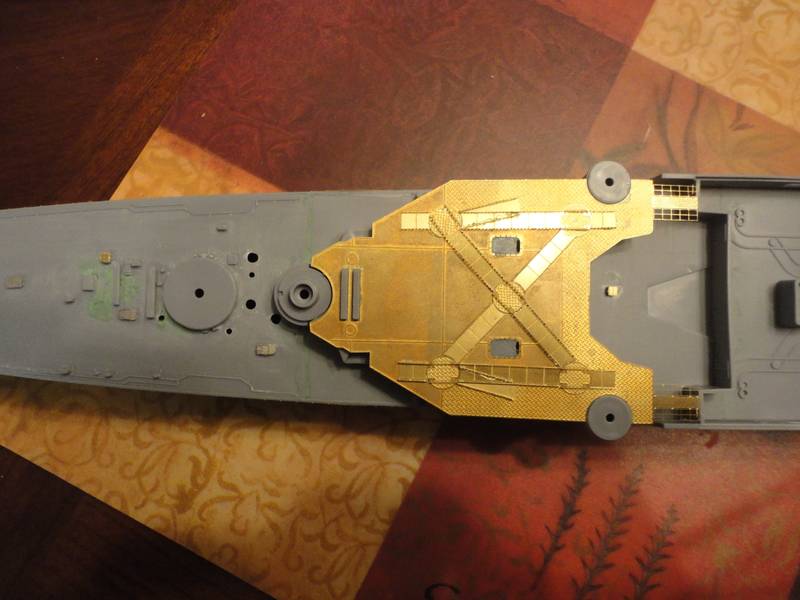
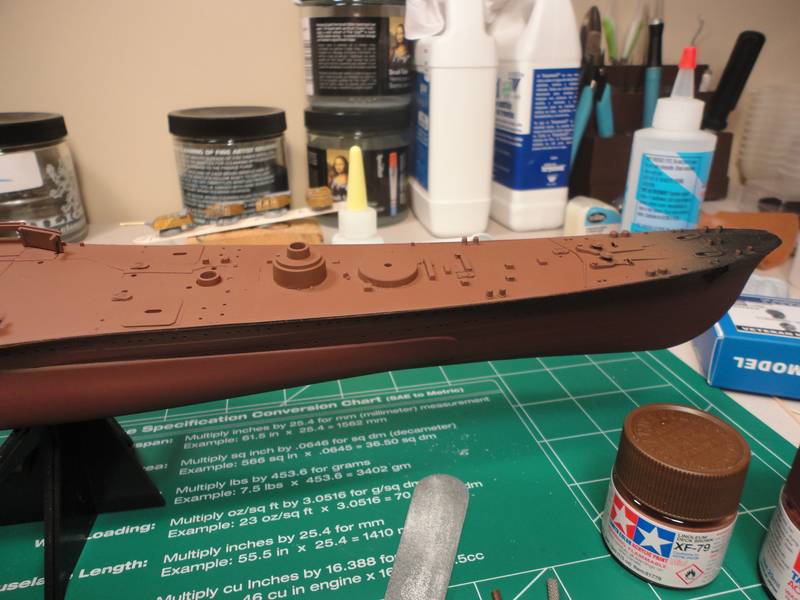
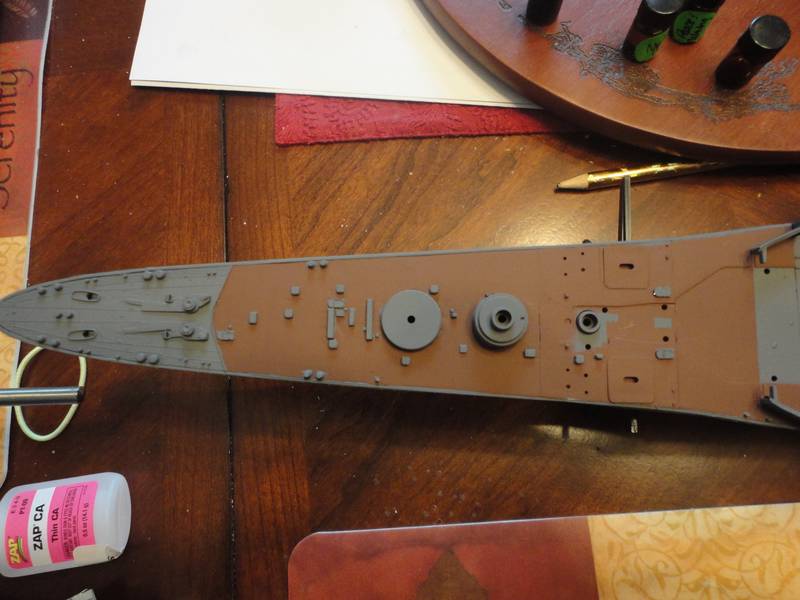
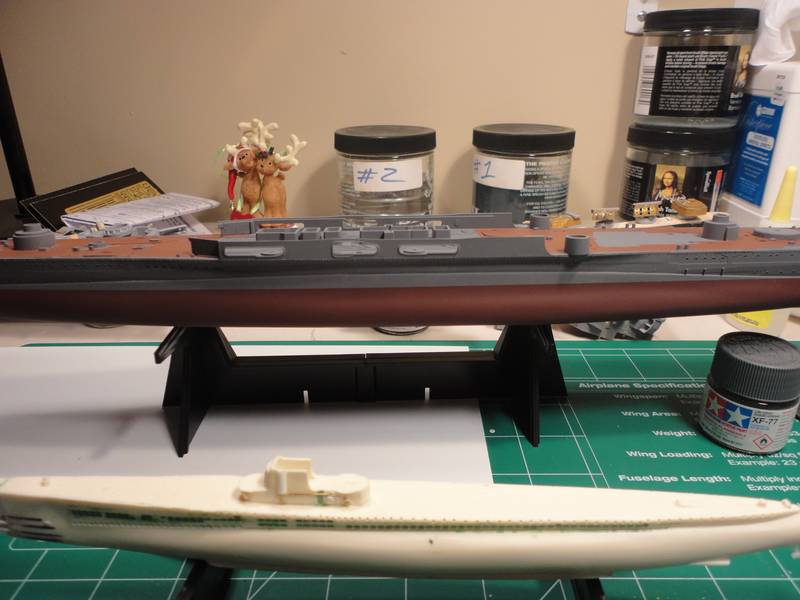
I added the remaining detail for the hull like the aft anchors and the protectors for the screws. Seem awfully small but hey.


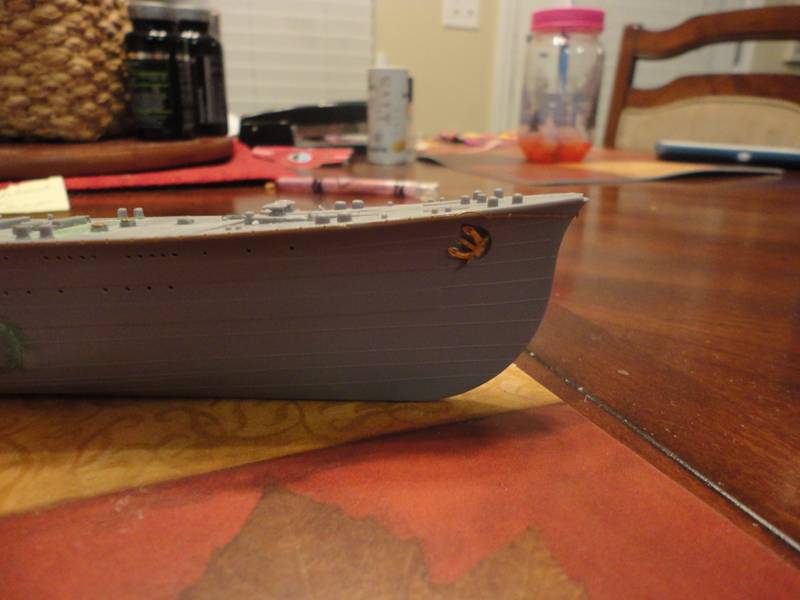
In the last picture you can make out the admiralty anchor. Up until 1939 the admiralty anchor was actually hung of the port side. From 1939 until she sank it was stored on the boat deck. I saw a picture with it on the aft deck so I thought I would put it there as it wouldn't have been seen on the boat deck.

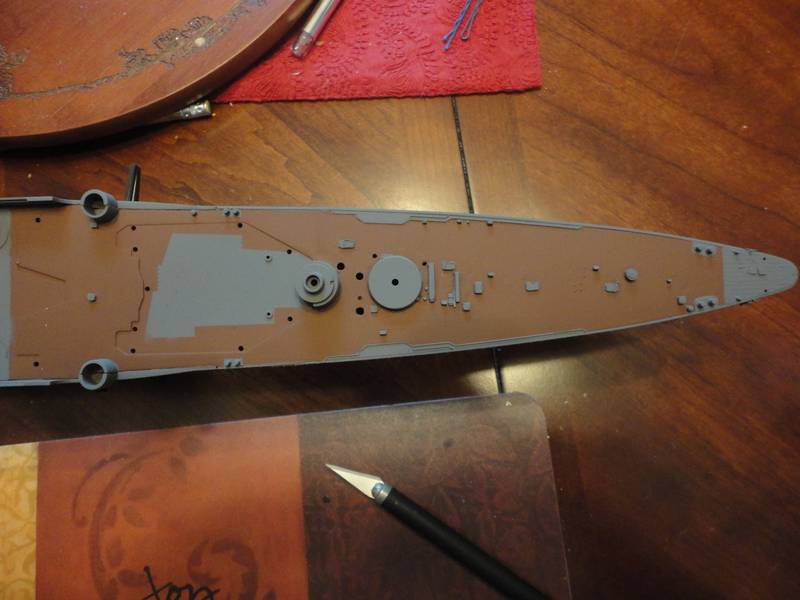
Now that the final details are added to the hull I plan on slinging the primer next weekend pending weather.

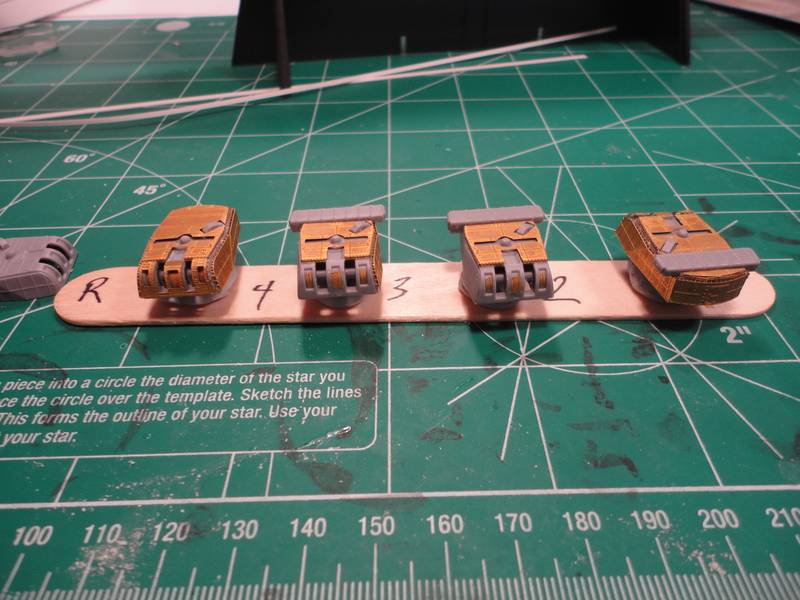
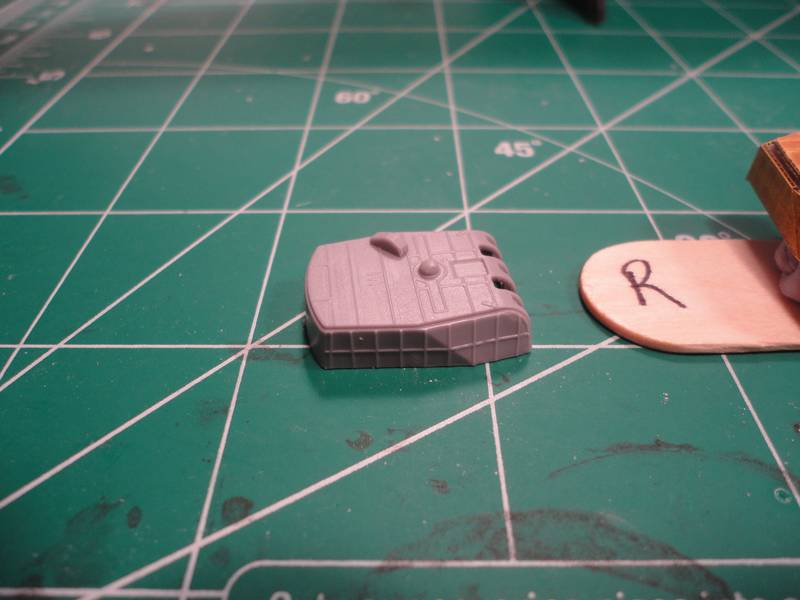
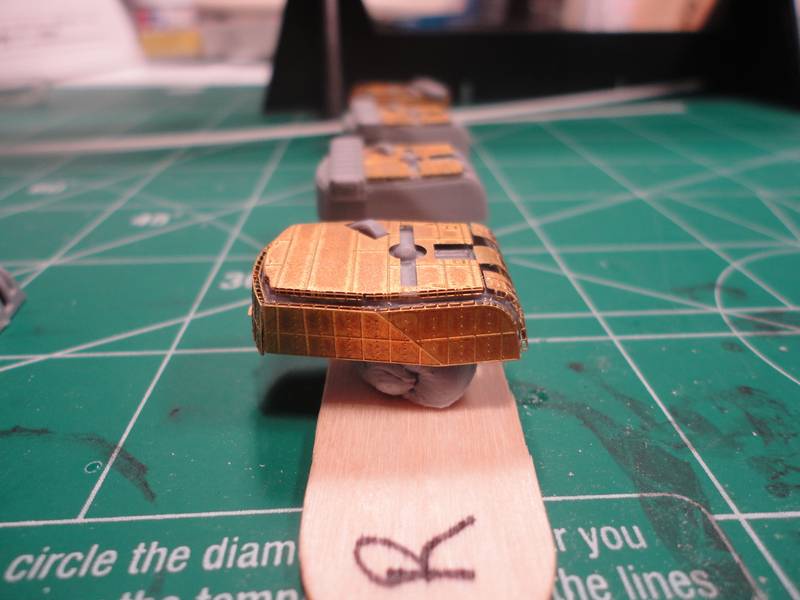
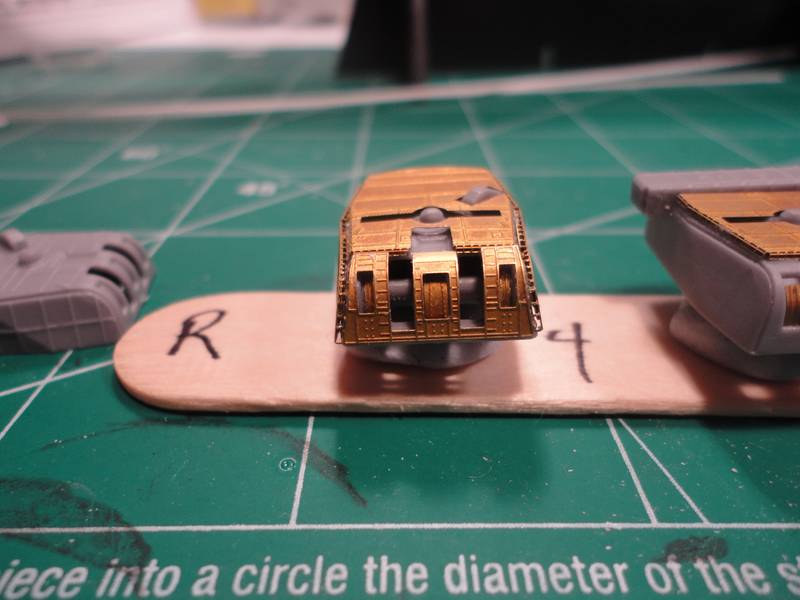
So after that I moved on to some of the smaller things like the torpedo tubes and spare torpedoes. Here you can see them. Once she is done this is all you will be able to see.


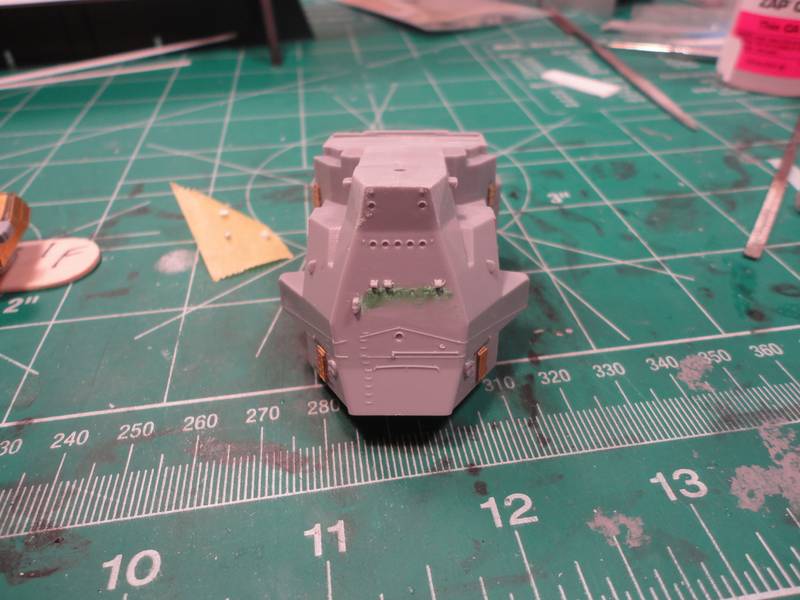
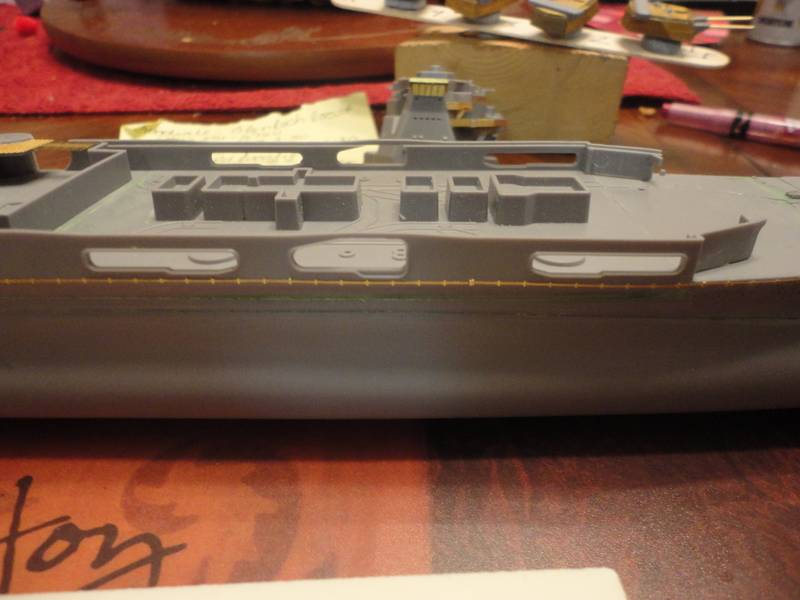
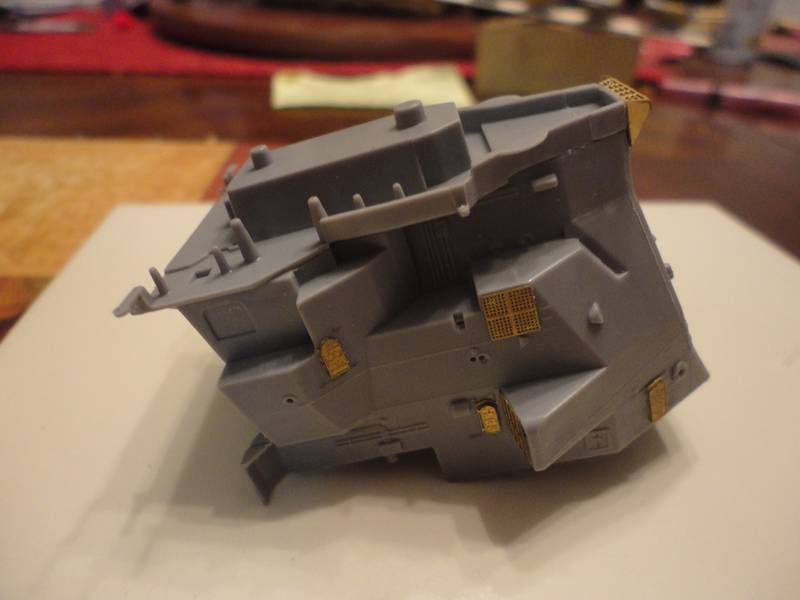
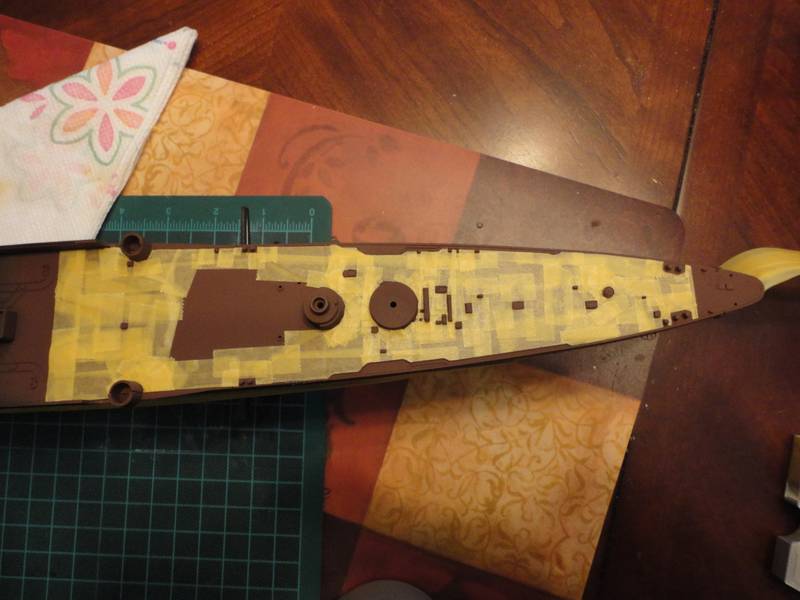
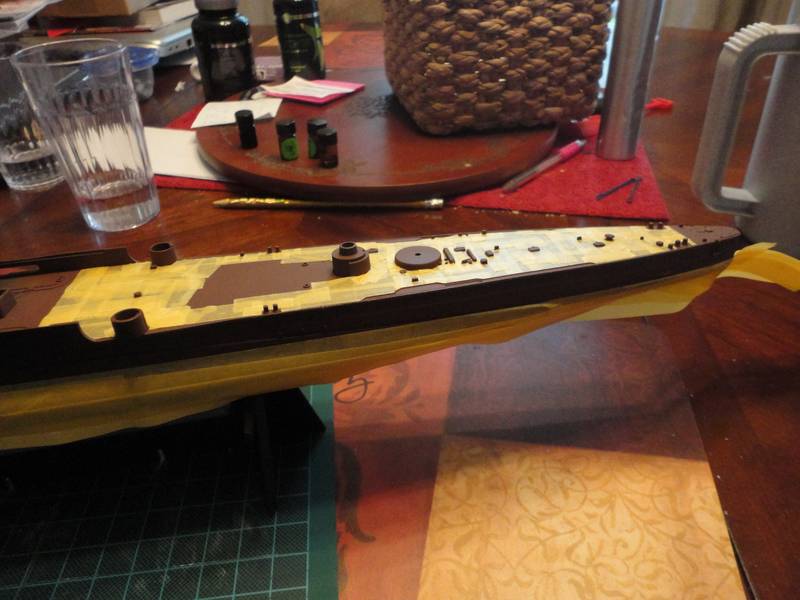
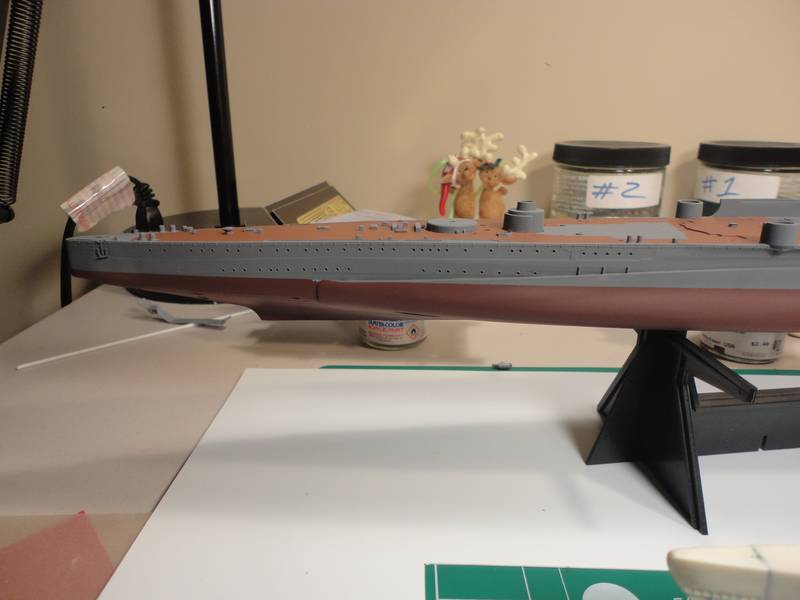
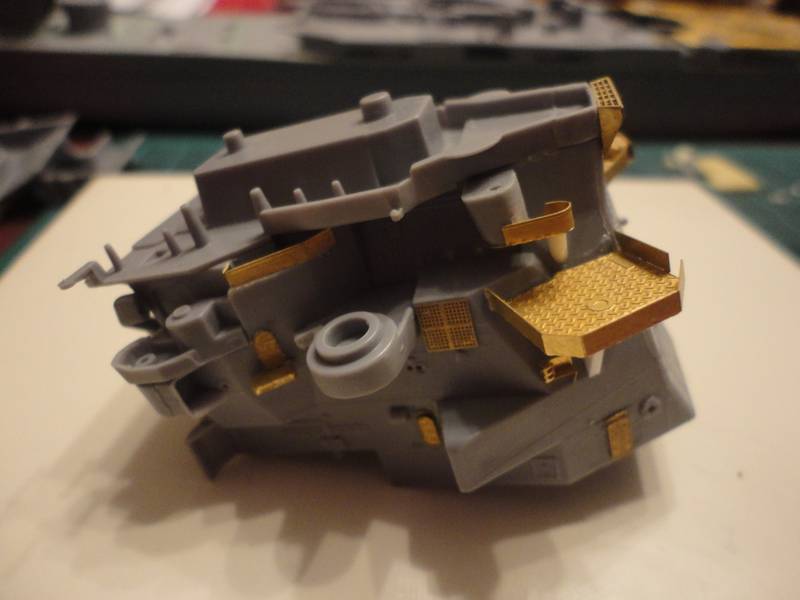
Once I completed that it was time to work on the AA deck. This portion of the ship was part of the AA modification that the Maya undertook, the only Takao class cruiser to receive the modification.


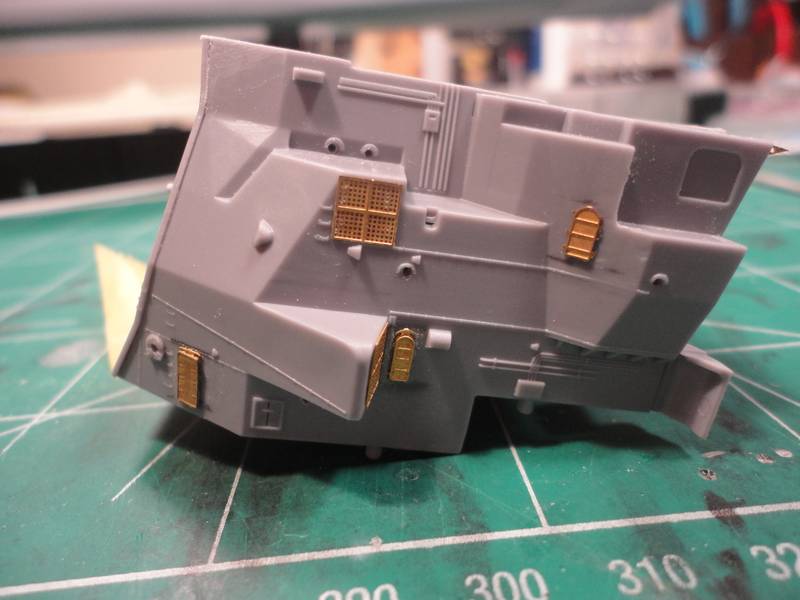
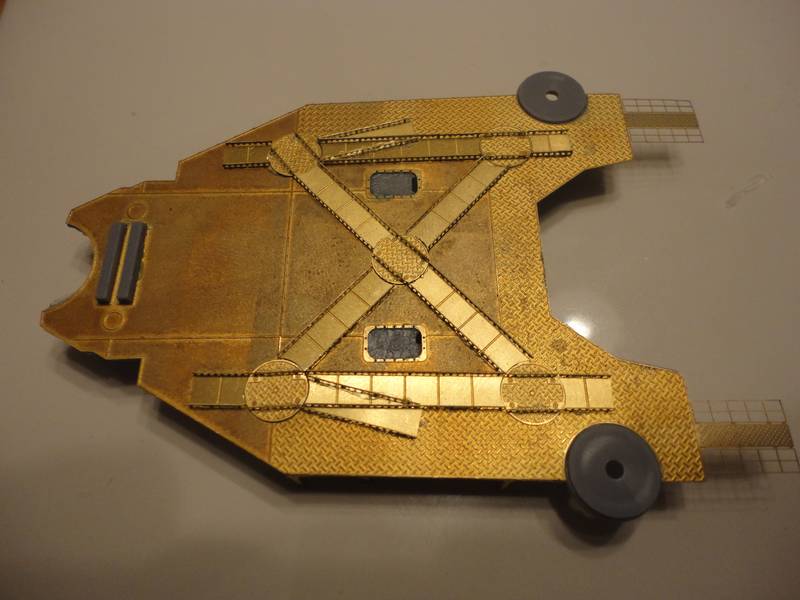
Here you can see the third deck. I had to dry fit the bridge in order to connect the third deck as it is supposed to be flush with the bridge face. There is a slight fit issue here so I am going to have to figure out how to fill the gap. Will be a challenge as there will be support gussets and support poles in the way when mounted.


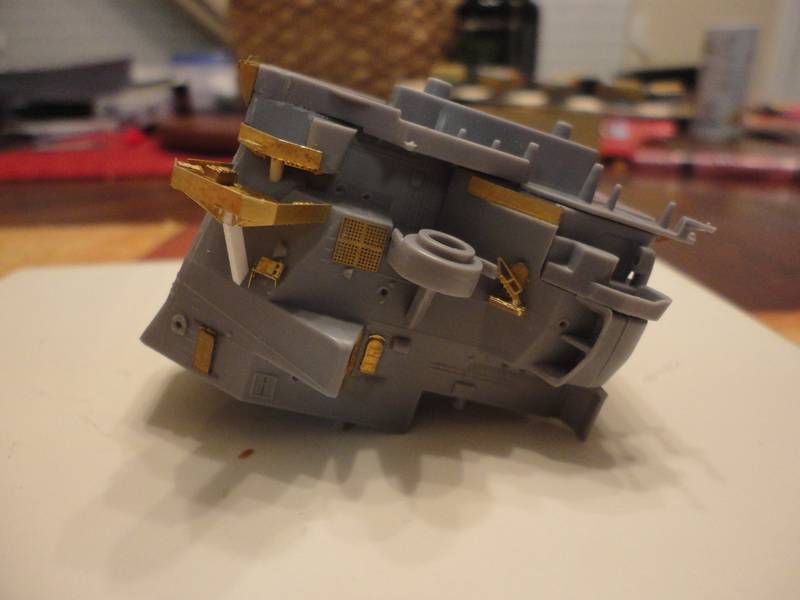
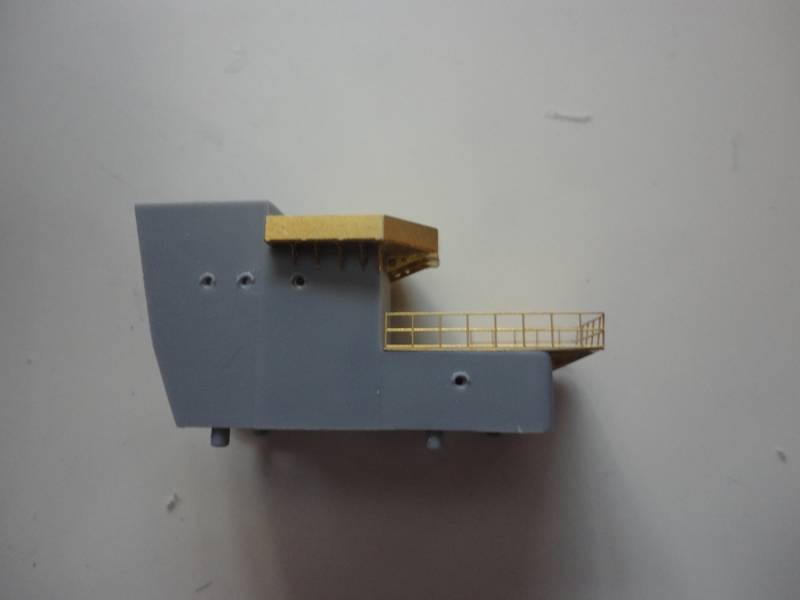
Following the AA decks I moved back to the bridge to finish the starboard side.


The platform to the rear under the door is supposed to have an access ladder up and to the right. However I lost control of the brass and spent quite a bit of time on my knees looking for it. Once I determined it was hopeless I went back to work. I opened the bottle to my gator grip and there was the access ladder. Unfortunately it fell in the glue right at the point the bottle connects with the cap and thus was crushed beyond repair.

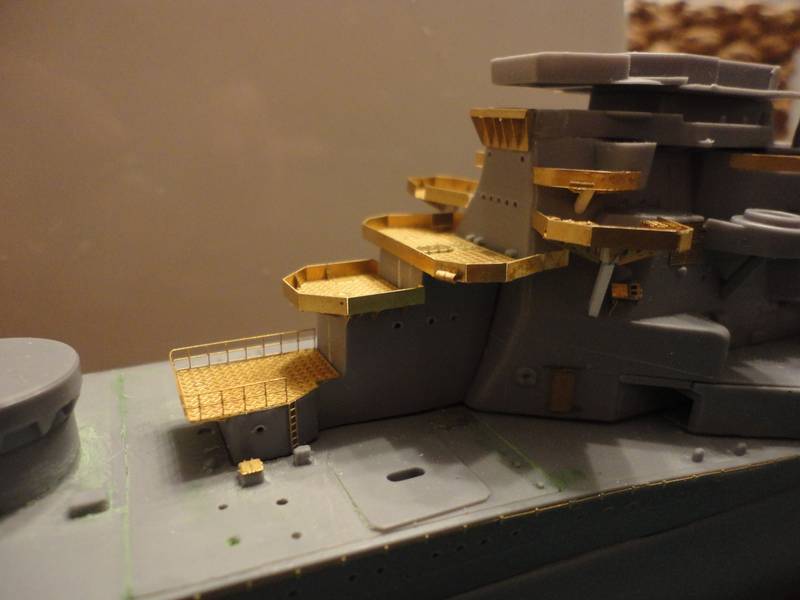
The next picture is angled above the starboard side bridge as it highlights a point of interest. There is a portion of the deck that connects to nothing and there is nothing in the Fly Hawk instructions that clear it up nor is there a ladder. Unfortunately the research documents for the Maya are slim so I am scratching my head as to what to do.


Next was the second level to the bridge and the first windshield. This was a challenge as there are some angles and a rounded area on the side.

Also notice the extremely large wind deflector above the windshield. You can see it well in the front picture later on.


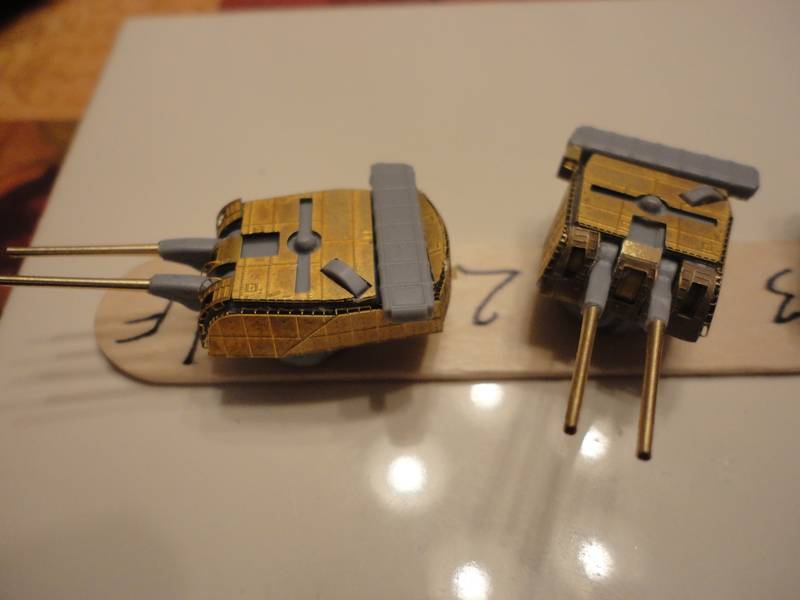
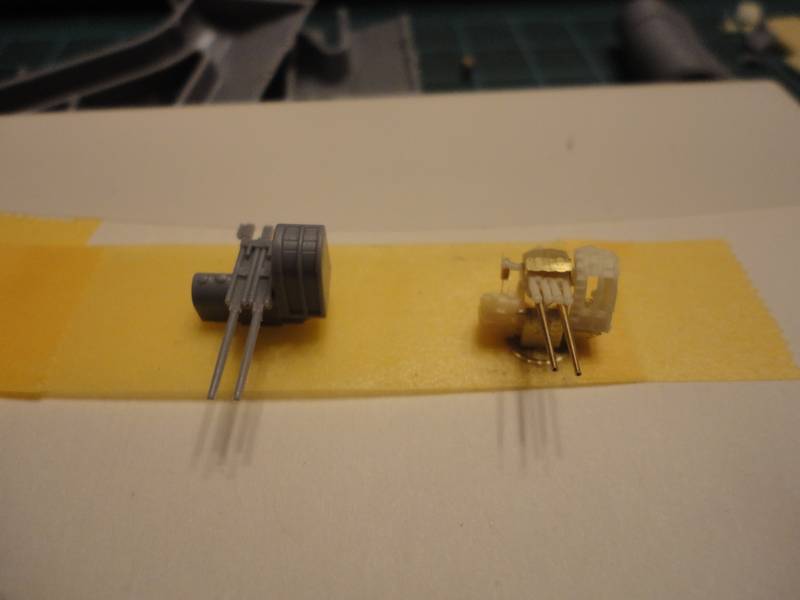
Here is a comparison between the kit 12.7mm AA guns and once I bought from Alliance Model Works. Other than the crooked barrel which I will fix they look great compared to the kit guns. Definitely happy I made the purchase.


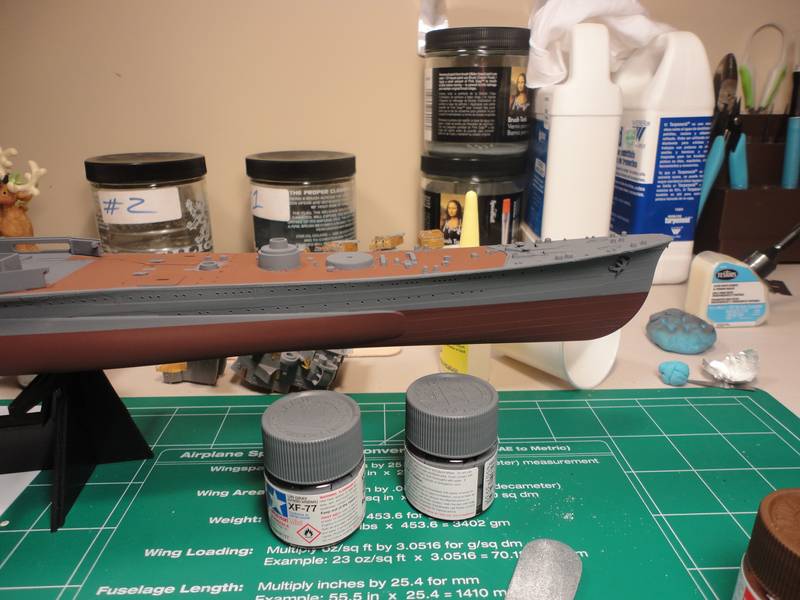
Well that's it for this weeks update but I will leave you with a dry fitted frontal shot.


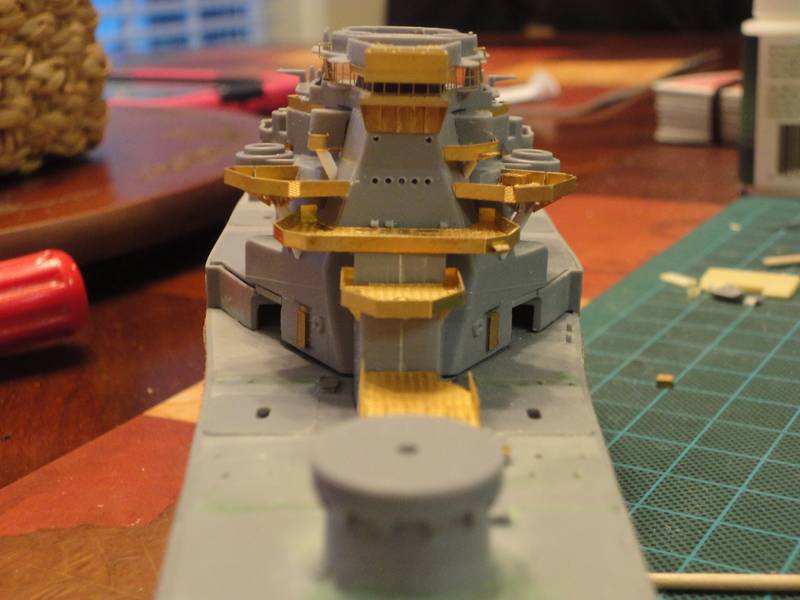
Now you can clearly see the large wind deflector. Next week maybe some paint but definitely attempting to fix the issue with the main guns.

Thanks for dropping in and as always, comments, suggestions and criticism is welcome and encouraged.

thanks

Dave


RussellE
#306
Visit this Community
Victoria, Australia
Joined: June 27, 2010
KitMaker: 3,959 posts
Model Shipwrights: 2,777 posts
Posted: Thursday, February 19, 2015 - 12:30 AM UTC
Coming along very nicely Dave

This is going to be a stand out piece for sure. Your PE work looks very crisp too.

Russ
rolltide31
#377
Visit this Community
Texas, United States
Joined: June 27, 2010
KitMaker: 1,481 posts
Model Shipwrights: 1,332 posts
Posted: Thursday, February 19, 2015 - 12:41 AM UTC
Russell,

thanks for the kind words and suggestions during this build. I cant tell you how much your suggestion regarding the bridge face was helpful. Definately motivates me to move forward with this build.

I think I have finally figured out how I am going to display her once she is complete. Will develop a diagram and socialize for comments.

I hope to have some paint on her this weekend so more to come shortly.

Dave
TRM5150
Visit this Community
Massachusetts, United States
Joined: January 03, 2010
KitMaker: 2,159 posts
Model Shipwrights: 1,400 posts
Posted: Thursday, February 19, 2015 - 01:01 AM UTC
Just awesome stuff there Dave!! Really clean work!
rolltide31
#377
Visit this Community
Texas, United States
Joined: June 27, 2010
KitMaker: 1,481 posts
Model Shipwrights: 1,332 posts
Posted: Saturday, February 21, 2015 - 02:45 AM UTC
Todd

Thanks for the comments. Definitely motivates me to keep moving

Since the weather is warm I'm gonna try and lay down a coat of primer on the hull tomorrow. Will post pics after complete

Dave
RussellE
#306
Visit this Community
Victoria, Australia
Joined: June 27, 2010
KitMaker: 3,959 posts
Model Shipwrights: 2,777 posts
Posted: Saturday, February 21, 2015 - 02:41 PM UTC

Quoted Text

Russell,

thanks for the kind words and suggestions during this build. I cant tell you how much your suggestion regarding the bridge face was helpful. Definately motivates me to move forward with this build.

I think I have finally figured out how I am going to display her once she is complete. Will develop a diagram and socialize for comments.

I hope to have some paint on her this weekend so more to come shortly.

Dave


Glad I could be of help mate.

Looking forward to seeing some paint go on and what you've got in store for the base.

Russ
JJ1973
#345
Visit this Community
Niedersachsen, Germany
Joined: August 22, 2011
KitMaker: 1,835 posts
Model Shipwrights: 1,832 posts
Posted: Sunday, February 22, 2015 - 01:04 AM UTC
Great PE work, the forward structure really comes along nice!

Looking forward to your updates!

Cheers,
Jan
rolltide31
#377
Visit this Community
Texas, United States
Joined: June 27, 2010
KitMaker: 1,481 posts
Model Shipwrights: 1,332 posts
Posted: Saturday, February 28, 2015 - 10:38 PM UTC
Thanks Jan for the kind comments

Russell - ask and ye shall receive

Spent last weekend laying down the primer which set me up to begin laying the base colors. I laid down a new color each night for the hull and the linoleum deck. So Saturday I was able to mask and then lay down the grey.

I used Tamiya Flat Hull red for the hull, Tamiya Flat Linoleum brown for the linoleum deck, and Tamiya Sasebo Grey for the deck and sides. All applied using my air brush.

I am happy with the hull red and the Sasebo grey but not 100 percent with the linoleum brown. Think there should be more arrange tint to the color.

Well here you go, let me know what you think.

Here's the hull


The linoleum deck and the hull


Top view of the linoleum


The masking has begun


The paint is applied. I use Sasebo Grey this time around. There is not a lot of reference material available about the Maya so I went for a darker grey.


I applied two layers for all three colors just to make sure.

and now the unveiling


and finally, another shot of the hunter with the hunted.


Will be moving on to continue working on the bridge next week and replacing all of the molded detail I removed when I began.

Thanks for looking in and as always, comments, suggestions, and critiques are always welcome.

Dave

Blespooky
Visit this Community
Tel Aviv-Yafo, Israel
Joined: June 03, 2014
KitMaker: 277 posts
Model Shipwrights: 171 posts
Posted: Saturday, February 28, 2015 - 11:54 PM UTC
David the color pallet looks good and the masking came out really clean. I think the darker grey is fitting to the Japanese ships as it gives them an ominous presence in contrast to the light grey American ships.

Great work
Bryan
RussellE
#306
Visit this Community
Victoria, Australia
Joined: June 27, 2010
KitMaker: 3,959 posts
Model Shipwrights: 2,777 posts
Posted: Sunday, March 01, 2015 - 03:56 PM UTC
Looking REALLY nice Dave!

great to see some pics up!

Russ