Ships by Class/Type
For discussions on ships by class and type.
U-Boat Type VII/C - 1/72 by Revell, Pontos...
elmarriachi
Visit this Community
Baden-Württemberg, Germany
Joined: December 26, 2009
KitMaker: 813 posts
Model Shipwrights: 304 posts
Posted: Tuesday, December 22, 2015 - 10:17 PM UTC
*** UPDATE ***

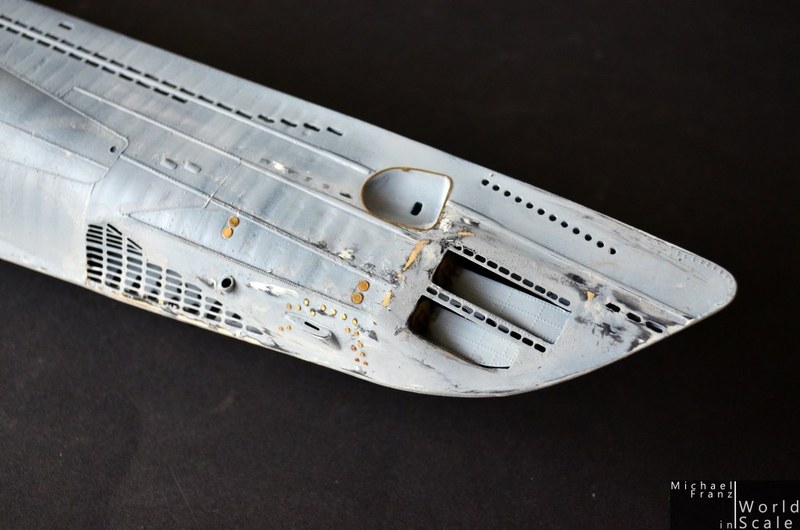
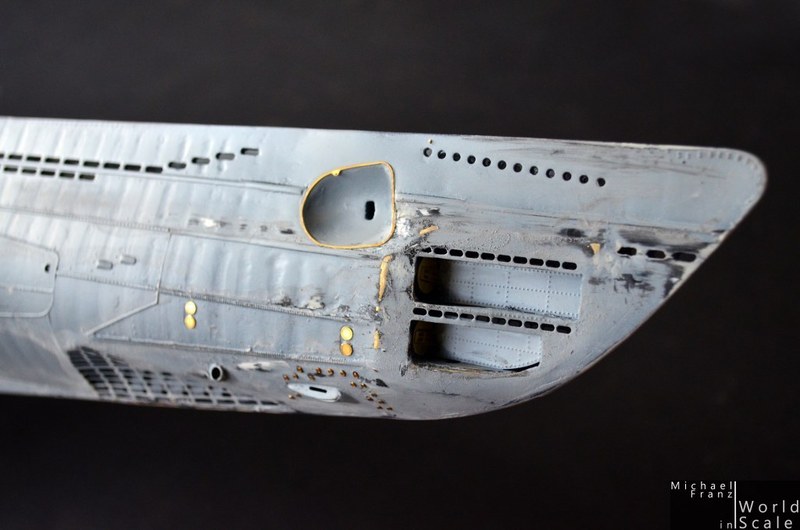
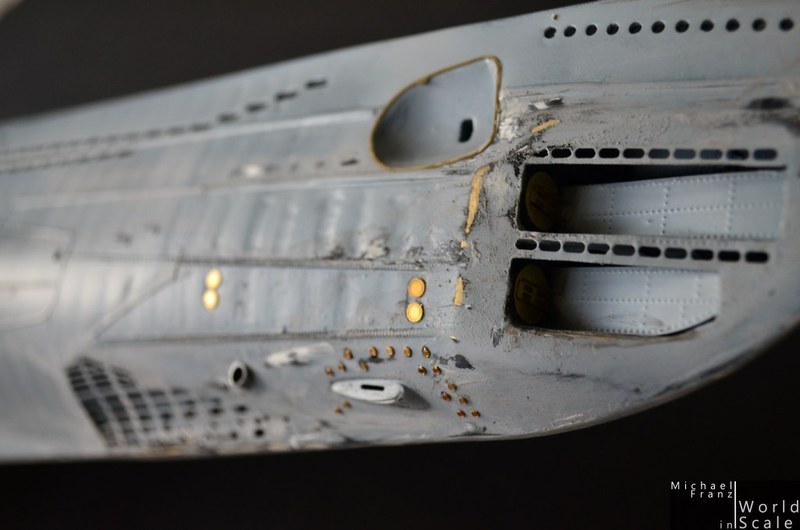
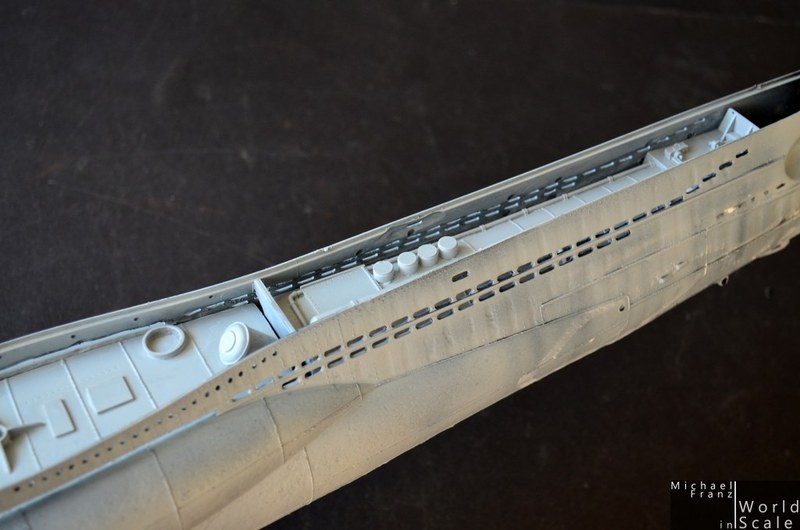
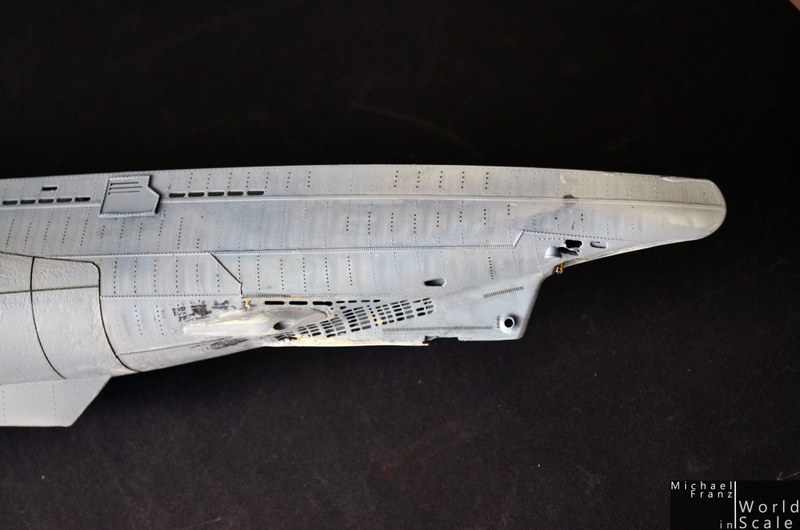
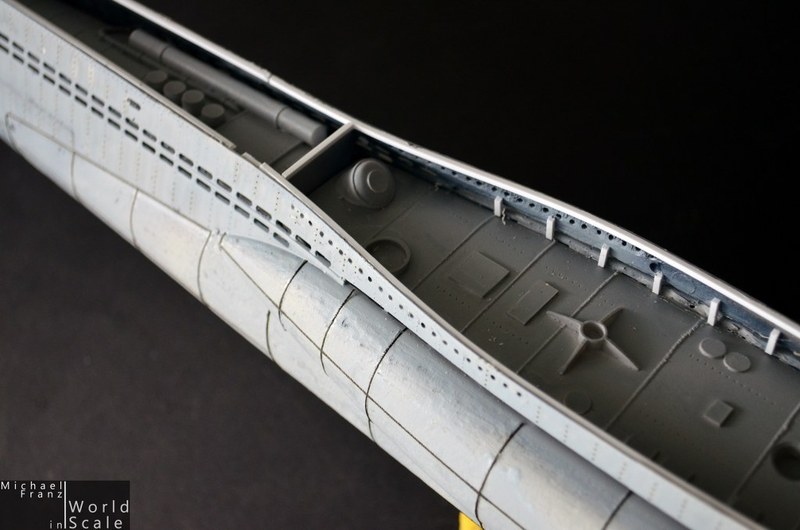
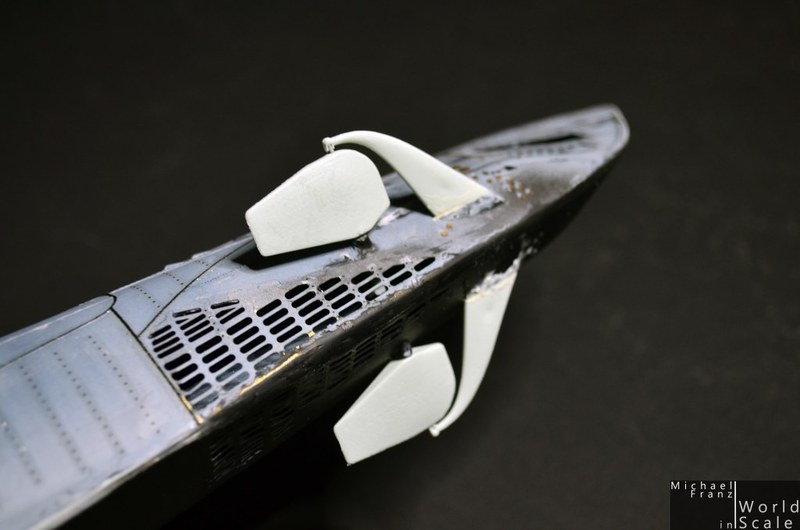
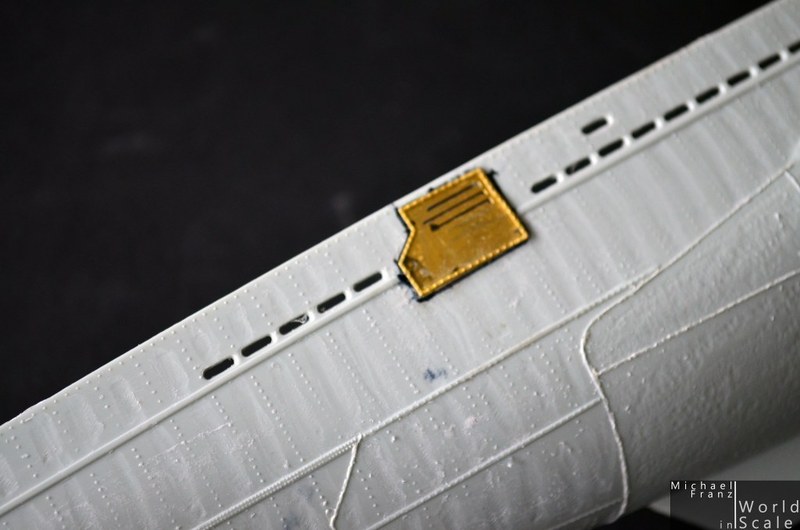
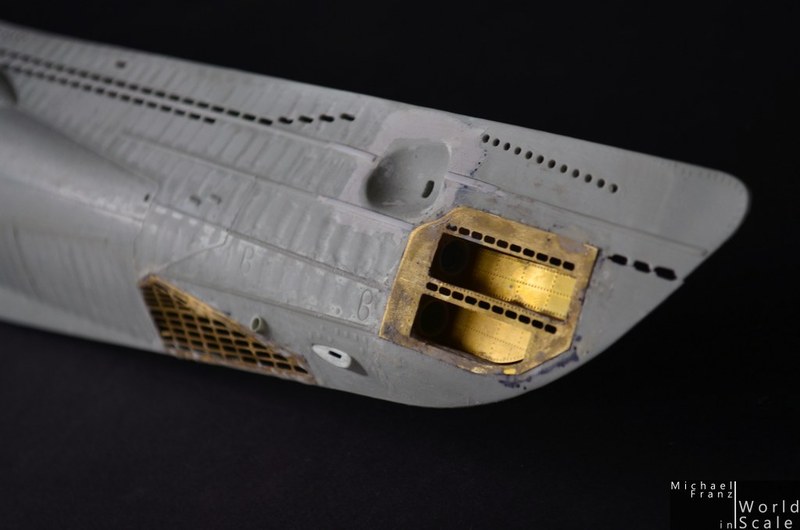
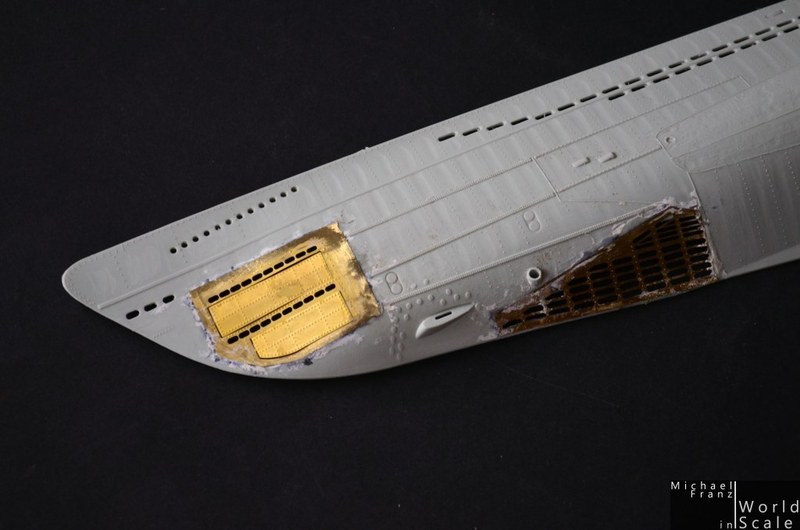
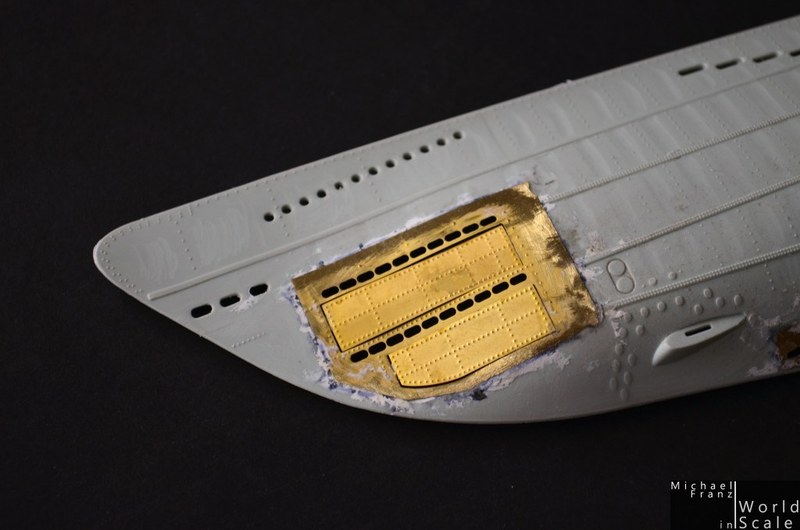
The boat received open torpedo doors on one side, closed ones on the other side. These are made of PE-parts, bend and glued in position. The open ones will receive further details later (PE-Parts). The closed ones were mounted with plastic stripes from the inside.
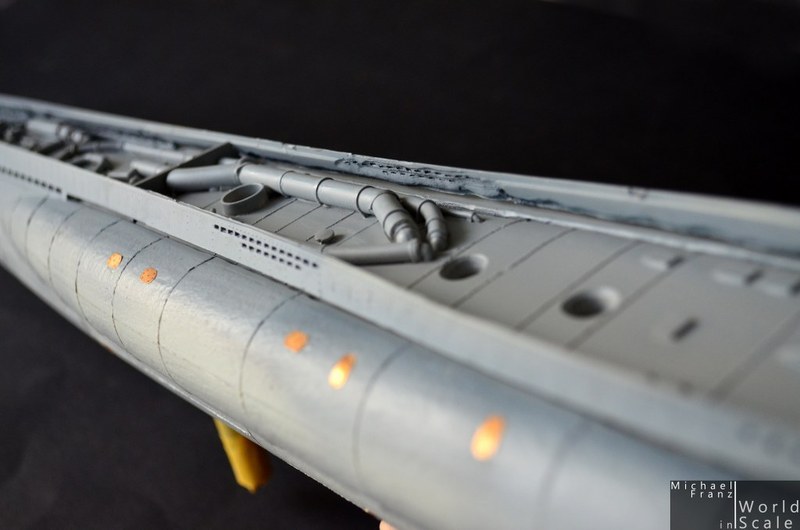
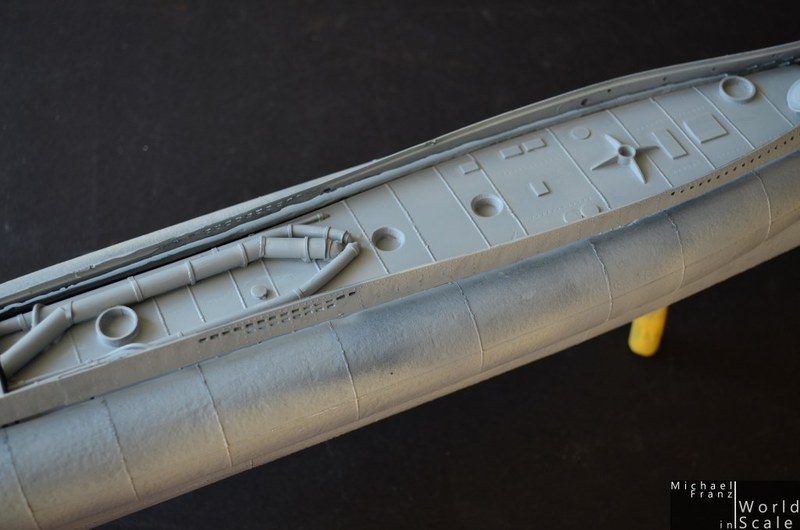
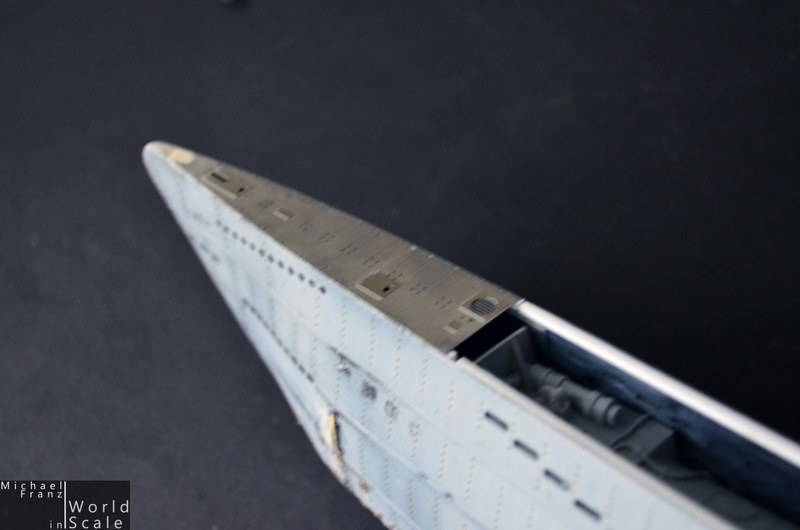
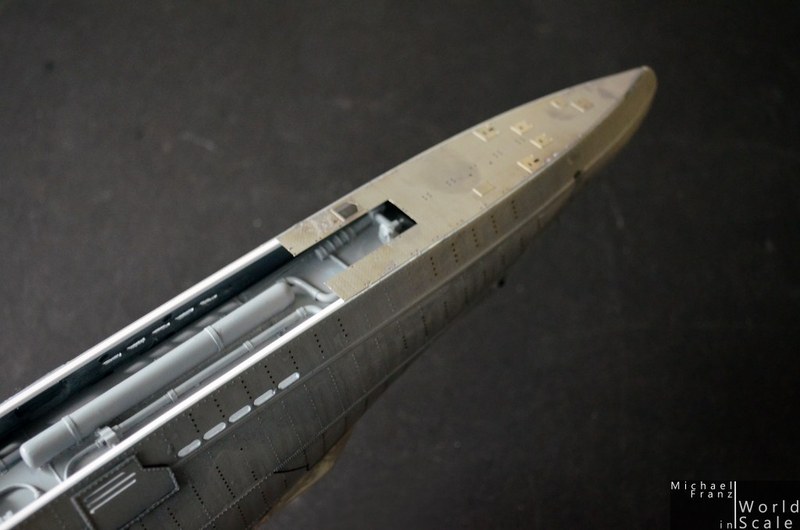
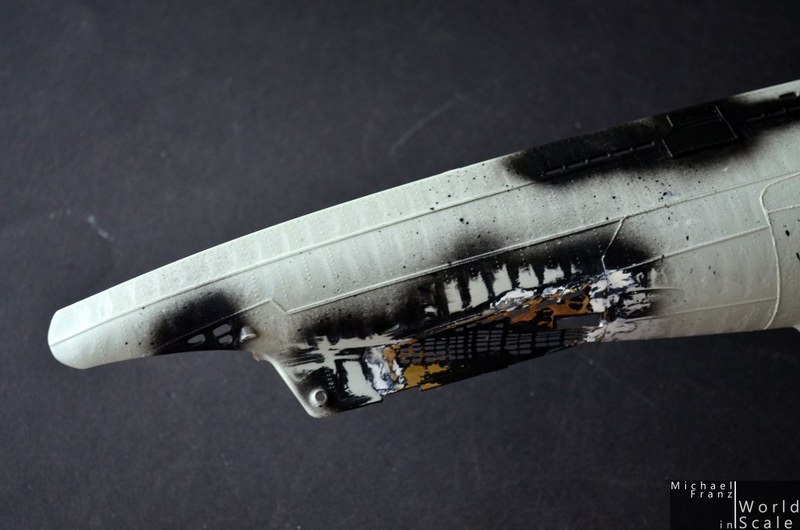
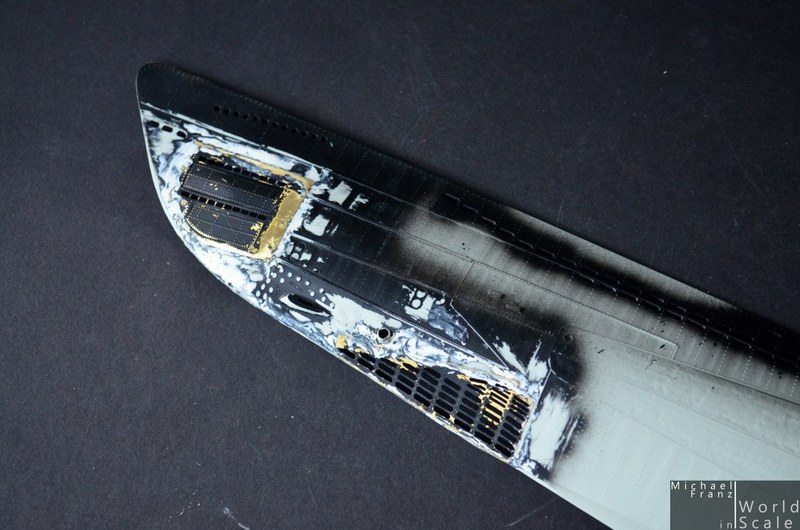
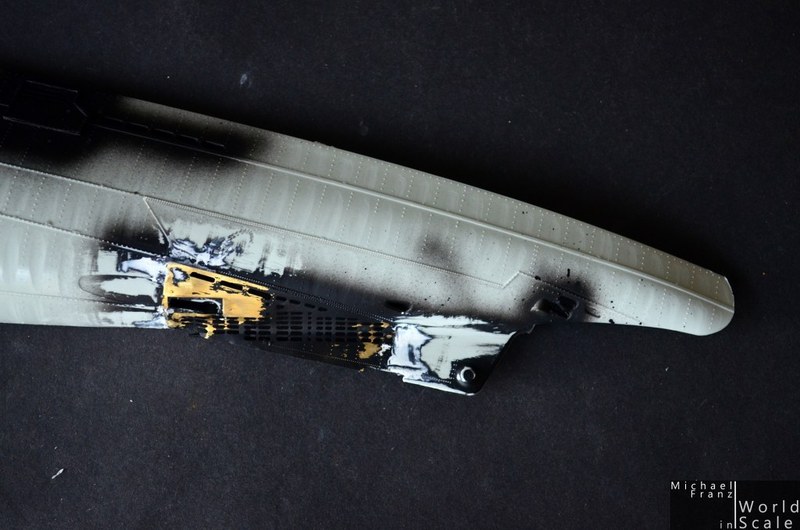
The exhaust is made of PE-parts with new openings on both sides...


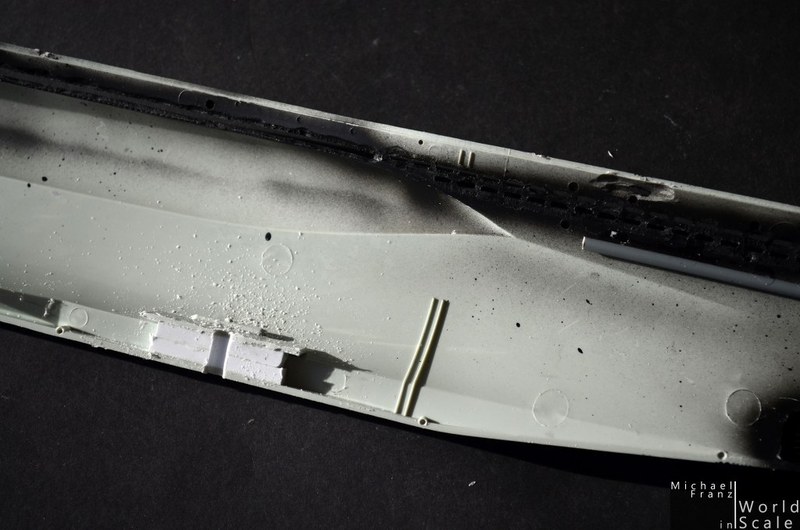
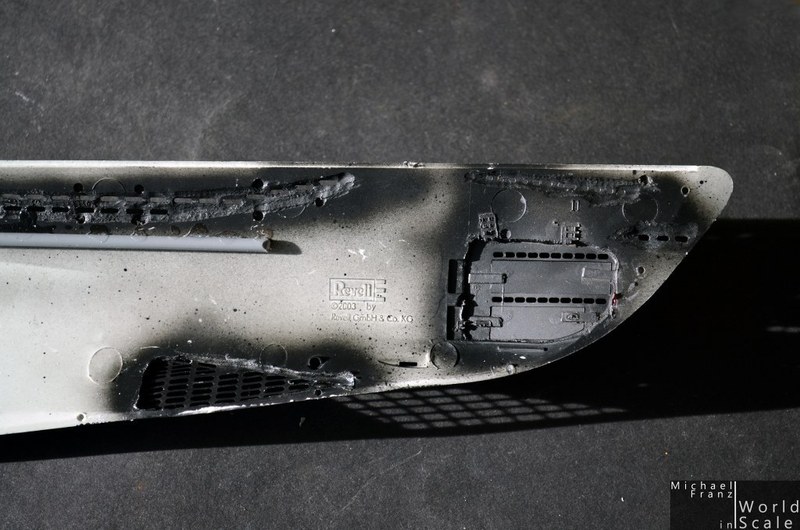
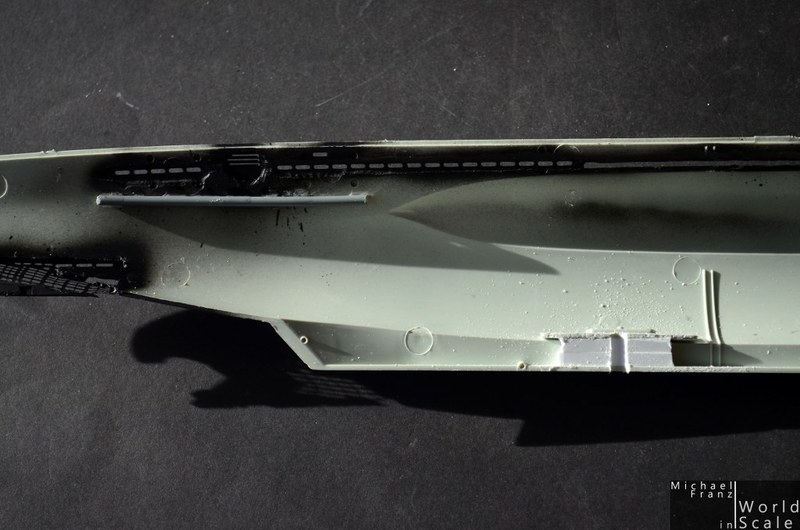
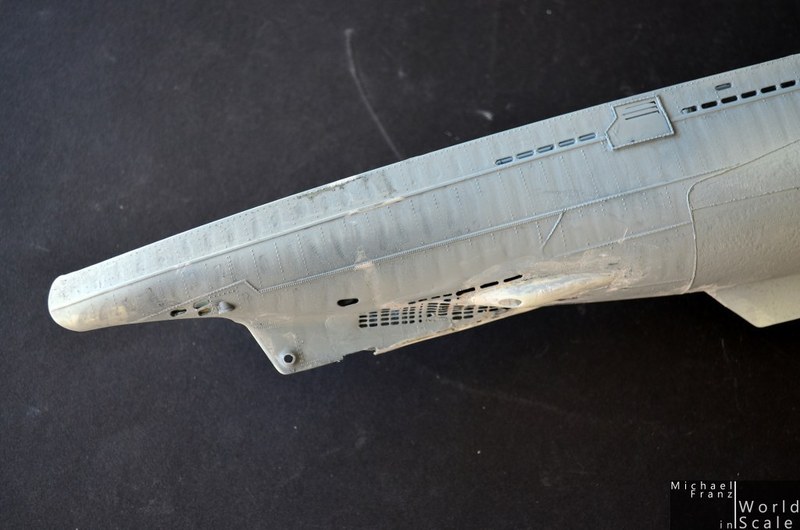
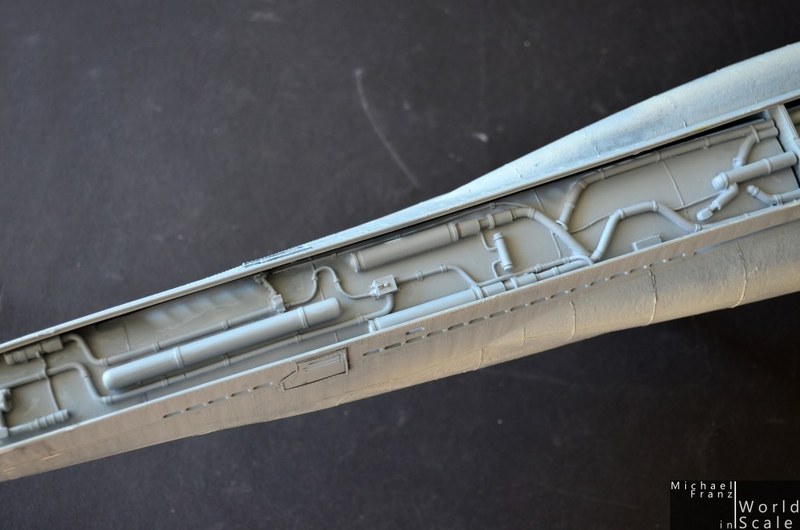
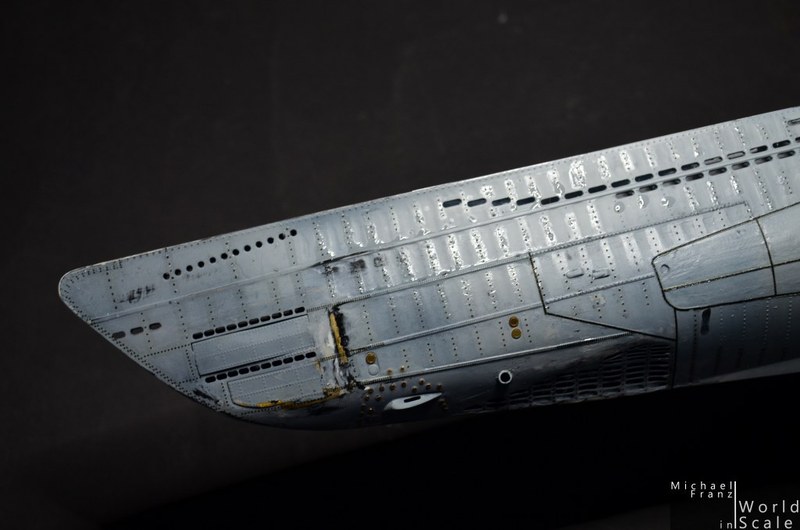
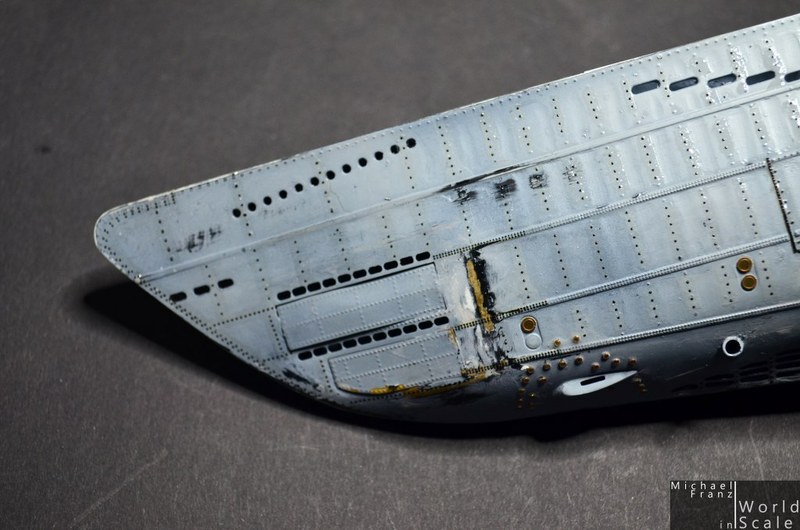
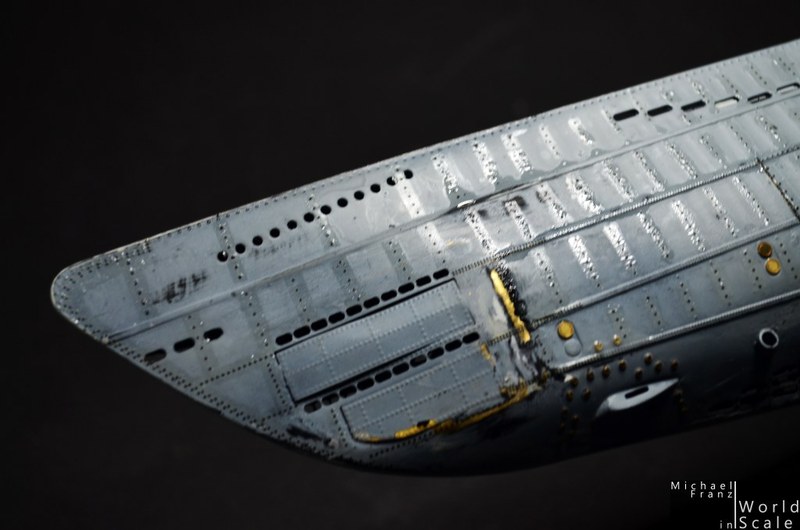
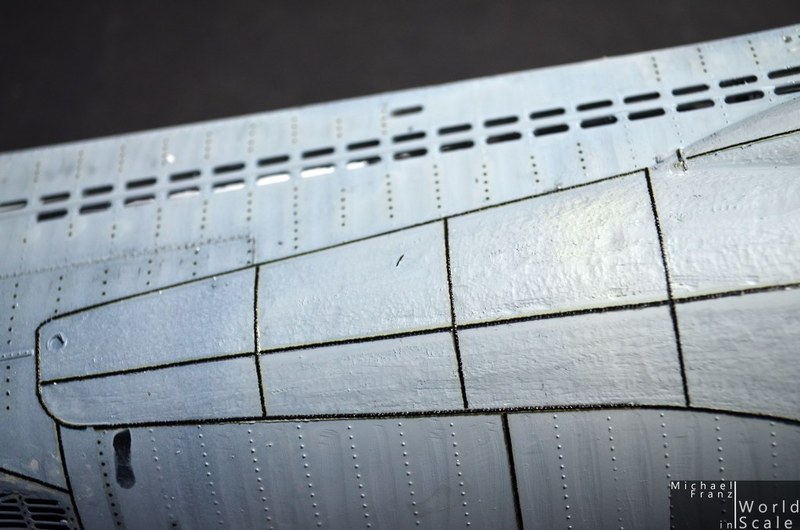
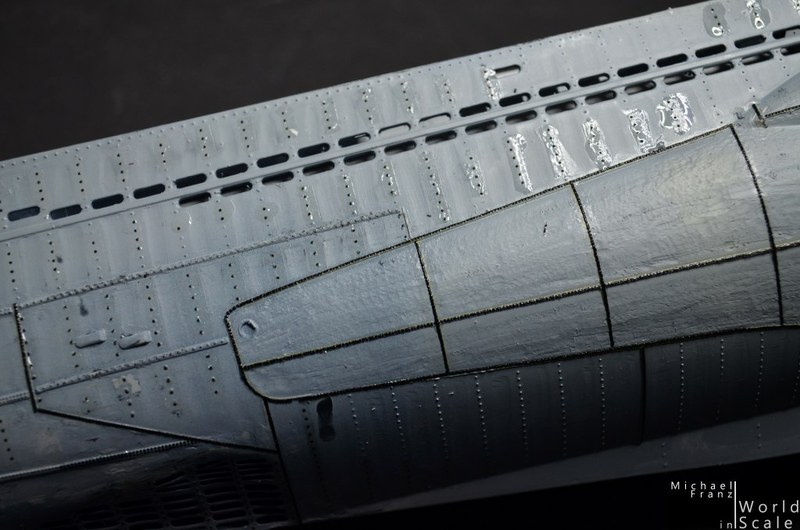
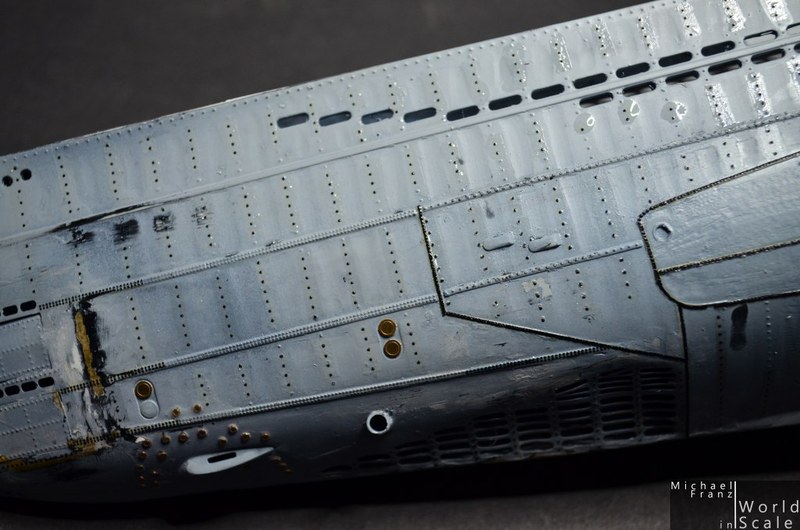
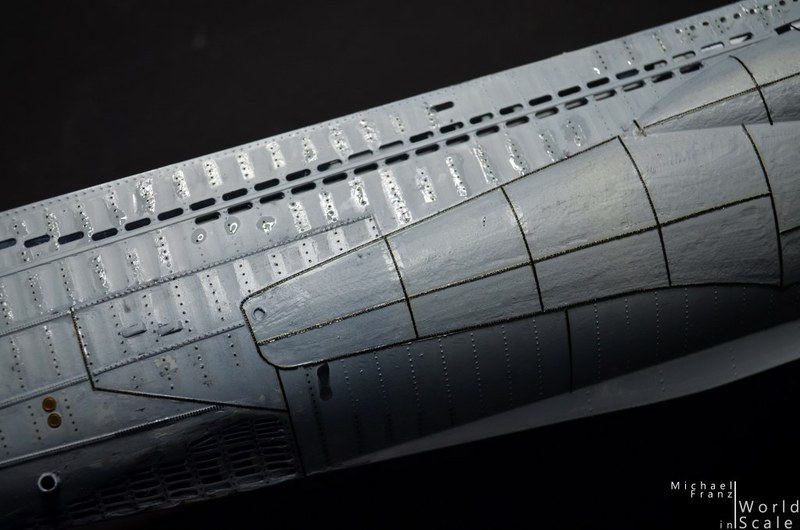
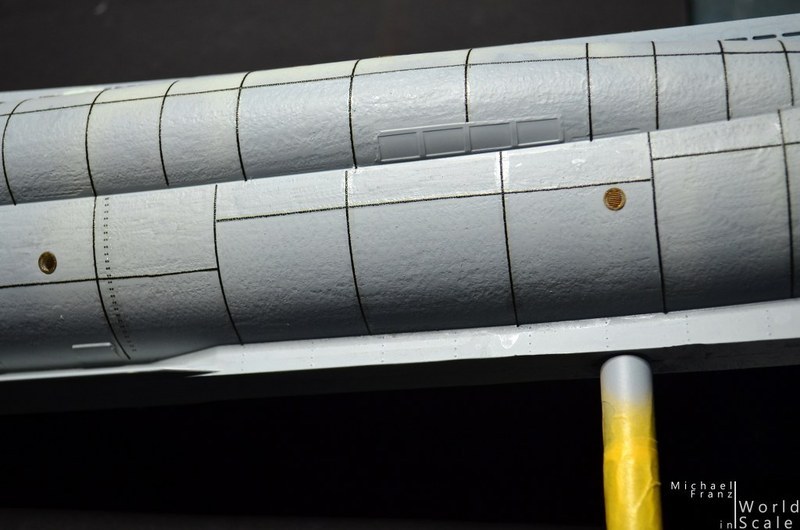
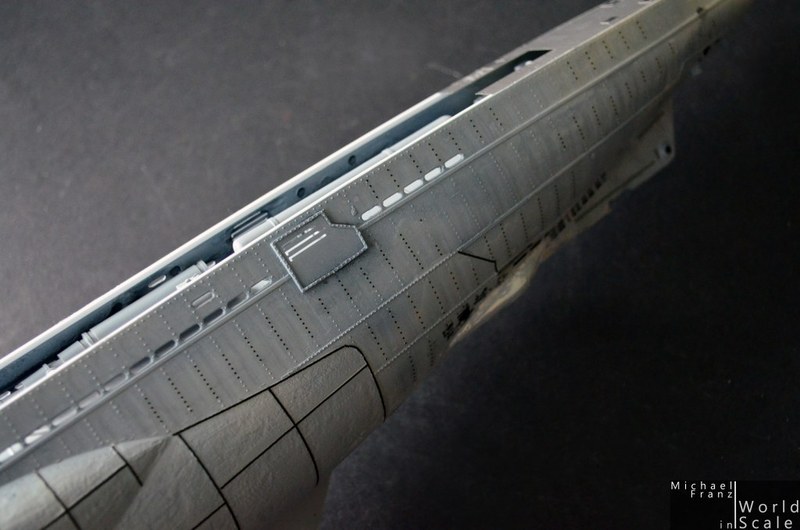
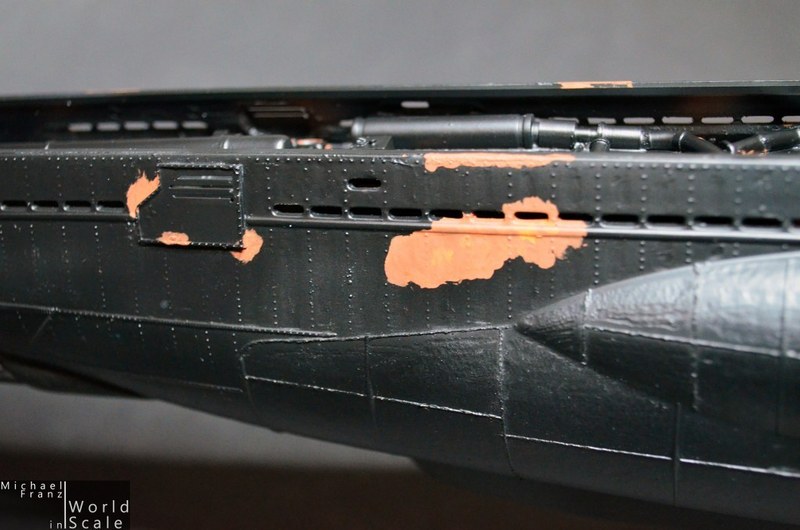
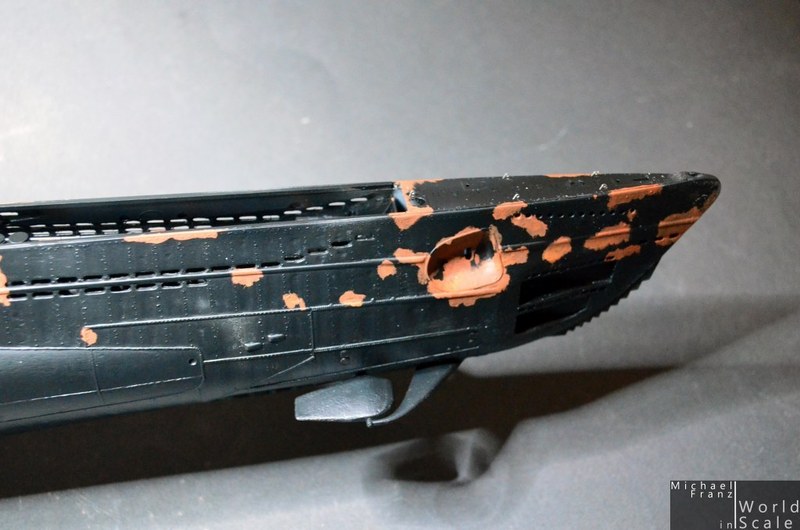
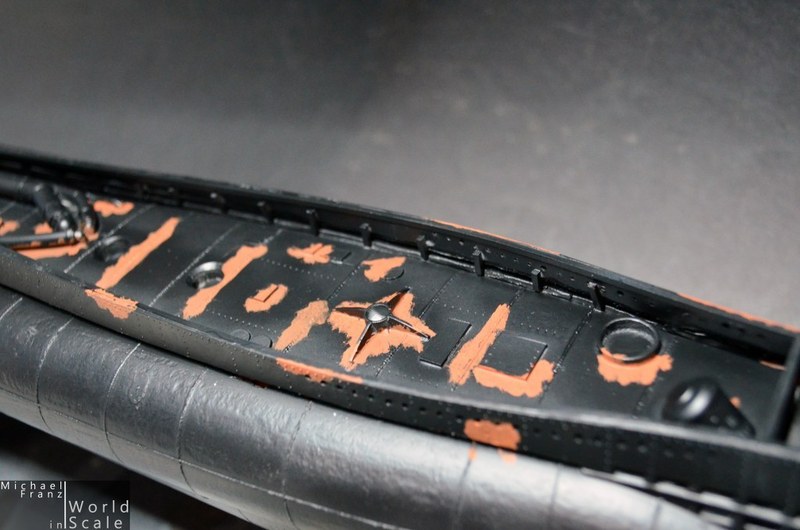
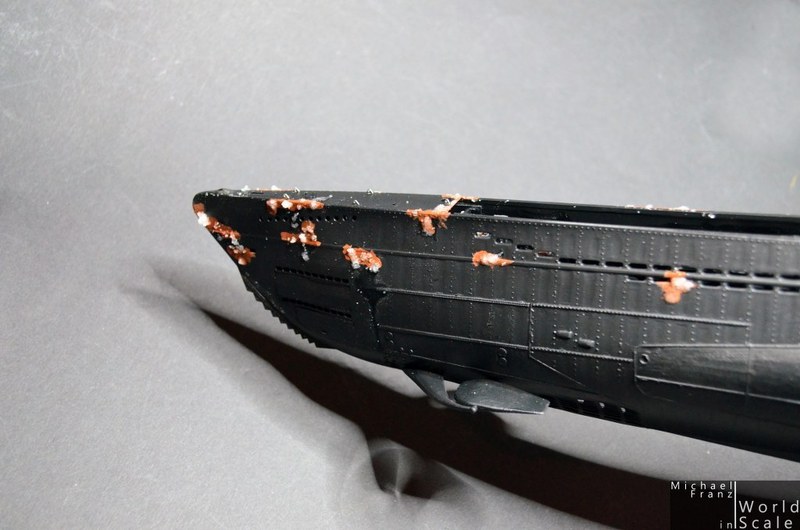
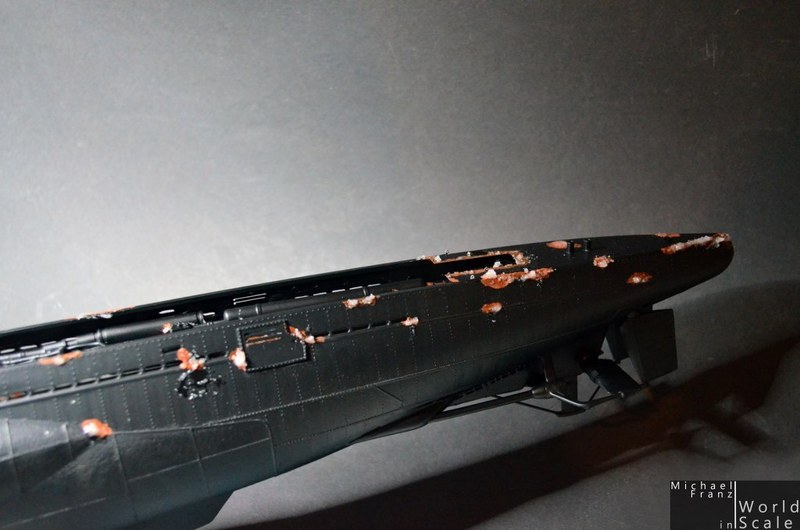
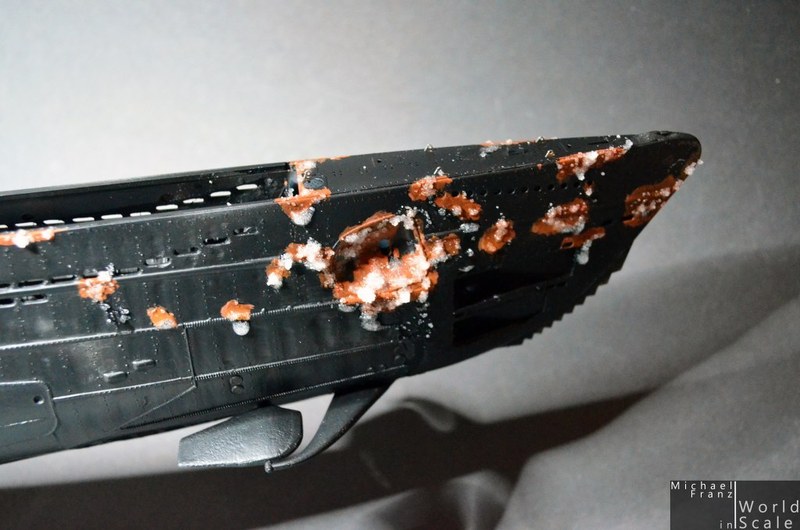
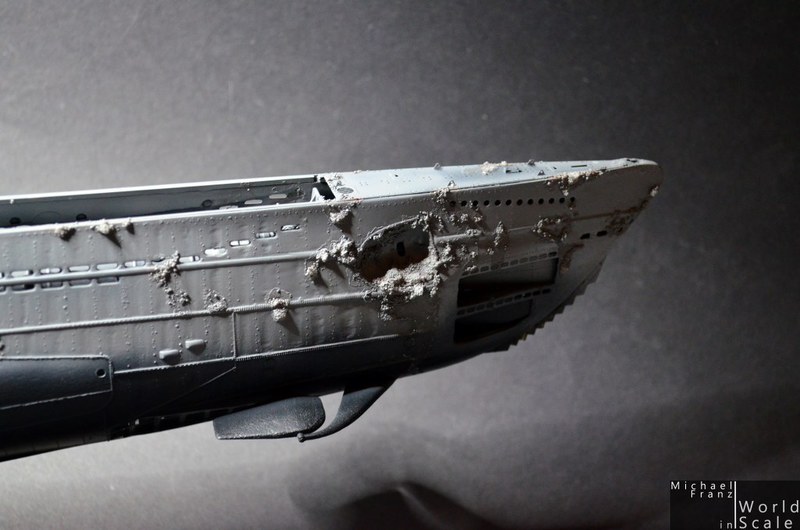
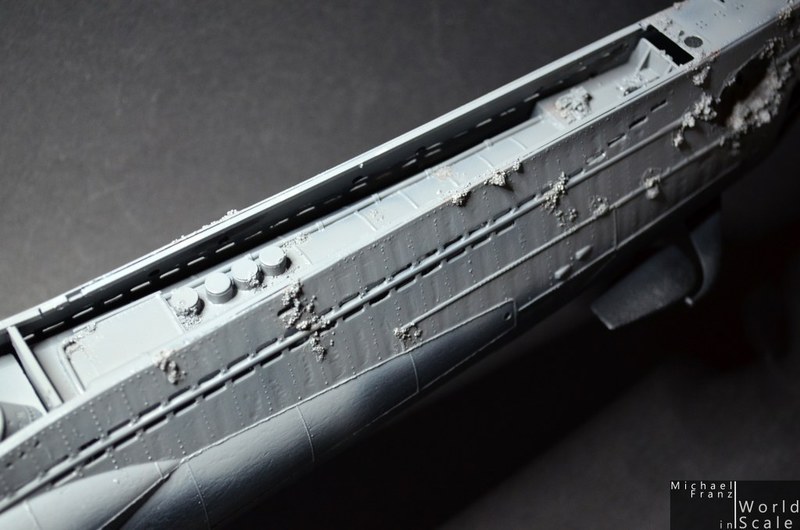
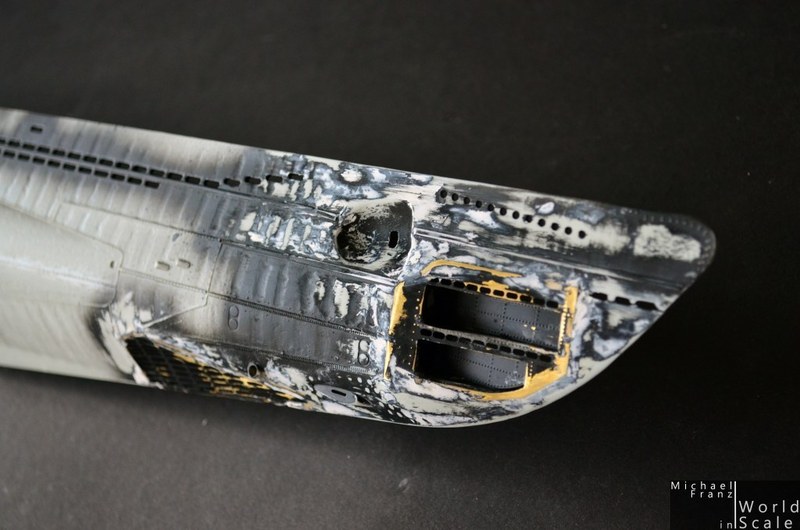
Before we continue with the detailing on the hull I sprayed a first layer of primer on the modifed parts of the hull to see where it needs more putty and more sanding.... Unfortunately (as expected), some further rounds of putty and sanding have to follow before it is a smooth surface....


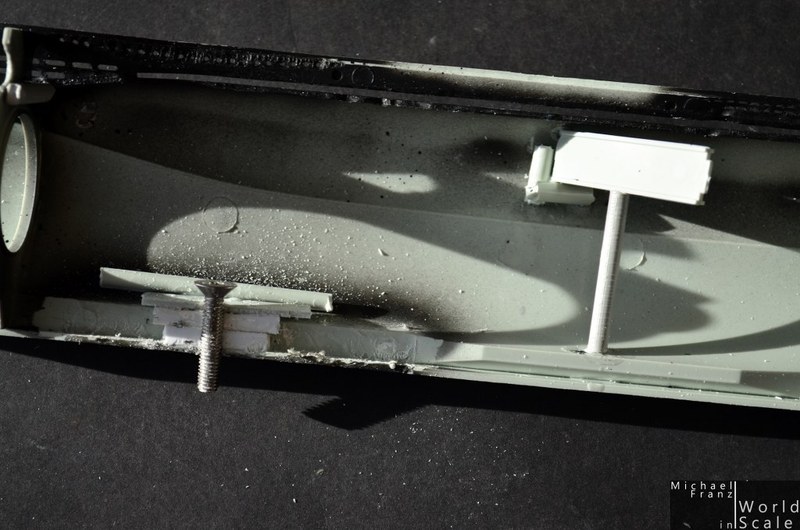
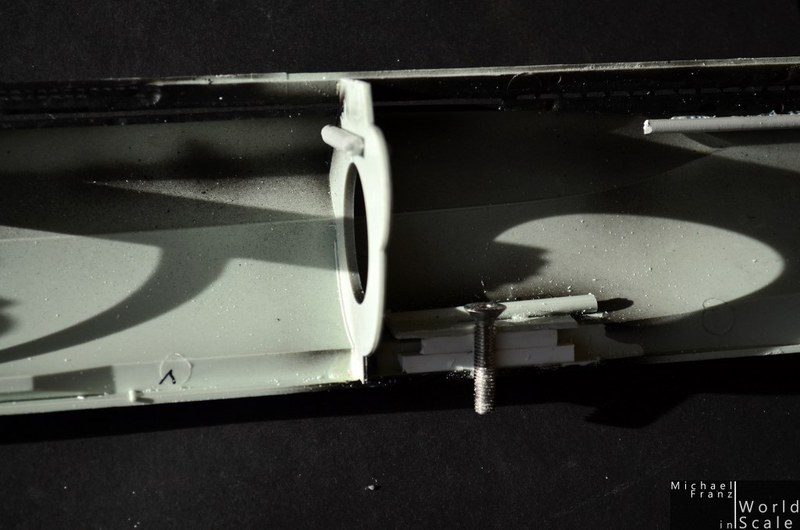
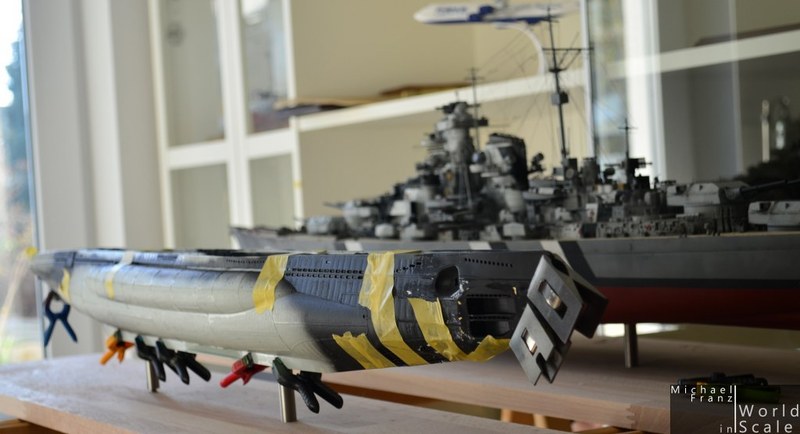
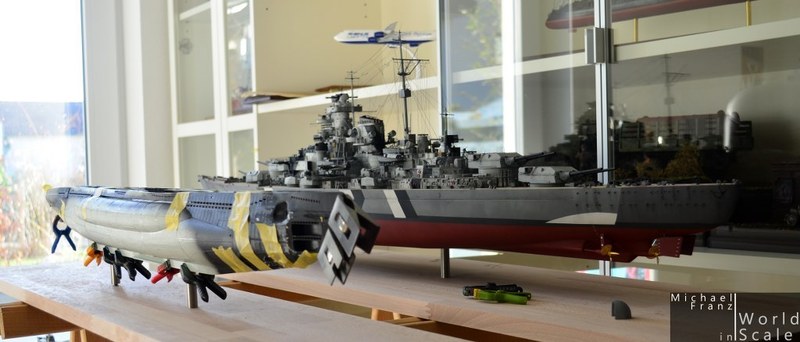
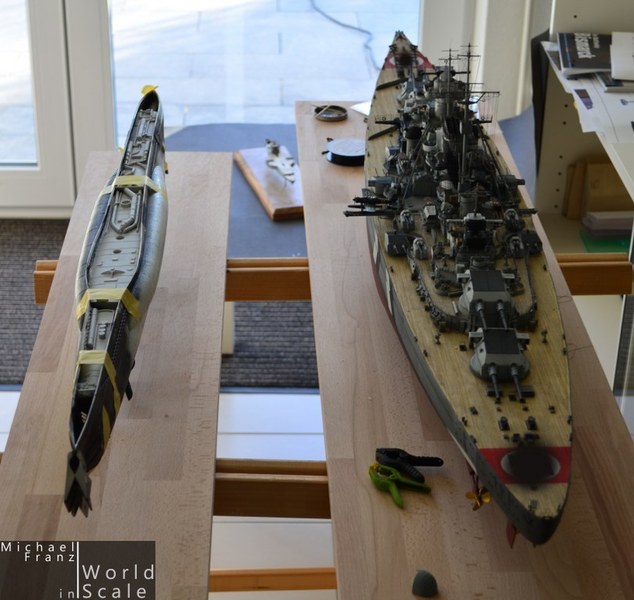
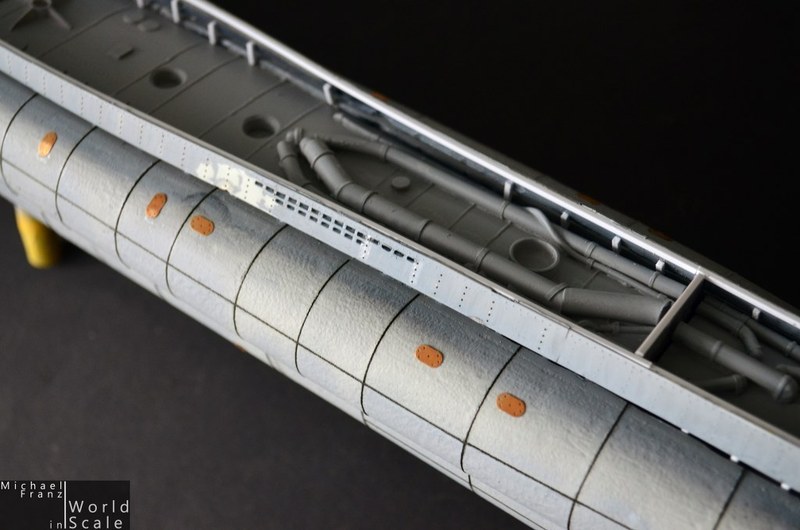
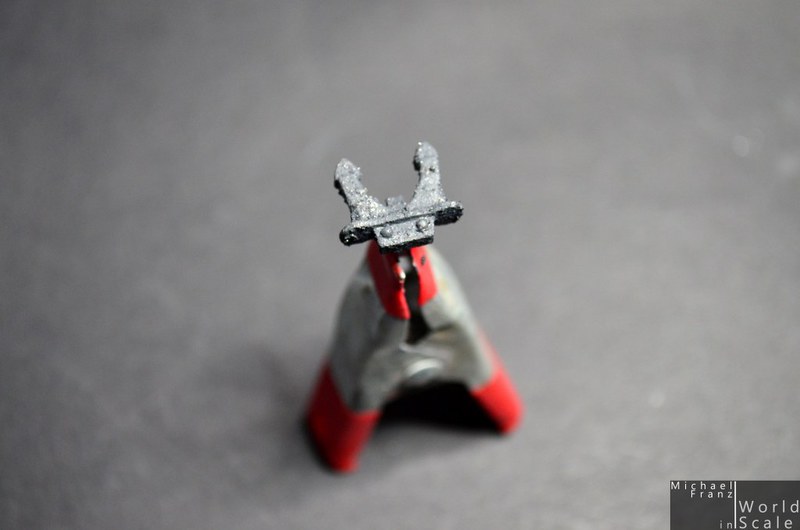
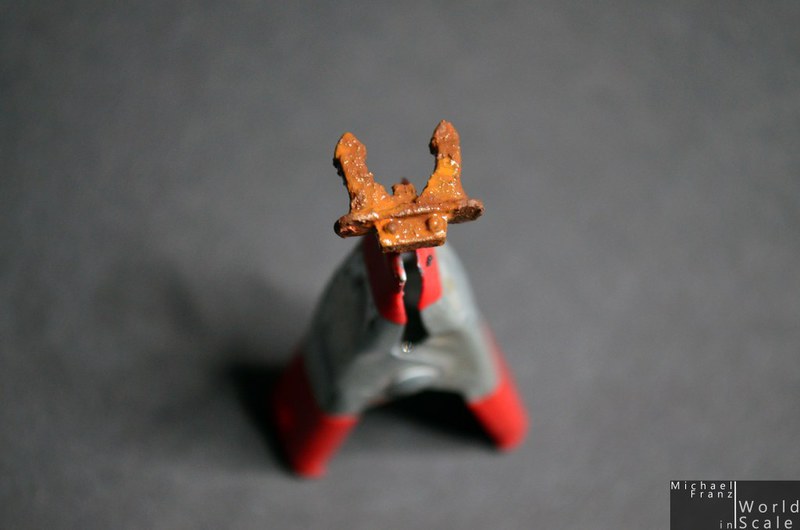
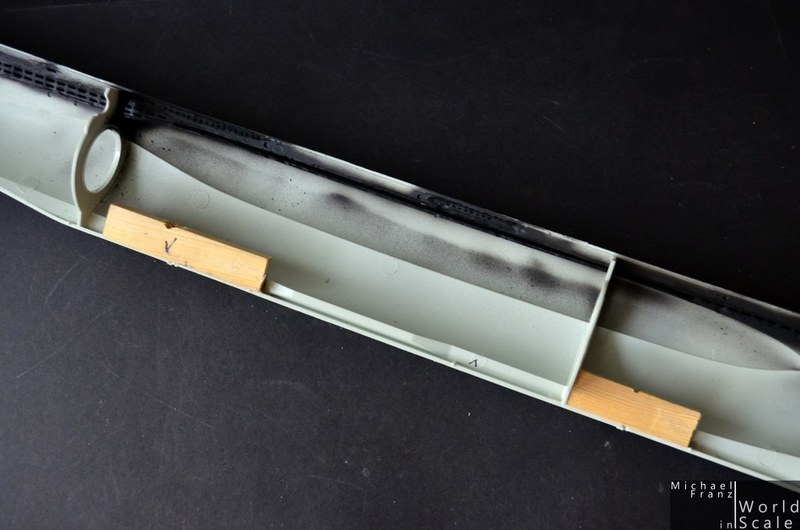
On the inside I glued two wooden parts on the bottom, in which I drilled the holes for the screws, which will hold the boat on the metal display...


But for now.... now I want to wish you and your familiys a MERRY, MERRY CHRISTMAS. Enjoy the holiday season with your loved family! Also thank you very much for your interest in watching this project!

Cheers
Michael
Fordboy
Visit this Community
Auckland, New Zealand
Joined: July 13, 2004
KitMaker: 2,169 posts
Model Shipwrights: 1,597 posts
Posted: Tuesday, December 22, 2015 - 11:26 PM UTC
Ahoy Michael

Great work/progress again.

Thanks and a very Merry Christmas to you & your family.

Cheers


Sean
RedDuster
Visit this Community
England - South East, United Kingdom
Joined: March 01, 2010
KitMaker: 7,078 posts
Model Shipwrights: 6,649 posts
Posted: Wednesday, December 23, 2015 - 04:10 AM UTC
What Sean said,

Cracking stuff Michael,

All the best to you and yours for the Christmas season

Si
RussellE
#306
Visit this Community
Victoria, Australia
Joined: June 27, 2010
KitMaker: 3,959 posts
Model Shipwrights: 2,777 posts
Posted: Friday, December 25, 2015 - 10:27 AM UTC
great progress Micheal

Merry Christmas everyone!
elmarriachi
Visit this Community
Baden-Württemberg, Germany
Joined: December 26, 2009
KitMaker: 813 posts
Model Shipwrights: 304 posts
Posted: Monday, December 28, 2015 - 10:54 PM UTC
*** UPDATE ***

Now it is time for a big update... thanks to some day of holiday... and thanks to my wife ... she has to work (oops, I know that she won't read that)

First of all the hull was once again sanded, fillered, sanded and primered again.... then the holders for the screws were installed. These screws hold the metal feet later, which will hold the boat on the wooden base. Also the holders were installed, which will hold the upper pressure hull in place later.
Once everything was dry, then the three resin parts of the pressure hull were glued in their final positions with super glue ...


Now the big moment.... putting together both halfs of the hull... fixing with tape and clamps.... and gluing together with thin plastic glue.
Some filling and sanding on the seam later the structure of the hull was added on the glued seam too.


Next step, a light primer on everything. This makes the adding of the resin rivets easier as these where black too....

Then, after some final sanding the first etched parts were added to the hull. Some round mesh parts in the middle of the boat, several covers on the top of the pressure hull.
Also the "Gruppenhorchgerät" on both sides of the bow is made new with photo etched parts... some more parts follow.

SRS provides the hatches of the torpedo tubes, etched parts, several parts for each hatch. Also the torpedo tube on the stern is made new with these etched parts. Revell is providing ... nothing there... no details, nothing.


Some pictures of the pressure hull, primered in light grey too. At the big long opening of the hull I will add some struts later (lot of struts...)...


And finally... my two biggest works side by side ...


Now further etched parts follow ... then the mentioned struts on the inside .... then the resin rivets and weld seams ....

Cheers
Micha
Fordboy
Visit this Community
Auckland, New Zealand
Joined: July 13, 2004
KitMaker: 2,169 posts
Model Shipwrights: 1,597 posts
Posted: Monday, December 28, 2015 - 11:46 PM UTC
Ahoy Micha

A very nice update indeed.

What is your opinion on the Blue Ridge Pressure Hull update set?

It looks great with what you have done thus far.

Cheers


Sean
elmarriachi
Visit this Community
Baden-Württemberg, Germany
Joined: December 26, 2009
KitMaker: 813 posts
Model Shipwrights: 304 posts
Posted: Thursday, December 31, 2015 - 10:22 PM UTC
*** UPDATE ***

I hope you all had a good start in the new year! Wish you all a great year 2016, health, luck, success, fun, .... whatever you wish for!


So... I started with the resin-rivets and weld seams... both are coming from Archer Fine Transfers. The weld seams from the kit are all replaced, some further ones (which were missing in the kit) added.

I have added the rivets wherever I lost these during the putty and sanding processes before. I could not replace all rivets as the Archer set does not include enough unfortunately, but it makes no difference leaving the ones of the kit. Both look nearly identically. So I have added the ones I lost during sanding process, and added the ones which were not included on the kit....

It is very (!!!) "funny" job..... just started with the first side. The welding seams on the first side are done, the other side not even started. Rivets... just the bow on the first side.... stern and full other side... waiting for me ....

Behind the round mesh at the center of the hull I have drilled open which also looks more realistic now


Cheers
Micha
TRM5150
Visit this Community
Massachusetts, United States
Joined: January 03, 2010
KitMaker: 2,159 posts
Model Shipwrights: 1,400 posts
Posted: Friday, January 01, 2016 - 06:00 AM UTC
Anther fantastic update Michael! Nice job on the rivets! Things are shaping up nicely! Happy New Year!
Fordboy
Visit this Community
Auckland, New Zealand
Joined: July 13, 2004
KitMaker: 2,169 posts
Model Shipwrights: 1,597 posts
Posted: Wednesday, January 06, 2016 - 01:47 AM UTC
Ahoy Micha

Great update I love this detail work especially the welds.

Inspirational indeed.

Cheers


Sean
RedDuster
Visit this Community
England - South East, United Kingdom
Joined: March 01, 2010
KitMaker: 7,078 posts
Model Shipwrights: 6,649 posts
Posted: Wednesday, January 06, 2016 - 03:45 AM UTC
Great work Michael,

The top of the pressure looks great in place, and the weld and rivet transfers should add some real depth under the paint job.

Cheers

Si
Aurora-7
#360
Visit this Community
Connecticut, United States
Joined: June 18, 2003
KitMaker: 1,020 posts
Model Shipwrights: 630 posts
Posted: Wednesday, January 06, 2016 - 03:46 AM UTC
Great work, Michael.

I have the Academy 1/150 Type IXB model which has toy features and lacks hull detail. I'm taking note of your work which will be a great help for me on the Academy kit.
elmarriachi
Visit this Community
Baden-Württemberg, Germany
Joined: December 26, 2009
KitMaker: 813 posts
Model Shipwrights: 304 posts
Posted: Wednesday, January 06, 2016 - 01:38 PM UTC
Thanks a lot! The rivets and welding seams decals are great... but the work is ... no fun Not really fun....
elmarriachi
Visit this Community
Baden-Württemberg, Germany
Joined: December 26, 2009
KitMaker: 813 posts
Model Shipwrights: 304 posts
Posted: Wednesday, January 06, 2016 - 01:38 PM UTC
*** UPDATE ***

The rivets and welding seams of the 2nd half of the hull follow now ....

On the finished half the hull got a first layer of black primer already to save the rivet/welding seams during the works on the other side.


On the top of the hull I glued a plastic stripe around the hull as a base for the wooden decks. Also the etched metal deck parts on the bow and stern are glued in place. Fitting perfect.
Some details on the metall decks follow later.


Next step, the diving rudder and steering rudders were installed.
The parts also received some treatment with the mill to get a realistic surface.
Some more etched parts follow, some putty and sanding too. Also some welding seams and further details follow.


Next steps... further works on the rudders, then etched parts on the metal decks, then primer on everything...


Cheers
Micha
Fordboy
Visit this Community
Auckland, New Zealand
Joined: July 13, 2004
KitMaker: 2,169 posts
Model Shipwrights: 1,597 posts
Posted: Wednesday, January 06, 2016 - 11:38 PM UTC
Ahoy Micha

Holy smoke this is looking real nice indeed.

Well done.

The work is great but most probably tedious and I have been struggling for an extended period with a bit of rigging.

Mmmmmm you are shaming me in a good way though.

Cheers


Sean
RedDuster
Visit this Community
England - South East, United Kingdom
Joined: March 01, 2010
KitMaker: 7,078 posts
Model Shipwrights: 6,649 posts
Posted: Thursday, January 07, 2016 - 12:55 AM UTC
Excellent progress Michael,

coming together very nicely.

Si
TRM5150
Visit this Community
Massachusetts, United States
Joined: January 03, 2010
KitMaker: 2,159 posts
Model Shipwrights: 1,400 posts
Posted: Thursday, January 07, 2016 - 05:57 AM UTC
The beautiful work continues!! Well done so far Michael! Nice to see the rudders getting attached!! Closing in on a coloring session soon!
warshipbuild
Visit this Community
United Kingdom
Joined: June 06, 2006
KitMaker: 222 posts
Model Shipwrights: 207 posts
Posted: Friday, January 08, 2016 - 01:41 AM UTC
Has anyone used these? They look the mutt's nuts.

Just wondered how they scaled out in comparison with both the OEM kit parts and the real thing.

http://www.shapeways.com/product/WZ5CJHLY8/wintergarten-1-72-brass-version?li=search-results-1&optionId=56258207
elmarriachi
Visit this Community
Baden-Württemberg, Germany
Joined: December 26, 2009
KitMaker: 813 posts
Model Shipwrights: 304 posts
Posted: Saturday, January 09, 2016 - 12:13 AM UTC
*** UPDATE ***

The rudders follow next. Some parts were replaced with brass rod, the surface of all plastic parts reworked with the mill ....


The painting starts then with a layer of black primer as basecoat for the next works... and as a base for later shadows on the final painting.
Next I have brush painted some rust on the places were I want more rust later. I used the rust colors from Lifecolor. Later it becomes more darker a big with pigments and oil colors.... but that's later ....


Once the rust color is dry I have mixed salt with water and put it on the rust. The salt method is (in my eyes) much better then the hairspray.... maybe because I have more experience with salt then with hairspray, don't know. But once removing the salt some damages in the paint remain which look really realistic in my eyes... but let's see what happens ...


Once the salt is dry, the first layer of the over-water-area-color is following... then once more salt ... then more colors ...

Cheers
Micha
JJ1973
#345
Visit this Community
Niedersachsen, Germany
Joined: August 22, 2011
KitMaker: 1,835 posts
Model Shipwrights: 1,832 posts
Posted: Sunday, January 10, 2016 - 10:23 AM UTC
Once more, absolutely excellent and stunning work!!

Looking forward to see how your salt method works...

Cheers,
Jan
RussellE
#306
Visit this Community
Victoria, Australia
Joined: June 27, 2010
KitMaker: 3,959 posts
Model Shipwrights: 2,777 posts
Posted: Sunday, January 10, 2016 - 03:43 PM UTC
Wow Micha! The welds have come up really well under the paint!
TRM5150
Visit this Community
Massachusetts, United States
Joined: January 03, 2010
KitMaker: 2,159 posts
Model Shipwrights: 1,400 posts
Posted: Sunday, January 10, 2016 - 04:39 PM UTC
All about the layers!! Nice to see the painting underway Michael! Keep it going!
rolltide31
#377
Visit this Community
Texas, United States
Joined: June 27, 2010
KitMaker: 1,481 posts
Model Shipwrights: 1,332 posts
Posted: Tuesday, January 12, 2016 - 10:28 PM UTC
Michael,

Amazing work and attention to detail. I am learning quite a bit watching your build. Look forward to seeing the salt process results.

thanks for sharing this incredible build.

Dave
elmarriachi
Visit this Community
Baden-Württemberg, Germany
Joined: December 26, 2009
KitMaker: 813 posts
Model Shipwrights: 304 posts
Posted: Wednesday, January 13, 2016 - 03:17 AM UTC
*** UPDATE ***

I do not like the plastic propellers and prefer the brass ones from G-factor for example. Pontos has added two brass parts to their upgrade kit which are fantastic. But I did not want to have brass optic, as most of the VII/C had iron propellers as I know (due to the lack of materials). So I have sanded the propellers a bit and painted it with Revell Aqua Iron 91 in two layers, then polished it. Once dry, I have used an old sponge and dab painted several colors to the propellers. Mostly white, a bit of light grey, dark grey, very dark grey (nearly black) and a bit of green ....


The plastic anchor first got a paint with dark grey, mixed with graphit-powder to give it a "rusty-surface".... a bit sanding on it once dry and a paint with rust colors from Lifecolor...... later, salt follows and the grey color of the hull...


The hull itself received a grey color .... ("dark sea grey") by Tamiya, XF-54. Sprayed with the airbrush, not fully covering the black which give it some shadows. Once the grey is dry, I have removed some salt with a brush.... then used another brush and added water on the hull, then sprinkled some more salt on the whole hull. Once this salt is dry, the I will spray the base coat XF54 mixed with white and mixed with black in a cloudy way over everyting to give it some variations in the colors. Then I will remove the salt and go on with the underwater area ....


Cheers
Micha
Fordboy
Visit this Community
Auckland, New Zealand
Joined: July 13, 2004
KitMaker: 2,169 posts
Model Shipwrights: 1,597 posts
Posted: Wednesday, January 13, 2016 - 04:59 AM UTC
Superb update Micha.

I am enjoying your use of the salt method of weathering.

Cheers


Sean
rolltide31
#377
Visit this Community
Texas, United States
Joined: June 27, 2010
KitMaker: 1,481 posts
Model Shipwrights: 1,332 posts
Posted: Wednesday, January 13, 2016 - 07:36 AM UTC
Micha,

It is a great pleasure to watch your builds and this is another example of a fantastic build.

Looking forward to seeing more progression soon.

Dave