U-Boat Type VII/C - 1/72 by Revell, Pontos...
Baden-Württemberg, Germany
Joined: December 26, 2009
KitMaker: 813 posts
Model Shipwrights: 304 posts
Posted: Wednesday, January 13, 2016 - 02:59 PM UTC
regards,
Michael
http://www.world-in-scale.de
England - South East, United Kingdom
Joined: March 01, 2010
KitMaker: 7,078 posts
Model Shipwrights: 6,649 posts
Posted: Thursday, January 14, 2016 - 01:41 AM UTC
Good luck Micha,
Great job so far, looks to me that it will come out fine.
Looking forward to seeing the result
Si

#345
Niedersachsen, Germany
Joined: August 22, 2011
KitMaker: 1,835 posts
Model Shipwrights: 1,832 posts
Posted: Thursday, January 14, 2016 - 09:59 AM UTC
Micha,
definitiv great work, I could not agree more with what everybody said!!

I have read about this salt approach, but I have never seen anybody doing it, or better, anybody showing and explaining the process while it's going on.
I keep my fingers crossed that the effect will show as you desire once you uncover it!!
Cheers,
Jan
Baden-Württemberg, Germany
Joined: December 26, 2009
KitMaker: 813 posts
Model Shipwrights: 304 posts
Posted: Thursday, January 14, 2016 - 01:15 PM UTC
.... I hope it too
It is always a thrilling moment
Yesterday I have painted the final color so tha today I could remove the salt ....

Cheers
Michael
regards,
Michael
http://www.world-in-scale.de
Auckland, New Zealand
Joined: July 13, 2004
KitMaker: 2,169 posts
Model Shipwrights: 1,597 posts
Posted: Sunday, January 17, 2016 - 01:10 AM UTC
Ahoy Mica
I am keen to see the final result of your painting & weathering.
Cheers
Sean
Baden-Württemberg, Germany
Joined: December 26, 2009
KitMaker: 813 posts
Model Shipwrights: 304 posts
Posted: Monday, January 18, 2016 - 03:33 AM UTC
regards,
Michael
http://www.world-in-scale.de
#345
Niedersachsen, Germany
Joined: August 22, 2011
KitMaker: 1,835 posts
Model Shipwrights: 1,832 posts
Posted: Monday, January 18, 2016 - 10:18 AM UTC
Wow, that's impressive!!
Returning home from a VERY long deployment of Feindfahrt...
Great job! Effects are coming out splendid!!
Cheers,
Jan
#306
Victoria, Australia
Joined: June 27, 2010
KitMaker: 3,959 posts
Model Shipwrights: 2,777 posts
Posted: Monday, January 18, 2016 - 04:00 PM UTC
I second that, Jan!
Very impressive!

Stay home and build models!
In 1/72
Gloster Gladiator MkII for the Bi-planes Campaign
In 1/350
Airfix 1:350 Type 45 Destroyer
Auckland, New Zealand
Joined: July 13, 2004
KitMaker: 2,169 posts
Model Shipwrights: 1,597 posts
Posted: Monday, January 18, 2016 - 11:43 PM UTC
Ahoy Micha
I echo the comments from Jan and Russell - great stuff indeed a very realistic effect.
Cheers
Sean
England - South East, United Kingdom
Joined: March 01, 2010
KitMaker: 7,078 posts
Model Shipwrights: 6,649 posts
Posted: Tuesday, January 19, 2016 - 02:33 AM UTC
Hi Micha,
Great job, and what the other guys said too.
Si
Baden-Württemberg, Germany
Joined: December 26, 2009
KitMaker: 813 posts
Model Shipwrights: 304 posts
Posted: Saturday, January 23, 2016 - 10:13 PM UTC
regards,
Michael
http://www.world-in-scale.de
#345
Niedersachsen, Germany
Joined: August 22, 2011
KitMaker: 1,835 posts
Model Shipwrights: 1,832 posts
Posted: Saturday, January 23, 2016 - 11:28 PM UTC
Wow, that poor thing looks really beaten up...give a nail brush, some anti-fouling and a few buckets of paint and I can fix that for you...


Sorry

Fantastic job Micha, the effects you are achieving are truly superb and stunning!! Really great work!!
Cheers,
Jan
Baden-Württemberg, Germany
Joined: December 26, 2009
KitMaker: 813 posts
Model Shipwrights: 304 posts
Posted: Monday, February 01, 2016 - 01:25 PM UTC
*** UPDATE ***
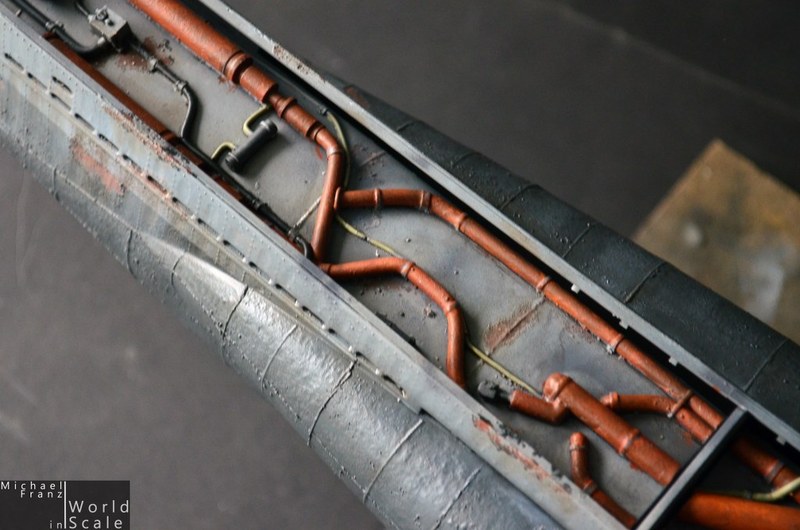
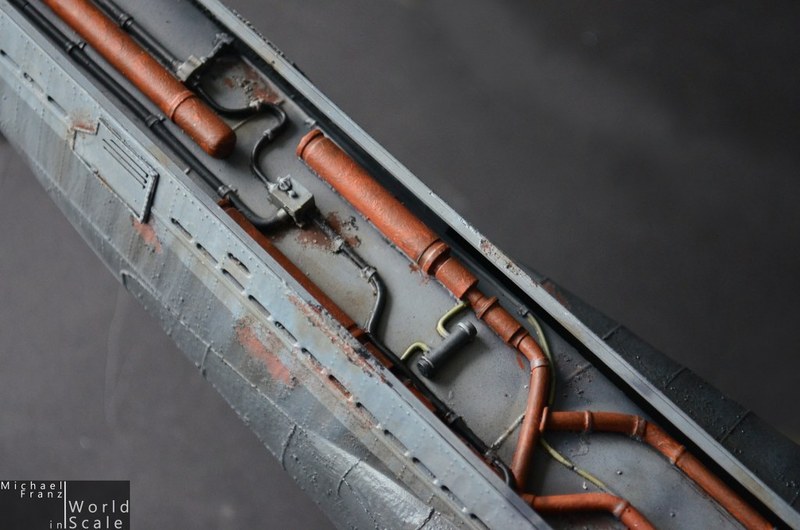
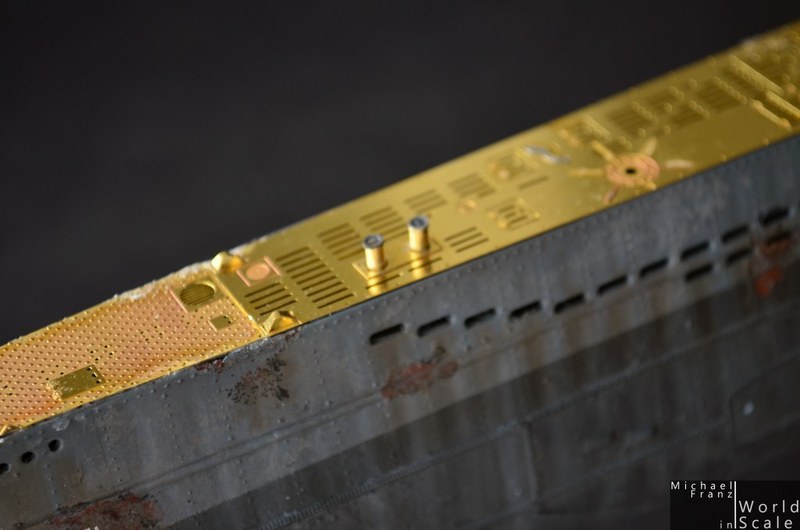
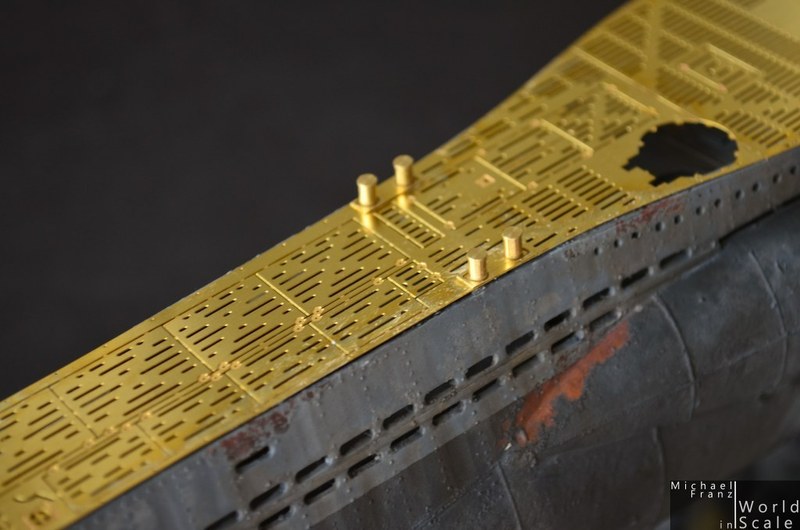
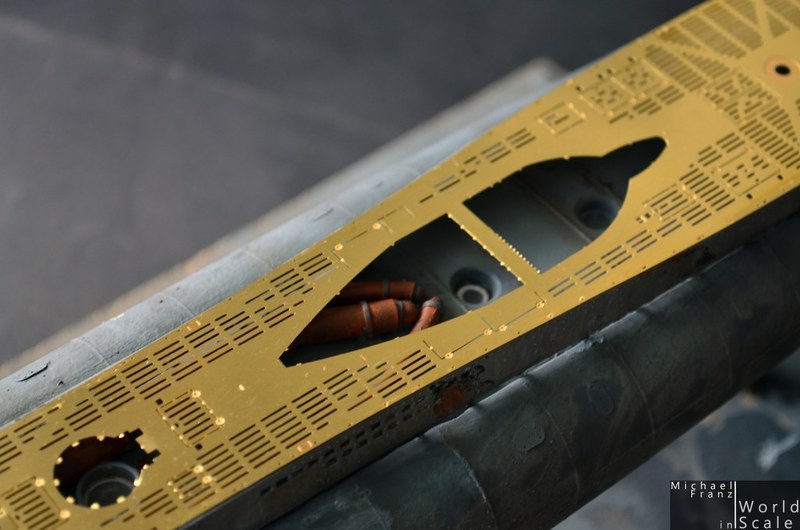
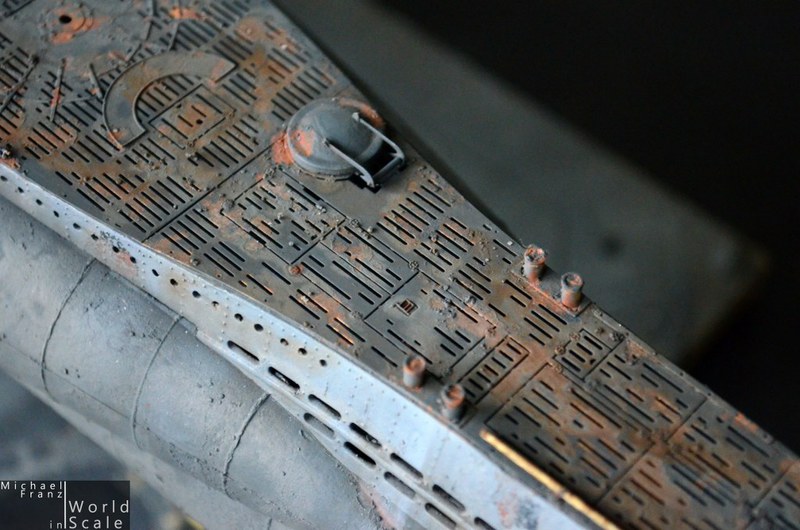
The maindeck received some further etched parts by RC-Subs and Pontos, as well as several turned brass material by Pontos...

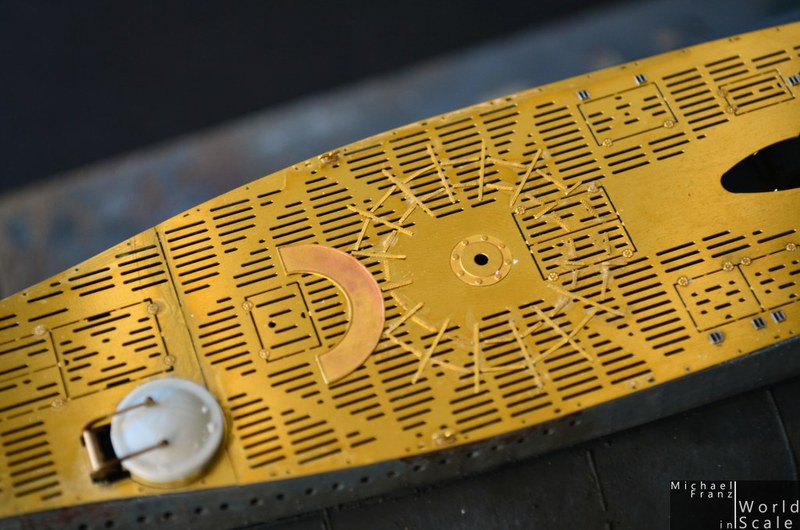

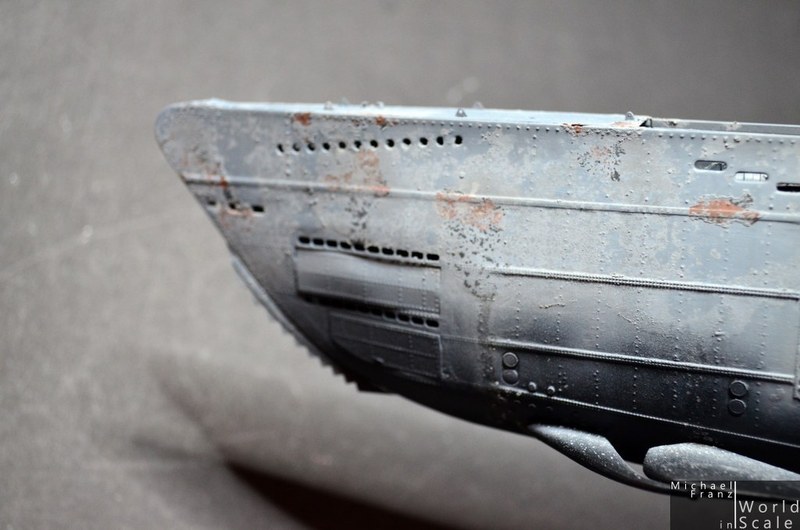
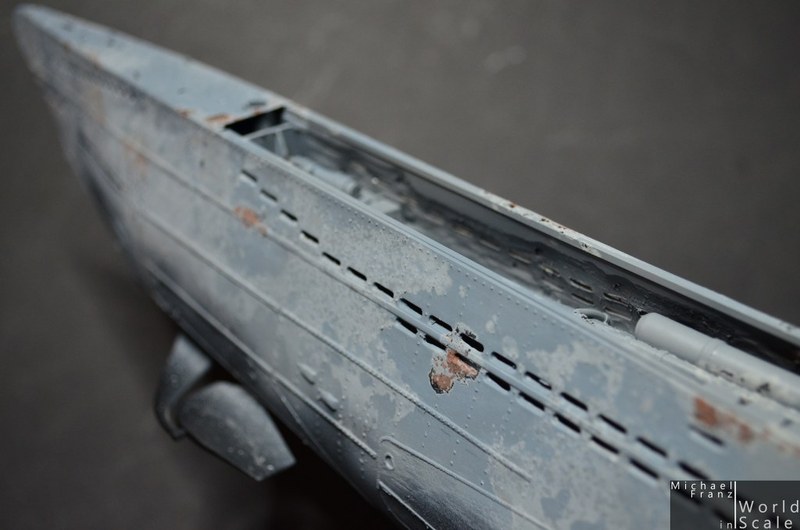
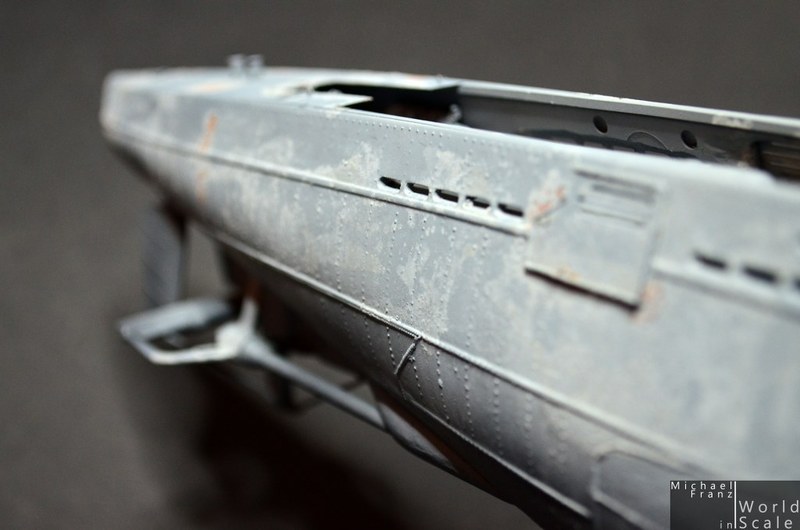
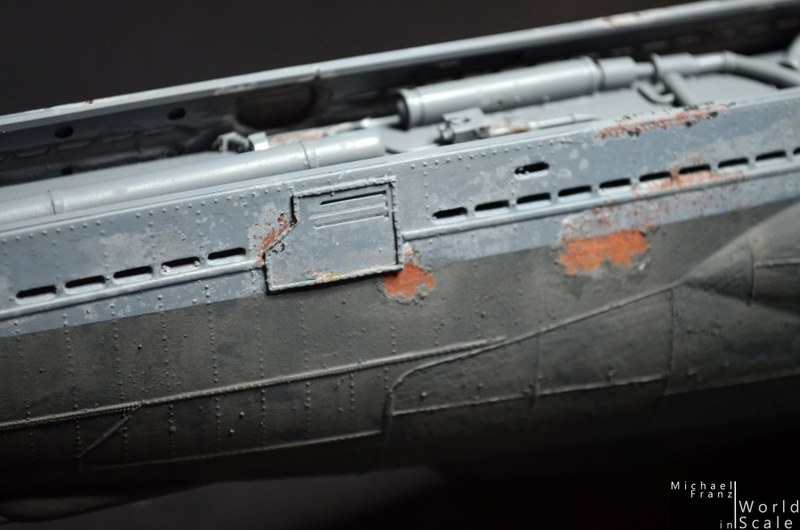
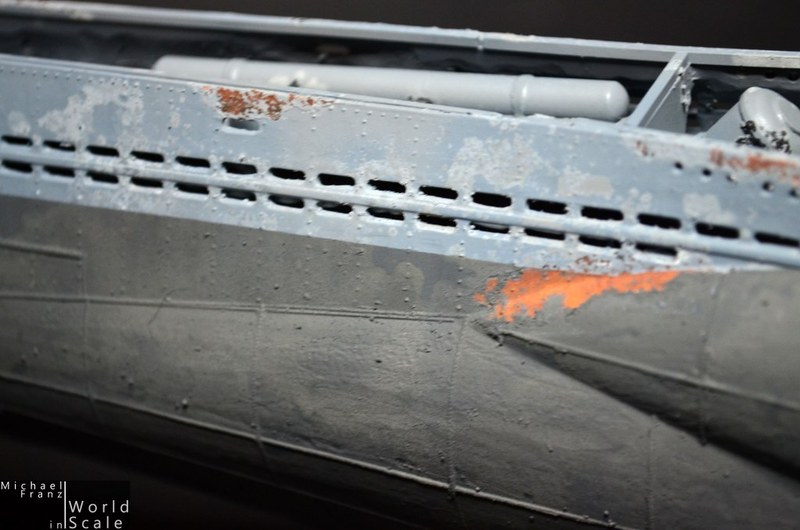
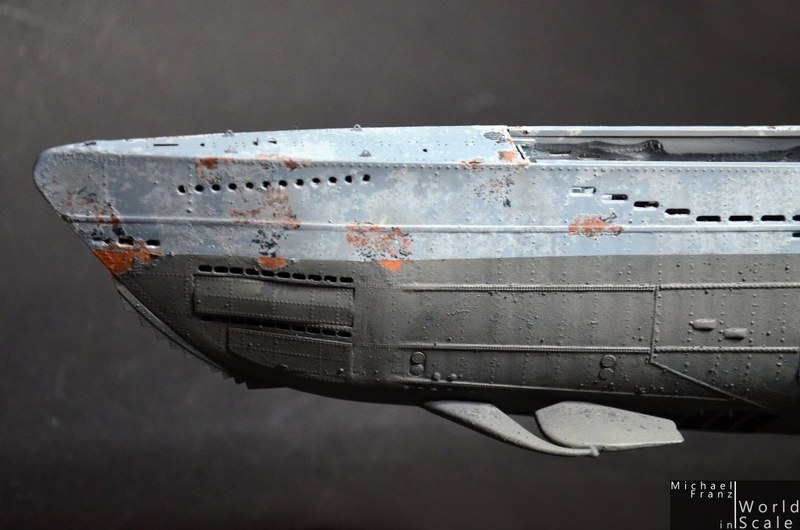
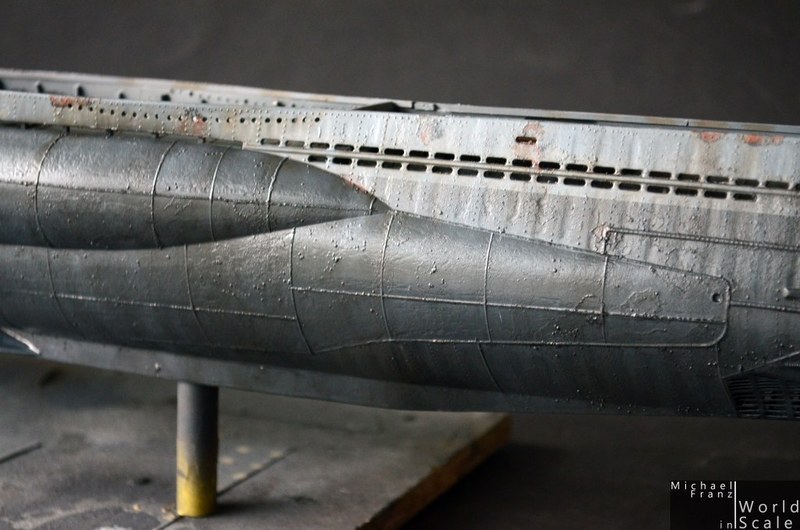
After that the maindeck was painted in dark wood brown, then the areas which were made of metal, received some rust. Then a lot of salt was put on the deck ...
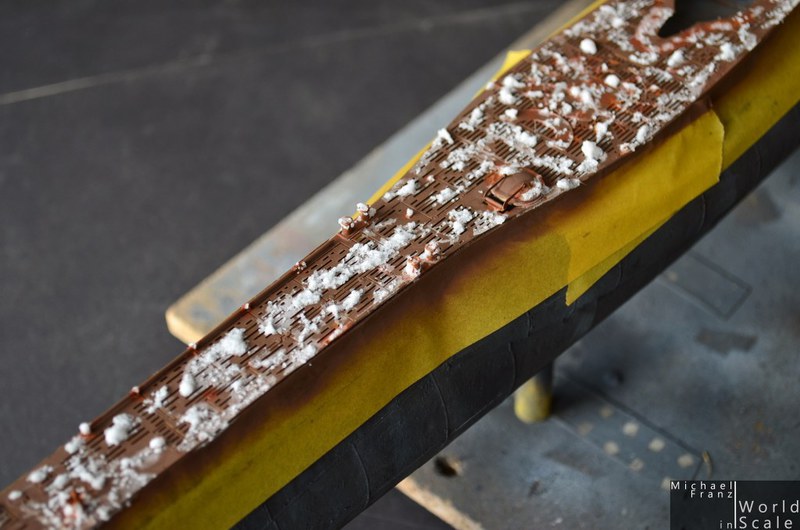
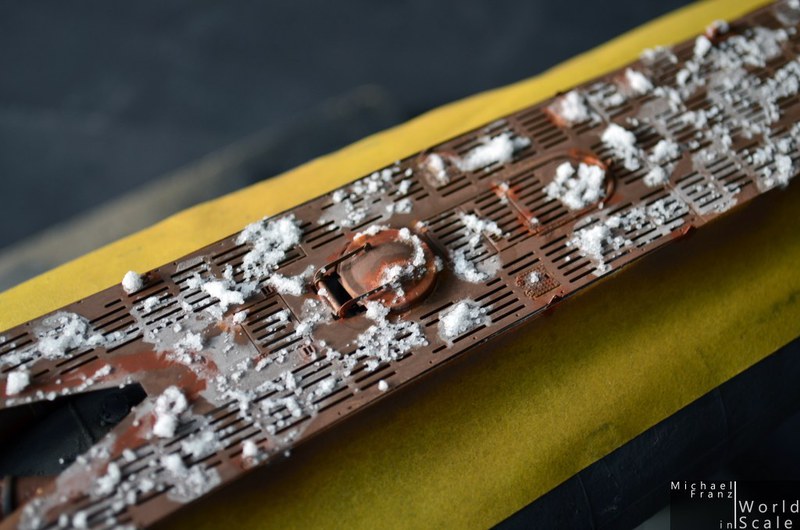
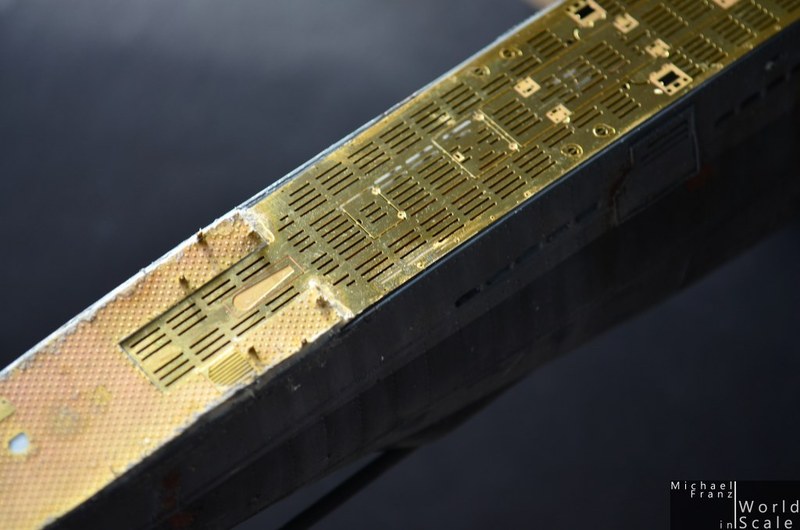
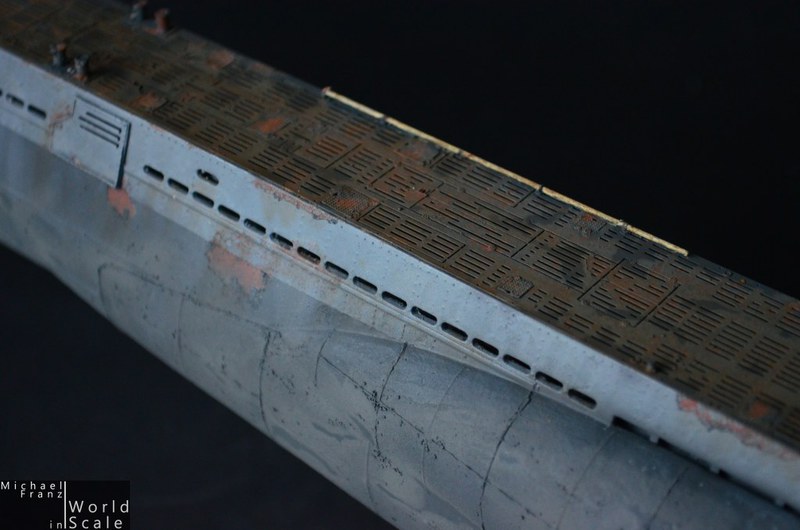
The main deck after a layer of "German Grey", and after the removal of the salt. The oil color washing is still missing here ...
The net-saw... made of etched parts and turned brass parts and some prass pipes ...
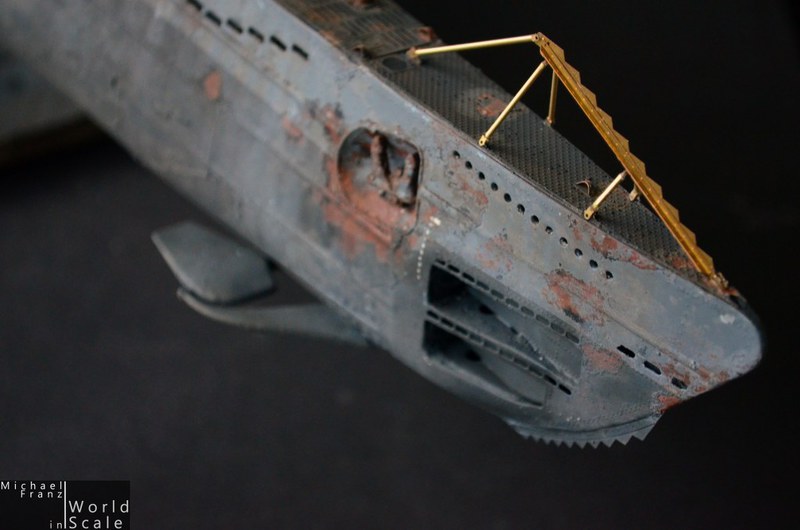
and the whole one ....

Cheers
Micha
regards,
Michael
http://www.world-in-scale.de
Auckland, New Zealand
Joined: July 13, 2004
KitMaker: 2,169 posts
Model Shipwrights: 1,597 posts
Posted: Tuesday, February 02, 2016 - 01:16 AM UTC
Ahoy Micha
Nice update.
This build is just getting better and better with each update.
Cheers
Sean
#306
Victoria, Australia
Joined: June 27, 2010
KitMaker: 3,959 posts
Model Shipwrights: 2,777 posts
Posted: Tuesday, February 02, 2016 - 03:27 AM UTC
Quoted Text
Ahoy Micha
Nice update.
This build is just getting better and better with each update.
Cheers
Sean
I second that, Sean

Stay home and build models!
In 1/72
Gloster Gladiator MkII for the Bi-planes Campaign
In 1/350
Airfix 1:350 Type 45 Destroyer
Baden-Württemberg, Germany
Joined: December 26, 2009
KitMaker: 813 posts
Model Shipwrights: 304 posts
Posted: Tuesday, February 02, 2016 - 12:44 PM UTC
A little bit of shocking in the morning ...
Yesterday I made a bit of "tabularasa" with the deck.... I wasn't that satisfied with the painting as it looked more like a rusty metal deck instead of a real wooden deck with installed metal parts on it.
Therefore I removed all the etched parts and turned brass parts from the metal deck.... sanded down all the surface.... and aadded the thin wooden deck from Pontos...... then started to mount all the metal parts on this deck again...... some more metal parts will follow... I have to make some parts new from scratch as I could not remove all the stuff without damaging. But no problem.
Next steps will be a weathering of the wooden deck with black and brown oil washings, then painting the metal parts with rust and grey .....
Cheers
Michael
regards,
Michael
http://www.world-in-scale.de
#345
Niedersachsen, Germany
Joined: August 22, 2011
KitMaker: 1,835 posts
Model Shipwrights: 1,832 posts
Posted: Tuesday, February 02, 2016 - 11:42 PM UTC
Wow, that'S quite an enterprise of yours - removing the entire deck... To me it looked really good!!
I wish you best of luck for your restoration and keep my fingers crossed that you get everything back on the way you desire! Really curious to see your modified deck, should look great I am sure!!
Cheers,
Jan
Auckland, New Zealand
Joined: July 13, 2004
KitMaker: 2,169 posts
Model Shipwrights: 1,597 posts
Posted: Wednesday, February 03, 2016 - 12:05 AM UTC
Ahoy Michael
Brave move indeed but if your not happy with the effect I guess its the thing to do.
I am keen to see how it all turns out.
I am sure it will be bigger and better.
Cheers
Sean
Ohio, United States
Joined: January 28, 2008
KitMaker: 107 posts
Model Shipwrights: 26 posts
Posted: Wednesday, February 03, 2016 - 12:30 AM UTC
Michael,
I don't follow many threads, but I have made a case for following yours. This is really, truly, remarkable work. Very, very, impressive.
David

I still have hopes that the project will turn out good, I just need to remind myself the goal is to always enjoy the process, improve when and where I can, but understand that if I only accept perfection, I will be detracting from the reason I build to be
England - South East, United Kingdom
Joined: March 01, 2010
KitMaker: 7,078 posts
Model Shipwrights: 6,649 posts
Posted: Wednesday, February 03, 2016 - 01:18 AM UTC
Looking great Michael,
The weathering is stunning, looks like that boat has seen the worst the Atlantic could throw at it.
Cheers
Si
Baden-Württemberg, Germany
Joined: December 26, 2009
KitMaker: 813 posts
Model Shipwrights: 304 posts
Posted: Wednesday, February 03, 2016 - 01:55 AM UTC
regards,
Michael
http://www.world-in-scale.de
#377
Texas, United States
Joined: June 27, 2010
KitMaker: 1,481 posts
Model Shipwrights: 1,332 posts
Posted: Wednesday, February 03, 2016 - 04:26 AM UTC
Micha,
It is always a pleasure to see your updates and watch as you tackle this monster build.
I look forward to seeing what steps you have taken on the new deck and what you do next to weathering this beast.
Dave
In Dry Dock #1: 1/350 IJN SHOKAKU (Fujimi)
In Dry Dock #2: 1/350 IJN Tama (Aoshima)
Baden-Württemberg, Germany
Joined: December 26, 2009
KitMaker: 813 posts
Model Shipwrights: 304 posts
Posted: Thursday, February 04, 2016 - 01:36 PM UTC
*** UPDATE ***
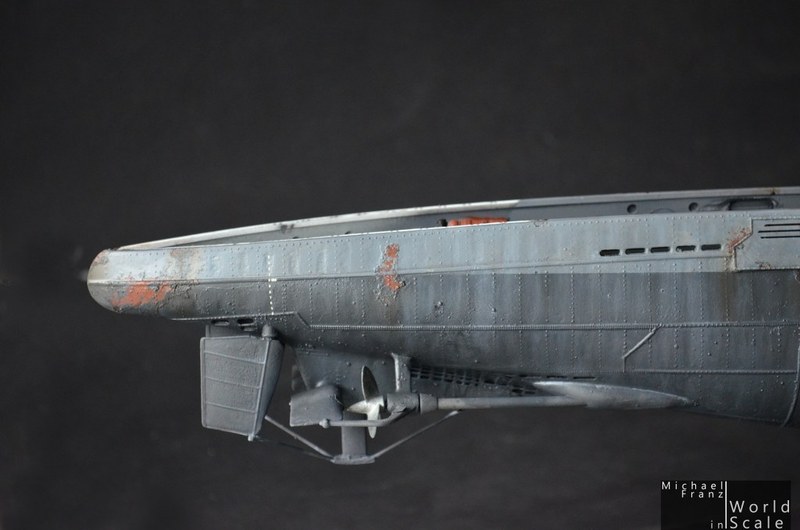
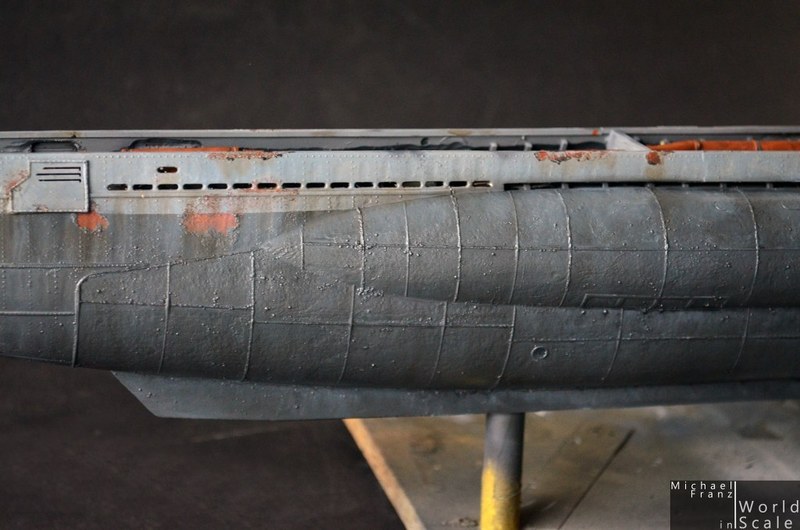
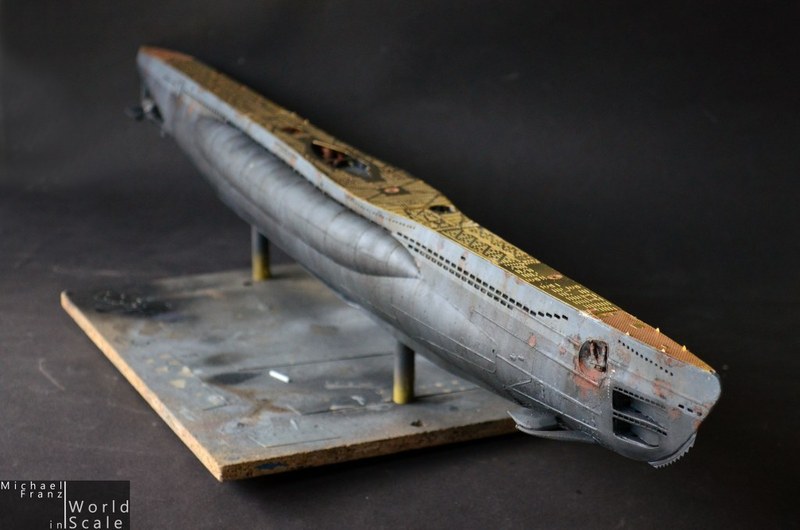
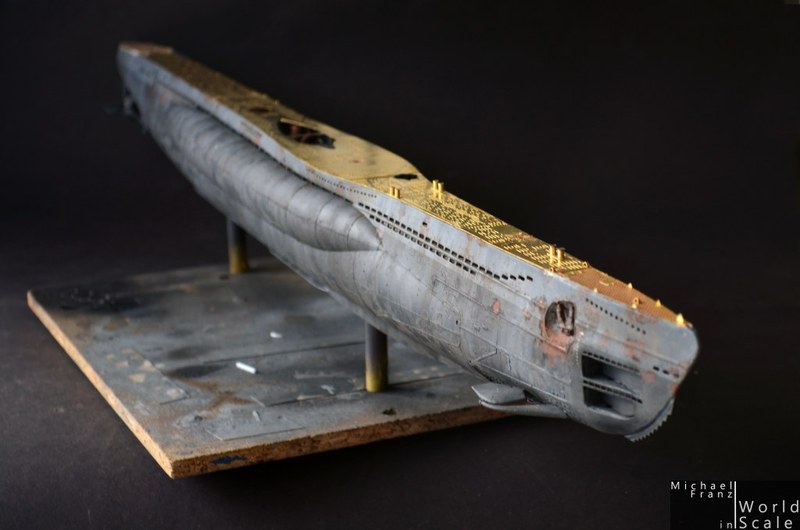
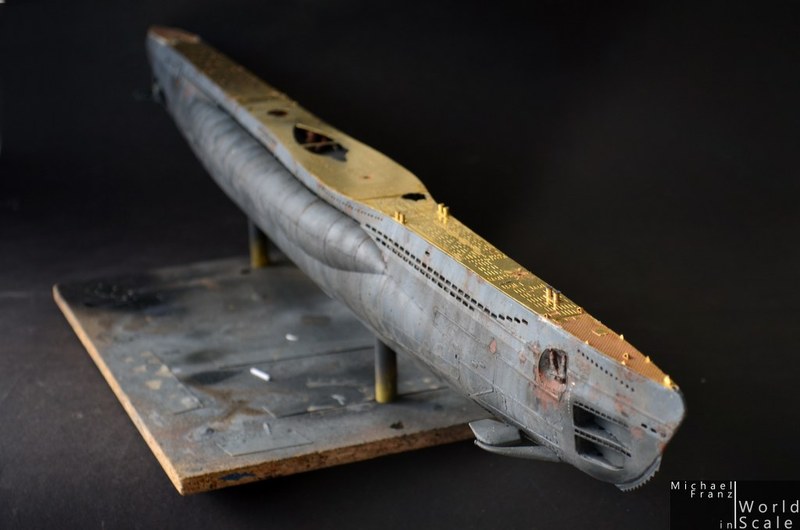
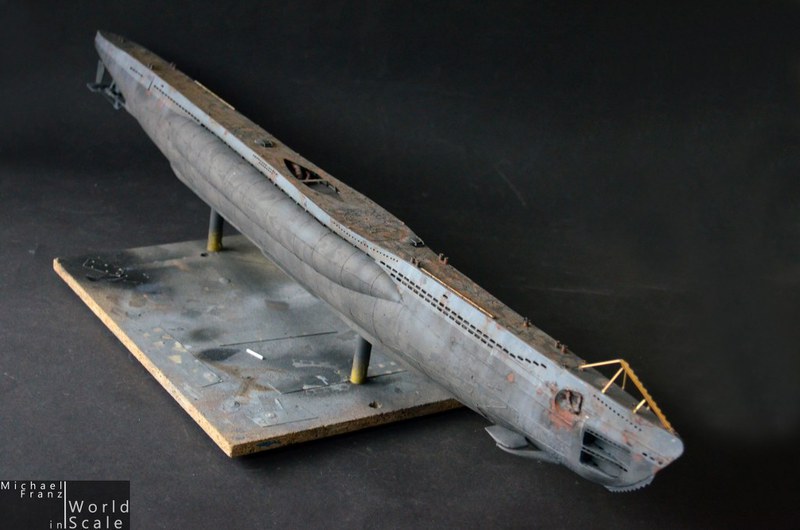
Some first pictures of the "new" wooden deck - version 2, "real wood".
Once all turned brass-, plastic- and etched parts were removed from the metal deck, the Pontos real wood deck was installed.
After that all the etched parts (hinges, covers, other details), turned brass parts (bitts, tools, ...) and plastic parts were installed once again.
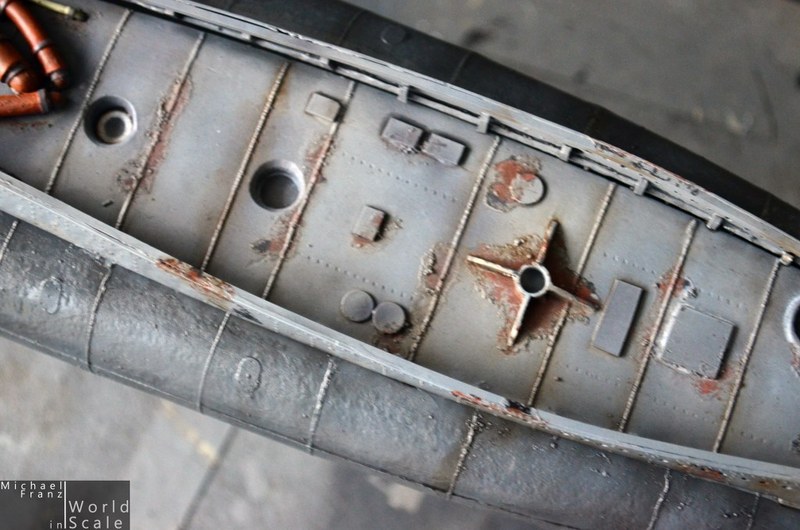
The wooden deck received a dark brown washing with oil colors and was sanded partly after dry. This was repeated 2 times for getting different shades of brown. After that a dark grey, partly black oil color washing was added.
Then all the (in original) metal parts were painted in grey.


Next step - the originally metal parts get some smaller rust chips and some bare metal, a washing with white and black oil colors.
Cheers
Micha
regards,
Michael
http://www.world-in-scale.de
#424
Queensland, Australia
Joined: April 23, 2015
KitMaker: 4,648 posts
Model Shipwrights: 249 posts
Posted: Thursday, February 04, 2016 - 02:22 PM UTC
Michael,
Your U-boat is beginning to look like it has had a long patrol. I hope when it sails into port it has pennants flying.
Cheers,
Gary
"Artillery adds dignity, to what would otherwise be an ugly brawl."
Frederick The Great
Ontario, Canada
Joined: April 26, 2015
KitMaker: 99 posts
Model Shipwrights: 99 posts
Posted: Thursday, February 04, 2016 - 06:48 PM UTC
Micha -
Your work is truly amazing. How do you find the time to build so many excellent models? Where do you put then when they are done?
Grant Goodale
Peel Scale Modellers