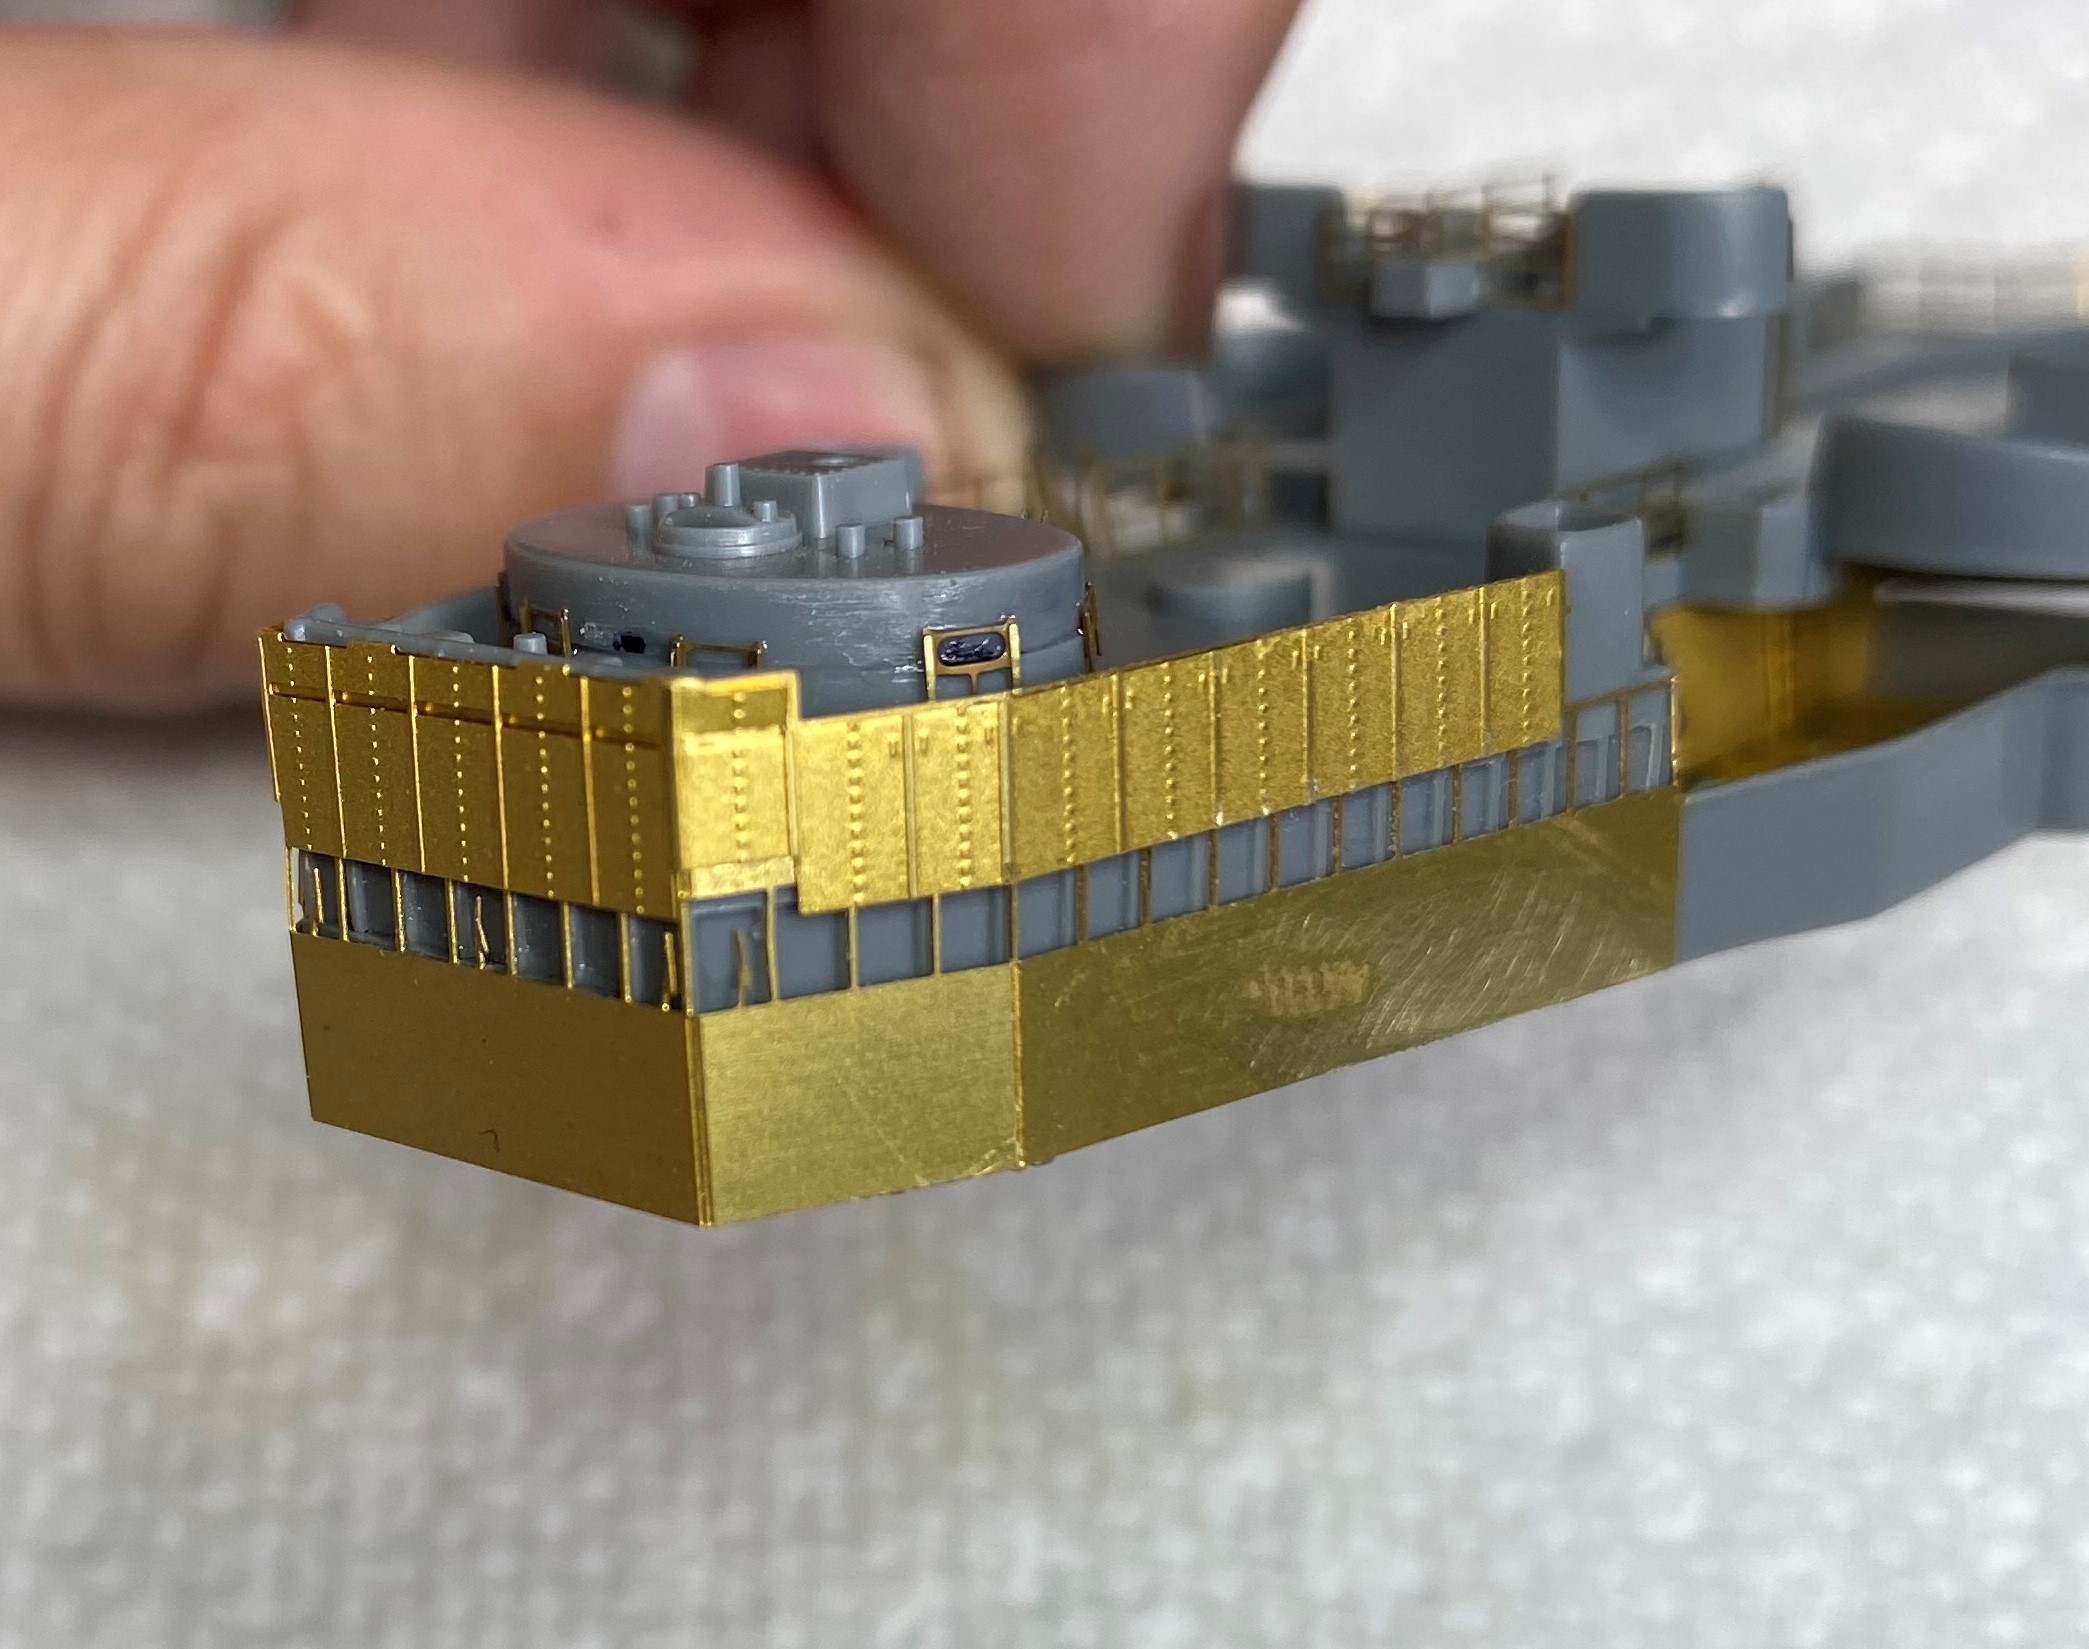
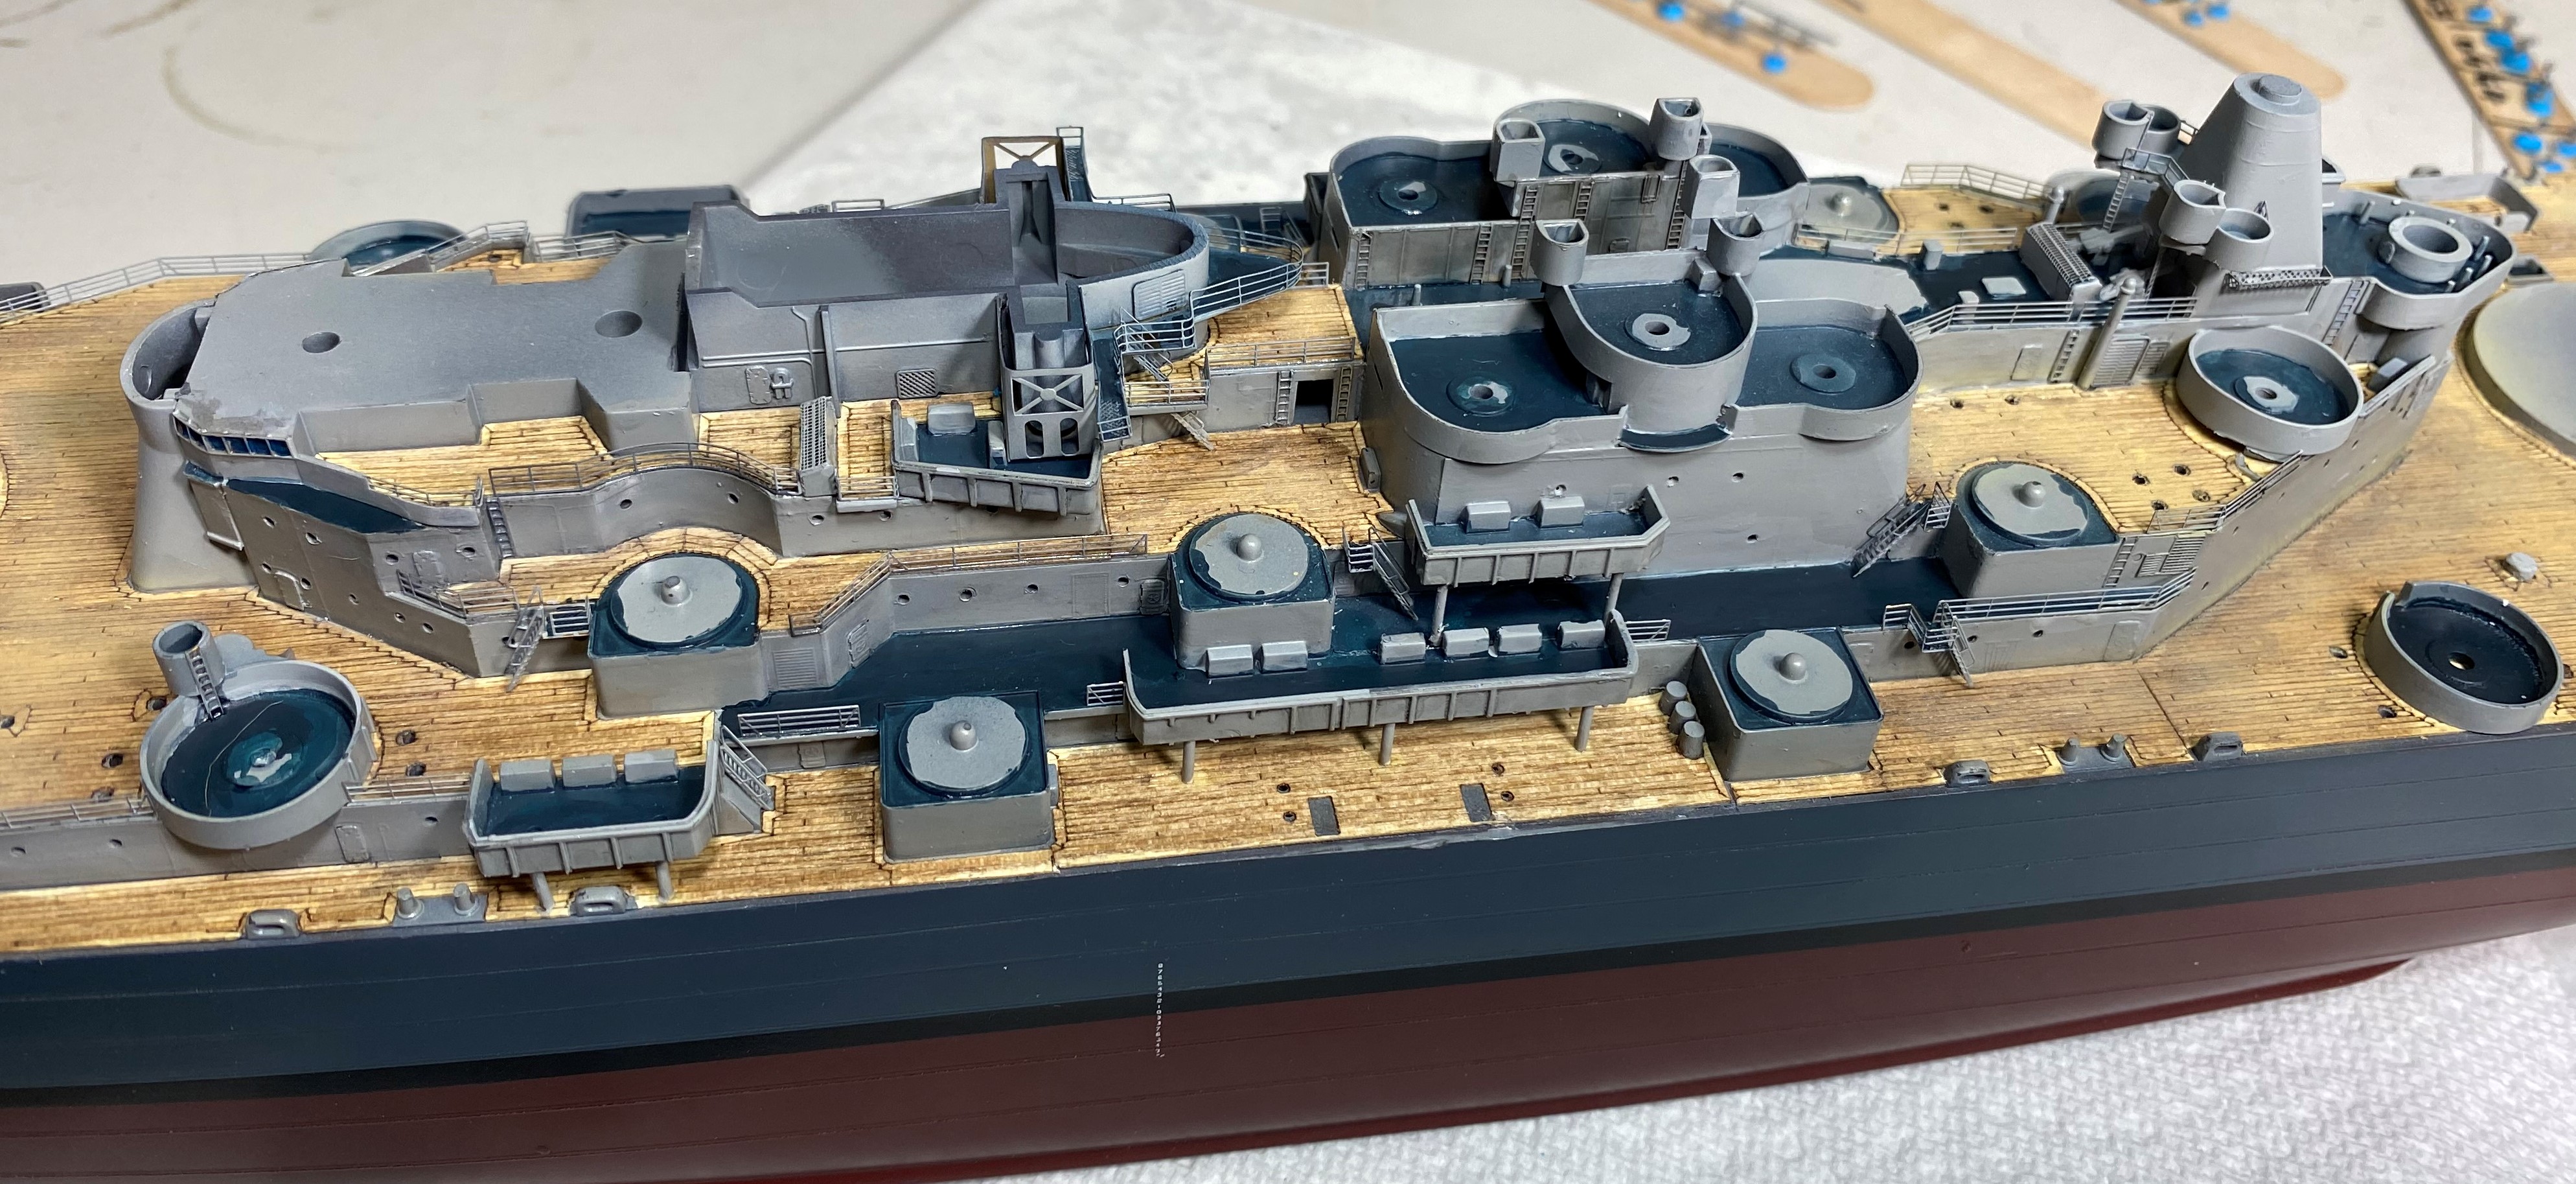
General Ship Modeling
Discuss modeling techniques, experiences, and ship modeling in general.
Build Log: 1/350 USS Missouri
McRunty
#491
Visit this Community
Missouri, United States
Joined: April 06, 2016
KitMaker: 602 posts
Model Shipwrights: 349 posts
Posted: Friday, February 15, 2019 - 05:46 AM UTC
I have been working on and off on the Mighty Mo this week and have made some 'Progress'

First up the good:

Anchor chains are on and looking good. I am pleased with them. I also am pretty happy with the various bits and bots that go around the anchor capstans.


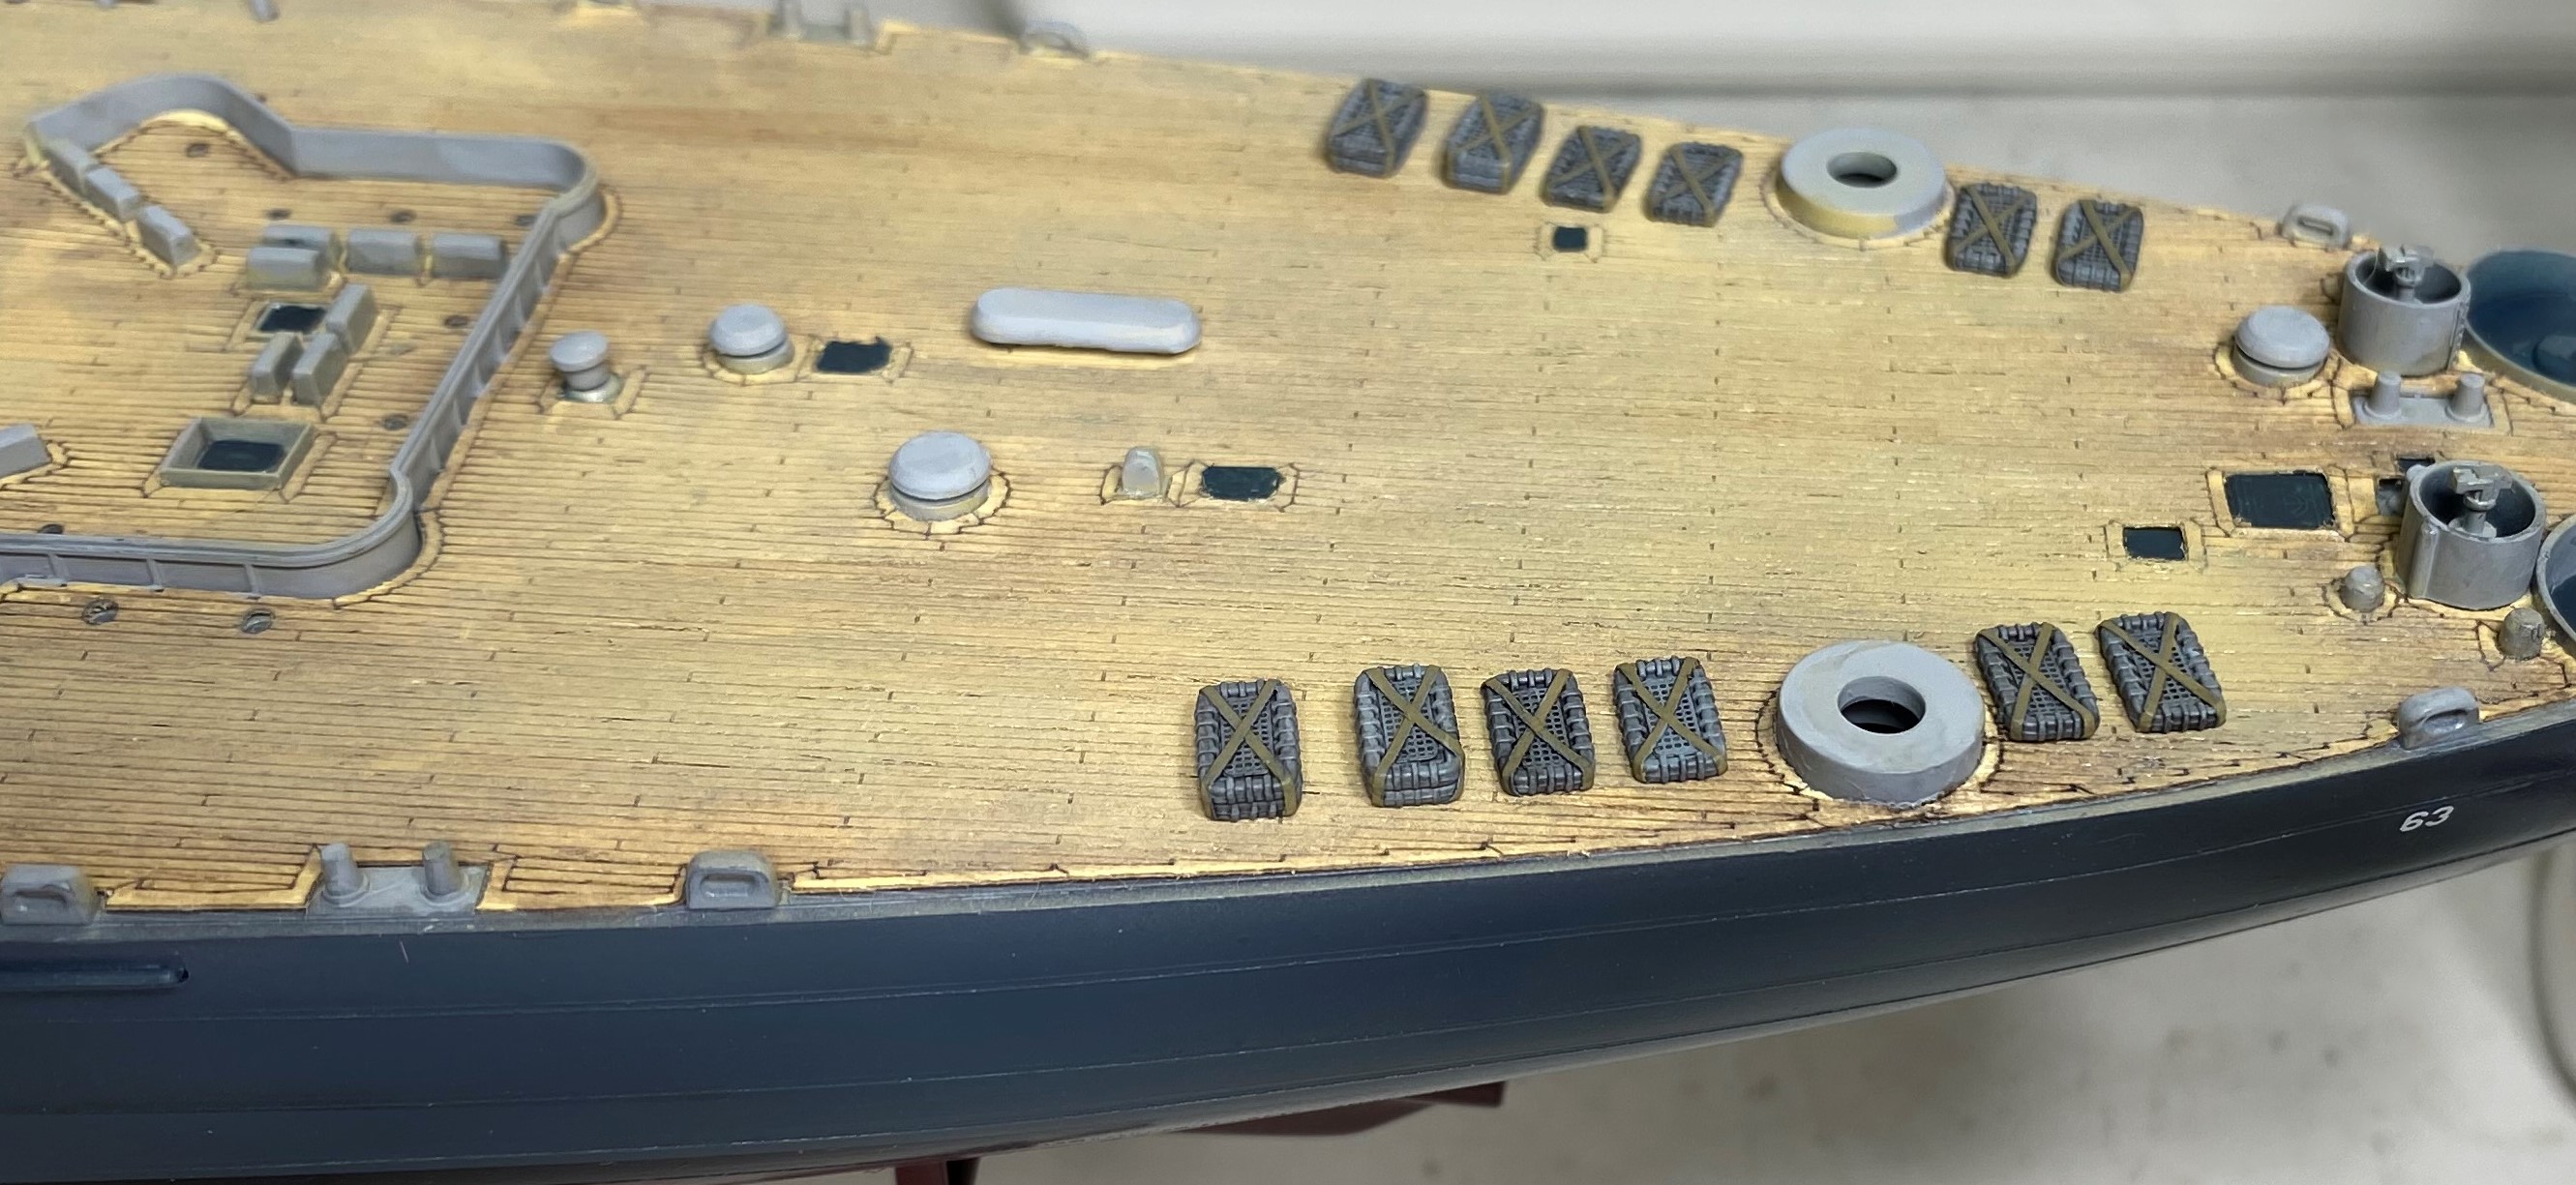
Plimsoll lines and ship number are on. These were dry transfers and the first time I have managed to use dry transfers and get them right. Turns out that patients, time and many youtube tutorials were the answer.


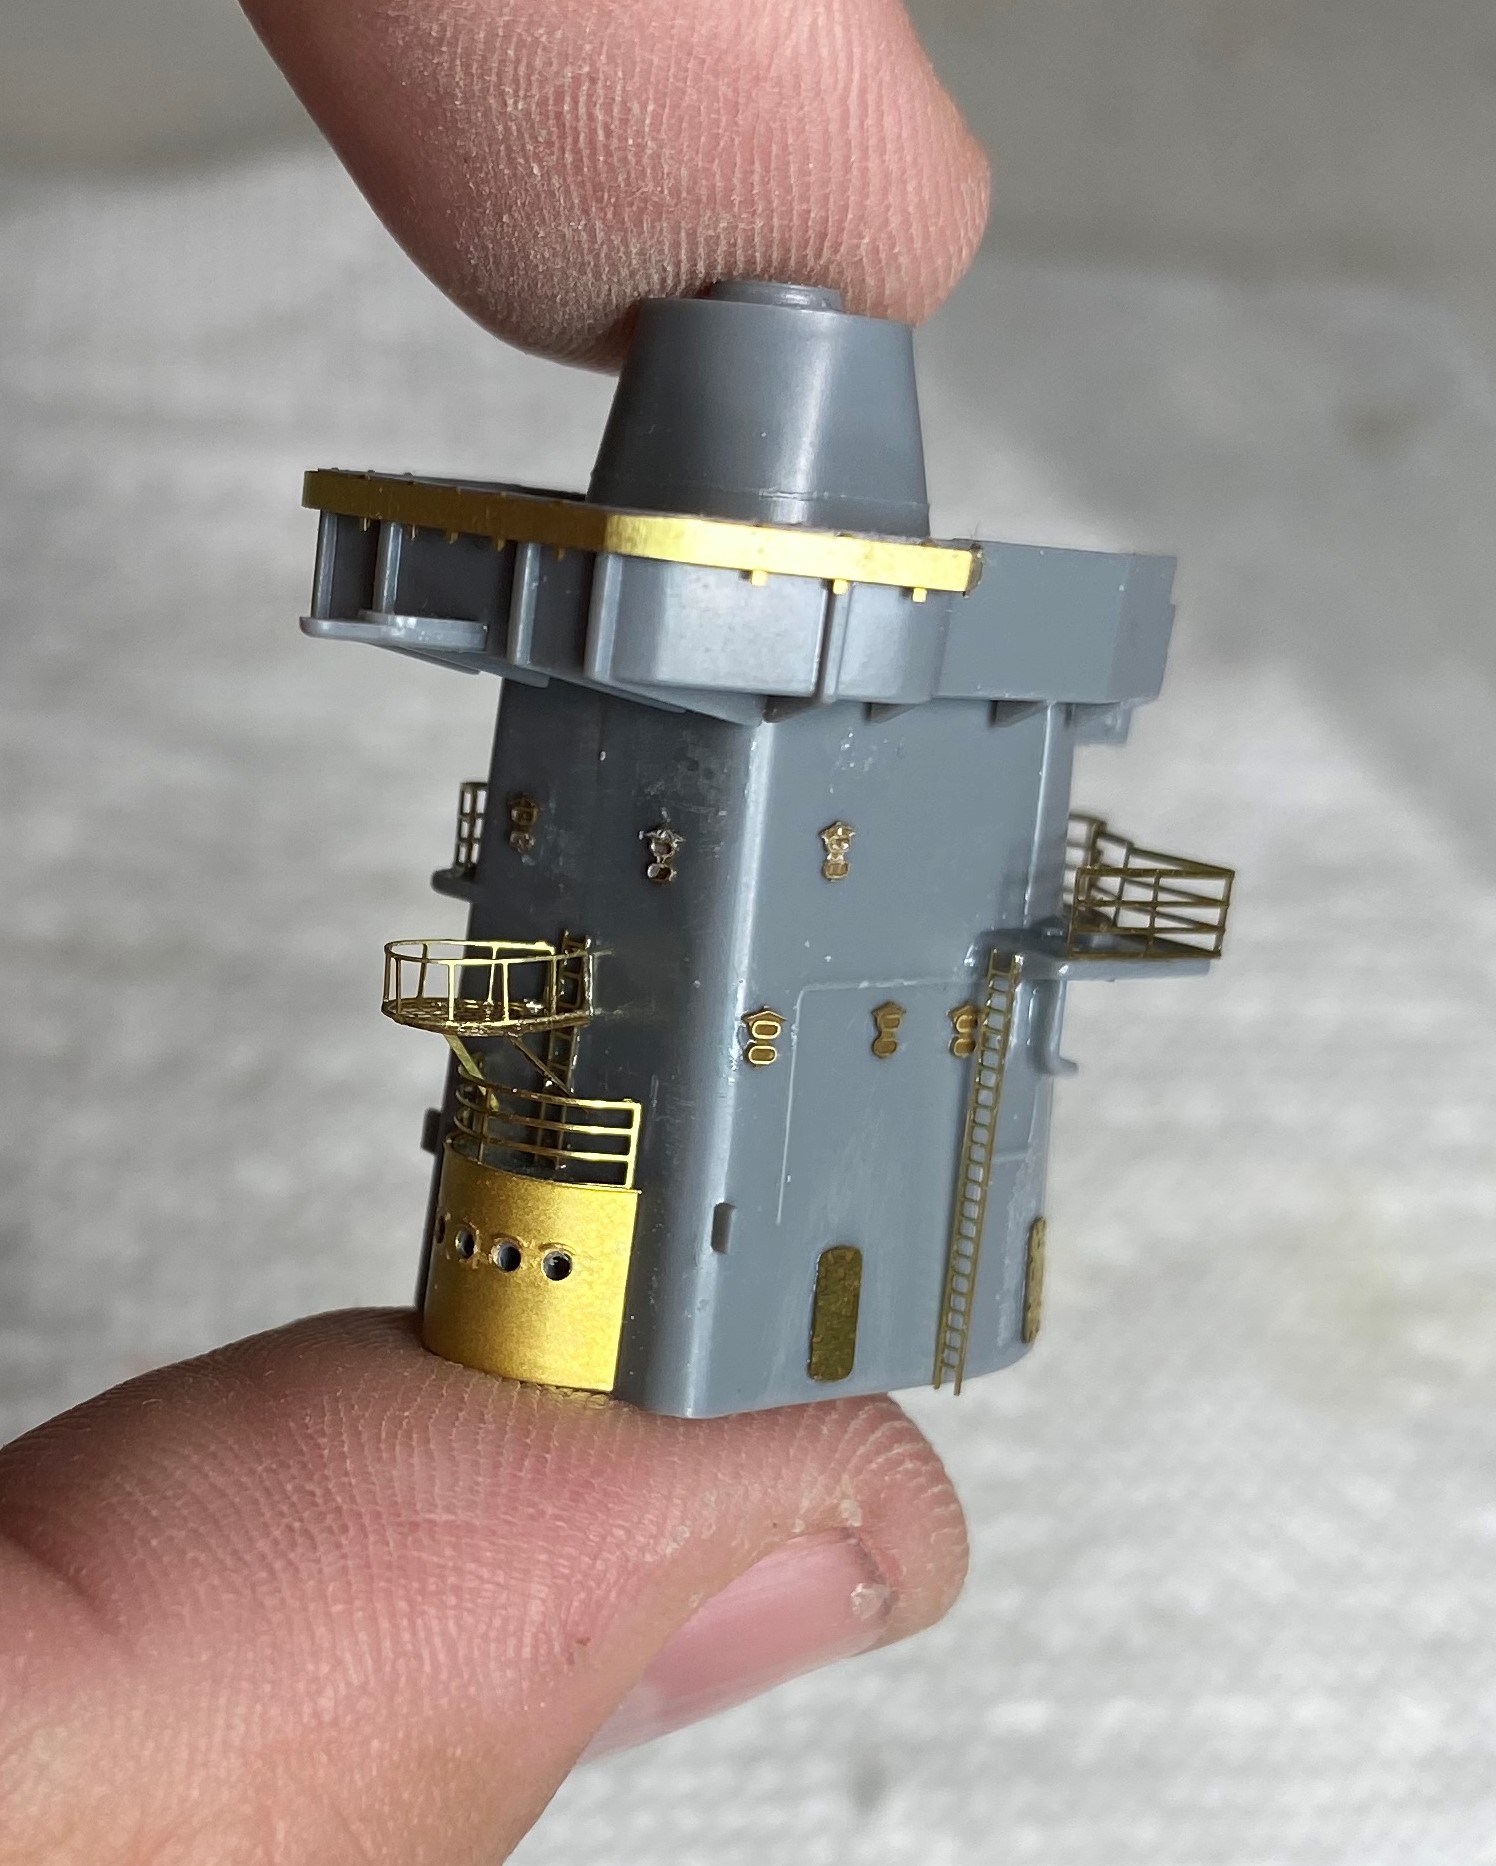
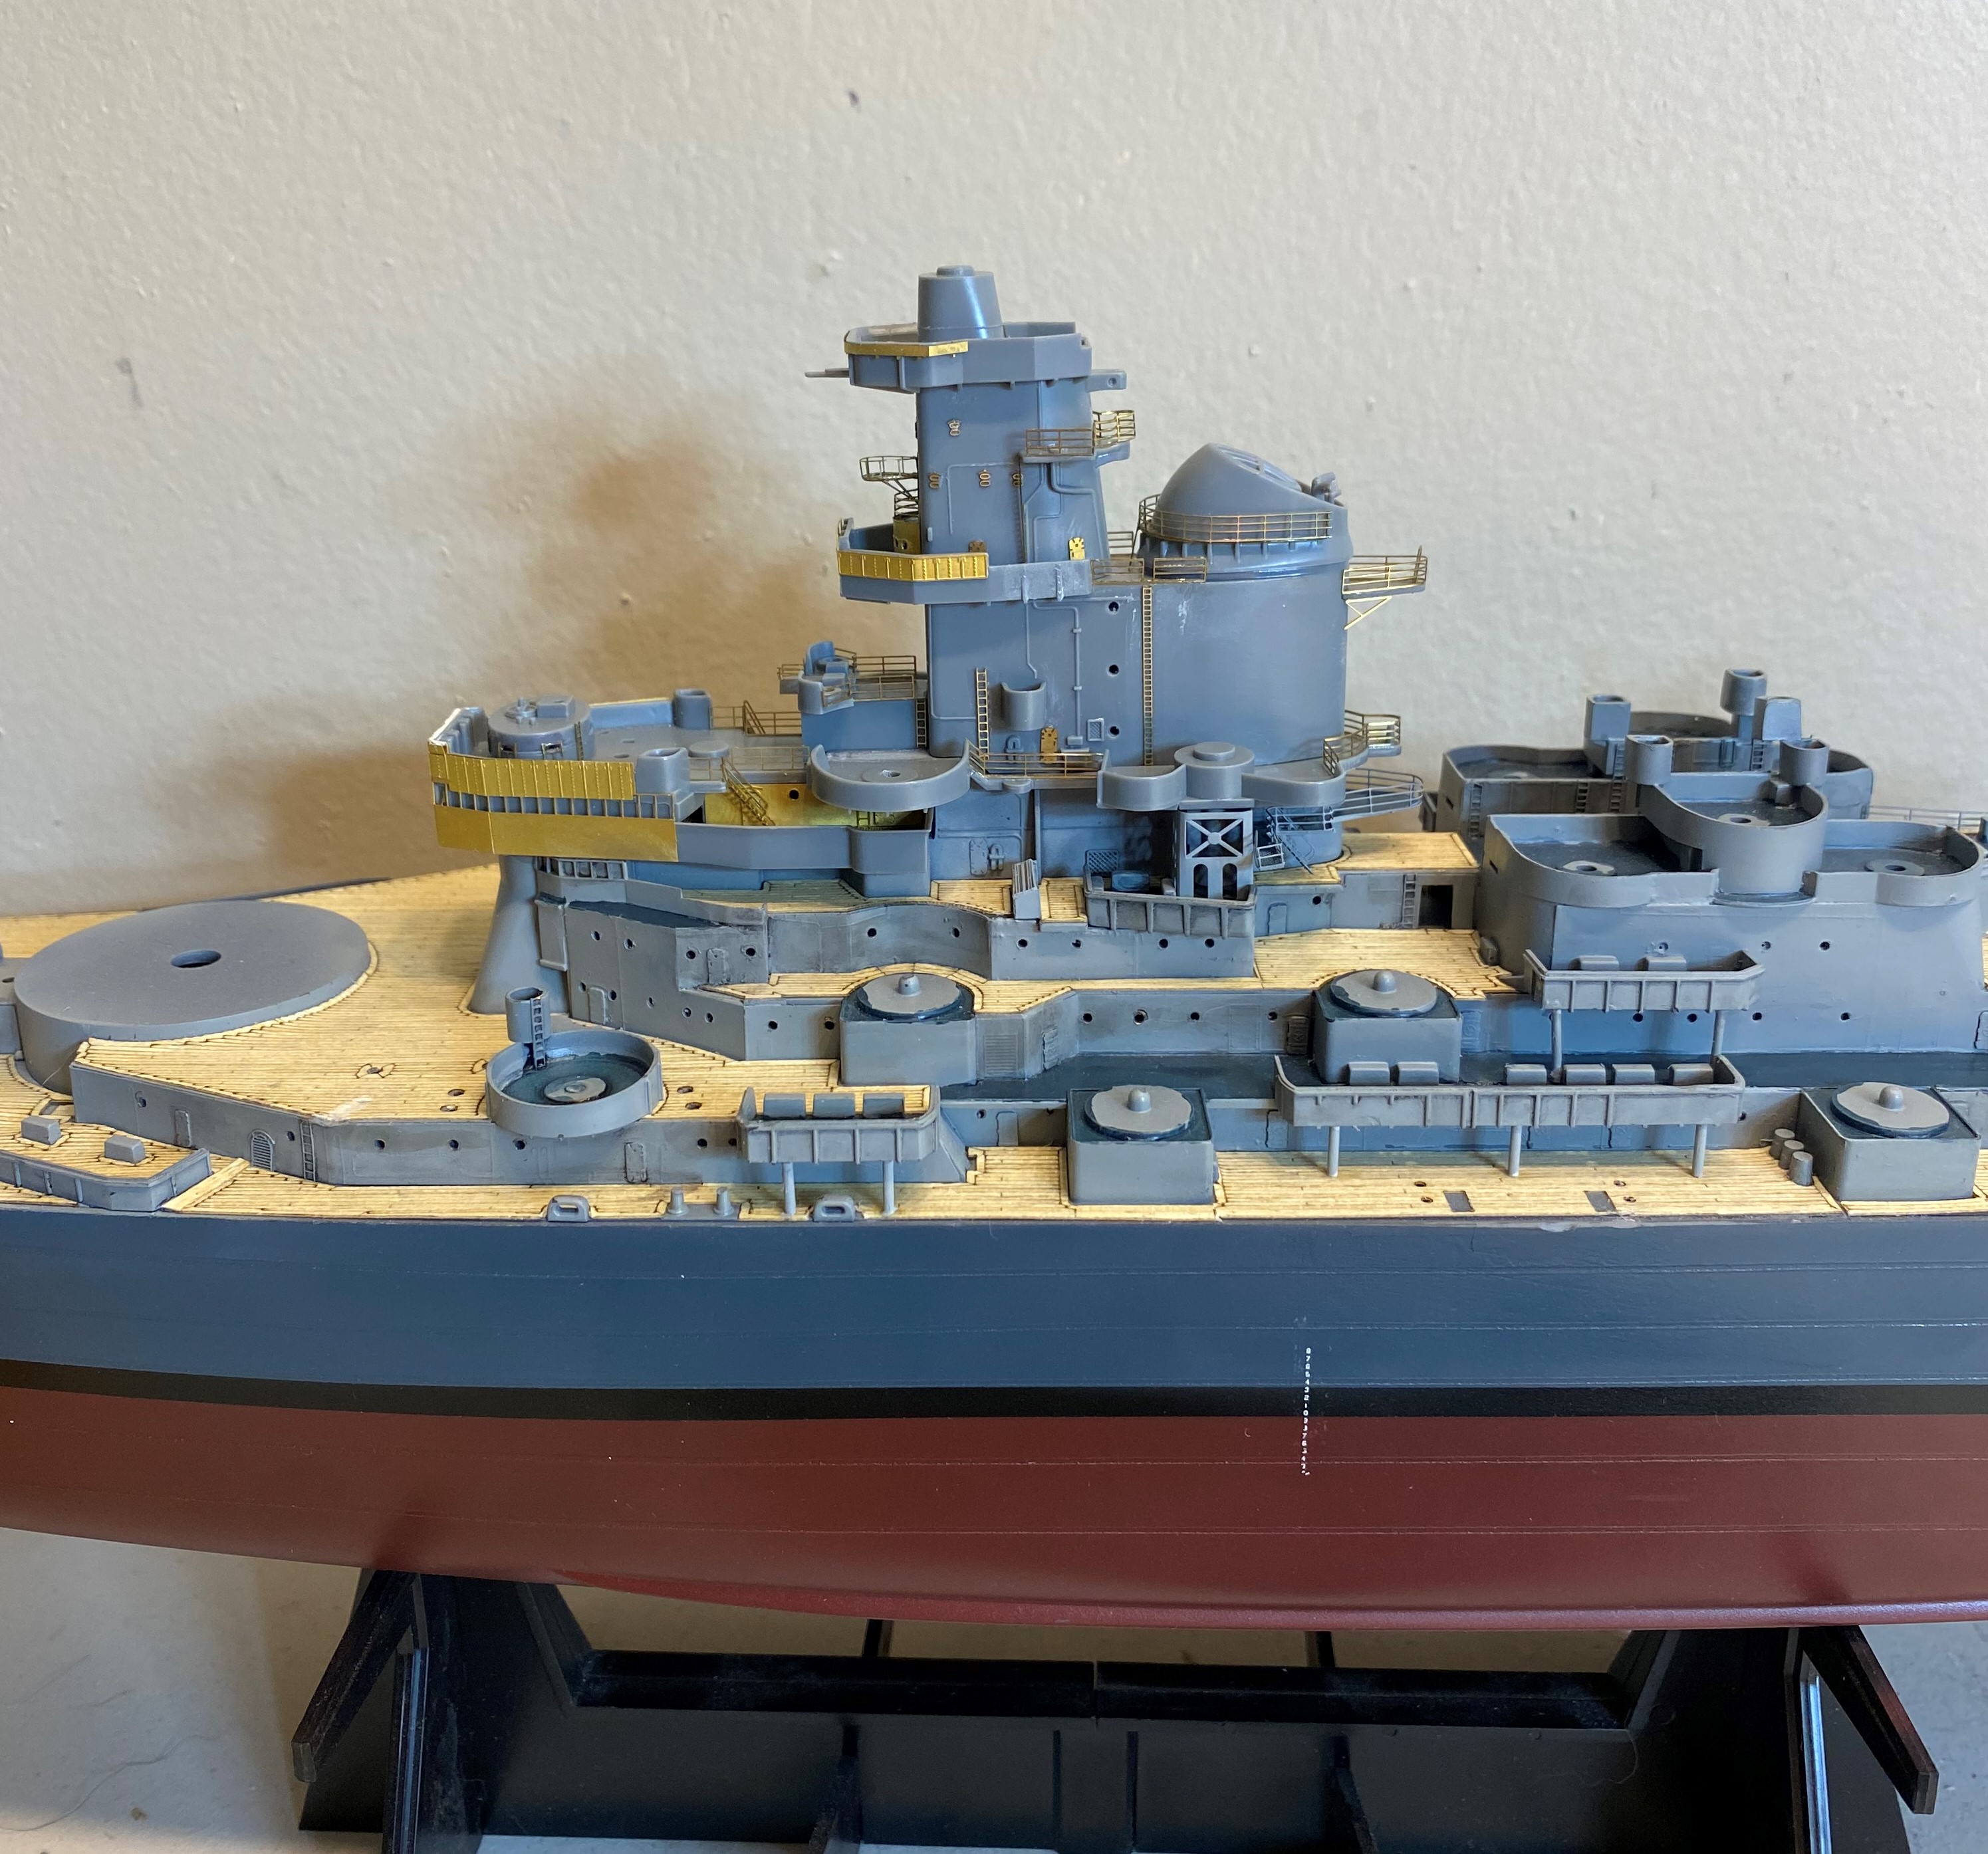
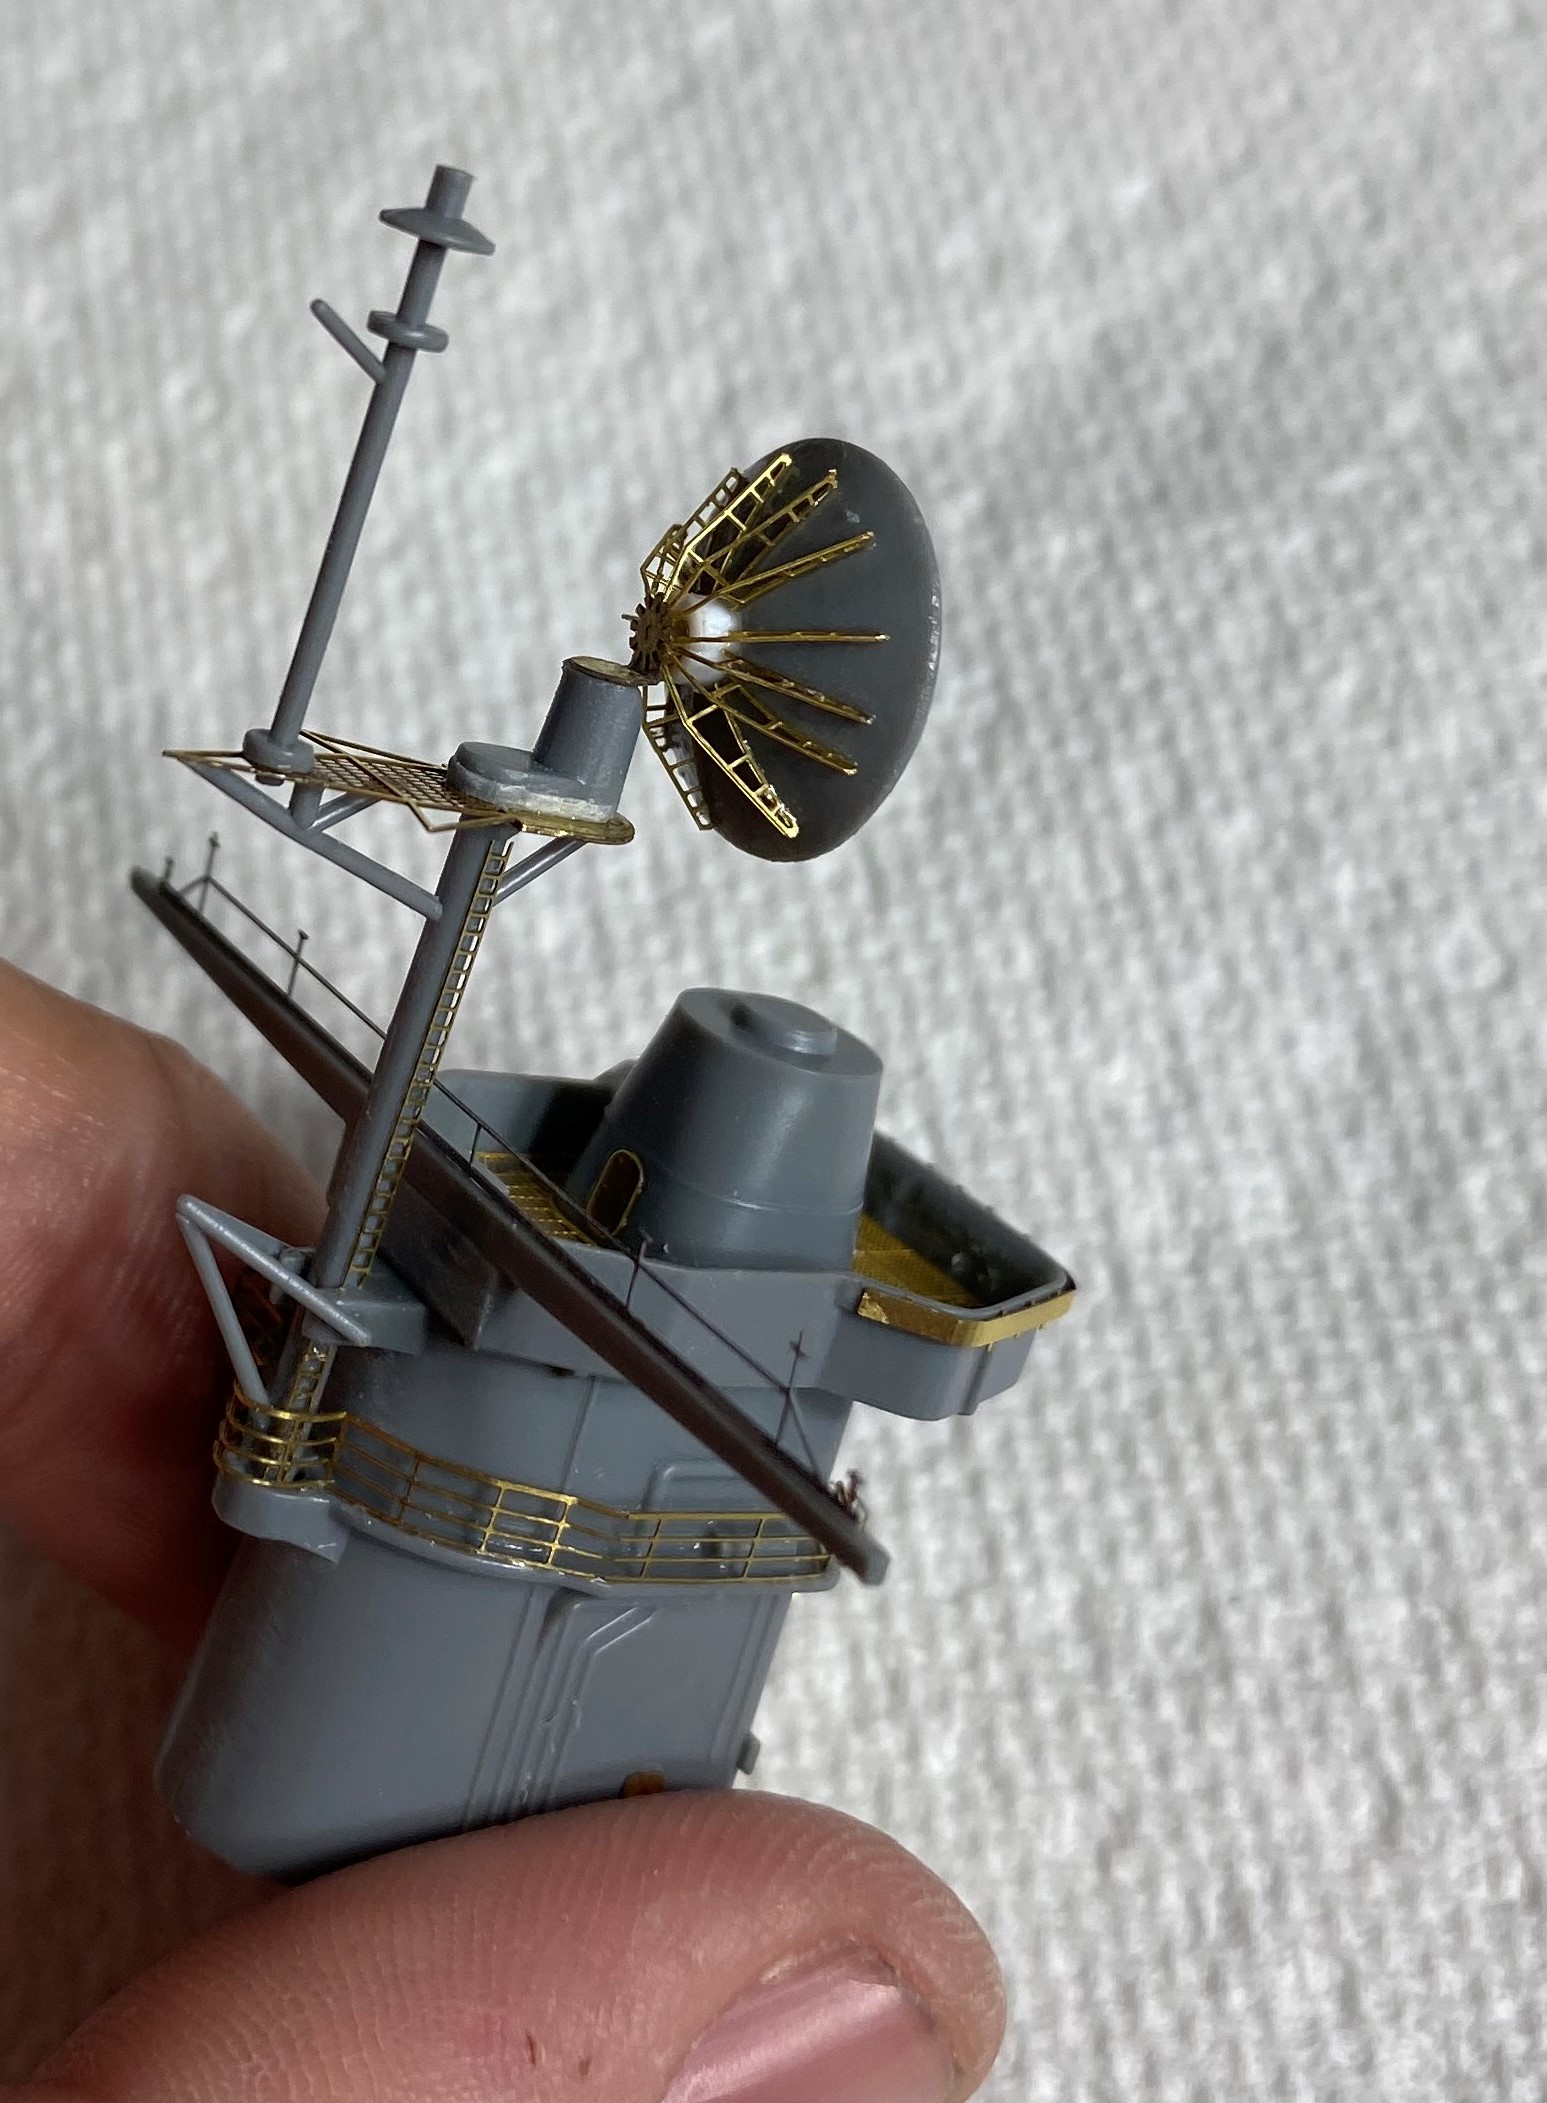
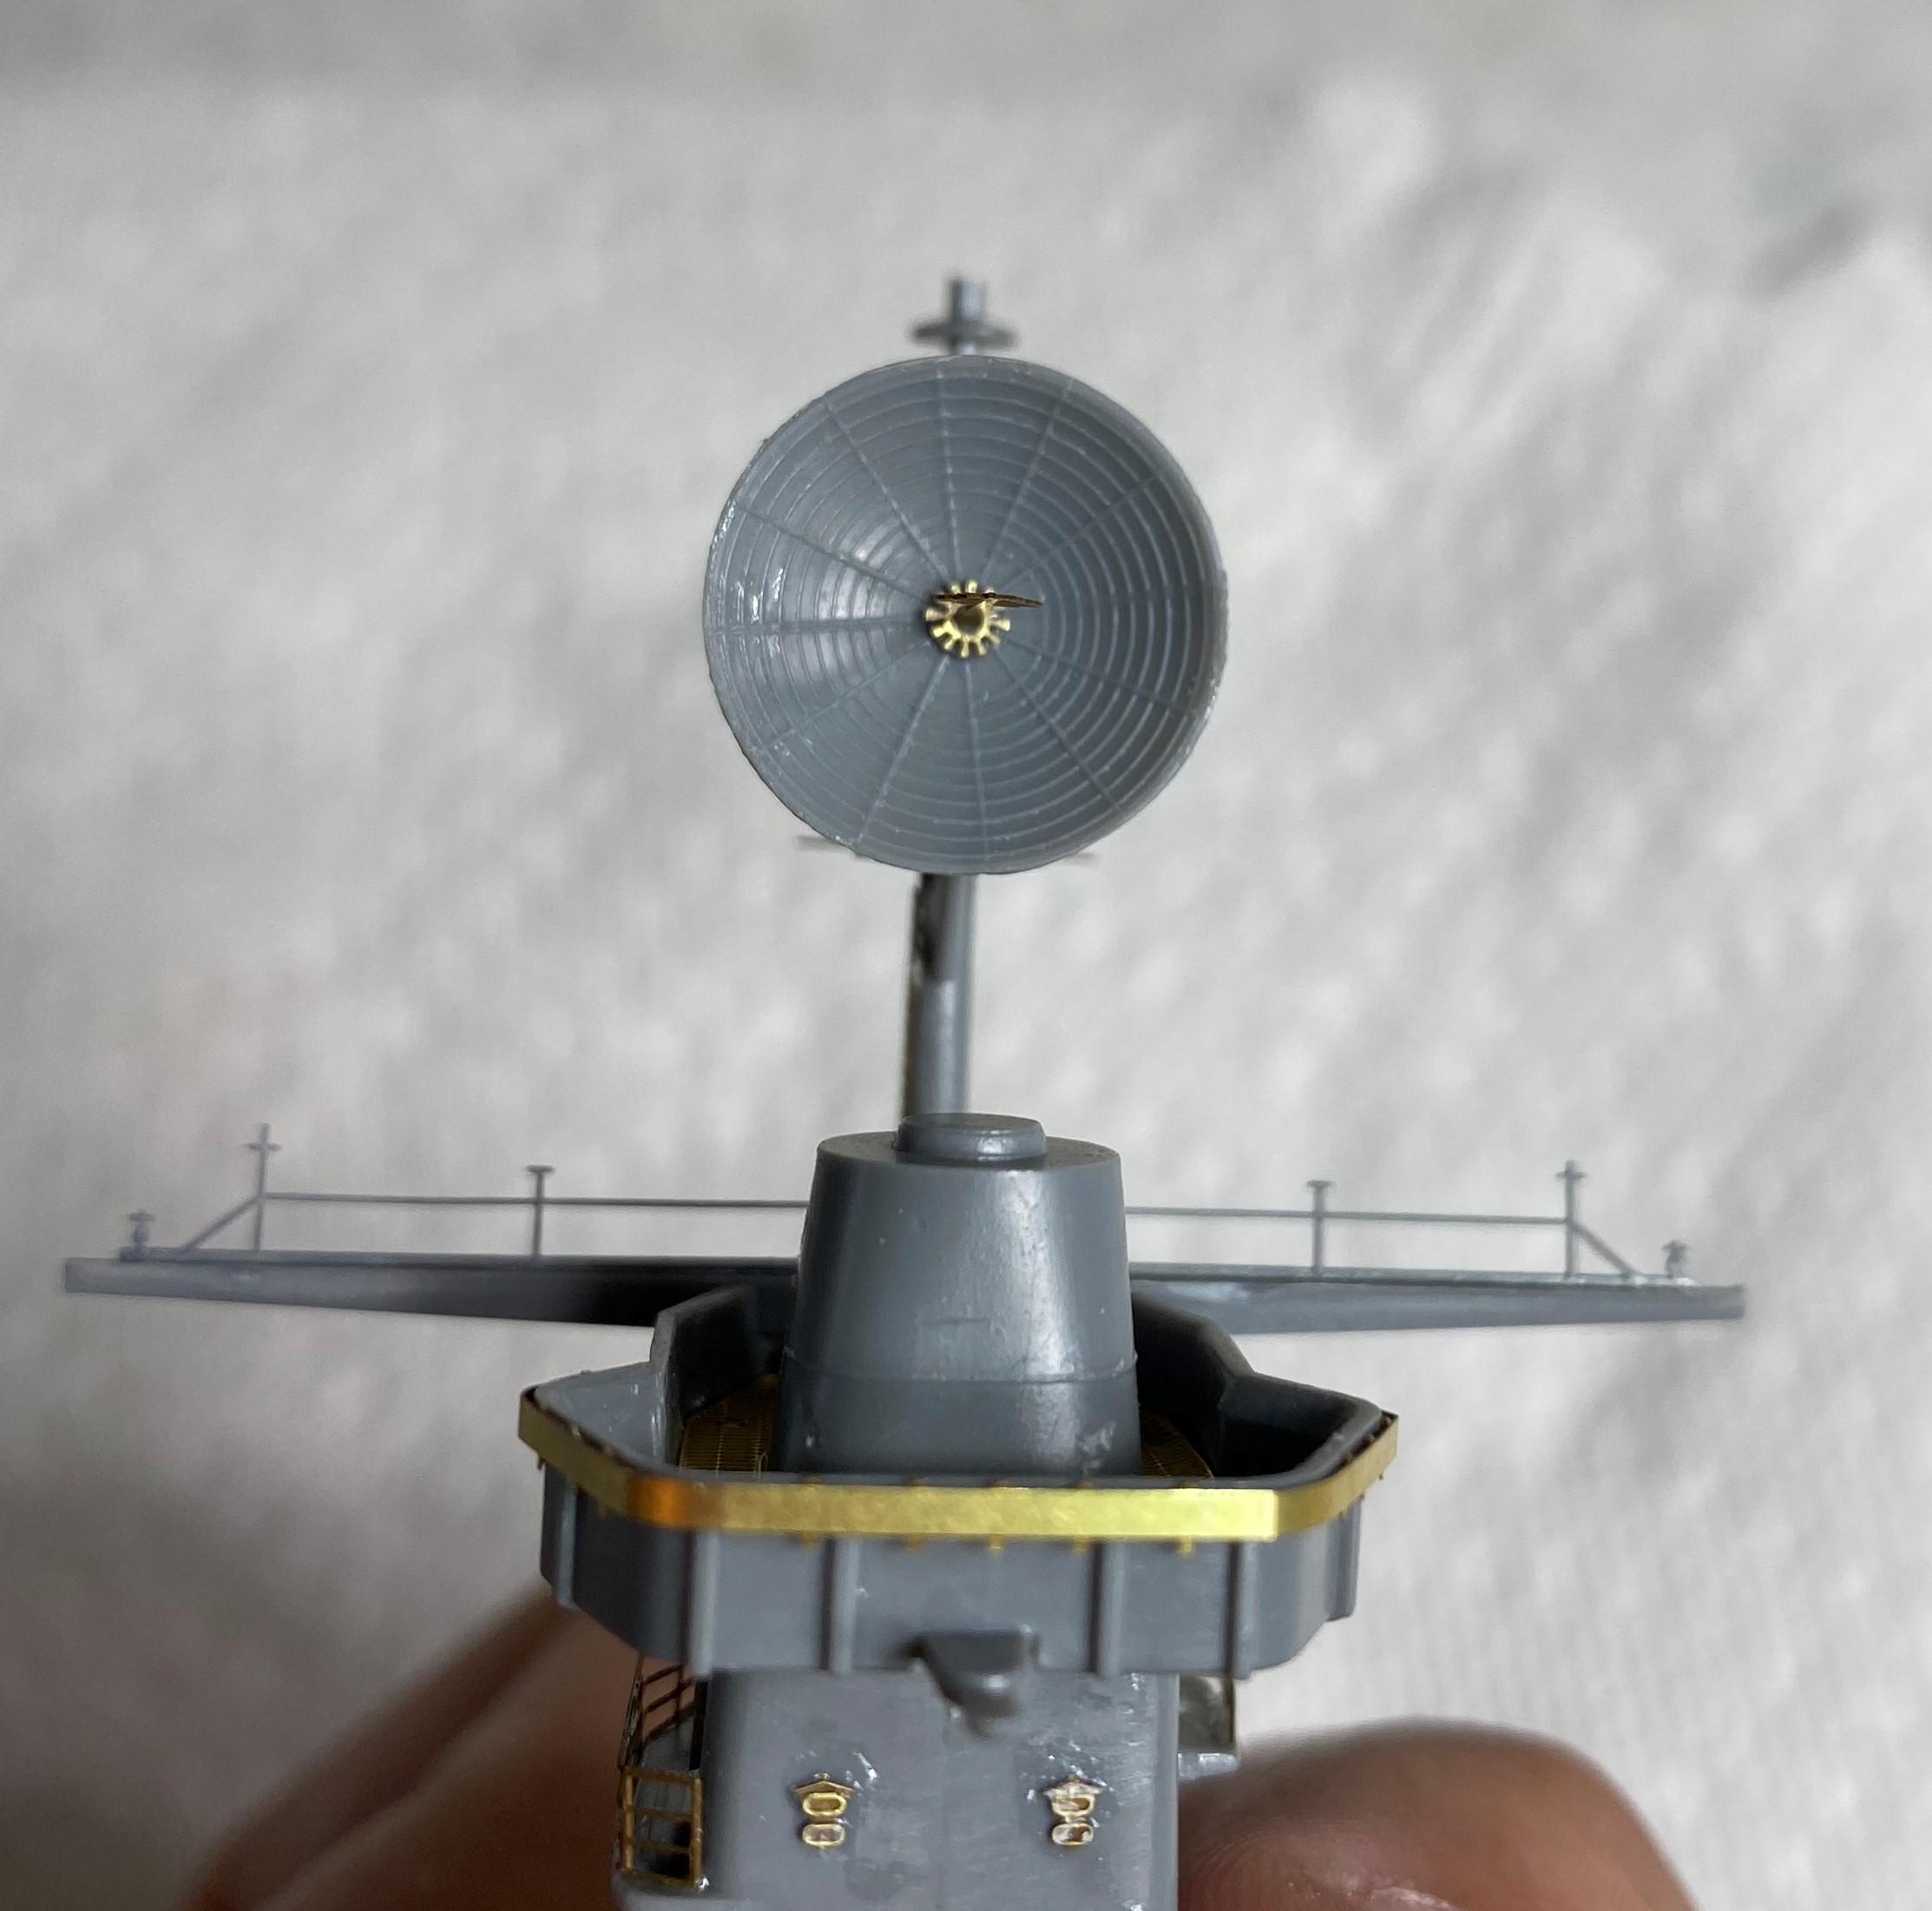
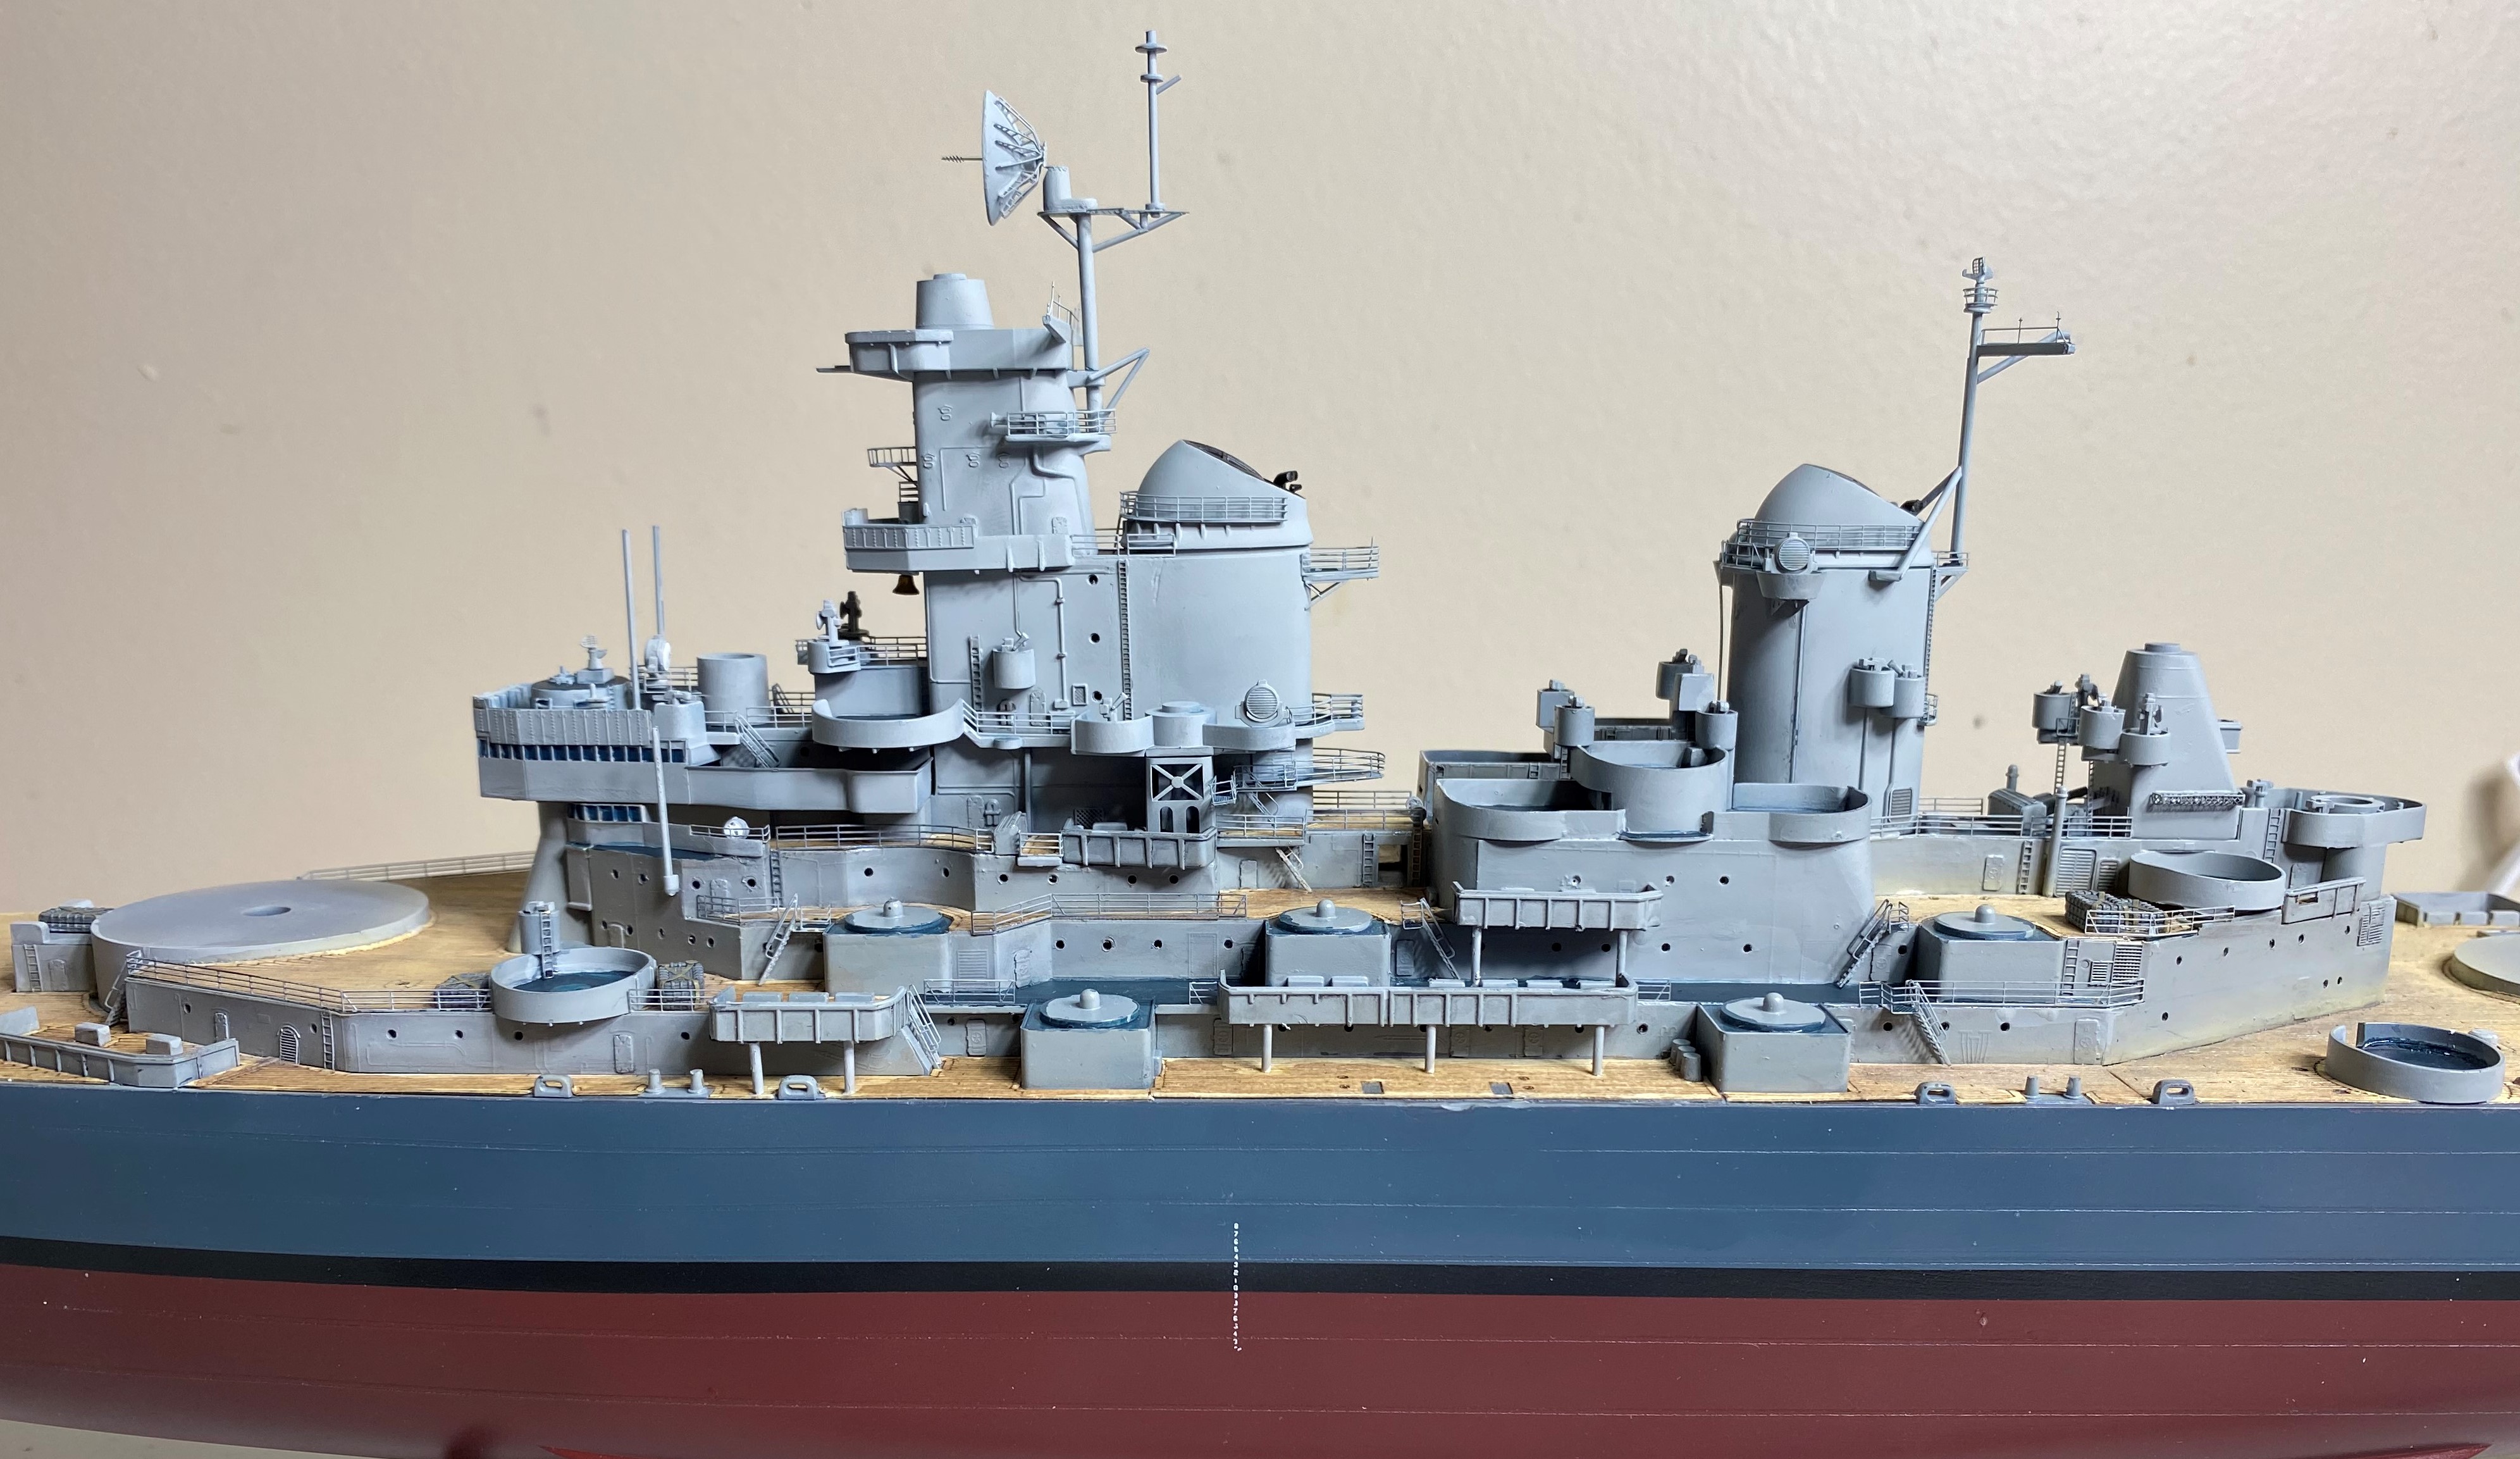
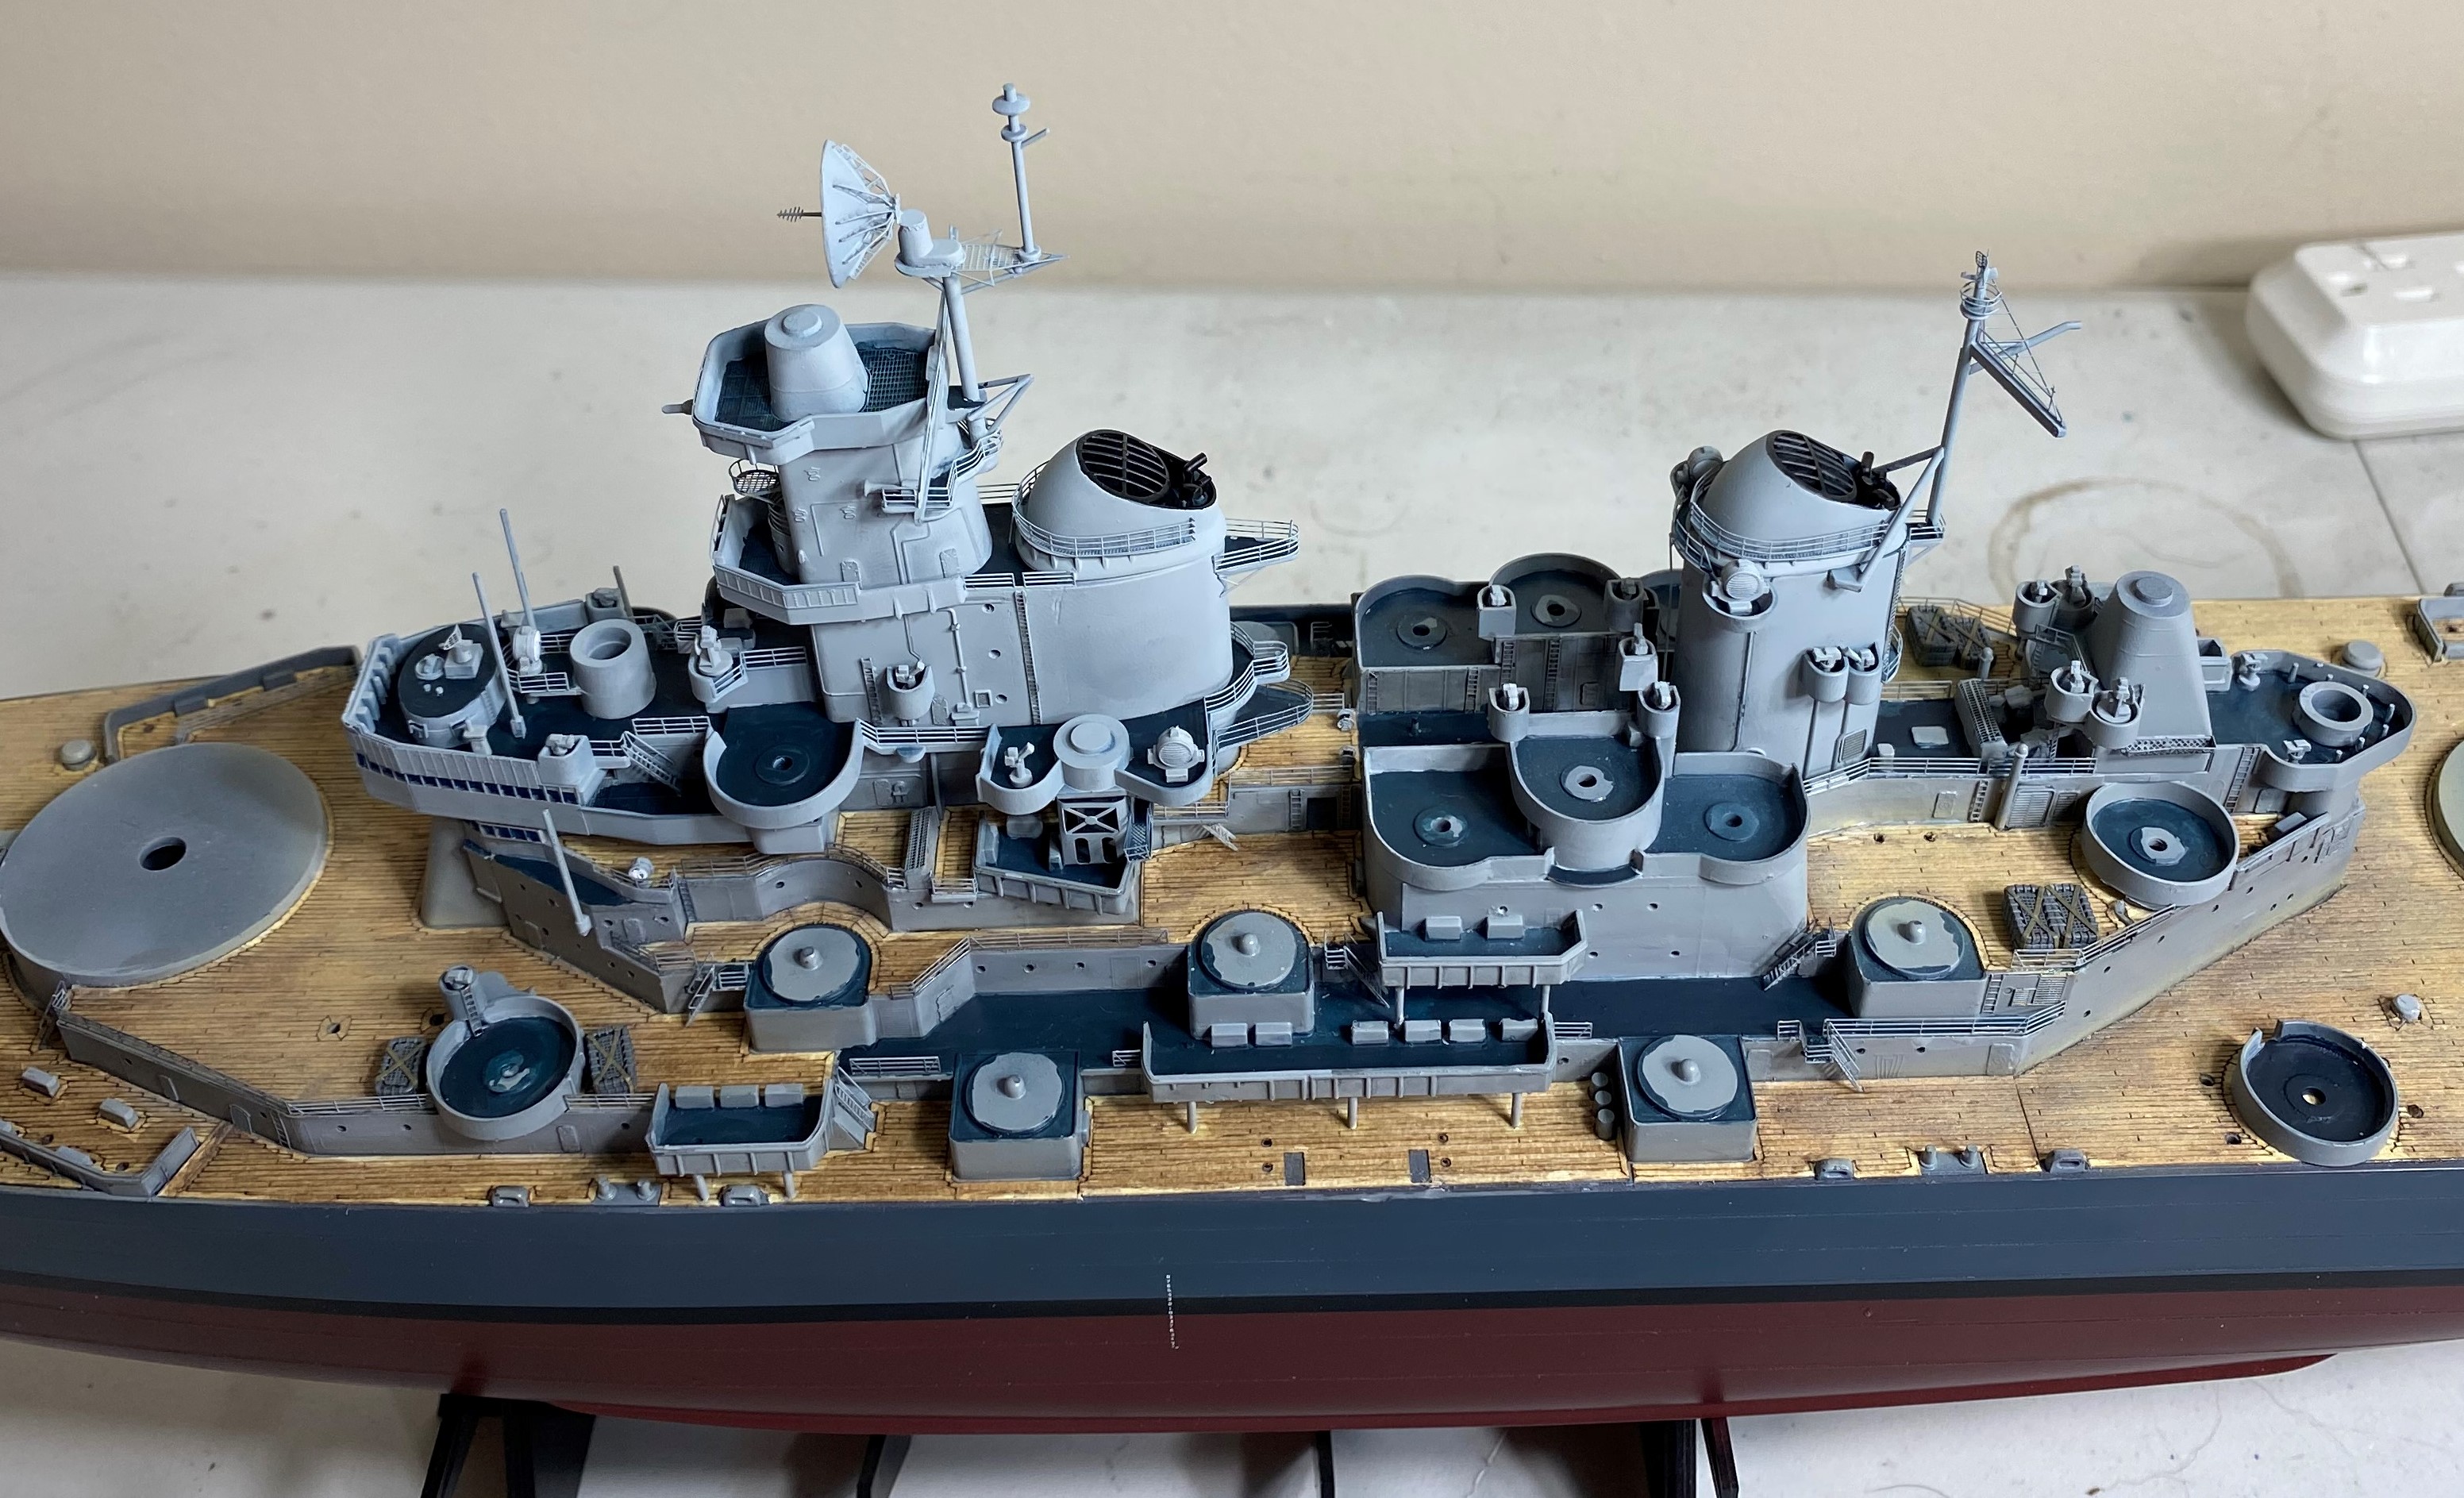
Rear conning tower came out looking pretty good. I am happy with it. Just need to fix the paint a bit.


The OK:

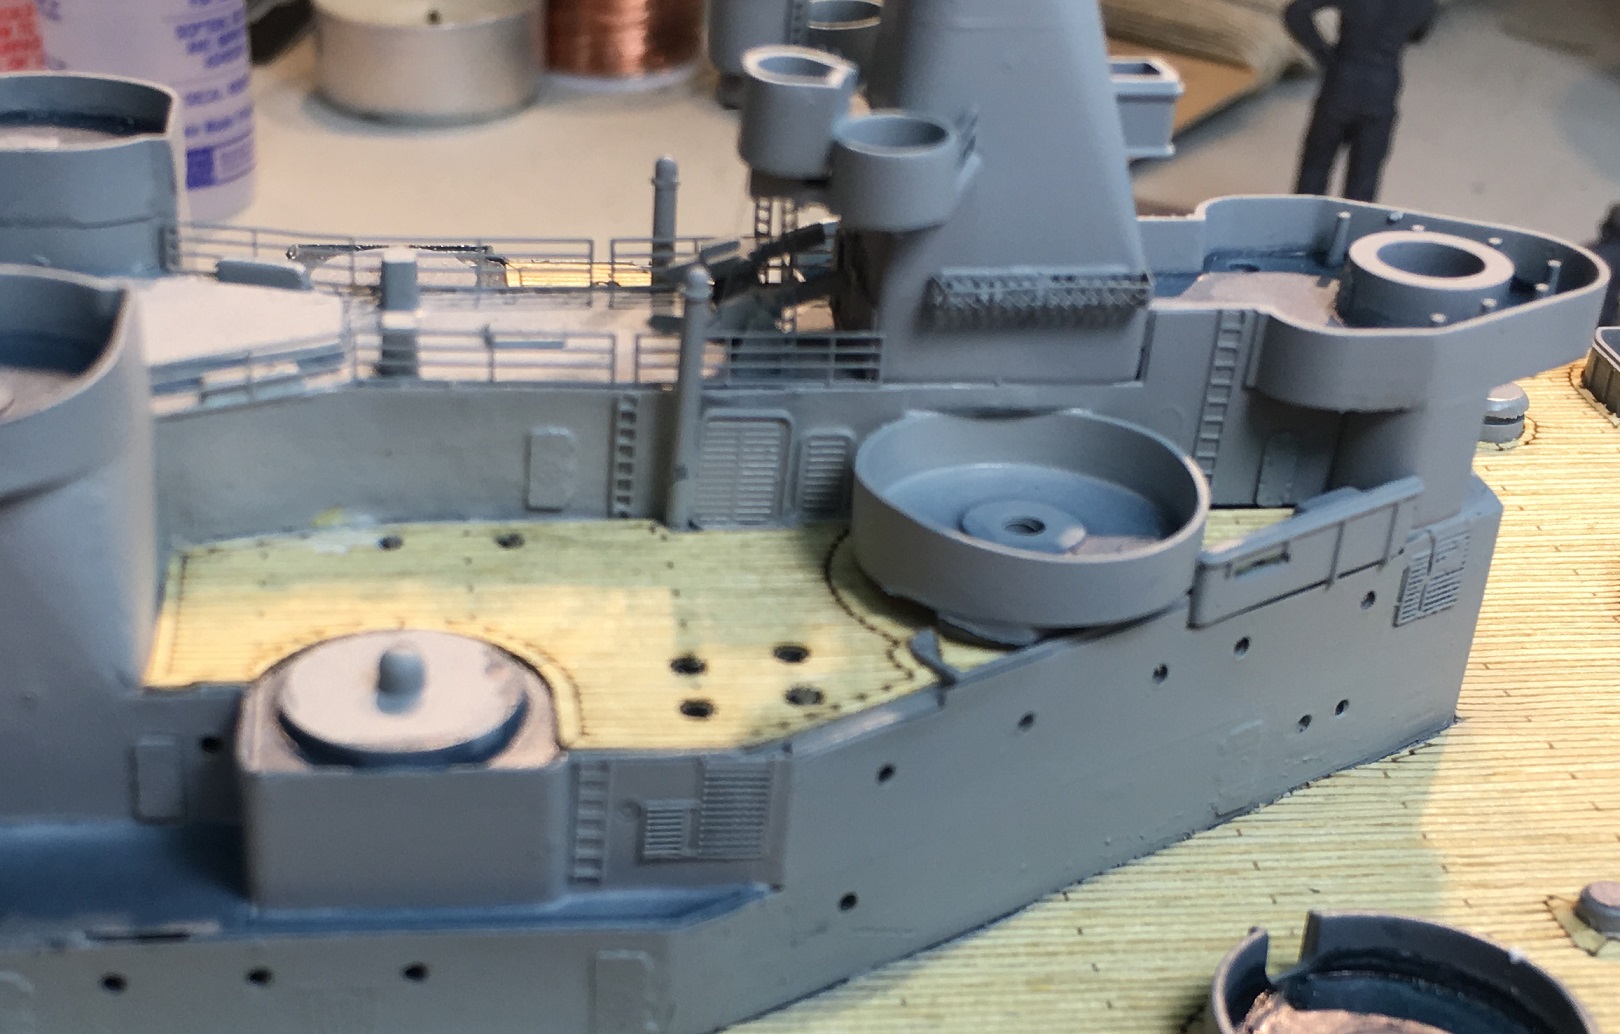
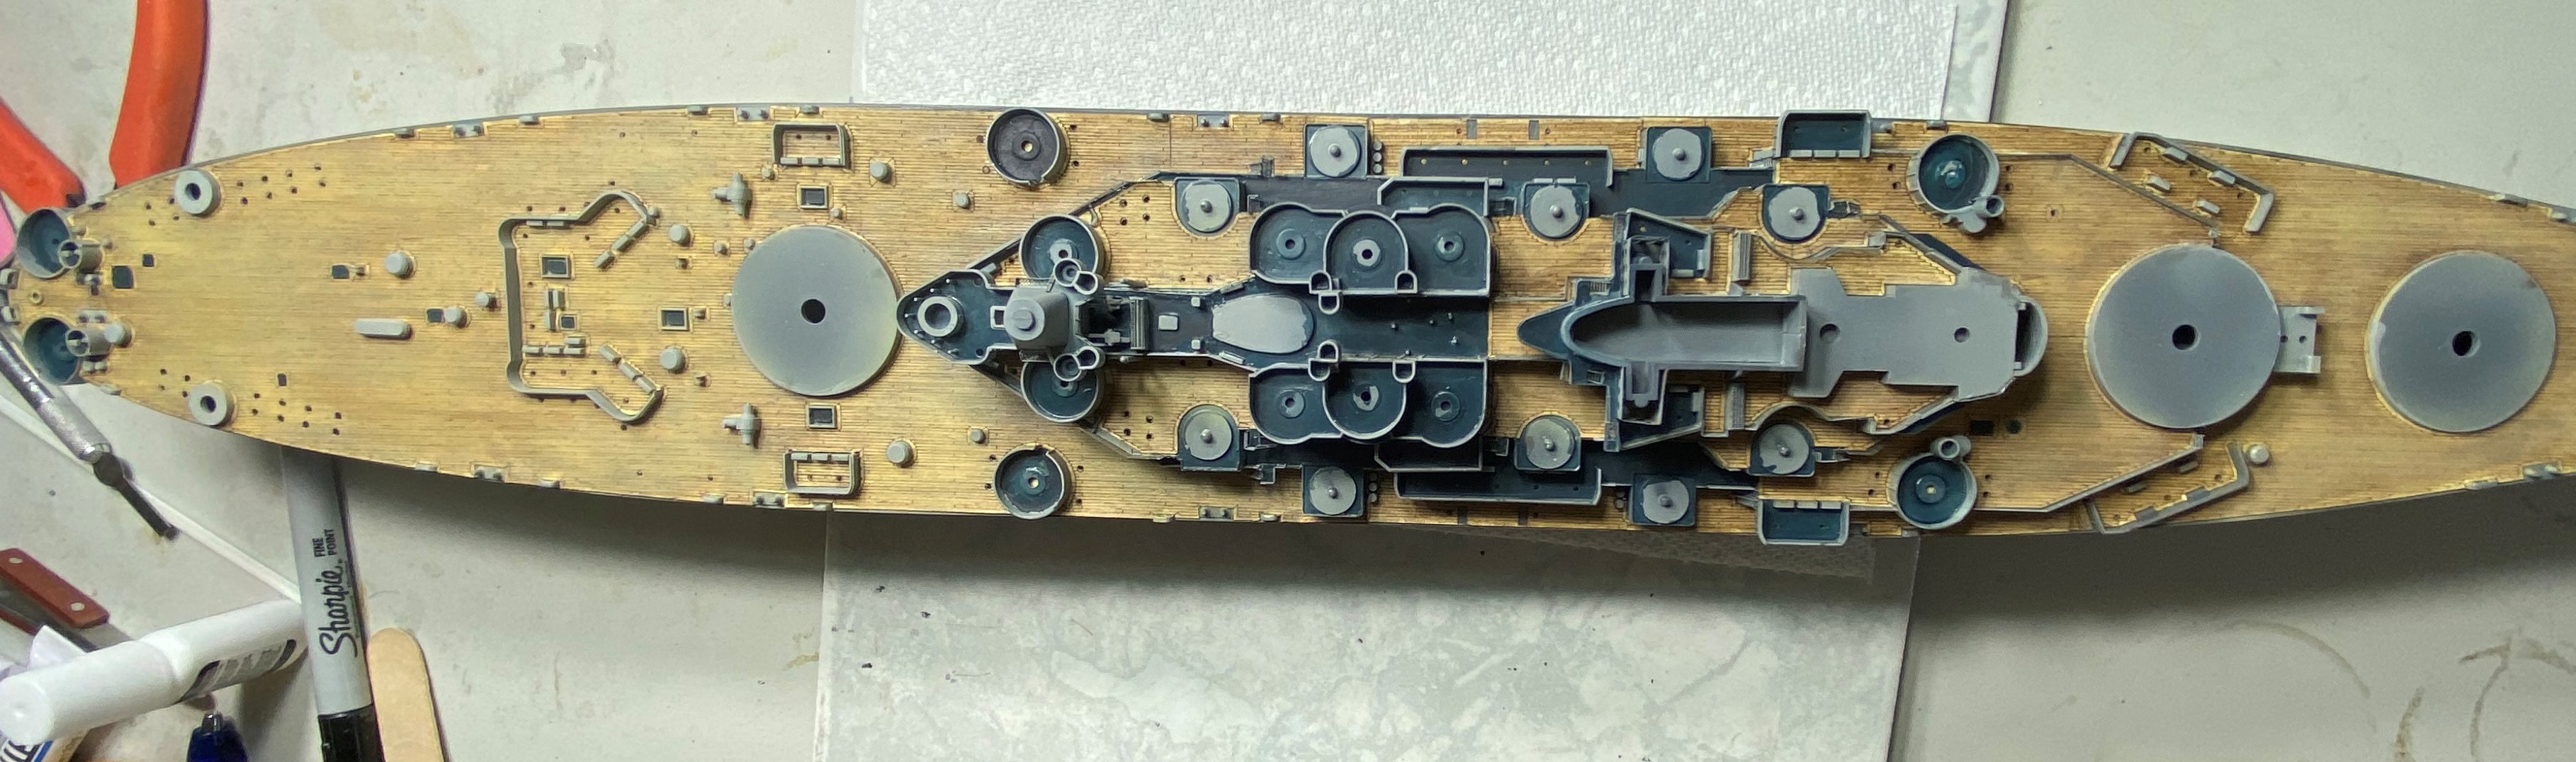
In my infinite wisdom I decided that drilling the portholes would make the ship look much better. All well and good you say except for the fact I had already painted the superstructure etc. Queue up a couple of hours spent with a very careful handled dremel with a long drill bit and we have port holes. I am pretty happy with how it came out.

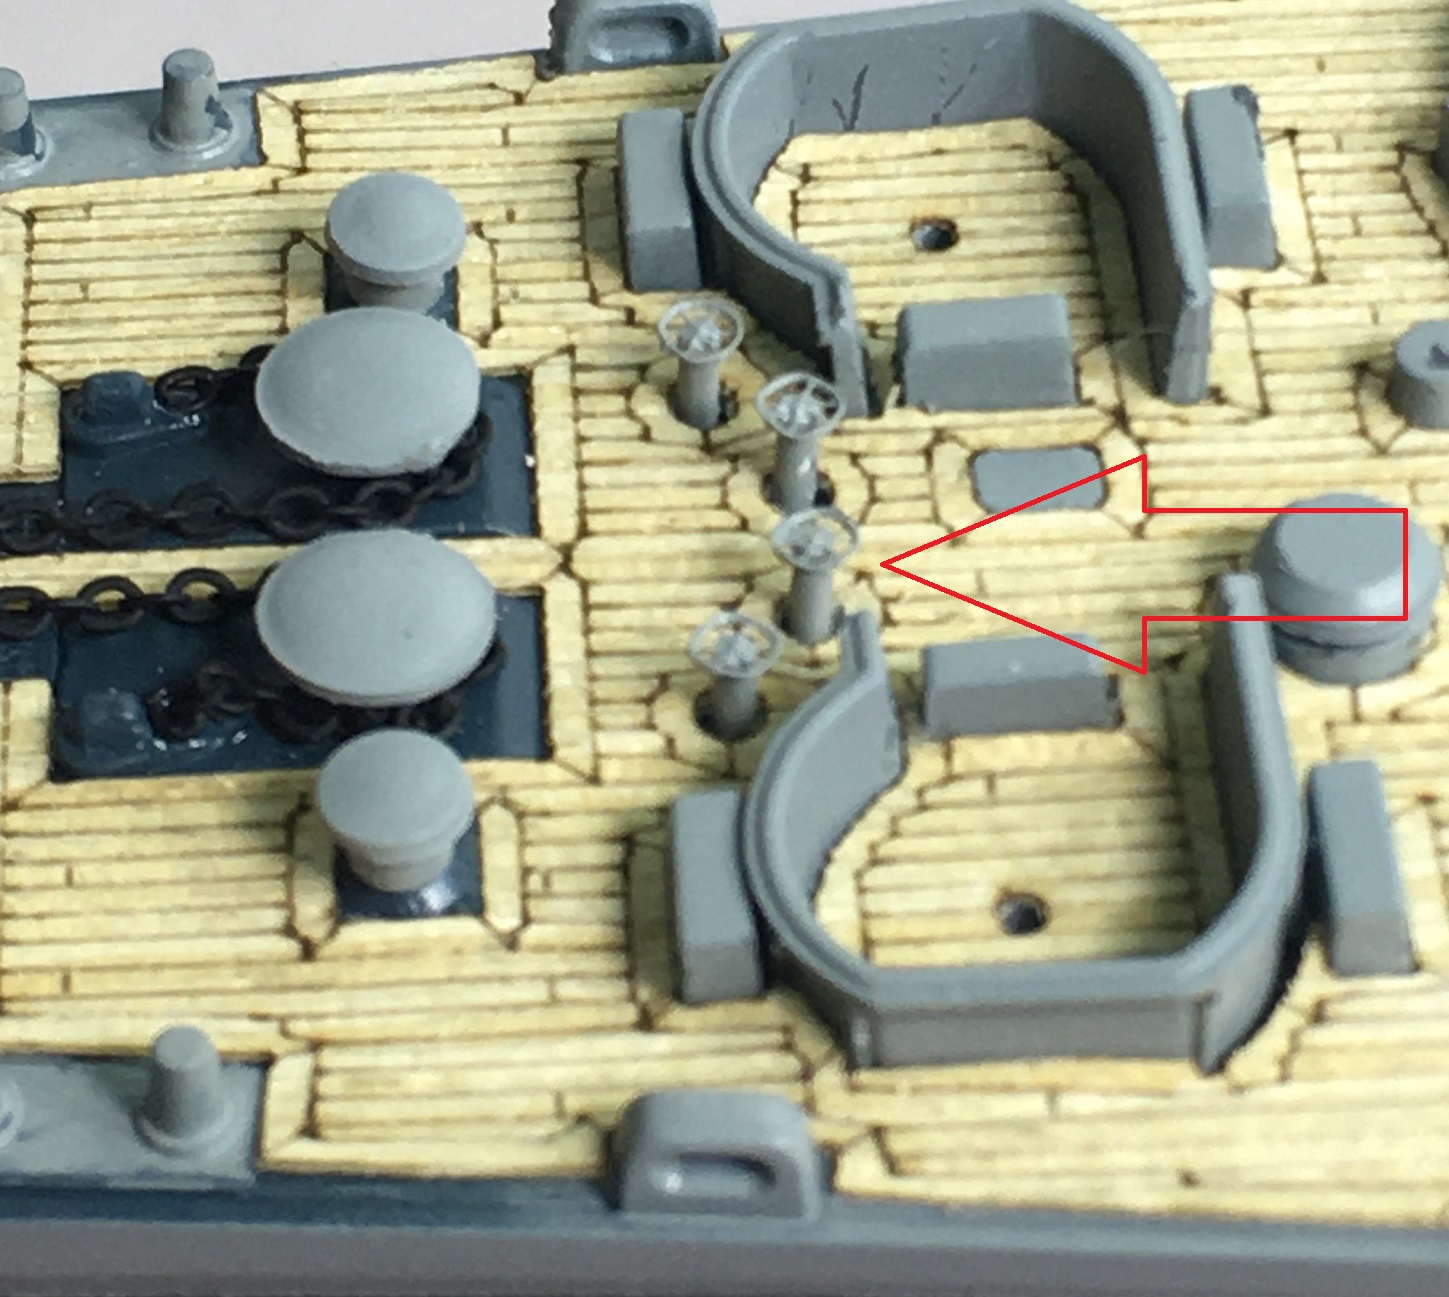
I have also decided (again, after the fact) to put in the support poles for the balcony bits as indicated by the arrow. These are not in the exact correct spot but that's the price you pay for not thinking ahead. I will be adding more on the other balconies when I get some more plastic rod.


Lastly the ugly:

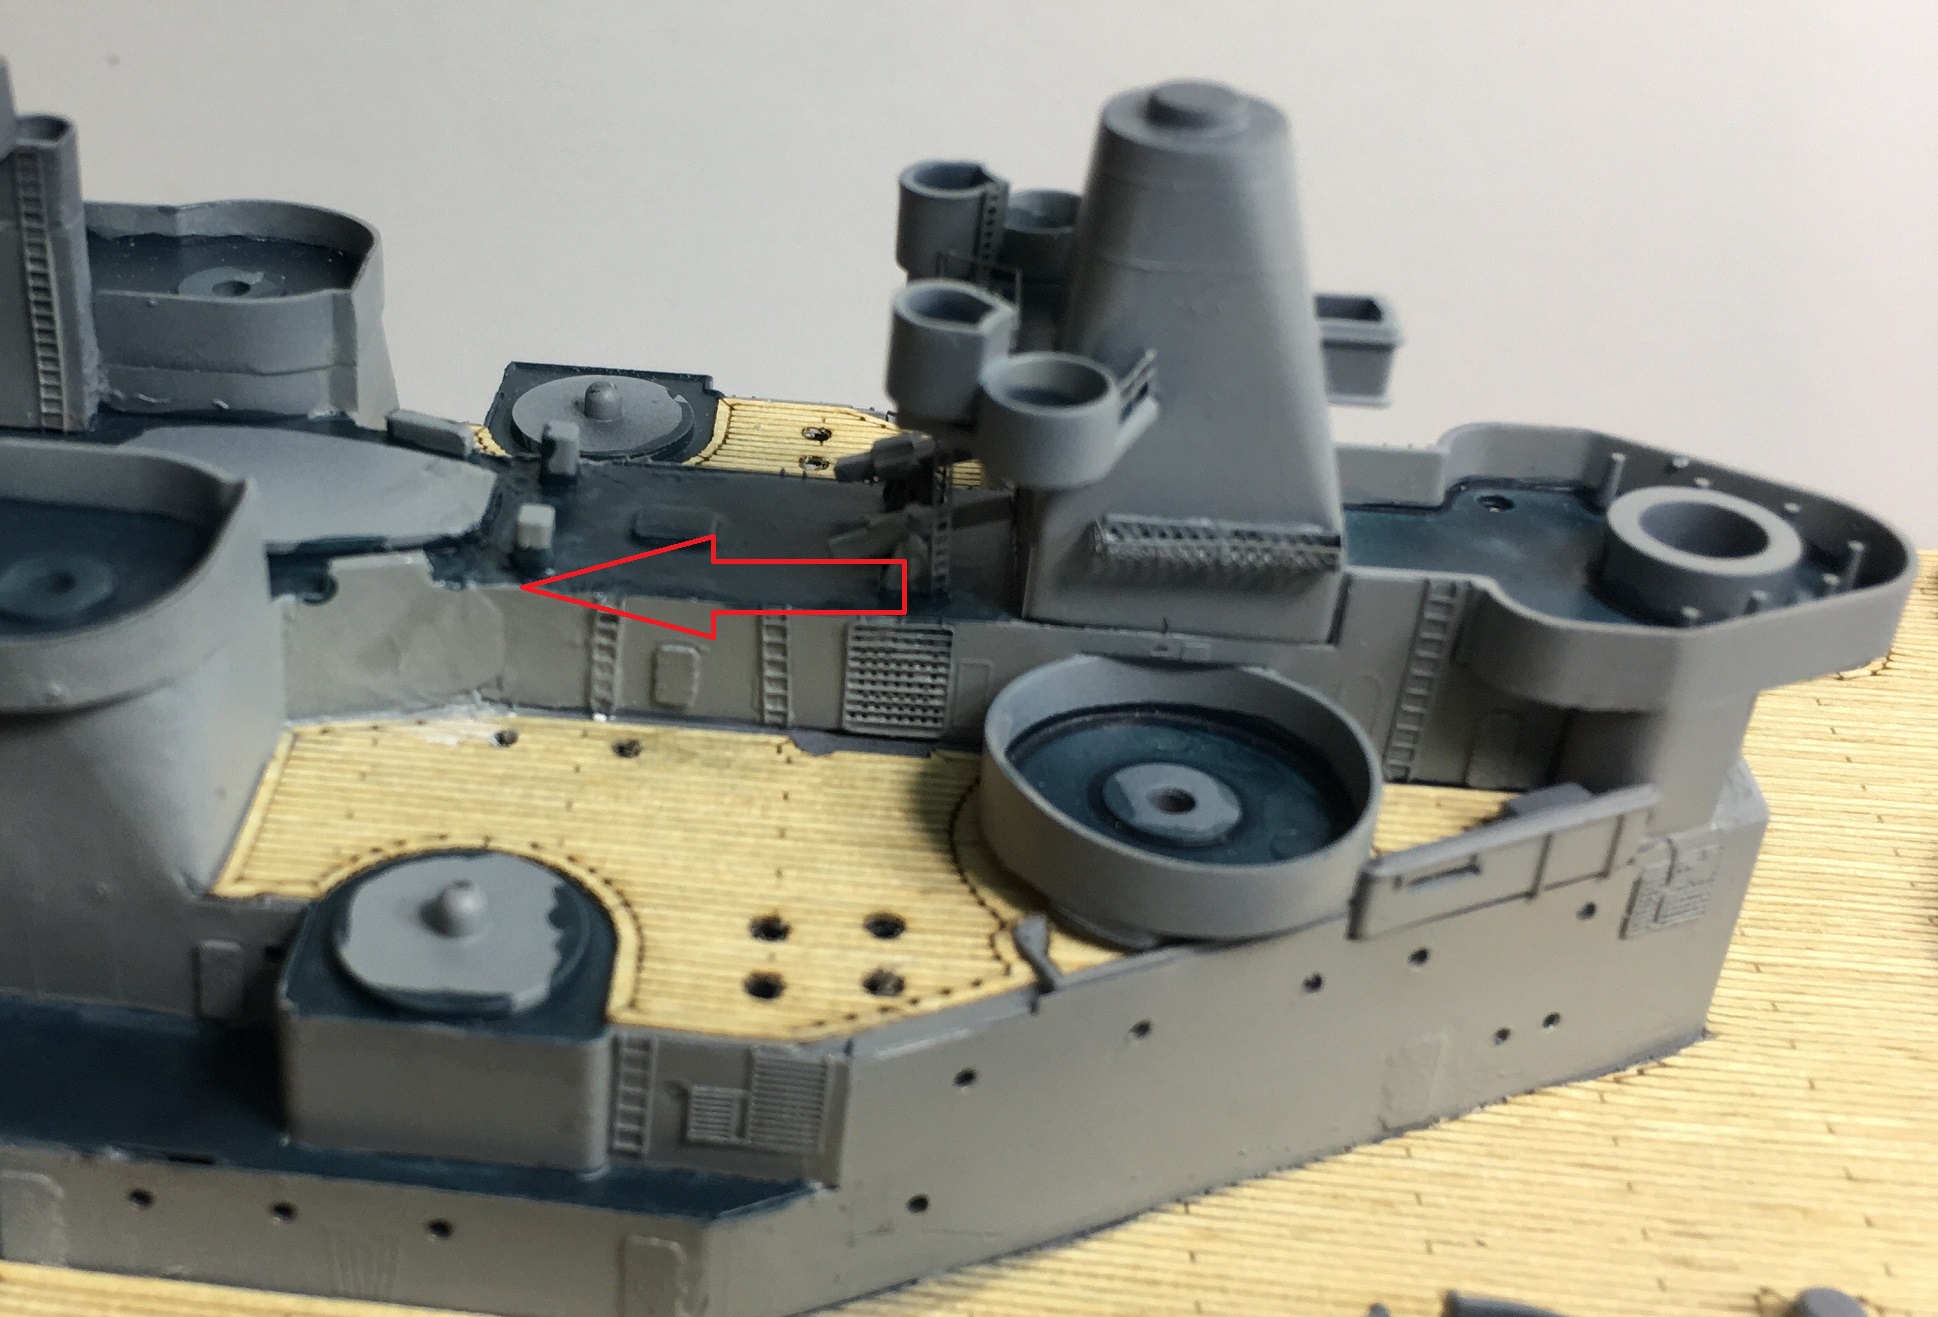
The rear housing which holds the rear conning tower broke away after painting. This tore off the putty and paint and left a nasty mess. Unfortunately because of where it is and the fact I had already put on the conning tower with its fragile PE as well as the wooden deck I am having a hell of a time getting in there to sand and smooth. I have already damaged the adjacent PE ladders which I am going to have to replace.I think I have come up with a solution which, if it works, I will document later.


And lastly, I mentioned this in a previous post but the paint I am using is horrible. Its AK interactive Haze Grey and is simply the worst paint I have ever used. I am forced to use it for now since I have not been able to match it to another paint but after this build or if I find something even remotely comparably its into the trash with it.
RedDuster
Visit this Community
England - South East, United Kingdom
Joined: March 01, 2010
KitMaker: 7,078 posts
Model Shipwrights: 6,649 posts
Posted: Saturday, February 16, 2019 - 09:32 PM UTC
Hi Rory,

Great job on the Anchor gear, the f'o'c's'le looks nice and busy. Pity about the dodgy paint, appreciate the heads up, looks like I will steer clear of that. I wouldn't be too worried about a mismatch in colour, paint on ships tend to weather slighty differently depending on how exposed it is, how much funnel smoke drifts over it etc.


Cheers

Si
McRunty
#491
Visit this Community
Missouri, United States
Joined: April 06, 2016
KitMaker: 602 posts
Model Shipwrights: 349 posts
Posted: Sunday, February 17, 2019 - 10:31 AM UTC
I have fixed my issues with both paint and the rear conning tower mess.

Paint wise I found Mission Models Haze Grey to be a very close match and it behaves so well. It went down beautifully.

Fixing the messed up area was easier than I thought it would be. I ripped off the damaged PE ladders and hatches and I used Tamiya tape to cover it

Granted its tape that has been sealed with CA on the edges and impregnated with pledge but still tape. And it looks pretty good if I do say so myself.

Without paint.


With the new MM Haze Grey.


I really am quite happy with it
timmyp
Visit this Community
Virginia, United States
Joined: May 18, 2008
KitMaker: 496 posts
Model Shipwrights: 404 posts
Posted: Sunday, February 17, 2019 - 10:22 PM UTC
Lookin' good! That's some fantastic detailing on the anchor windlasses & brake handles.

Tim
StephenLarsen
#474
Visit this Community
North Carolina, United States
Joined: June 13, 2015
KitMaker: 67 posts
Model Shipwrights: 41 posts
Posted: Monday, February 18, 2019 - 01:18 AM UTC
Very nice! Great paint rescue!
TimReynaga
Staff MemberAssociate Editor
MODEL SHIPWRIGHTS
Visit this Community
California, United States
Joined: May 03, 2006
KitMaker: 2,500 posts
Model Shipwrights: 1,830 posts
Posted: Tuesday, February 19, 2019 - 01:30 AM UTC
Rory,

I feel your pain! Your experience illustrates why so many of us are so conservative with the paints we use. Some paints work better than others, and once we "learn" a particular paint range there are fewer nasty surprises! Anyway, yours was a workmanlike and effective fix with that awful paint issue.
RussellE
#306
Visit this Community
Victoria, Australia
Joined: June 27, 2010
KitMaker: 3,959 posts
Model Shipwrights: 2,777 posts
Posted: Thursday, February 21, 2019 - 11:12 PM UTC
Rory, very nice fix with the tape method!
McRunty
#491
Visit this Community
Missouri, United States
Joined: April 06, 2016
KitMaker: 602 posts
Model Shipwrights: 349 posts
Posted: Wednesday, October 16, 2019 - 01:43 AM UTC

Quoted Text

Thanks so much, Rory! Very happy to hear you are happy with the parts!

Hi Russell! For the gray resin parts, I recently purchased a high-quality resin 3D printer and now do my own printing. Products printed in gray resin link:
https://www.model-monkey.com/

I can print for others, no minimum.

My Shapeways shop remains open, too, for those that prefer designs printed in materials other than gray resin. Nameplates 3D-printed in real metal are available in that shop, too. Model Monkey on Shapeways link:
https://www.shapeways.com/shops/Model_Monkey

Rory, very happy for you!


Hi Stephen, I have reviewed your turrets and submitted to Kitmaker. Just waiting to see if it gets approved.
StephenLarsen
#474
Visit this Community
North Carolina, United States
Joined: June 13, 2015
KitMaker: 67 posts
Model Shipwrights: 41 posts
Posted: Wednesday, October 16, 2019 - 02:14 AM UTC
Thanks so much, Rory!

I recently completed two more USS Missouri designs, a 1944 bridge and 1945 bridge (details differ). The 1945 bridge may be helpful to you. Here it is:


JJ1973
#345
Visit this Community
Niedersachsen, Germany
Joined: August 22, 2011
KitMaker: 1,835 posts
Model Shipwrights: 1,832 posts
Posted: Thursday, October 17, 2019 - 03:17 AM UTC
Ups- somehow I missed your thread for more than a year...

Rory, great work so far, I just scrolled through the last pages, looks really excellent!

I should be careful not to miss your next update...

Cheers
Jan
McRunty
#491
Visit this Community
Missouri, United States
Joined: April 06, 2016
KitMaker: 602 posts
Model Shipwrights: 349 posts
Posted: Thursday, October 17, 2019 - 03:37 AM UTC

Quoted Text

Ups- somehow I missed your thread for more than a year...

Rory, great work so far, I just scrolled through the last pages, looks really excellent!

I should be careful not to miss your next update...

Cheers
Jan


Hi Jan,

I will be getting back into this build soon. I got distracted by things with wings and tracks
McRunty
#491
Visit this Community
Missouri, United States
Joined: April 06, 2016
KitMaker: 602 posts
Model Shipwrights: 349 posts
Posted: Tuesday, July 14, 2020 - 03:24 PM UTC
And we are back!

After a 9 month Hiatus I have returned to my USS Missouri build, spurred on by my just completed Rowangarth Tug. The juices are once again flowing.

When we left off she was on this state:


Over the last few days I have been working to build up the various subassemblies that make up the Bridge/Funnels etc.


I really like this detail, it even has windscreen wipers.


Part of the upper bridge and funnel:


Upper bridge:


And lastly all test fitted together. Even unpainted this makes a huge difference to the look of the ship:

d6mst0
#453
Visit this Community
Texas, United States
Joined: August 28, 2016
KitMaker: 1,925 posts
Model Shipwrights: 1,298 posts
Posted: Tuesday, July 14, 2020 - 11:20 PM UTC
Rory,

Nice PE work, it really enhances the detail of the superstructure. I hope your eyes weren't to strained after adding all of those tiny pieces. Good job getting them aligned with each other.

Mark
Panzer_Modeler
Visit this Community
New Mexico, United States
Joined: May 19, 2020
KitMaker: 419 posts
Model Shipwrights: 146 posts
Posted: Wednesday, July 15, 2020 - 02:03 AM UTC
Wow, that looks great Rory
ejhammer
Visit this Community
Michigan, United States
Joined: June 10, 2008
KitMaker: 230 posts
Model Shipwrights: 136 posts
Posted: Wednesday, July 15, 2020 - 02:21 AM UTC
Looking good.

My "MO" has been sitting on the shelf for a year too. Kinda lost my enthusiasm for some reason.

Seeing your "re-start" I hope will invigorate me to get my mojo back. I'm up to about halfway up the superstructure, getting ready for the stack and top decks. I really struggled with the application of the wood decks and painting all the pe details after application without messing up the wood. I got the Pontos set which cost as much as the kit, so I don't want to screw it up.

Keep up the very fine work you're doing.

EJ
McRunty
#491
Visit this Community
Missouri, United States
Joined: April 06, 2016
KitMaker: 602 posts
Model Shipwrights: 349 posts
Posted: Wednesday, July 15, 2020 - 12:51 PM UTC

Quoted Text

I got the Pontos set which cost as much as the kit, so I don't want to screw it up.


I get that. I built my HMS Warspite with the Pontos kit and it was very intimidating. I am building this with the Eduard set in conjunction with a set from some Chinese company.
RussellE
#306
Visit this Community
Victoria, Australia
Joined: June 27, 2010
KitMaker: 3,959 posts
Model Shipwrights: 2,777 posts
Posted: Friday, July 17, 2020 - 12:36 AM UTC
Great to see this one back on the bench, Rory!

Great update too
McRunty
#491
Visit this Community
Missouri, United States
Joined: April 06, 2016
KitMaker: 602 posts
Model Shipwrights: 349 posts
Posted: Sunday, July 19, 2020 - 08:07 AM UTC
Weekend update time. Been working at this a lot and while it looks like I haven't done a lot I have actually progressed a lot.

First up, all railings have been added to the superstructure. Only railing left is the main deck. I will add that after I have added all the 'bits' to the deck to avoid damaging it.


Next up the masts and radars are built and installed.


The Sk-2 Radar was a lesson in taking a step back and admitting you have failed. I went through 3 separate sets of PE radars and I screwed them all up. I eventually mcguyvered a radar out of the kit part and salvaged PE from my failed attempts. Does it look amazing? No. But it will suffice. I am not prepared to spend more money on a radar which has already beaten me 3 times.


Next up, all the direction finders, searchlights etc have been cleaned up and are ready for spraying.


Currently working on the life rafts. In my infinite wisdom I decided to add strapping to them. Its a pain in the bum and not entirely historically accurate but will add some visual pop. Most rafts were attached with ropes but I have found photos of some ships where they are attached with the crossed strapping. 13 down, many more to go.


And lastly, not sure it will show in the pics but I went back and added some tonal variation to the deck. I really, really, REALLY should have down this before I installed the deck. Live and learn for next time...


Next week I will be tackling the main and secondary direction finders, the 5 inch guns and possibly the aircraft catapults.

I also plan on painting the superstructure sub assemblies so I can start to build her up.
TimReynaga
Staff MemberAssociate Editor
MODEL SHIPWRIGHTS
Visit this Community
California, United States
Joined: May 03, 2006
KitMaker: 2,500 posts
Model Shipwrights: 1,830 posts
Posted: Sunday, July 19, 2020 - 09:51 AM UTC
Rory,

That's a good work around on the SK-2!

In model building it's not about being perfect but rather about having fun and coming up with satisfactory solutions. That's exactly what you did here, and it looks good!

d6mst0
#453
Visit this Community
Texas, United States
Joined: August 28, 2016
KitMaker: 1,925 posts
Model Shipwrights: 1,298 posts
Posted: Sunday, July 19, 2020 - 09:54 AM UTC
Rory,

And I thought PE only hated me, feel your pain. The radar did come out very nice and once painted and weathered it will look awesome.

I didn't know that rafts were tied down, wouldn't that prevent them from floating free if the ship sank? Never really research the subject so what do I know. Anyway nice progress she going to look wonderful.

Mark
McRunty
#491
Visit this Community
Missouri, United States
Joined: April 06, 2016
KitMaker: 602 posts
Model Shipwrights: 349 posts
Posted: Monday, July 20, 2020 - 05:40 AM UTC
Mark,

They were definitely tied down. I have read far more about Carley rafts the last few days than I ever thought possible. They were meant to be pushed off the ship as opposed to floating off.

Clear photos of WW2 era USN Carley rafts are oddly hard to find. I found the 3 below via google.

Tied down rope:


Tied down with rope:


Strapped down:

d6mst0
#453
Visit this Community
Texas, United States
Joined: August 28, 2016
KitMaker: 1,925 posts
Model Shipwrights: 1,298 posts
Posted: Monday, July 20, 2020 - 10:02 AM UTC
Rory,

Thank you for the feedback, now I know. Can I assume that is the same for British ships? I am finishing up my HMS Zulu and I should be adding tie downs to the those floats.

Mark
McRunty
#491
Visit this Community
Missouri, United States
Joined: April 06, 2016
KitMaker: 602 posts
Model Shipwrights: 349 posts
Posted: Monday, July 20, 2020 - 10:18 AM UTC
Mark,

Looks like it was the same for RN ships. There are a few pics of Carly floats on HMS Repulse and Hood with the tied down with ropes.
McRunty
#491
Visit this Community
Missouri, United States
Joined: April 06, 2016
KitMaker: 602 posts
Model Shipwrights: 349 posts
Posted: Monday, July 20, 2020 - 03:20 PM UTC
Todays update:

Superstructure is on and she is looking grand. She has been sitting for almost 2 years with just the lower superstructure on and its wonderful to see her looking semi complete. Still a long way to go but we are getting there.


And lastly I have installed the strapped lifeboats and I think they came out looking very spiffy.


Tomorrow I shall start tackling the Mk 37 and Mk38 Directors.
d6mst0
#453
Visit this Community
Texas, United States
Joined: August 28, 2016
KitMaker: 1,925 posts
Model Shipwrights: 1,298 posts
Posted: Monday, July 20, 2020 - 11:34 PM UTC
Rory,

Looking good. Knowing all the work it took just to get that far with the superstructure is now going to pay off as you add the final pieces. She already looks like she means business.

Mark