HobbyBoss 1/700 USS Arizona WIP

#453
Texas, United States
Joined: August 28, 2016
KitMaker: 1,925 posts
Model Shipwrights: 1,298 posts
Posted: Monday, November 12, 2018 - 05:39 AM UTC
Charlie,
Sure is a lot of prep work when building a ship. Nice progress.
Mark

#306
Victoria, Australia
Joined: June 27, 2010
KitMaker: 3,959 posts
Model Shipwrights: 2,777 posts
Posted: Monday, November 12, 2018 - 11:17 PM UTC
Charlie, the assembly line of parts begins!

The joys of ship building

The good thing about the smaller scales is they don't require the level of detail the larger scales do
Looking very nice so far!
Stay home and build models!
In 1/72
Gloster Gladiator MkII for the Bi-planes Campaign
In 1/350
Airfix 1:350 Type 45 Destroyer
Arizona, United States
Joined: September 20, 2017
KitMaker: 350 posts
Model Shipwrights: 175 posts
Posted: Tuesday, November 13, 2018 - 05:23 AM UTC
While this has been fun, the superstructure problem I have come to have kind of put the brakes on the progress.
I just can't figure out how to get it together.
Actually looking forward to building some more modern warships in the near future.
Current Floating PIMA: HobbyBoss USS Arizona
Current Driving PIMA: AMT 1953 Chevrolet Corvette
Arizona, United States
Joined: September 20, 2017
KitMaker: 350 posts
Model Shipwrights: 175 posts
Posted: Wednesday, November 14, 2018 - 04:14 AM UTC
I found out the problem!!
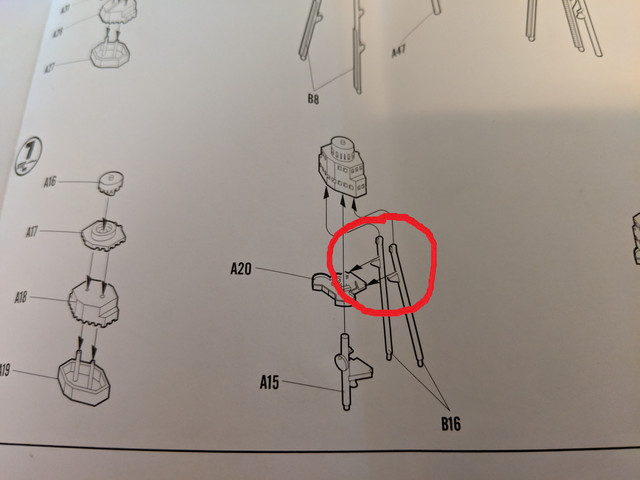
Those little ridges show on the instructions to go right under the superstructure. I removed them and fit them into place on the lower superstructure and those little triangles go waaaaaaaay lower than the instructions show.
Silly HobbyBoss.
Current Floating PIMA: HobbyBoss USS Arizona
Current Driving PIMA: AMT 1953 Chevrolet Corvette
#306
Victoria, Australia
Joined: June 27, 2010
KitMaker: 3,959 posts
Model Shipwrights: 2,777 posts
Posted: Thursday, November 15, 2018 - 08:50 PM UTC
Nice work Charlie!
Stay home and build models!
In 1/72
Gloster Gladiator MkII for the Bi-planes Campaign
In 1/350
Airfix 1:350 Type 45 Destroyer
Arizona, United States
Joined: September 20, 2017
KitMaker: 350 posts
Model Shipwrights: 175 posts
Posted: Friday, November 16, 2018 - 03:07 AM UTC
Quoted Text
Nice work Charlie!
Not gonna lie, people commenting and saying I am doing a better job than I think I am doing is really, really inspirational.
I need to do the same in more threads.
Thanks, man.
Current Floating PIMA: HobbyBoss USS Arizona
Current Driving PIMA: AMT 1953 Chevrolet Corvette
#306
Victoria, Australia
Joined: June 27, 2010
KitMaker: 3,959 posts
Model Shipwrights: 2,777 posts
Posted: Saturday, November 17, 2018 - 10:03 PM UTC
ah, the power of "MSW"community: We're here to help Charlie
Stay home and build models!
In 1/72
Gloster Gladiator MkII for the Bi-planes Campaign
In 1/350
Airfix 1:350 Type 45 Destroyer
Arizona, United States
Joined: September 20, 2017
KitMaker: 350 posts
Model Shipwrights: 175 posts
Posted: Monday, November 19, 2018 - 04:30 AM UTC
Small update!!
My giant fingers and I managed to get this done:

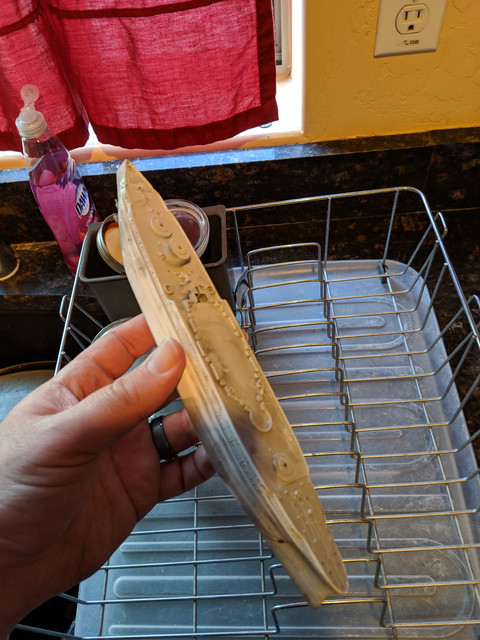
So that's nice. On the other hand, my boot was all wavy and I just cannot get my head around liking Hull Red for these ships. Its too dark even tho it may be correct. So with this all together, she got a Windex bath.

I am gonna try to get some painting done tonight. Still trying to tackle how to paint the top of that superstructure.
Any tips on painting a reasonably straight boot line on these ships? I was using Tamiya tape but my eye must be crooked.
Current Floating PIMA: HobbyBoss USS Arizona
Current Driving PIMA: AMT 1953 Chevrolet Corvette
#306
Victoria, Australia
Joined: June 27, 2010
KitMaker: 3,959 posts
Model Shipwrights: 2,777 posts
Posted: Monday, November 19, 2018 - 09:31 PM UTC
Hehee, that's the first time I've seen a ship in a dish washer!

For boot top stripes I suggest using a height gauge to lightly mark with pencil a line on the hull that you want to mask to. A height gauge just needs to be something you can rest the pencil on and get a consistent line around the hull at the required height.
After that Charlie, I use Tamiya tape. For the flatter segments of the hull I use 6mm wide. As the hull tapers towards the bow/stern, I cut short strips 2mm wide and these usually flex to the shape on the gentler curves.
As the curves become tighter you'll need shorter lengths.
Don't try to mask the entire hull with just one piece of tape. Lots of shorter pieces are the key
Stay home and build models!
In 1/72
Gloster Gladiator MkII for the Bi-planes Campaign
In 1/350
Airfix 1:350 Type 45 Destroyer
#453
Texas, United States
Joined: August 28, 2016
KitMaker: 1,925 posts
Model Shipwrights: 1,298 posts
Posted: Wednesday, November 21, 2018 - 12:04 AM UTC
I agree with Russell. I have a cheap height gauge made of wood that I use to mark a line down the hull. Using Tamiya tape (always Tamiya tape) when masking for a boot line as it lays down the best and seals tight.
There are great videos on you-tube demonstrating how to use a height gauge.
Mark
TimReynaga
 Associate Editor
California, United States
Joined: May 03, 2006
KitMaker: 2,500 posts
Model Shipwrights: 1,830 posts
Posted: Wednesday, November 21, 2018 - 01:40 AM UTC
Hi Charlie,
I agree with Russ and Mark about the height gauge, but I've also had good results just "eyeballing" it. Since you have stripped the paint, the line between the upper and lower hull is visible on your model. You could use that as your guide. As for the tape, I also agree that Tamiya tape is the best. I like to stick a length of the tape on a plexiglass surface and cut 2mm strips using a metal ruler to assure straight cuts. Then I use a single strip to mark the waterline. The key here is to keep it taught as it is laid down to assure a straight line; the thin strip enables easier control. When I like the positioning, I add a series of thicker tape strips until the lower hull is masked. Pretty simple, really, but it works. Good luck with it!
Arizona, United States
Joined: September 20, 2017
KitMaker: 350 posts
Model Shipwrights: 175 posts
Posted: Wednesday, November 21, 2018 - 03:16 AM UTC
Great advice guys!! I ran out of time to work on her last weekend and will try this weekend once the Holidays have slowed down. Got mandatory ten hours days for Black Friday AND Cyber Monday. Ugh.
I am itching to work on her and get this boot situation figured out. I appreciate all the tips so much!! I have lots to think about!
Current Floating PIMA: HobbyBoss USS Arizona
Current Driving PIMA: AMT 1953 Chevrolet Corvette
Arizona, United States
Joined: September 20, 2017
KitMaker: 350 posts
Model Shipwrights: 175 posts
Posted: Tuesday, November 27, 2018 - 03:09 AM UTC
Update from the Holiday weekend!! I painted the lenses on these searchlights:
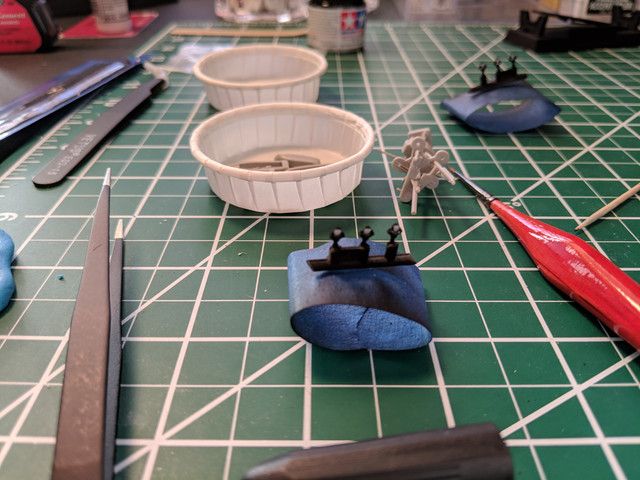
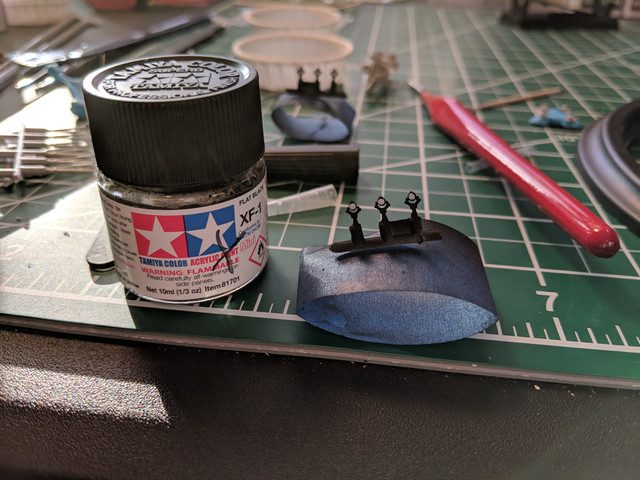
Detailed these up with some black where the airbrush missed. I am really enjoying painting these little parts.
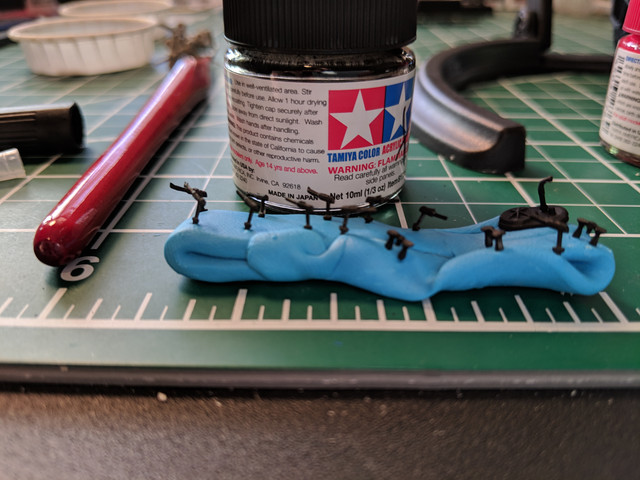
Here is the first set for airbrushing. I am gonna go through a lot of this blue steel color!
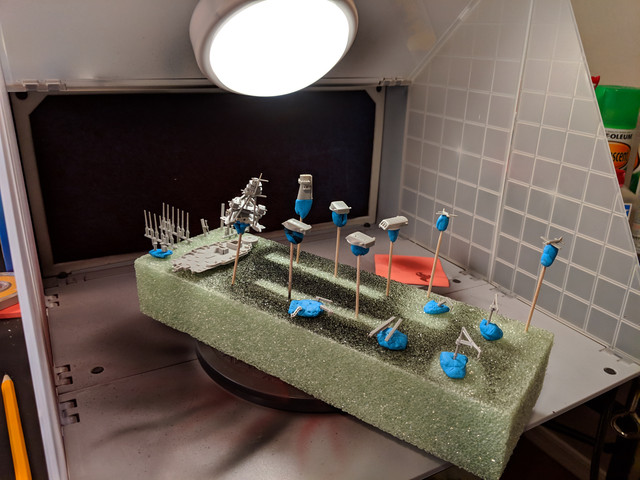
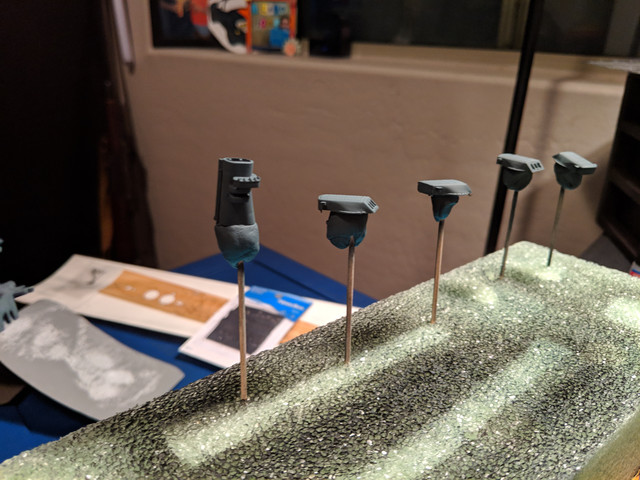
Love this color. I still have to spray the lifeboats and the deck. Not to mention some more little bits and pieces the first coat missed.
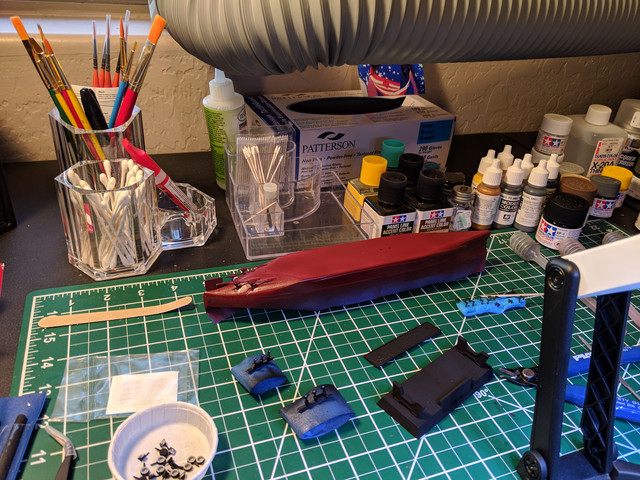
Here is my proudest part!! 1 part Hull Red and 3 parts Red created this color. I applied two coats and absolutely love it. I feel like it more appropriate for this ship. Mostly in my own head tho.
I am now trying to tackle these wee-little float planes and trying to think of a way to paint the two tone paint job. Any ideas would be super!!
Current Floating PIMA: HobbyBoss USS Arizona
Current Driving PIMA: AMT 1953 Chevrolet Corvette
#306
Victoria, Australia
Joined: June 27, 2010
KitMaker: 3,959 posts
Model Shipwrights: 2,777 posts
Posted: Tuesday, November 27, 2018 - 08:48 AM UTC
Ah, the parts forest for airbrushing-always a good sight to see on a build
The Hull red you've chosen looks nice too Mark

Stay home and build models!
In 1/72
Gloster Gladiator MkII for the Bi-planes Campaign
In 1/350
Airfix 1:350 Type 45 Destroyer
Arizona, United States
Joined: September 20, 2017
KitMaker: 350 posts
Model Shipwrights: 175 posts
Posted: Tuesday, November 27, 2018 - 09:34 AM UTC
Quoted Text
Ah, the parts forest for airbrushing-always a good sight to see on a build
The Hull red you've chosen looks nice too Mark
Thanks!!
Just gonna go ahead and pretend you said my name. LOL
Current Floating PIMA: HobbyBoss USS Arizona
Current Driving PIMA: AMT 1953 Chevrolet Corvette
Virginia, United States
Joined: May 18, 2008
KitMaker: 496 posts
Model Shipwrights: 404 posts
Posted: Tuesday, November 27, 2018 - 04:07 PM UTC
Quoted Text
Charlie,
I too used to use Squadron filler (it was once the best thing going), but time has definitely passed it by. There are quite a few products out there for modelers now that are much better.
The filler I usually use is simple cyanoacrylate (super glue), which I apply to seams with an X-acto blade. It dries fairly quickly, but you can also hit it with cyano accelerator to set it instantly. It dries to about the same hardness and consistency as most model plastics, can be sanded glass smooth, doesn't flake, and is very durable.
Maybe for your next project...
Ugg! I finally bought some Squadron putty a while back (haven't used it), and now Tim says it's past its prime...oh well, back to spit and papier mache!
BTW, your work is looking great...that's some intense detailing on the searchlights, painting the lenses like that! Keep at it & keep it up!
Tim
#306
Victoria, Australia
Joined: June 27, 2010
KitMaker: 3,959 posts
Model Shipwrights: 2,777 posts
Posted: Tuesday, November 27, 2018 - 05:37 PM UTC
Quoted Text
Quoted Text
Ah, the parts forest for airbrushing-always a good sight to see on a build
The Hull red you've chosen looks nice too Mark
Thanks!!
Just gonna go ahead and pretend you said my name. LOL
Ooops, sorry Charlie. Was chatting to a co-worker called Mark at the time
Stay home and build models!
In 1/72
Gloster Gladiator MkII for the Bi-planes Campaign
In 1/350
Airfix 1:350 Type 45 Destroyer
TimReynaga
Associate Editor California, United States
Joined: May 03, 2006
KitMaker: 2,500 posts
Model Shipwrights: 1,830 posts
Posted: Wednesday, November 28, 2018 - 02:57 AM UTC
Quoted Text
Ugg! I finally bought some Squadron putty a while back (haven't used it), and now Tim says it's past its prime...oh well, back to spit and papier mache!
The Squadron stuff is a bit Old School, but I must admit that I do still use it occasionally when its tendency to shrink is advantageous, such as when sculpting blast bags or simulating canvas covers for boats

And Charlie, I really like your red antifouling mix - looks dead right to me!
Arizona, United States
Joined: September 20, 2017
KitMaker: 350 posts
Model Shipwrights: 175 posts
Posted: Wednesday, November 28, 2018 - 04:13 AM UTC
Quoted Text
Quoted Text
Ugg! I finally bought some Squadron putty a while back (haven't used it), and now Tim says it's past its prime...oh well, back to spit and papier mache!
The Squadron stuff is a bit Old School, but I must admit that I do still use it occasionally when its tendency to shrink is advantageous, such as when sculpting blast bags or simulating canvas covers for boats
And Charlie, I really like your red antifouling mix - looks dead right to me!
Don't think I will be using the Squadron stuff a bit! Gonna try this Vallejo stuff next time! Thanks! The hull looks so much better to the eye now. That Hull Red is pretty much brown. Will probably be a better fit for my next project.
Current Floating PIMA: HobbyBoss USS Arizona
Current Driving PIMA: AMT 1953 Chevrolet Corvette
Arizona, United States
Joined: September 20, 2017
KitMaker: 350 posts
Model Shipwrights: 175 posts
Posted: Monday, December 03, 2018 - 03:04 AM UTC
Sorry Gents! No update this weekend. My model skillz were in use taking care of my five month pregnant wife who also now has bronchitis.
I will try to sneak in some work this week!!
Current Floating PIMA: HobbyBoss USS Arizona
Current Driving PIMA: AMT 1953 Chevrolet Corvette
Arizona, United States
Joined: September 20, 2017
KitMaker: 350 posts
Model Shipwrights: 175 posts
Posted: Monday, December 10, 2018 - 04:37 AM UTC
Small update over the weekend. Poor wife got food poisoning so I was able to do a little bit of work while she took a nap. The hull so far:
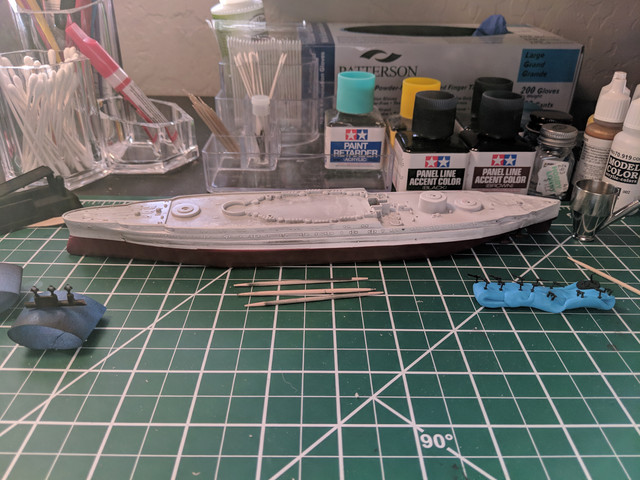
I still have no idea how I am gonna bet a boot on here. Guess I'll make it up as I go and try to make it straight!

Painted the superstructure by hand. Under magnification, I hate it. But it looks ok by itself.
The first deck I have ever installed. Went super easy. Had to take it back off when I realized the back was sticky if I removed the paper. I am not a smart man.
Current Floating PIMA: HobbyBoss USS Arizona
Current Driving PIMA: AMT 1953 Chevrolet Corvette
#306
Victoria, Australia
Joined: June 27, 2010
KitMaker: 3,959 posts
Model Shipwrights: 2,777 posts
Posted: Monday, December 10, 2018 - 08:27 AM UTC
Quoted Text
Small update over the weekend. Poor wife got food poisoning so I was able to do a little bit of work while she took a nap. The hull so far:
Hope your wife's feeling better now Charlie
Quoted Text
I still have no idea how I am gonna bet a boot on here. Guess I'll make it up as I go and try to make it straight!
A height guage made from a pencil and blocks of wood and lego to scribe lines faintly on the hull then thin short strips of Tamiya tape

Quoted Text
Painted the superstructure by hand. Under magnification, I hate it. But it looks ok by itself.
Looks fine to me
We're always our own worst critics...
Quoted Text
The first deck I have ever installed. Went super easy. Had to take it back off when I realized the back was sticky if I removed the paper. I am not a smart man.
Sounds like something I'd do Charlie
Stay home and build models!
In 1/72
Gloster Gladiator MkII for the Bi-planes Campaign
In 1/350
Airfix 1:350 Type 45 Destroyer
Arizona, United States
Joined: September 20, 2017
KitMaker: 350 posts
Model Shipwrights: 175 posts
Posted: Wednesday, December 26, 2018 - 05:54 AM UTC
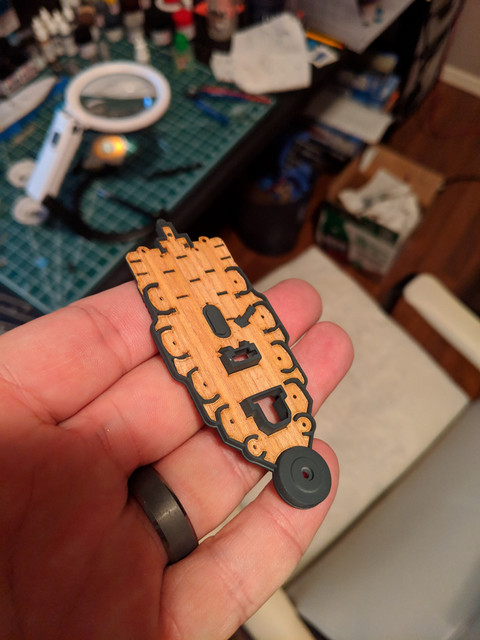
Little Christmas update:
Got some of the AA attached with the spotlights

Not my finest work, but thank goodness for tweezers!!
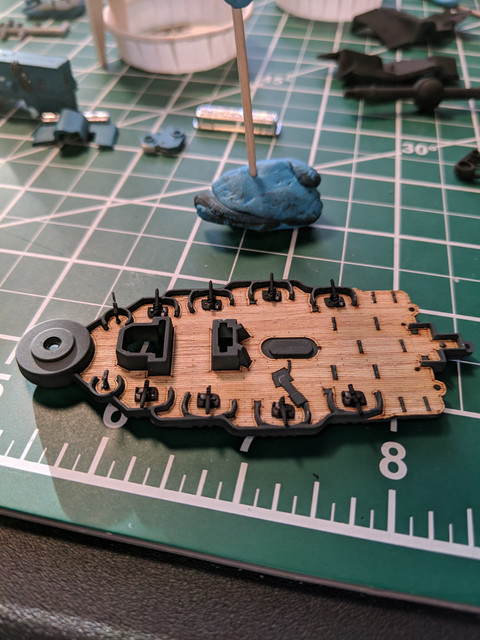
All the smaller pieces all glues in! Thank goodness for superglue, I'll tell you what.
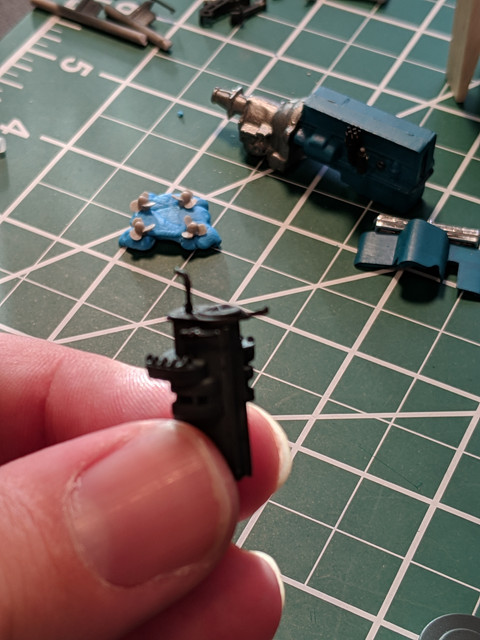
Some more little bits assembled.
I have dry fitted the superstructure onto the deck but haven't snapped a picture.
I hope you all had a wonderful Holiday!!
Current Floating PIMA: HobbyBoss USS Arizona
Current Driving PIMA: AMT 1953 Chevrolet Corvette
TimReynaga
Associate Editor California, United States
Joined: May 03, 2006
KitMaker: 2,500 posts
Model Shipwrights: 1,830 posts
Posted: Wednesday, December 26, 2018 - 12:38 PM UTC
Charlie,
That's some great progress - the deck looks terrific. Sticky side down!
Arizona, United States
Joined: September 20, 2017
KitMaker: 350 posts
Model Shipwrights: 175 posts
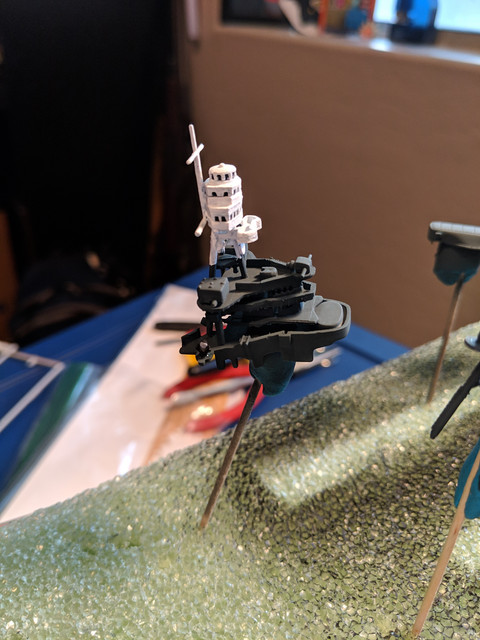
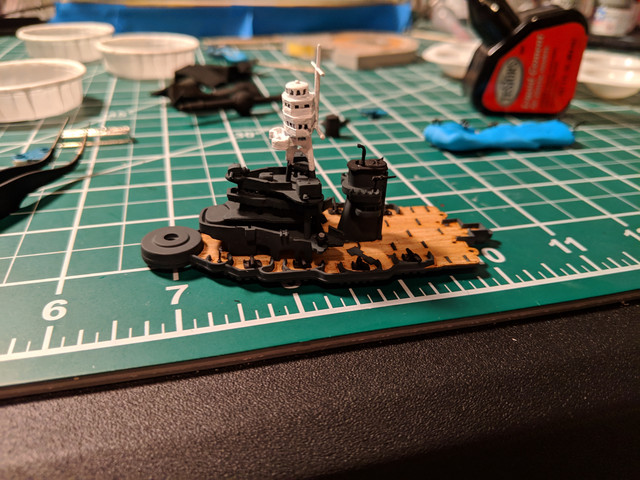
Posted: Thursday, December 27, 2018 - 02:54 AM UTC
Quoted Text
Charlie,
That's some great progress - the deck looks terrific. Sticky side down!
Thanks Tim!! Here is the picture I thought I took, but actually didn't.
]
Current Floating PIMA: HobbyBoss USS Arizona
Current Driving PIMA: AMT 1953 Chevrolet Corvette