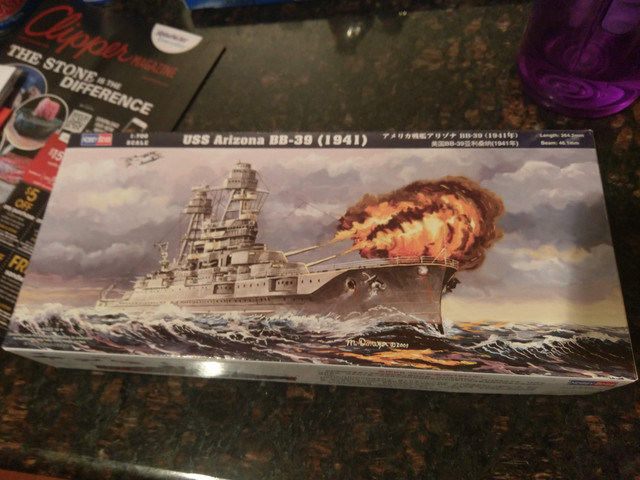
HobbyBoss 1/700 USS Arizona WIP
Arizona, United States
Joined: September 20, 2017
KitMaker: 350 posts
Model Shipwrights: 175 posts
Posted: Monday, October 22, 2018 - 06:31 AM UTC
Well this is my "first" actual 1/700 ship and being it is my home state, I figure I should try my best!
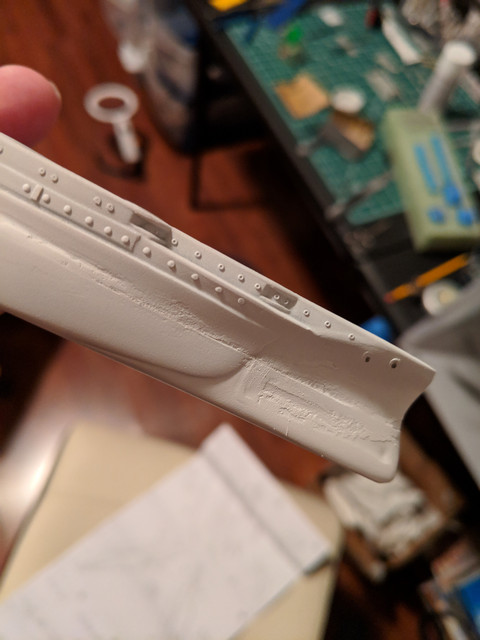
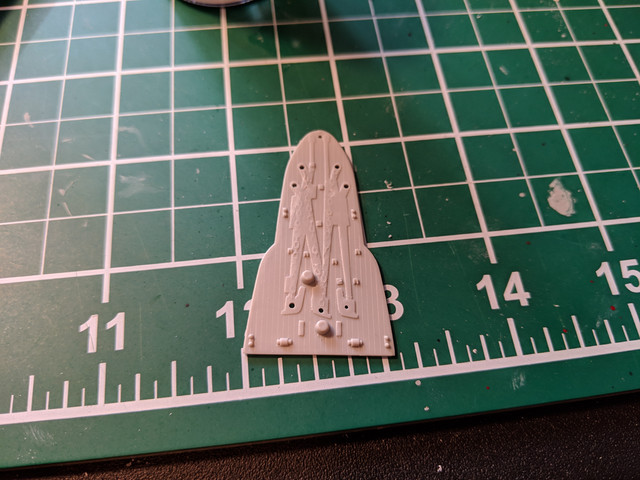
I am pretty excited to get this thing started and have already started separating parts for painting. Once I glued the hull together, I saw it had very nasty line going right down the thing. So this this my first attempt at using putty:
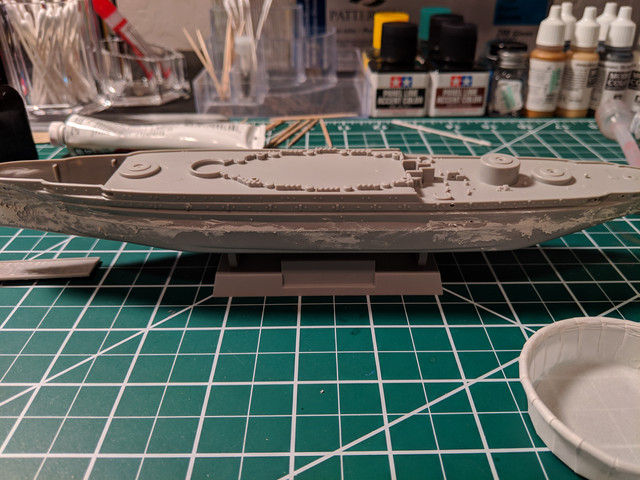
I mixed some Squadron White with some Testors glue and used a credit card to get it in all the areas. Not the nicest job, but it will sand down.
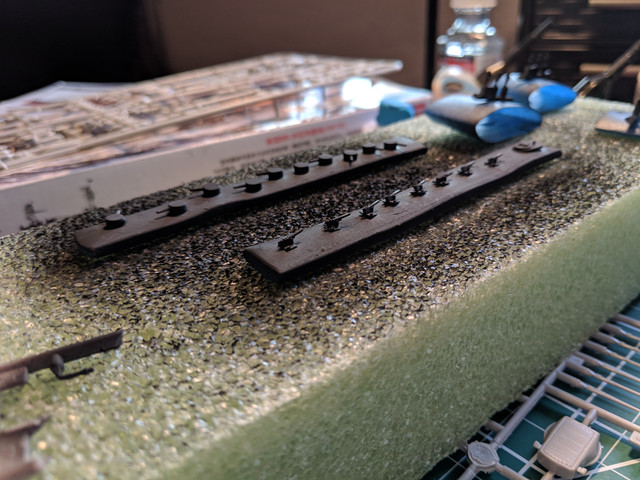
Here is the separate little pieces that will be painted flat black:
There is something very, very cathartic about taking a little break on the weekend and gluing these things together. So relaxing.
Just cutting and cleaning up the mold lines on the superstructure before adult-duties called on me.
That's all I got so far. I love every, precious moment of it.
Current Floating PIMA: HobbyBoss USS Arizona
Current Driving PIMA: AMT 1953 Chevrolet Corvette
TimReynaga
 Associate Editor
California, United States
Joined: May 03, 2006
KitMaker: 2,500 posts
Model Shipwrights: 1,830 posts
Posted: Monday, October 22, 2018 - 02:25 PM UTC
Quoted Text
There is something very, very cathartic about taking a little break on the weekend and gluing these things together. So relaxing...
I know what you mean. As a new dad many years ago one of my favorite sources of non-baby, non-adult duty relaxation was to steal a few moments to play with plastic! You are off to a great start with your Arizona - be sure to keep us posted as you progress!
Arizona, United States
Joined: September 20, 2017
KitMaker: 350 posts
Model Shipwrights: 175 posts
Posted: Tuesday, October 23, 2018 - 04:24 AM UTC
Quoted Text
Quoted Text
There is something very, very cathartic about taking a little break on the weekend and gluing these things together. So relaxing...
I know what you mean. As a new dad many years ago one of my favorite sources of non-baby, non-adult duty relaxation was to steal a few moments to play with plastic! You are off to a great start with your Arizona - be sure to keep us posted as you progress!
I really appreciate the kind words. Really helps towards the inspiration to get it done!! Also, look what the mail man brought yesterday

Current Floating PIMA: HobbyBoss USS Arizona
Current Driving PIMA: AMT 1953 Chevrolet Corvette
Colorado, United States
Joined: June 22, 2018
KitMaker: 275 posts
Model Shipwrights: 273 posts
Posted: Tuesday, October 23, 2018 - 05:01 AM UTC
Charlie: When I saw your post this morning I was thinking to myself, how is he going to get that forward part of the deck on and deal with that infernal seam. The answer is you aren't with the help of aftermarket decks. Good for you. That seam drove me so crazy years ago when I attempted to build Arizona. I finally gave up in disgust and threw it away. That was of course in the era before wood deck aftermarket products.
Oddly enough the Dragon Arizona presents the very same problem, but their Pennsylvania includes the full deck attached to the hull in one single piece.
Will be watching AZ carefully, monitoring your progress. Looking good so far, and I am sure when your finished it will be a great tribute to your State, one that I dearly love, especially the Prescott, Cottonwood, upper Verde Valley area.
Colorado, United States
Joined: June 22, 2018
KitMaker: 275 posts
Model Shipwrights: 273 posts
Posted: Tuesday, October 23, 2018 - 05:05 AM UTC
Forgot to ask the eternal question, Dark Gray, Standard Navy Gray, Sea Blue, or Navy Blue?
With that wood deck I know what I would do, but I am very partial to the 1930's Navy. Colorful era.
Arizona, United States
Joined: September 20, 2017
KitMaker: 350 posts
Model Shipwrights: 175 posts
Posted: Tuesday, October 23, 2018 - 05:28 AM UTC
Quoted Text
Charlie: When I saw your post this morning I was thinking to myself, how is he going to get that forward part of the deck on and deal with that infernal seam. The answer is you aren't with the help of aftermarket decks. Good for you. That seam drove me so crazy years ago when I attempted to build Arizona. I finally gave up in disgust and threw it away. That was of course in the era before wood deck aftermarket products.
Oddly enough the Dragon Arizona presents the very same problem, but their Pennsylvania includes the full deck attached to the hull in one single piece.
Will be watching AZ carefully, monitoring your progress. Looking good so far, and I am sure when your finished it will be a great tribute to your State, one that I dearly love, especially the Prescott, Cottonwood, upper Verde Valley area.
Thanks for the kind words, man. I did notice that the deck is split for some unknown reason. The wooden deck will defiantly help that out. I take pictures at opportunity I get to work on her, so updates will be frequent.
Current Floating PIMA: HobbyBoss USS Arizona
Current Driving PIMA: AMT 1953 Chevrolet Corvette
Arizona, United States
Joined: September 20, 2017
KitMaker: 350 posts
Model Shipwrights: 175 posts
Posted: Tuesday, October 23, 2018 - 05:29 AM UTC
Quoted Text
Forgot to ask the eternal question, Dark Gray, Standard Navy Gray, Sea Blue, or Navy Blue?
With that wood deck I know what I would do, but I am very partial to the 1930's Navy. Colorful era.
Before I even got the model, I am going with the red, white and blue theme. I loved seeing the updated more-blueish ship with some of the white up top and that lovely hull red below. The red on the main guns is an added bonus.
Current Floating PIMA: HobbyBoss USS Arizona
Current Driving PIMA: AMT 1953 Chevrolet Corvette
Colorado, United States
Joined: June 22, 2018
KitMaker: 275 posts
Model Shipwrights: 273 posts
Posted: Tuesday, October 23, 2018 - 06:11 AM UTC
Sea or Navy Blue?
I purchased an already built West Virginia in 1/1100 by Eaglemoss. She is supposed to be in Sea Blue I suppose, unlike the very few other USN models this firm has. They are in Navy Blue, and are quite accurate to prototype, Enterprise especially so. WV on the other hand stands out like a blinking neon sign. Dull coat helped a bit, but still WV, a ship I love to the extent I have a print of her passing under the Brooklyn Bridge hanging in my den, was a real disappointment color wise.
Anyway, I will be following closely, and I am sure it will turn out quite well based upon what I have seen so far.
Arizona, United States
Joined: September 20, 2017
KitMaker: 350 posts
Model Shipwrights: 175 posts
Posted: Tuesday, October 23, 2018 - 06:40 AM UTC
Quoted Text
Sea or Navy Blue?
I purchased an already built West Virginia in 1/1100 by Eaglemoss. She is supposed to be in Sea Blue I suppose, unlike the very few other USN models this firm has. They are in Navy Blue, and are quite accurate to prototype, Enterprise especially so. WV on the other hand stands out like a blinking neon sign. Dull coat helped a bit, but still WV, a ship I love to the extent I have a print of her passing under the Brooklyn Bridge hanging in my den, was a real disappointment color wise.
Anyway, I will be following closely, and I am sure it will turn out quite well based upon what I have seen so far.
I THINK I got a jar of XF18 for her. I THINK. I will have to double check when I get home.
Current Floating PIMA: HobbyBoss USS Arizona
Current Driving PIMA: AMT 1953 Chevrolet Corvette
Colorado, United States
Joined: June 22, 2018
KitMaker: 275 posts
Model Shipwrights: 273 posts
Posted: Tuesday, October 23, 2018 - 08:52 AM UTC
Were I building her as of 7 December that is what I would use. We modelers are generally confronted with finding the "best available" solution.
Arizona, United States
Joined: September 20, 2017
KitMaker: 350 posts
Model Shipwrights: 175 posts
Posted: Monday, October 29, 2018 - 06:34 AM UTC
So my first adventure with Squadron white, and I hated it.
I sanded it down and killed three Tamiya sanding sticks to which I thought was smooth. Primer showed otherwise. I took it back in and resanded it for a long spell with some sanding sticks I made. I ordered some Vallejo water based putty for the future as it seems easier to use.
That and I am pretty sure Squadron white will give me brain damage based on the smell.
Current Floating PIMA: HobbyBoss USS Arizona
Current Driving PIMA: AMT 1953 Chevrolet Corvette
Colorado, United States
Joined: June 22, 2018
KitMaker: 275 posts
Model Shipwrights: 273 posts
Posted: Monday, October 29, 2018 - 07:23 AM UTC
Tamiya makes a white putty which I swear by. Squadron white or green in my opinion is worthless.

#453
Texas, United States
Joined: August 28, 2016
KitMaker: 1,925 posts
Model Shipwrights: 1,298 posts
Posted: Monday, October 29, 2018 - 10:27 AM UTC
I use Vallejo putty all of the time, really like the narrow tip. Use Squadron putty but learned a long time ago to mask the area around where you plan on applying it. Once harden it is a pain to sand, so apply only where you need to.
A good filler is the homemade stuff made with leftover Tamiya extra thin glue (that the brush can't reach) and chopped up pieces of sprue. Does a great job as a filler and easy to sand. It also drys fast.
Mark

Arizona, United States
Joined: September 20, 2017
KitMaker: 350 posts
Model Shipwrights: 175 posts
Posted: Monday, October 29, 2018 - 11:10 AM UTC
I plan on painting over it tonight with some black and it is what it is. On my next build, I will try the Vallejo stuff.
Good point about the masking tape, really, REALLY should have done that.
Current Floating PIMA: HobbyBoss USS Arizona
Current Driving PIMA: AMT 1953 Chevrolet Corvette
TimReynaga
Associate Editor California, United States
Joined: May 03, 2006
KitMaker: 2,500 posts
Model Shipwrights: 1,830 posts
Posted: Tuesday, October 30, 2018 - 01:01 AM UTC
Charlie,
I too used to use Squadron filler (it was once the best thing going), but time has definitely passed it by. There are quite a few products out there for modelers now that are much better.
The filler I usually use is simple cyanoacrylate (super glue), which I apply to seams with an X-acto blade. It dries fairly quickly, but you can also hit it with cyano accelerator to set it instantly. It dries to about the same hardness and consistency as most model plastics, can be sanded glass smooth, doesn't flake, and is very durable.
Maybe for your next project...
TimReynaga
Associate Editor California, United States
Joined: May 03, 2006
KitMaker: 2,500 posts
Model Shipwrights: 1,830 posts
Posted: Tuesday, October 30, 2018 - 01:11 AM UTC
By the way, Charlie, don't worry if this project isn't perfect - they never are! We just do the best we can, learn from experience, and try to make each build a little better than the last.
And most of all, don't forget to keep it fun!
Arizona, United States
Joined: September 20, 2017
KitMaker: 350 posts
Model Shipwrights: 175 posts
Posted: Tuesday, October 30, 2018 - 03:18 AM UTC
As always Tim, your wisdom is always appreciated.
Love seeing new posts on muh threads.
UPDATE: Couldn't really use the AB last night. I am getting my house painted and they sealed up the window I use for ventilation. So I will have to stay preoccupied with building sections and prepping for paint.
Looks like I need some more super glue.
Current Floating PIMA: HobbyBoss USS Arizona
Current Driving PIMA: AMT 1953 Chevrolet Corvette
#453
Texas, United States
Joined: August 28, 2016
KitMaker: 1,925 posts
Model Shipwrights: 1,298 posts
Posted: Tuesday, October 30, 2018 - 04:25 AM UTC
Quoted Text
Charlie,
I too used to use Squadron filler (it was once the best thing going), but time has definitely passed it by. There are quite a few products out there for modelers now that are much better.
The filler I usually use is simple cyanoacrylate (super glue), which I apply to seams with an X-acto blade. It dries fairly quickly, but you can also hit it with cyano accelerator to set it instantly. It dries to about the same hardness and consistency as most model plastics, can be sanded glass smooth, doesn't flake, and is very durable.
Maybe for your next project...
I found that you have to sand the CA right away before it cures otherwise it will be so hard that sanding it will be quite a chore. I left a patch sitting overnight before sanding and I ended up using a metal file because it was like sanding glass.
Mark
Arizona, United States
Joined: September 20, 2017
KitMaker: 350 posts
Model Shipwrights: 175 posts
Posted: Tuesday, October 30, 2018 - 08:39 AM UTC
I might have to find another clearance model and try this trick.
I am tellin ya, after today I am dying for some 1/700 therapy.
Current Floating PIMA: HobbyBoss USS Arizona
Current Driving PIMA: AMT 1953 Chevrolet Corvette
#306
Victoria, Australia
Joined: June 27, 2010
KitMaker: 3,959 posts
Model Shipwrights: 2,777 posts
Posted: Wednesday, October 31, 2018 - 08:35 AM UTC
Watching with interest Charlie... always tricky to match up hull halves like that...

Stay home and build models!
In 1/72
Gloster Gladiator MkII for the Bi-planes Campaign
In 1/350
Airfix 1:350 Type 45 Destroyer
Arizona, United States
Joined: September 20, 2017
KitMaker: 350 posts
Model Shipwrights: 175 posts
Posted: Wednesday, October 31, 2018 - 10:09 AM UTC
Quoted Text
Watching with interest Charlie... always tricky to match up hull halves like that...
It is the current bane of my existence, Russell. I am learning to live with it.
Current Floating PIMA: HobbyBoss USS Arizona
Current Driving PIMA: AMT 1953 Chevrolet Corvette
Arizona, United States
Joined: September 20, 2017
KitMaker: 350 posts
Model Shipwrights: 175 posts
Posted: Monday, November 05, 2018 - 03:59 AM UTC
Morning gents, got some work done this weekend:
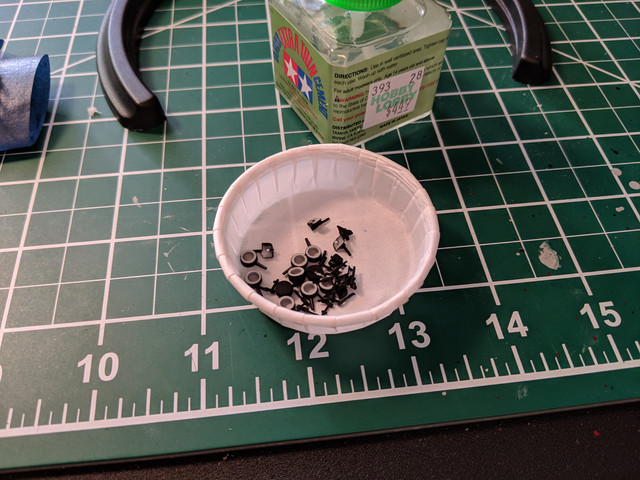
Used up all of my flat black:
While that was drying, I went to work building sub assemblies and sanding down little bits and pieces:

And I am so proud of myself!! I managed to scrape off most if not all of the molded on chains for the anchors!! I got a tiny chain with my wooden deck so they needed to go!
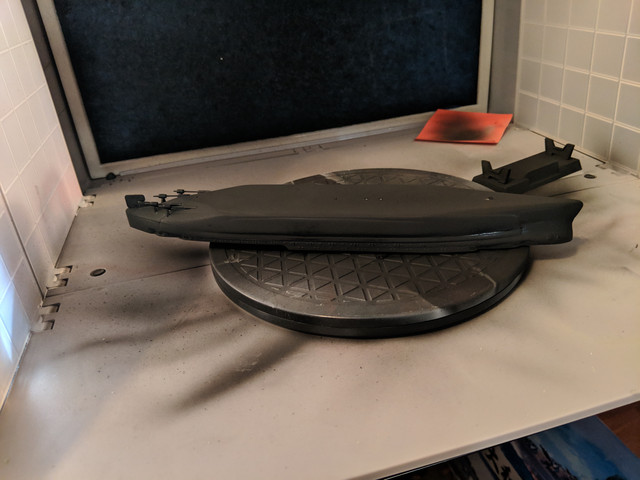
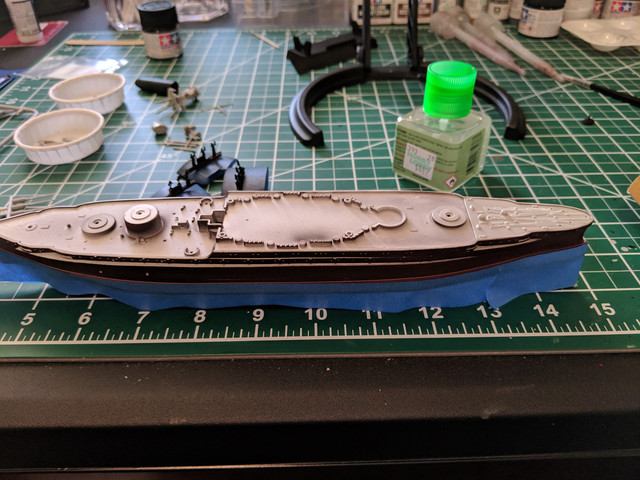
Then I got to spray some 50/50 Hull Red and Flat red
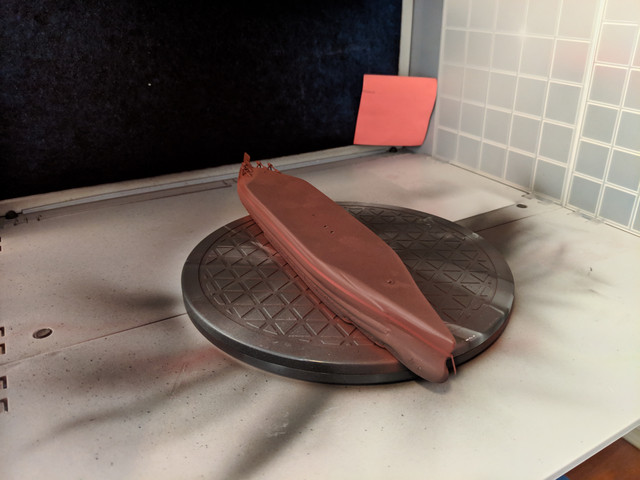
At this point, I kind of slowed down and to let everything dry and set up. Some tiny parts we got here and I can't imagine doing another scale. The smallness is very nice.
Thanks for looking guys. Next I have to figure out how to make an even line for the white at the top of the ship.
Current Floating PIMA: HobbyBoss USS Arizona
Current Driving PIMA: AMT 1953 Chevrolet Corvette
#306
Victoria, Australia
Joined: June 27, 2010
KitMaker: 3,959 posts
Model Shipwrights: 2,777 posts
Posted: Monday, November 05, 2018 - 09:06 PM UTC
Some real nice progress Charlie
Stay home and build models!
In 1/72
Gloster Gladiator MkII for the Bi-planes Campaign
In 1/350
Airfix 1:350 Type 45 Destroyer
Arizona, United States
Joined: September 20, 2017
KitMaker: 350 posts
Model Shipwrights: 175 posts
Posted: Tuesday, November 06, 2018 - 03:06 AM UTC
Quoted Text
Some real nice progress Charlie
Thanks, Russell!!
Current Floating PIMA: HobbyBoss USS Arizona
Current Driving PIMA: AMT 1953 Chevrolet Corvette
Arizona, United States
Joined: September 20, 2017
KitMaker: 350 posts
Model Shipwrights: 175 posts
Posted: Monday, November 12, 2018 - 03:38 AM UTC
Made a small amount of progress this weekend but got stuck on part of the assembly.
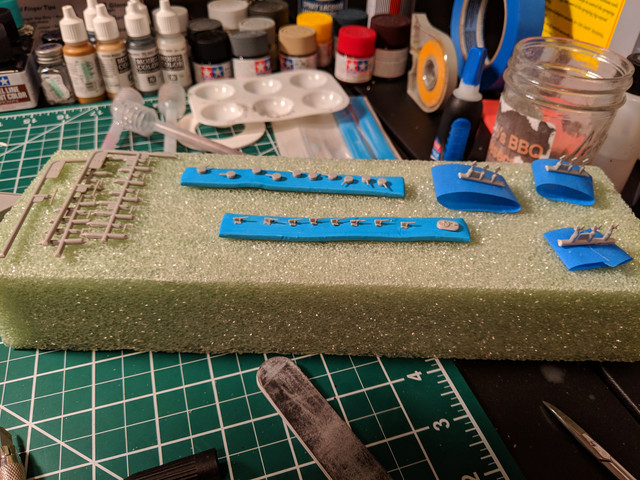
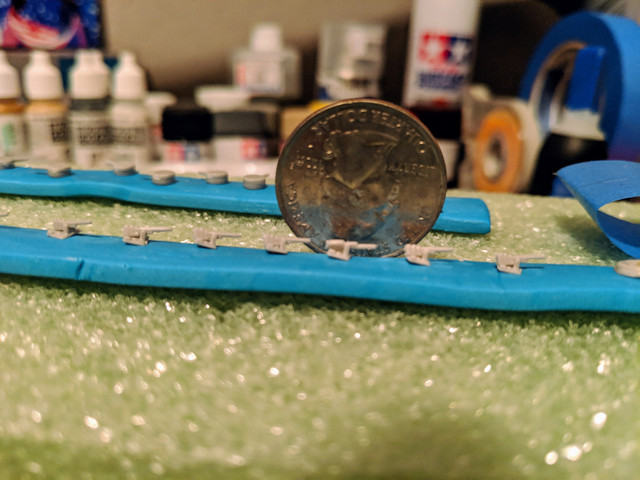
Got all muh lifeboats cleaned and ready for paint:
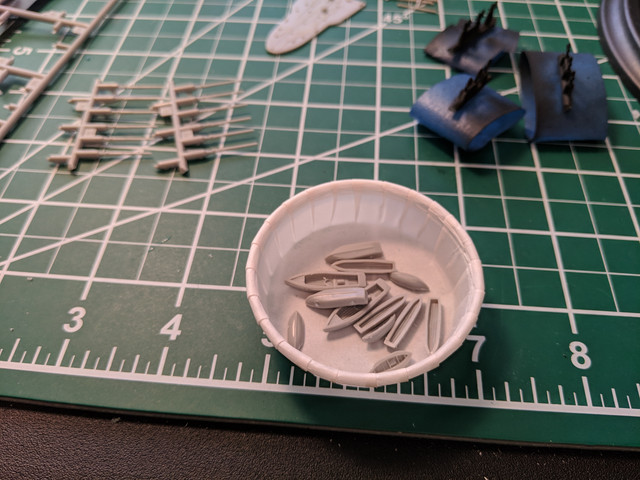
I will tell ya: Get yourself some of these little paper cups from a burger joint. They are life savers:
Got a parts forest for the upcoming paint job:
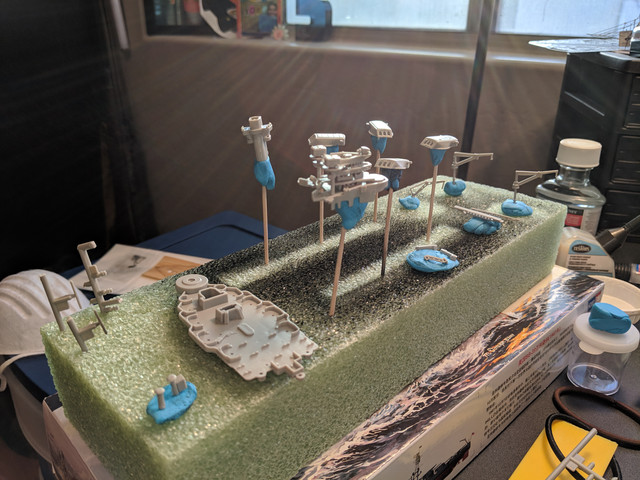
And masked off the hull to paint before slapping on the wood deck:
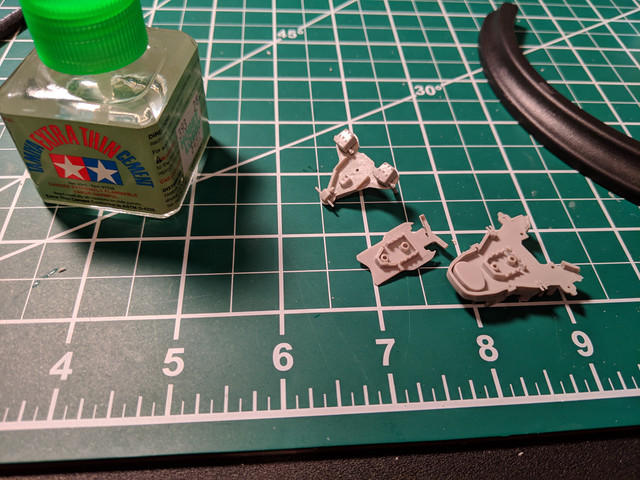
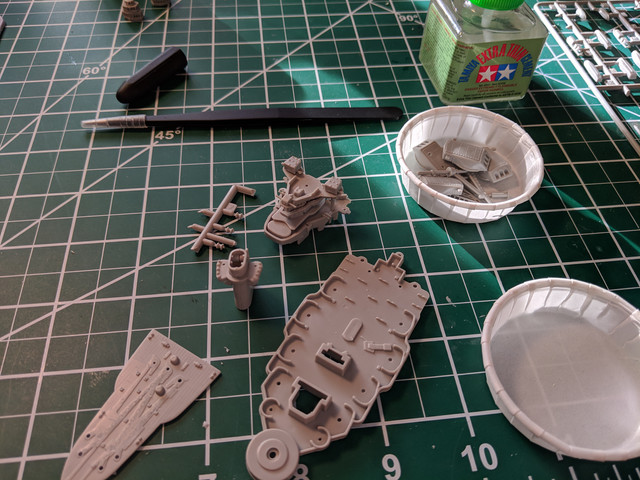
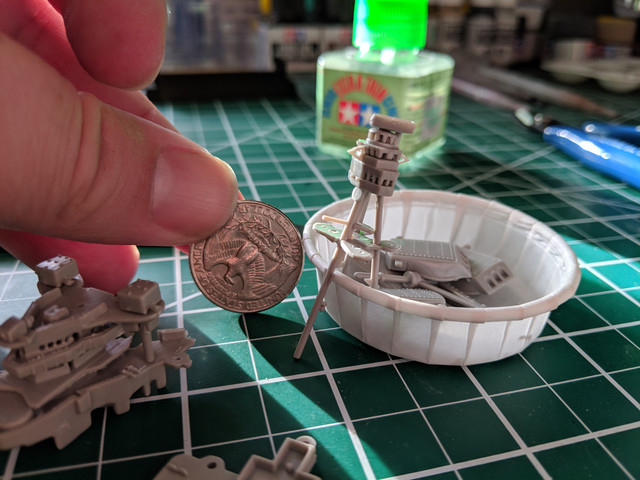
Problem I had:
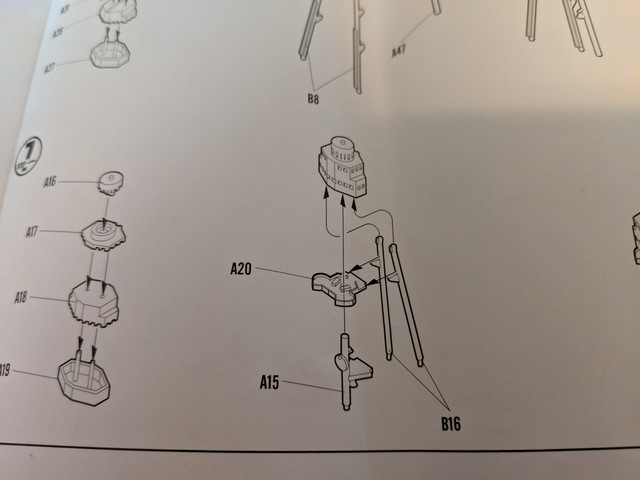
You can see the instructions show the rear superstructure and the assembly. Those two rear posts are waaaaaaaaaay too tall. I am wondering of I have to cut them down to size or what. Anyone else build this Arizona have any tips?
Current Floating PIMA: HobbyBoss USS Arizona
Current Driving PIMA: AMT 1953 Chevrolet Corvette