

Thanks for looking in on build. I finished painting all of the superstructure assemblies last night and now started on the secondary weapons. I hope the 25mm aftermarket items don't drive me crazy during assembly.
Mark


Russel/Mark,
Thanks for looking in on build. I finished painting all of the superstructure assemblies last night and now started on the secondary weapons. I hope the 25mm aftermarket items don't drive me crazy during assembly.
Mark
 Mark, I think all us folk on salty side usually end up a little crazy after building the AA suite for even just one ship


Just catching up with this build Mark, great work so far. Looks like a really nice kit, great detail.


 So it has been in dry dock since 2007.
  You inspire me to put on my big-modeler's pants and try again.


Mark bummer about the paint issues, I can sympathize with you on that topic. Those upgrades look great, amazing how much a PE part lifts the realism of a model. Hats off to you for attempting the canvas look on the railings. Well worth it as they look 100%.
Quoted TextMark bummer about the paint issues, I can sympathize with you on that topic. Those upgrades look great, amazing how much a PE part lifts the realism of a model. Hats off to you for attempting the canvas look on the railings. Well worth it as they look 100%.
Ned,
Thank you for comments and looking in.
Russell,
I never hear of just using white glue to simulate canvas, only seen the tissue method on U-tube (Been thinking about painting the canvas with a mix of white and little brown to take out the brightness). I seen white glazing used to simulate glass on portholes. Thanks for looking in and for the encouragement.
Mark
Quoted TextQuoted TextMark bummer about the paint issues, I can sympathize with you on that topic. Those upgrades look great, amazing how much a PE part lifts the realism of a model. Hats off to you for attempting the canvas look on the railings. Well worth it as they look 100%.
Ned,
Thank you for comments and looking in.
Russell,
I never hear of just using white glue to simulate canvas, only seen the tissue method on U-tube (Been thinking about painting the canvas with a mix of white and little brown to take out the brightness). I seen white glazing used to simulate glass on portholes. Thanks for looking in and for the encouragement.
Mark
Nice to see some progress Mark,
Like the guys say the winches look great. You will get there with the other issues.
Your canvas dodgers look rather good, but I am with Russ on using PVA without the paper for the railings, simpler, and if you only paint the outside the original railing colour shows through on the inside.
Keep up the good work mate,
cheers
Si


Looking very nice so far Mate. Am enjoying your work.....Cheers mark


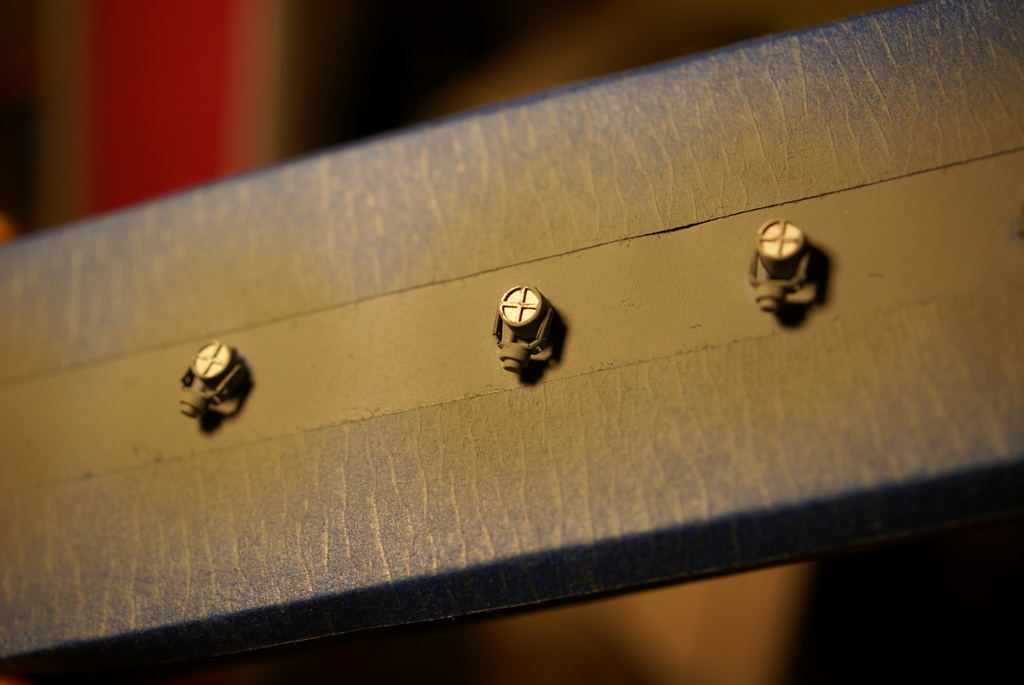
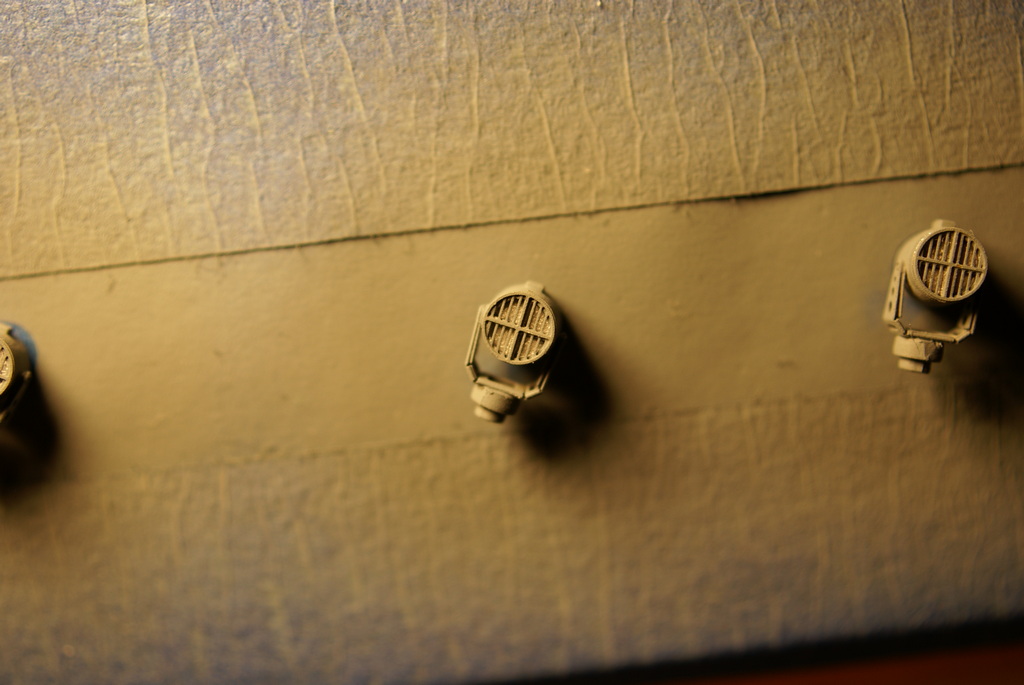
I getting ready to install the searchlights and was wondering if the lens were tinted and not clear glass? All of the photos I have are in black and white and I can't tell. Anyone knows the answer.
Mark

 |


