Ships by Class/Type: Battleships
Topics from the Dreadnaught era to modern day.
Hosted by Steve Joyce
Schulschiff Schleswig-Holstein 1939 1:350
Black_sheep
Visit this Community
Bayern, Germany
Joined: December 11, 2009
KitMaker: 823 posts
Model Shipwrights: 551 posts
Posted: Saturday, August 15, 2020 - 09:45 PM UTC

Quoted Text

Love the plaque and base!


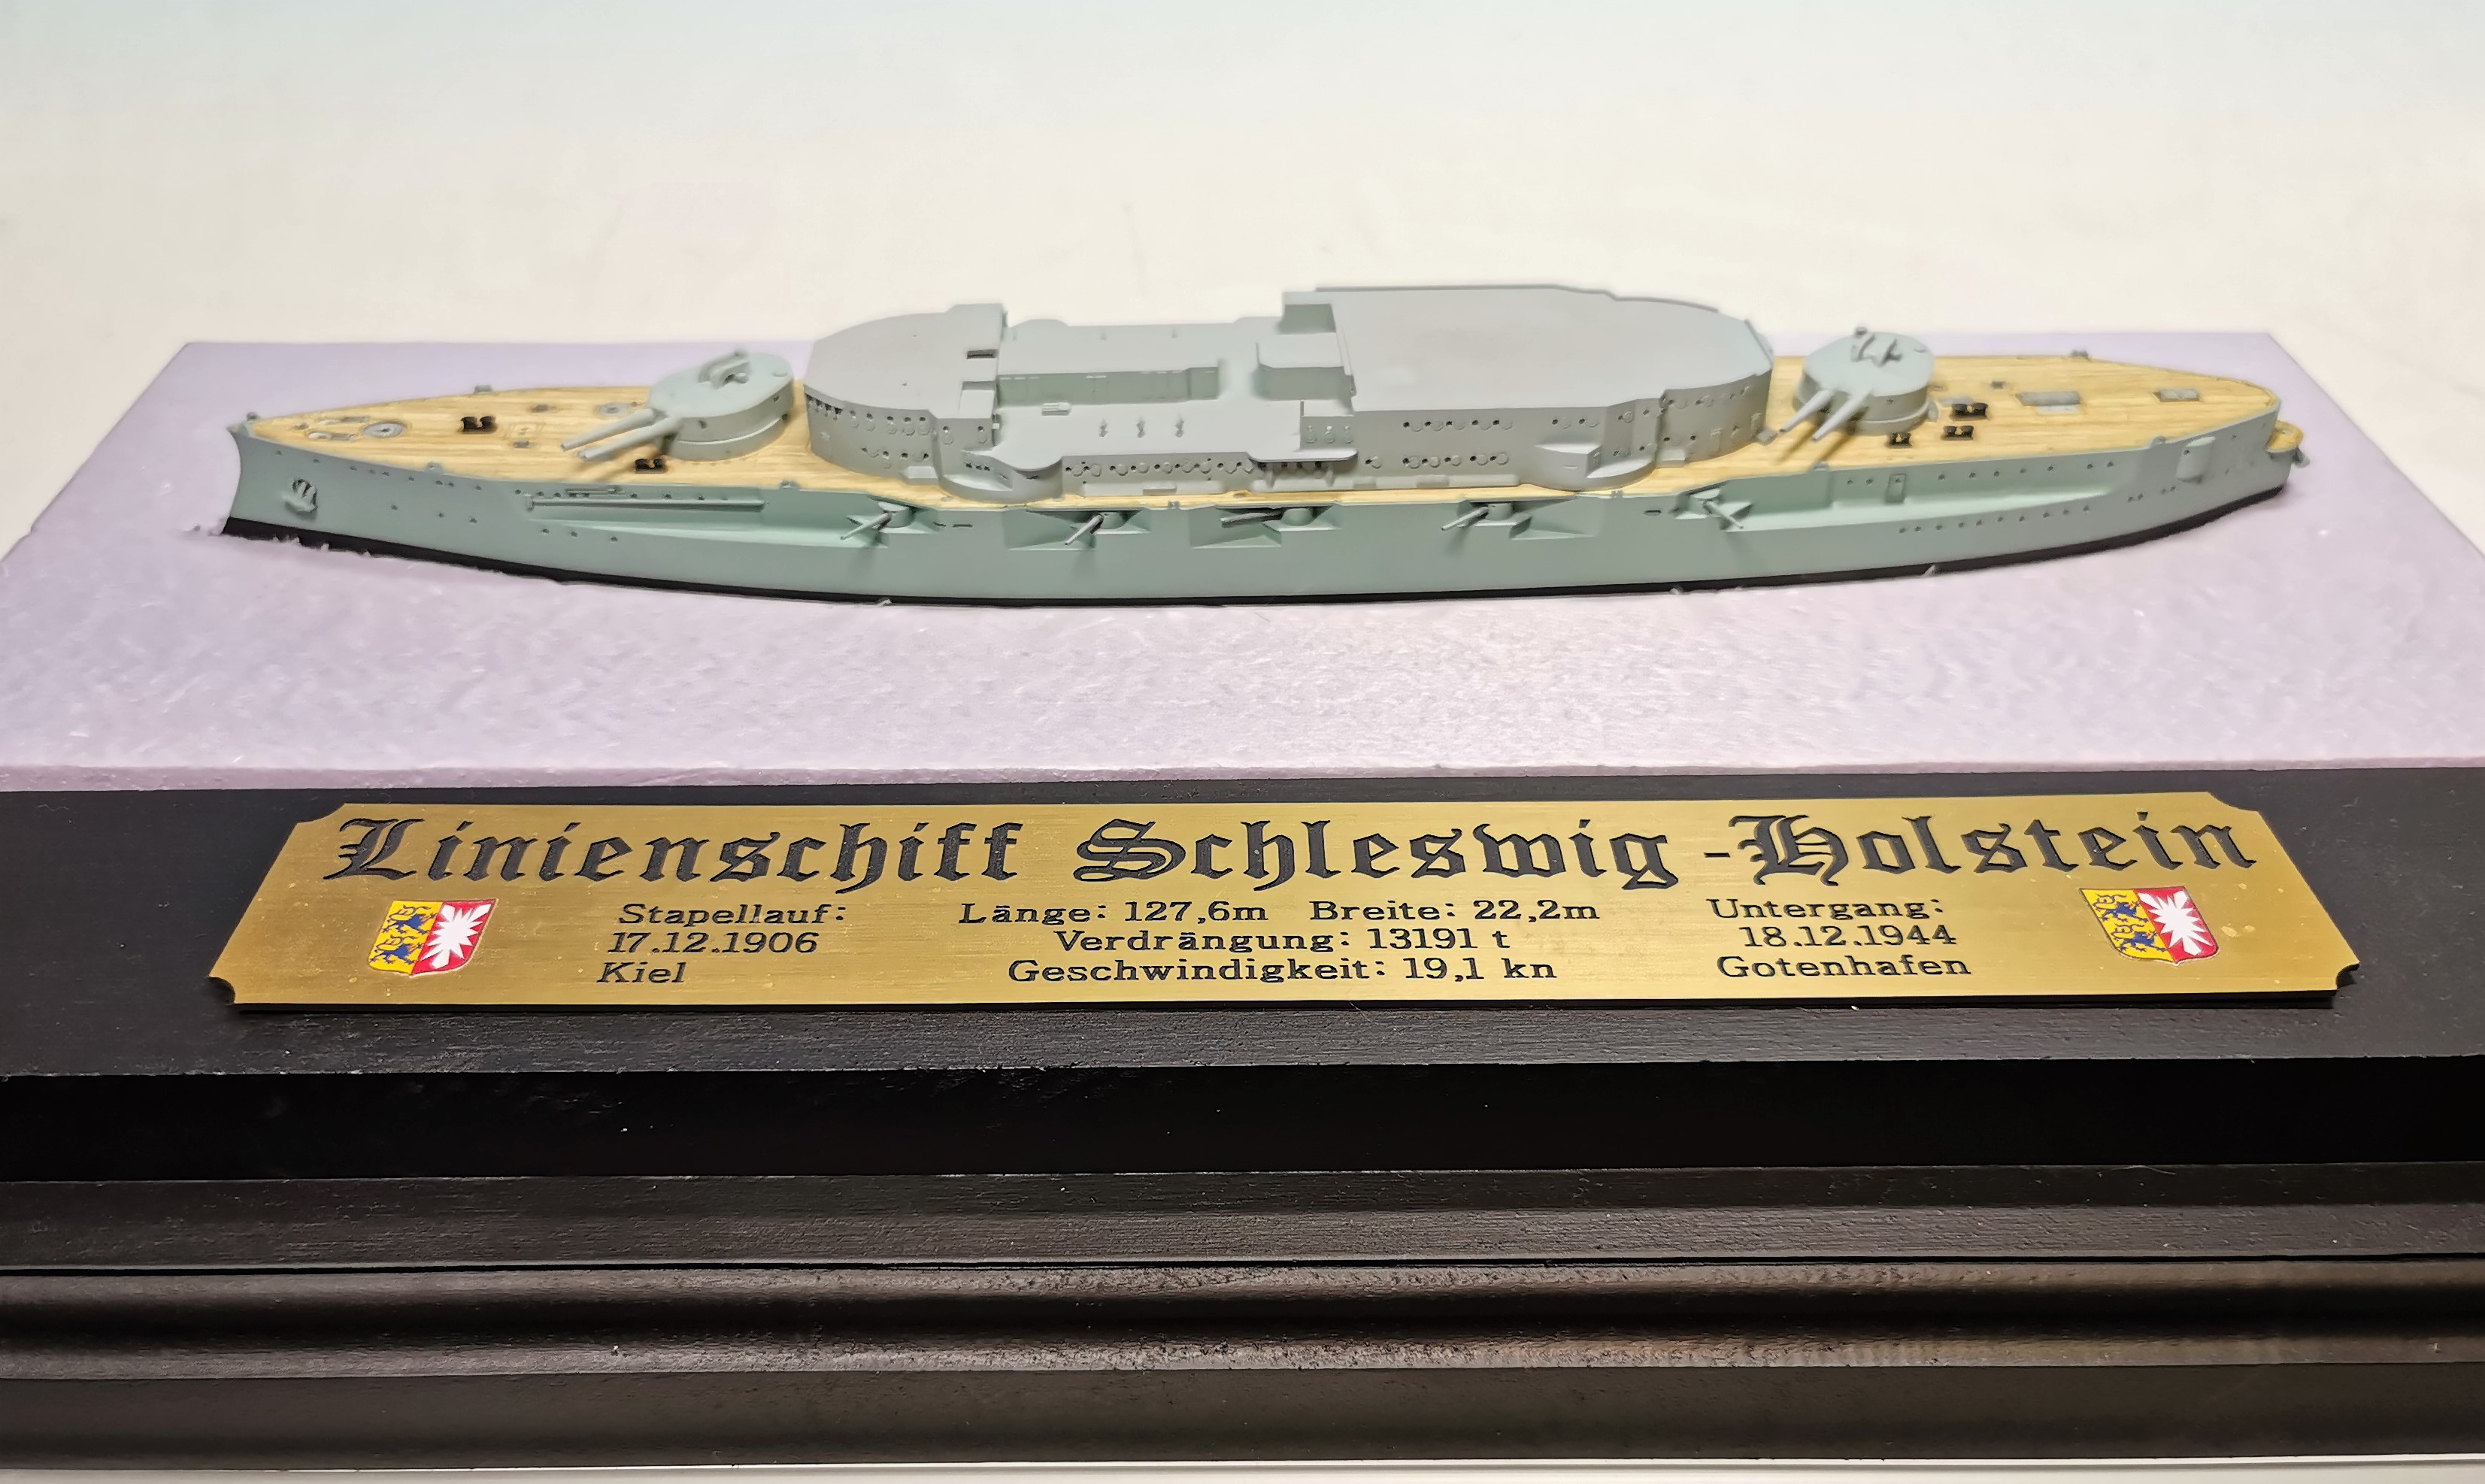
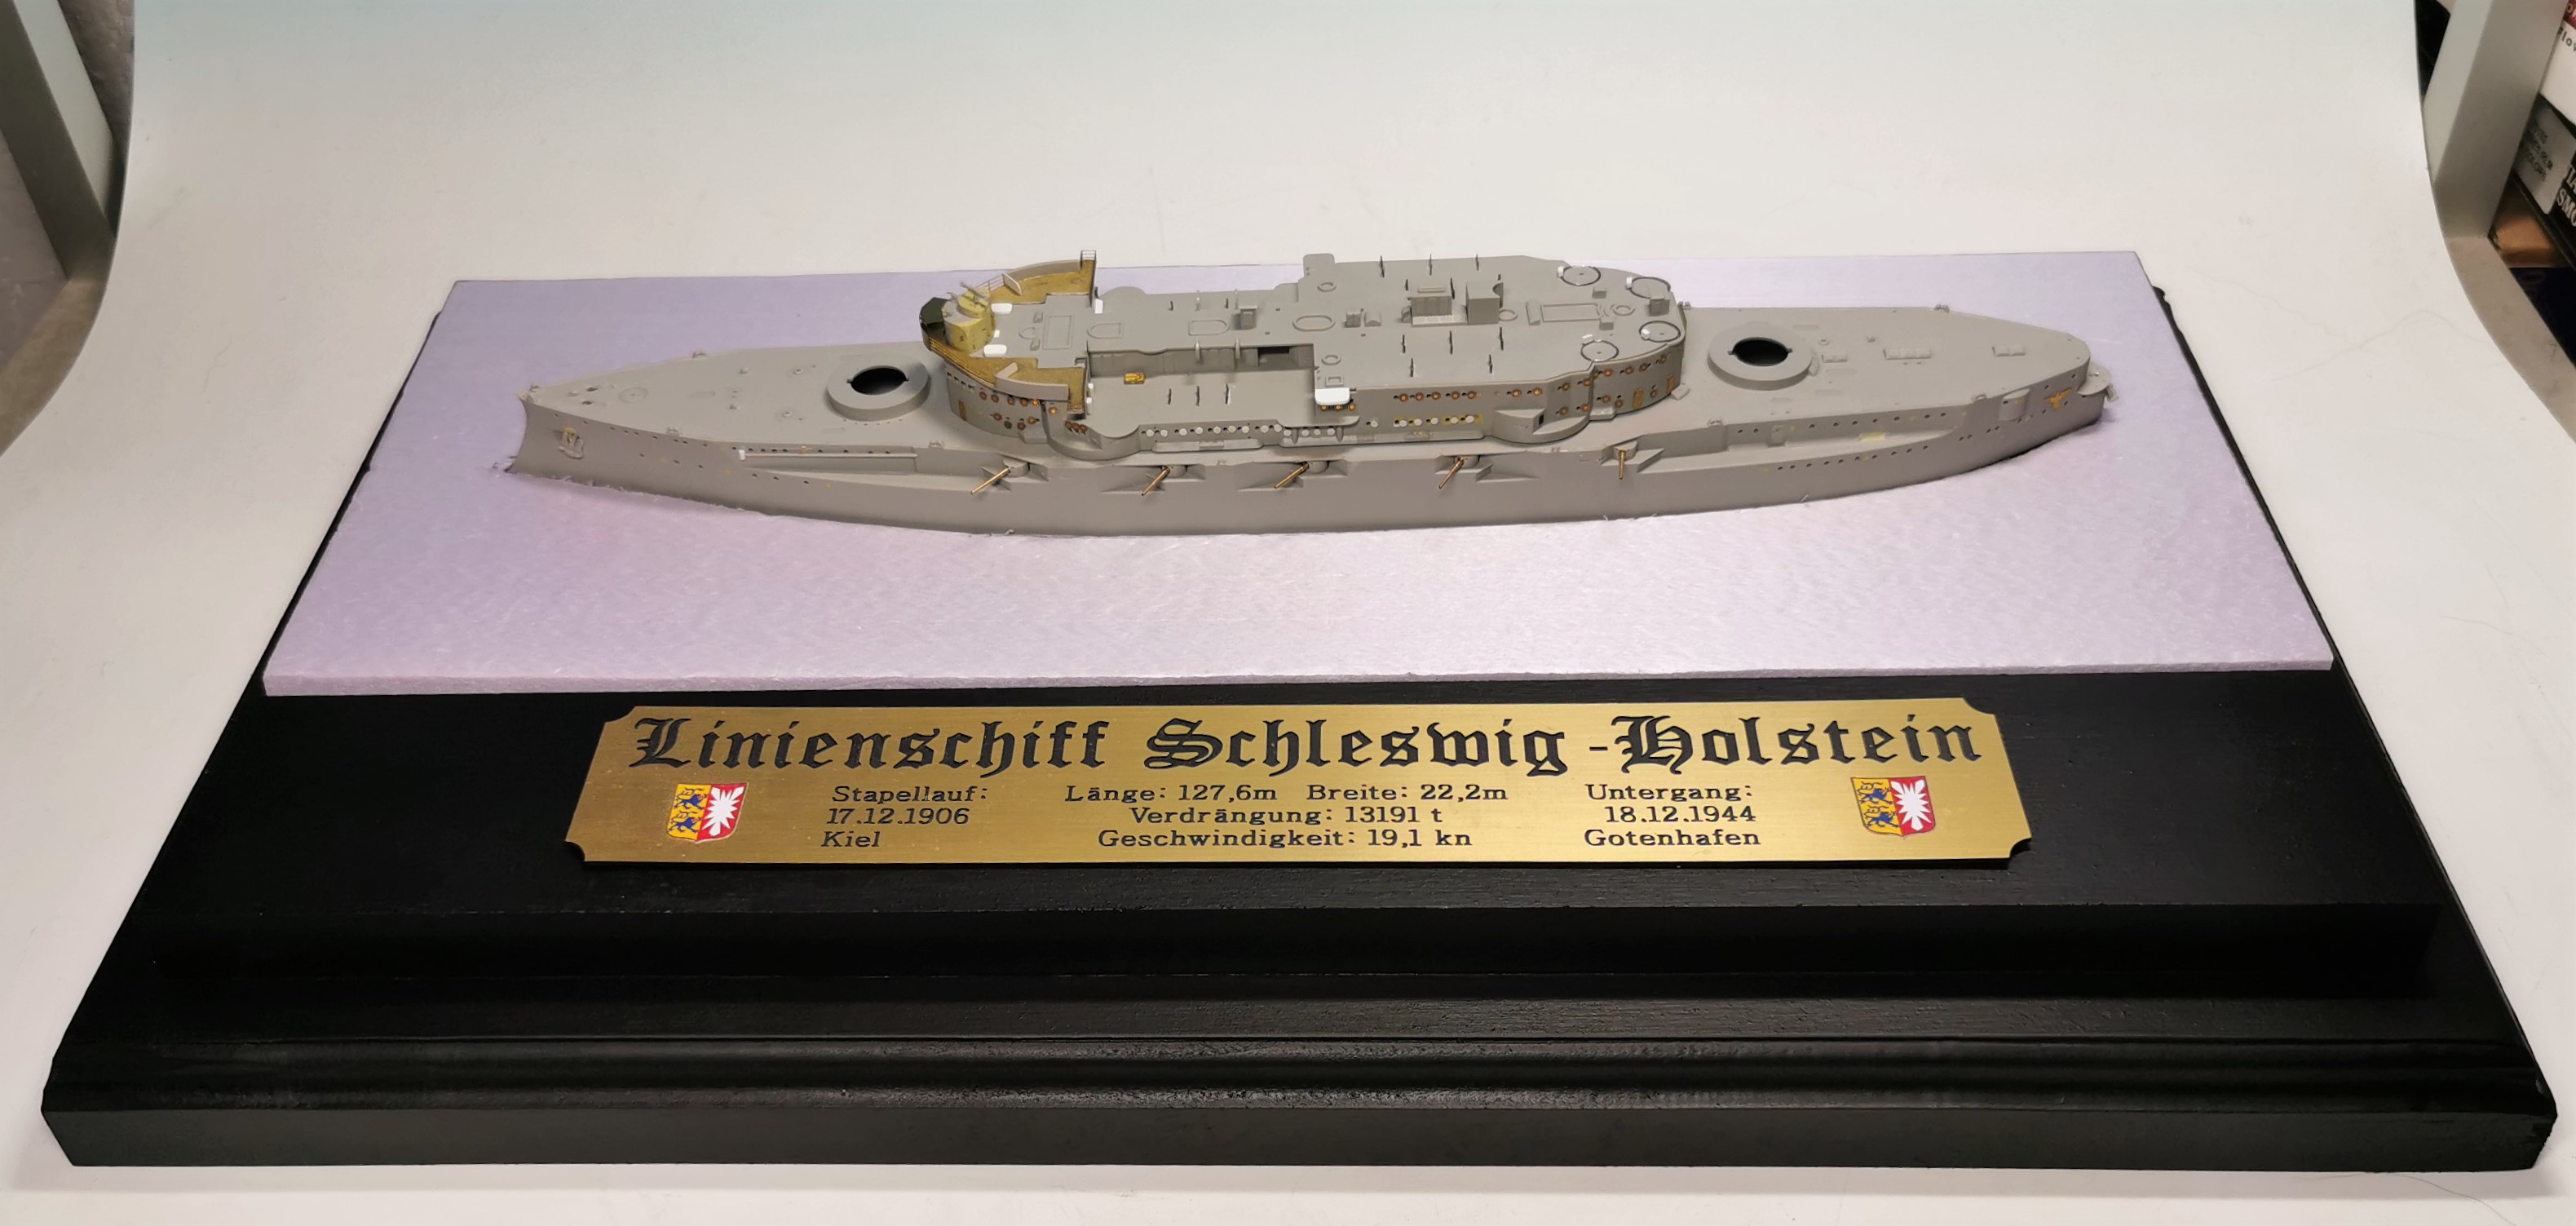
Thank you Gaz, this is how the finished one looks like


RussellE
#306
Visit this Community
Victoria, Australia
Joined: June 27, 2010
KitMaker: 3,959 posts
Model Shipwrights: 2,777 posts
Posted: Sunday, August 16, 2020 - 01:01 PM UTC
I love the plaques you add to your ships Thomas-I would like to find someone locally that could make something similar in Australia, but alas, so far, no luck
RedDuster
Visit this Community
England - South East, United Kingdom
Joined: March 01, 2010
KitMaker: 7,078 posts
Model Shipwrights: 6,649 posts
Posted: Monday, August 17, 2020 - 06:02 AM UTC
Very stylish base indeed Thomas,

As Russ said the plaque is excellent.

Cheers

Si
Black_sheep
Visit this Community
Bayern, Germany
Joined: December 11, 2009
KitMaker: 823 posts
Model Shipwrights: 551 posts
Posted: Tuesday, August 18, 2020 - 07:54 PM UTC
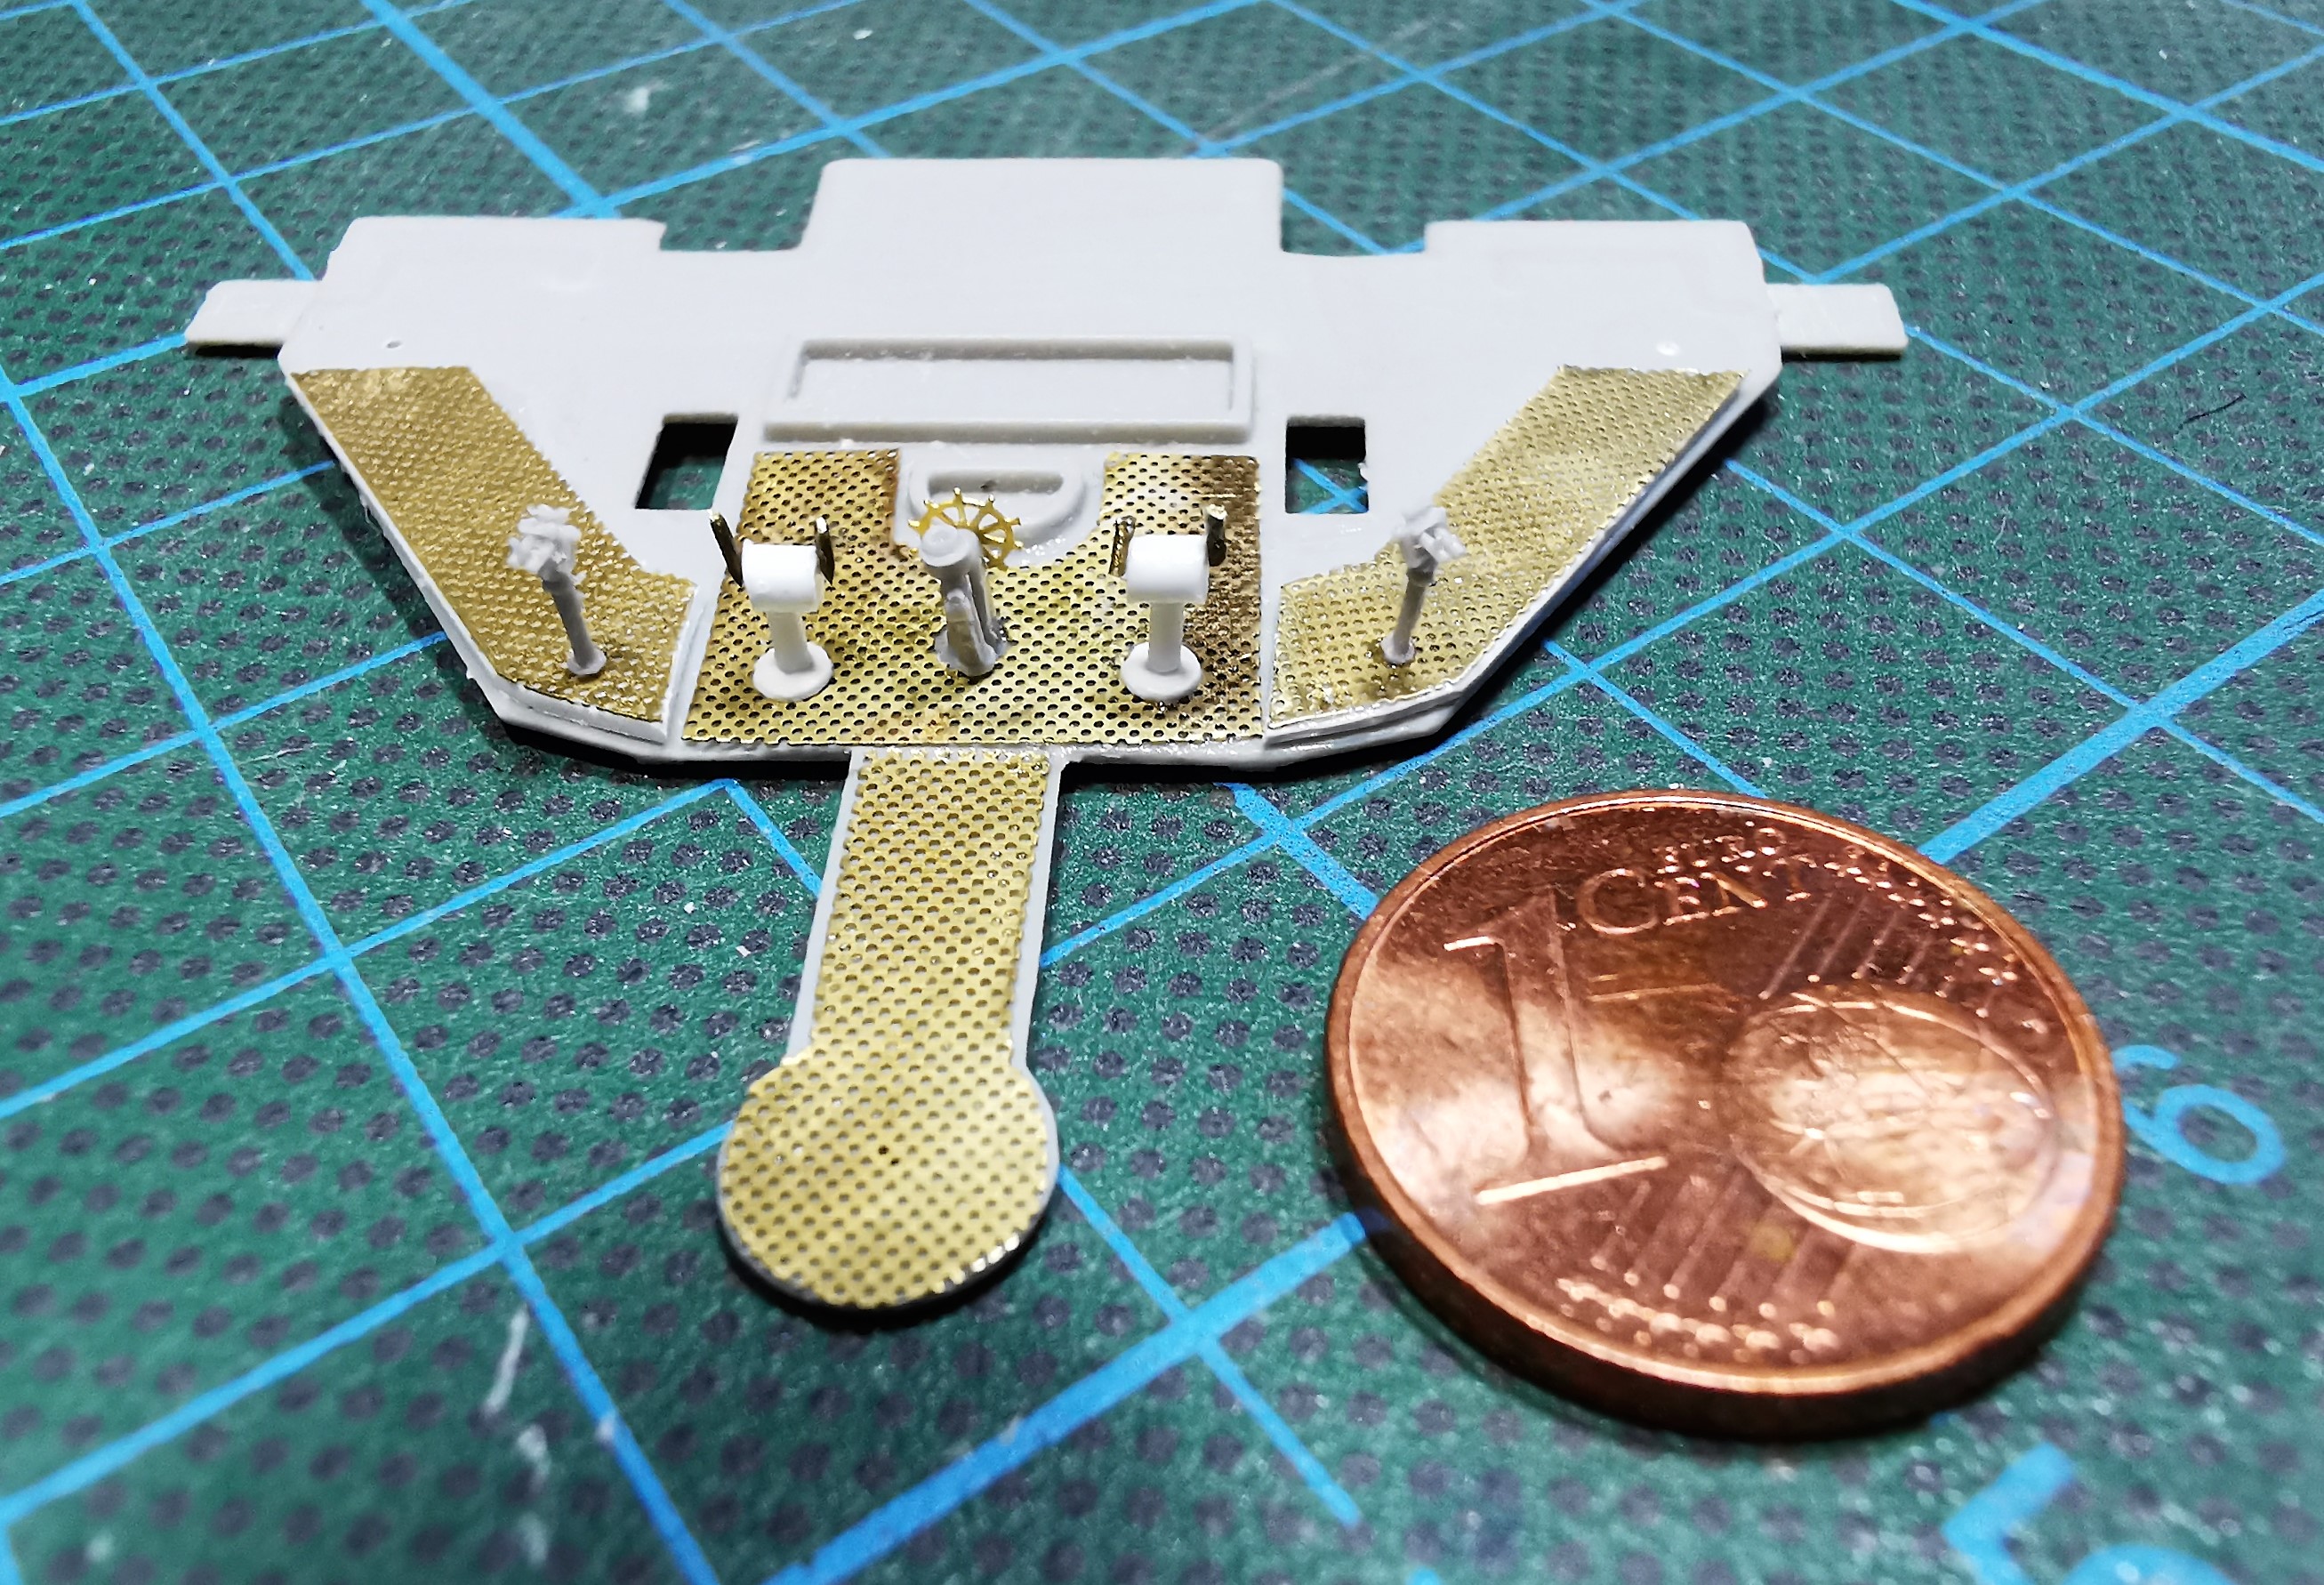
I started the 2nd upper deck and the main bridge section. There is were most work at this kit is necessary as TRUMPETER ommitted every detail there so here is a lot scratching and detailing necessary.

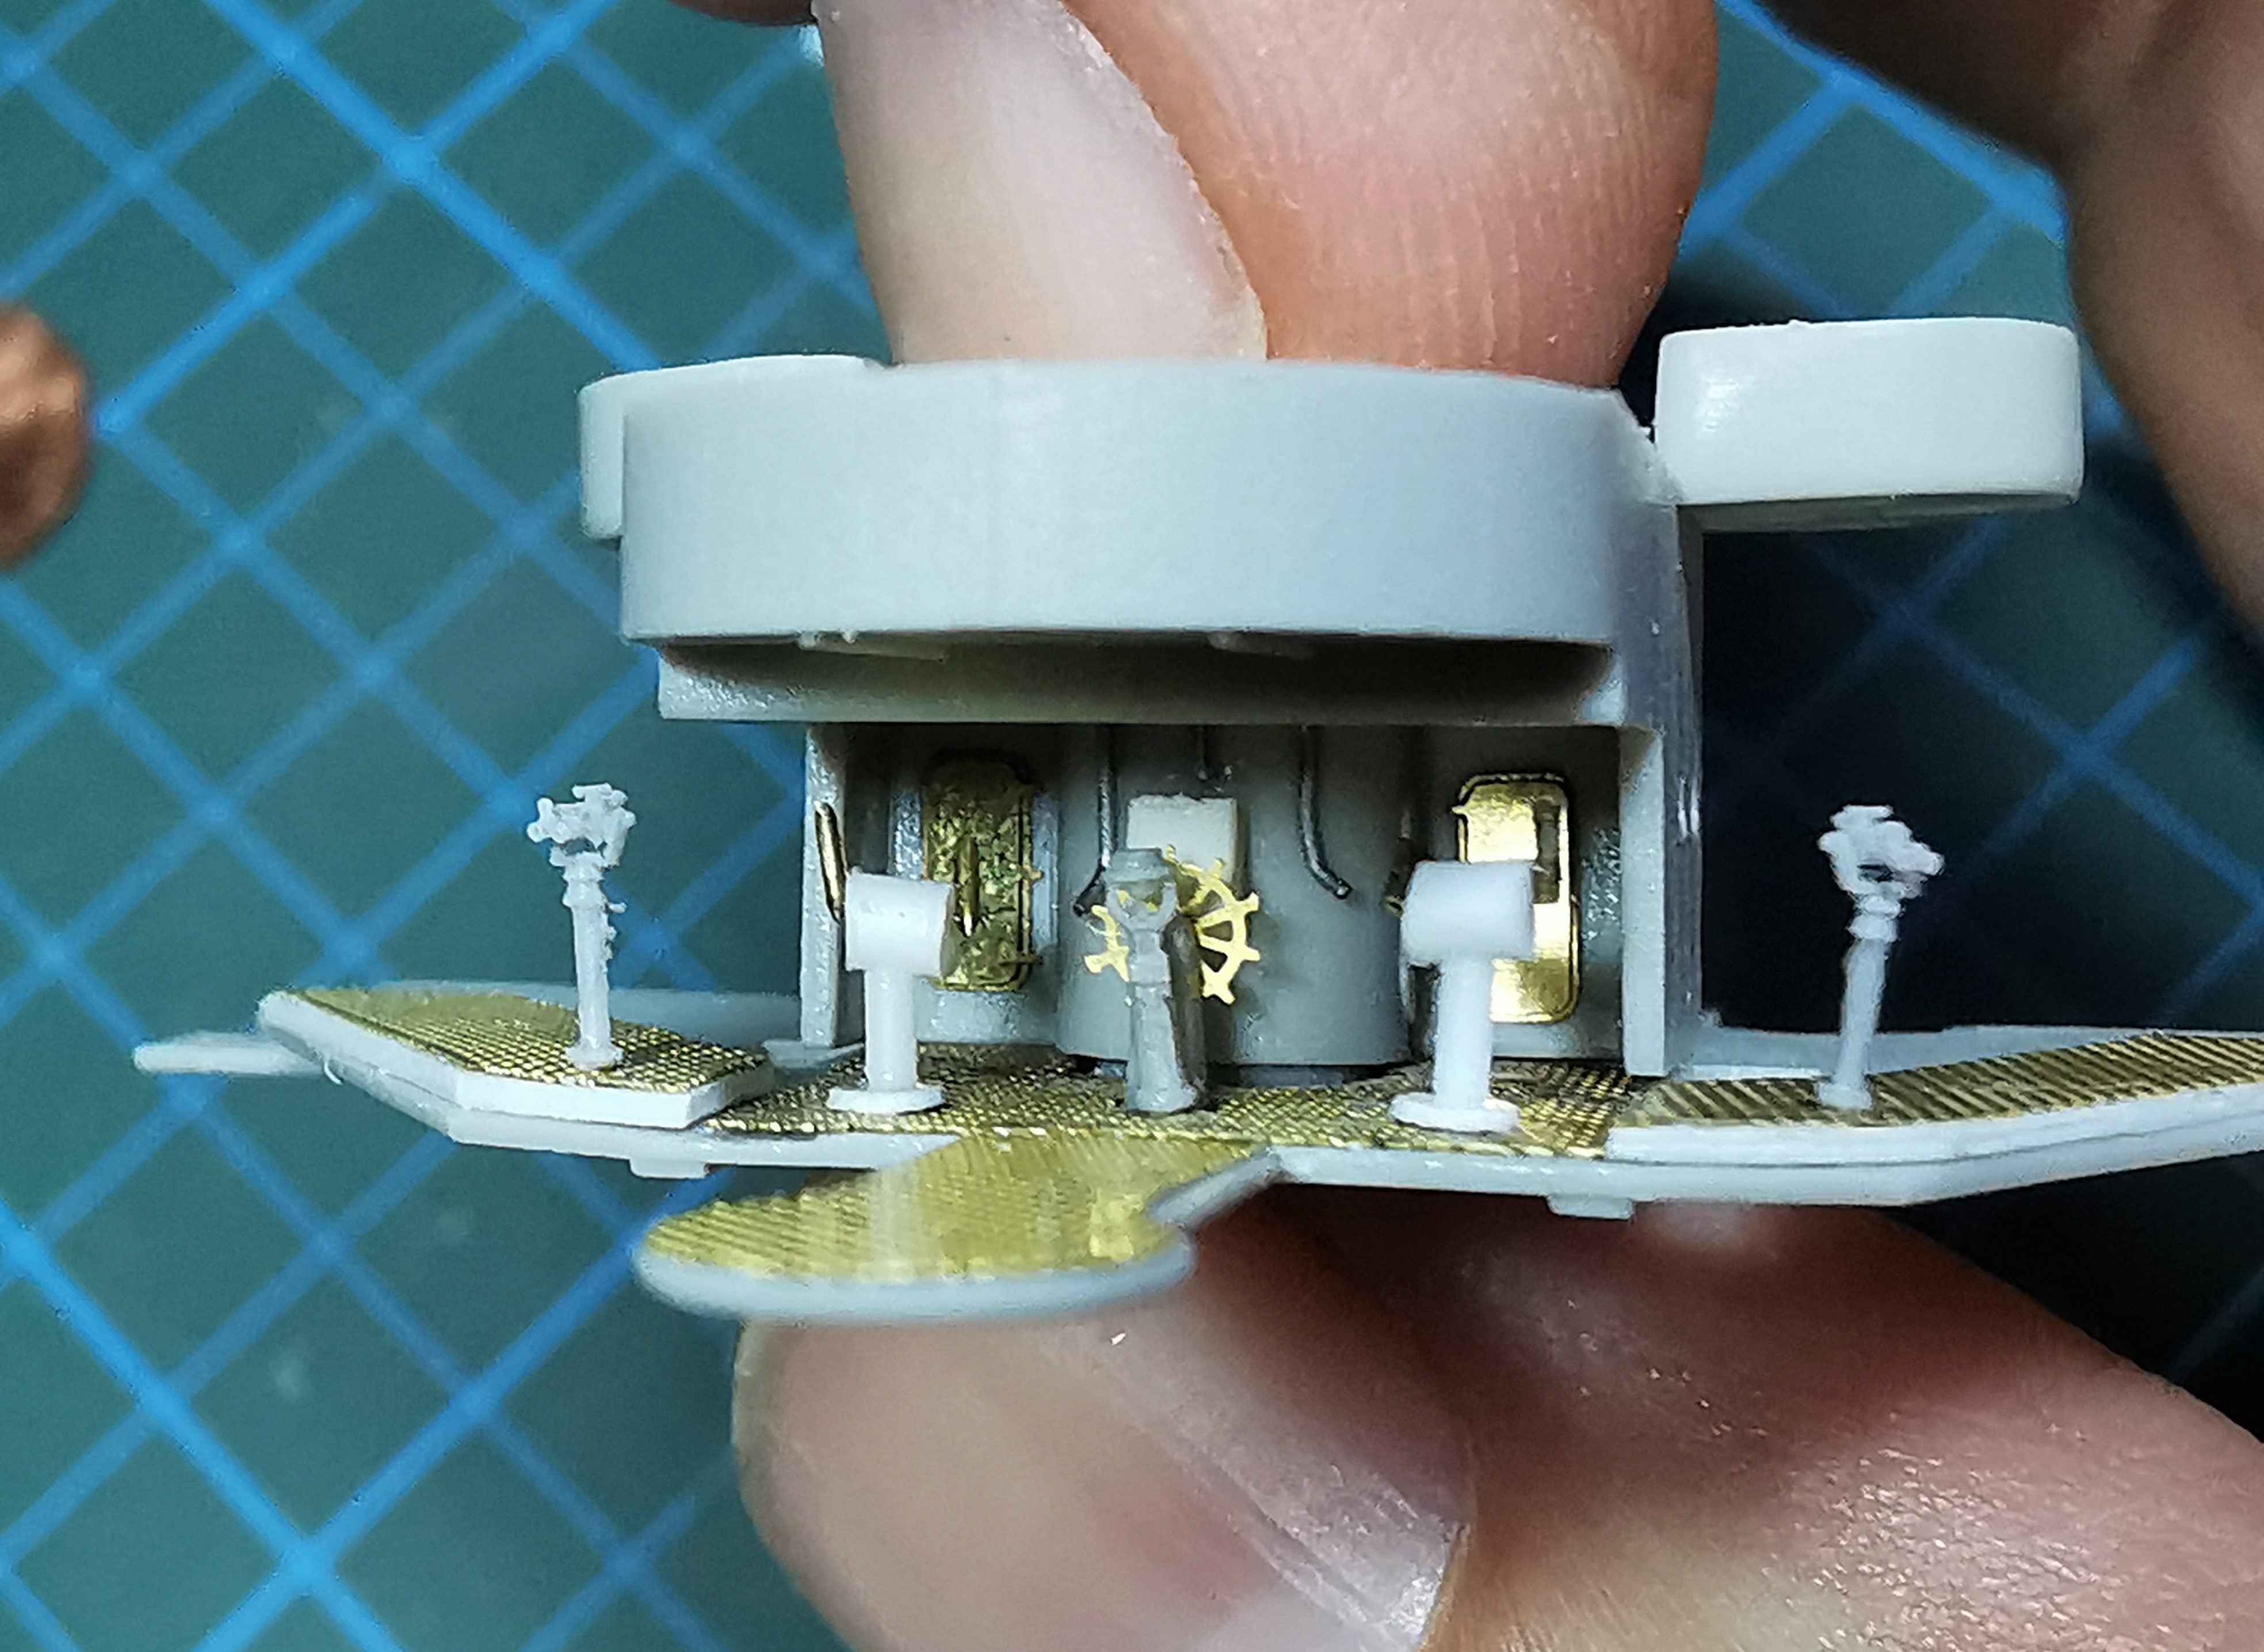
I started with reproducing the wooden gratings. The real ship had two machine telegraphs within the bridge so I scratchbuilt them, too


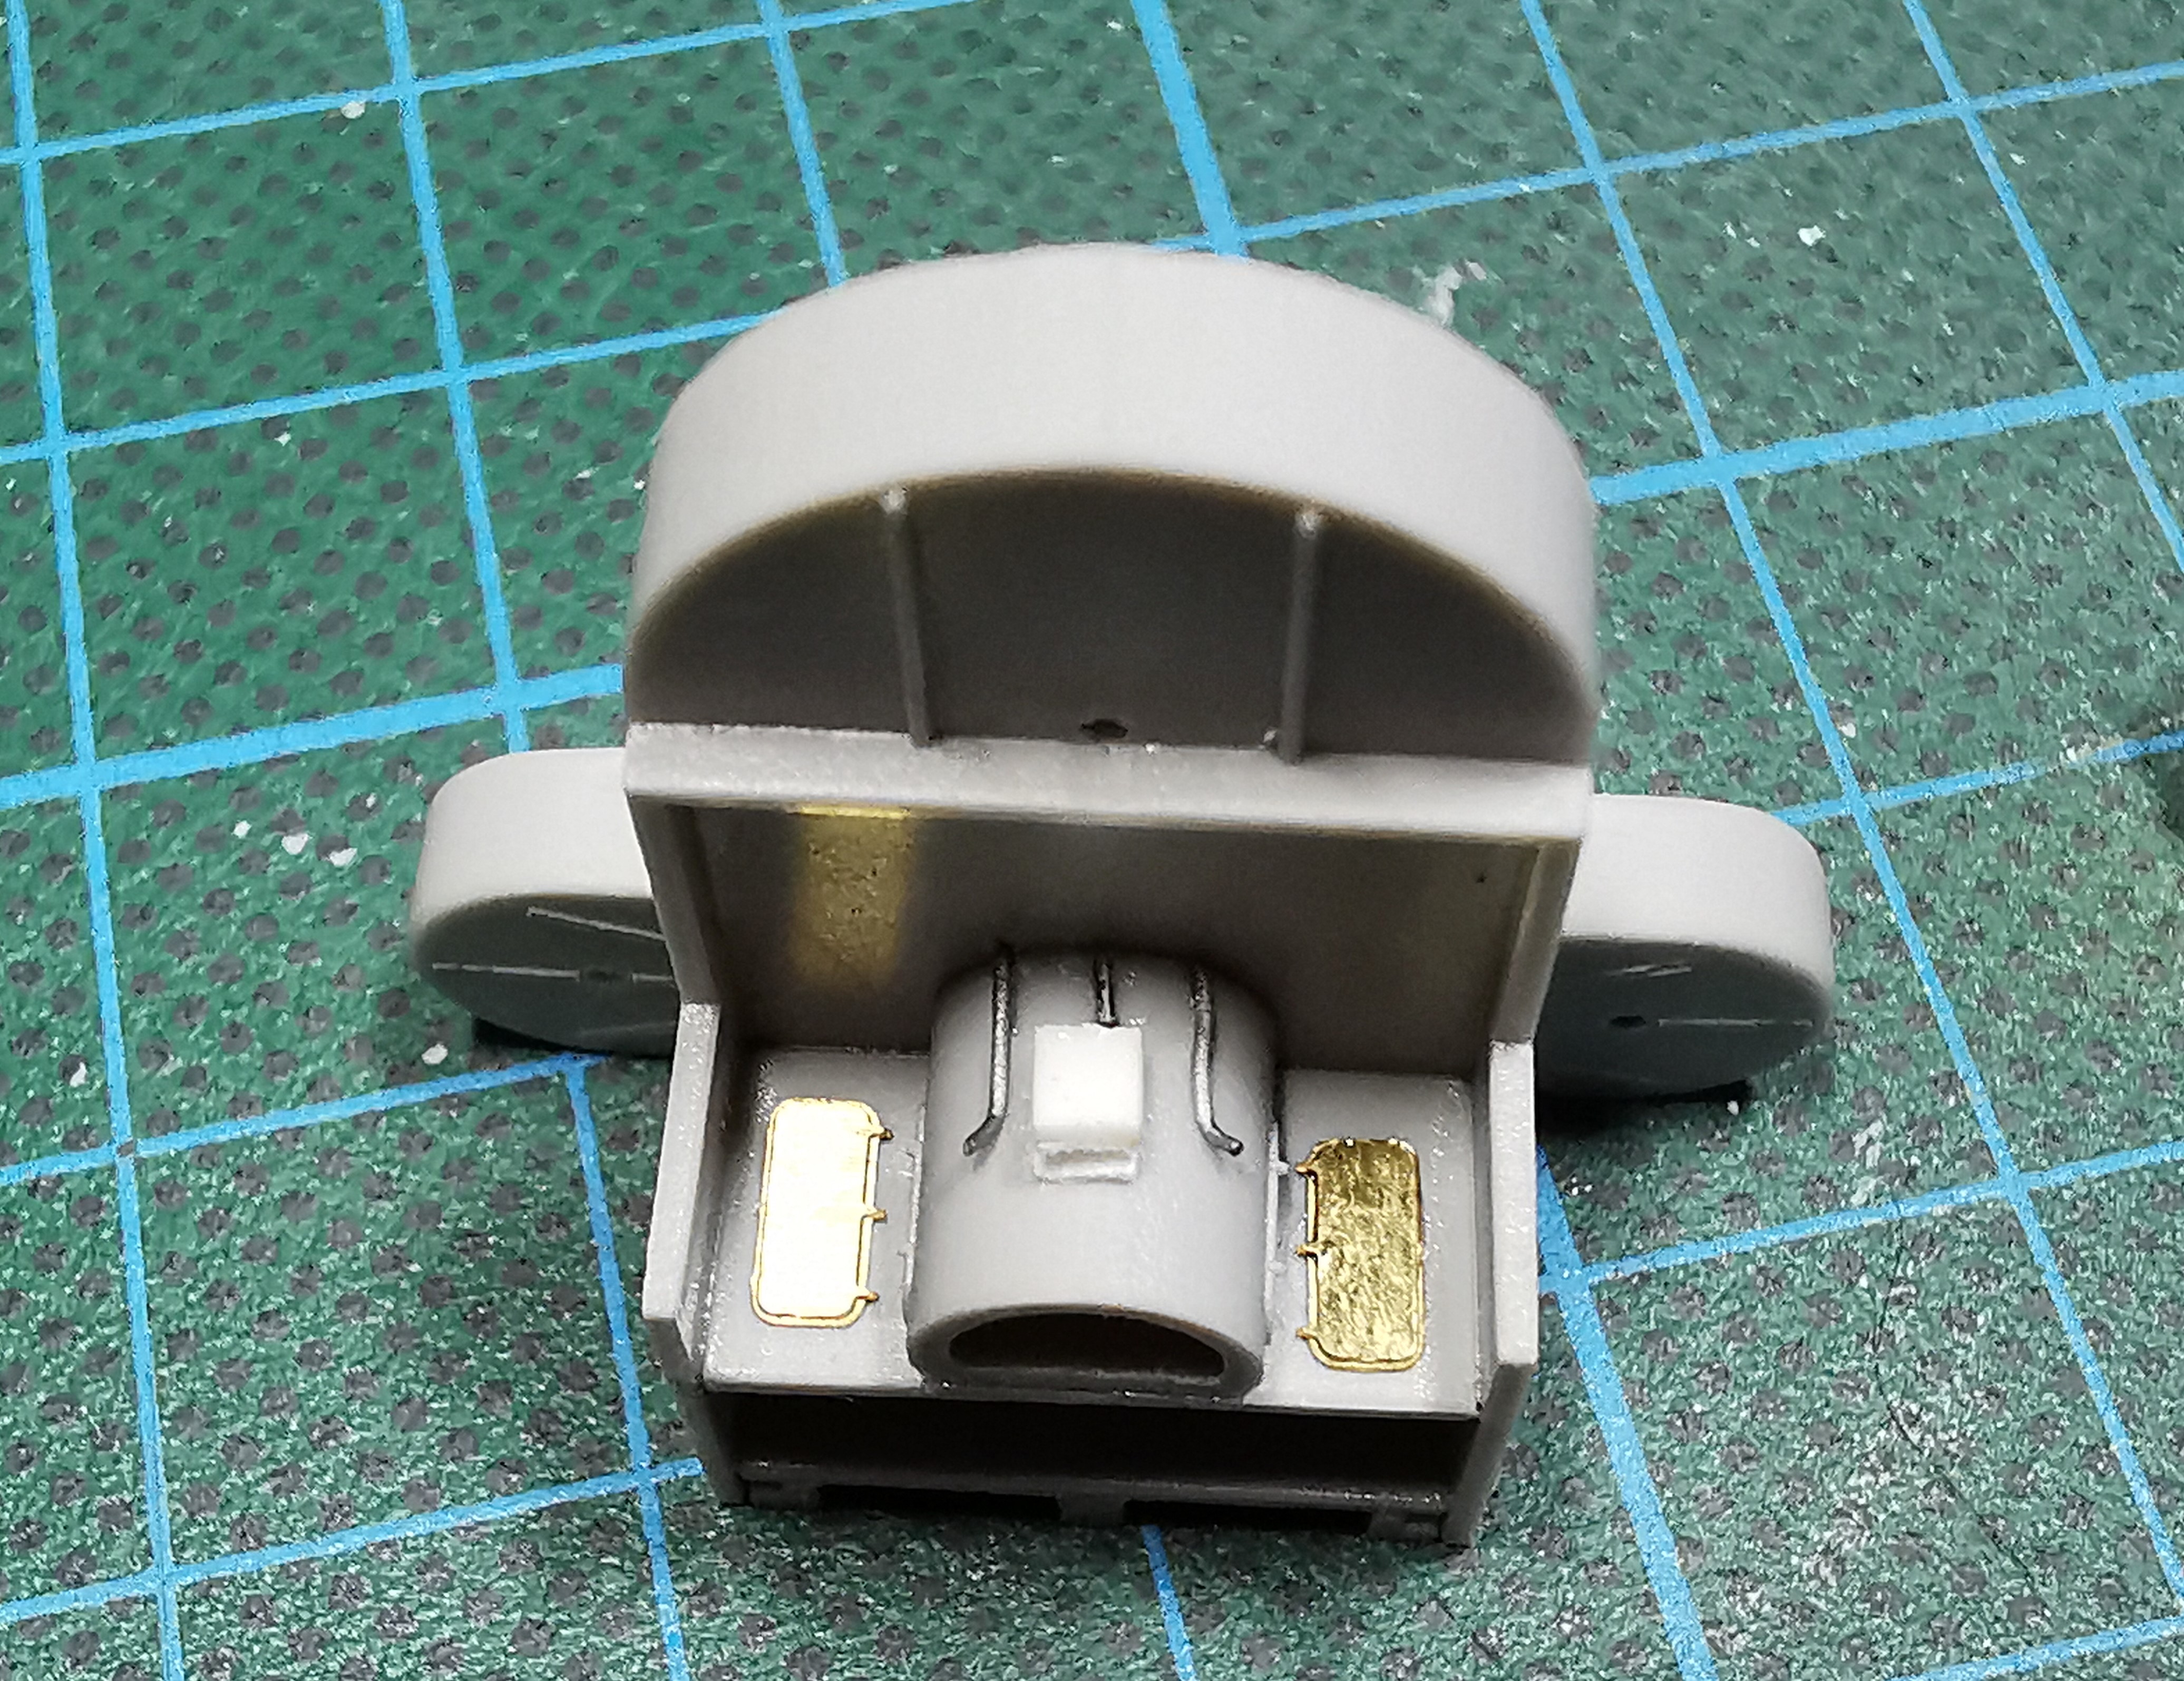
At the rear wall I added the missing back doors, two voicepipes and a switchboard


Togther it looks this way. As the front bridge enclosure have big windows and open sides I do hope one can see all these details later when peeping into the bridge


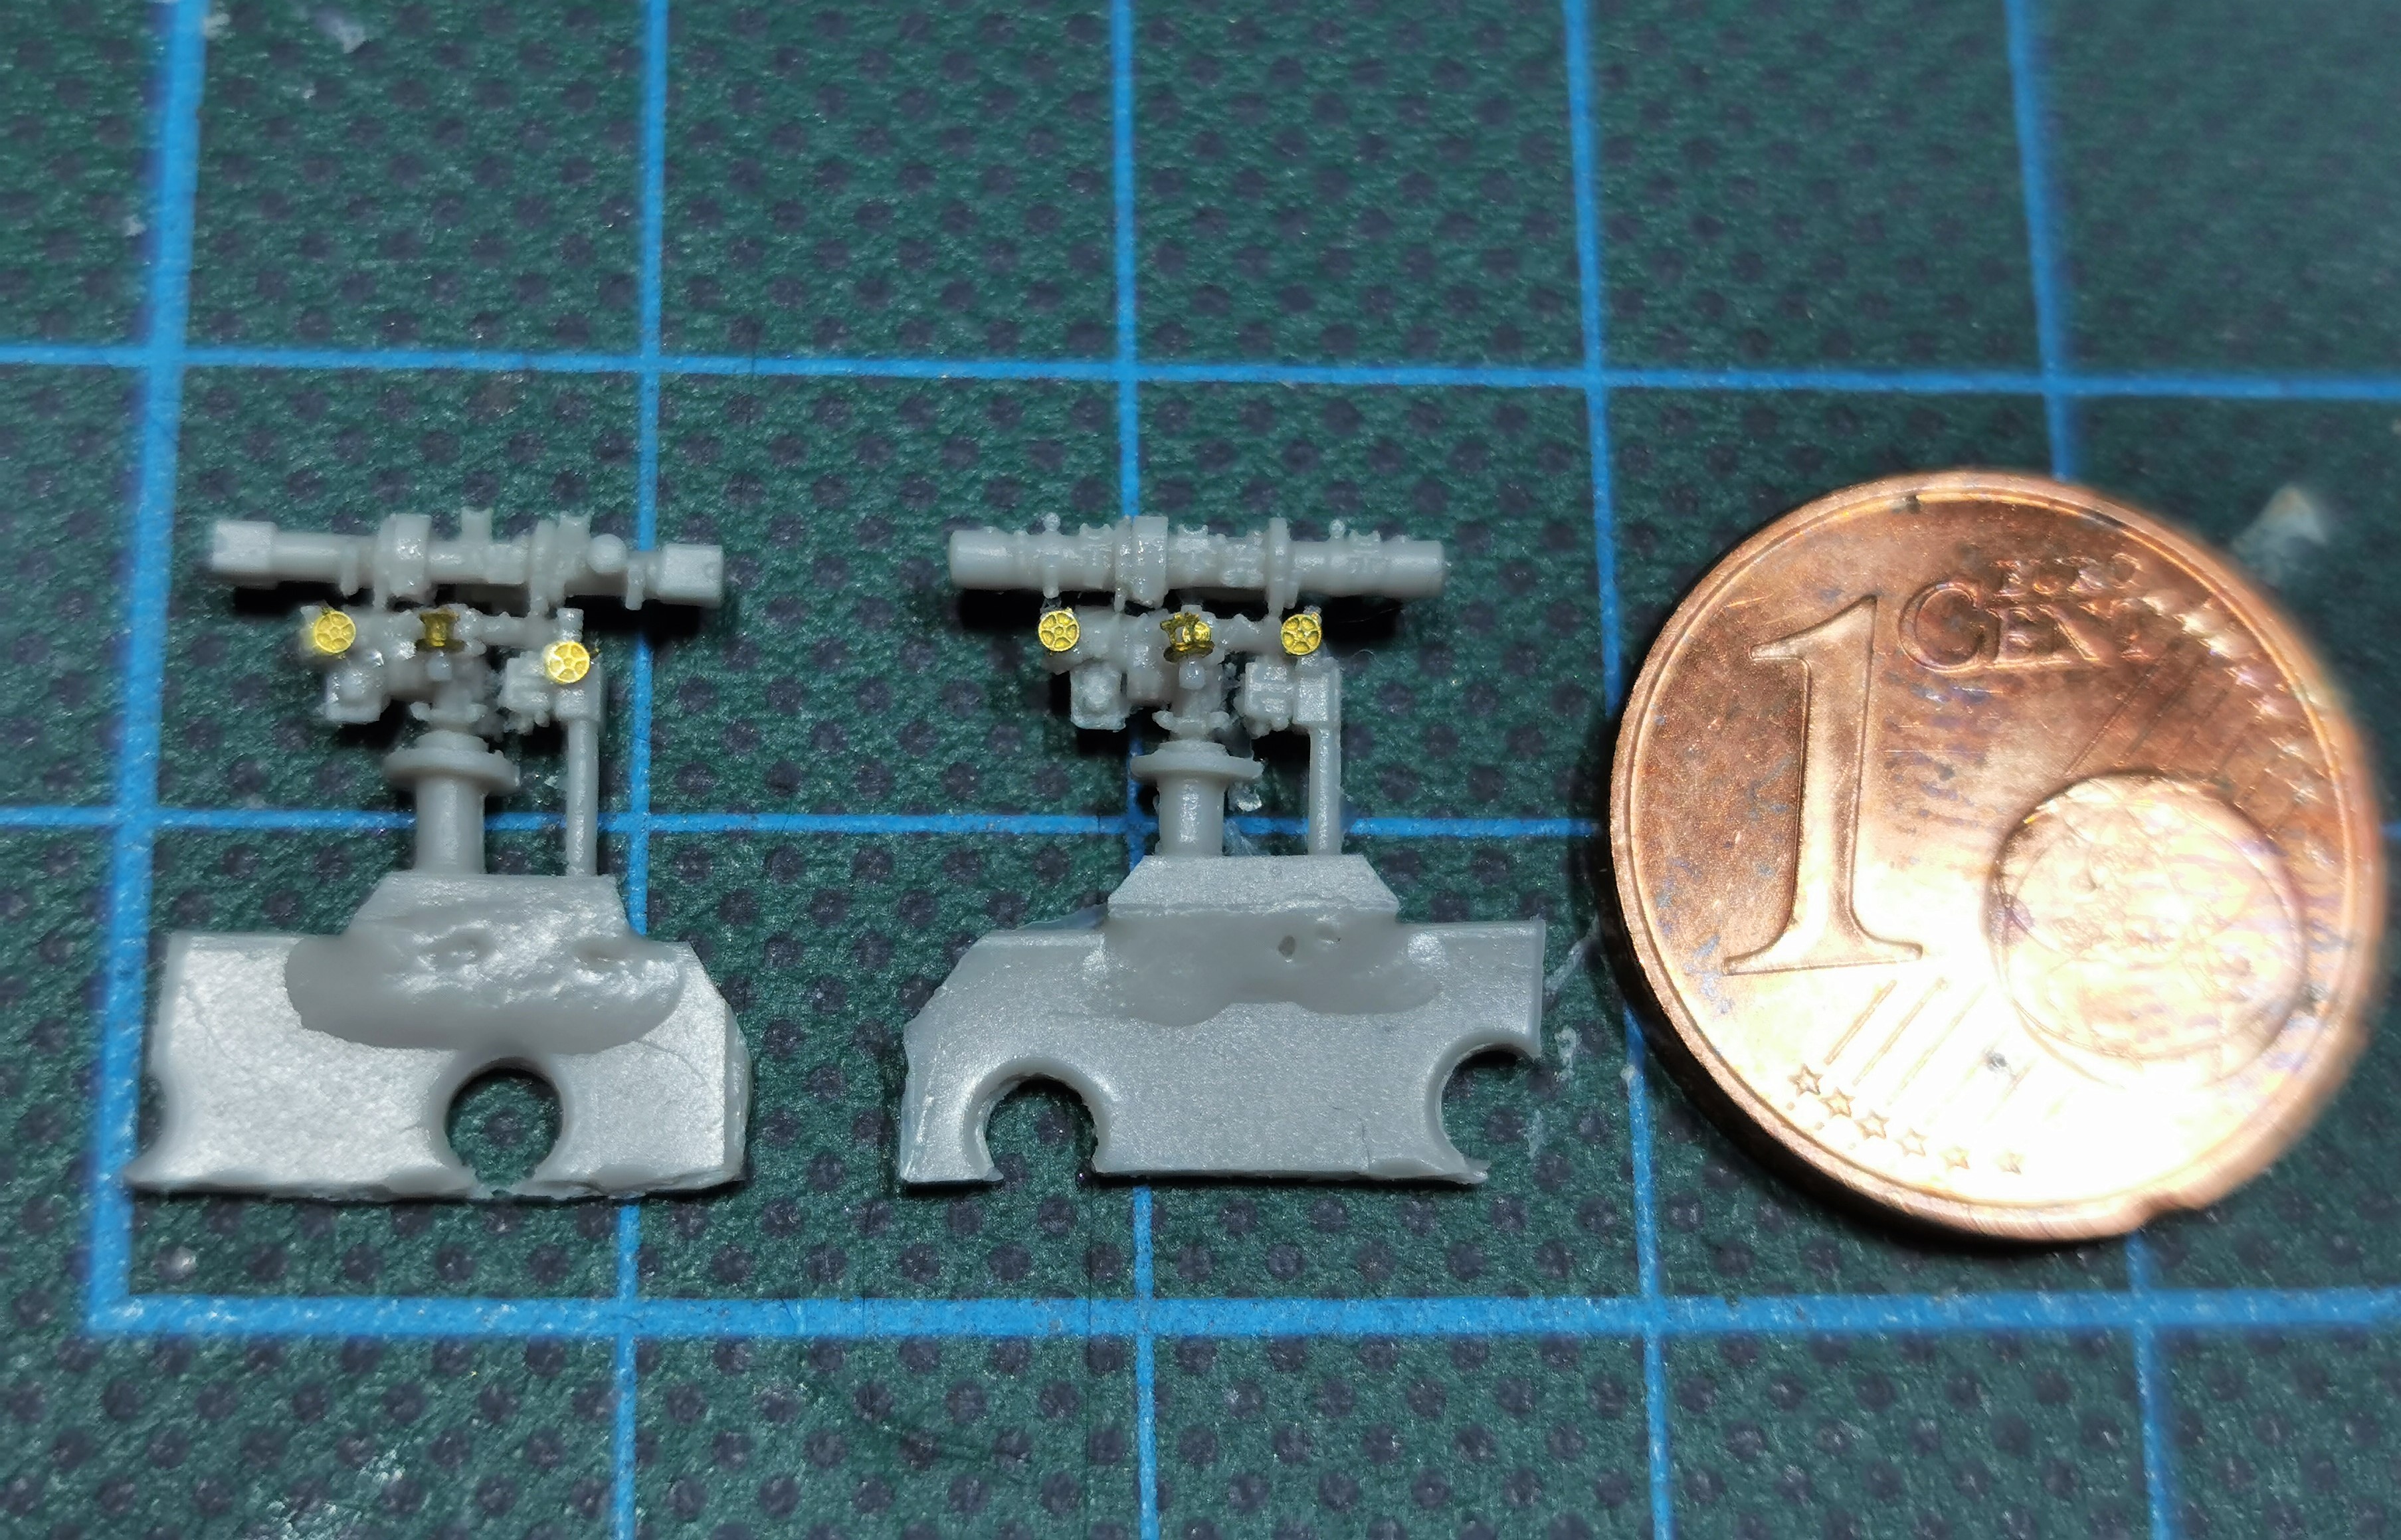
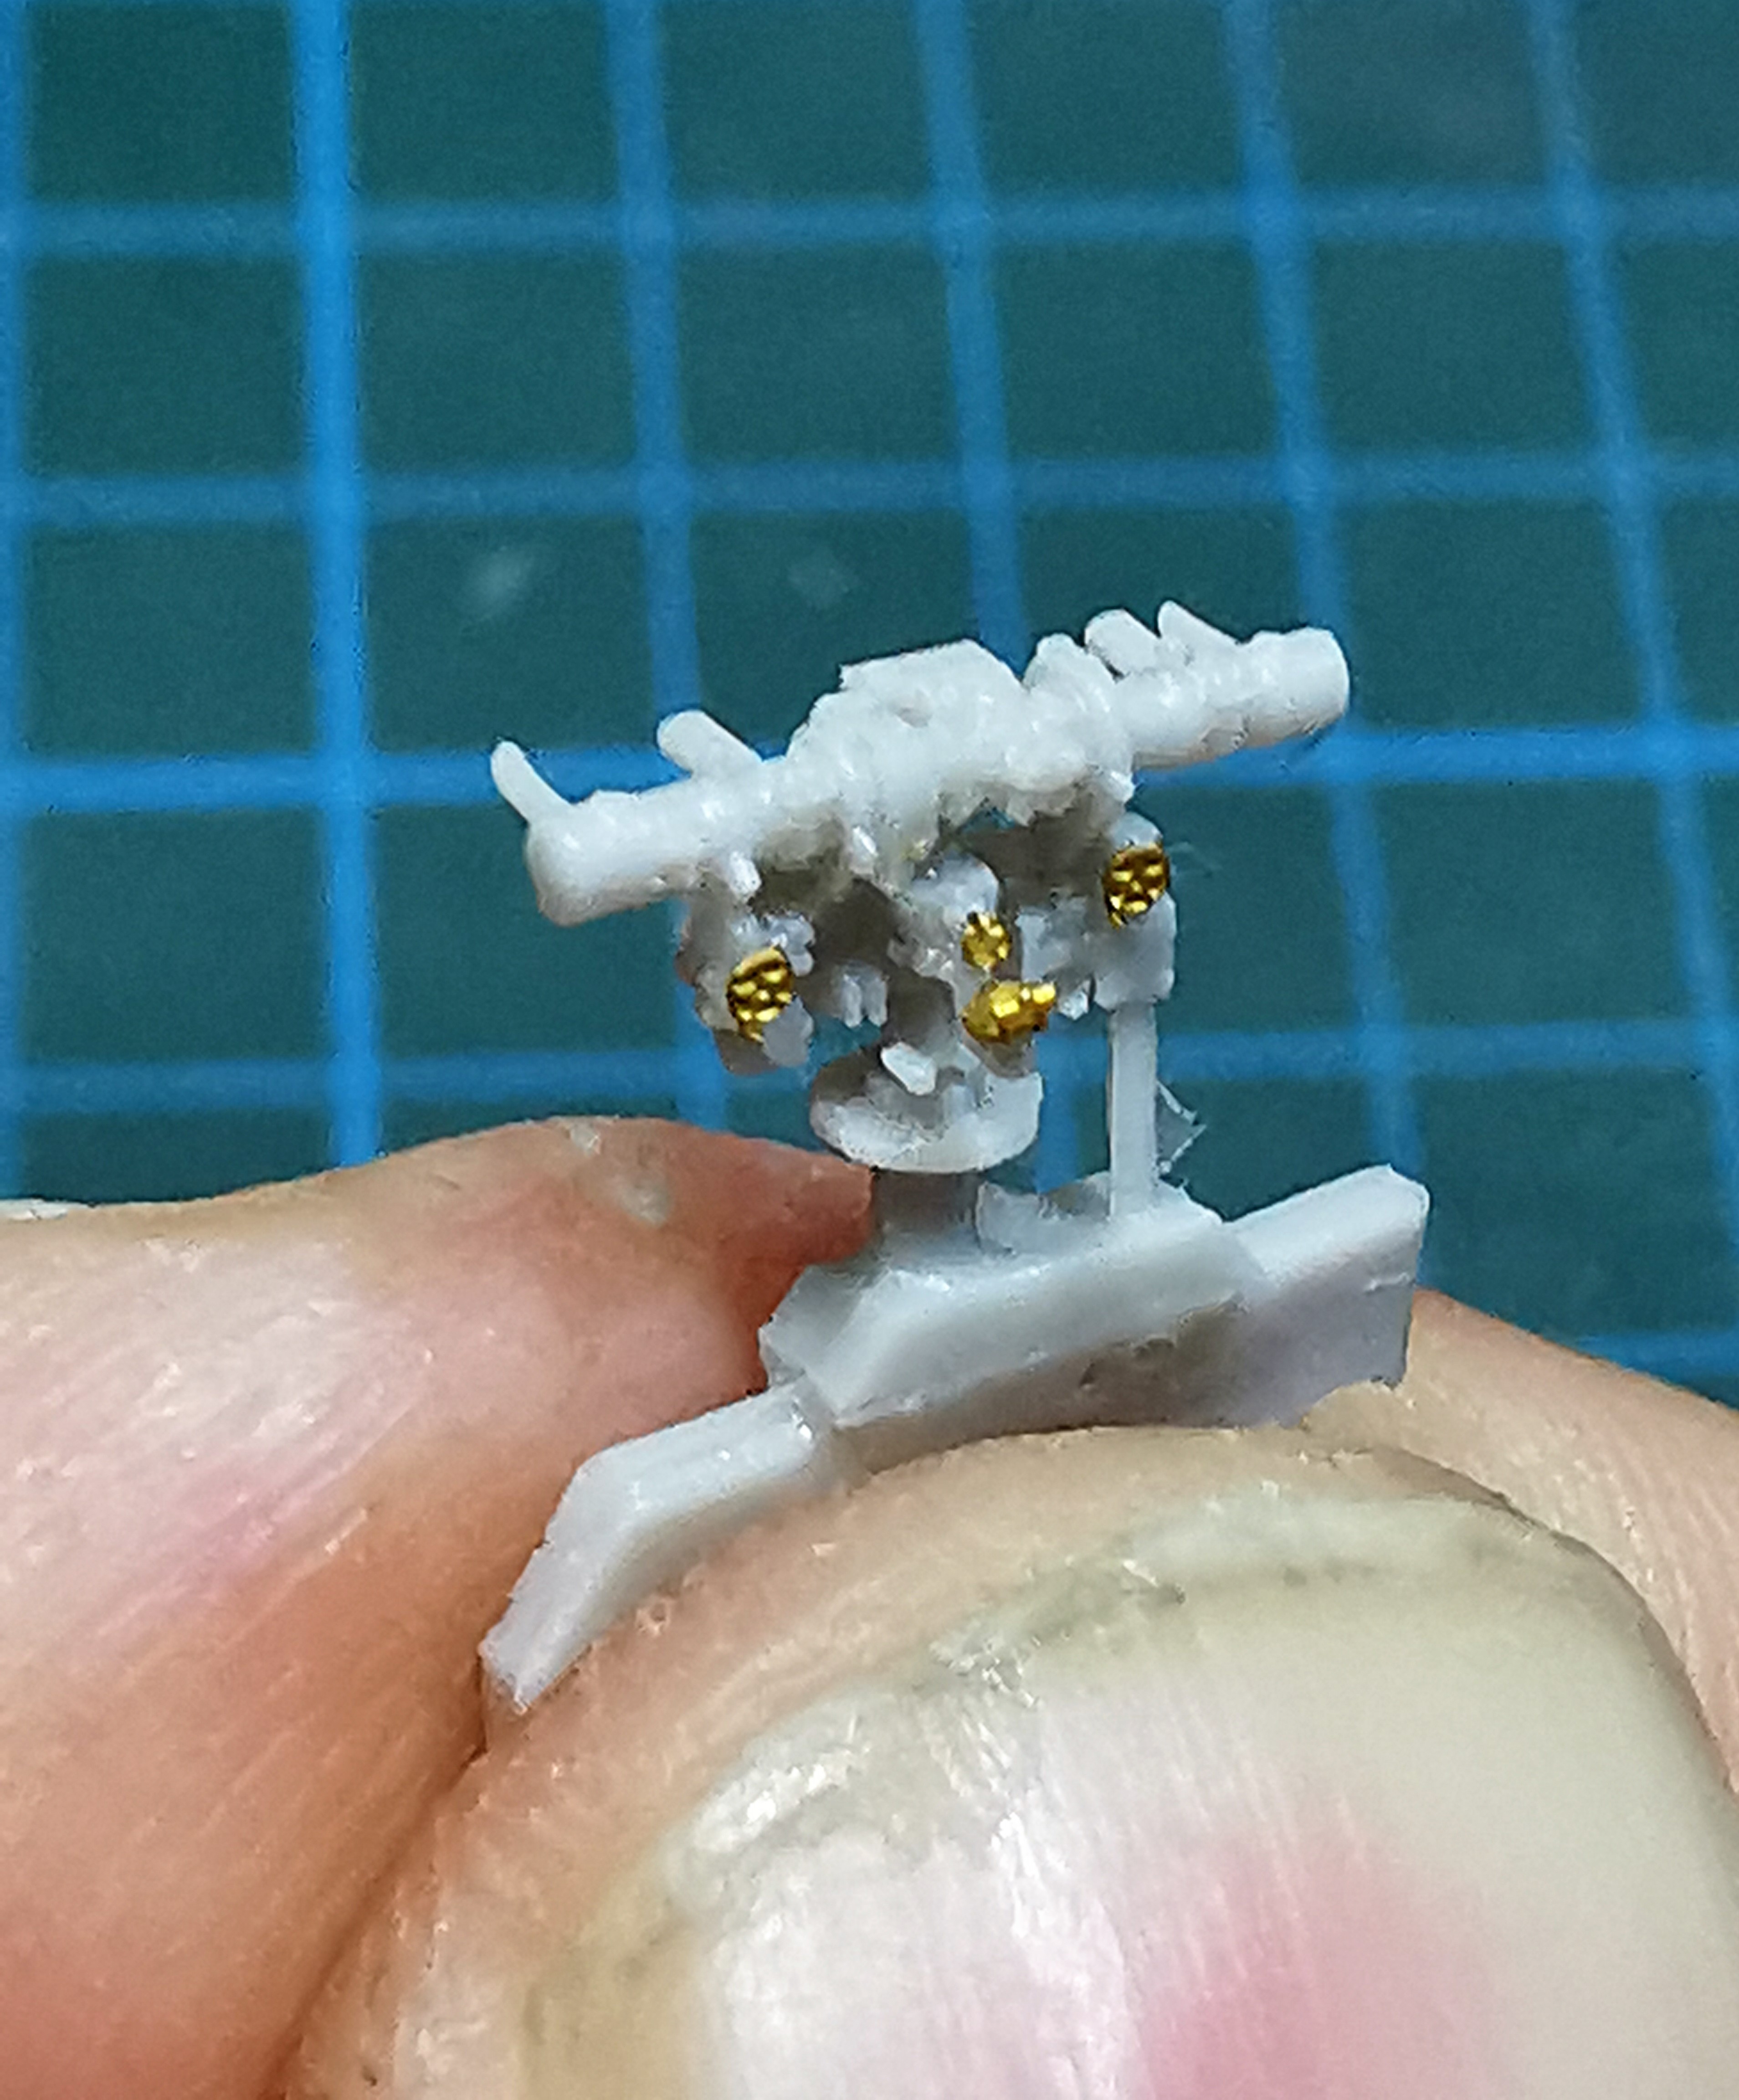
Then I assembled VETERAN MODEL´s rangefinders. These are tiny but of outstanding quality. They provide you microscopic handwheels as big as a flea but I was able to glue them onto the rangefinders. These will be a huge improvements later compared to the "naked" kit ones


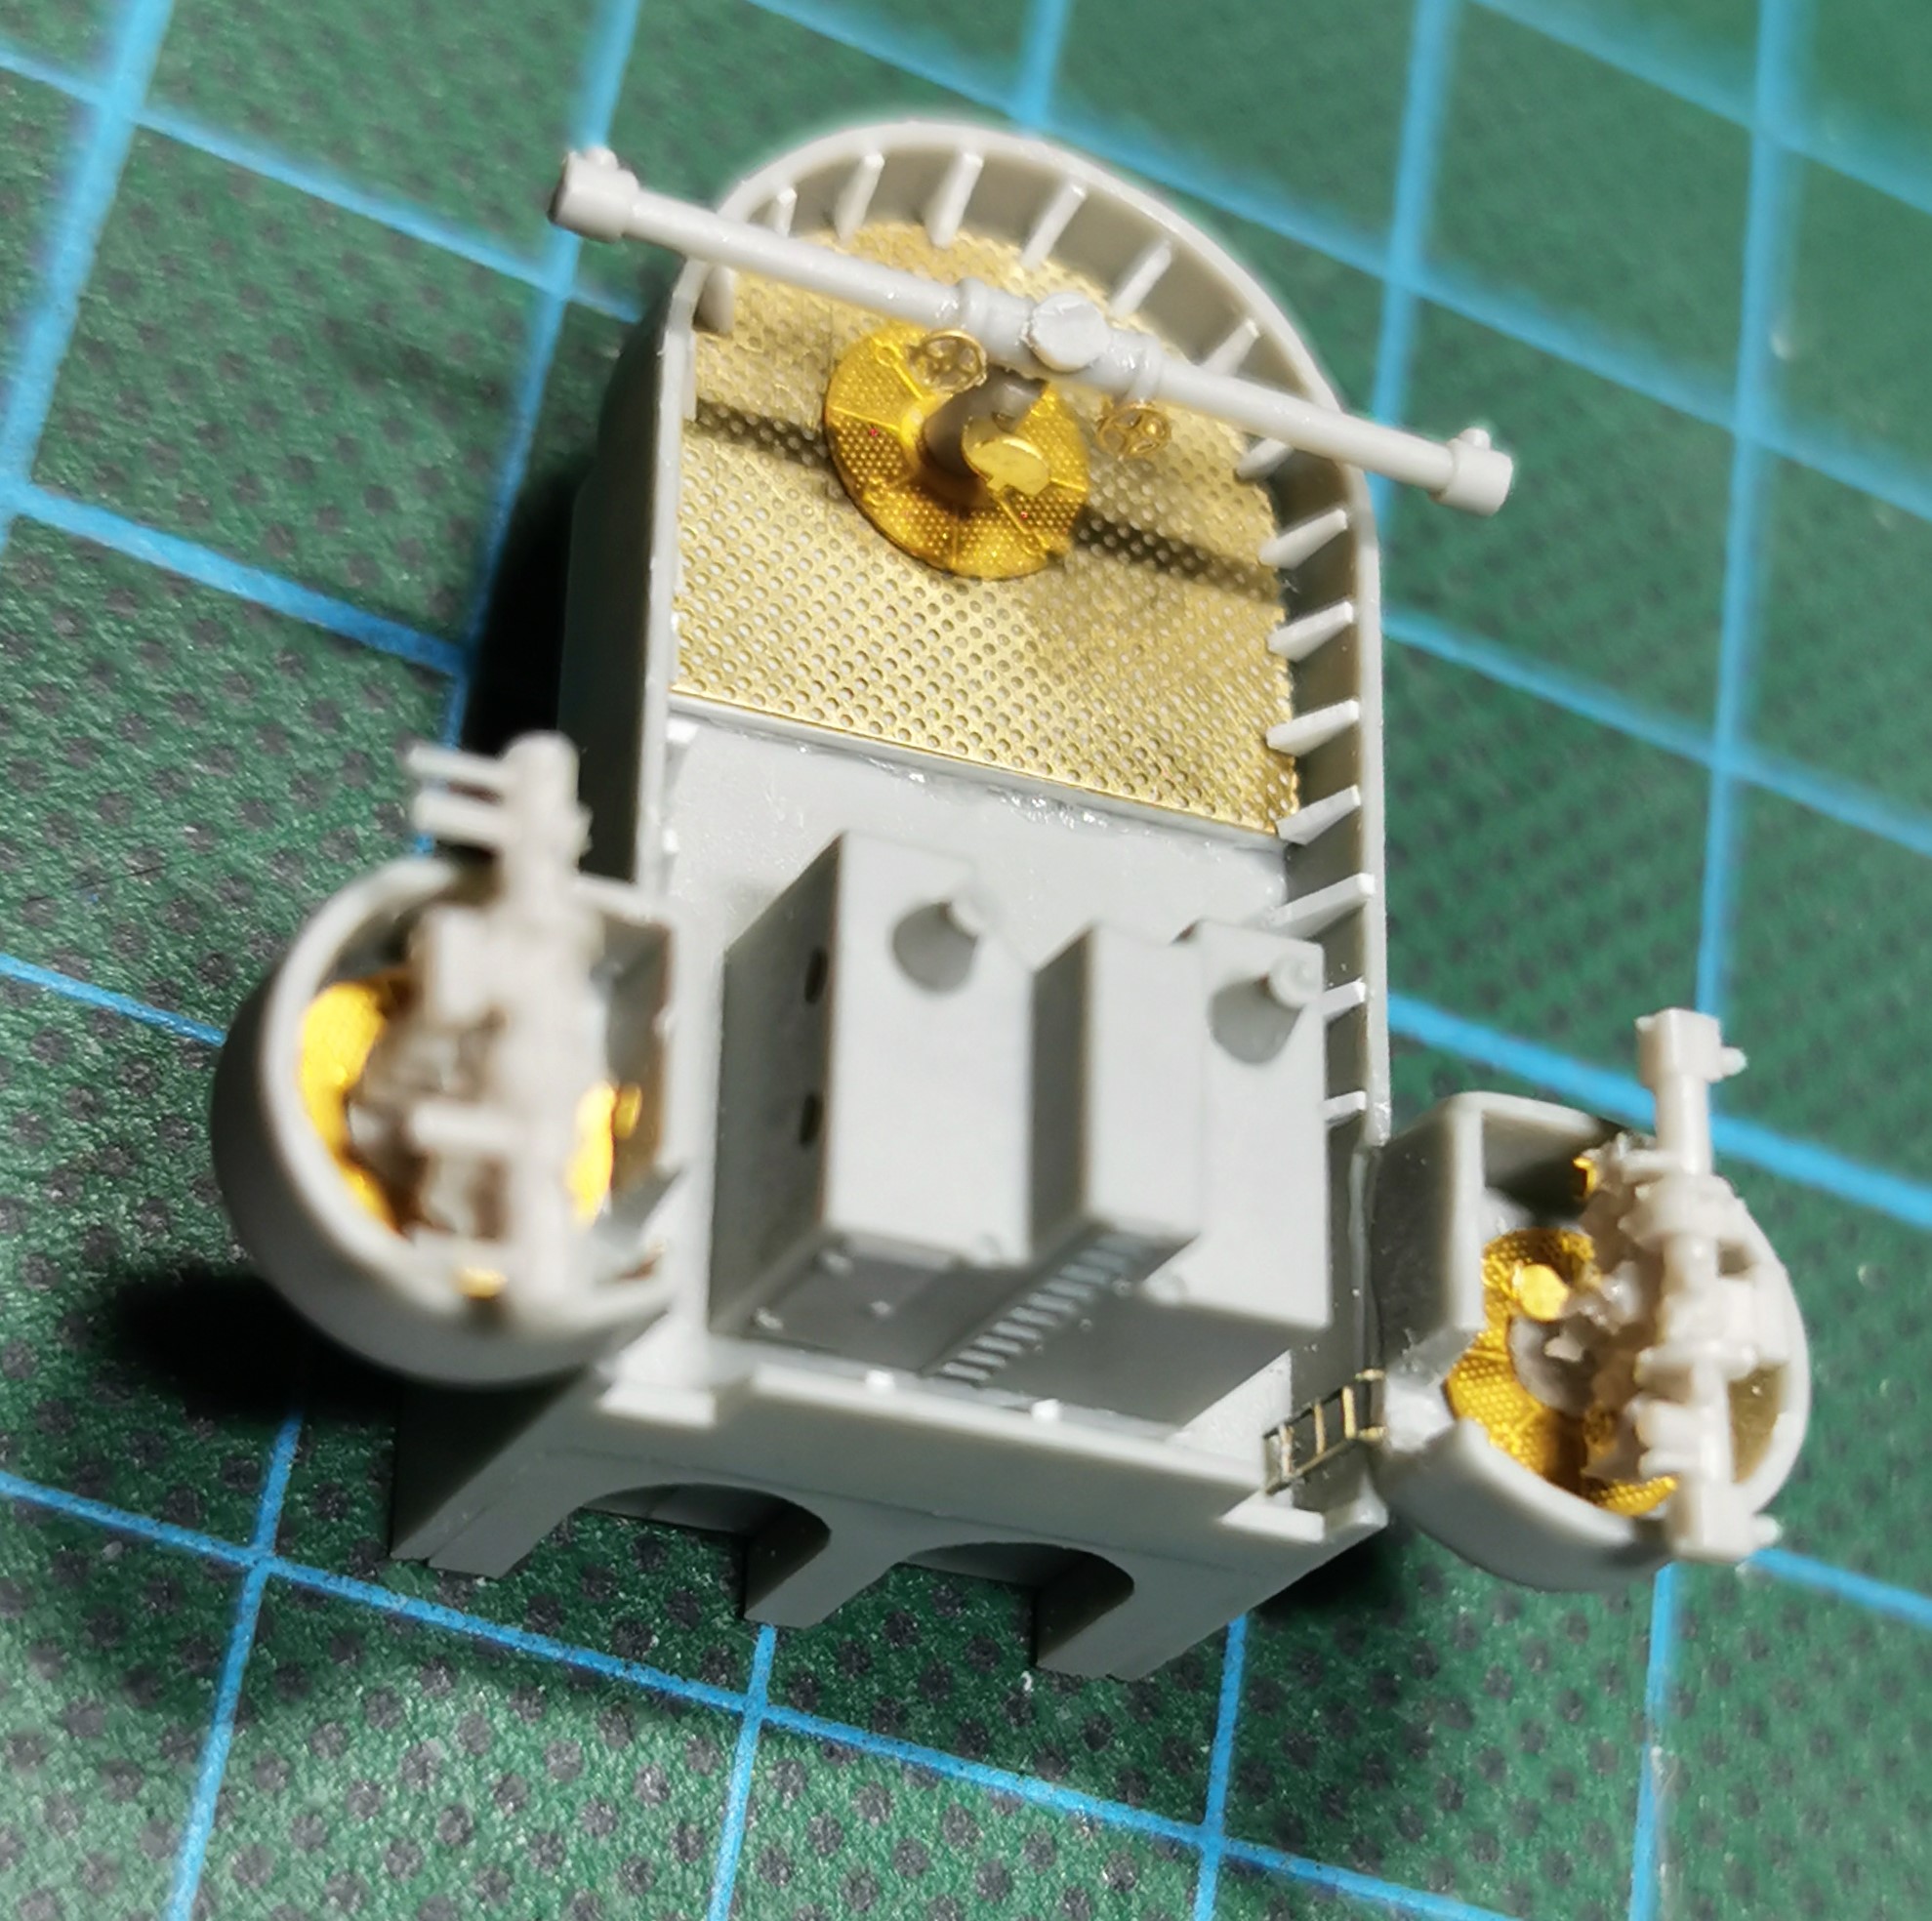
The bridge roof was also improved with adding the missing wooden grating for the big rangefinder. The sidewalls got the missing reinforcement plates for the sidewalls out of very thin evergreen sheet. The circular emplacements for the two side baskets of the smaller rangefinders received openings and a stair for entering.


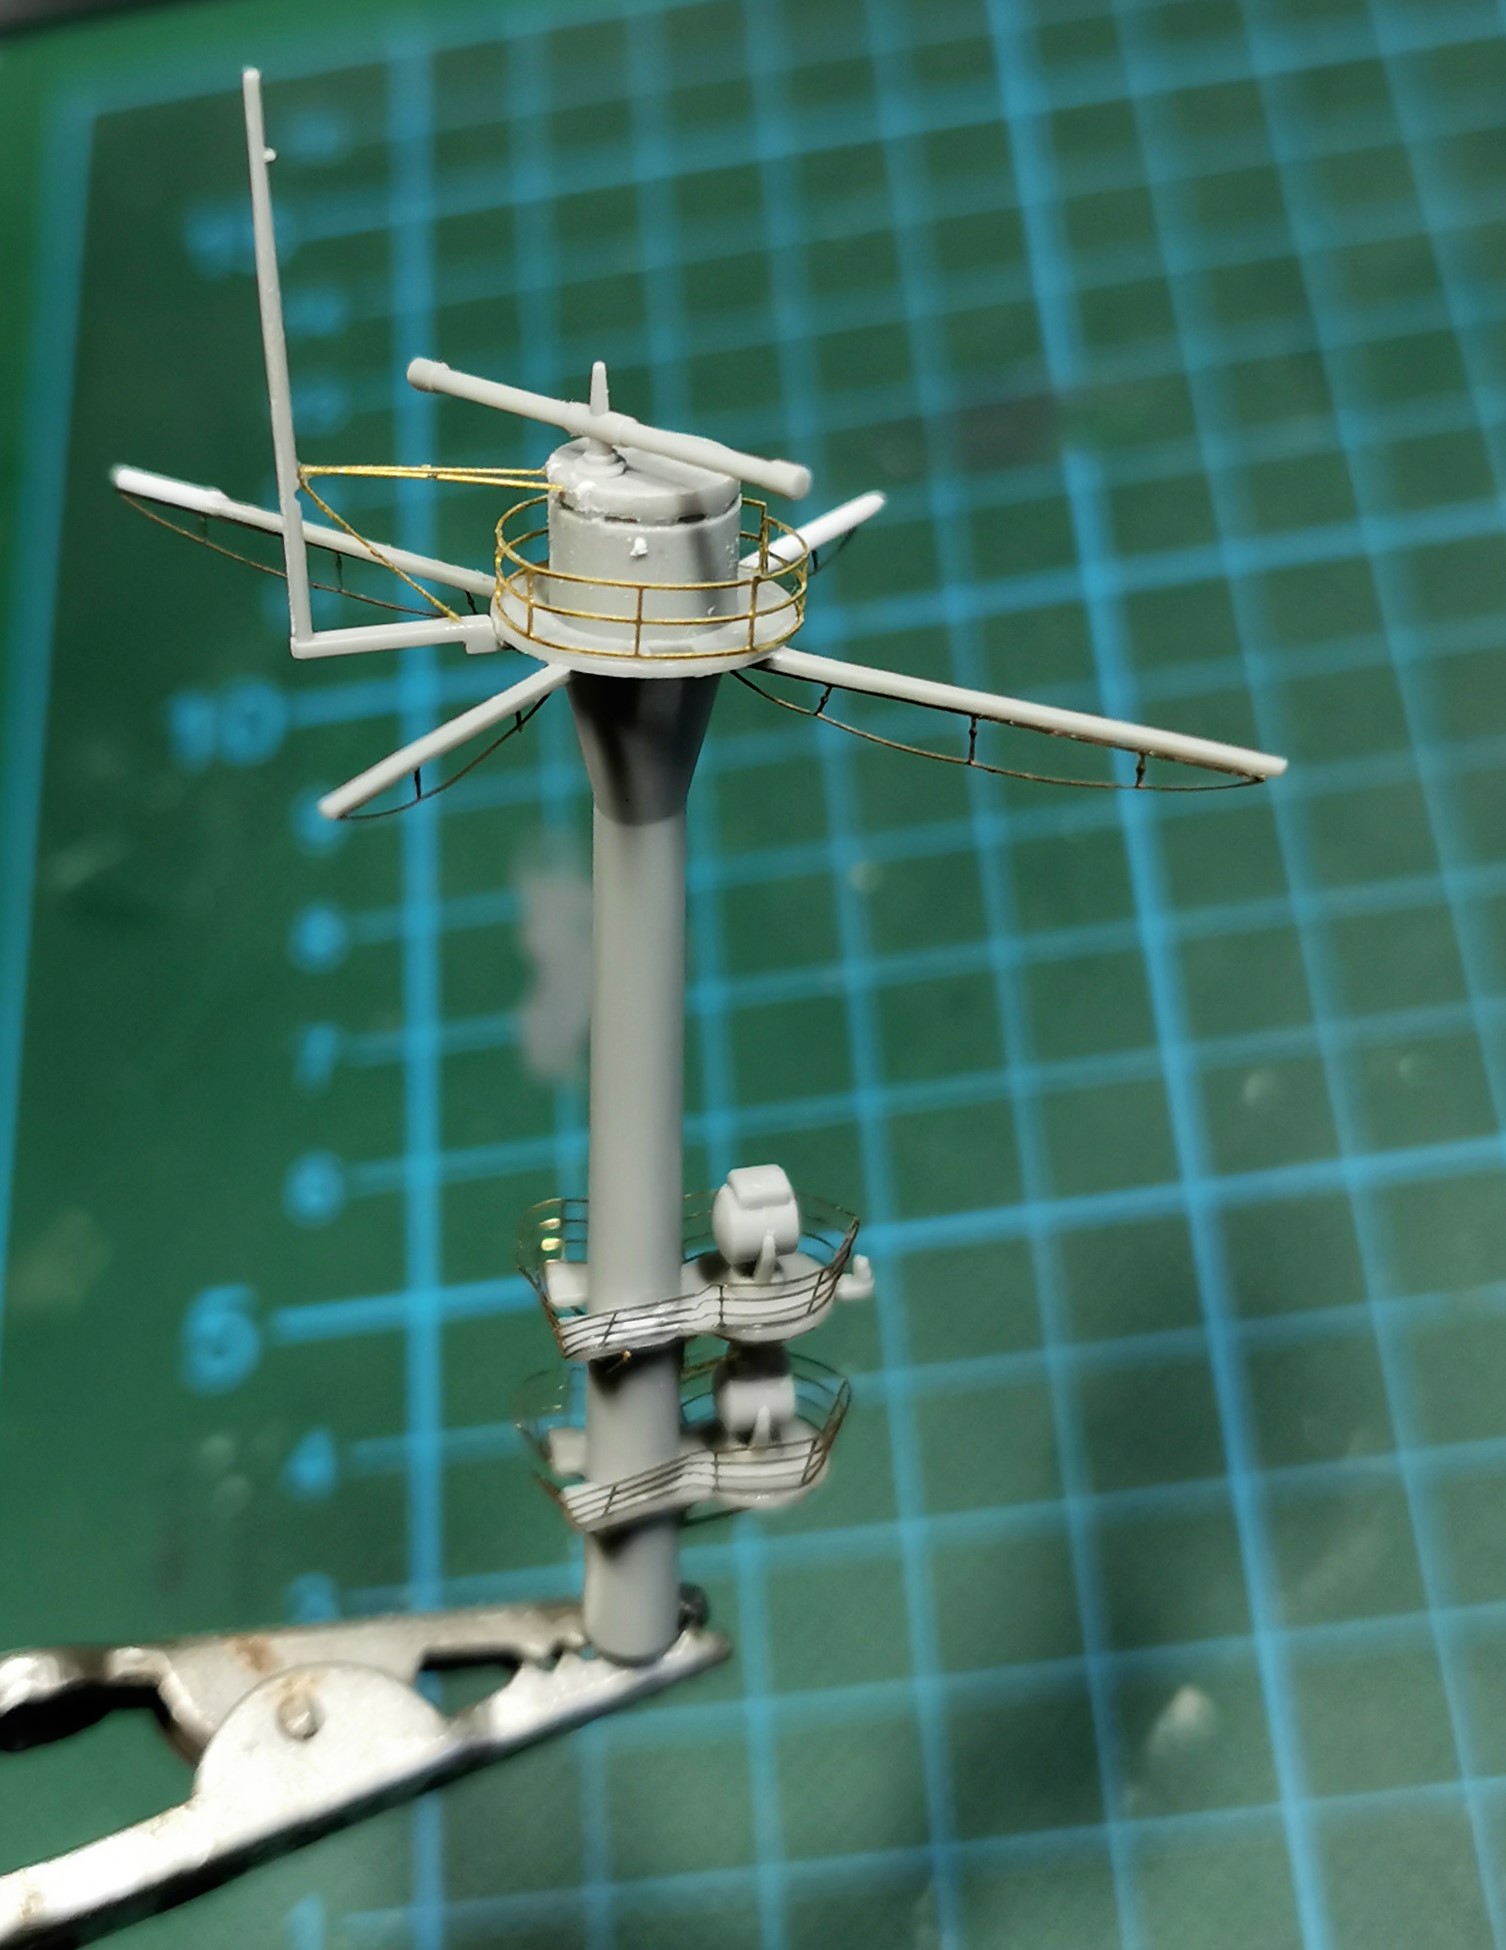
And, finally, the frontal main observation mast was finished, too. Here you have to be absolutely careful as the mast arms are very fragile - I did broke one and a half arms off and had to replace them with evergreen rod. I felt the railings for the two seachlight platforms very difficult as they have to be bended in a very complicated style and the railings themself have to got a certain inclination, too. Additionally these railings from EDUARD, as I already said before in this blog, are veery delicate; more then the others I had before.


Next will be the first painting chapter for the ship´s hull as the ordered colors arrived finally
d6mst0
#453
Visit this Community
Texas, United States
Joined: August 28, 2016
KitMaker: 1,925 posts
Model Shipwrights: 1,298 posts
Posted: Tuesday, August 18, 2020 - 10:55 PM UTC
Thomas,

Great attention to detail with the bridge layout and directors. Even if you can't see all of it having the satisfaction that it is there makes it worth the effort.

Mark
Black_sheep
Visit this Community
Bayern, Germany
Joined: December 11, 2009
KitMaker: 823 posts
Model Shipwrights: 551 posts
Posted: Wednesday, August 19, 2020 - 12:50 AM UTC

Quoted Text

Thomas,

Great attention to detail with the bridge layout and directors. Even if you can't see all of it having the satisfaction that it is there makes it worth the effort.

Mark


Thank you Mark; yes this is exactly how I feel about it
TimReynaga
Staff MemberAssociate Editor
MODEL SHIPWRIGHTS
Visit this Community
California, United States
Joined: May 03, 2006
KitMaker: 2,500 posts
Model Shipwrights: 1,830 posts
Posted: Wednesday, August 19, 2020 - 02:42 AM UTC

Thomas,

You are braver than I taking on those plastic mast arms! I'd have replaced them with metal rod - but you pulled it off nicely!
Black_sheep
Visit this Community
Bayern, Germany
Joined: December 11, 2009
KitMaker: 823 posts
Model Shipwrights: 551 posts
Posted: Wednesday, August 19, 2020 - 04:24 AM UTC

Quoted Text

Thomas, You are braver than I taking on those plastic mast arms! I'd have replaced them with metal rod - but you pulled it off nicely!


Tim yes you are right, maybe it would have been the better choice to choose metal rod instead of plastic. We will see later whats going on during rigging
RedDuster
Visit this Community
England - South East, United Kingdom
Joined: March 01, 2010
KitMaker: 7,078 posts
Model Shipwrights: 6,649 posts
Posted: Wednesday, August 19, 2020 - 06:11 AM UTC
The Bridge detail looks excellent Thomas.

Very nicely done indeed.

Cheers

Si
Black_sheep
Visit this Community
Bayern, Germany
Joined: December 11, 2009
KitMaker: 823 posts
Model Shipwrights: 551 posts
Posted: Wednesday, August 19, 2020 - 07:15 AM UTC

Quoted Text

The Bridge detail looks excellent Thomas.

Very nicely done indeed.

Cheers

Si


Thank you very much Si. You will have everything much more easier with the bridge interior work later at your own 1:200 scale Bismarck
RussellE
#306
Visit this Community
Victoria, Australia
Joined: June 27, 2010
KitMaker: 3,959 posts
Model Shipwrights: 2,777 posts
Posted: Wednesday, August 19, 2020 - 09:46 AM UTC
very nice bridge works Thomas
JJ1973
#345
Visit this Community
Niedersachsen, Germany
Joined: August 22, 2011
KitMaker: 1,835 posts
Model Shipwrights: 1,832 posts
Posted: Thursday, August 20, 2020 - 07:50 AM UTC
Thomas,

that's fantastic work of yours! your progress is really fast and your attention to detail just awesome, just great to see her come together. I do like your base and the plaque, too! And yes, this Veteran stuff is cool!

Cheers
Jan
Black_sheep
Visit this Community
Bayern, Germany
Joined: December 11, 2009
KitMaker: 823 posts
Model Shipwrights: 551 posts
Posted: Friday, August 21, 2020 - 03:05 AM UTC

Quoted Text

very nice bridge works Thomas


Thank you Russell, I do my best
Black_sheep
Visit this Community
Bayern, Germany
Joined: December 11, 2009
KitMaker: 823 posts
Model Shipwrights: 551 posts
Posted: Friday, August 21, 2020 - 03:06 AM UTC

Quoted Text

Thomas,

that's fantastic work of yours! your progress is really fast and your attention to detail just awesome, just great to see her come together. I do like your base and the plaque, too! And yes, this Veteran stuff is cool!

Cheers
Jan


Hallo Jan, many thanks the modelling speed is because I have one week off for holiday and it´s simply too hot do do something outside
Black_sheep
Visit this Community
Bayern, Germany
Joined: December 11, 2009
KitMaker: 823 posts
Model Shipwrights: 551 posts
Posted: Friday, August 21, 2020 - 03:12 AM UTC
Sorry still no painting as I found some more parts to build first and paint them together with the other main parts.

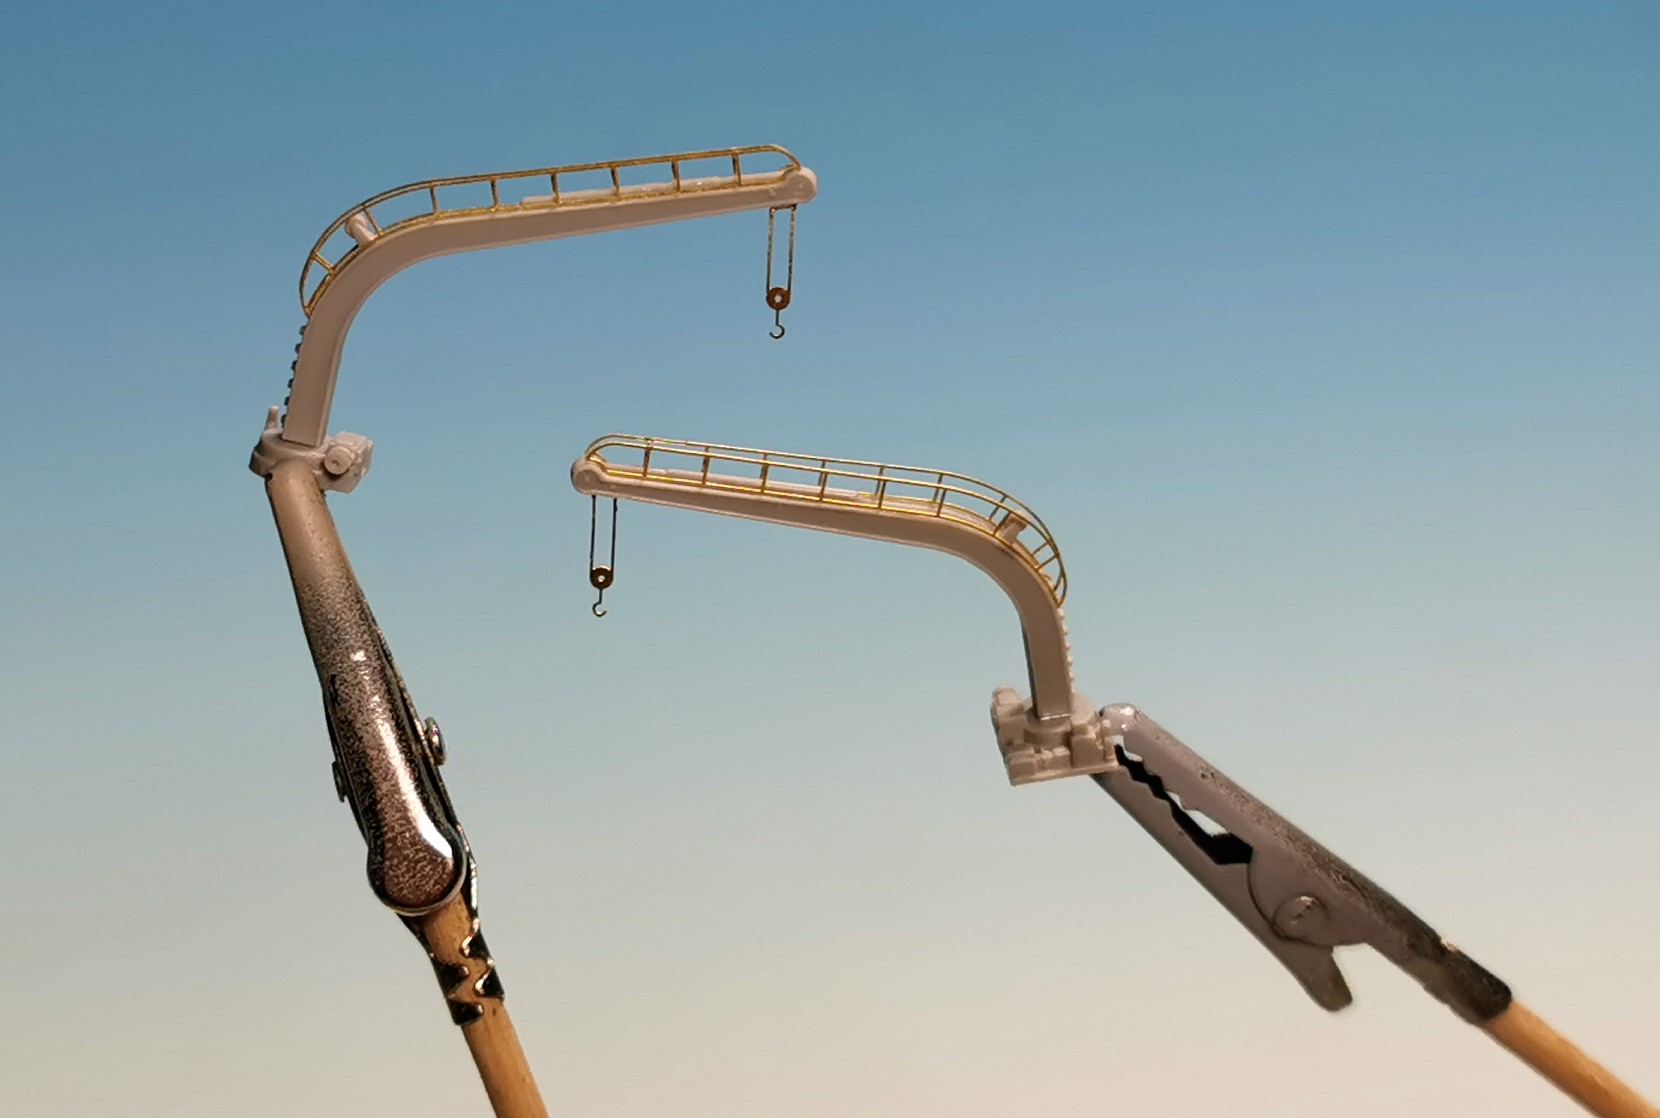
There are the two ship cranes. Nothing difficult here and TRUMPETER´s etching parts are nicely done here. I am glad Eduard ommitted do double some parts out of TRUMPETER´s set and make some other important parts instead. Unfortunately not enough for this ship here


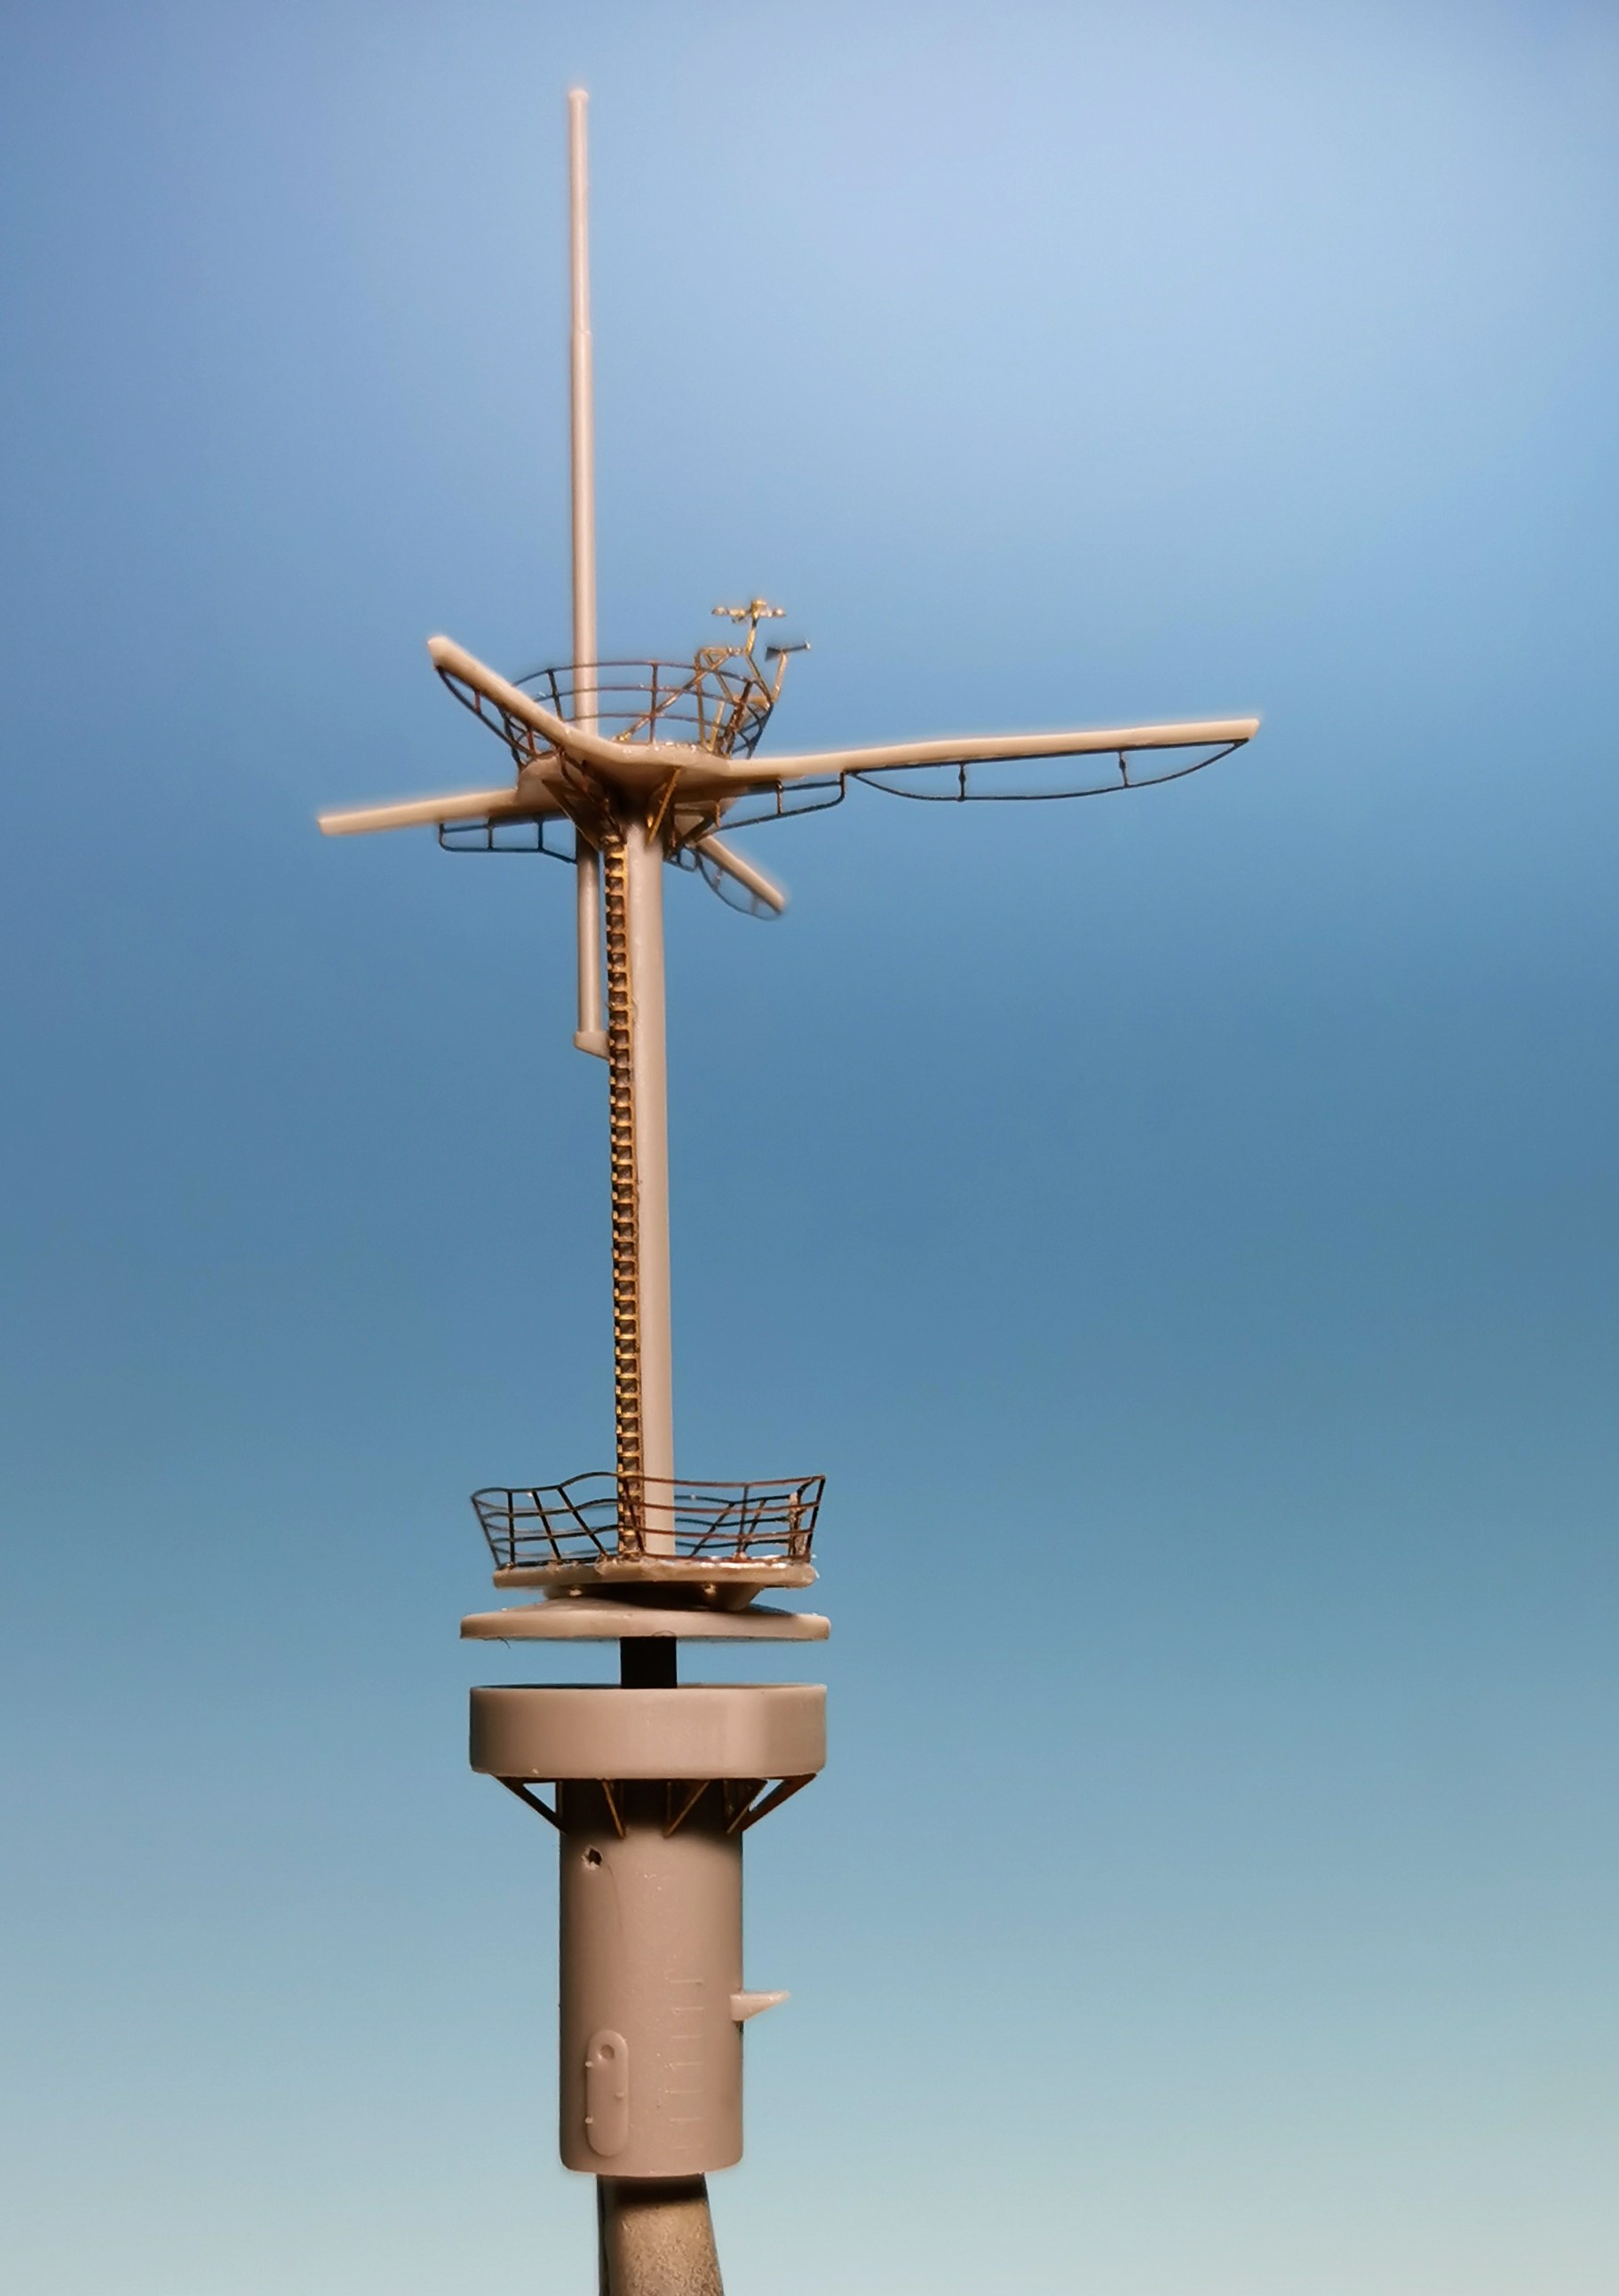
Then there was the aft observation mast finished. Again a very fragile affair with quite some PE-parts. Man I am glad I don´t have to bend/glue those angled railings anymore now


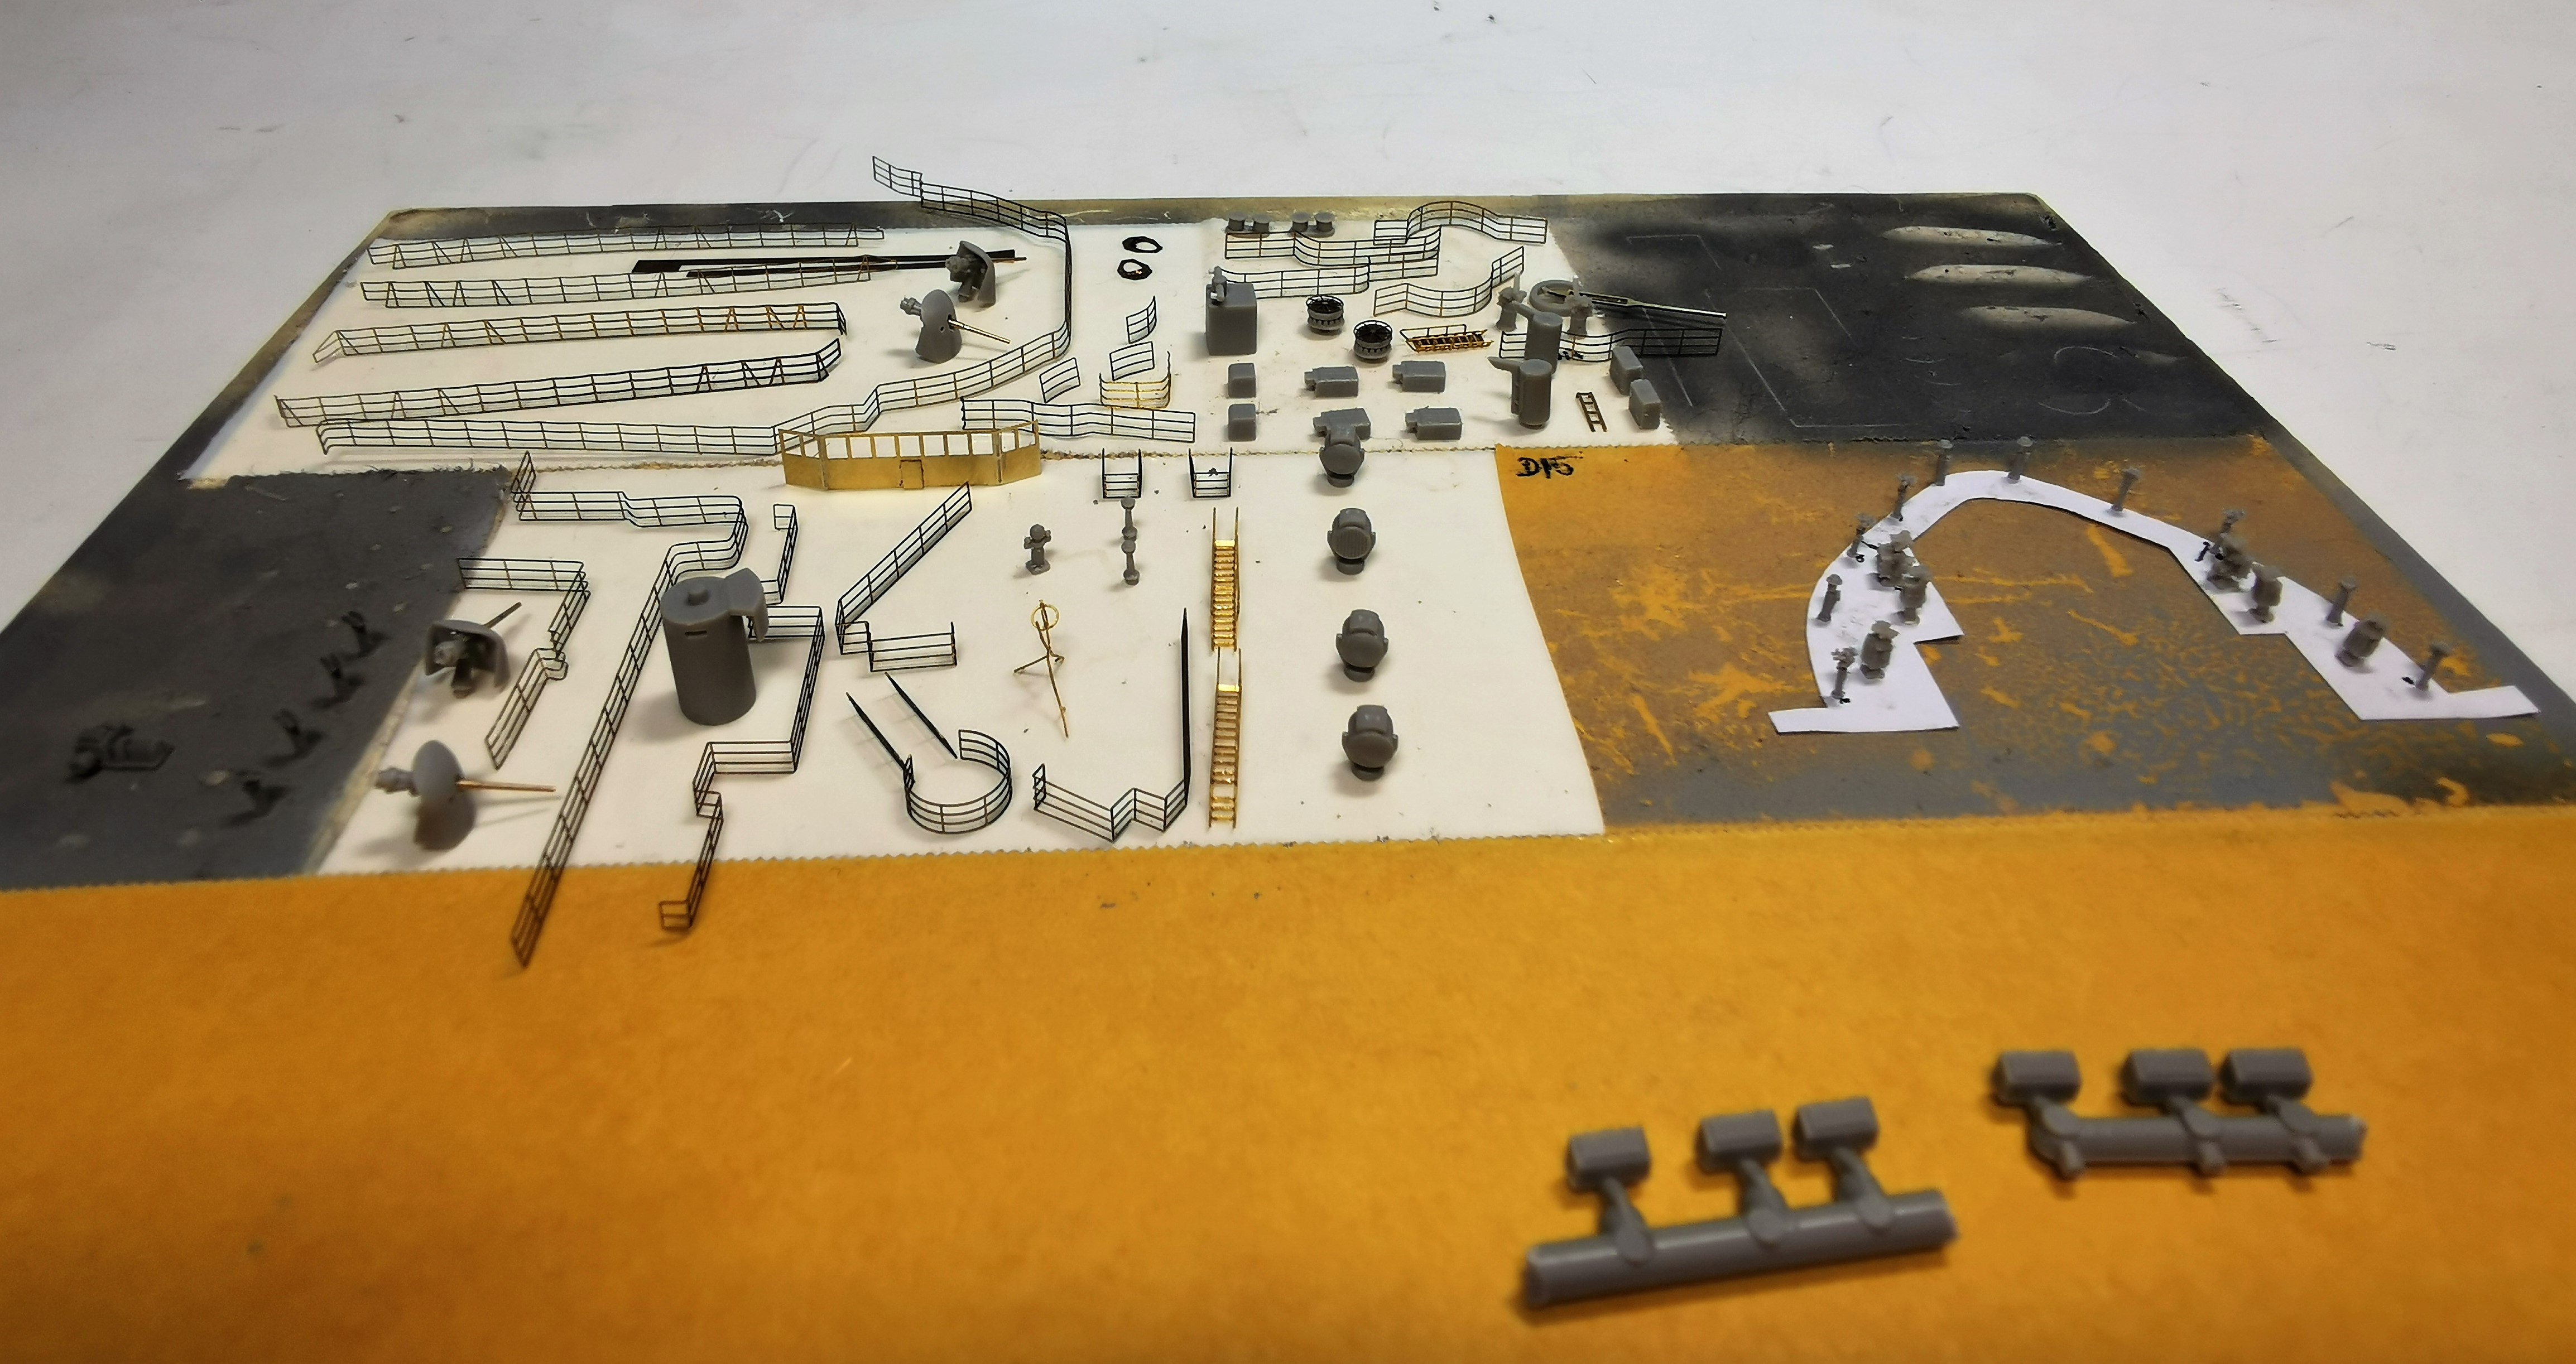
And my ever growing table for small parts waiting to be painted


Now I think there is no escape for painting anymore
GazzaS
#424
Visit this Community
Queensland, Australia
Joined: April 23, 2015
KitMaker: 4,648 posts
Model Shipwrights: 249 posts
Posted: Friday, August 21, 2020 - 10:35 AM UTC
Very nice metal work, Sir!
RussellE
#306
Visit this Community
Victoria, Australia
Joined: June 27, 2010
KitMaker: 3,959 posts
Model Shipwrights: 2,777 posts
Posted: Friday, August 21, 2020 - 02:15 PM UTC

Quoted Text

Now I think there is no escape for painting anymore


Now, that's what we've been waiting for
d6mst0
#453
Visit this Community
Texas, United States
Joined: August 28, 2016
KitMaker: 1,925 posts
Model Shipwrights: 1,298 posts
Posted: Saturday, August 22, 2020 - 01:59 AM UTC
Thomas,

Sweet looking PE work.

Mark
Black_sheep
Visit this Community
Bayern, Germany
Joined: December 11, 2009
KitMaker: 823 posts
Model Shipwrights: 551 posts
Posted: Saturday, August 22, 2020 - 08:06 AM UTC
@Gaz and Mark: Thank you sirs

@ Russel: I was very busy with the (air)brush today and was able to succeed visibly:

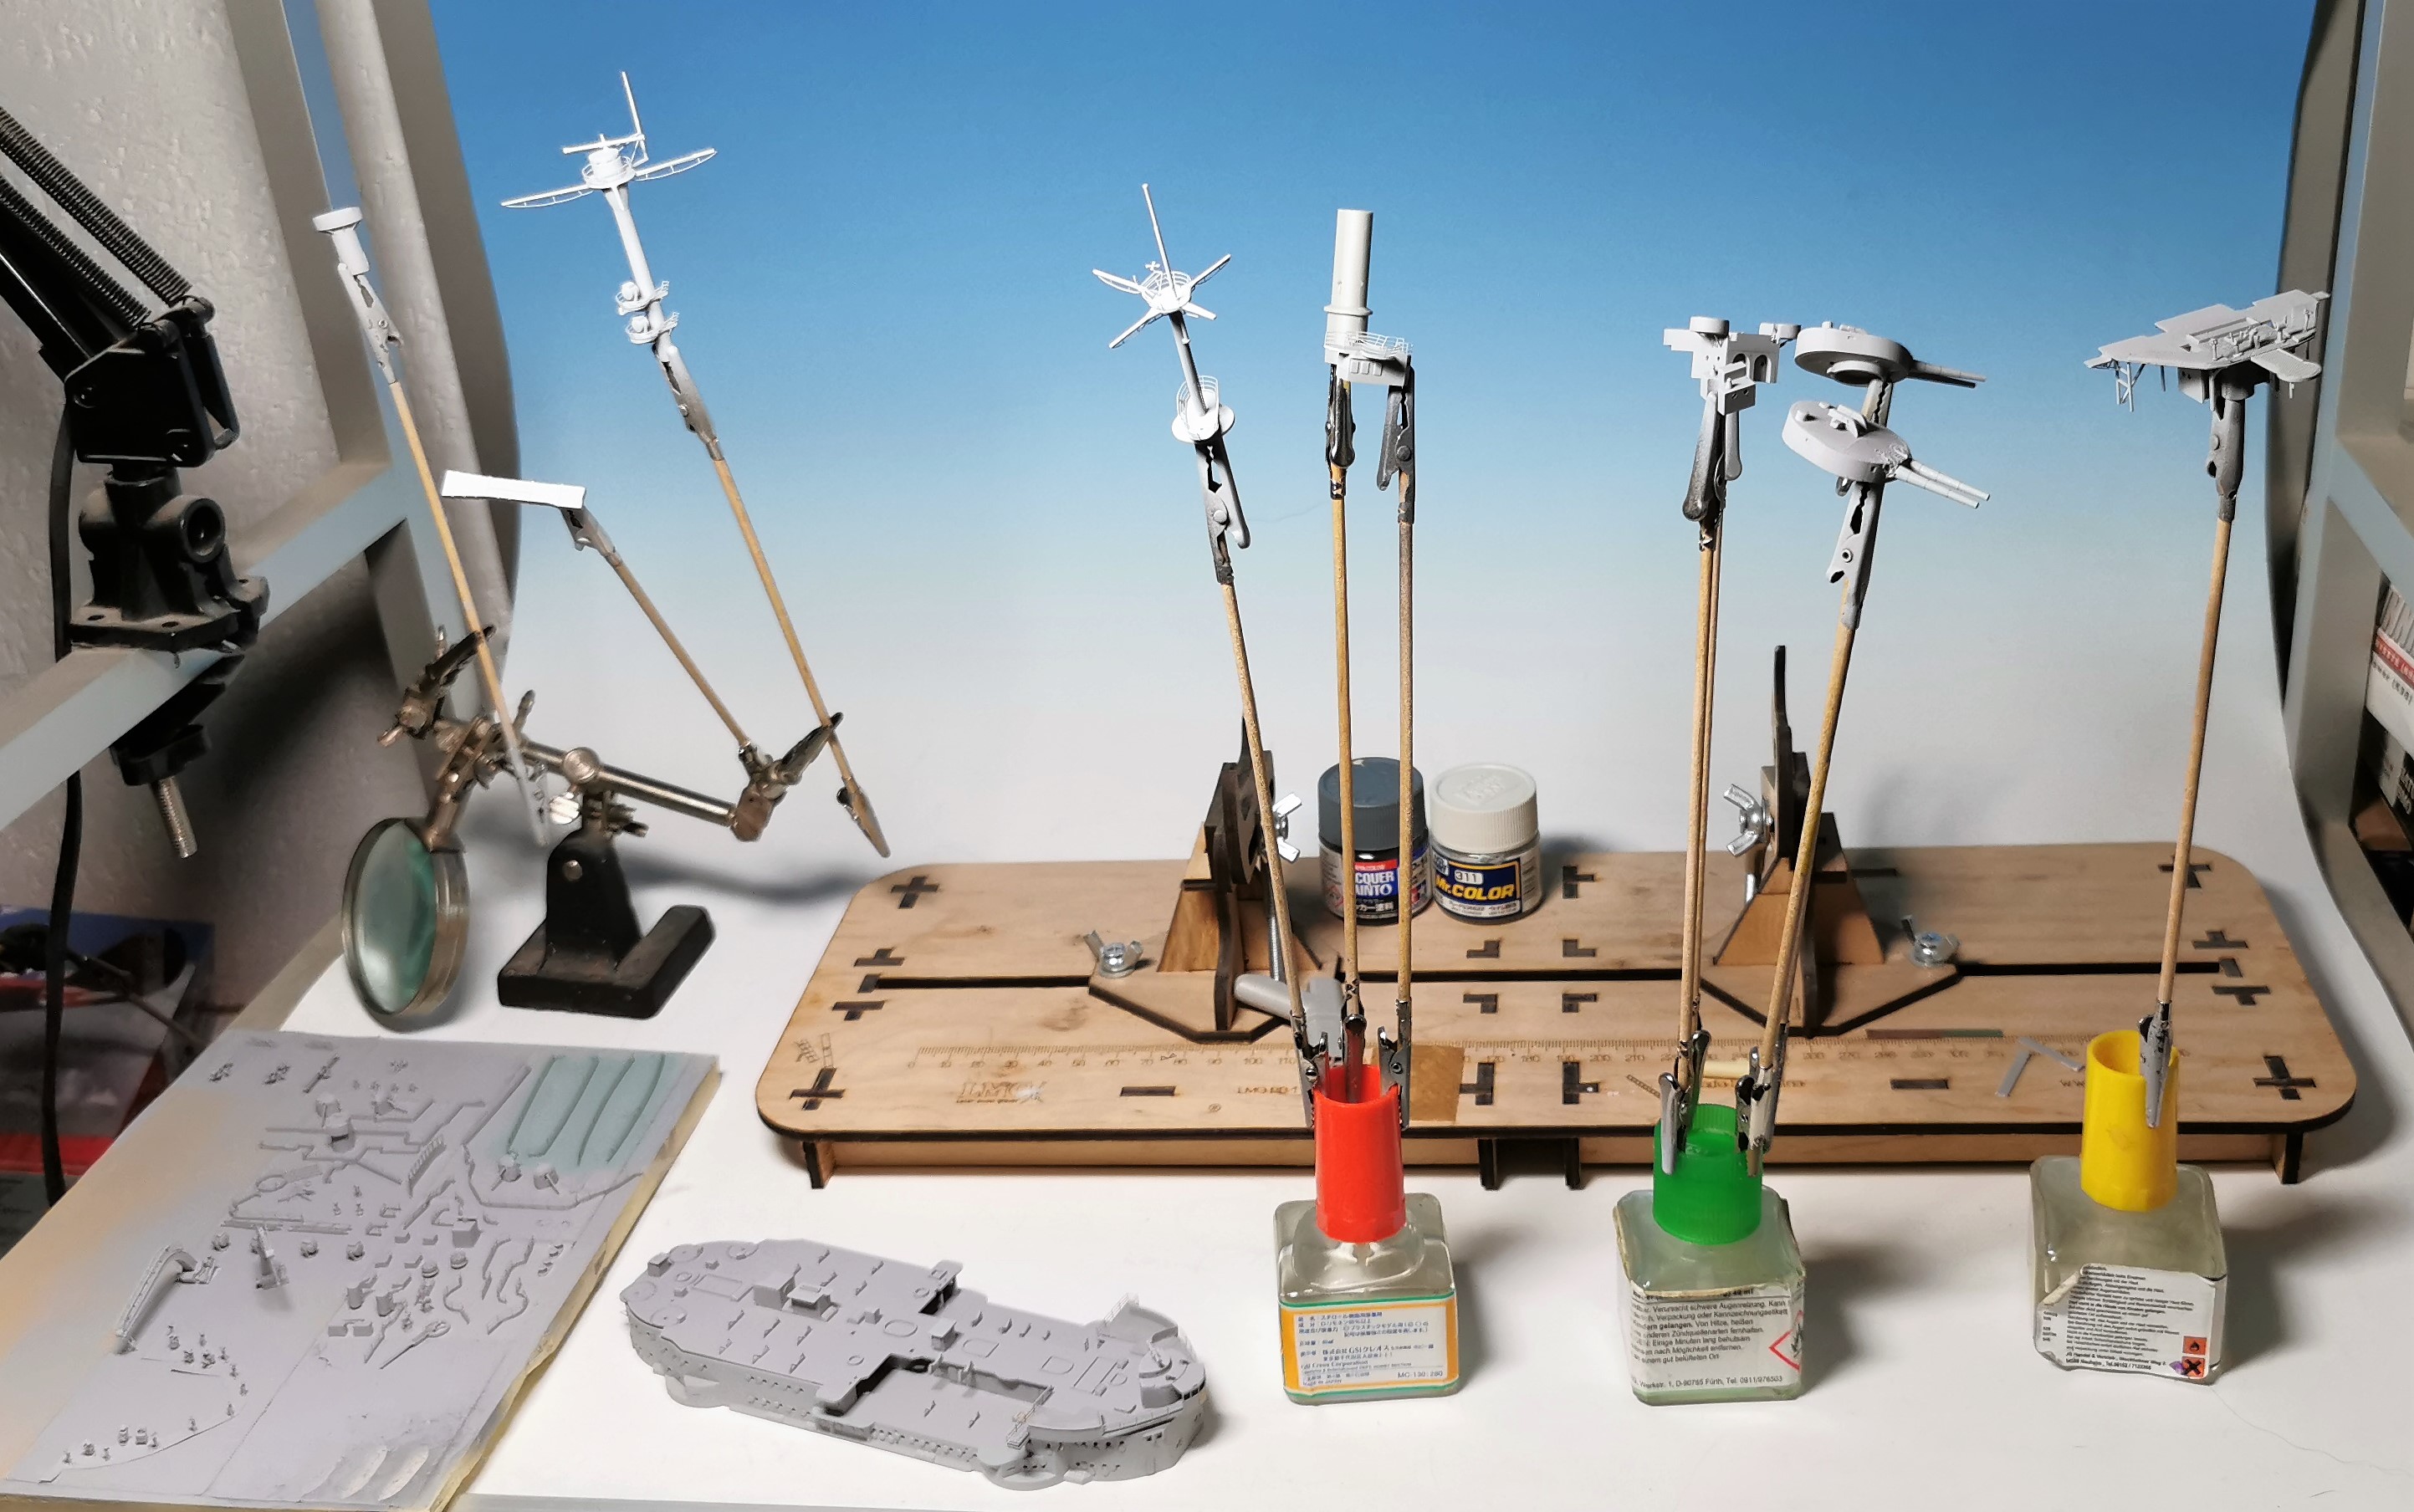
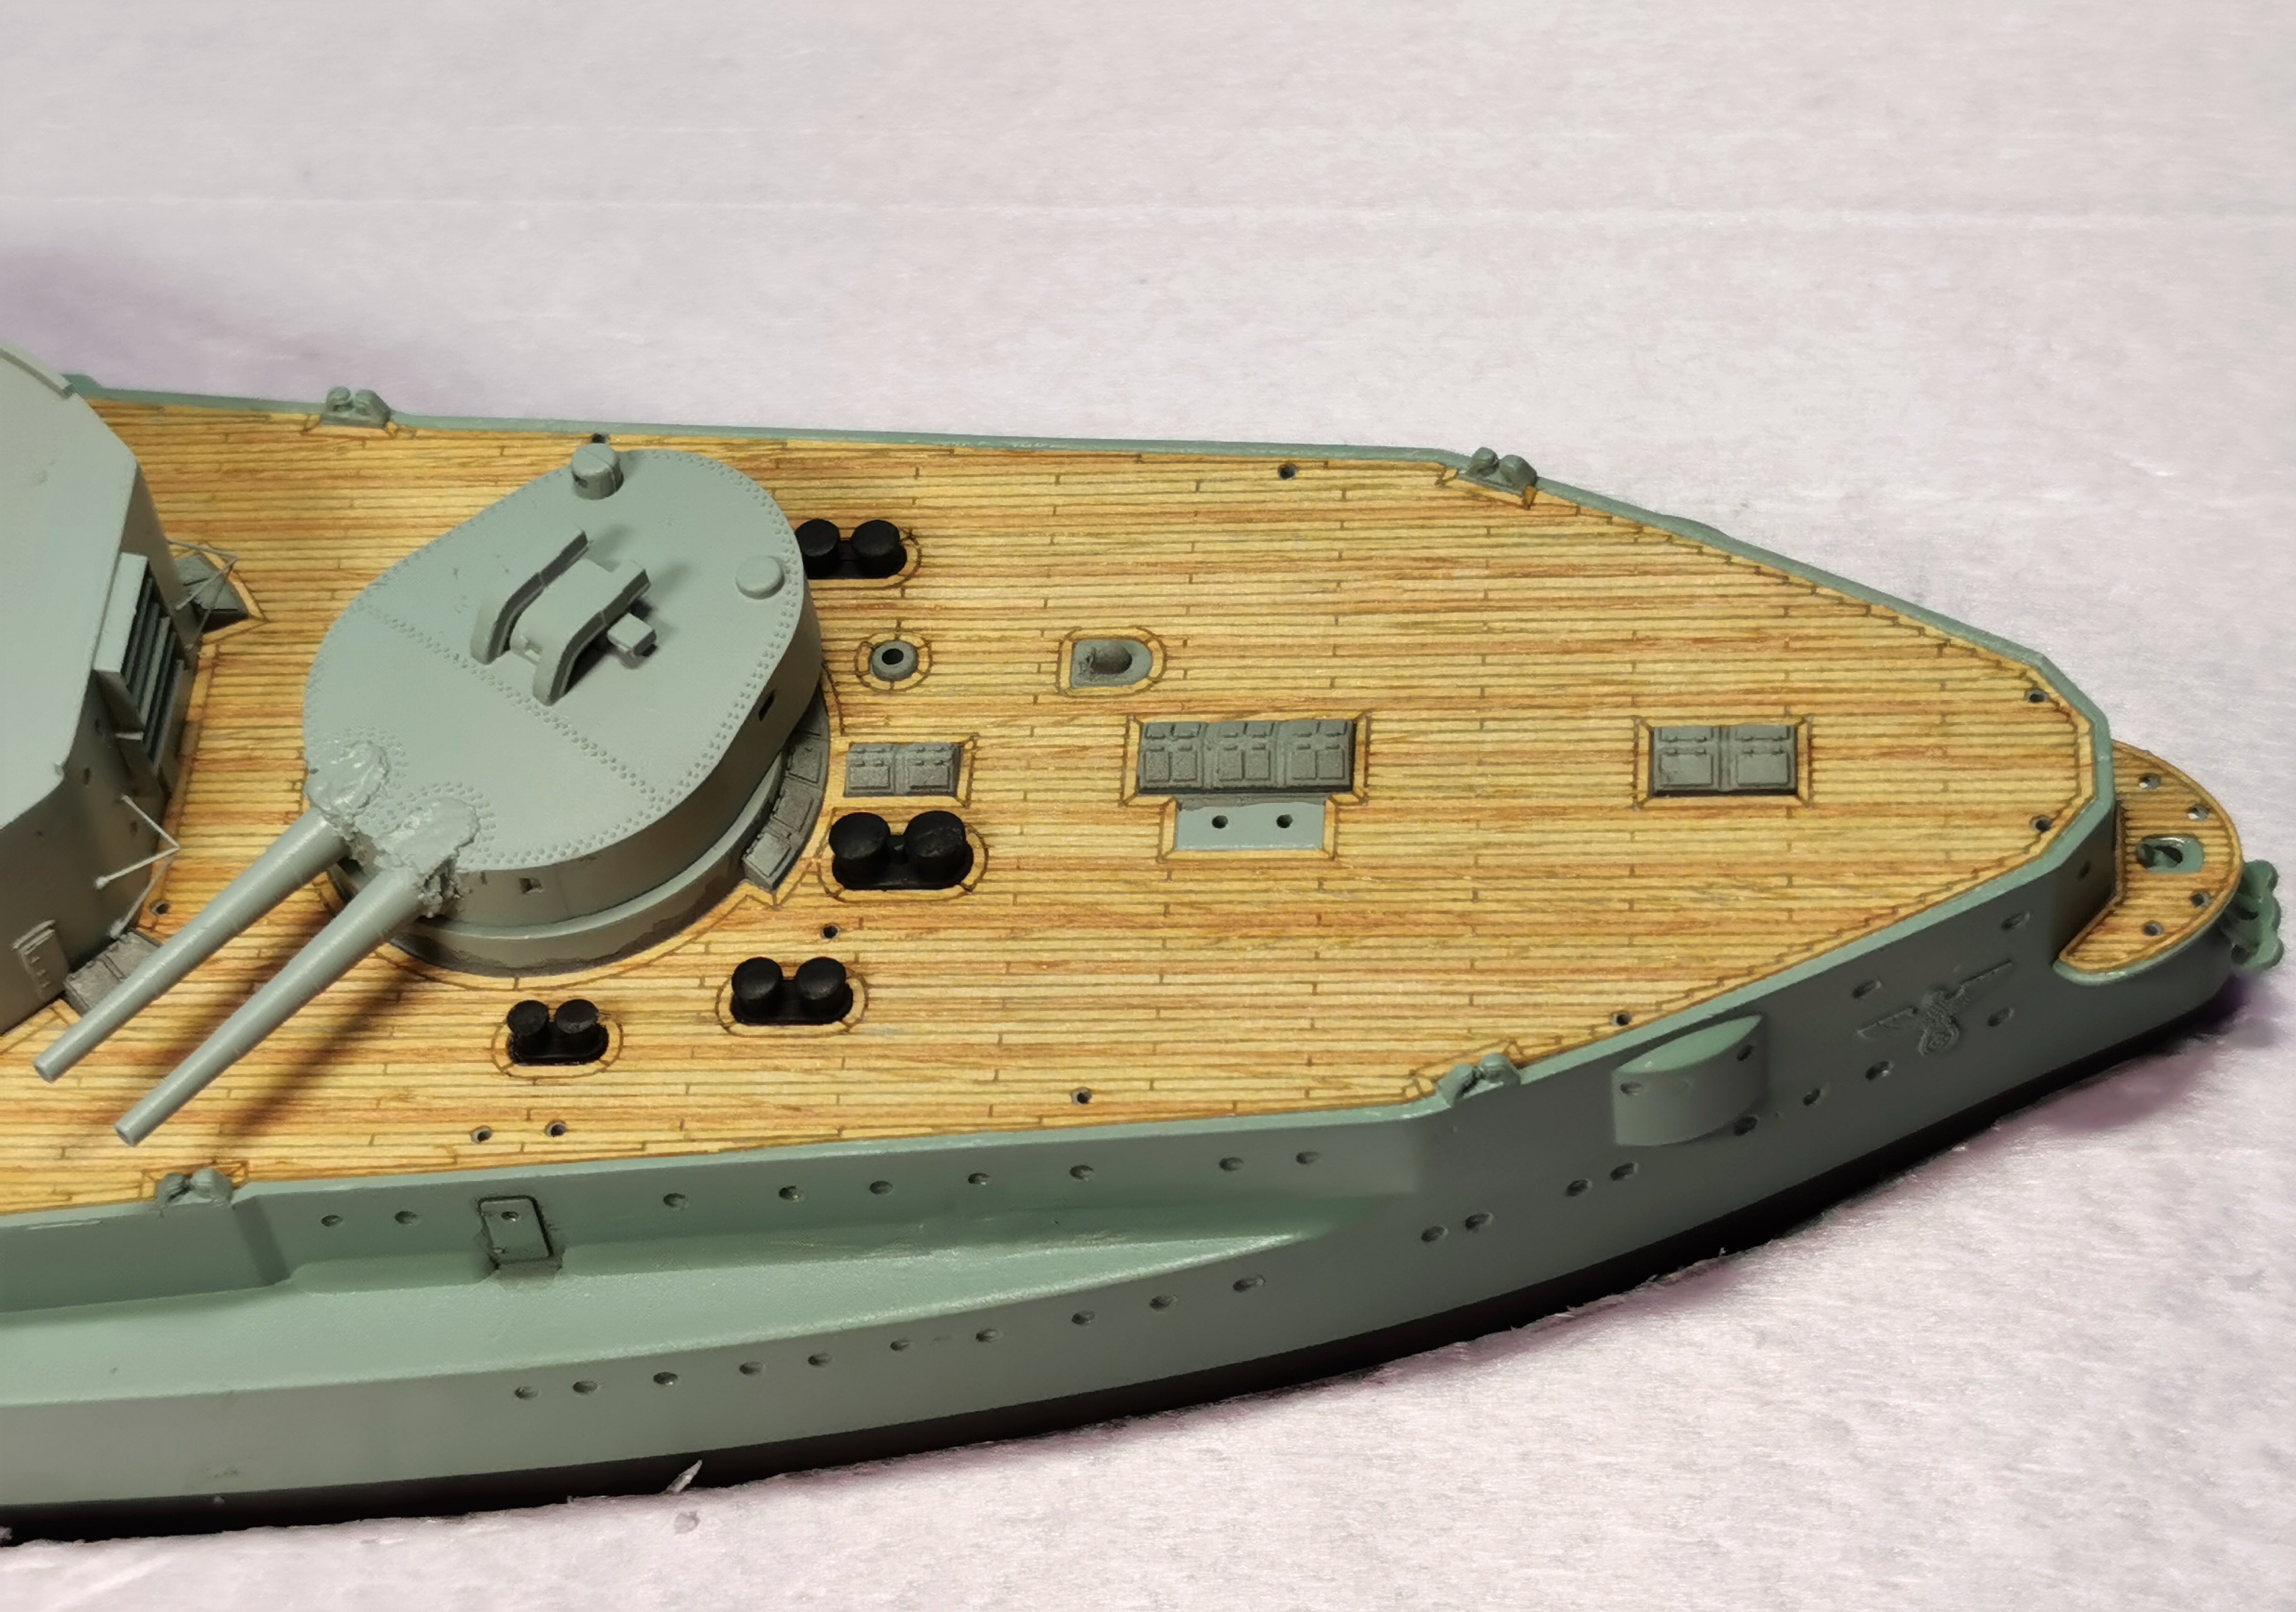
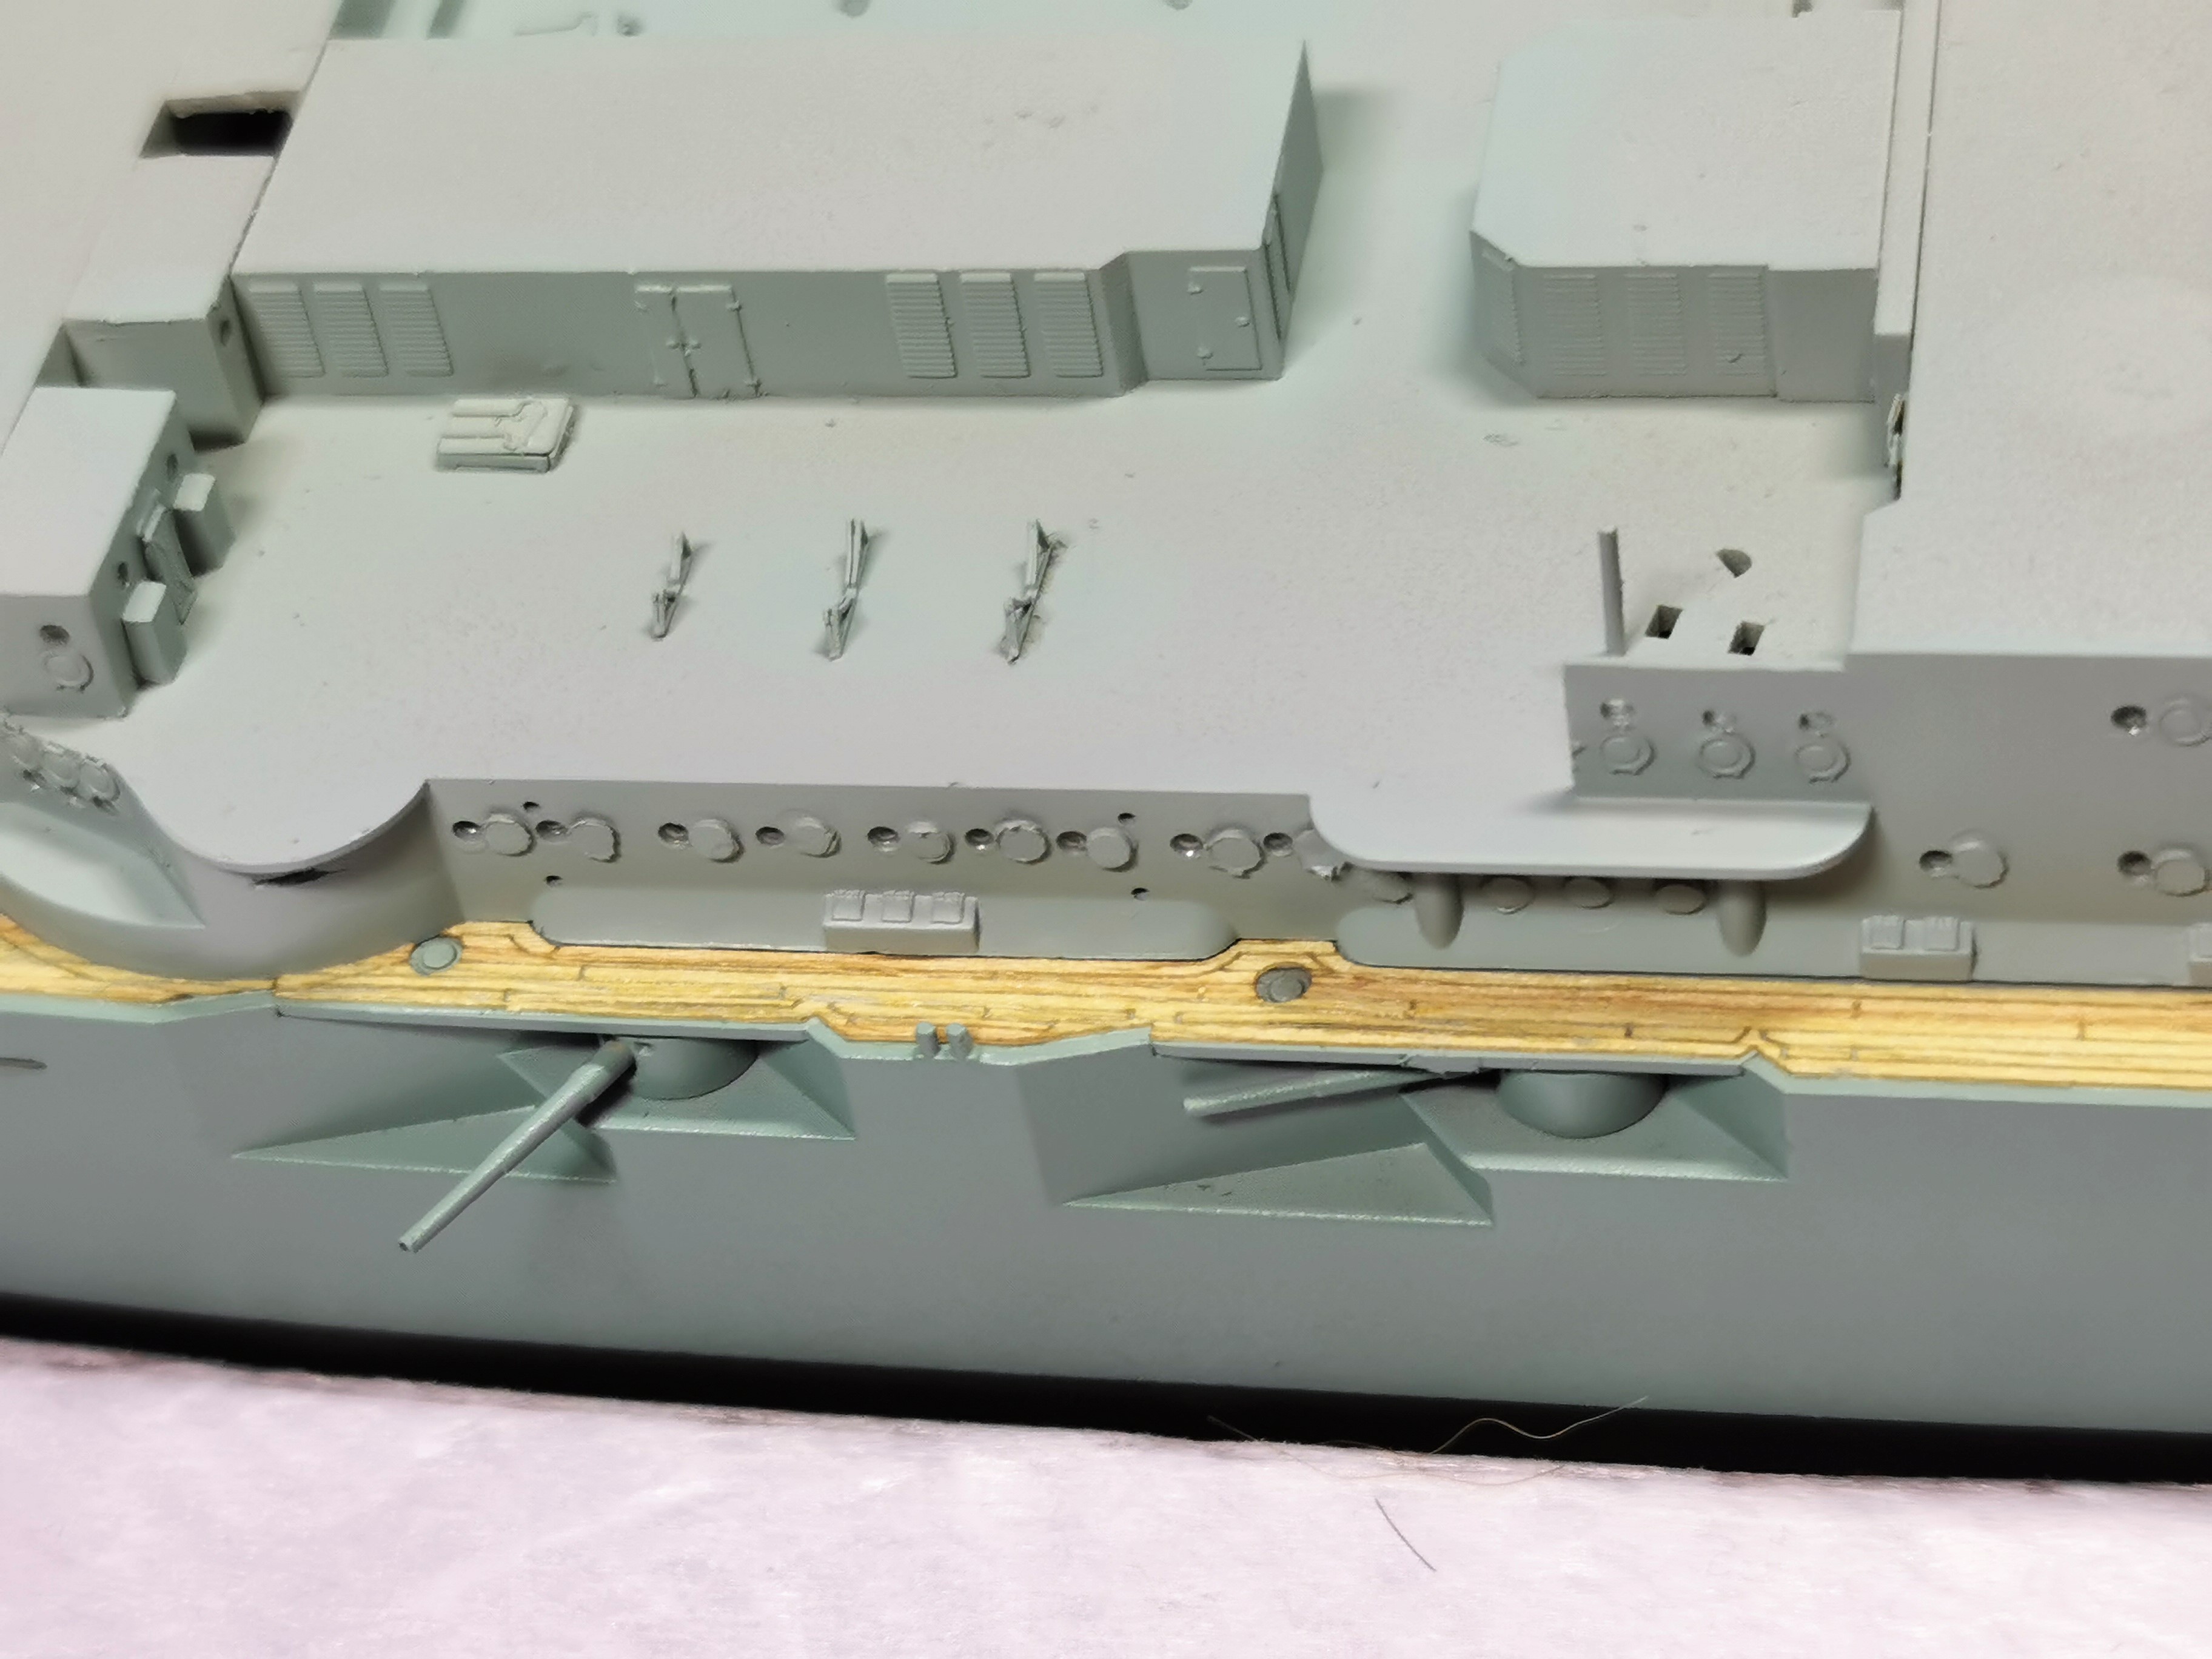
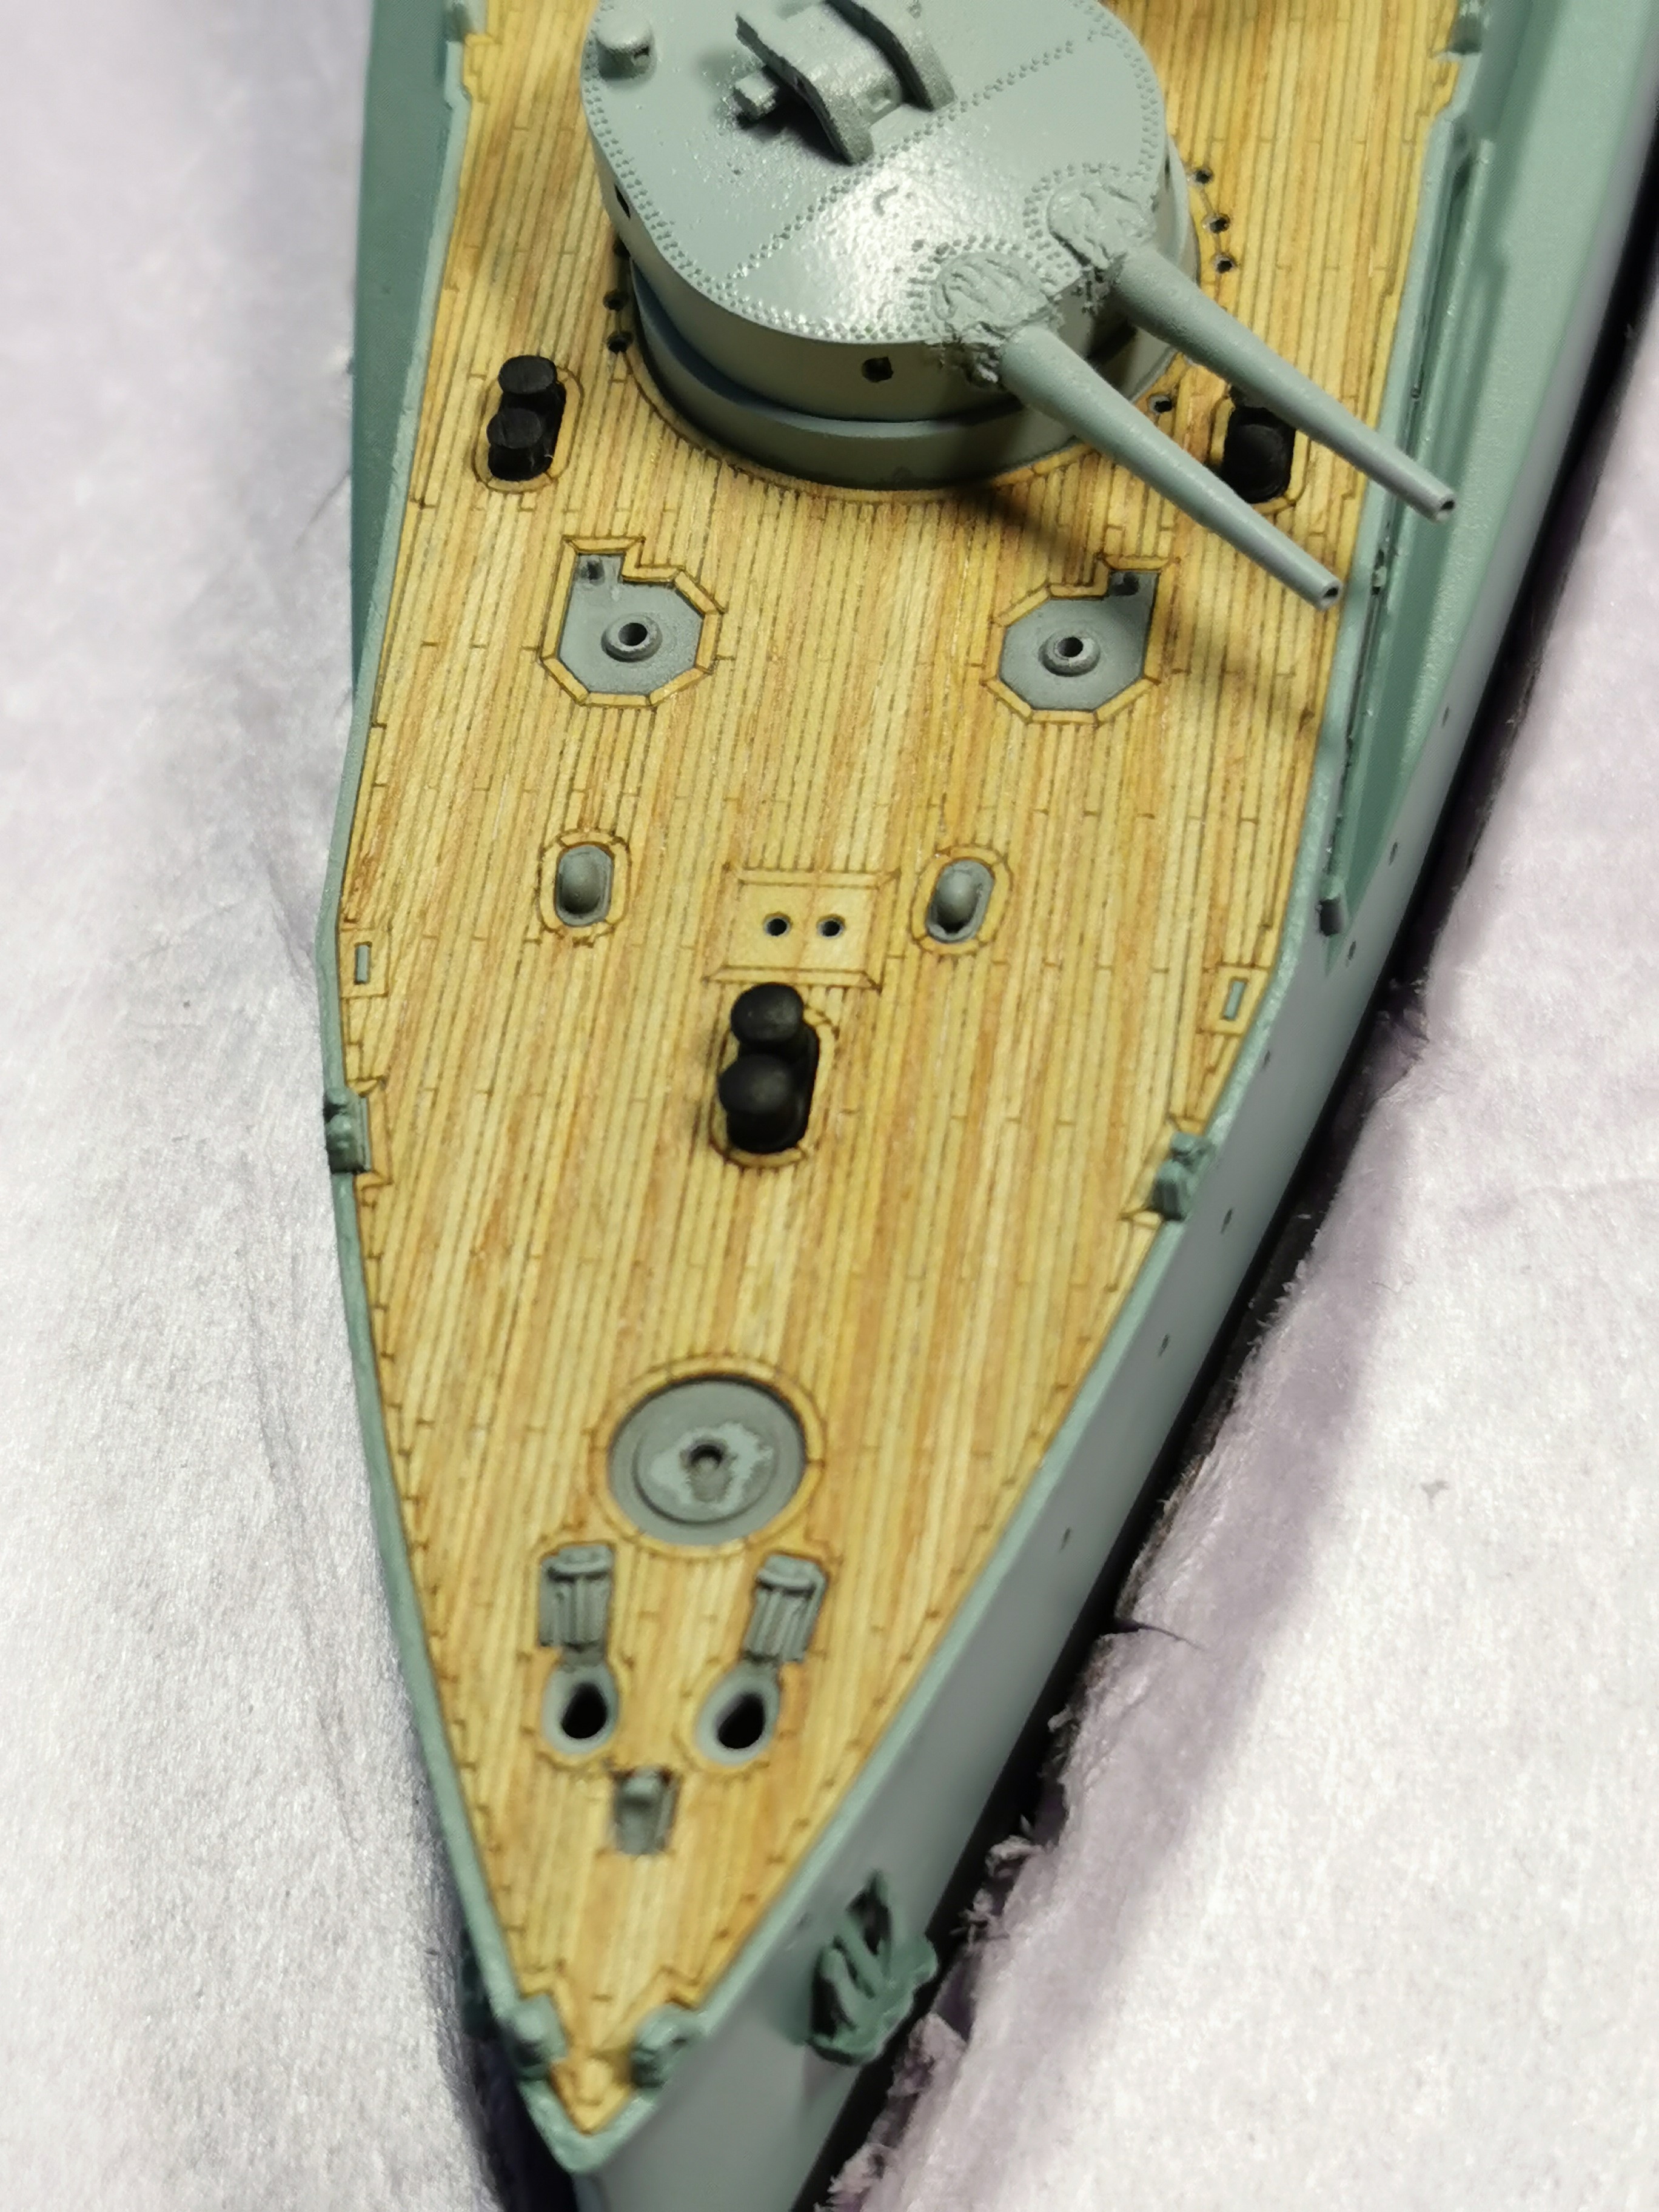
First there was priming of all parts for better grip of the following paints


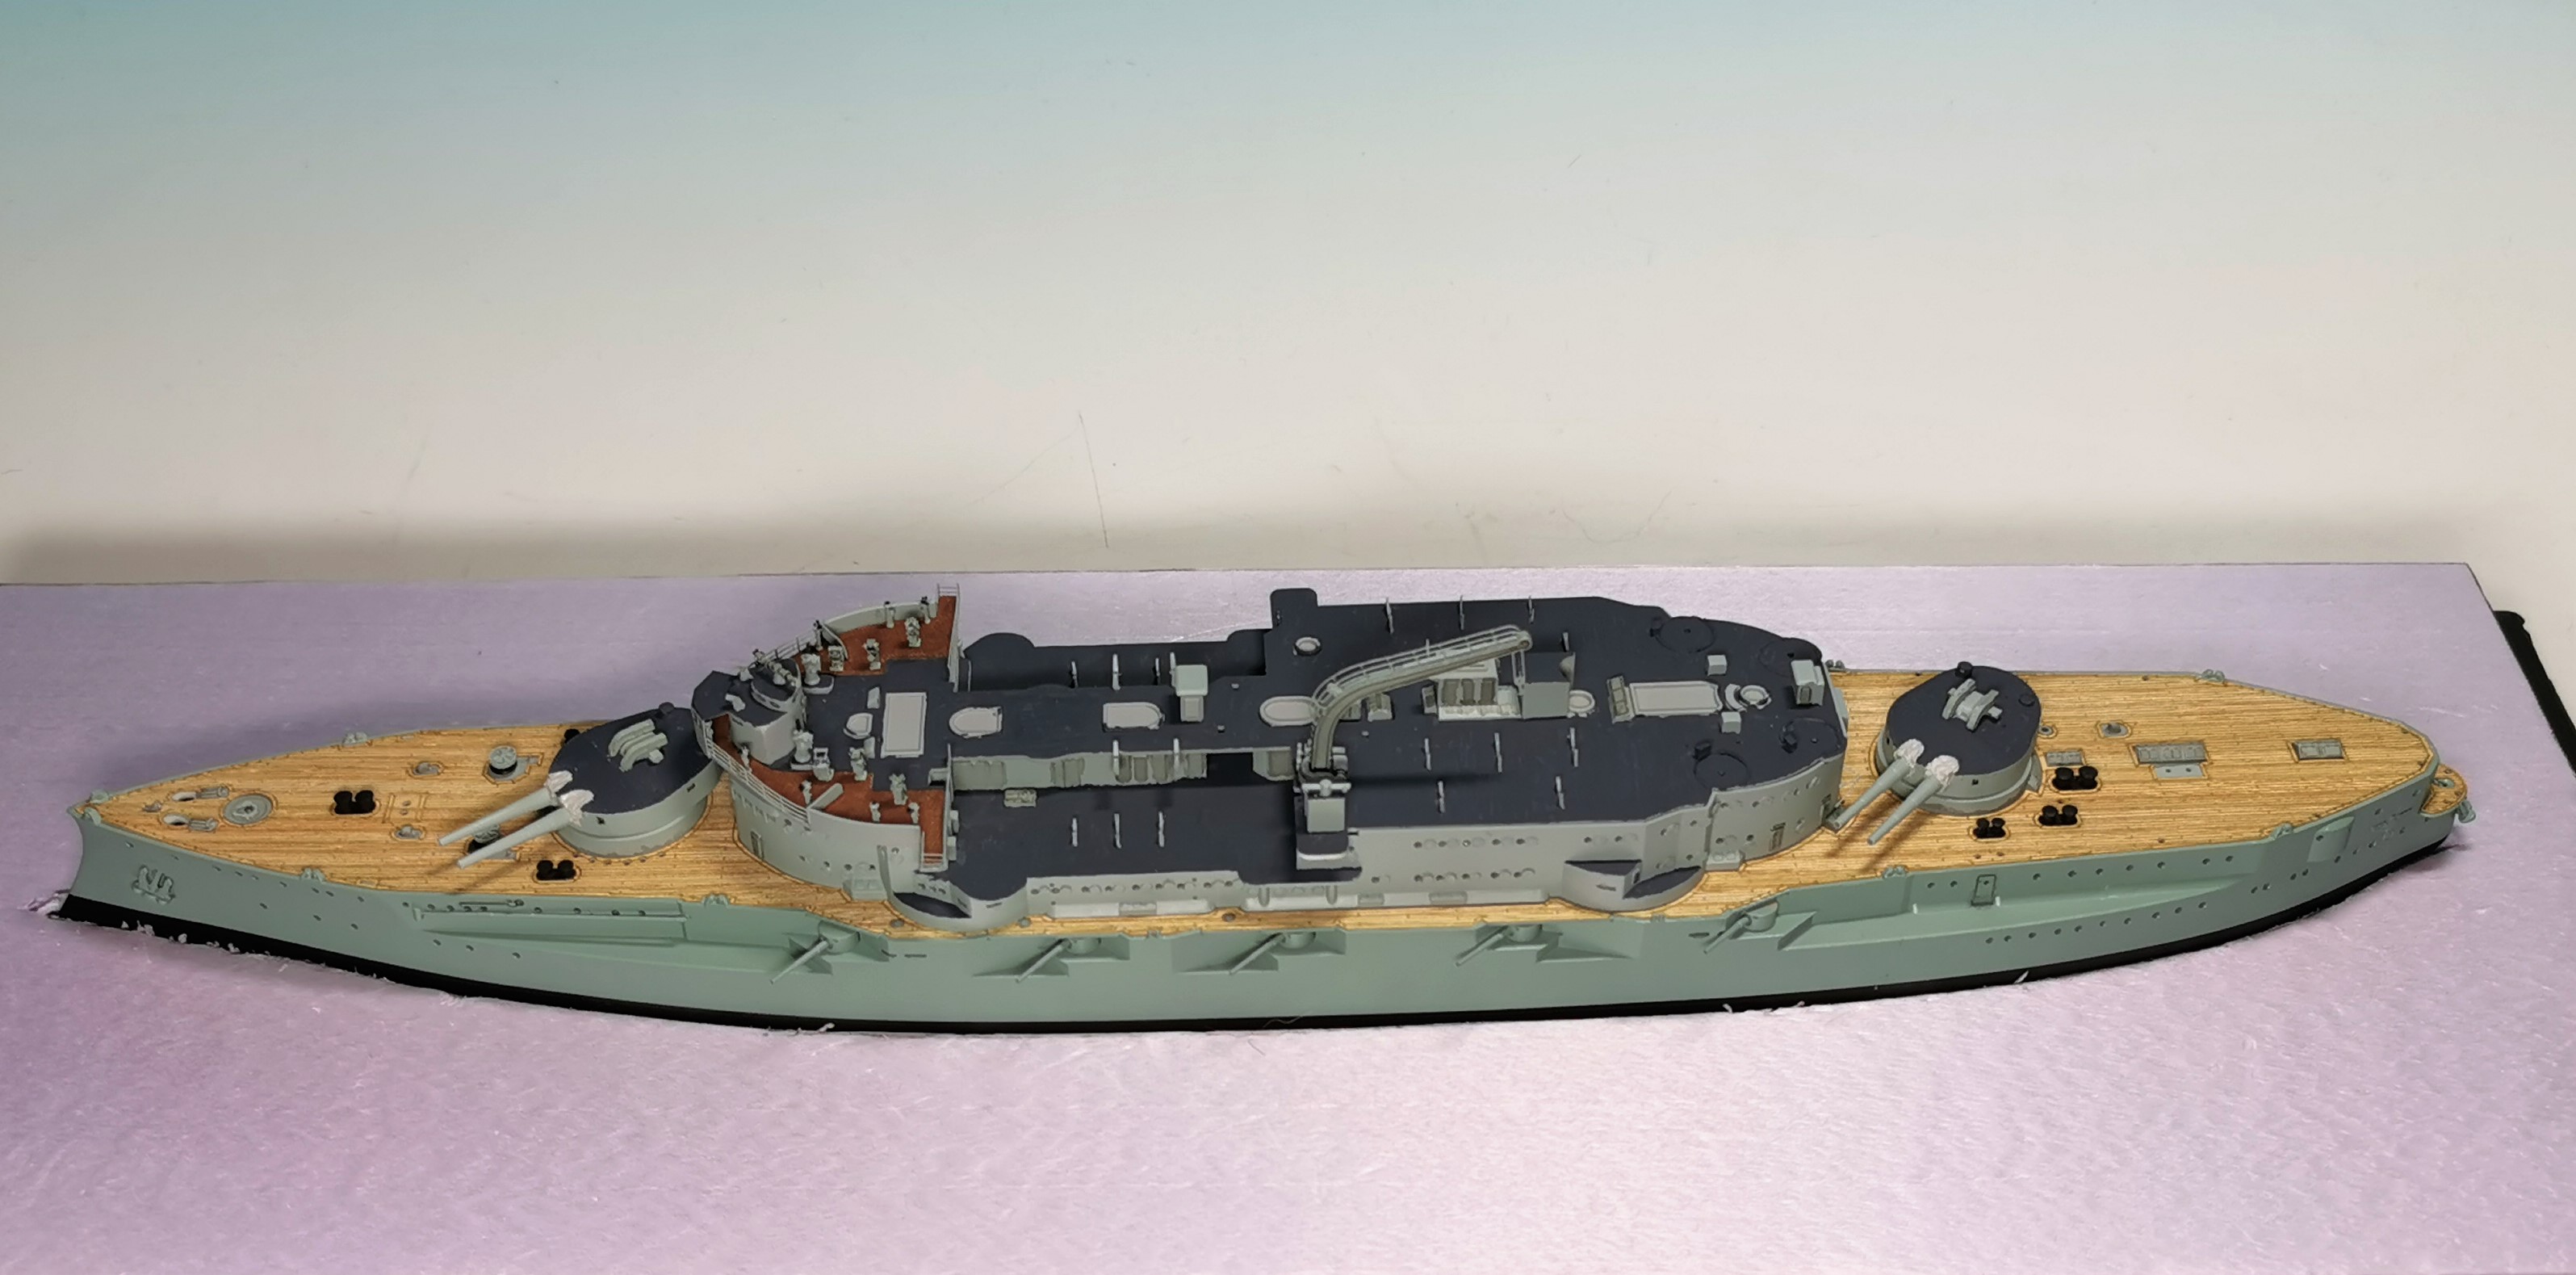
Then I painted the black waterpass, masked him and continued with painting the ship´s upper hull with RLM78, a light blueish-grey color. The portholes were filled with Kristal Klear. The upper hull decks and parts were painted in RLM76, a more lighter grey color then the ships hull. Now the ship give´s a first impression


After this I painted the bollards in anthrazit and glued the real wooden furniture deck - this shipyard works deck is veery thin, extreme care have to be taken during attachment. But it does look very real I think


Thats it for today - tomorrow I will paint the upper deck´s floor
Removed by original poster on 08/22/20 - 20:13:47 (GMT).
Removed by original poster on 08/22/20 - 20:11:40 (GMT).
GazzaS
#424
Visit this Community
Queensland, Australia
Joined: April 23, 2015
KitMaker: 4,648 posts
Model Shipwrights: 249 posts
Posted: Saturday, August 22, 2020 - 09:20 AM UTC
Thomas,
The wooden deck and deck furniture look great! I like to see the turrets next to the citadel.

Great work!

Gaz
Black_sheep
Visit this Community
Bayern, Germany
Joined: December 11, 2009
KitMaker: 823 posts
Model Shipwrights: 551 posts
Posted: Sunday, August 23, 2020 - 08:06 AM UTC

Quoted Text

Thomas,
The wooden deck and deck furniture look great! I like to see the turrets next to the citadel.

Great work!

Gaz
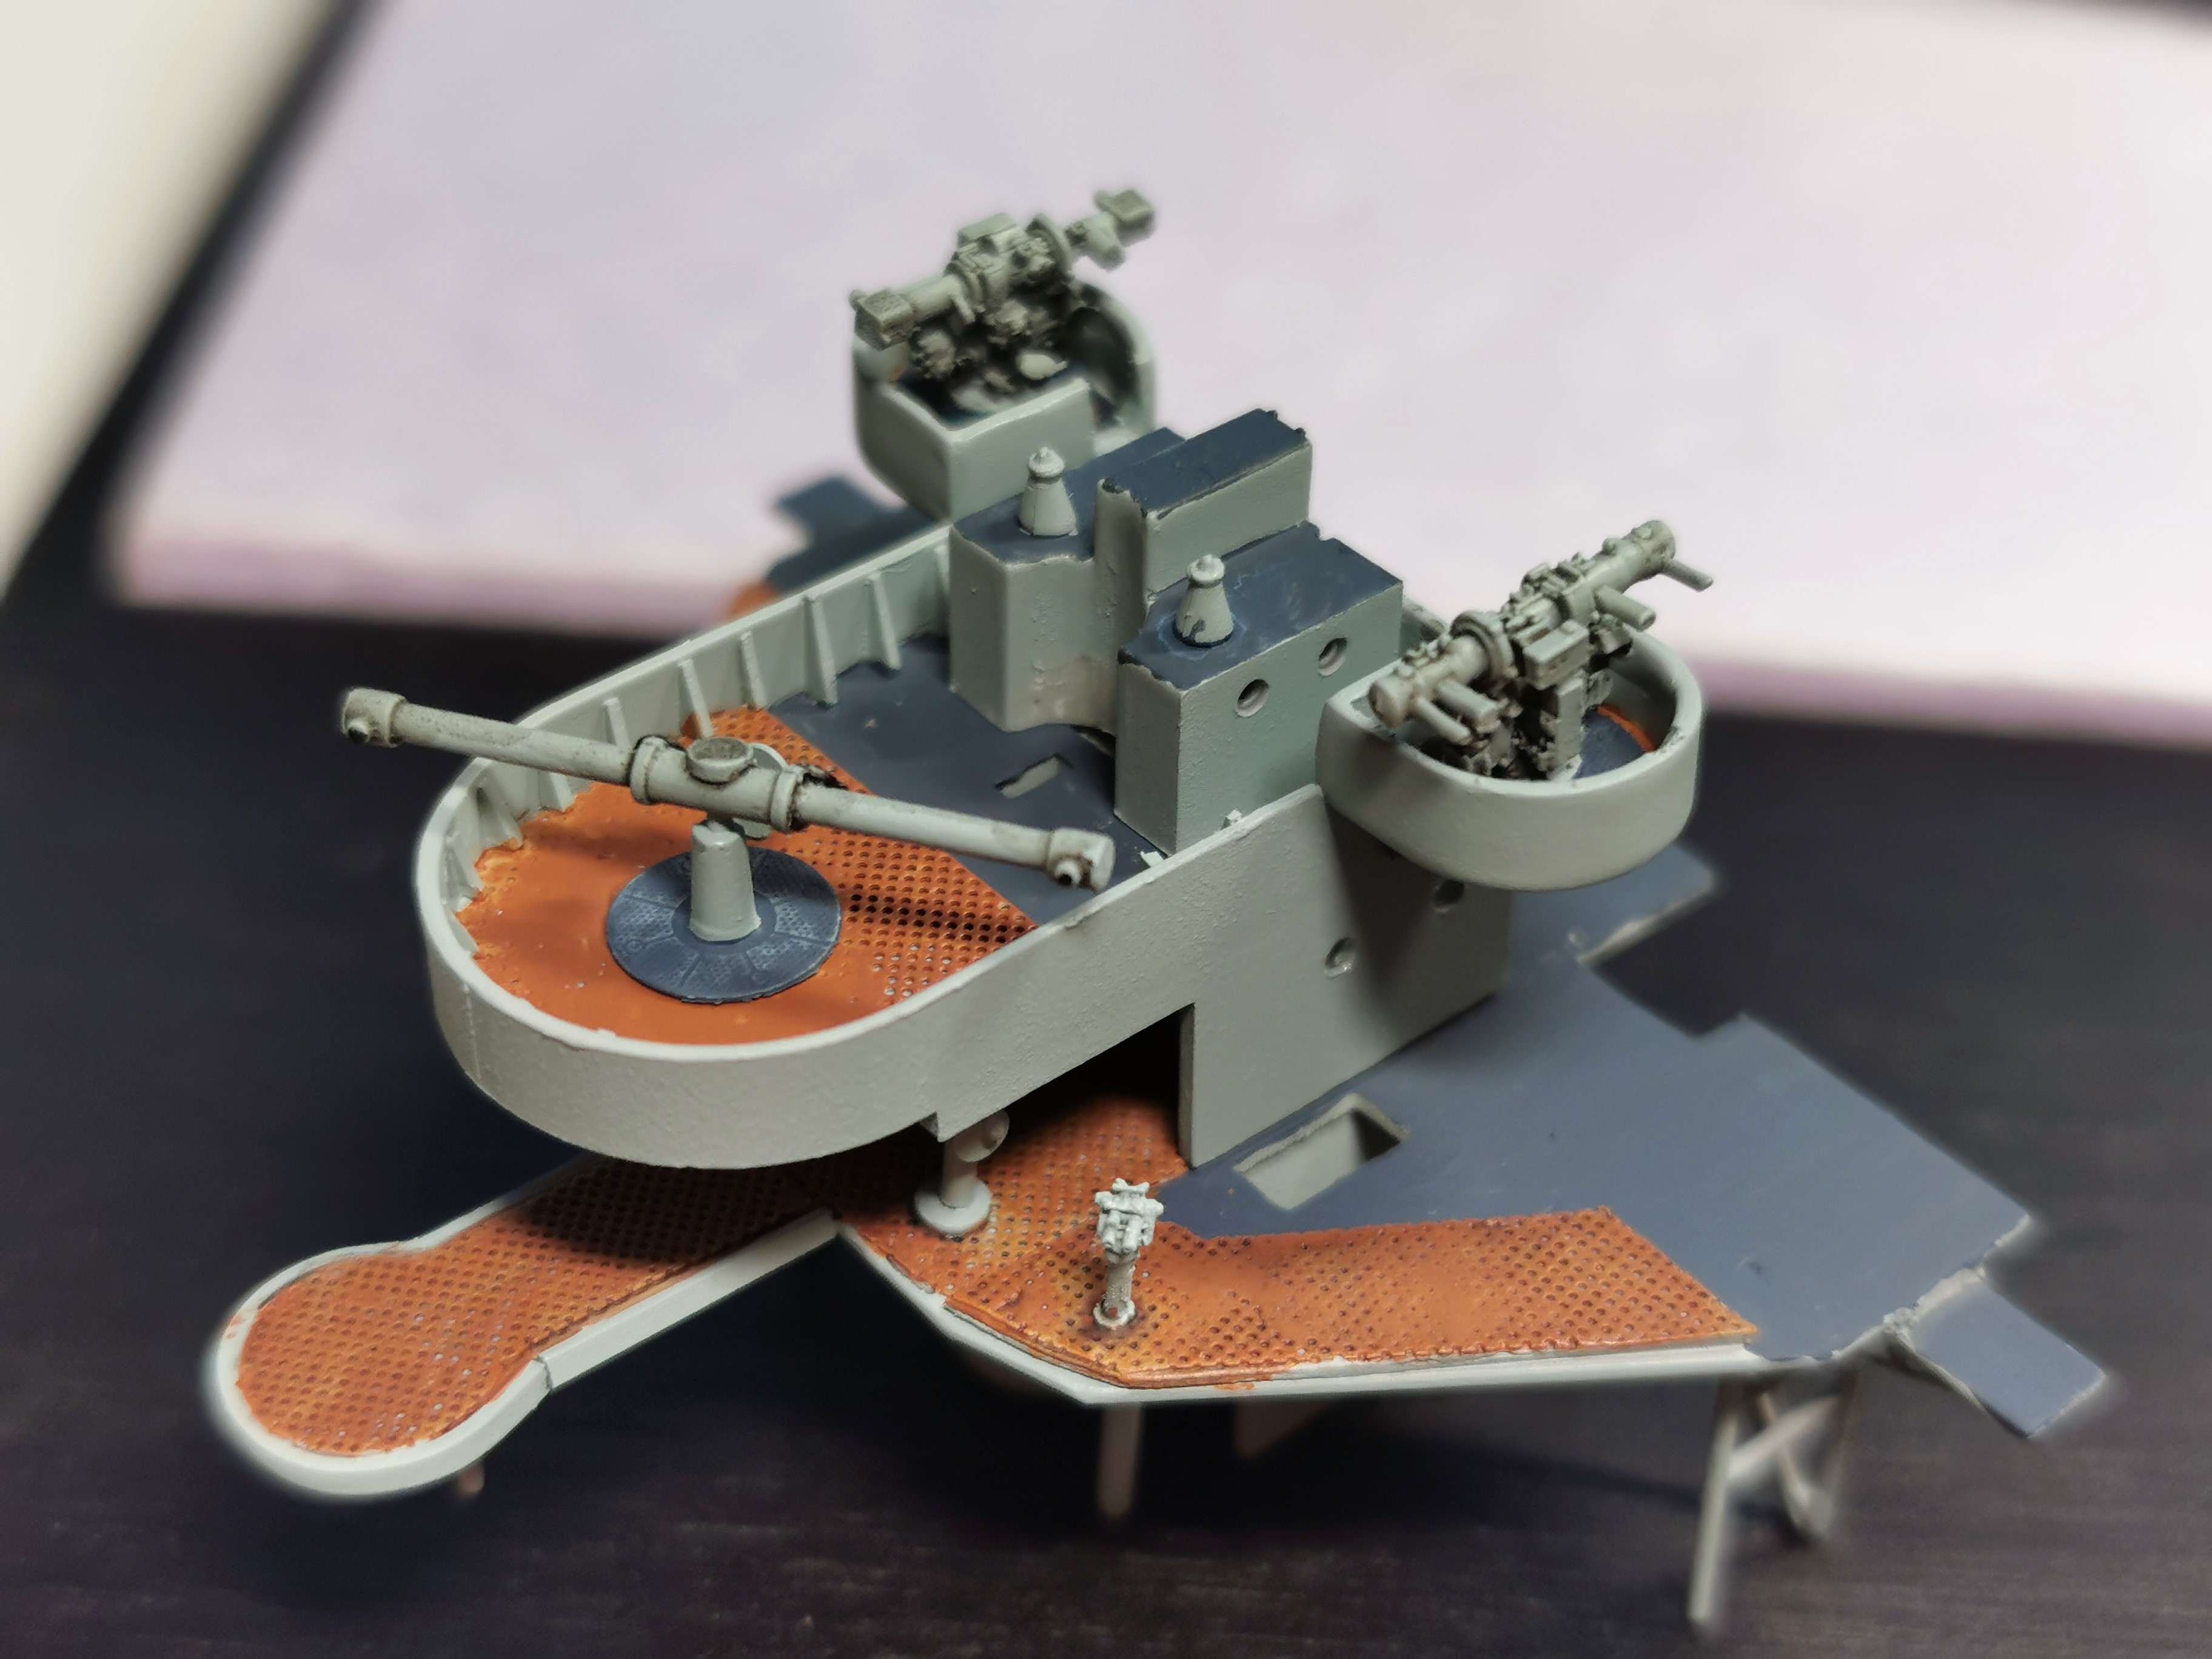


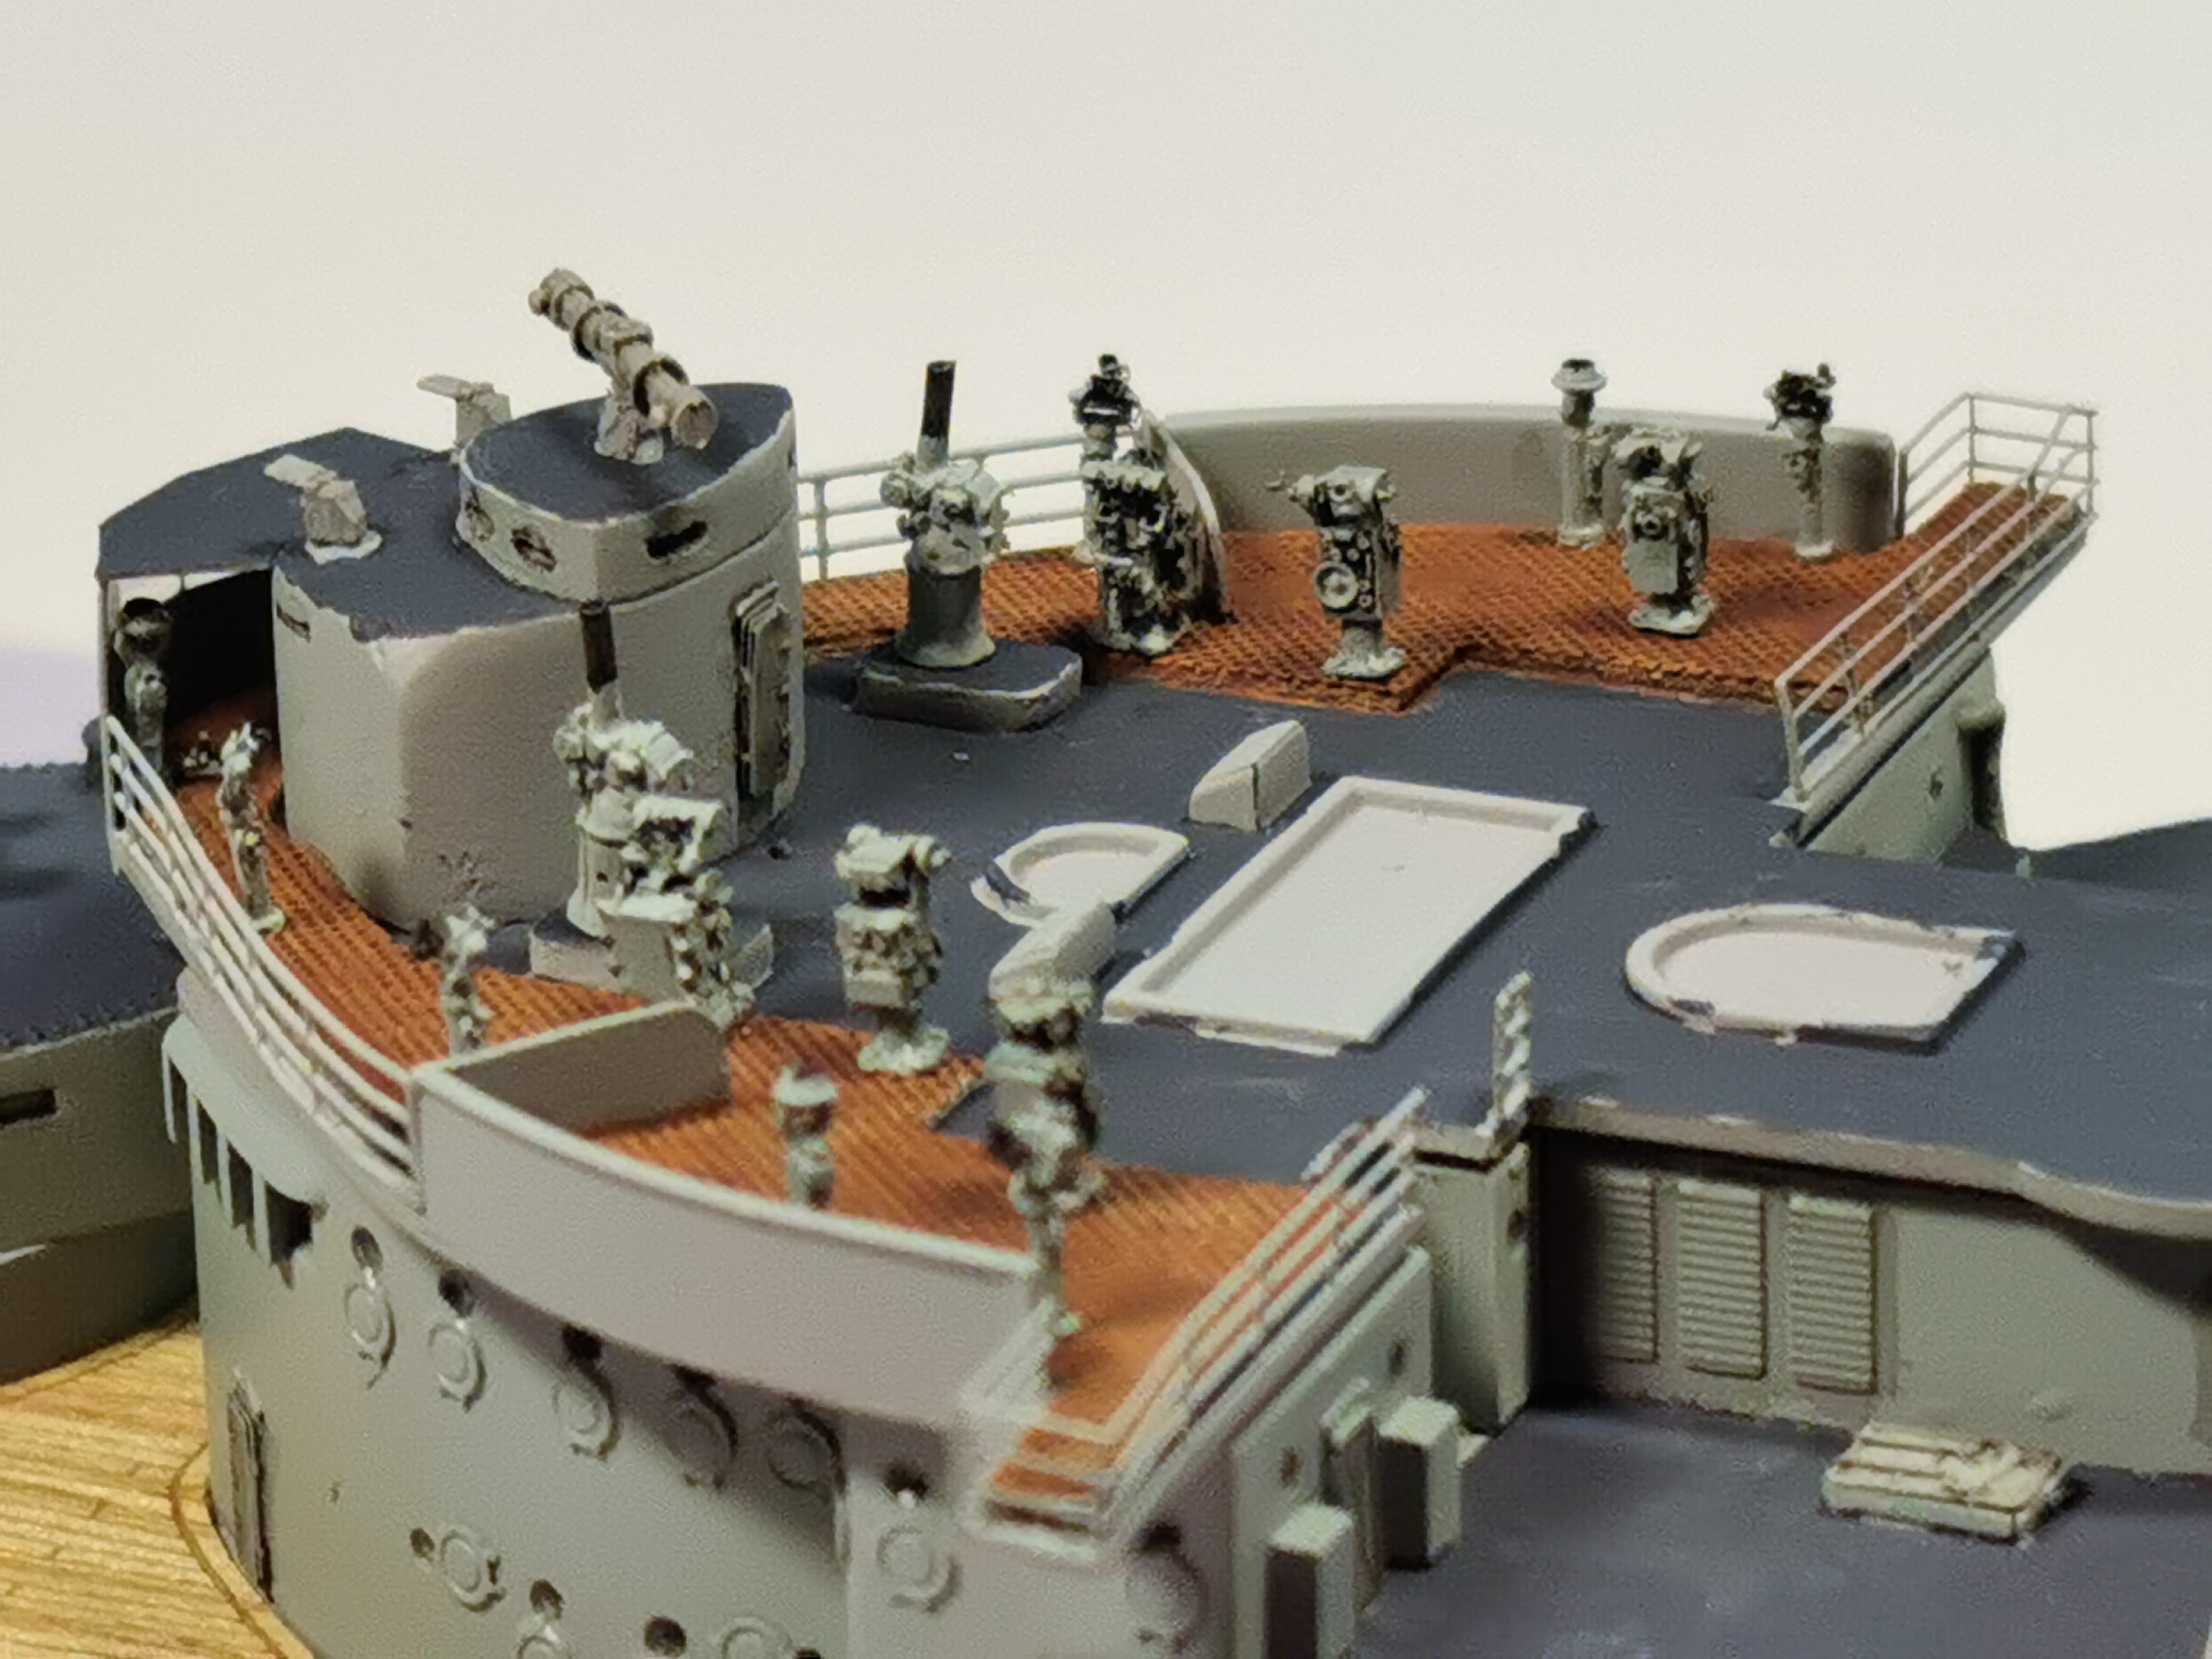
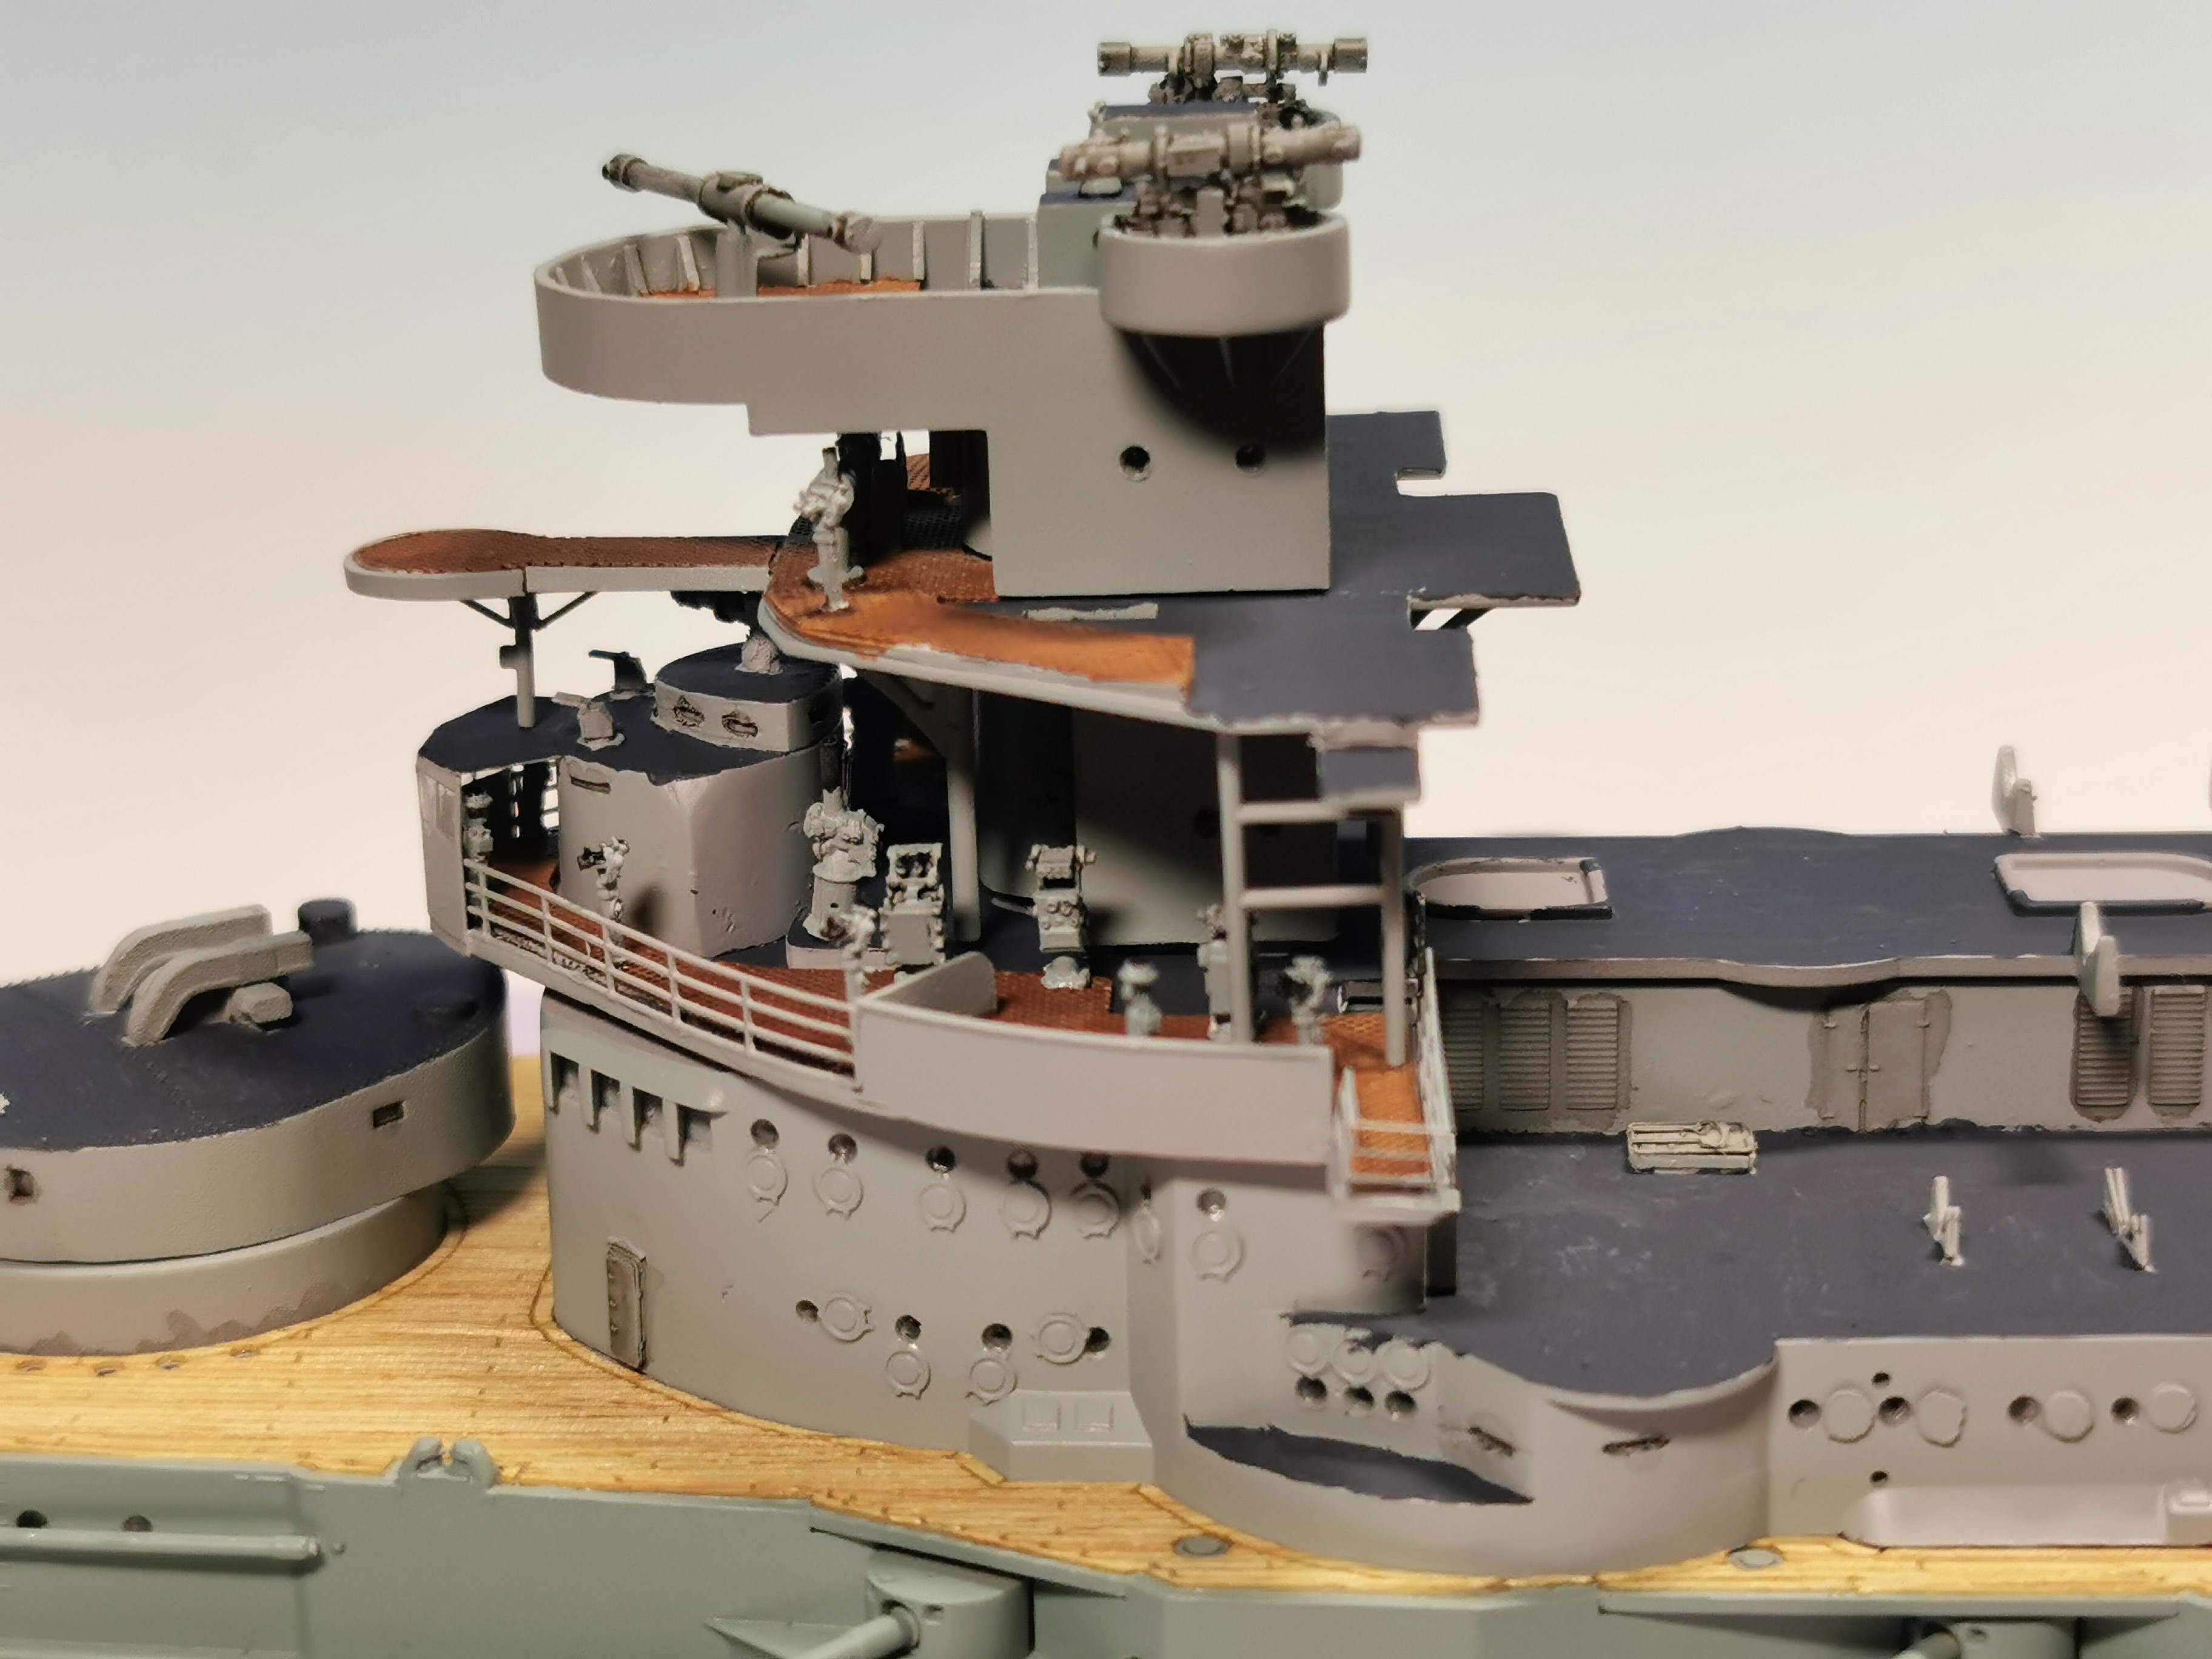
Gaz your wish is my command: This weekend I was completing the bigger paintwork with finishing the floor. Here TRUMPETER suggest your to take a brownish color - maybe they think there were Linoleum at the floor but, apart from the frontal wooden gratings the floor was a gray painted steel. I painted by hand with a brush and did used Vallejo 70816 which matched perfectly. The wooden gratings were painted in Vallejo 70875 beige brown. The guns blastbags were painted in a very light grey, almost offwhite. After all I used a very careful "wash" with black glaze. Some of these remnants are still visible and will be corrected soon:


I am very satisfied with my improved top platform with all its different sized rangefinders. These Veteran rangefinders do look great after the black glaze treatment


This is the first bow upper deck with all observation equipment installed. Together with the wooden gratings it looks much better than the "naked" TRUMPETER kit


This is how the upper platform is looking atop the first upper deck. With the railings and canvas later it will look great, I already love the ship


Have a great week - my holiday is over now and business is awaiting me tomorrow
GazzaS
#424
Visit this Community
Queensland, Australia
Joined: April 23, 2015
KitMaker: 4,648 posts
Model Shipwrights: 249 posts
Posted: Sunday, August 23, 2020 - 01:39 PM UTC
The paint brings it to life, Thomas!

Excellent!
d6mst0
#453
Visit this Community
Texas, United States
Joined: August 28, 2016
KitMaker: 1,925 posts
Model Shipwrights: 1,298 posts
Posted: Sunday, August 23, 2020 - 02:32 PM UTC

Quoted Text

The paint brings it to life, Thomas!

Excellent!


DITTO!

Mark