You are viewing the archived version of the site.
Go to modelshipwrights.com for the current dynamic site!
Go to modelshipwrights.com for the current dynamic site!
Hosted by Steve Joyce
Schulschiff Schleswig-Holstein 1939 1:350
TimReynaga

Joined: May 03, 2006
KitMaker: 2,500 posts
Model Shipwrights: 1,830 posts

Posted: Sunday, August 23, 2020 - 03:23 PM UTC
I agree, the paint has added a new dimension... obviously there is still away to go, but I can visualize her finished now!
Posted: Sunday, August 23, 2020 - 11:21 PM UTC
Thomas, now that paint is on she's looking beautiful!
The range finders are particularly impressive
The range finders are particularly impressive


Black_sheep

Joined: December 11, 2009
KitMaker: 823 posts
Model Shipwrights: 551 posts

Posted: Saturday, August 29, 2020 - 04:46 AM UTC
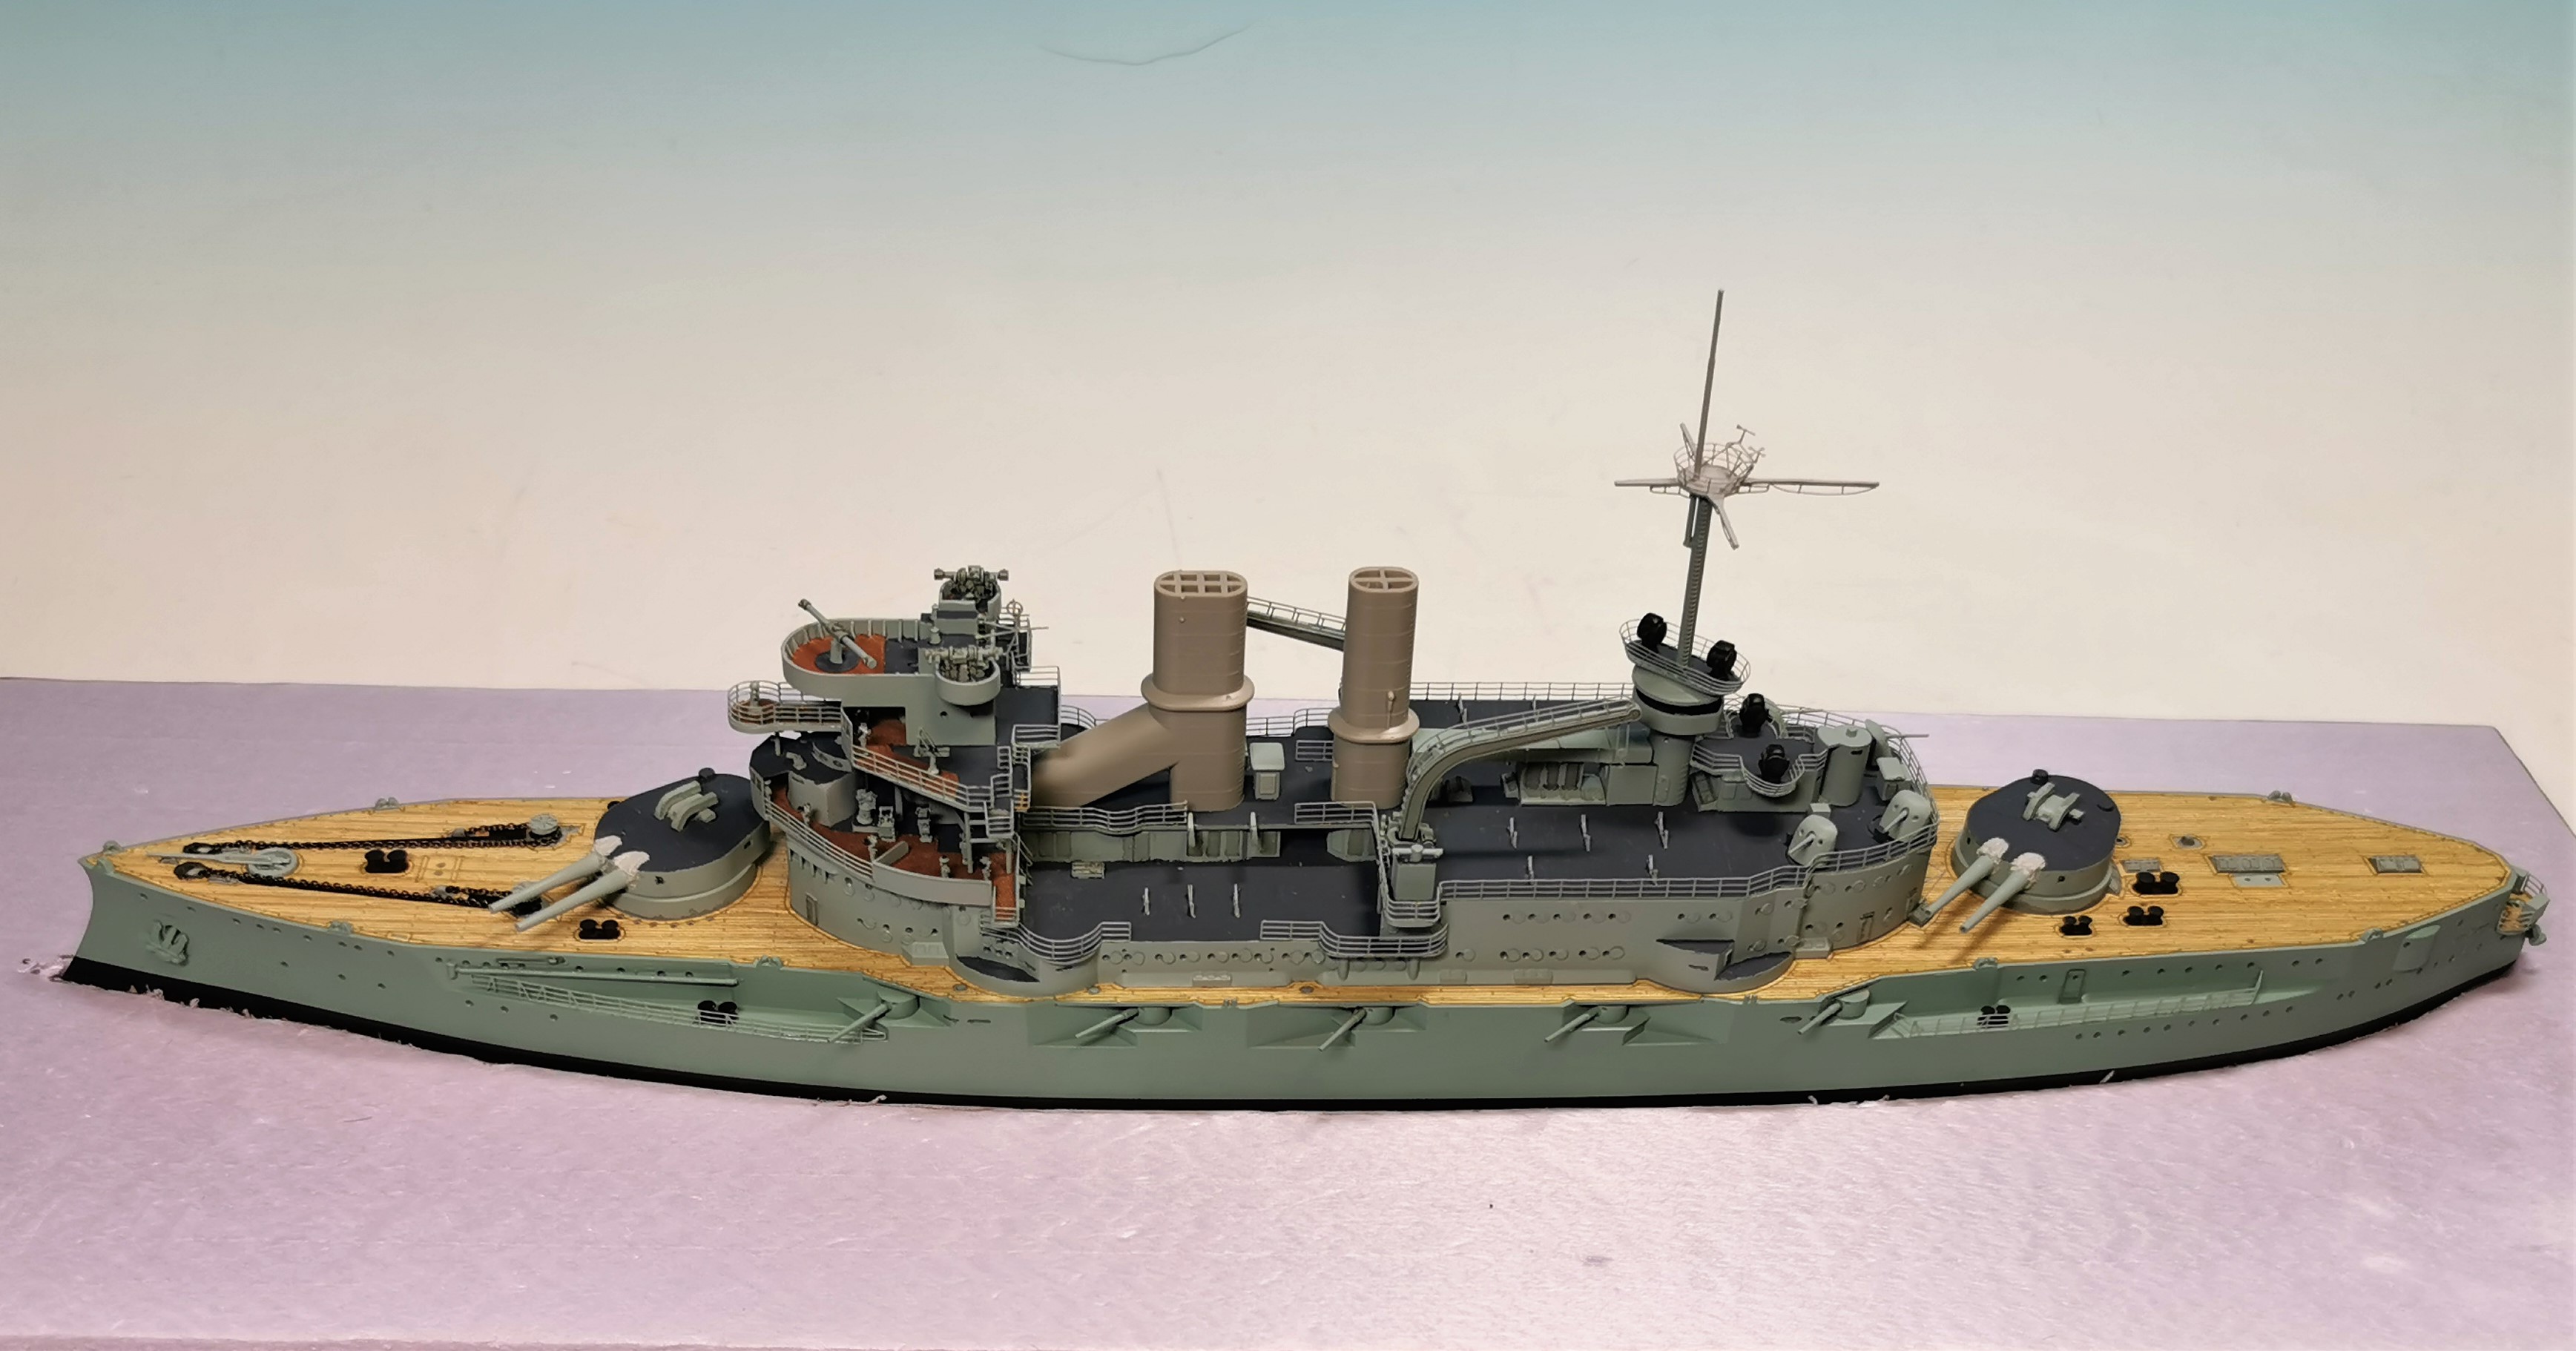
Gentlemen, finally all the railings for the upper superstructures are finished. These were really difficult for me to handle as they are very thin and fragile as I told you before. Actually this railings are in my opinion the most thinnest I had to tackle with from Eduard so far. Some railings also broke apart at the backside of the lower bridge and I hade to tailor some new railing segments out of spare parts.
I also started to fix some small parts like the anchor chain, aft 8.8 cm Flak guns, bollards and some stairs. There is still a lot small parts missing but you can get a first impression of the final look of this remarkable ship.
I want to show you the works before I will add KRISTAL KLEAR for replicate the canvas for the first and second upper bridge railings like the real one had:
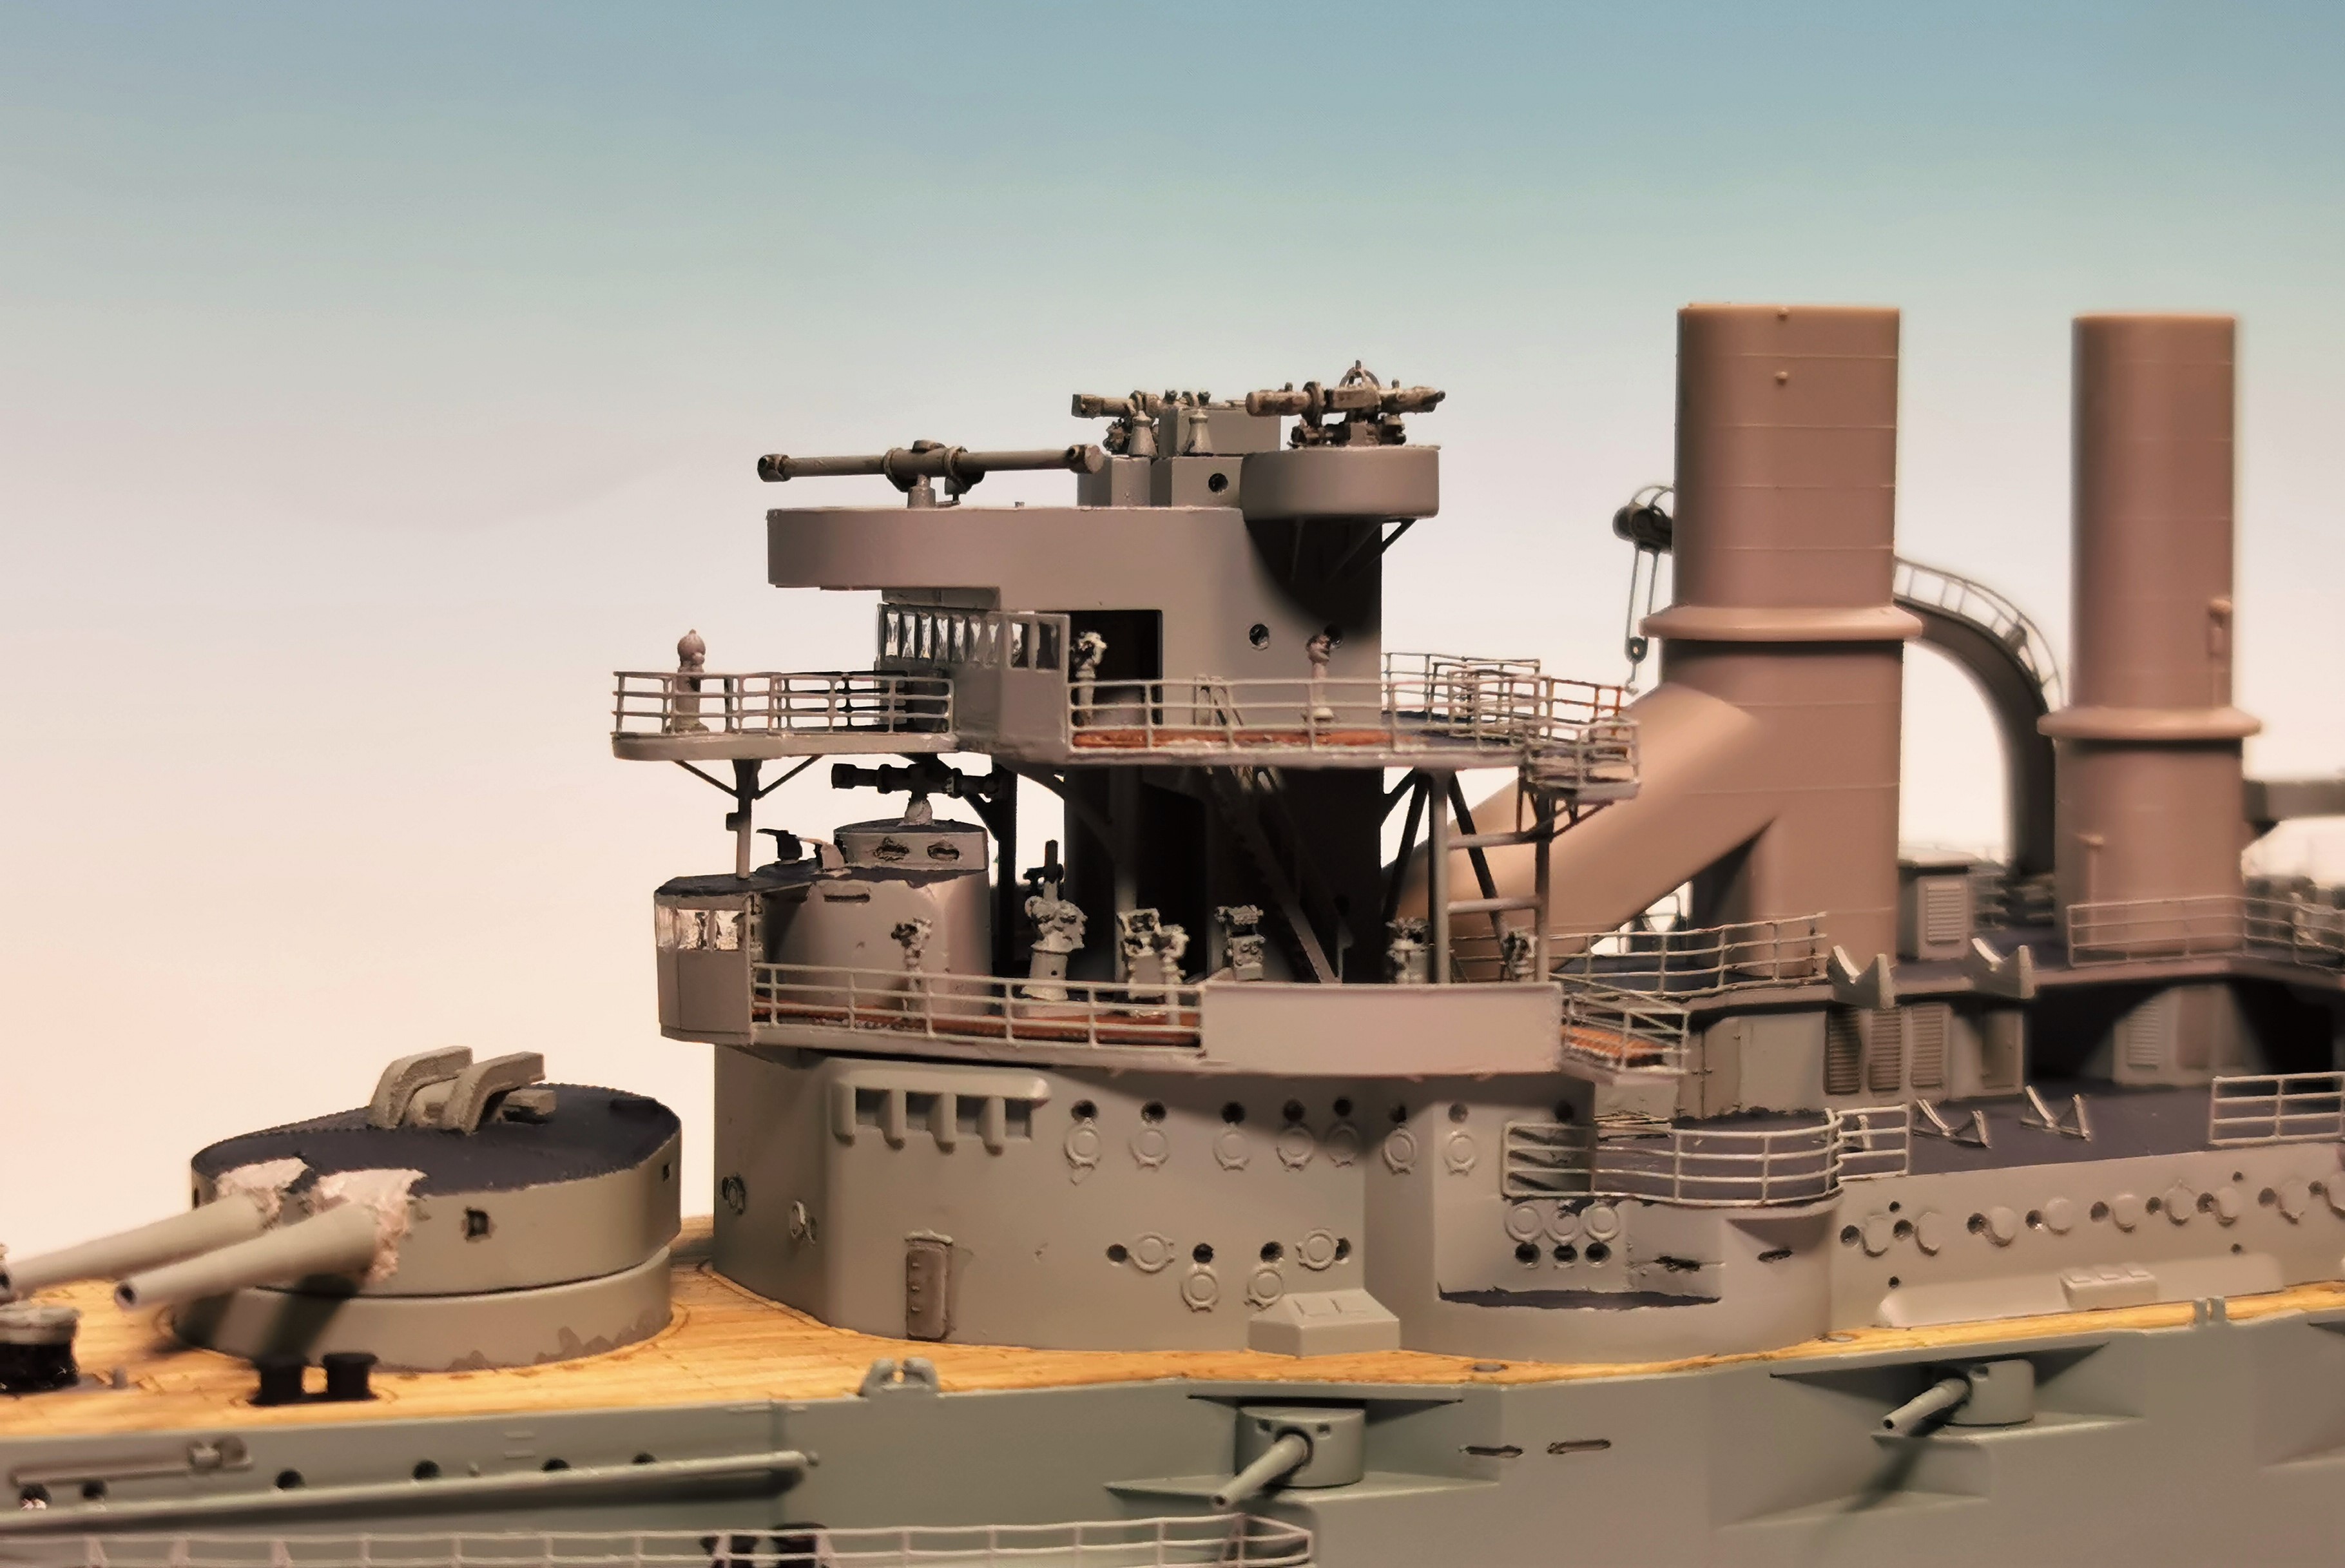
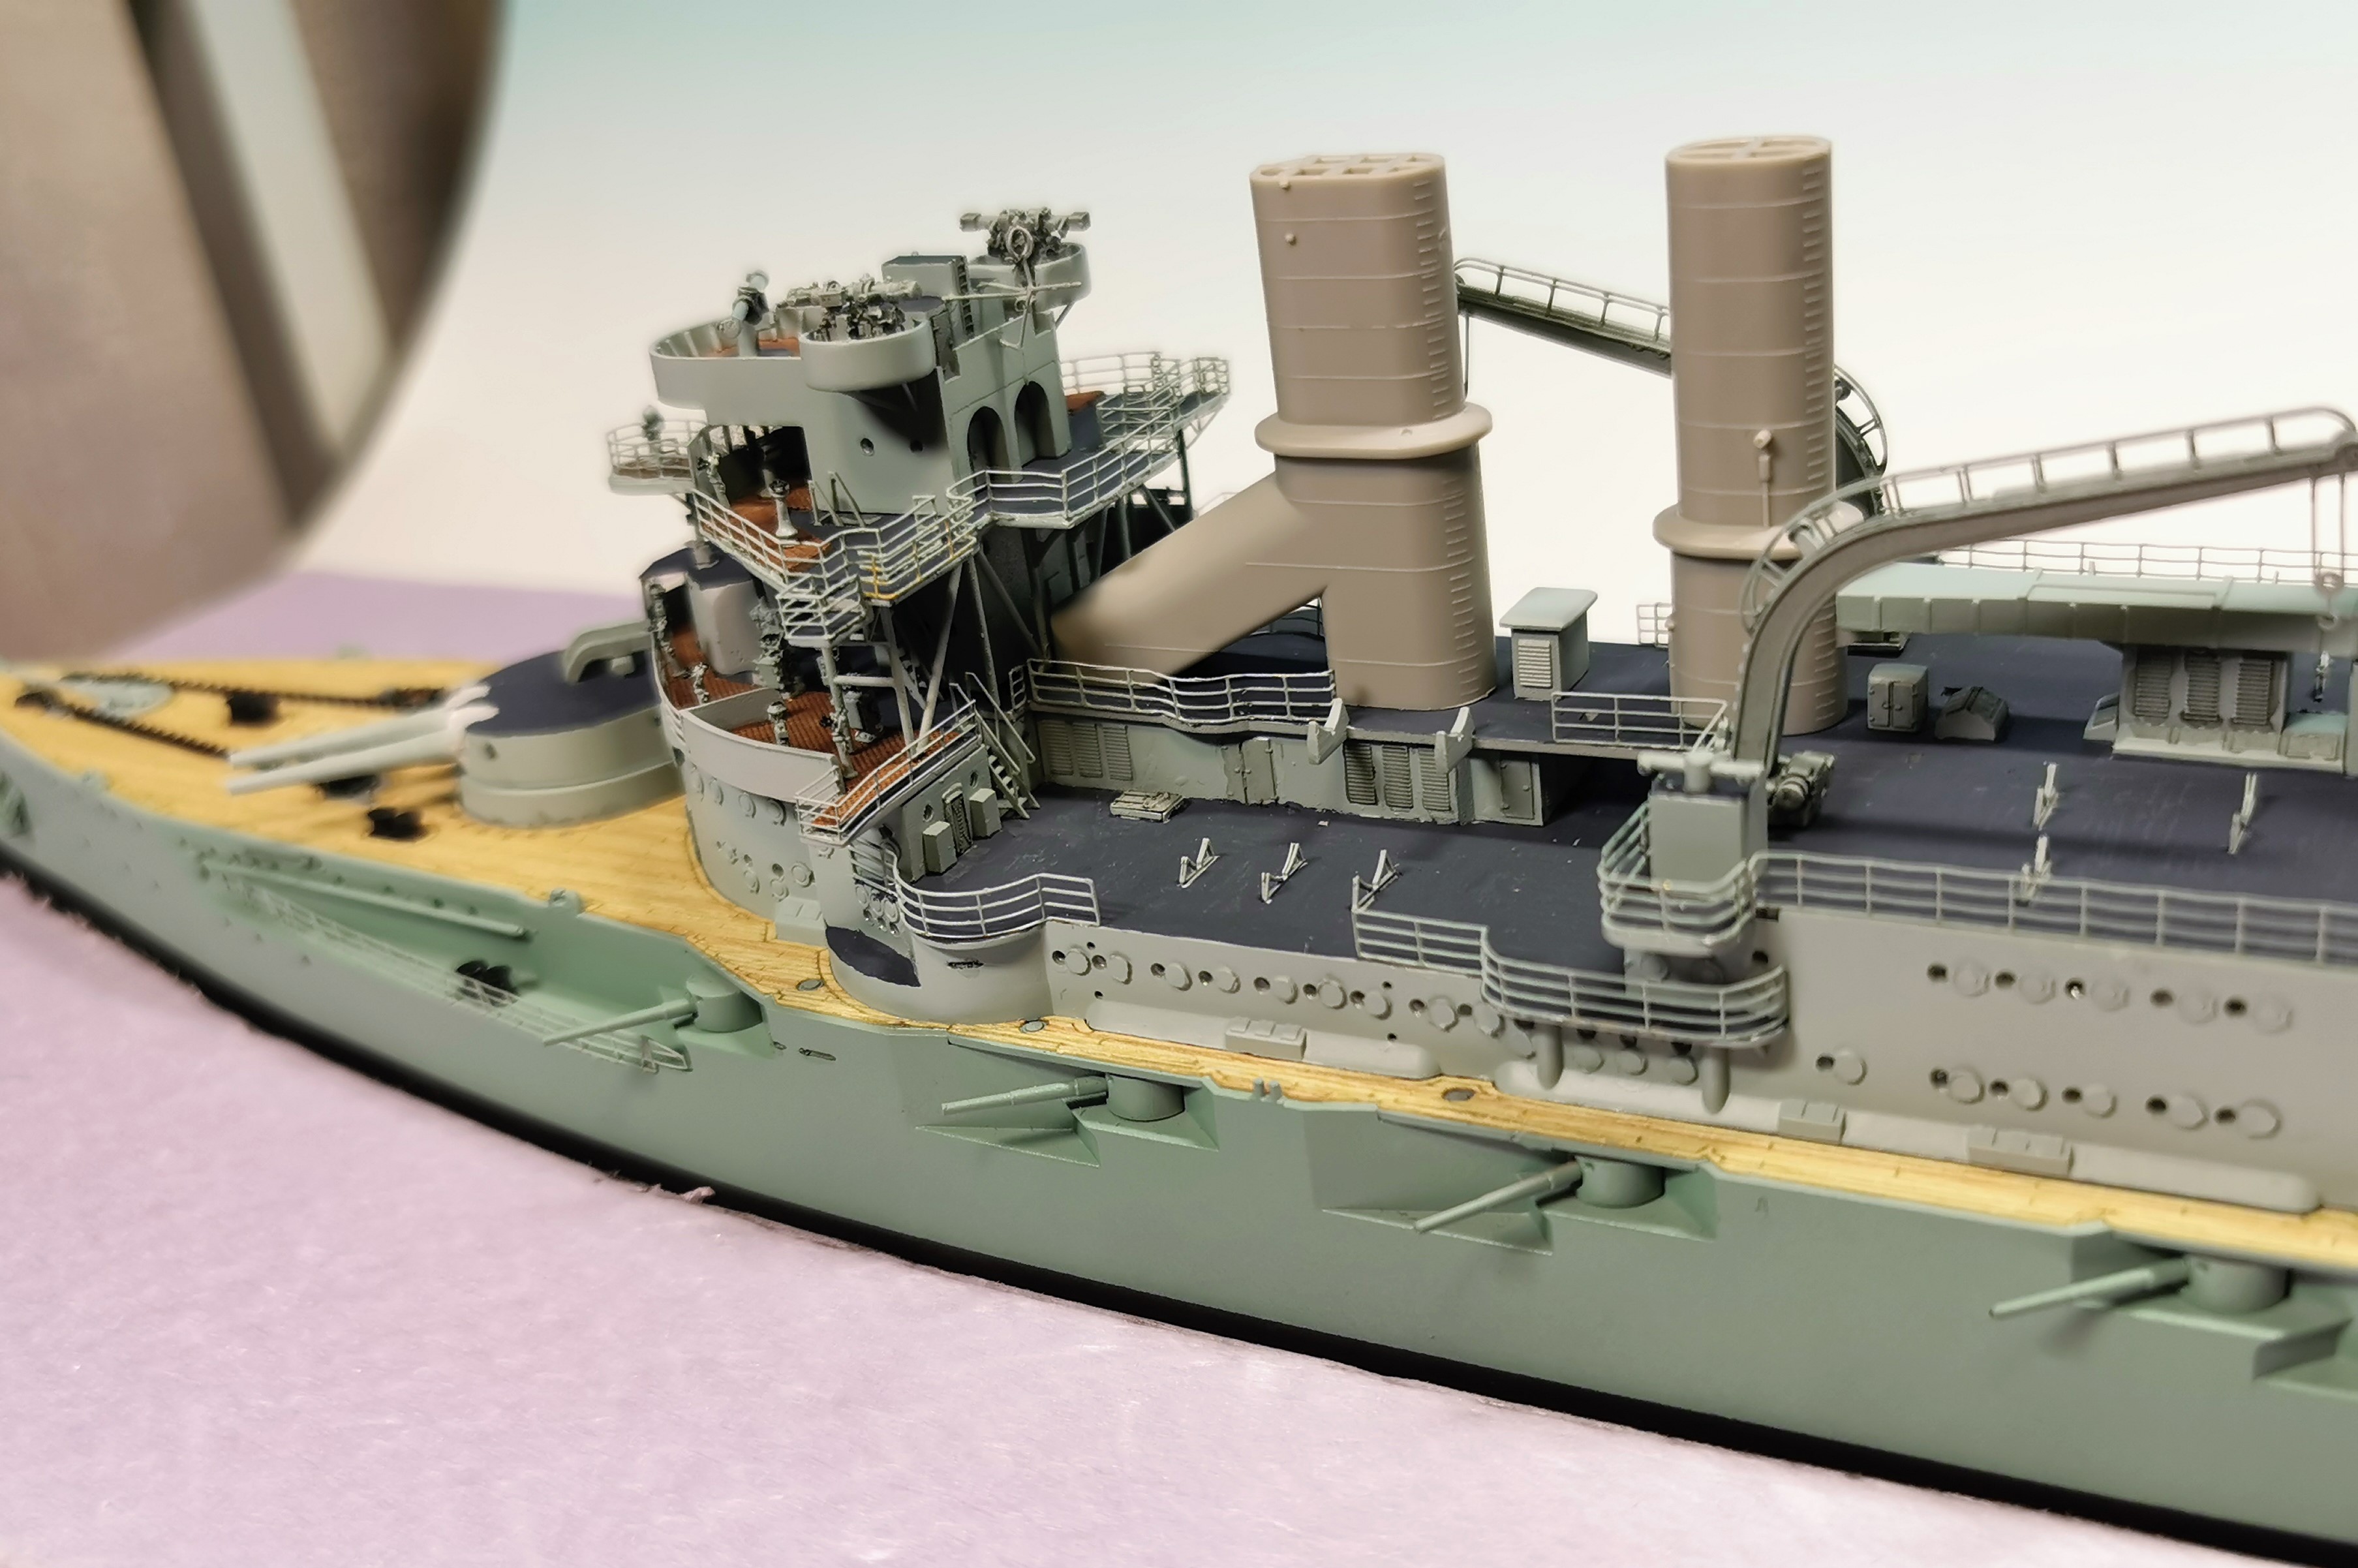
The left upper Flak guns are heading toward the Westerplatte emplacements as the pictures of the real one shows
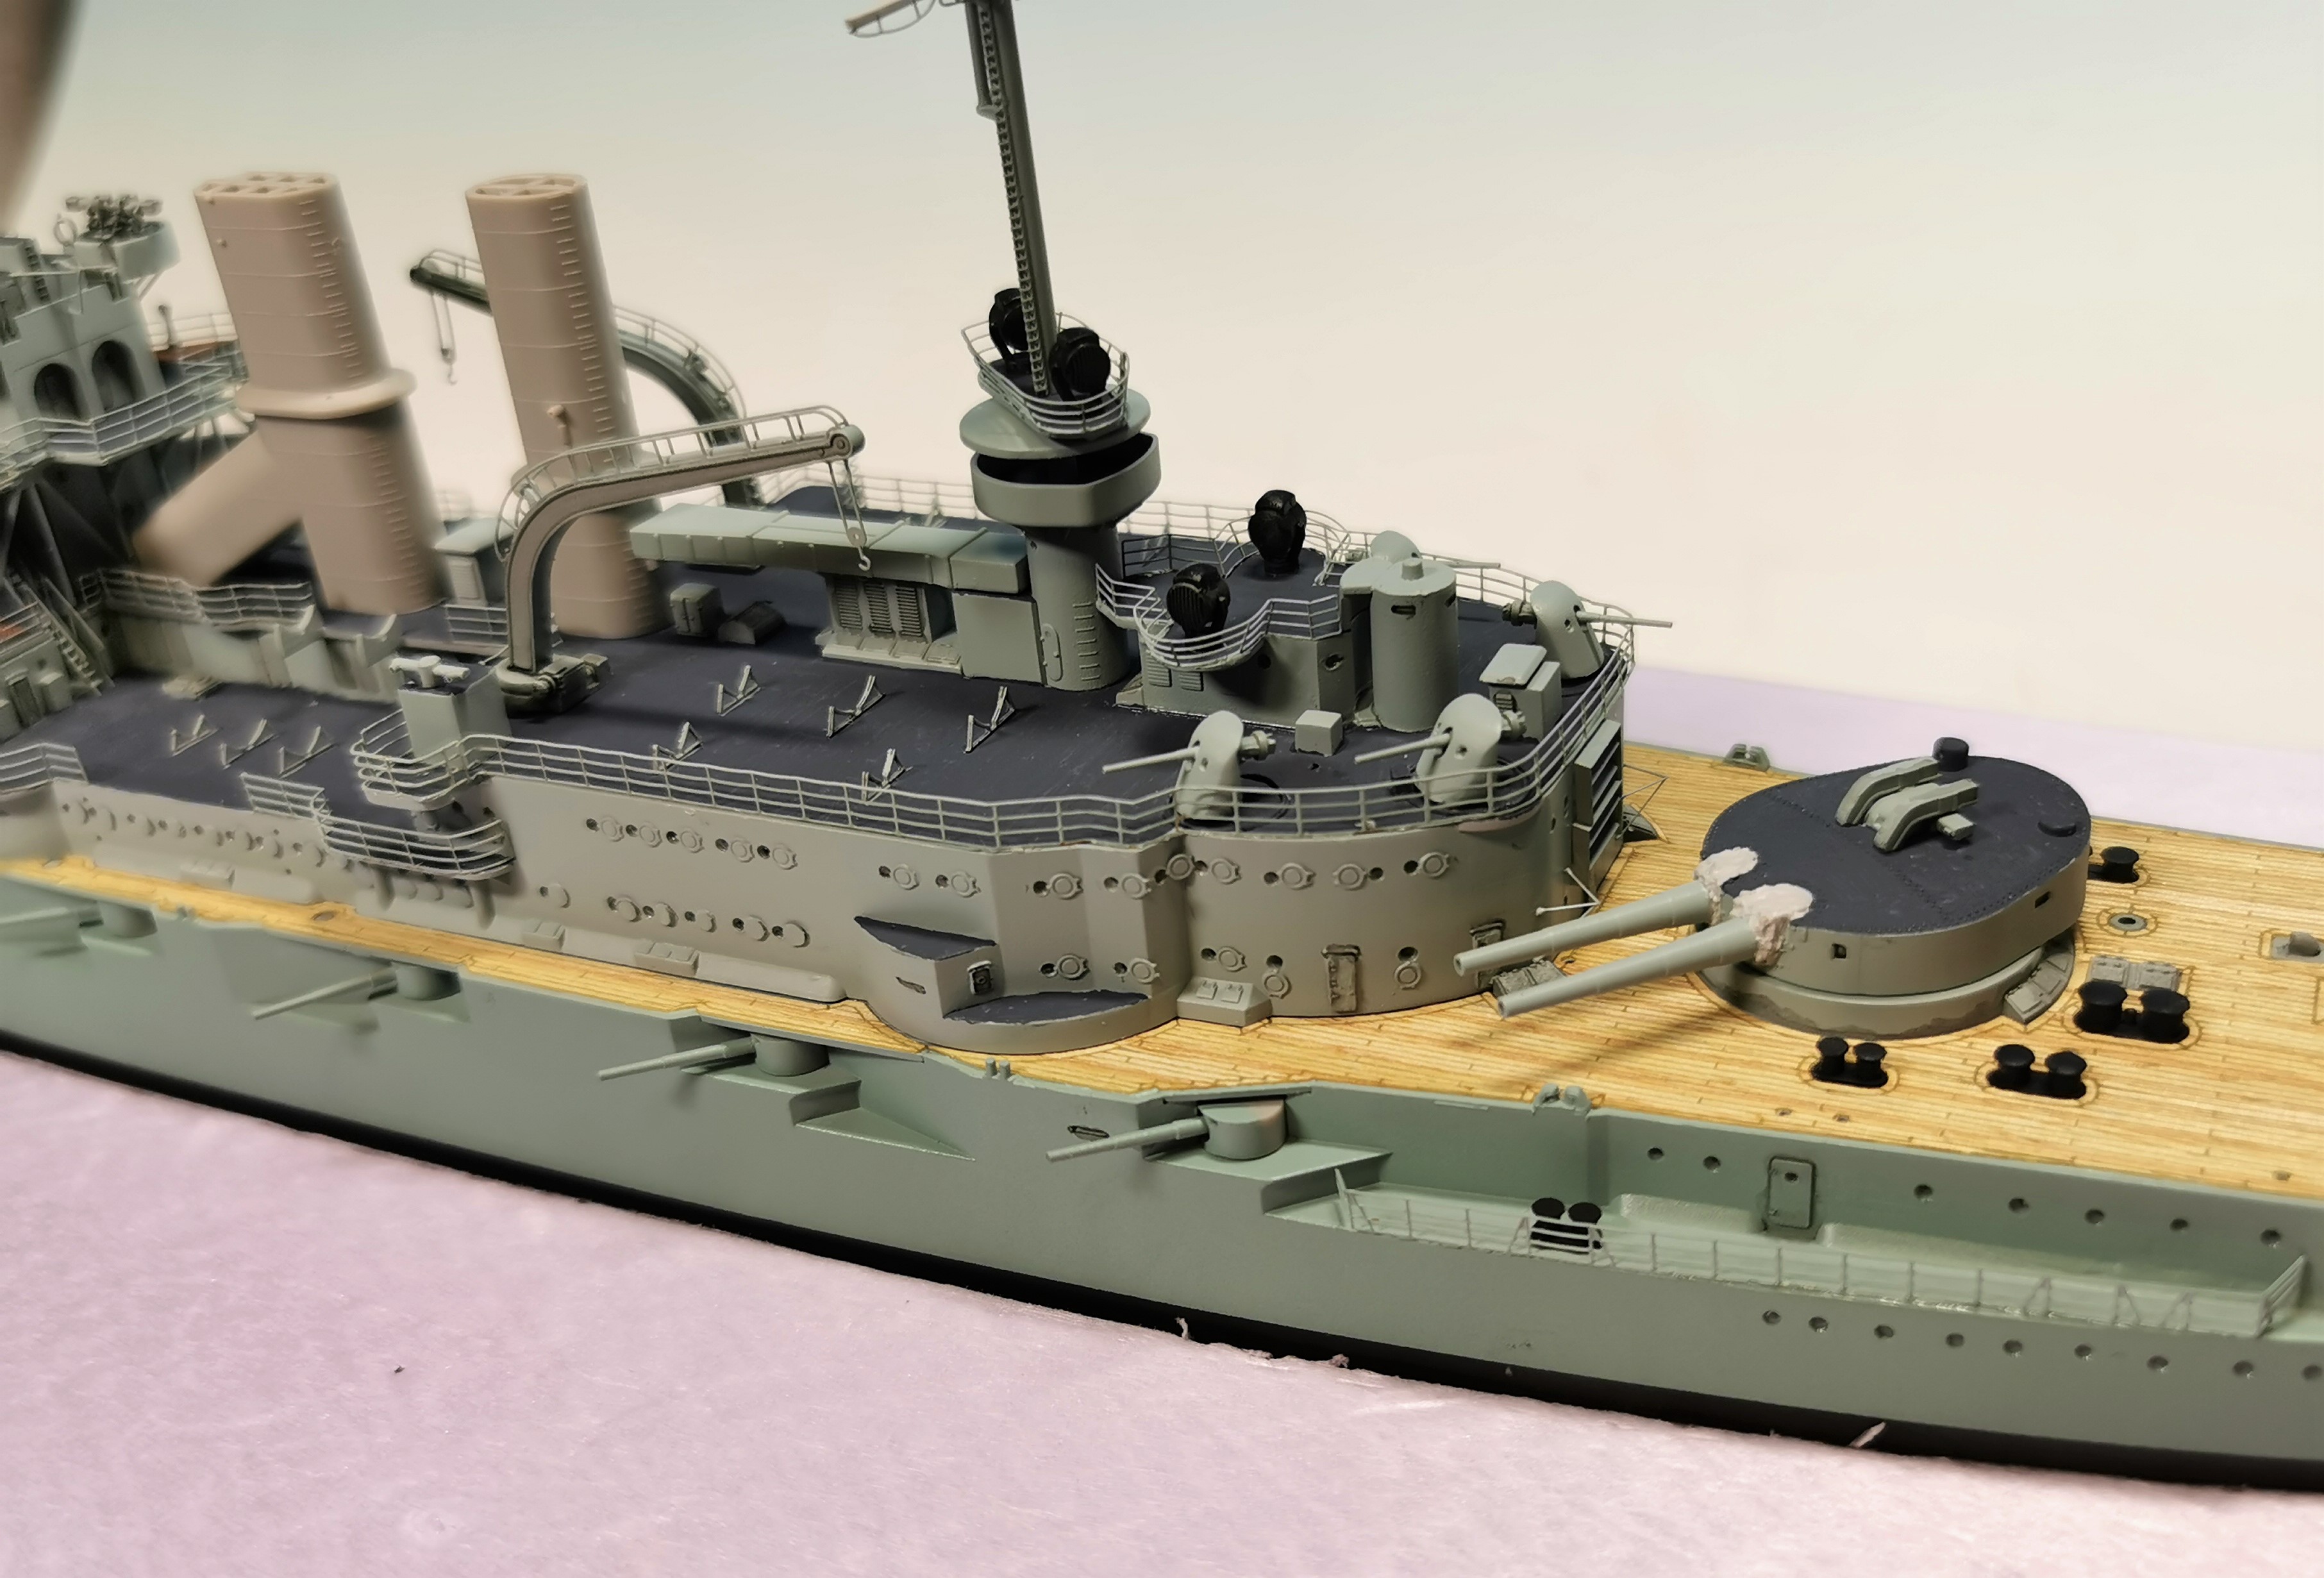
I like the improved look of the bridge with all aperatures now on it very much
All the lower and upper bridge windows get KRISTAL KLEAR glass windows. Everything behind is still nicely visible
Starting now with the canvas for all the bridge railings
I also started to fix some small parts like the anchor chain, aft 8.8 cm Flak guns, bollards and some stairs. There is still a lot small parts missing but you can get a first impression of the final look of this remarkable ship.
I want to show you the works before I will add KRISTAL KLEAR for replicate the canvas for the first and second upper bridge railings like the real one had:


The left upper Flak guns are heading toward the Westerplatte emplacements as the pictures of the real one shows


I like the improved look of the bridge with all aperatures now on it very much

All the lower and upper bridge windows get KRISTAL KLEAR glass windows. Everything behind is still nicely visible


Starting now with the canvas for all the bridge railings

RedDuster

Joined: March 01, 2010
KitMaker: 7,078 posts
Model Shipwrights: 6,649 posts

Posted: Saturday, August 29, 2020 - 06:47 AM UTC
Looking very good Thomas,
The detail on the bridge structure is top class, not too busy but some very nice depth in the open areas.
Cheers
Si
The detail on the bridge structure is top class, not too busy but some very nice depth in the open areas.
Cheers
Si
Posted: Saturday, August 29, 2020 - 10:33 AM UTC
Thomas,
Really looking great now the ship is all painted and detailed out.
Mark
Really looking great now the ship is all painted and detailed out.
Mark


MartinJQuinn

Joined: January 19, 2005
KitMaker: 574 posts
Model Shipwrights: 530 posts

Posted: Monday, August 31, 2020 - 04:56 AM UTC
Very sharp work! It's all coming together quite nicely.
Posted: Tuesday, September 01, 2020 - 09:25 AM UTC
Wow!
very nice Thomas
very nice Thomas


Black_sheep

Joined: December 11, 2009
KitMaker: 823 posts
Model Shipwrights: 551 posts

Posted: Saturday, September 05, 2020 - 01:14 AM UTC
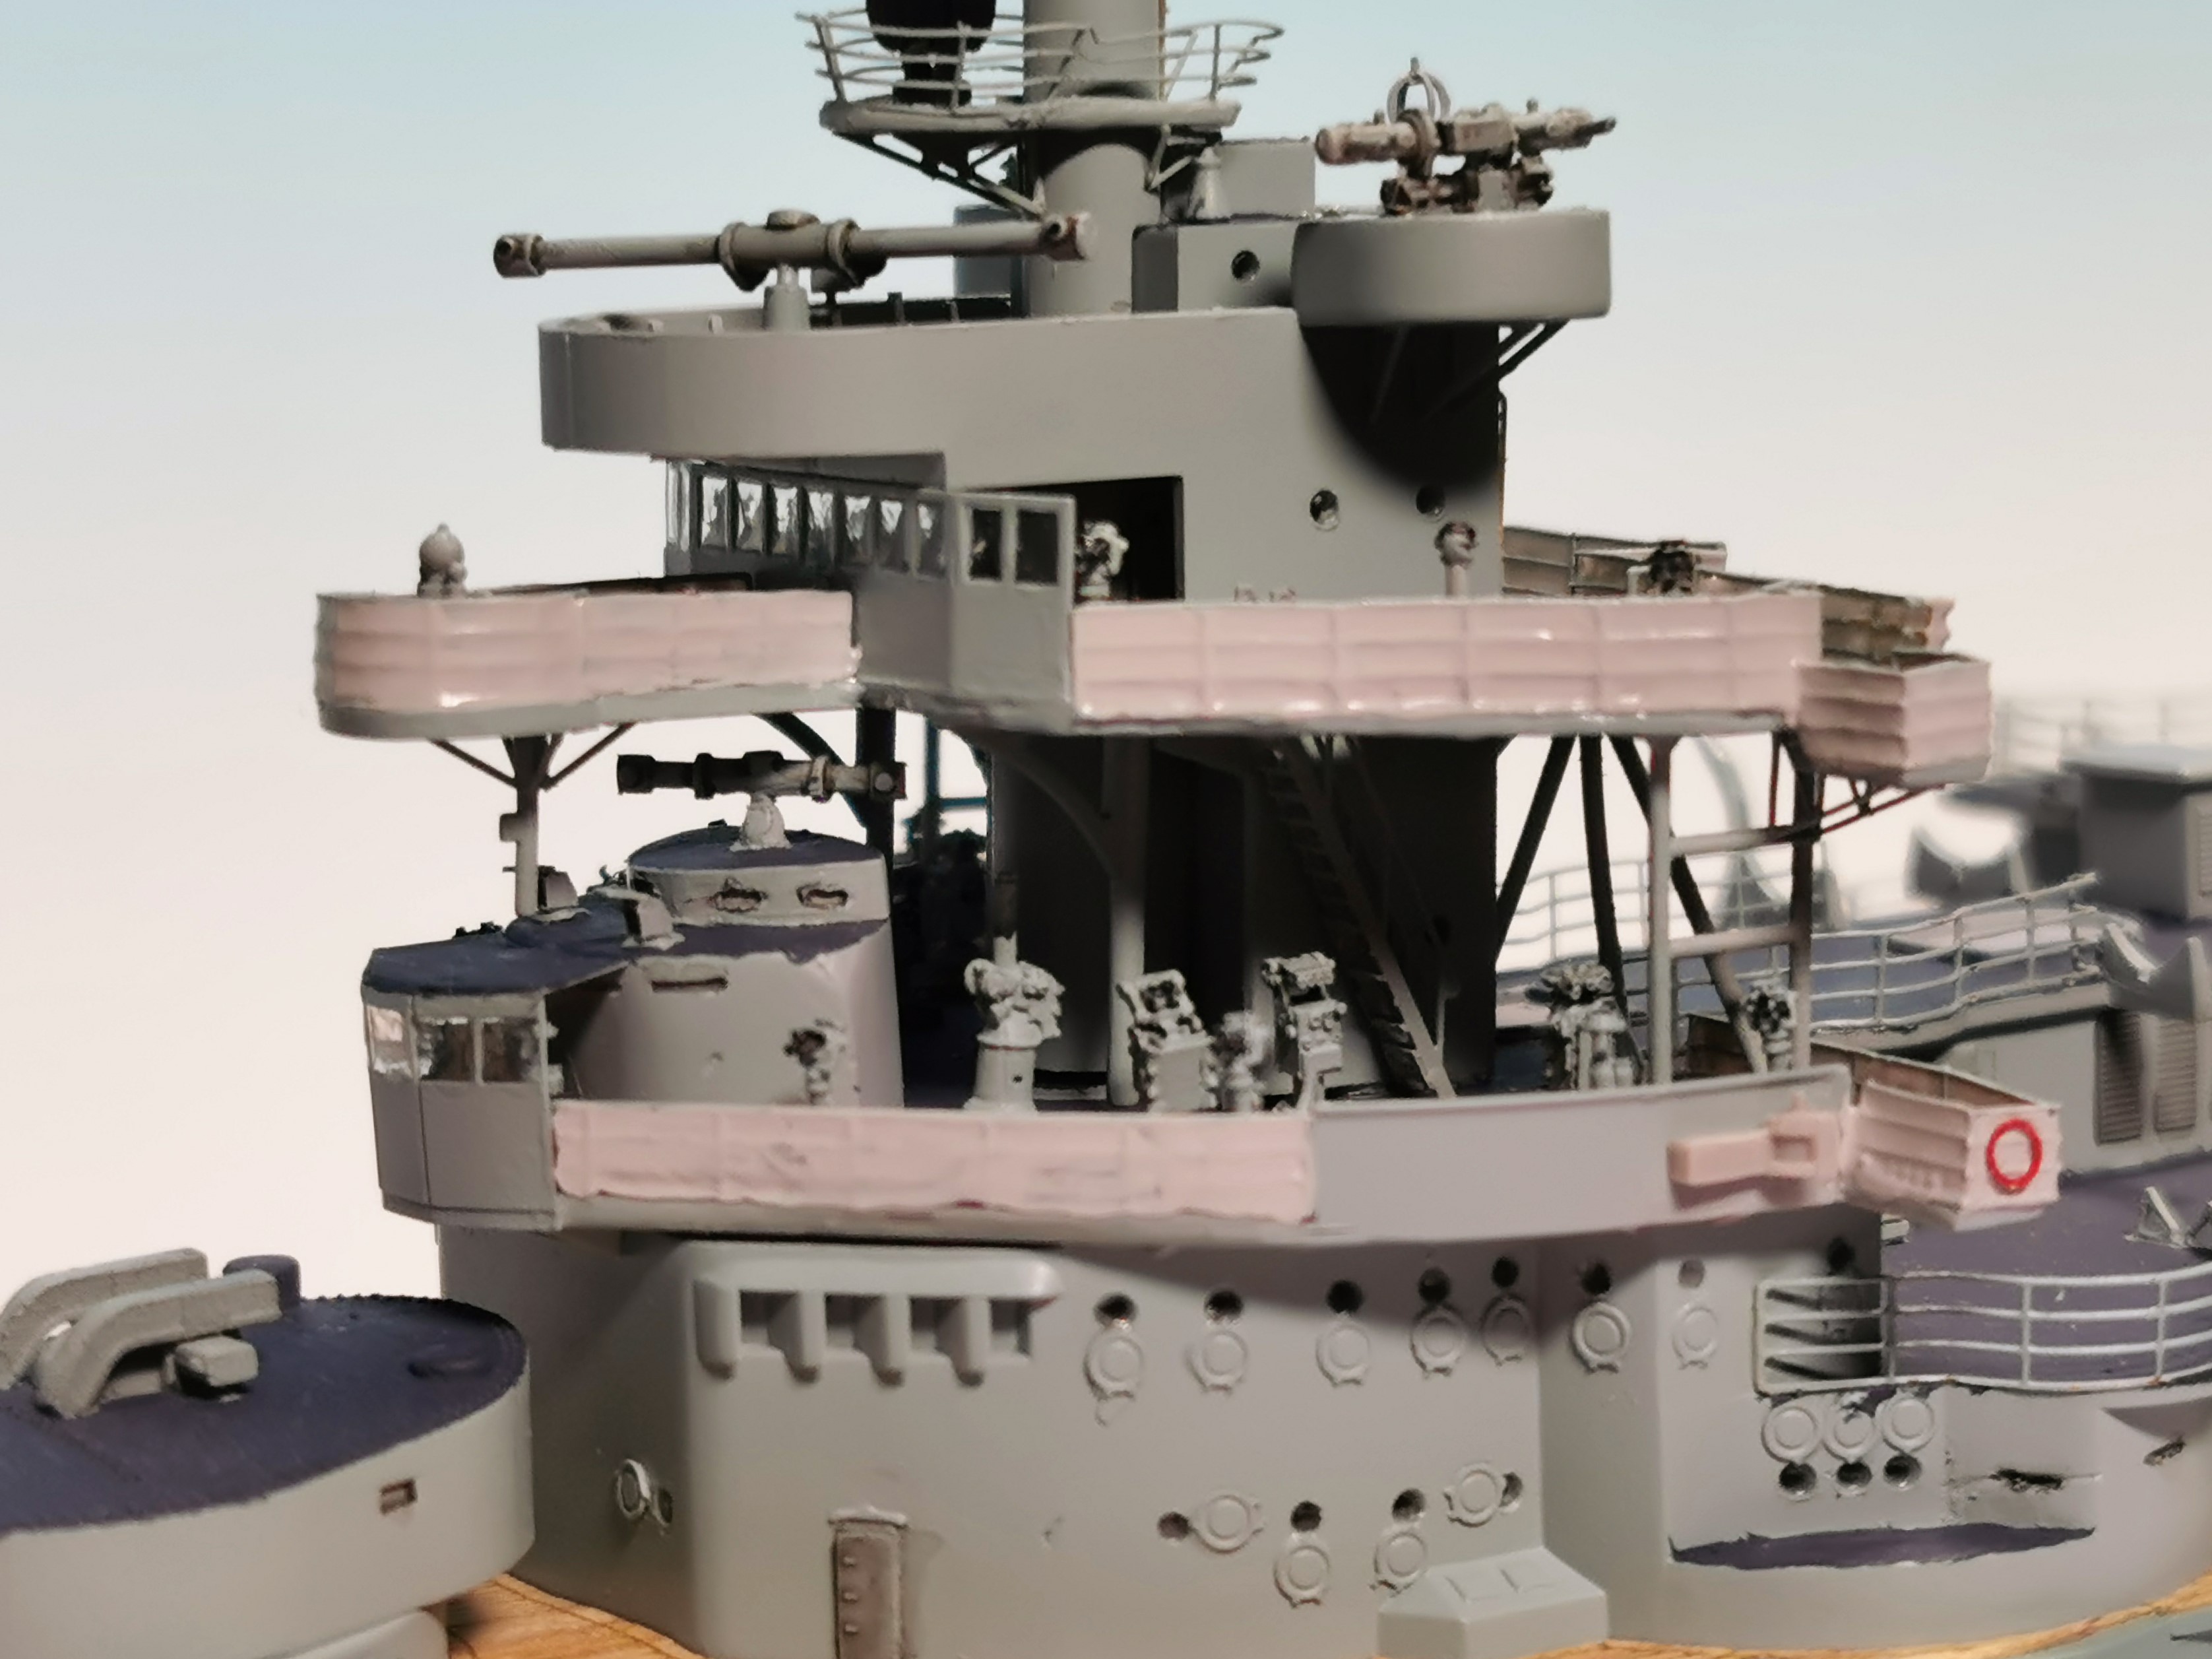
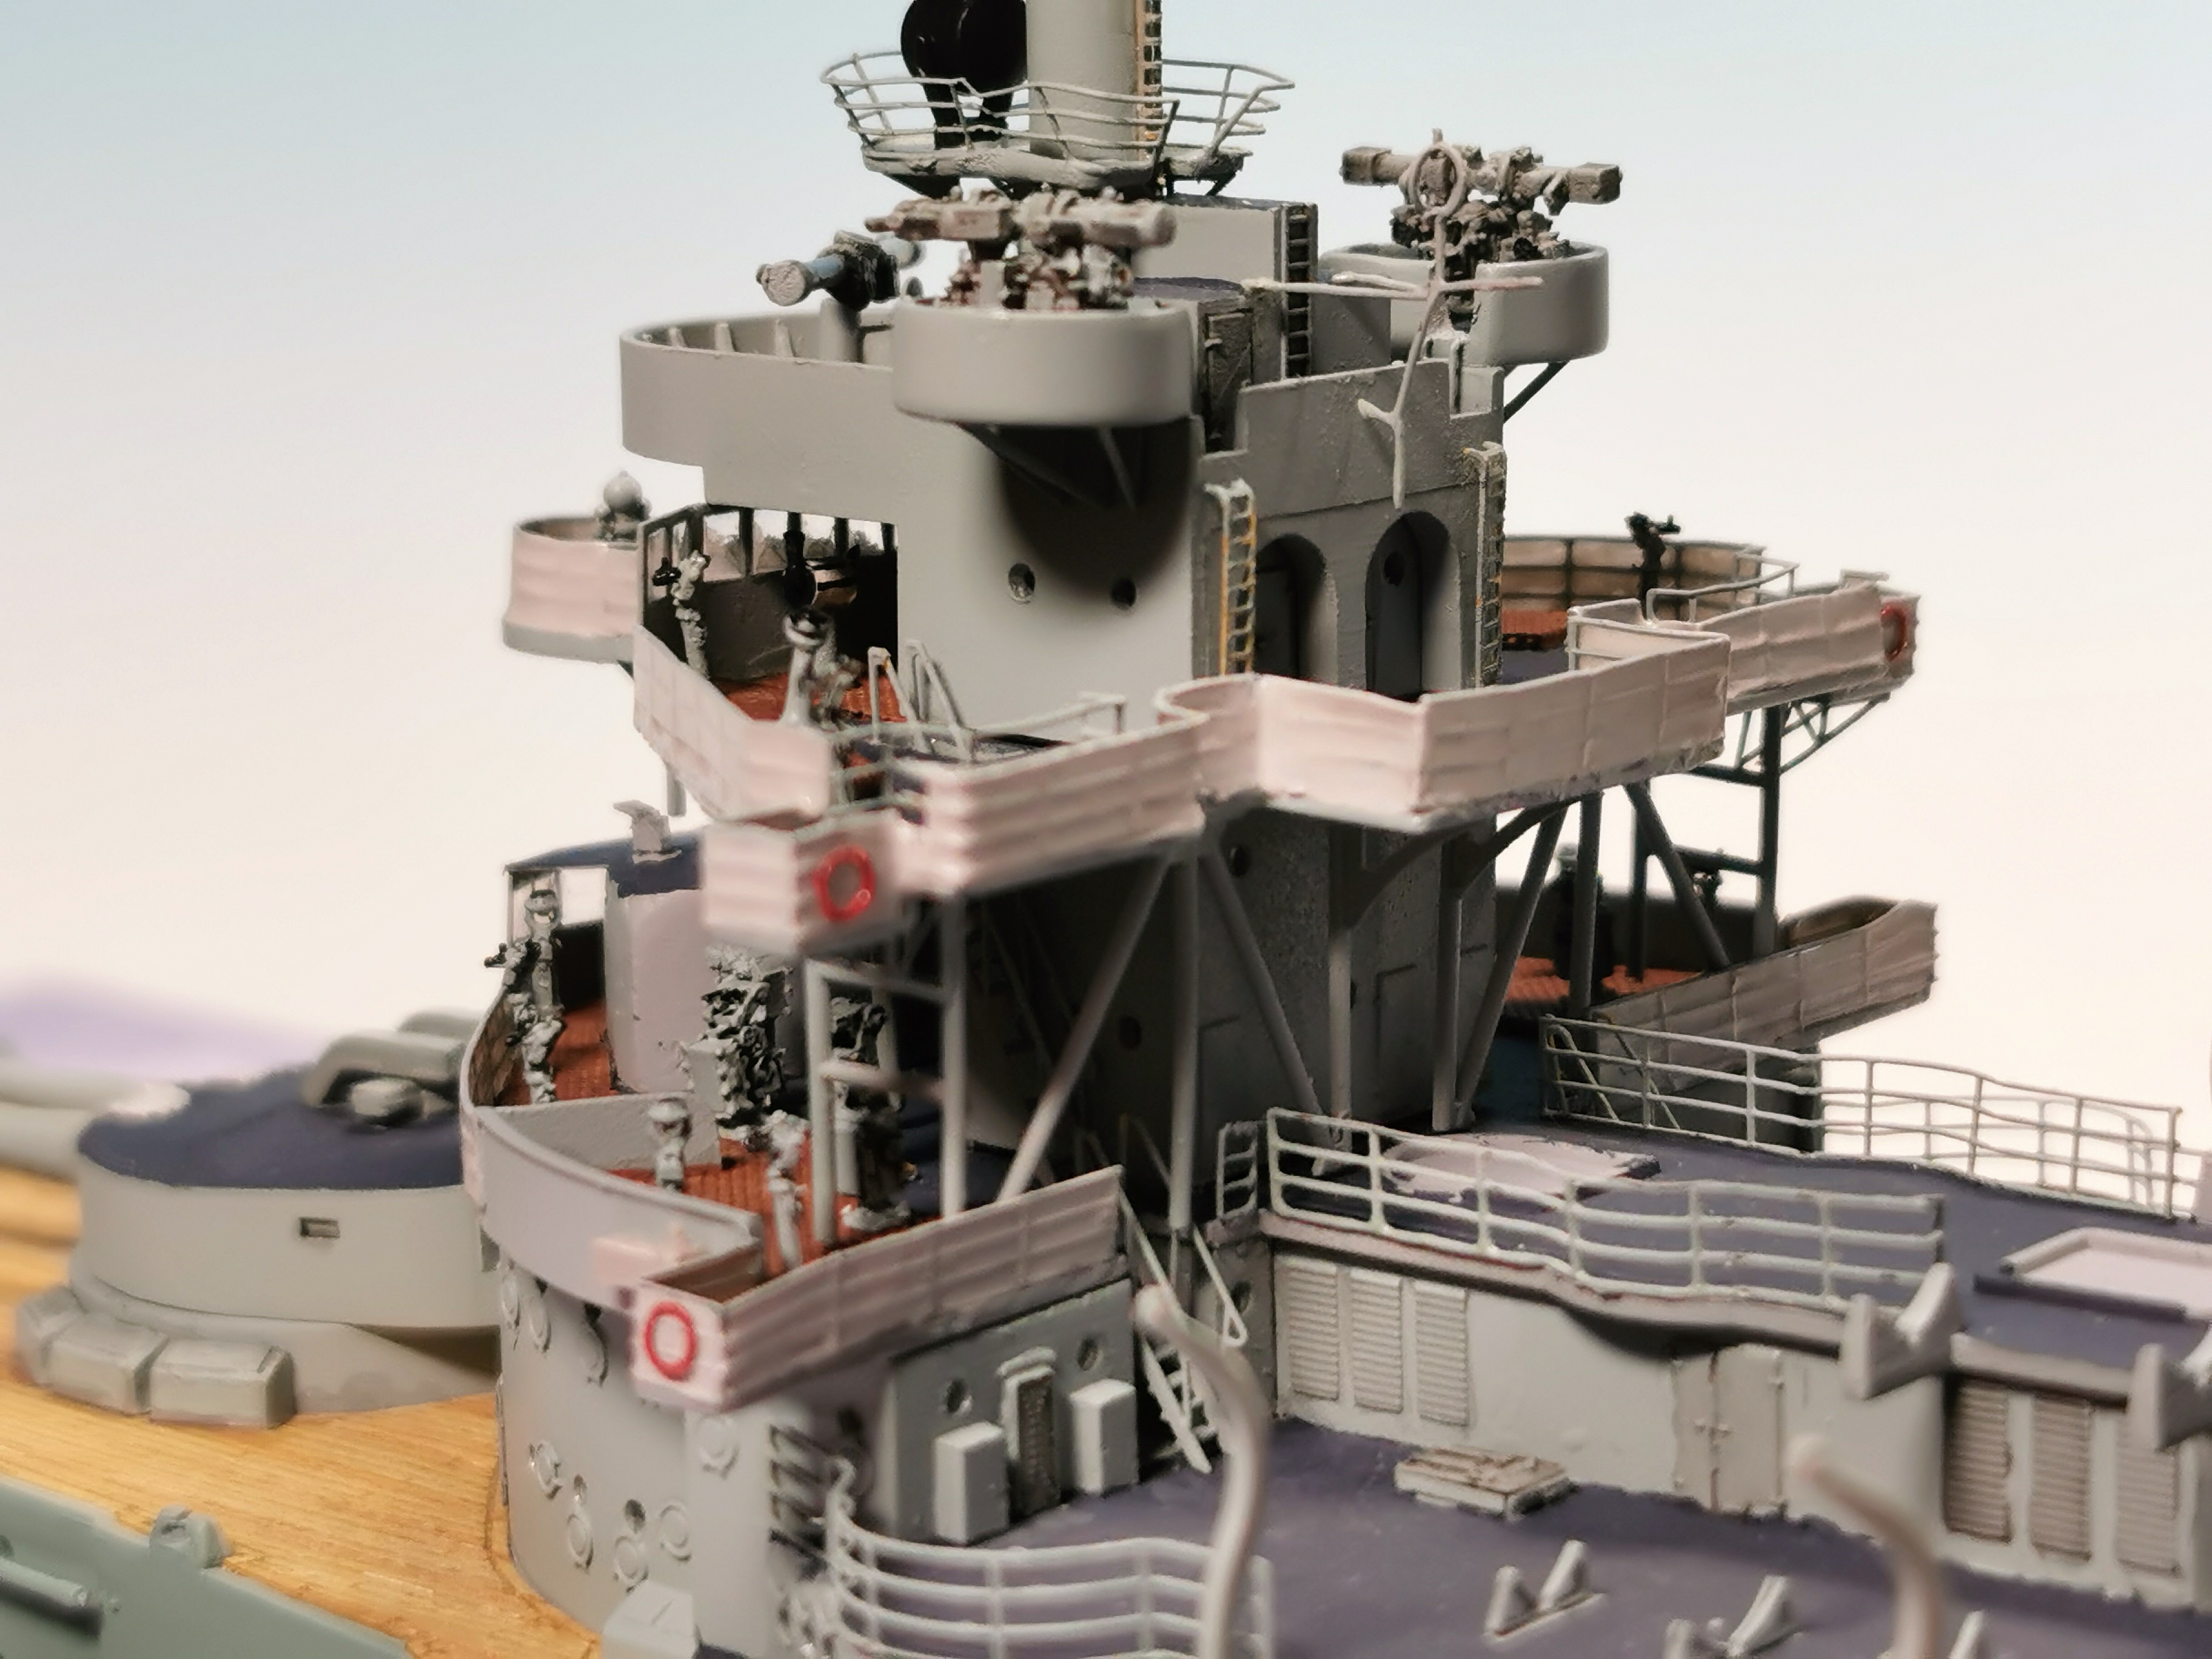
Thank you all for your comments mates, very appreciated. I was not lazy during the last days and was able to finish my bridge. I created the canvas with KRISTAL KLEAR and painted it after drying in a light gray color. Now I have the structure and the correct view at both sides of these railings. For me it looks perfectly and I am very satisfied about it. The position lights at both sides still needs to be painted:
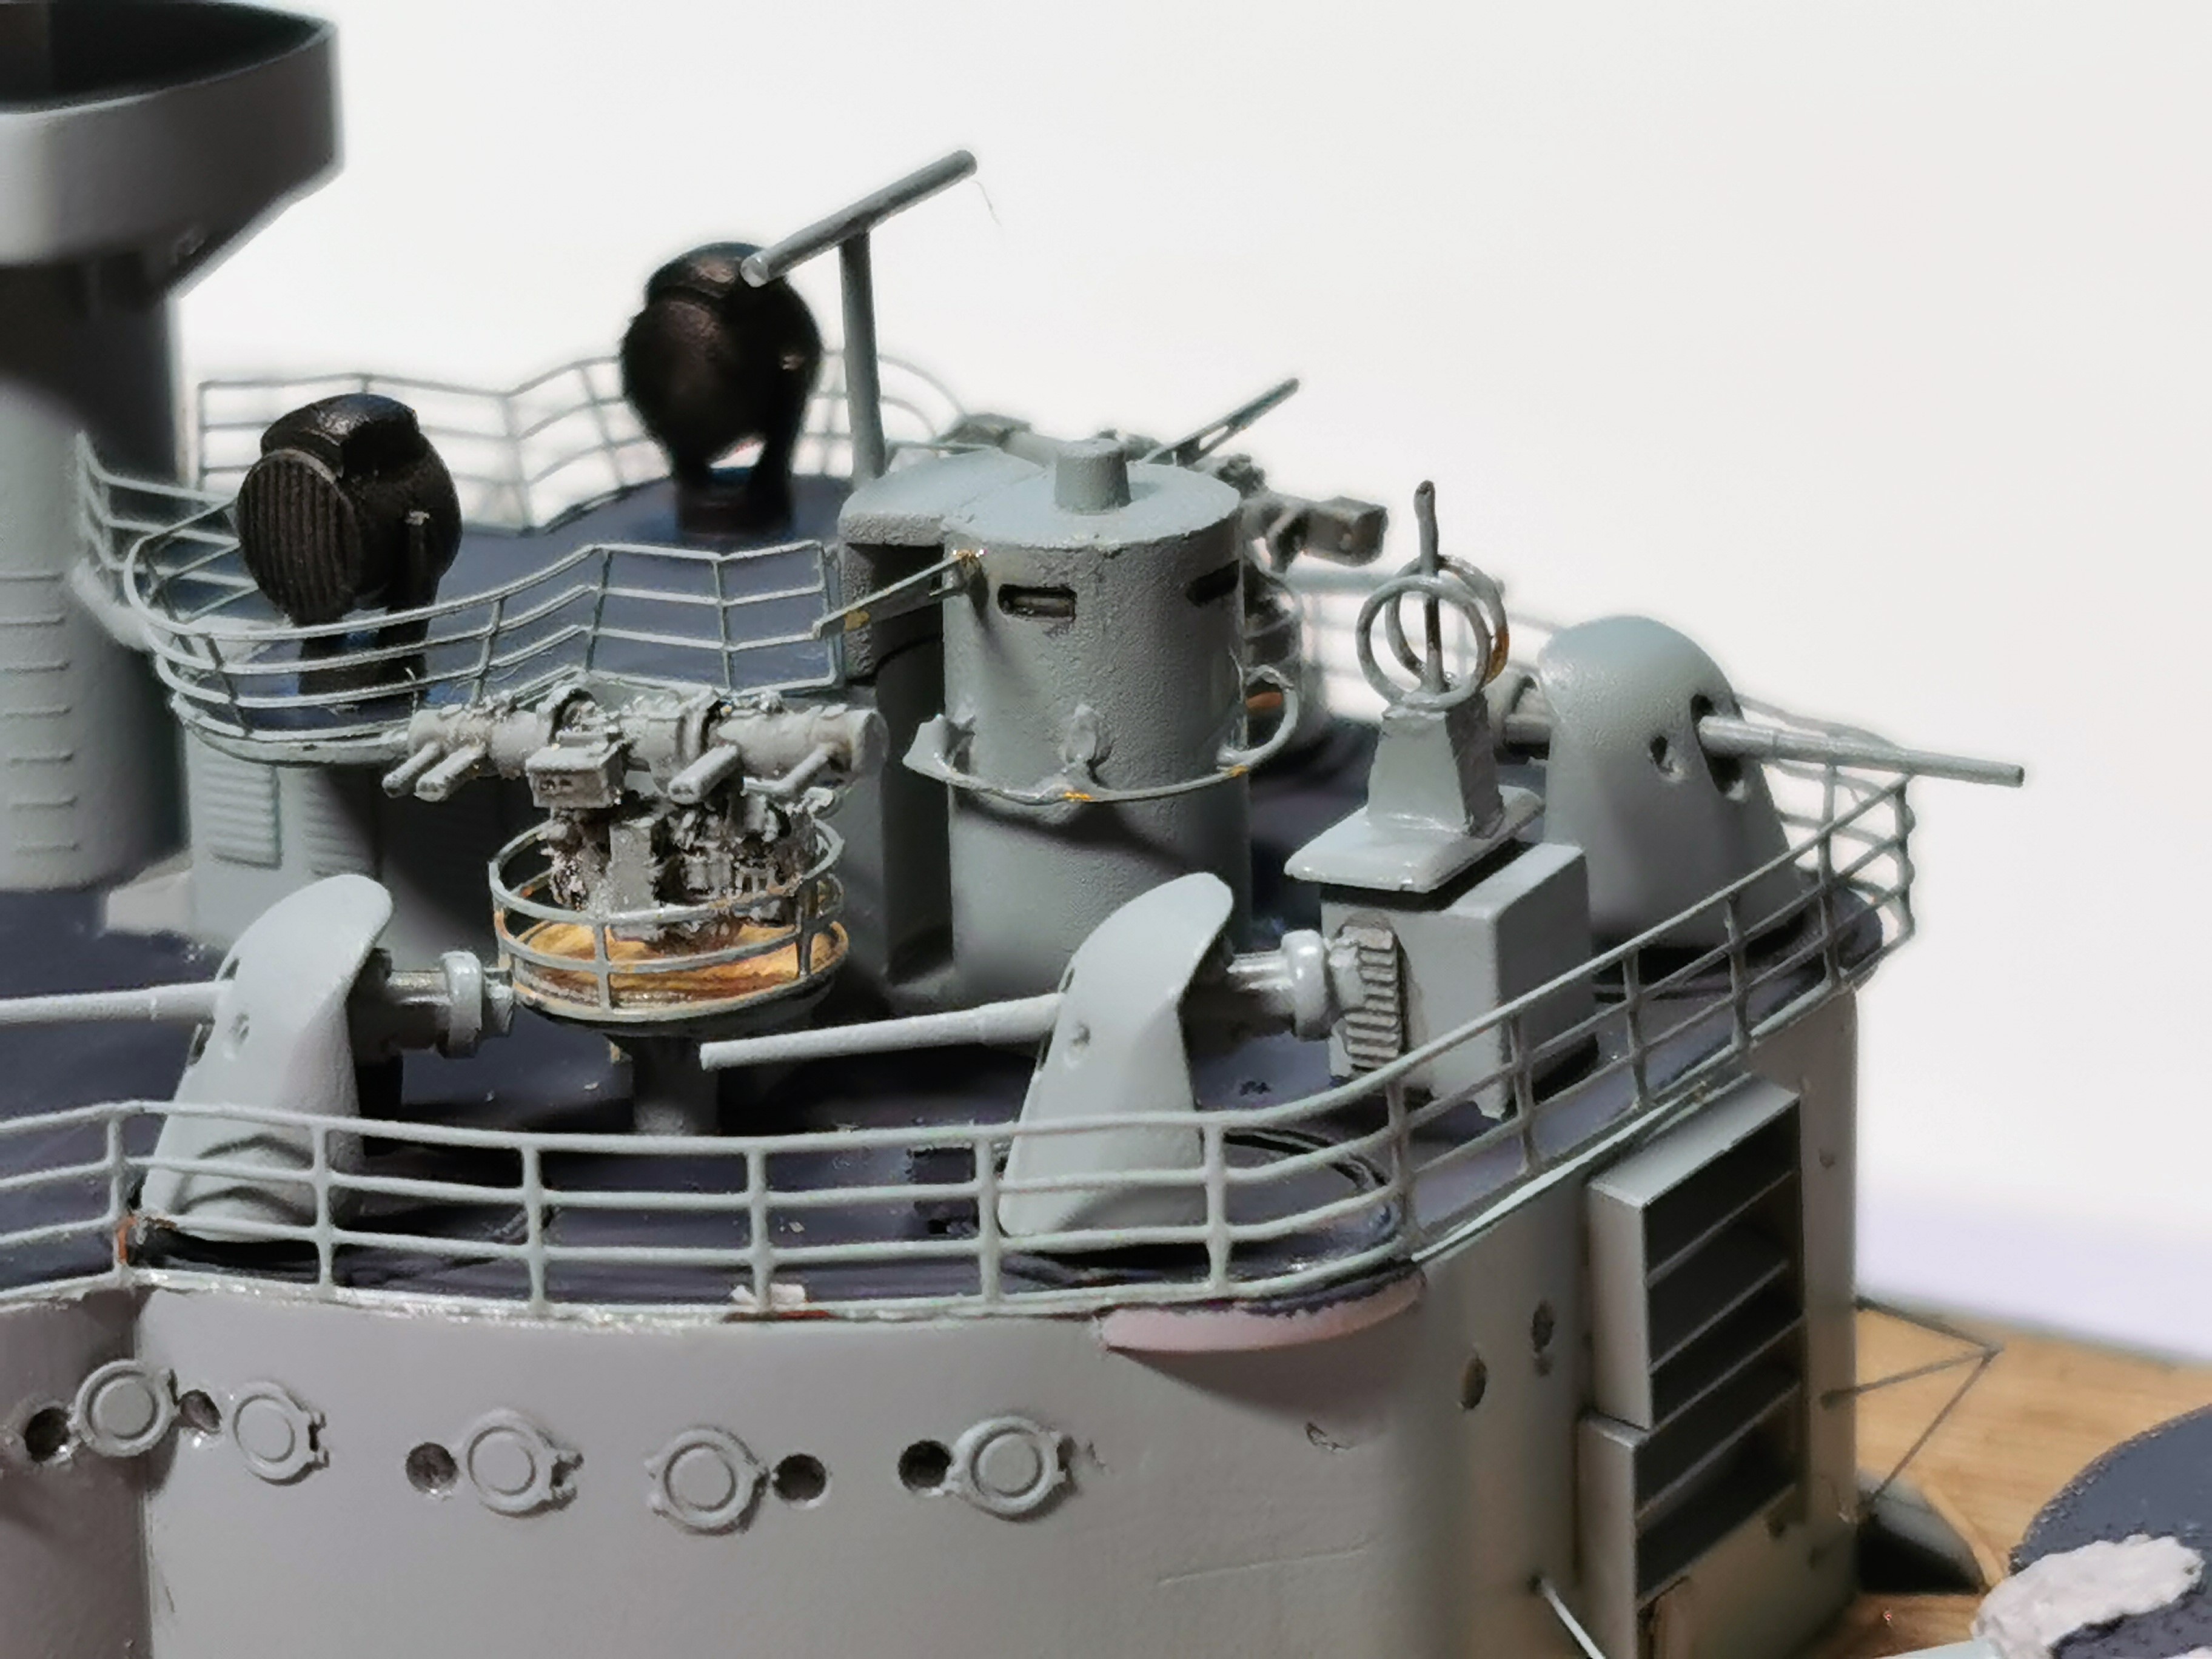
Then I finished the rangefinders together with their platforms. As these platforms had wooden floors I carved out the floor from spare real wood deck furniture from the ship´s deck. The rangefinder platforms actually had a small railing; regrettably neither TRUMPETER nor EDUARD provided these so I had to carve out of some spare railing but now everything looks right to me. After this I added some missing antennas and railings around the aft armored fire control station and the small superstructure in front of it - the railing aroung the armorded fire control station looks somewhat rough but it was very delicate, unleashed some cursing from my side but looks now ok with the normal eyeball mk1
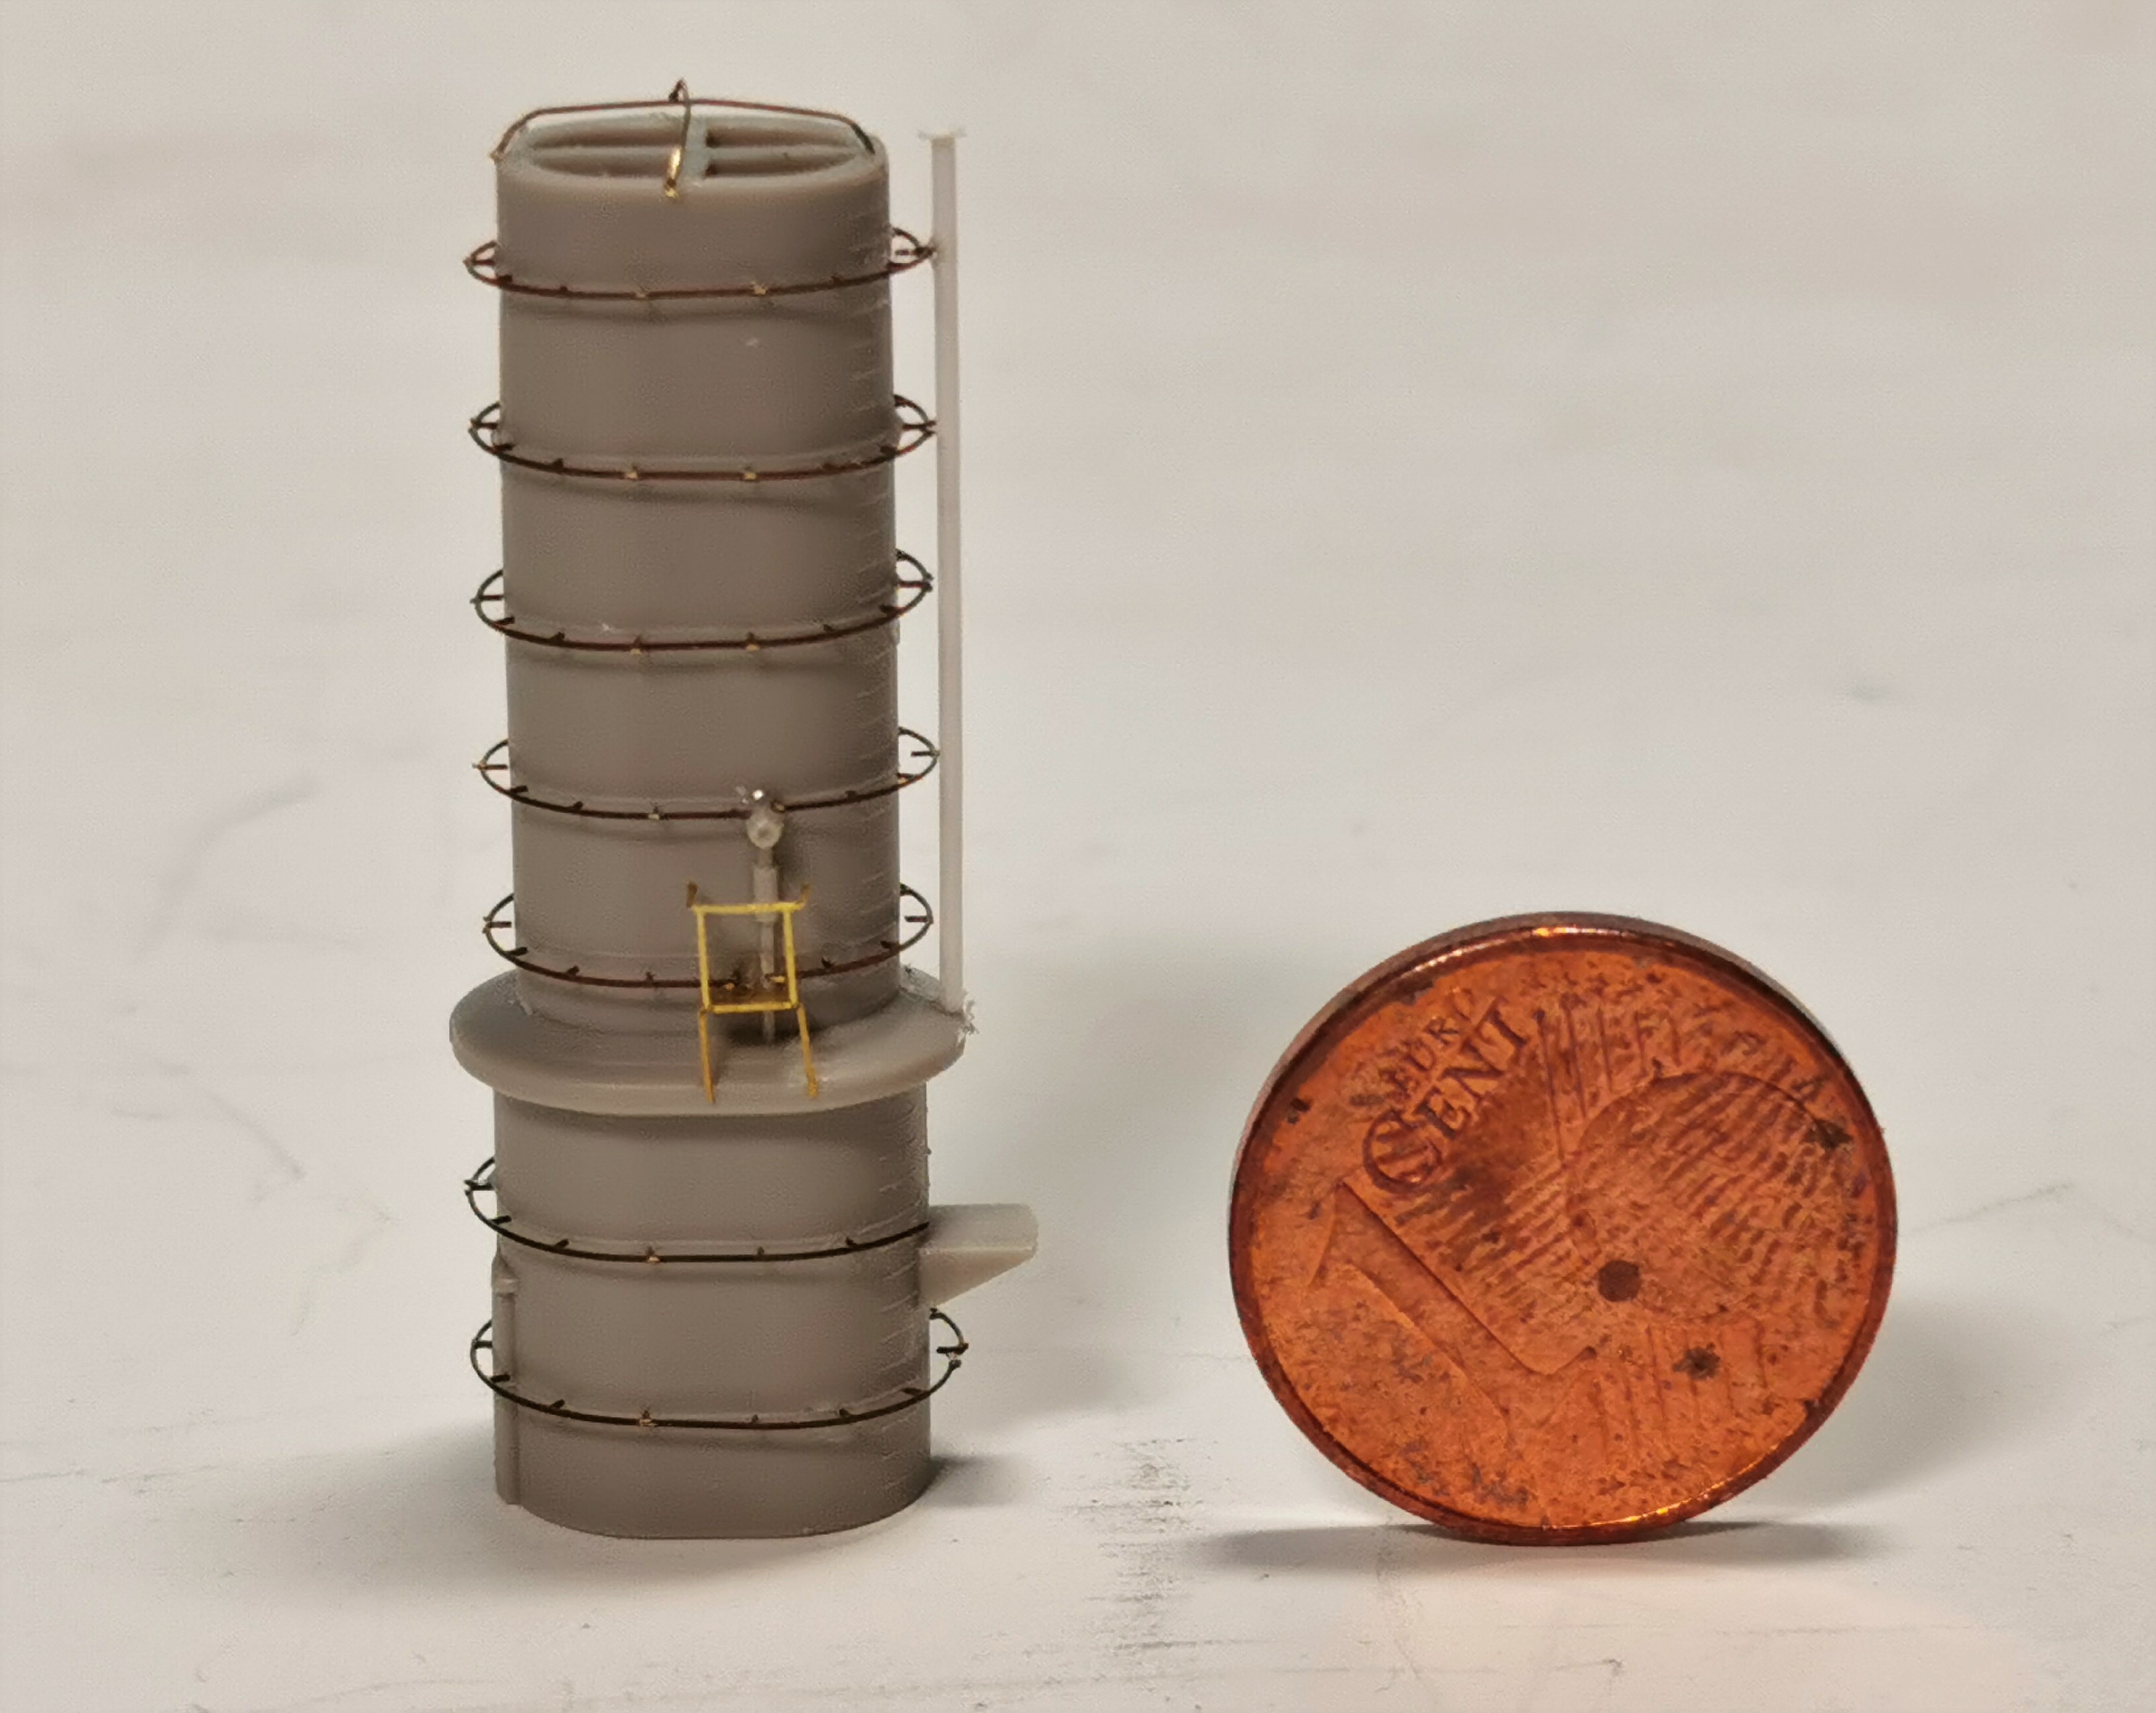
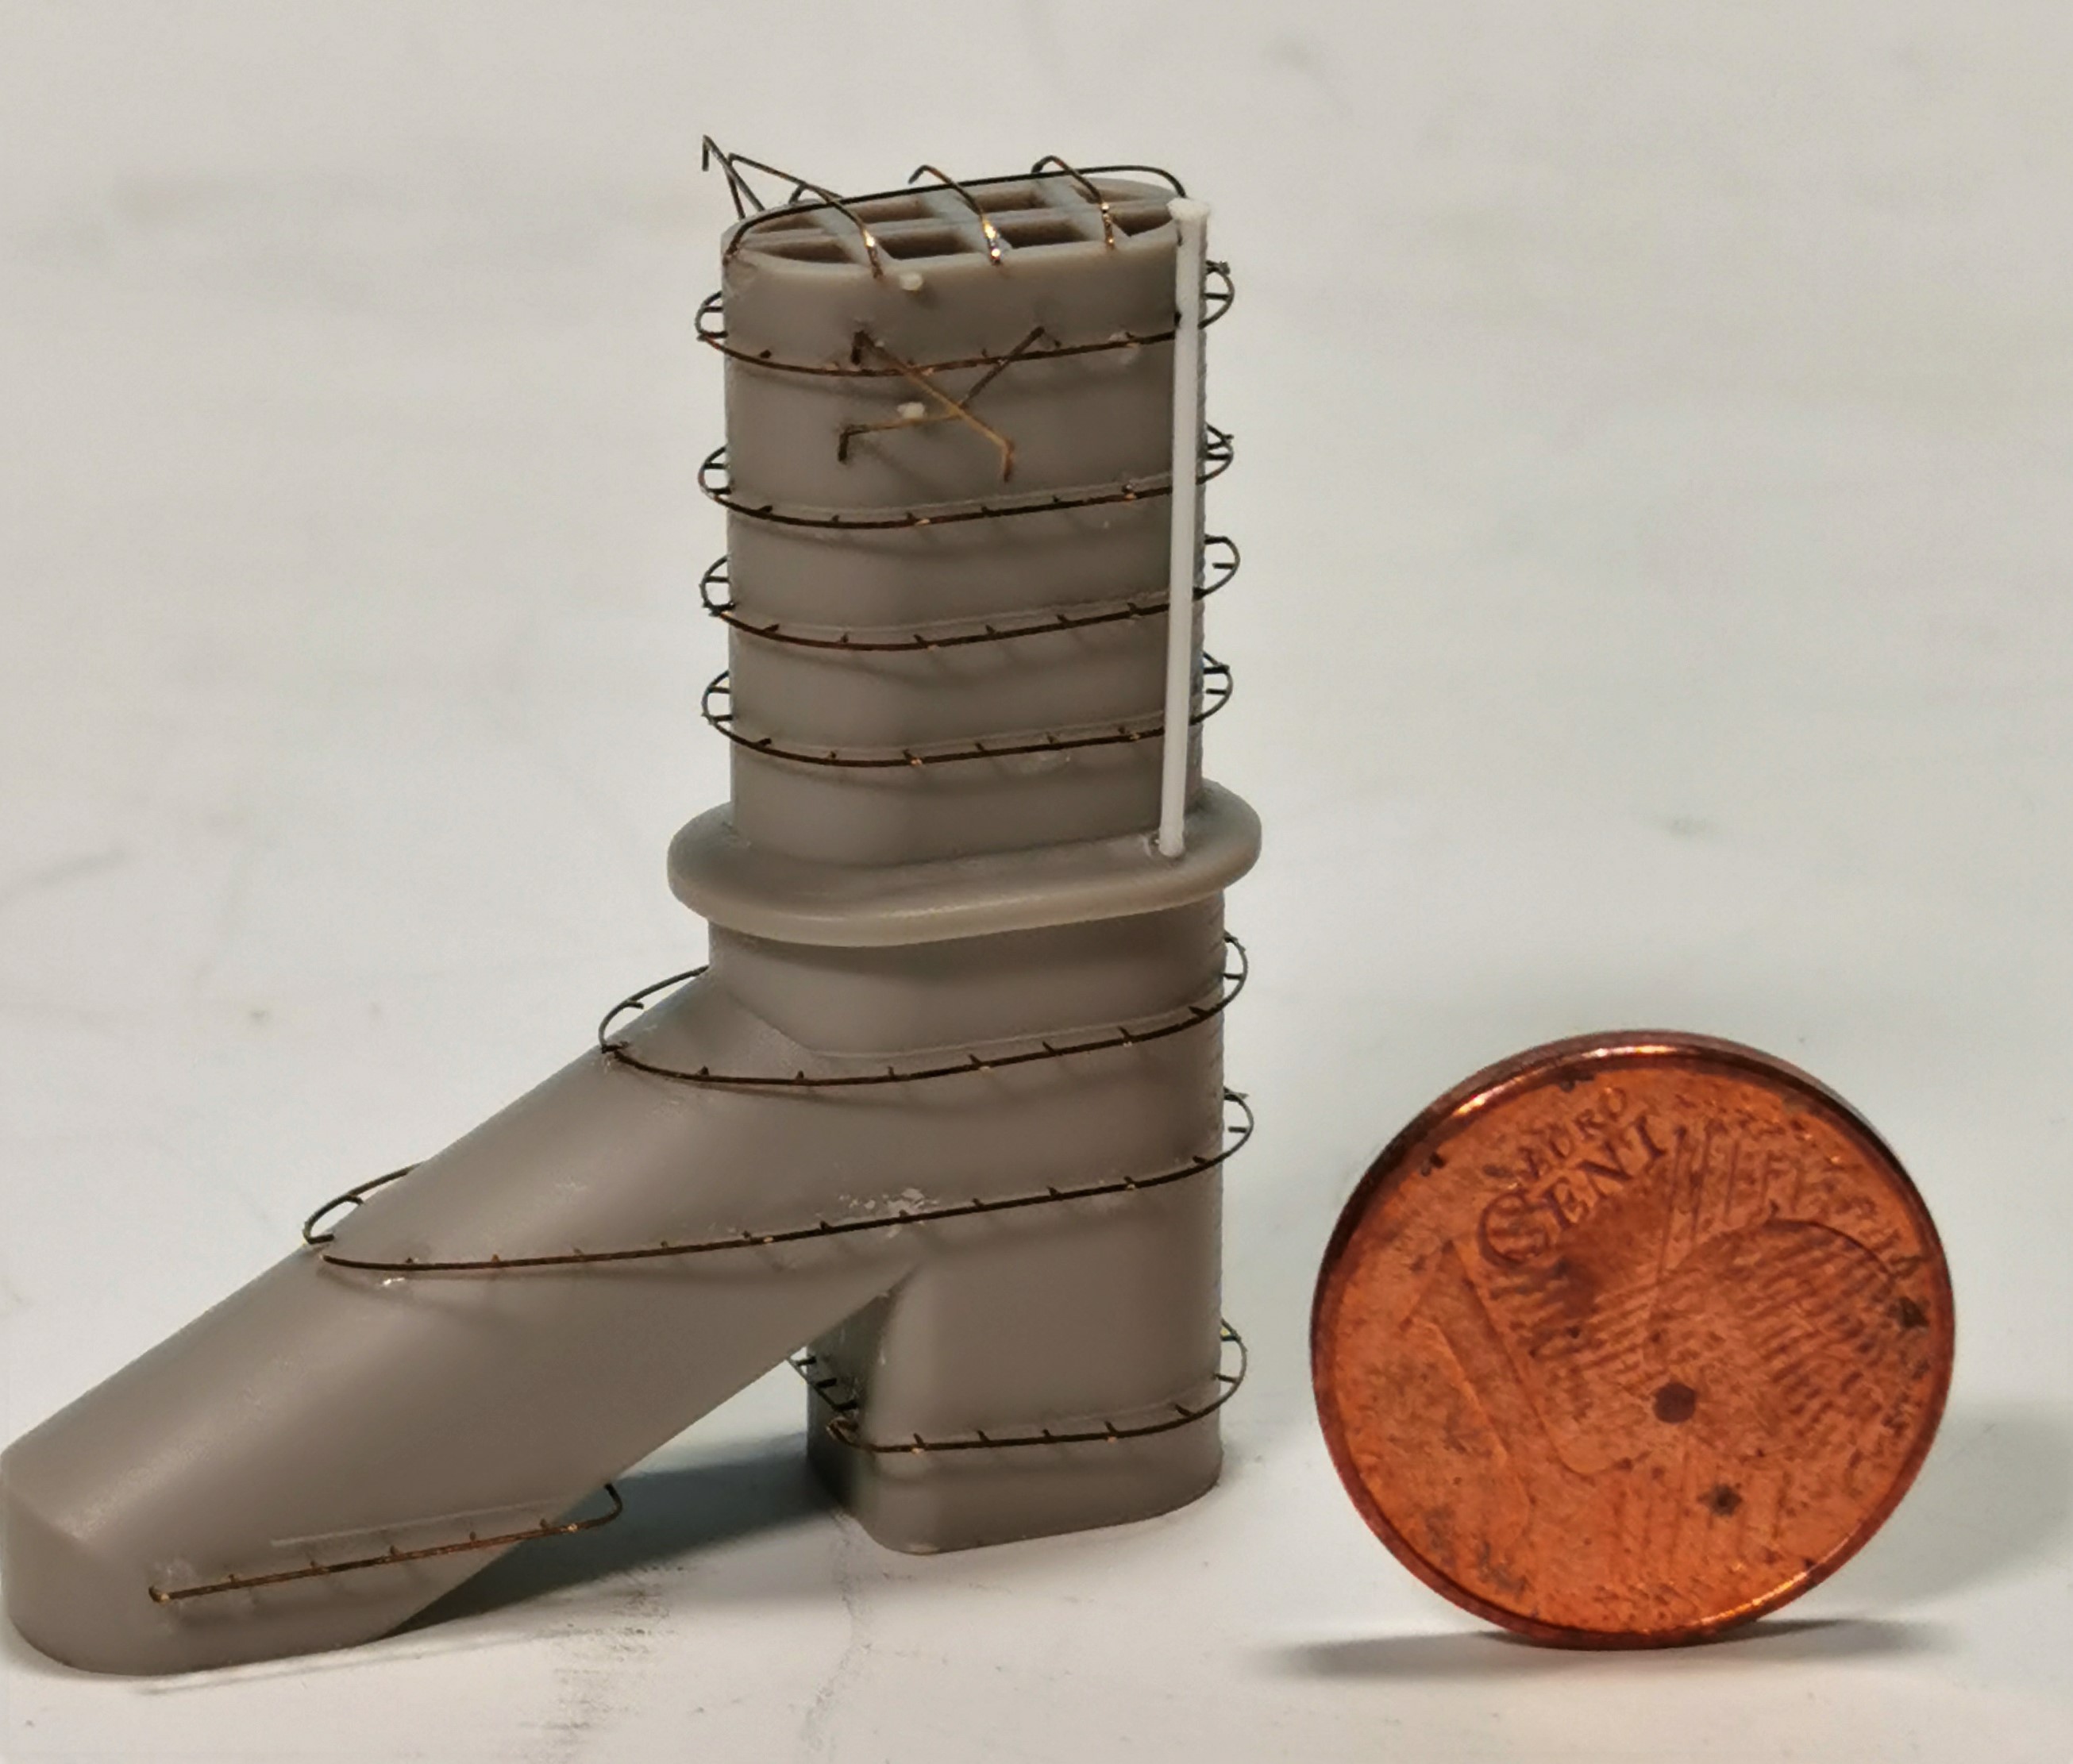
Then it was time to get started with the two funnels. Here I added all the fragile funnel railings (correct term for it?). Remembered me at my former SMS Emden build which had four funnels with railings. I´m glad here were just two but this time everything went very fast and without any catastrophy. My secret here is just using a pointed toothpick and attaching just a small drop of superglue for fixing the railings at all four sides. Painting these funnels will get tricky though as both funnels need to get painted in three different colors
Thats it so far. Glad you are all still here with me - don´t jump over board now as the lifeboats will just be build next now


Then I finished the rangefinders together with their platforms. As these platforms had wooden floors I carved out the floor from spare real wood deck furniture from the ship´s deck. The rangefinder platforms actually had a small railing; regrettably neither TRUMPETER nor EDUARD provided these so I had to carve out of some spare railing but now everything looks right to me. After this I added some missing antennas and railings around the aft armored fire control station and the small superstructure in front of it - the railing aroung the armorded fire control station looks somewhat rough but it was very delicate, unleashed some cursing from my side but looks now ok with the normal eyeball mk1

Then it was time to get started with the two funnels. Here I added all the fragile funnel railings (correct term for it?). Remembered me at my former SMS Emden build which had four funnels with railings. I´m glad here were just two but this time everything went very fast and without any catastrophy. My secret here is just using a pointed toothpick and attaching just a small drop of superglue for fixing the railings at all four sides. Painting these funnels will get tricky though as both funnels need to get painted in three different colors


Thats it so far. Glad you are all still here with me - don´t jump over board now as the lifeboats will just be build next now

Posted: Saturday, September 05, 2020 - 02:11 PM UTC
Thomas,
Nice work on creating those canvas covers for the railings. I will have to try using Krystal Clear next time.
Those railings around the funnels looks great. That is one job I never enjoy is getting them install correctly. Your build is really shaping up nicely.
Mark
Nice work on creating those canvas covers for the railings. I will have to try using Krystal Clear next time.
Those railings around the funnels looks great. That is one job I never enjoy is getting them install correctly. Your build is really shaping up nicely.
Mark


Black_sheep

Joined: December 11, 2009
KitMaker: 823 posts
Model Shipwrights: 551 posts

Posted: Saturday, September 05, 2020 - 11:39 PM UTC
Quoted Text
Thomas,
Nice work on creating those canvas covers for the railings. I will have to try using Krystal Clear next time.
Those railings around the funnels looks great. That is one job I never enjoy is getting them install correctly. Your build is really shaping up nicely.
Mark
I can really recommend KRISTAL KLEAR as it can be used not just for simulating glass windows as also for realistic canvas. When your paint it outside you can still see the railing in its color which looks very realistic.
Funnel railings are really no fun but I´m glad somehow this time it went smoothly


Black_sheep

Joined: December 11, 2009
KitMaker: 823 posts
Model Shipwrights: 551 posts

Posted: Saturday, September 05, 2020 - 11:46 PM UTC
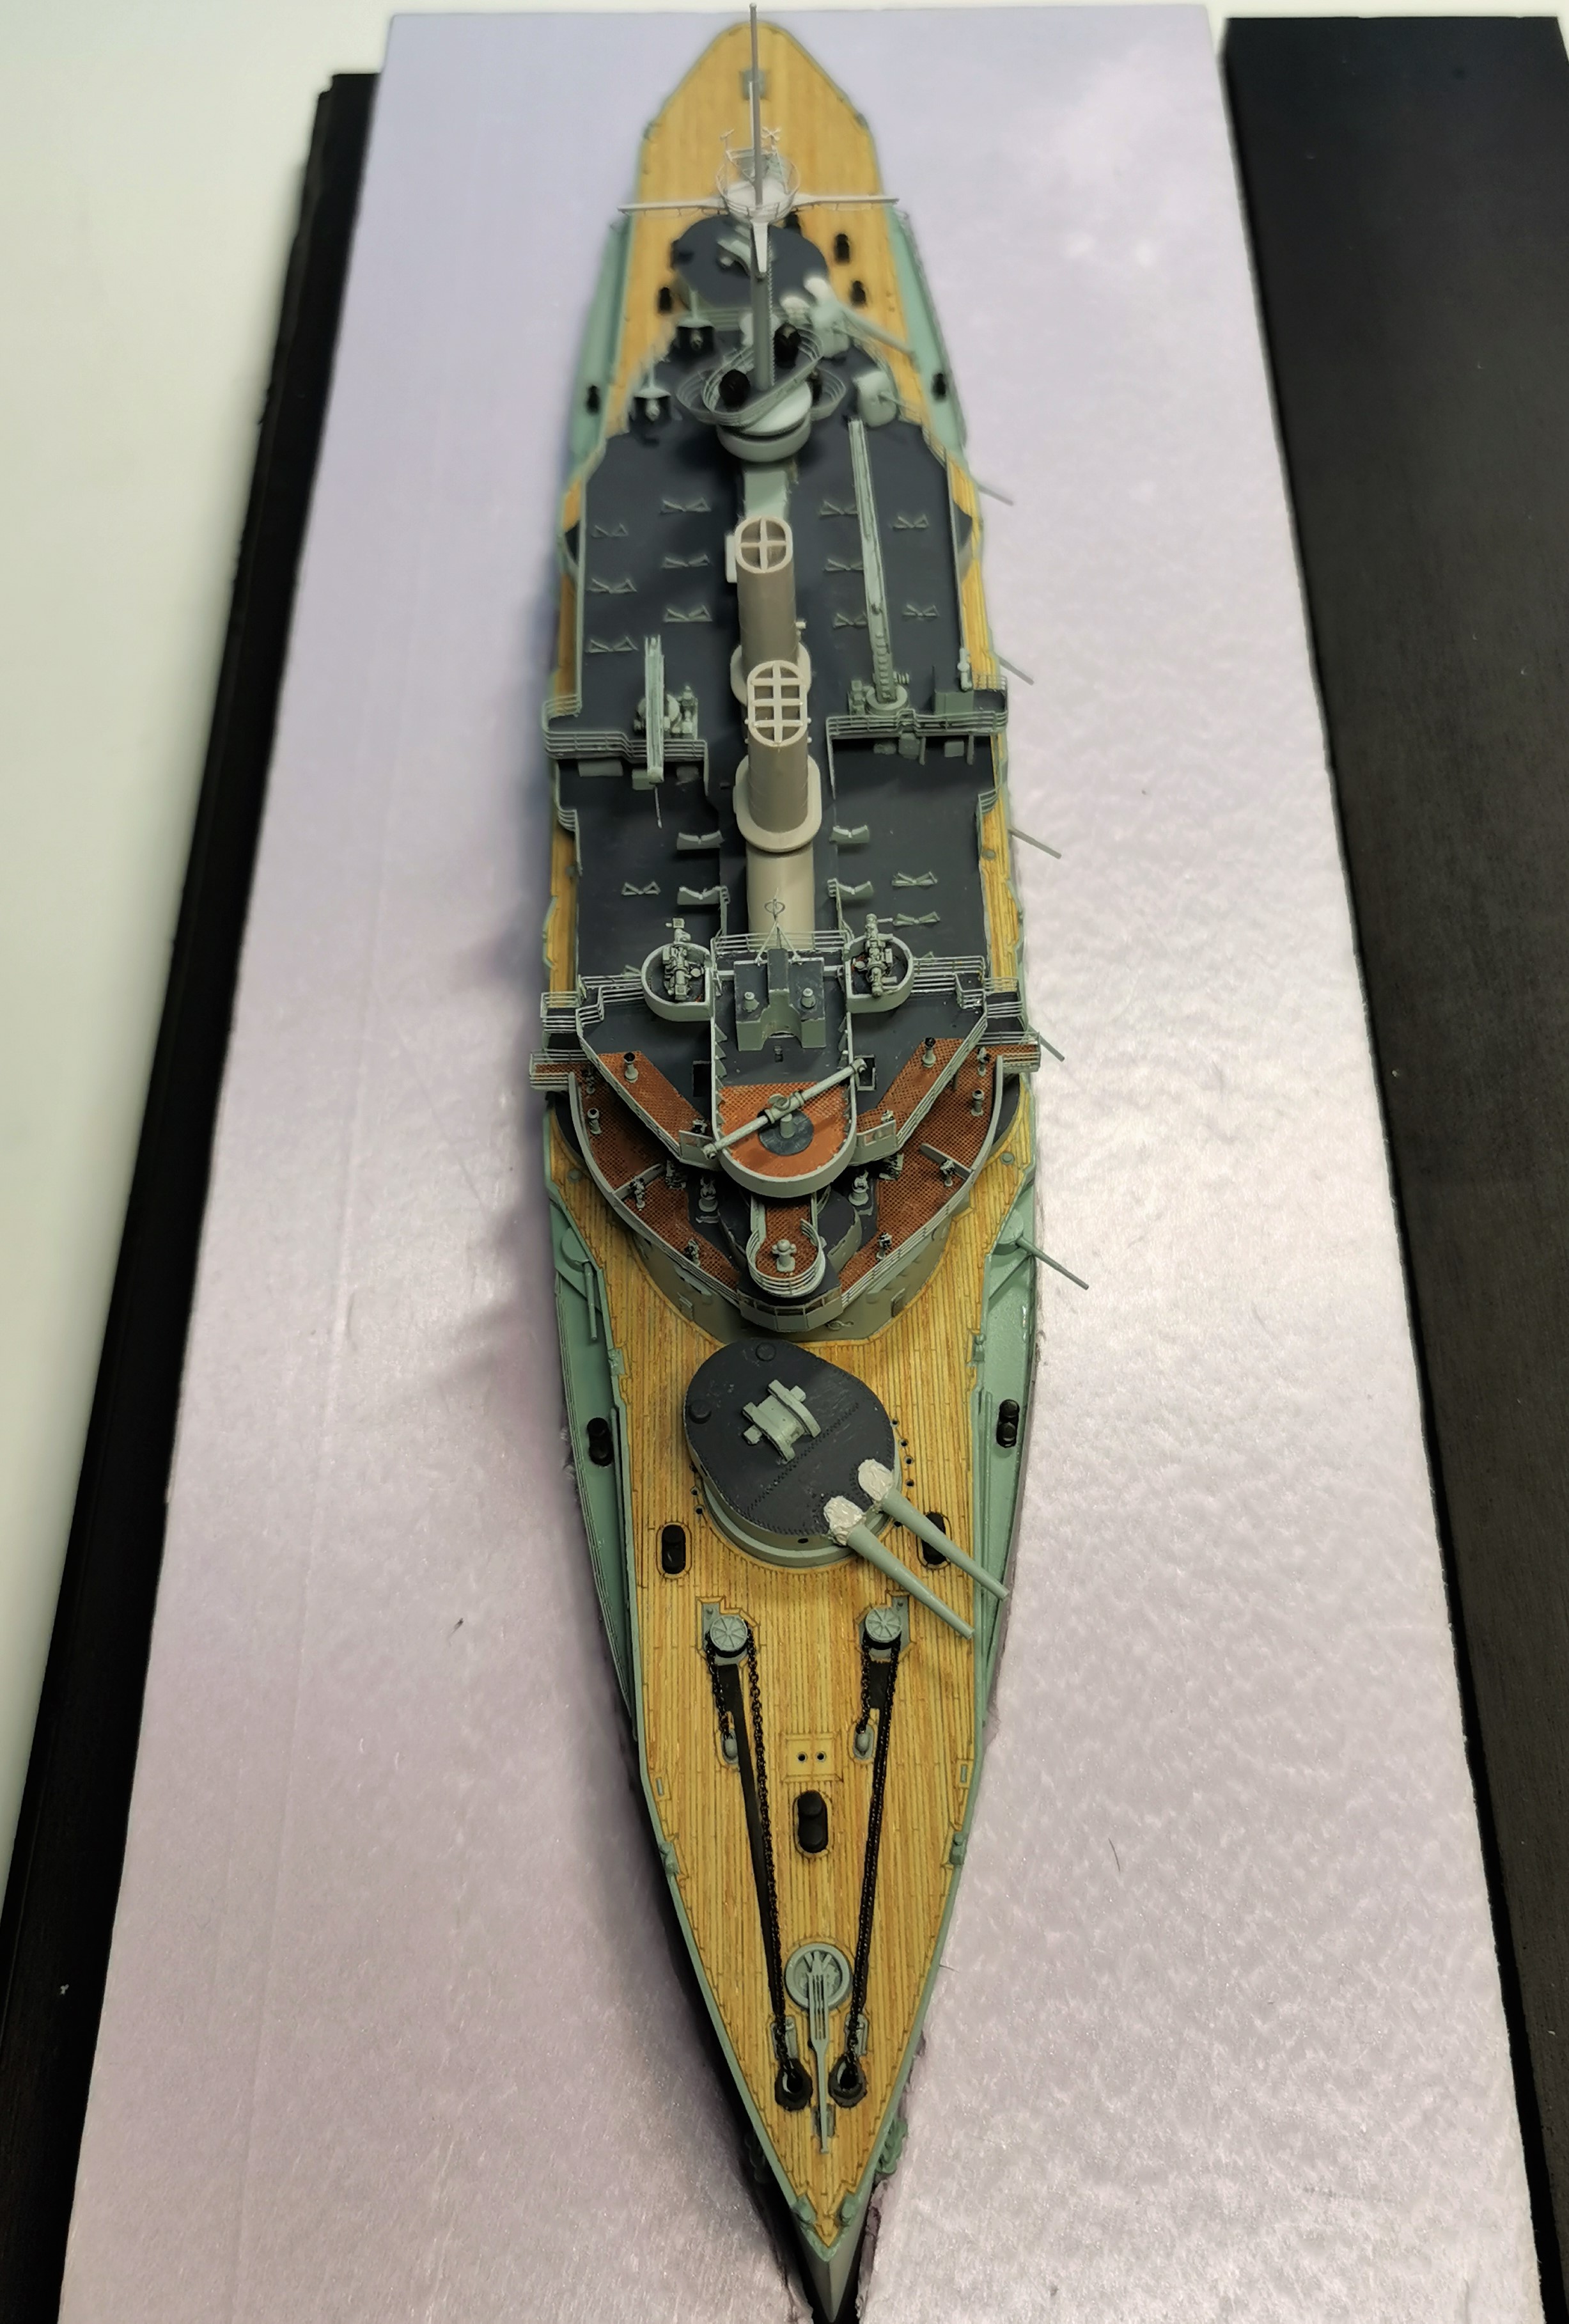
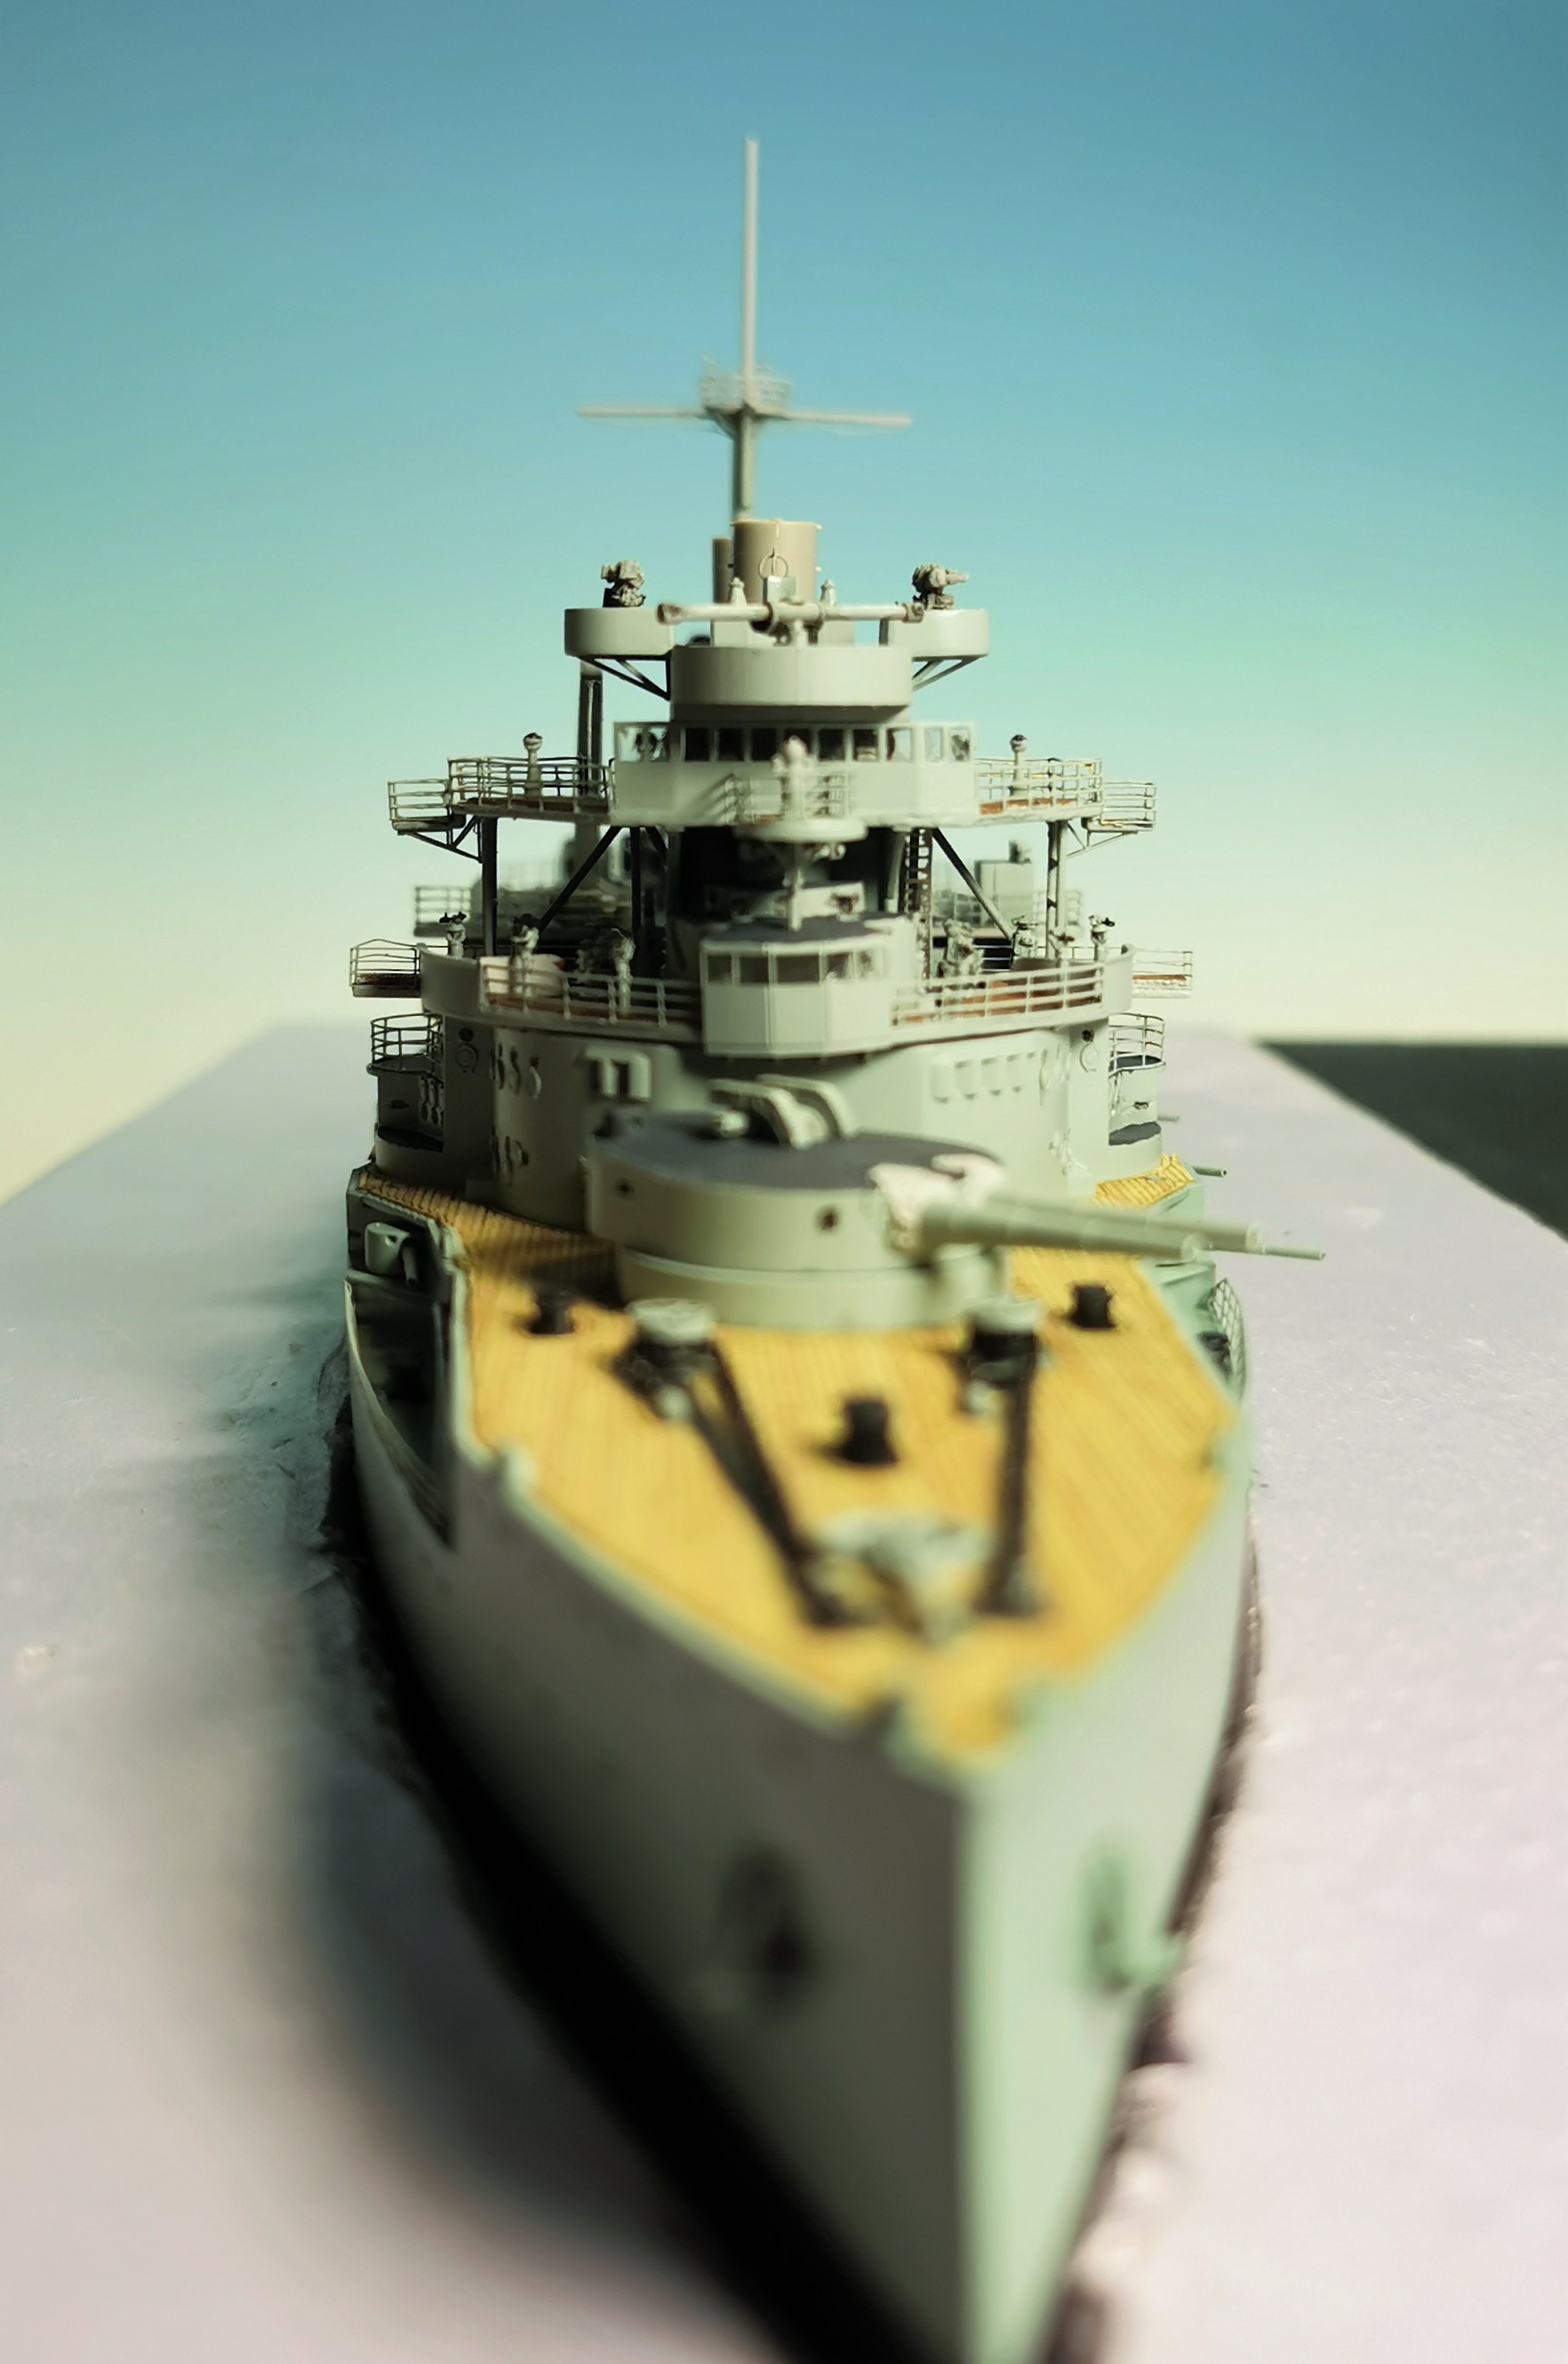
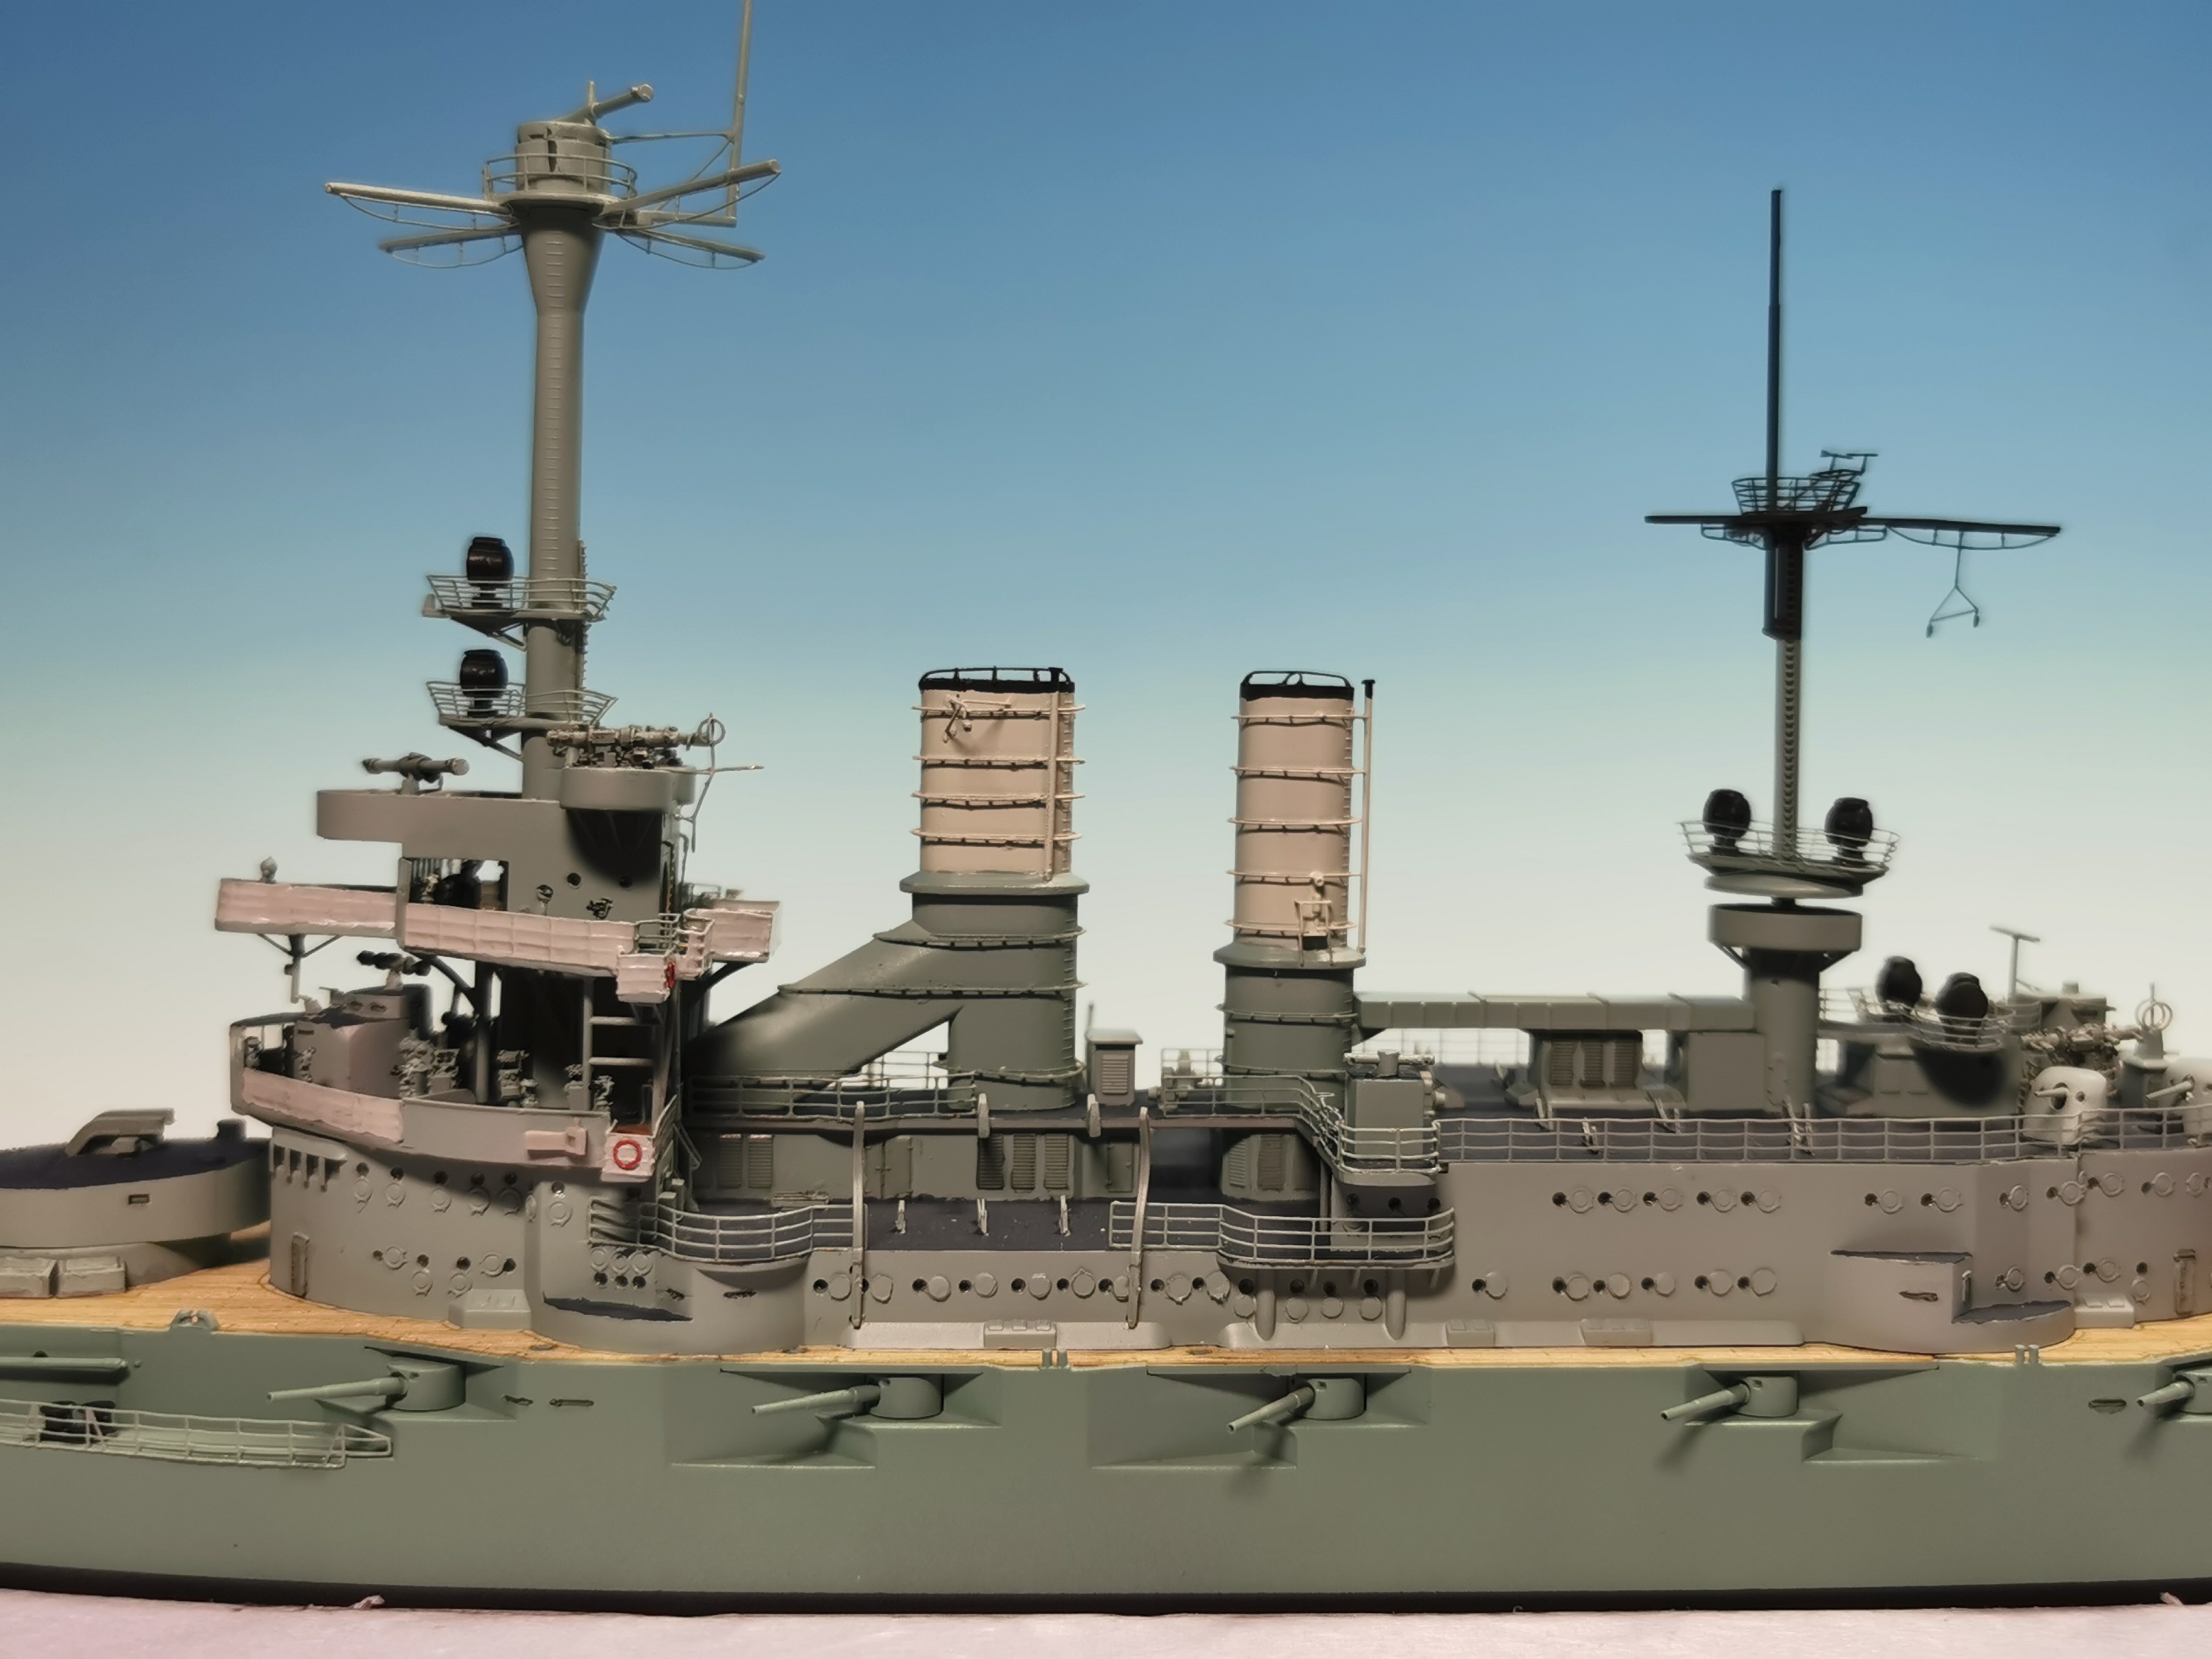
Finally the funnels ar painted in its apropriate three color tone light grey - even lighter grey and black atop. All without hassles and so I was able to fix them forever at the ship´s superstructure. The stern upper mast part was also painted black and glued onto the observation platform
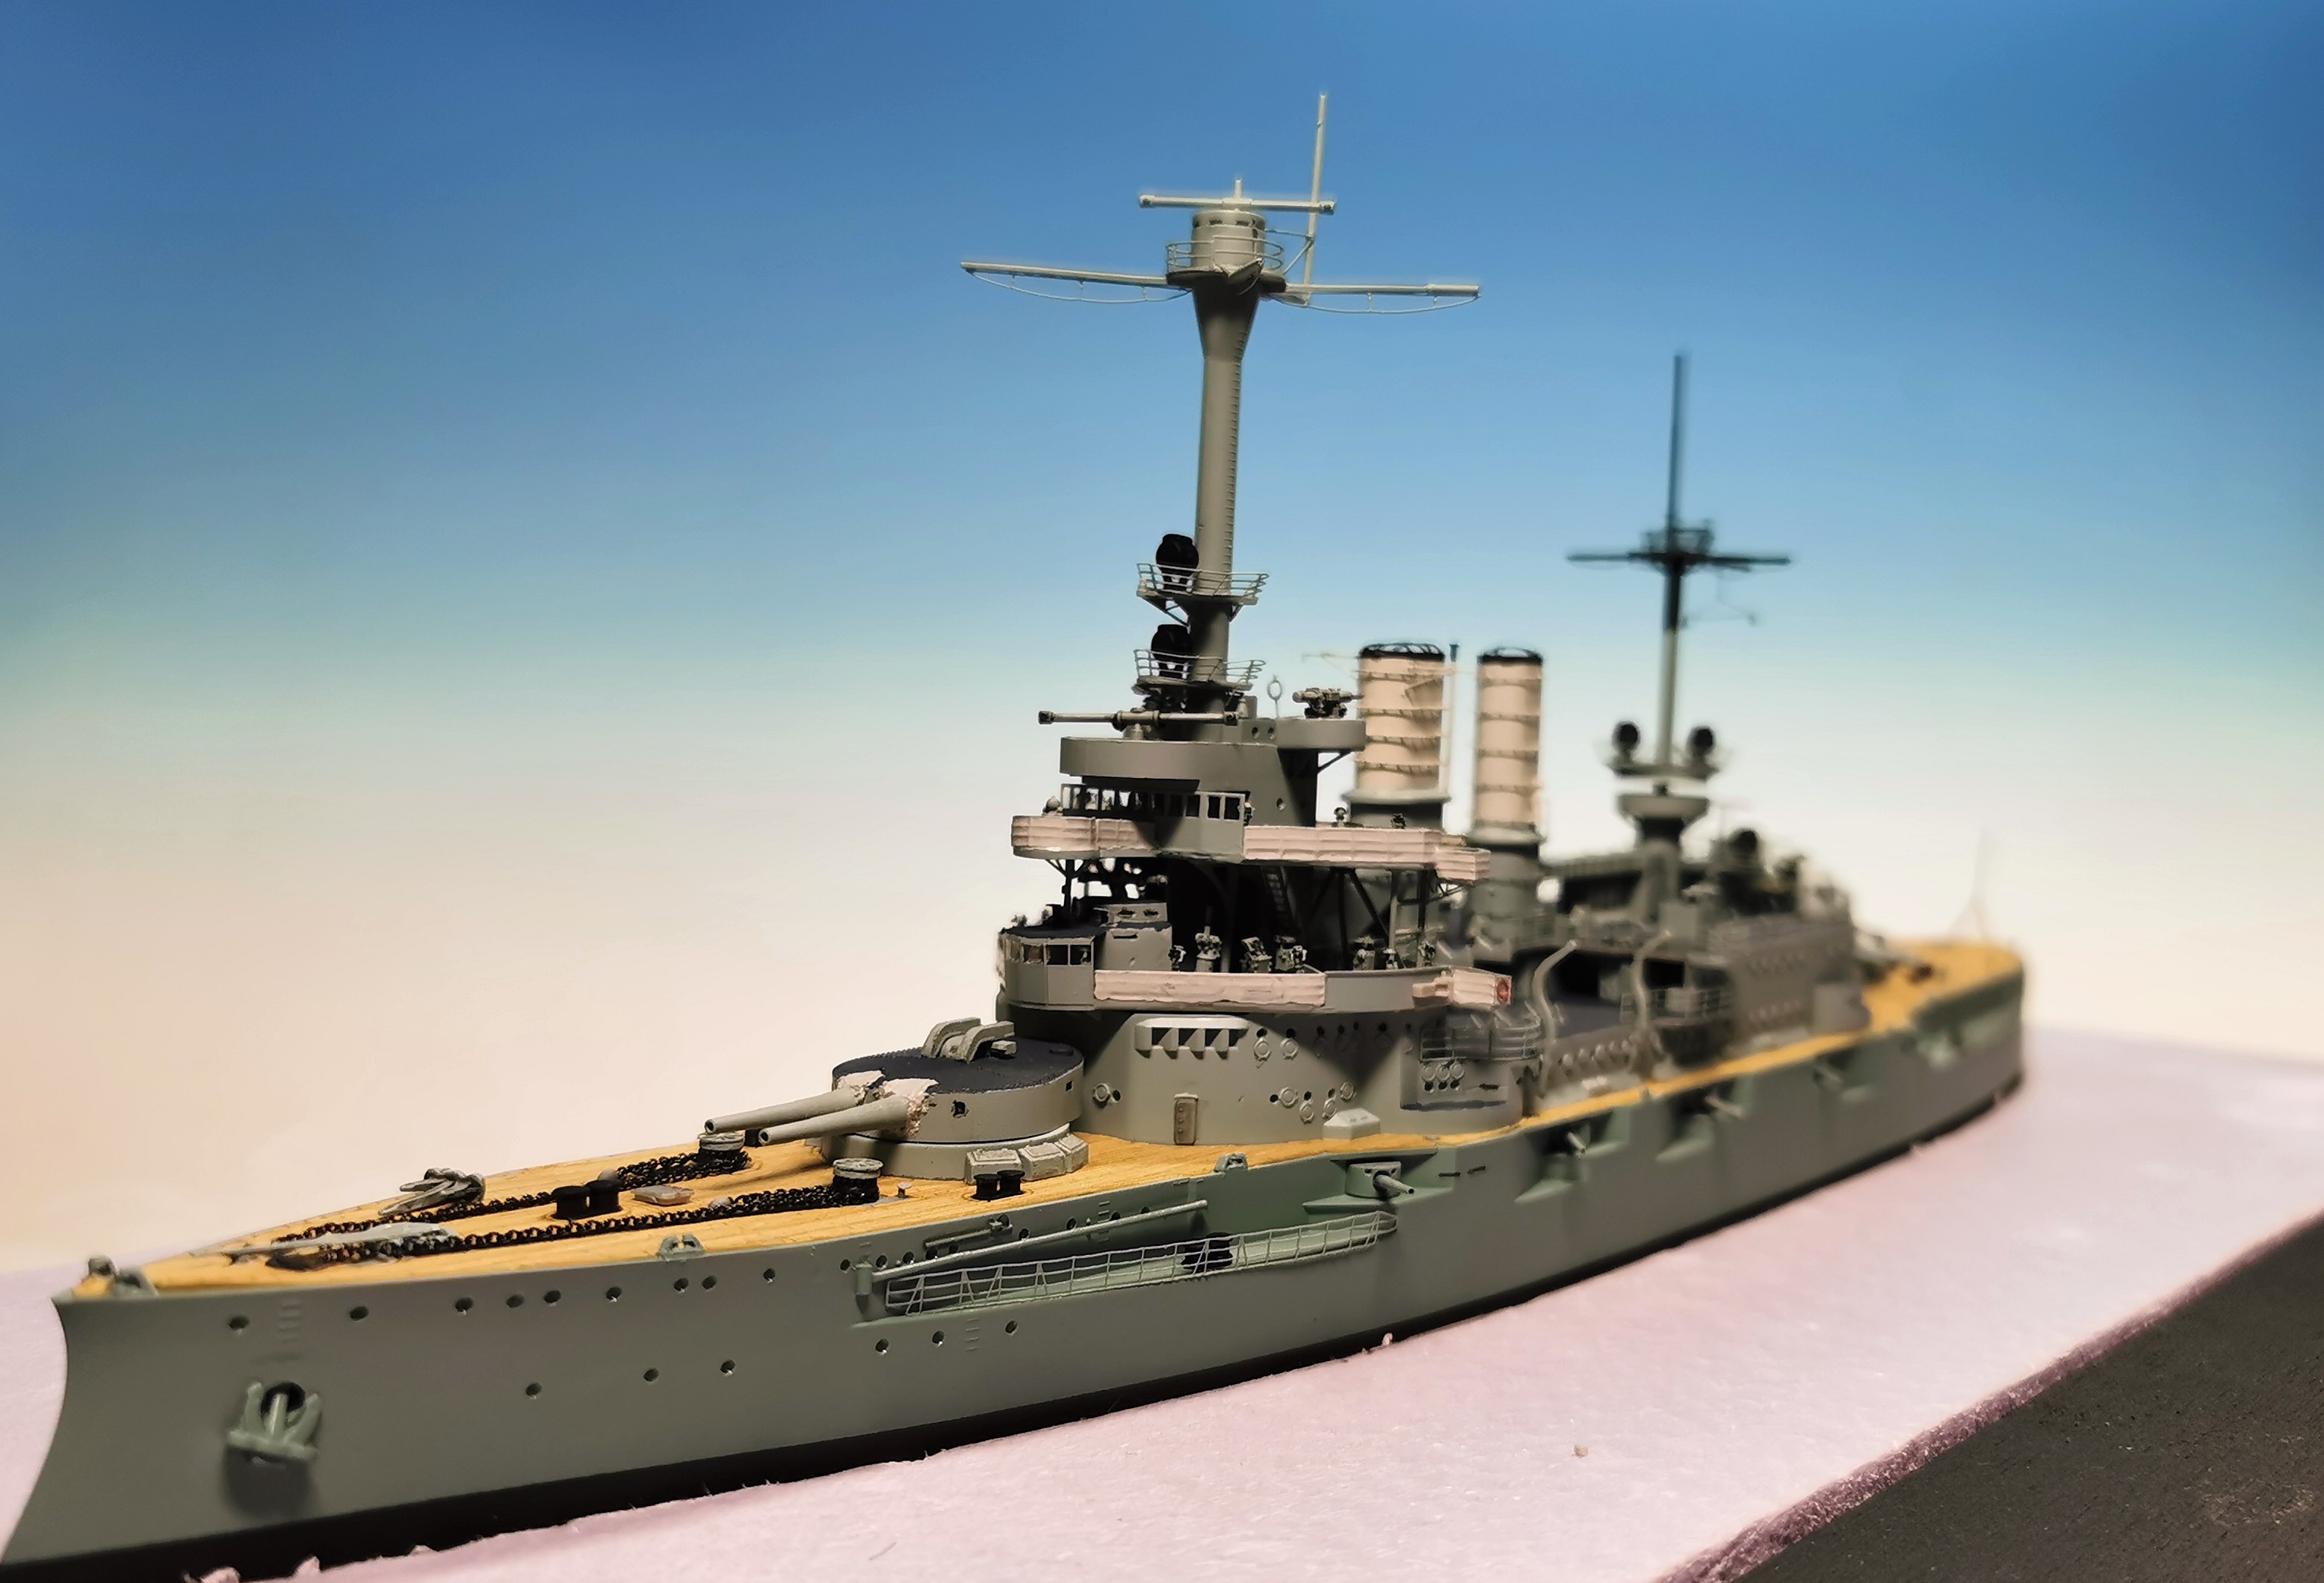
Now there are the hull´s railings coming next, then the "Fahrwasseranzeiger" (don´t know the proper name in english - these red and green signals behind the aft mast which are signalling following ships when the formation will turn simultanious


Now there are the hull´s railings coming next, then the "Fahrwasseranzeiger" (don´t know the proper name in english - these red and green signals behind the aft mast which are signalling following ships when the formation will turn simultanious

Posted: Sunday, September 06, 2020 - 12:55 AM UTC
Thomas,
Nice, looks like you are approaching the finish line.
Mark
Nice, looks like you are approaching the finish line.
Mark


Black_sheep

Joined: December 11, 2009
KitMaker: 823 posts
Model Shipwrights: 551 posts

Posted: Wednesday, September 09, 2020 - 07:48 AM UTC
Now I made the  how is the "Fahrwasseranzeiger" called in english? As far as I remember it is the signal which shows following ships in a column what heading the ship in front is going during radio silence. Please correct me if I´m wrong - and I would be glad if you tell me its technical term in english.
Eduard made the upper beam but the cones had to be selfmade out of evergreen rod. The lower beams at the observation platform were made out of bended metal rod. This is how it looks now:
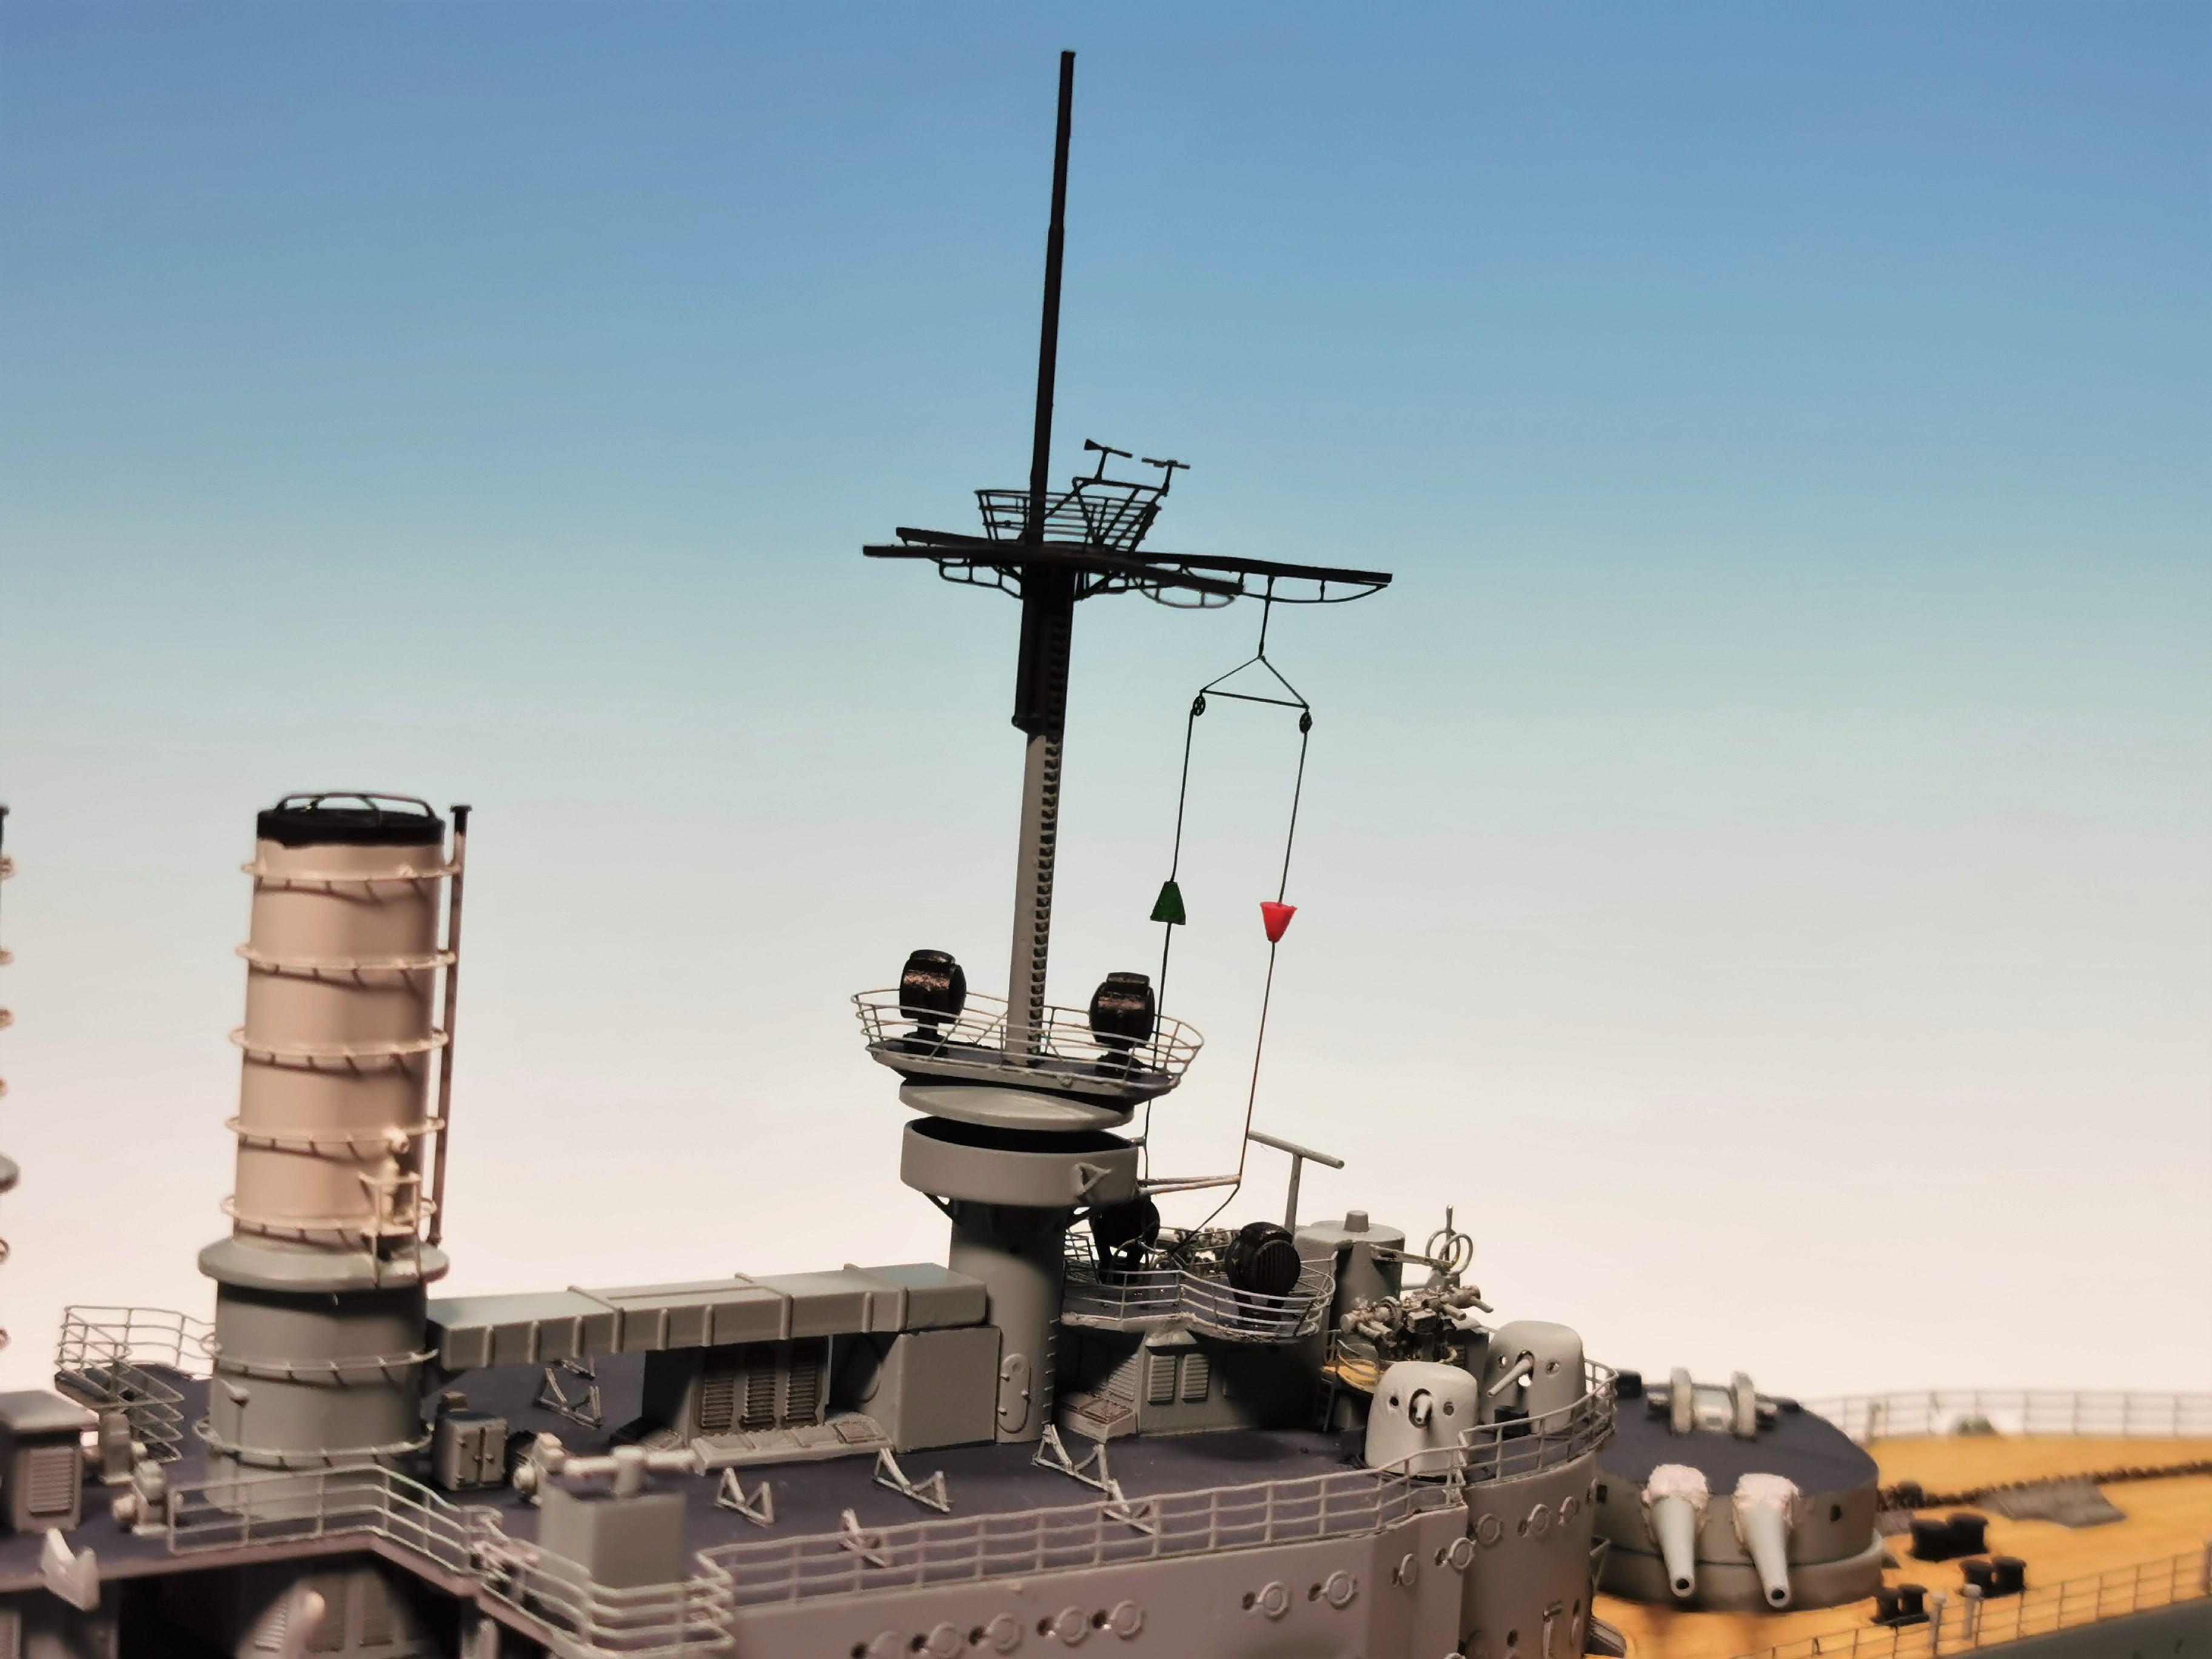
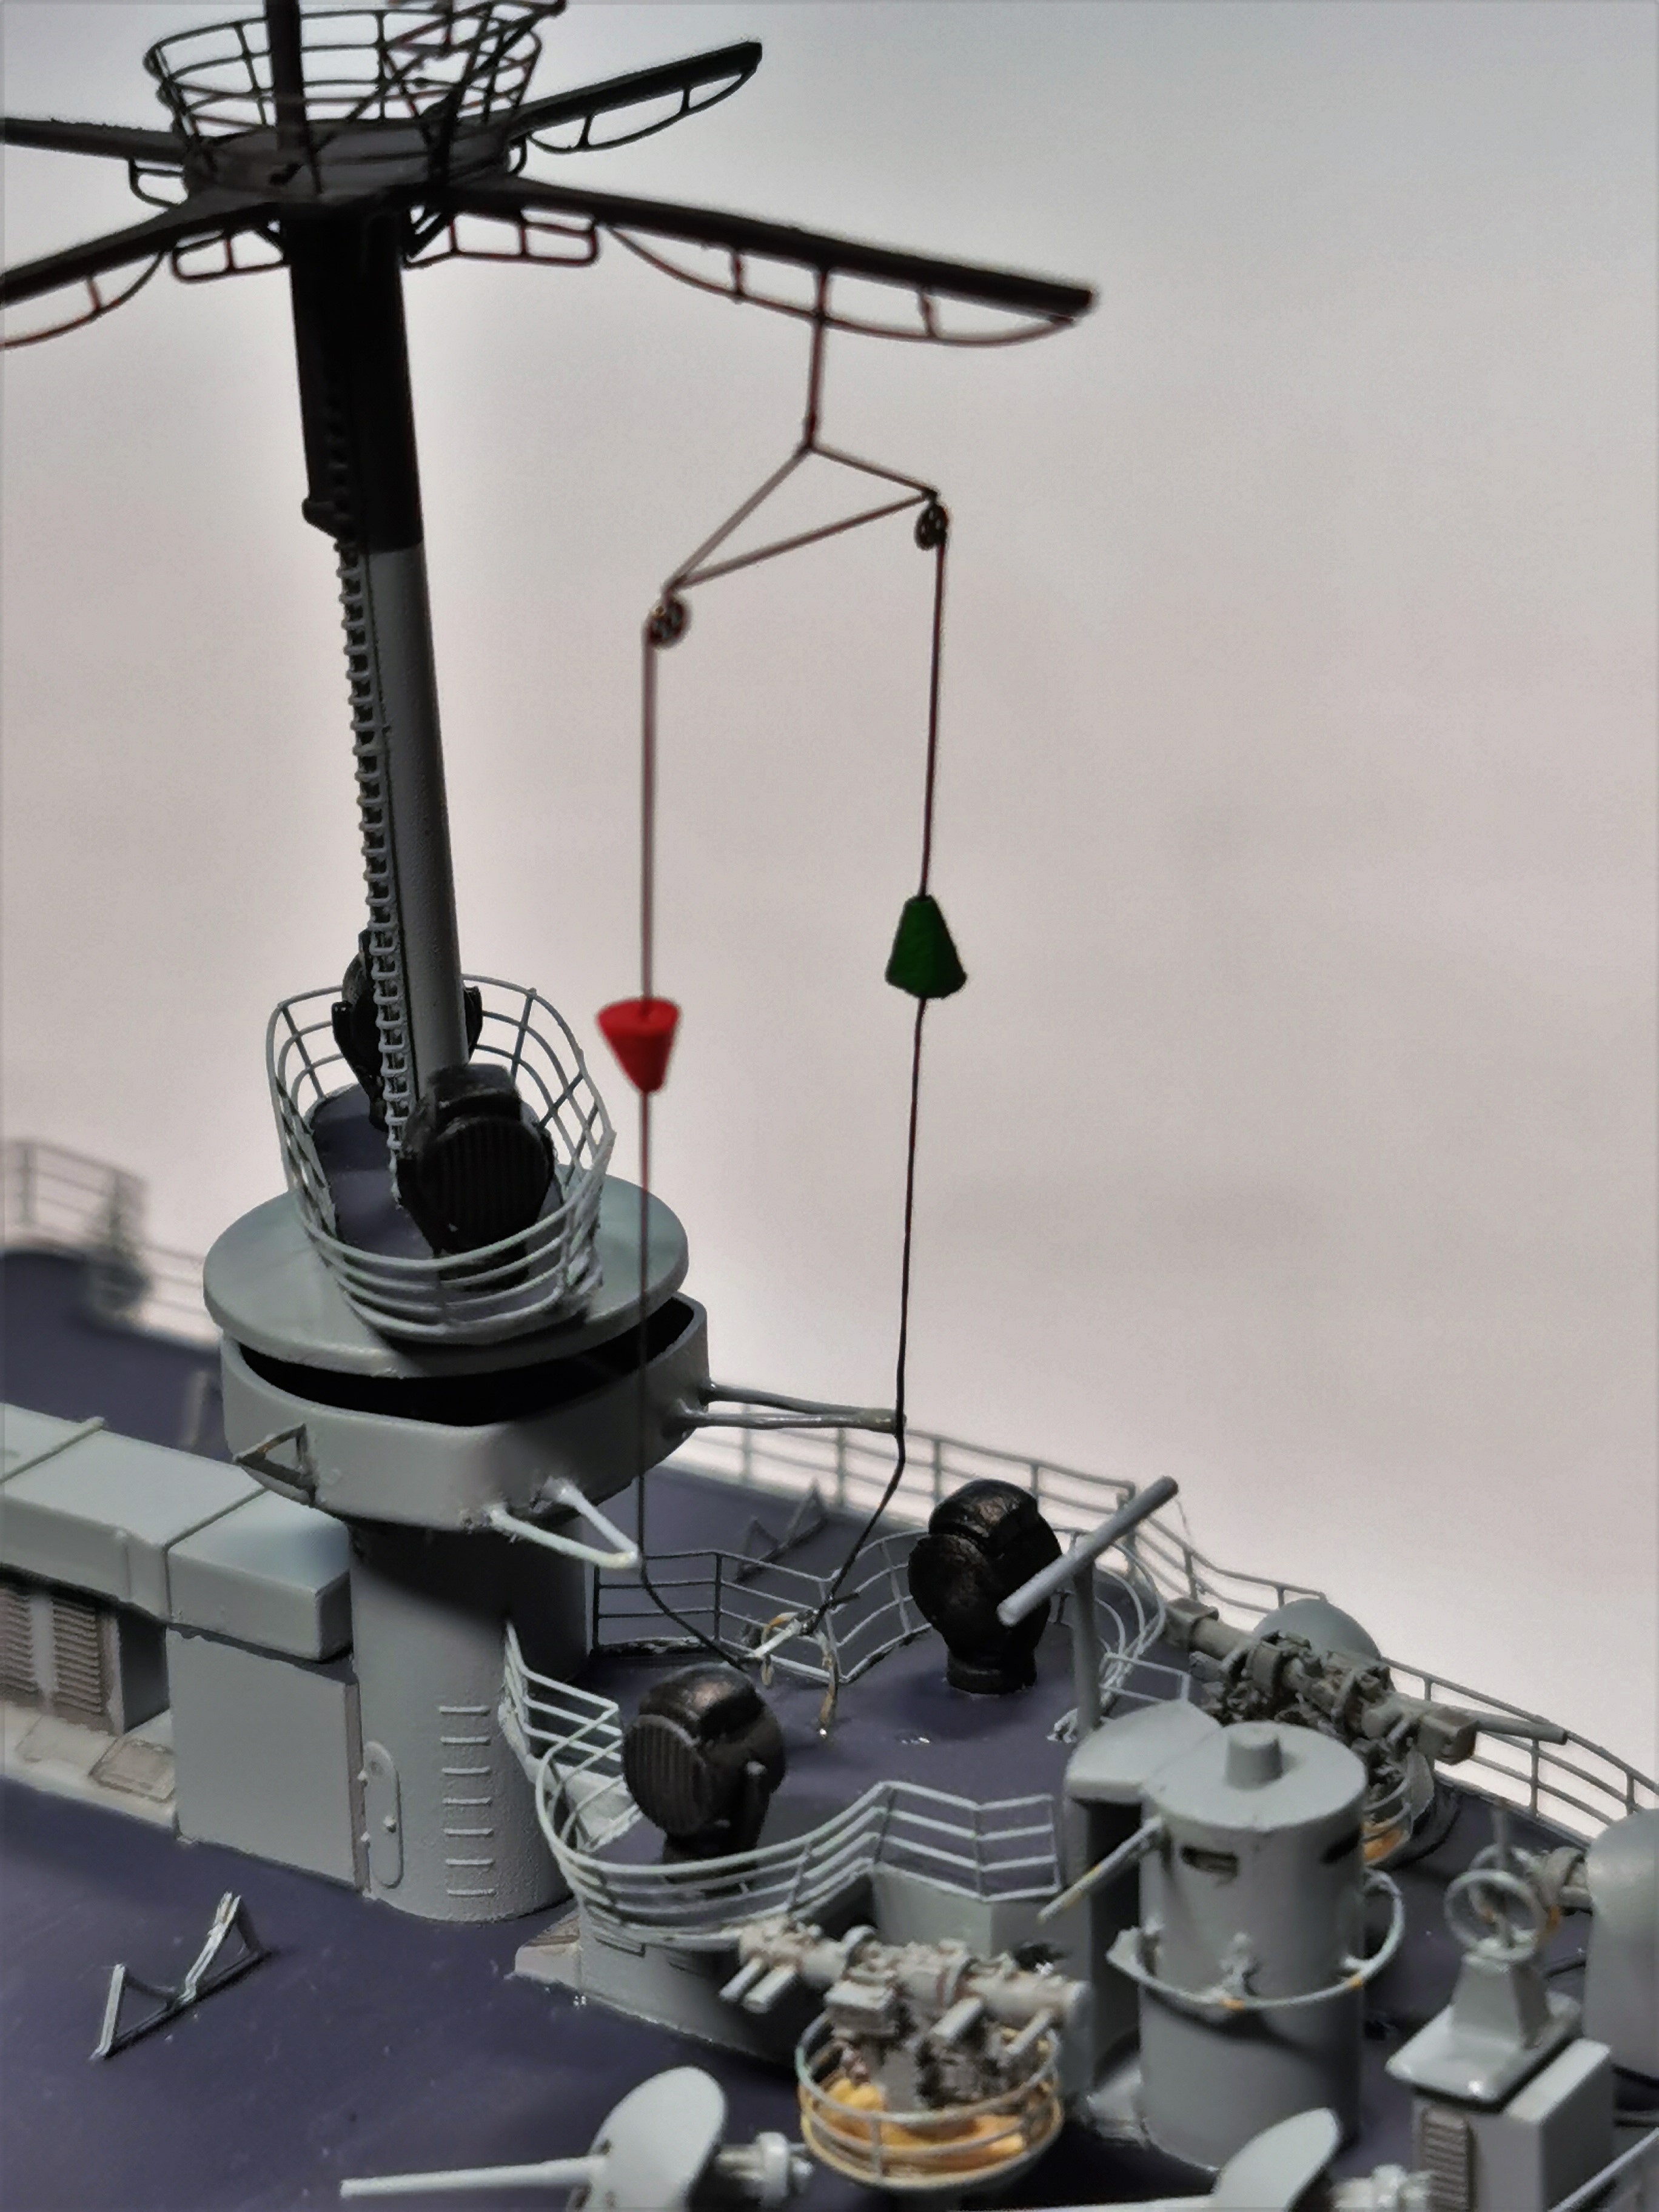
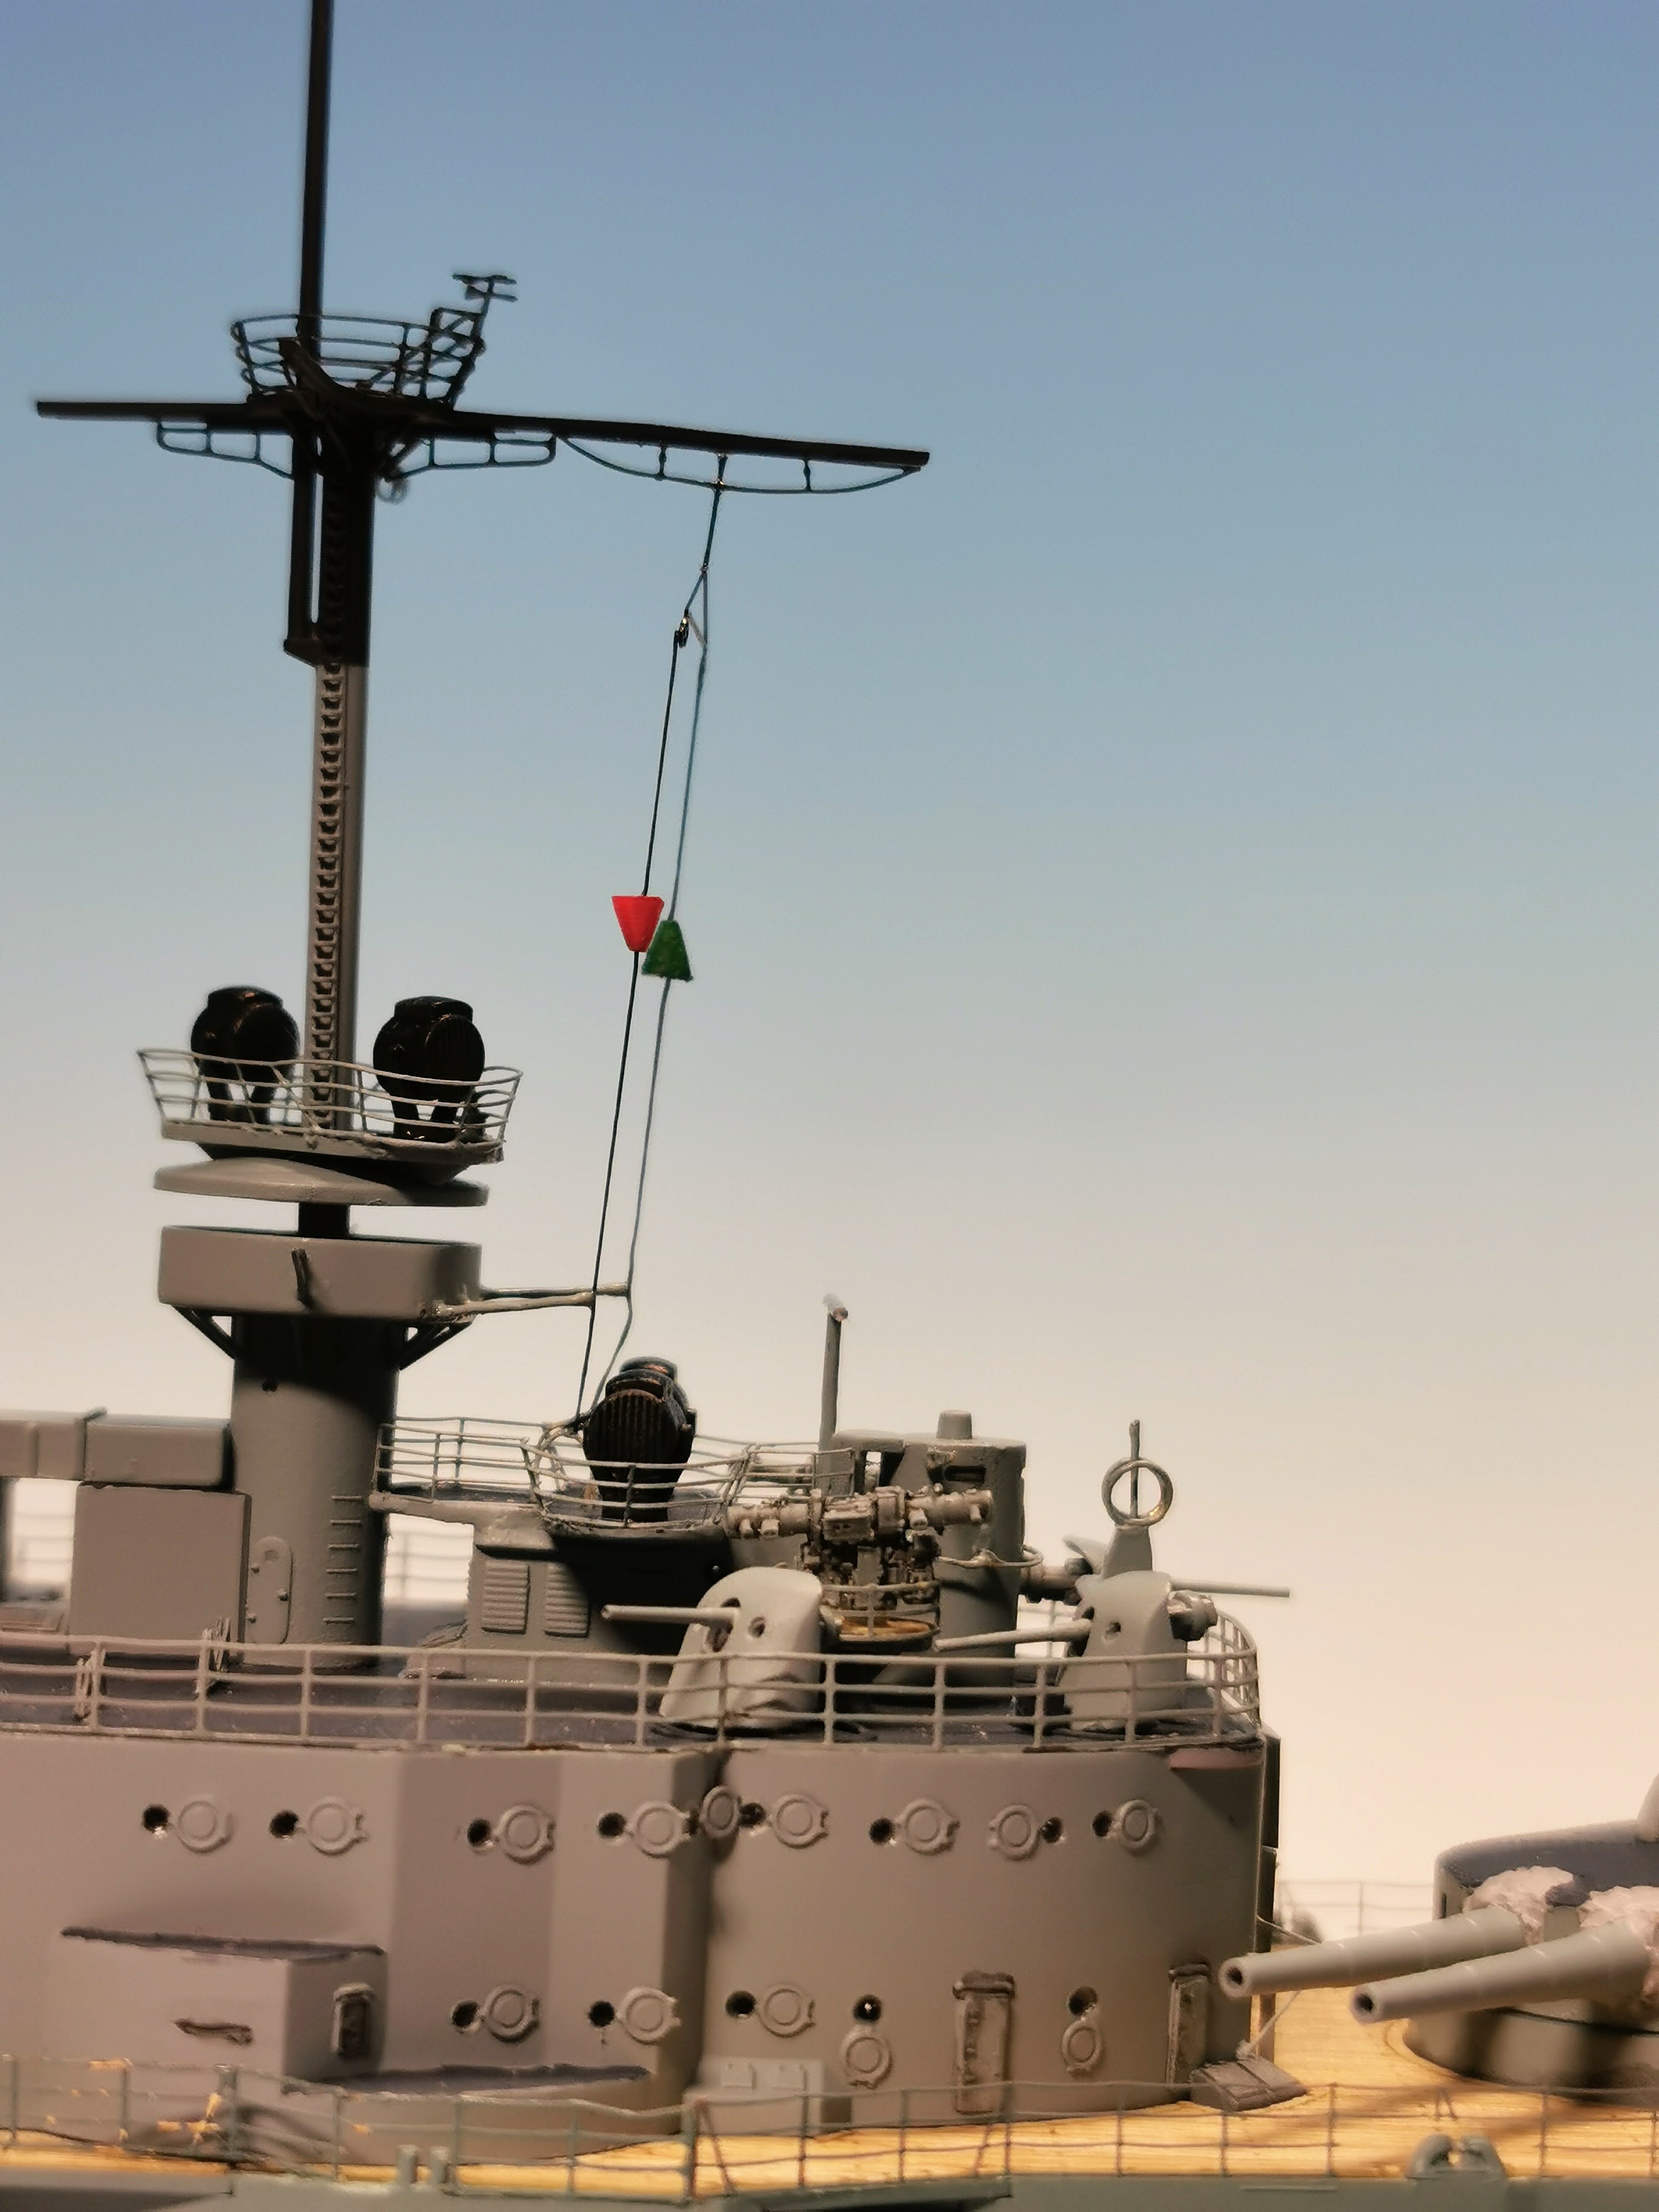
To be continued with the x 20 mm Flak-guns
 how is the "Fahrwasseranzeiger" called in english? As far as I remember it is the signal which shows following ships in a column what heading the ship in front is going during radio silence. Please correct me if I´m wrong - and I would be glad if you tell me its technical term in english.
 Eduard made the upper beam but the cones had to be selfmade out of evergreen rod. The lower beams at the observation platform were made out of bended metal rod. This is how it looks now:


To be continued with the x 20 mm Flak-guns

Posted: Wednesday, September 09, 2020 - 06:43 PM UTC
Brilliant!
Posted: Wednesday, September 09, 2020 - 11:12 PM UTC
Quoted Text
Brilliant!
Ditto!
RedDuster

Joined: March 01, 2010
KitMaker: 7,078 posts
Model Shipwrights: 6,649 posts

Posted: Thursday, September 10, 2020 - 09:01 AM UTC
Hi Thomas,
What the guys said!
Really enjoying seeing this build progress.
Cheers
Si
What the guys said!
Really enjoying seeing this build progress.
Cheers
Si

Black_sheep

Joined: December 11, 2009
KitMaker: 823 posts
Model Shipwrights: 551 posts

Posted: Saturday, September 12, 2020 - 04:59 AM UTC
Made the missing six 20 mm AA-guns for the ship. Man, this were the smallest parts I needed to fold and glue together - almost too small for the microtweezers! Each gun consisted of 9 parts  In VETERAN´s box there were parts for eight guns, I lost parts for two guns (they just "pinged" away to elysium...) so I was lucky to receive my six guns, exactly what I needed in the end:
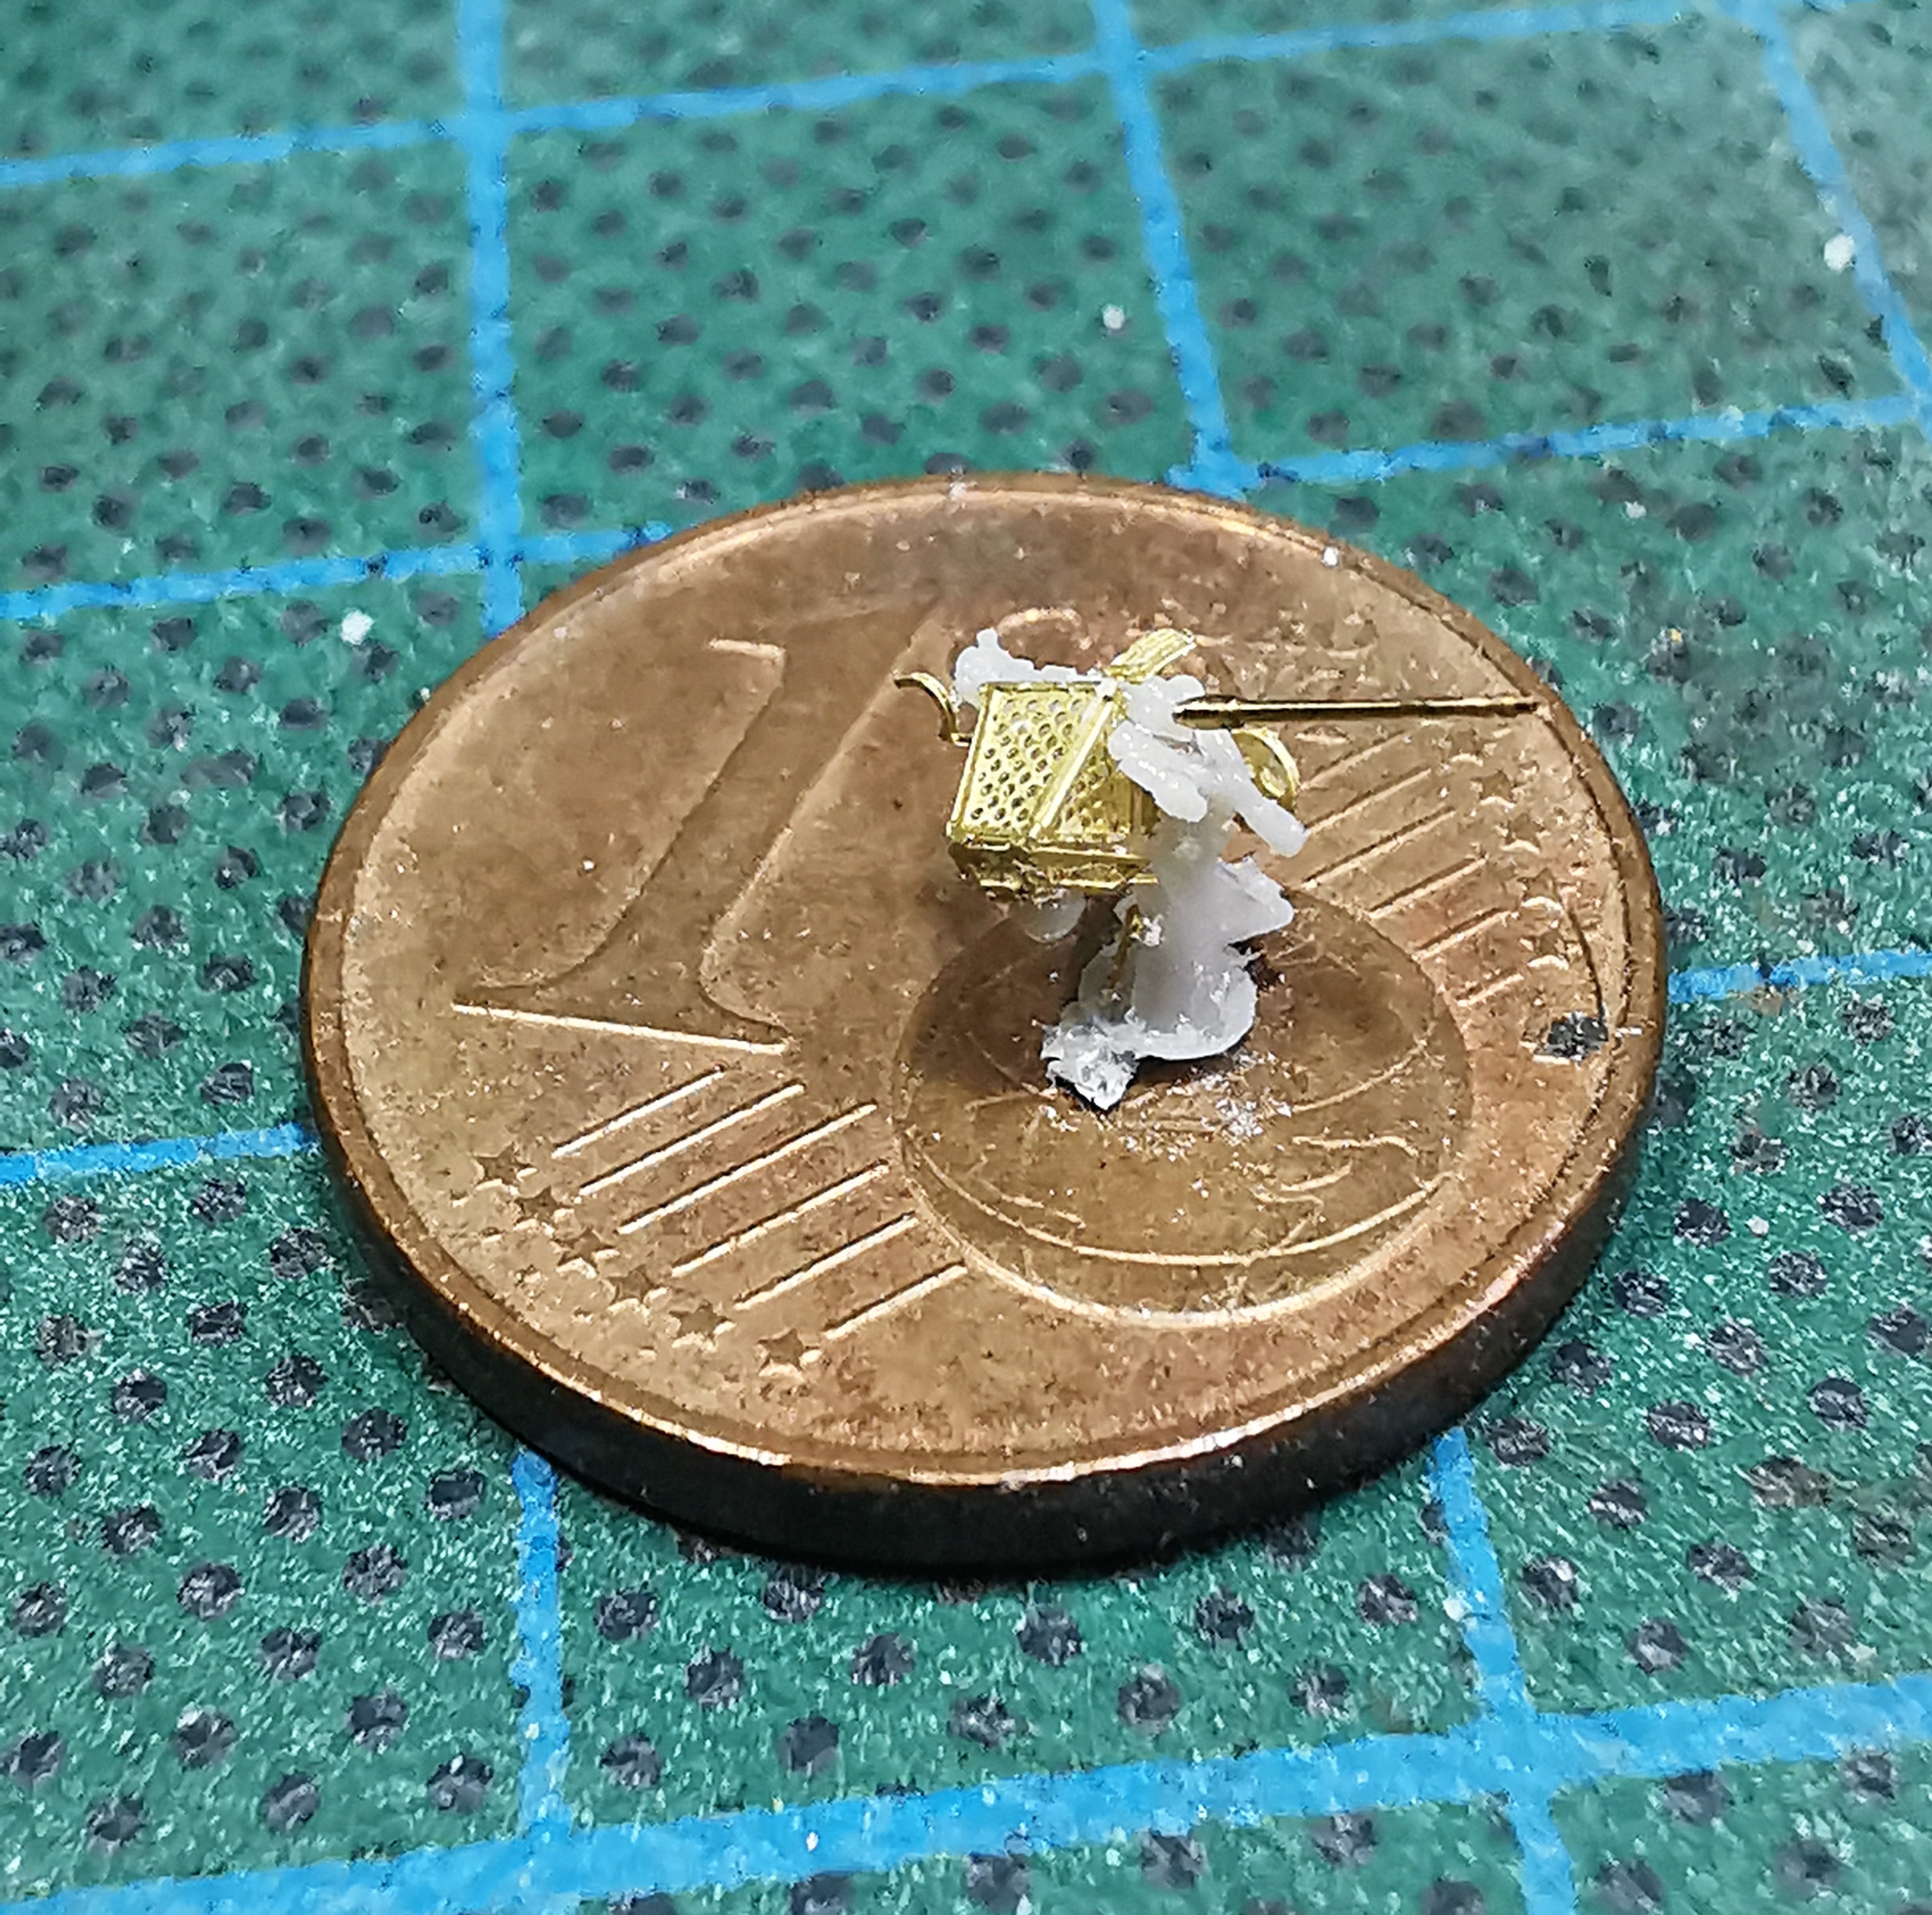
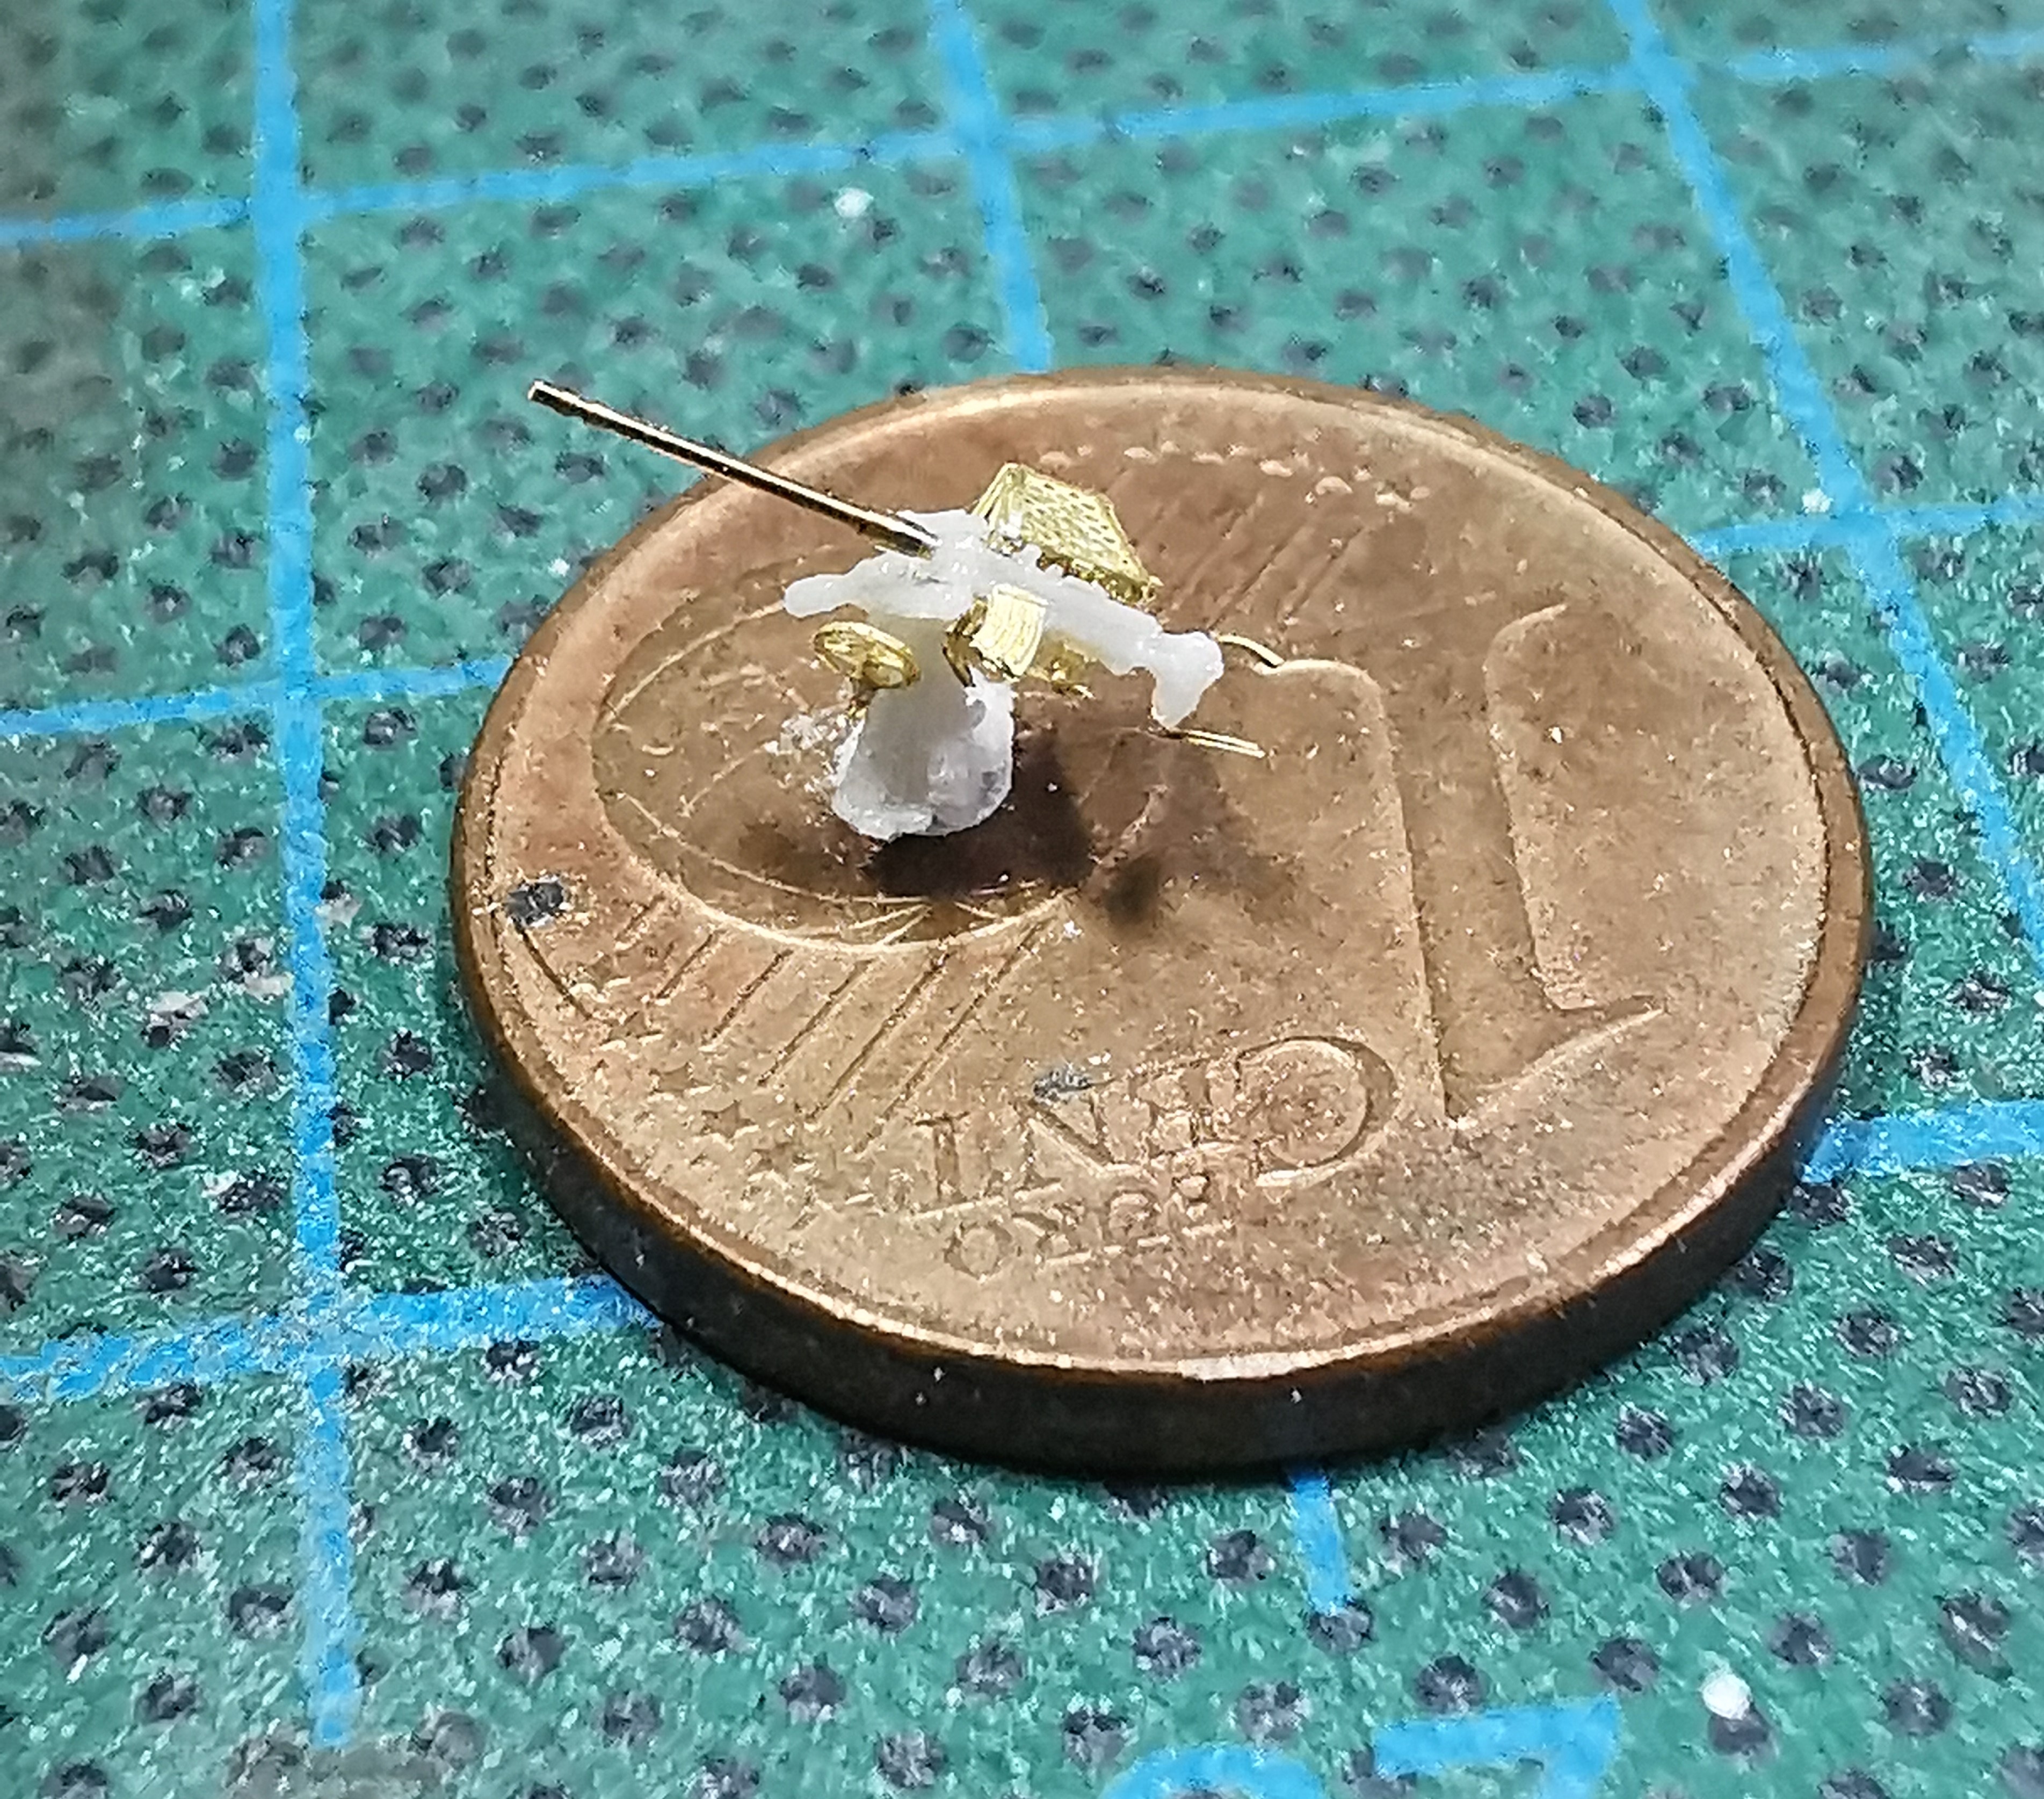
And after painting (I ommitted the kill rings at the barrel )
)
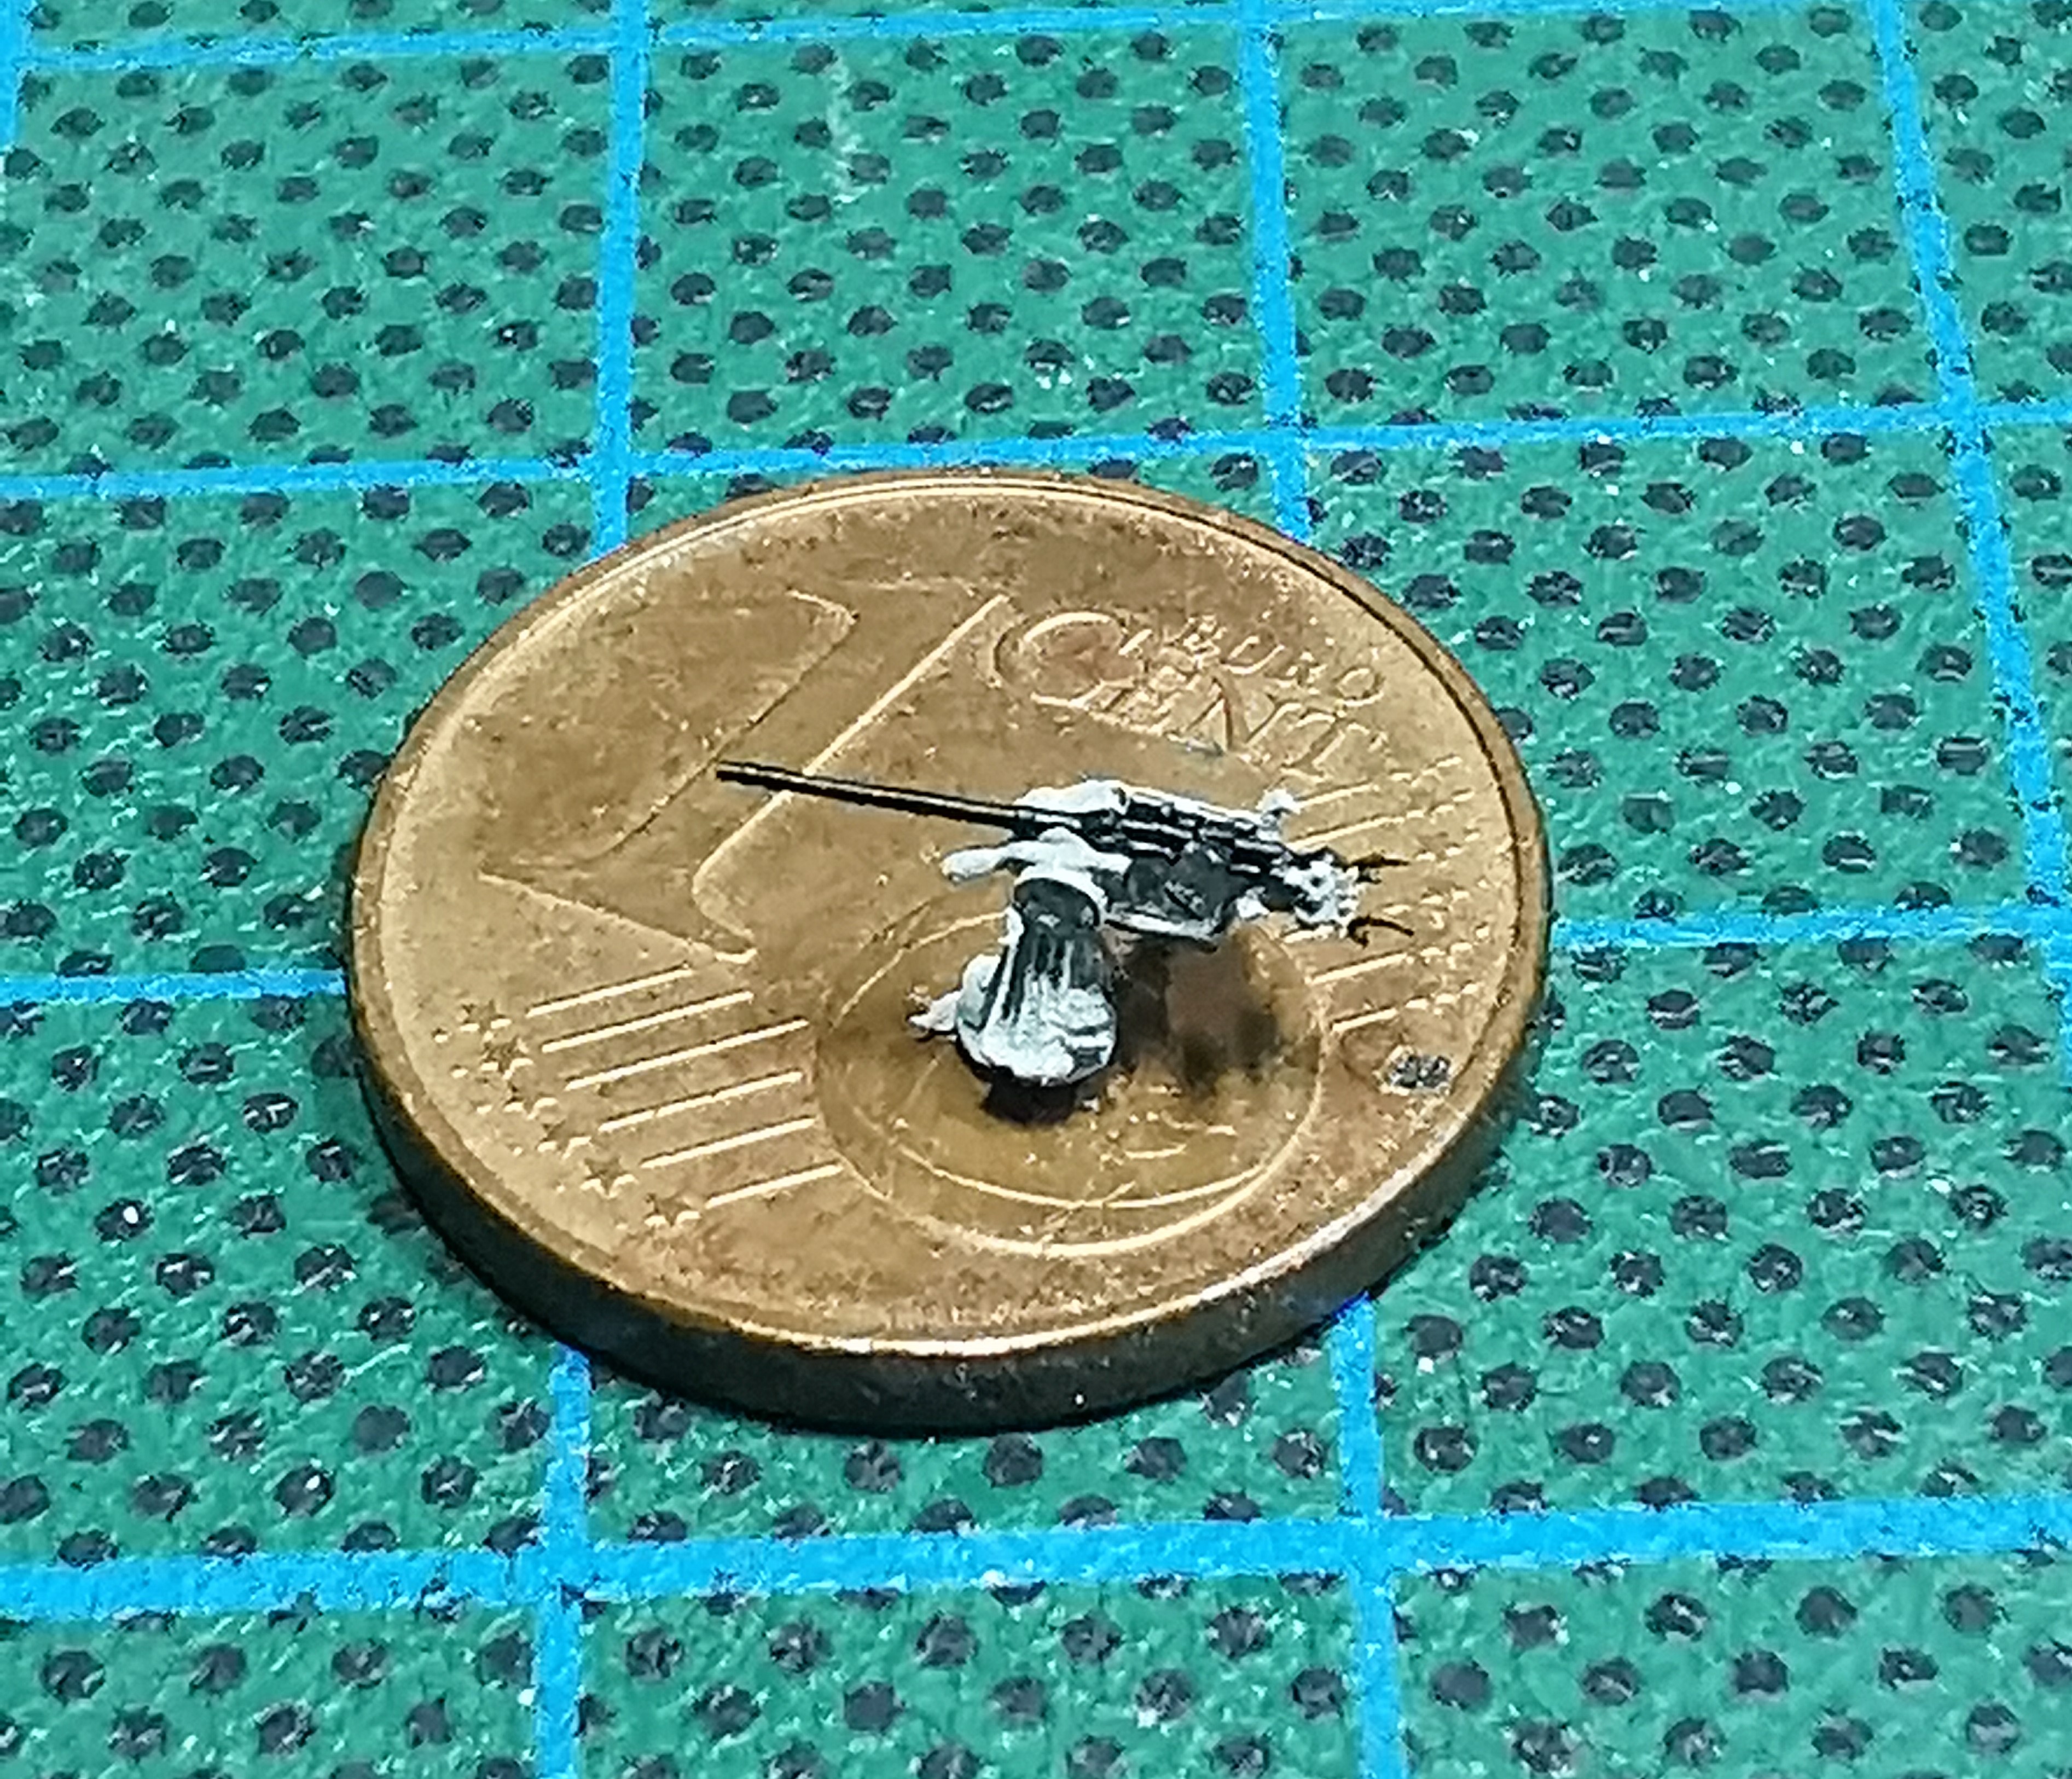
Of course during final installment two barrels broke away again, one never to be seen again (replaced it with a bit from etched railing, no one can see the difference). Both barrels glued on again and will never be toughed again by anyone!
The bow Flak gun at the second upper bridge deck
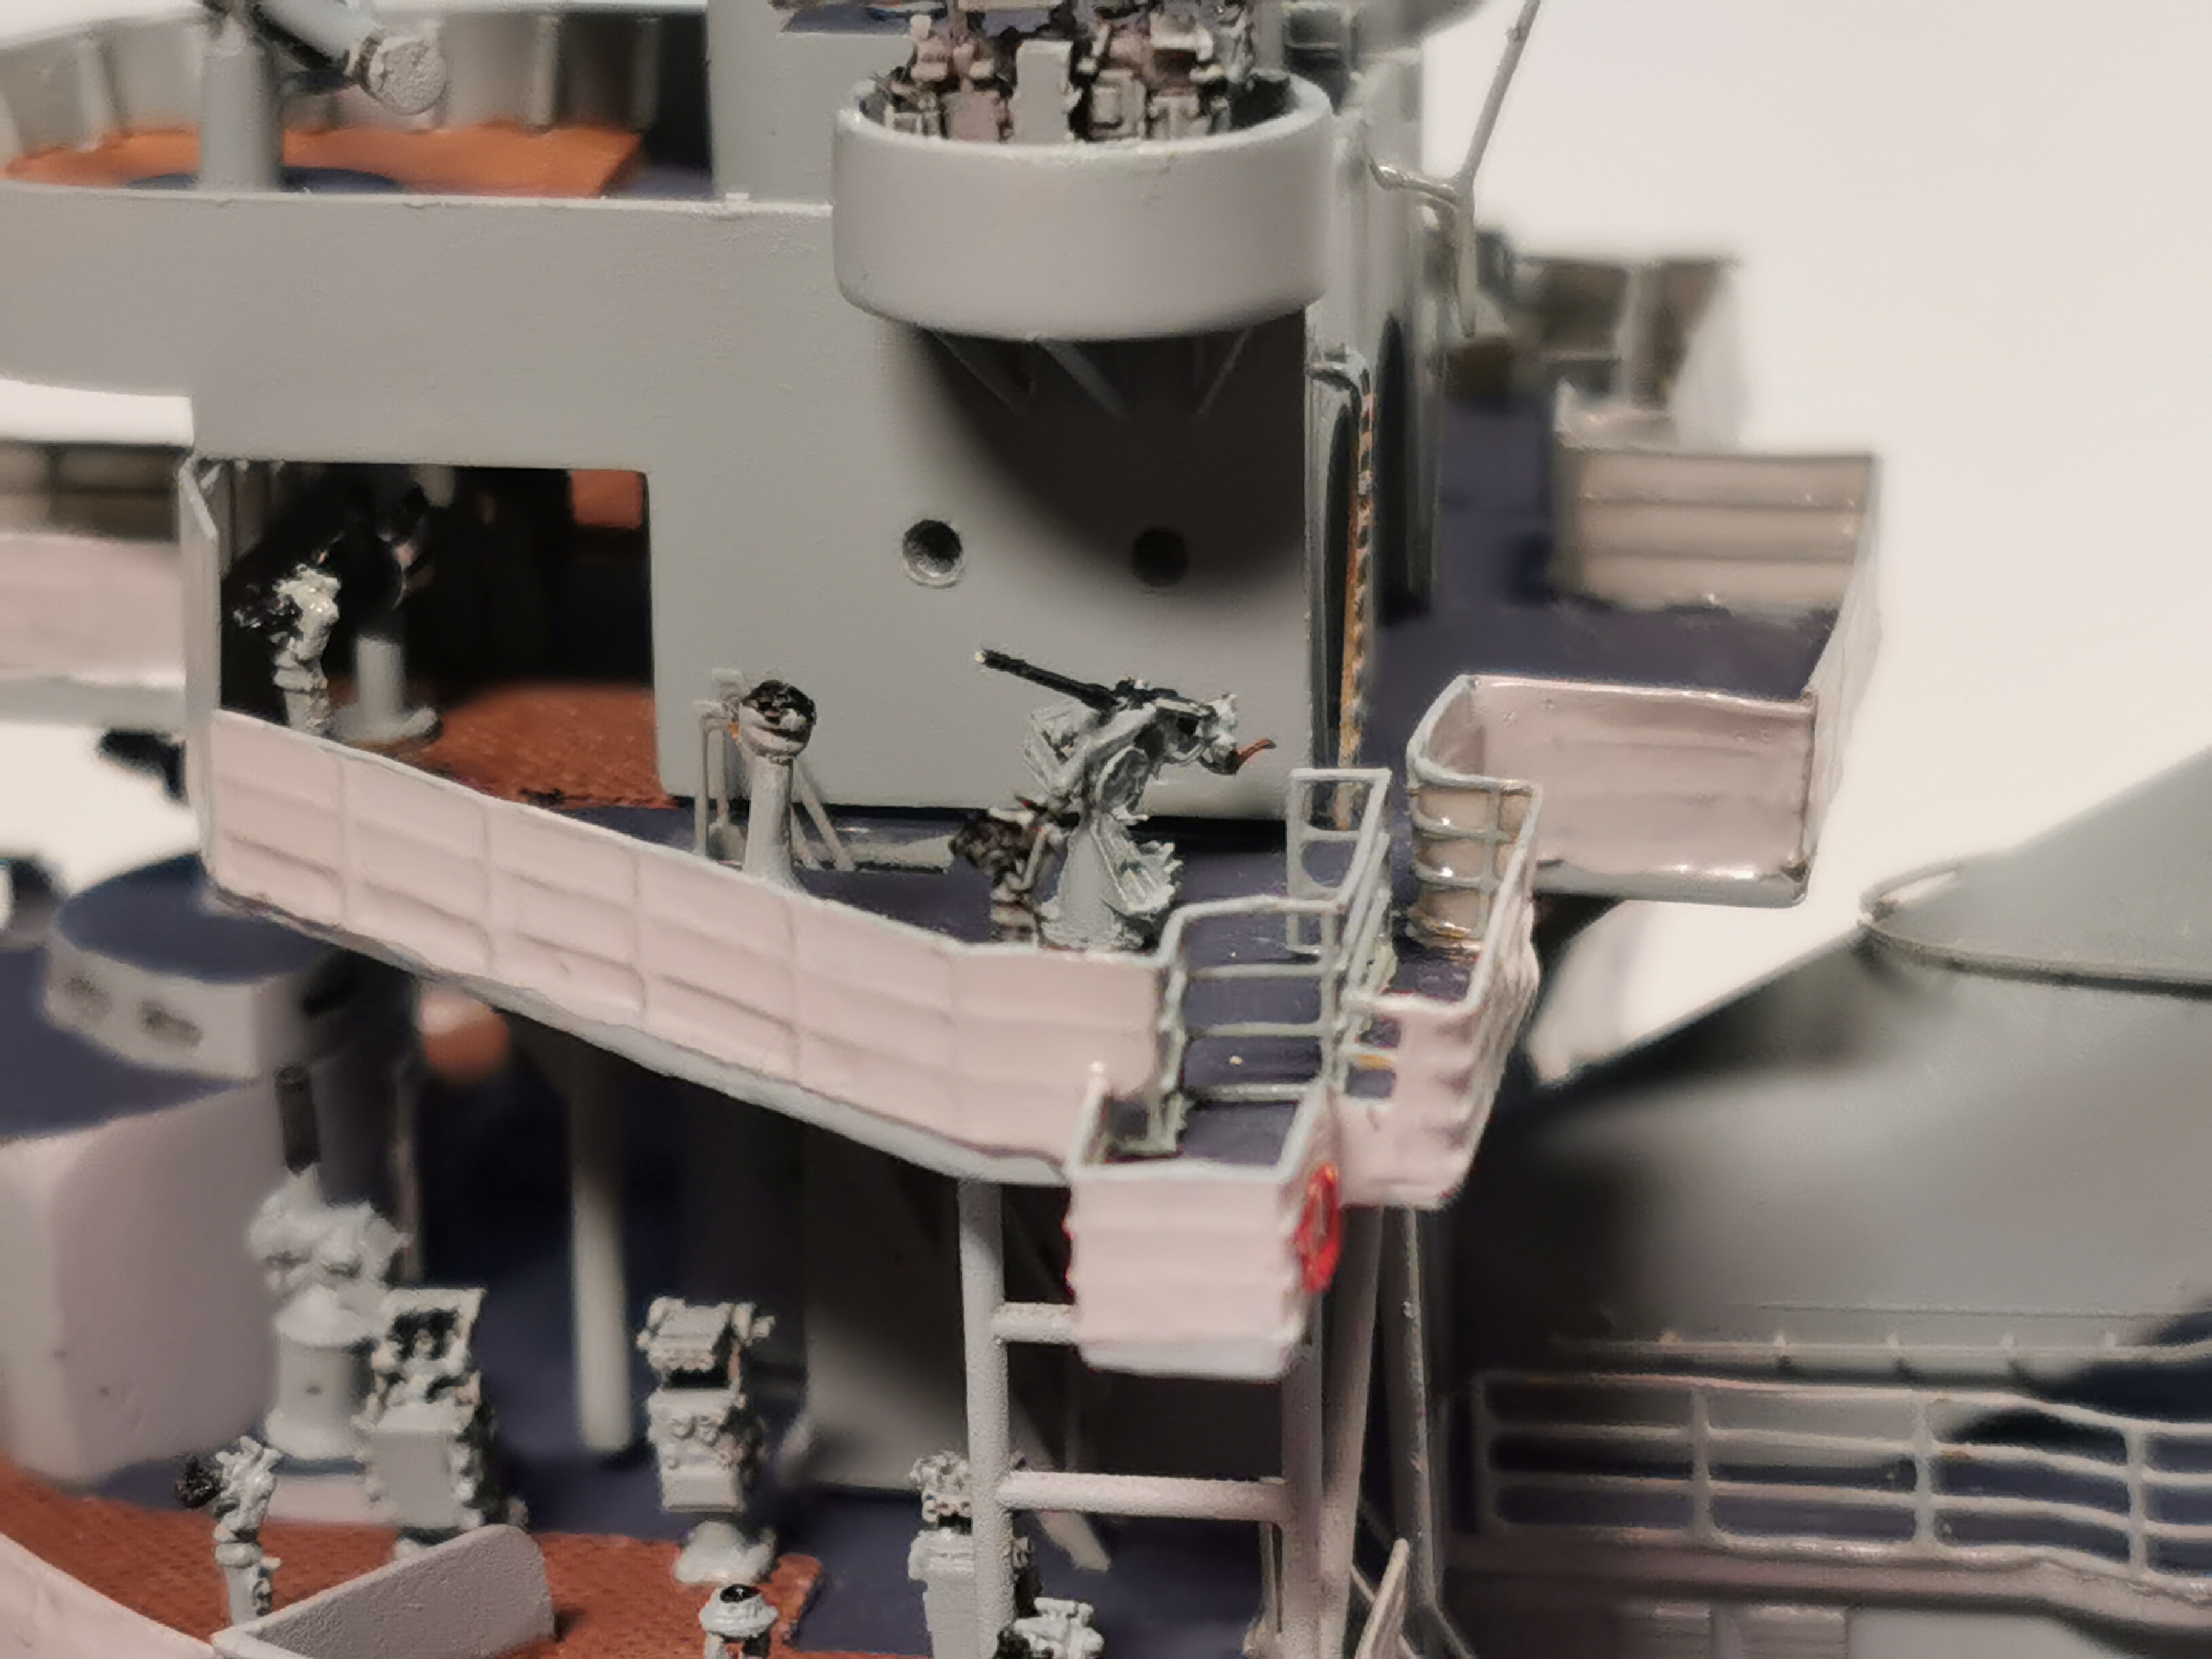
The Flak gun at the ships middle section:
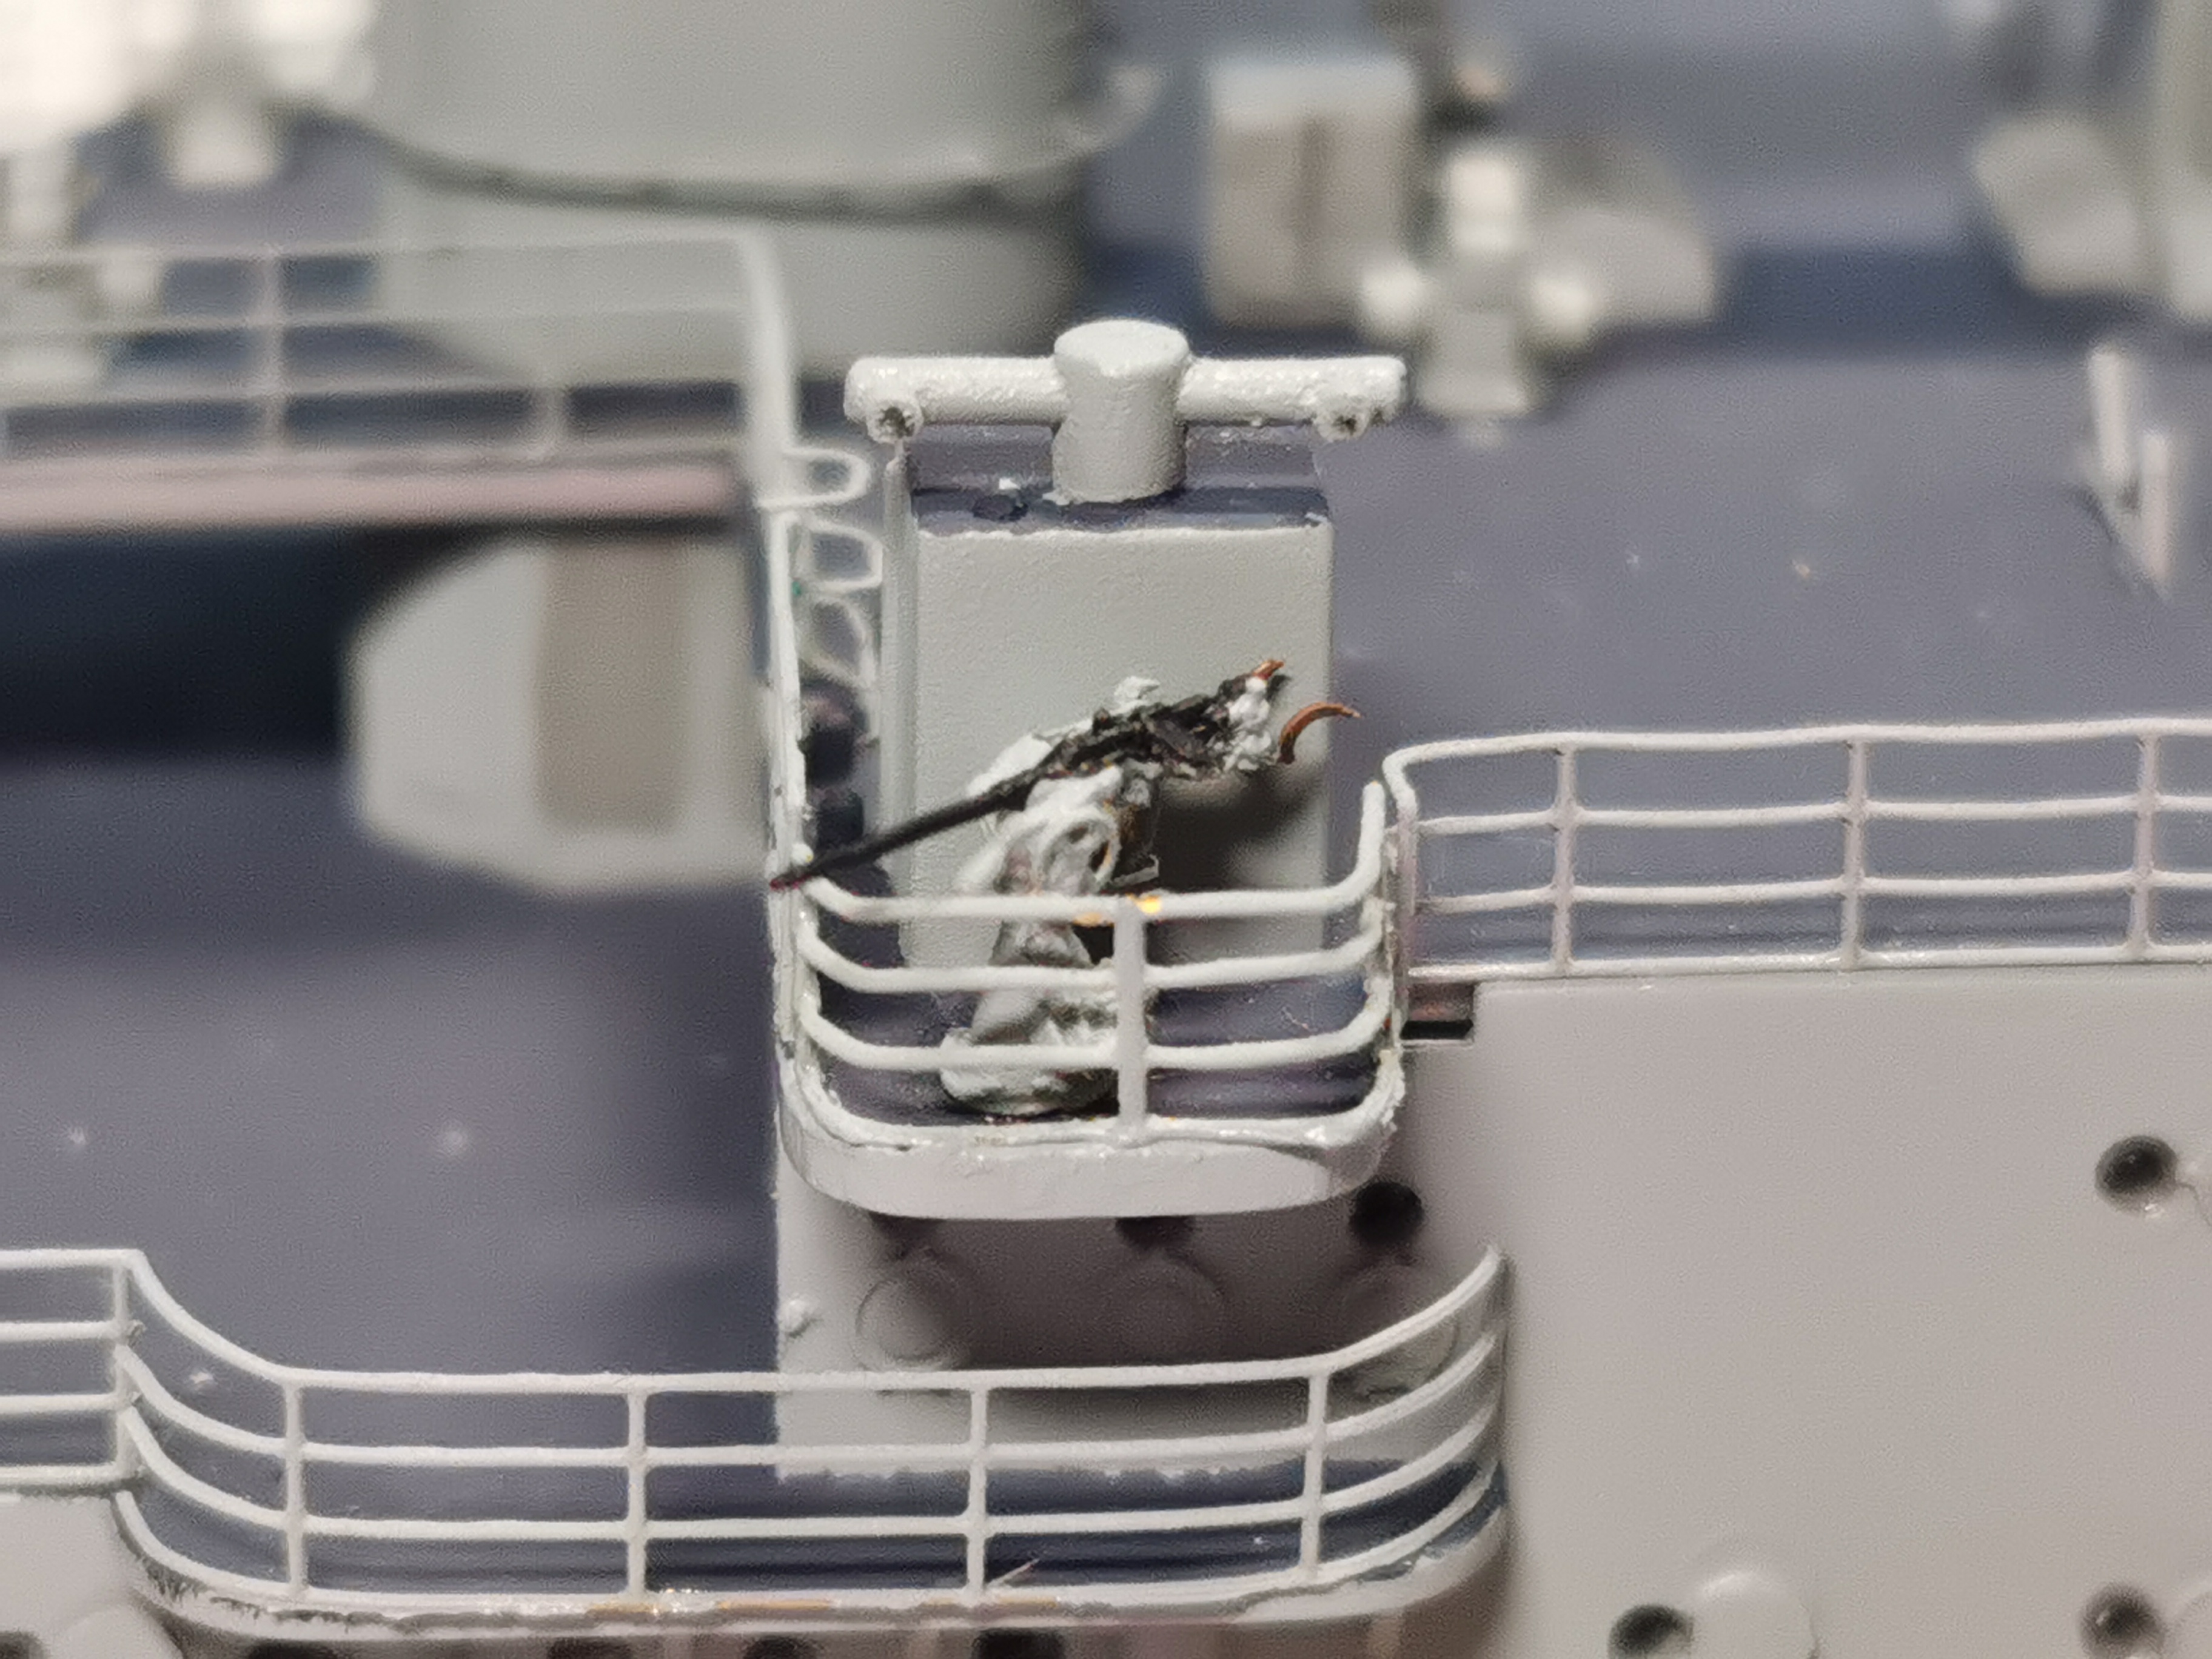
and the two Flak guns at the aft superstructure
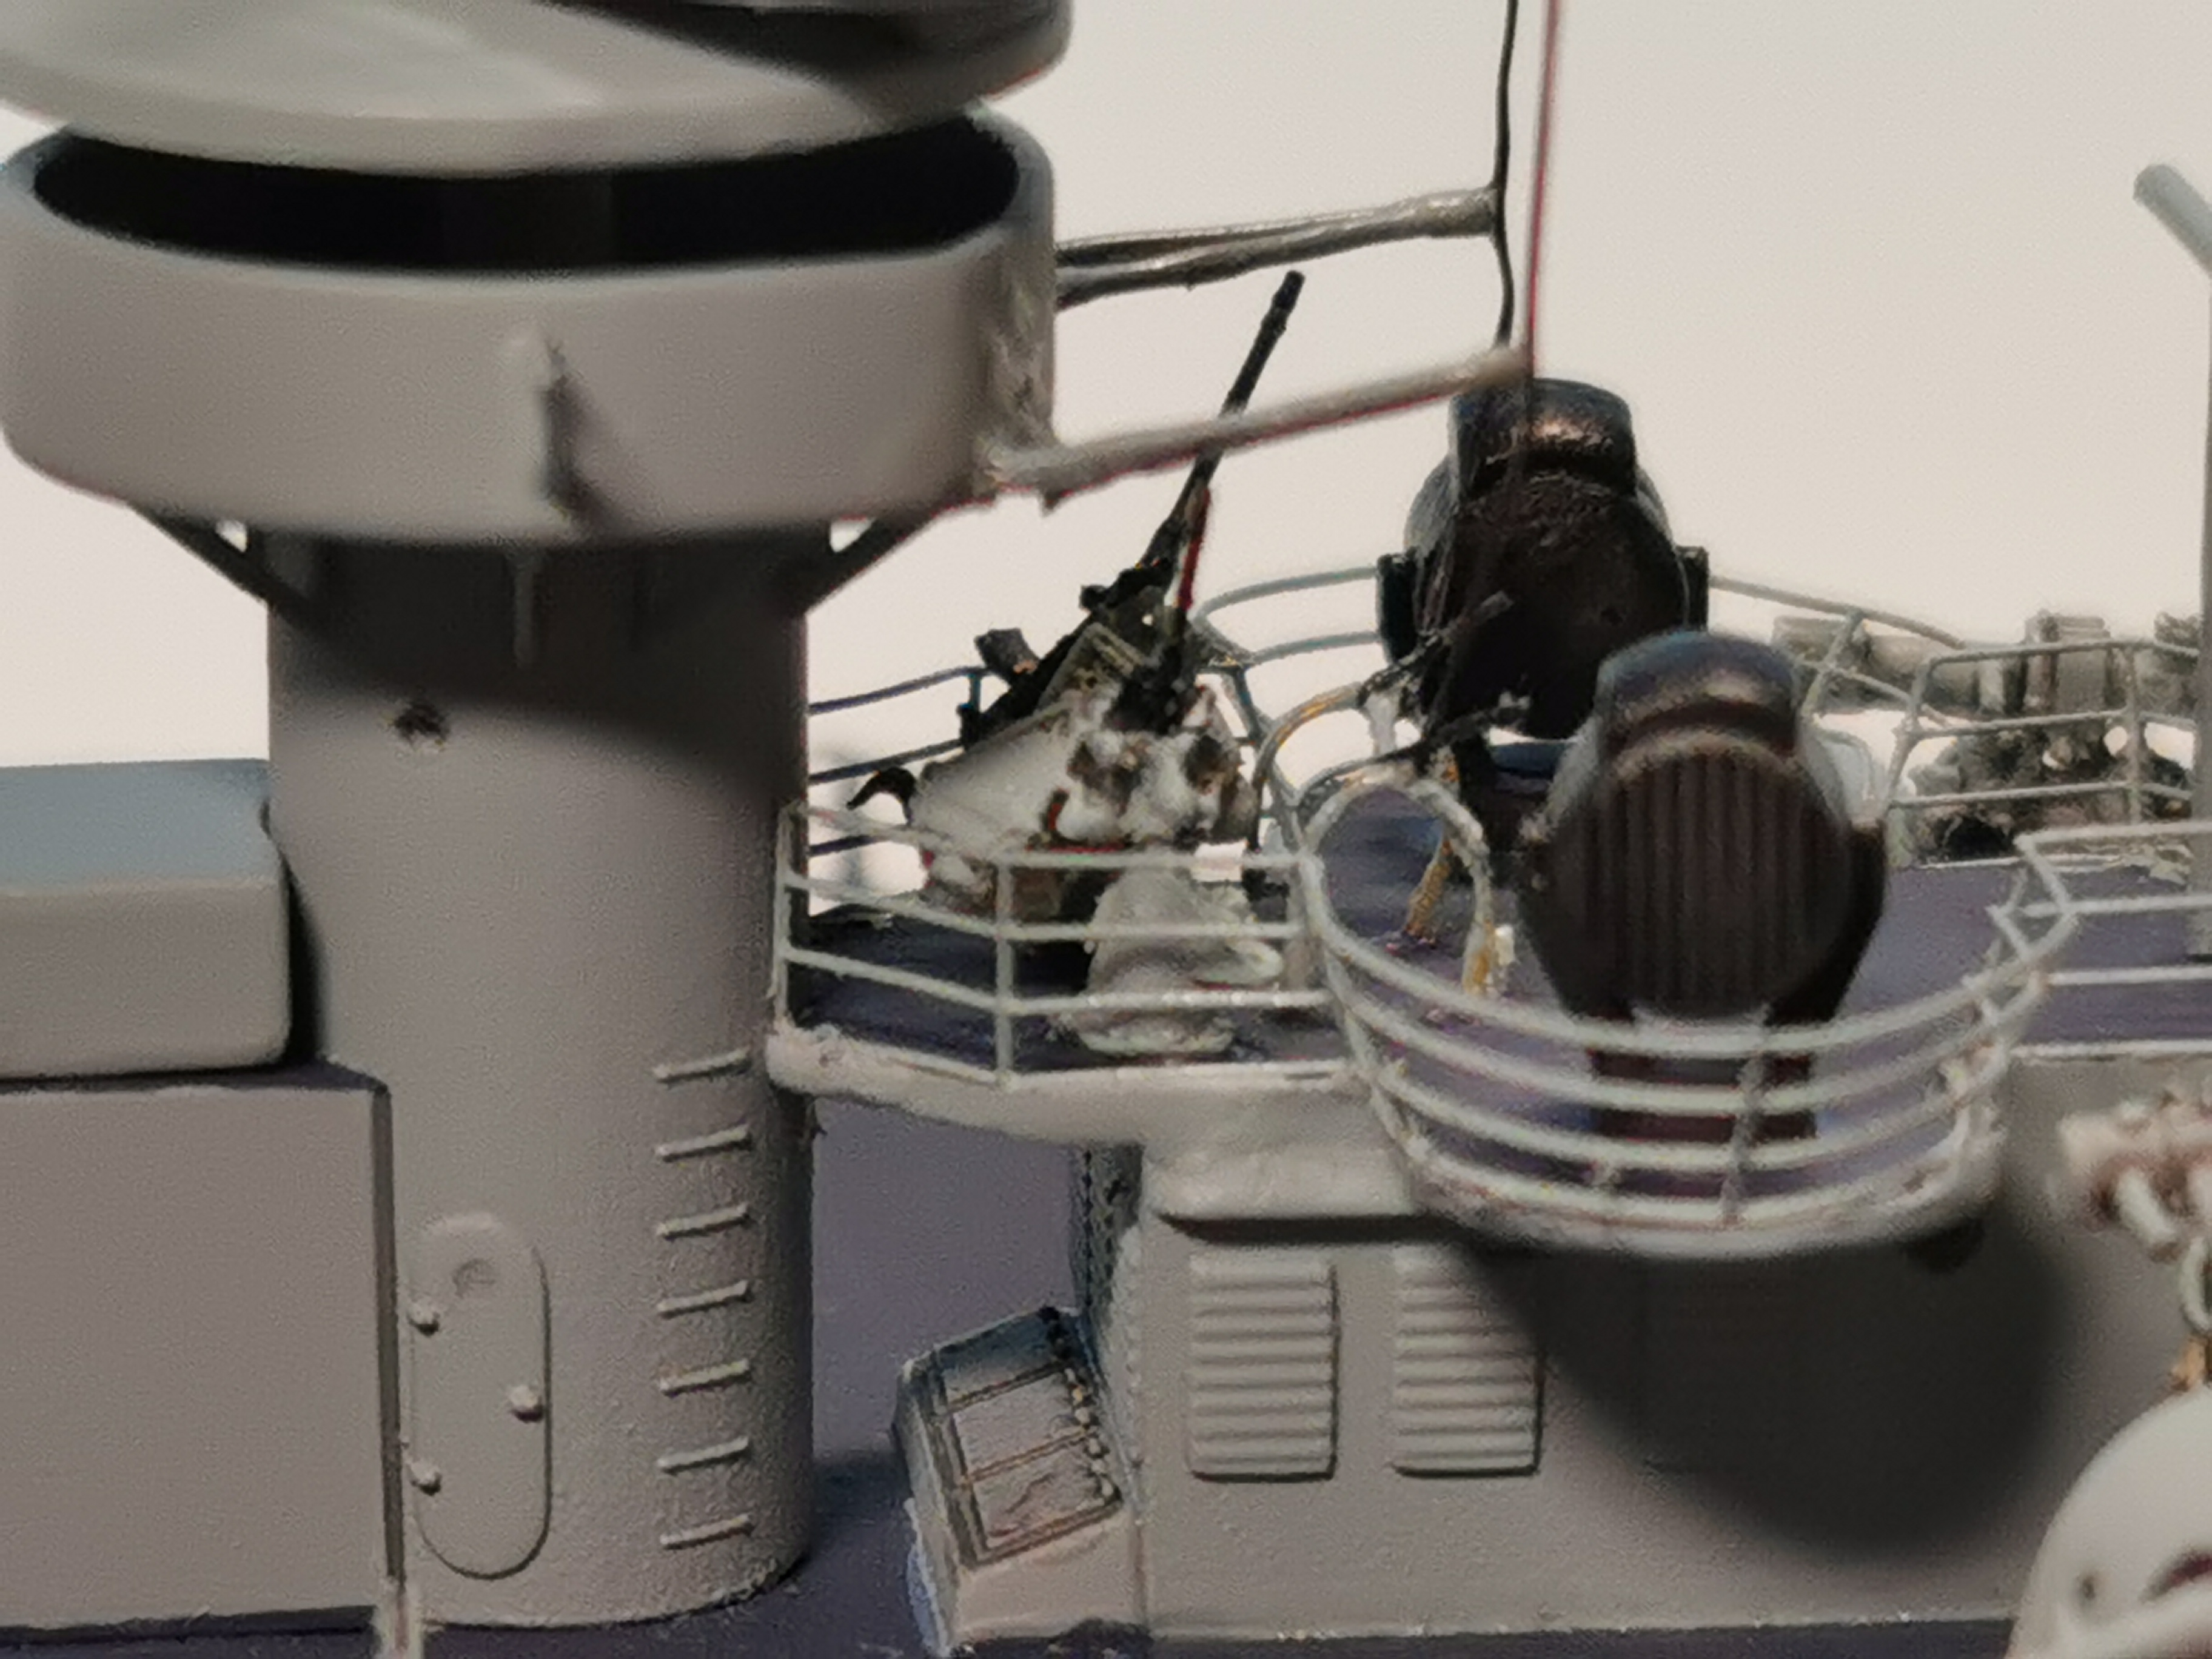
I am really glad this Flak job is done Still waiting for the ammunition boxes from SSN Modellbau to come - now we will enter all these eleven lifeboats
 In VETERAN´s box there were parts for eight guns, I lost parts for two guns (they just "pinged" away to elysium...) so I was lucky to receive my six guns, exactly what I needed in the end:

And after painting (I ommitted the kill rings at the barrel
 )
)
Of course during final installment two barrels broke away again, one never to be seen again (replaced it with a bit from etched railing, no one can see the difference). Both barrels glued on again and will never be toughed again by anyone!
The bow Flak gun at the second upper bridge deck

The Flak gun at the ships middle section:

and the two Flak guns at the aft superstructure

I am really glad this Flak job is done
 Still waiting for the ammunition boxes from SSN Modellbau to come - now we will enter all these eleven lifeboats
RedDuster

Joined: March 01, 2010
KitMaker: 7,078 posts
Model Shipwrights: 6,649 posts

Posted: Saturday, September 12, 2020 - 08:25 AM UTC
Hi Thomas,
Very nice work on the 20mm, I used the Veteran 20mm on my 1/350th Bismarck, the were "fun" to put together, but worth the effort.
Cheers
Si
Very nice work on the 20mm, I used the Veteran 20mm on my 1/350th Bismarck, the were "fun" to put together, but worth the effort.
Cheers
Si
Posted: Saturday, September 12, 2020 - 09:00 AM UTC
Brilliant work, Thomas!! Those things are tiny, and you've made them look awesome.
Gaz
Gaz

Black_sheep

Joined: December 11, 2009
KitMaker: 823 posts
Model Shipwrights: 551 posts

Posted: Saturday, September 12, 2020 - 05:35 PM UTC
Quoted Text
Brilliant work, Thomas!! Those things are tiny, and you've made them look awesome.
Gaz
Thank you Gaz, I am glad I can work with the bigger lifeboats now


Black_sheep

Joined: December 11, 2009
KitMaker: 823 posts
Model Shipwrights: 551 posts

Posted: Saturday, September 12, 2020 - 05:37 PM UTC
Quoted Text
Hi Thomas,
Very nice work on the 20mm, I used the Veteran 20mm on my 1/350th Bismarck, the were "fun" to put together, but worth the effort.
Cheers
Si
There are some more Veteran 20 mm Flaks waiting for me with my 1:350 Graf Spee... How many of these did you needed for your Bismarck?
Cheers
Thomas
Posted: Saturday, September 12, 2020 - 10:44 PM UTC
Thomas,
Feel your pain on those 20mm guns and the joy when their done and installed. They do look great and lifted the detail on the model to a new level which makes the effort worth it. Again nice work.
Mark
Feel your pain on those 20mm guns and the joy when their done and installed. They do look great and lifted the detail on the model to a new level which makes the effort worth it. Again nice work.
Mark

Posted: Sunday, September 13, 2020 - 12:40 PM UTC
Thomas, I believe you have mastered the art of nano-engineering 


MartinJQuinn

Joined: January 19, 2005
KitMaker: 574 posts
Model Shipwrights: 530 posts

Posted: Monday, September 14, 2020 - 05:28 AM UTC
Nice work on those 20mm guns. I used the same parts on a recently completed 1/350 Tirpitz, and struggled with them. Yours came out great - well done!
RedDuster

Joined: March 01, 2010
KitMaker: 7,078 posts
Model Shipwrights: 6,649 posts

Posted: Monday, September 14, 2020 - 06:15 AM UTC
Quoted Text
Quoted TextHi Thomas,
Very nice work on the 20mm, I used the Veteran 20mm on my 1/350th Bismarck, the were "fun" to put together, but worth the effort.
Cheers
Si
There are some more Veteran 20 mm Flaks waiting for me with my 1:350 Graf Spee... How many of these did you needed for your Bismarck?
Cheers
Thomas
Hi Thomas,
12 were needed, I was quite glad they came in packs of eight, I managed to ping a couple of bits across the workshop too. I have learned from that, always make sure I order more than I need, the spare guns / parts will always come in handy on another project.
Cheers
Si
 |


