Ships by Class/Type: Military Small Craft
For topics on PT boats, landing craft, Vietnam riverine, etc.
HMS Campanula K18 1/144th Flower Class
RedDuster
Visit this Community
England - South East, United Kingdom
Joined: March 01, 2010
KitMaker: 7,078 posts
Model Shipwrights: 6,649 posts
Posted: Sunday, March 25, 2018 - 11:16 PM UTC

Quoted Text

As always, mighty fine work Si, and an enviable pace too


Thanks Russ,

It is something nice to work with, it has me properly inspired right now.

Sunday's update to follow shortly

Cheers

Si
RedDuster
Visit this Community
England - South East, United Kingdom
Joined: March 01, 2010
KitMaker: 7,078 posts
Model Shipwrights: 6,649 posts
Posted: Monday, March 26, 2018 - 01:44 AM UTC
Finally,

Sunday's update.

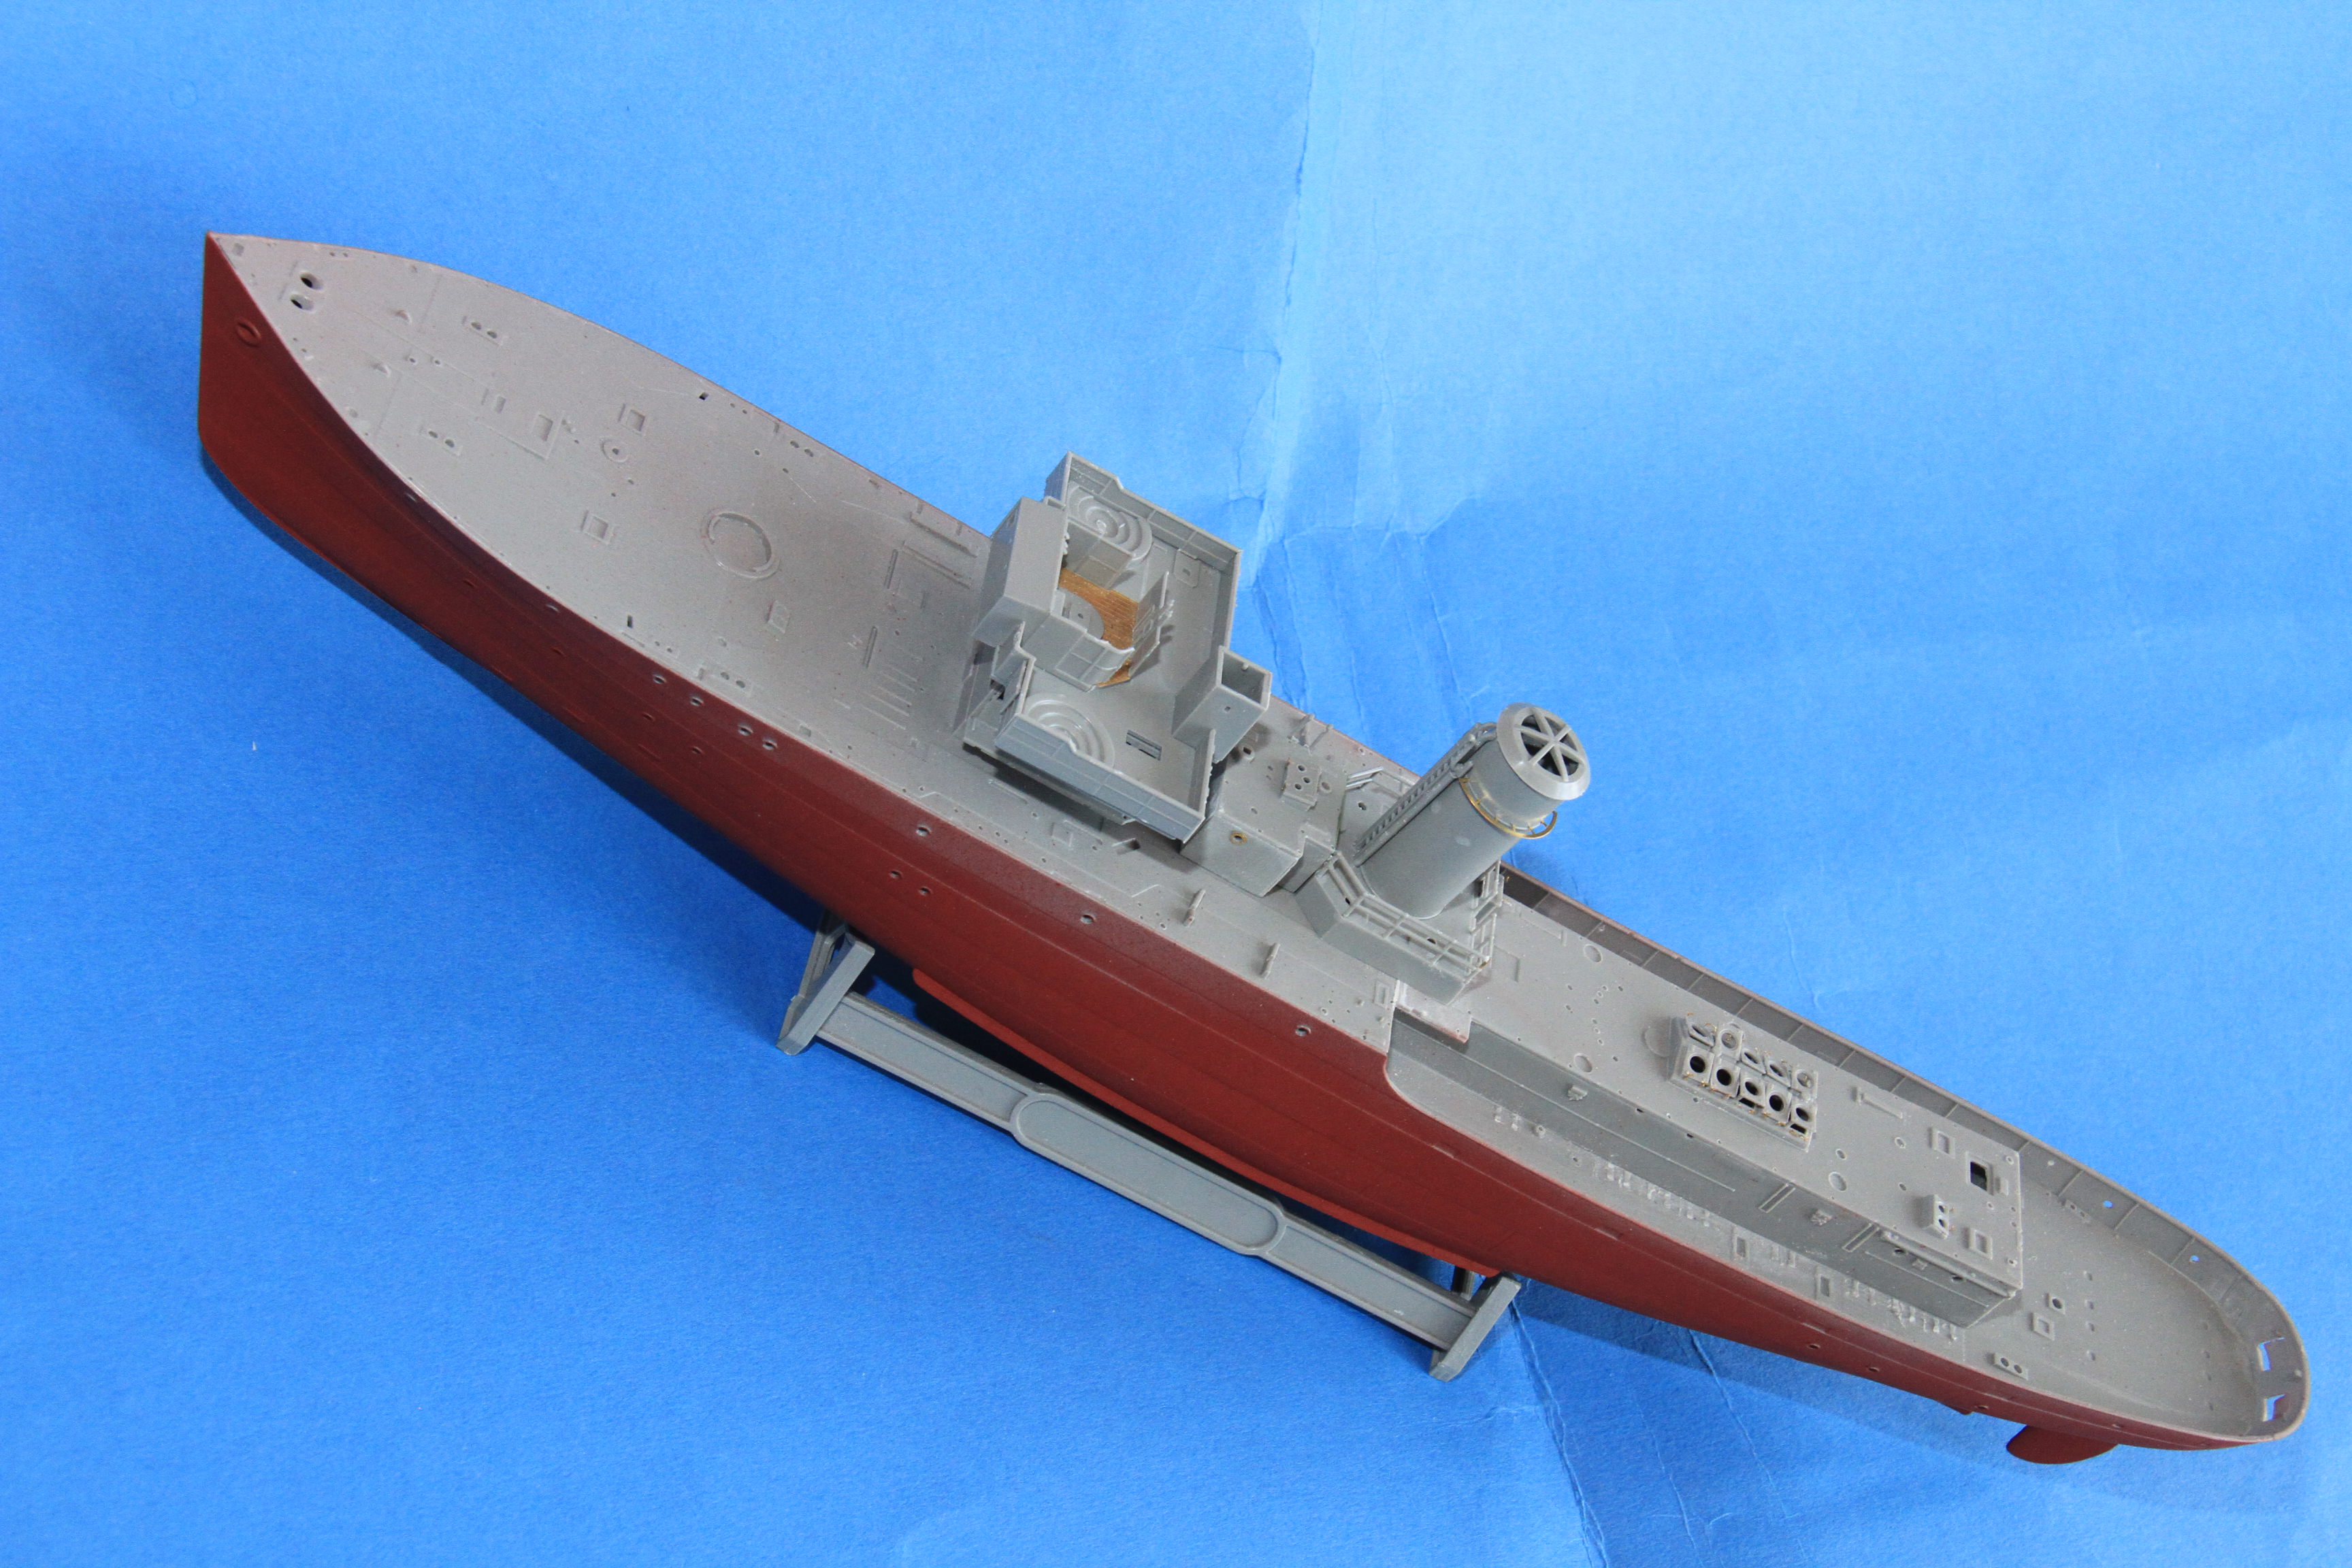
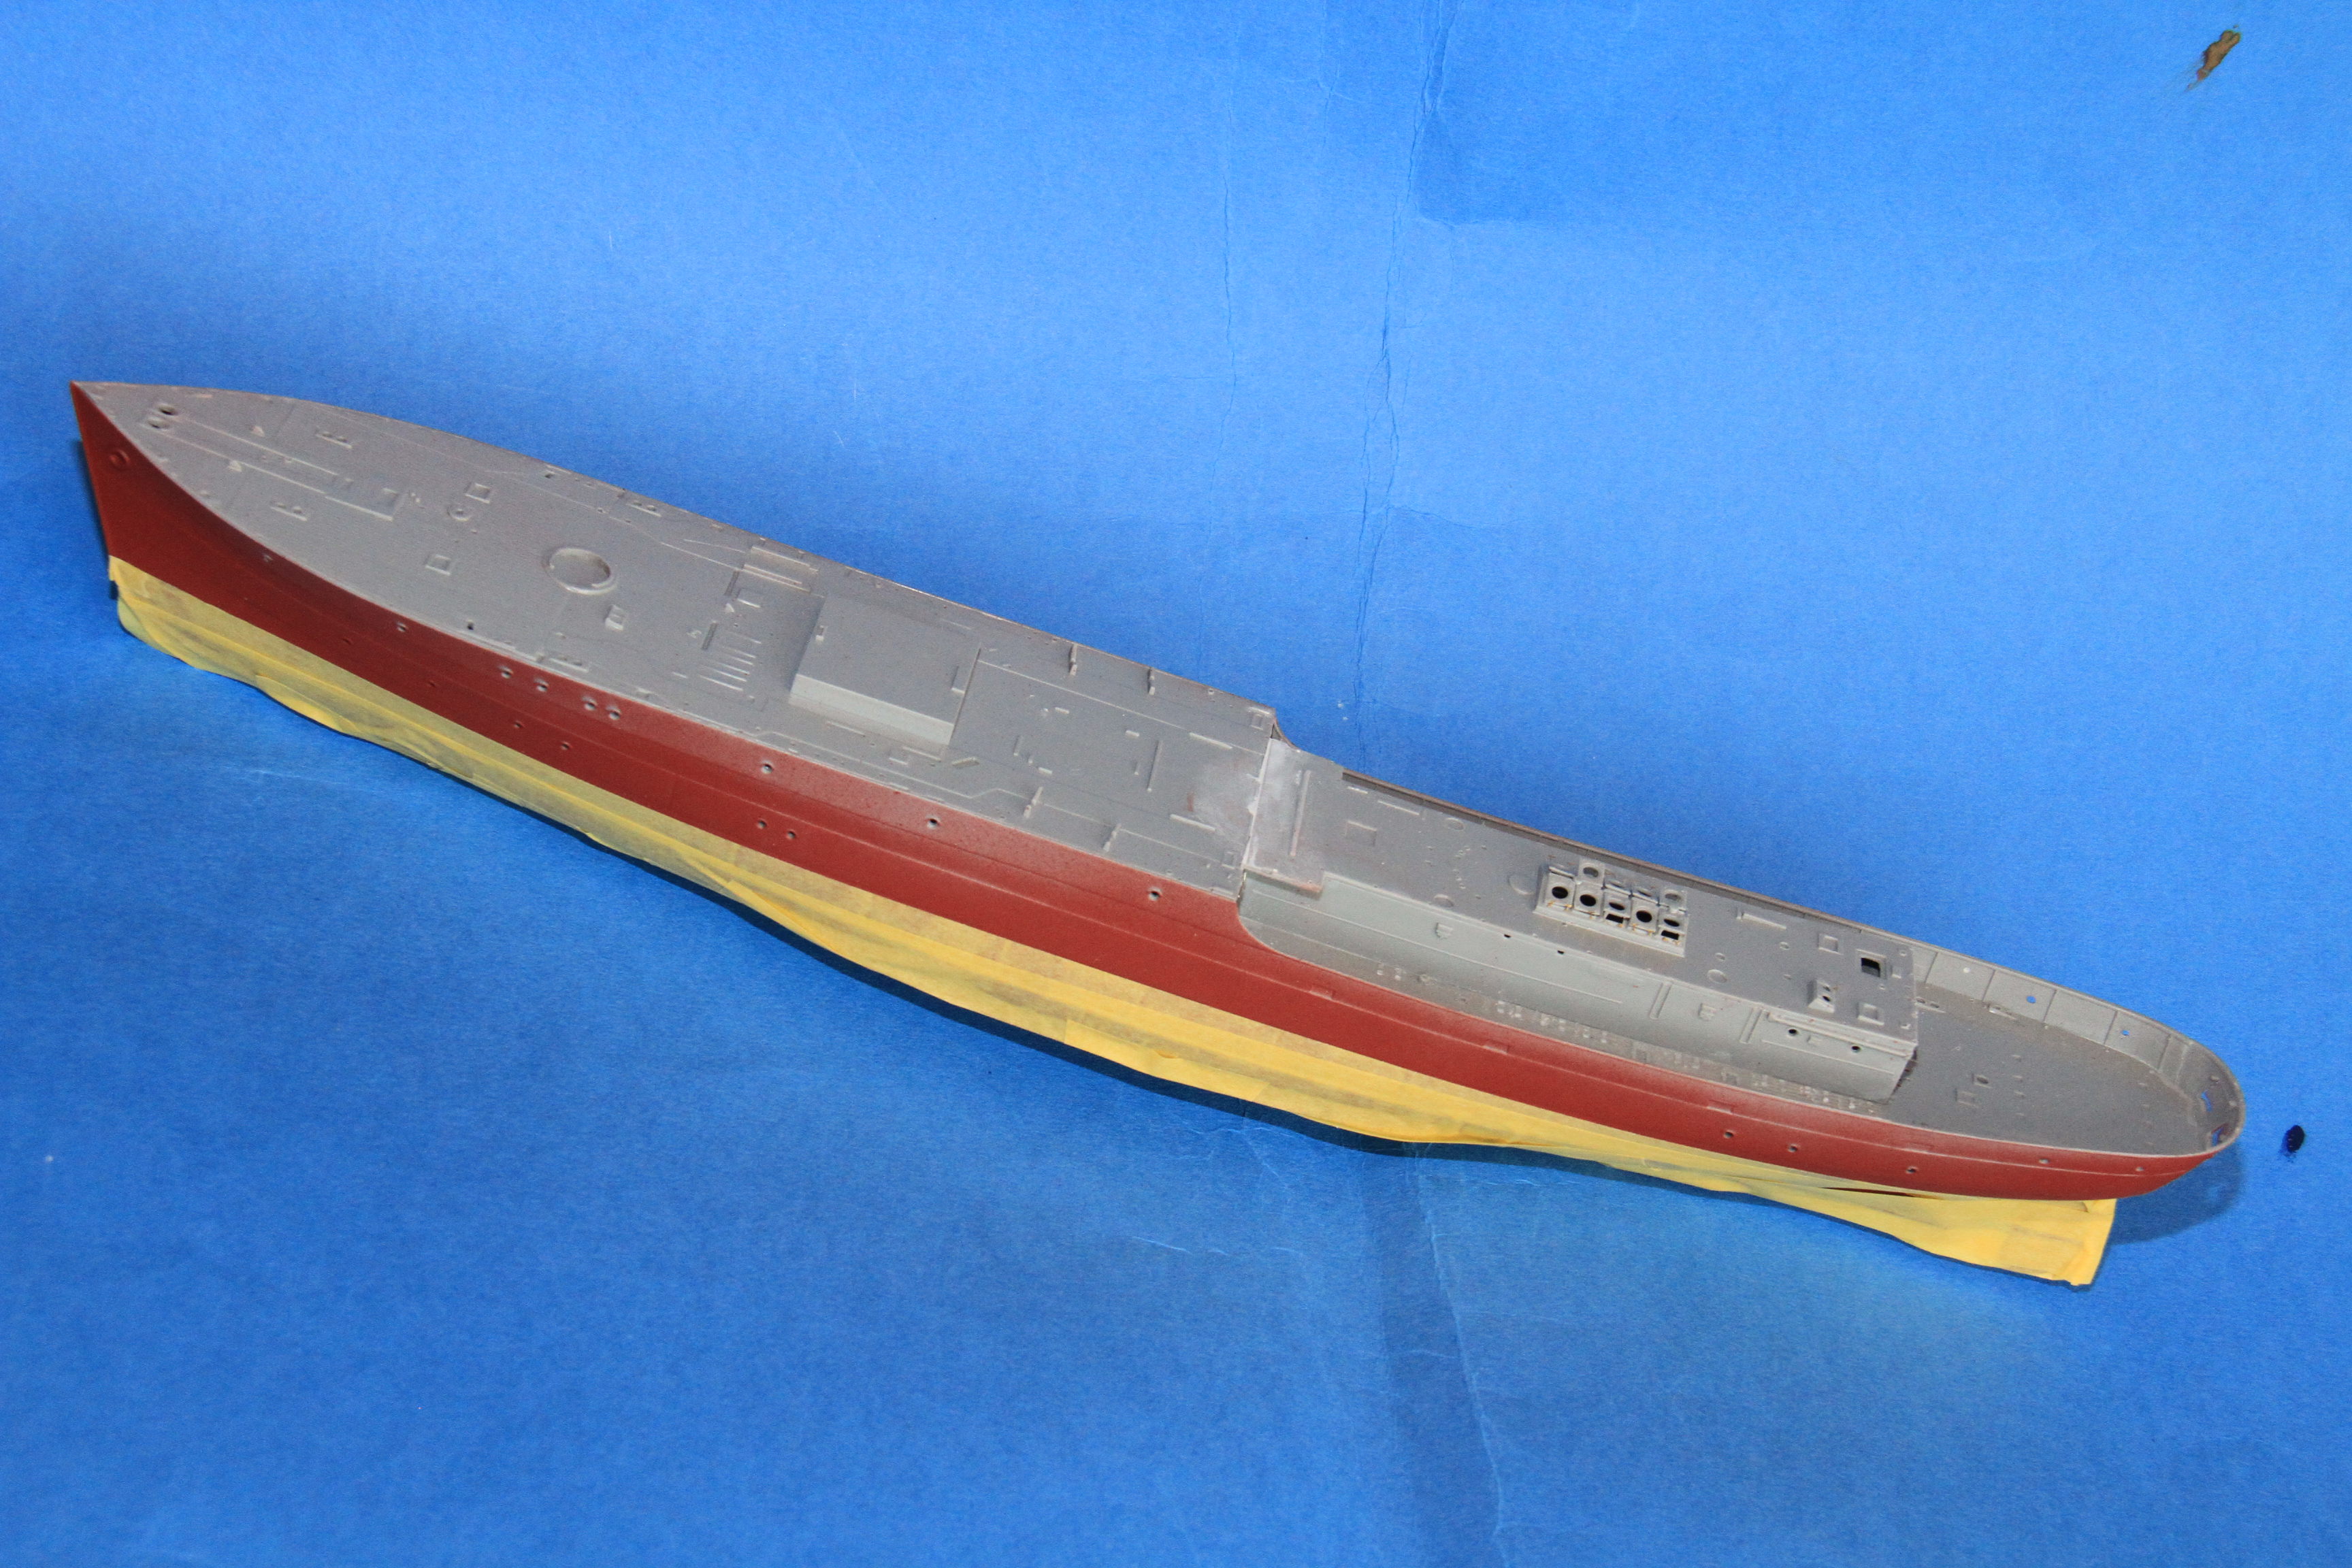
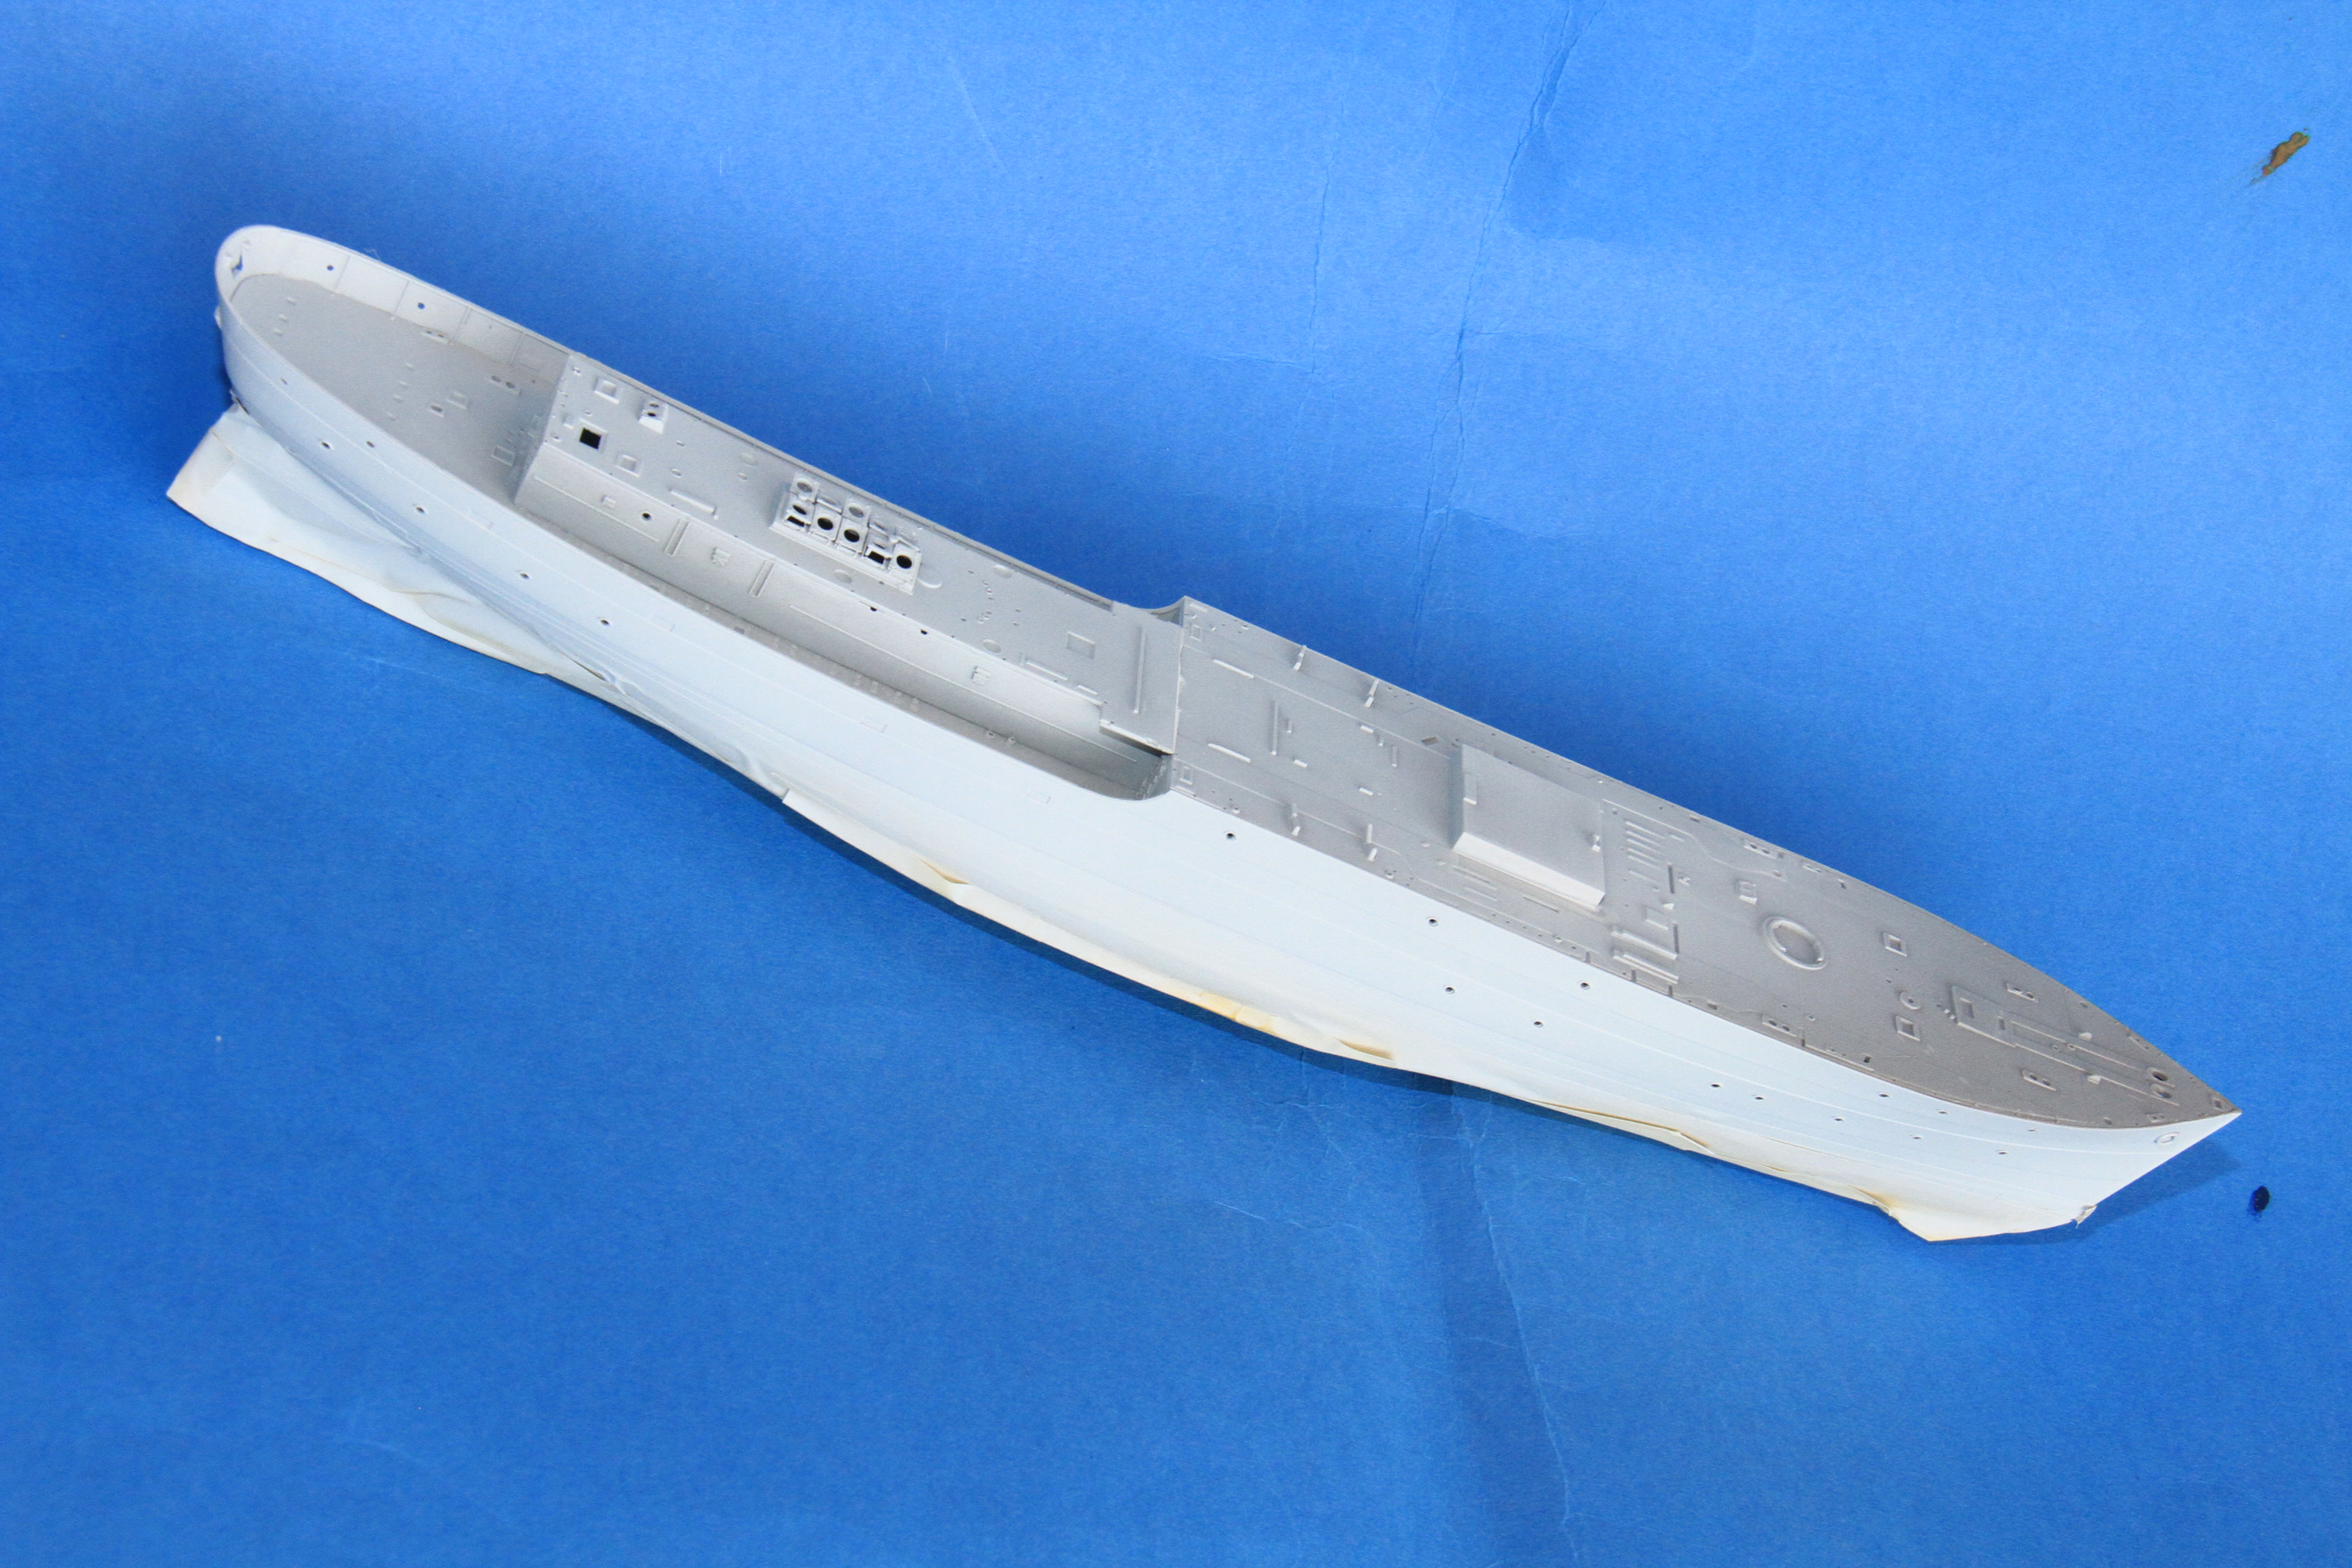
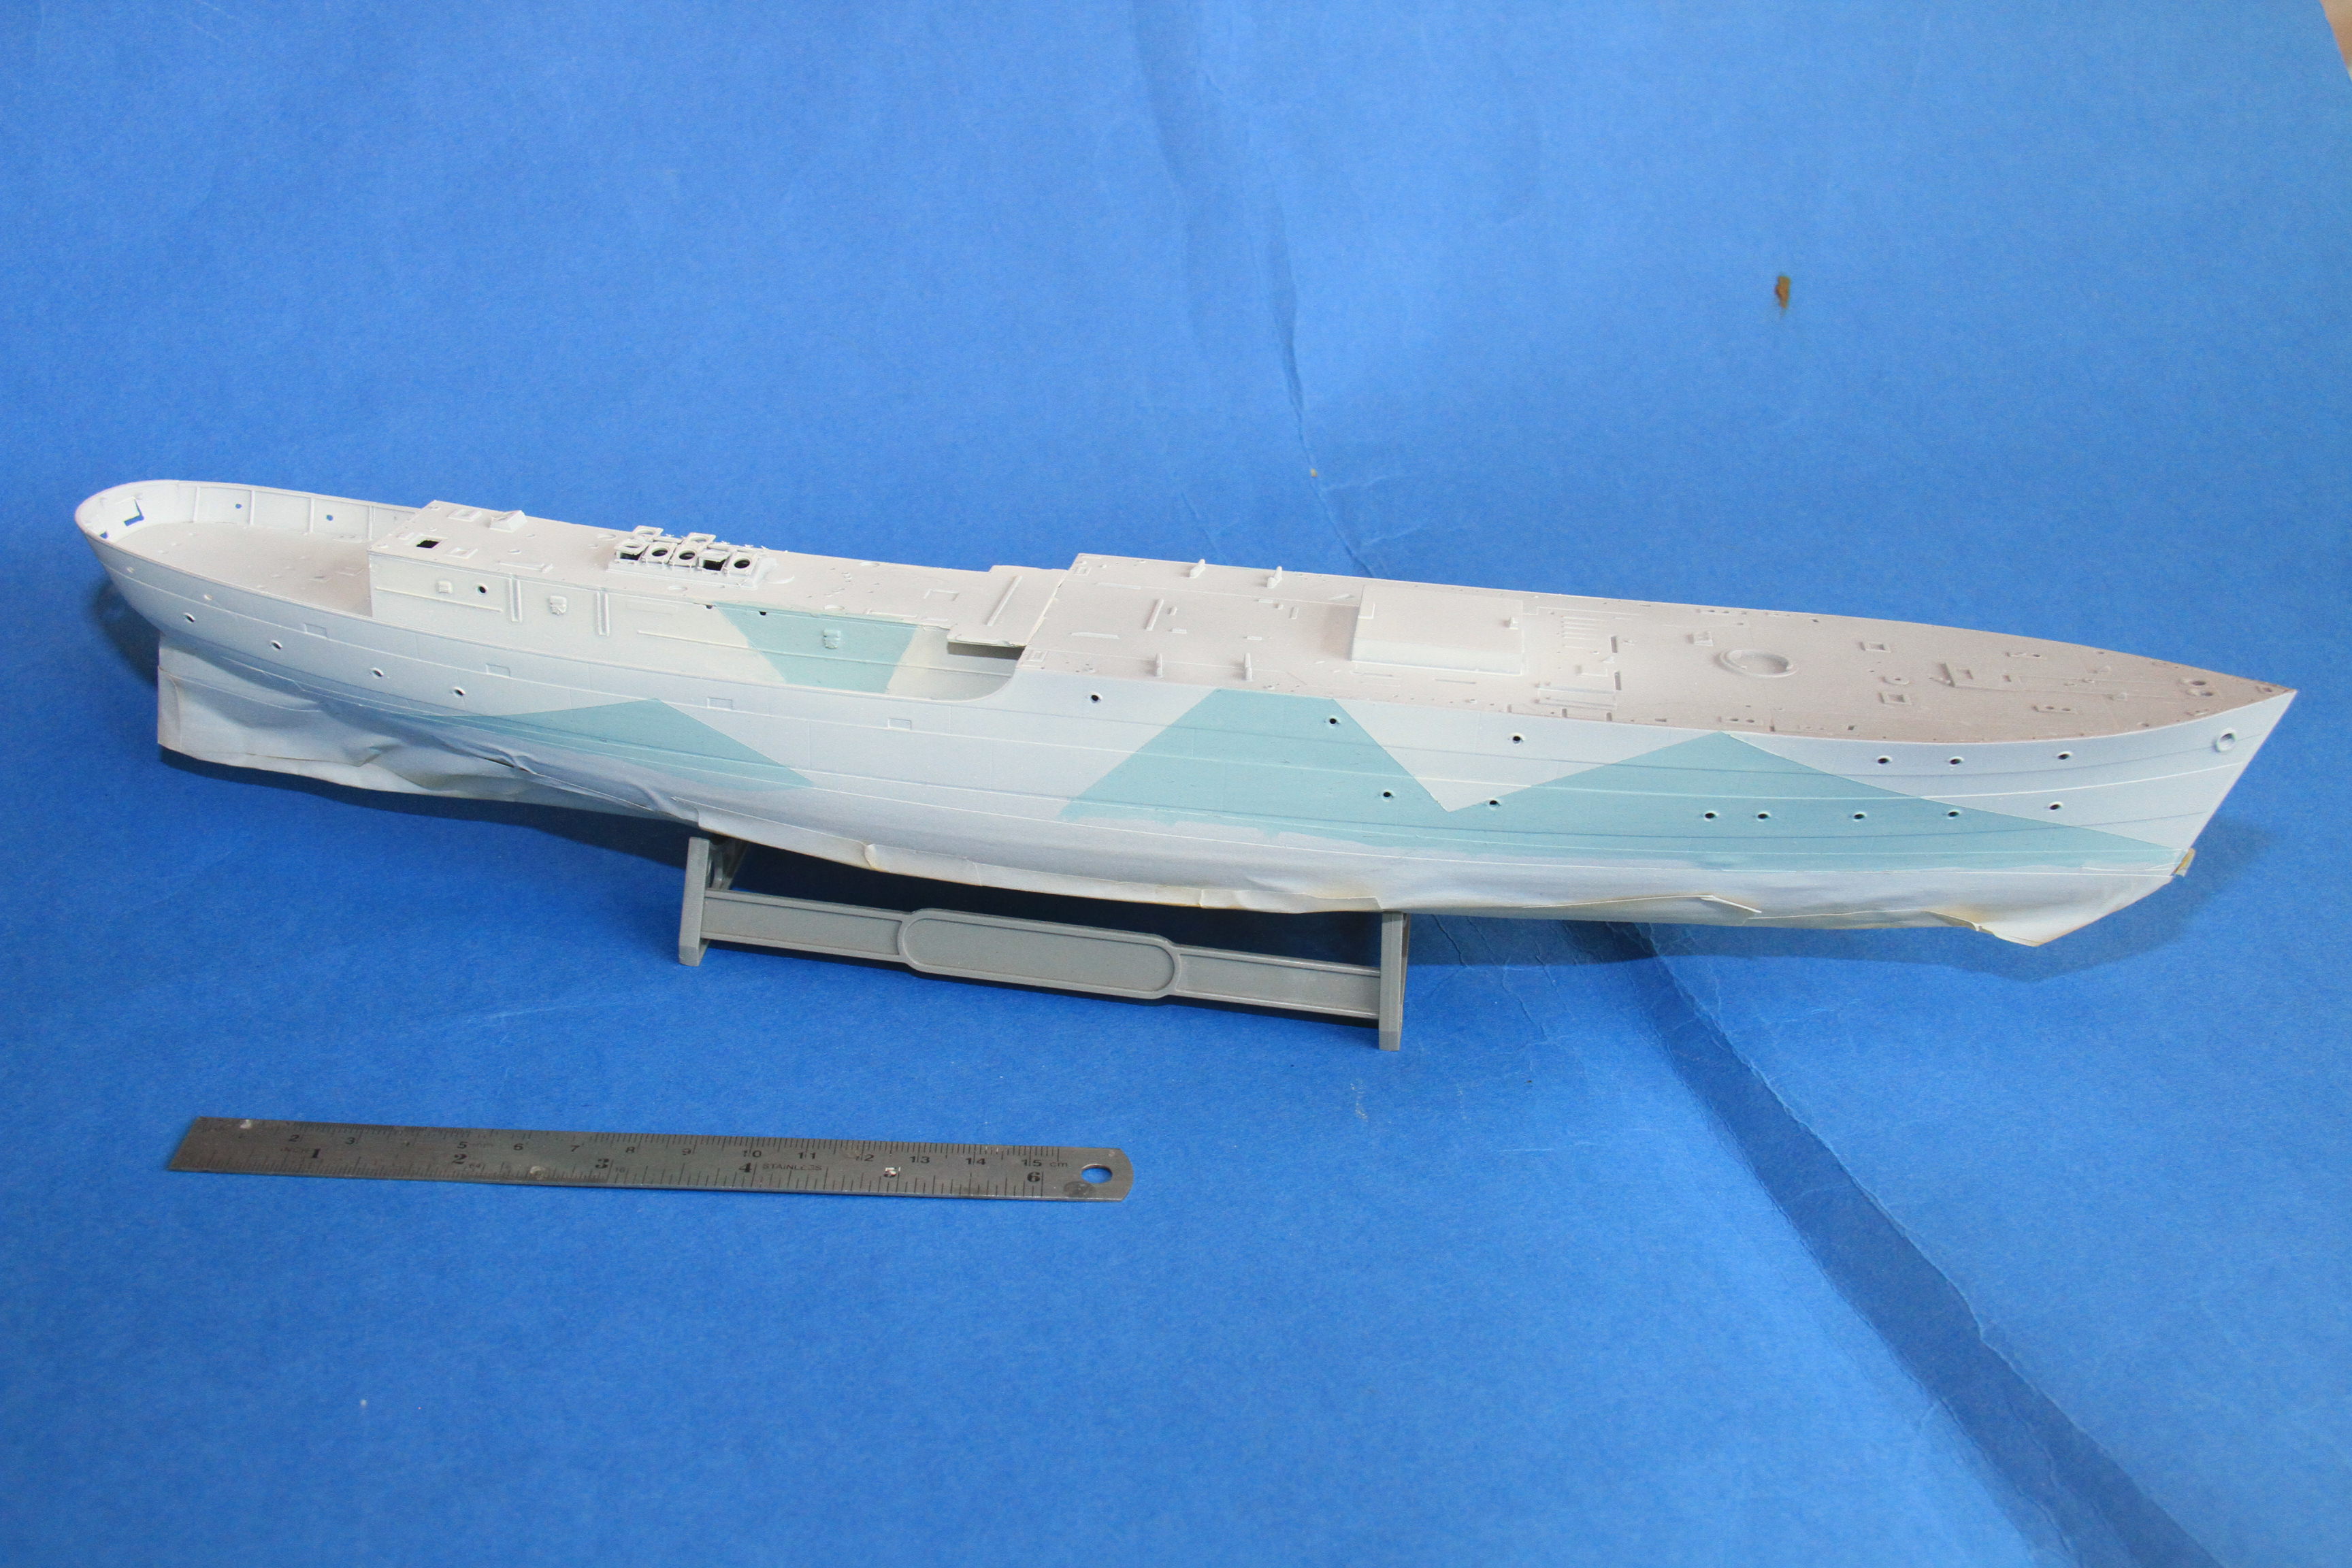
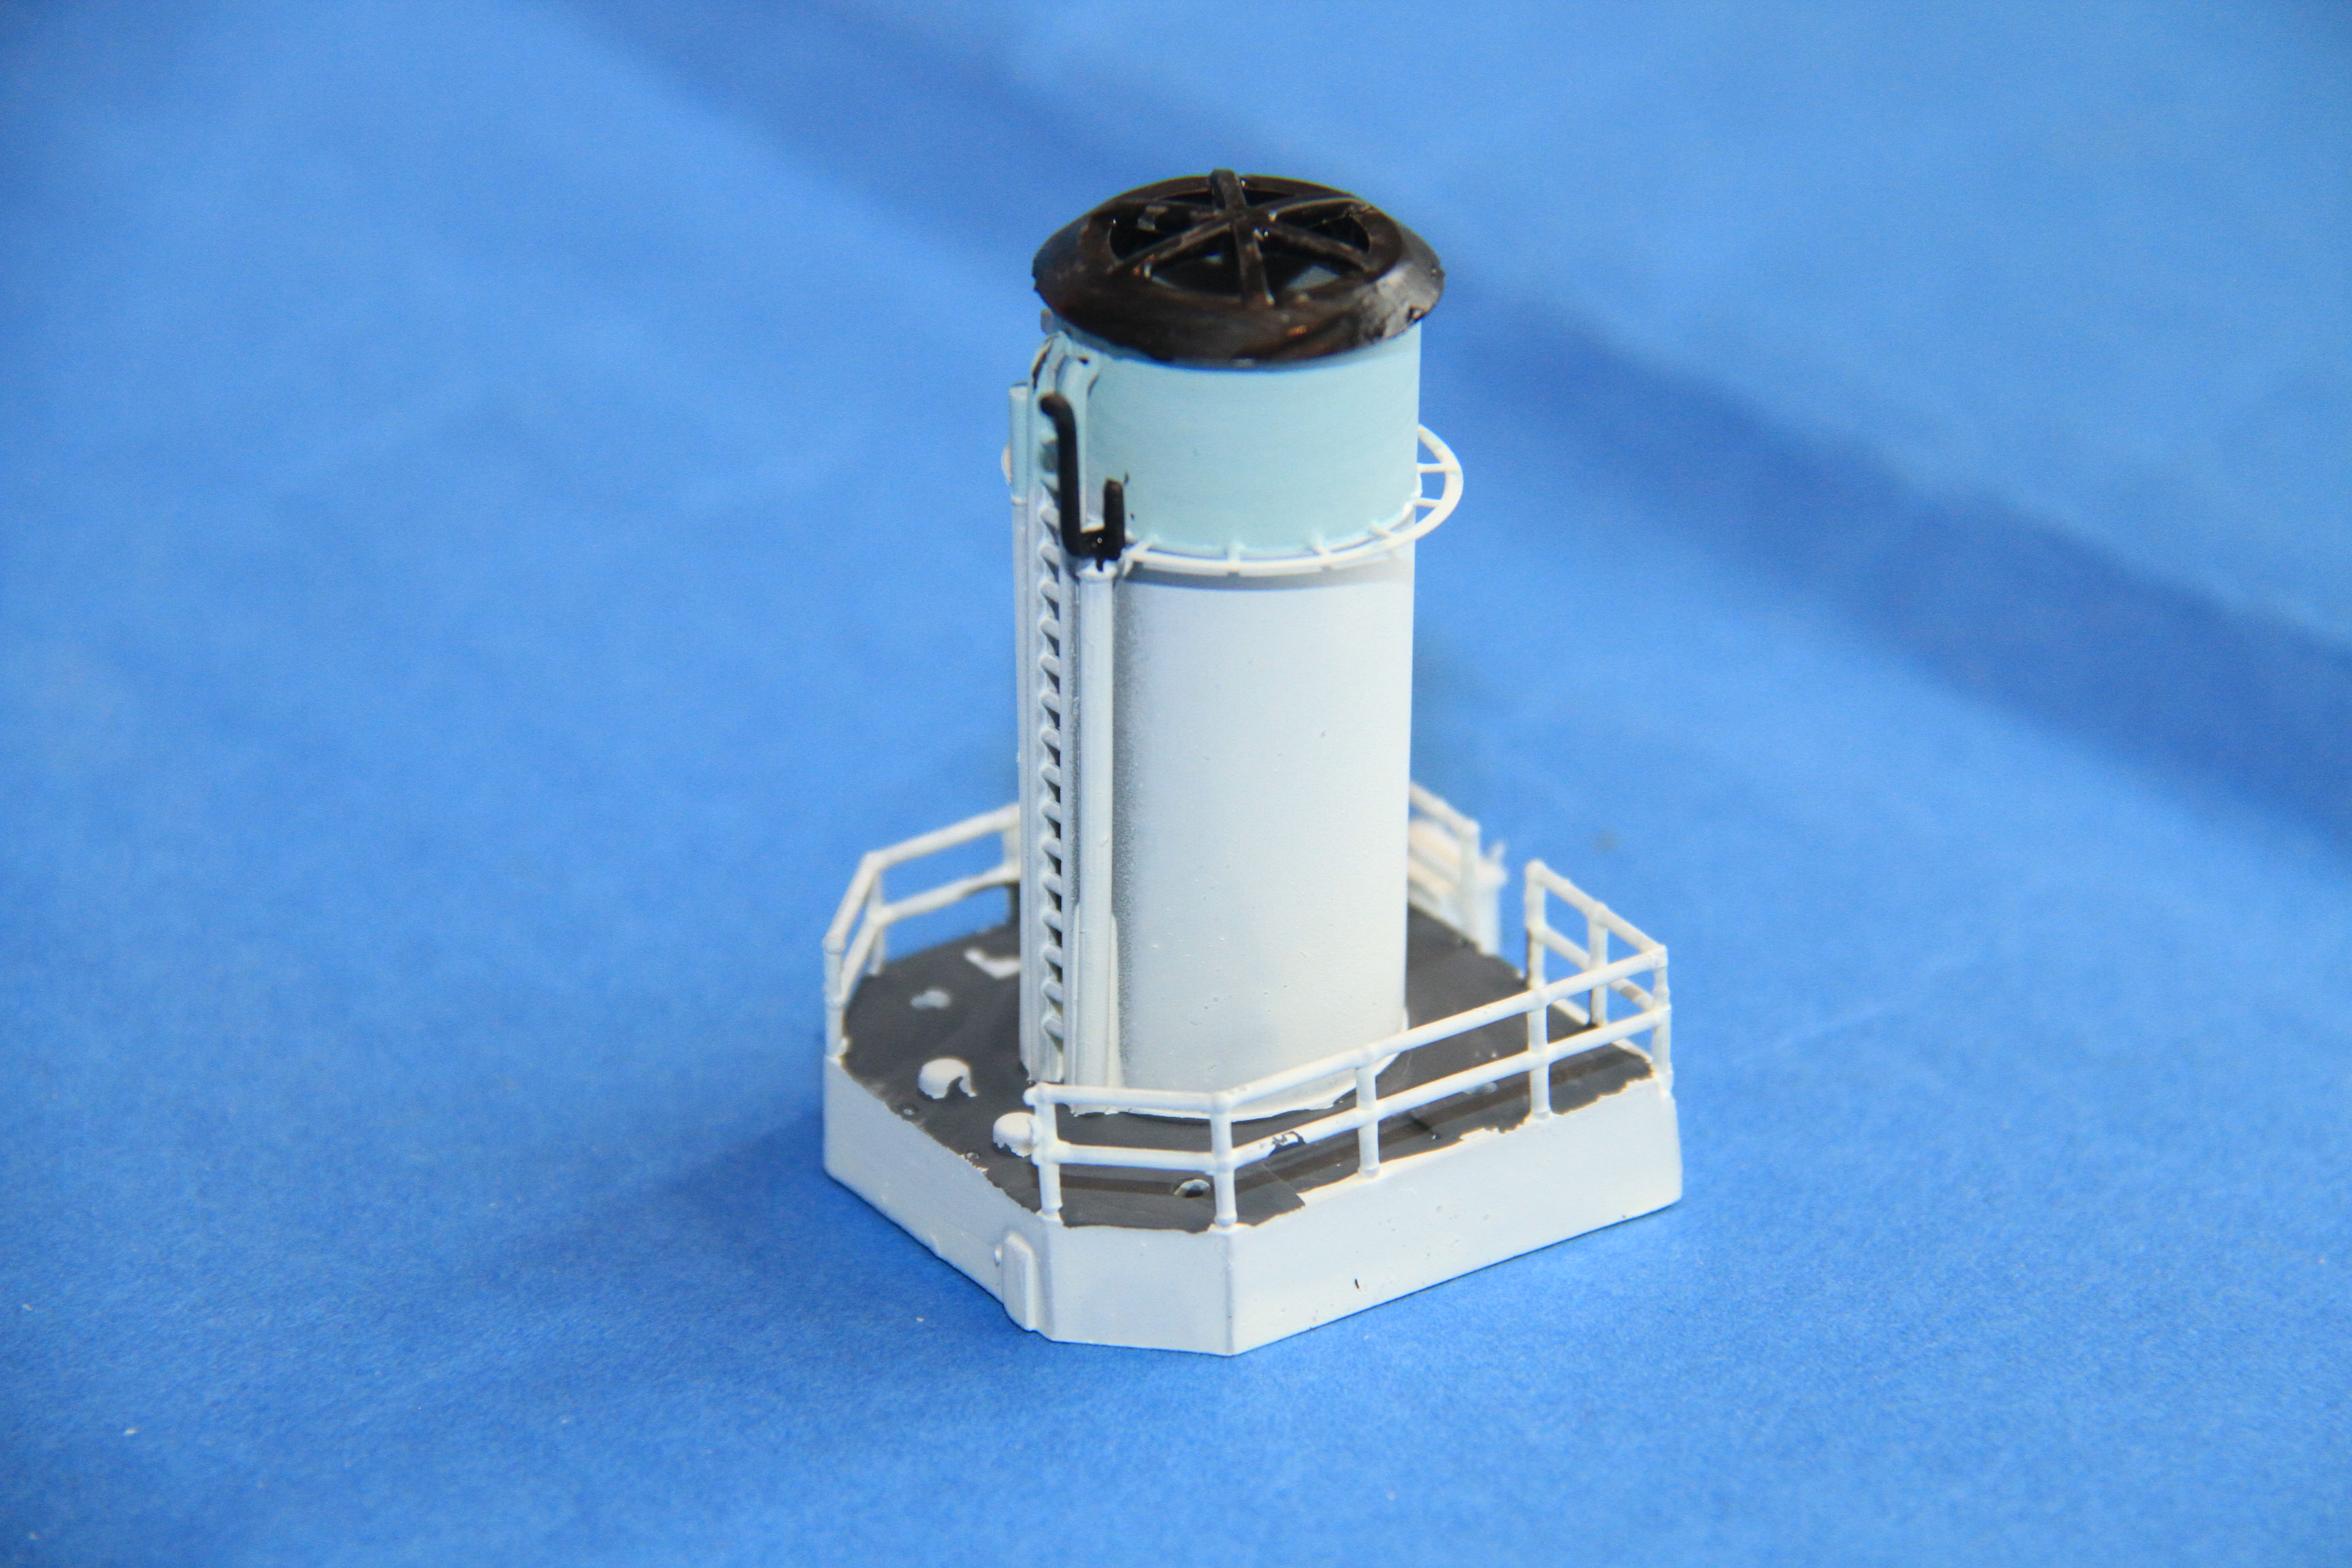
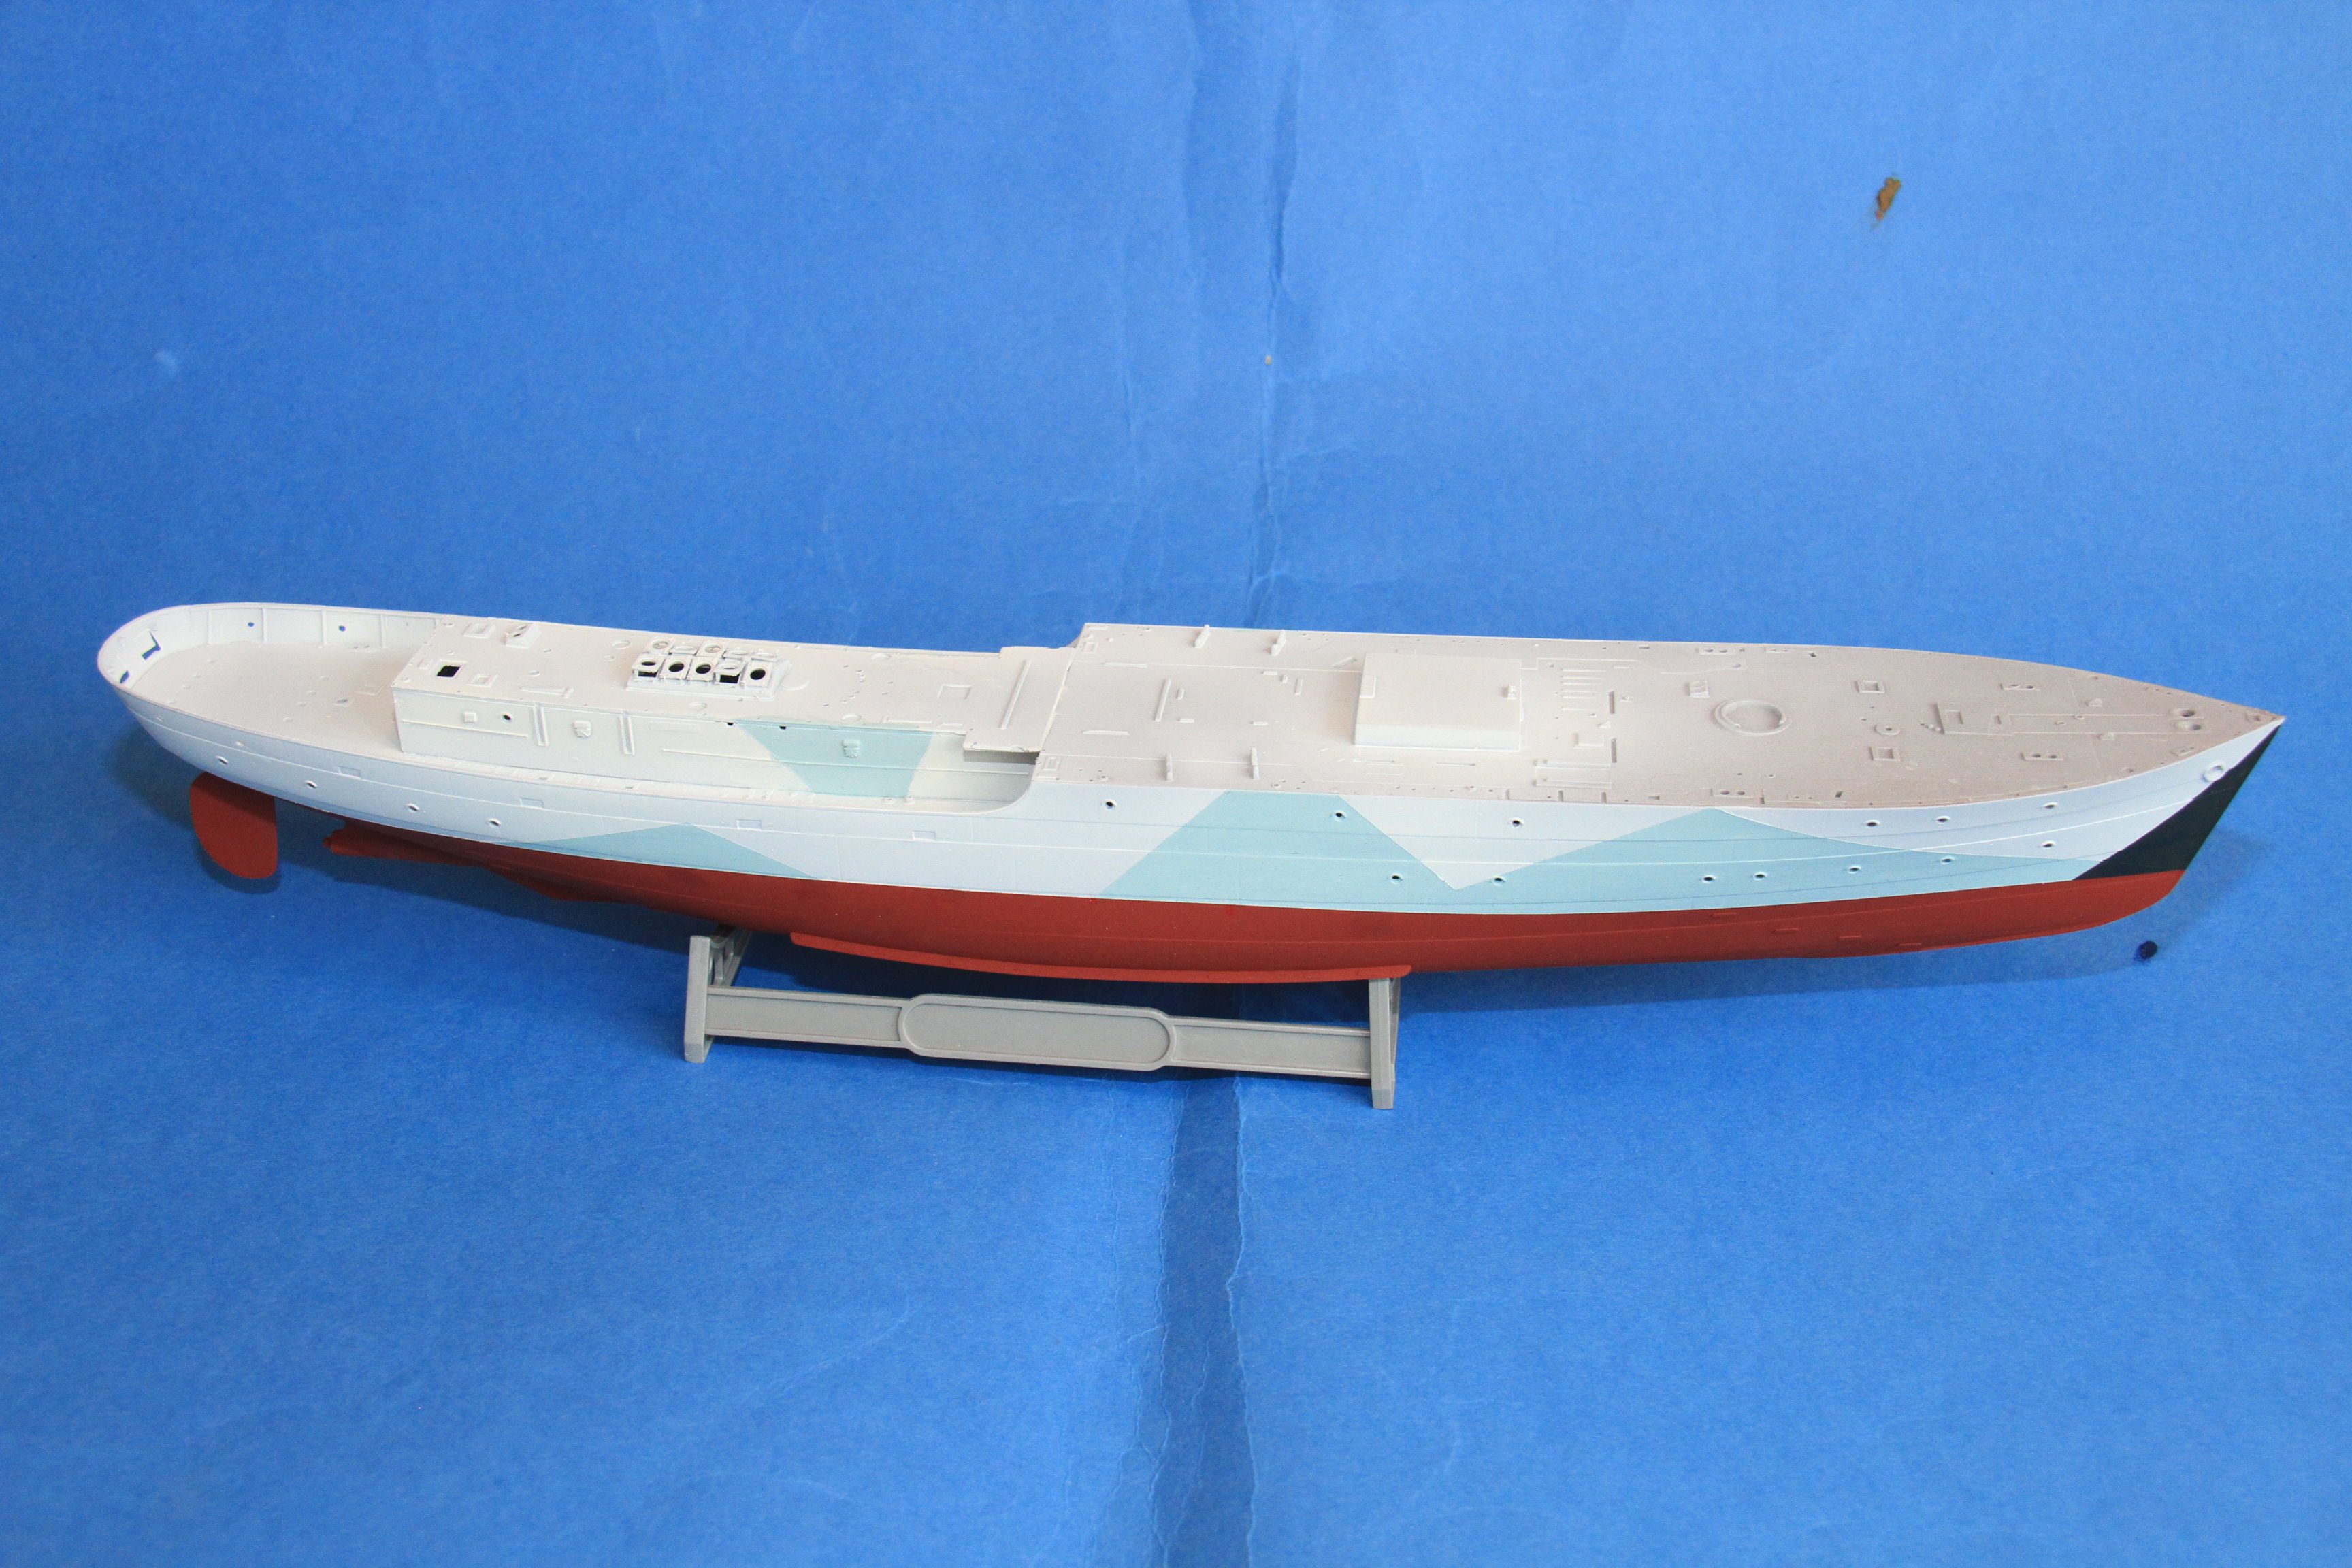
Halford's red primer on for the anti fouling.


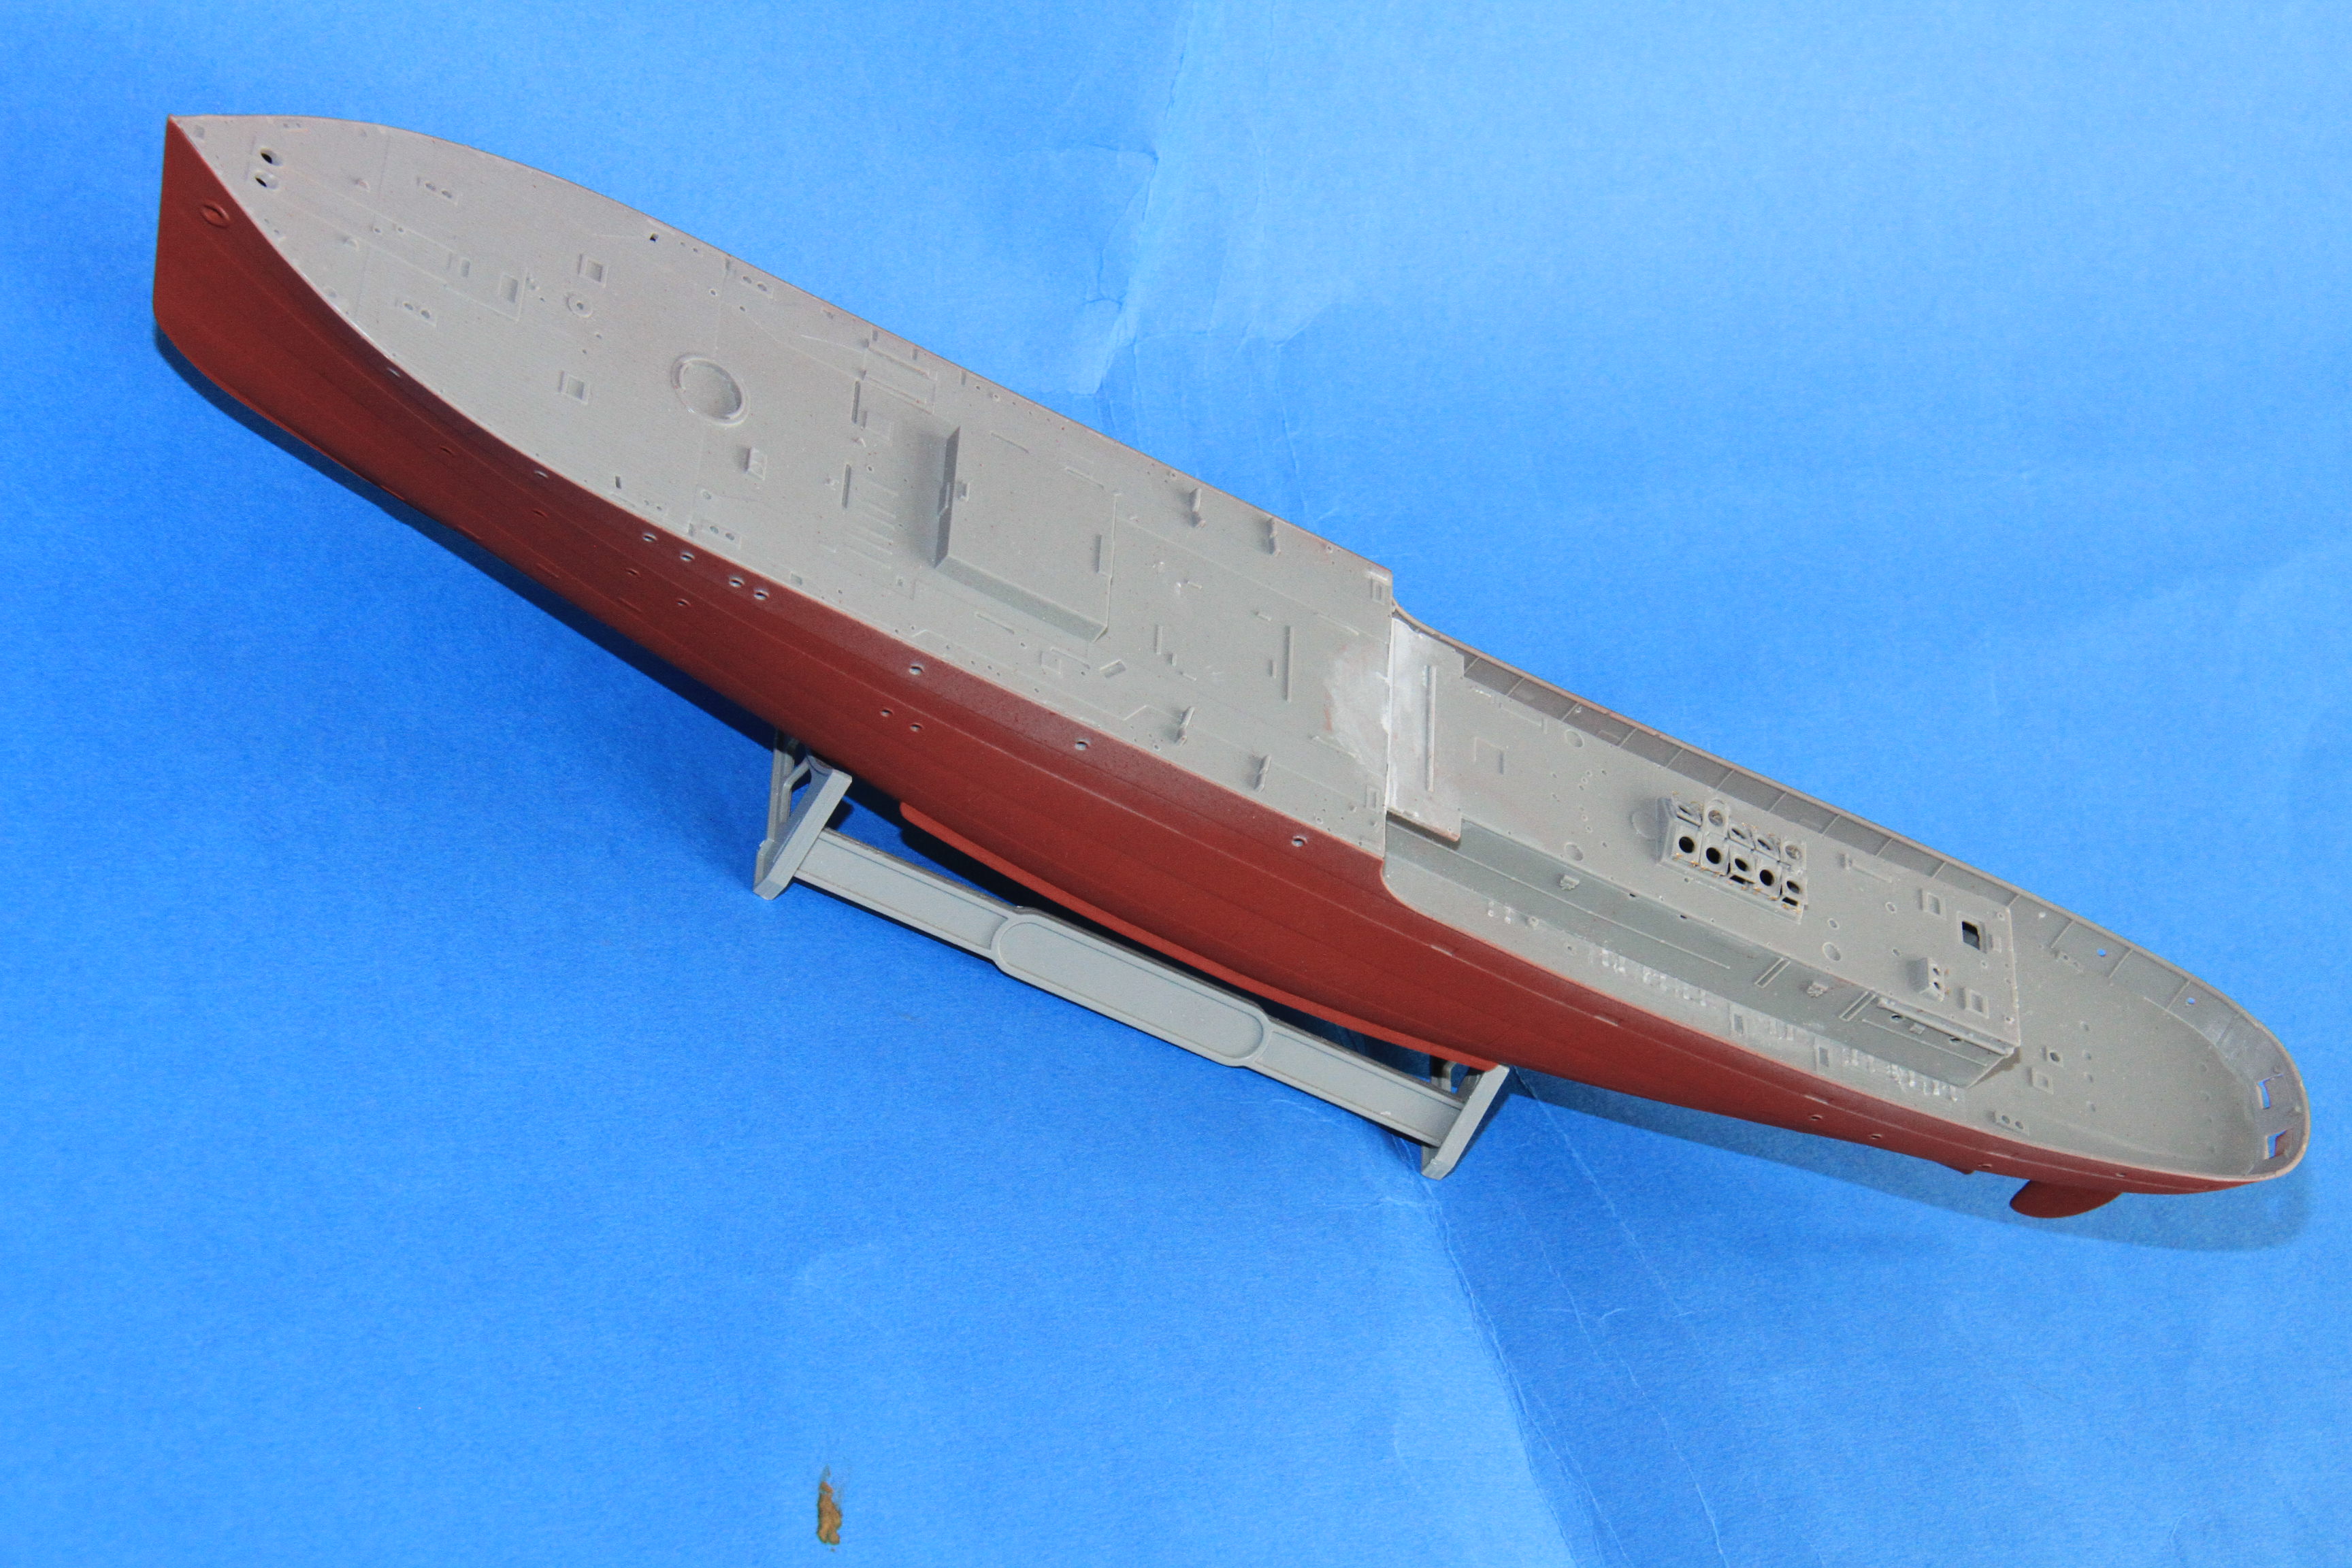
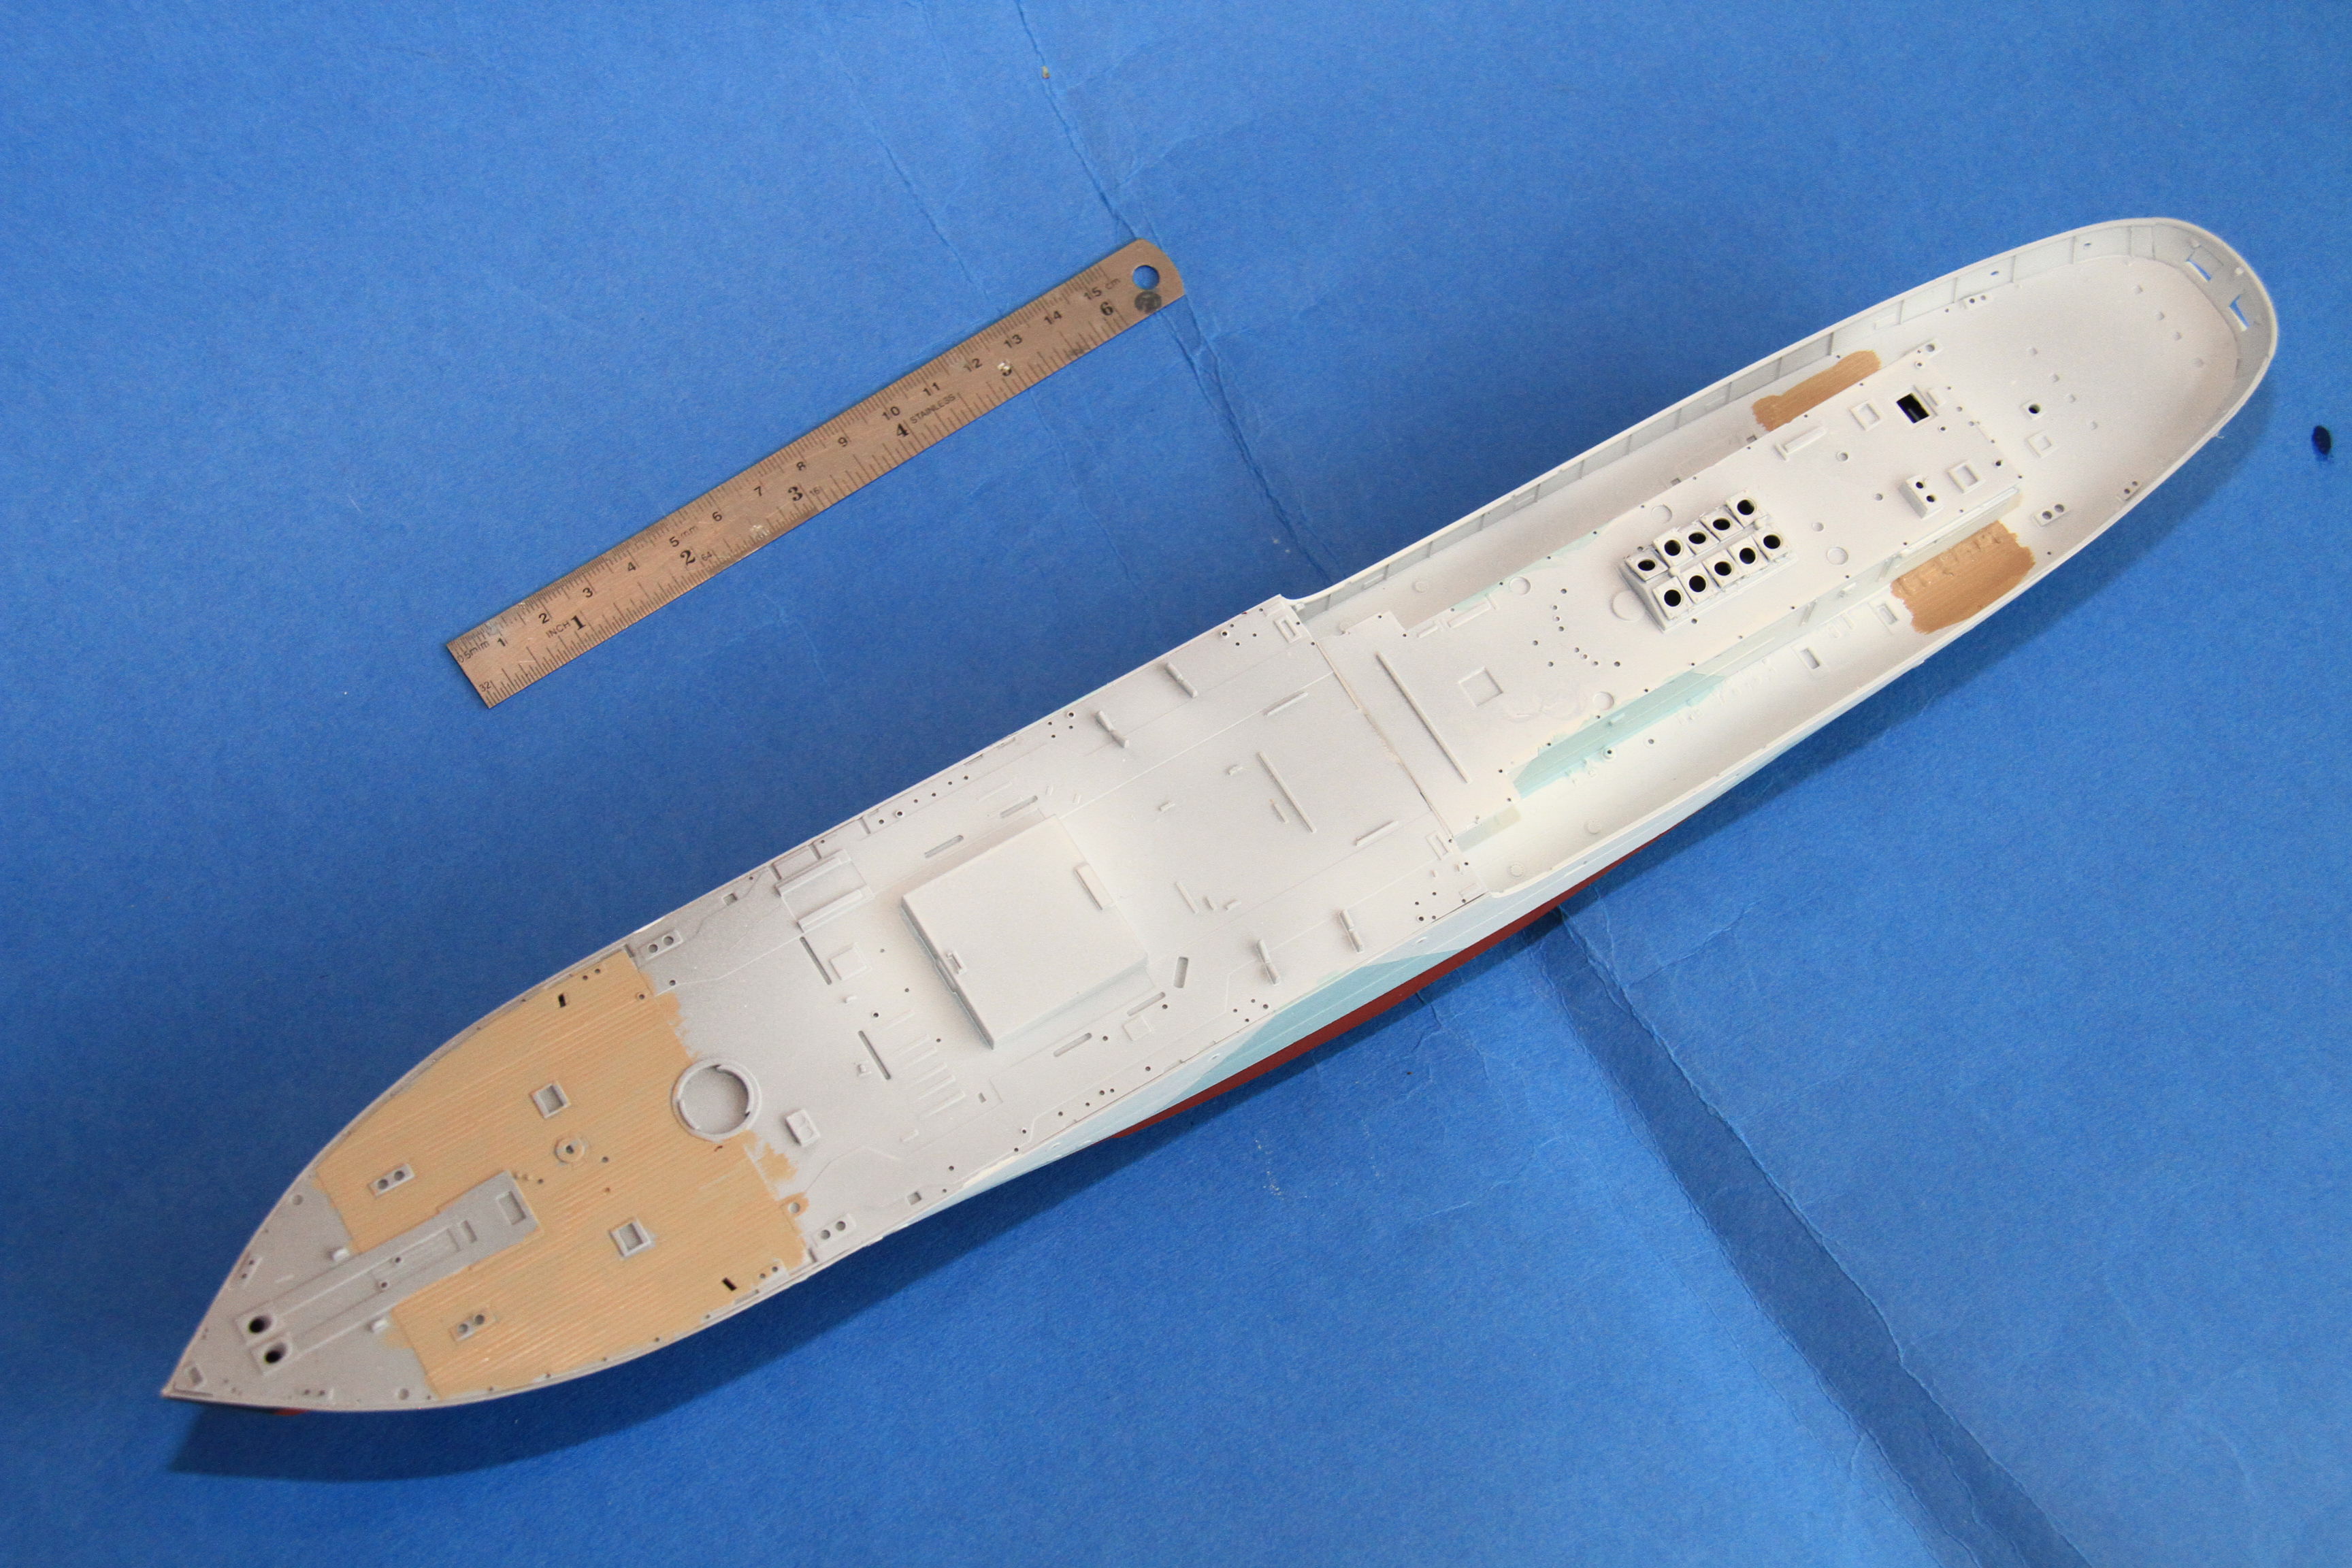
The slight issue with short moulding on one section of moulding fixed.


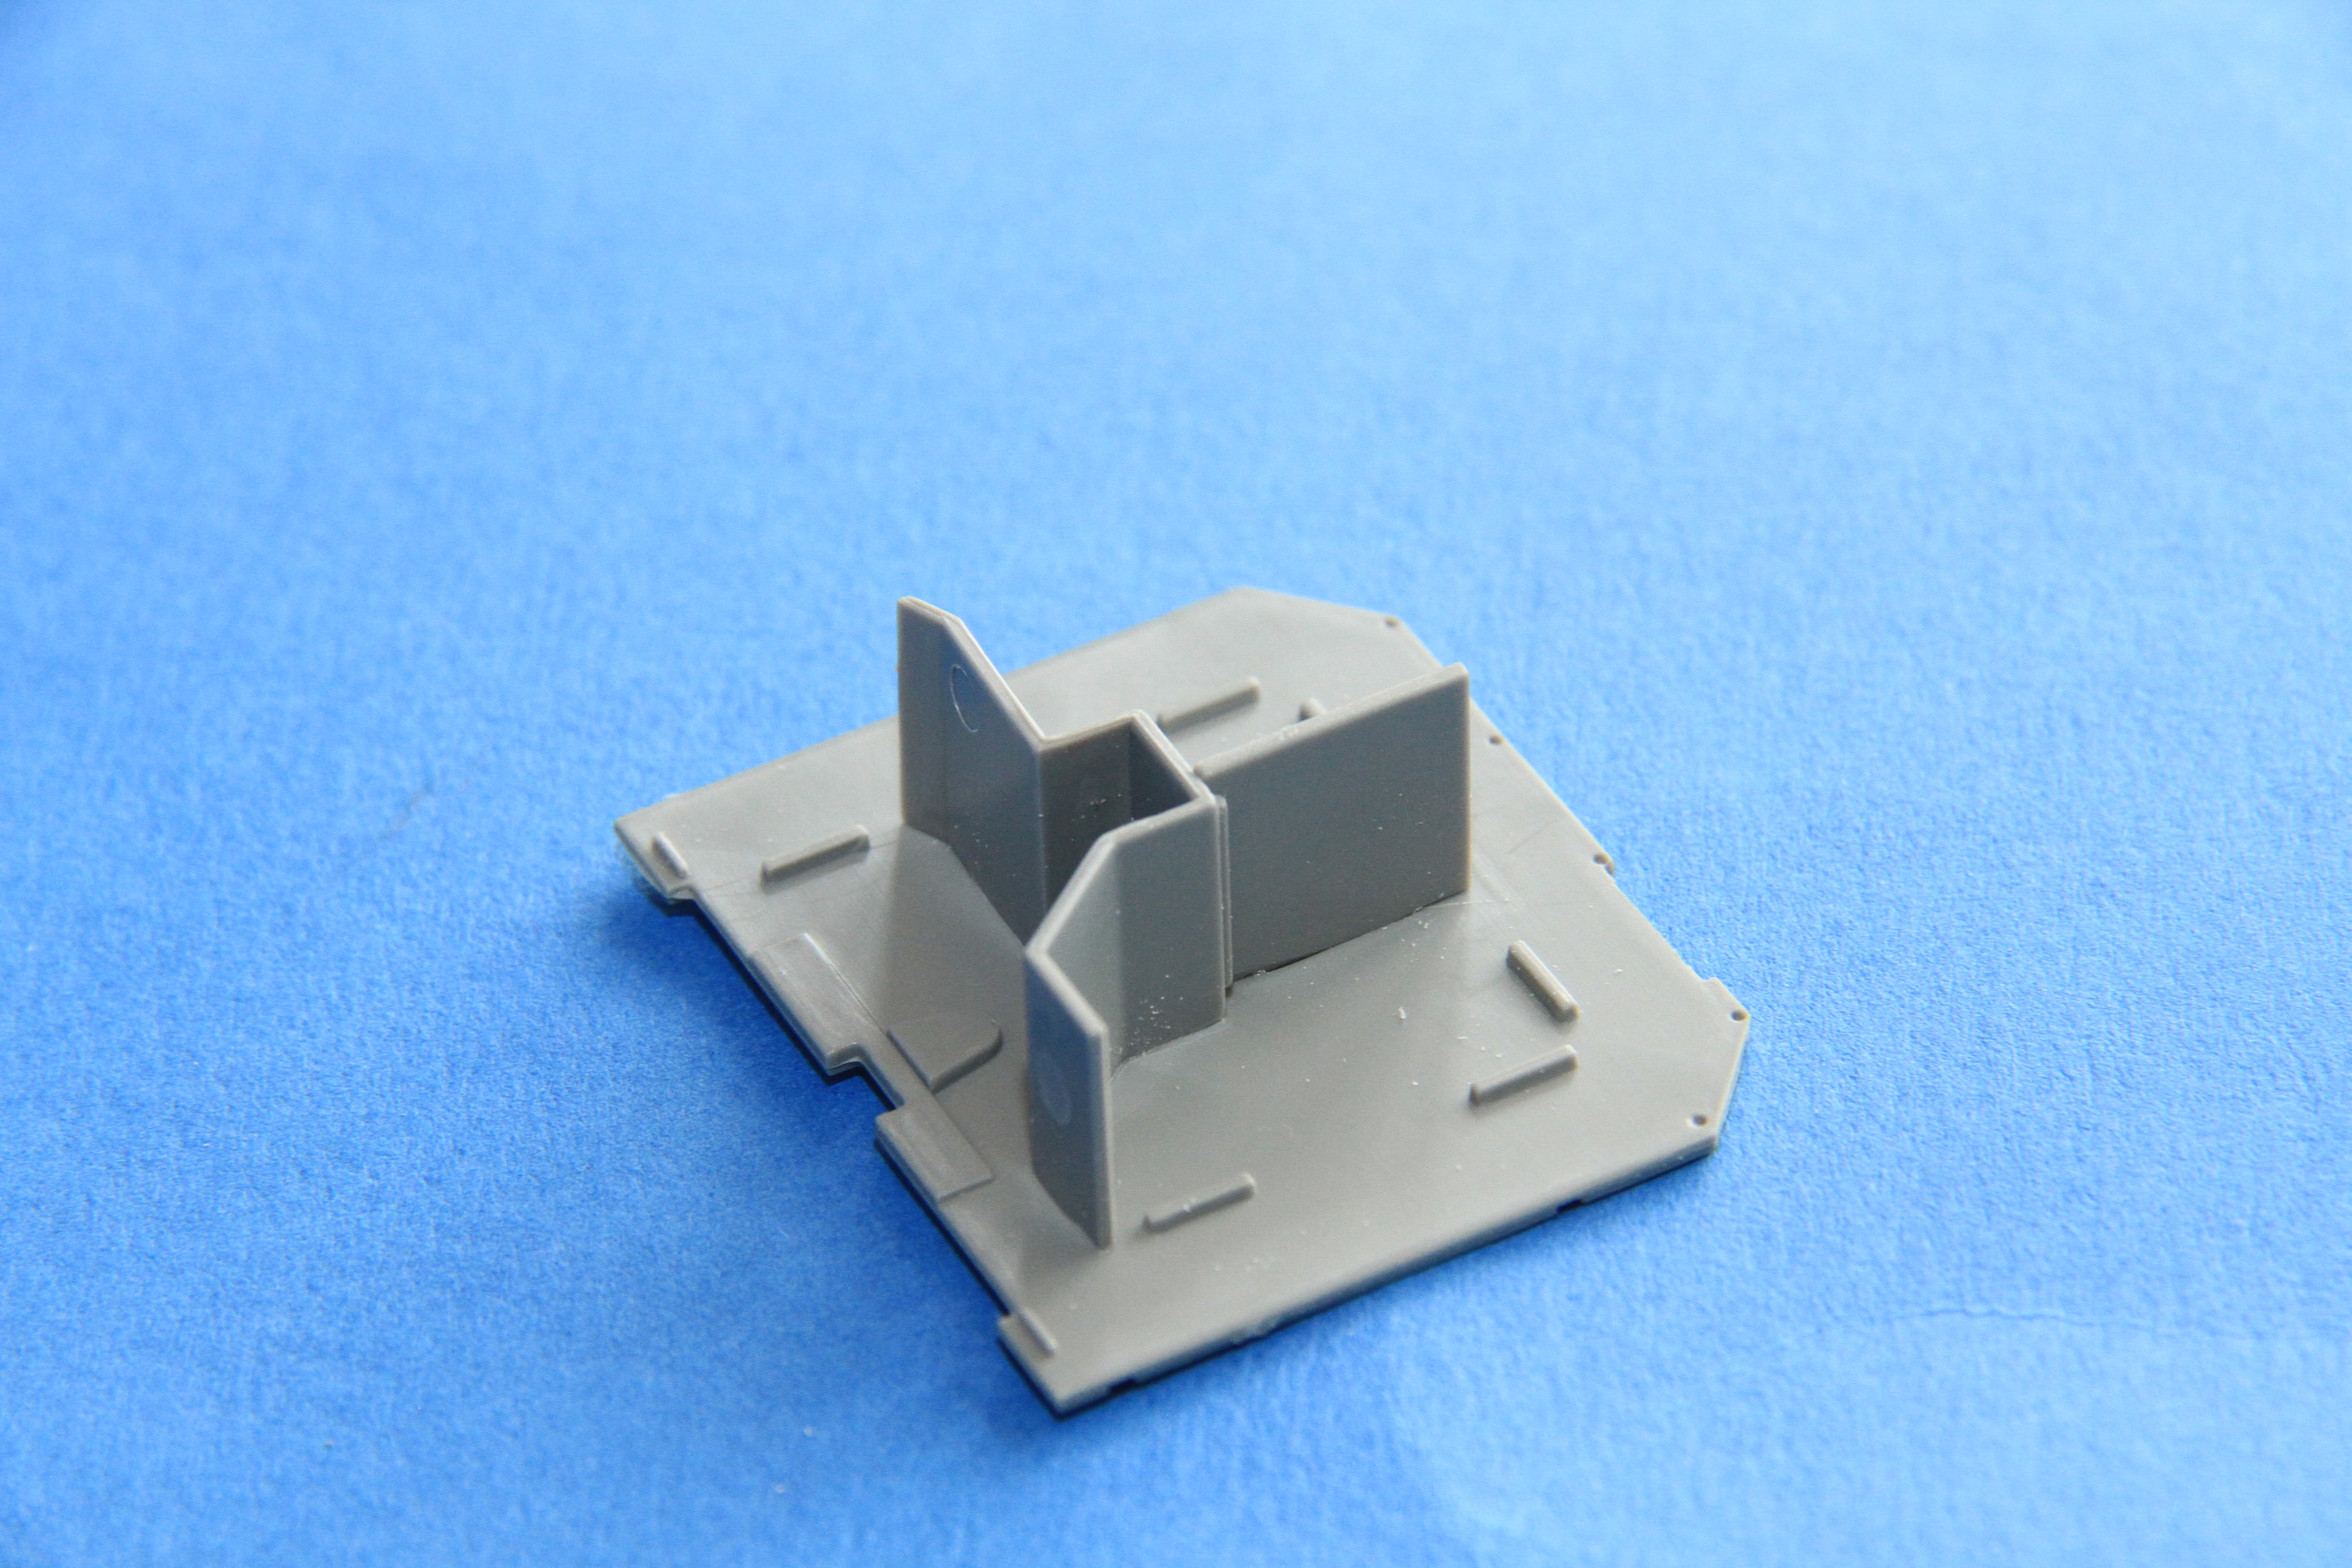
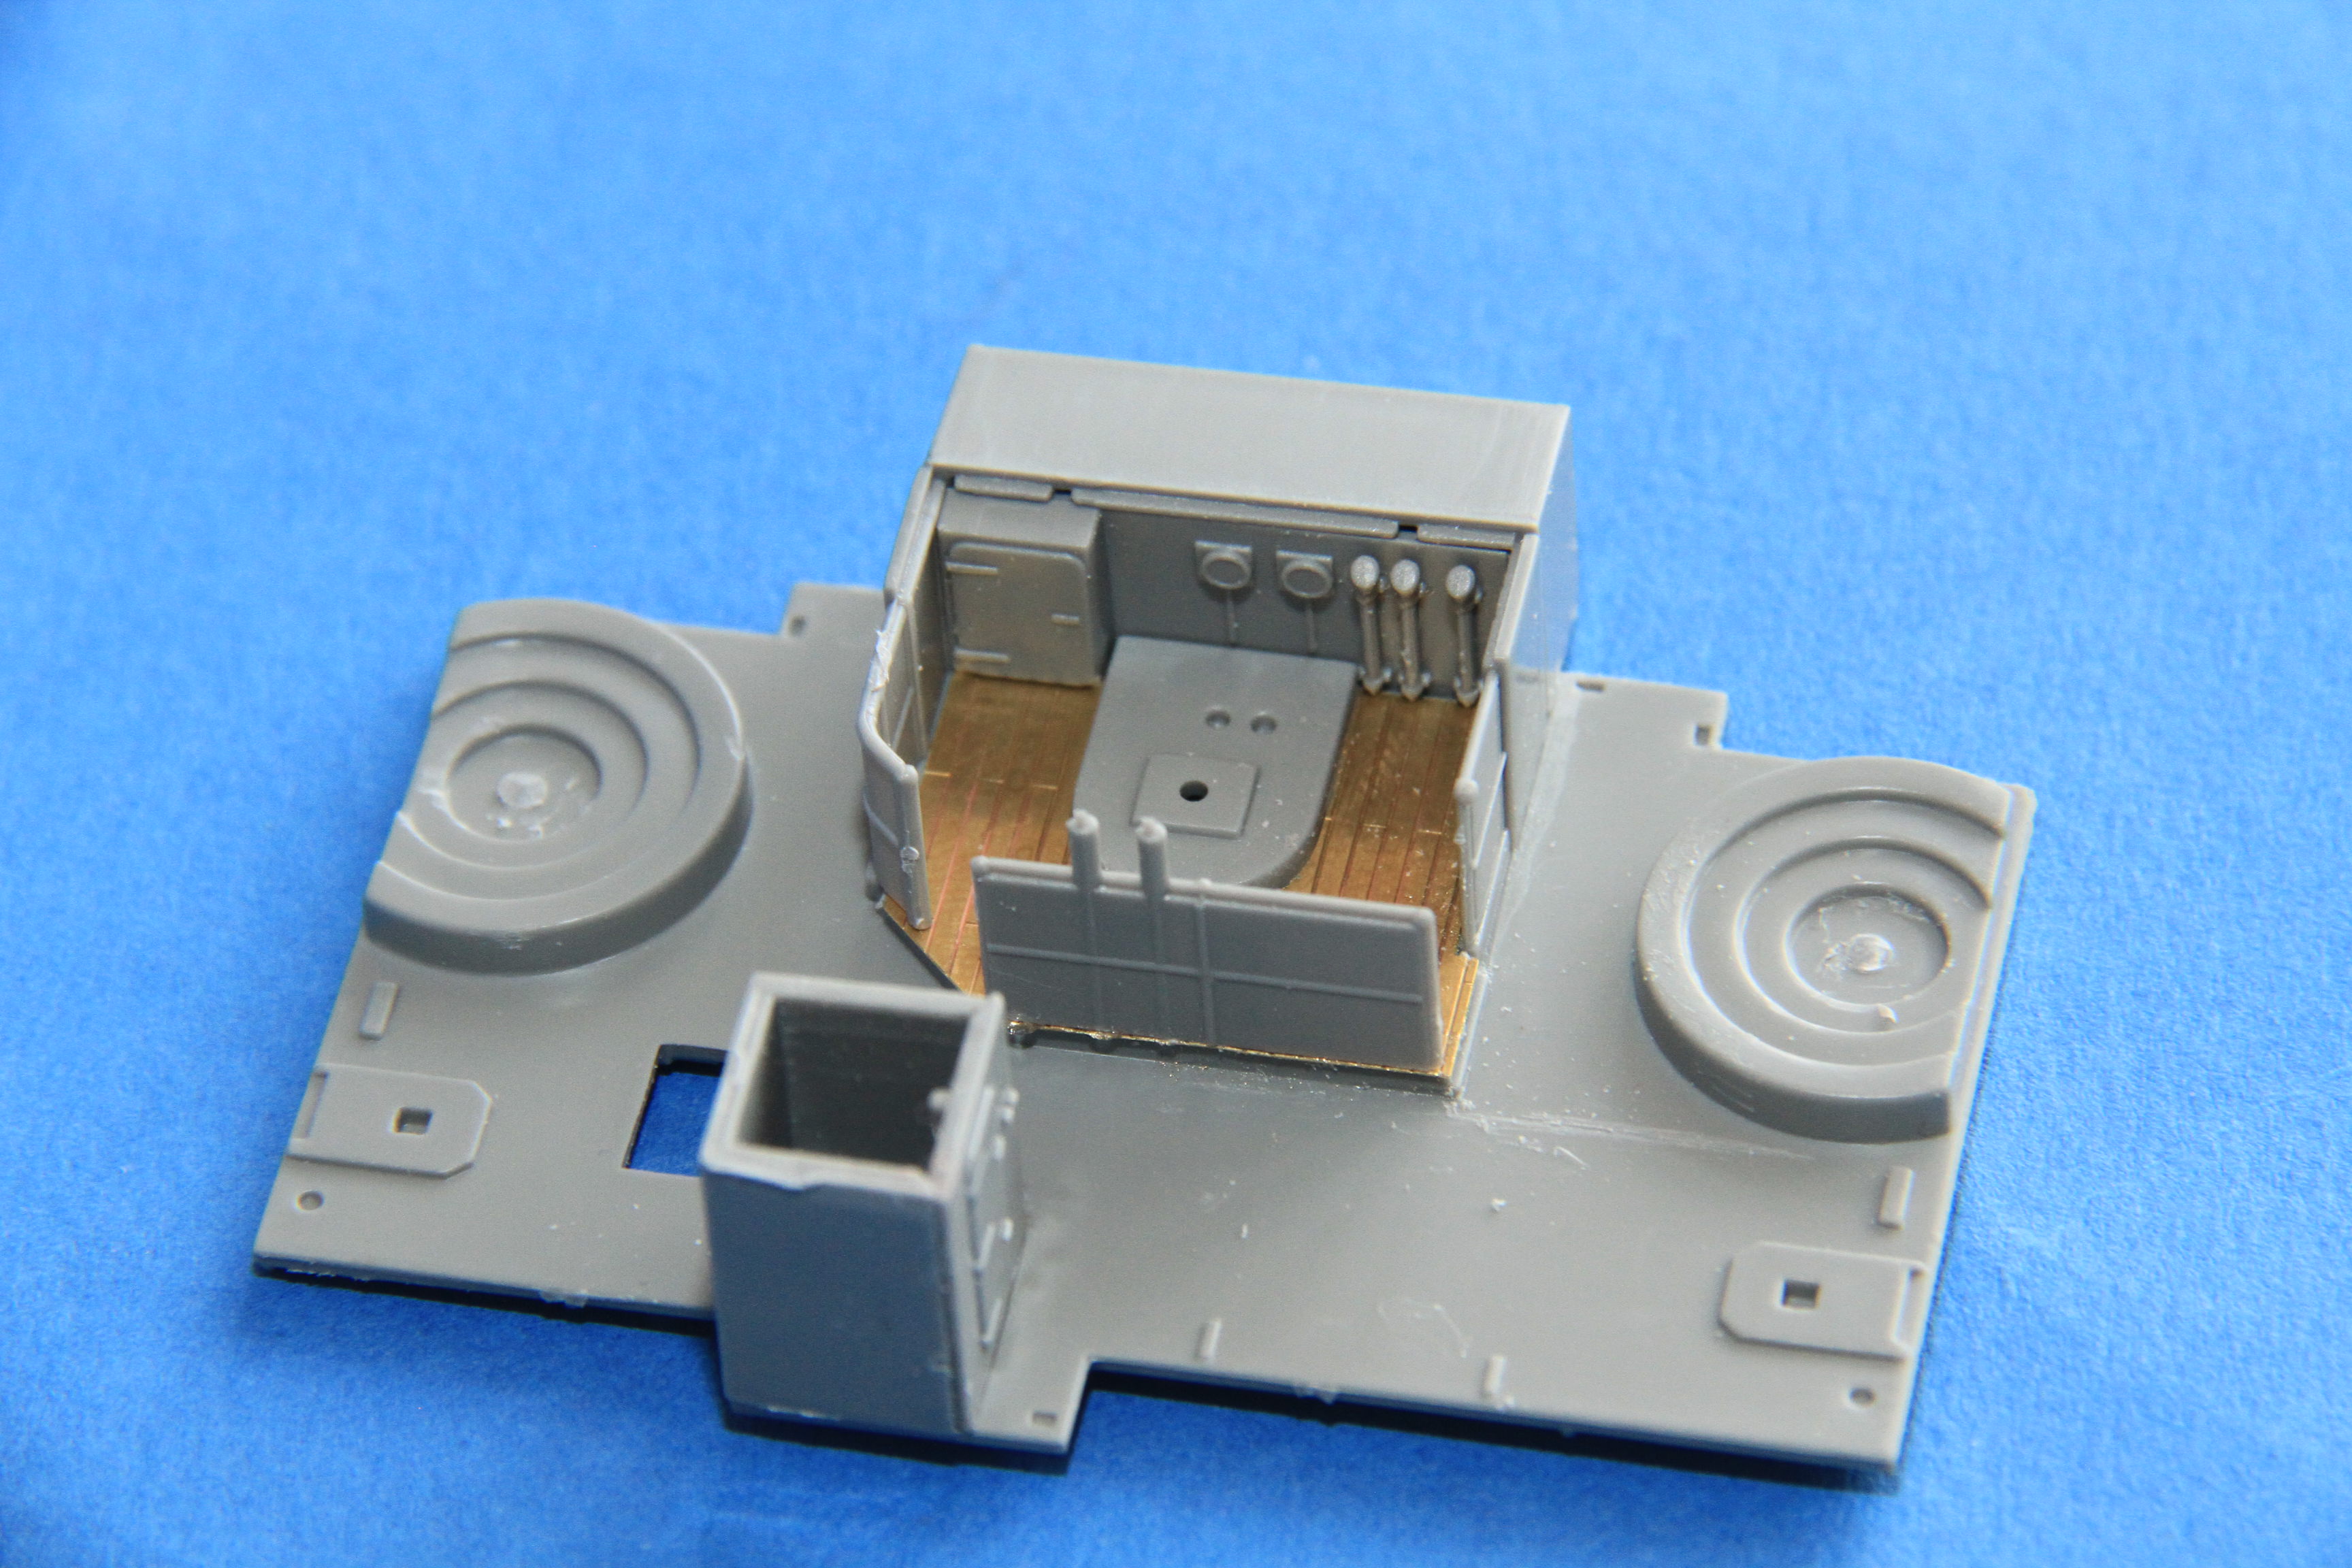
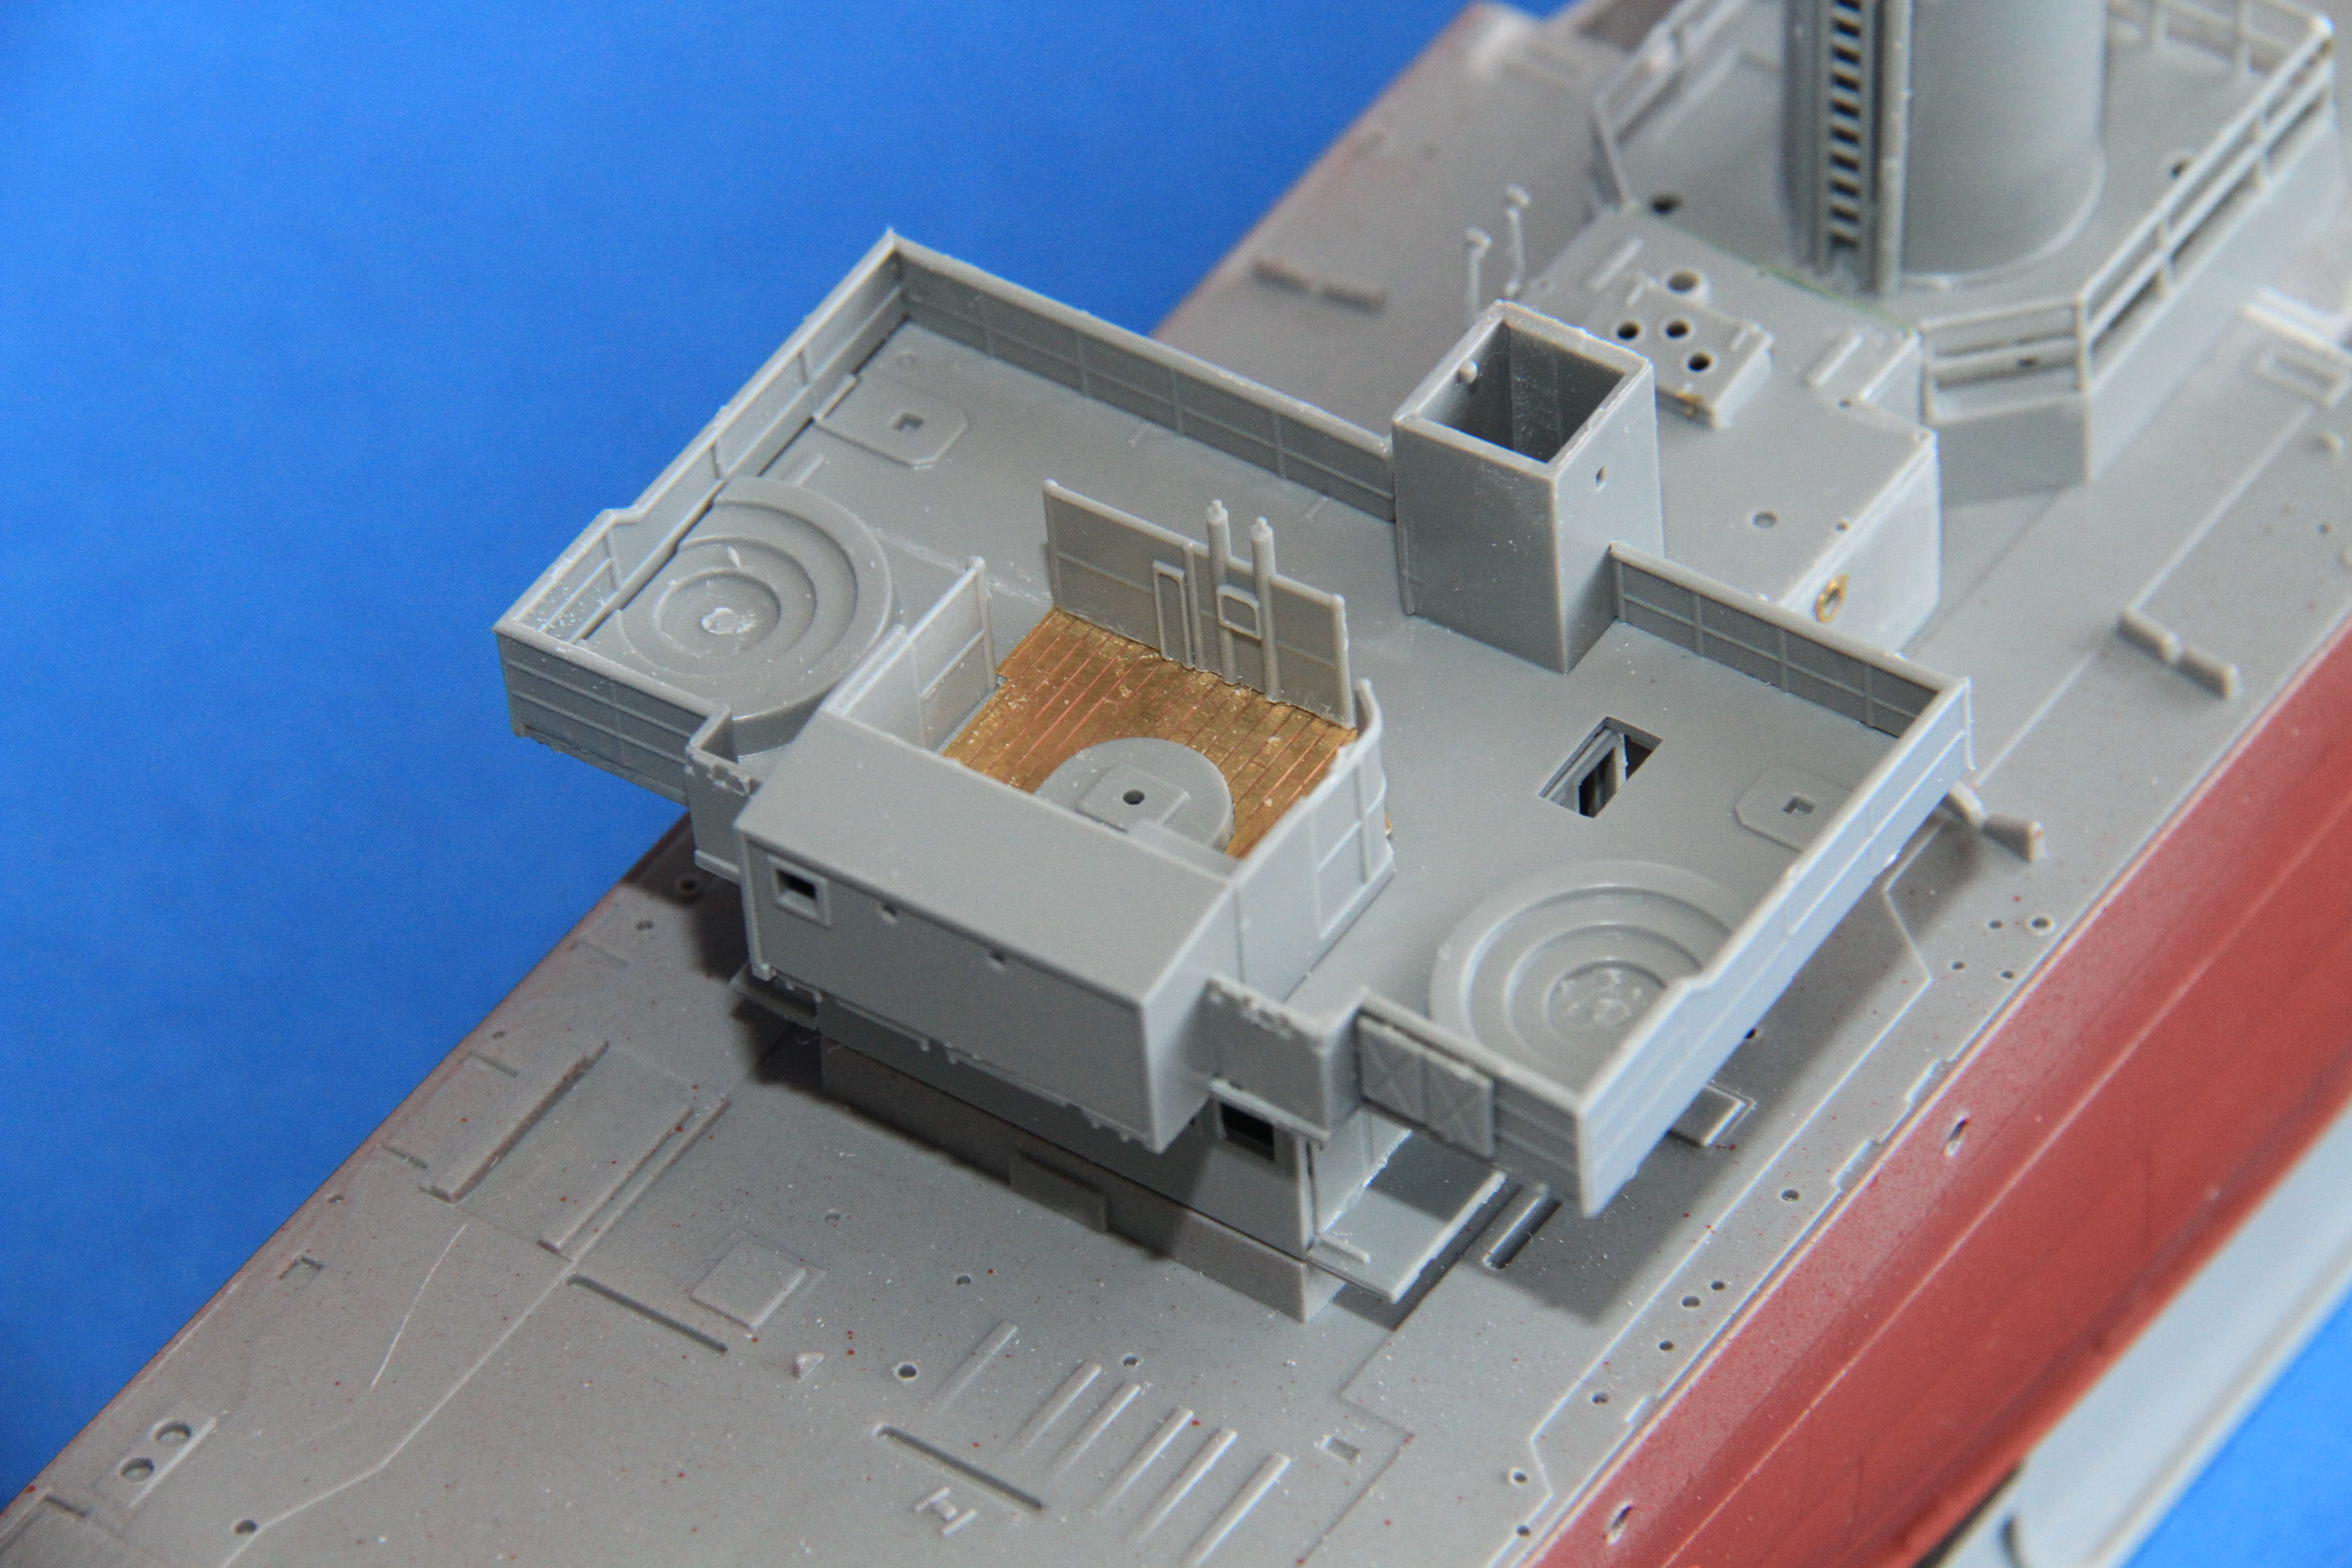
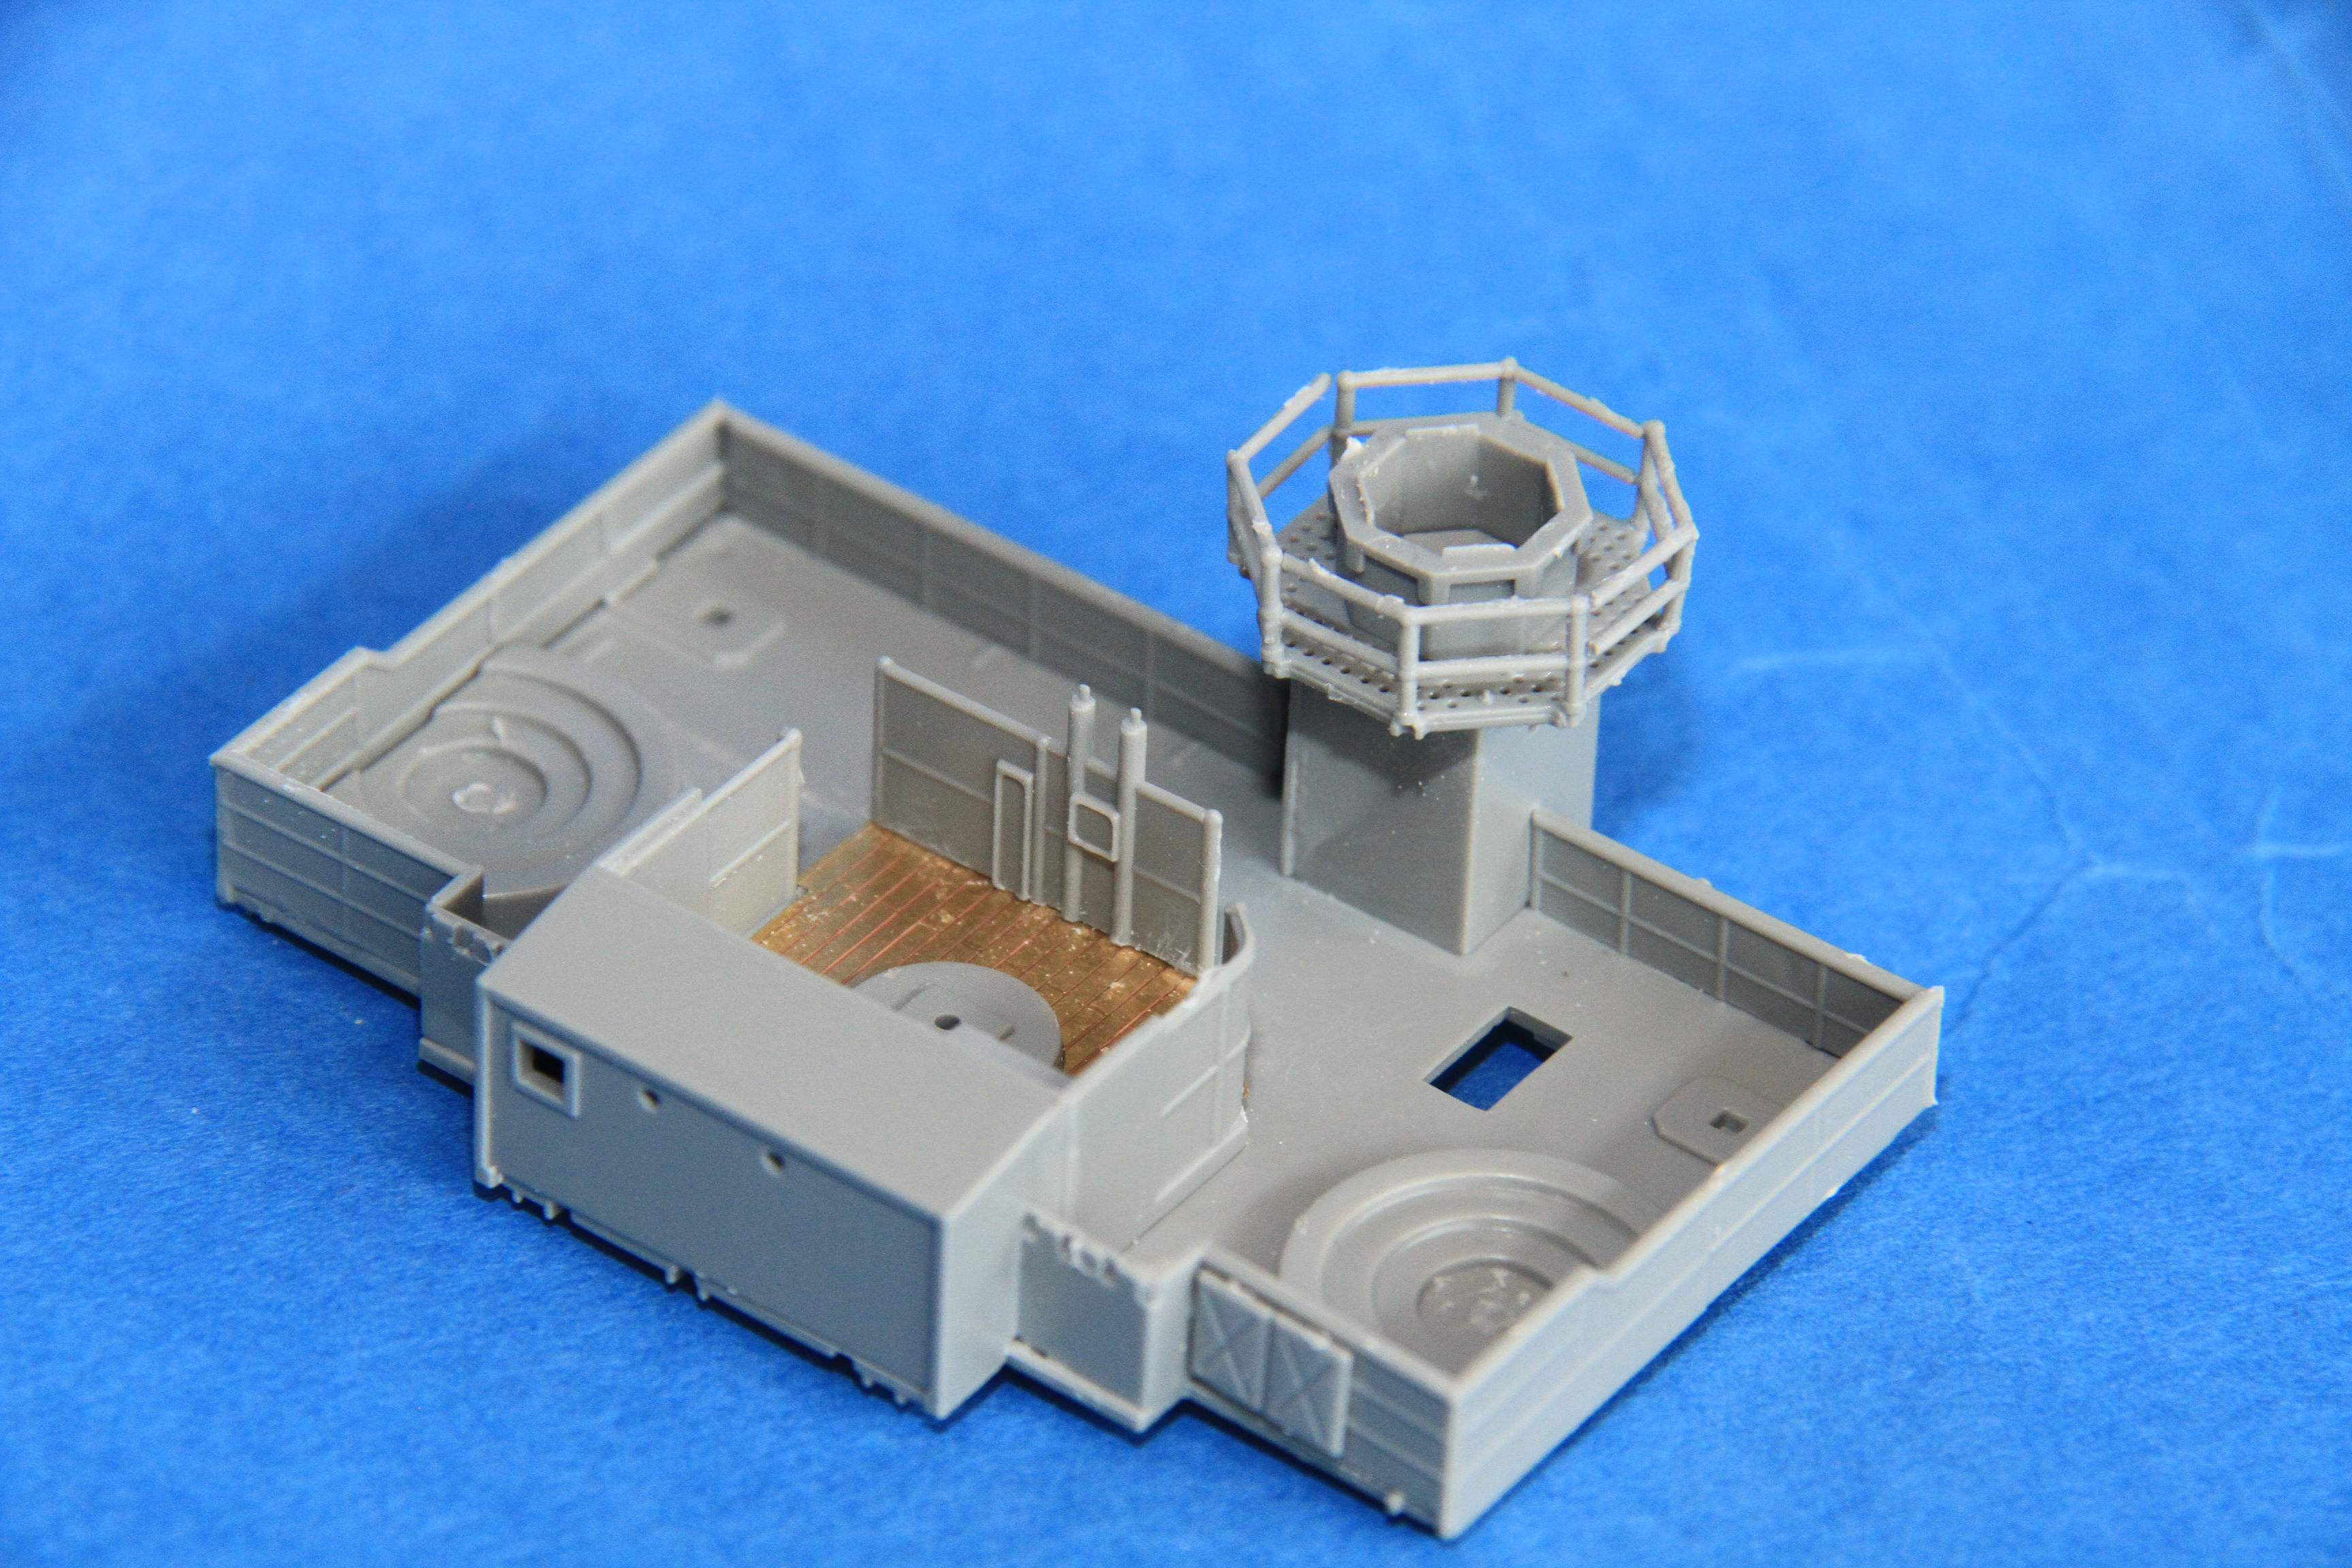
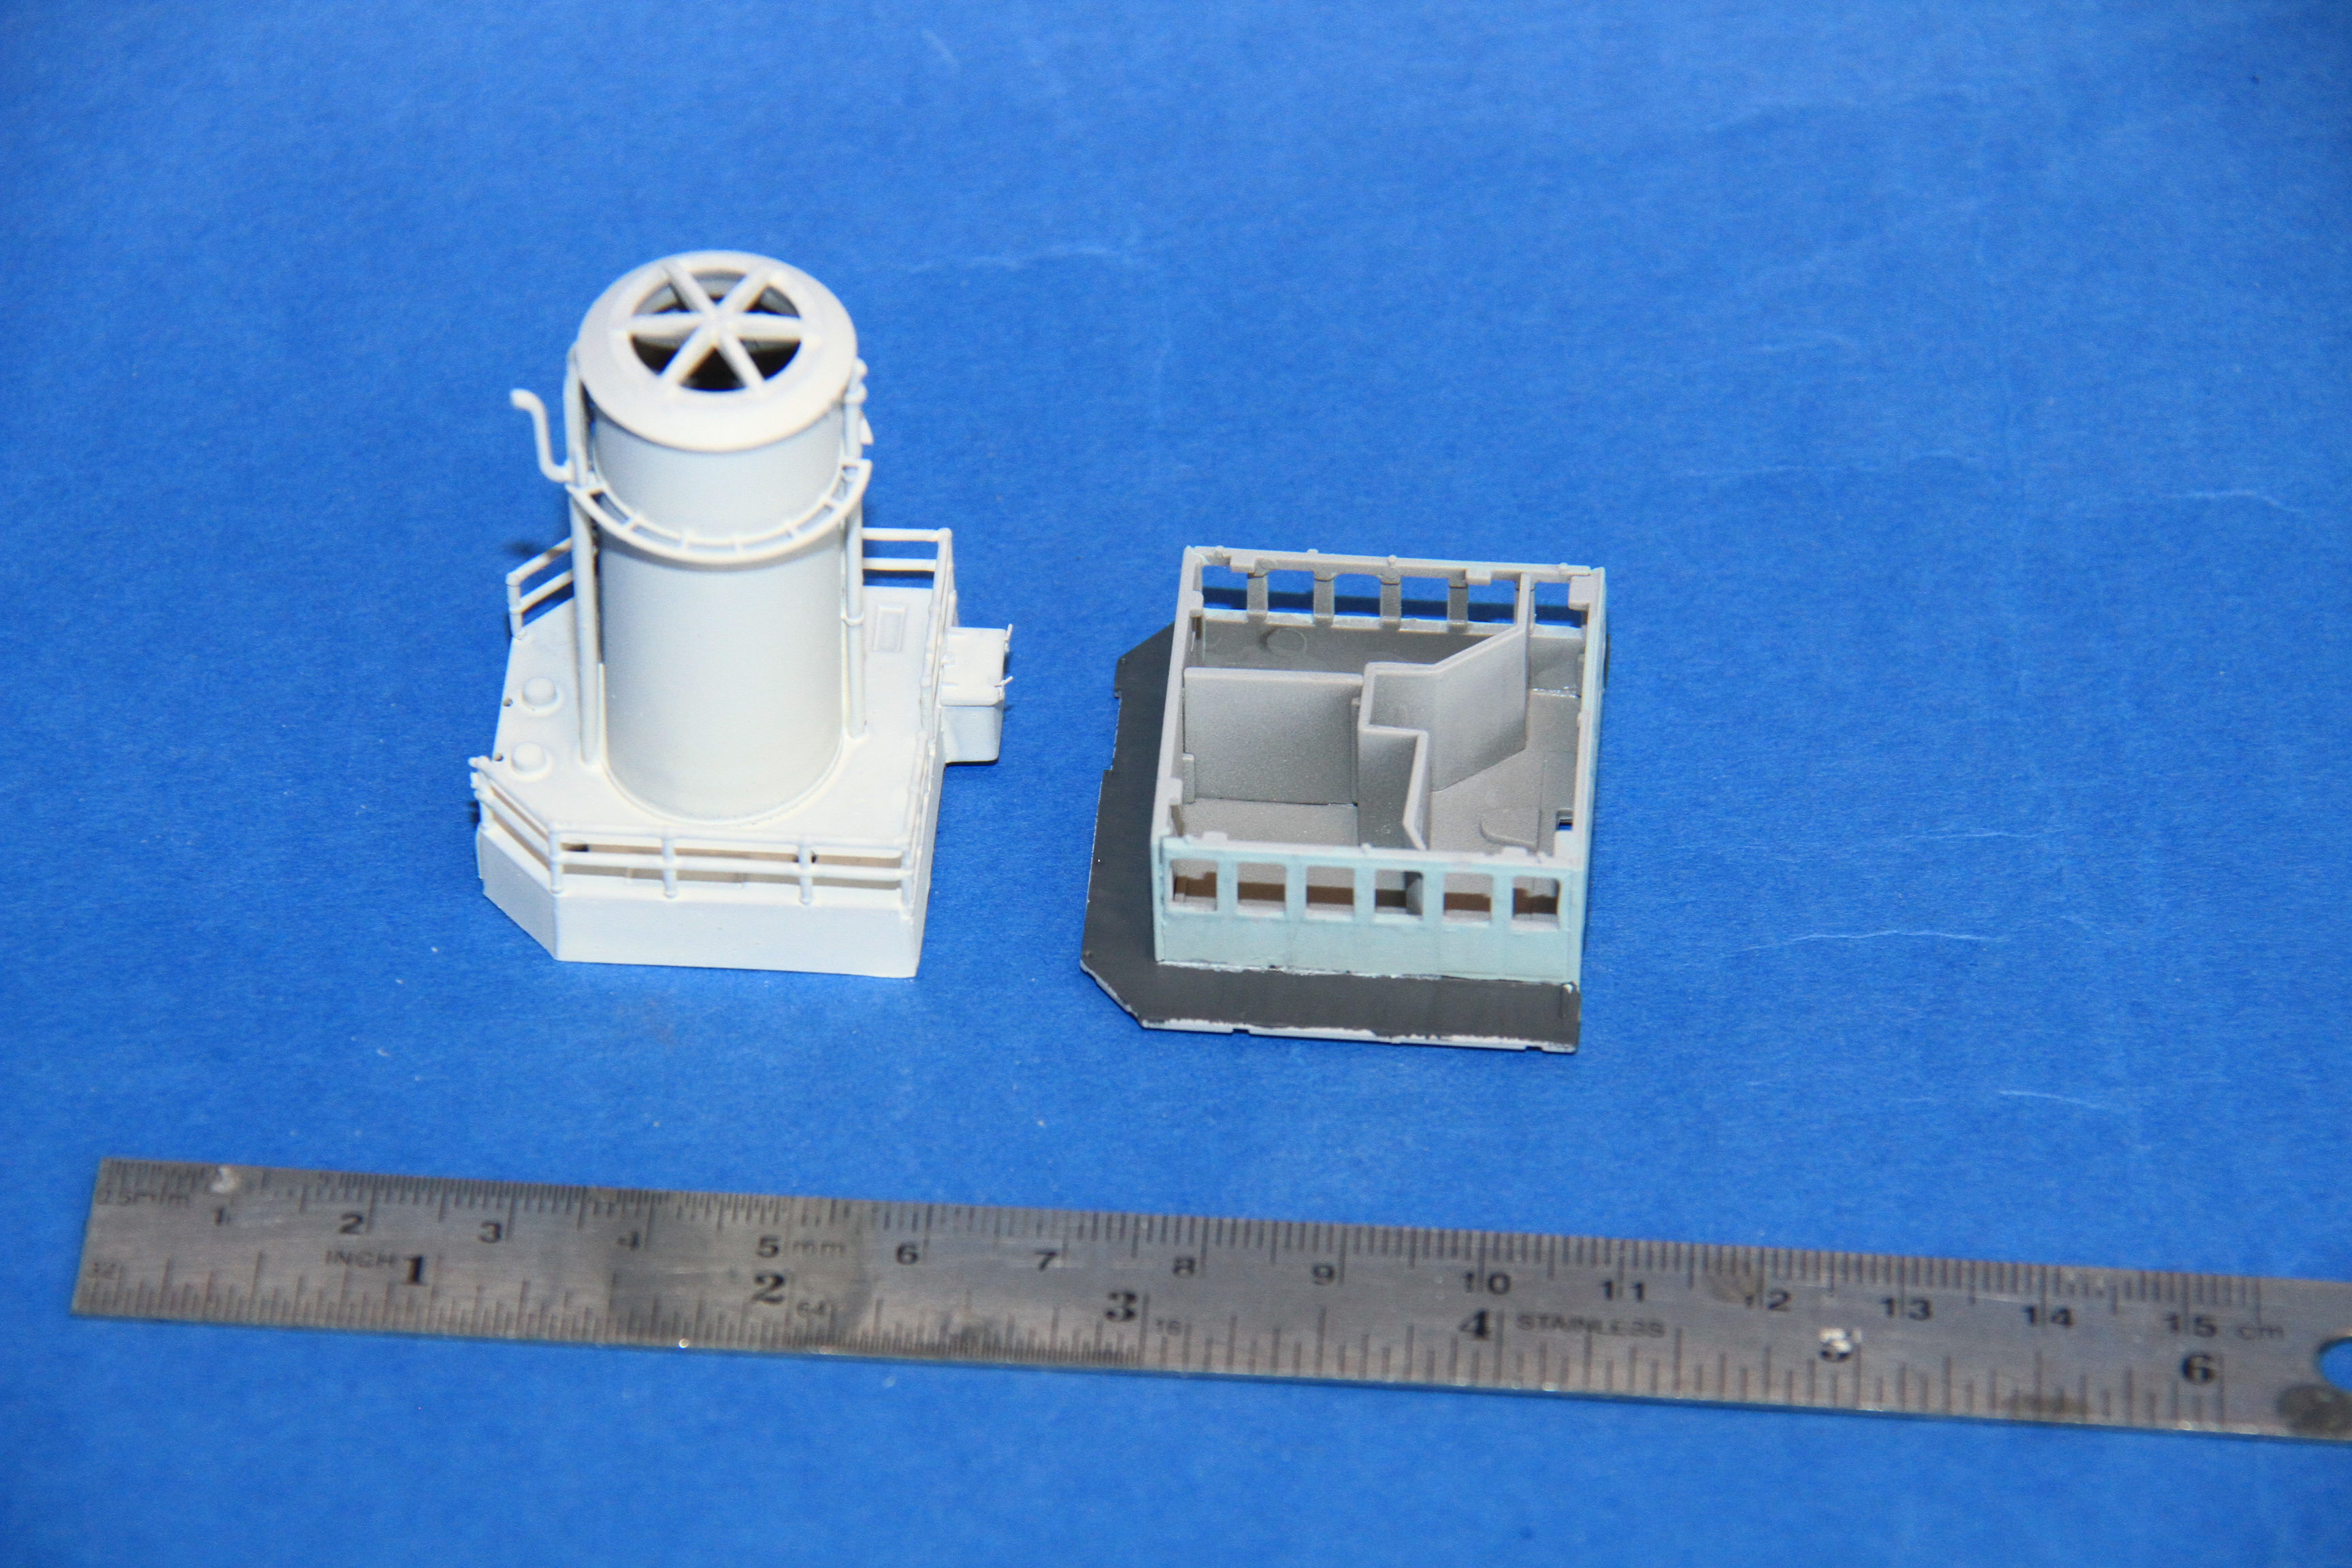
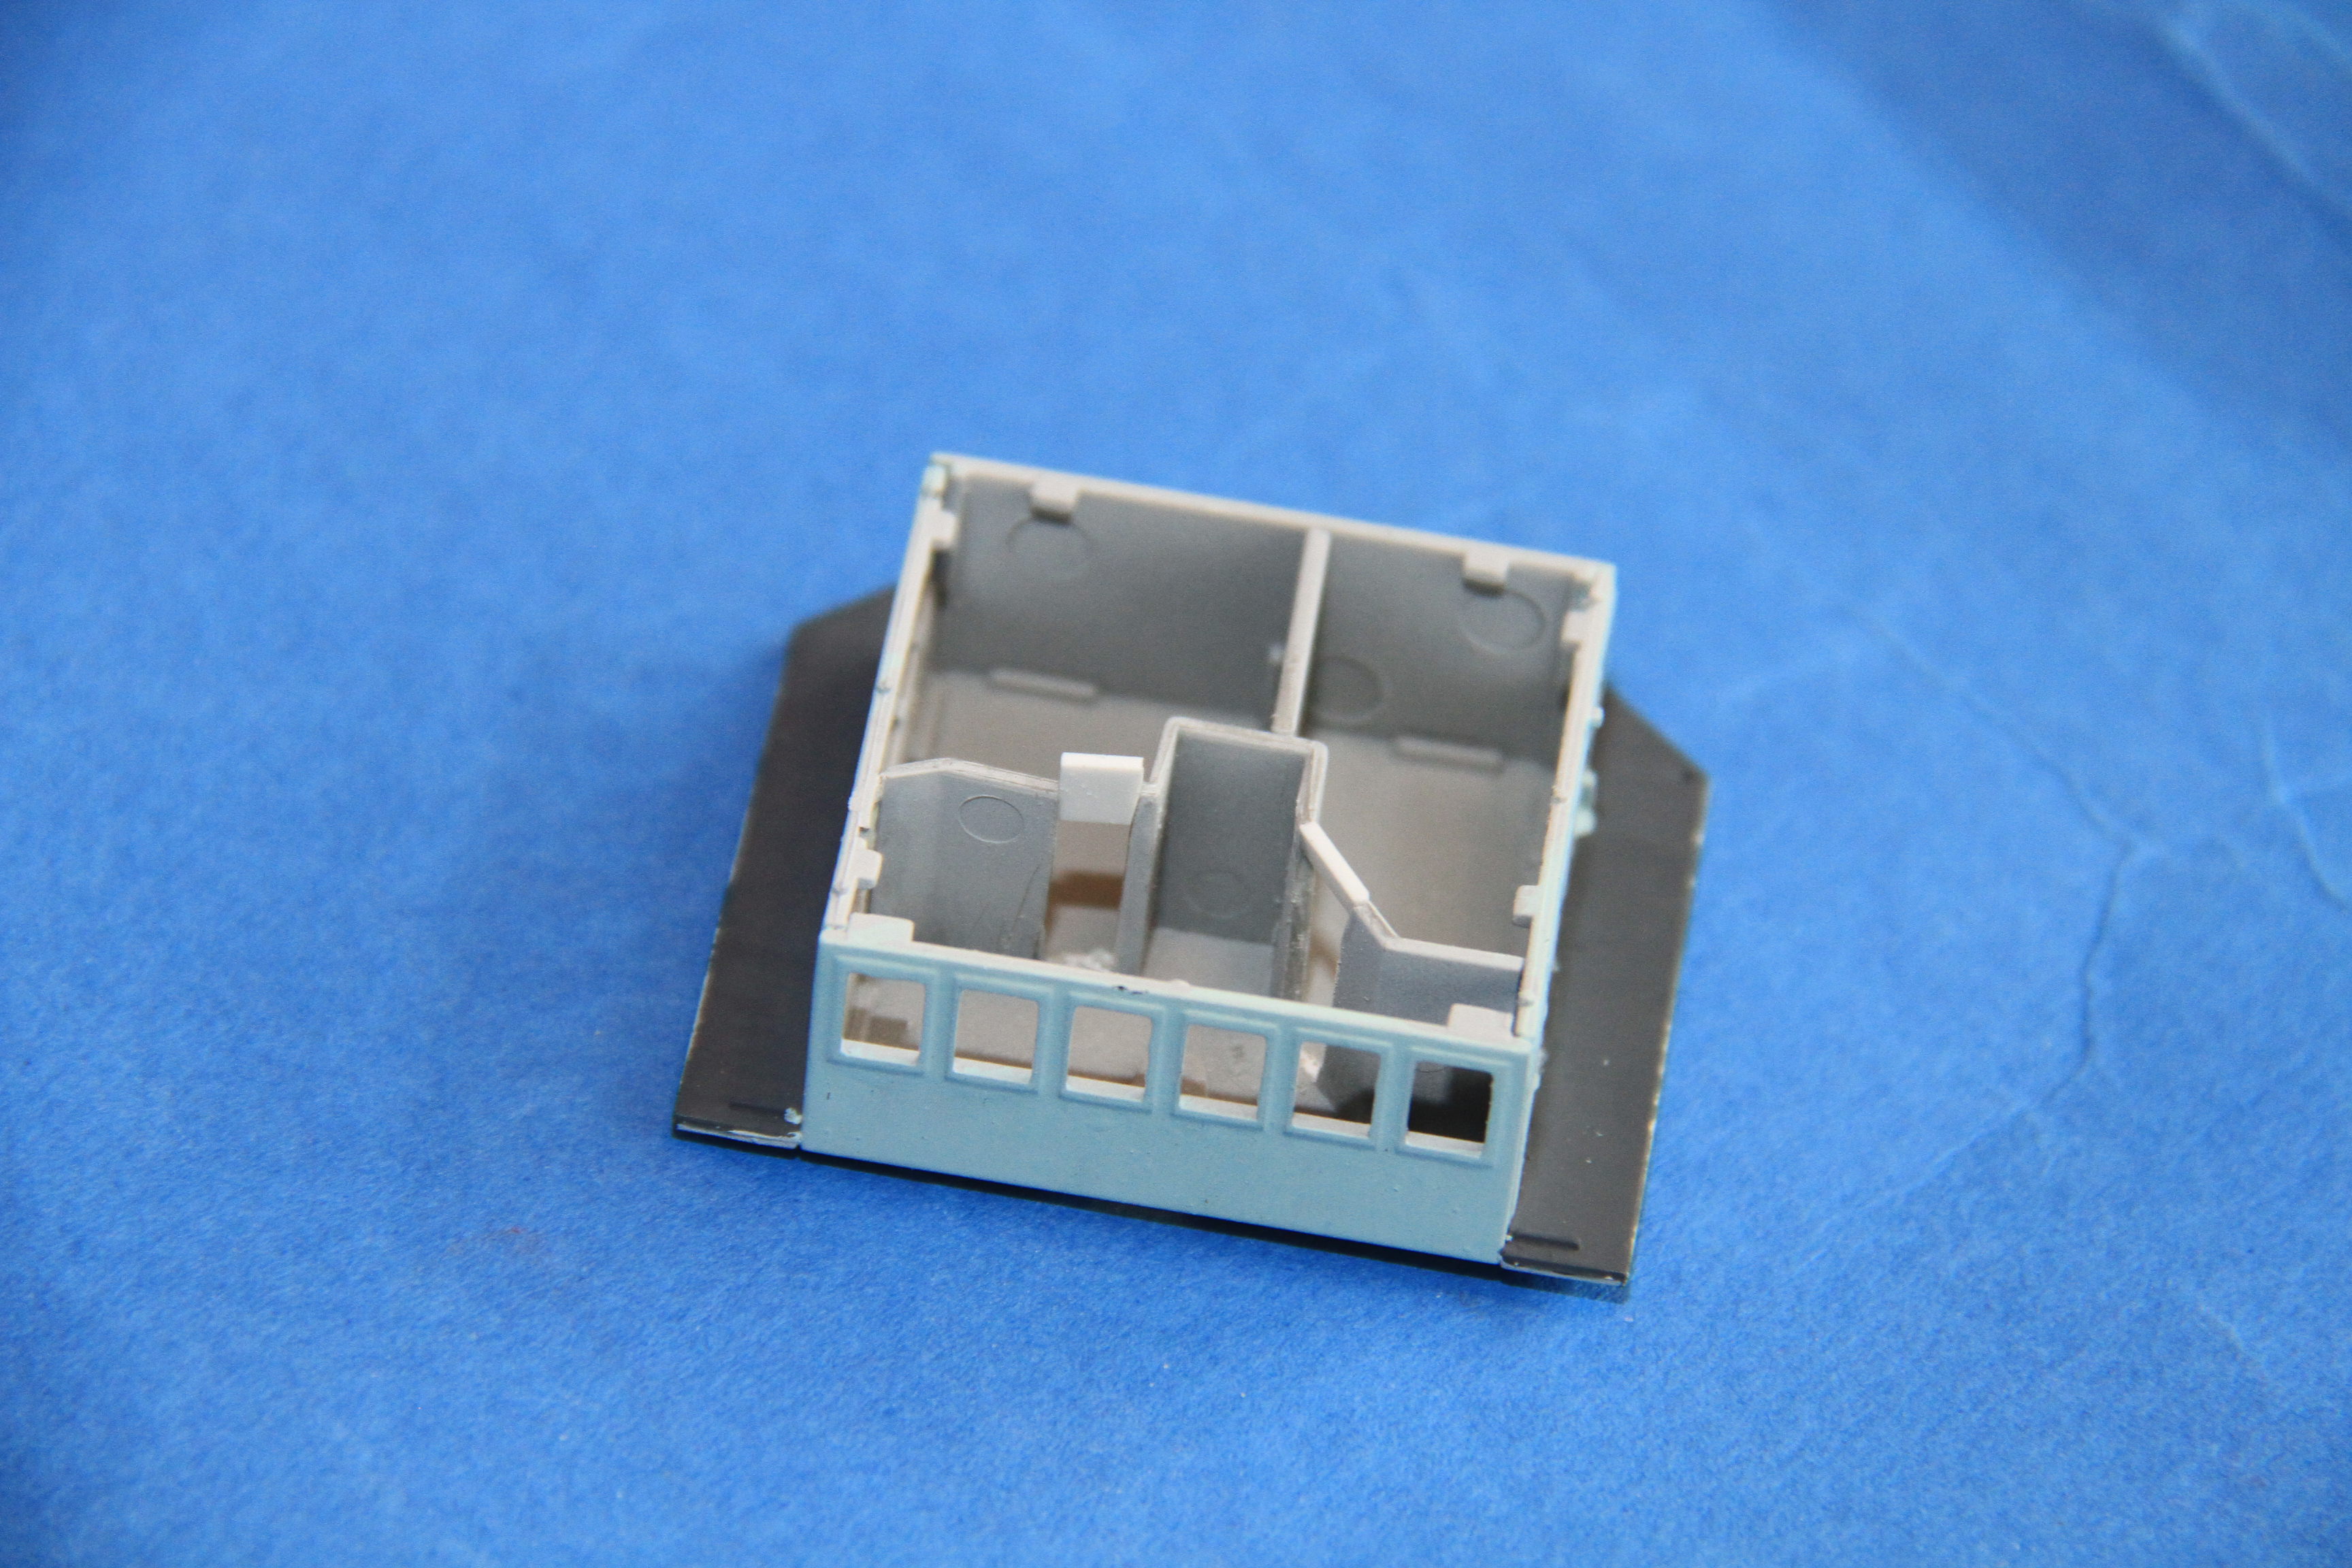
The Interior bulkheads of the forward superstructure fitted.


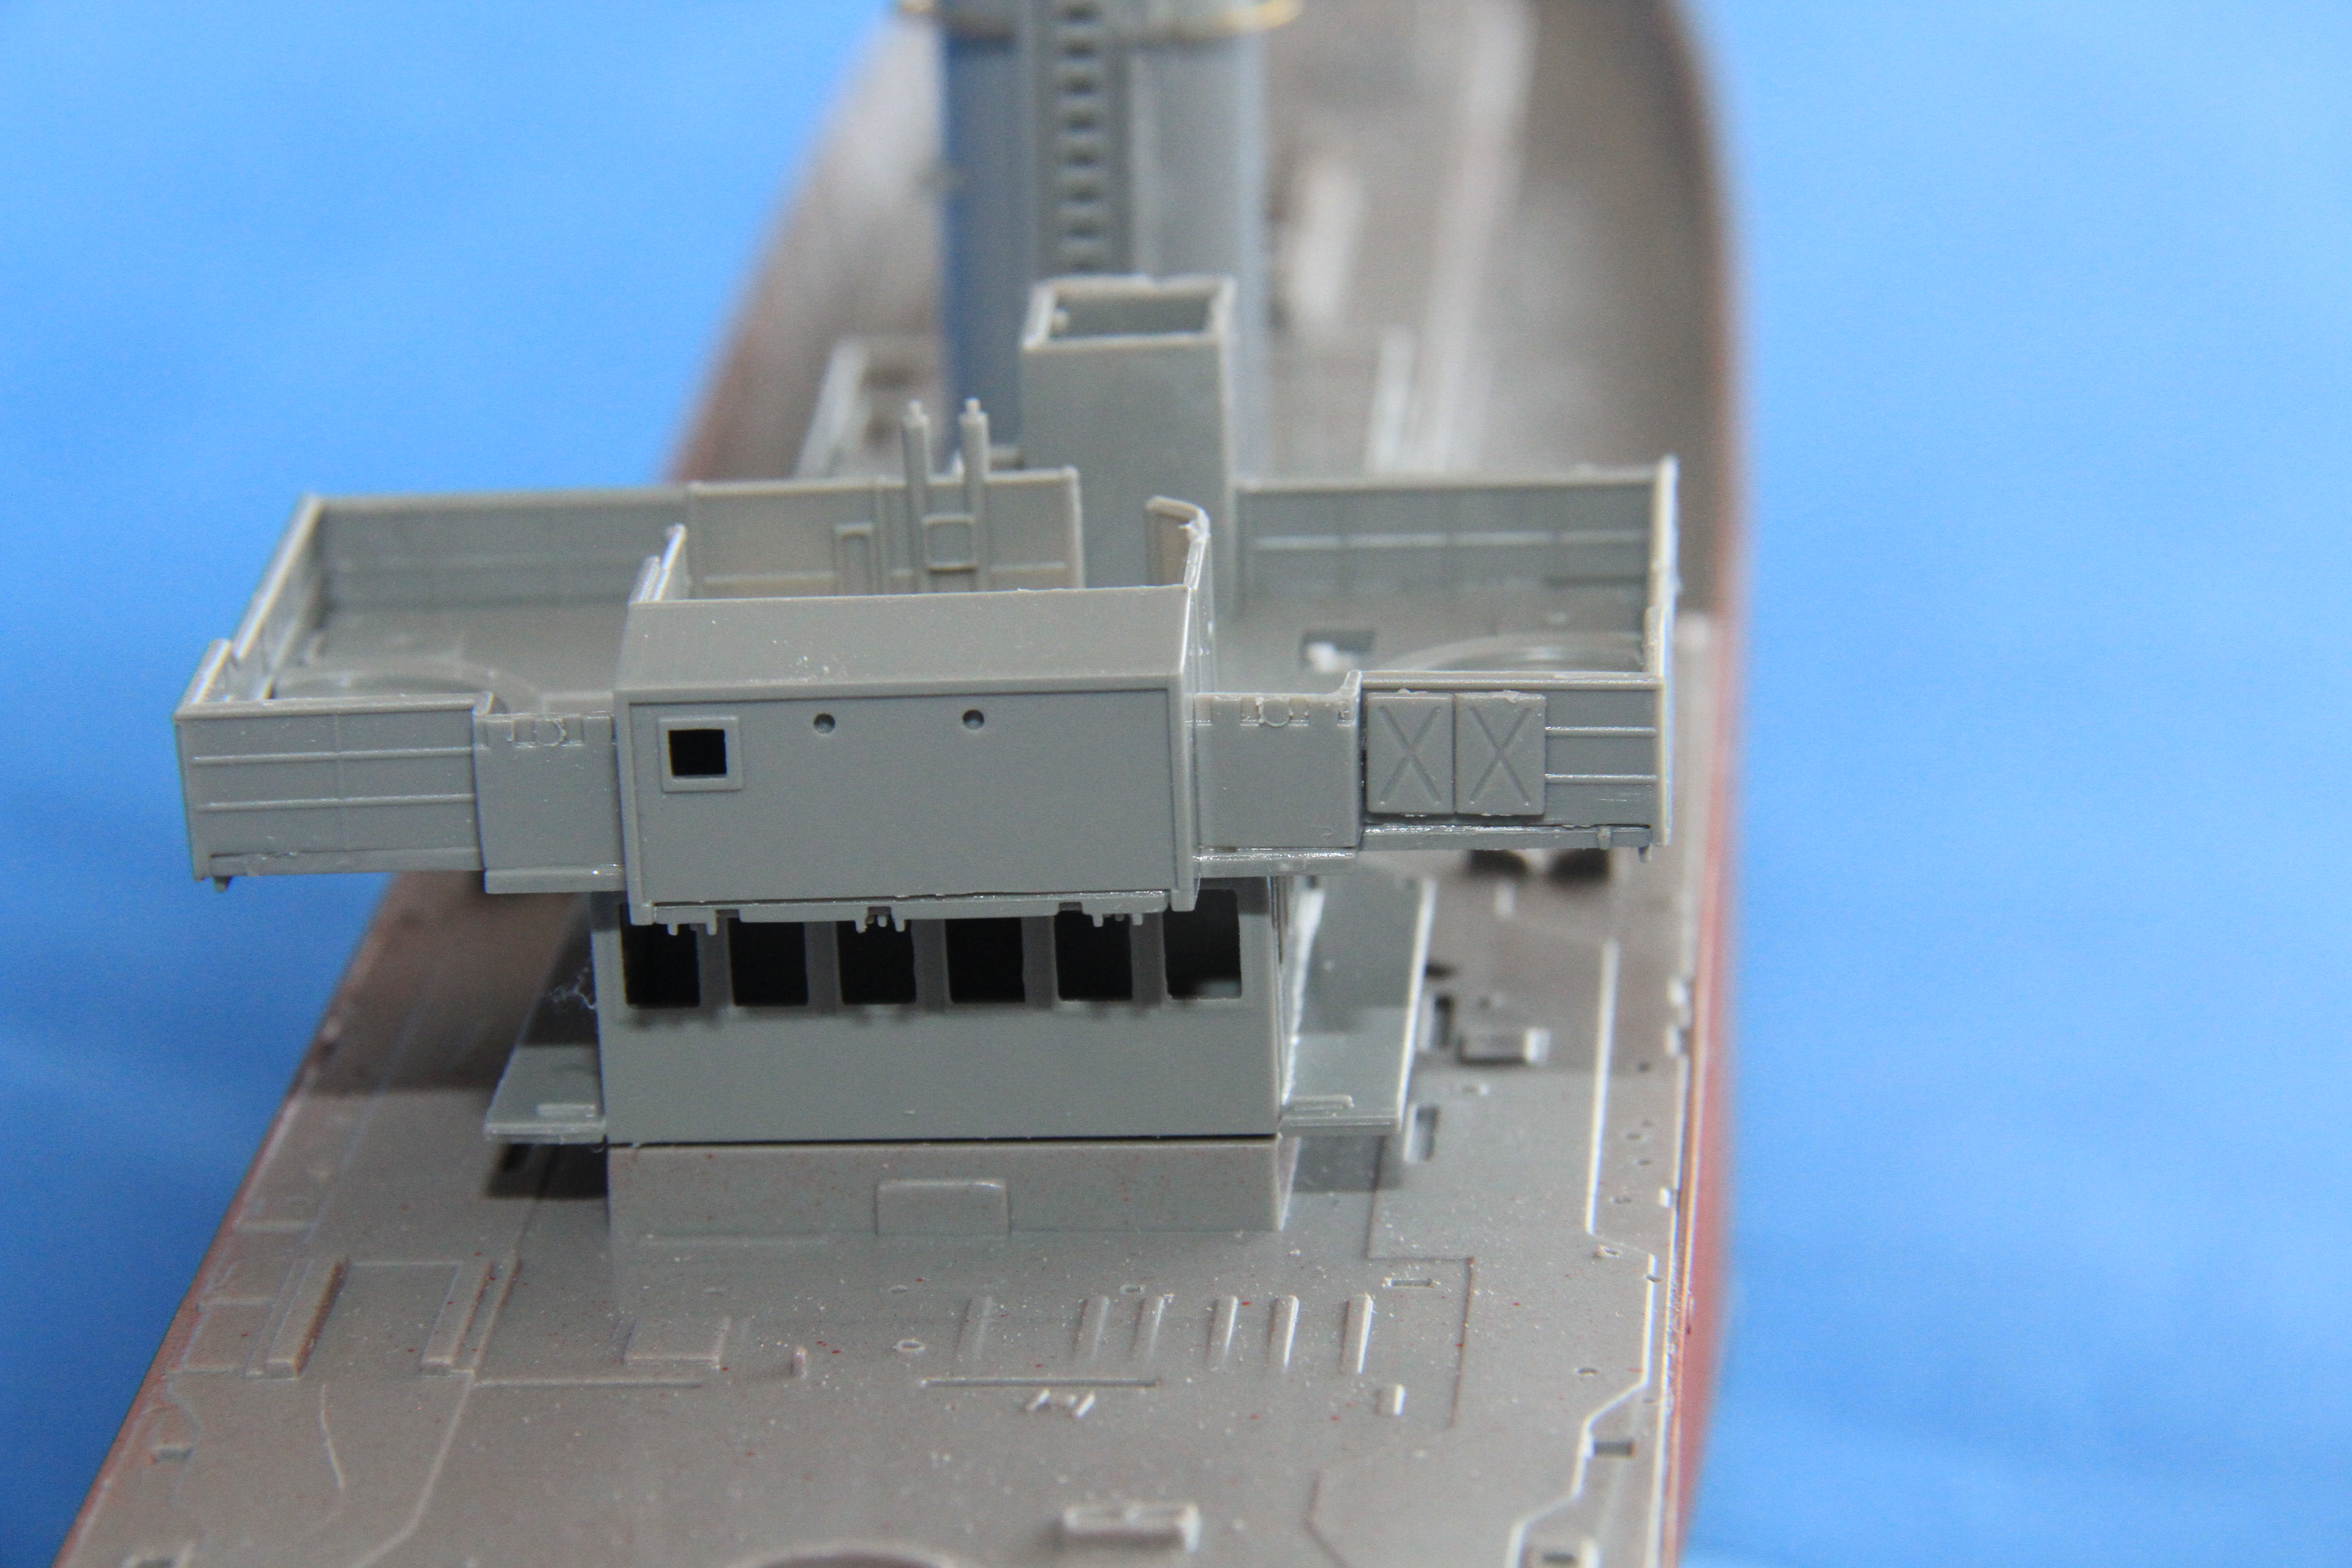
and the exterior bulkheads in place.


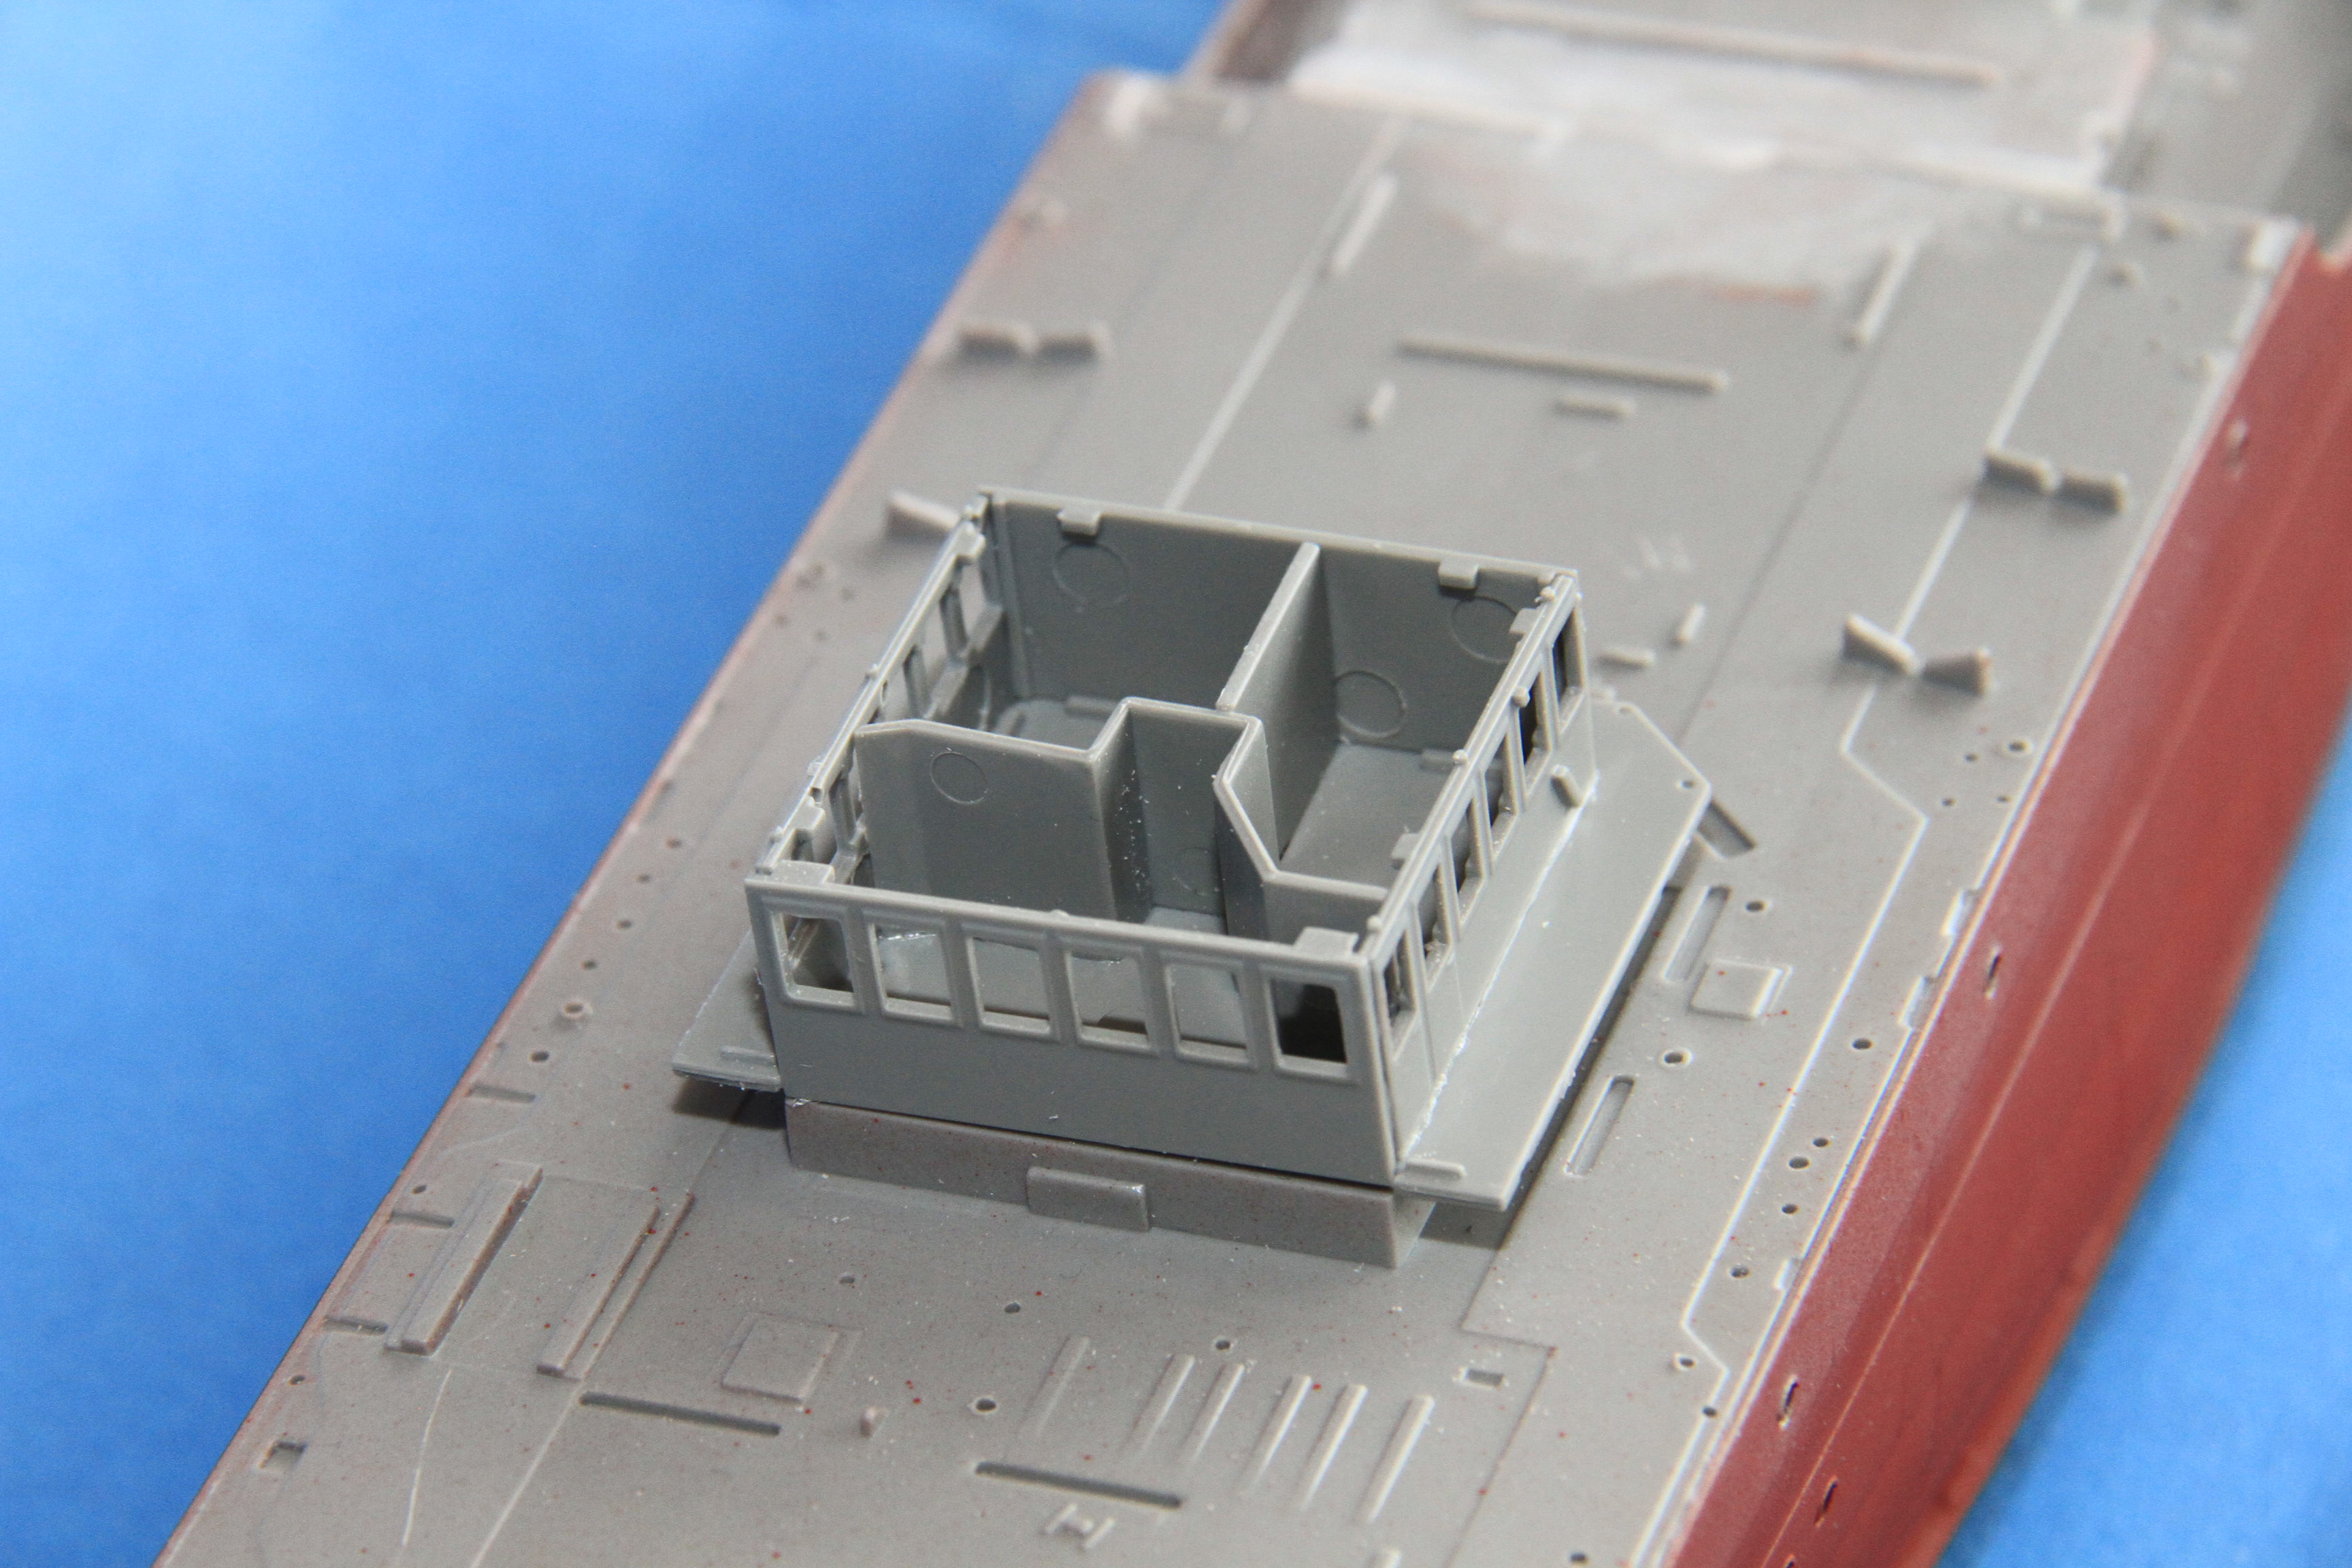
Non of the references I have show the layout of this deck, but I would assume the for'd section is the wheelhouse, to port is the Captain's sea cabin, and to starboard the chartroom. If anyone can confirm or put me right I would be grateful. I am thinking after basic spraying, fitting some interior.

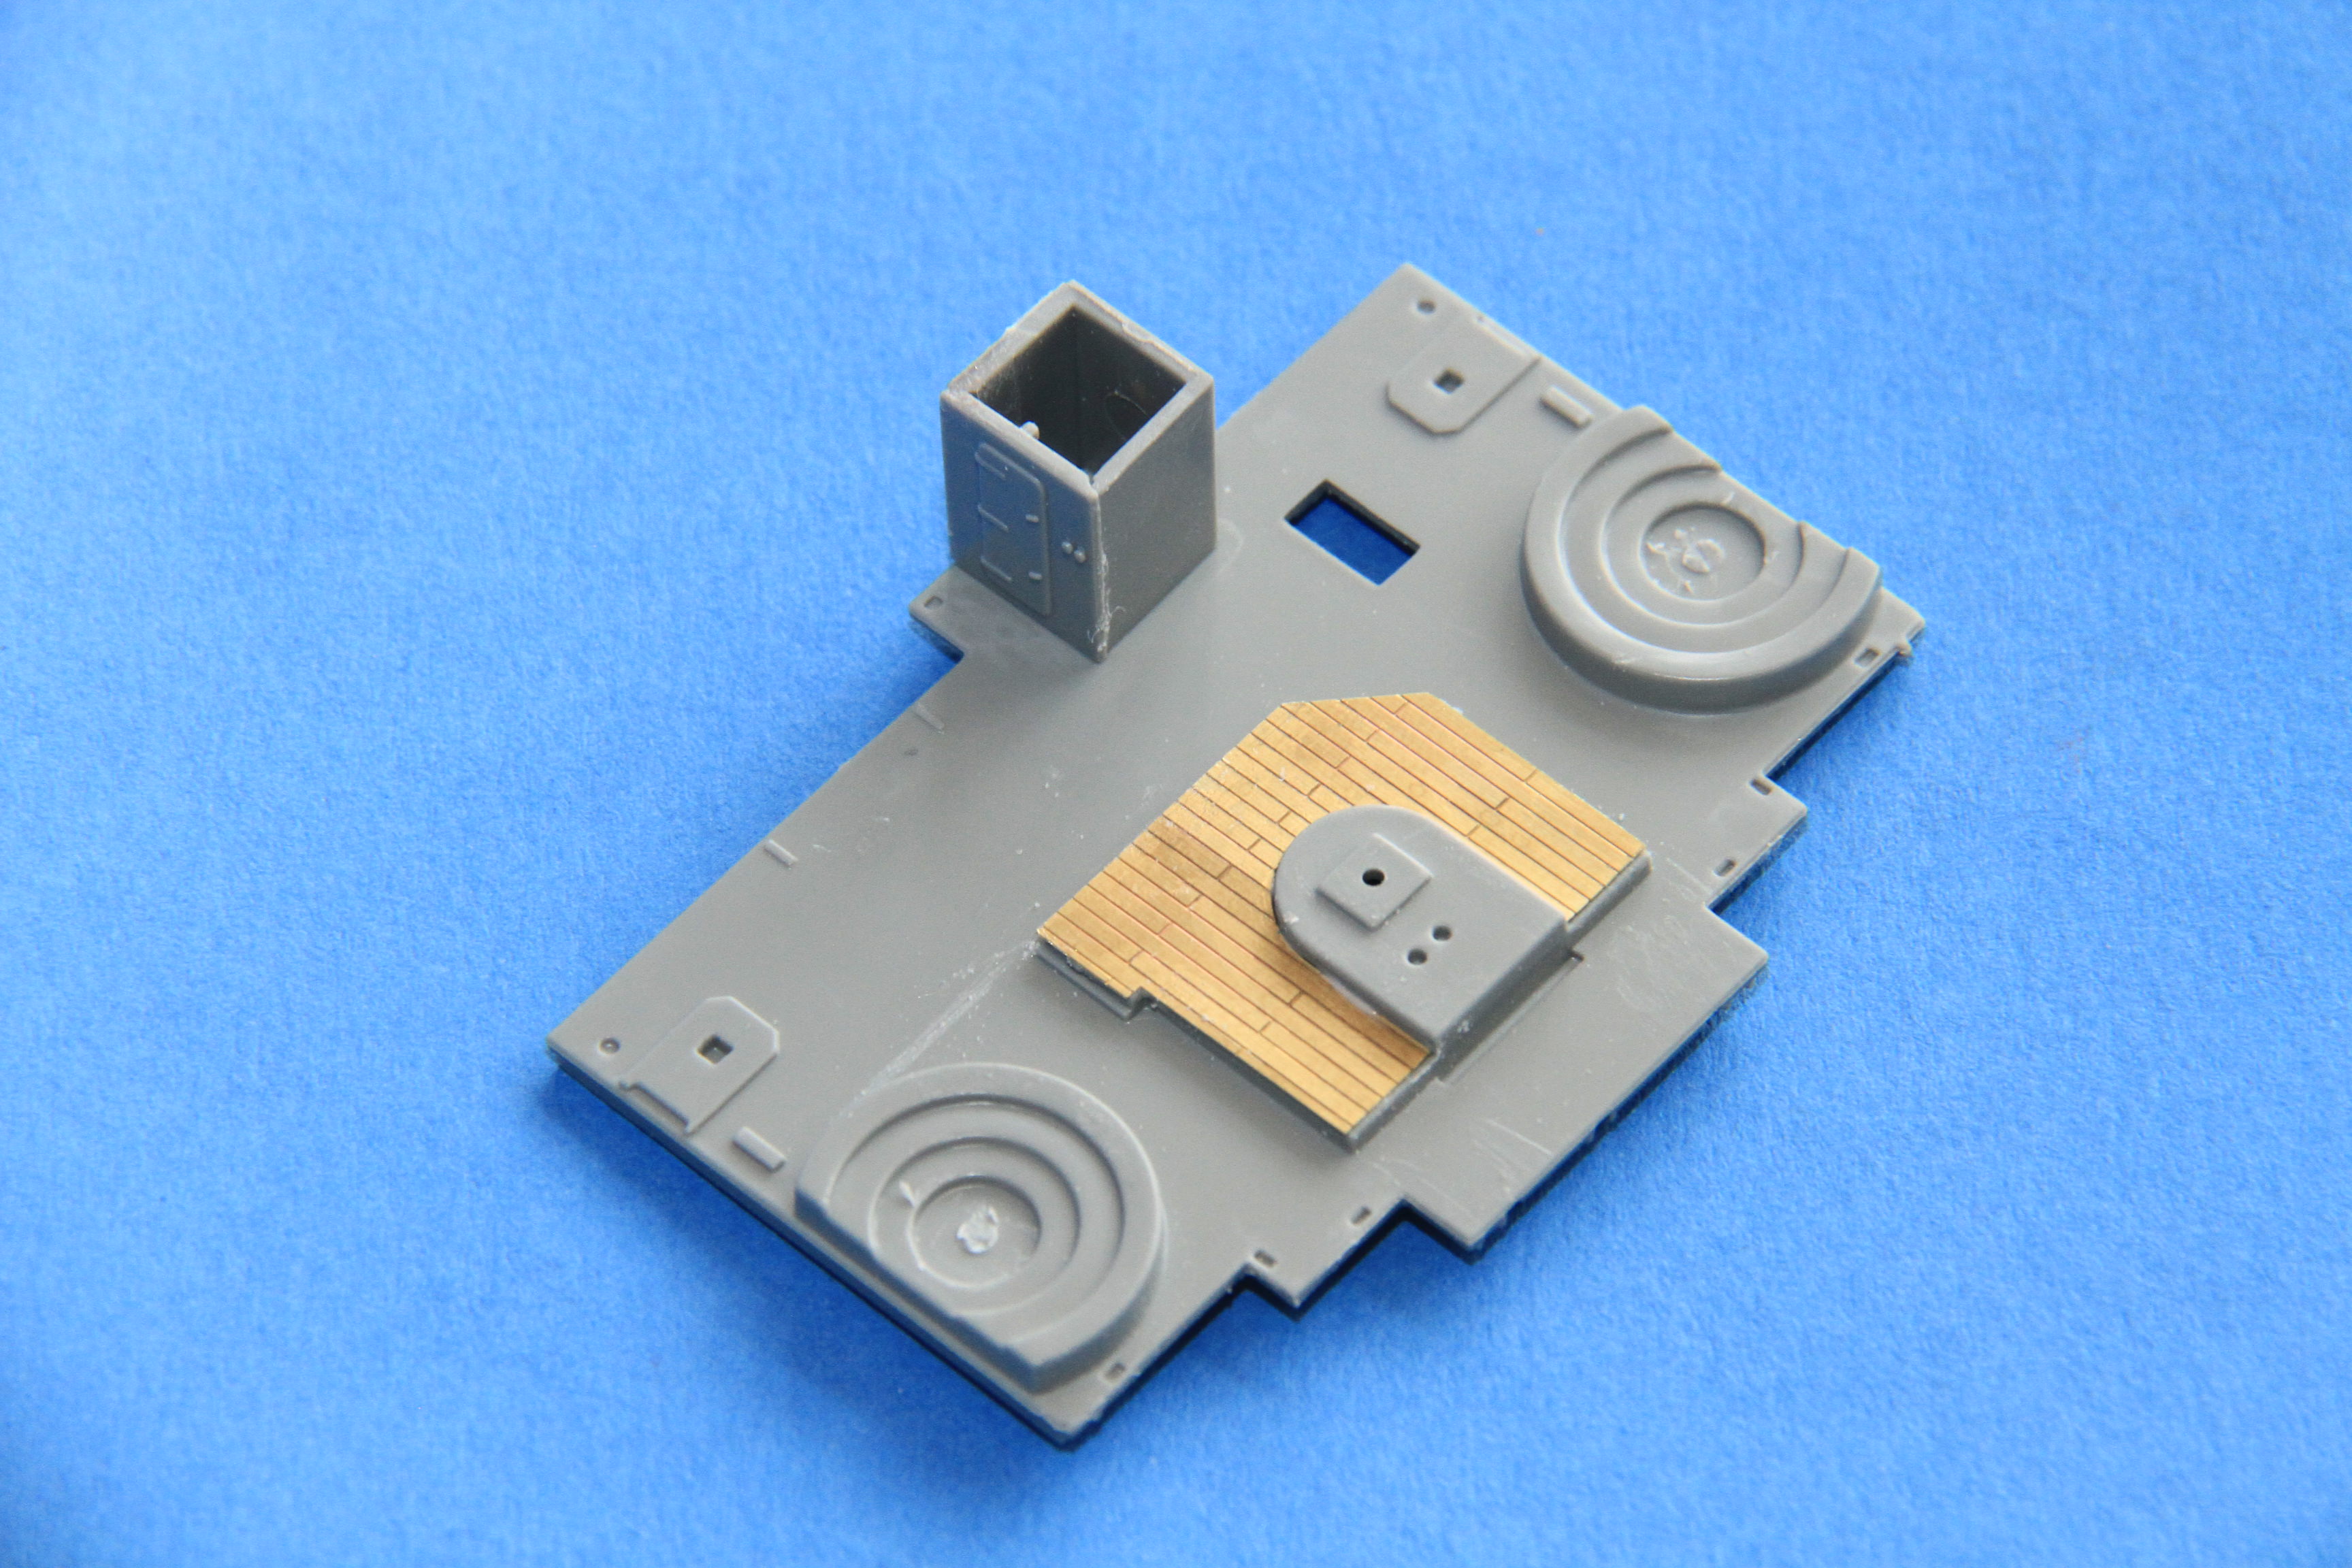
Starting work on the bridge. Starling's etched planking on the compass platform in place.


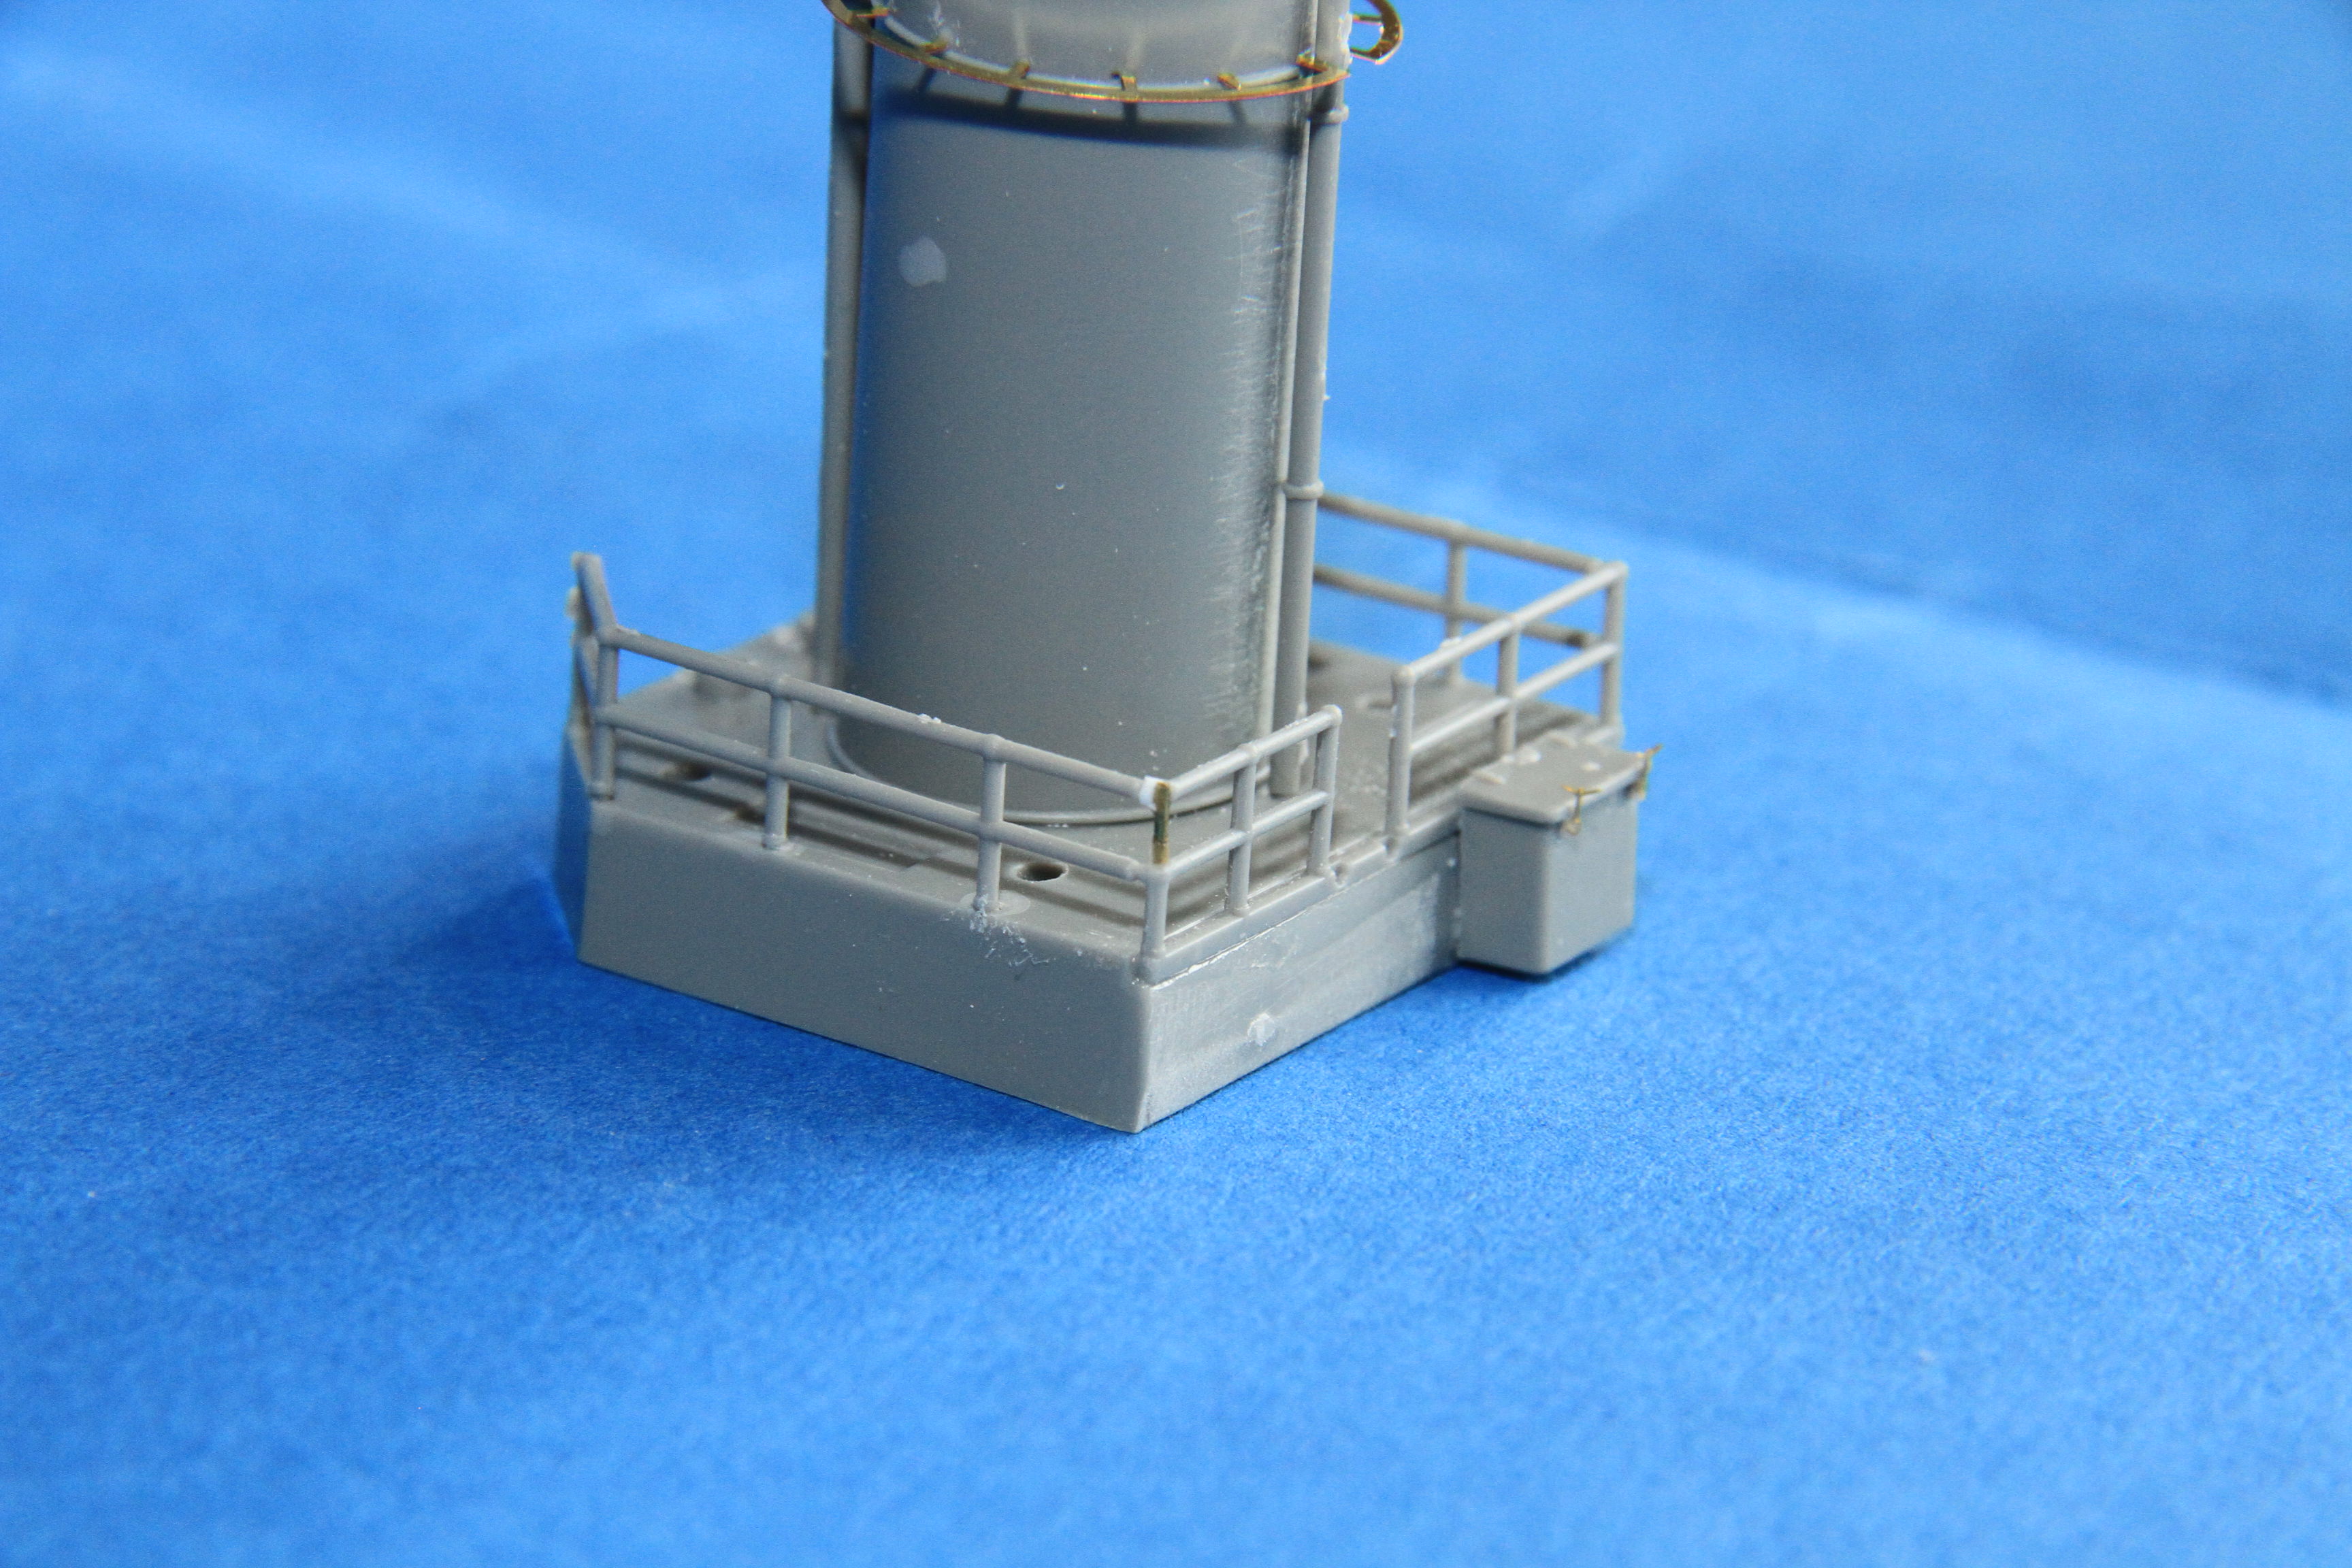
Compass platform railings fitted, and a few details.


the bridge railings fitted, they are all moulded covered in canvas dodgers, there are separate parts for the sprinter padding.


A couple of sections of splinter padding fitted


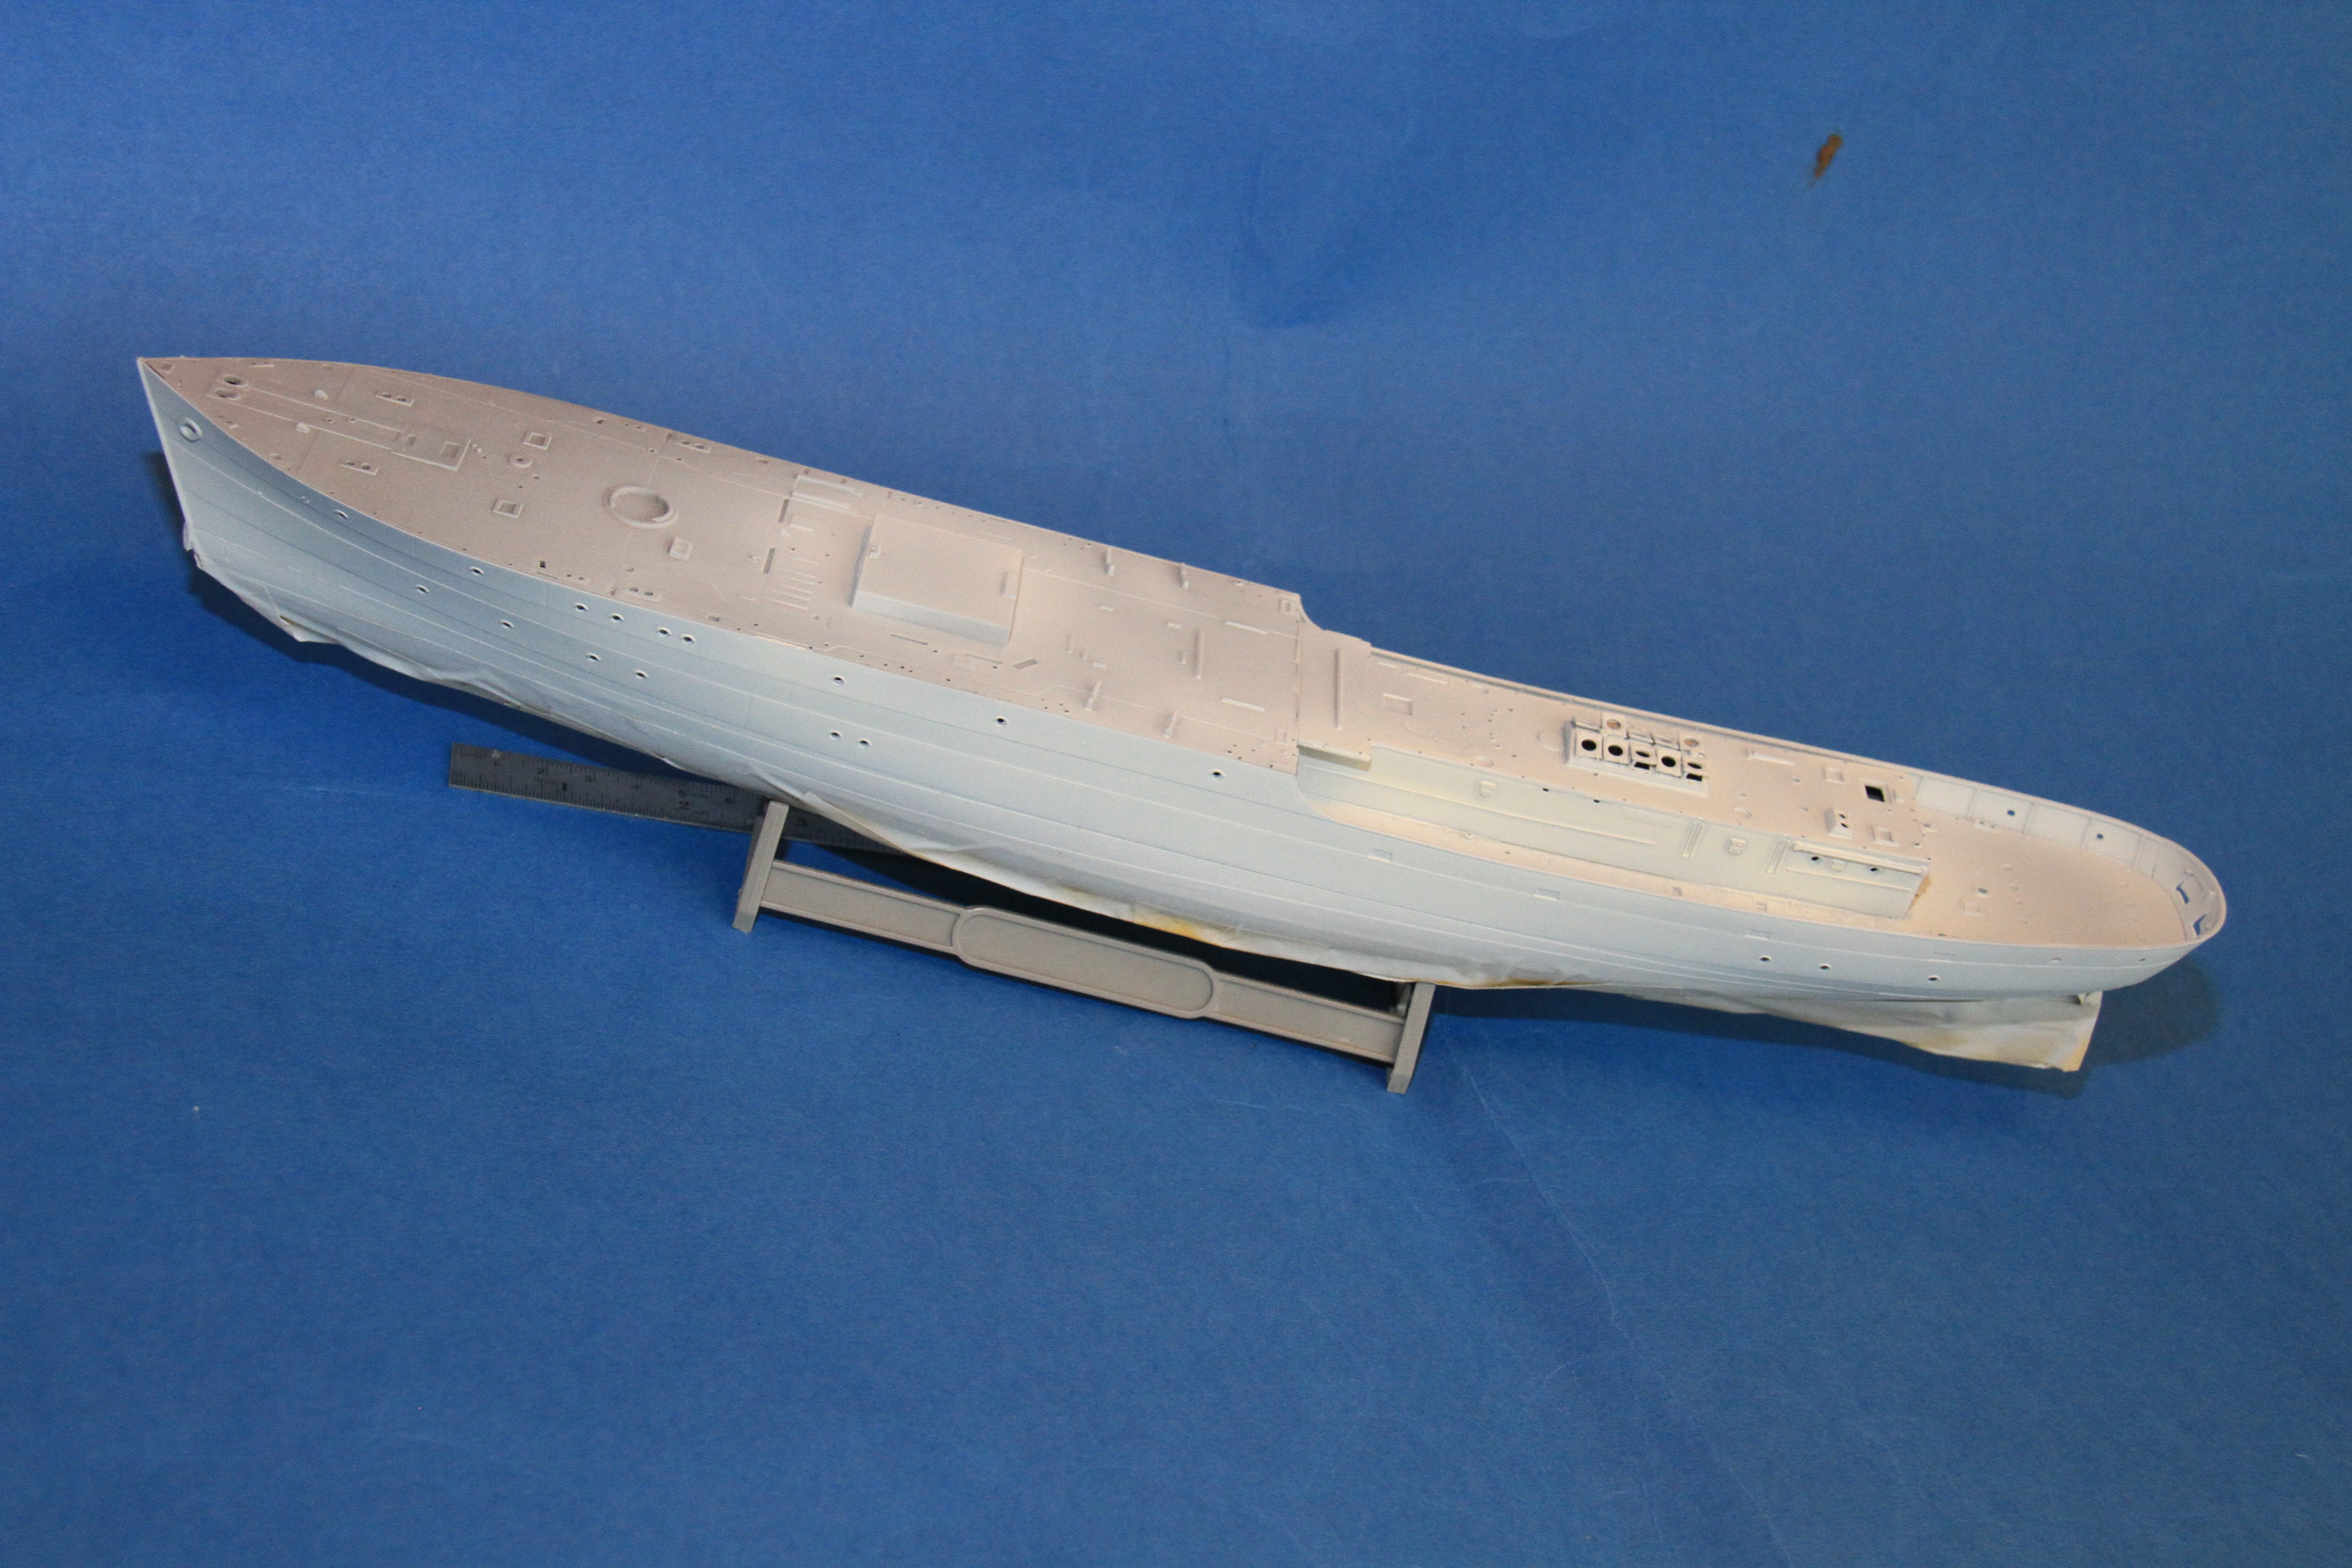
Overview of where I am at so far.


More soon.

Si
Longshanks8
Visit this Community
England - South West, United Kingdom
Joined: July 04, 2013
KitMaker: 430 posts
Model Shipwrights: 390 posts
Posted: Monday, March 26, 2018 - 03:17 AM UTC
Sackville 20 closed bridge

DSC04106 by

screen-shot-2011-09-14-at-3_34_15-pm by

Steady progress looking good ....

The above pics are from HMCS Sackville further pics of ship can be googled.

As to rear layout memory says Capt. day cabin to port wireless room to stbd. but I'll check tomorrow

HTH

Kev
RedDuster
Visit this Community
England - South East, United Kingdom
Joined: March 01, 2010
KitMaker: 7,078 posts
Model Shipwrights: 6,649 posts
Posted: Monday, March 26, 2018 - 10:57 PM UTC
Thanks Kev,

That would be excellent, very much appreciate the assist.

Cheers

Si
d6mst0
#453
Visit this Community
Texas, United States
Joined: August 28, 2016
KitMaker: 1,925 posts
Model Shipwrights: 1,298 posts
Posted: Monday, March 26, 2018 - 11:42 PM UTC
Si,

Making nice progress with the wheelhouse. The PE flooring should leave a nice detail when painted.

Mark
RedDuster
Visit this Community
England - South East, United Kingdom
Joined: March 01, 2010
KitMaker: 7,078 posts
Model Shipwrights: 6,649 posts
Posted: Tuesday, March 27, 2018 - 01:17 AM UTC

Quoted Text

Si,

Making nice progress with the wheelhouse. The PE flooring should leave a nice detail when painted.

Mark


Thanks Mark,

It is coming on, I am going to add some interior detail, I shall glaze the windows with Krystal Klear so I hope it will sill be visible.

The etched planking is a nice addition, I am not sure if all corvettes had it but I hoping it will add something to the bridge.

Cheers

Si
Cadeus
Visit this Community
Indiana, United States
Joined: September 01, 2015
KitMaker: 144 posts
Model Shipwrights: 139 posts
Posted: Tuesday, March 27, 2018 - 01:30 AM UTC
Looking good Si
d6mst0
#453
Visit this Community
Texas, United States
Joined: August 28, 2016
KitMaker: 1,925 posts
Model Shipwrights: 1,298 posts
Posted: Tuesday, March 27, 2018 - 05:11 PM UTC
Si,

What is Krystal Klear?

Mark
Black_sheep
Visit this Community
Bayern, Germany
Joined: December 11, 2009
KitMaker: 823 posts
Model Shipwrights: 551 posts
Posted: Wednesday, March 28, 2018 - 12:41 AM UTC
@Mark: "Microscale Kristal Klear is a flexible clear liquid plastic adhesive and model window forming material. Joins most dissimila materials and is especially useful on clear platic parts for nearly invisible joints. Will not cause crazing of clear parts."

This is whats written at the bottle. I also use it for glueing clear parts (canopies, windows) or reproduce porthole or searchlight windows or vehicle lights. It Looks like white glue first but dries completely transparent later. Pretty nice stuff!

Cheers

Thomas
d6mst0
#453
Visit this Community
Texas, United States
Joined: August 28, 2016
KitMaker: 1,925 posts
Model Shipwrights: 1,298 posts
Posted: Wednesday, March 28, 2018 - 05:16 PM UTC

Quoted Text

@Mark: "Microscale Kristal Klear is a flexible clear liquid plastic adhesive and model window forming material. Joins most dissimila materials and is especially useful on clear platic parts for nearly invisible joints. Will not cause crazing of clear parts."

This is whats written at the bottle. I also use it for glueing clear parts (canopies, windows) or reproduce porthole or searchlight windows or vehicle lights. It Looks like white glue first but dries completely transparent later. Pretty nice stuff!

Cheers

Thomas


Thomas,

Reviewed the product on the internet. You can glaze a window up to 1/4" in size. Just how would you do that? Put some on toothpick and touch on end of the window and then slide the toothpick over to the over side kinda like making bubbles?

Mark
Black_sheep
Visit this Community
Bayern, Germany
Joined: December 11, 2009
KitMaker: 823 posts
Model Shipwrights: 551 posts
Posted: Wednesday, March 28, 2018 - 08:25 PM UTC
Hey Mark, yes this is exactly the way I do it and it works fine.
Longshanks8
Visit this Community
England - South West, United Kingdom
Joined: July 04, 2013
KitMaker: 430 posts
Model Shipwrights: 390 posts
Posted: Wednesday, March 28, 2018 - 10:16 PM UTC
Hi Si

I've been unable to find the correct configuration for the rear of the wheelhouse.

There are so many different bridge layouts (5), short foscle, long foscle and modified. A real minefield

Kev
RedDuster
Visit this Community
England - South East, United Kingdom
Joined: March 01, 2010
KitMaker: 7,078 posts
Model Shipwrights: 6,649 posts
Posted: Wednesday, March 28, 2018 - 10:37 PM UTC

Quoted Text

Looking good Si


Thanks Norman,

She is coming on. It is a very nice kit.

Cheers

Si
RedDuster
Visit this Community
England - South East, United Kingdom
Joined: March 01, 2010
KitMaker: 7,078 posts
Model Shipwrights: 6,649 posts
Posted: Wednesday, March 28, 2018 - 10:44 PM UTC

Quoted Text

Hi Si

I've been unable to find the correct configuration for the rear of the wheelhouse.

There are so many different bridge layouts (5), short foscle, long foscle and modified. A real minefield

Kev


No worries Kev,

The Wheelhouse, I have found some more nice photos on the web, the other two sections will have to be a bit of guesswork, I have a feeling, as the corvettes were built at so many different yards, there many minor differences from ship to ship, so a bit of creative gizmology to make what can be seen through the windows looks busy.

Thanks for your help mate.

Cheers

Si
RedDuster
Visit this Community
England - South East, United Kingdom
Joined: March 01, 2010
KitMaker: 7,078 posts
Model Shipwrights: 6,649 posts
Posted: Saturday, March 31, 2018 - 01:46 AM UTC
A break in the weather and a chance to get some spraying done.

The lower hull masked off and ready to go.


And sprayed with Citadel Corax white, covers almost anything.


Whilst that was drying, I built the pompom bandstand.


And some more work done on the bridge, the radar lantern.


Might not look a lot different from a couple of pics ago, but sprayed with lifecolour Western Approaches White.


Finally, the funnel casing has been base coated and sprayed WA white, meantime the lower bridge has been base coated and the WA blue and Deck grey hairy sticked on.


I can now start on the interior, likely non of which will be visible.

more soon.

Cheers

Si
d6mst0
#453
Visit this Community
Texas, United States
Joined: August 28, 2016
KitMaker: 1,925 posts
Model Shipwrights: 1,298 posts
Posted: Saturday, March 31, 2018 - 03:01 AM UTC
Si,

Making nice progress with those superstructure parts.

Mark
RedDuster
Visit this Community
England - South East, United Kingdom
Joined: March 01, 2010
KitMaker: 7,078 posts
Model Shipwrights: 6,649 posts
Posted: Saturday, March 31, 2018 - 02:47 PM UTC

Quoted Text

Si,

Making nice progress with those superstructure parts.

Mark


Thanks Mark,

She is coming on, hoping to get a bit further today, thanks for looking in mate.

Cheers

Si
RedDuster
Visit this Community
England - South East, United Kingdom
Joined: March 01, 2010
KitMaker: 7,078 posts
Model Shipwrights: 6,649 posts
Posted: Sunday, April 01, 2018 - 02:26 AM UTC
Today's progress.

After yesterday's fun spraying the W.A. white, did a few test runs at different paint consistencies and pressures, but couldn't get rid of the clogging and spattering problems, I can only put this down to low air temperature. So I decided to put my hairy stick skills to the test.

The W.A. Blue marked off.


And three light coats of brushwork later, the masking is off.


Whilst than was curing (I love acrylics) work on the interior of the lower bridge started. The doors fro the captain's sea cabin and Radio room / chartroom cut. This would have been a lot easier with a bit more pre planning for an interior.


Also the some colour on the funnel and its casing.


The dark panel on the bow done, and all the masking off.


The multi colour deck, some base coat on the wooden areas.


One thing I often forget until after I am well on with adding stuff to the upper deck is the screw. This time I remembered, coat of paint.


and fitted.


More soon.

Cheers

Si
RussellE
#306
Visit this Community
Victoria, Australia
Joined: June 27, 2010
KitMaker: 3,959 posts
Model Shipwrights: 2,777 posts
Posted: Monday, April 02, 2018 - 05:17 PM UTC
No time wasted here Si-good to see some colour going on!
TimReynaga
Staff MemberAssociate Editor
MODEL SHIPWRIGHTS
Visit this Community
California, United States
Joined: May 03, 2006
KitMaker: 2,500 posts
Model Shipwrights: 1,830 posts
Posted: Monday, April 02, 2018 - 05:54 PM UTC
The colors (colours?) look great, Si - gotta love those Western Approaches schemes!
RedDuster
Visit this Community
England - South East, United Kingdom
Joined: March 01, 2010
KitMaker: 7,078 posts
Model Shipwrights: 6,649 posts
Posted: Monday, April 02, 2018 - 11:45 PM UTC

Quoted Text

No time wasted here Si-good to see some colour going on!


A quiet easter at home has been conducive getting some time at the workbench Russ,

I am quite pleased with the scheme, the dark panel on the bow stands out nicely.

Cheers

Si
RedDuster
Visit this Community
England - South East, United Kingdom
Joined: March 01, 2010
KitMaker: 7,078 posts
Model Shipwrights: 6,649 posts
Posted: Monday, April 02, 2018 - 11:47 PM UTC

Quoted Text

The colors (colours?) look great, Si - gotta love those Western Approaches schemes!


Thanks Tim,

I like them too, makes a change from all the shades of grey, my favourites, like this one, have one random dark panel to give that bit of contrast.

Thanks for looking in.

Cheers

Si
jimb
Visit this Community
New York, United States
Joined: August 25, 2006
KitMaker: 2,539 posts
Model Shipwrights: 185 posts
Posted: Tuesday, April 03, 2018 - 12:29 AM UTC
Great job on the Corvette. It's looking really nice. I've been wondering about this kit, and it's nice to see it being built.

Jim
RedDuster
Visit this Community
England - South East, United Kingdom
Joined: March 01, 2010
KitMaker: 7,078 posts
Model Shipwrights: 6,649 posts
Posted: Wednesday, April 04, 2018 - 11:27 PM UTC

Quoted Text

Great job on the Corvette. It's looking really nice. I've been wondering about this kit, and it's nice to see it being built.

Jim


Thanks Jim

It is a very nice kit, would look pretty good out of the box, lots of room for adding detail too.

Thanks for looking in, much appreciated.

Cheers

Si
TimReynaga
Staff MemberAssociate Editor
MODEL SHIPWRIGHTS
Visit this Community
California, United States
Joined: May 03, 2006
KitMaker: 2,500 posts
Model Shipwrights: 1,830 posts
Posted: Sunday, April 08, 2018 - 06:29 AM UTC

I like that detailed screw. You don't usually see the slits for the cap mounting hardware depicted on model kit parts. Nice.