

Go to modelshipwrights.com for the current dynamic site!


1⁄350Building the "Perfect Storm"
14
Comments
riding the wave...
After shaping the wave, I added a frame from 3mm plastic sheet. Its some kind of recycling material so it was quite cheap. Again, trying something new saved me a lot of money, as using Evergreen would have cost a lot more than the 1.95 I had paid for a 50x30cm sheet.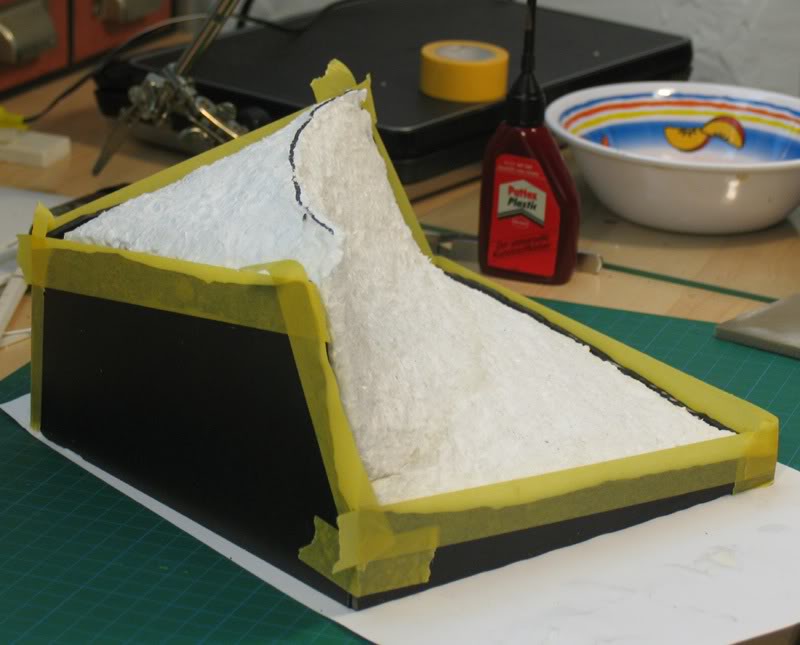
In the next step the whole scene was painted with thick layers of acrylic gel. When you take your time, the gel starts to set while you work. That gives you chance to sculpt structures and wave patterns.
I start by using a 1" putty knife to apply the gel to the base. Trying to smooth out all irregularities of the styro-foam surface, I try to spread it as even as possible. It's like making the perfect peanut butter sandwich (not crunchy!). I take care to smooth over and over in the directions the wave would be moving.
The artist acrylic gel I use starts to set on the surface already after about 8-10 minutes. So basically, the setting starts as soon as I have applied an evenly thick and smooth layer over all. You can feel the setting in as soon as the gel starts sticking to the putty knife better than to the sea-scape: This is your time to go and clean the spade thoroughly, allowing for a tad bit of additional drying time.
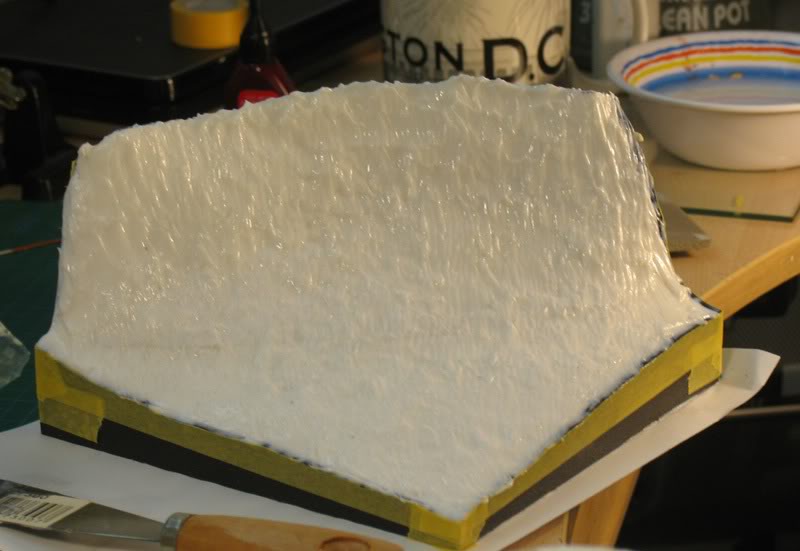
Out comes the 1.5" wide brush. Its one of those cheap, hardware store, 5-in-a-bag brushes, that you would usually use for painting your fence and throw it out afterward (the brush - not the fence!). Slightly moisten the brush before starting to move the tip of it carefully over the surface of your sea-scape. Use no pressure whatsoever...you'll see the brush will pick up the dried surface and drag the layer below with it. This is all it takes!
When creating the surface of your seascape take care to start at the crest and continue towards the trough in short and smooth flicking motions. The bigger the scale the longer the flick. (does that make sense?!) If you picture in your mind the intended weather conditions (light wind or storm, rain, shine, etc.), youll automatically know when you overdo the turbulence at the surface.
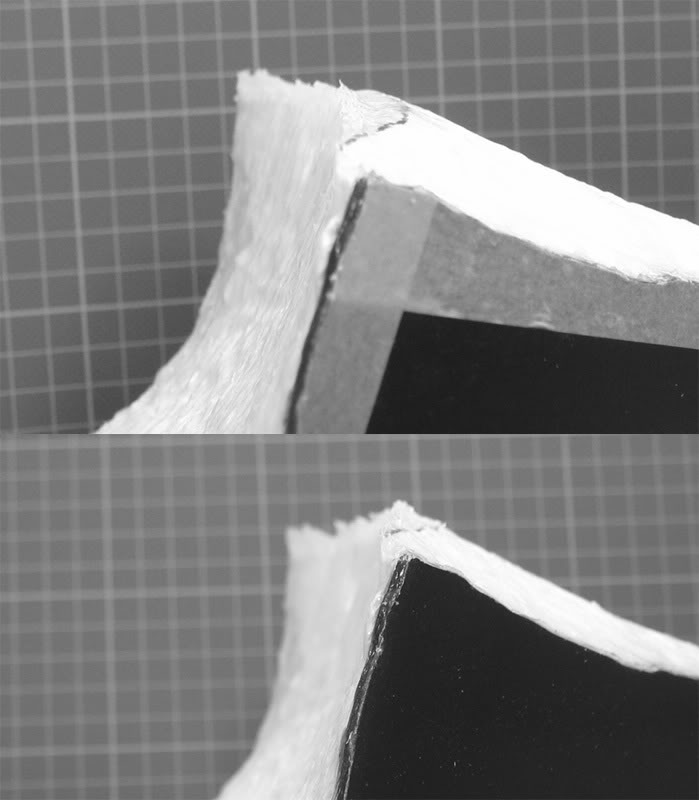
As said, with my type of gel I do not need to wait that long, but I certainly would recommend against using a blow dryer to quicken the process of drying. Natural drying time is best. The effect of the blow drying may be worst case scenario that the surface is dry while the underlying layer, has no time to exhale its liquefying solvent, staying in a sticky, half-dry condition. The other effect would/could be that you get too high a tension on the surface. The gel will contract a little while drying, giving tension to the Styrofoam and lifting up the corners and edges of your display. It even happened to the 3 sandwich that I created for his wave. I assume that quick-drying could essentially worsen the effect.
On top of it: Go slow! The art of model building is not a sprint race, it is long distance running: Sometimes its the track, sometimes it is cross country, but its hardly ever quick.
I used the gel to make the gap between the frame and the Styrofoam vanish, too.
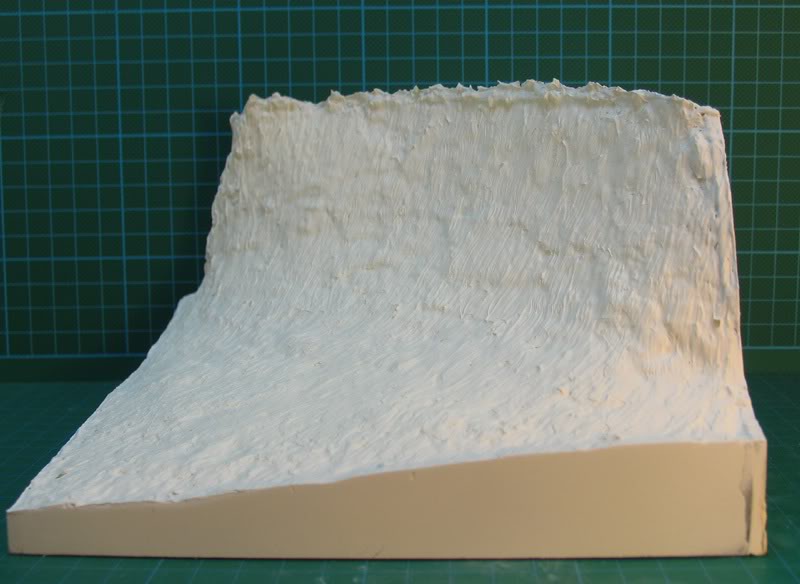
After some days I got back to the base and found that the crest had sagged while setting. So I added another layer for the crest.
After another day of drying I, smoothed over the edges of the frame and primed the whole assembly. I used a primer usually used for figure painting...I found that stuff excellent for application of acrylic artists paint and its quite a bit cheaper than Mr. Hobbies product.
About the Author


FROM: NORDRHEIN-WESTFALEN, GERMANY
Too old to be young. Too young to be old. Happily married, one son. Living just North of the German Ruhr area . Trying to concentrate on ship models, but having way too many soft spots for other fields of interest. Please remember: Vee Jermans hef no sense of humor (at least Dave of WEM says so) ...
Comments

This is exactly the reason why I check these kind of places day after day after day, because sometimes I let my jaw drop a bit at the sight of something truly original and greatly done like your work Guido
-and what a great step by step too!
MAR 10, 2010 - 07:48 AM

Hi Guido!
Could you describe your low-light photo techniques?
--Karl
MAR 10, 2010 - 10:57 AM

Thank you for your praise, gentlemen!
It means a lot to get so many kind words from such an elect group of modelers.
The low light technique is really quite simple. You switch of all light and illuminate your model with a hand-held torch/ flash light. Of cause you need a tripod for your camera. Your camera will decide for you when it has collected enough light to close the shutter.
You can use colored transparent paper to achieve effects like sunrise/-set.
The art is to crop the pictures to their maximum effect. Take your time. Experiment a bit.
Cheers,
Guido
MAR 11, 2010 - 03:23 AM

Still beautiful - I hope you bring it for the weekend - I would like to see it in real
Cheers/Jan
MAR 11, 2010 - 04:08 AM

Hallo Guido
I had the privilege of seeing it born from plain Evergreen sheet and Styrofoam, with bits of PE from the spare box, and some brass masts... this is the proof that you can make a stunning diorama, a excellent ship (boat in this particular case) with a low budget, and still, be a show stopper!
Thank you once again for all your effort in making this a great place to learn, enjoy and have fun with our hobby!
Tschuss,
Rui
MAR 16, 2010 - 07:19 AM

There's no other feeling like it, the heat of the angle poise on your neck, Beethoven on the MP3, and a wealth of models to build - G'dammit you're a model ship builder! - start theme music.......
Another masterclass, Guido, well done, and bring him to Telford.
Peter F
MAR 16, 2010 - 08:30 PM
Nice interpretation of the "swordfish captain speech", Peter!
Cheers,
Guido
MAR 16, 2010 - 08:42 PM

I already made my comments in the Group Build, but this is so good bears giving you a second BZ. I also want to (yet again) thank all the expert modelers who take the time to record and detail their WIP for the rest of us to learn from.
Cheers
MAR 20, 2010 - 06:16 AM
Copyright ©2021 by Guido Hopp. _OPINIONS Model Shipwrights, KitMaker Network, or Silver Star Enterrpises. Images also by copyright holder unless otherwise noted. Opinions expressed are those of the author(s) and not necessarily those of Model Shipwrights. All rights reserved. Originally published on: 2010-03-10 00:00:00. Unique Reads: 15147

WEB HOSTING BY


Copyright ©2021 Model Shipwrights and Kitmaker Network, a subsidiary of Silver Star Enterprises
All Rights Reserved. Please read our Conditions of Use and Privacy Policy.
All Rights Reserved. Please read our Conditions of Use and Privacy Policy.