

Go to modelshipwrights.com for the current dynamic site!


1⁄351/350 DKM Bismark with WEM PE Set
7
Comments
And so it was with this story in the back of my mind that I first saw that White Ensign Models was about to release an Ultimate Bismarck photo etched detail set and I knew I had to build another. After some correspondence with John Snyder at WEM I had 3 sets of brass details made to enhance Tamiyas 1/350 scale kit. These sets included Bismarck/Tirpitz Photo etched deck plate details; Bismarck/Tirpitz Photo etched metal details, and Kriegsmarine AA weapons photo etched metal detail set. The deck set consists of 35 brass parts designed to lay over the kits decks and provide wood relief, steel grating and no slip tread plate. Also included are brass replacements for AA position splinter shielding. The detail set consists of 132 different types of parts (many replicated 2+ times) for detailing or replacing existing kit parts. The final set, Kriegsmarine AA set consists of brass parts to replace the kits light AA weapons-2cm C38 quad flakvierling, 2cm C 38 single, 3.7cm double flak and 2cm C 30 single guns.
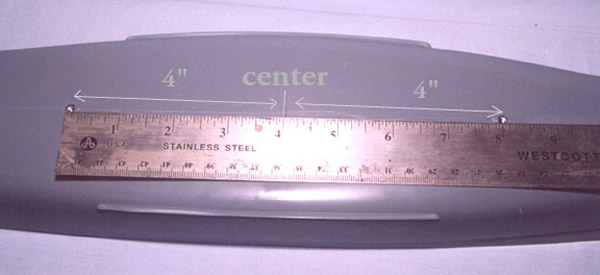
Construction begins with preparing the hull for mounting. The center of the hull is determined by measuring from the most extreme points fore and aft. In this case the bow and stern at the deck level. Once the center of the hull is marked on the keel I measured 4 fore and aft

About the Author


Comments

Wow, I'm really impressed. Good work!
I would really like to see this model in real. Those 2cm Flakvierlings looks awesome.
Thanks for sharing.
APR 08, 2005 - 02:17 AM

You can always expect first rate work out of Mikes stuff. I would love to see some close ups as well, especially since I plan to do this one for my Dreadnaught campaign. His rigging is exquisite.
APR 08, 2005 - 07:28 AM

Dang, that's one nice looking model. It lives up to the often claimed, but not always seen, "museum quality." Then I saw Mike's bio saying he build models professionally. You can tell.
I have one comment, or question. The side camo looks like a photo I've seen of th Bismark where the black and white stripes were painted over for the Atlantic mission, and were basically showing through the paint. At that time the fore and aft swastikas were also painted out. I feel like I'm trying to teach my grandmother to suck eggs but is this paint job strictly accurate?
APR 08, 2005 - 07:48 AM

I think the swaztikas were covered with a canvas. The fact that they're clearly visible on the wreck lead me to this conclusion. Still could be wrong.
APR 08, 2005 - 11:10 AM

I believe that is correct in regards to their being covered with a canvas.
I'm sorry, by the way Mike, you never cease to amaze me with your ships. Truly.
I noted that you brought up the swastika issue. I've always wondered about that, I thought perhaps that they were red and the gray question emerged after the relocation of the Bismarck. Afterall, at the time, at least to me, it stood to reason that they would appear gray since red light is absorbed at those depths and that in order for the red to be visable that they would need to be so many feet away with the flood lights or cameras to reflect the red.
Anyway, I was just curious as to where this question arose.
APR 08, 2005 - 11:38 AM

Hello Mike
Although I edited and published the article I din't had the chace to say:
Congrarulations on the model and on the article!
A+ work and writing!!
It was a joy working on it, and it really made me would like to see the model "in person"
Thanks for dedicating it to Garry
Keep'm commin' (models and articles)
Skipper
APR 08, 2005 - 01:07 PM
Fantastic! The Bismark is right up therewith my favorite ships. Great job. Thanks for sharing!
SEP 24, 2007 - 12:17 PM
Copyright ©2021 by Mike Taylor. _OPINIONS Model Shipwrights, KitMaker Network, or Silver Star Enterrpises. Images also by copyright holder unless otherwise noted. Opinions expressed are those of the author(s) and not necessarily those of Model Shipwrights. All rights reserved. Originally published on: 2005-04-08 00:00:00. Unique Reads: 16444

WEB HOSTING BY


Copyright ©2021 Model Shipwrights and Kitmaker Network, a subsidiary of Silver Star Enterprises
All Rights Reserved. Please read our Conditions of Use and Privacy Policy.
All Rights Reserved. Please read our Conditions of Use and Privacy Policy.