_GOTOBOTTOM
General Ship Modeling
Discuss modeling techniques, experiences, and ship modeling in general.
Akagi Build Log
snaga61
Visit this Community
California, United States
Joined: January 09, 2007
KitMaker: 82 posts
Model Shipwrights: 81 posts
Posted: Monday, December 01, 2008 - 03:19 PM UTC
Well... here goes:

SInce I'm a ship newbie this build log is meant to show progress as well as solicite suggestions/advice for the build process. The super-set PE arrives on Wednesday and I still need to get the the other sets. FOr now I'll do some cleanup on the hull to get rid of the mold lines and the visible ejector pin marks on the bottom of the flight deck.

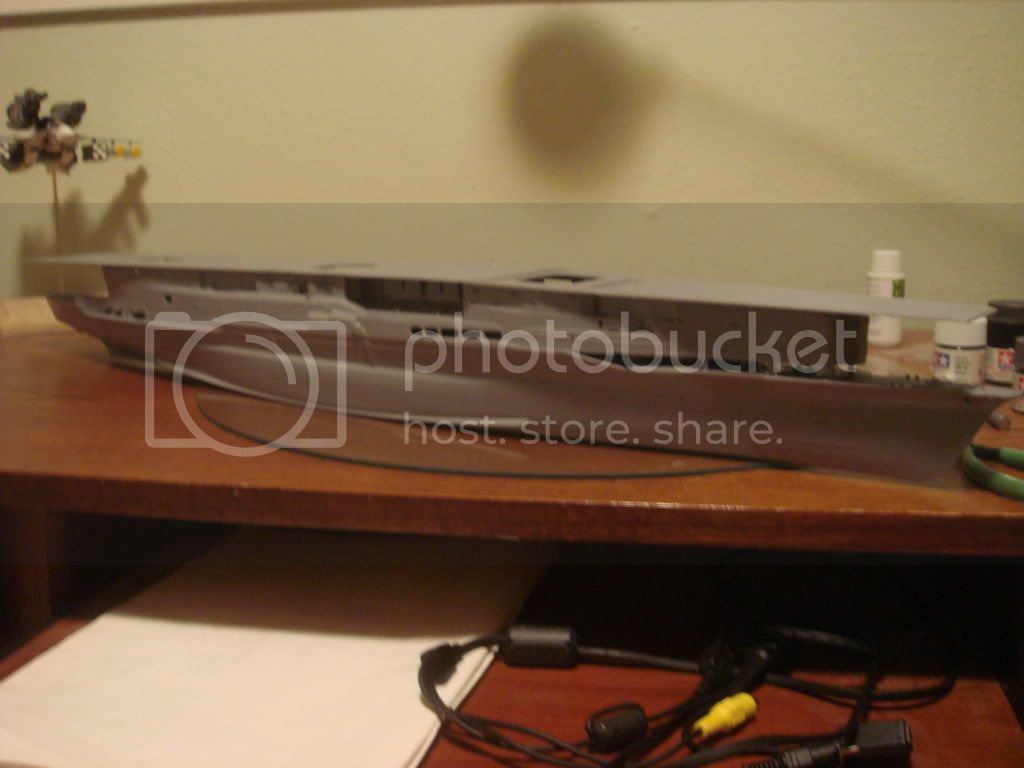
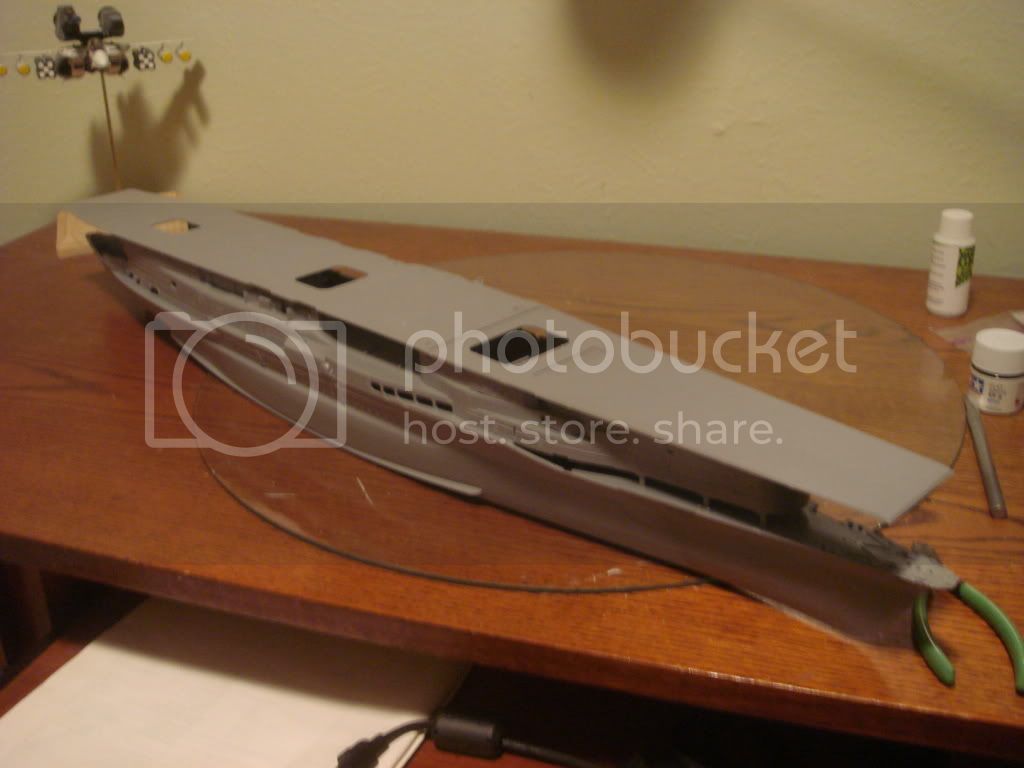
Here are some pictures of the beast with the hull halves, structural strengtheners, and the flight deck dry-fitted. A most impressive site


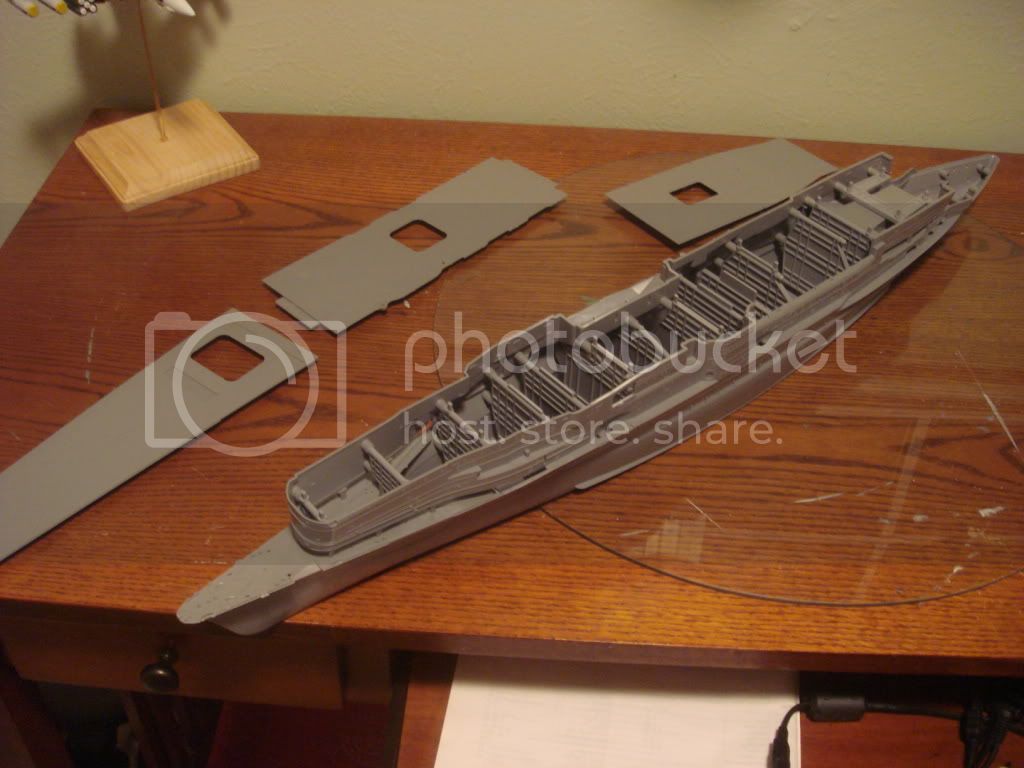
How the thing looks with all of the internal bulk-heads


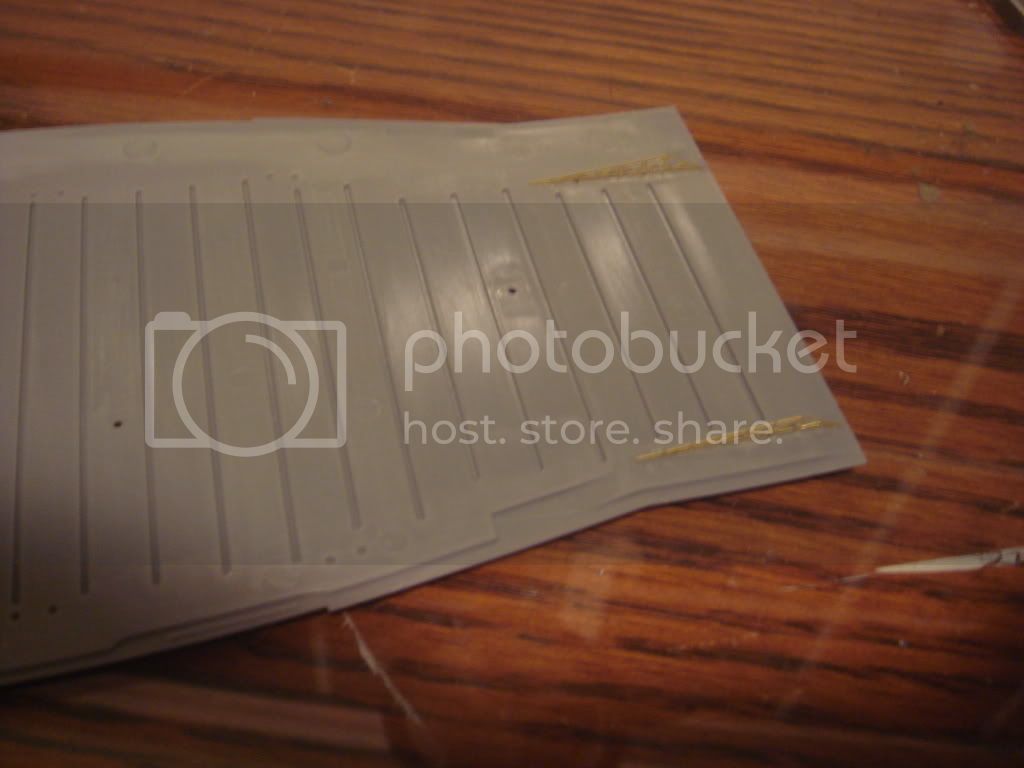
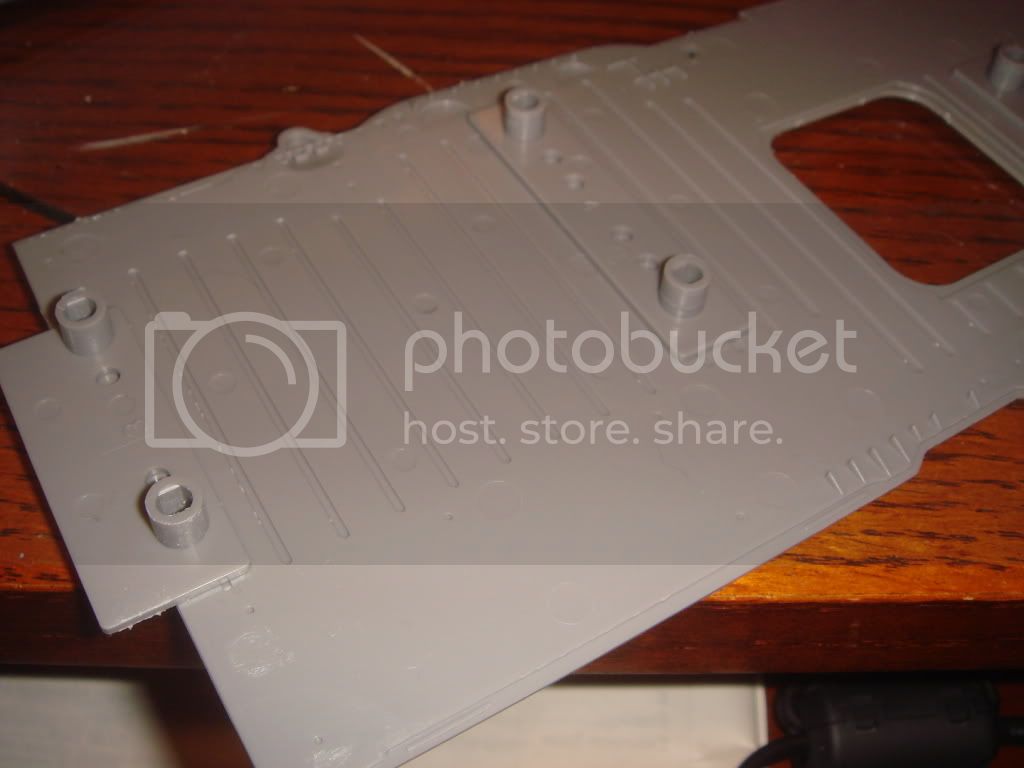
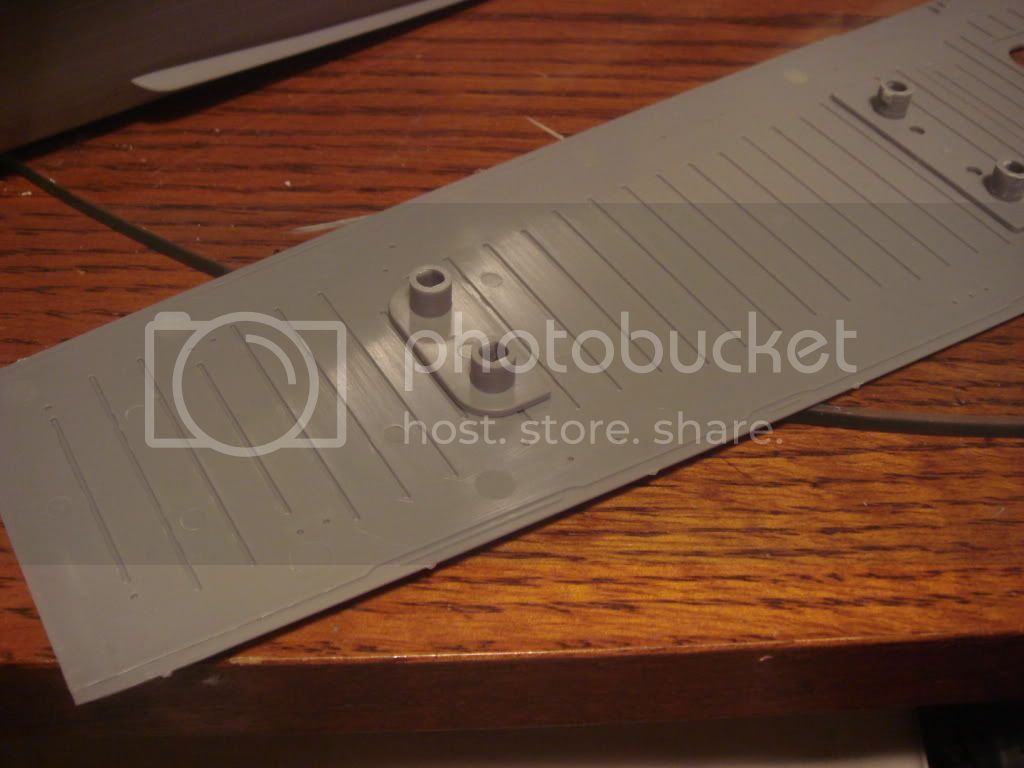
The ejector marks under the flight deck


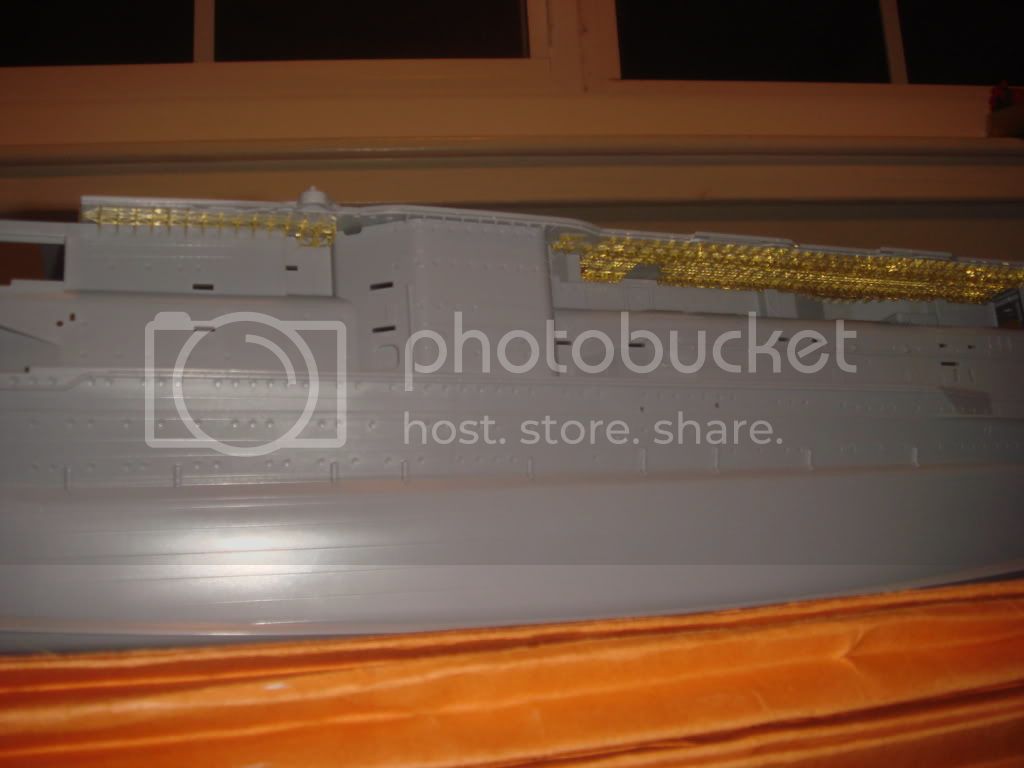
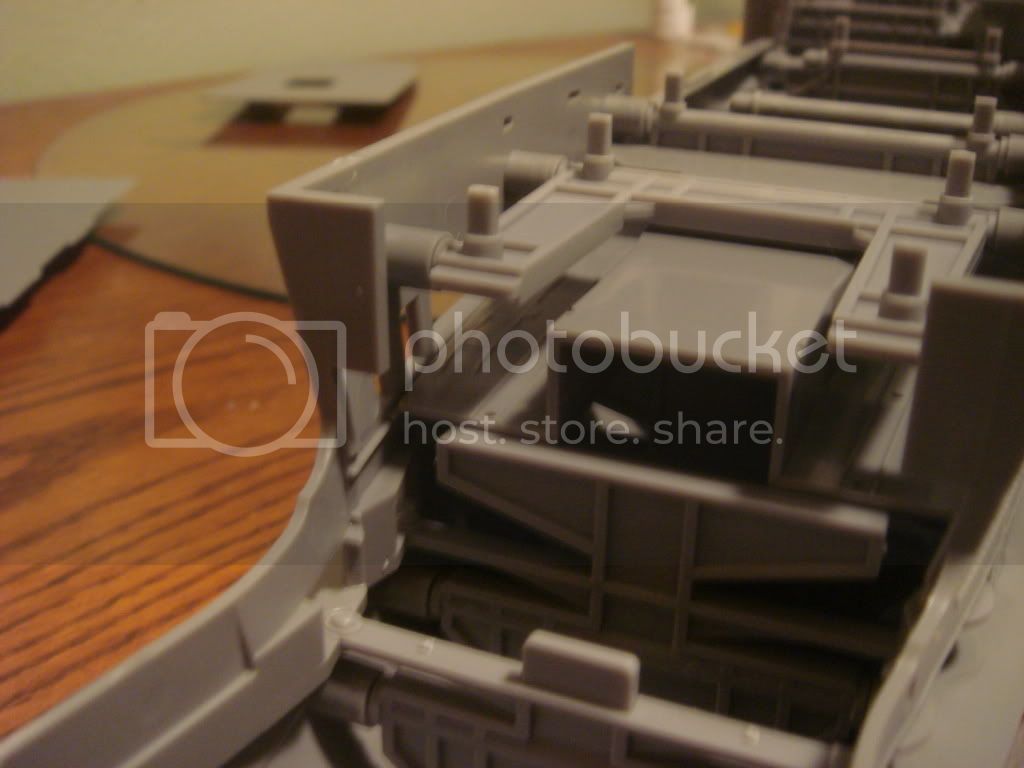
Areas where sub-assmblies will have to built, painted, weathered, and installed before the hull halves can be assmebled


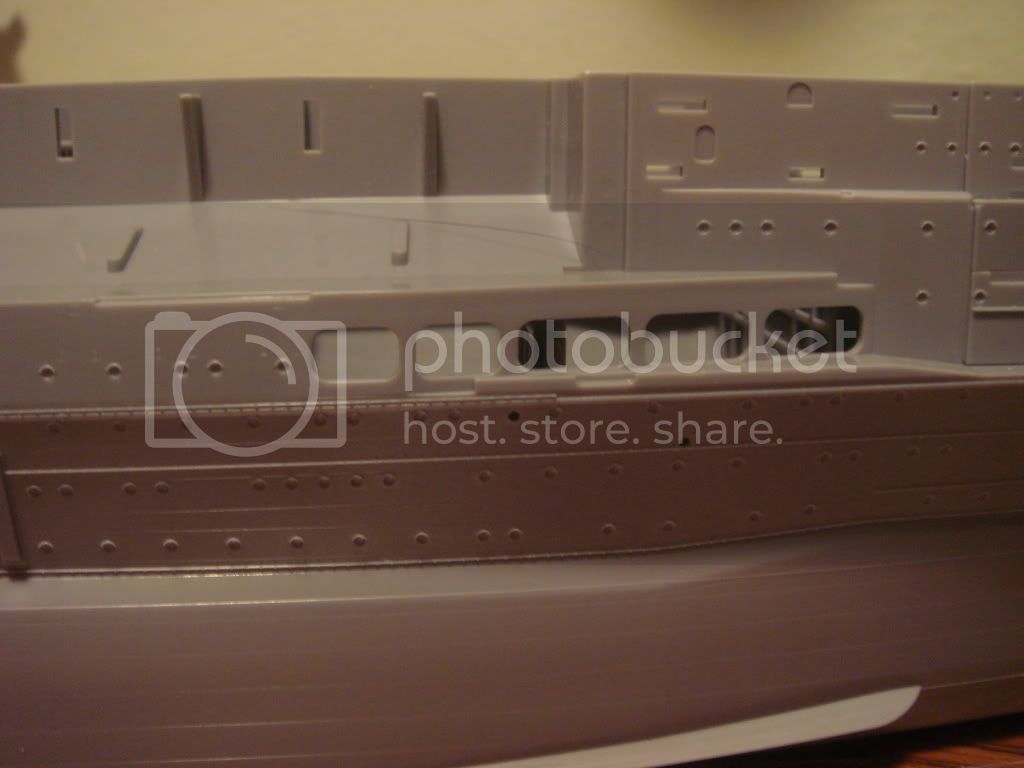
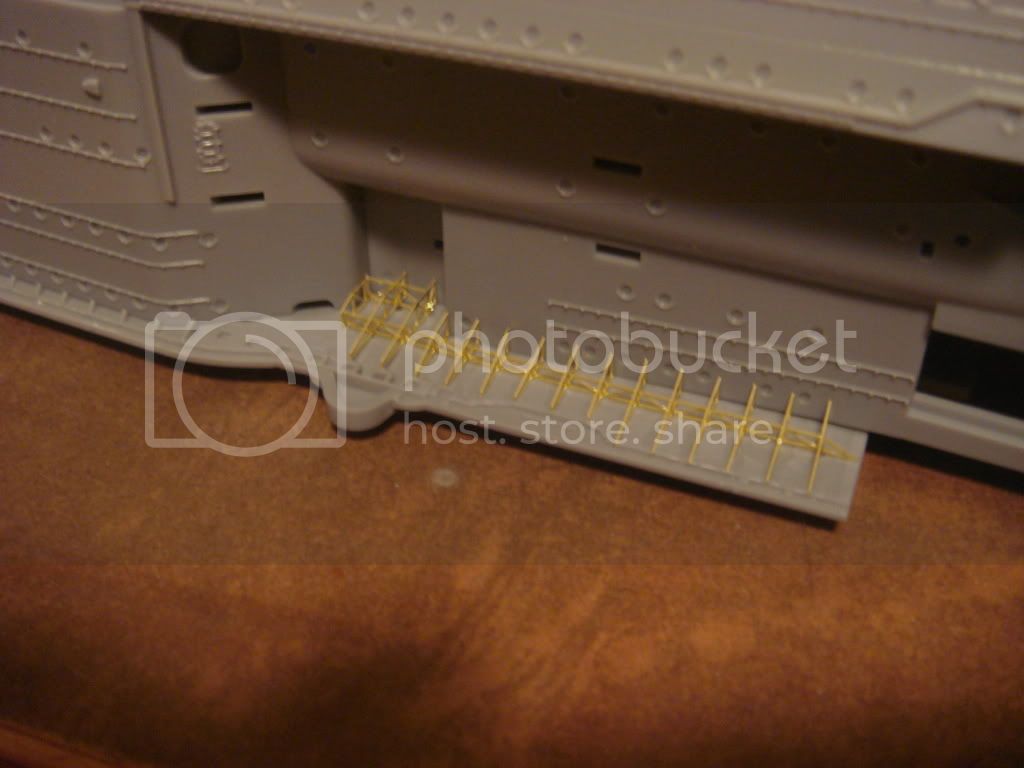
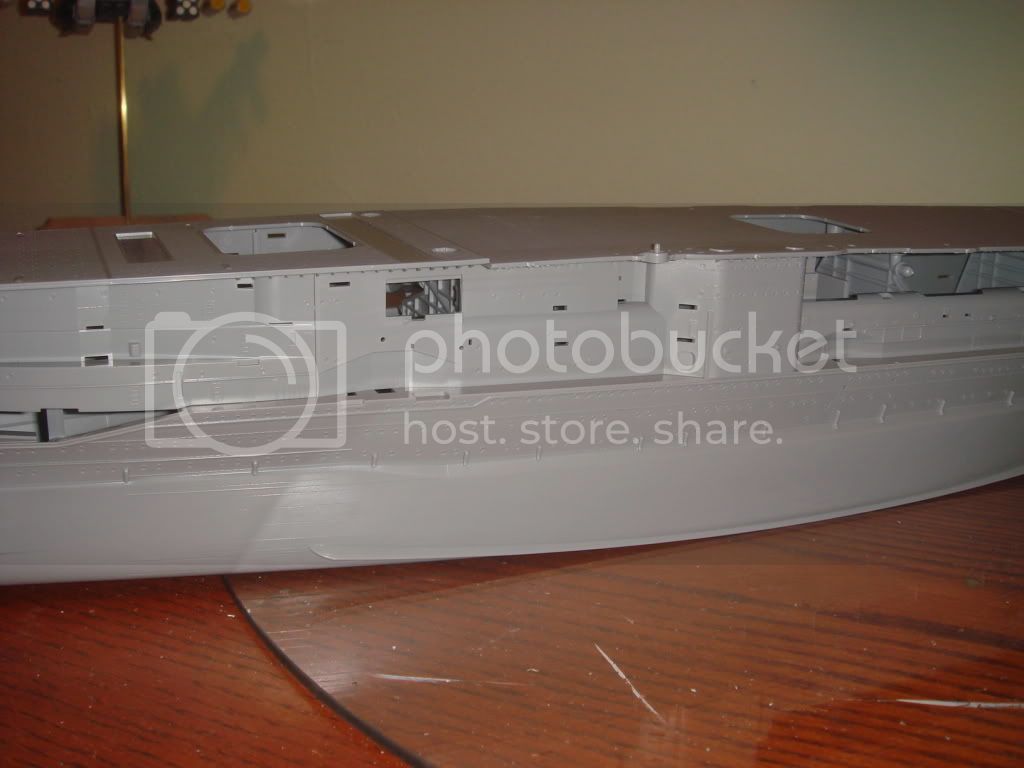
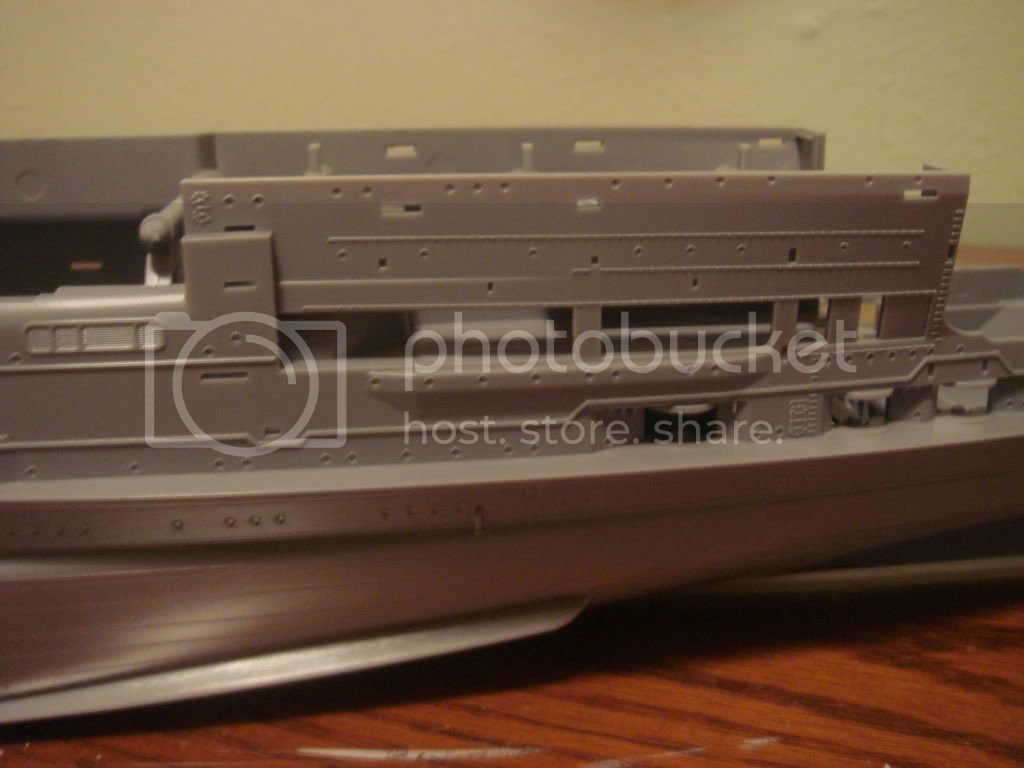
Starboard area below the funnel


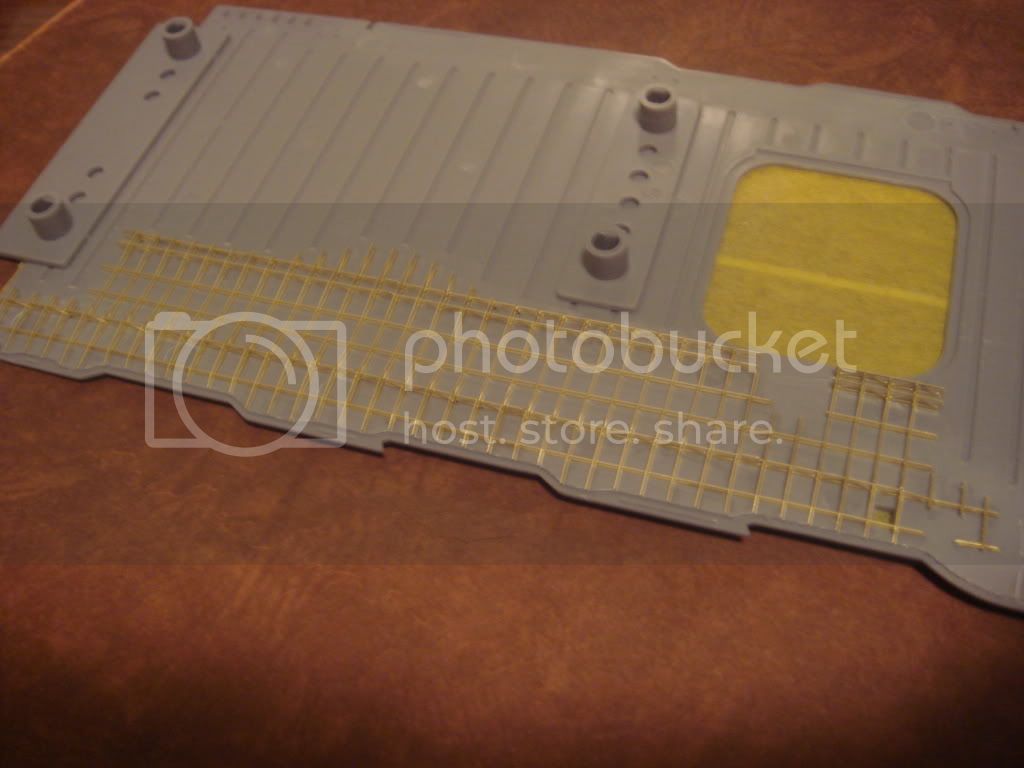
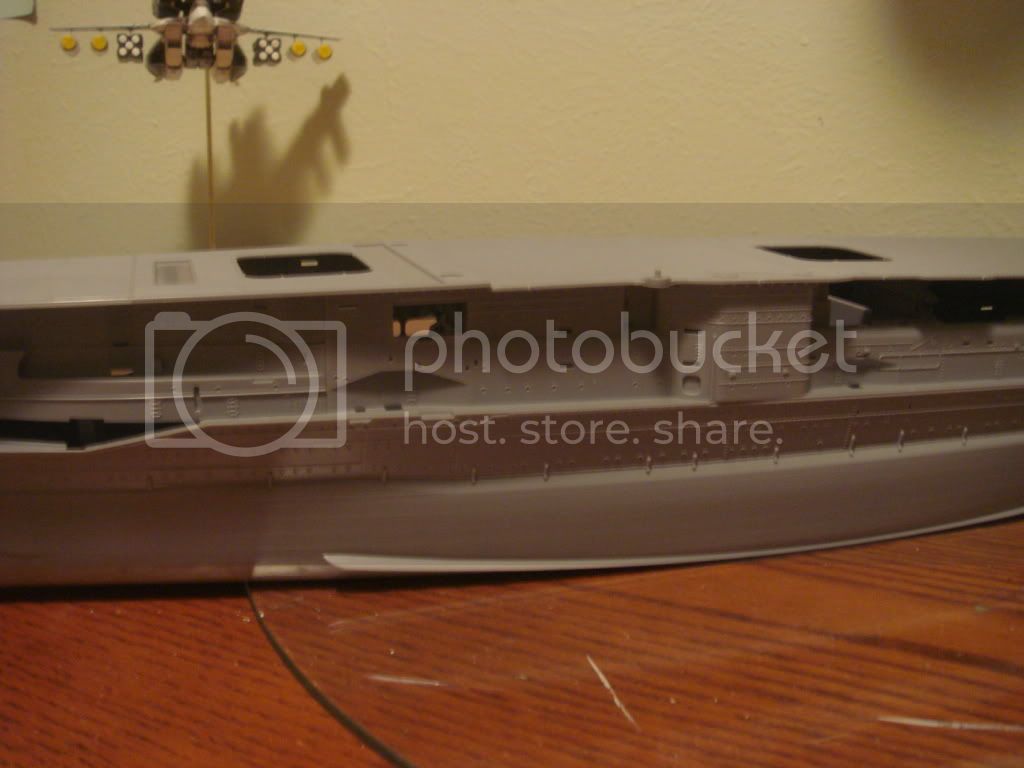
Boat deck under the flight deck, just in front of the open stern boat deck.


I wouldn't noticed the mold lines on the hull halves if left to my own devices. Thanks to Tracy White over at ModelWarship.com for his review of the kit.

That's it for now. Some sanding and filling to do before the deck PE gets here.
blaster76
Visit this Community
Texas, United States
Joined: September 15, 2002
KitMaker: 8,985 posts
Model Shipwrights: 3,509 posts
Posted: Tuesday, December 02, 2008 - 06:26 AM UTC
When I did the monster that is the Nimitz. I spent a lot of time building the airwing, something else you can do while waiting for the PE. A lot of those mold marks will disappear under all that PE. You might want to dry fit the plastic stuff (underside girders) just to see what really shows up. I have found that sanding mold marks from areas that are going to be covered a big waste of time. I mean, why do the underside of the tank as I am not goling to display it upside down. As it is, this build will probably takeseveral months no matter how good you are. That underside PE set is a major maze and will take a lot of time just studying and planning out what you are going to do, then the bending and folding, then the dry fitting. I almost sjhudder to think. Of course when all is said and done it looks magnificent.
CaptSonghouse
Visit this Community
California, United States
Joined: August 08, 2008
KitMaker: 1,274 posts
Model Shipwrights: 1,236 posts
Posted: Tuesday, December 02, 2008 - 10:27 AM UTC
My Akagi arrived today.

What a fat box! Not even the Lexington rated such a boxcar. At first glance, the basic kit looks to be well thought out and an excellent canvas for superdetailing. This kit will be an excellent build for anybody.

--Karl
snaga61
Visit this Community
California, United States
Joined: January 09, 2007
KitMaker: 82 posts
Model Shipwrights: 81 posts
Posted: Tuesday, December 02, 2008 - 10:50 AM UTC
Anybody ordered from Myatomic hobbies before? The PE set prices are alot lower than any other web retailer.

Set A: $39.99 + free shipping.

Just checking before I pry open the wallet, again.
superfly
Visit this Community
Ontario, Canada
Joined: October 02, 2008
KitMaker: 40 posts
Model Shipwrights: 36 posts
Posted: Tuesday, December 02, 2008 - 12:19 PM UTC
Looking at the Super Set PE for the "under-decking" I think most of the girder interlock within each other. You might be able to pre-build most main girders then glue it on the deck instead of measuring out each spacing. If your off by the just a fraction everything will be off. Maybe trace where the hanger deck attaches to underside of the flight deck to ensure correct placement of the girders...The instruction sheet is very vague....they want the builder to mark out each segment. ... but i think its easier to prebuild the main girders first...DRY FIT! DRY FIT! DRY FIT!!
snaga61
Visit this Community
California, United States
Joined: January 09, 2007
KitMaker: 82 posts
Model Shipwrights: 81 posts
Posted: Tuesday, December 02, 2008 - 03:27 PM UTC

Quoted Text

Looking at the Super Set PE for the "under-decking" I think most of the girder interlock within each other. You might be able to pre-build most main girders then glue it on the deck instead of measuring out each spacing. If your off by the just a fraction everything will be off. Maybe trace where the hanger deck attaches to underside of the flight deck to ensure correct placement of the girders...The instruction sheet is very vague....they want the builder to mark out each segment. ... but i think its easier to prebuild the main girders first...DRY FIT! DRY FIT! DRY FIT!!


Just got the set. You're right about pre-building the girder grid rather than doing it piece by piece. If not pre-building the whole thing then at least pre-fit the end pieces (and maybe a couple of the inner ones) to align it before gluing it onto the deck.

One issue I have is the slots under the deck where the plastic grid girders fit into. Is anybody going to fill those before putting the PE on?
snaga61
Visit this Community
California, United States
Joined: January 09, 2007
KitMaker: 82 posts
Model Shipwrights: 81 posts
Posted: Tuesday, December 02, 2008 - 03:42 PM UTC
Just looked at the instruction a little more closely. The picture sheet shows the PE glued on w/o filling the slots
snaga61
Visit this Community
California, United States
Joined: January 09, 2007
KitMaker: 82 posts
Model Shipwrights: 81 posts
Posted: Tuesday, December 02, 2008 - 09:10 PM UTC
Couldn't wait to find out hard hard/easy it is to work the PE so I started on the aft flight deck. That area seem the easiest to get my feet wet.

The Hasegawa guys did a good job engineering the PE. The interlocking grid work is not too hard, just have to go slow and think through the sequence so as to not fumble around with the small pieces too much. A big help was the Gator glue (I guess white glue may work too but I'll stick with the Gator glue). I'll explain as I go through the sequence.

The Hasegawa guys designed it so the builder doesn't really have to rely totally on measing where the grid pieces need to go. As I look through the PE instructions more carefully, it seems that they provided pin hole for a few selected PE pieces. The corresponding PE pieces has pins on the bottom meant to mate with the section. That's basically how an entire girder grid can be aligned.

First I glued the two girder pieces with the alignment pins onto the deck. The interlocking slot is pointed up so the cross pieces will lay on top.


Once that's done I selected the largest top cross member piece and started attaching the other bottom pieces. Each piece is tacked with a small amount of Gator glue to hold it in place but has enough flex for later with I align the grid with other top cross members


All of the bottom pieces (except for the two already attached to the deck) have been tacked on


Then the top cross piece is attached to the two bottom pieces on the deck. At this point the pieces will hold together by friction


Start attaching the other top cross pieces. As I attached new ones, I used CA to locked the previously attached ones in place. This ensures good, square alignment for the areas assembled but provides flex for the area that still needs the cross pieces.


Completed the area between the Aft top and bottom decks


Took about 3 hrs. but enjoyed it thoroughly. This will look awesome once the all of the PE is on.
Kapitanleutnant
Visit this Community
United States
Joined: May 19, 2008
KitMaker: 20 posts
Model Shipwrights: 10 posts
Posted: Wednesday, December 03, 2008 - 04:07 AM UTC
I'm soooo green eyed jealous guys!!! As I said before, I have to sell my body on the street corner at .25 cents a pop...and I'm up to $1.25 so far. Sigh. Perhaps I'll be able to afford this bad boy when my tax return comes in. Until then, I'll live vicariously through this build.
Clanky44
Visit this Community
Ontario, Canada
Joined: September 15, 2005
KitMaker: 1,901 posts
Model Shipwrights: 934 posts
Posted: Wednesday, December 03, 2008 - 11:16 PM UTC
Lead the way my friend!

Great start on the Akagi, all those internal bulkheads look to be a challenge for those of us looking to waterline the model.

If I can make one suggestion, place a piece of coloured cardboard (or a cutting board) beneath the model parts as you photograph. That should remove the glare from the glass table beneath and focus the attention to the model parts.

looking forward to future updates,

Frank
goldenpony
Visit this Community
Zimbabwe
Joined: July 03, 2007
KitMaker: 3,529 posts
Model Shipwrights: 2,419 posts
Posted: Thursday, December 04, 2008 - 12:35 AM UTC
It sure would take some serious surgery to make her a waterline. Although I prefer waterline ships, I do not think I would do that on this ship.

Sure is an impressive looking kit thus far!

barbacanosa
Visit this Community
Baleares, Spain / España
Joined: August 09, 2005
KitMaker: 296 posts
Model Shipwrights: 45 posts
Posted: Thursday, December 04, 2008 - 03:21 AM UTC
As a beginner models naval I will take note of your construction as I am of Akagi Hasegawa since few years ago and I do not dare start it.
maybe now, and with your help me decide.

Domi
snaga61
Visit this Community
California, United States
Joined: January 09, 2007
KitMaker: 82 posts
Model Shipwrights: 81 posts
Posted: Thursday, December 04, 2008 - 10:01 AM UTC

Quoted Text

Lead the way my friend!

Great start on the Akagi, all those internal bulkheads look to be a challenge for those of us looking to waterline the model.


Kym Knight has started to waterline the build but cutting up the stiffeners. He has pictures up on Warship.com.
superfly
Visit this Community
Ontario, Canada
Joined: October 02, 2008
KitMaker: 40 posts
Model Shipwrights: 36 posts
Posted: Thursday, December 04, 2008 - 10:58 AM UTC
Theres a guy on modelwarships.com who does "full hull" dioramas...basically its a full hull ship on a deep base filled with clear resin so you can see the entrie ship but its also a waterline. I like this idea..I think it would be easier than cutting up the Akagi. You can make a deep base with wooden sides or have it a "see through" effect using clear resin with color tint.
SqzMyLemon
Visit this Community
Alberta, Canada
Joined: December 10, 2007
KitMaker: 66 posts
Model Shipwrights: 60 posts
Posted: Thursday, December 04, 2008 - 11:02 AM UTC
Great start to the kit. My Akagi arrived today and it's an impressive looking kit. I have the A, B, & C detail sets yet to buy, but that's ok as I'll not start this bad boy till I build the King George V.

Will be following your build with keen interest and making note of any potential pitfalls you may run across. Good luck with the kit and look forward to your updates.
blaster76
Visit this Community
Texas, United States
Joined: September 15, 2002
KitMaker: 8,985 posts
Model Shipwrights: 3,509 posts
Posted: Friday, December 05, 2008 - 11:06 AM UTC
Great strart on the build log. You have done immeasurable good by posting how you built up the first part of the deck underside. It sure looks a lot less intimidating the way you presented it.

Atomic hobbies....hmmmmmm I'll have to check it out. Great MOdels wants $55 each for the A and B sets. Plus I still have to get a minimum of 2 aircraft sets and then try to find someone who wants to do a Midway with the Vals and trade some Vals for Kates.

But heck, I will be a long way from building this puppy. I plan to start my Kongo in January. After that I'll probably want to tackle a few "easier kits" just to get my build vs buy numbers right. I see where Squadron is selling the Atago at half price. I'll finally pick that class up. Just waiting for the Myoko's nnow.
snaga61
Visit this Community
California, United States
Joined: January 09, 2007
KitMaker: 82 posts
Model Shipwrights: 81 posts
Posted: Friday, December 05, 2008 - 01:33 PM UTC
Thanks guys. Haven't had any time to work on it the last couple of days but hopefully get some work done this weekend.

I have a question for the guys who already have the wooden deck:

since I'm lazy and don't want to paint the deck and will probably get the wooden deck, does the instructions mention any "clean-up" (cutting molded-in detail) on the kit deck before applying? I want to do this before doing more on the deck PE to minimize handling once the more fiddly areas, such as the front where the strut supports go, are done.
Rab
Visit this Community
Queensland, Australia
Joined: October 03, 2006
KitMaker: 353 posts
Model Shipwrights: 207 posts
Posted: Friday, December 05, 2008 - 01:54 PM UTC
Hey Snaga,
I haven't done any detailed checking of the deck yet, but my thoughts concerning it 's construction would be to add the wood decking before adding the underside P/E. It doesn't look like anything needs to be cut from deck to add the wood veneer.
snaga61
Visit this Community
California, United States
Joined: January 09, 2007
KitMaker: 82 posts
Model Shipwrights: 81 posts
Posted: Friday, December 05, 2008 - 06:35 PM UTC
Thanks Kym. Think I'm out of luck on that one as I haven't gotten the wood deck yet. However the really fiddly stuff seem to be at the front, so hopefully I'll get the deck before I work on that section.

Small update:

Worked a bit on the mid deck section right in front of the island.


Gotta be real careful here and make sure the alignment is straight as its a snug fit between the PE pieces and the side of the hull


After seeing just what this little bit looks like against the hull has me convinced that doing this kit without the superset PE would really be short changing the build.
Rab
Visit this Community
Queensland, Australia
Joined: October 03, 2006
KitMaker: 353 posts
Model Shipwrights: 207 posts
Posted: Friday, December 05, 2008 - 07:59 PM UTC
I suppose I neglected to think about adding the wood sections once the plastic deck is secured to the ship, that way the P/E underside won't interfere.
One thing I'm going to do, is leave the little landing craft off the racks. They'll look great heading to shore full of sailors.
snaga61
Visit this Community
California, United States
Joined: January 09, 2007
KitMaker: 82 posts
Model Shipwrights: 81 posts
Posted: Friday, December 05, 2008 - 08:38 PM UTC
Ah... yes, you're building the waterline version. That should look great.

Found this page on a Japanese site. Detailed 3D models of the Akagi anchored with boats all around it.

http://w2322.nsk.ne.jp/qm.masaki/cgakagi2.html
superfly
Visit this Community
Ontario, Canada
Joined: October 02, 2008
KitMaker: 40 posts
Model Shipwrights: 36 posts
Posted: Saturday, December 06, 2008 - 02:55 AM UTC
Hey Dave,

I dry fitted the wooden deck and you don't have to remove anything. I would build the underdecking first, then paint it ....then apply the deck pieces...I wouldn't want to mask the wooden deck. Are you putting on PE jack stays? Would the PE jack stays clear the underdecking ok?
goldenpony
Visit this Community
Zimbabwe
Joined: July 03, 2007
KitMaker: 3,529 posts
Model Shipwrights: 2,419 posts
Posted: Saturday, December 06, 2008 - 03:02 AM UTC
Here is a link to the site Dave listed

Akagi Link

snaga61
Visit this Community
California, United States
Joined: January 09, 2007
KitMaker: 82 posts
Model Shipwrights: 81 posts
Posted: Saturday, December 06, 2008 - 07:18 AM UTC

Quoted Text

Hey Dave,

I dry fitted the wooden deck and you don't have to remove anything. I would build the underdecking first, then paint it ....then apply the deck pieces...I wouldn't want to mask the wooden deck. Are you putting on PE jack stays? Would the PE jack stays clear the underdecking ok?


Thanks Renato. I will continue with the deck PE then.

No jack stays for me. Even though it would add a nice touch I think the existing molding looks okay.
snaga61
Visit this Community
California, United States
Joined: January 09, 2007
KitMaker: 82 posts
Model Shipwrights: 81 posts
Posted: Sunday, December 07, 2008 - 04:36 PM UTC
The is the effort for the weekend. Its going faster than I thought but its still a lot of PE .

This is the mid-deck port section. Needed more cross beams tacked together so the piece wouldn't be so wiggly.


Completed


How it looks with deck mounted


 _GOTOTOP