

Go to modelshipwrights.com for the current dynamic site!


General Ship Modeling
Discuss modeling techniques, experiences, and ship modeling in general.
Discuss modeling techniques, experiences, and ship modeling in general.
Hosted by Jim Starkweather
1/350 IJN "Akagi" - Pearl Harbor Detail

BravoTwoZero

Joined: June 11, 2009
KitMaker: 461 posts
Model Shipwrights: 80 posts

Posted: Friday, February 13, 2015 - 03:26 AM UTC
Great job Tim! You have great skills dealing with photo etched parts. I enjoy reading your thread. Thank you for the tip on using black acrylic sheet. I have placed an order for an 8x11 sized one. Can't wait to try it out. Question about the canopies. did you re-purpose spare photo etch parts? If so, what were they for originally? Again great job and thanks!

JJ1973

#345

Joined: August 22, 2011
KitMaker: 1,835 posts
Model Shipwrights: 1,832 posts

Posted: Saturday, February 14, 2015 - 07:16 PM UTC
Tim,
this is most stunning work you are showing here, like many prior commenters I'm in awe about what you are doing - or have been doing so far.
Your thread was simply overwhelming at first, being busy with real life issues and not having time to seriously watch what you are showing, that's why I'm late with my comments. Thanks for showing this!!!
I am definitely on board for your build log!! And once more, seconding commenters earlier, thanks for the black acrylic idea, I am getting a piece for myself very soon, that seems a real good idea!!
All the best for your build, I'll be watching and am looking forward to your progress!!
Cheers,
Jan

HalseysBeard

Joined: March 17, 2011
KitMaker: 137 posts
Model Shipwrights: 135 posts

Posted: Sunday, February 15, 2015 - 12:43 PM UTC
Hi Joseph and Jan..your kind words are appreciated...and Jan, they are from an aftermarket kit. I will look up which one when I go back into the workroom and advise.
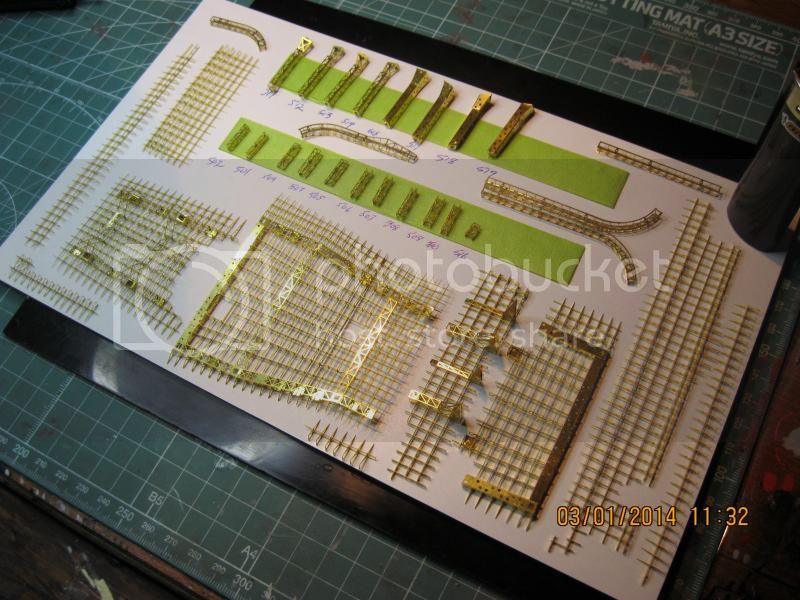
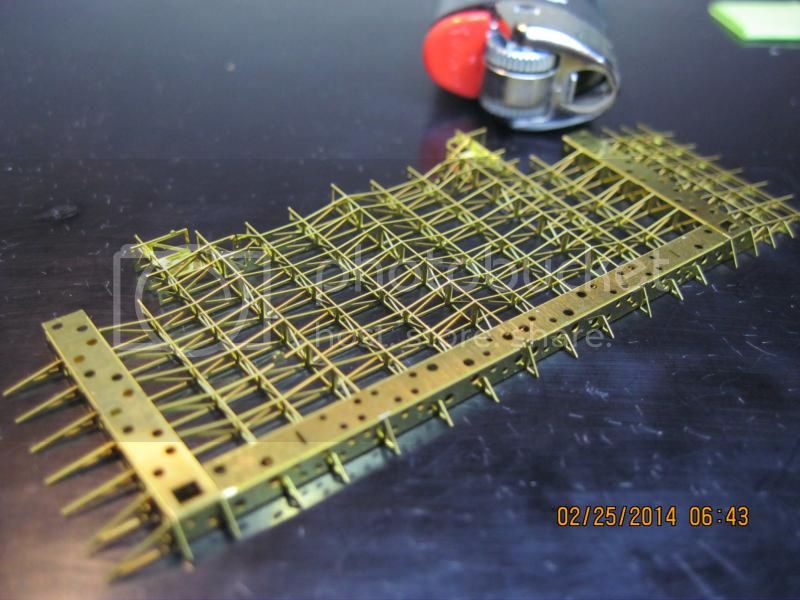
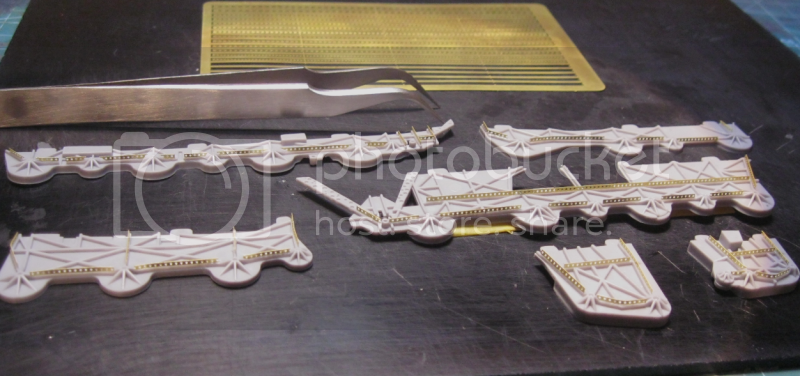
Anyway, here's all the underdeck supports, trams and columns done:
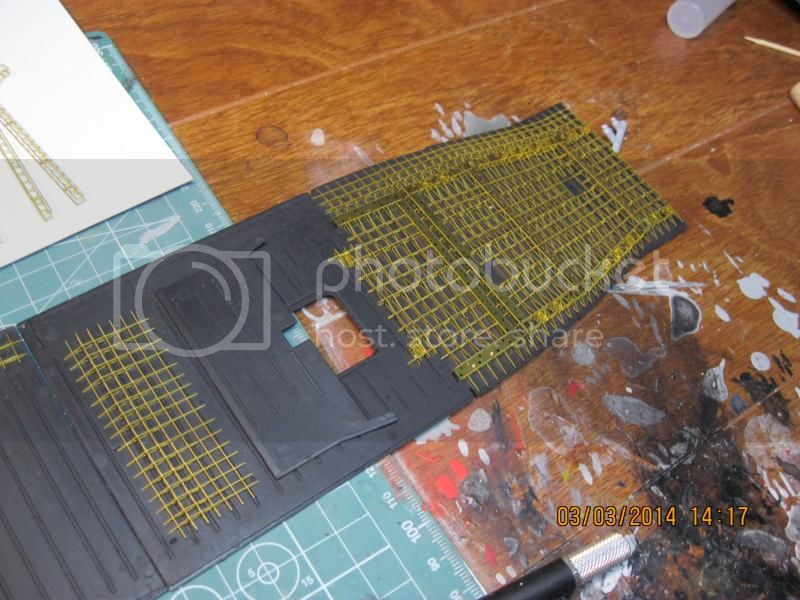
Now, where does all that pe go anyway? The flight deck is divided into 3 parts, but in looking I saw the underneath of all of them was pocked with large ejector marks and many unwanted ridges. As I wanted a flat base for the grids to attach to, that had to be fixed.
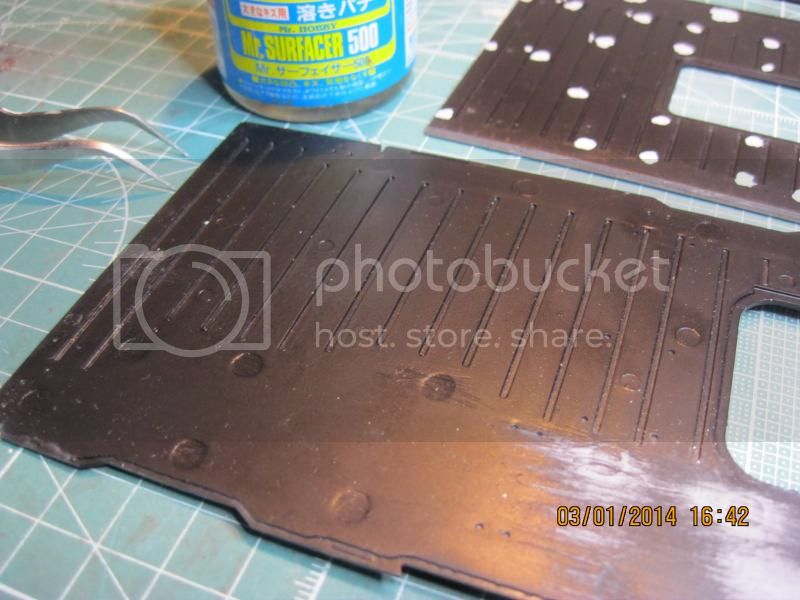
Mr. Surfacer, to do the fills, and some sanding got me what I needed:
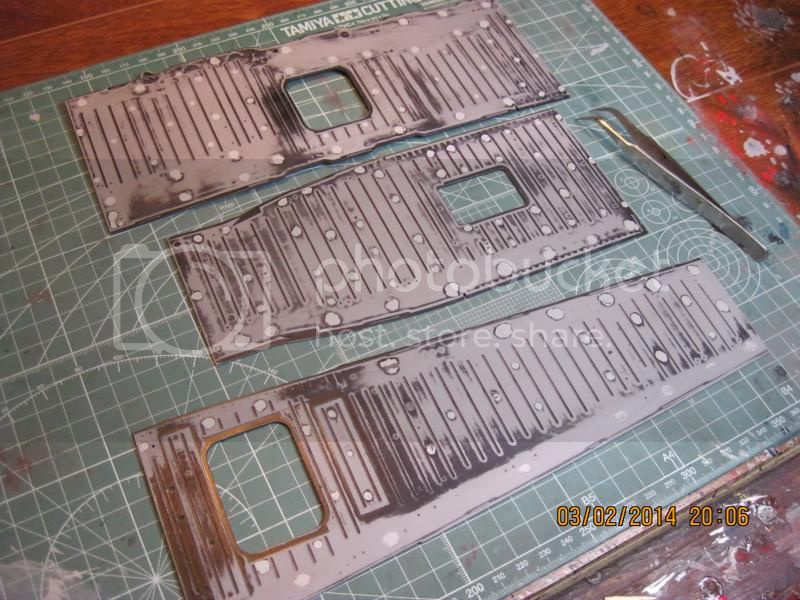
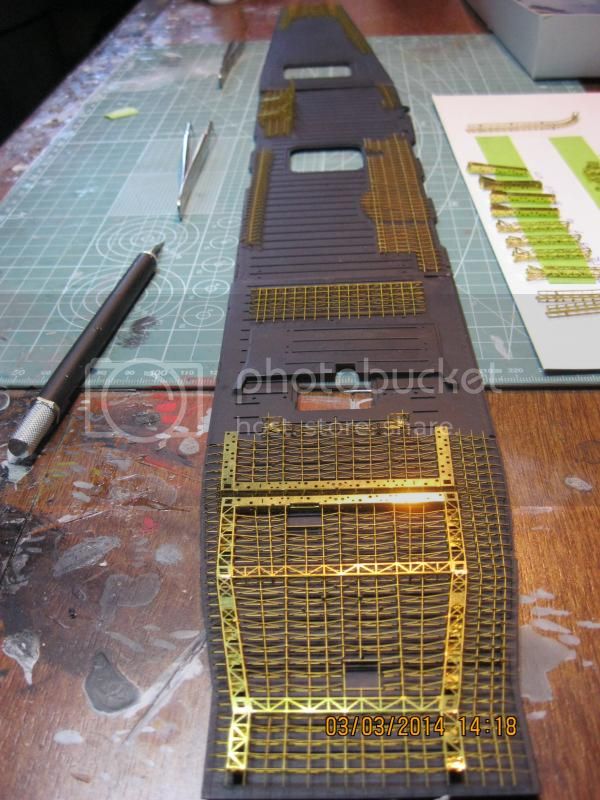
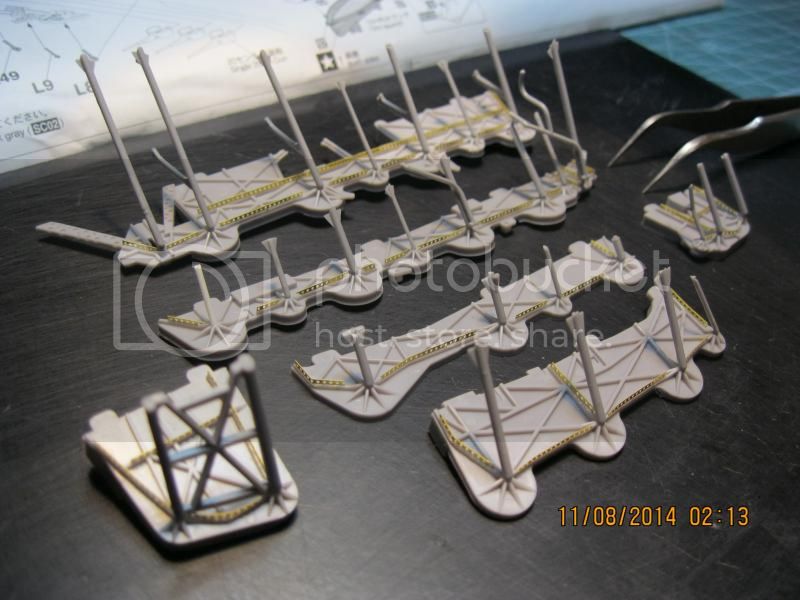
After painting the underside of the deck parts, I laid out the pe supports on the deck to check the fit
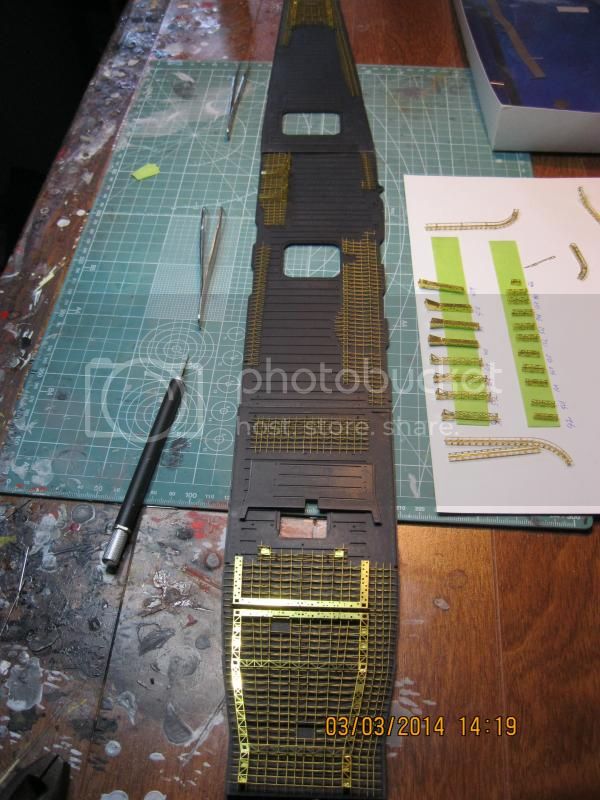
I was especially worried about this part because of the changes in the elevation of this part of the deck (the deck that this part covers is at first flat, then slopes down about 1/2 inch, and then flattens out again...but it was a perfect fit. Kudo's to the guys who designed this pe!
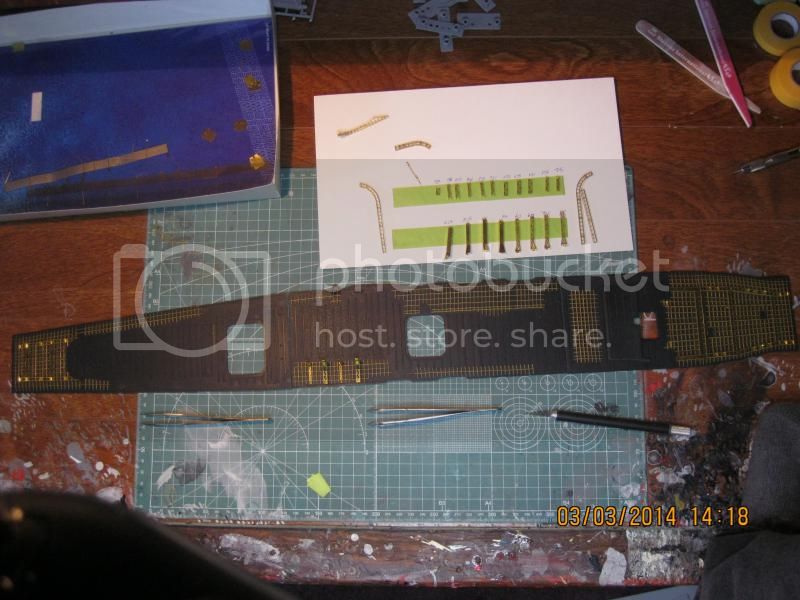
Mid-deck parts checked for fit:

And another overall shot:
Thanks for viewing my model ship build so far, comments are always welcome of course! -Tim
Anyway, here's all the underdeck supports, trams and columns done:

Now, where does all that pe go anyway? The flight deck is divided into 3 parts, but in looking I saw the underneath of all of them was pocked with large ejector marks and many unwanted ridges. As I wanted a flat base for the grids to attach to, that had to be fixed.

Mr. Surfacer, to do the fills, and some sanding got me what I needed:

After painting the underside of the deck parts, I laid out the pe supports on the deck to check the fit


I was especially worried about this part because of the changes in the elevation of this part of the deck (the deck that this part covers is at first flat, then slopes down about 1/2 inch, and then flattens out again...but it was a perfect fit. Kudo's to the guys who designed this pe!

Mid-deck parts checked for fit:

And another overall shot:

Thanks for viewing my model ship build so far, comments are always welcome of course! -Tim

HalseysBeard
Joined: March 17, 2011
KitMaker: 137 posts
Model Shipwrights: 135 posts
Posted: Sunday, February 15, 2015 - 06:23 PM UTC
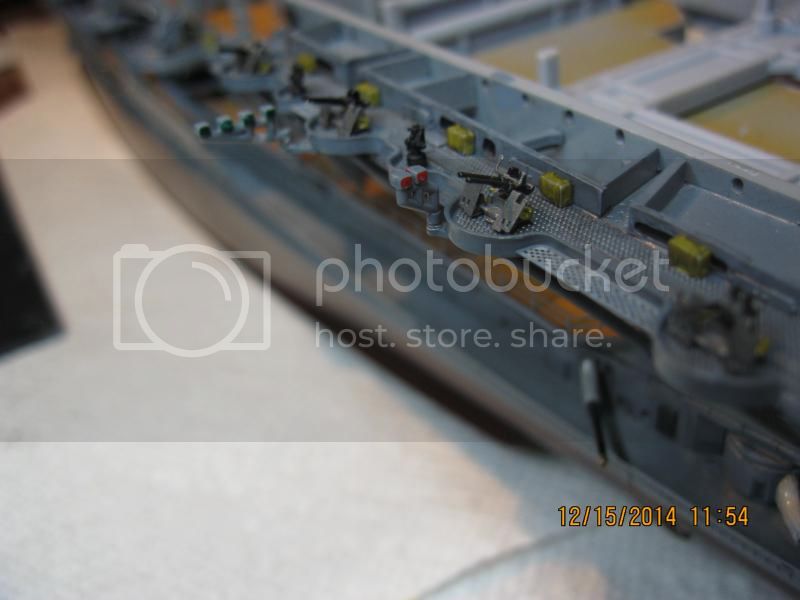
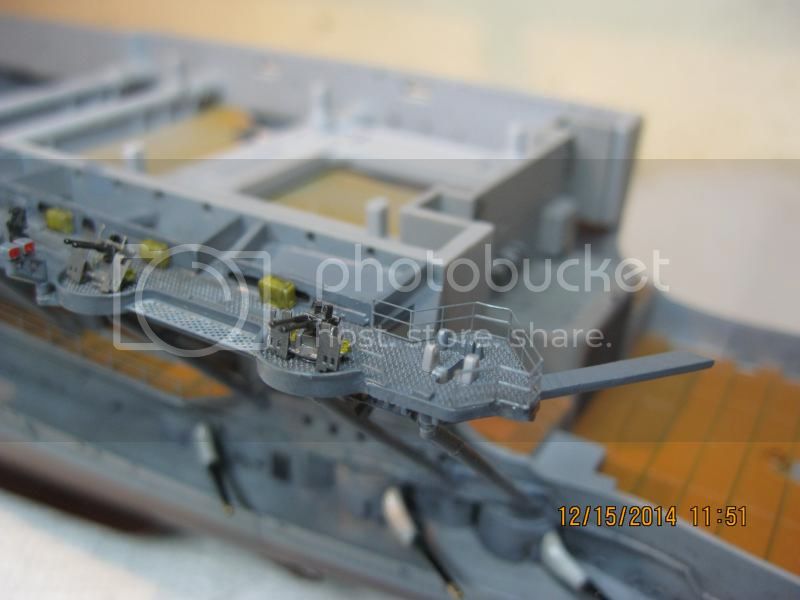
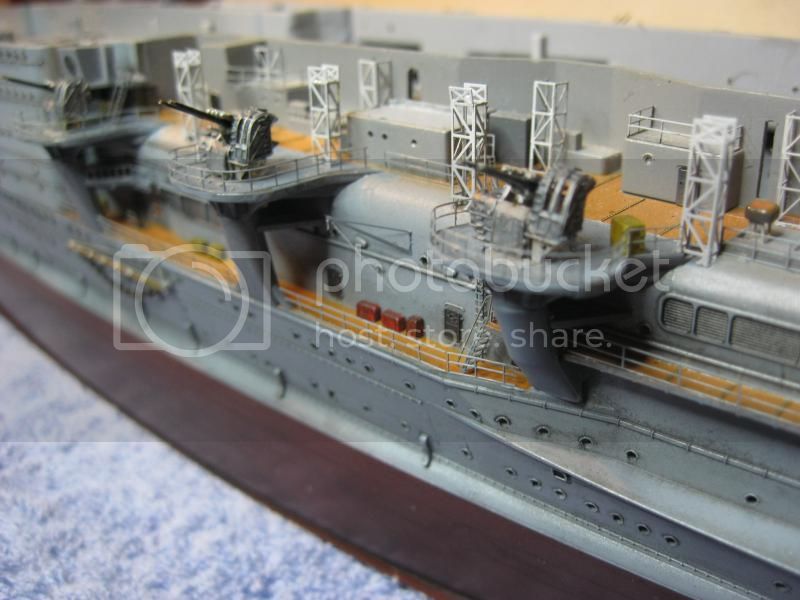
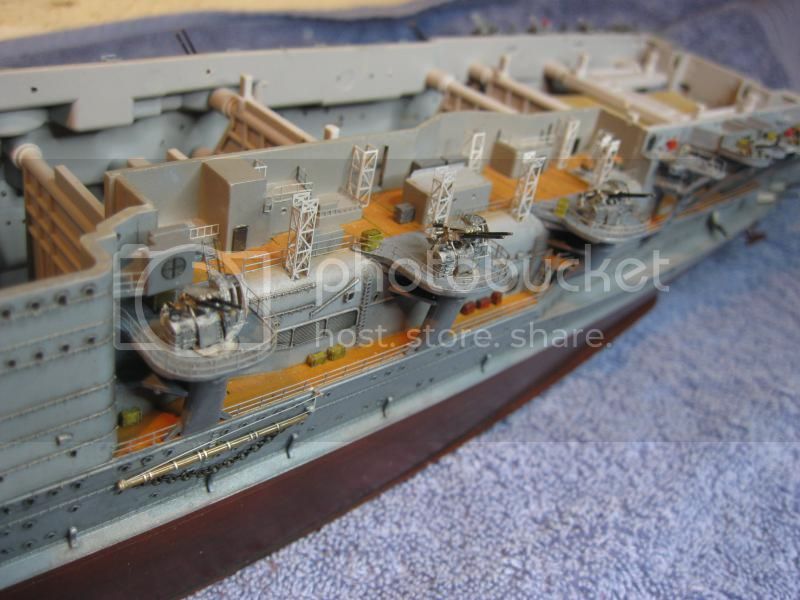
Adding some detail to the gun tubs:


HalseysBeard
Joined: March 17, 2011
KitMaker: 137 posts
Model Shipwrights: 135 posts
Posted: Sunday, February 15, 2015 - 06:25 PM UTC
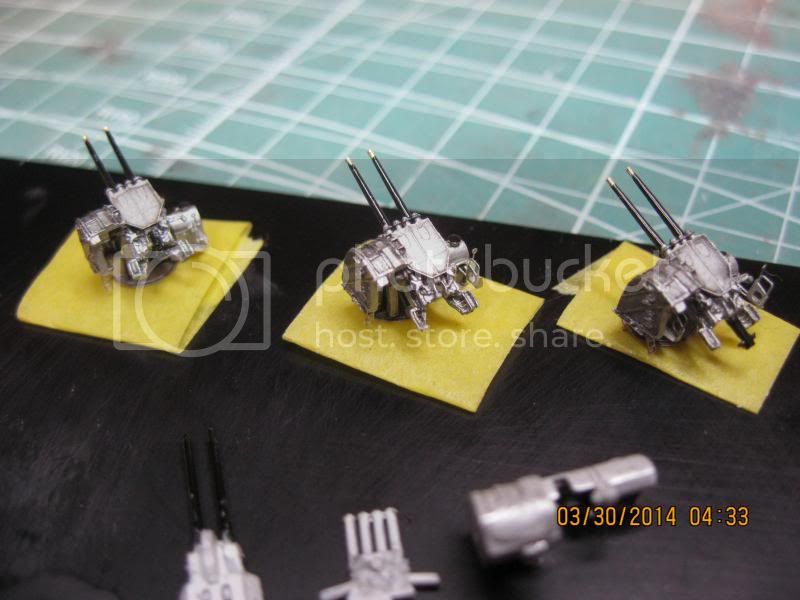
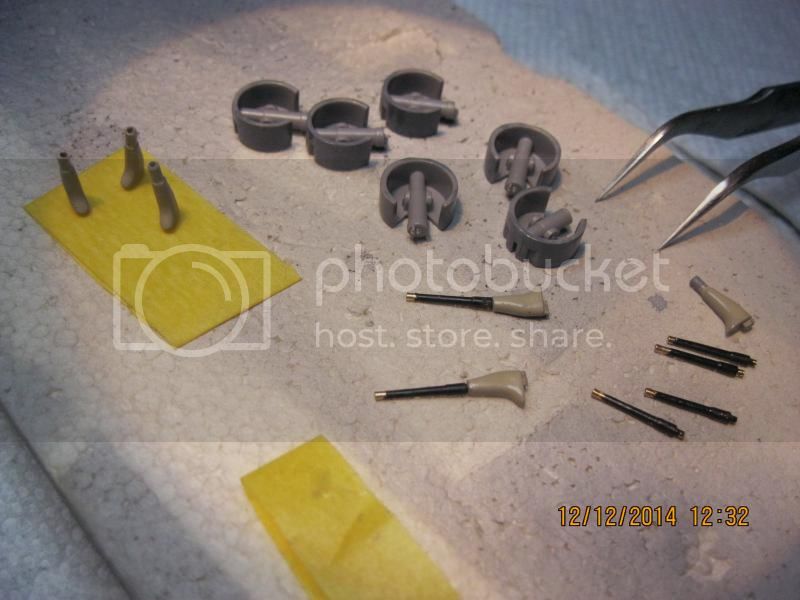
Starting some work on the AA's:
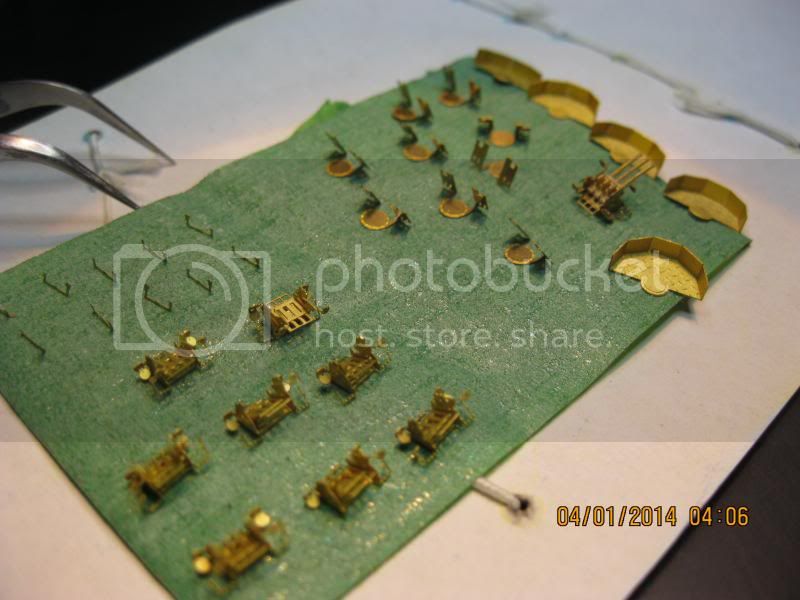
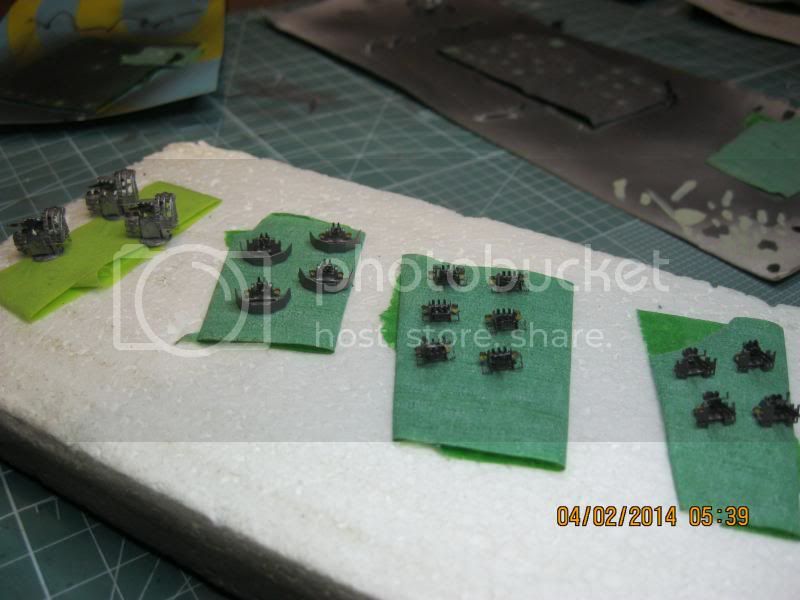
Twins:
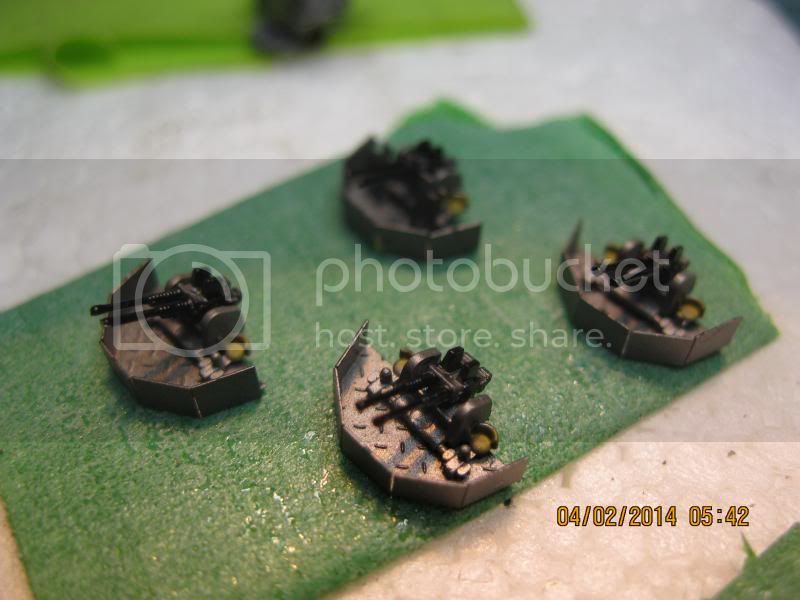
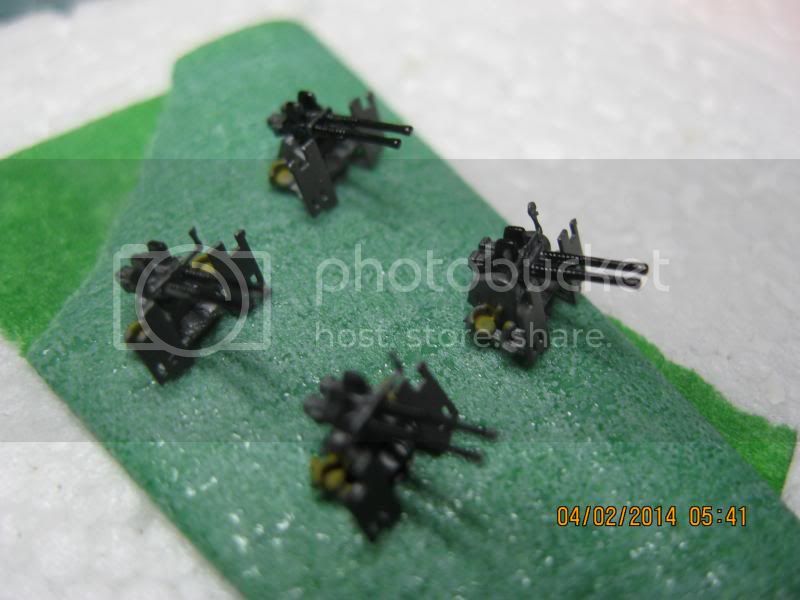
Triples:
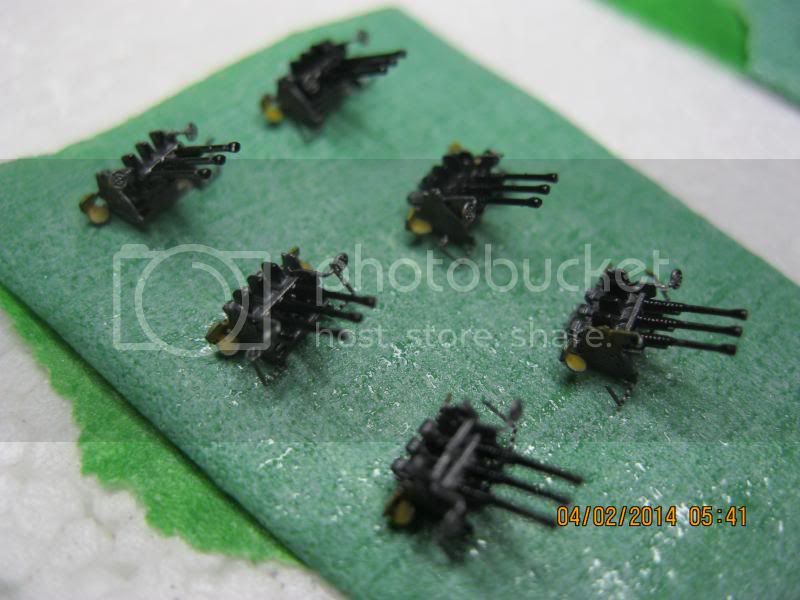
12.7cm AA: (the parts in the foreground are from the kit, which I didn't use. The Voyager ones, on the tape, were much more detailed)

Comments, suggestions and questions always welcome! -Tim


Twins:


Triples:

12.7cm AA: (the parts in the foreground are from the kit, which I didn't use. The Voyager ones, on the tape, were much more detailed)


Comments, suggestions and questions always welcome! -Tim
HalseysBeard
Joined: March 17, 2011
KitMaker: 137 posts
Model Shipwrights: 135 posts
Posted: Sunday, February 15, 2015 - 06:26 PM UTC


LionsDen
Joined: June 28, 2013
KitMaker: 102 posts
Model Shipwrights: 38 posts
Posted: Sunday, February 15, 2015 - 08:10 PM UTC
You are a machine, Tim! You work so quickly and yet are so precise, it's been fun watching your progress. One thing in particular I really like is how your weathering has turned out. Perfect for this scale - not too subtle, not too extreme. If it's not an imposition, would you mind describing your weathering process in more detail? Thanks!
~Troy
~Troy

TRM5150
Joined: January 03, 2010
KitMaker: 2,159 posts
Model Shipwrights: 1,400 posts

Posted: Sunday, February 15, 2015 - 08:34 PM UTC
Always a WOW when I show up to see things progress here!! Your work on the guns is amazing Tim! Keep it going!!! 

rolltide31
#377
Joined: June 27, 2010
KitMaker: 1,481 posts
Model Shipwrights: 1,332 posts

Posted: Monday, February 16, 2015 - 05:51 AM UTC
Tim,
Just like Todd said, WOW. Very impressive. Looking forward to seeing this build continue and learning what I can from watching.
Dave
Just like Todd said, WOW. Very impressive. Looking forward to seeing this build continue and learning what I can from watching.
Dave
HalseysBeard
Joined: March 17, 2011
KitMaker: 137 posts
Model Shipwrights: 135 posts
Posted: Friday, February 20, 2015 - 12:14 PM UTC
Thanks Todd! And Dave too! Troy, I will describe the method I used in tomorrow's post...thx for your inquiry.
I have the funnel done and installed and some detail added to the starboard superstructure, but regrettably, I didn't take many photos of the work in progress. More pics to follow this week with more detail. THANKS FOR VIEWING! -Tim


HalseysBeard
Joined: March 17, 2011
KitMaker: 137 posts
Model Shipwrights: 135 posts
Posted: Friday, February 20, 2015 - 12:15 PM UTC
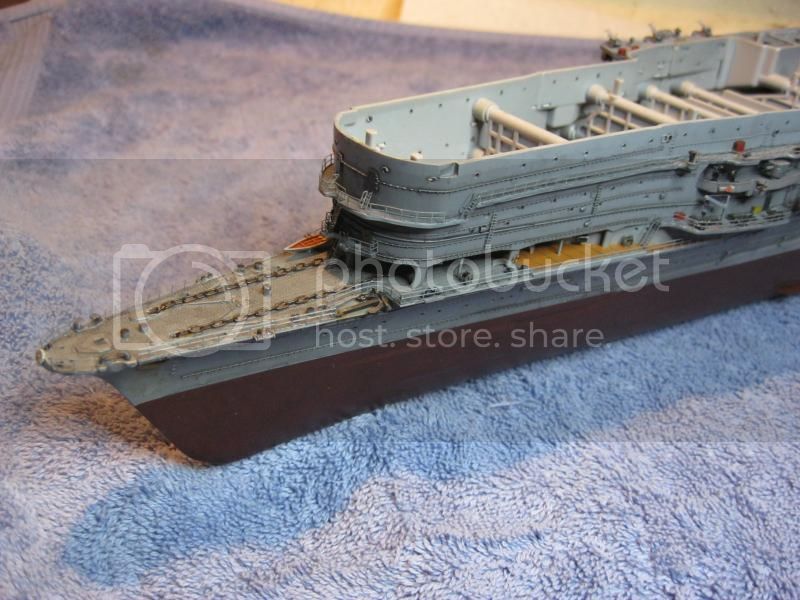
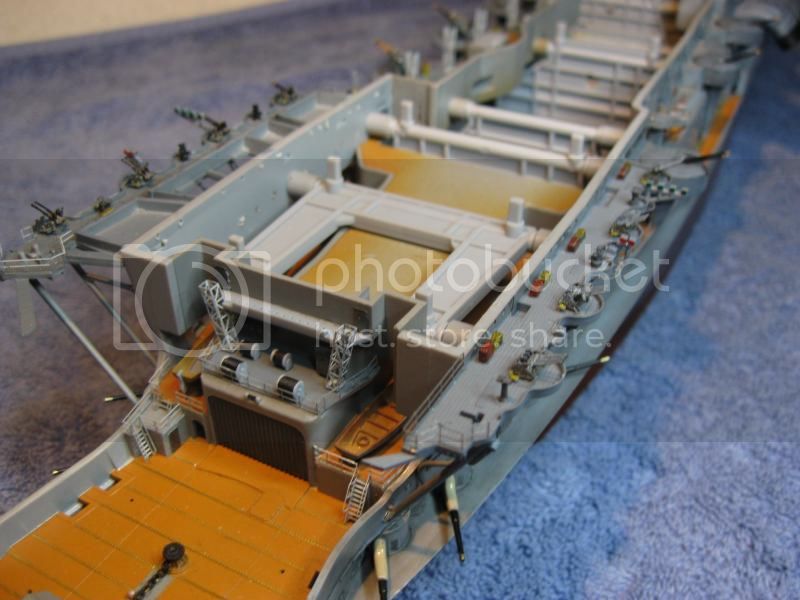
The superstructure on both sides of the ship is almost complete now, but here's a couple of pics of work in progress and of the rear deck before adding the utility boats to the area:
A couple pics of the work in progress on the funnel. Still have a railing or two more to add to it plus the ladders that go over them
propping up one particularily stubborn support while glue sets:
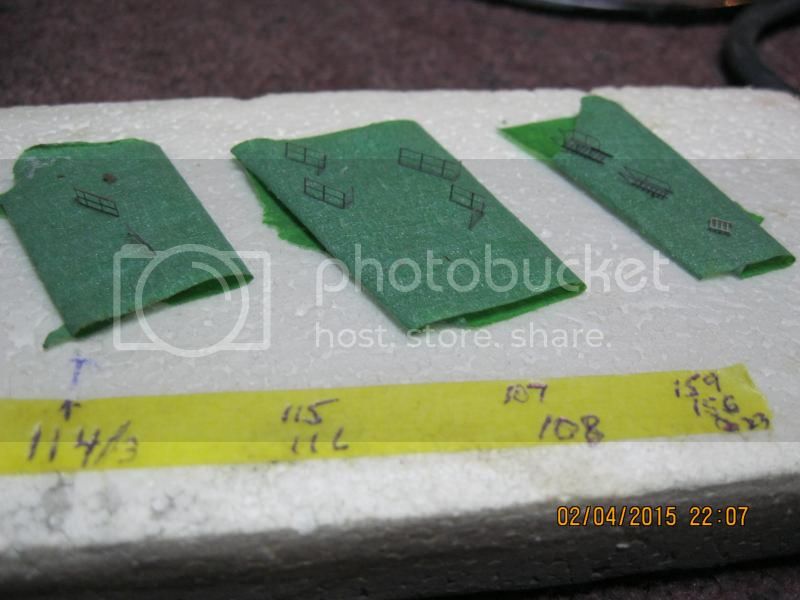
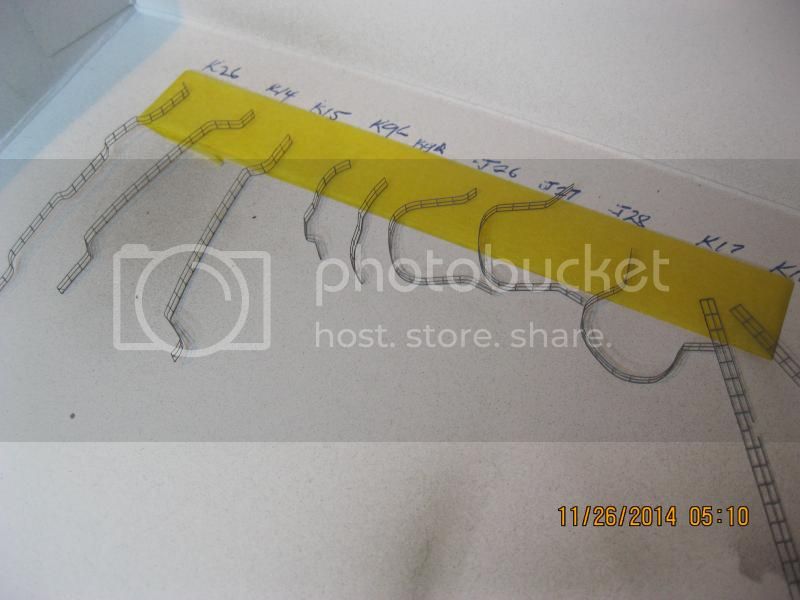
keeping track of some small rear deck parts while painting (corresponding part numbers written on tape below)
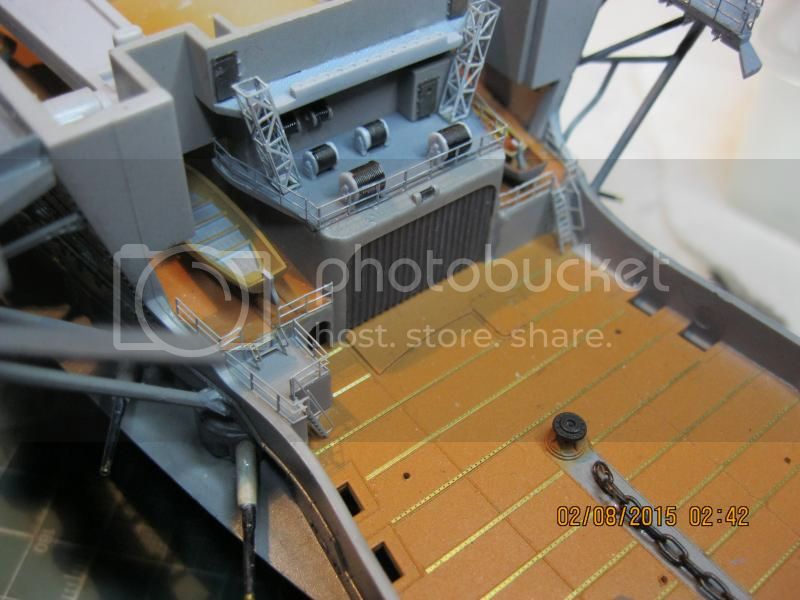
support towers for the area painted

installing some of the parts from above
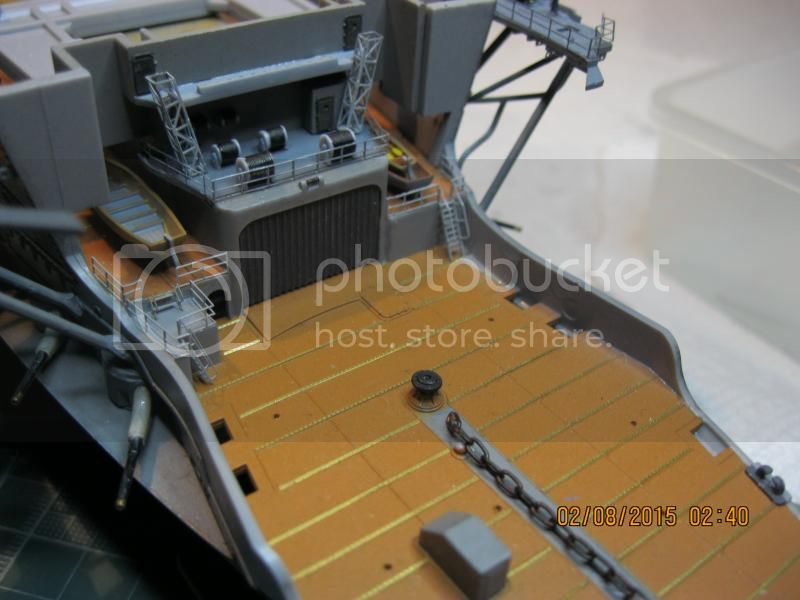
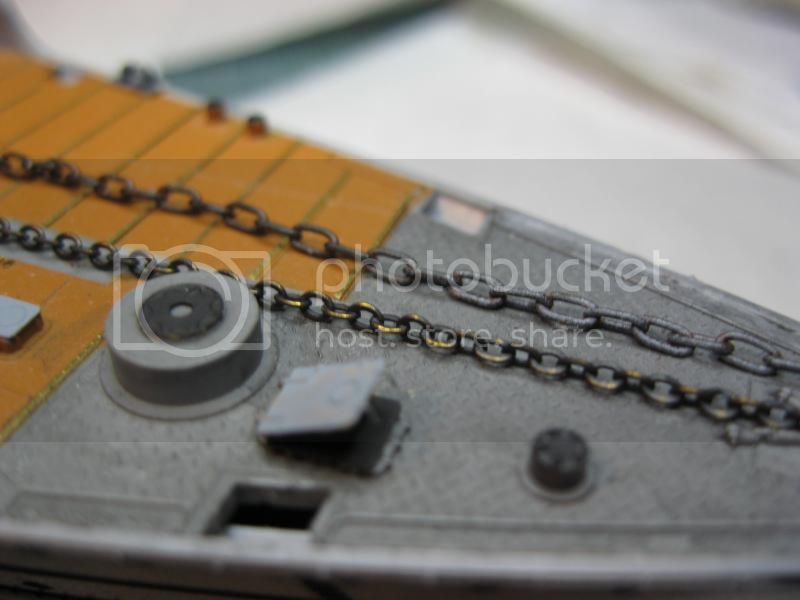
I am adding the utility boats to this area next, and replacing the anchor chains with a finer version, with so please come back and have a look! Thanks for viewing my model ship! -Tim
A couple pics of the work in progress on the funnel. Still have a railing or two more to add to it plus the ladders that go over them


propping up one particularily stubborn support while glue sets:

keeping track of some small rear deck parts while painting (corresponding part numbers written on tape below)

support towers for the area painted

installing some of the parts from above


I am adding the utility boats to this area next, and replacing the anchor chains with a finer version, with so please come back and have a look! Thanks for viewing my model ship! -Tim
HalseysBeard
Joined: March 17, 2011
KitMaker: 137 posts
Model Shipwrights: 135 posts
Posted: Friday, February 20, 2015 - 12:20 PM UTC
For Troy:
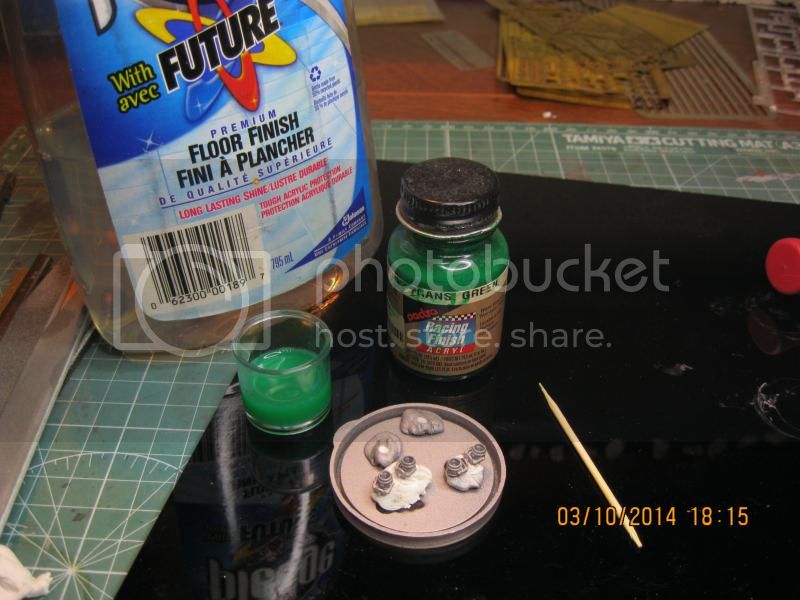
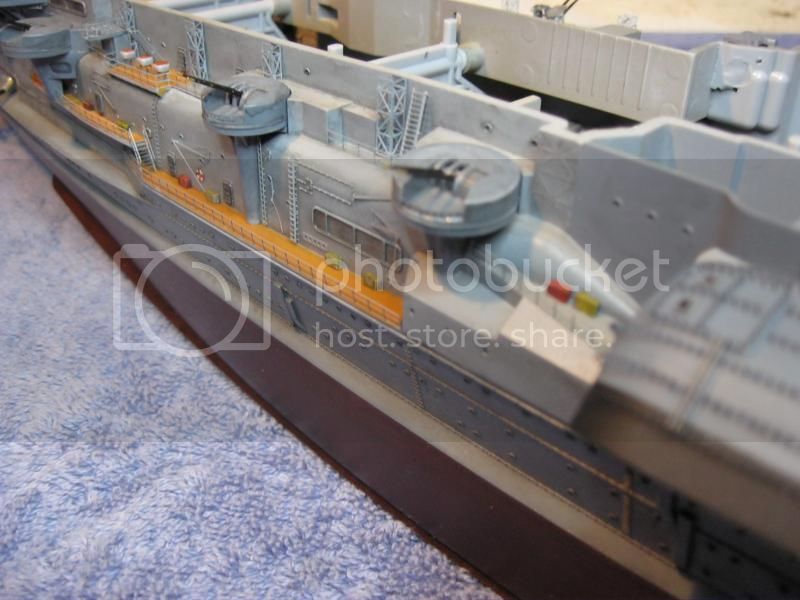
For the shading/grime, I used a combination of MIG black wash and MIG pigments. The wash was applied generously, followed by a wipes with Qtips dampened in thinner, then in some areas I added a some pigment and removed that too until I got the look I was looking for. (or at least the look I was trying for )The wash also imparts a decent finish to the panels overall.
Here's a pic of the first application of the MIG wash (before being lightened considerably with a Qtip)...you can see how it changes the appearance of the details I think.
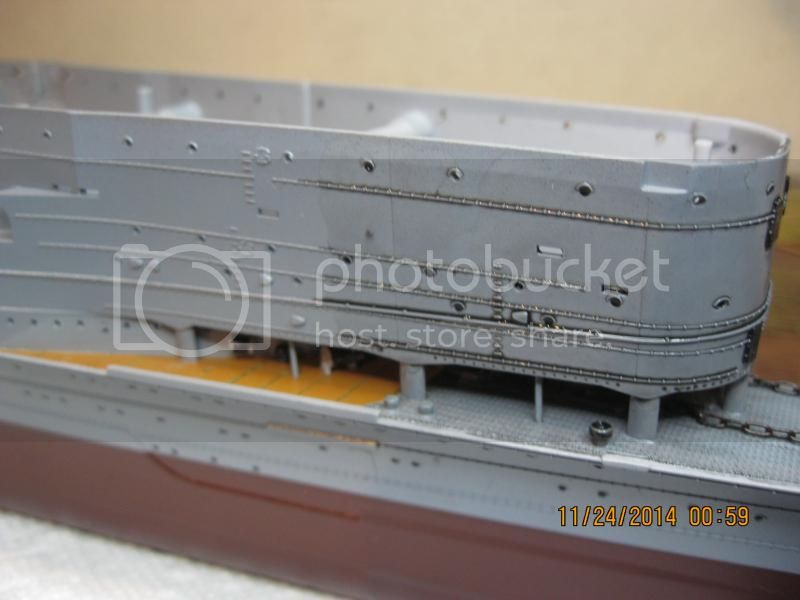
For the shading/grime, I used a combination of MIG black wash and MIG pigments. The wash was applied generously, followed by a wipes with Qtips dampened in thinner, then in some areas I added a some pigment and removed that too until I got the look I was looking for. (or at least the look I was trying for
)The wash also imparts a decent finish to the panels overall. Here's a pic of the first application of the MIG wash (before being lightened considerably with a Qtip)...you can see how it changes the appearance of the details I think.

HalseysBeard
Joined: March 17, 2011
KitMaker: 137 posts
Model Shipwrights: 135 posts
Posted: Friday, February 20, 2015 - 12:23 PM UTC
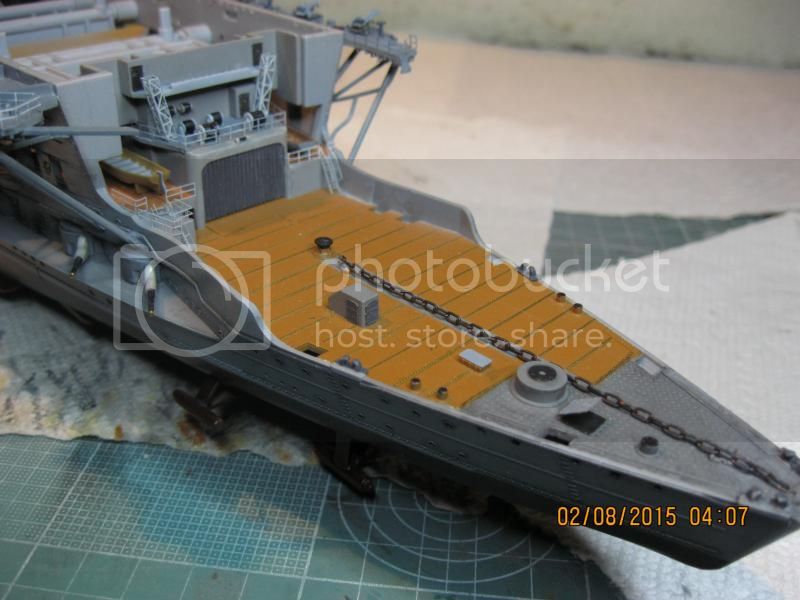
Old oversized chain in rear, new chain in front:
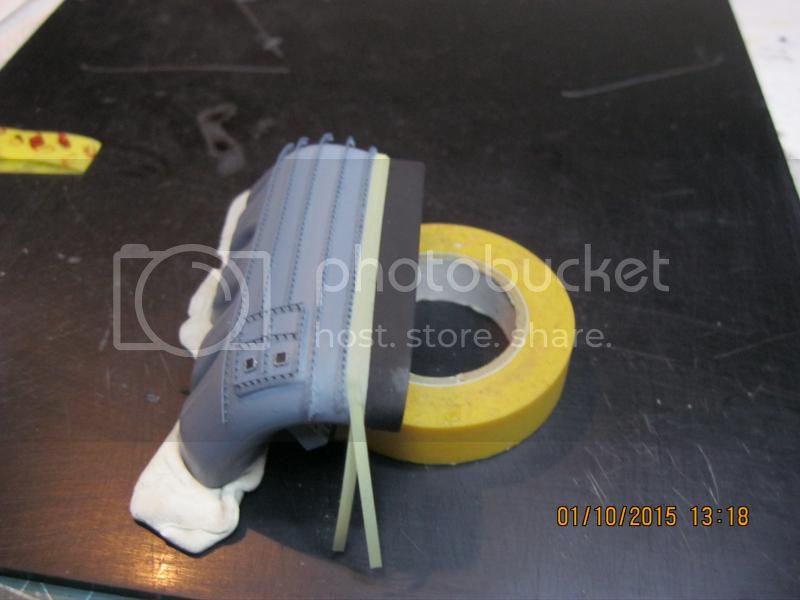
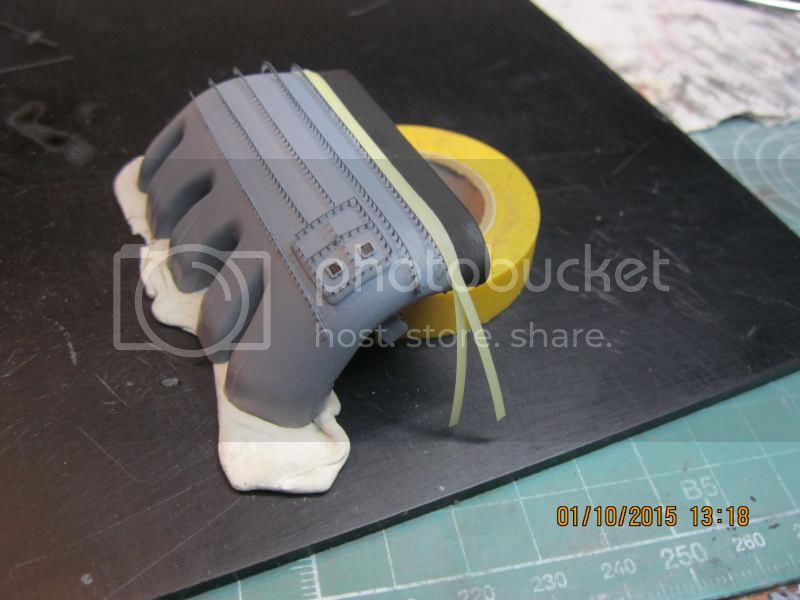
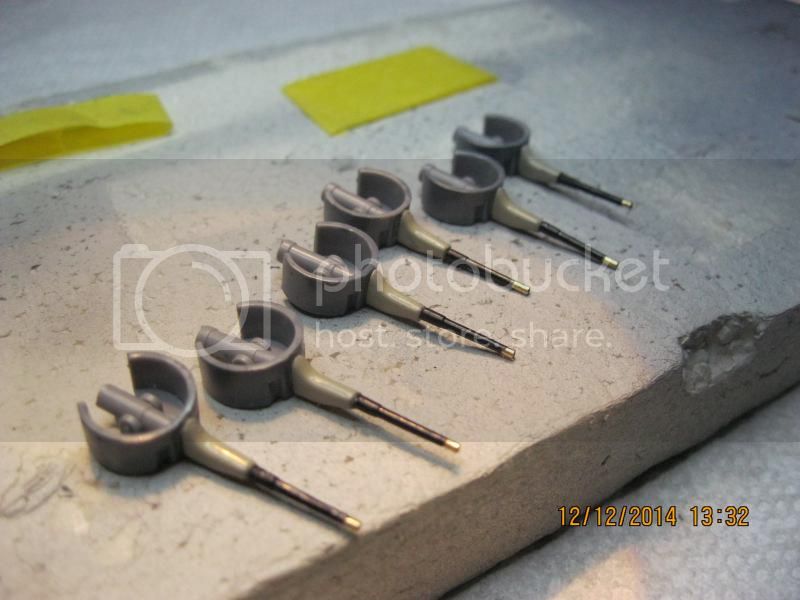
Here's some pics of making the Akagi stern hull mounted guns:

turned brass versus kit barrel:
holes drilled in blast bags (upper left) for barrel insertion
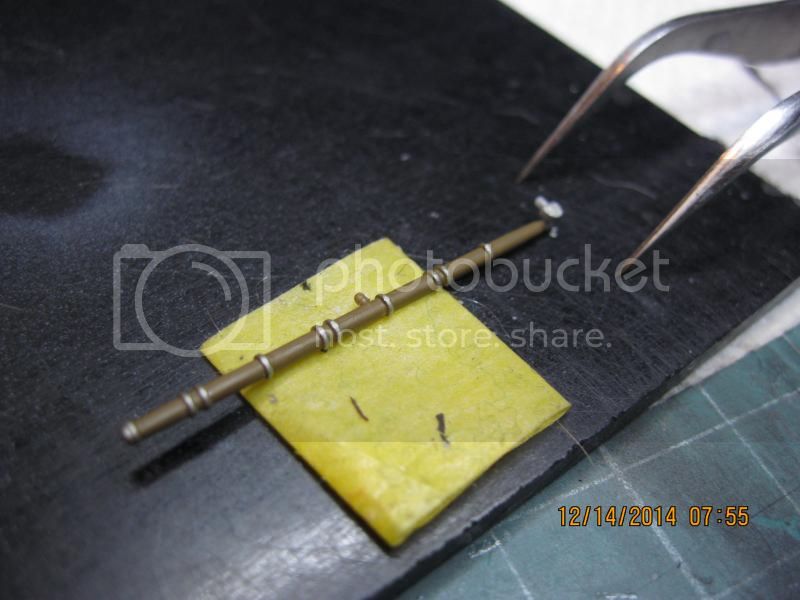
railings for 12.7 gun platforms and area are formed. I like to form the railings before the parts are actually installed so I can use the actual part as a template for bending accurately... and they usually turn out to fit quite well using this method. And personally, I don't anneal brass pe anymore... I find it takes alot of the strength/stiffness out of long lengths of railing, which stiffness comes in handy when placing/installing longer lengths!
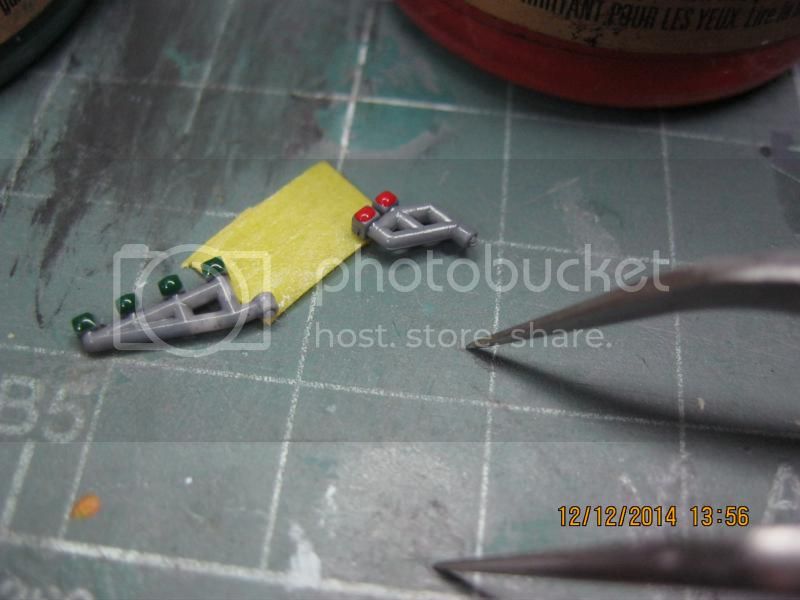
...a couple misc pics of other parts:

Here's some pics of making the Akagi stern hull mounted guns:

turned brass versus kit barrel:

holes drilled in blast bags (upper left) for barrel insertion


railings for 12.7 gun platforms and area are formed. I like to form the railings before the parts are actually installed so I can use the actual part as a template for bending accurately... and they usually turn out to fit quite well using this method. And personally, I don't anneal brass pe anymore... I find it takes alot of the strength/stiffness out of long lengths of railing, which stiffness comes in handy when placing/installing longer lengths!

...a couple misc pics of other parts:


HalseysBeard
Joined: March 17, 2011
KitMaker: 137 posts
Model Shipwrights: 135 posts
Posted: Friday, February 20, 2015 - 12:24 PM UTC
Some news pics I took tonight:


HalseysBeard
Joined: March 17, 2011
KitMaker: 137 posts
Model Shipwrights: 135 posts
Posted: Friday, February 20, 2015 - 12:25 PM UTC

Adding utility boats:


Cheers!- Tim
TRM5150
Joined: January 03, 2010
KitMaker: 2,159 posts
Model Shipwrights: 1,400 posts
Posted: Friday, February 20, 2015 - 09:38 PM UTC
Very nice Tim!! Fine detailing done!! 

Blespooky

Joined: June 03, 2014
KitMaker: 277 posts
Model Shipwrights: 171 posts

Posted: Saturday, February 21, 2015 - 03:38 AM UTC
Tim this shape is looking great. You weathering is also very nice but your speed is astounding. In the same time it took me to glue down the flight deck on an ffg model you have built this amazing project. Ill continue following closely and taking notes.
Bryan
Bryan
HalseysBeard
Joined: March 17, 2011
KitMaker: 137 posts
Model Shipwrights: 135 posts
Posted: Saturday, February 21, 2015 - 04:34 AM UTC
Hey thanks guys! And Bryan...I know it seems I'm building fast but I'm not really. I started this model over a year ago actually 
A small update seems in order, right?
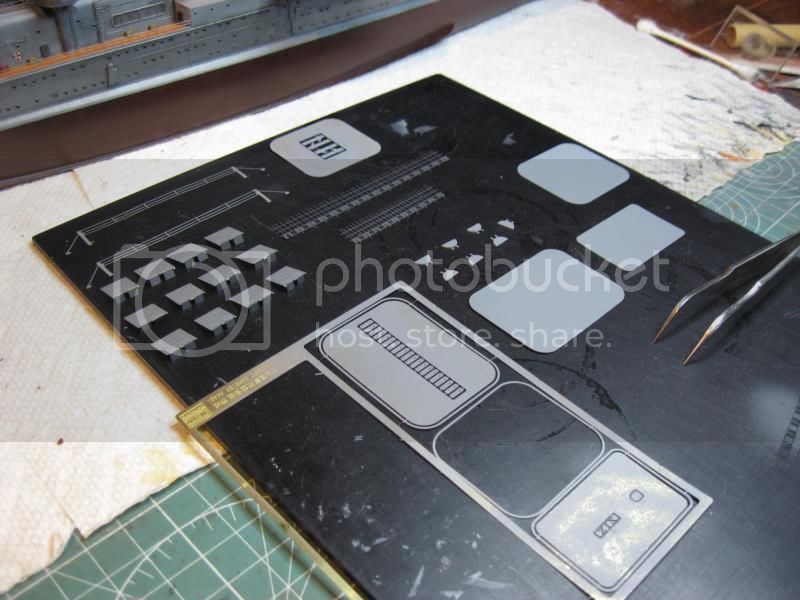
Dry fitting the decks, with some of the deck photoetch started in foreground:

pe parts before painting, the two gray ones are to be painted black
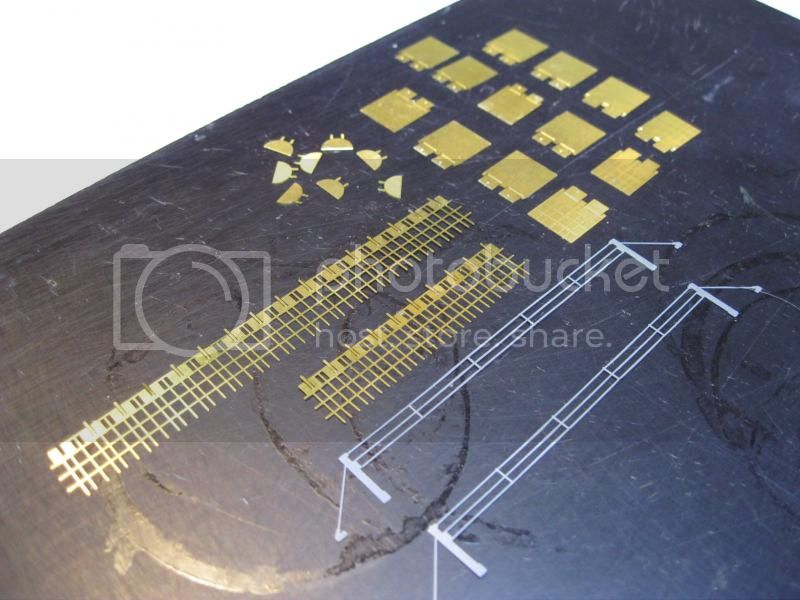
Some of the deck pe is painted

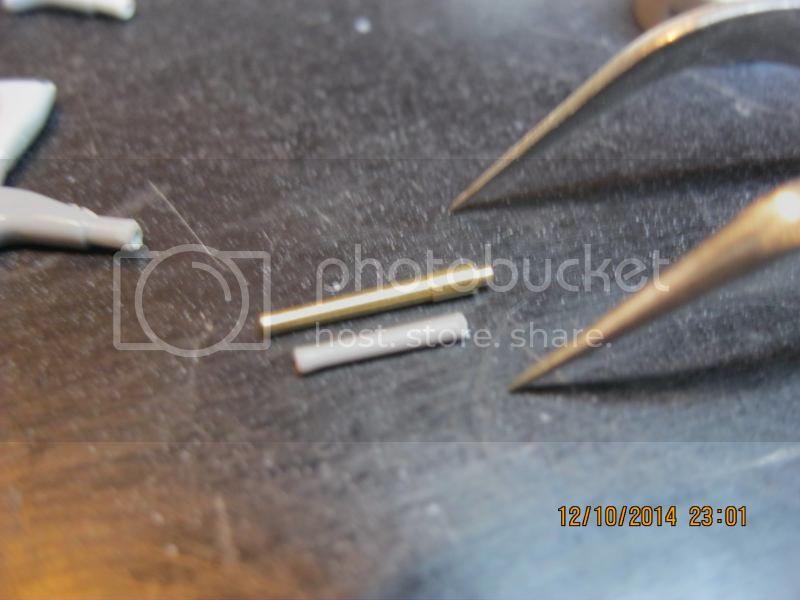
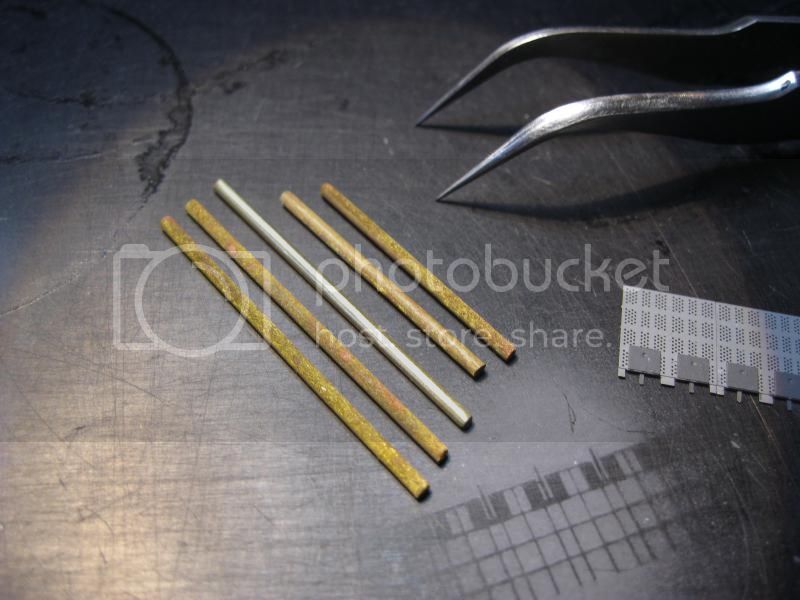
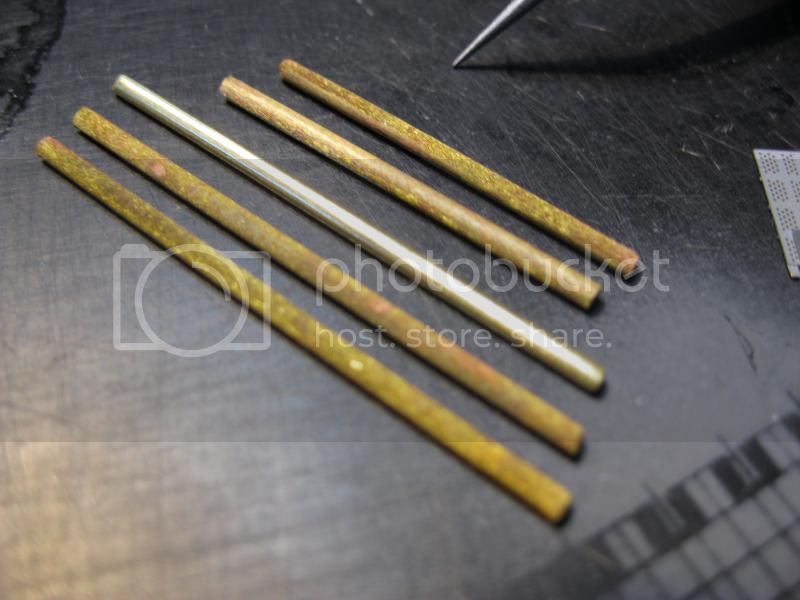
Brass prop shaft experiments I cut 5 peices of brass rod to fit as (the 4) prop shafts...I polished one, in the way I was going to use..and then I put the other 4 into a vinegar/salt bath for 3 days and let it almost dry out, and this is what I got. I don't know what to think...do you think they do look more realistic for shafts that have been at sea for awhile? Or should I polish them up and install shiny? hmm......
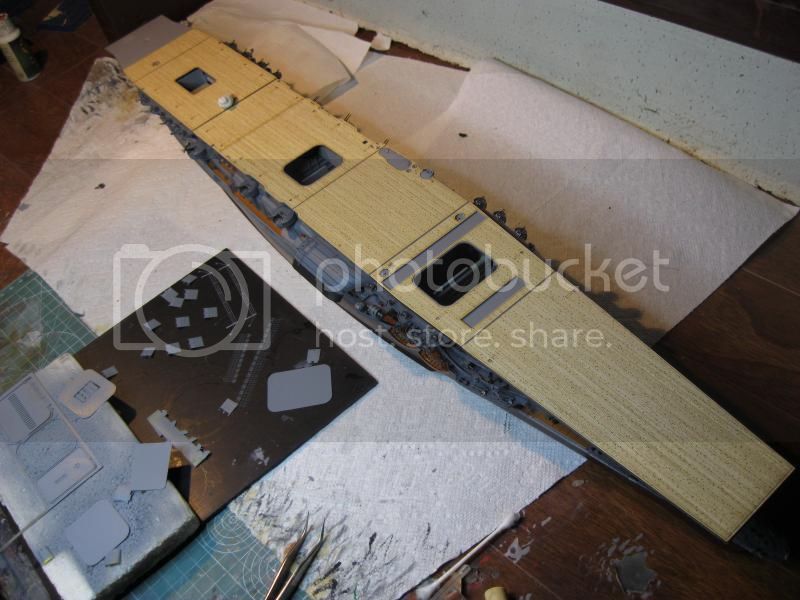
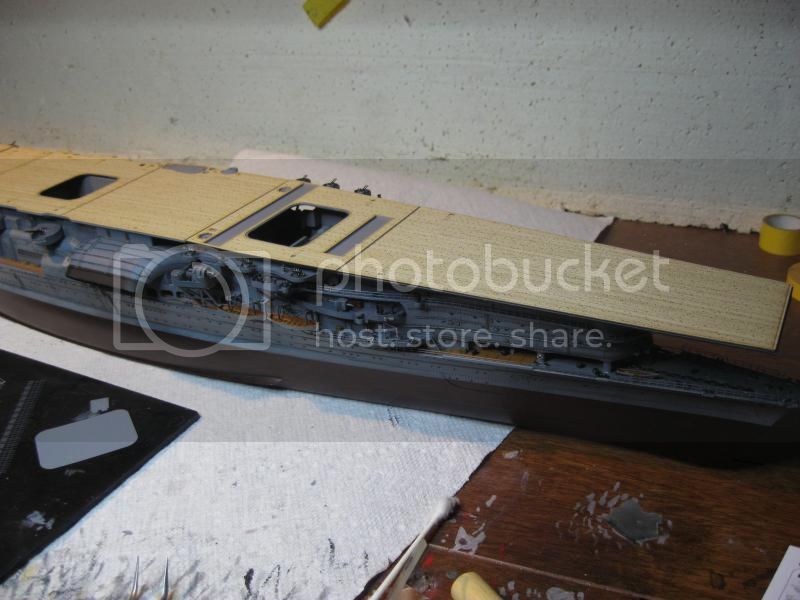
Some more shots for the wood deck dry fitted on the hull...

Cheers, Tim
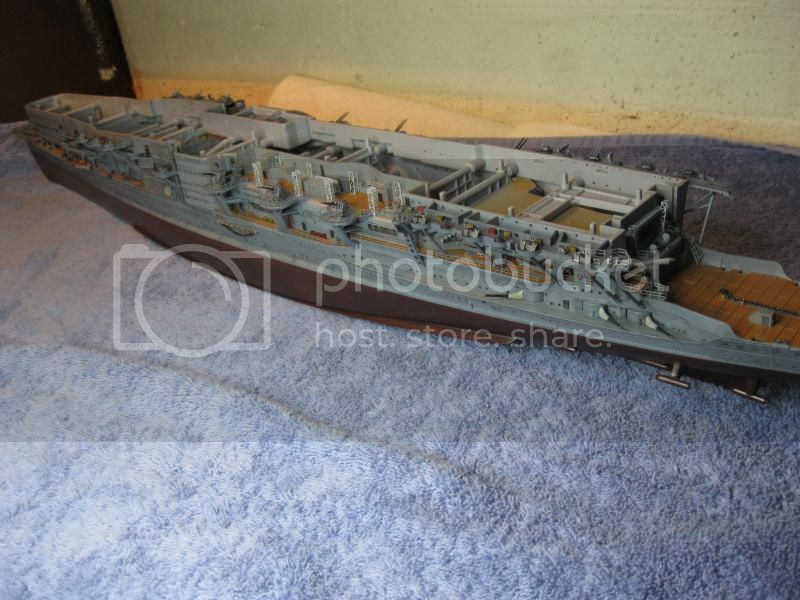
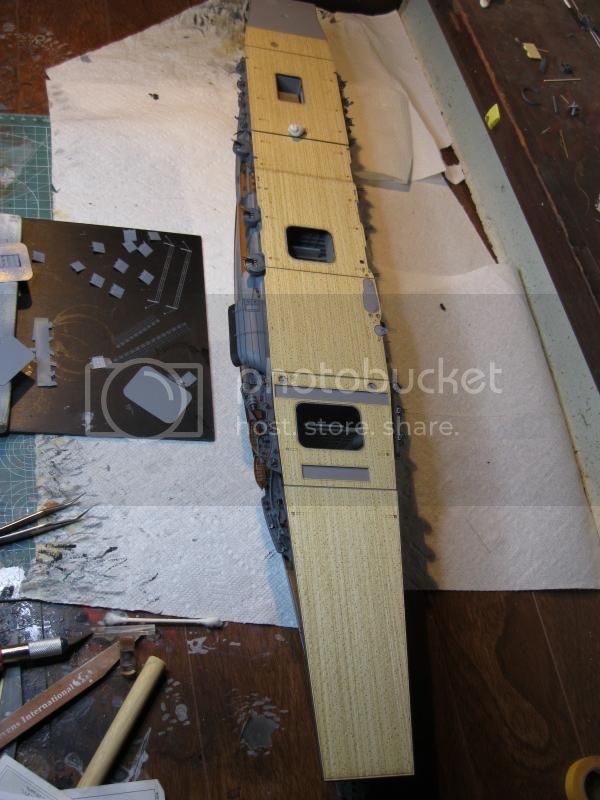
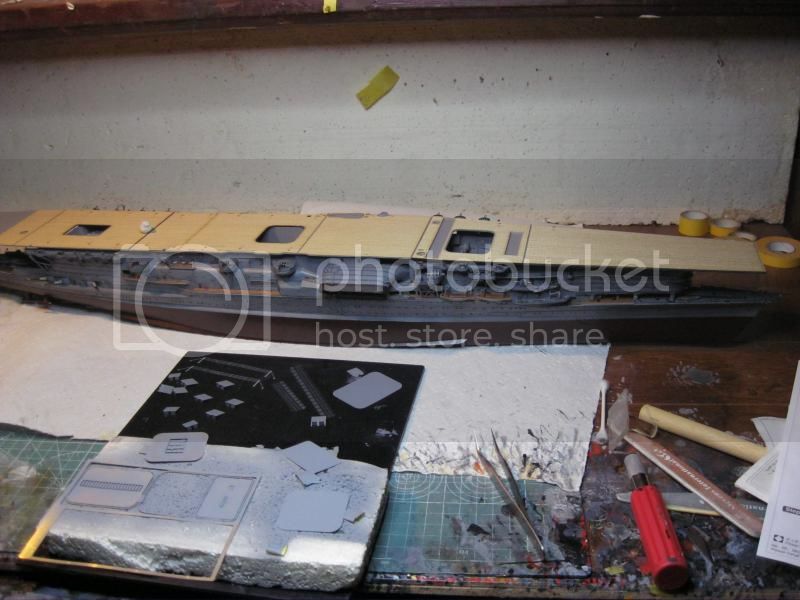
A small update seems in order, right?
Dry fitting the decks, with some of the deck photoetch started in foreground:

pe parts before painting, the two gray ones are to be painted black

Some of the deck pe is painted


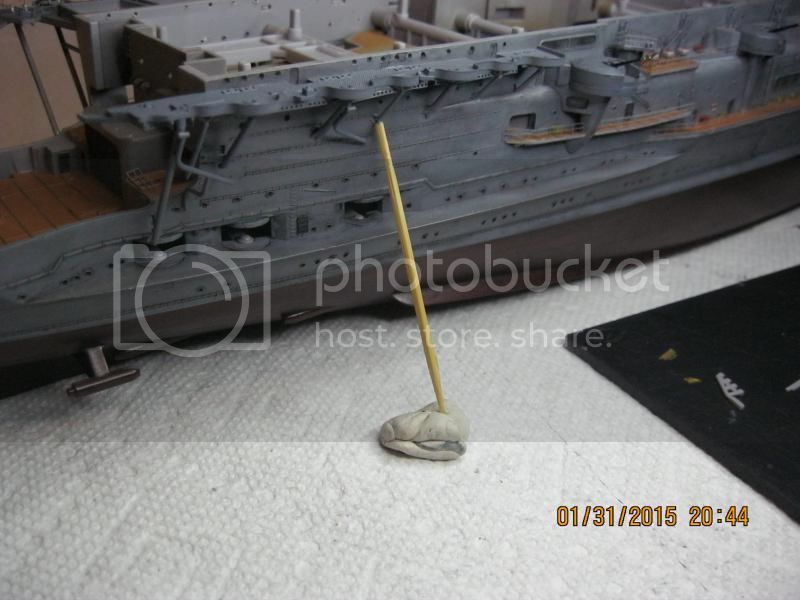
Brass prop shaft experiments
I cut 5 peices of brass rod to fit as (the 4) prop shafts...I polished one, in the way I was going to use..and then I put the other 4 into a vinegar/salt bath for 3 days and let it almost dry out, and this is what I got. I don't know what to think...do you think they do look more realistic for shafts that have been at sea for awhile? Or should I polish them up and install shiny? hmm......

Some more shots for the wood deck dry fitted on the hull...


Cheers, Tim
TRM5150
Joined: January 03, 2010
KitMaker: 2,159 posts
Model Shipwrights: 1,400 posts
Posted: Saturday, February 21, 2015 - 04:58 AM UTC
Another fantastic showing Tim! I personally like the weathered ones...but that's just my opinion! Love the looks of the deck in place for the dry test!! Very impressive stuff!!
Love the looks of the deck in place for the dry test!! Very impressive stuff!! rolltide31
#377
Joined: June 27, 2010
KitMaker: 1,481 posts
Model Shipwrights: 1,332 posts
Posted: Saturday, February 21, 2015 - 05:56 AM UTC
Tim
Your Akagi is looking great. Love the deck and the weathering you have done to the hull. I have never used the mig washes, are they easy to use and what do you think of them?
I have to vote with Todd, I do like the weathered props
Dave
Your Akagi is looking great. Love the deck and the weathering you have done to the hull. I have never used the mig washes, are they easy to use and what do you think of them?
I have to vote with Todd, I do like the weathered props
Dave

JPTRR

#051
Joined: December 21, 2002
KitMaker: 7,772 posts
Model Shipwrights: 476 posts

Posted: Saturday, February 21, 2015 - 05:56 AM UTC
Tim,
I can hardly believe what I am seeing! I am speechless. Your work is extraordinary!
I can hardly believe what I am seeing! I am speechless. Your work is extraordinary!

JJ1973
#345
Joined: August 22, 2011
KitMaker: 1,835 posts
Model Shipwrights: 1,832 posts
Posted: Sunday, February 22, 2015 - 12:56 AM UTC
I can only second what was said...this is hard to believe...just outstanding!!
Great work, just unbelievable your updates really require time to digest what you actually are showing there!!
Jan
Great work, just unbelievable
your updates really require time to digest what you actually are showing there!! Jan
Blespooky
Joined: June 03, 2014
KitMaker: 277 posts
Model Shipwrights: 171 posts
Posted: Sunday, February 22, 2015 - 04:49 AM UTC
Tim, if you plan on weathering the hull below water line and chipping the stabilizers/rudder then the weathered prop shaft is a must. I think its a great idea.
Looking good, cant wait for the next installment.
Bryan
Looking good, cant wait for the next installment.
Bryan
HalseysBeard
Joined: March 17, 2011
KitMaker: 137 posts
Model Shipwrights: 135 posts
Posted: Sunday, February 22, 2015 - 05:40 PM UTC
Thank you very much guys! Your encouragement and input is CERTAINLY appreciated...trust me on that!
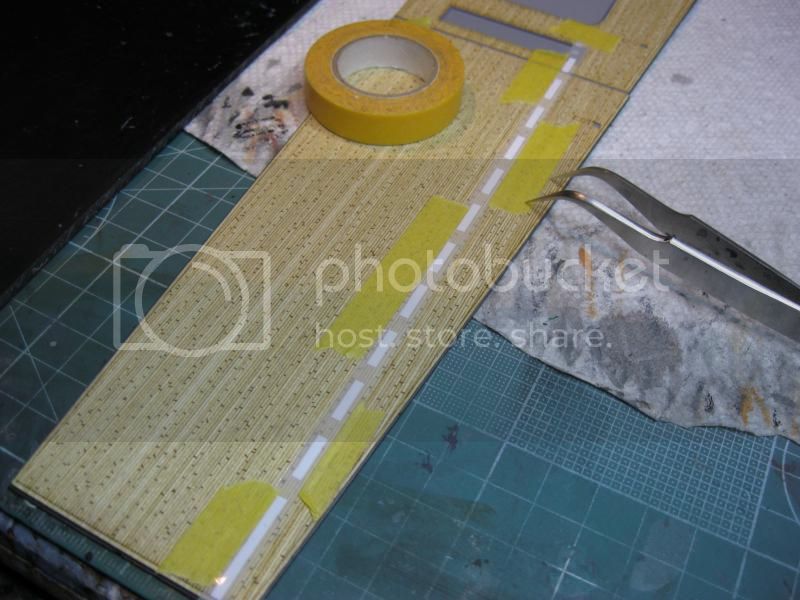
well I took the plunge this morning! First time working with dry transfers....wqas I nervous about them? Yep!
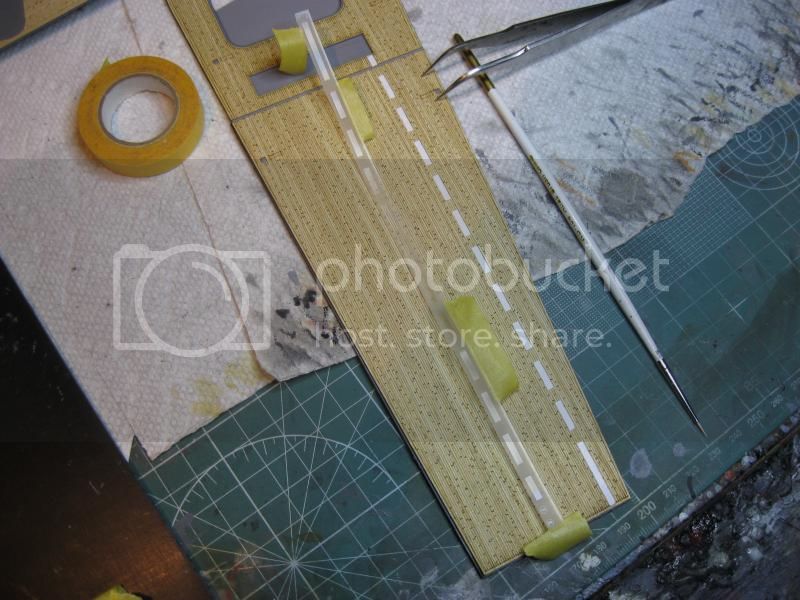
So, I put the #1 line on...and it turned out ok I think. (phew!!) One thing I found is you must burnished down the leading edges of all the little pieces QUITE well (more than I would have thought) or they will pull up and split. This happened to me on one of the pieces when I was pulling up the cellophane (very slowly!), but I noticed it right away and laid it back down before much damage was done. Here's some pics:
Laying down the line after positioning with tape:
After burnishing and removal of cellophane: (not without incident)

One down, 31 more to go!... Everything about Agaki has a million parts it seems

A question for anyone...do dry transfers vary as to quality and ease of use? The quality is here for sure, but I found I had to burnish the h3ll out of these ones to get them to stick to the wood! Cheers to all model ship builders and especially those who have commented on my build thread! -Tim
well I took the plunge this morning! First time working with dry transfers....wqas I nervous about them? Yep!
So, I put the #1 line on...and it turned out ok I think. (phew!!) One thing I found is you must burnished down the leading edges of all the little pieces QUITE well (more than I would have thought) or they will pull up and split. This happened to me on one of the pieces when I was pulling up the cellophane (very slowly!), but I noticed it right away and laid it back down before much damage was done. Here's some pics:
Laying down the line after positioning with tape:

After burnishing and removal of cellophane: (not without incident)


One down, 31 more to go!... Everything about Agaki has a million parts it seems

A question for anyone...do dry transfers vary as to quality and ease of use? The quality is here for sure, but I found I had to burnish the h3ll out of these ones to get them to stick to the wood! Cheers to all model ship builders and especially those who have commented on my build thread! -Tim
TRM5150
Joined: January 03, 2010
KitMaker: 2,159 posts
Model Shipwrights: 1,400 posts
Posted: Sunday, February 22, 2015 - 10:12 PM UTC
Hi Tim! Some more fantastic work! Deck looks sweet with marking going down! I have not use too many different brands of transfers other than Archer's, but some time it take some rubbing to get things going. The harder the tool,m the easier I did find. There are some rounded burnishing tools on the market. I usually cave in and use the backside of a rounded pair of tweezers.
Keep that bench on fire, this is turning out beautiful!!
Keep that bench on fire, this is turning out beautiful!!
 |

WEB HOSTING BY


Copyright ©2021 Model Shipwrights and Kitmaker Network, a subsidiary of Silver Star Enterprises
All Rights Reserved. Please read our Conditions of Use and Privacy Policy.
All Rights Reserved. Please read our Conditions of Use and Privacy Policy.