Ships by Class/Type: Battleships
Topics from the Dreadnaught era to modern day.
Hosted by Steve Joyce
HMS Hood 1941 - Trumpeter 1/350 + Lion Roar
JJ1973
#345
Visit this Community
Niedersachsen, Germany
Joined: August 22, 2011
KitMaker: 1,835 posts
Model Shipwrights: 1,832 posts
Posted: Tuesday, February 28, 2017 - 10:38 AM UTC
Thank you very much Russ!! Yep, those PomPoms are a little bit special

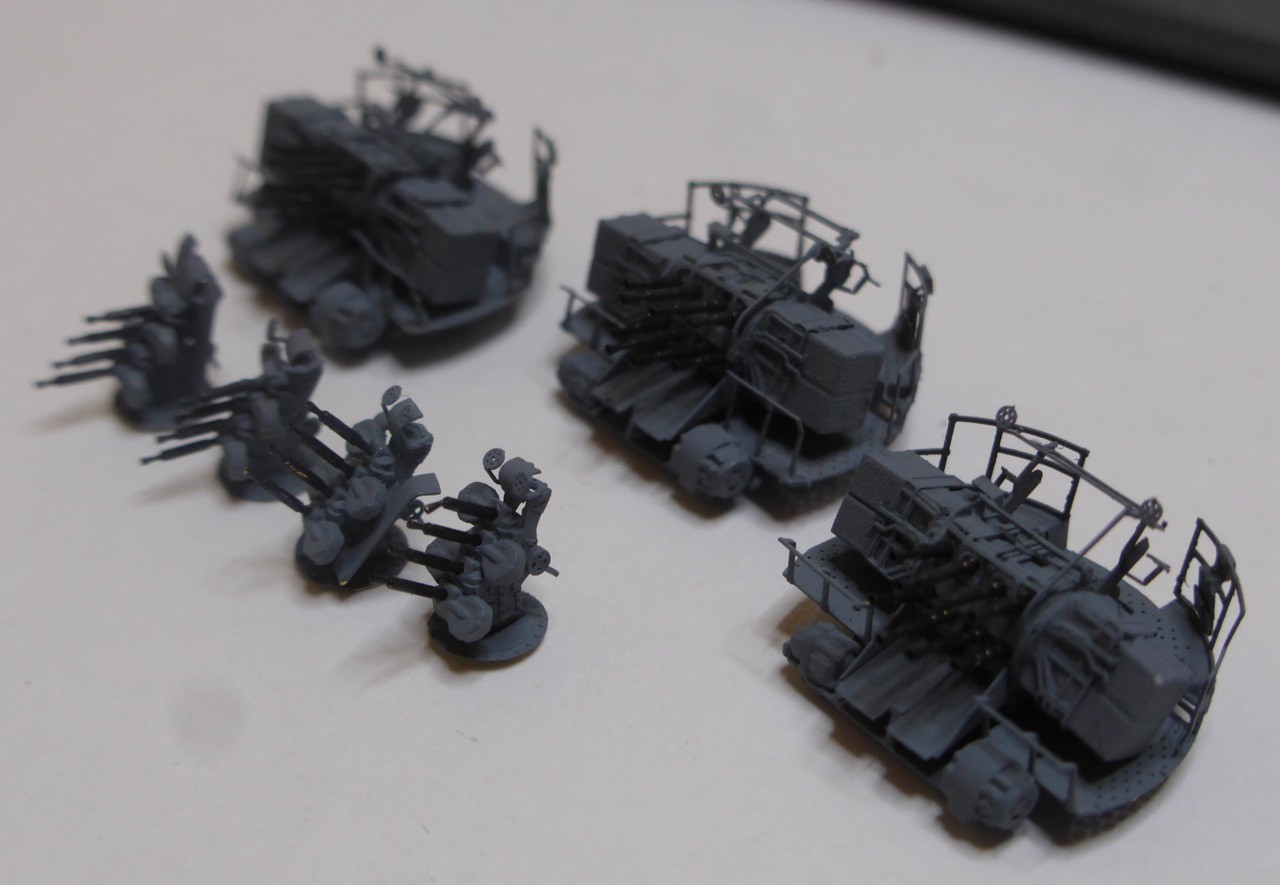
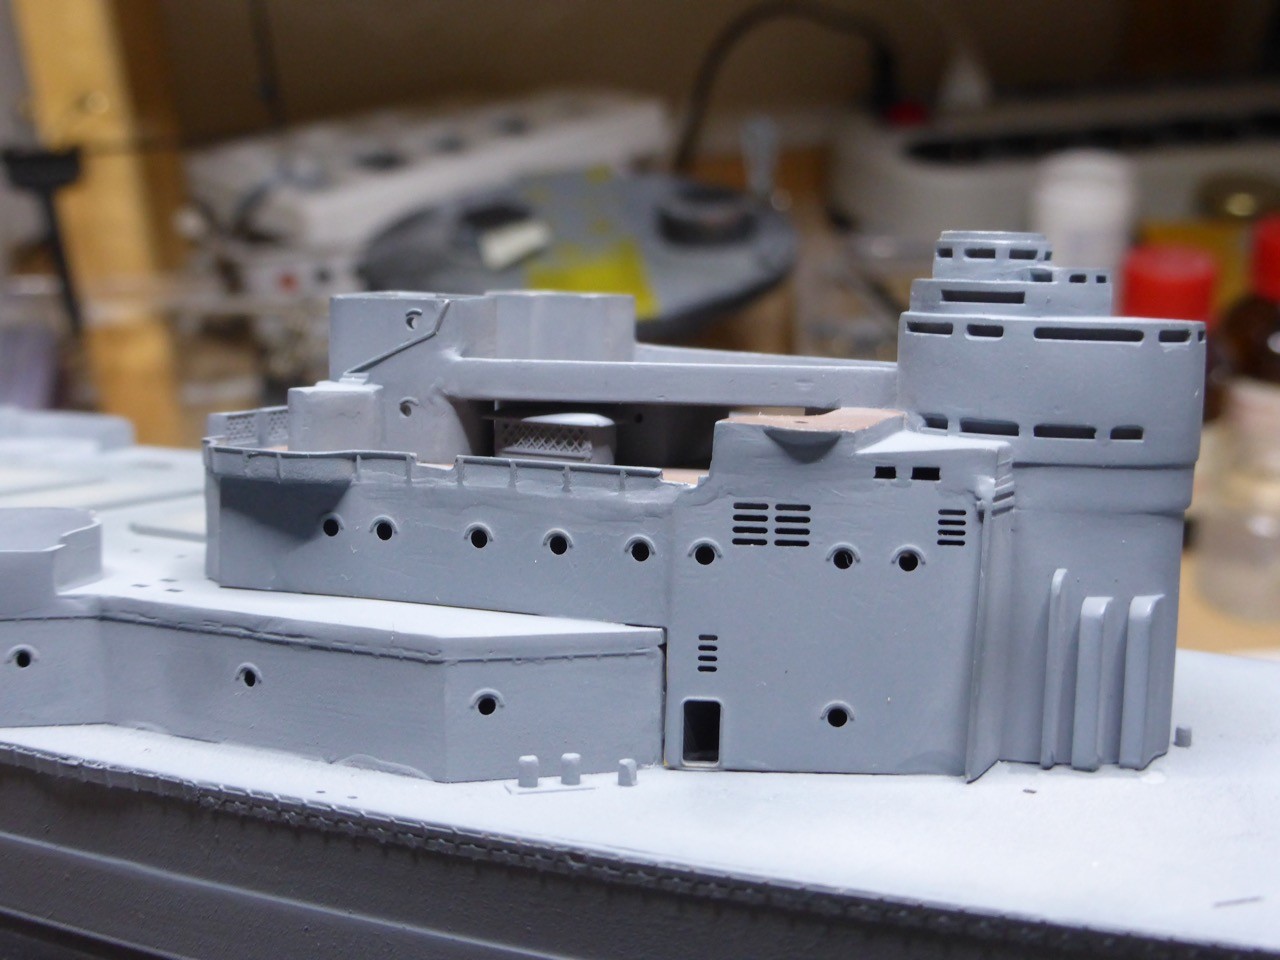
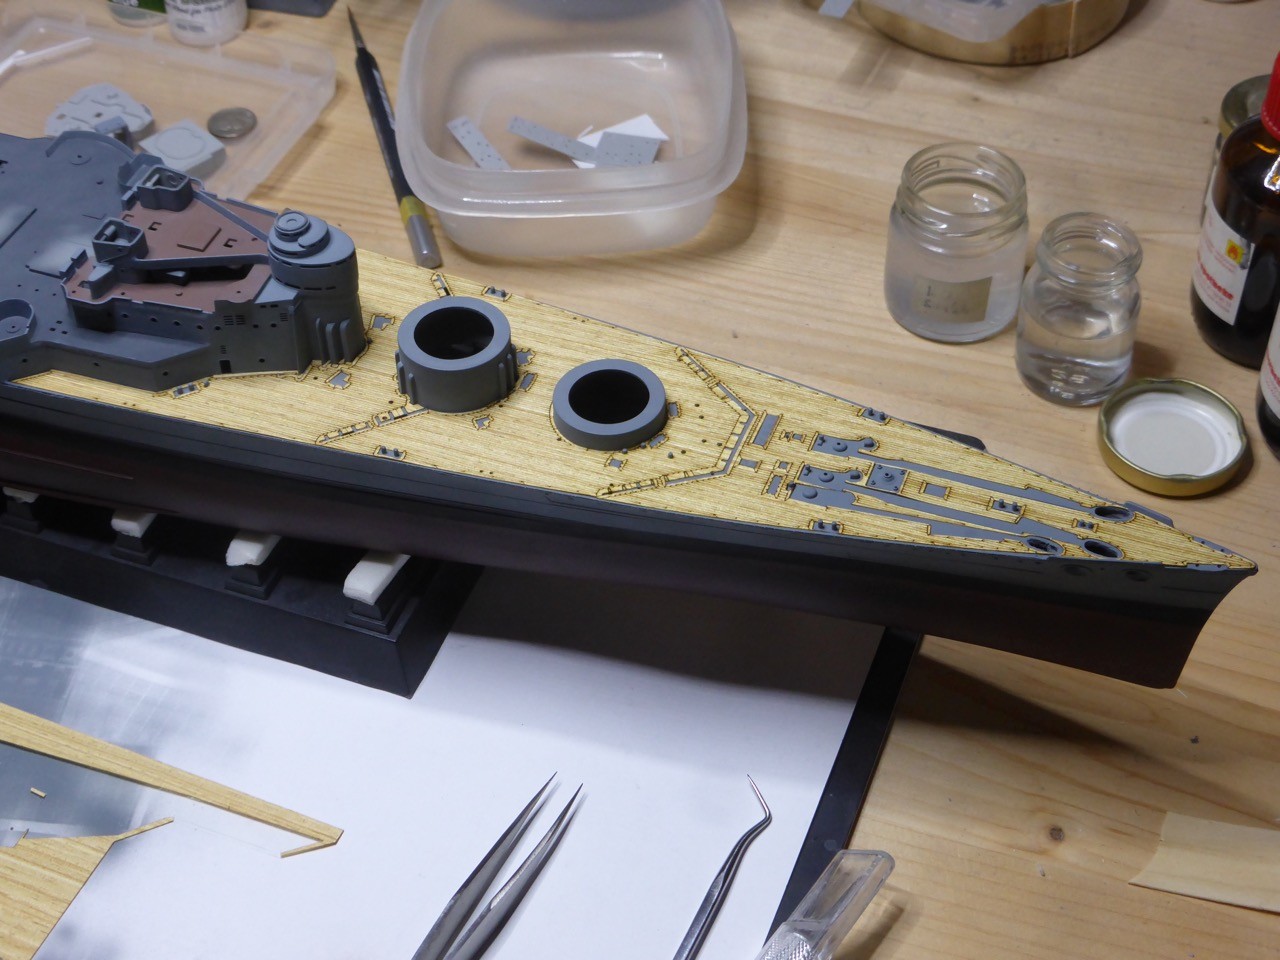
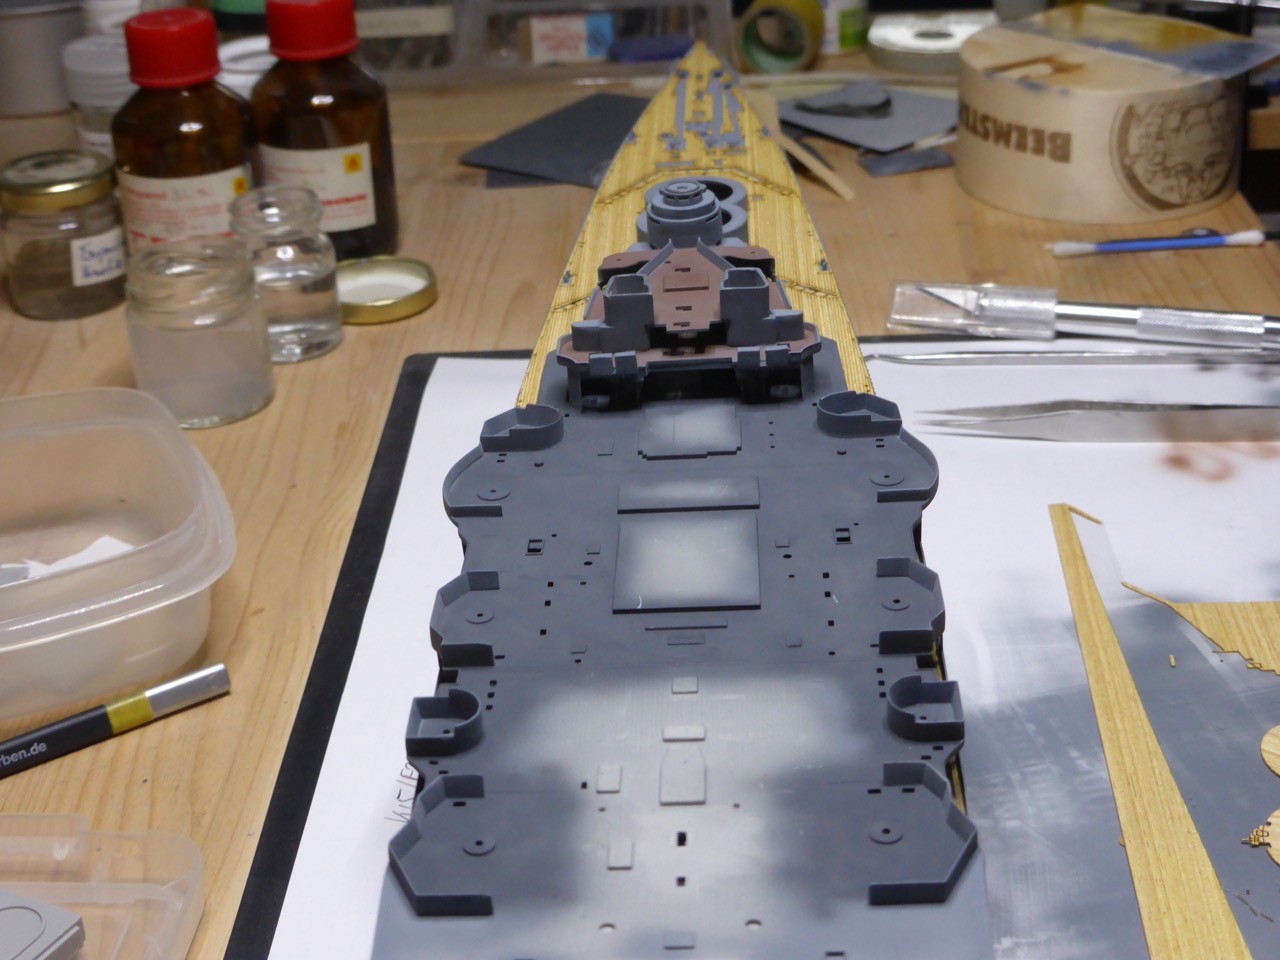
Anyway, let's go for the next chapter of the story

One general rule - all the PE needs to be bent in the way that the etched markings/lines are facing inside the bend. Well, with one exception, that is the first part that I showed that covers the breech block, but that is rather obvious.

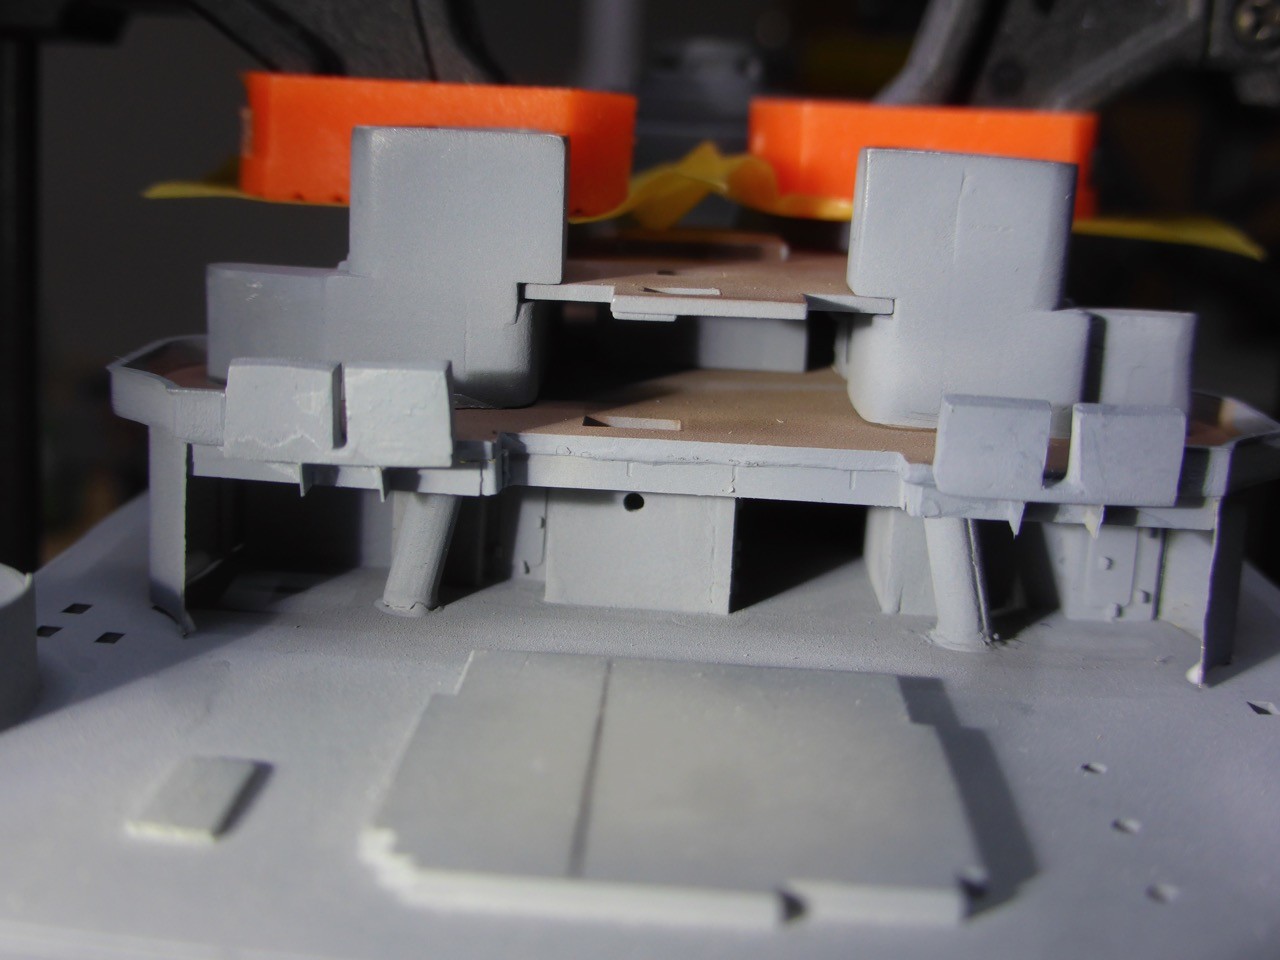
Now the cradle - somehow it seems I have not much in progress pictures. A little origami:


The first bend is important to add some general stability.


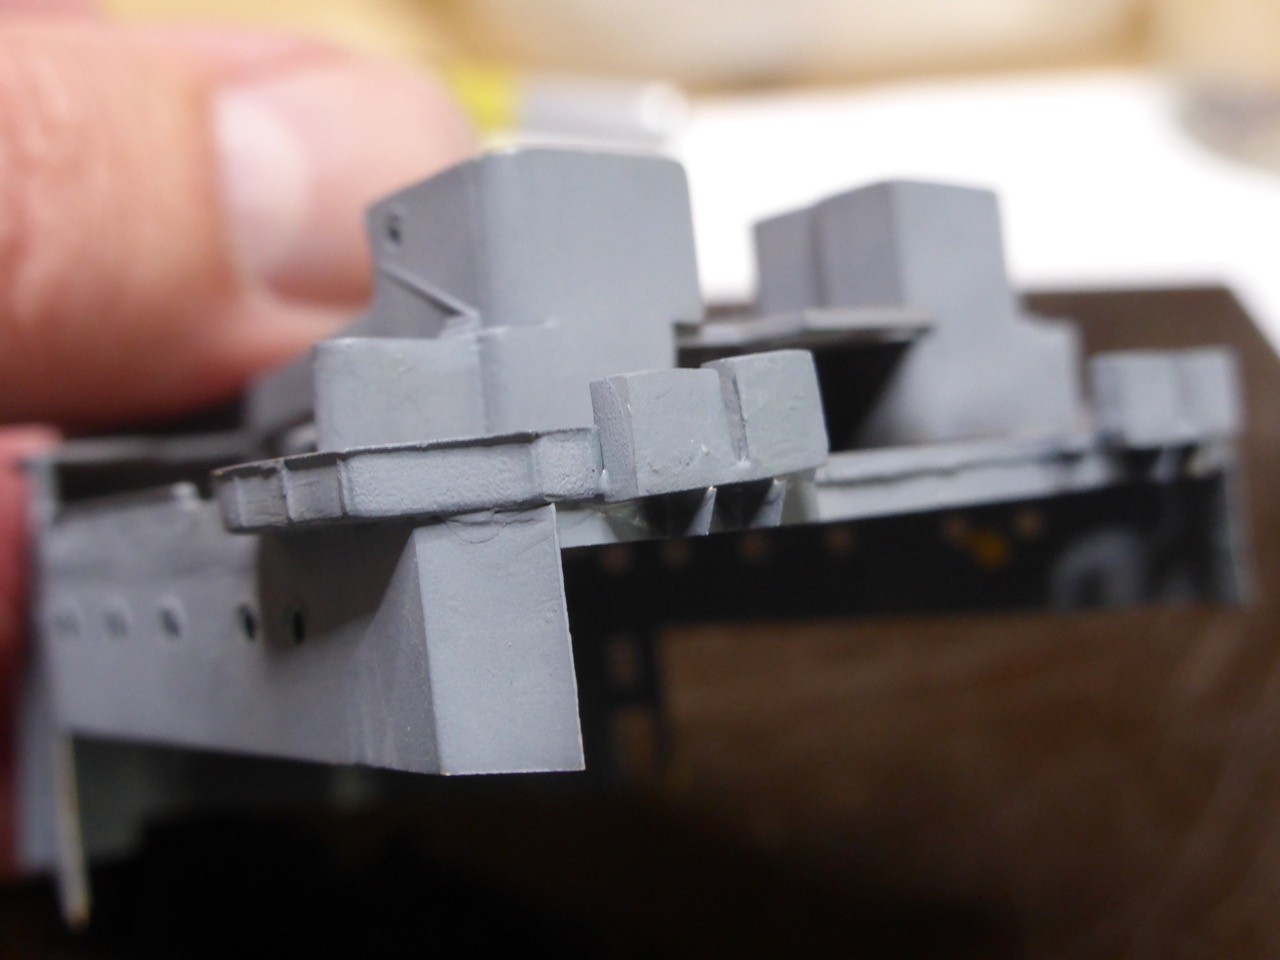
The stand/joint for the breech block is in the center, however, as I said, I could not get it to work - I decided to cut it


and I ended up removing the geared wheels from the breech to make it fit. In addition, as mentioned, the block is too wide and needs sanding down at both sides, otherwise it will squeeze the cradle into odd angles. As you can see, I did not get it entirely right, next time I need to sand down a little more.
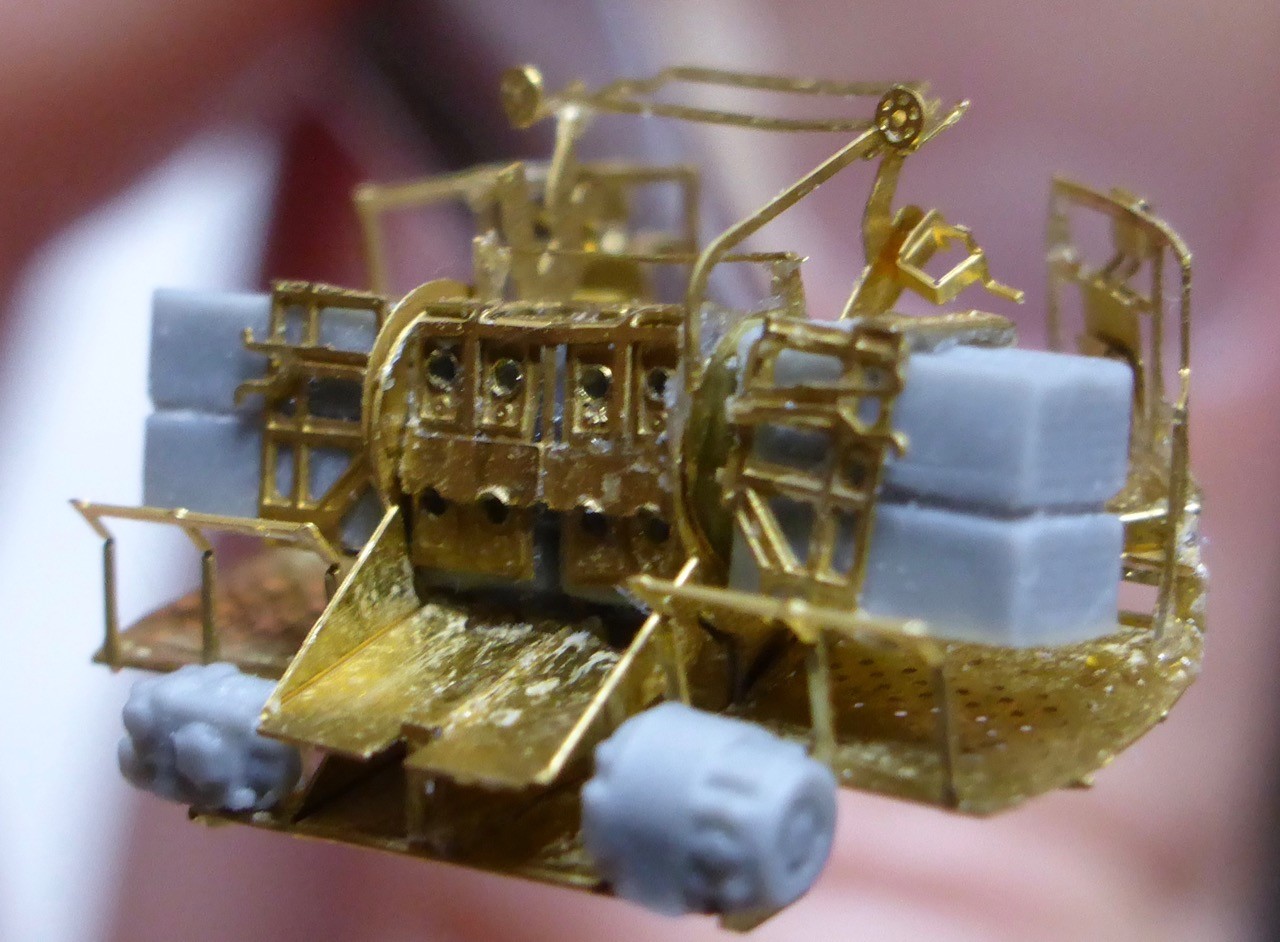
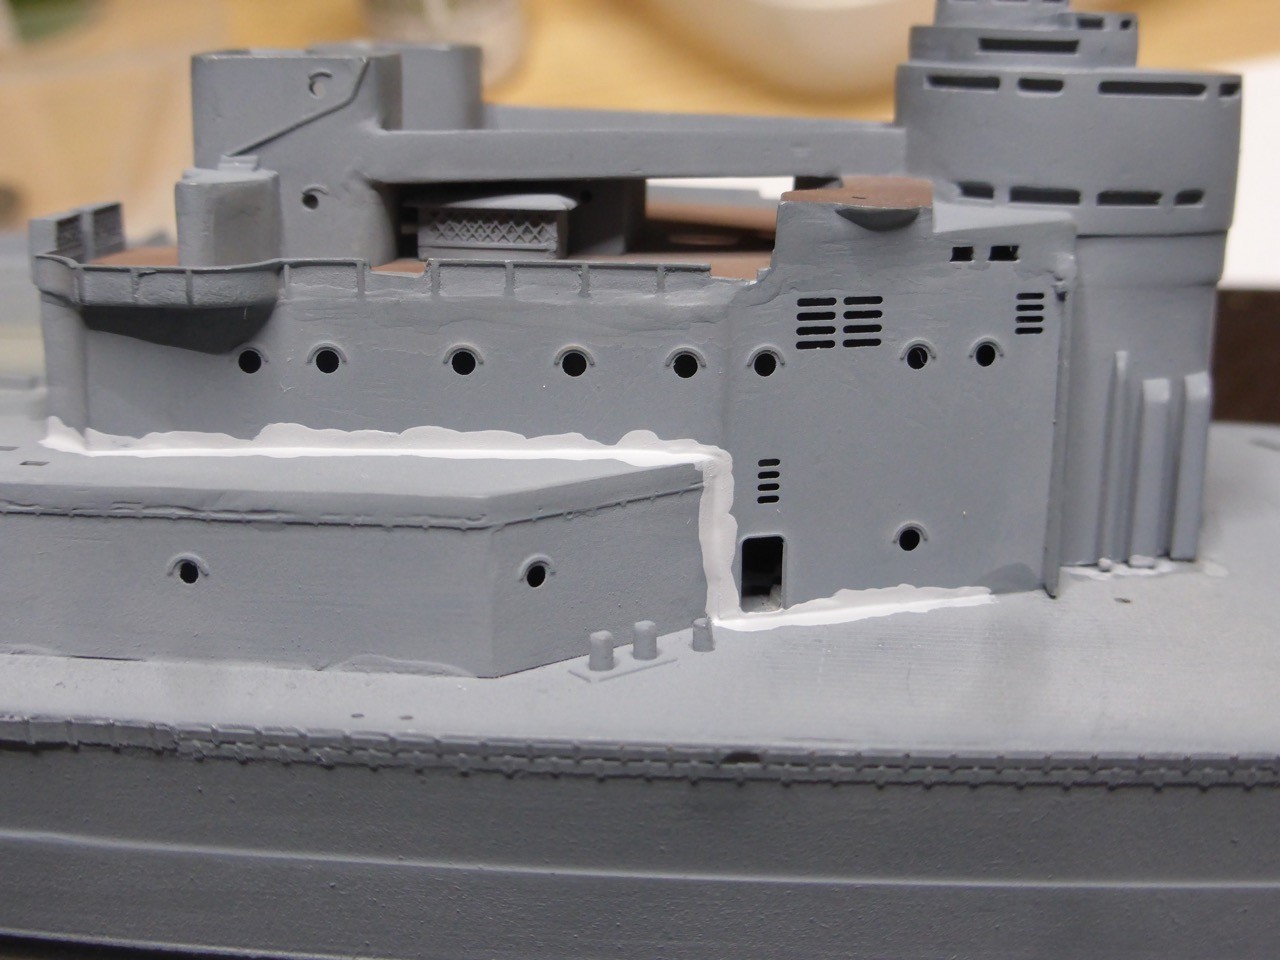
Well, here it is:


Next, the chute for spend ammunition, built out of two parts:


And addad:


And now, for a part of real advanced metal origami, the base. You definitely want to think your steps through before you start. Or you can do it as I did - just do it and decide that the first attempt is not really what you desire...
Problem here is the sequence of the bends, bending some parts without effecting others, and most imported, get your 90° angles really 90°, otherwise you'll end up with some unpleasant surprises later on...

Let's go - and always bend towards the marking line...

The part initially:


One side up


Important - the little steps in the 'corners' left and right, two micro bends.


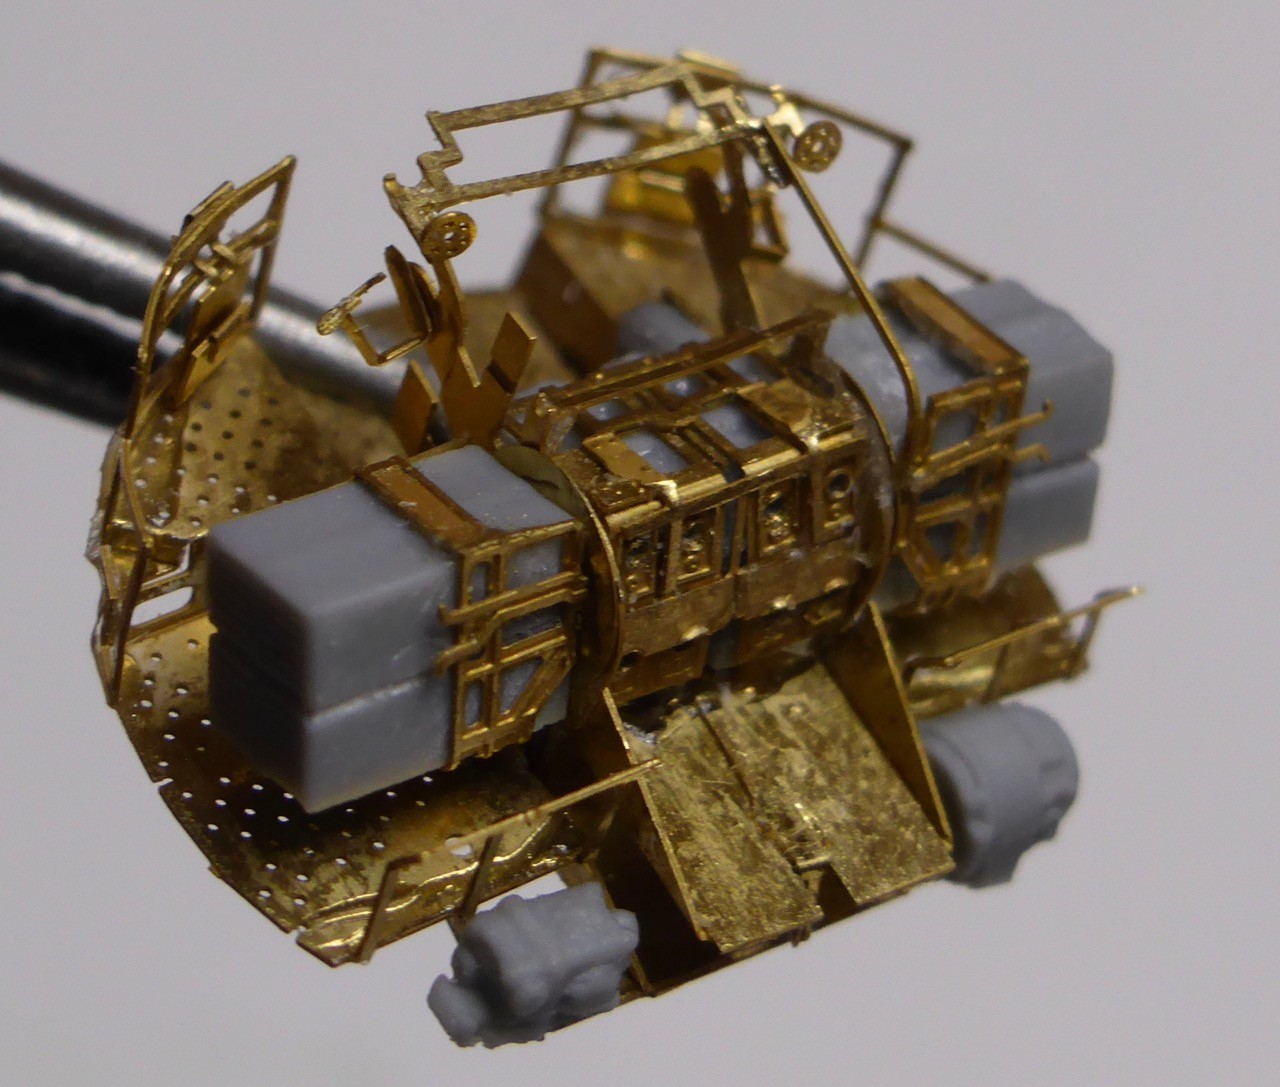
Building the side platforms


Should look like that...


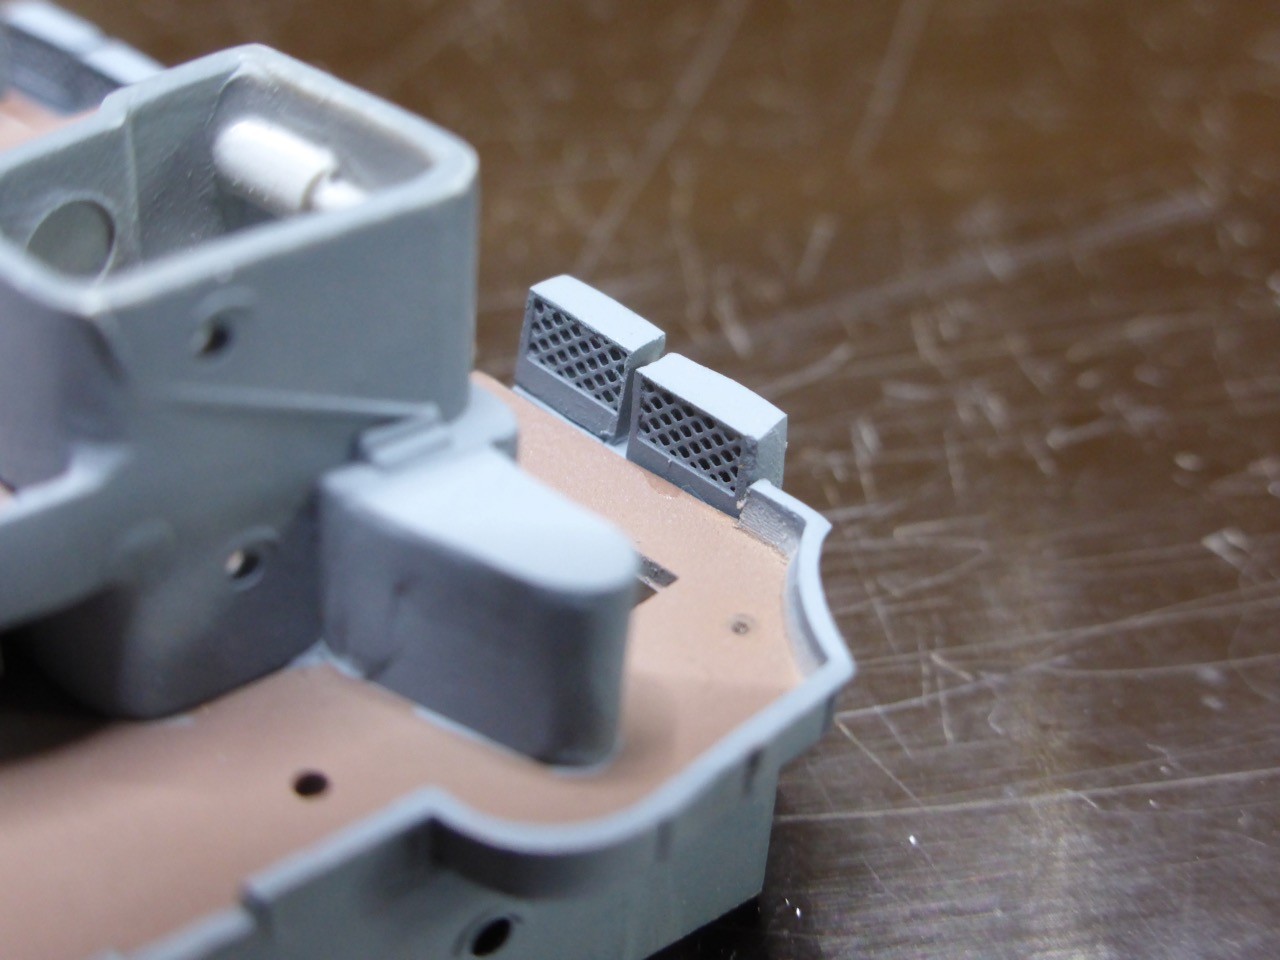
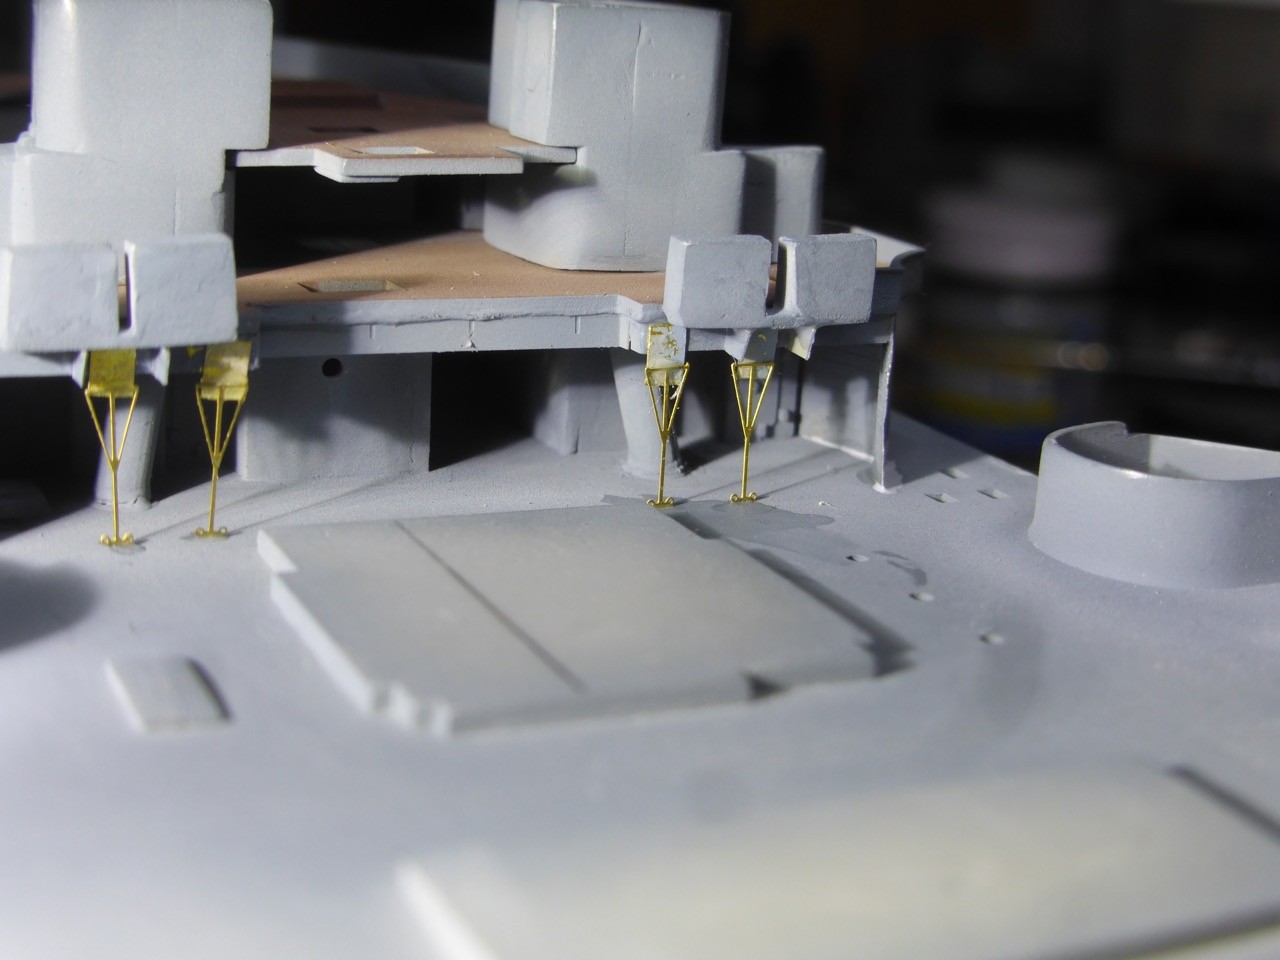
Some more smaller details


Now the platforms need to get in their correct positions, and by this building the lower base plate and the area where the cradle will go later on.


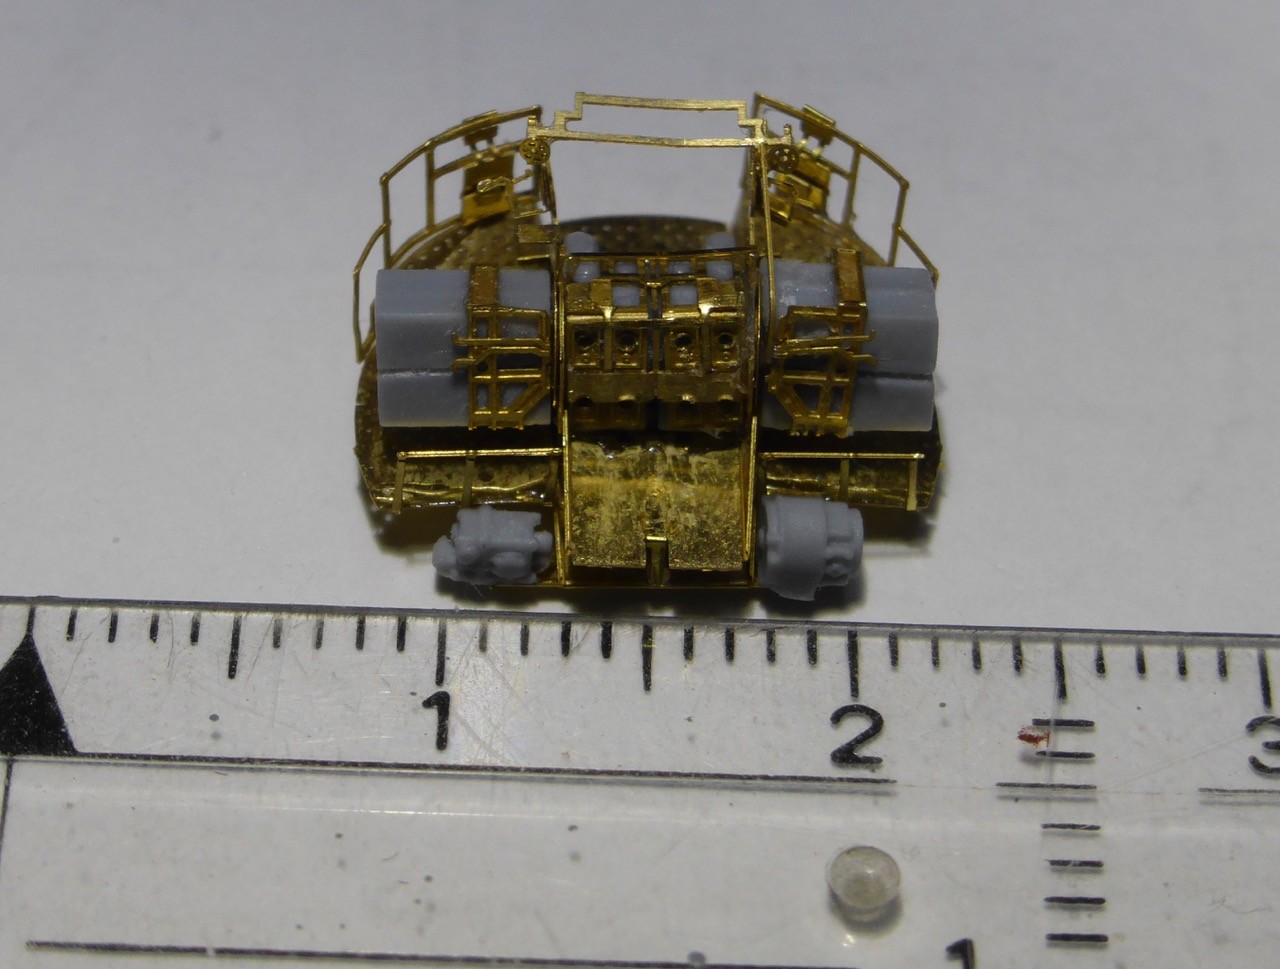
If you mess up the angles during this step - and I am not 100% right here, as you may be able to see - the whole structure is slightly out of shape. You don't realise it right away, but later on when other parts are added...
(You can spot some voids in the corners indicating that my angles are slightly off)


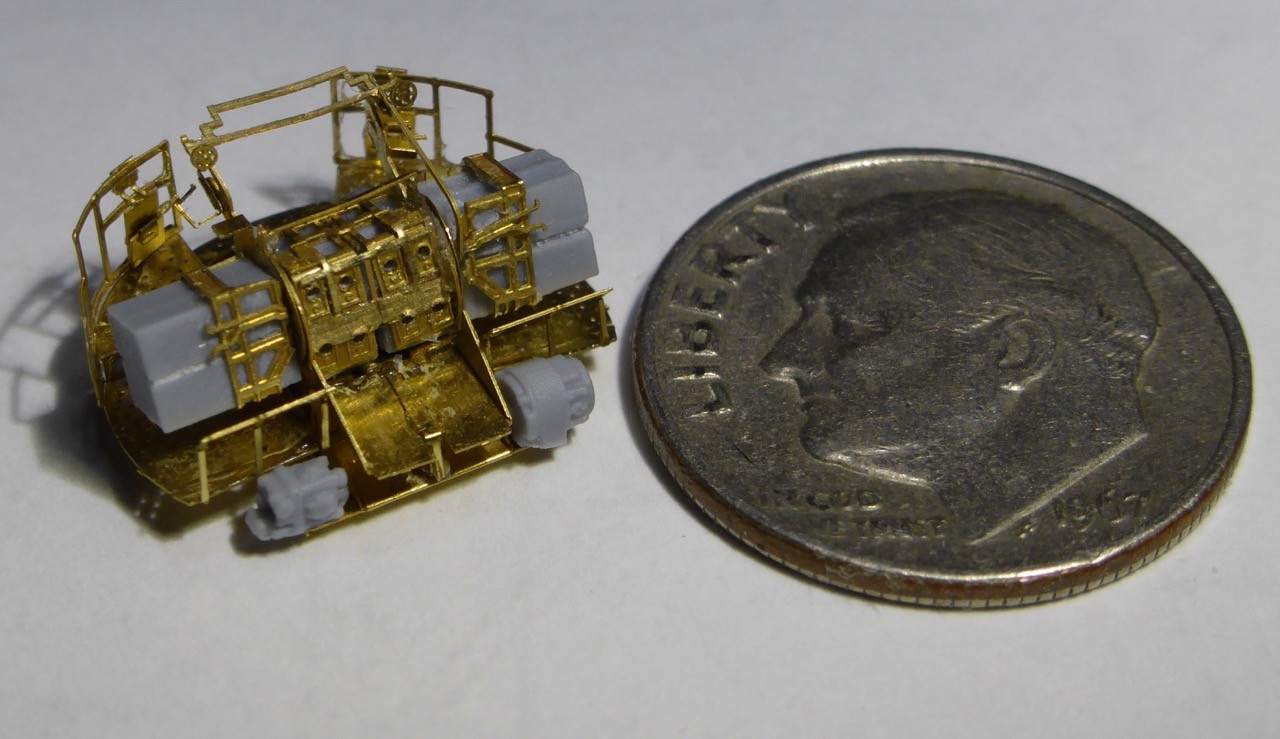
Should look something like this:


And to finish for today, the structure below the base plate added. Nine (!) microscopical profiles to add. I made a mistake in using thin ca glue at first, it works better with gel. You can maybe see the differences left/right side, one hast quite some spilled glue.


All right, good point for a break, office is calling!

Next chapter soon (tomorrow??), so stay tuned

Thanks for looking in,

cheers,
Jan
rolltide31
#377
Visit this Community
Texas, United States
Joined: June 27, 2010
KitMaker: 1,481 posts
Model Shipwrights: 1,332 posts
Posted: Tuesday, February 28, 2017 - 12:33 PM UTC
Jan,

First off, I apologize for my absence. I have been watching but not necessarily in a position to respond to anyones posts. I believe I am past that.

Your work on the Hood is amazing. I am really enjoying the tutorial you are giving on the Pom-Pom's. Amazing work and attention to detail.

I am happy to say that at this point I do not have anything on the bench that requires such complicated moves.

Truly aspiring work.

Dave
JJ1973
#345
Visit this Community
Niedersachsen, Germany
Joined: August 22, 2011
KitMaker: 1,835 posts
Model Shipwrights: 1,832 posts
Posted: Wednesday, March 01, 2017 - 10:35 AM UTC
Hi Dave,

no apology needed, not at all!! I know too well what you're talking about with commenting, I'm in the very same situation from time to time. And I'm glad to know you are following, whether you have the chance to comment or not is not that important - good to know to have you in!!

So I'm having about 15 minutes to post some update before the office is calling again, let's see that I can show some more PomPom craziness !

Next is getting the whole cradle installed on the platform. This was a little trial and error, and I ended up removing the spent ammo chute, put the cradle in place and re-install the chute.


Chute back on.


Some impressions.


Now for the magazines. Again, those resin parts are slightly too big, so they need some sanding to fit into their - nicely done - 'seats'.


Another issue there should be a link cast on the magazines that fits into the breech. However, this link does not exist. Not a big problem, but somewhat confusing...

Magazines in place.


Small stuff, like sights and some bars and levers added.


And eventually, the railing and some parts that look a little like layers seat's on the railing, but I'm not quite sure. No other kit has those details, as far as I know.


Some final bends - getting some instrument panels in the correct position left and right of the cradle.


With that it's done - more or less. But before I'll paint, I will start the small production line. Than paint the turned brass barrels for all three, and than it should be really done.

So I'm away this weekend, and I'll see how I squeeze in some bench time over the next week. Anyway, posting here will drop down, since I'll be mostly buys with my production line, so not so much to show.
-and, should the next up in the production line show progress, I might decide to build three new ones...but I'll decide that after the next PomPom is done.

So that's it for know, as always thank you all for following and looking in here!!

Cheers,
Jan
RussellE
#306
Visit this Community
Victoria, Australia
Joined: June 27, 2010
KitMaker: 3,959 posts
Model Shipwrights: 2,777 posts
Posted: Wednesday, March 01, 2017 - 03:52 PM UTC
Wow! Just Wow, Jan!

What a project! Only 3 more to go
TimReynaga
Staff MemberAssociate Editor
MODEL SHIPWRIGHTS
Visit this Community
California, United States
Joined: May 03, 2006
KitMaker: 2,500 posts
Model Shipwrights: 1,830 posts
Posted: Wednesday, March 01, 2017 - 06:35 PM UTC
Amazing origami work, Jan - I'll never look at one of these pom poms the same way again!
rolltide31
#377
Visit this Community
Texas, United States
Joined: June 27, 2010
KitMaker: 1,481 posts
Model Shipwrights: 1,332 posts
Posted: Wednesday, March 01, 2017 - 10:01 PM UTC
Jan,

Thanks for the understanding...

As Tim and Russell said...WOW!!!

that is some amazing origami work. I have not had the opportunity to work on something as complex as that, luckily for me the IJN engineering for the 25mm AA Guns is a bit more simplistic, not sure I have the skills or figure manipulation capability to accomplish what you have with your Pom-Poms.

Amazing work!!!

Dave
mgrummitt
Visit this Community
California, United States
Joined: January 07, 2014
KitMaker: 133 posts
Model Shipwrights: 105 posts
Posted: Monday, March 06, 2017 - 12:57 AM UTC
Yeah, I found the Hood build. I'm a little late, but I'm all caught up!

Great work Jan! The PE is insanely small. I'm just getting into the PE so by the time I get to that level I hope I'm that good

I was watching someone solder the PE have you tried that before?

Excellent build so far!
JJ1973
#345
Visit this Community
Niedersachsen, Germany
Joined: August 22, 2011
KitMaker: 1,835 posts
Model Shipwrights: 1,832 posts
Posted: Sunday, March 12, 2017 - 12:12 AM UTC
Russ, Tim and Dave,

thank you once again for following and for your kind comments!!

Mike,

welcome aboard and great to have you in!! - I've seen PE soldering, I think Warren did some soldering here on MSW. I think it's good for bigger scales, I don't think it would work on those tiny parts - at least not with the soldering equipment that I have.

So, time was/is flying by and I see that a lot was going on here - i have to catch up with quite some builds! However, internet is slow on me today, so I will leave it with this one post for today. More comments when everything is up to speed again...

I hope those few pictures will show...

I was working on the PomPoms. Yes, three to go, decision is made not to use the first two. I think No. three is looking way better - not finished yet, of course, and the front rails are not in positions. But I could avoid some earlier mistakes and the appearance is more sound. At least I think so.


And more losses: this part of the cradle was almost finished and I was trying to get the breech block inserted when I dropped it. My office chair was quicker to catch it than I, so it was entirely bent. I spent quite some time to straighten it, flattened it completely, but the damage is to severe, at this point shown I decided that it will not work - the necessary accuracy for those parts, in particular the correct angles, is too high, this part would spoil the whole arrangement...


So much for now, I hope to make some more progress over the coming week - but it looks rather busy office-wise...

Thanks for looking in and cheers,

Jan
RedDuster
Visit this Community
England - South East, United Kingdom
Joined: March 01, 2010
KitMaker: 7,078 posts
Model Shipwrights: 6,649 posts
Posted: Monday, March 13, 2017 - 01:06 AM UTC
Hi Jan,

Small progress is better than no progress mate, do understand what you mean about work / real life keeping you away from the bench.

Hope you get some time soon.

cheers

Si
RussellE
#306
Visit this Community
Victoria, Australia
Joined: June 27, 2010
KitMaker: 3,959 posts
Model Shipwrights: 2,777 posts
Posted: Monday, March 13, 2017 - 02:47 AM UTC
More nano-engineered magic Jan...

It's funny how these small details take such a large percentage of time it takes to build such a large kit...

But it will all be worth it in the end!

Hope real life doesn't keep you from the bench too long
JJ1973
#345
Visit this Community
Niedersachsen, Germany
Joined: August 22, 2011
KitMaker: 1,835 posts
Model Shipwrights: 1,832 posts
Posted: Sunday, March 19, 2017 - 10:39 AM UTC
Hi Si and Russ!!

Thank you very much for your comments and bearing with my (still not accelerating) speed....

I was hoping to get some good bench time out of last week/weekend, but instead I got a couple of days TDY thrown in, quick trip to Norway for some consultations. Actually not too bad, but not good for progress...

So showing that I'm still alive by making many pictures of only small work...anyway, this is to show my third PomPom, and the first that I am contend with. So I will scrap the first two and go from here. Ready except for the barrels (and paint).


Maybe it's hard to tell from the picture, but this was was a big progress - it did fall in place way better, the general shape is more 'straight' and all parts, including the geared wheels underneath the breeches are in place. So two to go... (the good one is on the righthand side - good to see is that all the sights are better aligned)


All right, office time!

Cheers,
Jan
RedDuster
Visit this Community
England - South East, United Kingdom
Joined: March 01, 2010
KitMaker: 7,078 posts
Model Shipwrights: 6,649 posts
Posted: Monday, March 20, 2017 - 12:21 AM UTC
Nice work Jan,

Good class on using the North star pompoms. The do look really good when you get them right.

Cheers

Si
RussellE
#306
Visit this Community
Victoria, Australia
Joined: June 27, 2010
KitMaker: 3,959 posts
Model Shipwrights: 2,777 posts
Posted: Monday, March 20, 2017 - 01:46 AM UTC
nice work on the Pom Pom's Jan...

I know what you're going through at the moment-having the same kinda fun with the Prinz's AA set
Cosimodo
#335
Visit this Community
Auckland, New Zealand
Joined: September 03, 2013
KitMaker: 1,808 posts
Model Shipwrights: 871 posts
Posted: Monday, March 20, 2017 - 04:45 AM UTC
Great tutorial Jan and you can see the improvement in the third pompom over the first effort. It looks like a good idea to over order so you have some leeway with practice since they seem to be extraordinarily fiddly. Good luck with the rest!

cheers
Michael
JJ1973
#345
Visit this Community
Niedersachsen, Germany
Joined: August 22, 2011
KitMaker: 1,835 posts
Model Shipwrights: 1,832 posts
Posted: Monday, March 27, 2017 - 04:13 PM UTC
Michael, Russ and Si -

once again thank you so much for your kind comments and for patiently following here

So there's another break coming up, after lots of work and TDY it's time for leave and holidays, so I wan't be posting much - if anything - over the coming weeks.
But I managed to get one big step ahead, one last update before heading to the airport...I finished the PomPoms and .50 cals. So for the smaller arms there are only the UP launchers left - PomPom, .50 and 4" finished.

Here are some pictures:

Without barrels and before painting (one old .50 cal with barrels...)


Turned brass barrels arranged for painting:


Painted without barrels:


And all done


And here's all of them together. I have to say that I'm really relieved...that was quite some slow work.


Now a little over three weeks of holidays, and then I should find some time to work on the main ship again.

For now, thanks for looking in, thanks for your patience!!

Cheers,
Jan
RedDuster
Visit this Community
England - South East, United Kingdom
Joined: March 01, 2010
KitMaker: 7,078 posts
Model Shipwrights: 6,649 posts
Posted: Tuesday, March 28, 2017 - 12:44 AM UTC
Hi Jan

great work on the light AA, You have given me the confidence to have another go at the pompoms.

Have a great holiday.

Cheers

Si
RussellE
#306
Visit this Community
Victoria, Australia
Joined: June 27, 2010
KitMaker: 3,959 posts
Model Shipwrights: 2,777 posts
Posted: Tuesday, March 28, 2017 - 02:09 AM UTC
Fantastic work on the light AA Jan!

Definitely a relief to have all of them completed before your holiday!

Enjoy the time away from 'real life' and the bench and we'll be waiting to see the next update on your Hood!
Mgunns
Visit this Community
Arizona, United States
Joined: December 12, 2008
KitMaker: 1,423 posts
Model Shipwrights: 99 posts
Posted: Sunday, April 16, 2017 - 07:29 AM UTC
Very very nice work. Patience paid off.
JJ1973
#345
Visit this Community
Niedersachsen, Germany
Joined: August 22, 2011
KitMaker: 1,835 posts
Model Shipwrights: 1,832 posts
Posted: Sunday, April 30, 2017 - 10:53 PM UTC
Si, Russ and Mark,

thank you very much for your comments!! And all, thank you for your patience!! I hope you'll still stick around, even after this extended break - substantial longer than I planned...

However, here is an update, and to the ship, not to AAA or boats or the like.

First, I still was not sure what to do about the flag lockers that I had removed earlier and scratch built some new. Looking at EJ Foeth's build I know that there need to be some supports under those lockers, but several trials to build something from styrene looked rather poor and clumsy. So I went back to my 'old PE box' and just looked what could be of some use.

Here's the flag lockers


First thing I came across were some awning stanchions


but they were too short. And there should be an additional structure.
Something from my old WEM Graf Spee kit looked good - a structure that should support the catapult, that I ended up not using back then.


Parts modified and put together


All glued in place.


Well, not perfect, but should do - considering the rather concealed place where it will be in the end.

Next - finally - gluing the lower bridge in place.


All kinds of gaps that have to be dealt with...no surprise here.


Trusted old Mr. Surfacer 500 brushed on


Will see how it looks when it is cured - probably a few more layers needed.

And finally for today, the awning stanchions, upside down, with a little more support added, glued in place. Once they are painted they should look ok...


That's it for today, next update should be following after the next weekend - I should find some good bench time then, I hope!!

Thank you all for your patience and thank you for stopping by and looking in!!

Cheers,
Jan


RussellE
#306
Visit this Community
Victoria, Australia
Joined: June 27, 2010
KitMaker: 3,959 posts
Model Shipwrights: 2,777 posts
Posted: Monday, May 01, 2017 - 04:45 PM UTC
Hi Jan!

Welcome back! I hope you had a wonderful holiday!

did you go anywhere nice?

Great work on the Hood and those flag lockers...

Ah yes, those Trumpeter gaps! What can i say? I think they must own shares in gap filler companies
rolltide31
#377
Visit this Community
Texas, United States
Joined: June 27, 2010
KitMaker: 1,481 posts
Model Shipwrights: 1,332 posts
Posted: Monday, May 01, 2017 - 09:50 PM UTC
Jan,

Hope you had a great vacation!!

Your attention to detail always amazes me, especially when it comes to improvising fixes to problems encountered. I need to learn how to do that instead of shying away from it.

She is coming along amazingly, cant wait to see more.

Dave
RedDuster
Visit this Community
England - South East, United Kingdom
Joined: March 01, 2010
KitMaker: 7,078 posts
Model Shipwrights: 6,649 posts
Posted: Tuesday, May 02, 2017 - 01:17 AM UTC
Hi Jan,

Welcome back, good to see some progress again. Like fix on the flag lockers, very neat indeed.

Cheers

Si
JJ1973
#345
Visit this Community
Niedersachsen, Germany
Joined: August 22, 2011
KitMaker: 1,835 posts
Model Shipwrights: 1,832 posts
Posted: Tuesday, May 02, 2017 - 09:39 AM UTC
Russ, Dave and Si,

great to see you still in on this build, despite some, well, slower times..
Thank you so much for your kind comments!! - Yep, those flag lockers, and the structure, gave me some headache...needs some tidying up, still, but should look all right in the end.

Russ - leave was great! Spent some time in California once more, and it's so great to see how nature comes alive there, after the rain!! Never seen those hills green like this year, and talked to some locals, they said it really has been a while - several years - since it last time looked like this spring!!

Cheers,
Jan
RussellE
#306
Visit this Community
Victoria, Australia
Joined: June 27, 2010
KitMaker: 3,959 posts
Model Shipwrights: 2,777 posts
Posted: Tuesday, May 02, 2017 - 04:07 PM UTC
good to hear you had a great time, mate
JJ1973
#345
Visit this Community
Niedersachsen, Germany
Joined: August 22, 2011
KitMaker: 1,835 posts
Model Shipwrights: 1,832 posts
Posted: Sunday, May 07, 2017 - 09:44 AM UTC
Okay, some more work done.

First of all, filling and sanding all the gaps on the lower bridge. Over the week, I painted several layers of Mr. Surfacer, so by Saturday it was ready for sanding down and painting.


I know it's not perfectly even, but that's the best I can get without risking a lot of collateral damage (not to mention that I feel the need to finally go on!!).

Next was repairing a considerable amount of damage that had occurred over time to the hull paint, while working on all the PE from the shelter deck etc. At the same time I re-installed the rudder that I had broken off at some point of time, and I installed the shafts. I had painted them metal color, but was made aware that they'd actually been red, or reddish. So I over-sprayed the, but not entirely, so that you can see a little metal shining through.


Next - 'installing' dark non-skid on the shelter deck. Quite a lot of masking and touch ups required...


Next - started work on some inclined ladders. I build some from Lion Roar, but decided (a little late) that it might be a smart idea to paint some PE frets first.


Finally it seemed about right to install the wooden deck. This proved rather complicated - the laser cutting was not 100% cutting through all parts, so I could not get the wood in one piece. Not a big problem, halfway through I decided to cut it in smaller pieces anyway to make installation easier. The forecastle is pretty busy with small stuff, and it was challenging to get the wood in place. Actually, at some points it failed, mainly around the lower bridge. That may be the case because I replaced the lower bridge by PE parts, so a different fit than the original kit's part. Some repair required, I am not entirely happy, but that should work - and should be concealed once all the smaller stuff will be shipped...


So much for today, next update should be here in a week from now!!

Thanks for looking in!!

Cheers,
Jan