

I've just bought the old WEM 1/350 HMS Starling Black Swan Class corvette (my first ever resin kit) and have been trying to source these mounts from North Star.
What a job! It seems that the owner of North Star models has recently had a car accident, so there will be a delay in resuming production and all UK suppliers are presently out of stock, so I have had to order from elsewhere.
My order is now in transit (I could only source 4 x mounts) but I am now looking at the gun houses which are too short!
Oh no!
I'll be interested how this problem is solved because I have to source more of these items for both Hood, Belfast, and the trio of Tribals in my stash! I do have a couple of WEM ones which I fortunately got before they ceased trading back in 2014 but I don't have enough to go round!


Go to modelshipwrights.com for the current dynamic site!
Hosted by Steve Joyce
HMS Hood 1941 - Trumpeter 1/350 + Lion Roar

warshipbuild

Joined: June 06, 2006
KitMaker: 222 posts
Model Shipwrights: 207 posts

Posted: Sunday, October 23, 2016 - 02:07 AM UTC

RussellE

#306

Joined: June 27, 2010
KitMaker: 3,959 posts
Model Shipwrights: 2,777 posts

Posted: Sunday, October 23, 2016 - 04:51 AM UTC
Wow Jan! An extensive break, but hey, you've bounced back big time with a massive update! 
hm... filling and sanding! Those Northstar 4" guns sure look like a remedy for modeller's block (when filling and sanding becomes too much ) Exceptionally little kits and you've done a great job on them!
Looking forward to the next stages of the build, mate.
hm... filling and sanding! Those Northstar 4" guns sure look like a remedy for modeller's block (when filling and sanding becomes too much
) Exceptionally little kits and you've done a great job on them! Looking forward to the next stages of the build, mate.


JJ1973
#345

Joined: August 22, 2011
KitMaker: 1,835 posts
Model Shipwrights: 1,832 posts
Posted: Sunday, October 23, 2016 - 09:37 AM UTC
Hi Dave and Russ,
thank you for looking in and your kind comments!!
I can't wait to go on here for myself, however, a full week of 'real life' ahead now first...

Cheers,
Jan
thank you for looking in and your kind comments!!
I can't wait to go on here for myself, however, a full week of 'real life' ahead now first...
Cheers,
Jan

Cosimodo
#335

Joined: September 03, 2013
KitMaker: 1,808 posts
Model Shipwrights: 871 posts

Posted: Monday, October 24, 2016 - 04:19 AM UTC
Expansive update Jan!
It's a shame about the twin 4" guns but along with all your other fixes I am sure you'll have a solution.
cheers
Michael
It's a shame about the twin 4" guns but along with all your other fixes I am sure you'll have a solution.
cheers
Michael

RedDuster

Joined: March 01, 2010
KitMaker: 7,078 posts
Model Shipwrights: 6,649 posts

Posted: Monday, October 24, 2016 - 11:58 PM UTC
Hi Jan,
Very nice job on the North star 4" guns, they look excellent, and for the tips.
Cheers
Si
Very nice job on the North star 4" guns, they look excellent, and for the tips.
Cheers
Si

simonn
Joined: October 15, 2016
KitMaker: 62 posts
Model Shipwrights: 2 posts
Posted: Tuesday, October 25, 2016 - 11:31 AM UTC
Jan
I'm an aircraft modeller having a random browse through the Kitmaker network and have just come across the thread. I am seriously impressed by the scale of this project and the range of skills and techniques you are using. I will be watching and learning.
Thanks
Simon
I'm an aircraft modeller having a random browse through the Kitmaker network and have just come across the thread. I am seriously impressed by the scale of this project and the range of skills and techniques you are using. I will be watching and learning.
Thanks
Simon

rolltide31
#377

Joined: June 27, 2010
KitMaker: 1,481 posts
Model Shipwrights: 1,332 posts

Posted: Wednesday, October 26, 2016 - 10:41 PM UTC
Jan,
I apologize for being remiss on comments lately. Your Hood is coming along amazingly. The 4" look incredible and will bring a high level of detail to what is already amazing work.
Looking forward to seeing them with some color and mounted on the hood.
Dave
I apologize for being remiss on comments lately. Your Hood is coming along amazingly. The 4" look incredible and will bring a high level of detail to what is already amazing work.
Looking forward to seeing them with some color and mounted on the hood.
Dave

FW_Allen
Joined: June 08, 2006
KitMaker: 7 posts
Model Shipwrights: 7 posts
KitMaker: 7 posts
Model Shipwrights: 7 posts
Posted: Sunday, October 30, 2016 - 06:48 AM UTC
The Northstar guns are indeed very nice. In fact, pretty much everything they make is quite nice. It's therefore most suprising and disappointing to see that the 4" gun shields do not fit. I hope you are able to make them work...but I suppose you could always try contacting them in the meantime.
I have ordered some of their parts (Pom Pom directors, bridge equipment, searchlights, etc)..but the one thing I cannot find anywhere are the winches! Trumpeter moulded the various winches as almost flat! So, that is the one feature that really needs to be corrected. Hopefully once the owner has recovered from his car wreck and is back up to full speed, they will produce more.
I have ordered some of their parts (Pom Pom directors, bridge equipment, searchlights, etc)..but the one thing I cannot find anywhere are the winches! Trumpeter moulded the various winches as almost flat! So, that is the one feature that really needs to be corrected. Hopefully once the owner has recovered from his car wreck and is back up to full speed, they will produce more.

JJ1973
#345
Joined: August 22, 2011
KitMaker: 1,835 posts
Model Shipwrights: 1,832 posts
Posted: Sunday, October 30, 2016 - 06:26 PM UTC
Thank you all so much for looking in and your kind comments!! 
Dave, don't worry - I am falling behind with commenting myself frequently. I'm glad to have you in and watching!
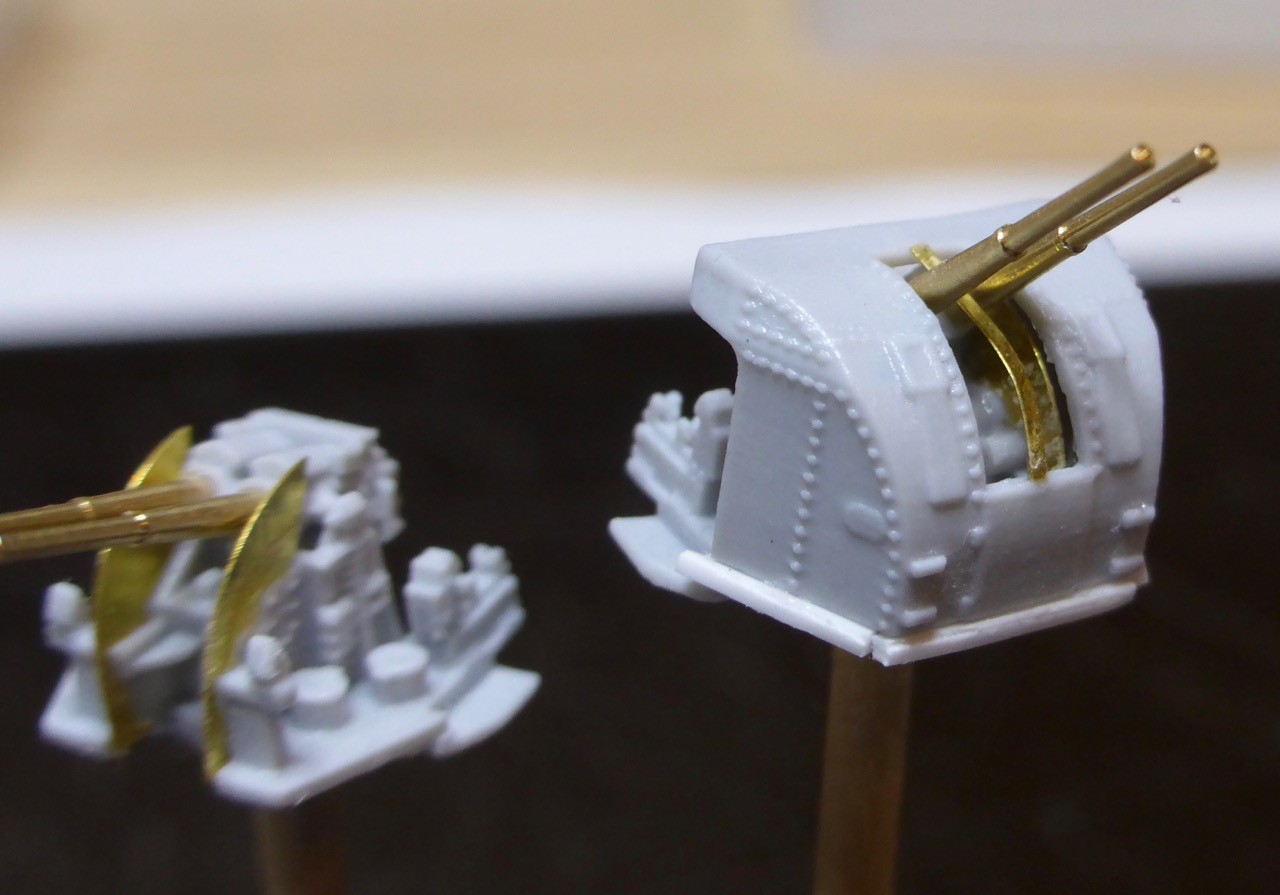
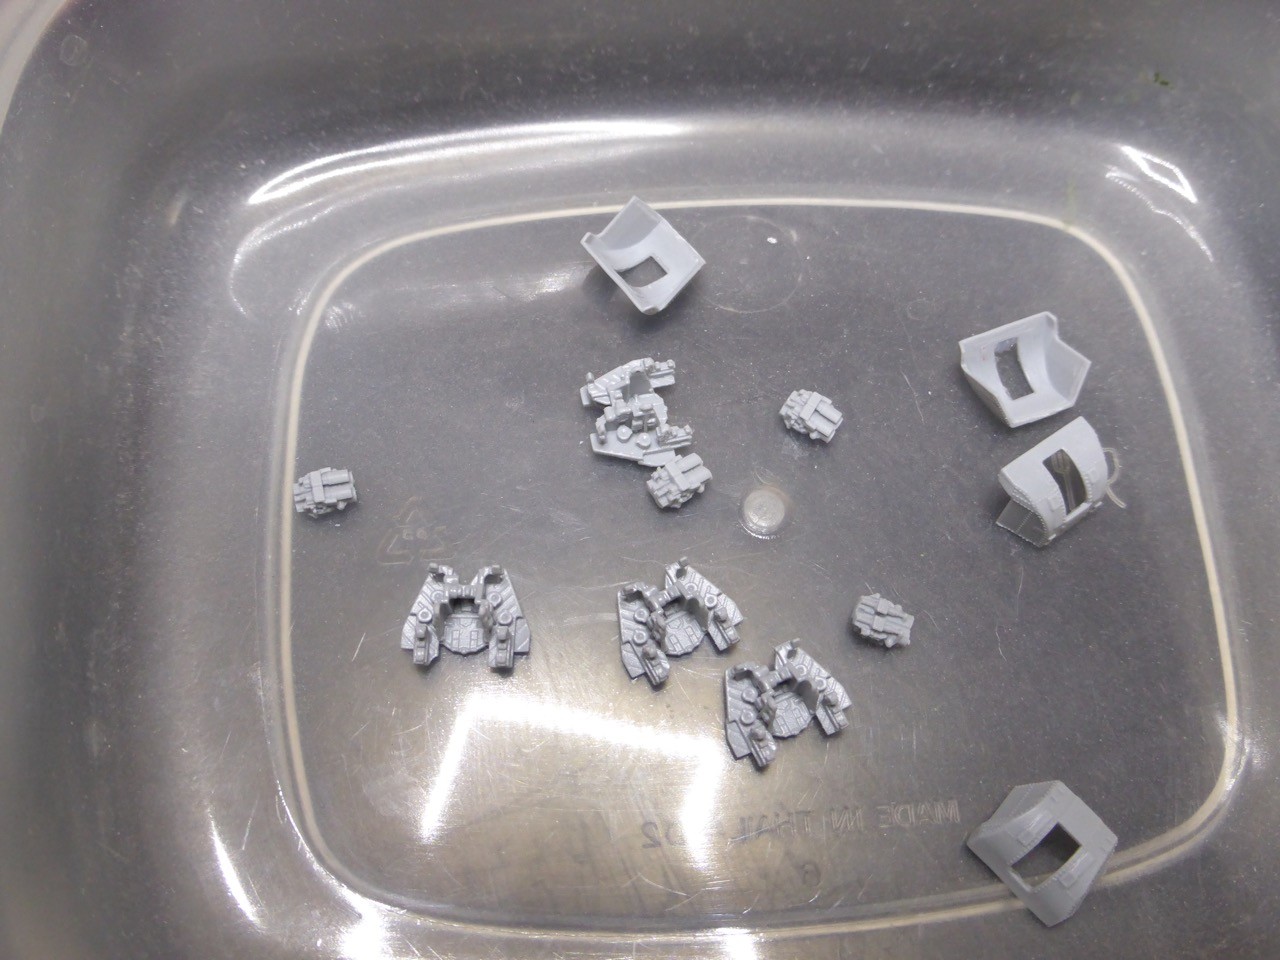
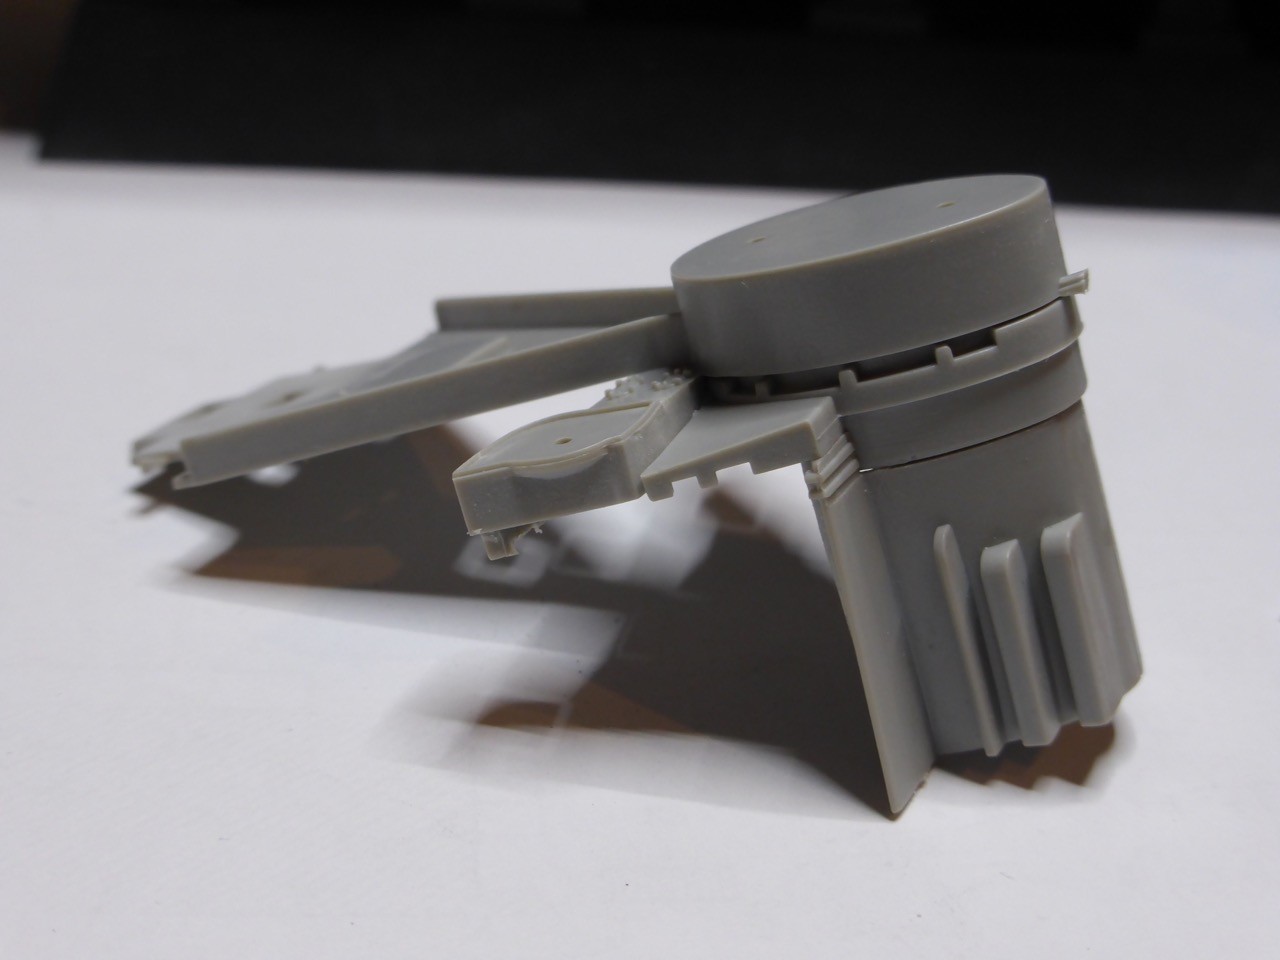
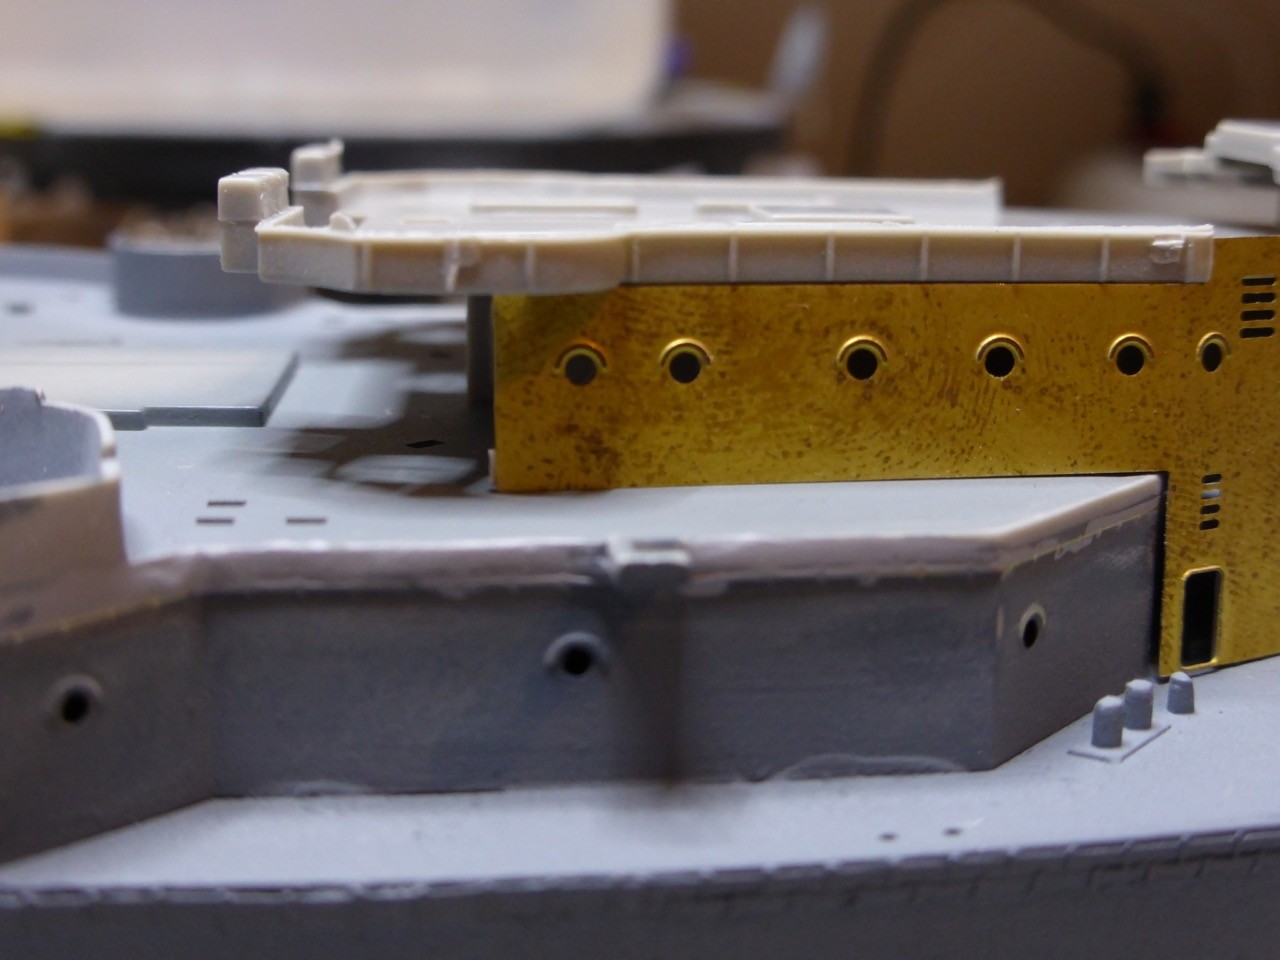
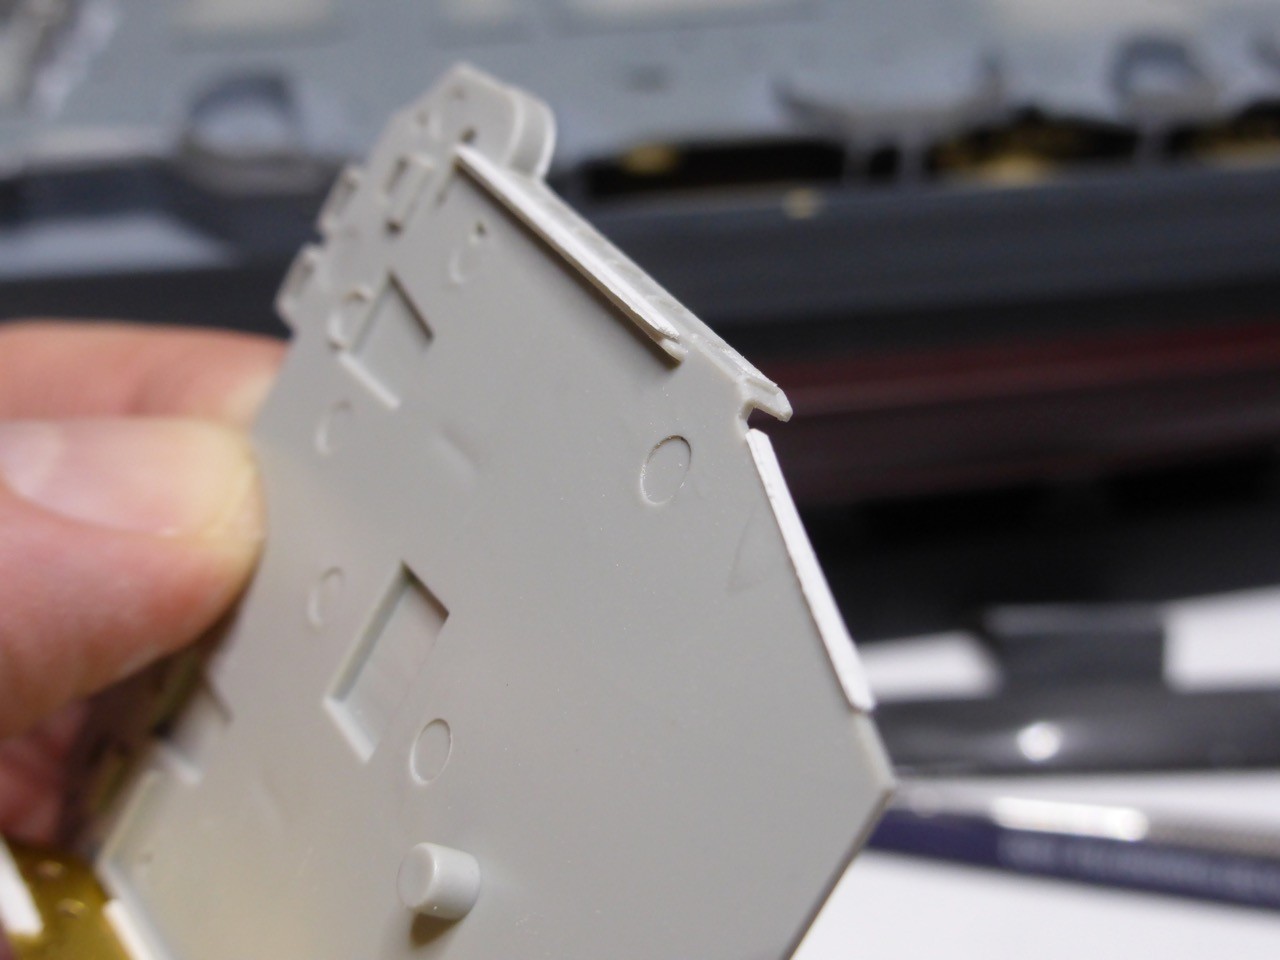
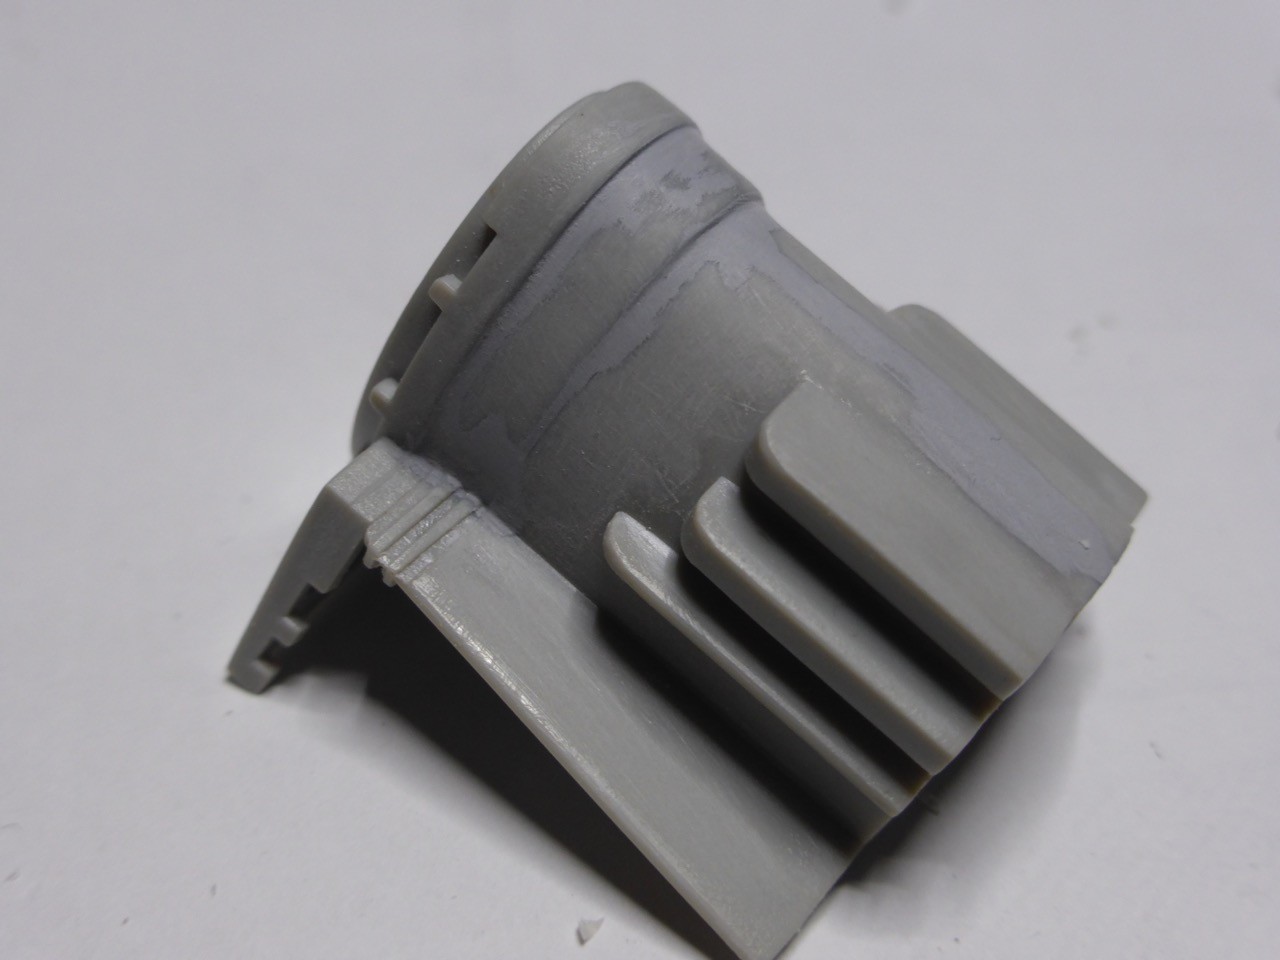
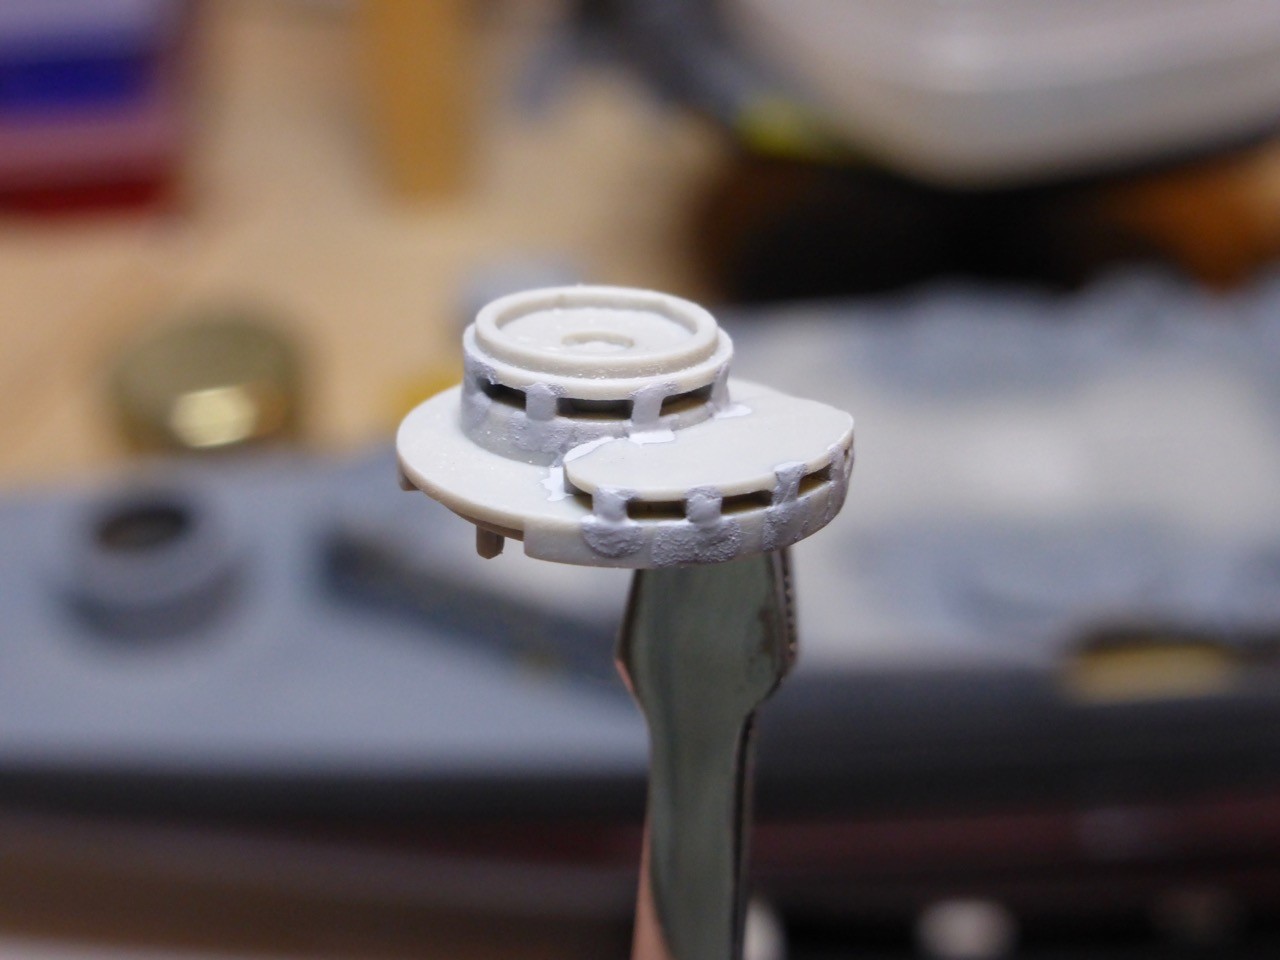
As for the 4" - to get that right, I don't think they are wrongly moulded (or printed?), the lowest row of rivets seems to be in the correct position. I managed to get one off the base all right and it seems to fit. The problem is that NorthStar should have 'donated' just 2 mm more material. I have to admit that I don't own a resin saw - I will get me one, simply not needed so far - it might work with a proper resin saw. With just about 2 mm more space on the lower end of the shield you could easily cut it with your hobby knife without harming the lowest row of rivets.
Anyway, no big deal I would say, since this part of the guns is normally not in plain sight but somewhat concealed. I tried my fix with some thin cut plastic stripes.
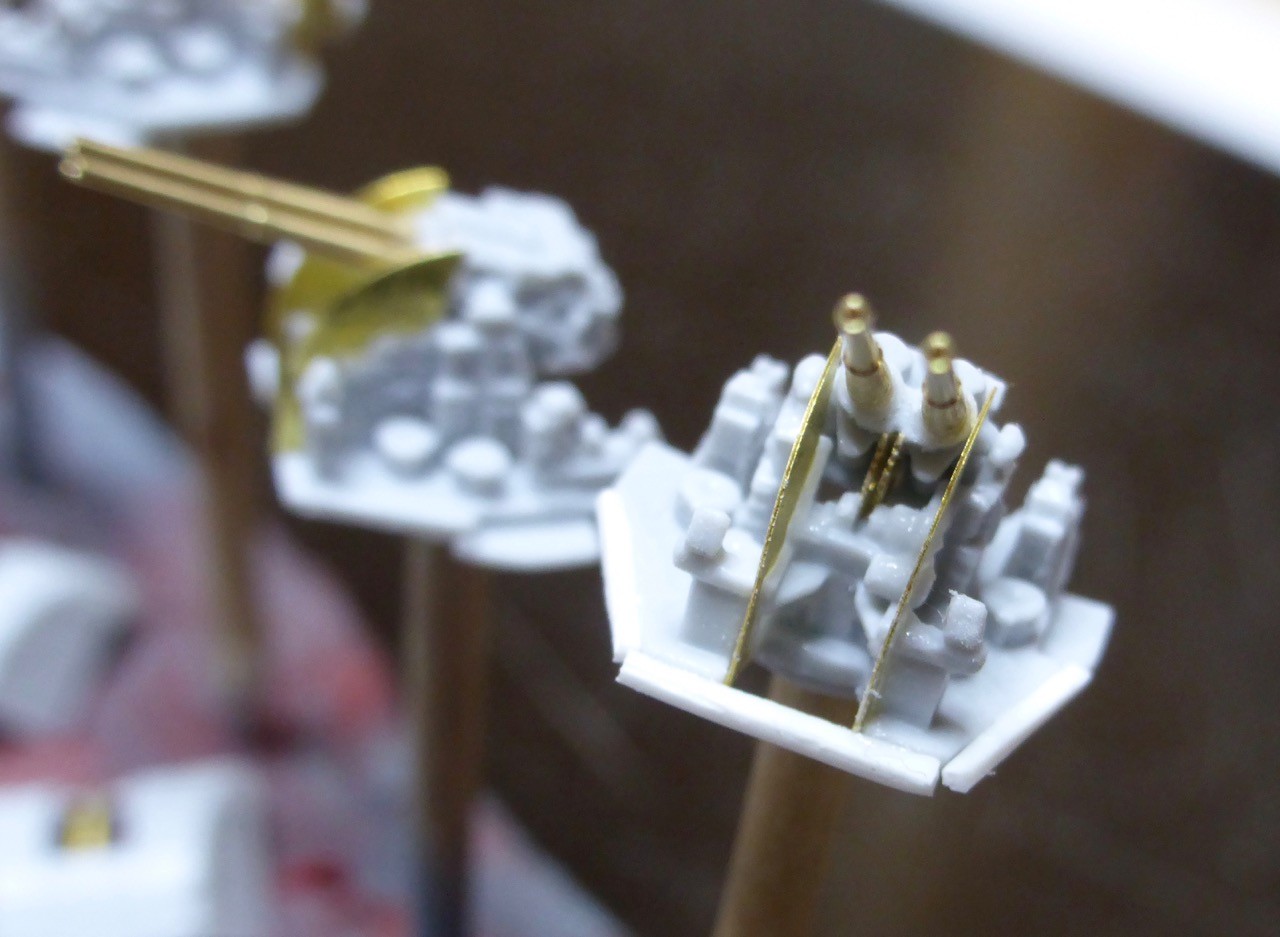
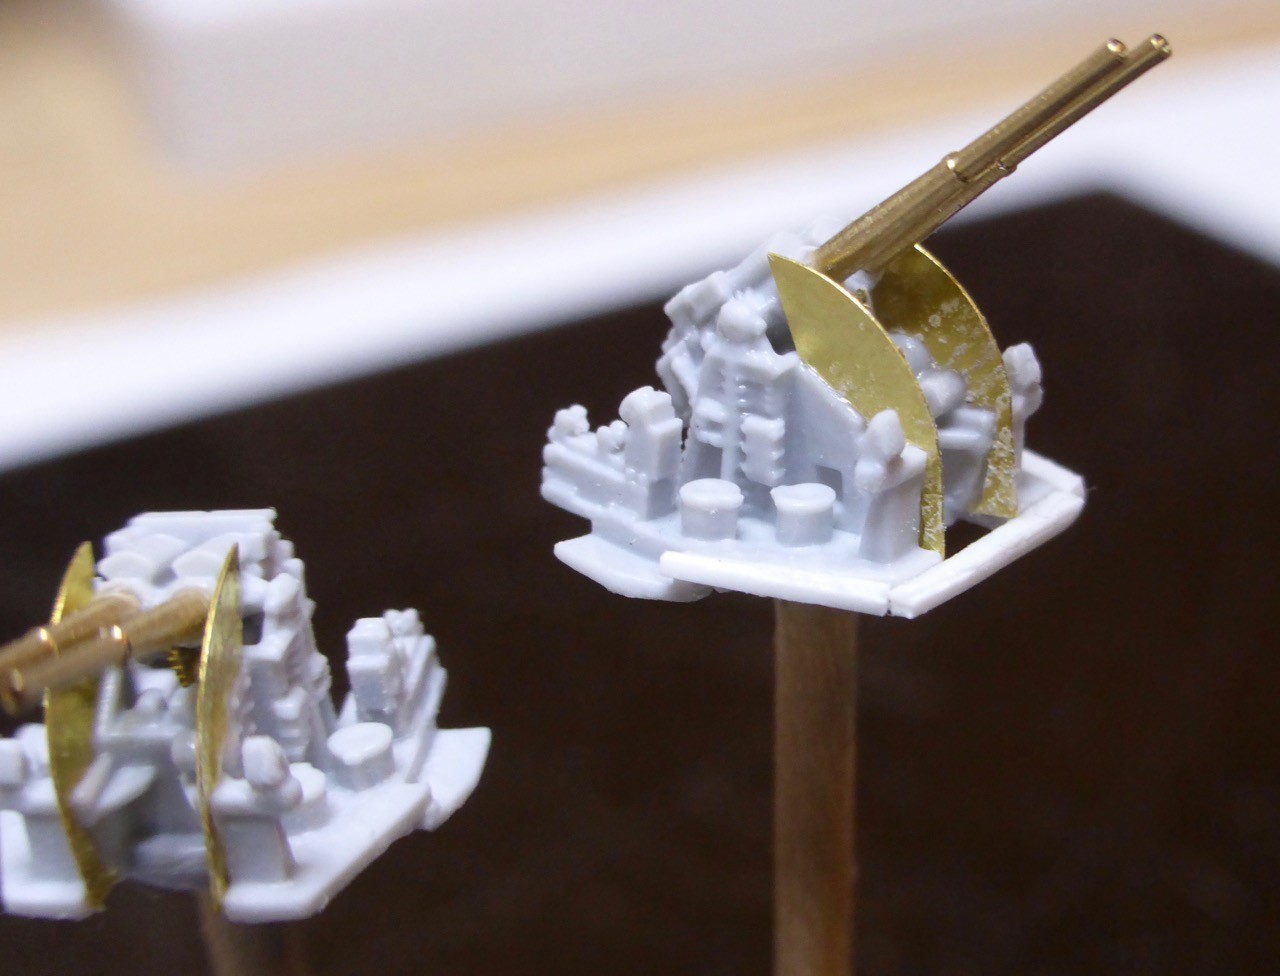
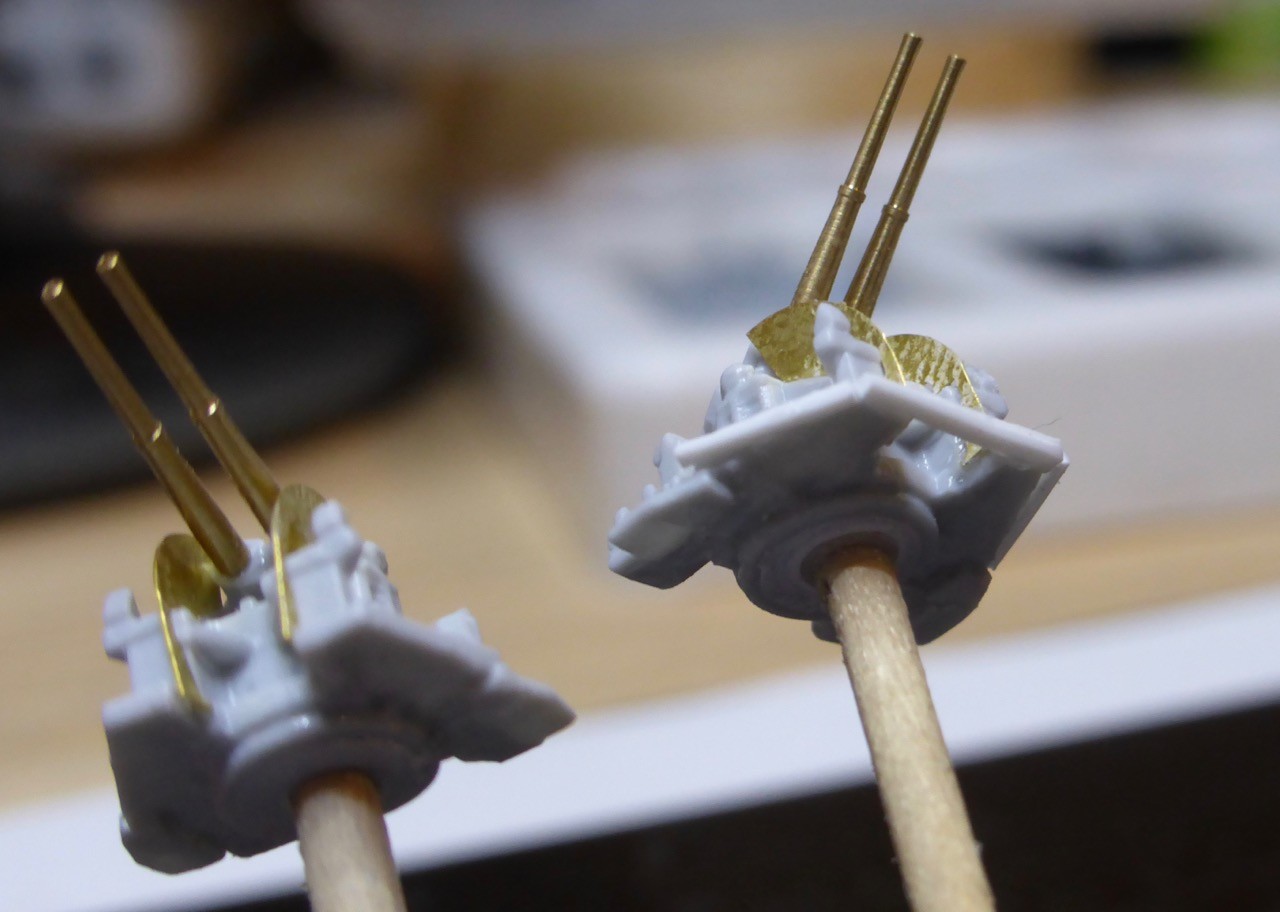
Once those are sanded, and a little surfacer added, they should look all right under a coat of paint. The shield here is just put in place, nothing glued yet.
Frank,
a question for you: I read your "Paint Schemes of HMS Hood", really good and helpful by the way. One question though, you are stating that everything below the waterline, including the propeller shafts, was anti-fouling red. I am concerned about the shafts. I have seen many warships in dry dock - modern ships, of course, no warships from WWII - and the shafts were always in a dark metal color, definitely unpainted. That's why I keep painting the iron color on my models (which actually is quite complicated in some cases...). Is it certain Hood's shafts were red??
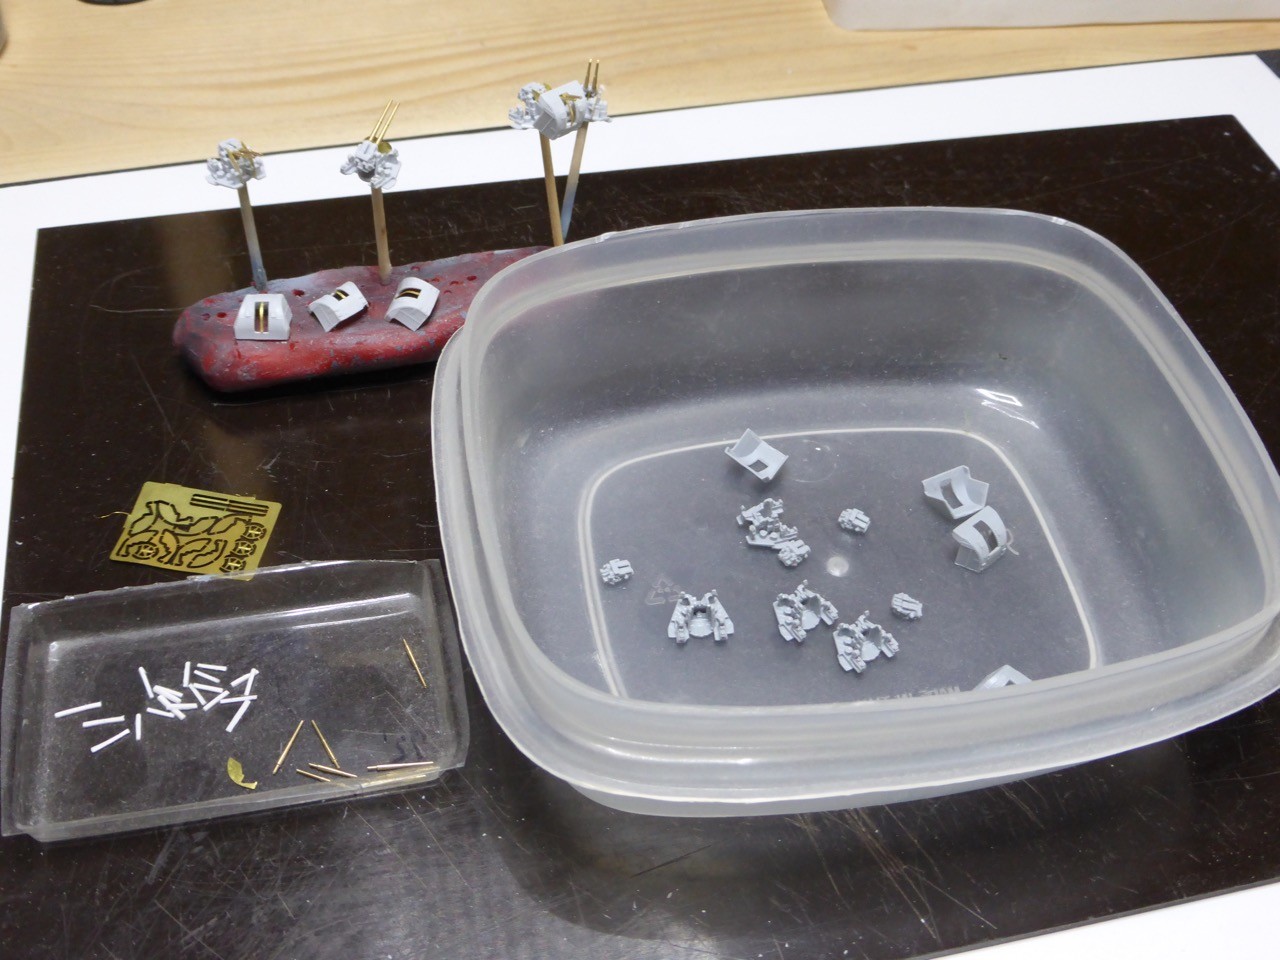
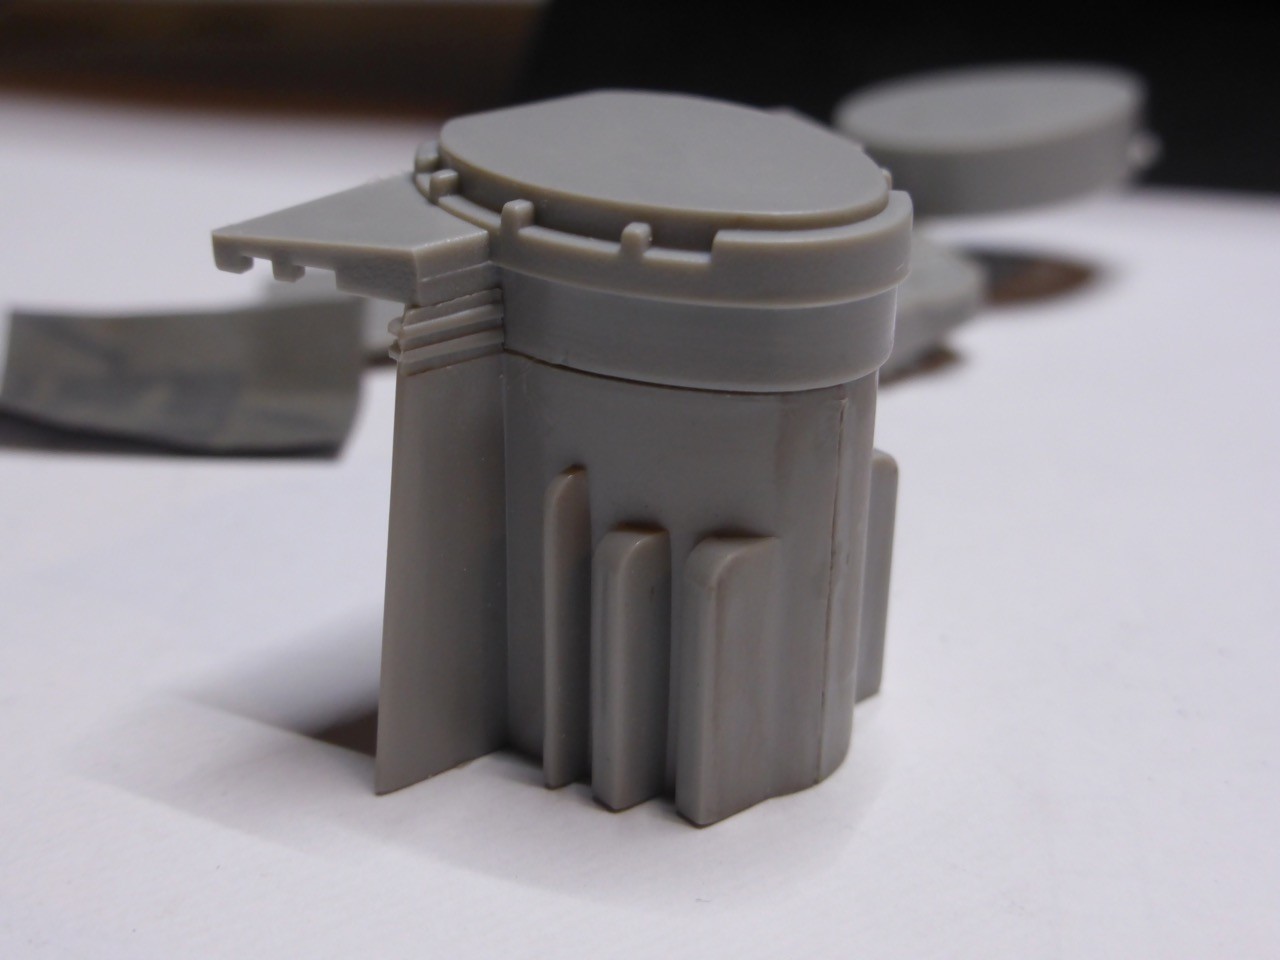
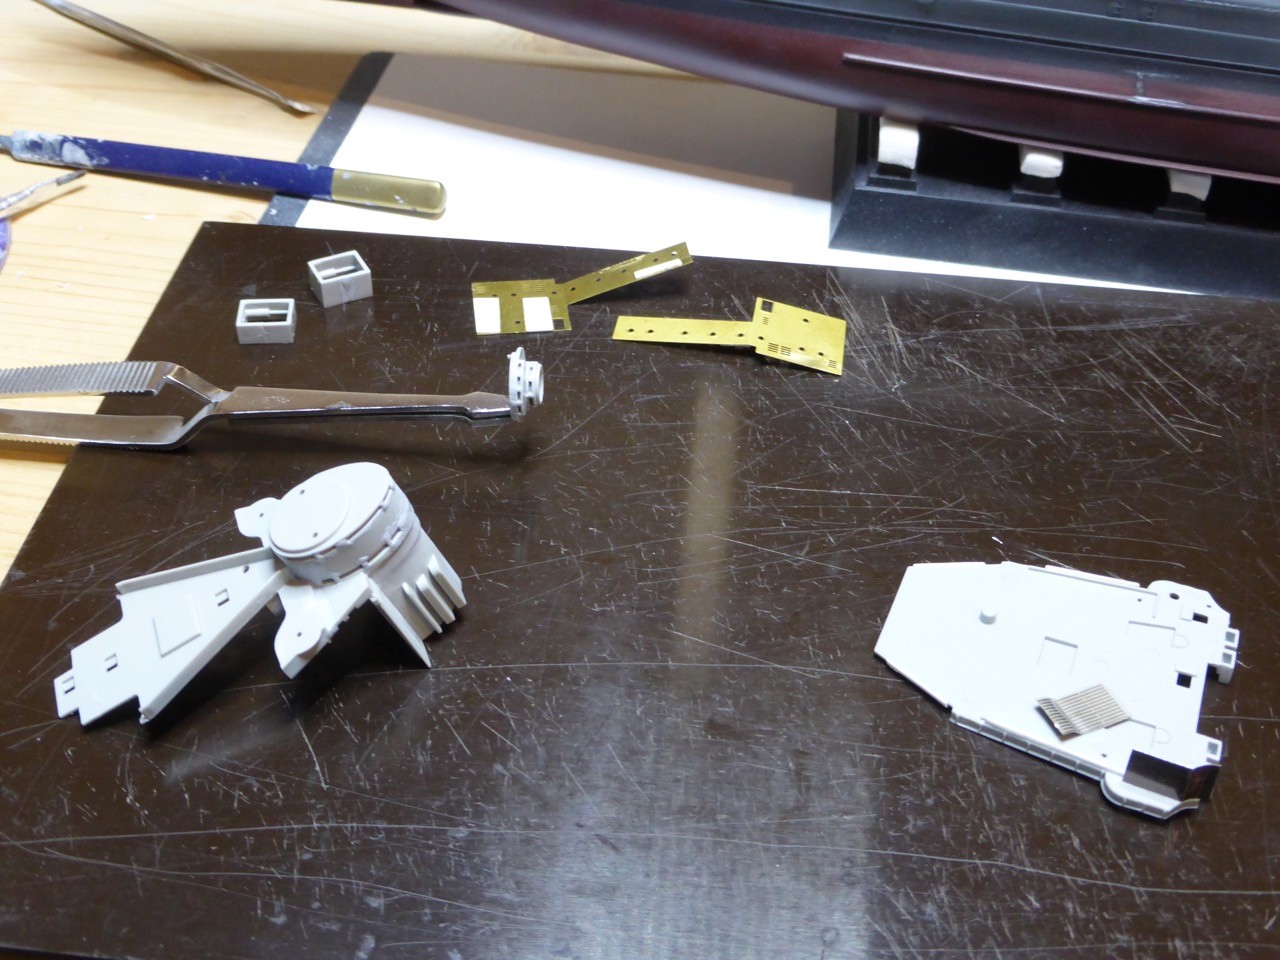
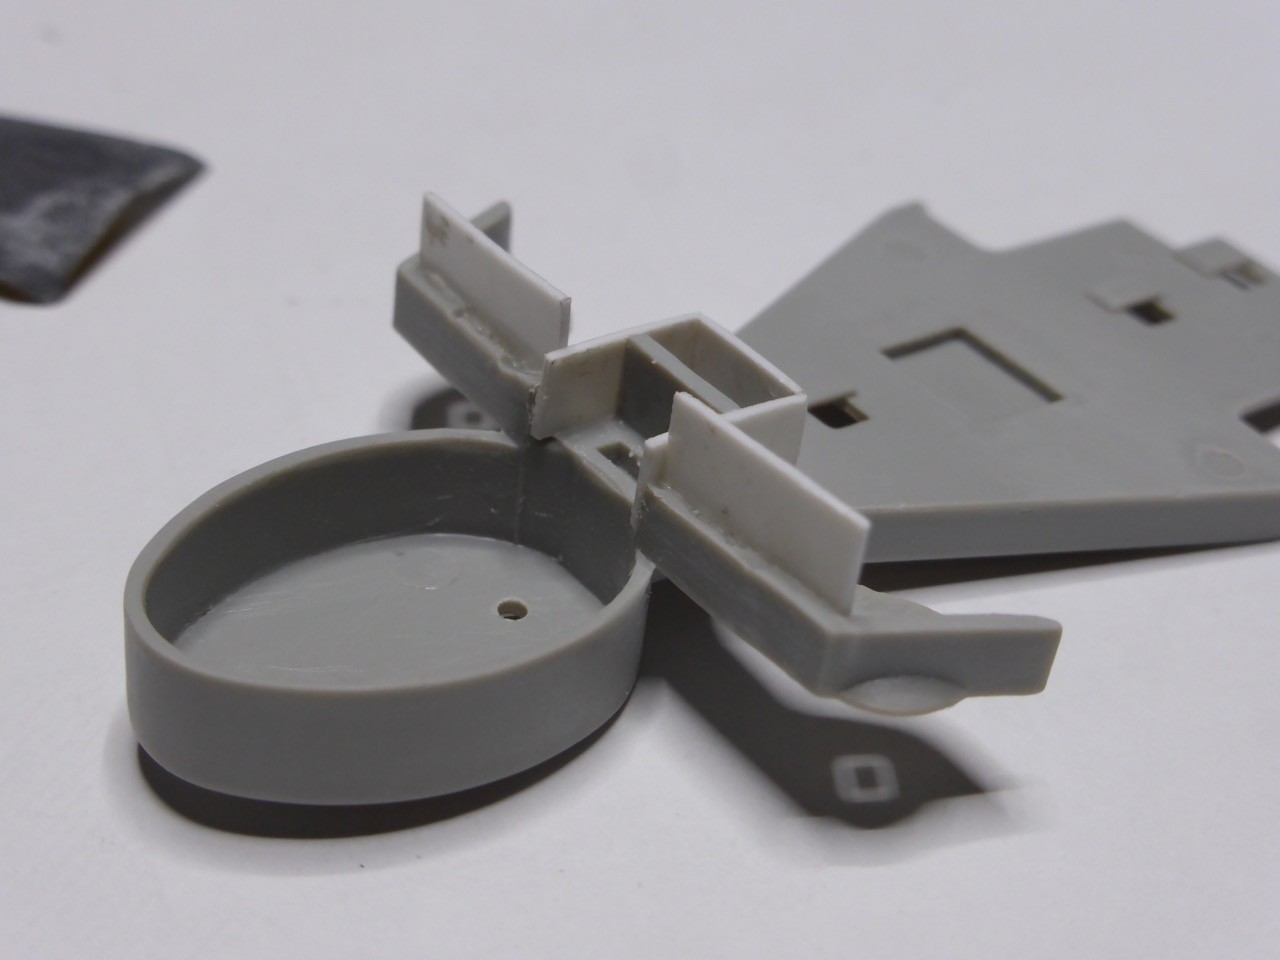
So I have been progressing a bit, more sanding on the forecastle deck, no pictures of that. Here are the parts for the last 4" guns, ready to assemble.
Since we do have a bank holiday, and I have taken care of all those things that needed to be done yesterday and attended a 90st birthday celebration on Saturday, I am looking forward to some bench time today and tomorrow. Should have an update for you tomorrow or Wednesday evening
Cheers,
Jan
Dave, don't worry - I am falling behind with commenting myself frequently. I'm glad to have you in and watching!
As for the 4" - to get that right, I don't think they are wrongly moulded (or printed?), the lowest row of rivets seems to be in the correct position. I managed to get one off the base all right and it seems to fit. The problem is that NorthStar should have 'donated' just 2 mm more material. I have to admit that I don't own a resin saw - I will get me one, simply not needed so far - it might work with a proper resin saw. With just about 2 mm more space on the lower end of the shield you could easily cut it with your hobby knife without harming the lowest row of rivets.
Anyway, no big deal I would say, since this part of the guns is normally not in plain sight but somewhat concealed. I tried my fix with some thin cut plastic stripes.
Once those are sanded, and a little surfacer added, they should look all right under a coat of paint. The shield here is just put in place, nothing glued yet.
Frank,
a question for you: I read your "Paint Schemes of HMS Hood", really good and helpful by the way. One question though, you are stating that everything below the waterline, including the propeller shafts, was anti-fouling red. I am concerned about the shafts. I have seen many warships in dry dock - modern ships, of course, no warships from WWII - and the shafts were always in a dark metal color, definitely unpainted. That's why I keep painting the iron color on my models (which actually is quite complicated in some cases...). Is it certain Hood's shafts were red??
So I have been progressing a bit, more sanding on the forecastle deck, no pictures of that. Here are the parts for the last 4" guns, ready to assemble.
Since we do have a bank holiday, and I have taken care of all those things that needed to be done yesterday and attended a 90st birthday celebration on Saturday, I am looking forward to some bench time today and tomorrow. Should have an update for you tomorrow or Wednesday evening
Cheers,
Jan
JJ1973
#345
Joined: August 22, 2011
KitMaker: 1,835 posts
Model Shipwrights: 1,832 posts
Posted: Sunday, October 30, 2016 - 11:47 PM UTC
A quick update and a few more questions to Frank from the HMS Hood Association
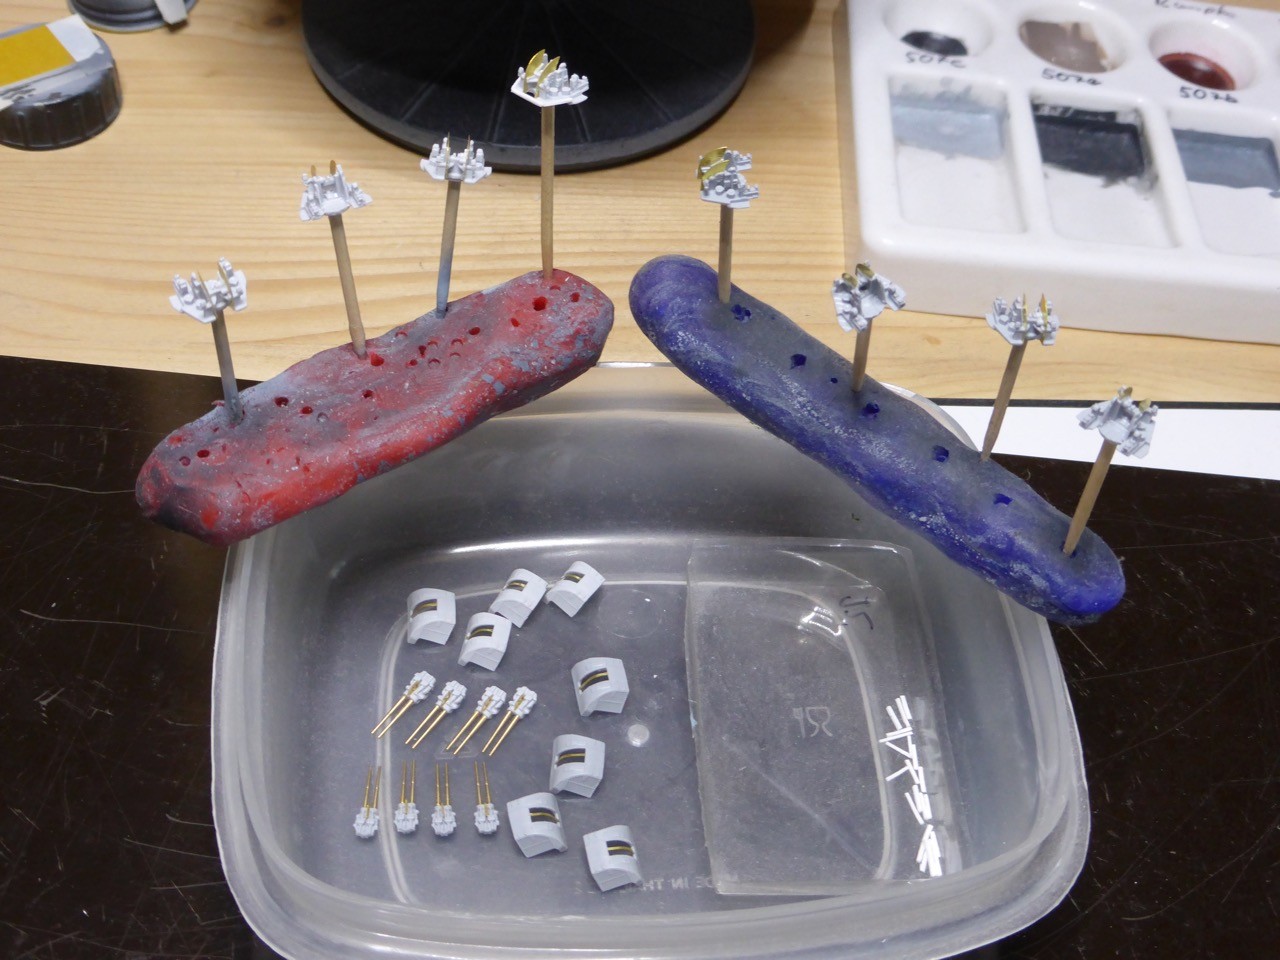
So firstly here's the 4" (seven plus one spare) waiting for paint. I'll care about the lower shields after painting and then apply another coat of paint on the outsides after all is flush and fine...
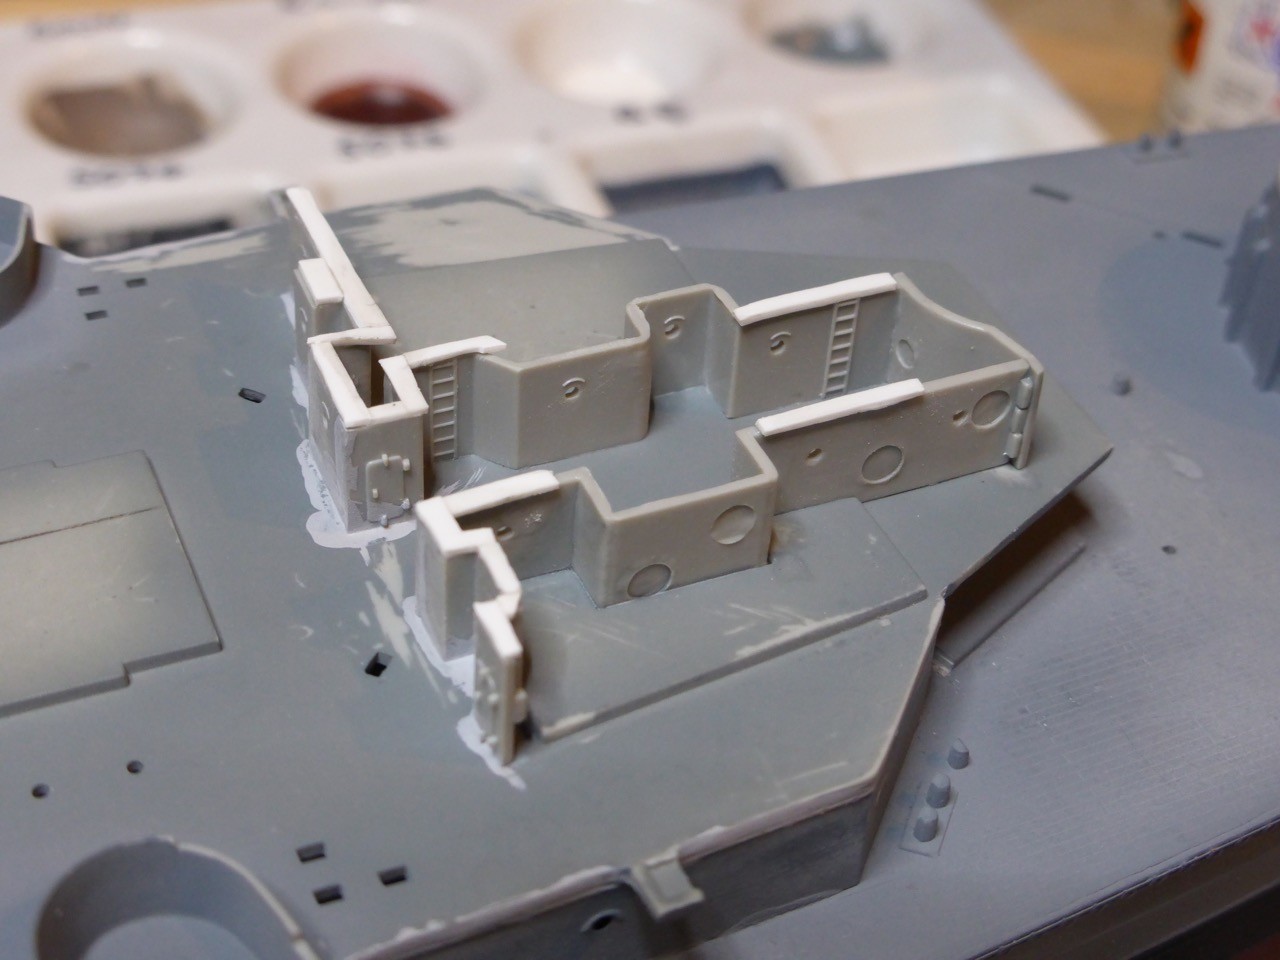
But now I started work again on the superstructure. I call the sanding job done, even if there will be some seams left to be seen (and there will be...but at some point I have to call it a job done). And yes, there is some damage to the paint job of the hull, no way avoiding that. My way of doing this is to paint very early on, so many critical and later on concealed areas get the proper paint. The damage done in the progress is in easily accessible areas (otherwise they would not suffer) and that can be fixed with a more superficial second layer of paint - but not before the main work on the hull is finished.
And that seems some time away, the bridge is a pretty 'interwoven' structure...
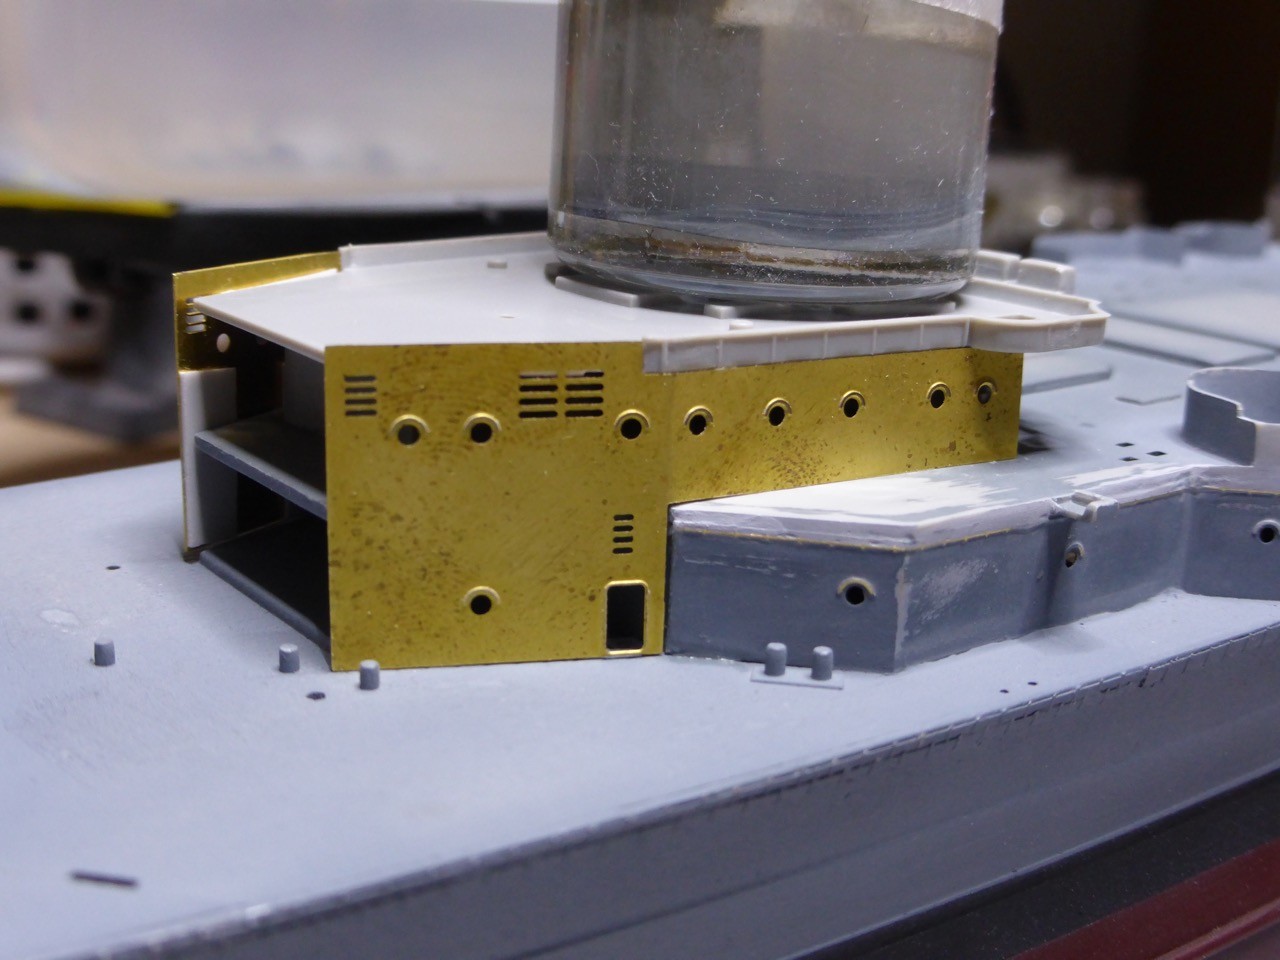
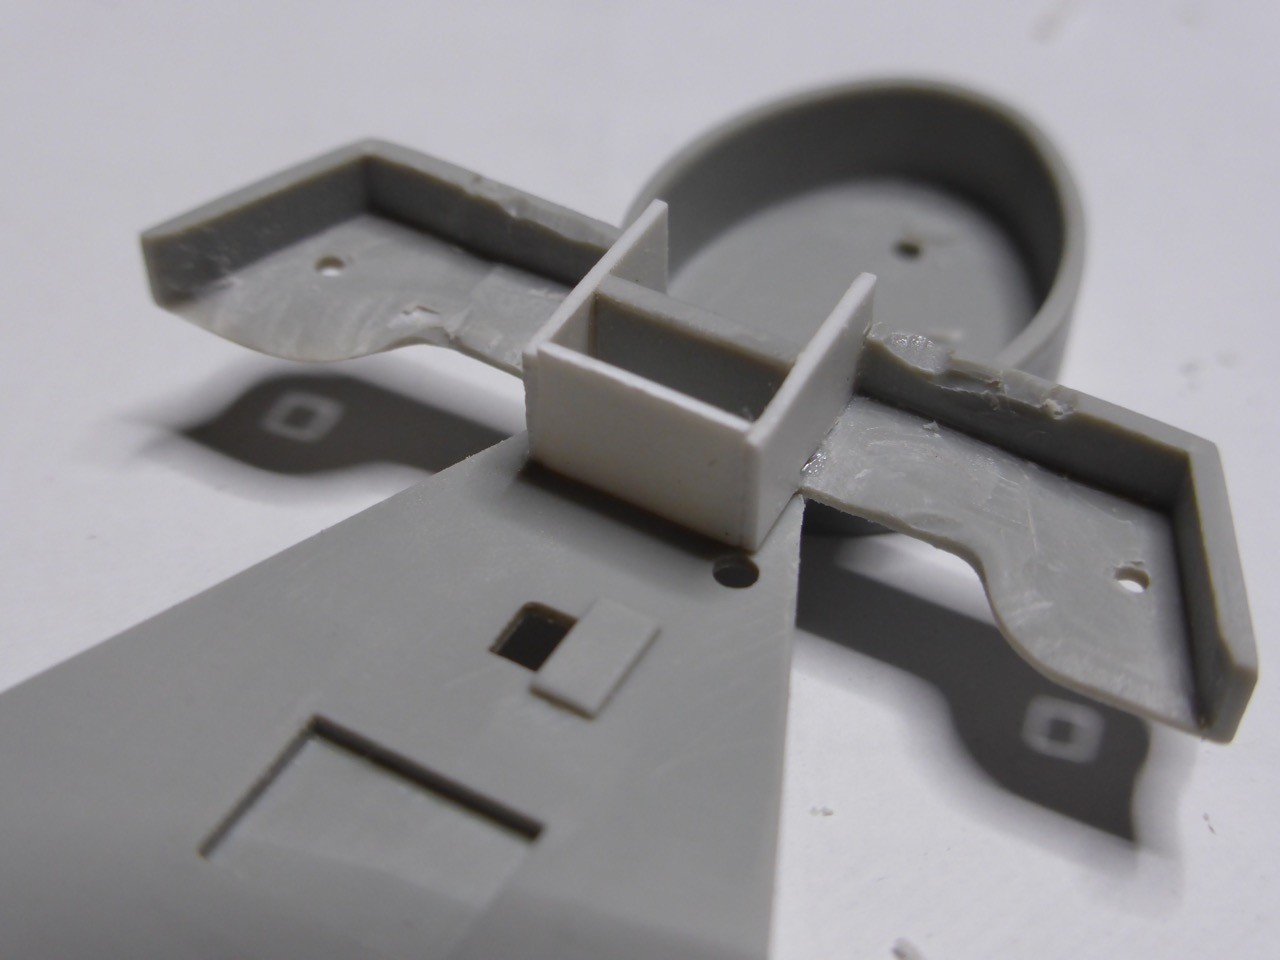
The internal area, glued in place. I disregarded the sink marks, and I will not do any PE work here - almost impossible to look inside.
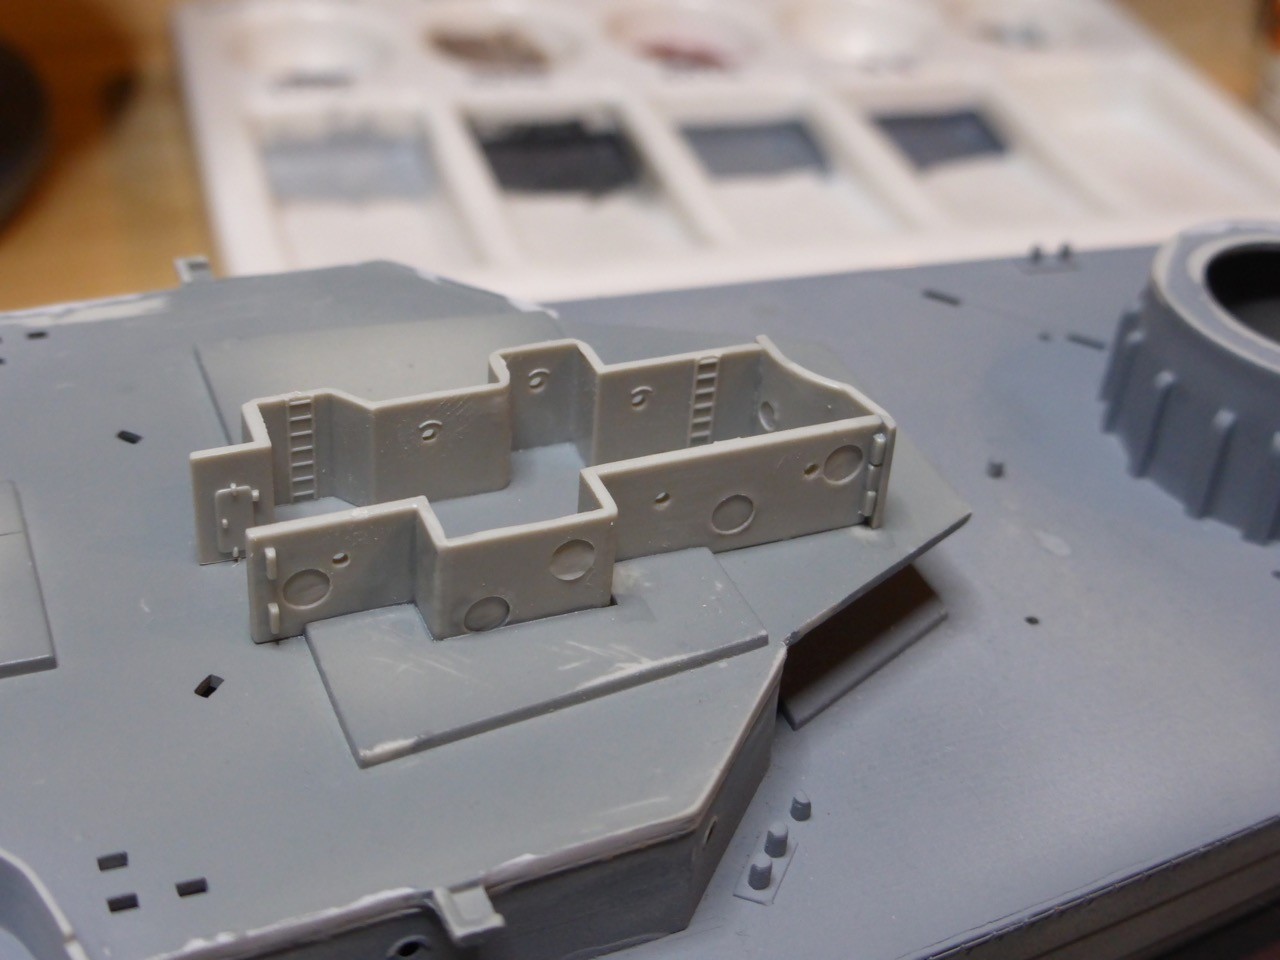
It's very nice that the internal arrangements are rebuilt and that it's not just closed.
First to Frank - you pointed me to a picture that showed the extension of the lower bridge base. There is also said 'Consider opening this area and recreate structures beneath' - am I correct assuming that this is for the 1/200 only and the structures here, in the 1/350 kit, already account for this?
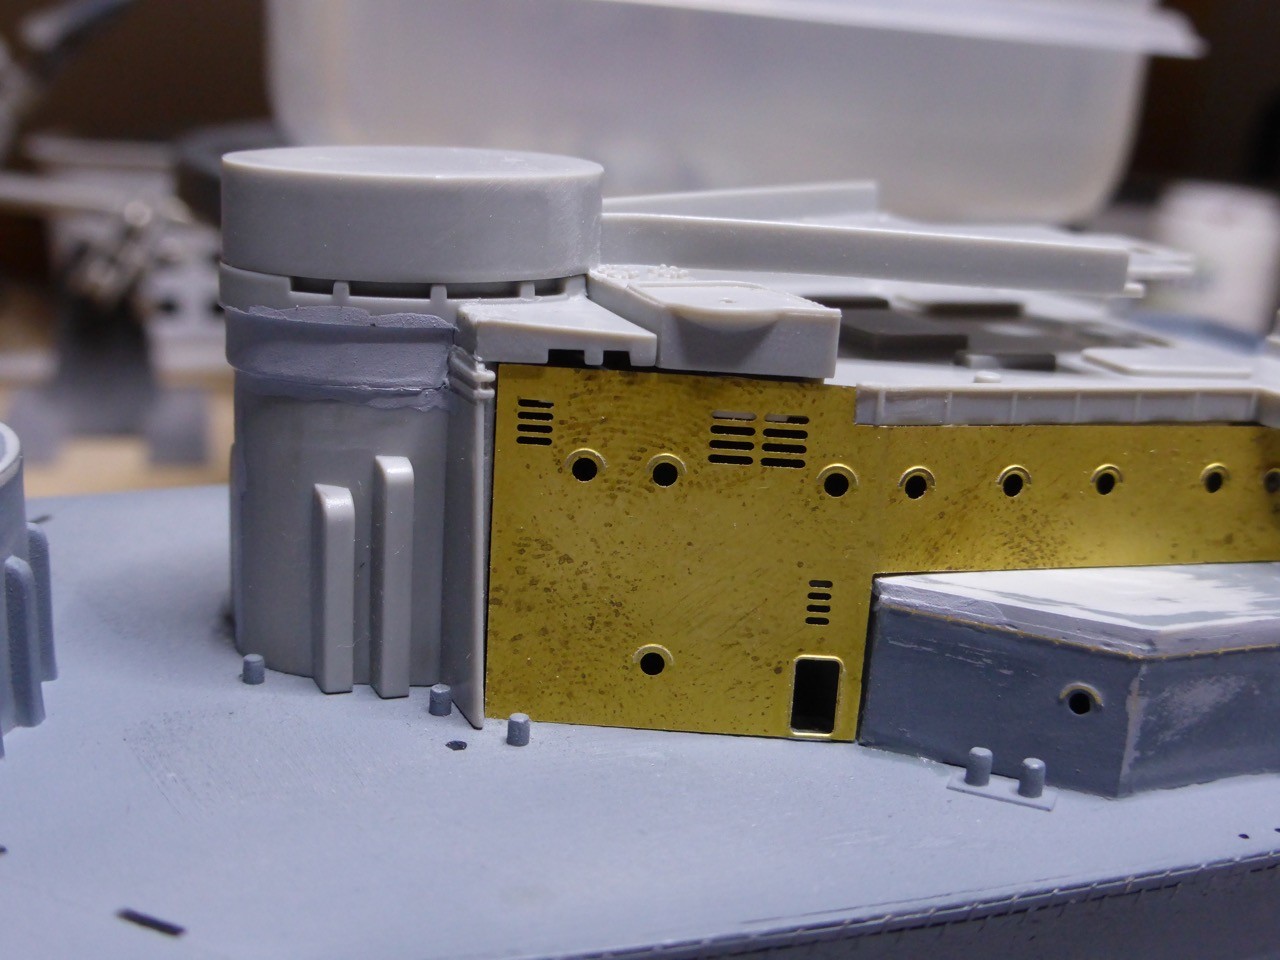
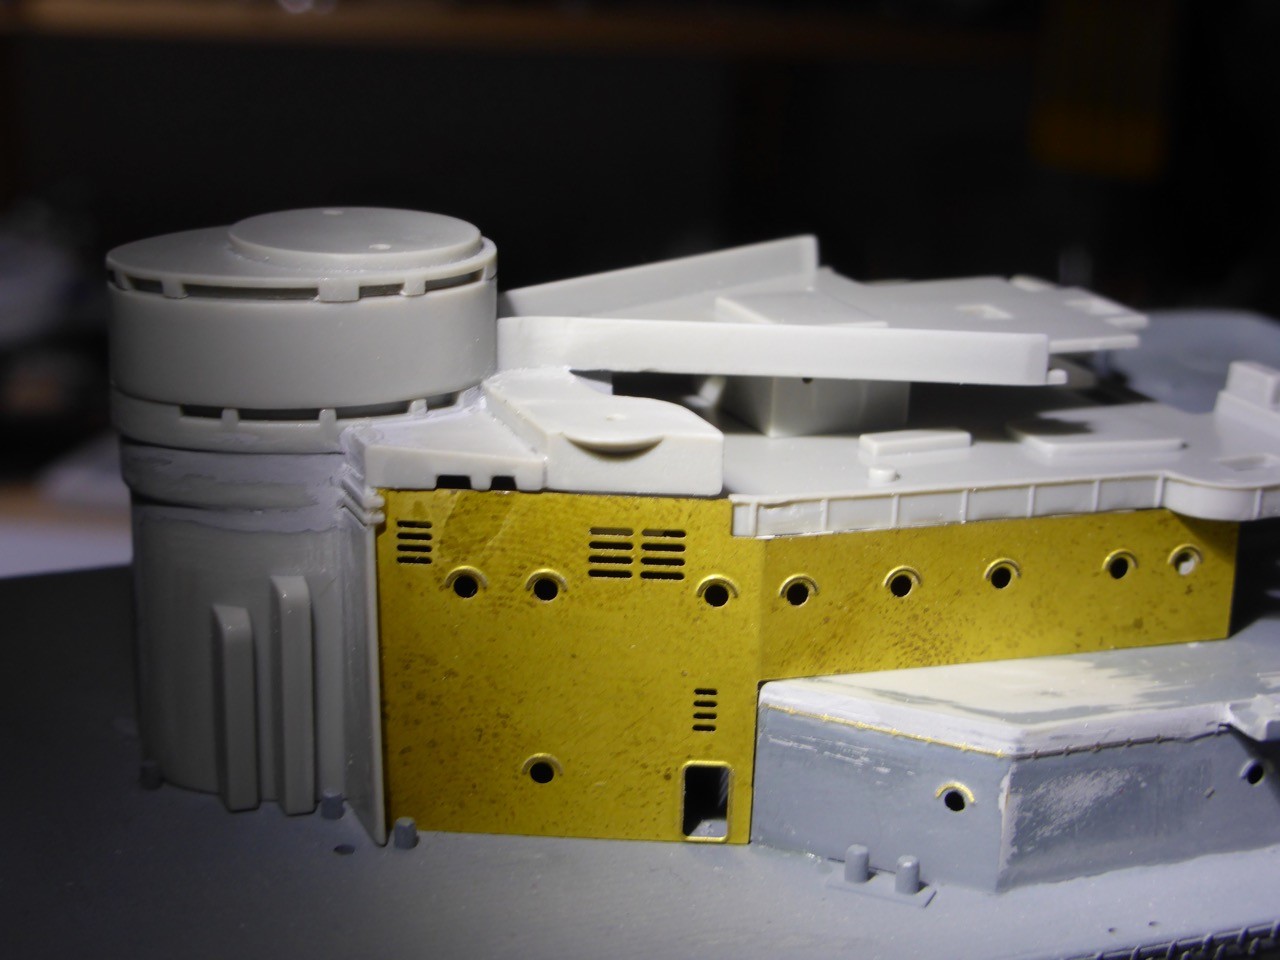
Front part of the armoured tower
PE bulkheads starboard added (nothing at all glued, all just set in place to adjust).
All right, clear indications of the next filling and sanding jobs...
So, I think the way to go about this is to build up the armoured tower and take care of all the seams before installing it on the ship.
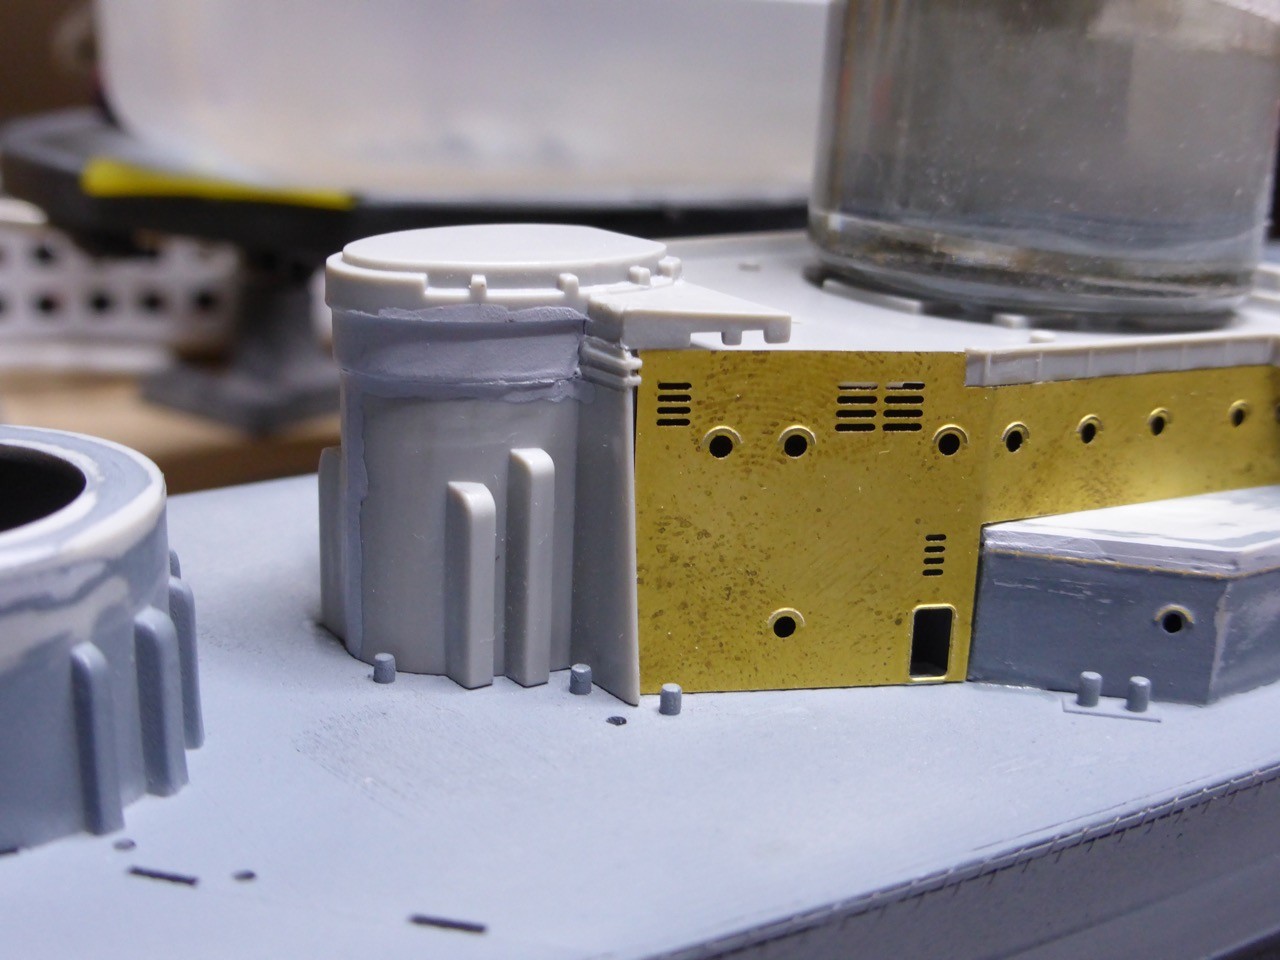
Next level - probably even building this whole sub-structure first...
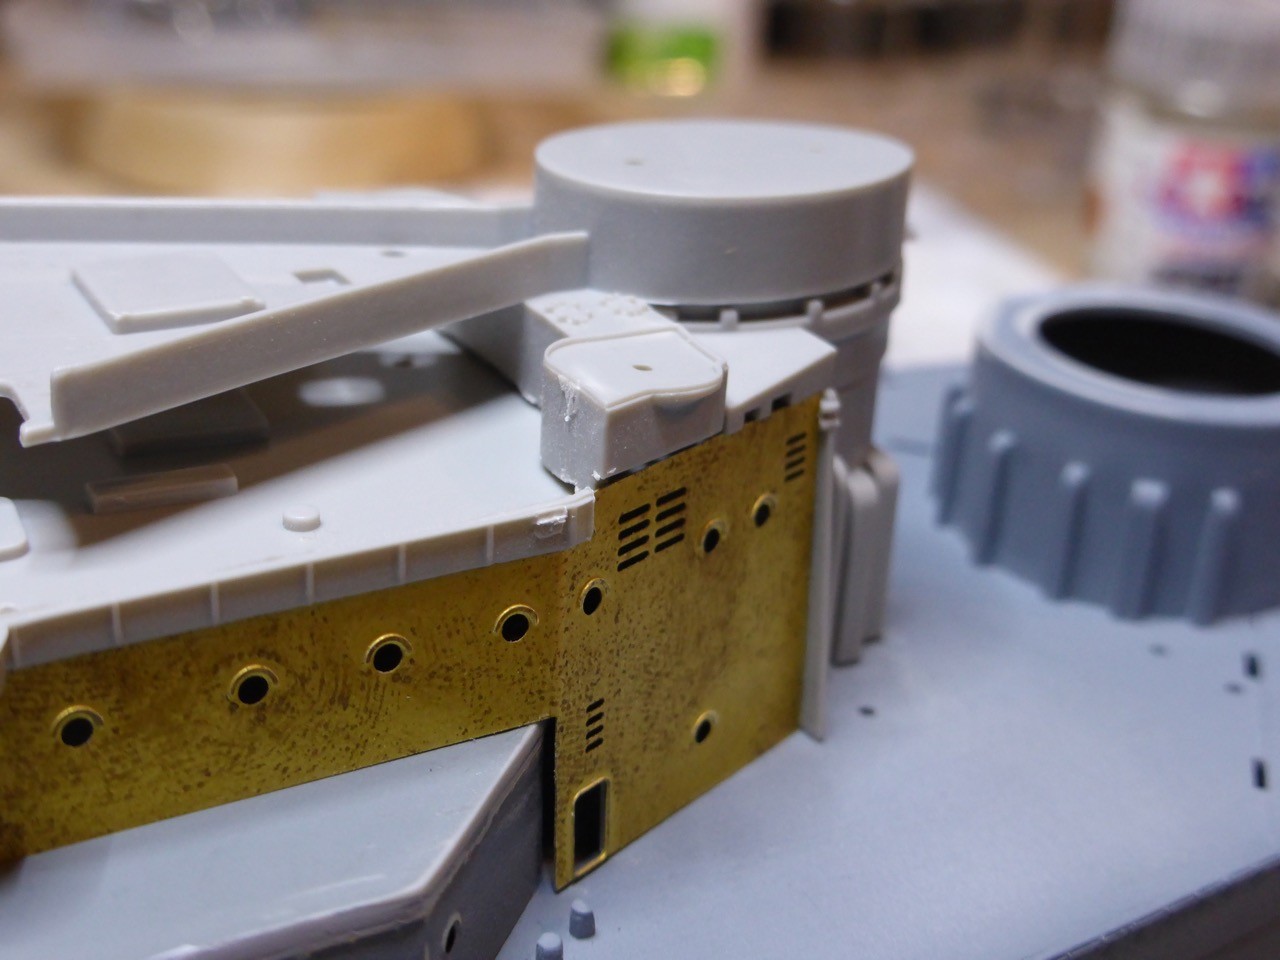
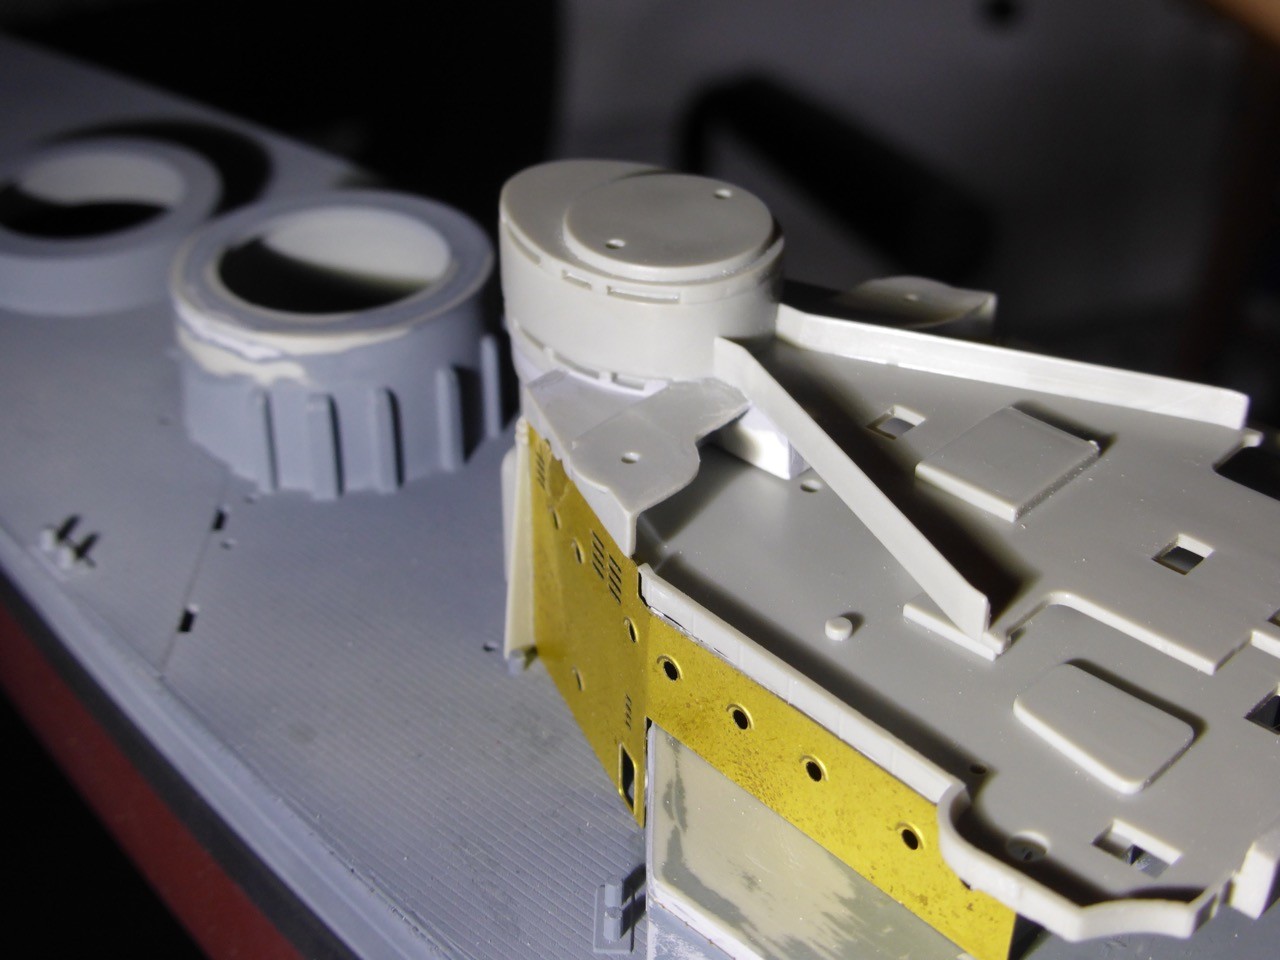
More test-fitting:
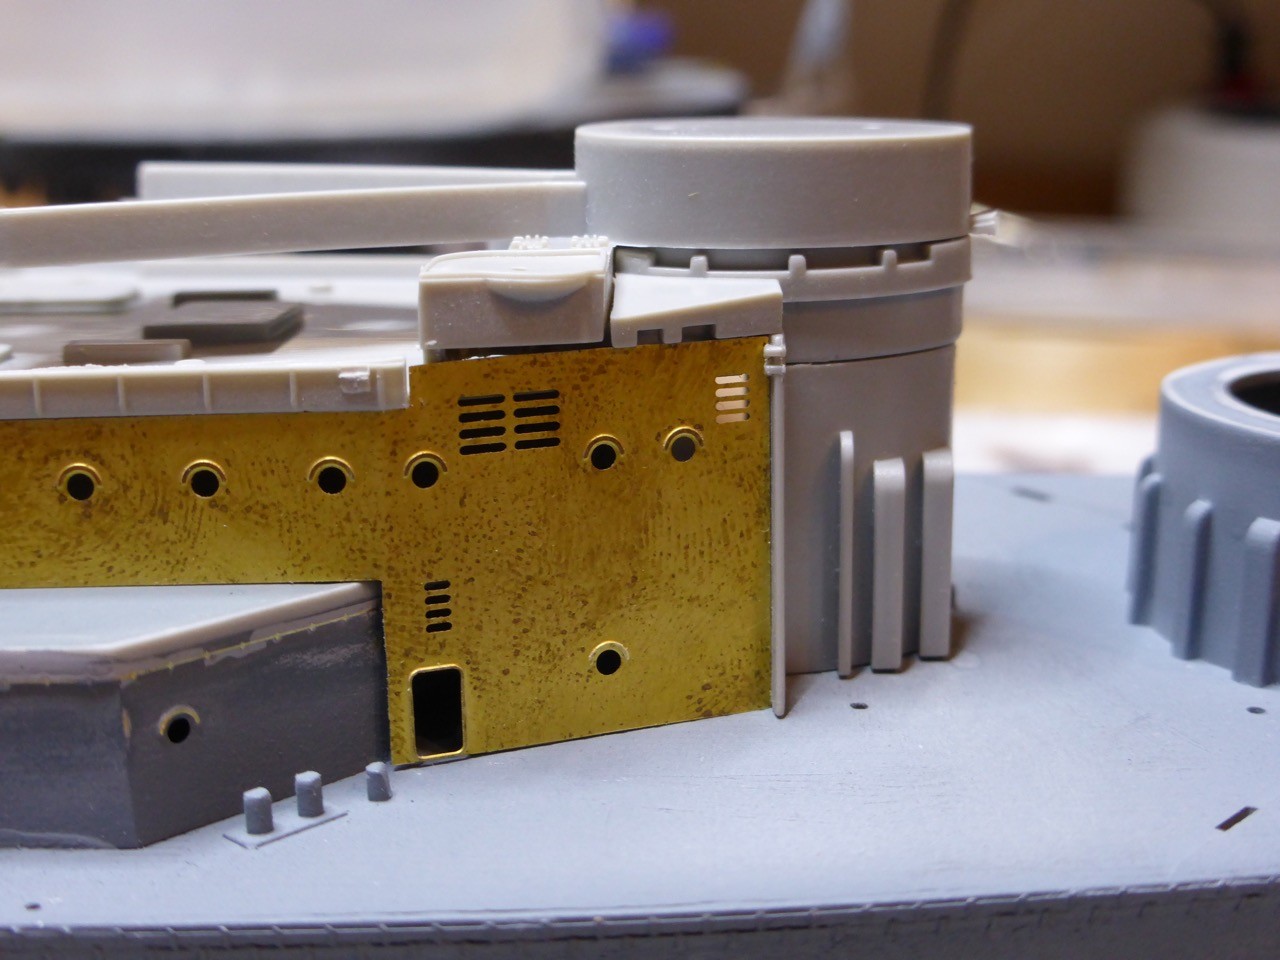
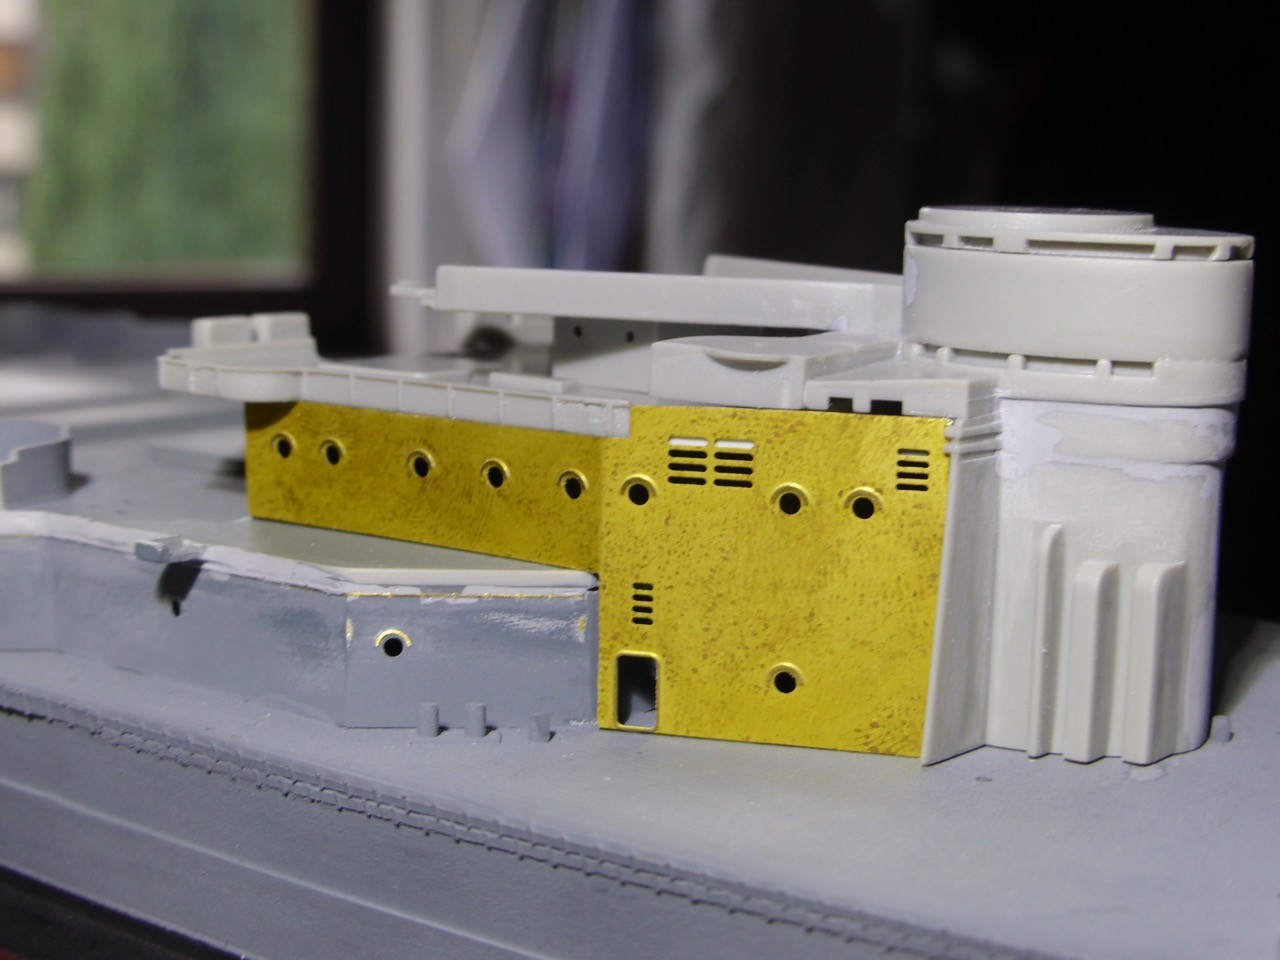
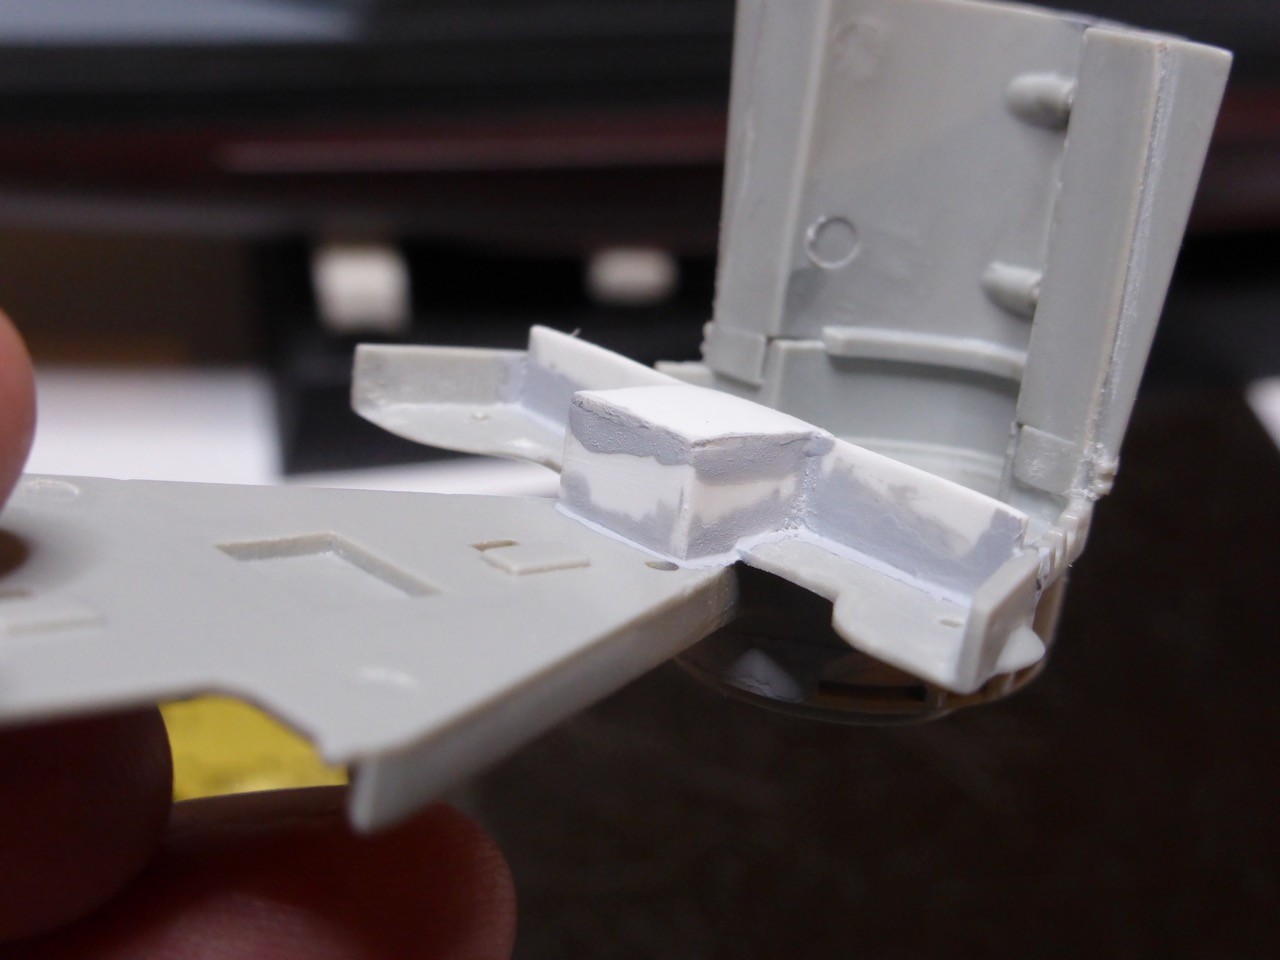
Second question for Frank - I assume this bulkhead needs to be extended to the end of the deck above, including an almost quarter-circle extension towards the end??
A little 'learning curve': making up for the difference in material strength...
Surprise: more filling and sanding coming up - may I ask for an extension of the Bismarck-Campaign already??? 
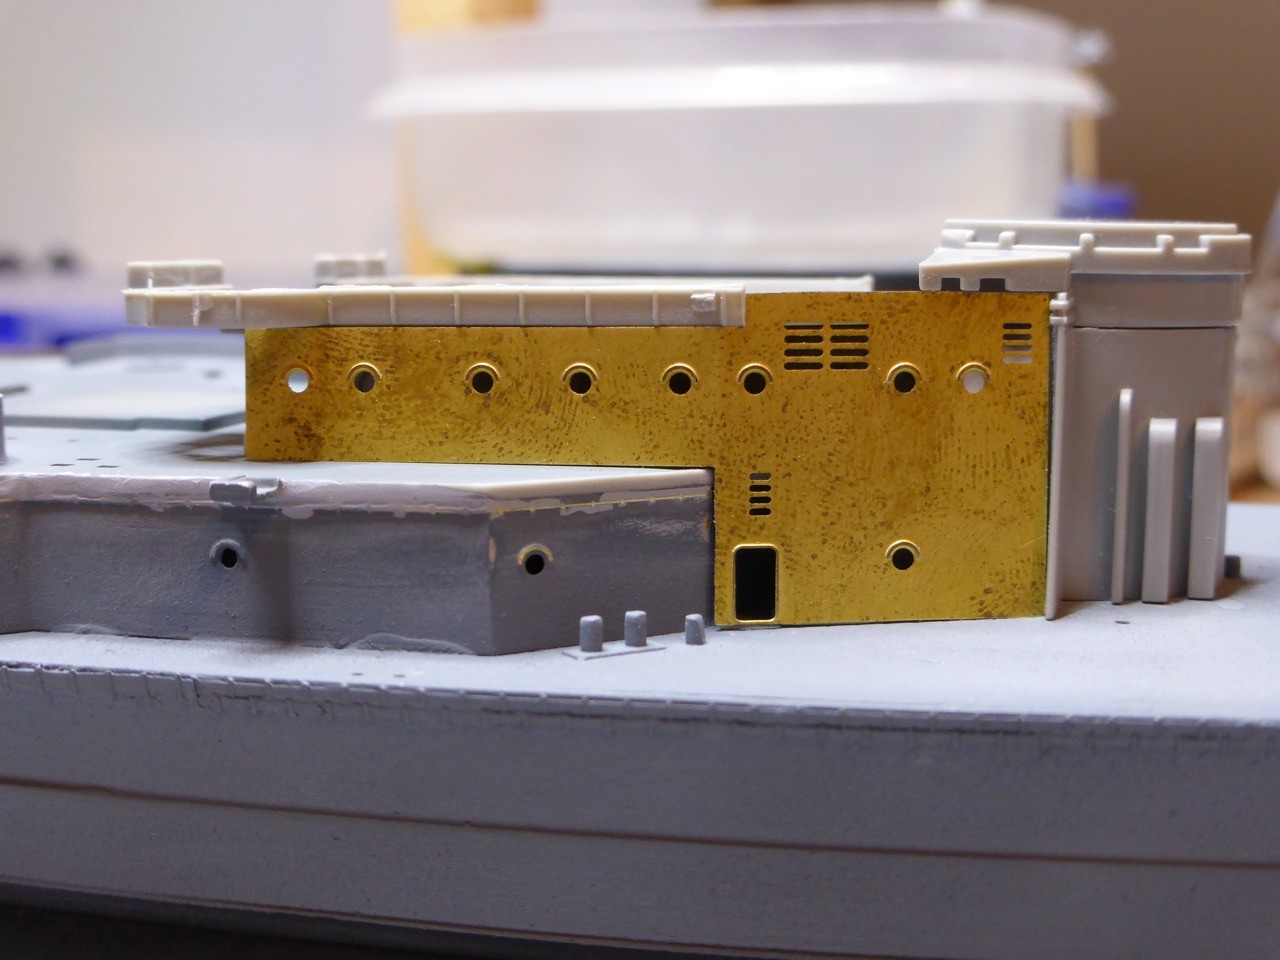
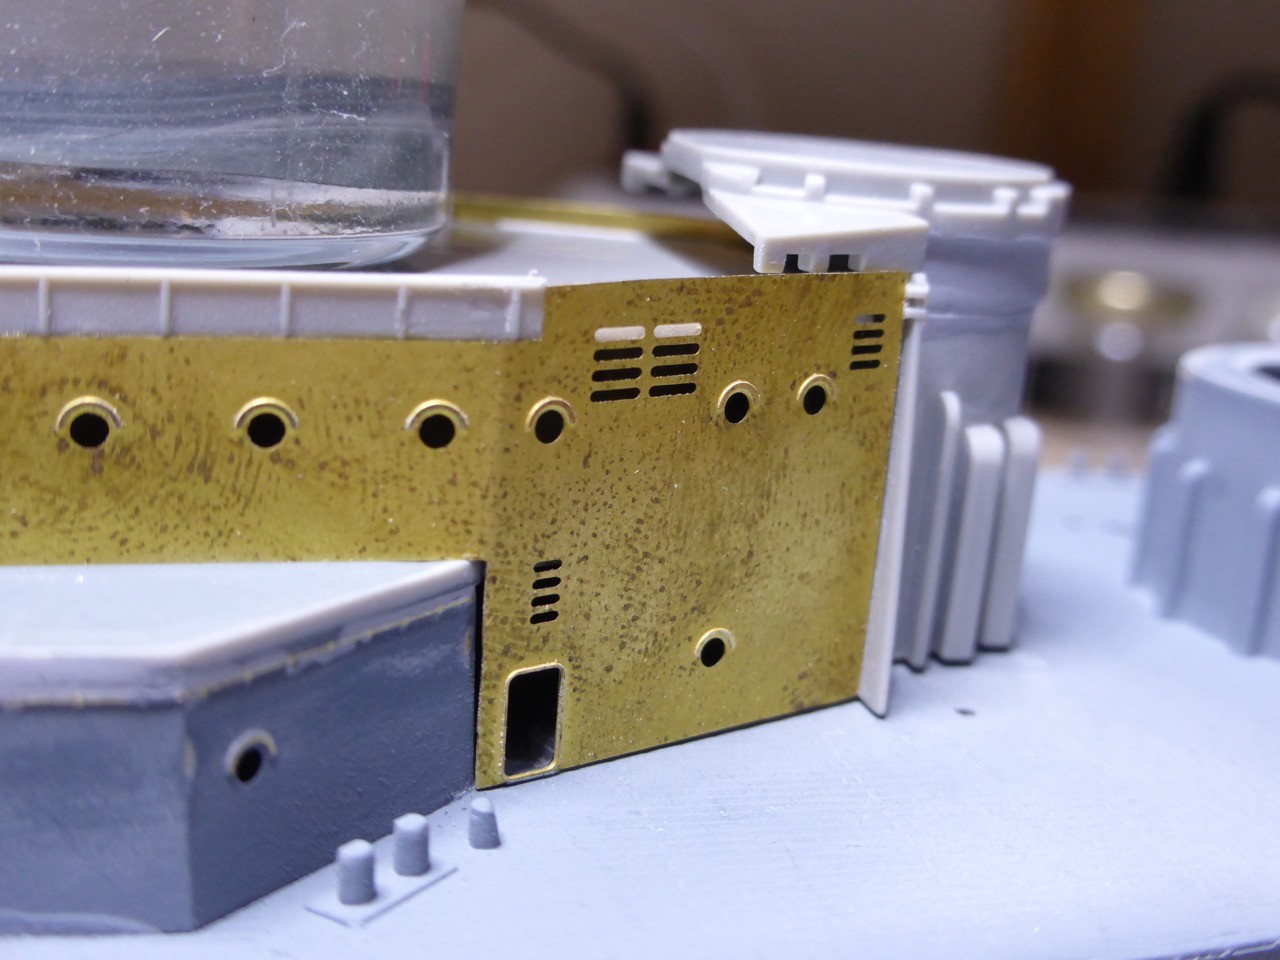
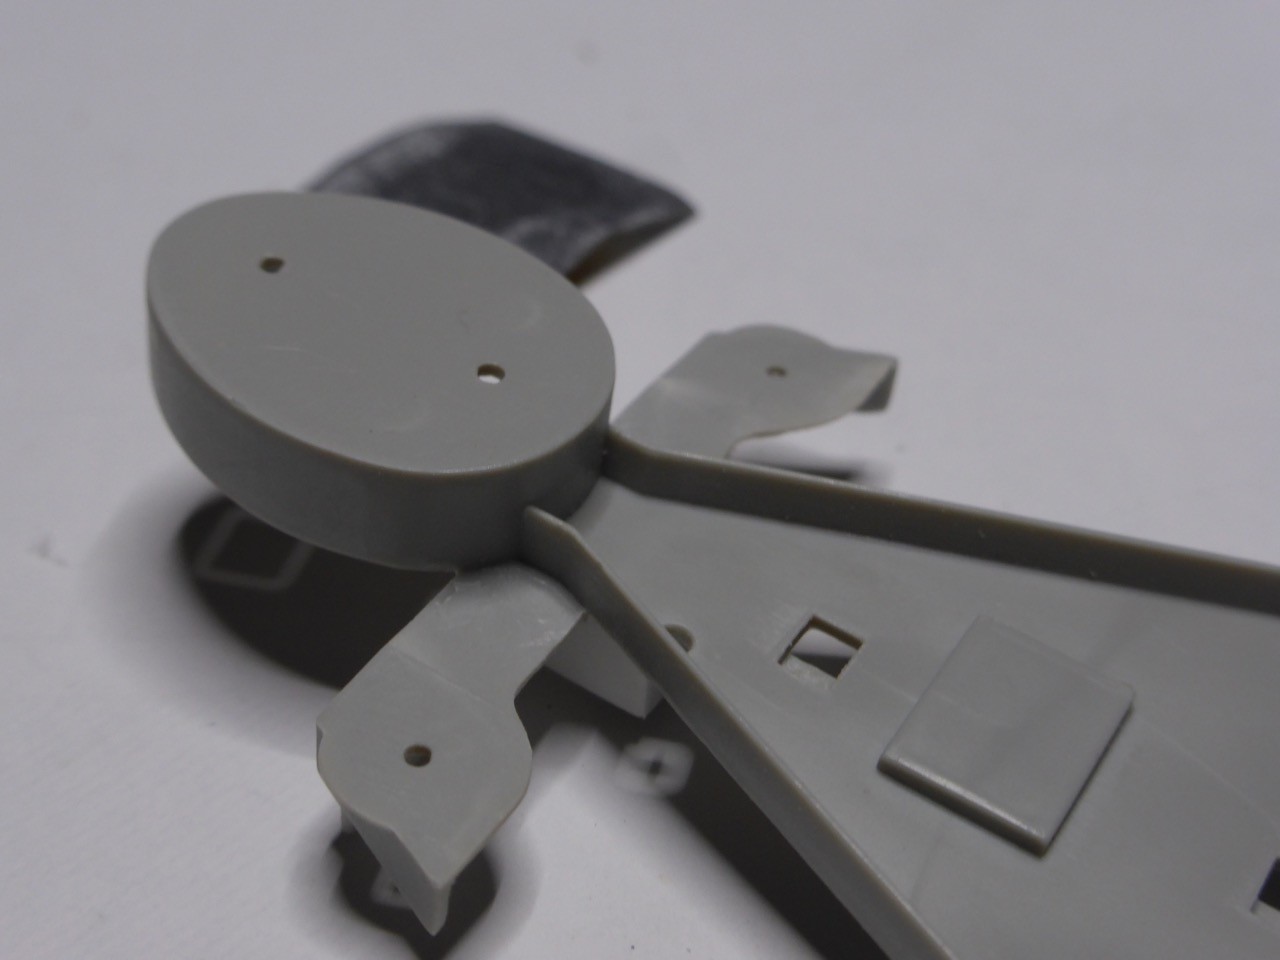
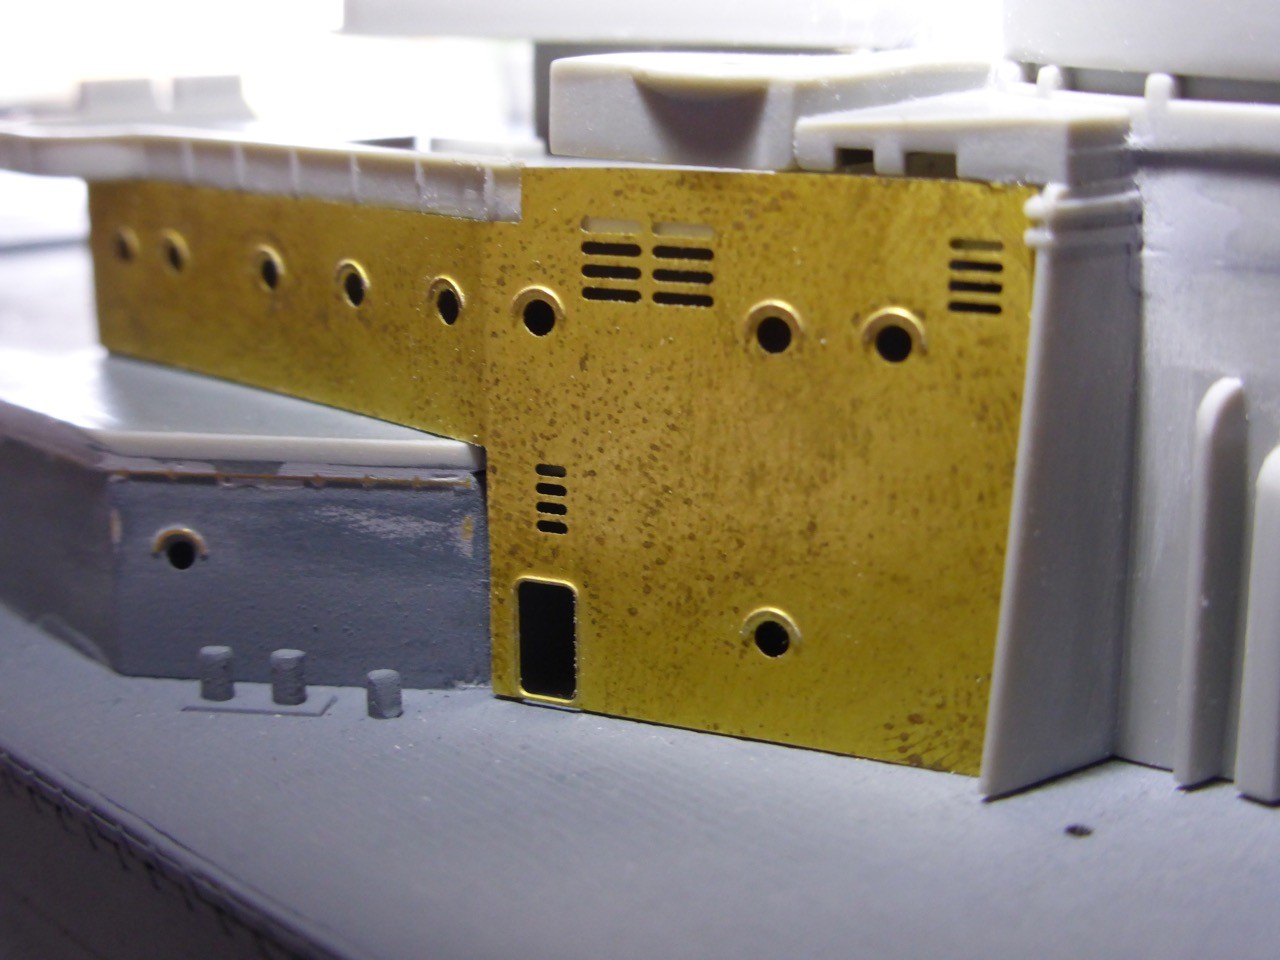
Last question for Frank - above the two portholes, between the vents, is this area flush or is there some 'bulge' in the area of the two rectangular openings? I am not quite sure from the pictures I have...
More tomorrow...
As always, thanks for watching my slow progress, thanks for commenting and Frank, should you look in in, many many thanks in advance for sharing your knowledge!! (and I will keep asking questions...)
Cheers,
Jan
So firstly here's the 4" (seven plus one spare) waiting for paint. I'll care about the lower shields after painting and then apply another coat of paint on the outsides after all is flush and fine...
But now I started work again on the superstructure. I call the sanding job done, even if there will be some seams left to be seen (and there will be...but at some point I have to call it a job done). And yes, there is some damage to the paint job of the hull, no way avoiding that. My way of doing this is to paint very early on, so many critical and later on concealed areas get the proper paint. The damage done in the progress is in easily accessible areas (otherwise they would not suffer) and that can be fixed with a more superficial second layer of paint - but not before the main work on the hull is finished.
And that seems some time away, the bridge is a pretty 'interwoven' structure...
The internal area, glued in place. I disregarded the sink marks, and I will not do any PE work here - almost impossible to look inside.
It's very nice that the internal arrangements are rebuilt and that it's not just closed.
First to Frank - you pointed me to a picture that showed the extension of the lower bridge base. There is also said 'Consider opening this area and recreate structures beneath' - am I correct assuming that this is for the 1/200 only and the structures here, in the 1/350 kit, already account for this?
Front part of the armoured tower
PE bulkheads starboard added (nothing at all glued, all just set in place to adjust).
All right, clear indications of the next filling and sanding jobs...
So, I think the way to go about this is to build up the armoured tower and take care of all the seams before installing it on the ship.
Next level - probably even building this whole sub-structure first...
More test-fitting:
Second question for Frank - I assume this bulkhead needs to be extended to the end of the deck above, including an almost quarter-circle extension towards the end??
A little 'learning curve': making up for the difference in material strength...
Surprise: more filling and sanding coming up - may I ask for an extension of the Bismarck-Campaign already???
Last question for Frank - above the two portholes, between the vents, is this area flush or is there some 'bulge' in the area of the two rectangular openings? I am not quite sure from the pictures I have...
More tomorrow...
As always, thanks for watching my slow progress, thanks for commenting and Frank, should you look in in, many many thanks in advance for sharing your knowledge!!
(and I will keep asking questions...)Cheers,
Jan
RedDuster
Joined: March 01, 2010
KitMaker: 7,078 posts
Model Shipwrights: 6,649 posts
Posted: Monday, October 31, 2016 - 01:37 AM UTC
Nice work Jan,
The 4" are looking really good.
Good luck with the continued test fitting.
Cheers
Si
The 4" are looking really good.
Good luck with the continued test fitting.
Cheers
Si
RussellE
#306
Joined: June 27, 2010
KitMaker: 3,959 posts
Model Shipwrights: 2,777 posts
Posted: Monday, October 31, 2016 - 02:49 PM UTC
Mighty good progress on the Mighty 'ood, mate!
FW_Allen
Joined: June 08, 2006
KitMaker: 7 posts
Model Shipwrights: 7 posts
KitMaker: 7 posts
Model Shipwrights: 7 posts
Posted: Tuesday, November 01, 2016 - 08:56 AM UTC
Crew/veterans of Hood recollected that the shafts were painted the same red as the lower hull. I've also seen dry dock photos that appear to show mottled paint on the shafts.
No need to open up the underside of the bridge in the 1/350 kit (only the 1/200 kit needs to be opened down there). The only place that needs to be opened up is the area beneath each 0.5" machine gun mount on the bridge. Those areas were definitely open.
Yes, the side bulkheads of the bridge do need to extend back to the curved section of splinter shielding. The large booms on the sides of the bridge move back as well.
Bulges on side of bridge between vents- those bulges were wind baffles. They were fitted to protect the torpedo lookout positions. Each side of the bridge had two baffles...one on the front edge and one between the vents (just below the small square windows).
JJ1973
#345
Joined: August 22, 2011
KitMaker: 1,835 posts
Model Shipwrights: 1,832 posts
Posted: Tuesday, November 01, 2016 - 10:38 AM UTC
Thank you so much Si, Russ and Frank for your comments and Frank for your help and advise!! That's really great!
I have some more picture and some more progress, I will try to upload them tonight. I am still not entirely certain abut - trying to pic the correct terms from the AotS -Admiral's Signal Platform and the Conning Tower Platform (AotS pages 86 to 89), I think I do have an idea though. I'll try to explain and show later on with some pictures.
Frank, you have those computer designed pictures from Thomas Schmid on your site, are they accurate for the lower bridge, the booms and the position of the carley floats? I read that they had been repositioned fro what e.g. is shown in the AotS. To me it appears that this is captured by Schmid's drawings, but I am not 100% certain...
More later, I hope I find some time tonight...thank you all once more for support and help!!
Cheers,
Jan
rolltide31
#377
Joined: June 27, 2010
KitMaker: 1,481 posts
Model Shipwrights: 1,332 posts
Posted: Tuesday, November 01, 2016 - 10:10 PM UTC
Jan,
Progress is coming along nicely. Never knew how intricate the Hood was regarding the superstructure. Drank and the Association are definitely a great source of information to assist with your build.
Looking forward to seeing more
Dave
Progress is coming along nicely. Never knew how intricate the Hood was regarding the superstructure. Drank and the Association are definitely a great source of information to assist with your build.
Looking forward to seeing more
Dave
JJ1973
#345
Joined: August 22, 2011
KitMaker: 1,835 posts
Model Shipwrights: 1,832 posts
Posted: Wednesday, November 02, 2016 - 10:49 AM UTC
Hi Dave,
thank you very much! Yes, I would say intricate is correct - I, too, was not aware of HOW intricate it actually was. And that's - to me - one very important aspect of modelling those ships - no better way to really learn and understand about them and how they were actually designed and supposed to function.
So here's a couple more pictures.
First a little more help from Frank asked - as I said I would...
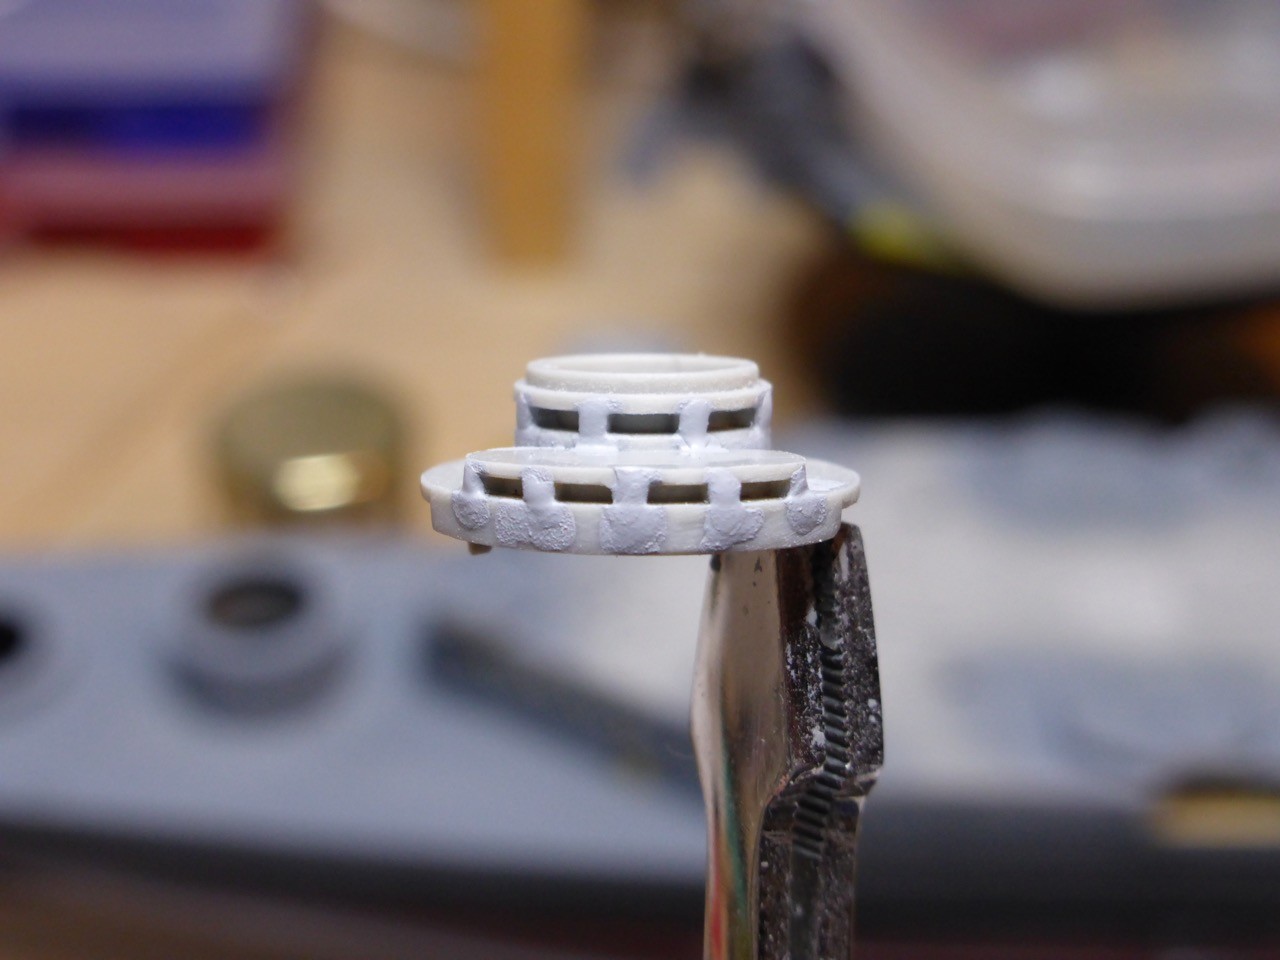
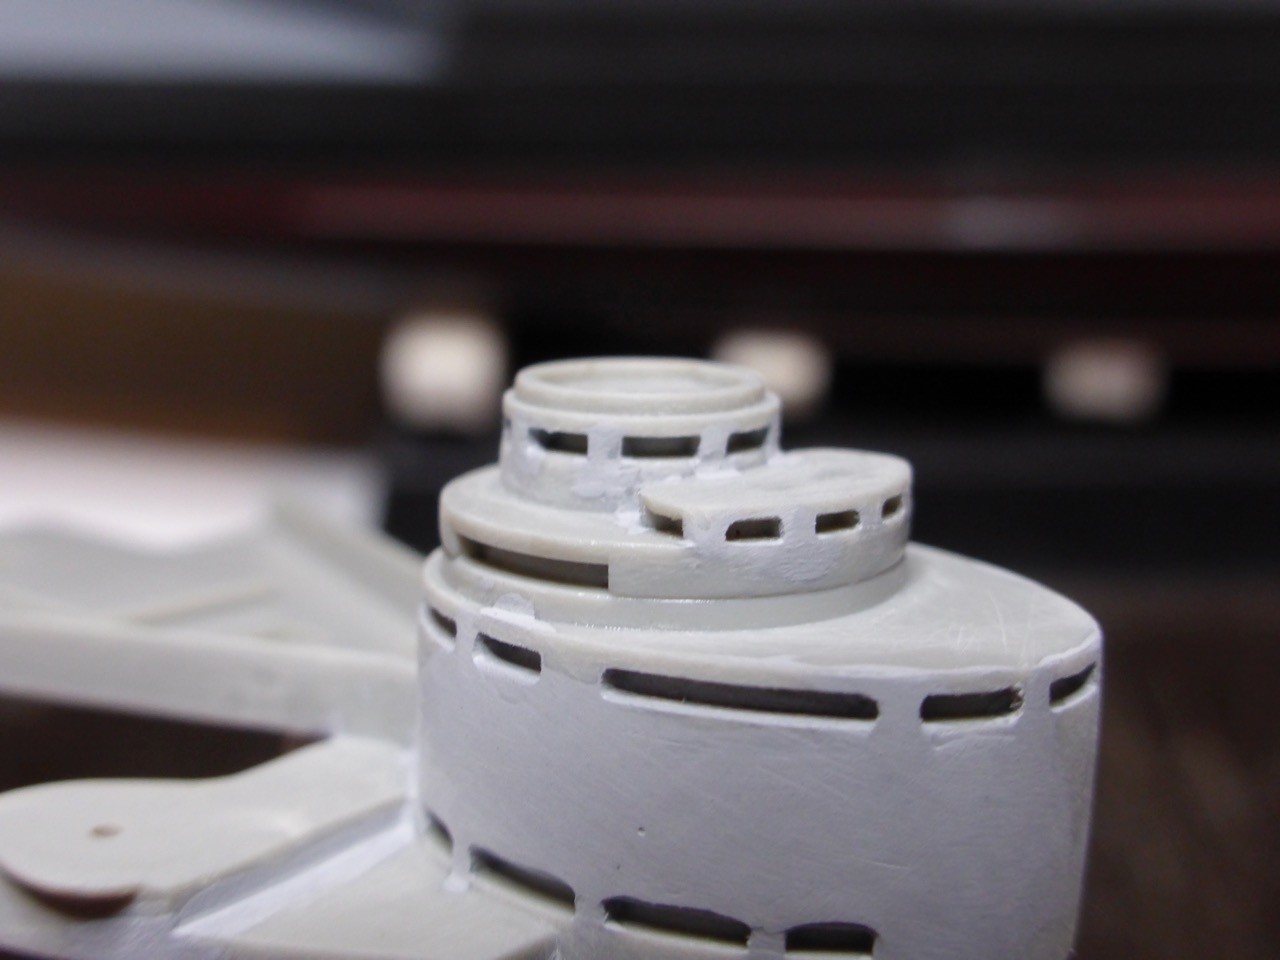
So this would be the Conning tower platform, and AotS does not have real good representations of it as of '41.
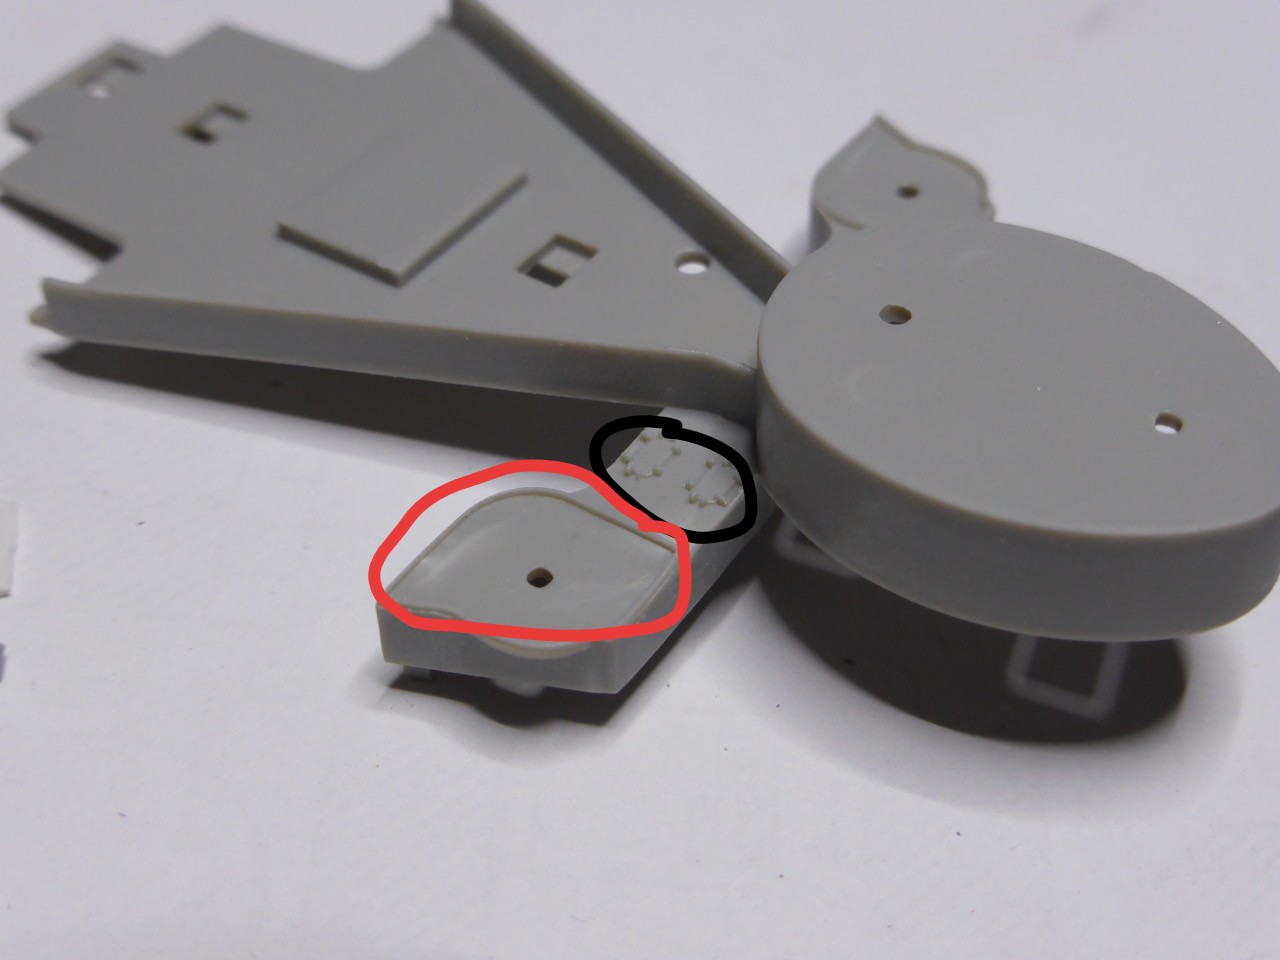
So my understanding is - black circle, has to be removed and ready use ammo lockers installed instead, read circle, all sanded flat. A circle of non-skid (dark paint) around the quad .50 cal, corticene for the rest. Railing around the whole area.
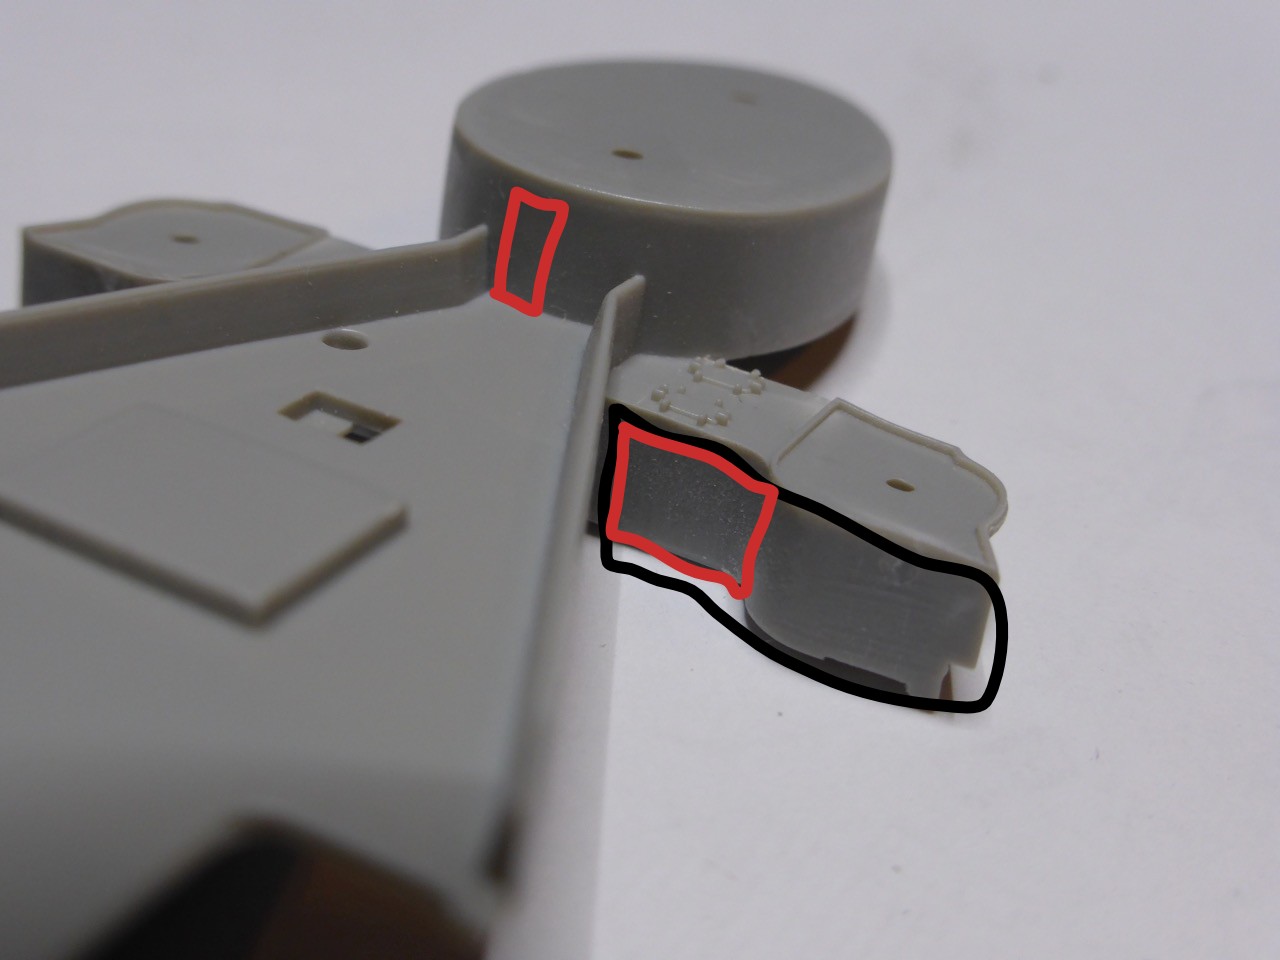
Red - armored door in the backside of the conning tower; underneath the .50 cal, open up the whole (black circle) or only the red and leave the structure directly underneath the guns? At the level of the Admiral's signal platform, the structure of the signal distributing office behind the armoured cunning tower? This is on a drawing dated '1931', but I can't find something from '41. So I assume it was still there? Behind that, the Admiral's sea cabin?
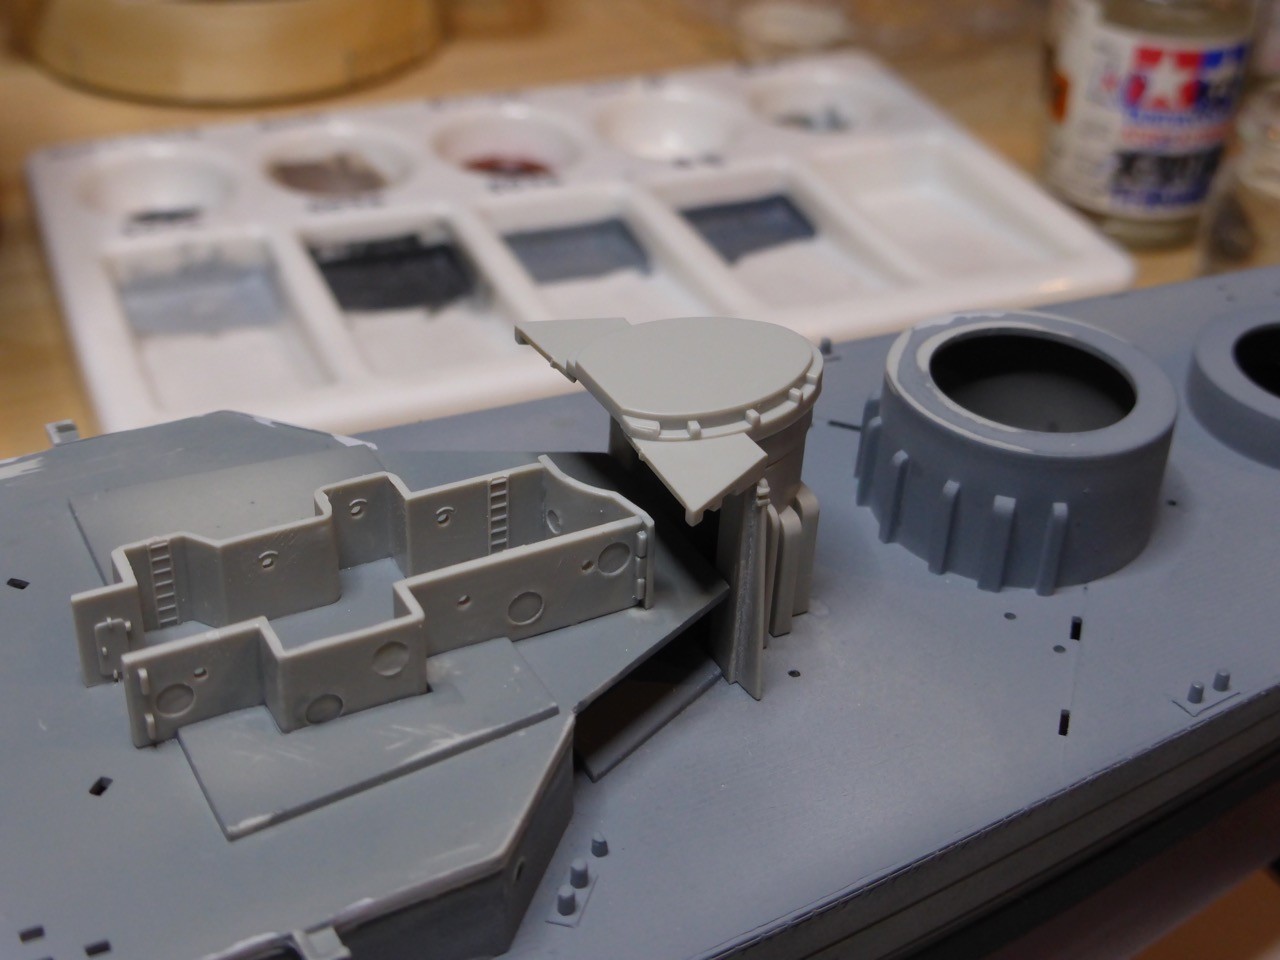
Ok, some more 'progress' - trying and dry-fitting (and considering how to go about it).
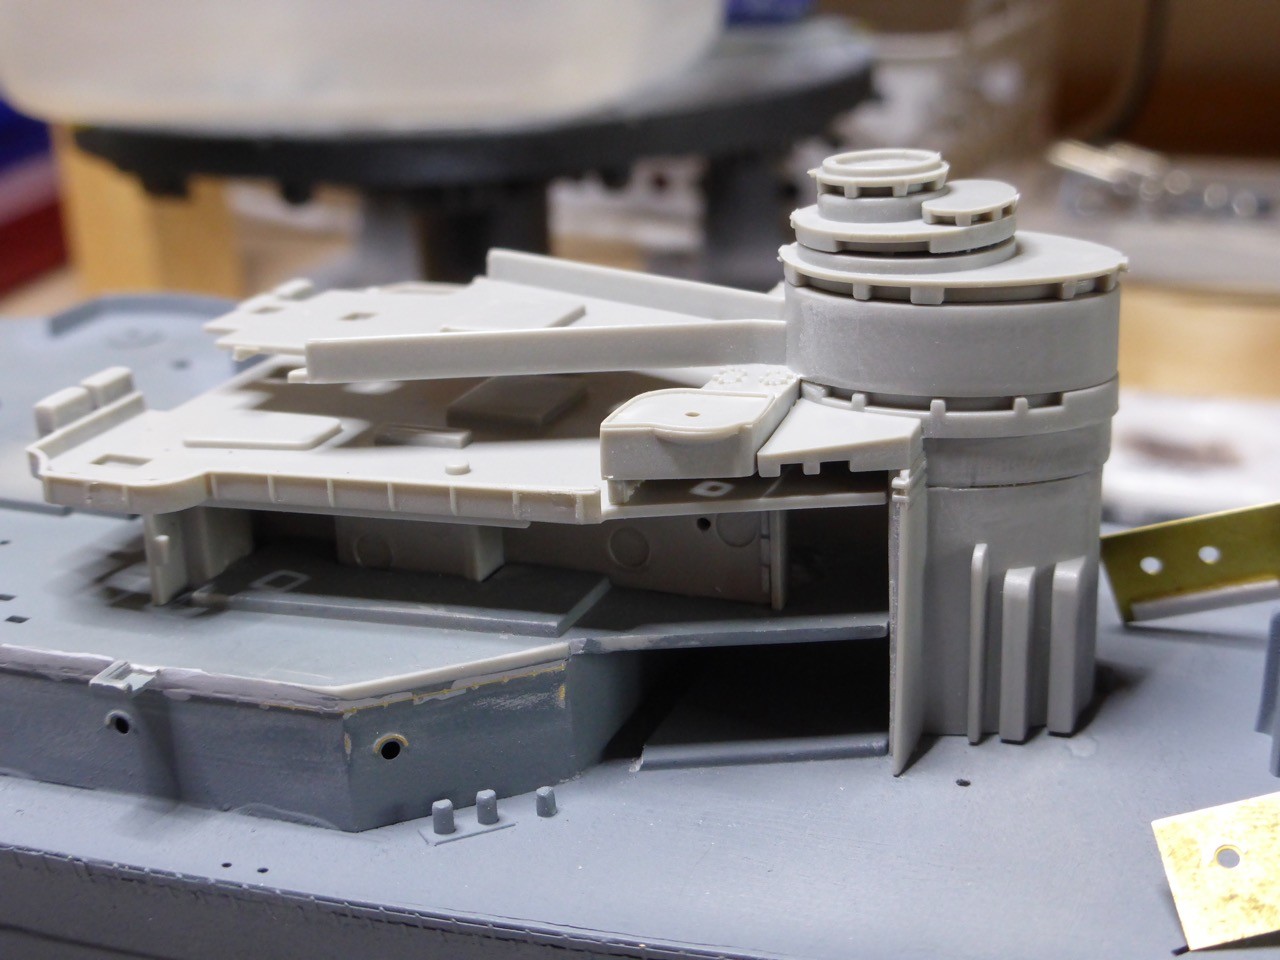
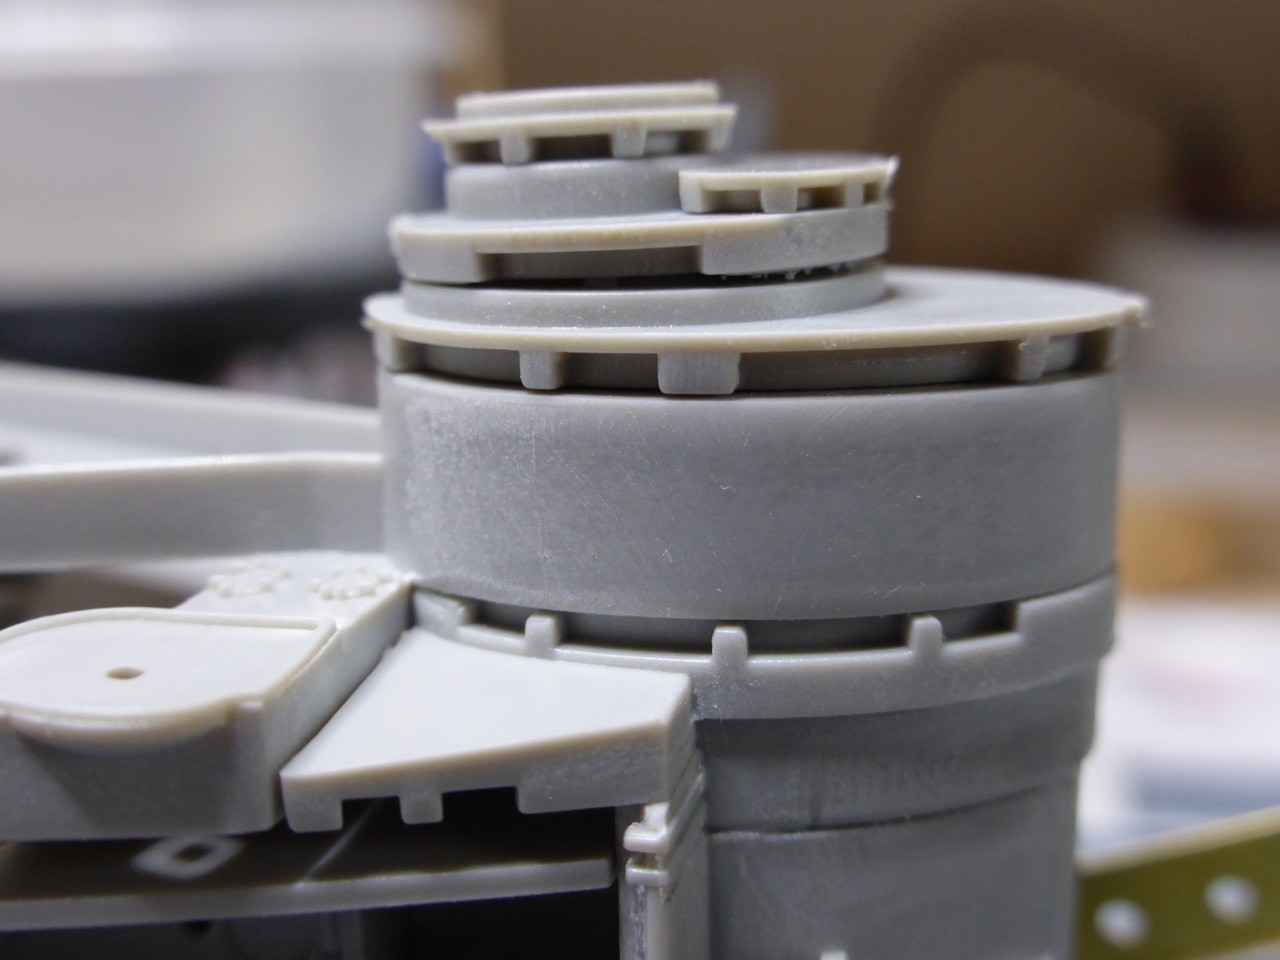
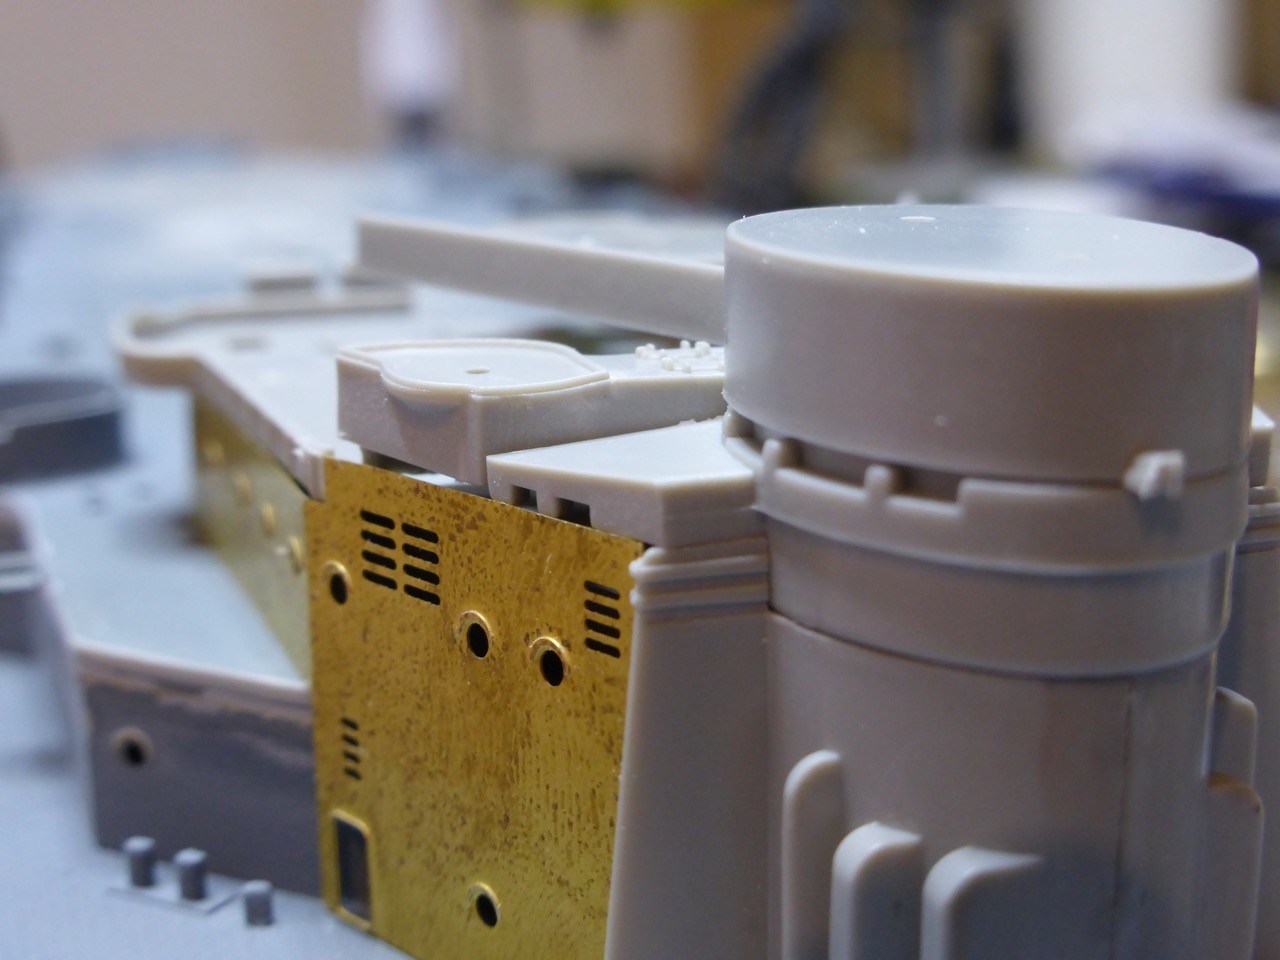
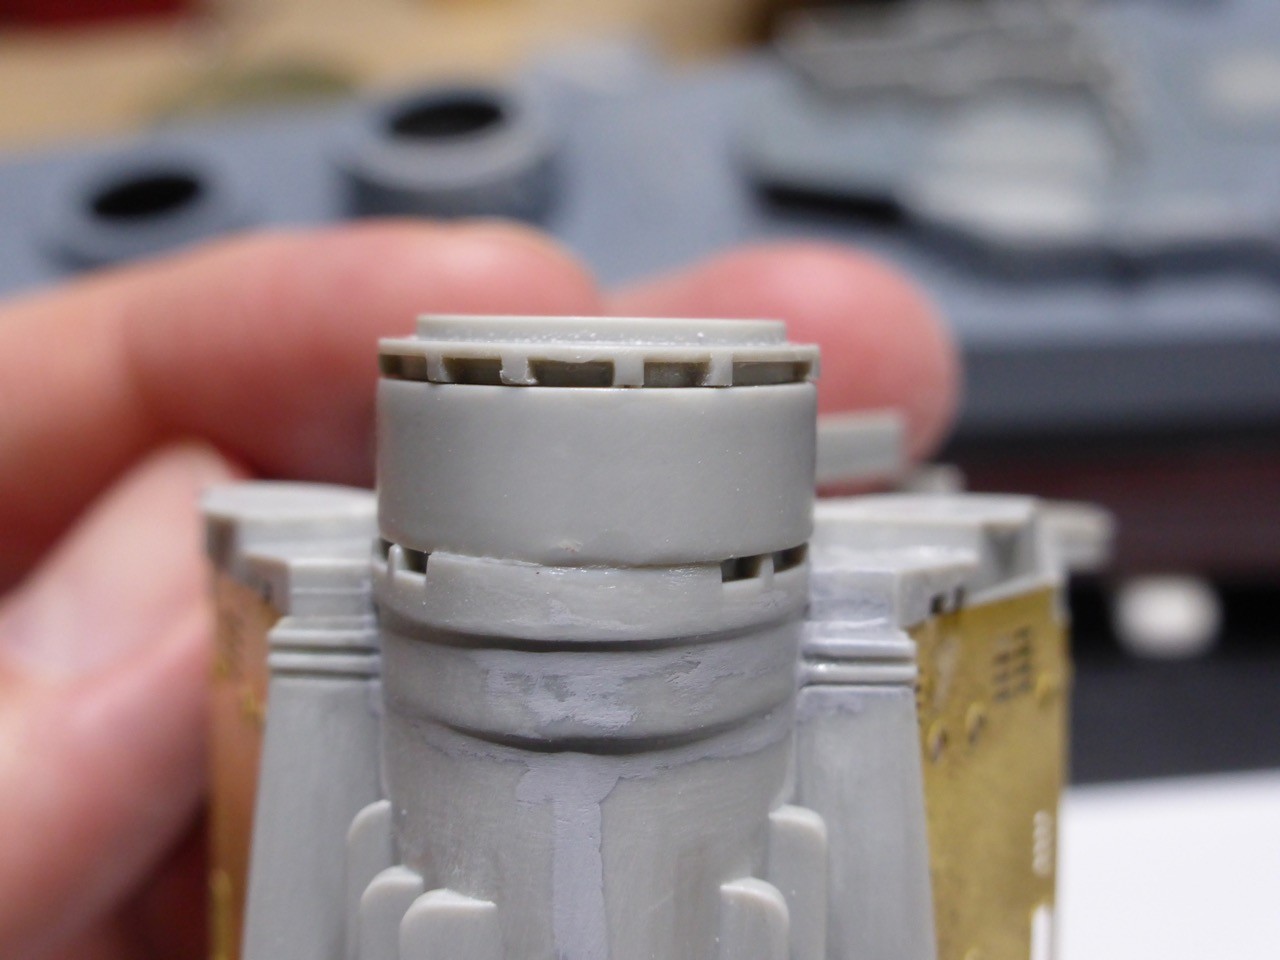
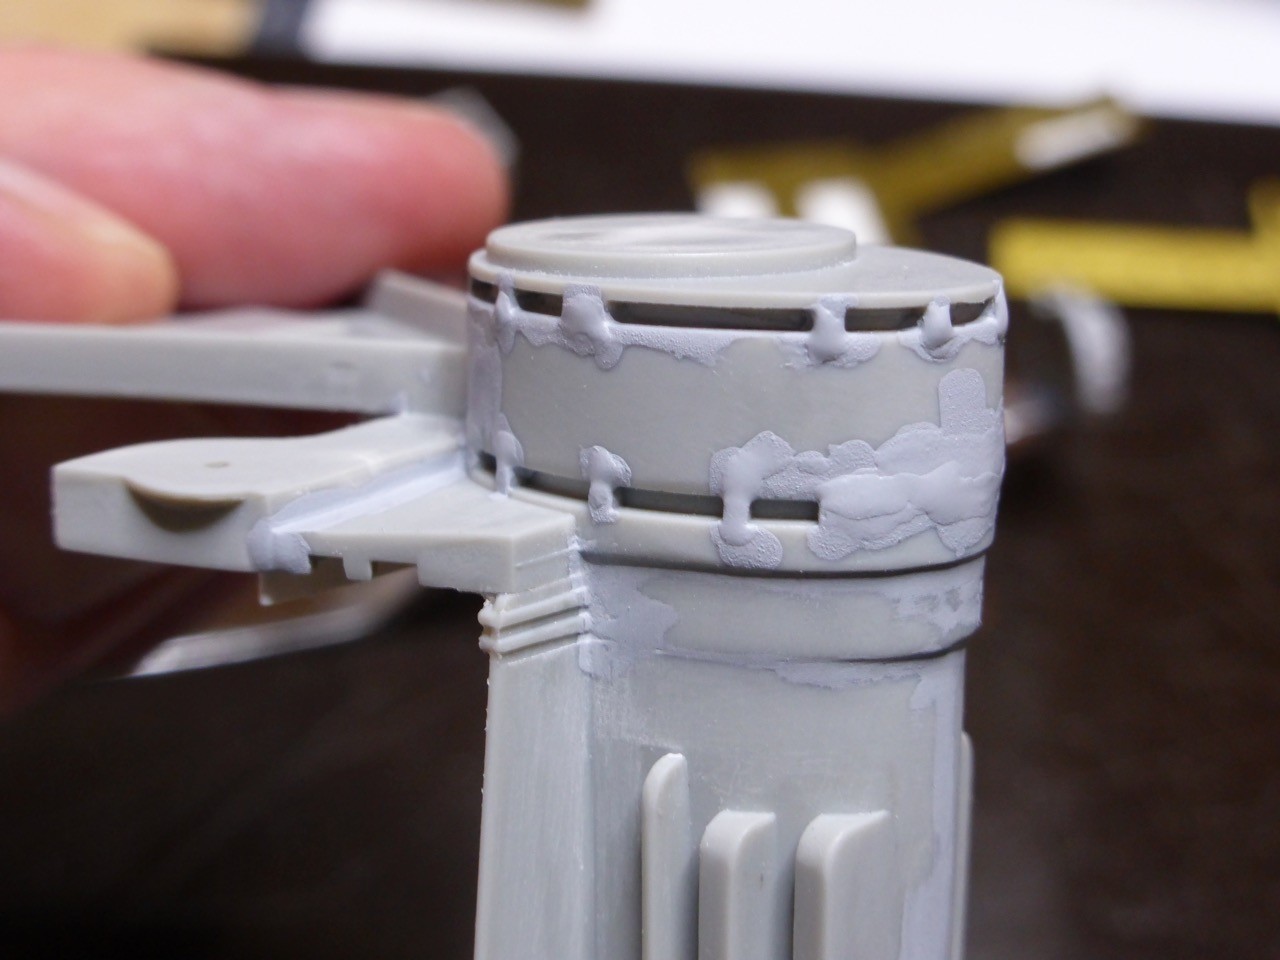
Armored conning tower - this will definitely require lots of love (and even more filling and sanding), as it should appear as one solid structure...
First layer of surfacer. Two distinctive steps need to remain underneath the lowest row of the windows.
To fix the hight of the windows, to get them all equal, I decided not to fill in small plastic stripes but rather sand down that part for a fraction of a mm. This helps reduce the seam at the same time, since the part was somewhat rounded underneath.
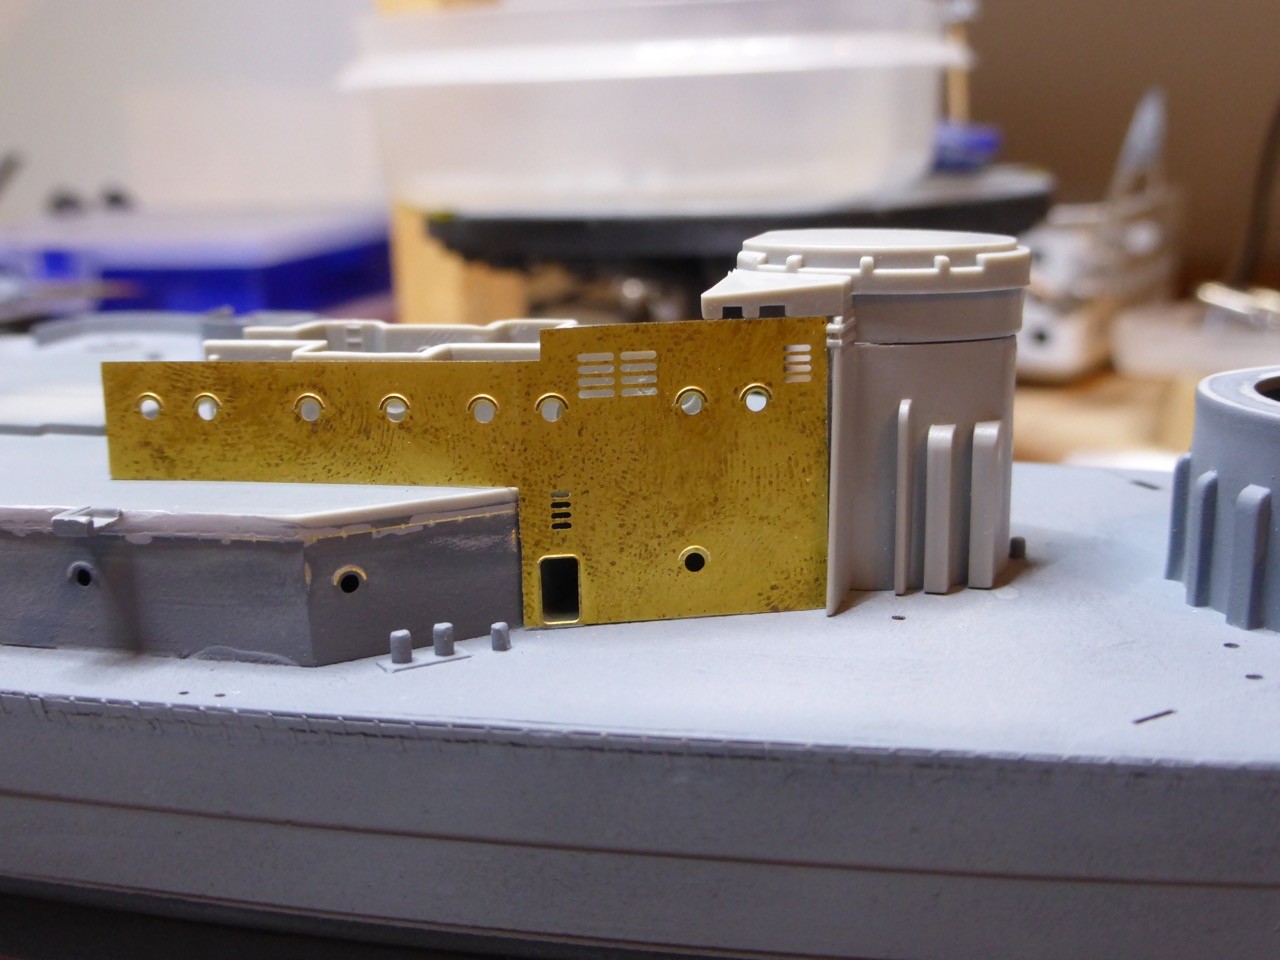
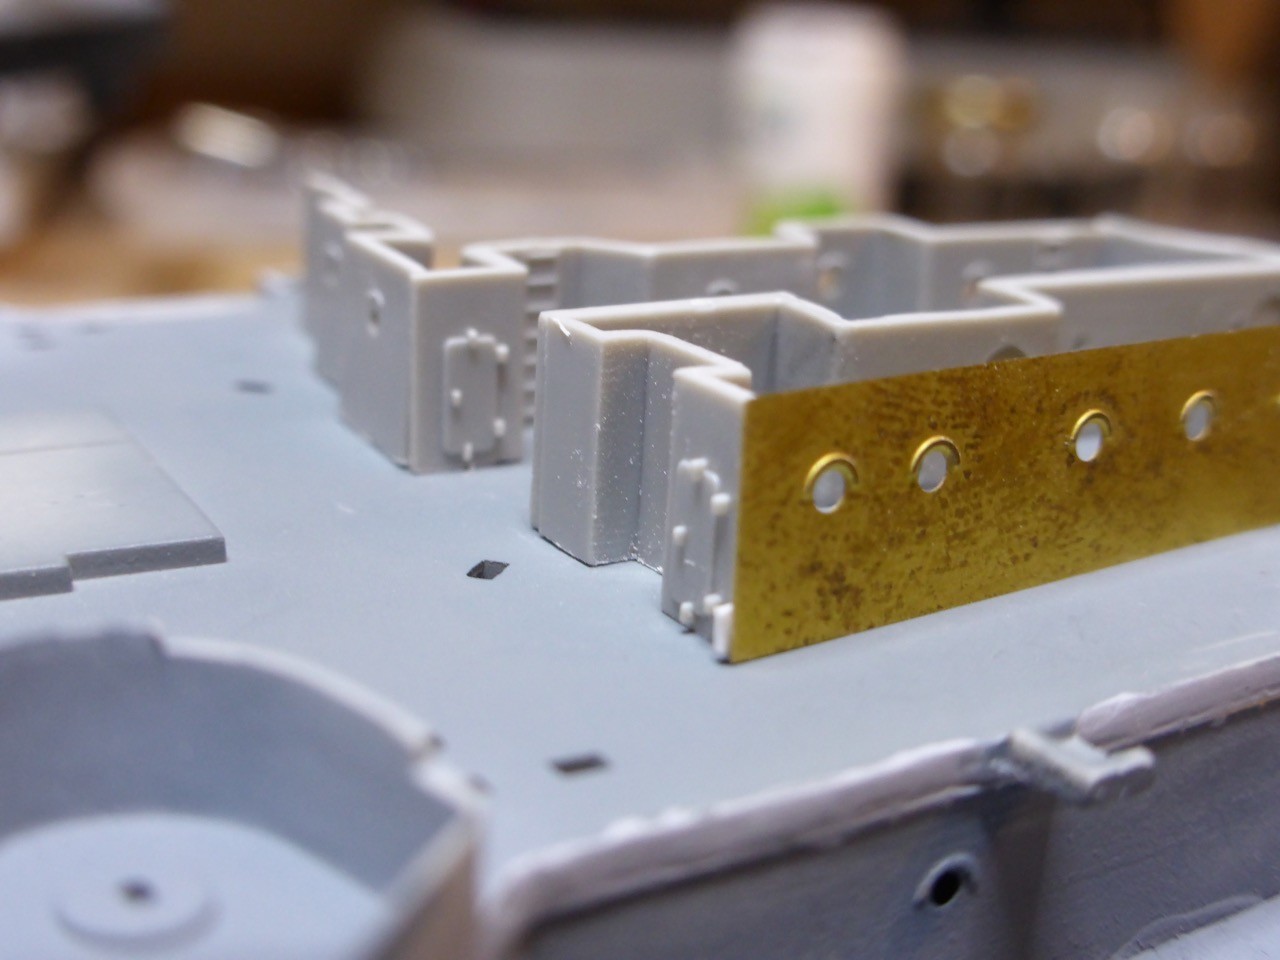
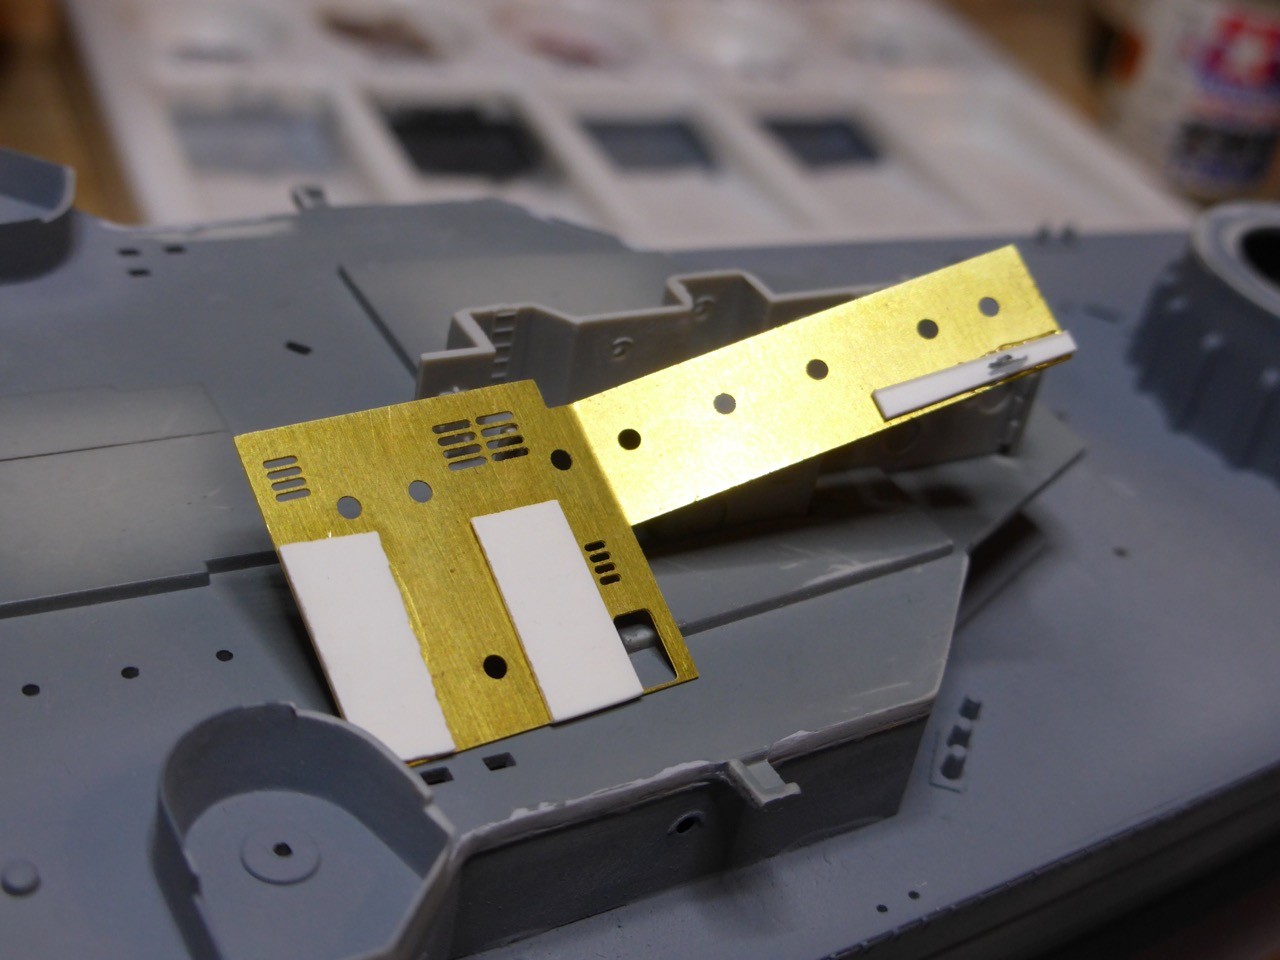
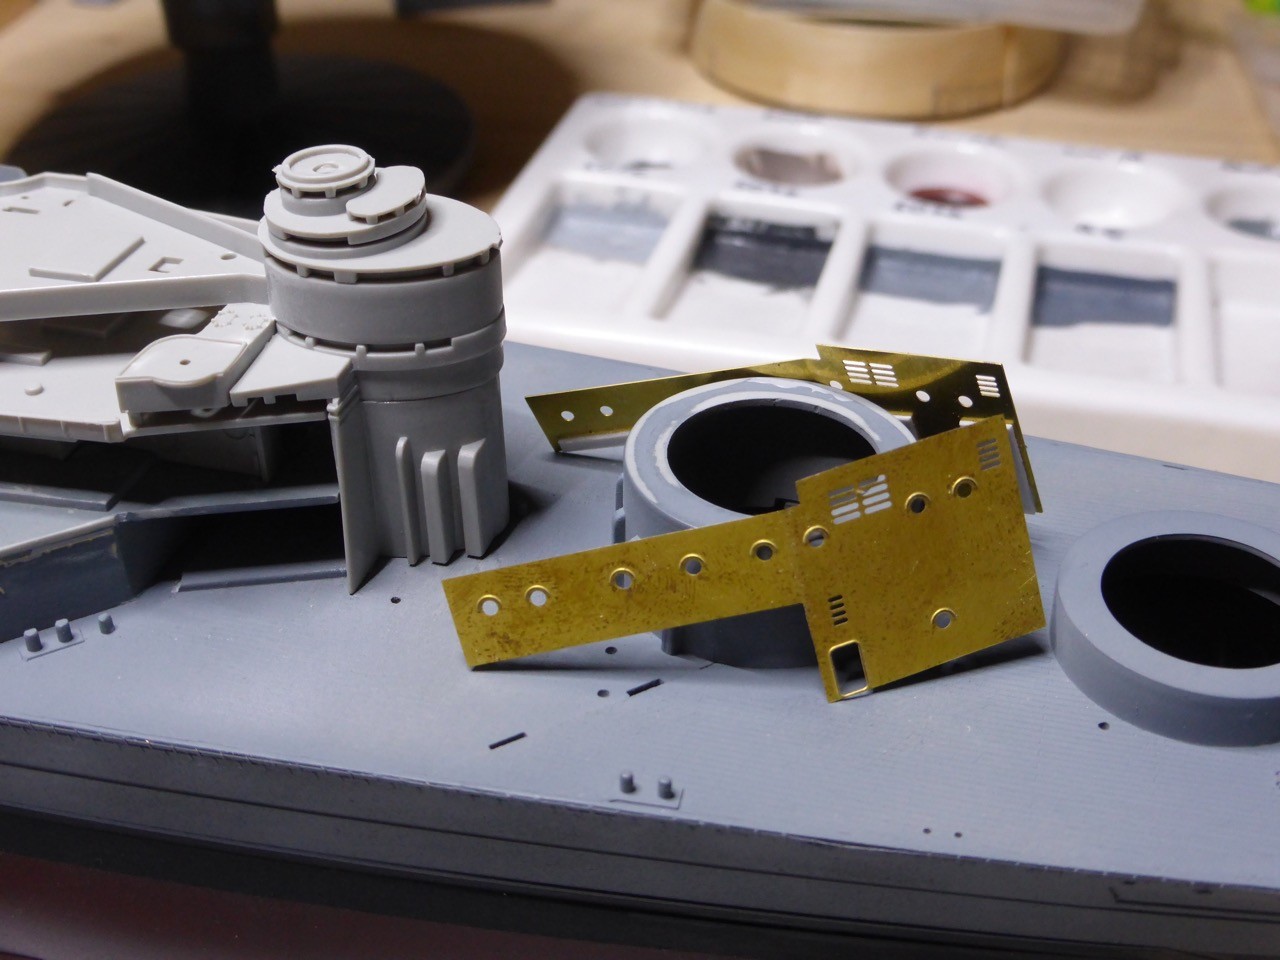
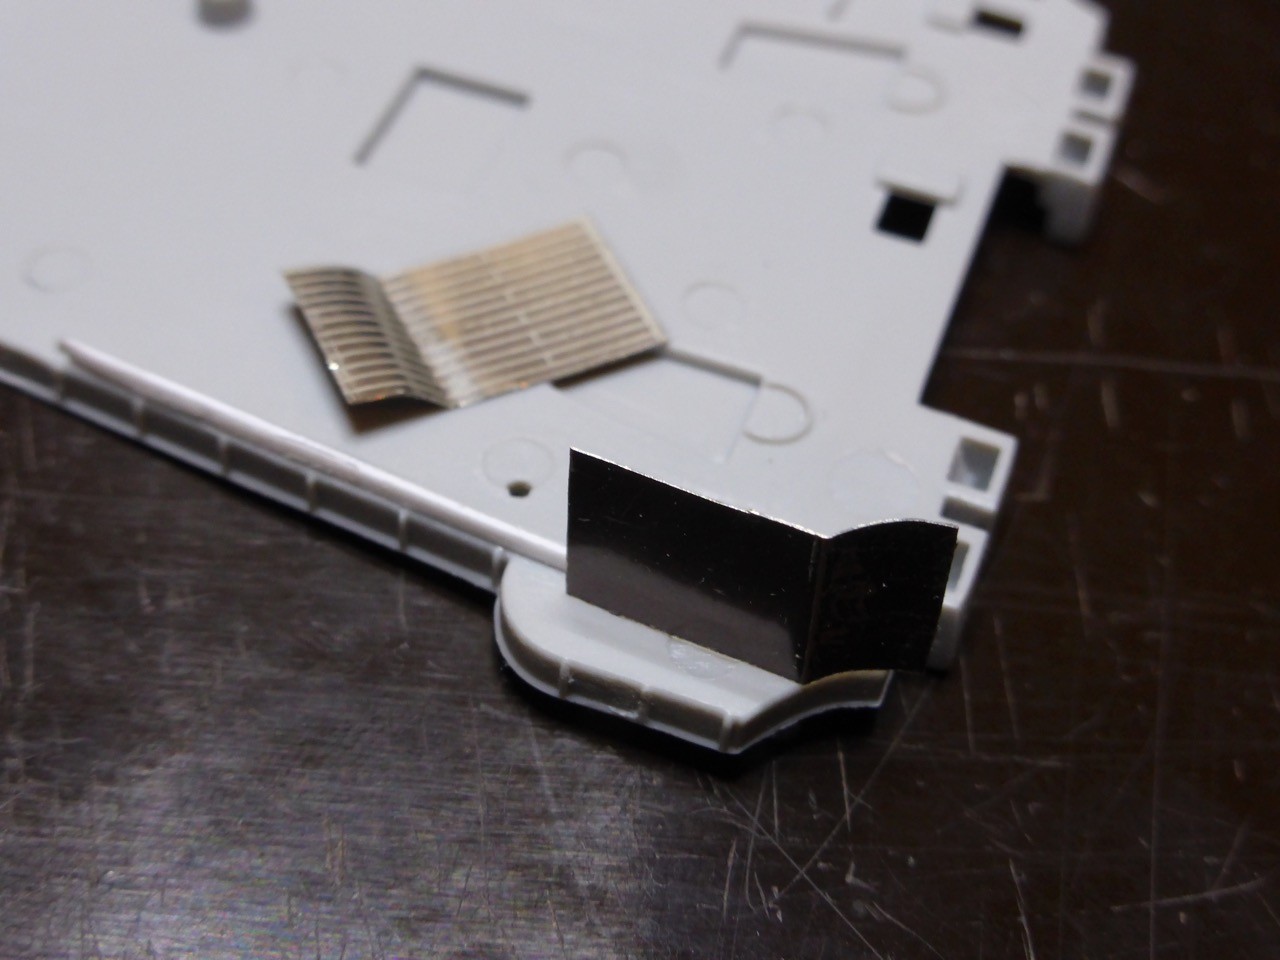
Accounting for the material strength of the brass bulkheads:
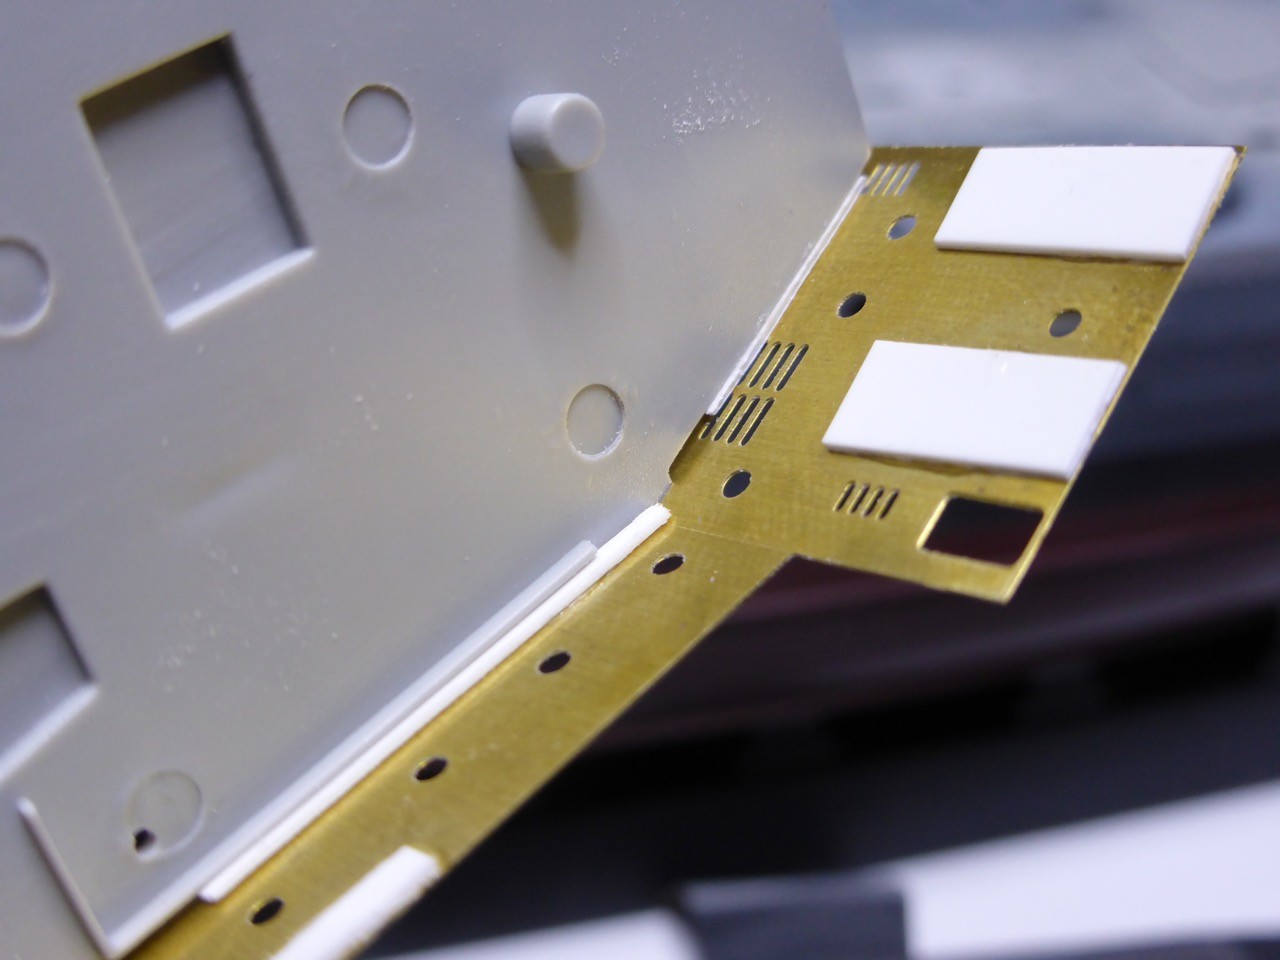
And finally some pictures showing my trials to get everything in place. Actually, it should work - some twisting and adjusting, and of course the well known procedures at the end, but overall fit is quite encouraging!

That's it for now - I should have some more by the end of the weekend!
Thanks for looking,
Cheers,
Jan
thank you very much! Yes, I would say intricate is correct - I, too, was not aware of HOW intricate it actually was. And that's - to me - one very important aspect of modelling those ships - no better way to really learn and understand about them and how they were actually designed and supposed to function.
So here's a couple more pictures.
First a little more help from Frank asked - as I said I would...
So this would be the Conning tower platform, and AotS does not have real good representations of it as of '41.
So my understanding is - black circle, has to be removed and ready use ammo lockers installed instead, read circle, all sanded flat. A circle of non-skid (dark paint) around the quad .50 cal, corticene for the rest. Railing around the whole area.
Red - armored door in the backside of the conning tower; underneath the .50 cal, open up the whole (black circle) or only the red and leave the structure directly underneath the guns? At the level of the Admiral's signal platform, the structure of the signal distributing office behind the armoured cunning tower? This is on a drawing dated '1931', but I can't find something from '41. So I assume it was still there? Behind that, the Admiral's sea cabin?
Ok, some more 'progress' - trying and dry-fitting (and considering how to go about it).
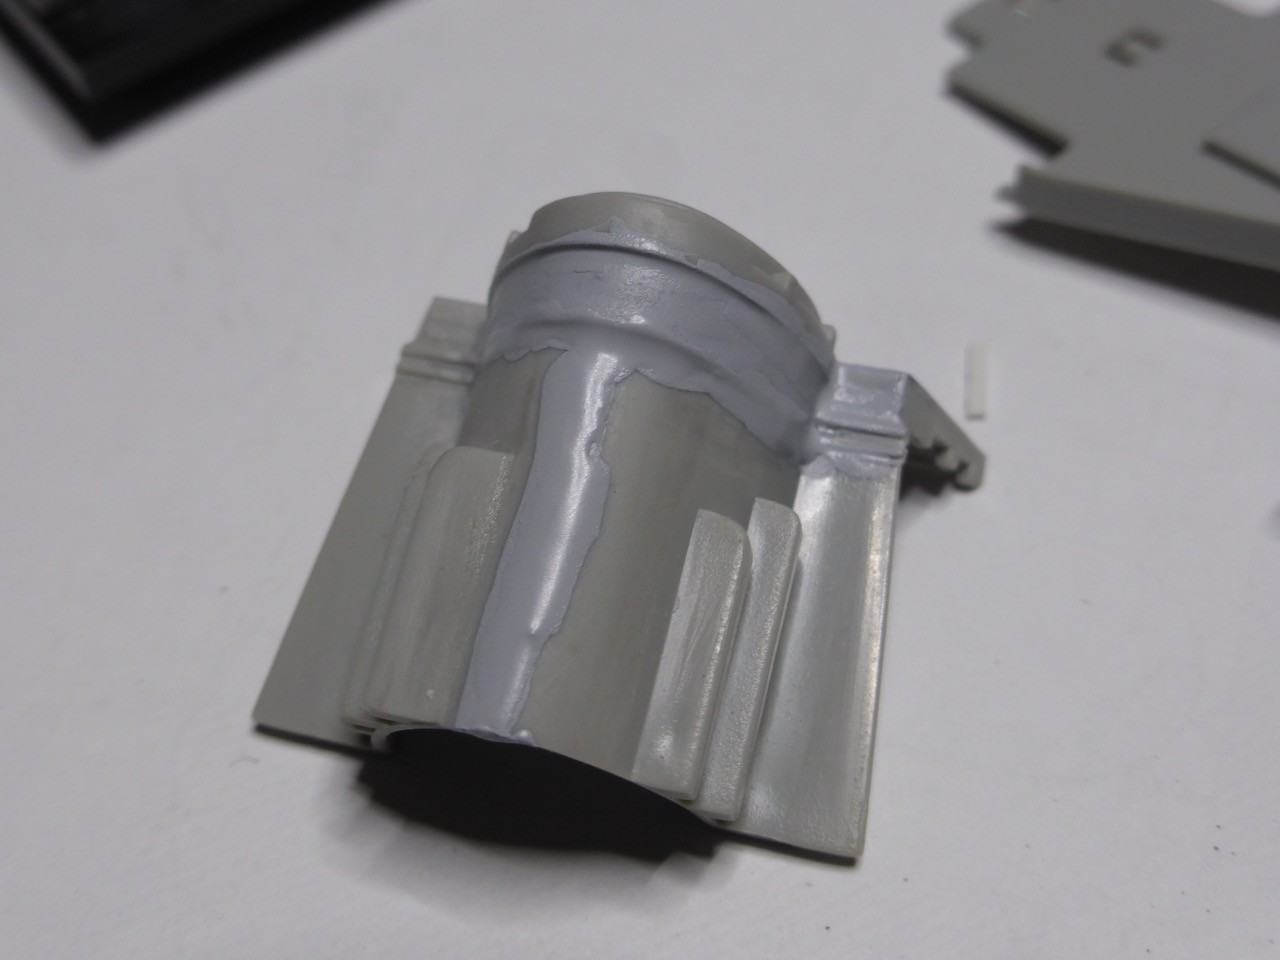
Armored conning tower - this will definitely require lots of love (and even more filling and sanding), as it should appear as one solid structure...
First layer of surfacer. Two distinctive steps need to remain underneath the lowest row of the windows.
To fix the hight of the windows, to get them all equal, I decided not to fill in small plastic stripes but rather sand down that part for a fraction of a mm. This helps reduce the seam at the same time, since the part was somewhat rounded underneath.
Accounting for the material strength of the brass bulkheads:
And finally some pictures showing my trials to get everything in place. Actually, it should work - some twisting and adjusting, and of course the well known procedures at the end, but overall fit is quite encouraging!
That's it for now - I should have some more by the end of the weekend!
Thanks for looking,
Cheers,
Jan
FW_Allen
Joined: June 08, 2006
KitMaker: 7 posts
Model Shipwrights: 7 posts
KitMaker: 7 posts
Model Shipwrights: 7 posts
Posted: Wednesday, November 02, 2016 - 11:31 PM UTC
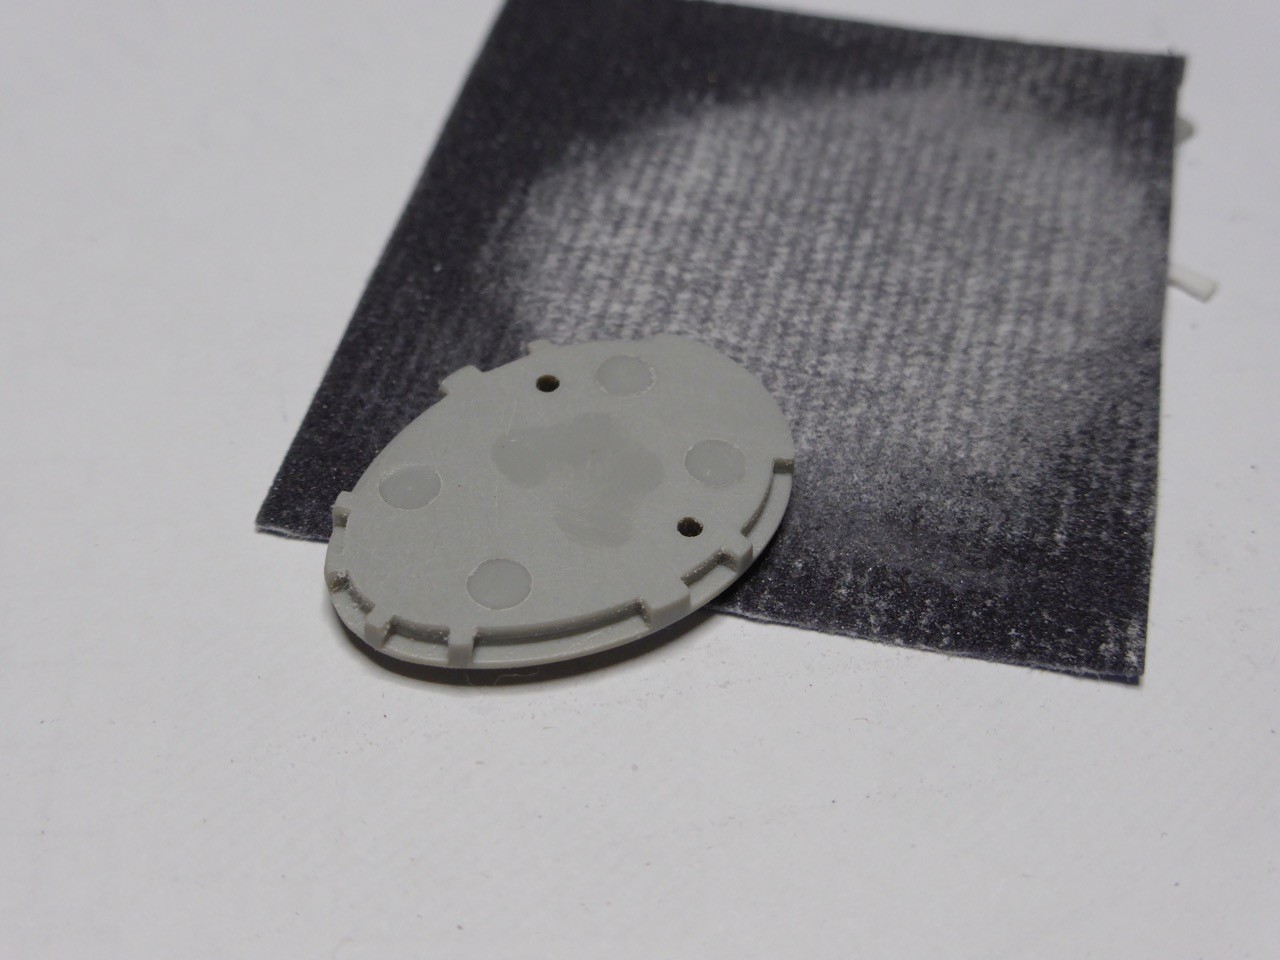
0.5" MG area- Yes, remove the two "hatches" and replace with two small ready use lockers (angled tops I believe). As for the deck material, we do know that at one time, corticene covered both areas. Not sure if that was ever changed (no evidence thus far to suggest there was a change). One other note about 0.5" MG...the forward two did not have shields. The rear two did have shields.
Area UNDER 0.5" MG - Cut that entire area out (black circle). The only thing that remained was a signals office directly behind the conning tower and under the CT platform. It was more or less square with a single door (slightly to the right of centre on its rear bulkhead).
By the way, with regard to the splinter shielding around the signals deck, we found that there were some low areas behind the stanchions...the former locations of the saluting cannons. They never bothered to raised the shield in those areas...the built the stanchions instead. You can see some images of this in that Pontos thread on the other forum. We also posted some other new updates...
RedDuster
Joined: March 01, 2010
KitMaker: 7,078 posts
Model Shipwrights: 6,649 posts
Posted: Thursday, November 03, 2016 - 01:20 AM UTC
Very nice work indeed Jan,
Looking forward to seeing more progress.
Cheers
Si
Looking forward to seeing more progress.
Cheers
Si
JJ1973
#345
Joined: August 22, 2011
KitMaker: 1,835 posts
Model Shipwrights: 1,832 posts
Posted: Sunday, November 06, 2016 - 10:33 AM UTC
Thank you Si and Frank,
and Frank once more for your help!!
Now it's time to implement all those inputs into the model, and that is in some points a little tricky, and time consuming. But I'm sure it'll be definitely worth it.
So once more after a pretty productive weekend I have not really progressed much...a picture of all the parts I worked on is not really that impressive:
Sanding the conning tower
Cutting and rebuilding the Conning Tower Platform. I was afraid that the whole 'bulkhead' underneath the .50 cal machine guns had to go - just as Frank confirmed. And this part is moulded particularly thick, so some work to do...
I built a signal's office, based on the position of the w/t aerial trunk in the port corner of the office. That is not 100% correct as the w/t trunk is just inside and I did it just outside, but I am fearing more problems if I happen to build my new bulkhead just where the trunk needs to go...
Then I installed a bulkhead farther forward towards the conning tower. I would imagine that this bulkhead in fact was NOT there and the area was open all the way towards the submarine lookouts - however, the way the kit's parts are designed, that seemed almost impossible to build for me. And the repositioned bulkhead gives the impression of an open space, I will paint it dark in the end so it should look open as far as one is able to peer inside.

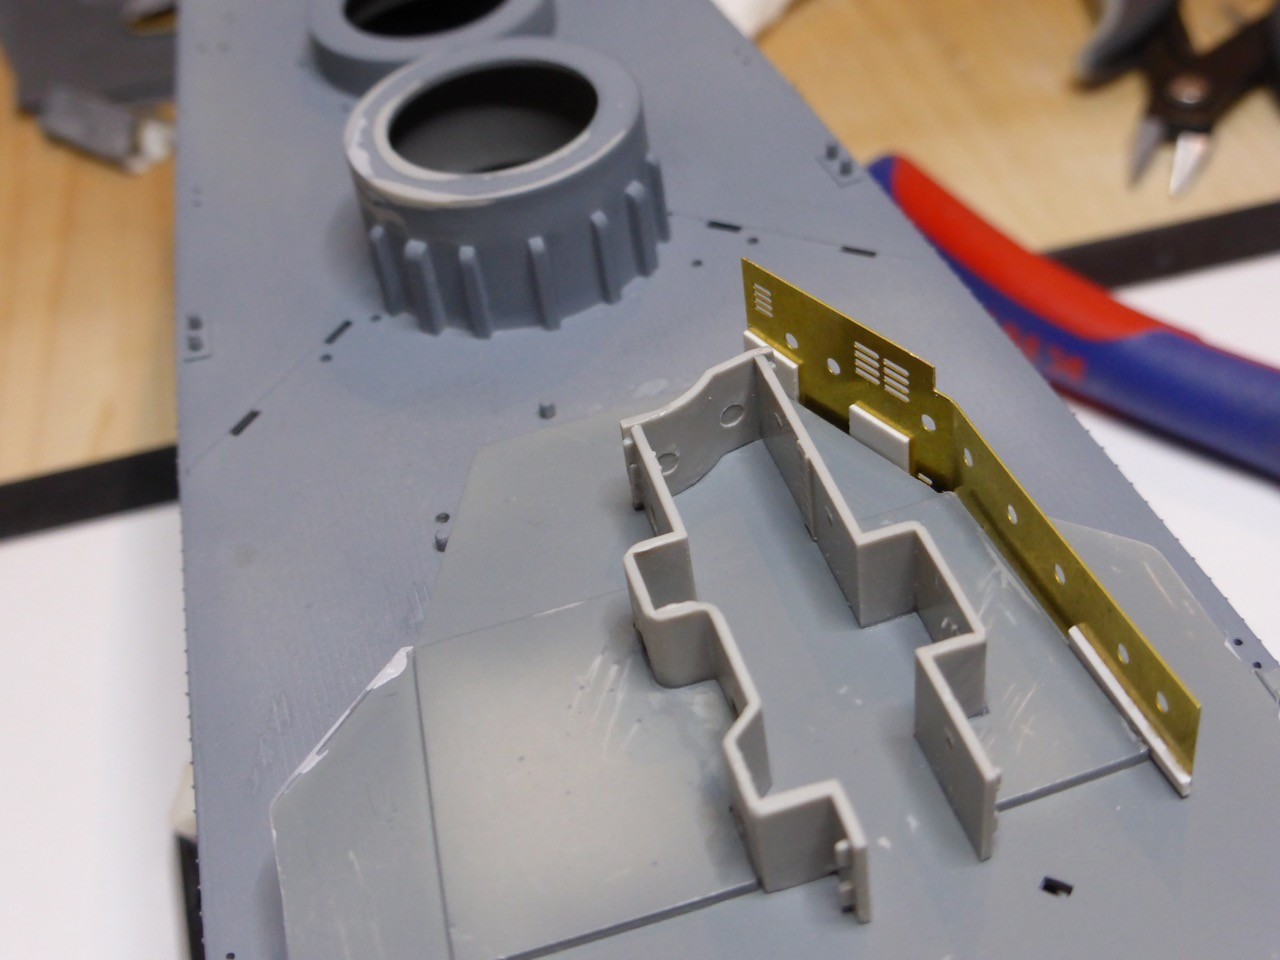
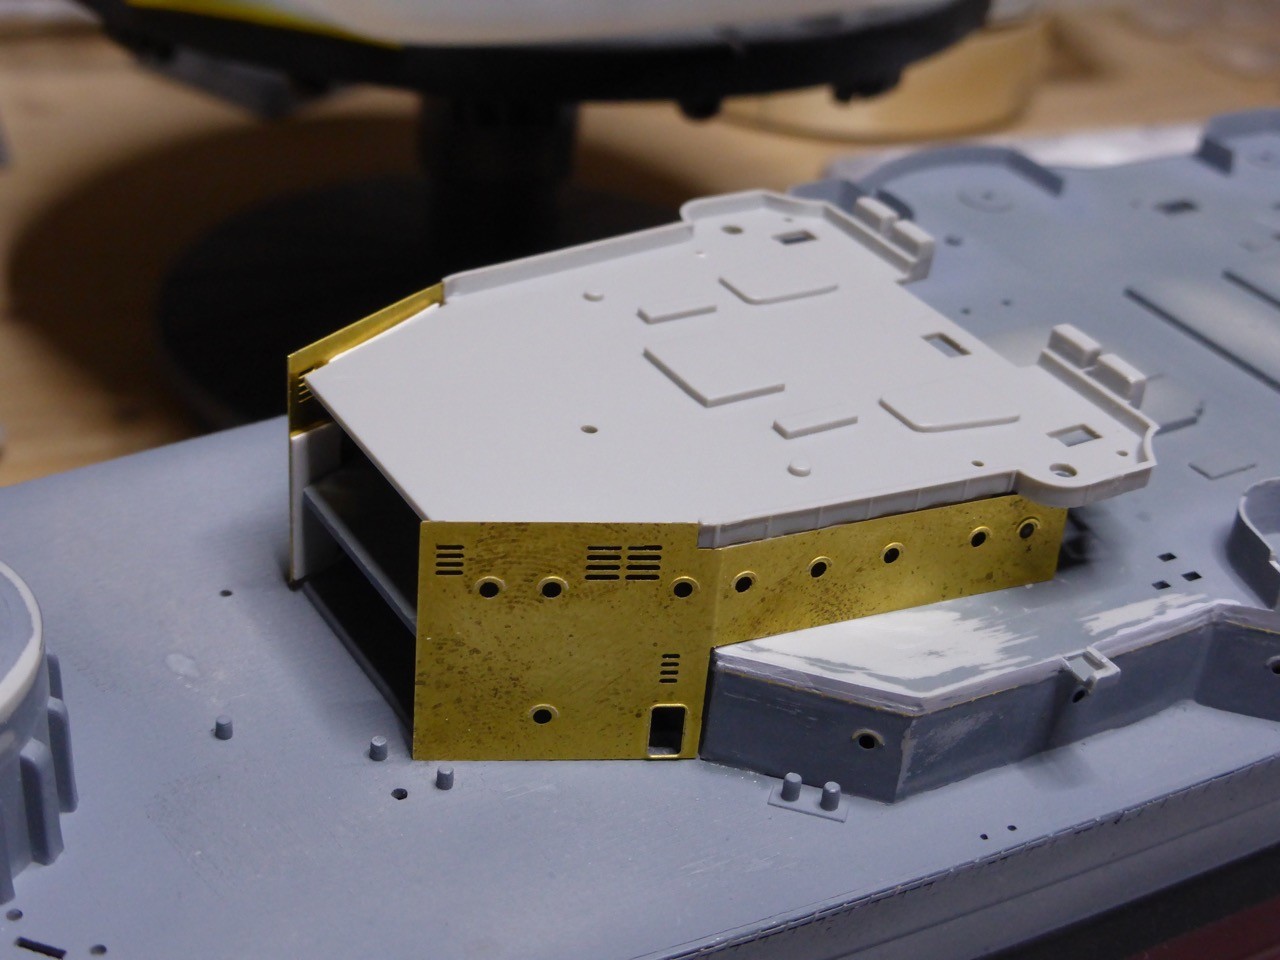
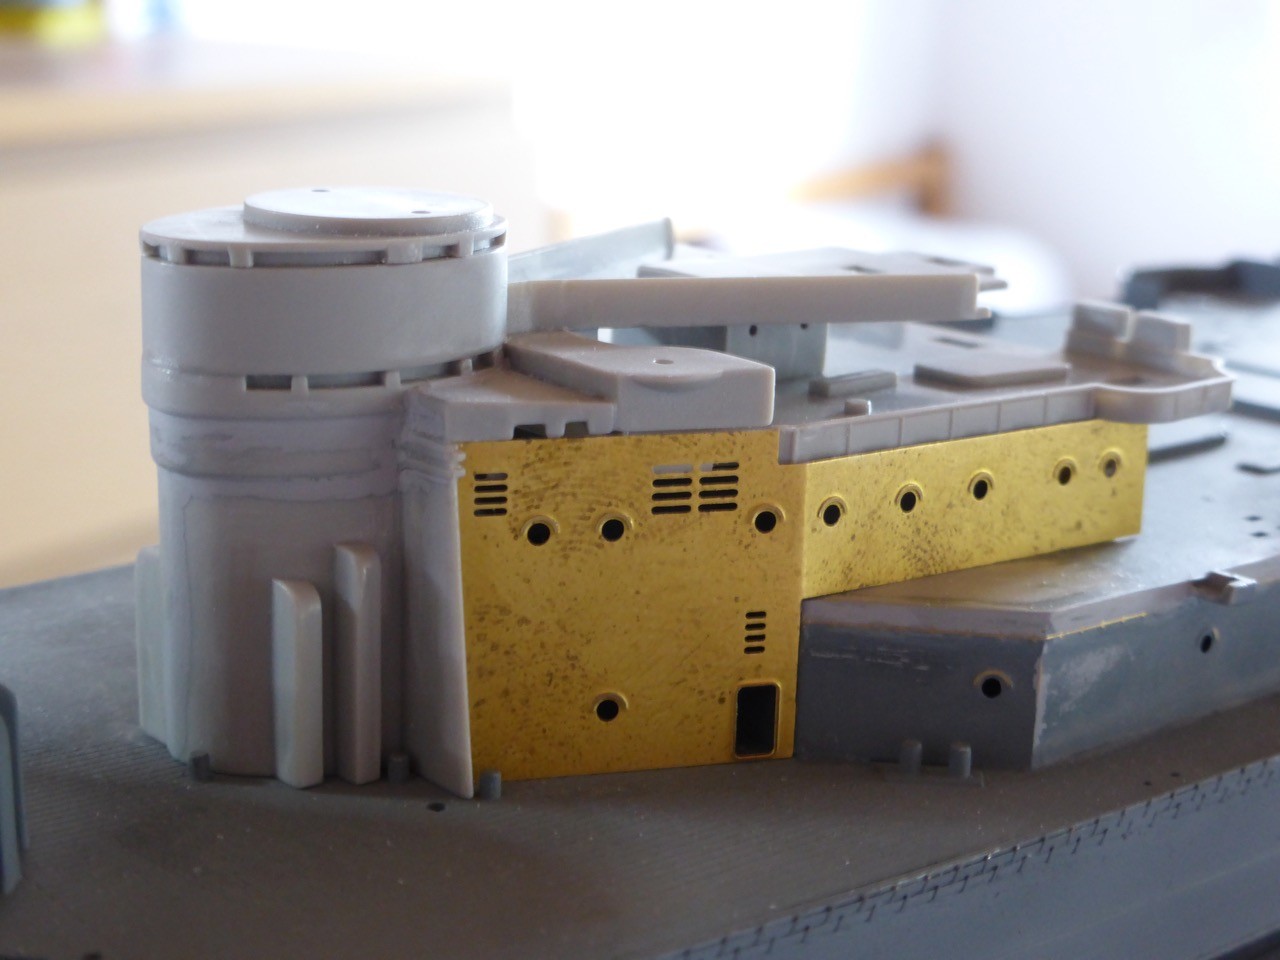
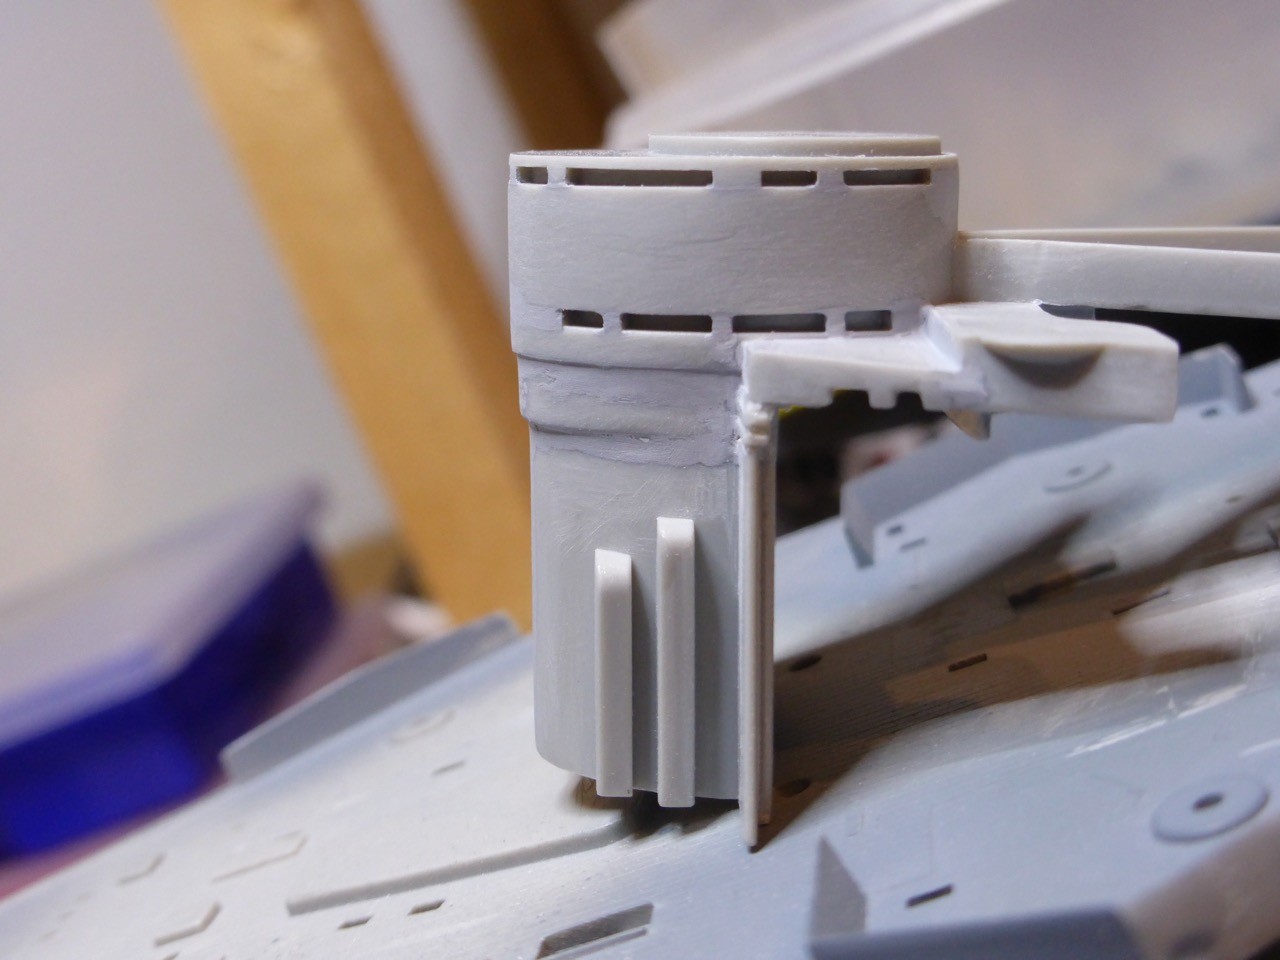
Test-building the forward structure with just minimal use of glue, so it can be easily dismantled again. I just needed to give it a little stability to see how it will fit later on.
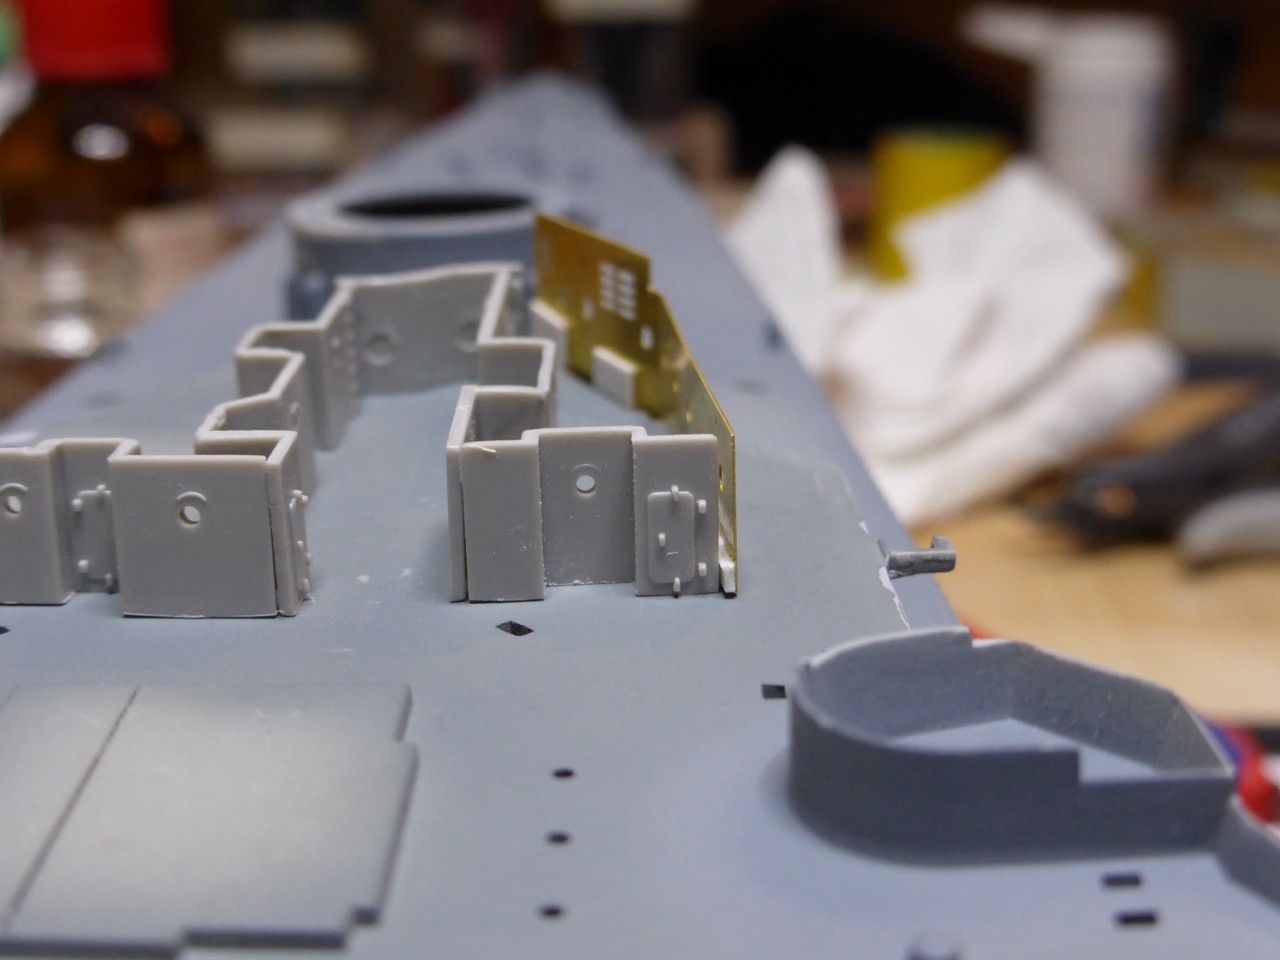
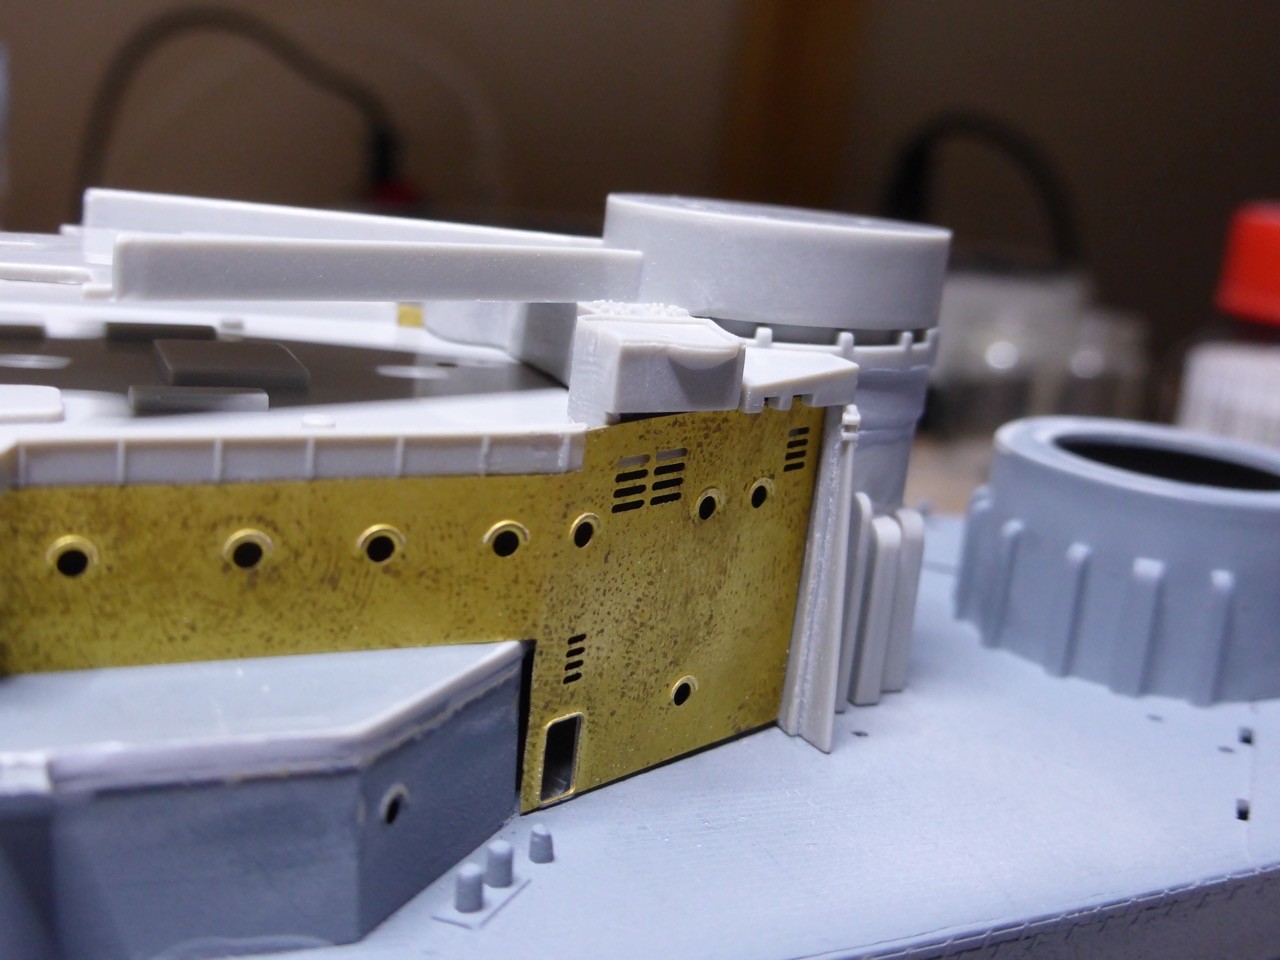
The forward structure just set on the ship - no glue at all. Some detail pictures show a generally good fit, but still lots of work to do, particularly around the submarine lookouts and underneath the .50 cal platforms.
And some of my 'distance bars' to make up for the material thickness are shining through the vents - I'll have to cut those away in these areas. Amazing - I only realised that when I was posting those pictures...
One 'nice' surprise - I sanded the bulkheads of the signal's office down too much (and a little uneven). That will need fixing...
And one more - the brass bulkheads are a fraction of a mm higher the the internal plastic bulkheads, so I need to put some stripes on top to account for that. Luckily it is really difficult to see, so no need to sand it 100% in shape, once painted and the structure is on to you can't really see it. You could, however, see the small void and light peering through...
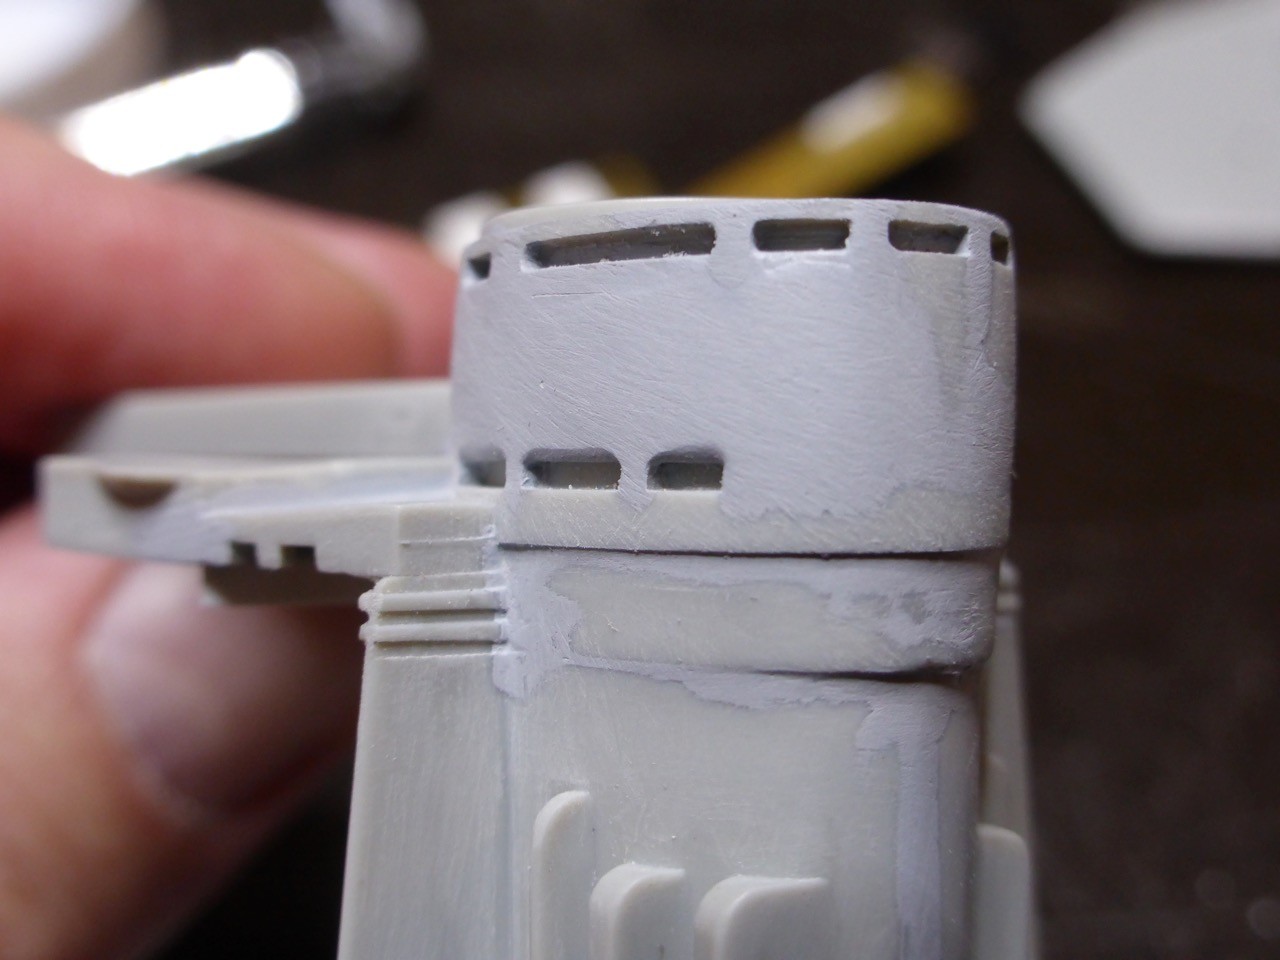
Fix to the signal's office, needs sanding down to fit...
And layers of surfacer to the upper part of the conning tower to - hopefully - end up with a flush structure. The way the part is moulded does not allow for the windows to be opened, so I'll have to work with black paint here later on to give the impression.
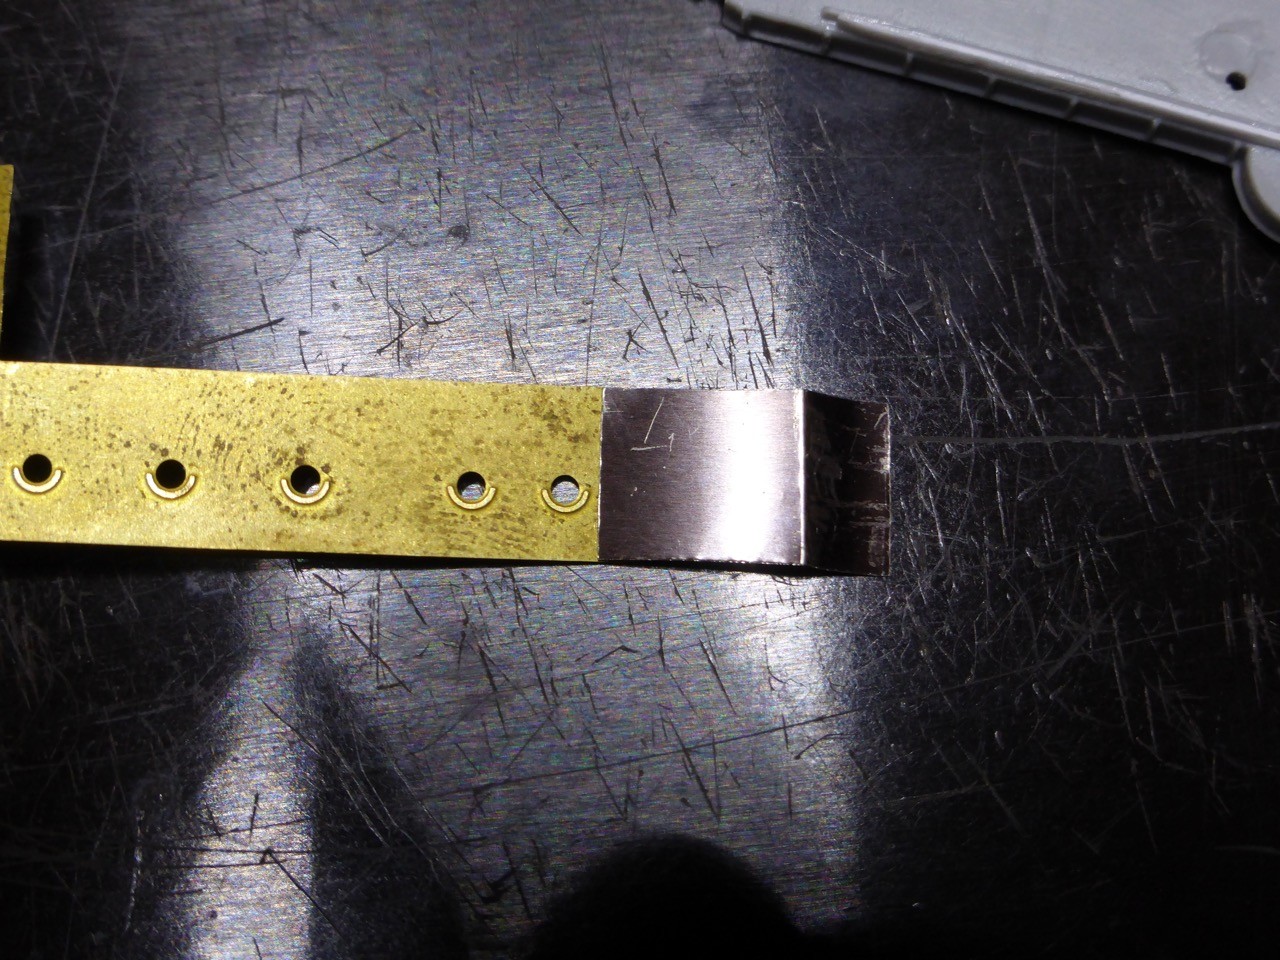
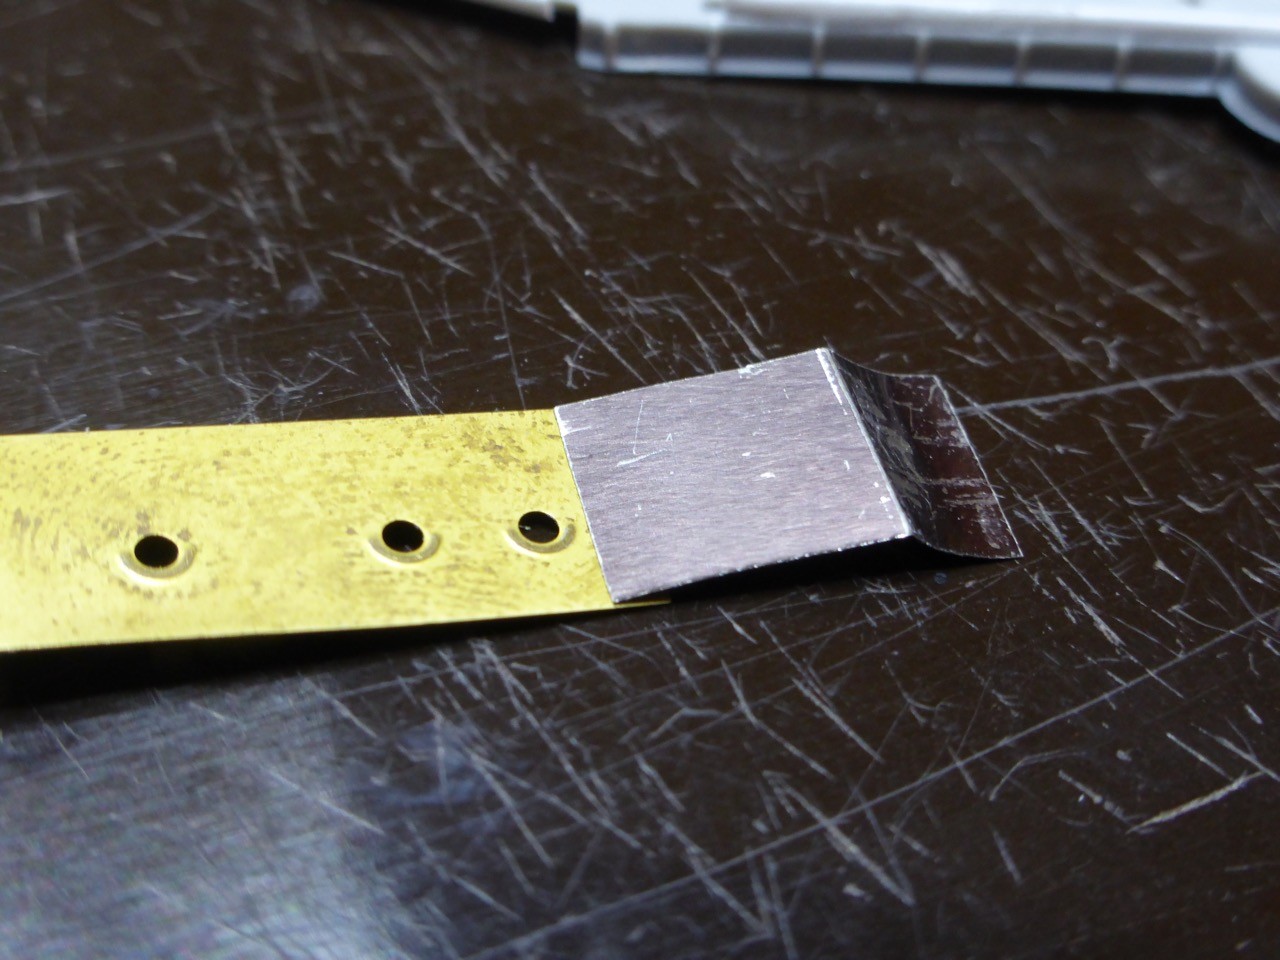
And finally, the extension to the lower bridge bulkheads, cut and bent from a sheet that actually is designed as deck planking for areas where no wooden decks are provided. I have to cut the correct length, and I will have it overlapping with the brass bulkhead part. There will be a small 'weld-line' in the end, but that's ok I would think.
Frank, I saw your updates on the other thread, the modifications to the signal platform railings should be comparatively easy...
So much for today - thank you all for looking in and comments as always highly appreciated!
I have neglected the campaign thread - I'll have to post some progress there, as well, sorry - I hope I'll find some time tonight!
Cheers,
Jan
and Frank once more for your help!!
Now it's time to implement all those inputs into the model, and that is in some points a little tricky, and time consuming. But I'm sure it'll be definitely worth it.
So once more after a pretty productive weekend I have not really progressed much...a picture of all the parts I worked on is not really that impressive:
Sanding the conning tower
Cutting and rebuilding the Conning Tower Platform. I was afraid that the whole 'bulkhead' underneath the .50 cal machine guns had to go - just as Frank confirmed. And this part is moulded particularly thick, so some work to do...
I built a signal's office, based on the position of the w/t aerial trunk in the port corner of the office. That is not 100% correct as the w/t trunk is just inside and I did it just outside, but I am fearing more problems if I happen to build my new bulkhead just where the trunk needs to go...
Then I installed a bulkhead farther forward towards the conning tower. I would imagine that this bulkhead in fact was NOT there and the area was open all the way towards the submarine lookouts - however, the way the kit's parts are designed, that seemed almost impossible to build for me. And the repositioned bulkhead gives the impression of an open space, I will paint it dark in the end so it should look open as far as one is able to peer inside.
Test-building the forward structure with just minimal use of glue, so it can be easily dismantled again. I just needed to give it a little stability to see how it will fit later on.
The forward structure just set on the ship - no glue at all. Some detail pictures show a generally good fit, but still lots of work to do, particularly around the submarine lookouts and underneath the .50 cal platforms.
And some of my 'distance bars' to make up for the material thickness are shining through the vents - I'll have to cut those away in these areas. Amazing - I only realised that when I was posting those pictures...
One 'nice' surprise - I sanded the bulkheads of the signal's office down too much (and a little uneven). That will need fixing...
And one more - the brass bulkheads are a fraction of a mm higher the the internal plastic bulkheads, so I need to put some stripes on top to account for that. Luckily it is really difficult to see, so no need to sand it 100% in shape, once painted and the structure is on to you can't really see it. You could, however, see the small void and light peering through...
Fix to the signal's office, needs sanding down to fit...
And layers of surfacer to the upper part of the conning tower to - hopefully - end up with a flush structure. The way the part is moulded does not allow for the windows to be opened, so I'll have to work with black paint here later on to give the impression.
And finally, the extension to the lower bridge bulkheads, cut and bent from a sheet that actually is designed as deck planking for areas where no wooden decks are provided. I have to cut the correct length, and I will have it overlapping with the brass bulkhead part. There will be a small 'weld-line' in the end, but that's ok I would think.
Frank, I saw your updates on the other thread, the modifications to the signal platform railings should be comparatively easy...
So much for today - thank you all for looking in and comments as always highly appreciated!
I have neglected the campaign thread - I'll have to post some progress there, as well, sorry - I hope I'll find some time tonight!
Cheers,
Jan
rolltide31
#377
Joined: June 27, 2010
KitMaker: 1,481 posts
Model Shipwrights: 1,332 posts
Posted: Sunday, November 06, 2016 - 12:31 PM UTC
Jan,
Simply amazing work. Your attention to detail and efforts to replicate are commendable. Really enjoy seeing the updates you provide. Can't wait to see more.
Dave
Simply amazing work. Your attention to detail and efforts to replicate are commendable. Really enjoy seeing the updates you provide. Can't wait to see more.
Dave
JJ1973
#345
Joined: August 22, 2011
KitMaker: 1,835 posts
Model Shipwrights: 1,832 posts
Posted: Sunday, November 06, 2016 - 11:24 PM UTC
Dave,
thank you very much, that's very kind!! Glad to have you in!!
Cheers,
Jan
thank you very much, that's very kind!! Glad to have you in!!
Cheers,
Jan
RussellE
#306
Joined: June 27, 2010
KitMaker: 3,959 posts
Model Shipwrights: 2,777 posts
Posted: Monday, November 07, 2016 - 01:22 AM UTC
Outstanding scratch building Jan, to overcome the kit's quirks!
JJ1973
#345
Joined: August 22, 2011
KitMaker: 1,835 posts
Model Shipwrights: 1,832 posts
Posted: Monday, November 07, 2016 - 10:11 AM UTC
Thanks mate
But it doesn't really help with my glacier-type build speed, though... but I guess you very well know that problem!!
Cheers,
Jan
But it doesn't really help with my glacier-type build speed, though... but I guess you very well know that problem!!
Cheers,
Jan
RussellE
#306
Joined: June 27, 2010
KitMaker: 3,959 posts
Model Shipwrights: 2,777 posts
Posted: Monday, November 07, 2016 - 02:21 PM UTC
Quoted Text
Thanks mate
But it doesn't really help with my glacier-type build speed, though... but I guess you very well know that problem!!
Cheers,
Jan
Indeed I do mate
JJ1973
#345
Joined: August 22, 2011
KitMaker: 1,835 posts
Model Shipwrights: 1,832 posts
Posted: Monday, November 14, 2016 - 10:34 AM UTC
A little update - busy weekend, not with the shipyard, but got a few minutes here and there...
Mainly filling and sanding, and not being able to spent much time modelling allowed the surfacer to cure properly...
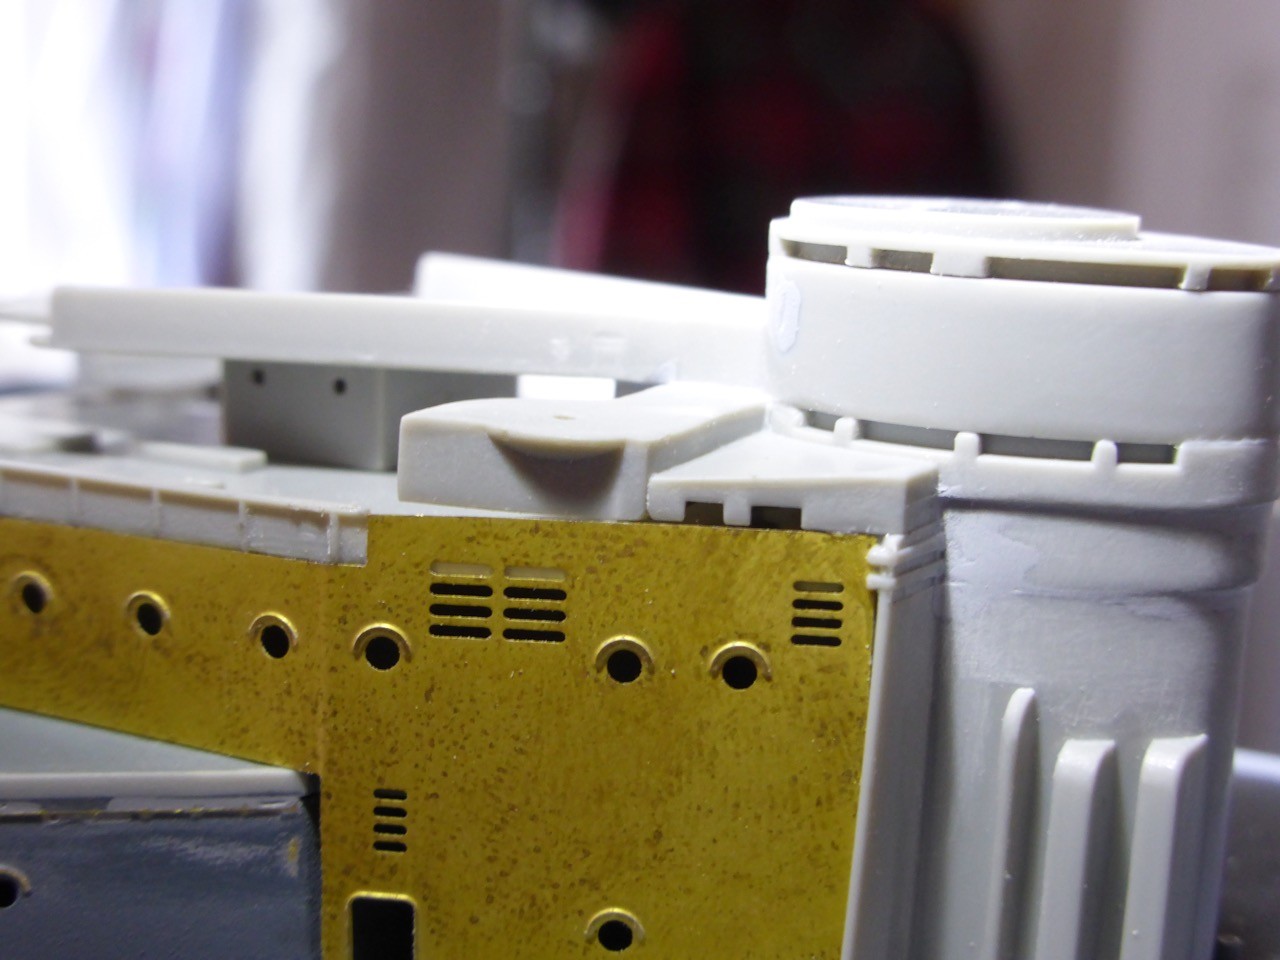
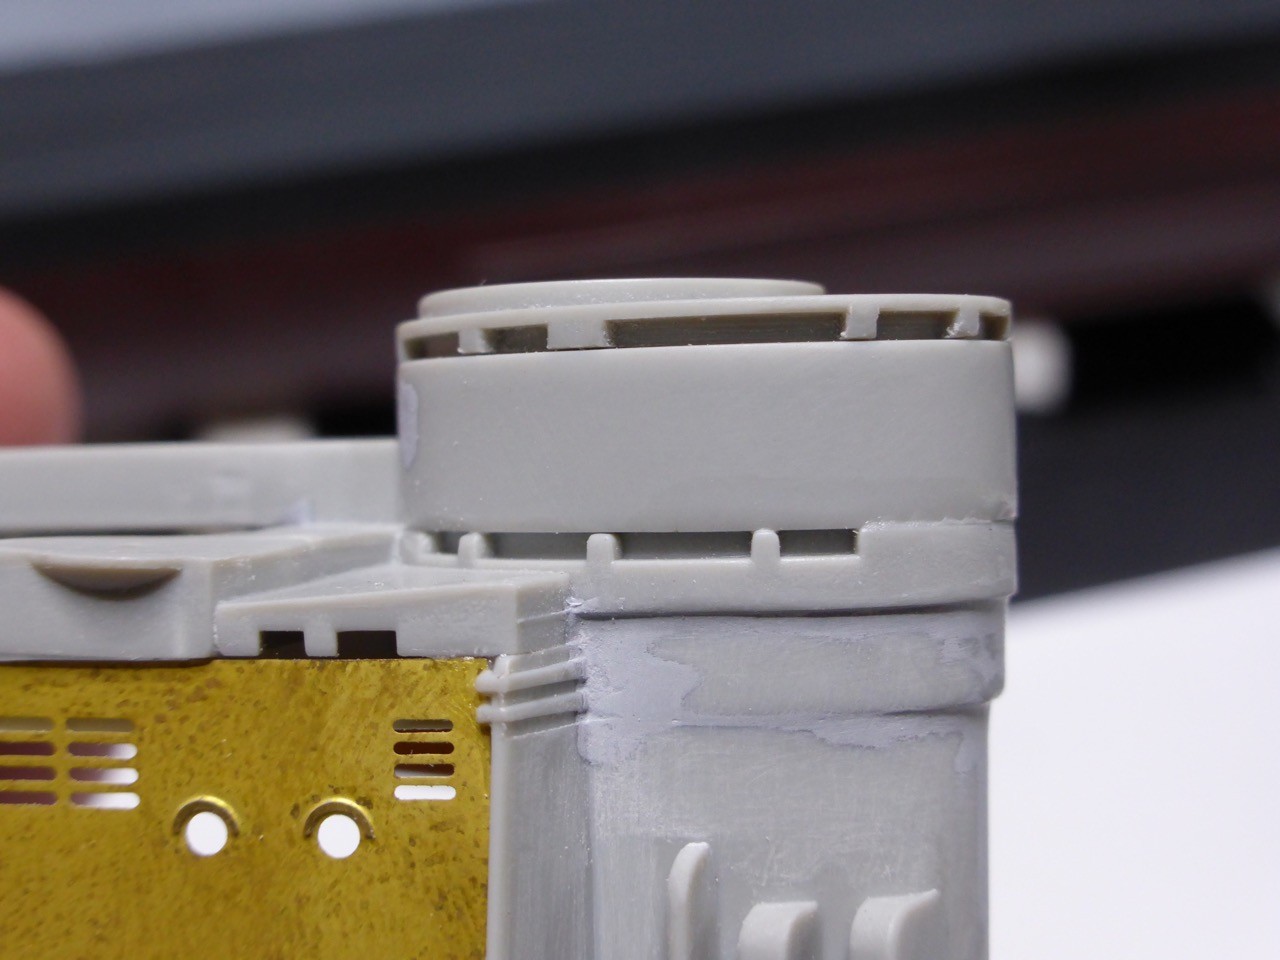
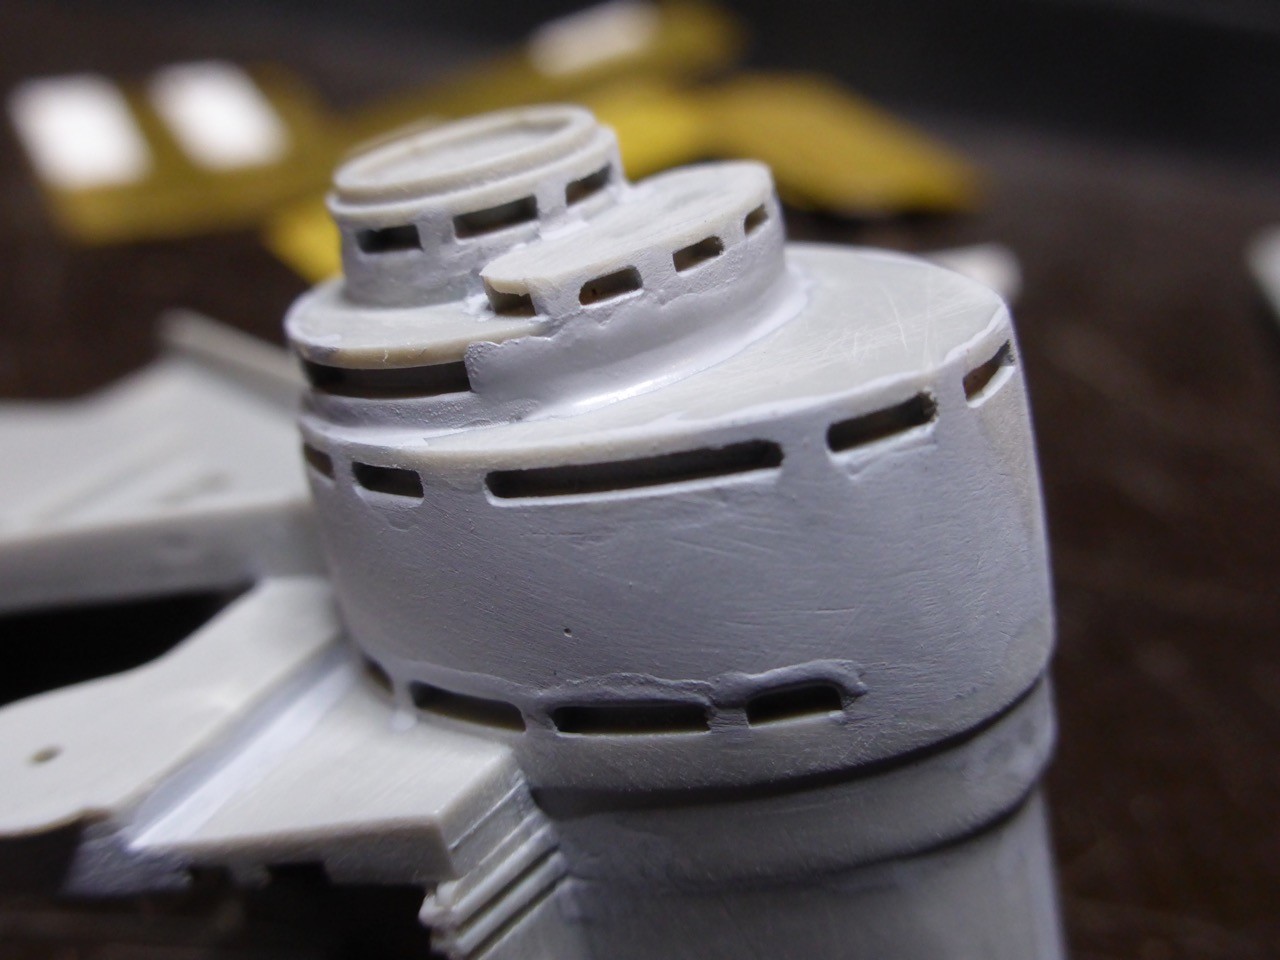
Basically it's all around and about the seams of the armoured conning tower.
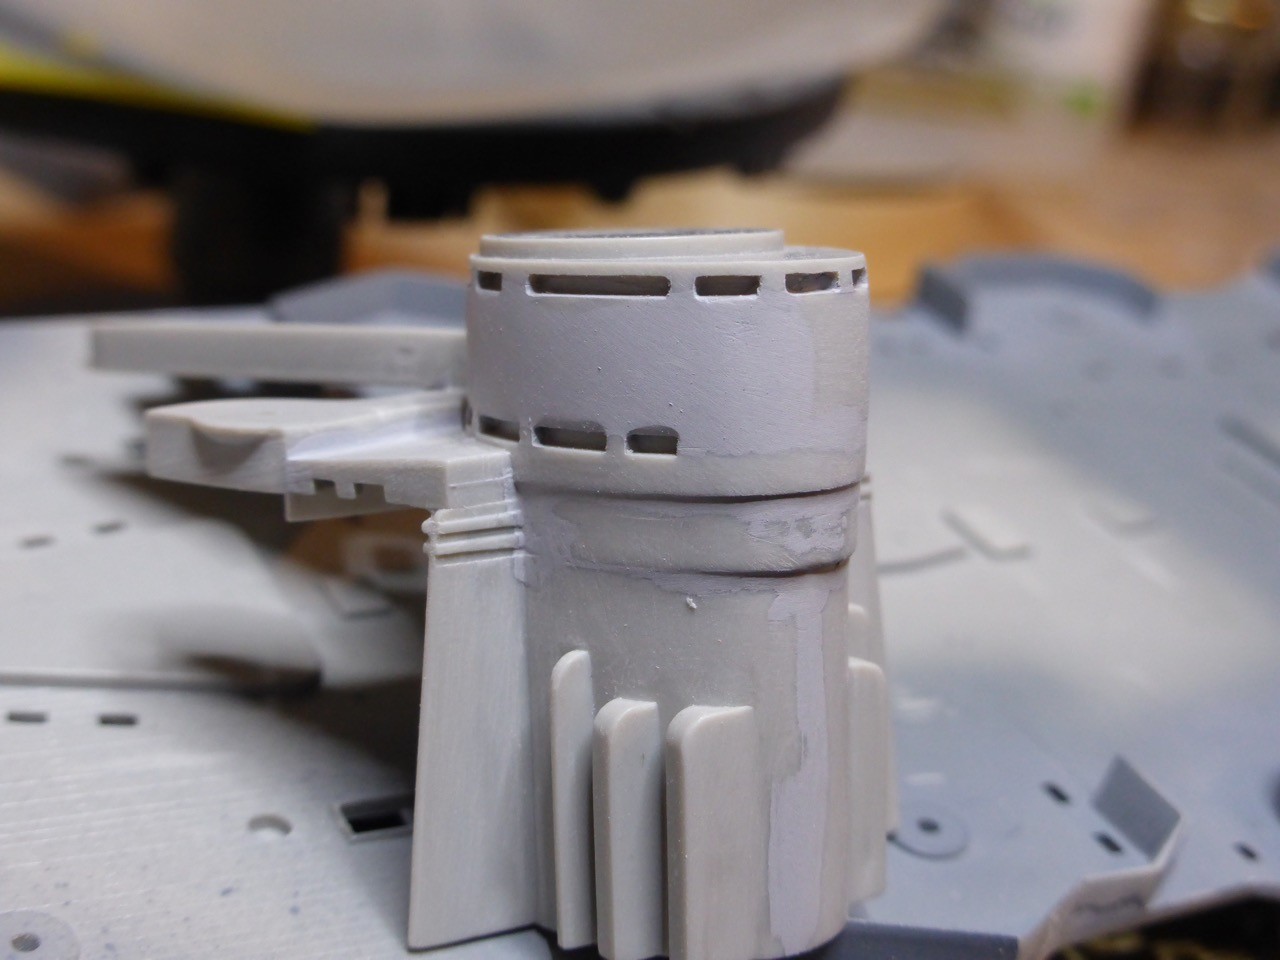
I need to build a a little substance on starboard, but with that the windows in the lower row are a little out of shape.
More surfacer. And yes, the surface is quite coarse, but that's only to get it into correct shape. Sanding with fine paper and a final layer of sprayed on surfacer will follow in the end...
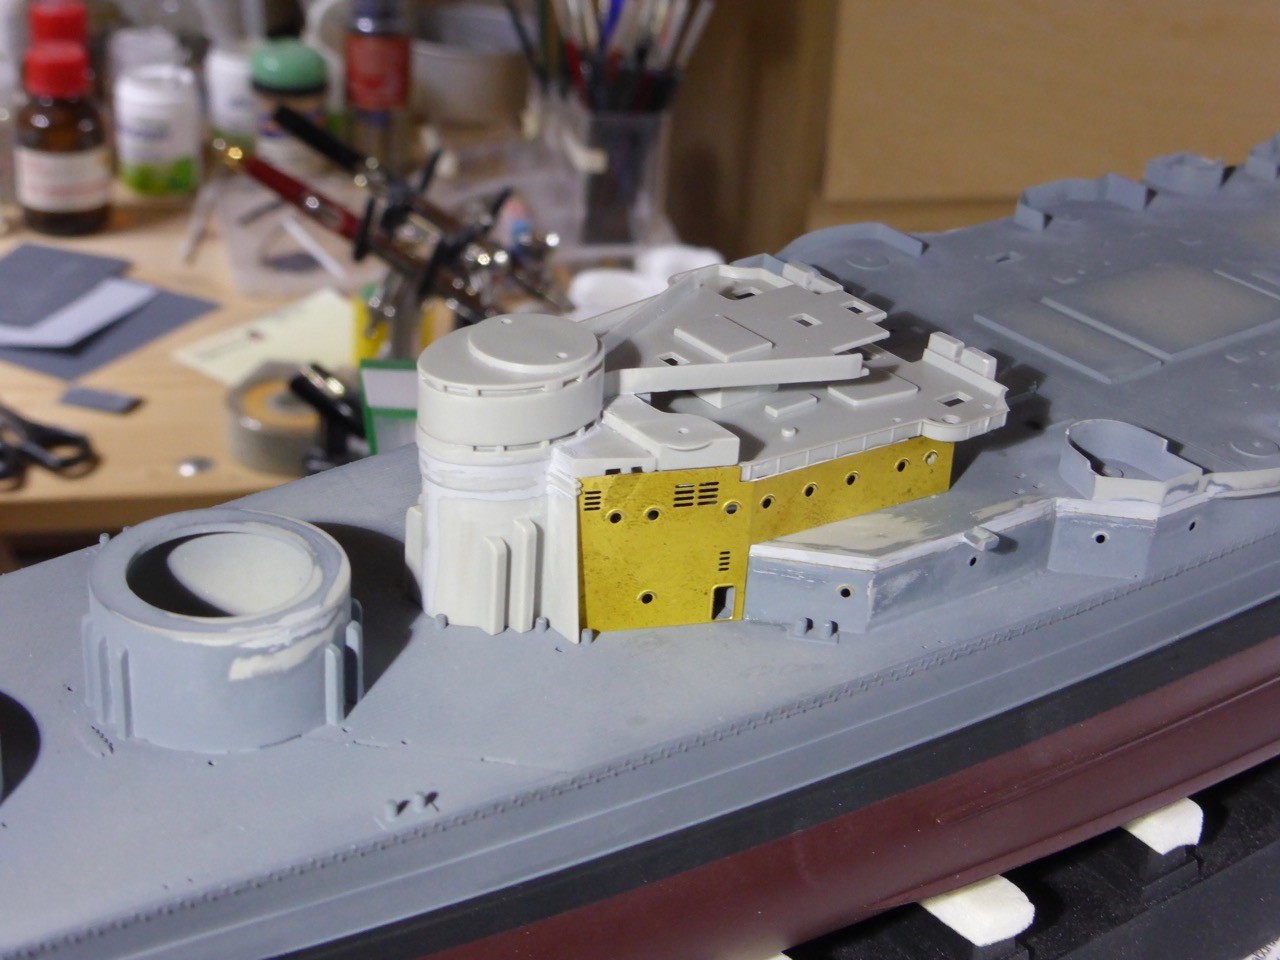
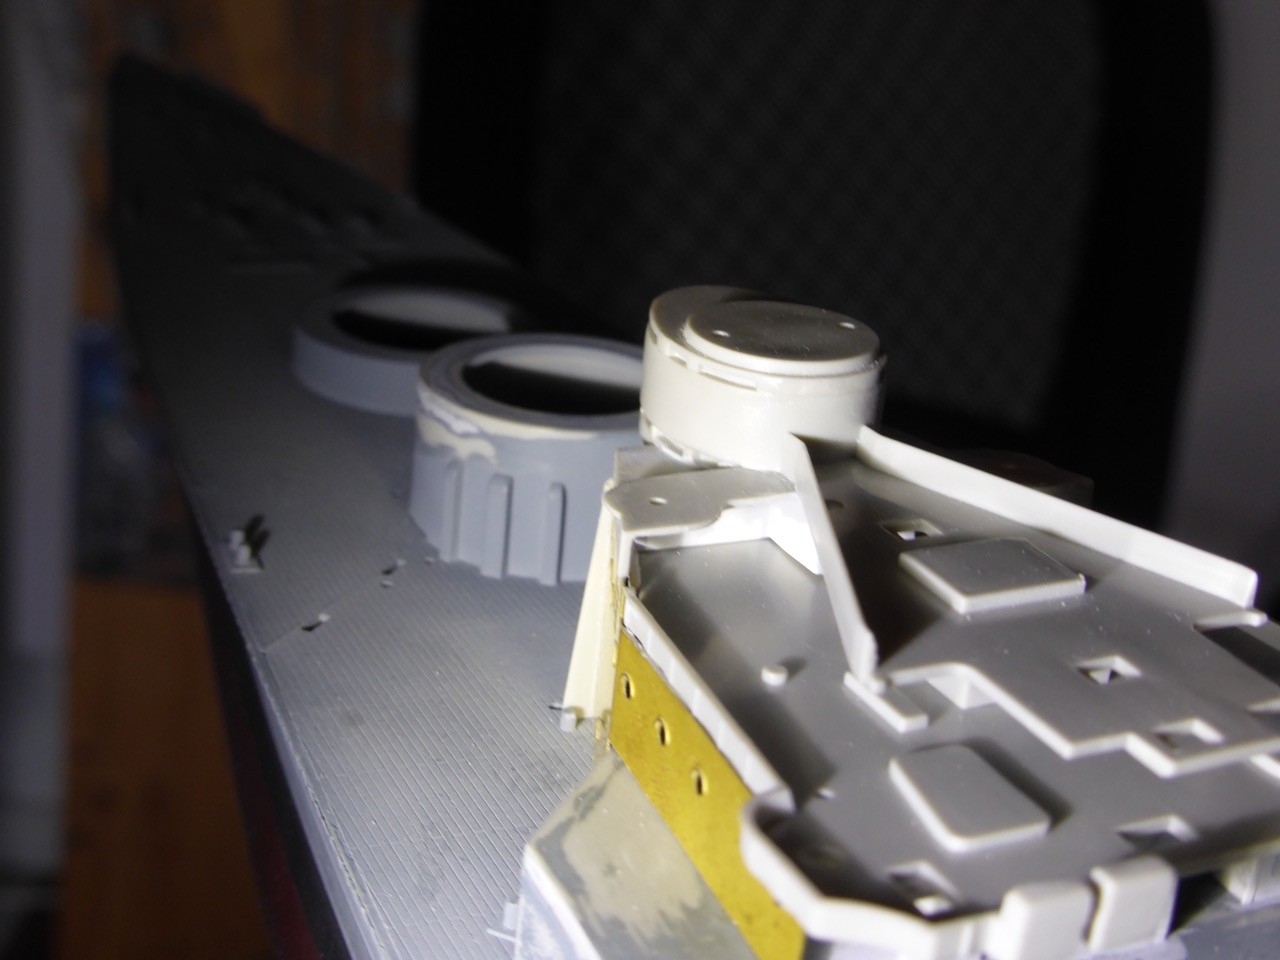
Next 'level' added and another seam...
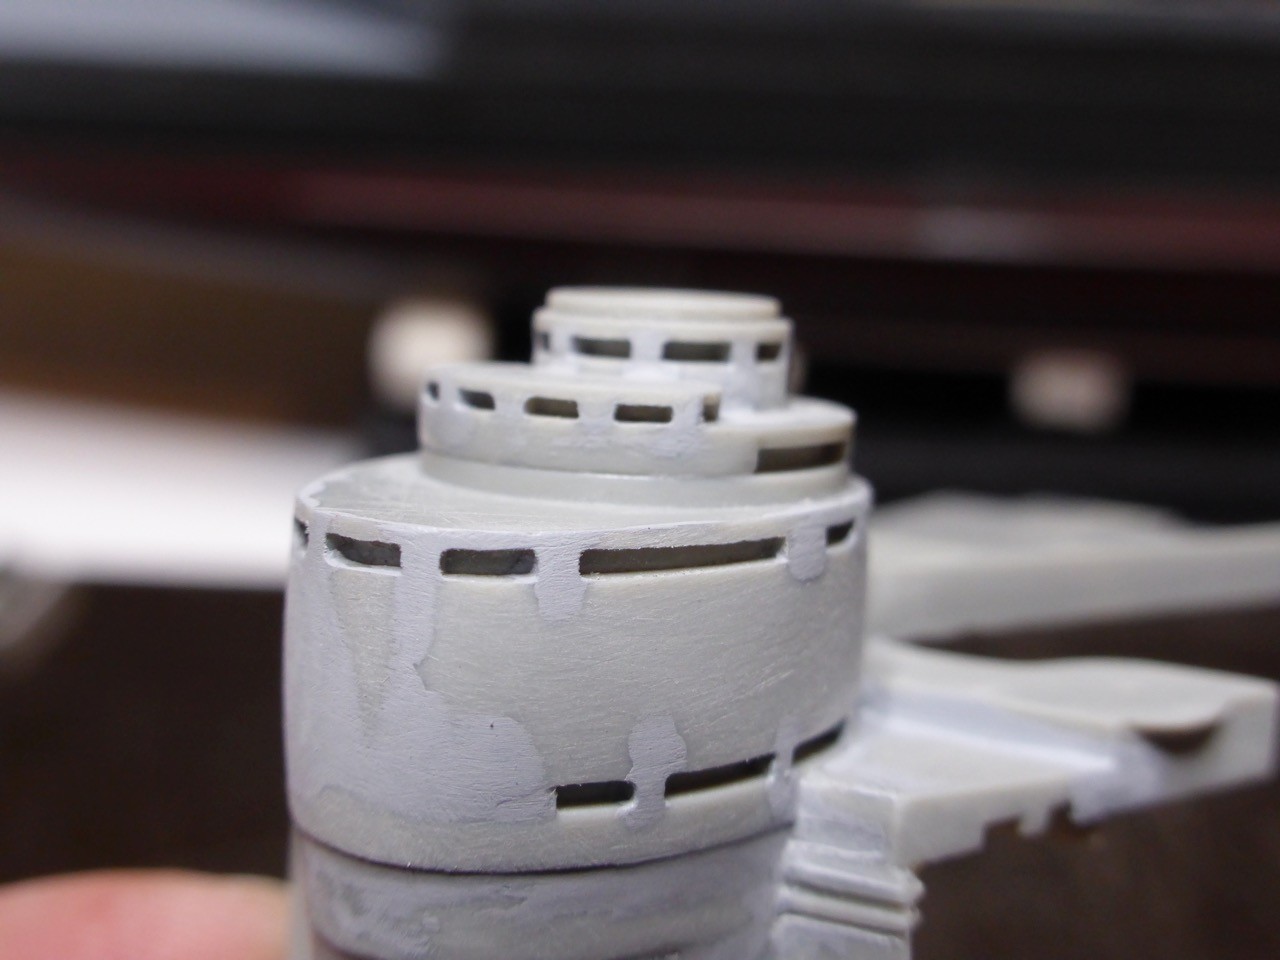
More surfacer...
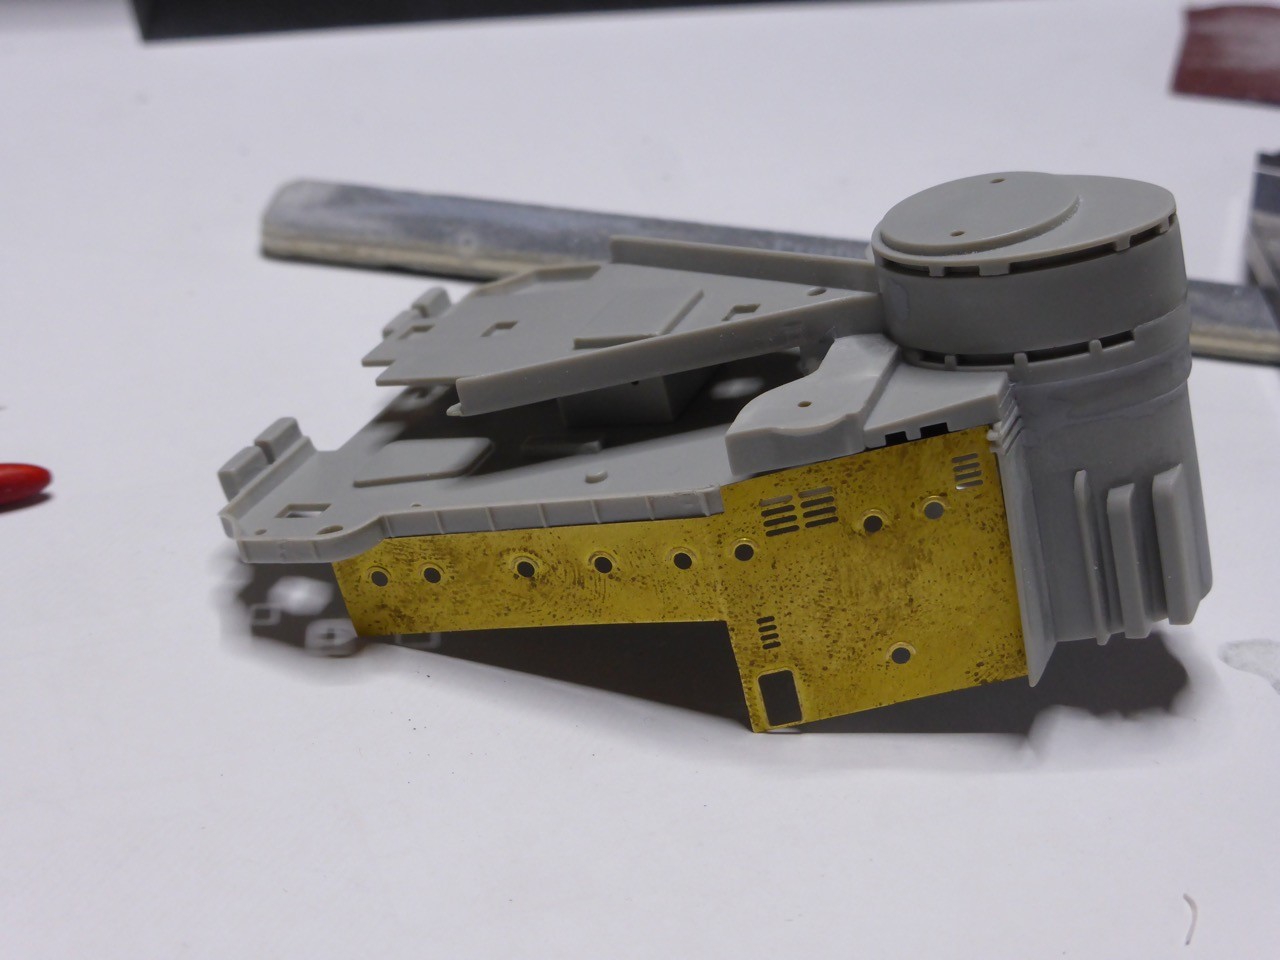
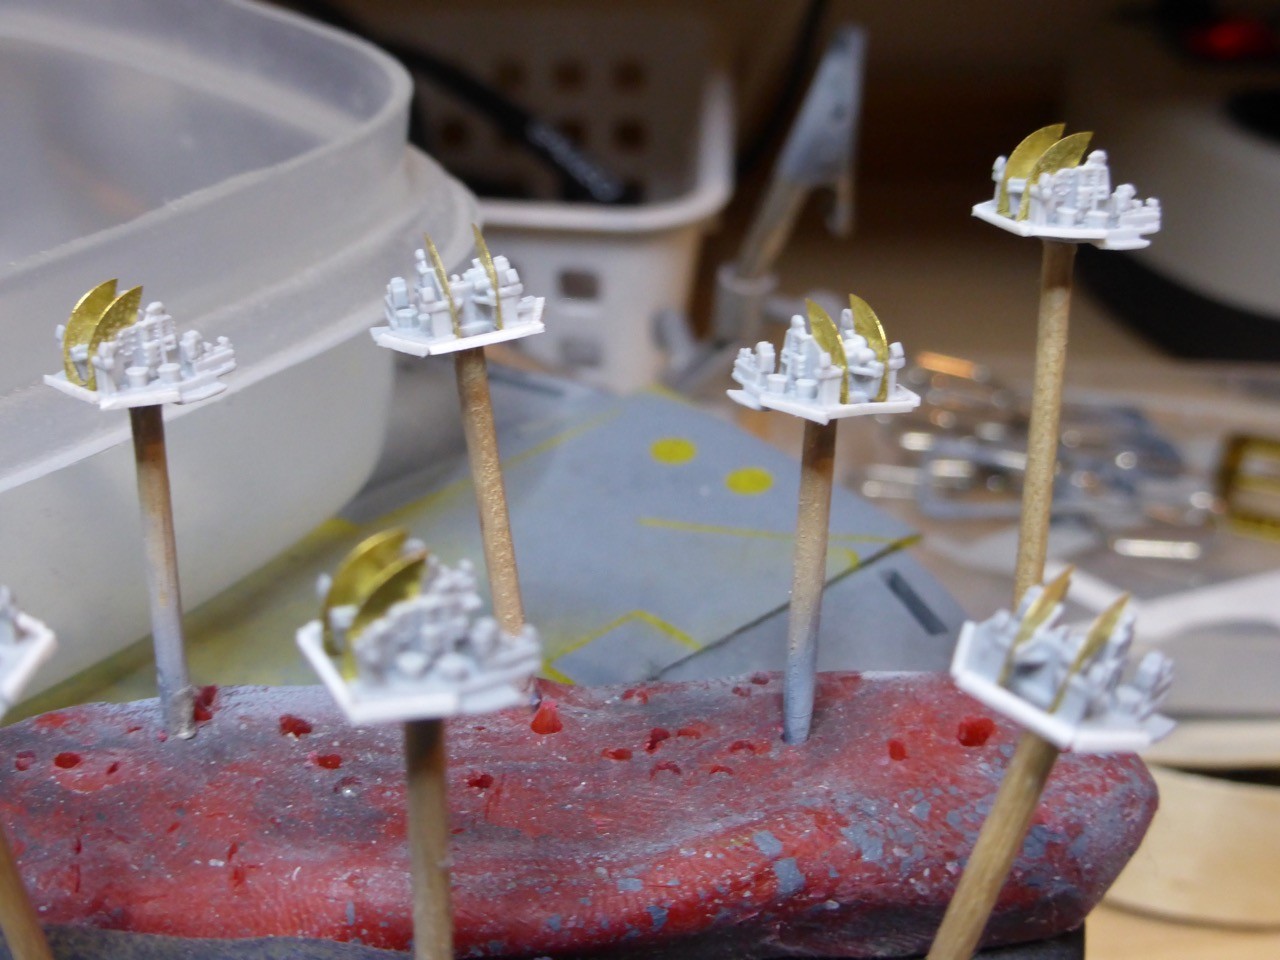
...and the fix for the gun shields added to the mounts. Of course this will be sanded and blended in once the gun shields will be in place.
So much for now, slow progress and once again busy times real life wise...
Thanks for looking,
cheers,
Jan
Mainly filling and sanding, and not being able to spent much time modelling allowed the surfacer to cure properly...
Basically it's all around and about the seams of the armoured conning tower.
I need to build a a little substance on starboard, but with that the windows in the lower row are a little out of shape.
More surfacer. And yes, the surface is quite coarse, but that's only to get it into correct shape. Sanding with fine paper and a final layer of sprayed on surfacer will follow in the end...
Next 'level' added and another seam...
More surfacer...
...and the fix for the gun shields added to the mounts. Of course this will be sanded and blended in once the gun shields will be in place.
So much for now, slow progress and once again busy times real life wise...
Thanks for looking,
cheers,
Jan
 |

WEB HOSTING BY


Copyright ©2021 Model Shipwrights and Kitmaker Network, a subsidiary of Silver Star Enterprises
All Rights Reserved. Please read our Conditions of Use and Privacy Policy.
All Rights Reserved. Please read our Conditions of Use and Privacy Policy.