Ships by Class/Type: Battleships
Topics from the Dreadnaught era to modern day.
Hosted by Steve Joyce
HMS Hood 1941 - Trumpeter 1/350 + Lion Roar
RussellE
#306
Visit this Community
Victoria, Australia
Joined: June 27, 2010
KitMaker: 3,959 posts
Model Shipwrights: 2,777 posts
Posted: Monday, September 12, 2016 - 04:20 PM UTC
Wow Jan!

All that early work has really paid off!

Fantastic!
rolltide31
#377
Visit this Community
Texas, United States
Joined: June 27, 2010
KitMaker: 1,481 posts
Model Shipwrights: 1,332 posts
Posted: Monday, September 12, 2016 - 08:00 PM UTC
Jan,

Your Hood is looking amazing. Nice job on the wooden deck. Really make the ship pop!!!

Dave
Harry_at_BFM
Visit this Community
Colorado, United States
Joined: February 04, 2007
KitMaker: 594 posts
Model Shipwrights: 556 posts
Posted: Monday, September 12, 2016 - 08:21 PM UTC
Hallo Jan,

Extremely nice work done. Now, I am thinking of trying my hand at a battleship
RedDuster
Visit this Community
England - South East, United Kingdom
Joined: March 01, 2010
KitMaker: 7,078 posts
Model Shipwrights: 6,649 posts
Posted: Tuesday, September 13, 2016 - 12:09 AM UTC
Great stuff Jan,

The deck looks great down, and porthole eyebrows must have been a real labour of love.

Another great update.

Cheers

Si
JJ1973
#345
Visit this Community
Niedersachsen, Germany
Joined: August 22, 2011
KitMaker: 1,835 posts
Model Shipwrights: 1,832 posts
Posted: Tuesday, September 13, 2016 - 08:59 AM UTC
Gentlemen,

thank you so much for looking in and for your kind comments!! That's really helping keeping motivation high!!

And now, with work moving more forward than sideways I'm looking forward again to some bench time on the weekend, that should be available!

Michael, well, you're right, I'm done with the portholes, but I will certainly see that in mind, extra thin cement with a brush, sounds like a really good idea! Should be easier in many aspects...but for the work on the hull it's too late.

Thank you all again!

Cheers,
Jan
JJ1973
#345
Visit this Community
Niedersachsen, Germany
Joined: August 22, 2011
KitMaker: 1,835 posts
Model Shipwrights: 1,832 posts
Posted: Saturday, September 17, 2016 - 10:47 PM UTC
Finally -

the weather is back to normal, all the stuff that had to be taken care of after my leave is done, and work on the shipyard went quite smooth. So here's this weekend's progress:

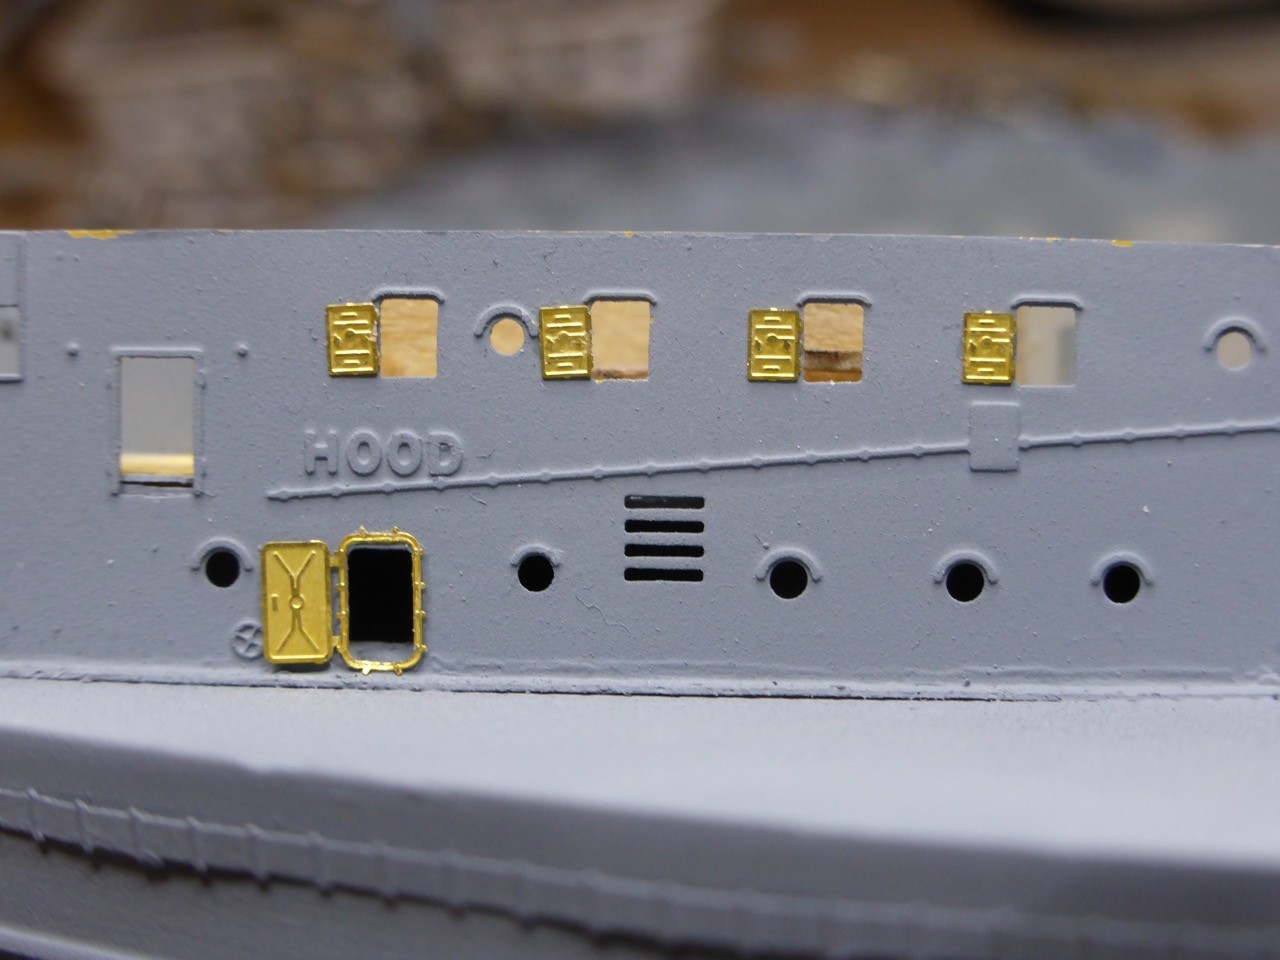
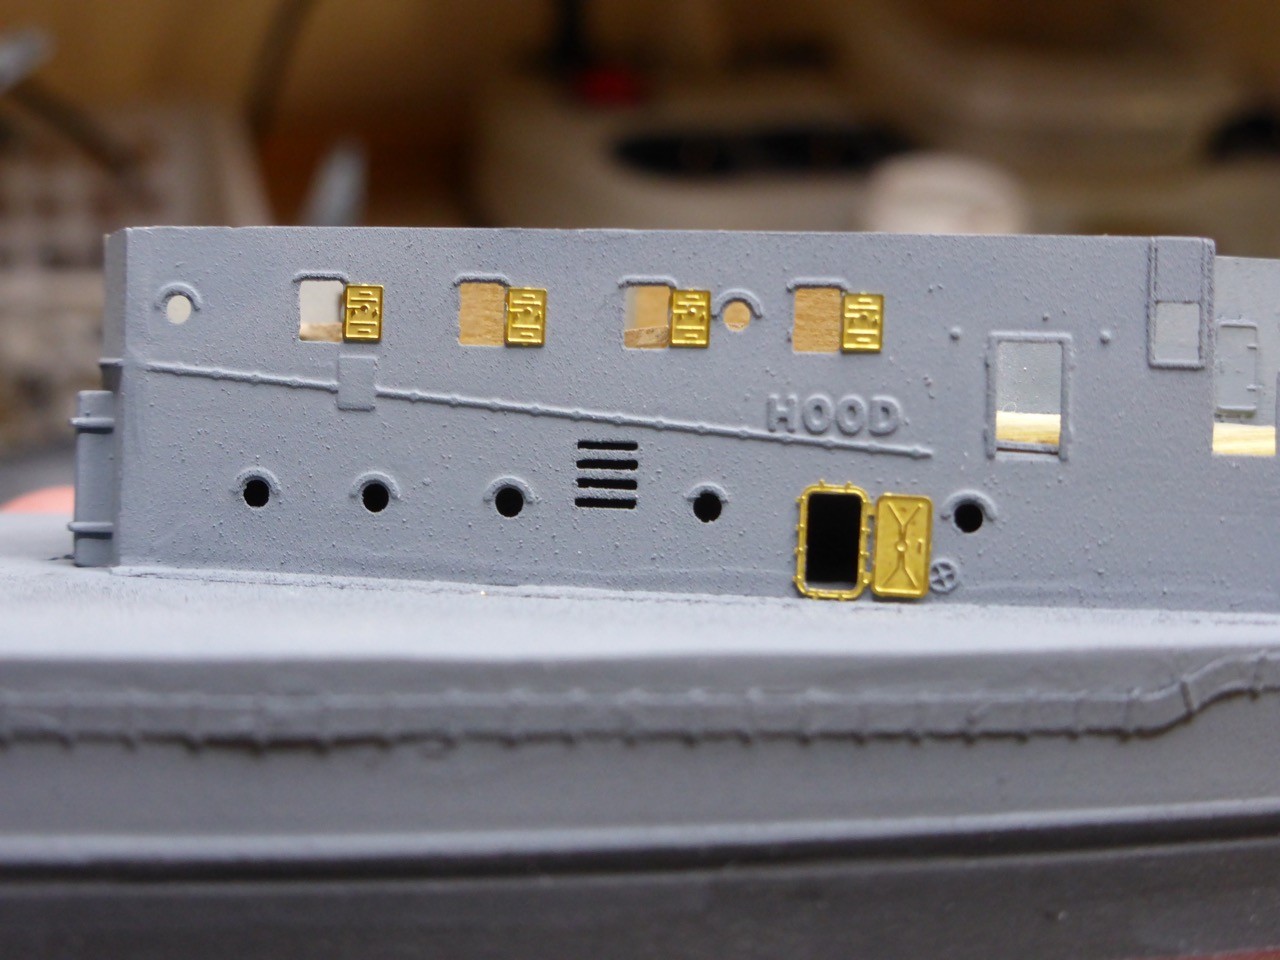
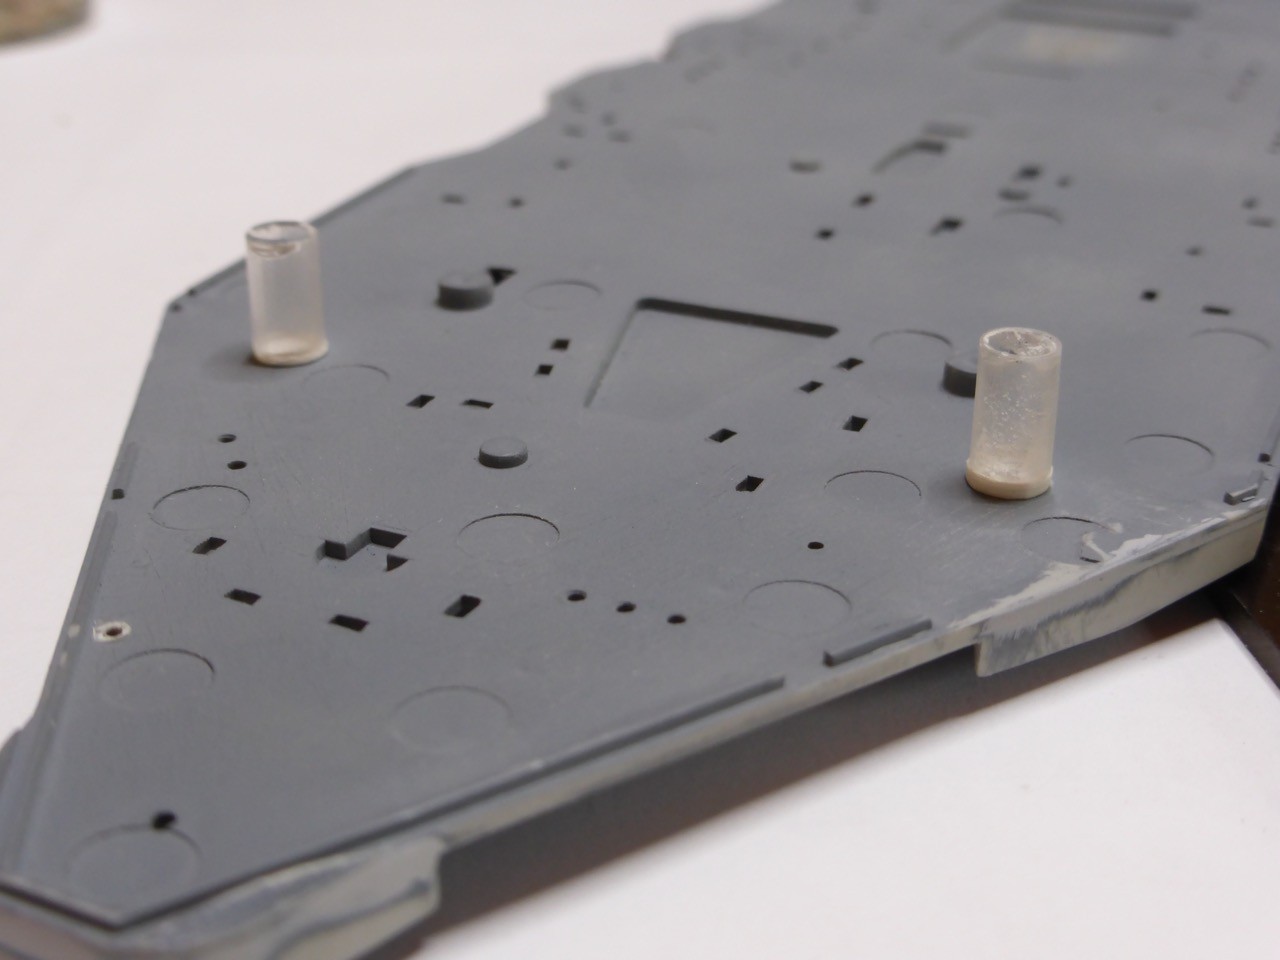
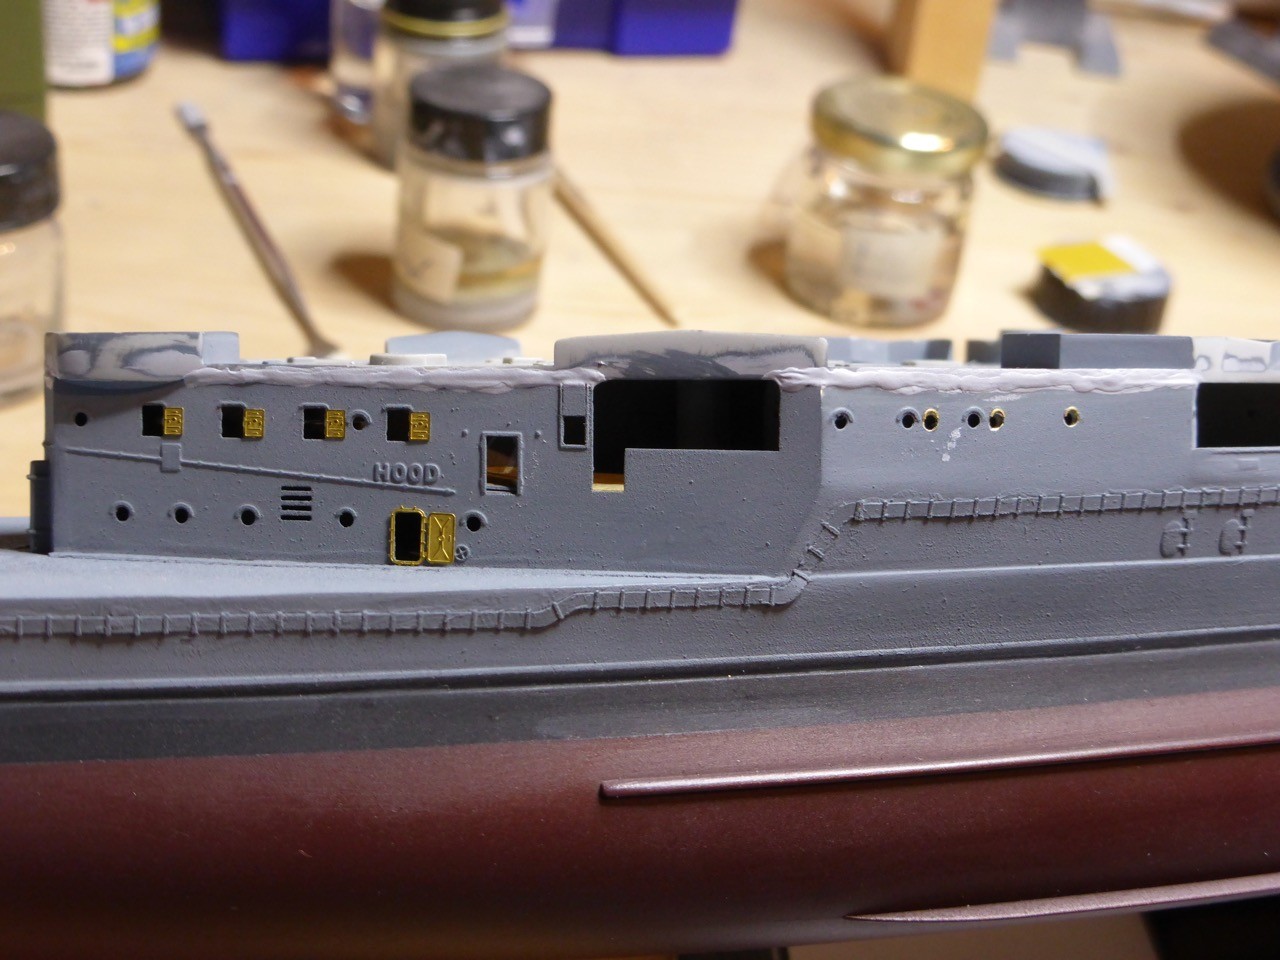
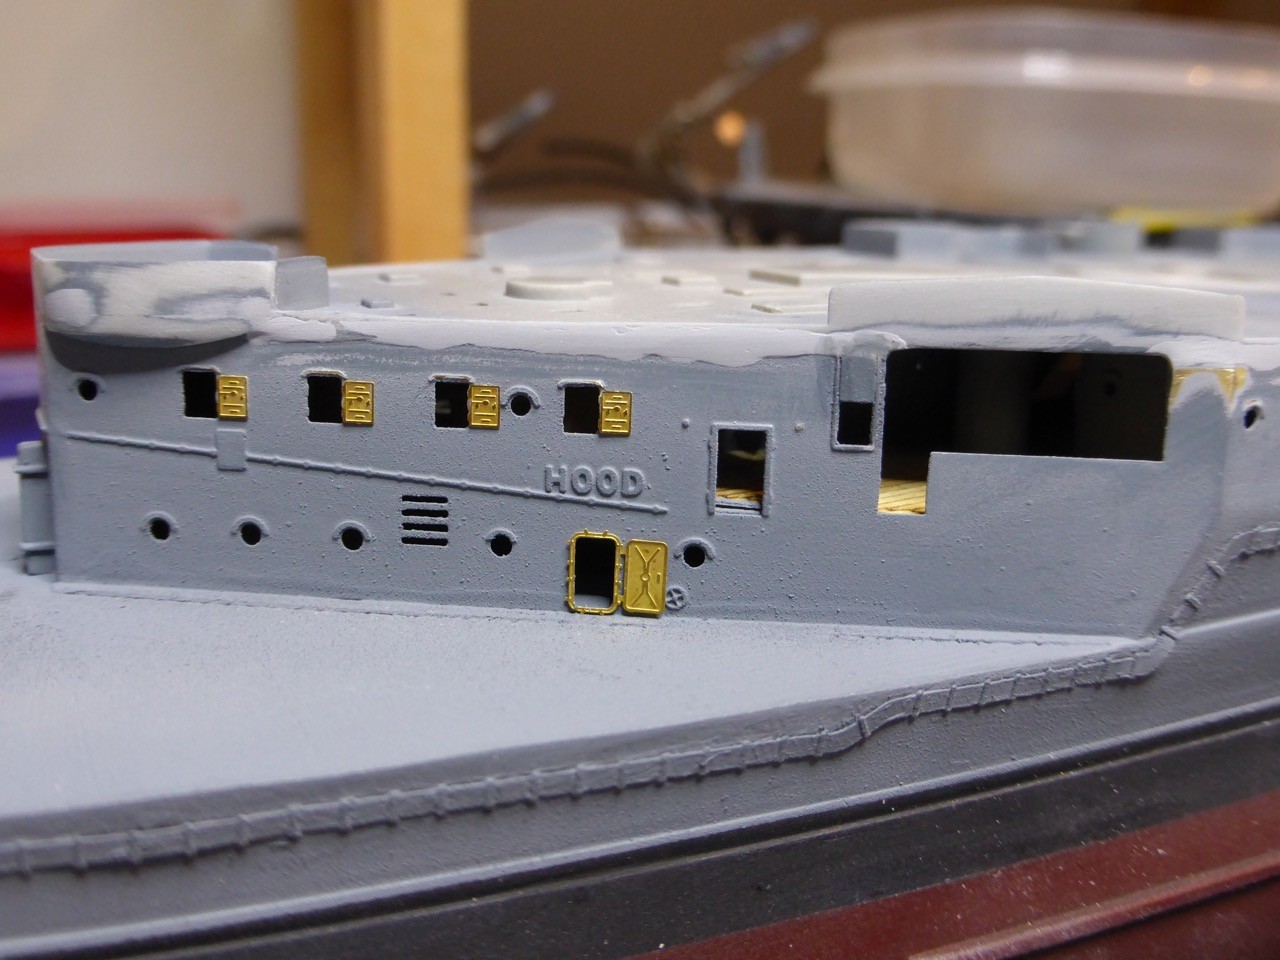
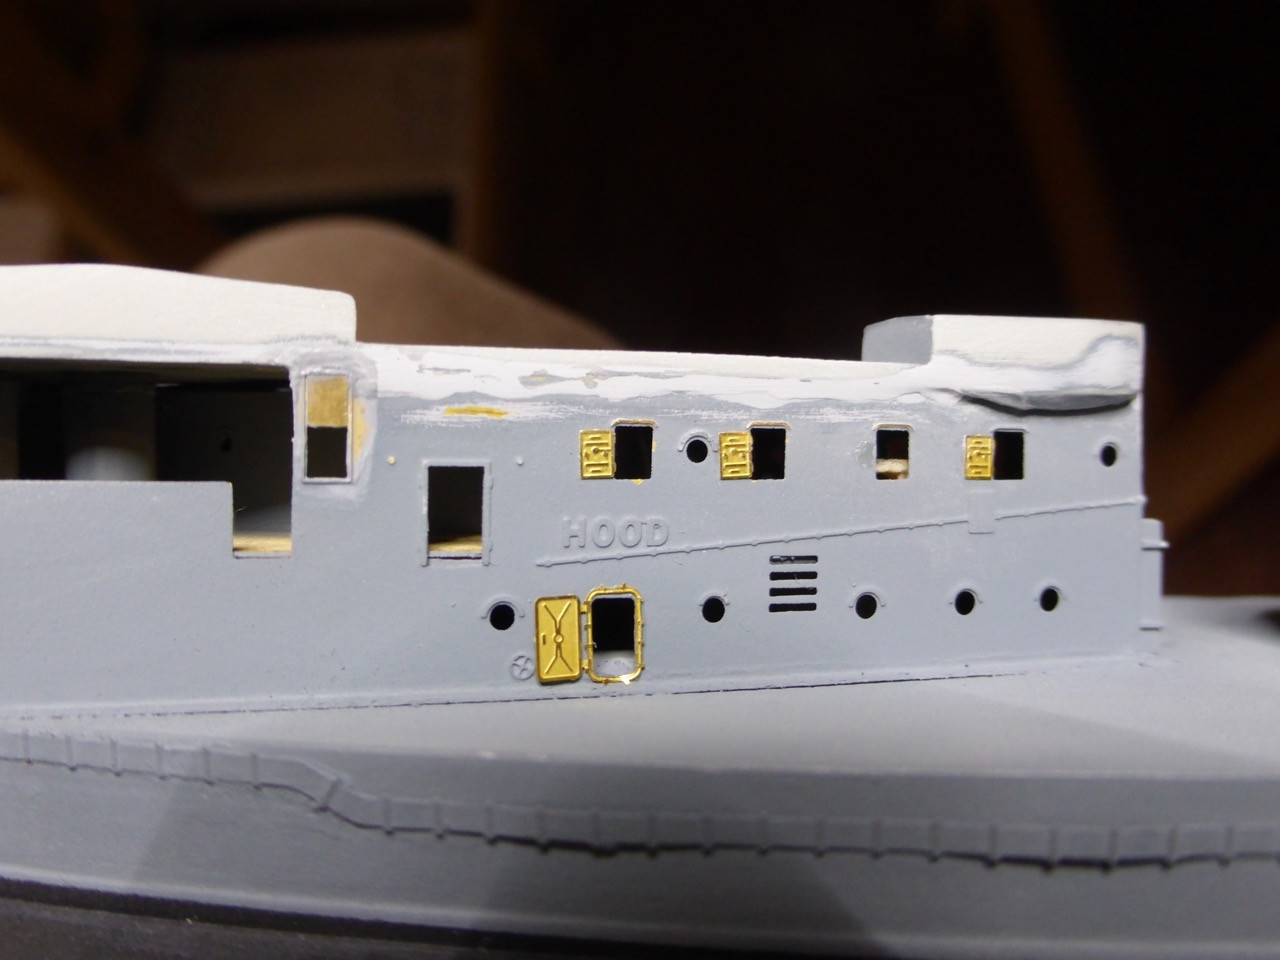
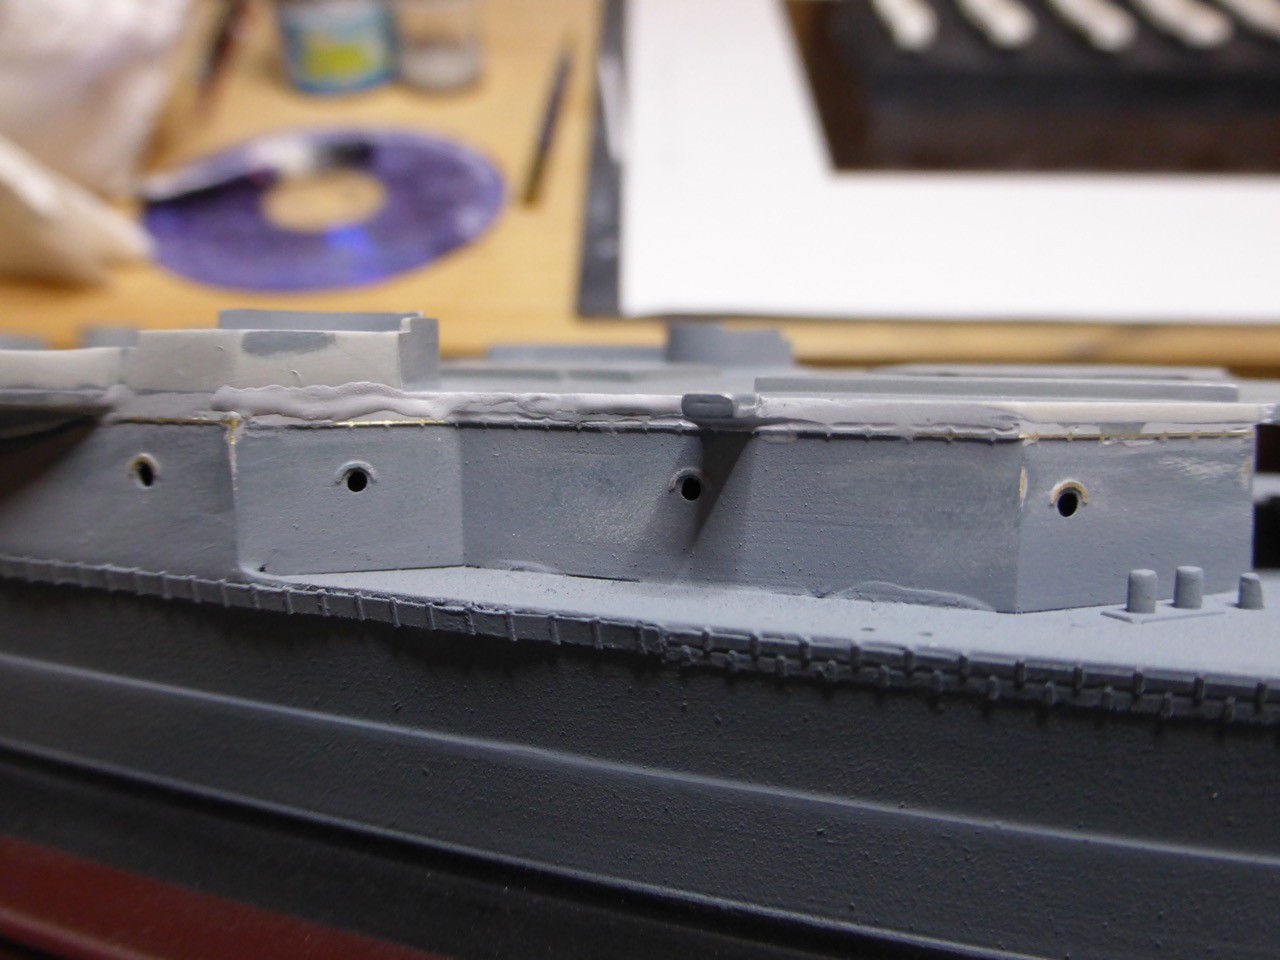
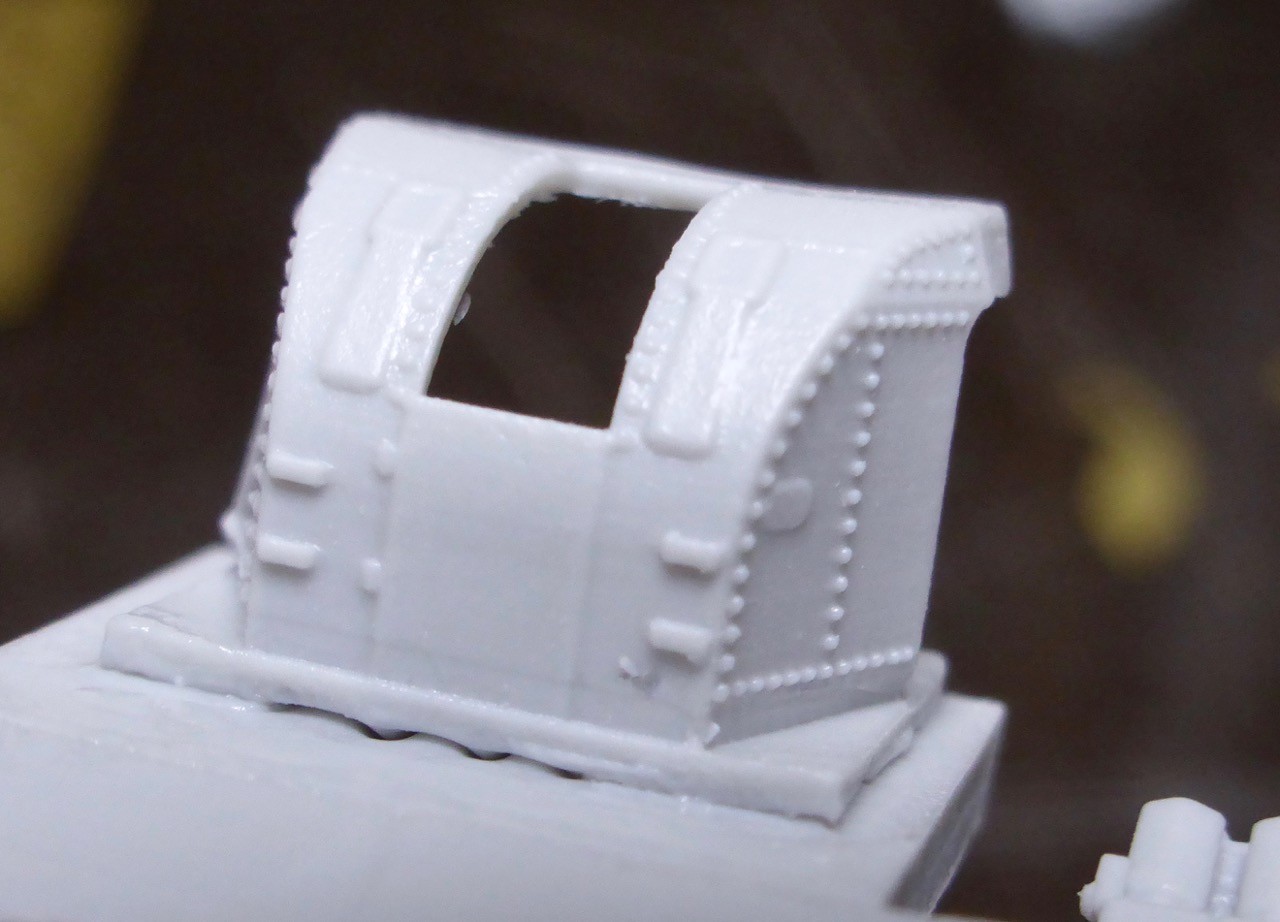
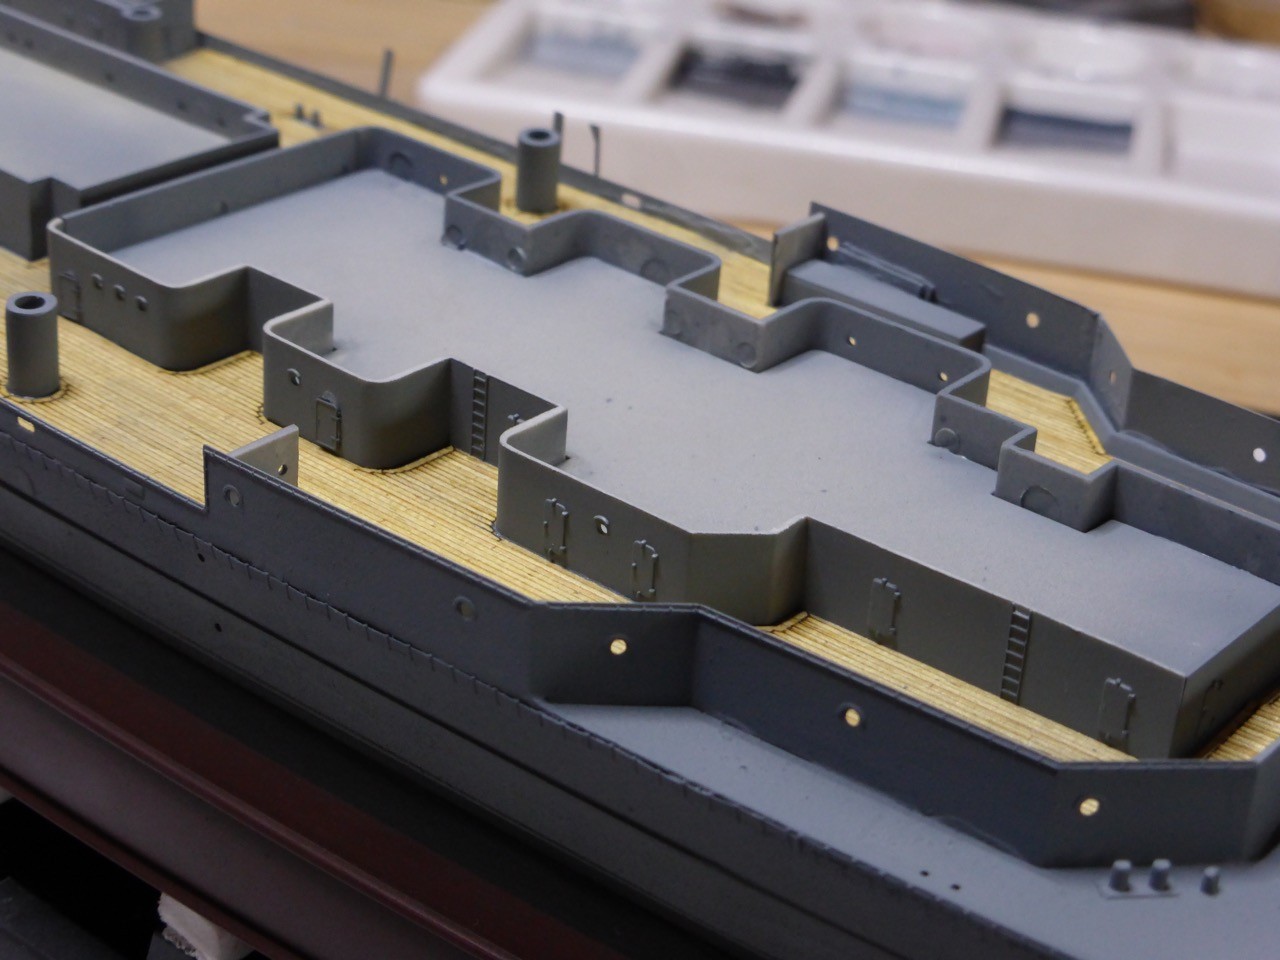
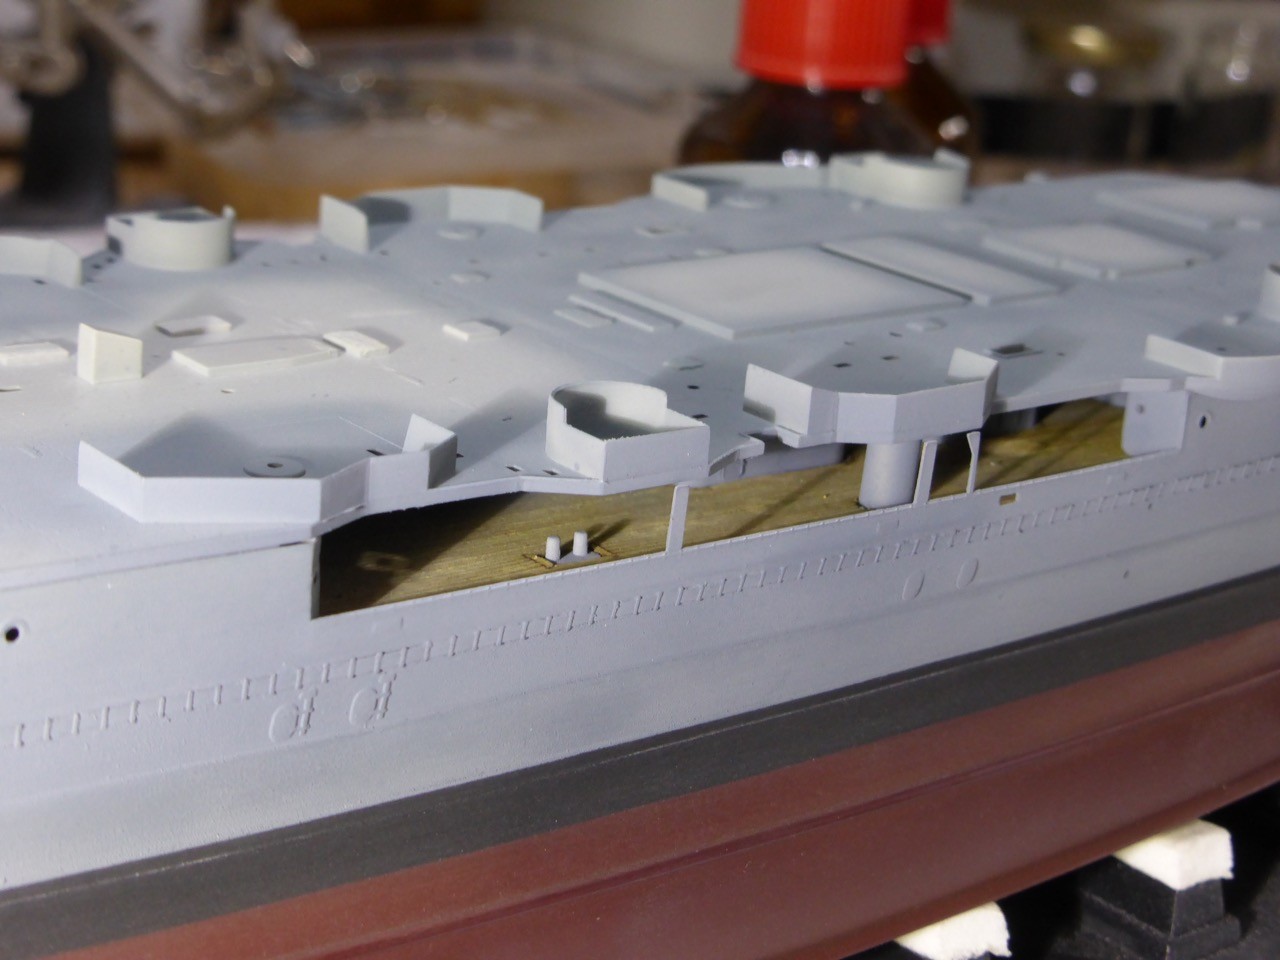
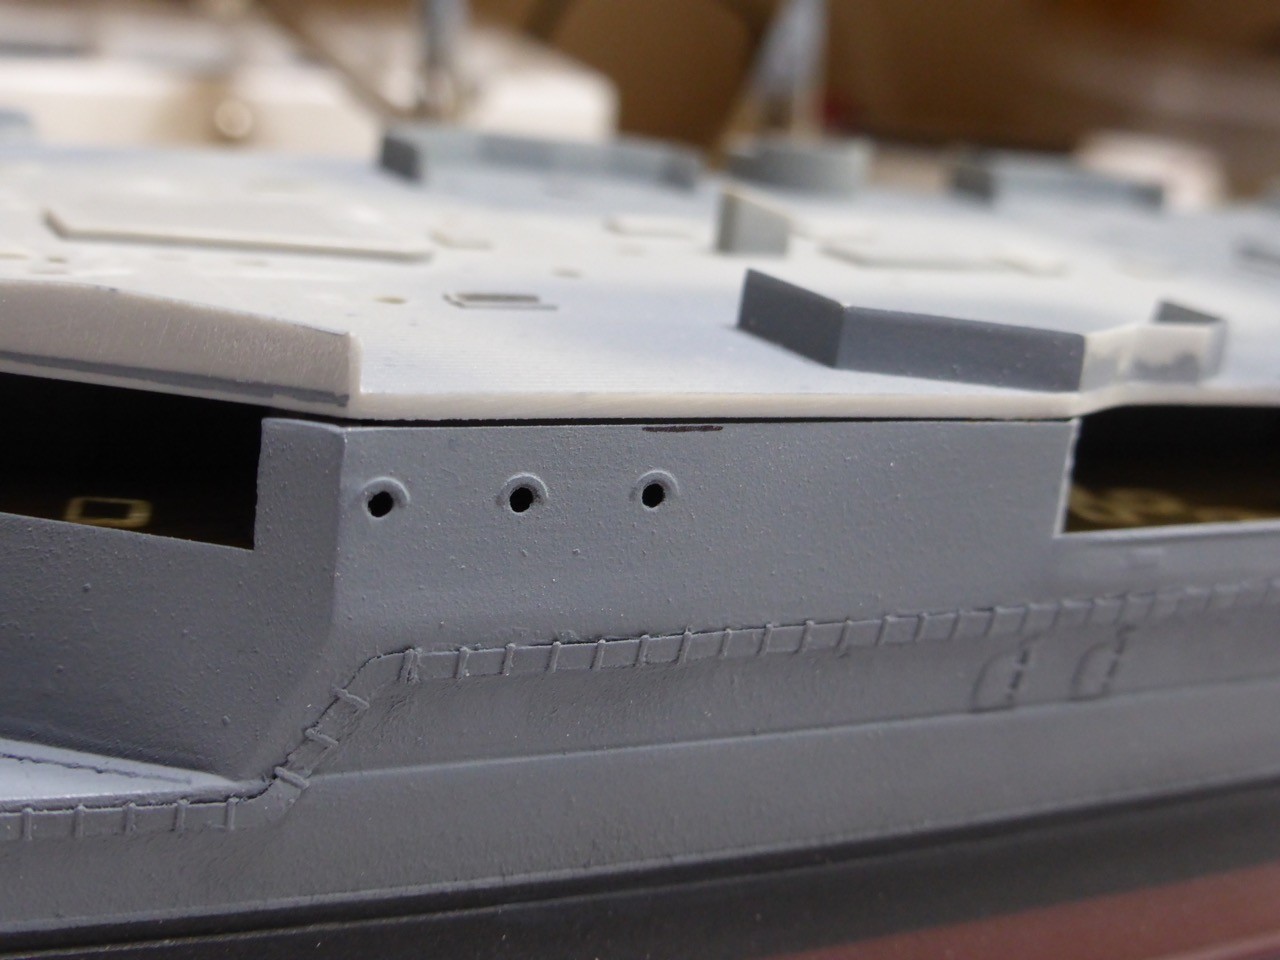
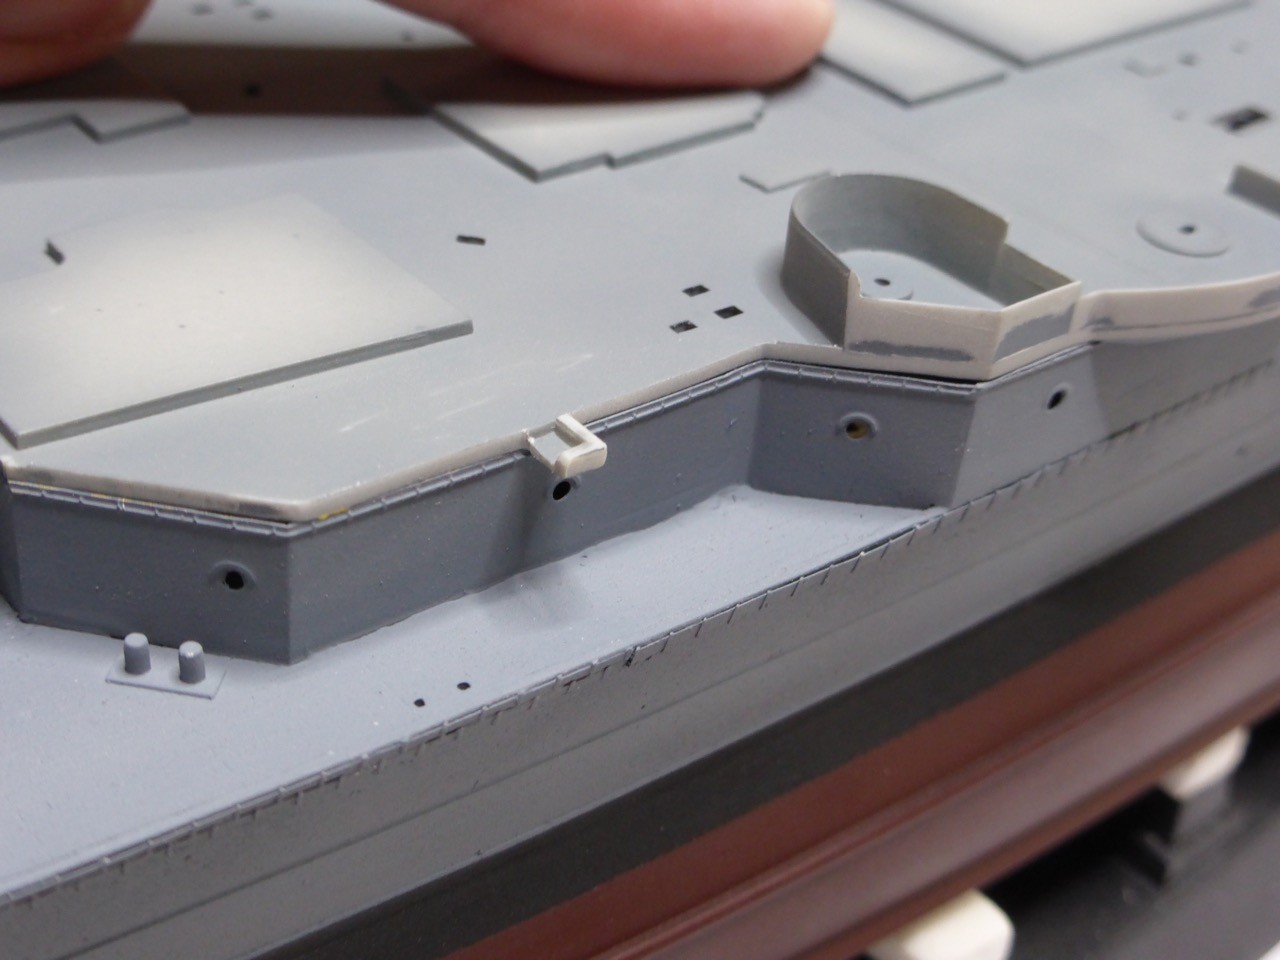
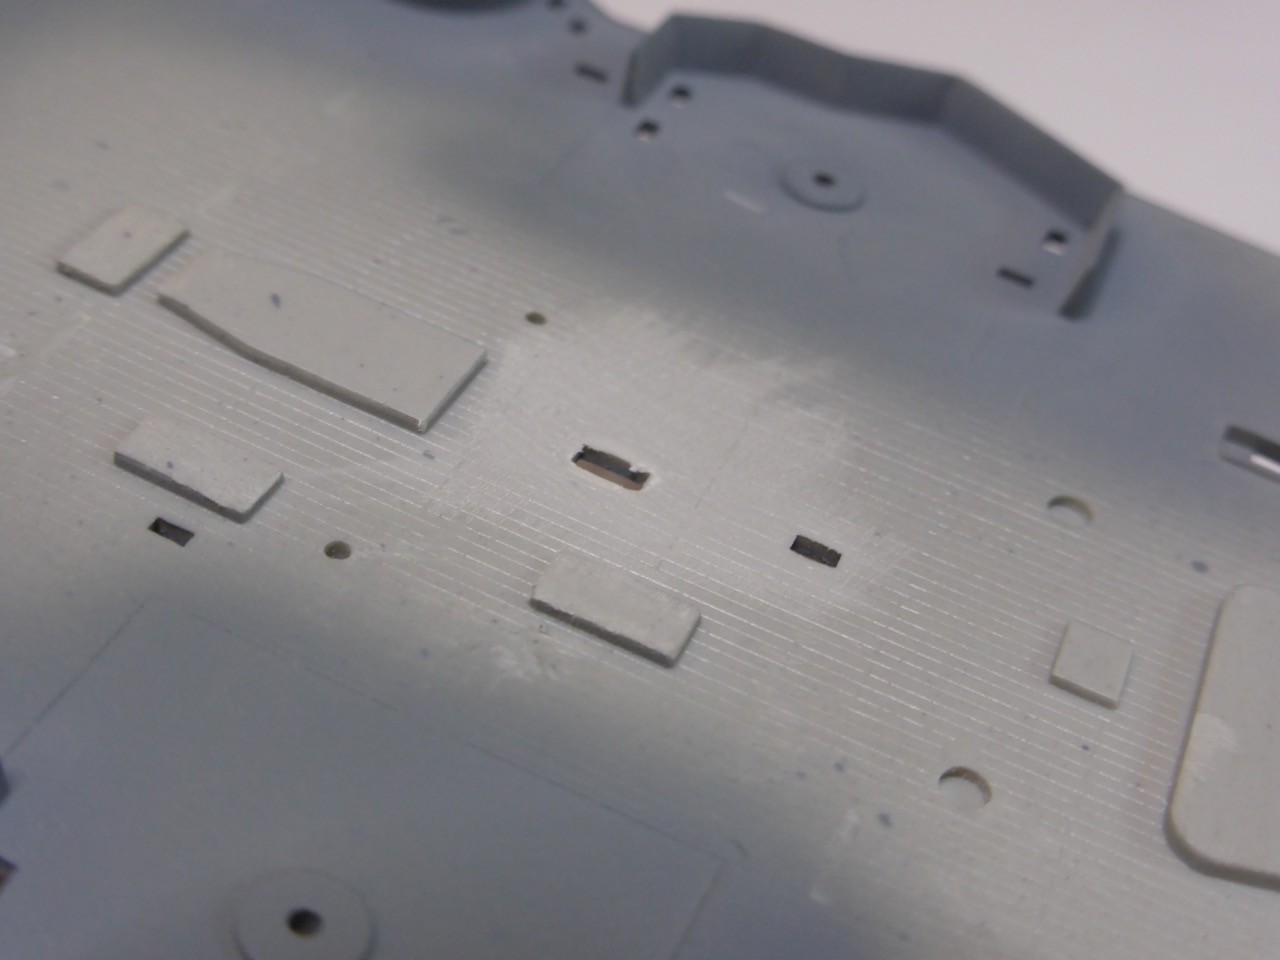
Preparations to the inner structures of the forecastle deck - cleaning, and I decided to replace only those doors, that will be visible in the end.


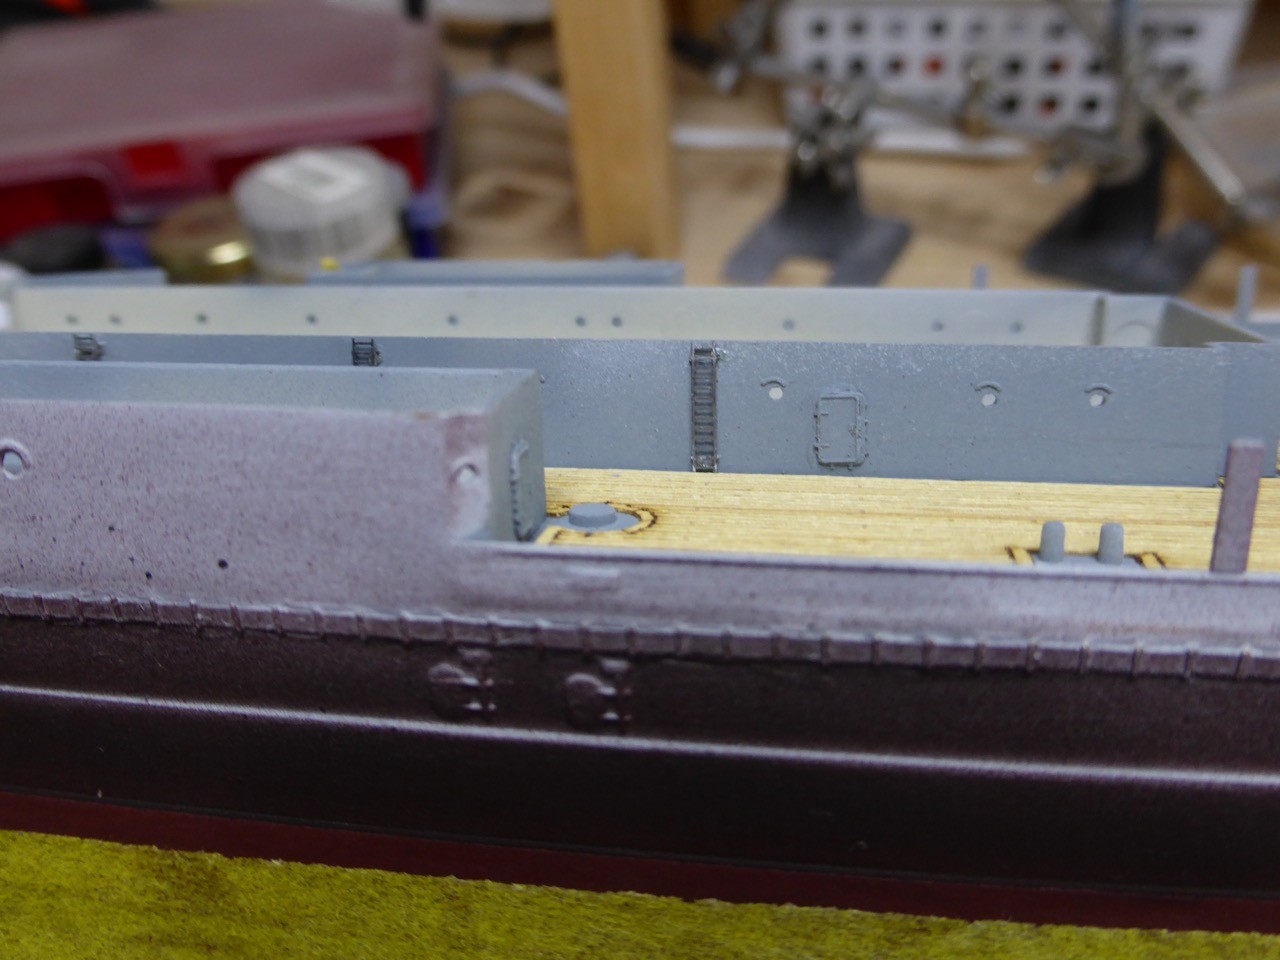
PE ladders back on. I had them installed very early on with not much consideration, then removed and put in a safe place. This is normally the most certain way to never see them again, but somehow I could remember where I had put them - probably wasn't a safe place then...


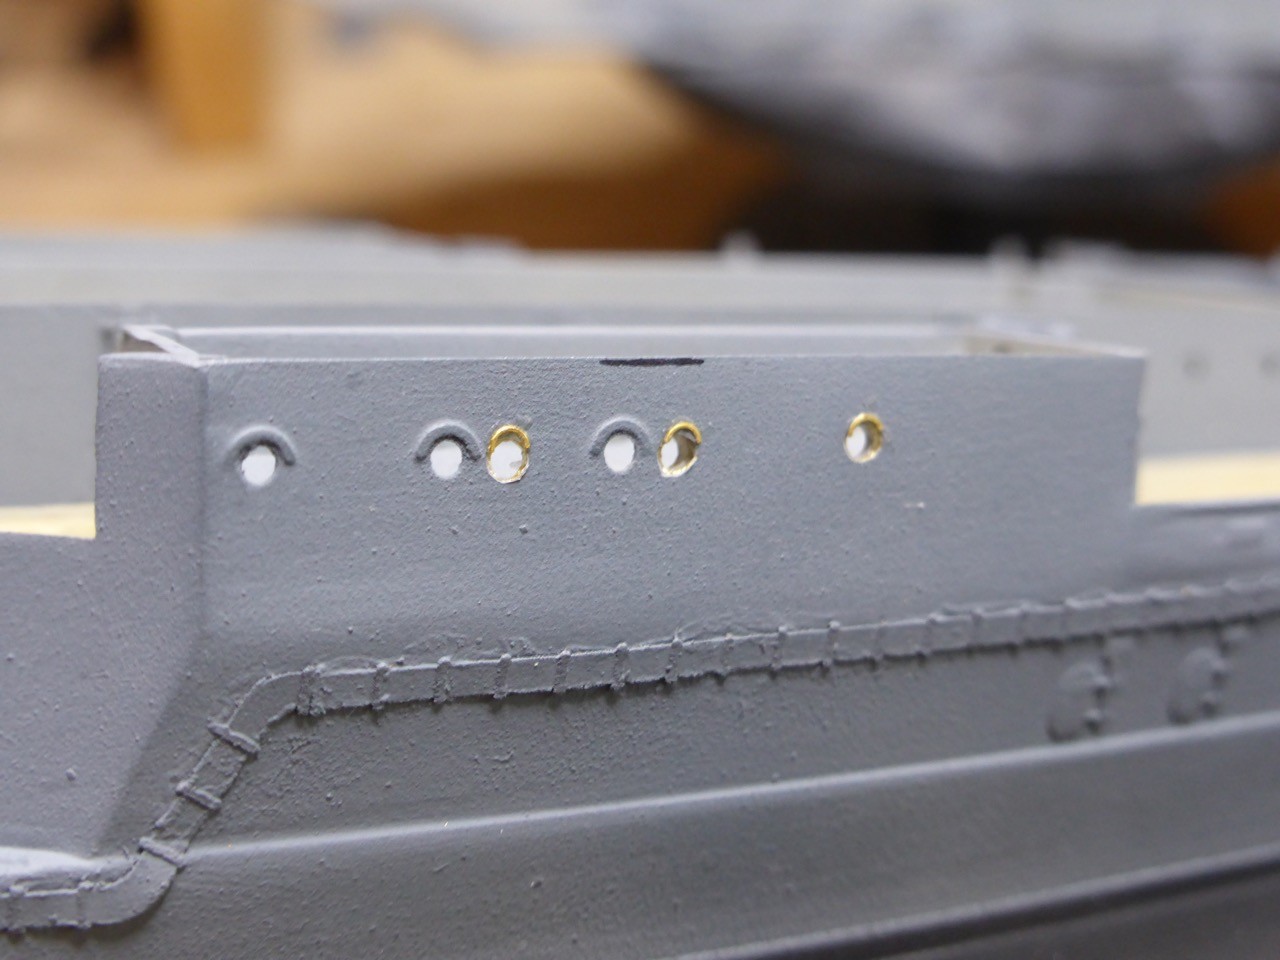
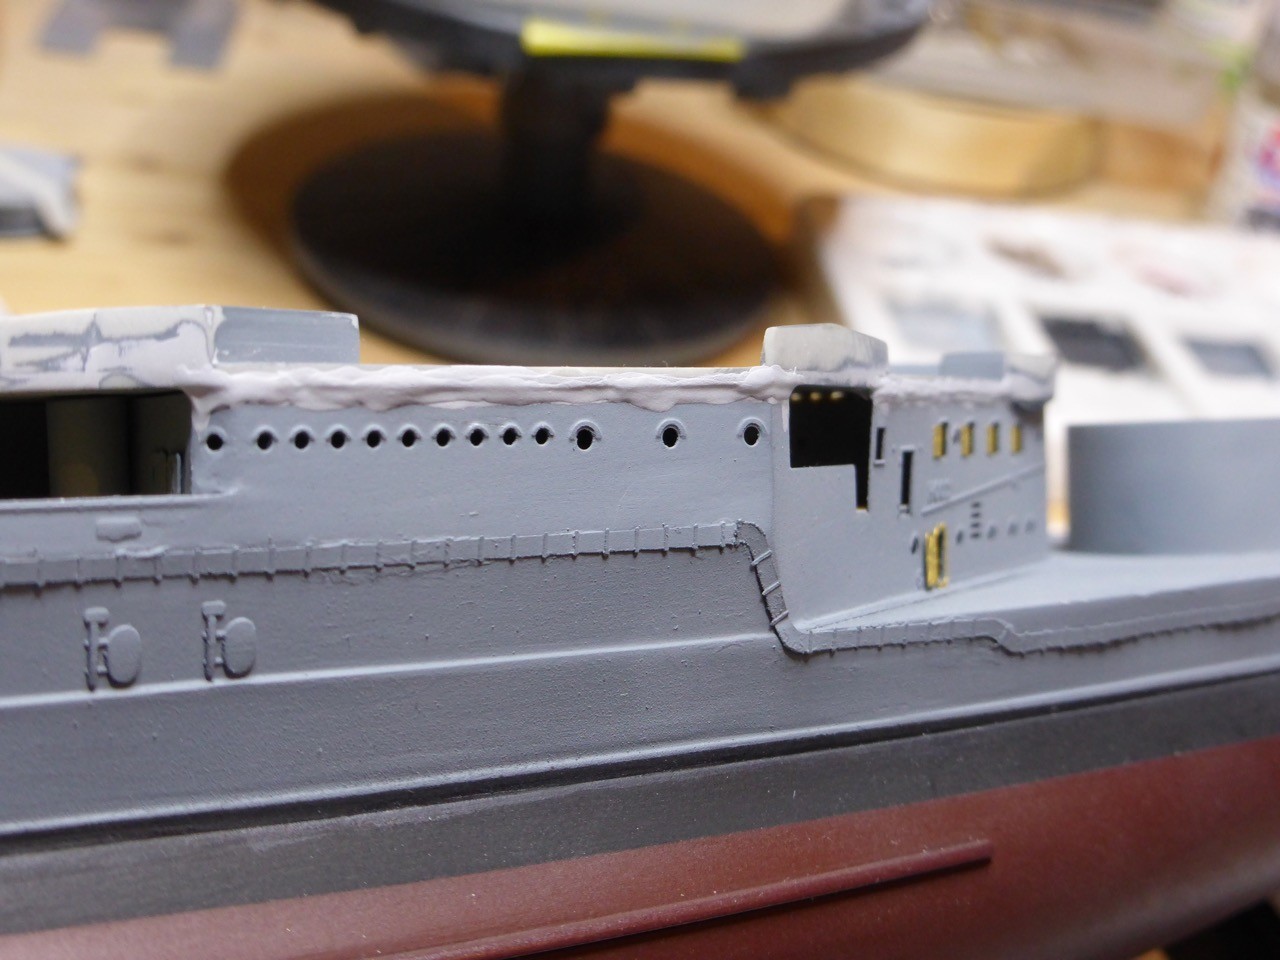
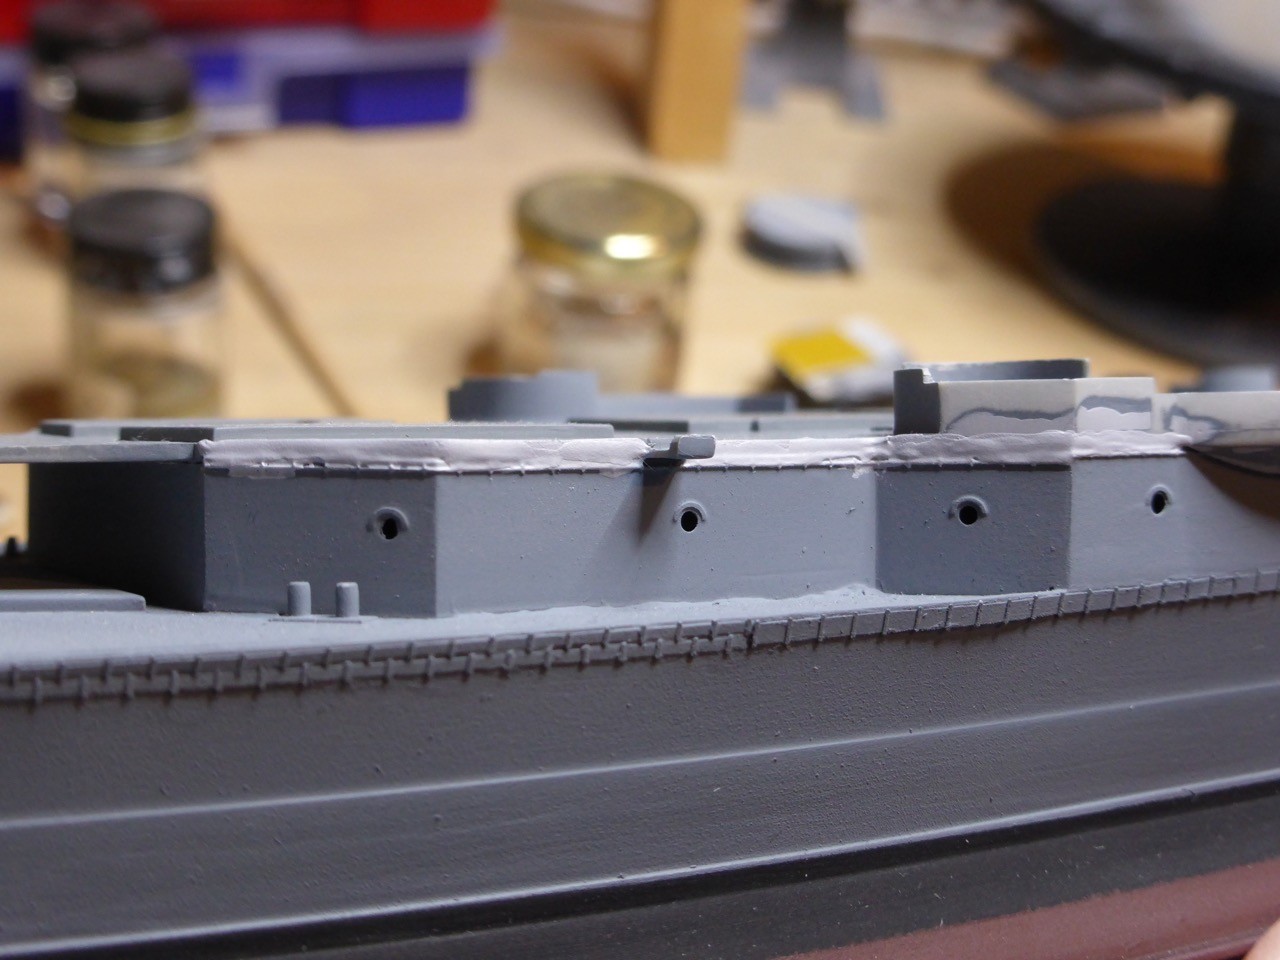
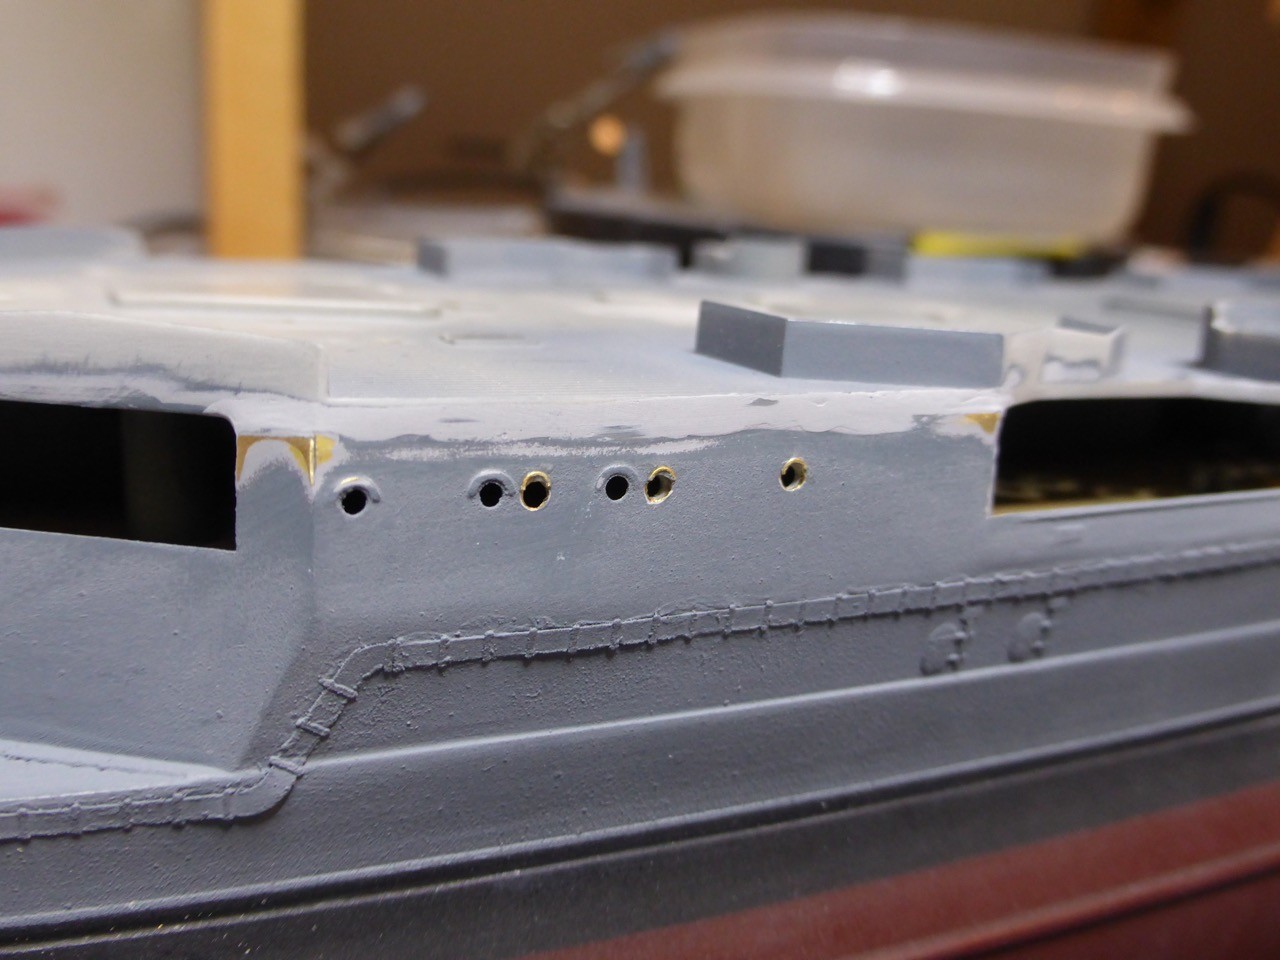
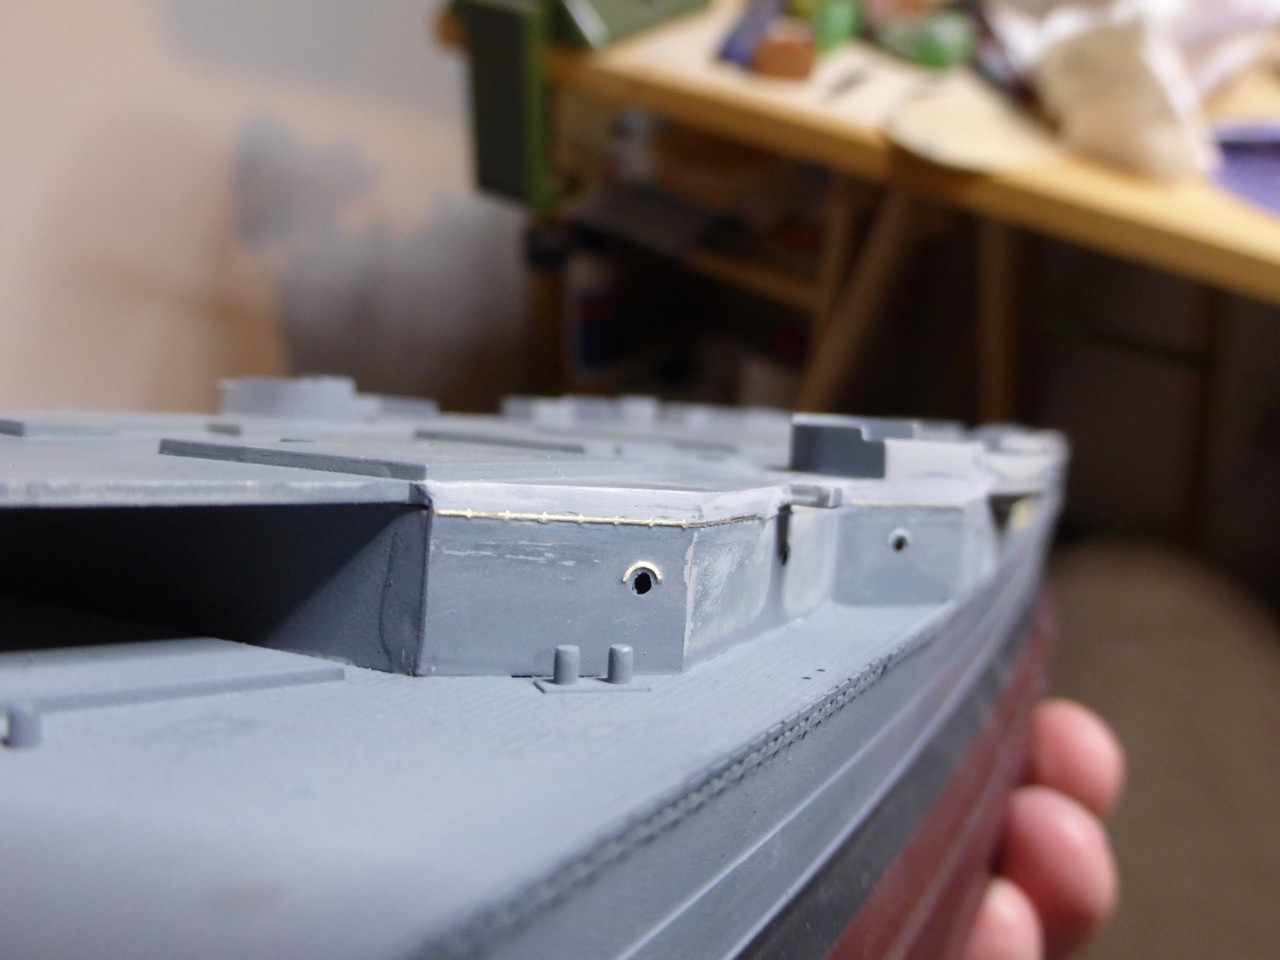
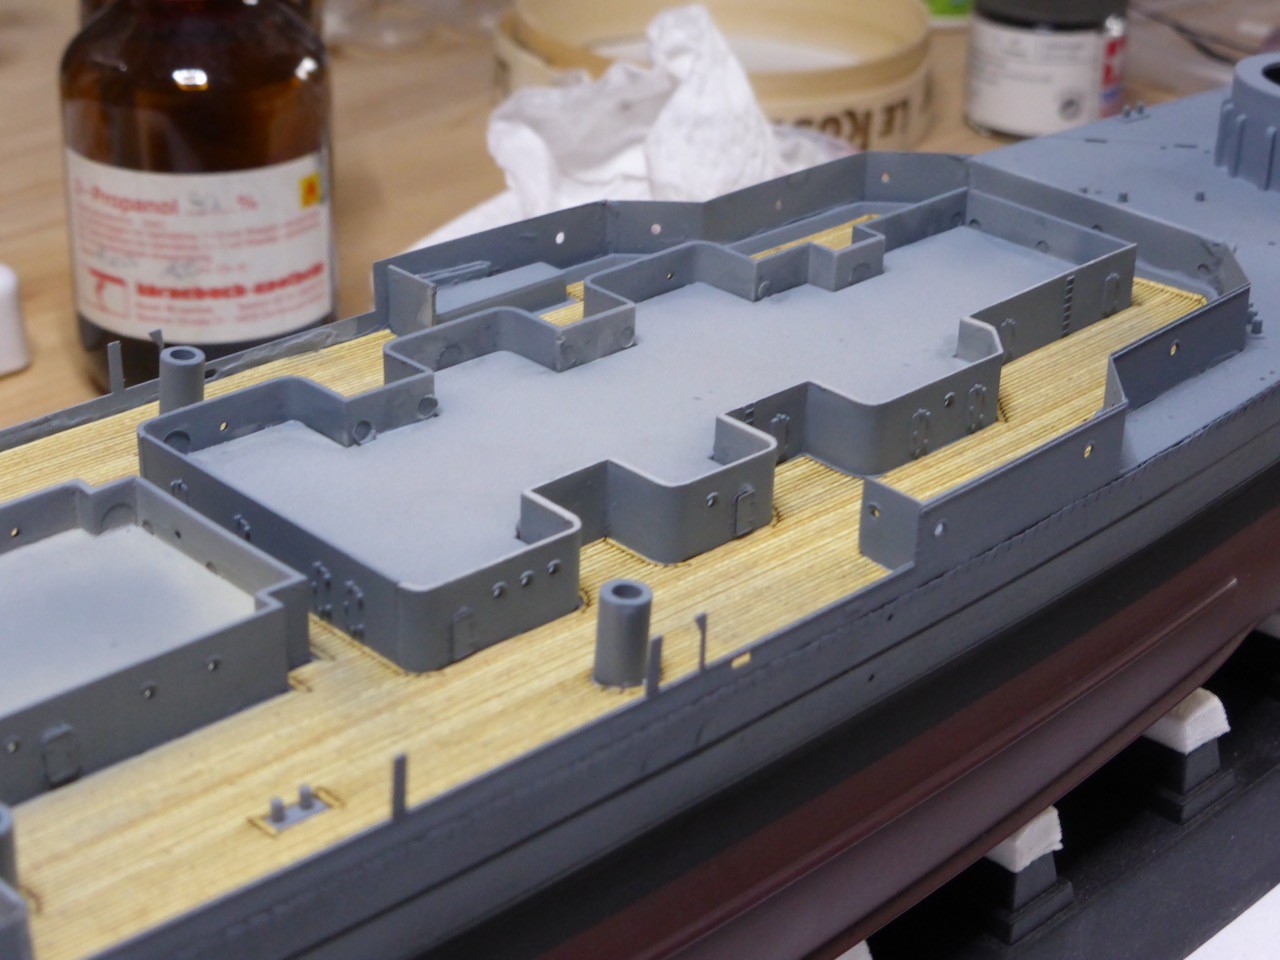
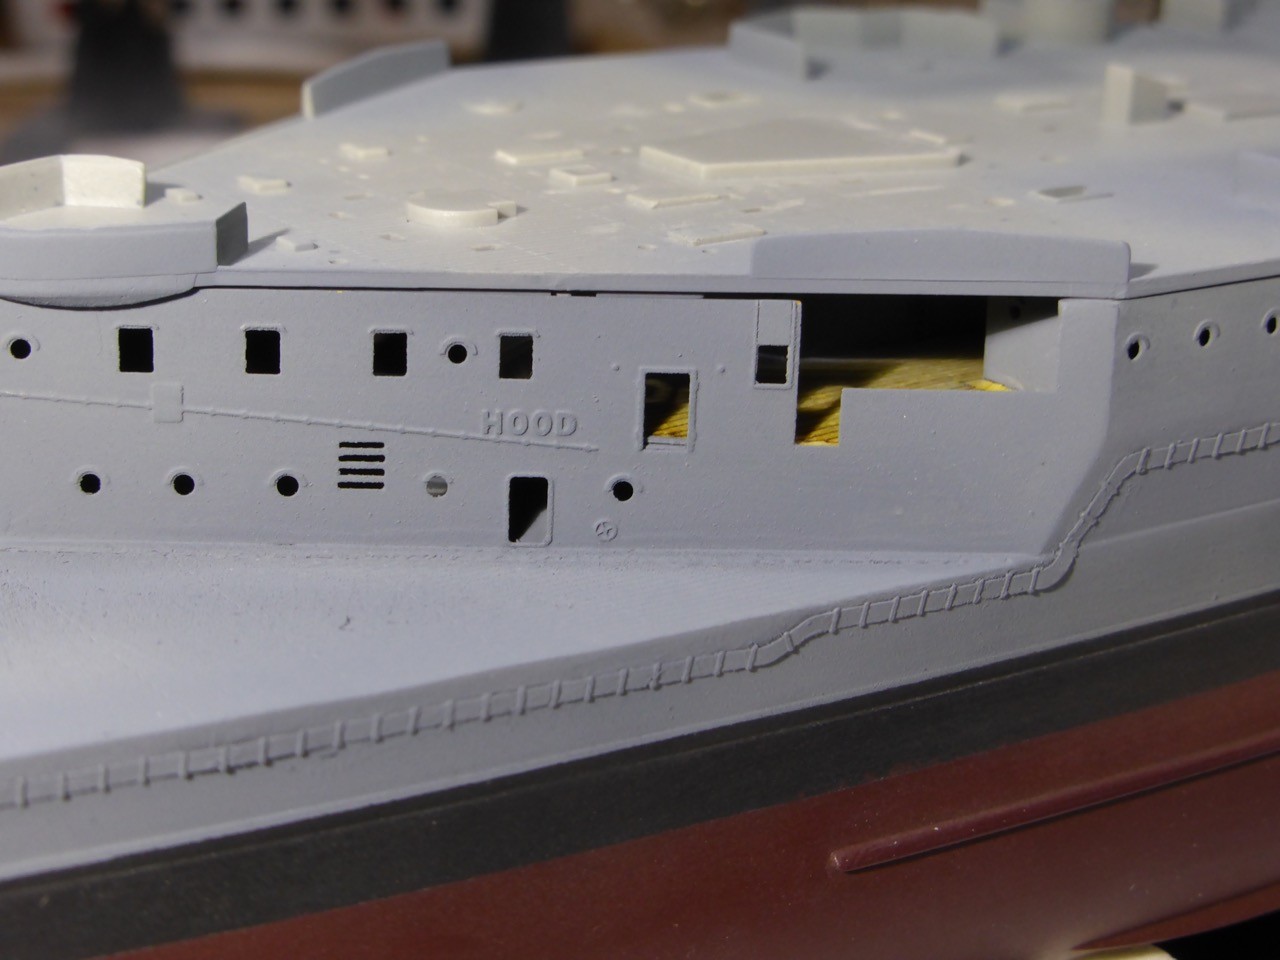
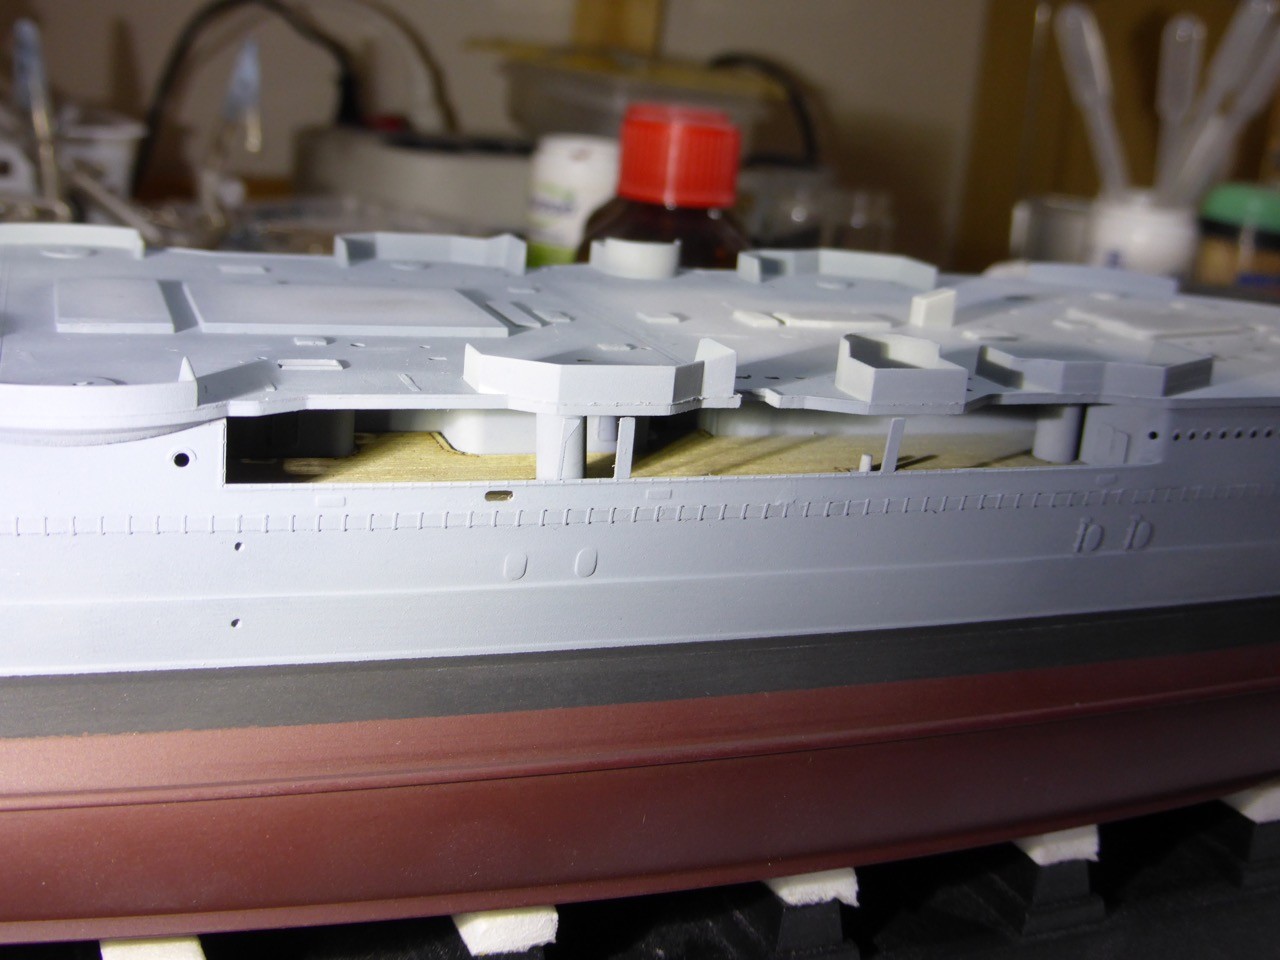
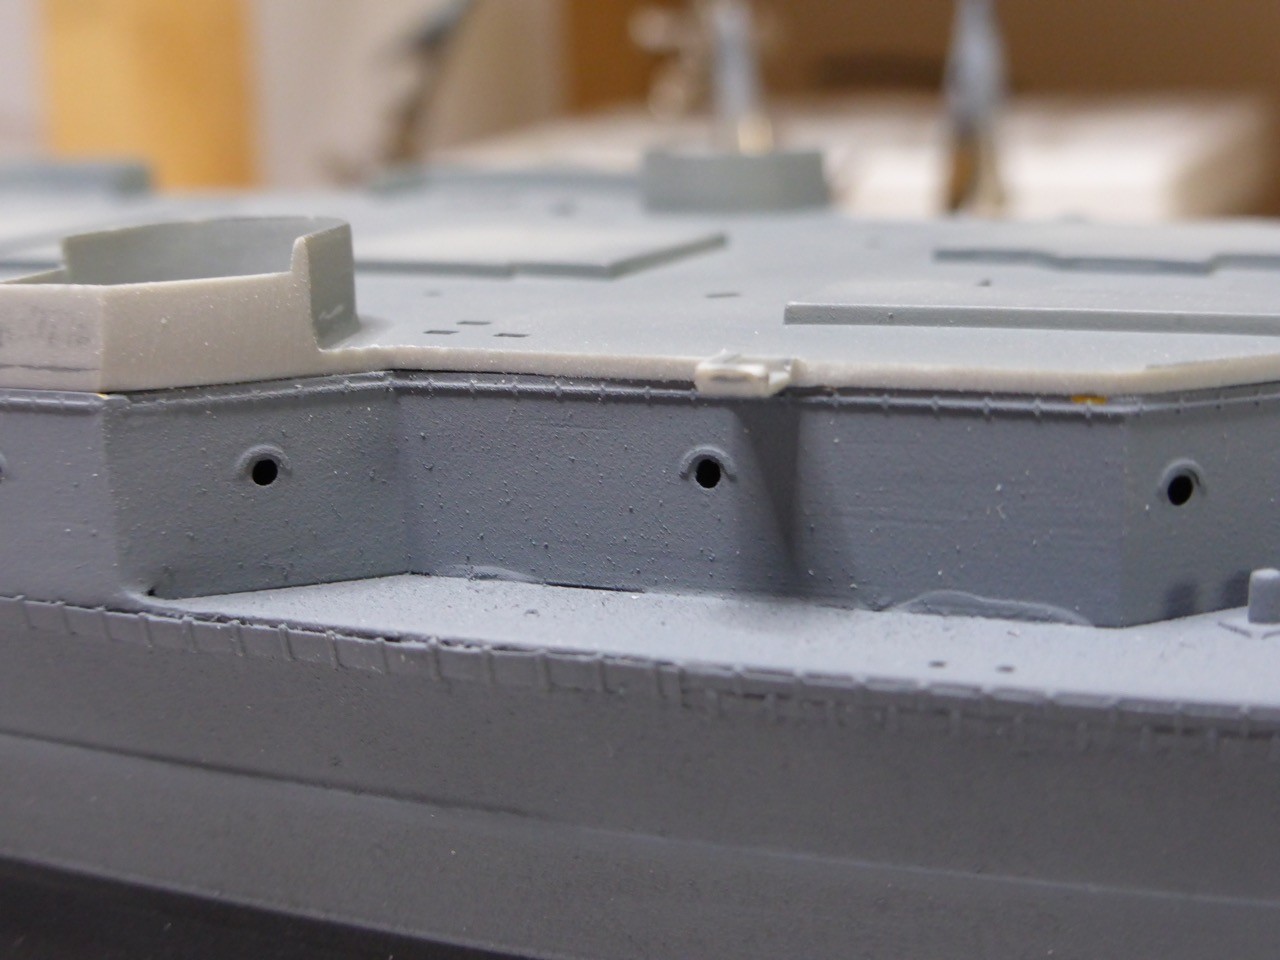
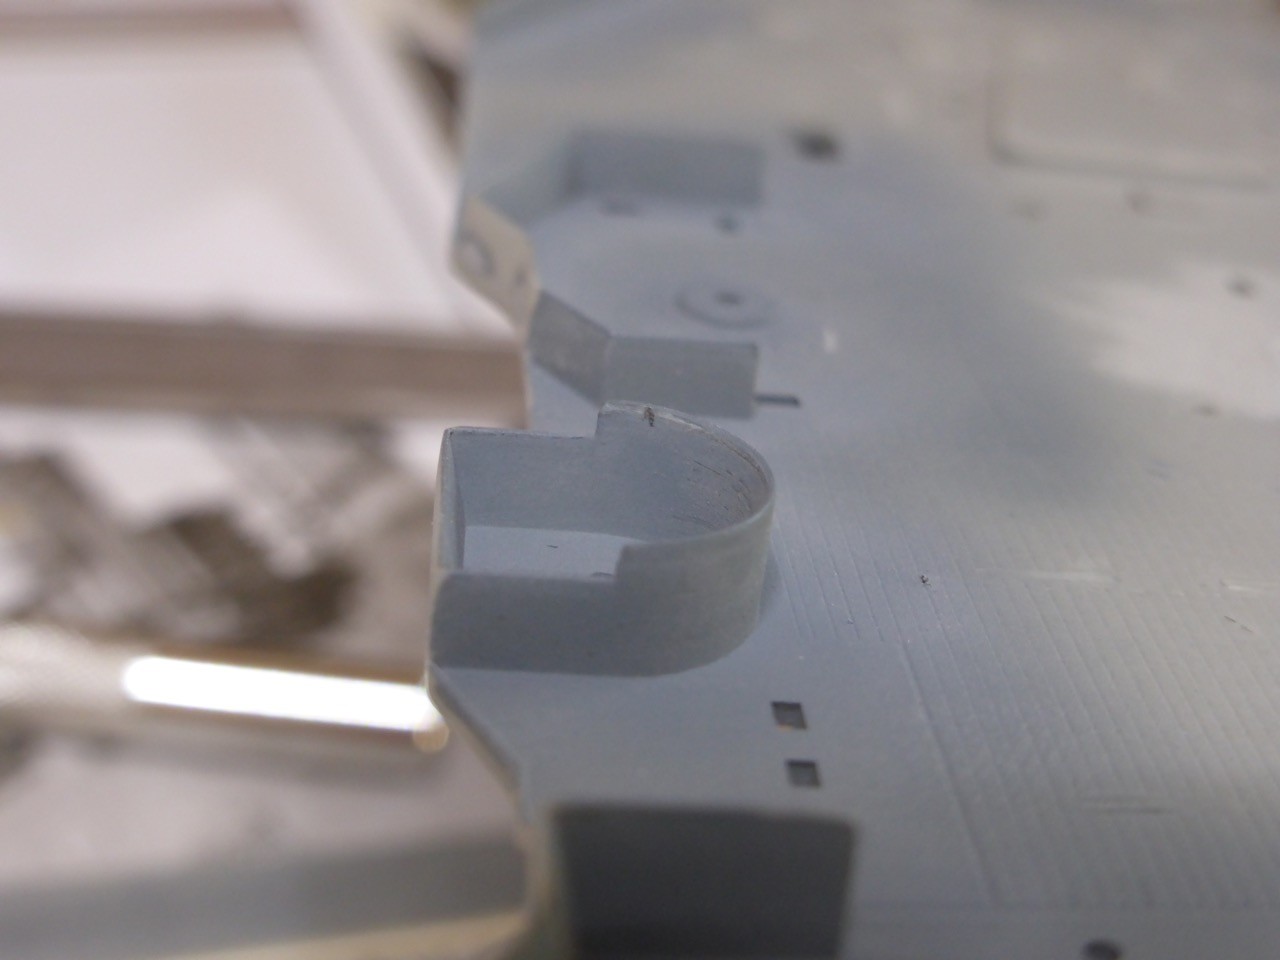
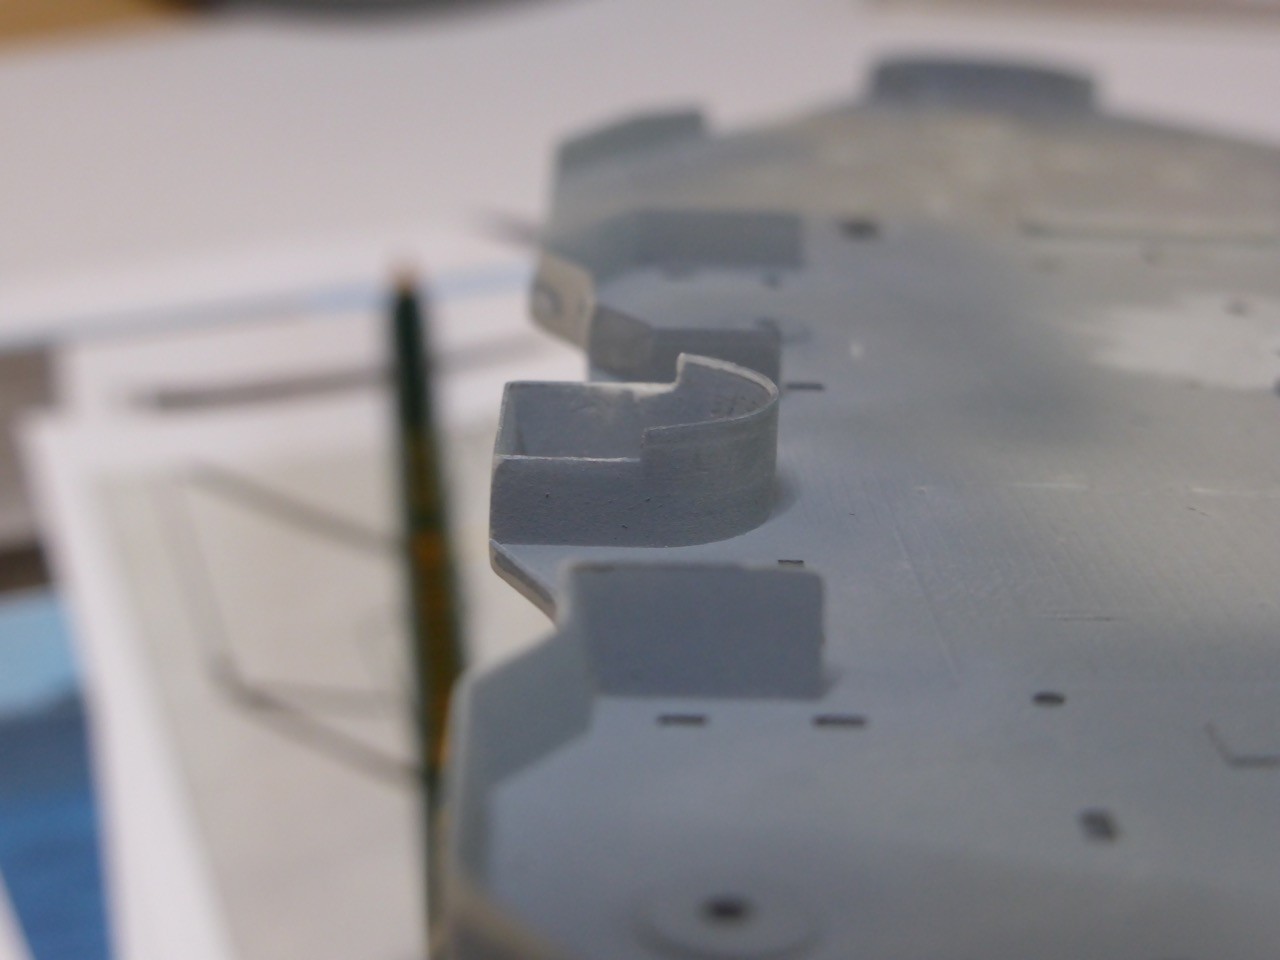
Forward on the forecastle deck, there is no inner structure provided outside (that's some urinals there actually), at least I didn't find anything. And this would be visible! So I put some bulkheads there, nobody will be able to look inside later on. And some masking for the wooden deck.


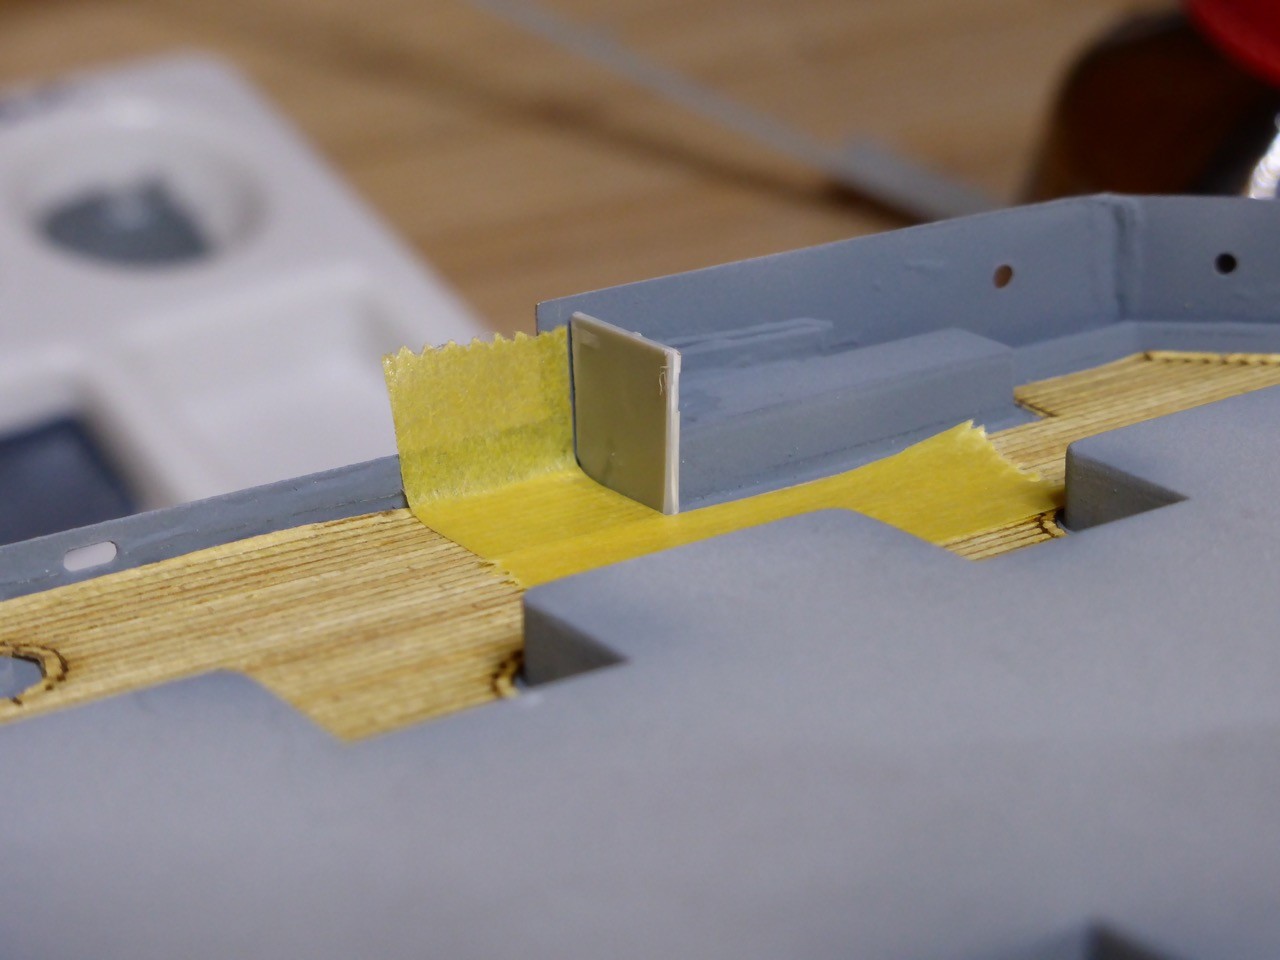
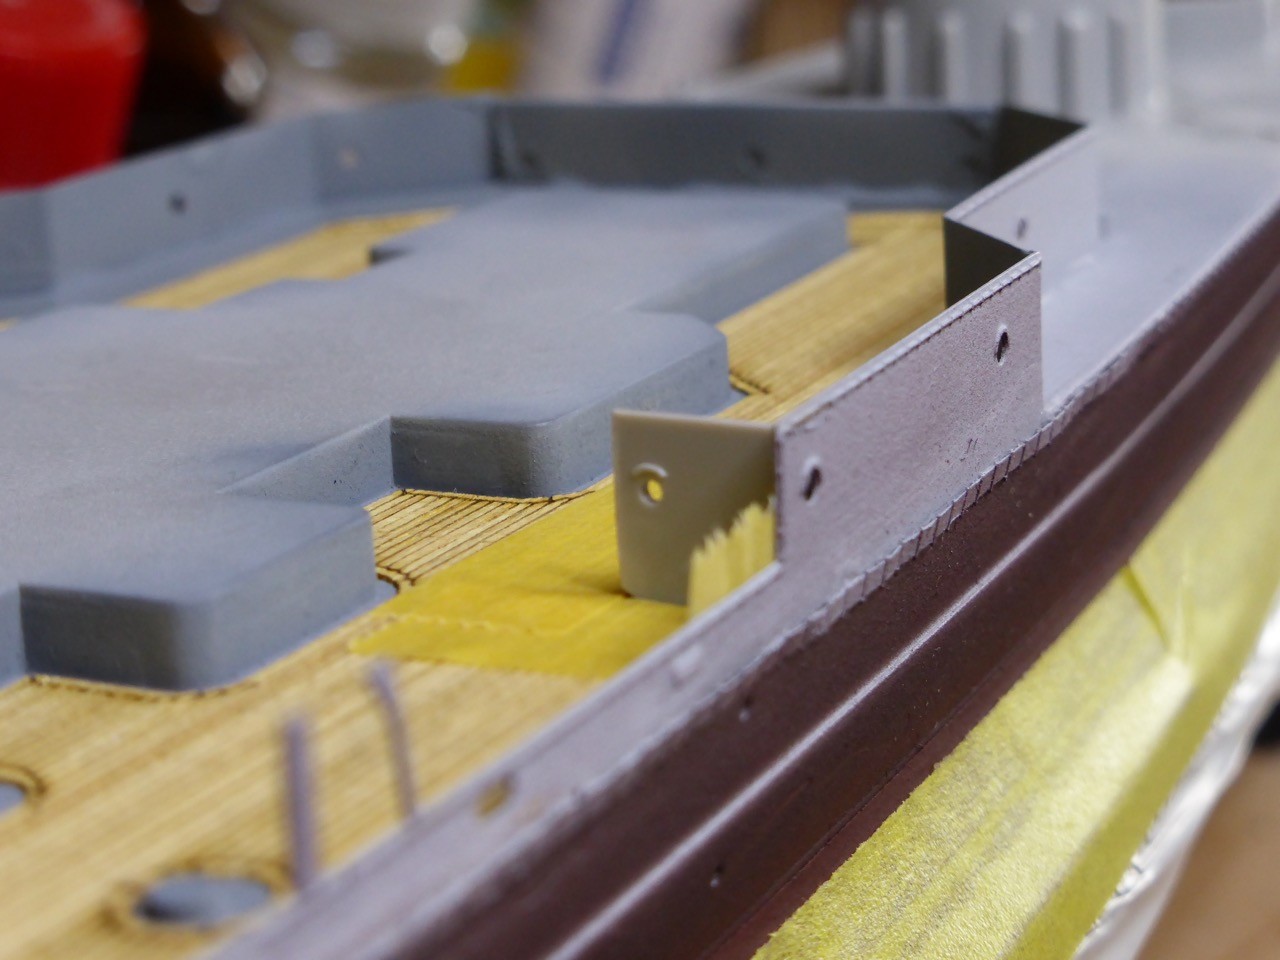
Masking the wooden deck aft:


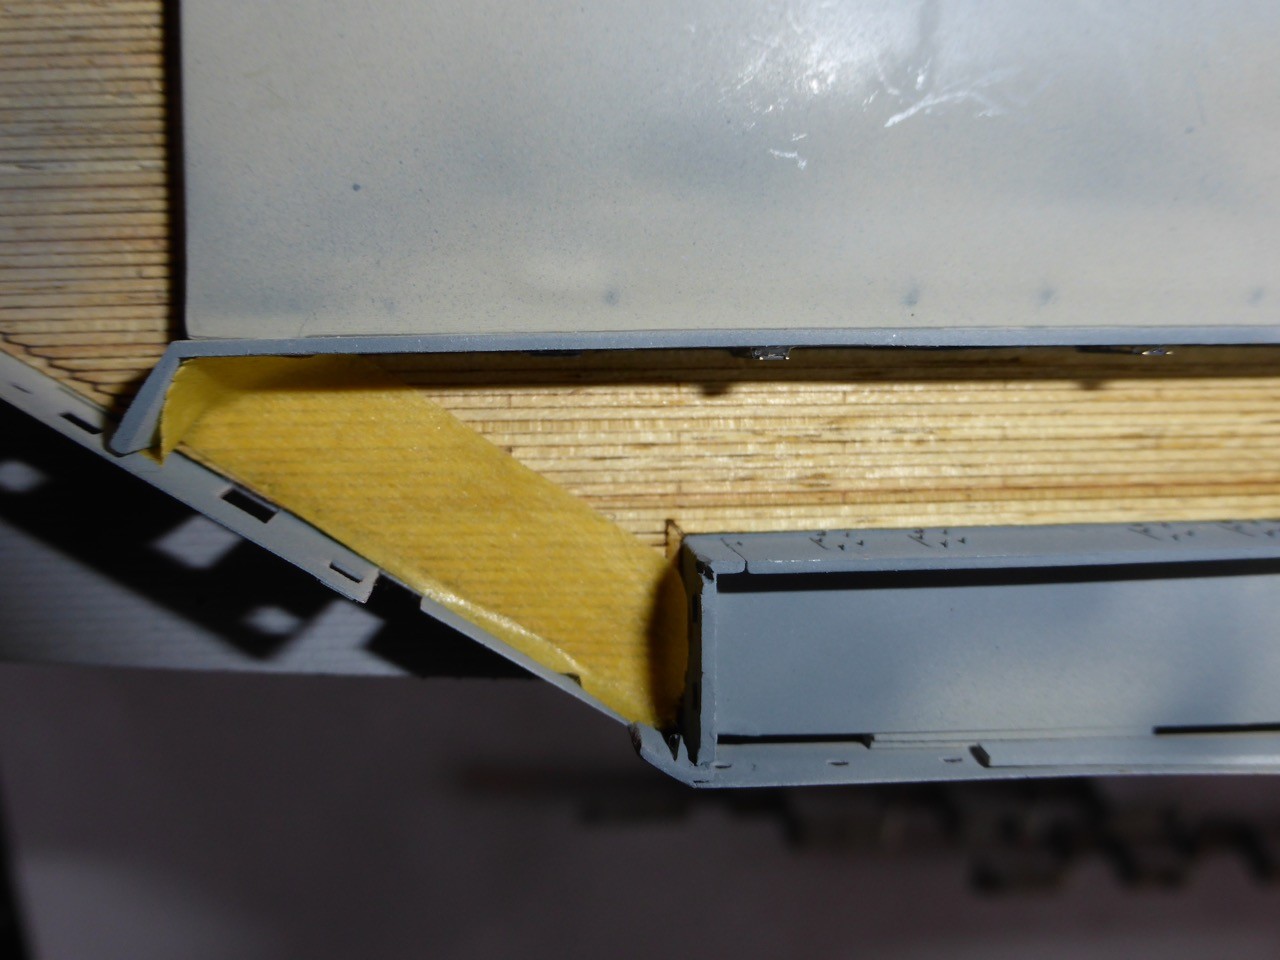
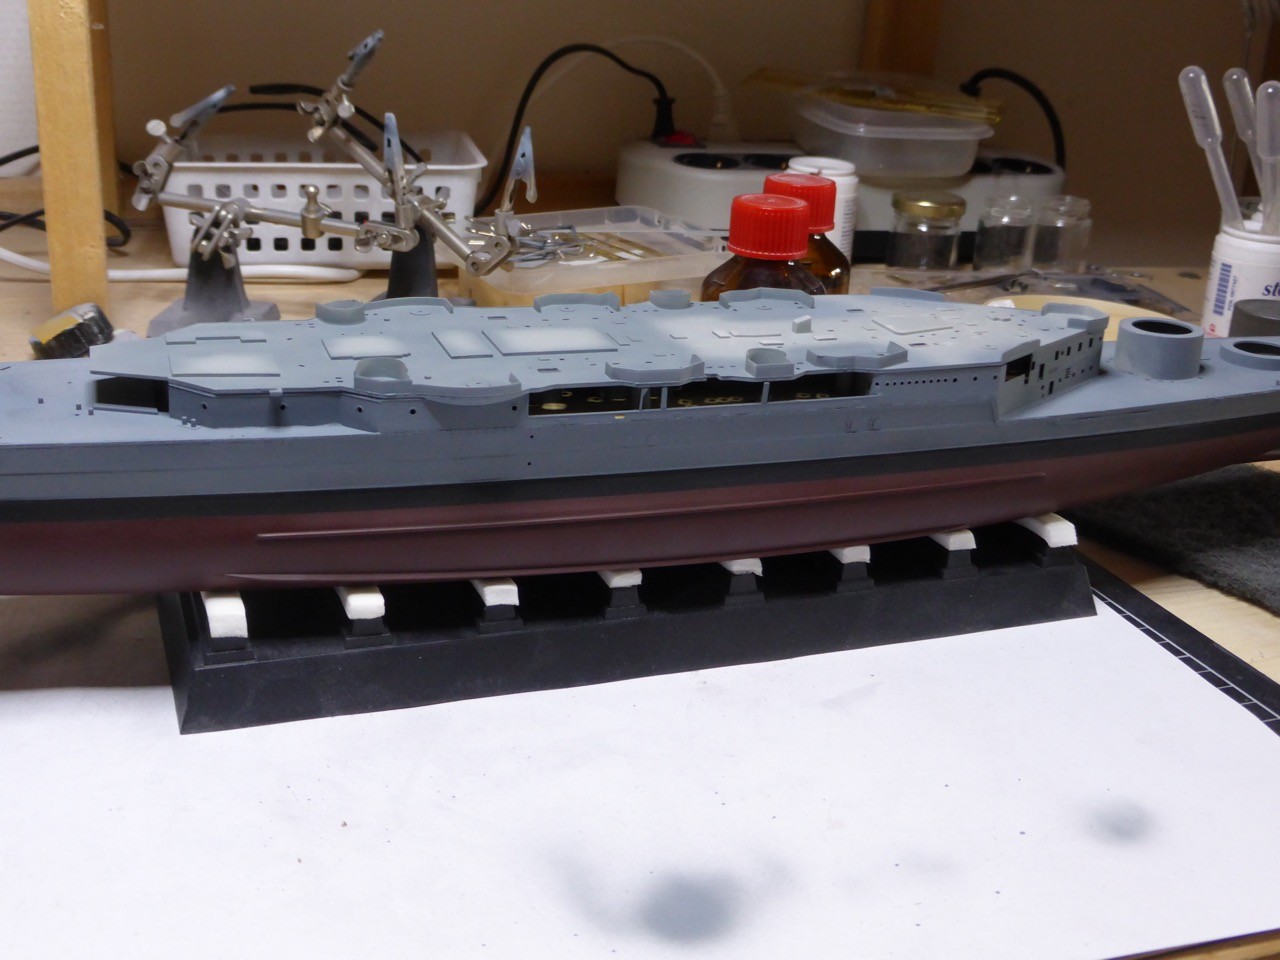
Masking the lower hull with some Tamiya tape that has about 50 cm worth of thin foil attached to it, so it's needed on one side only, the foil can be dragged around the hull and fixed with simple masking tape on the other side of the hull.


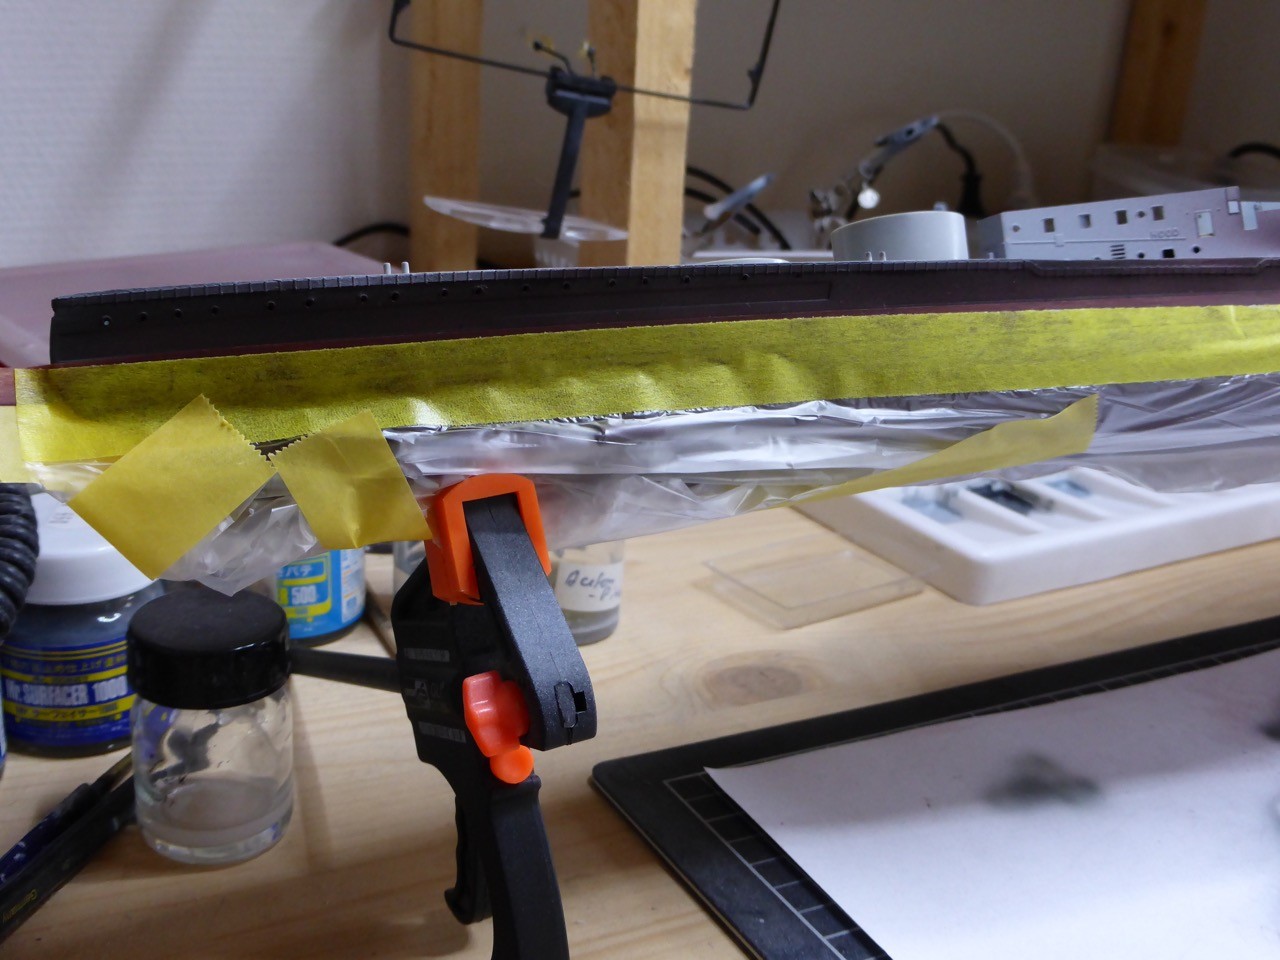
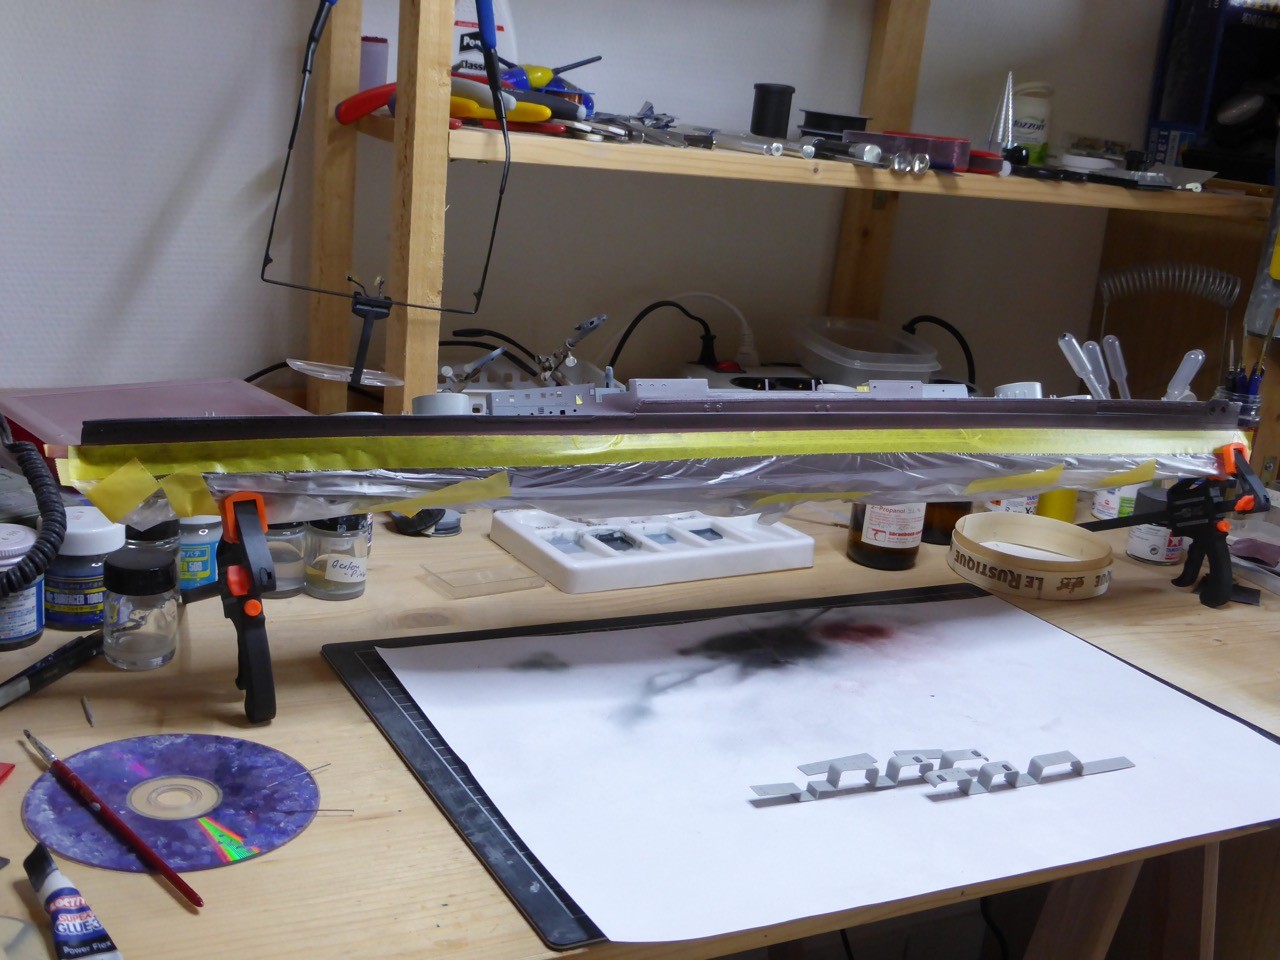
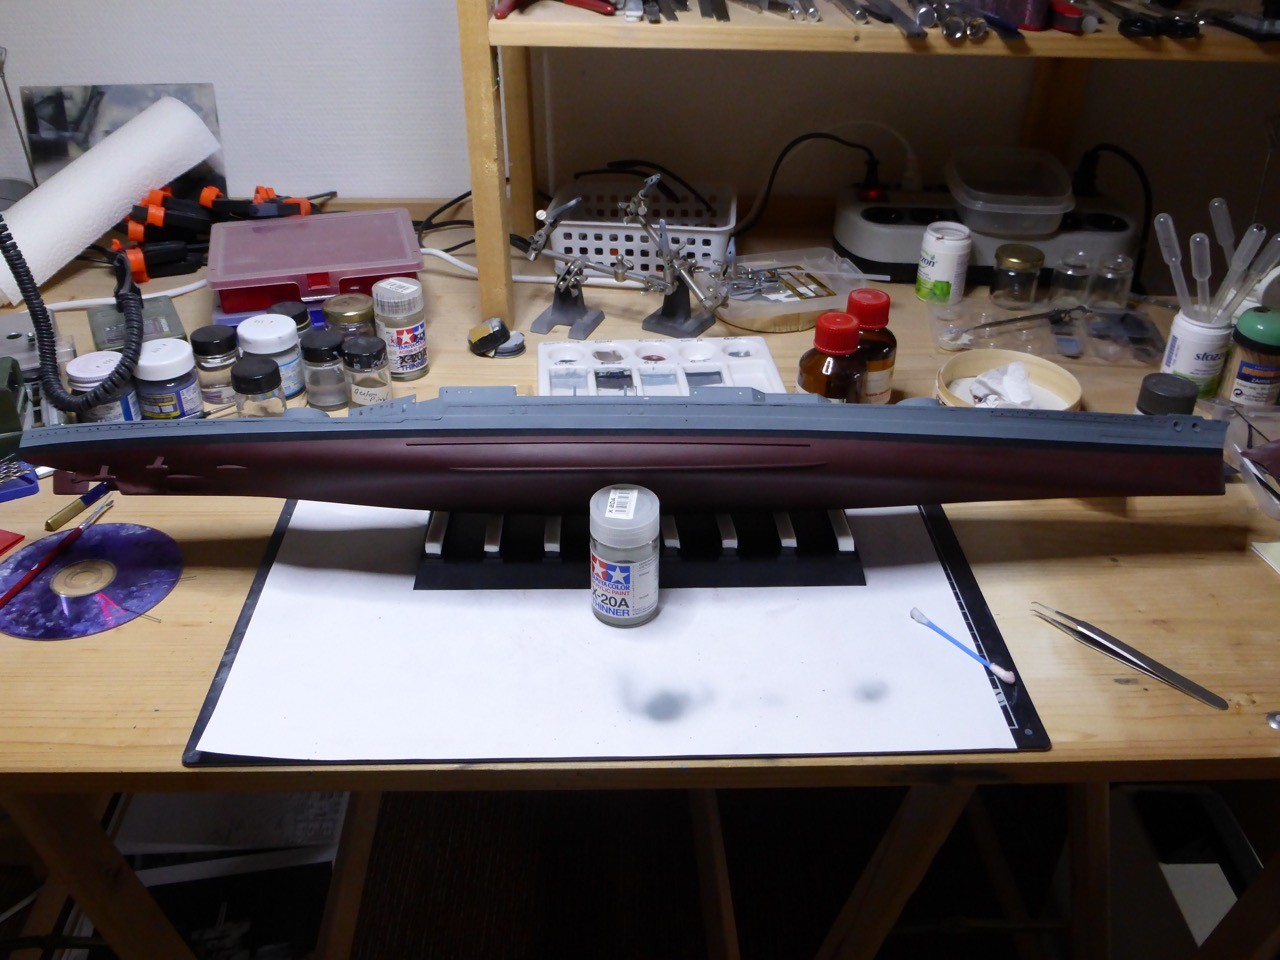
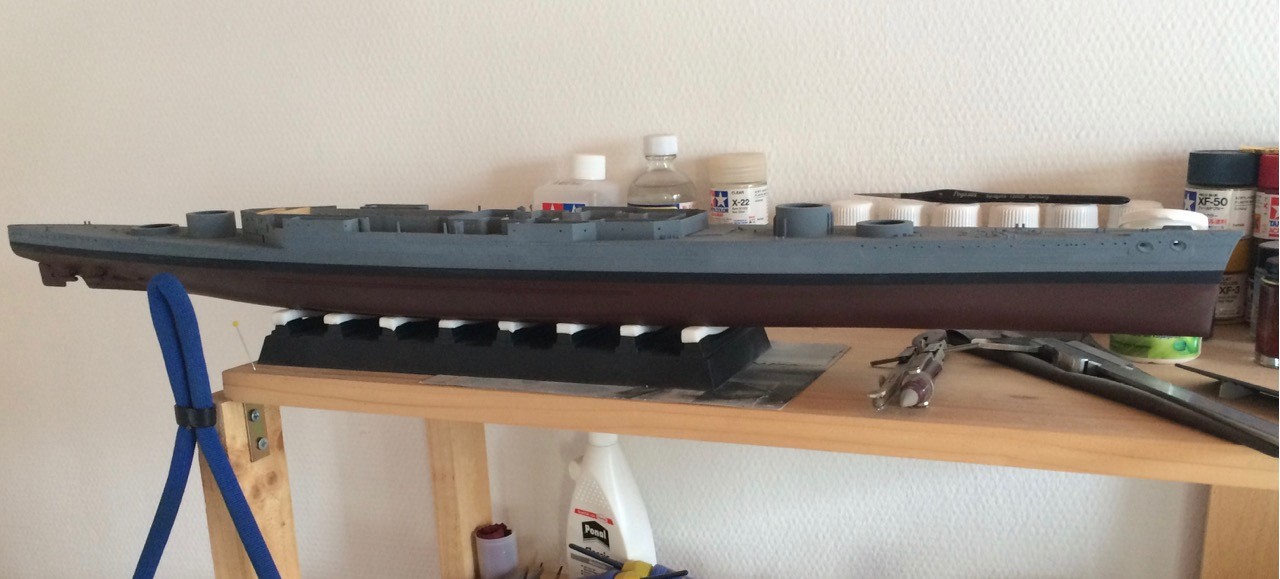
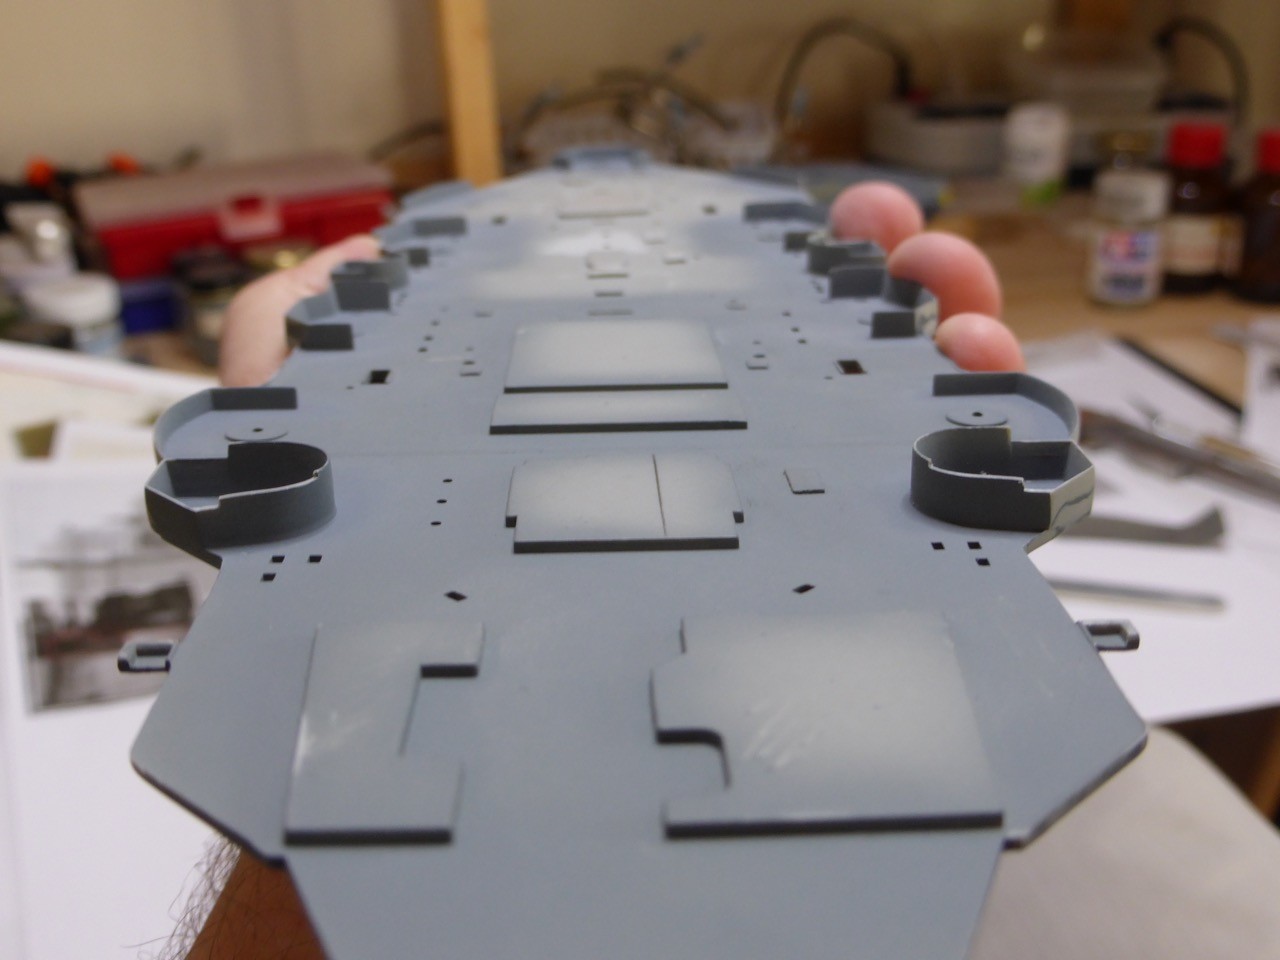
Spraying RN 507 b, and lots of it...


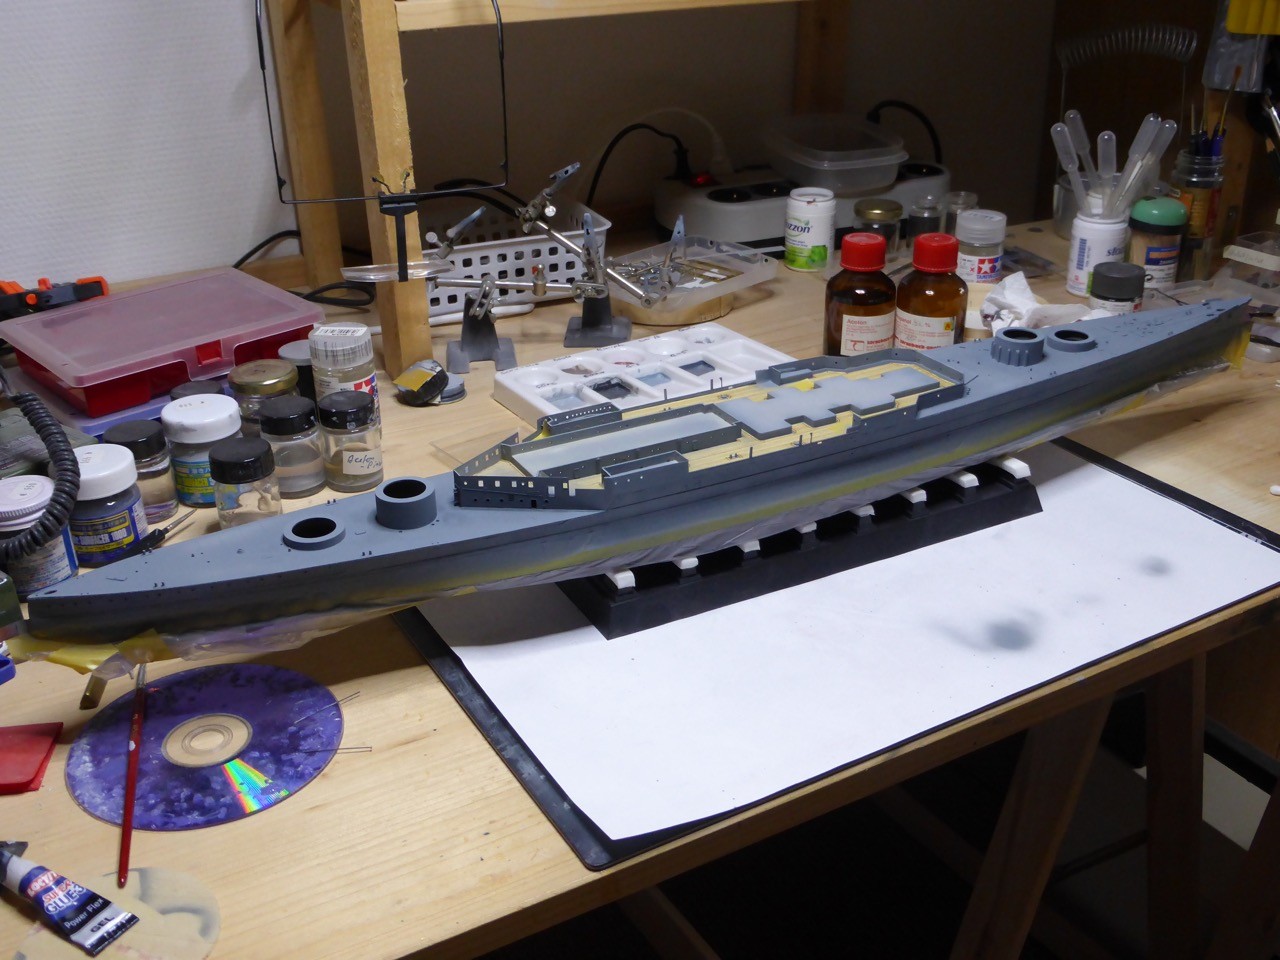
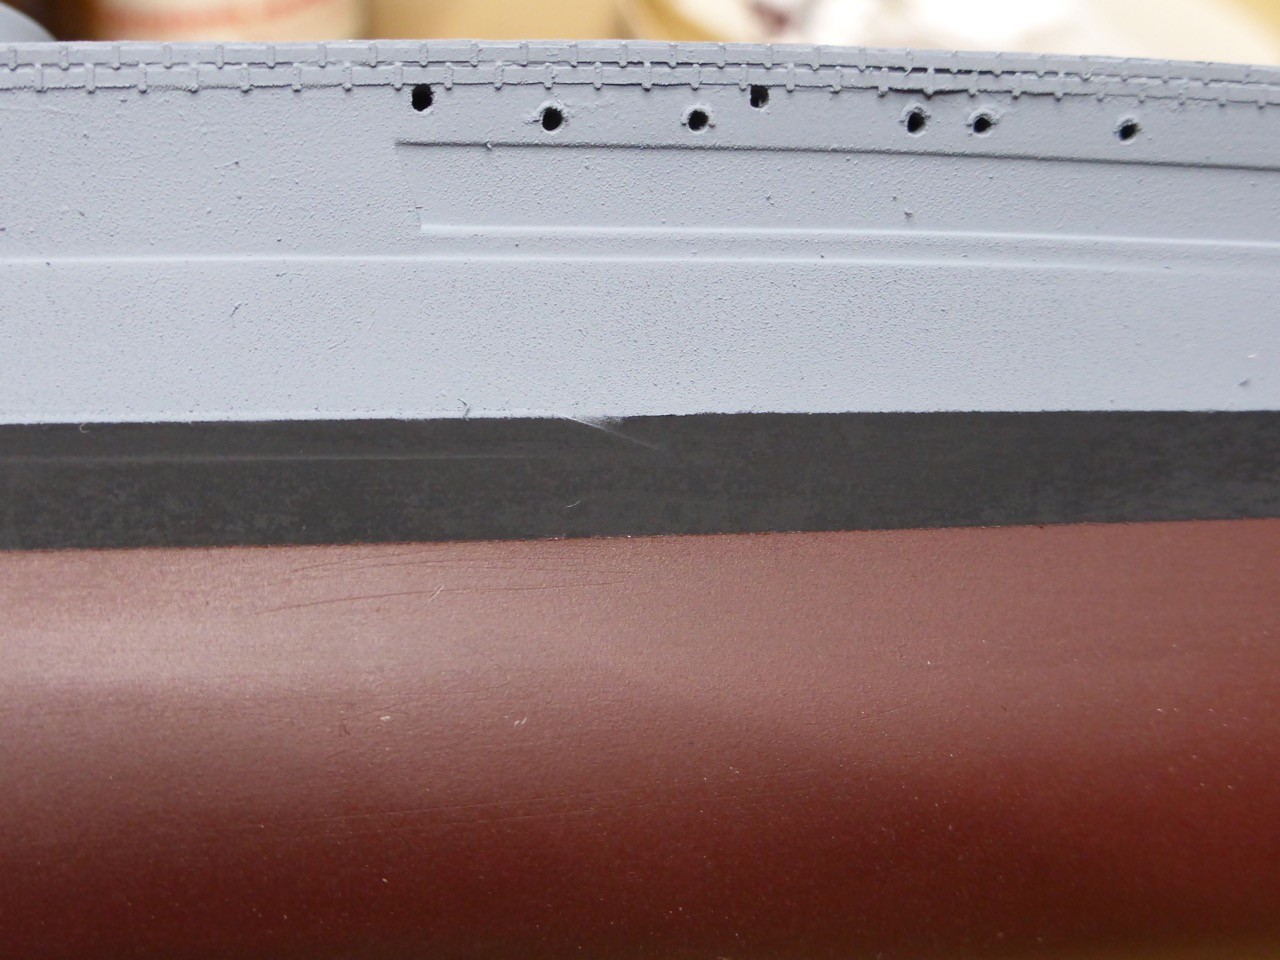
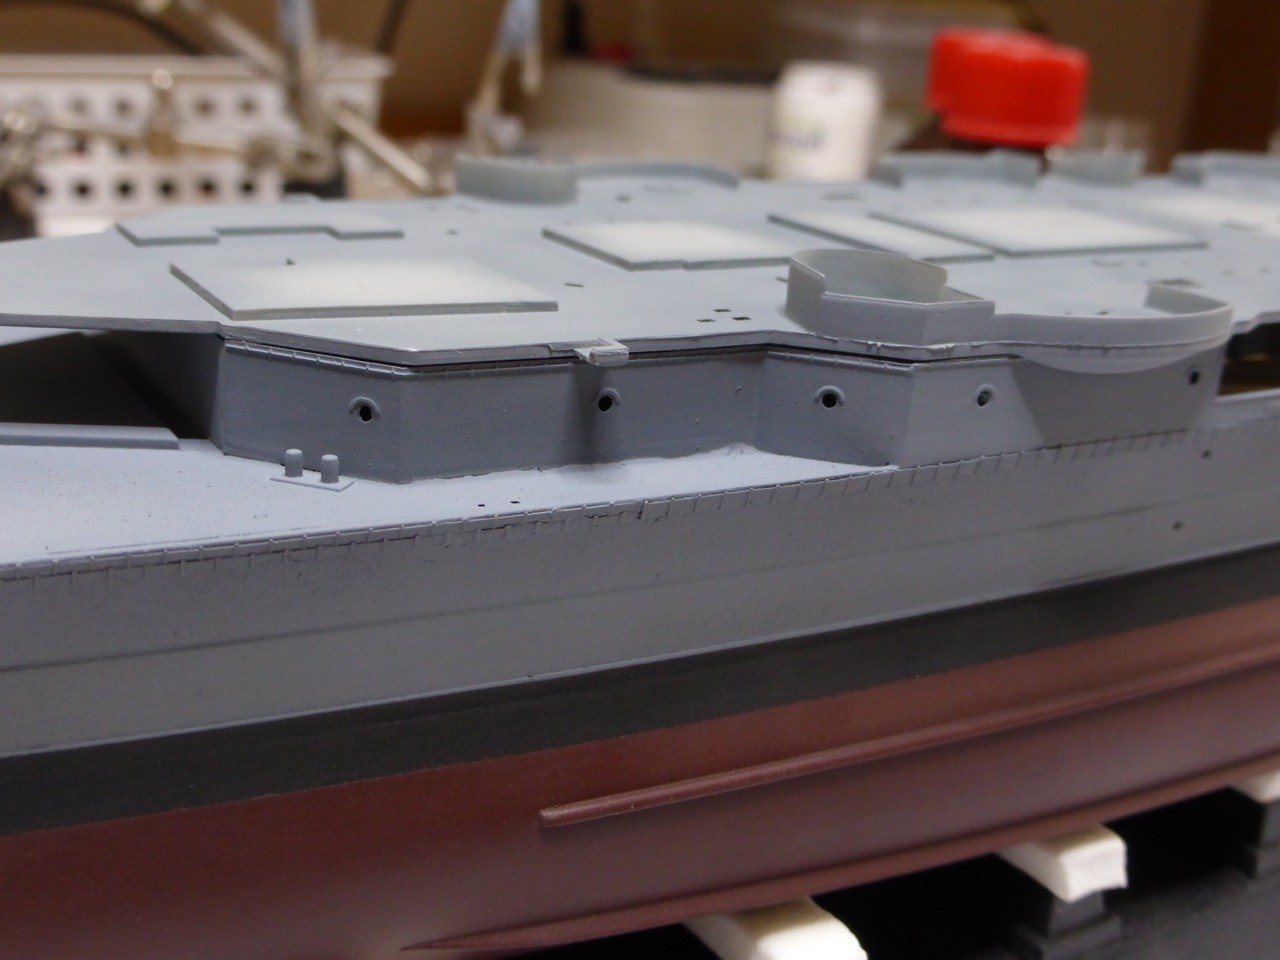
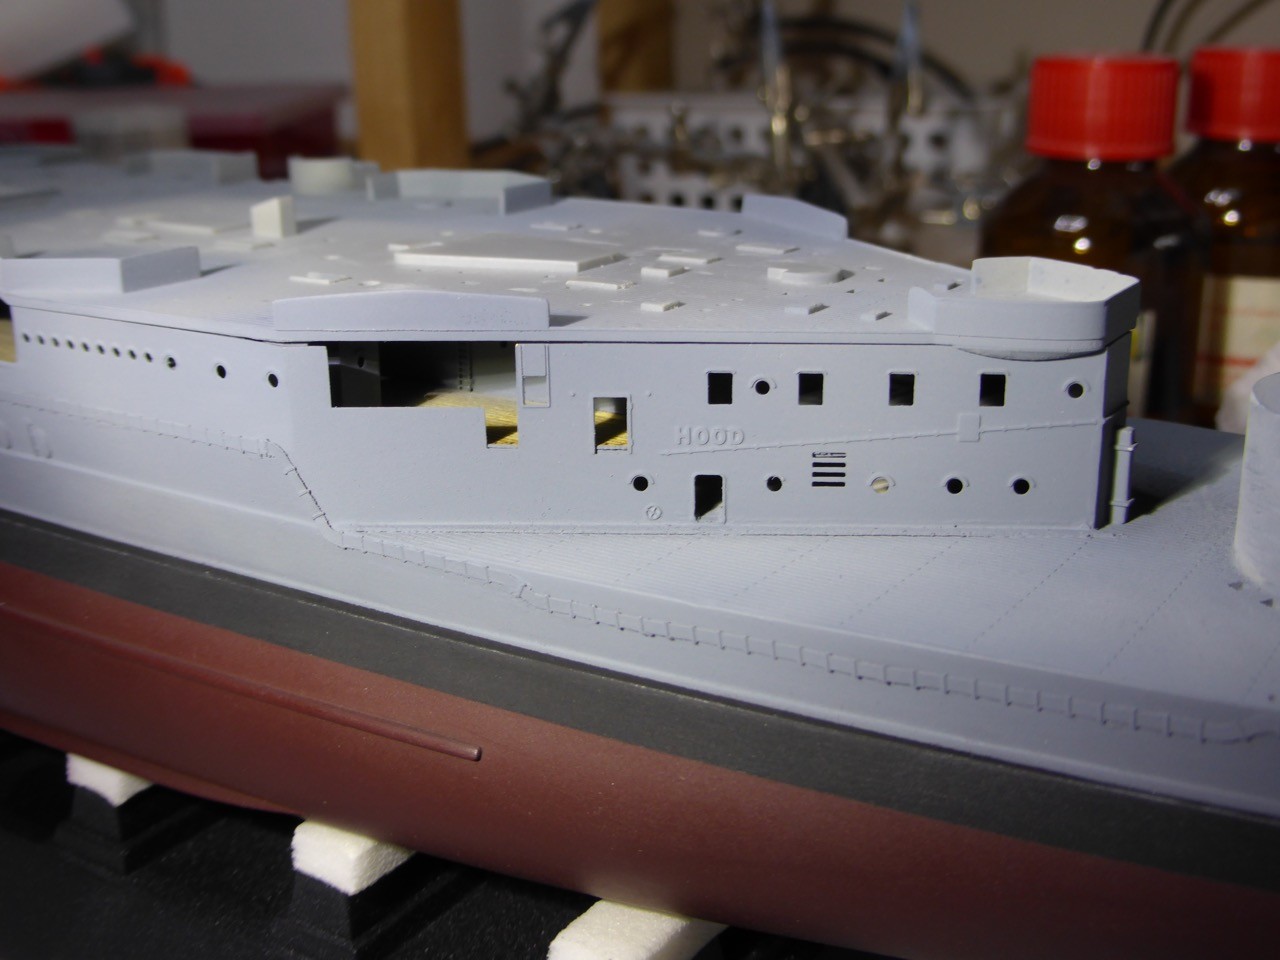
Masking removed. I am quite happy with the result - position of the boot topping looks fine to me, and there are only minor touch ups required.


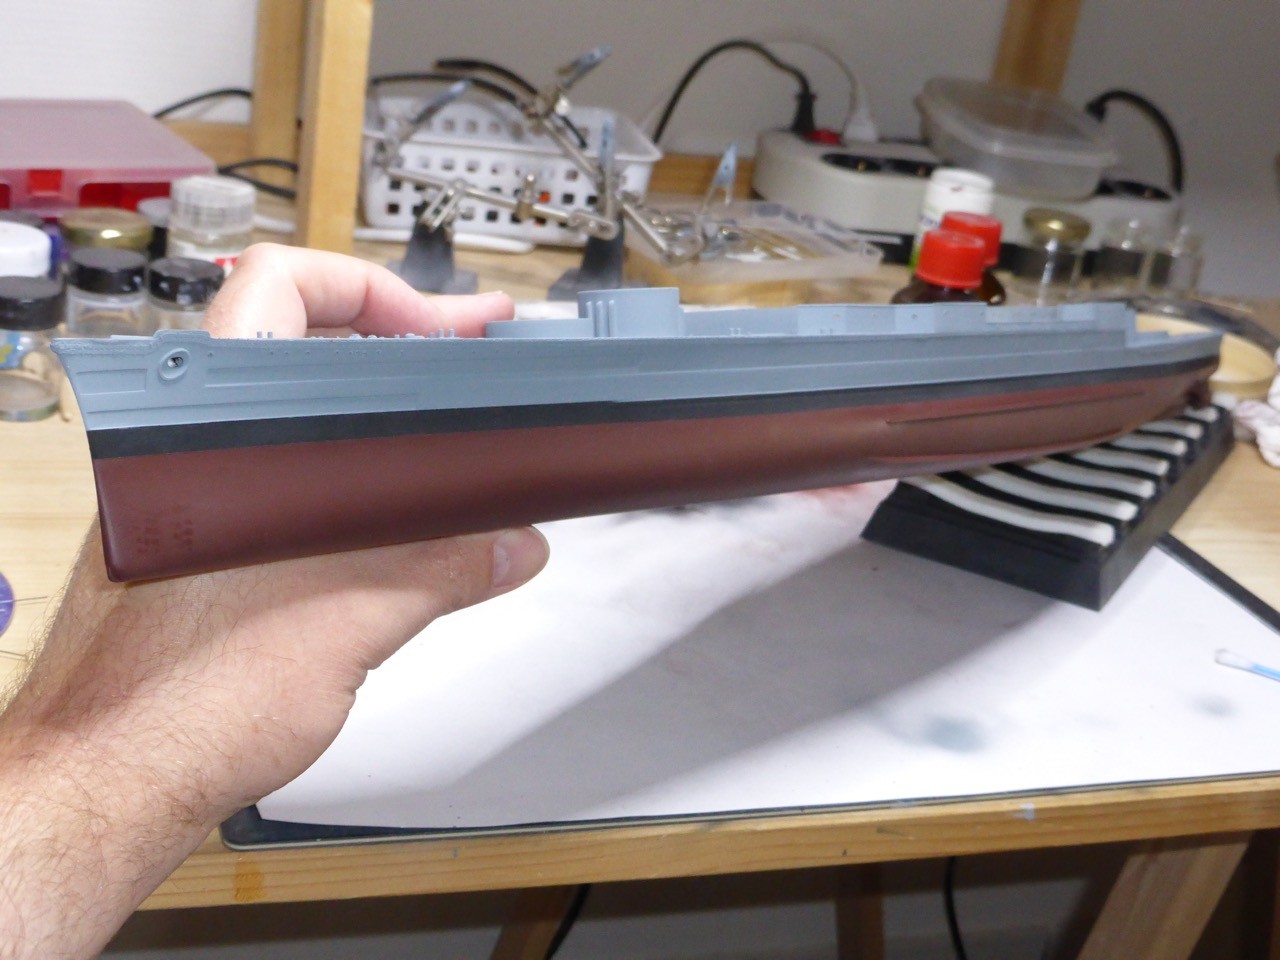
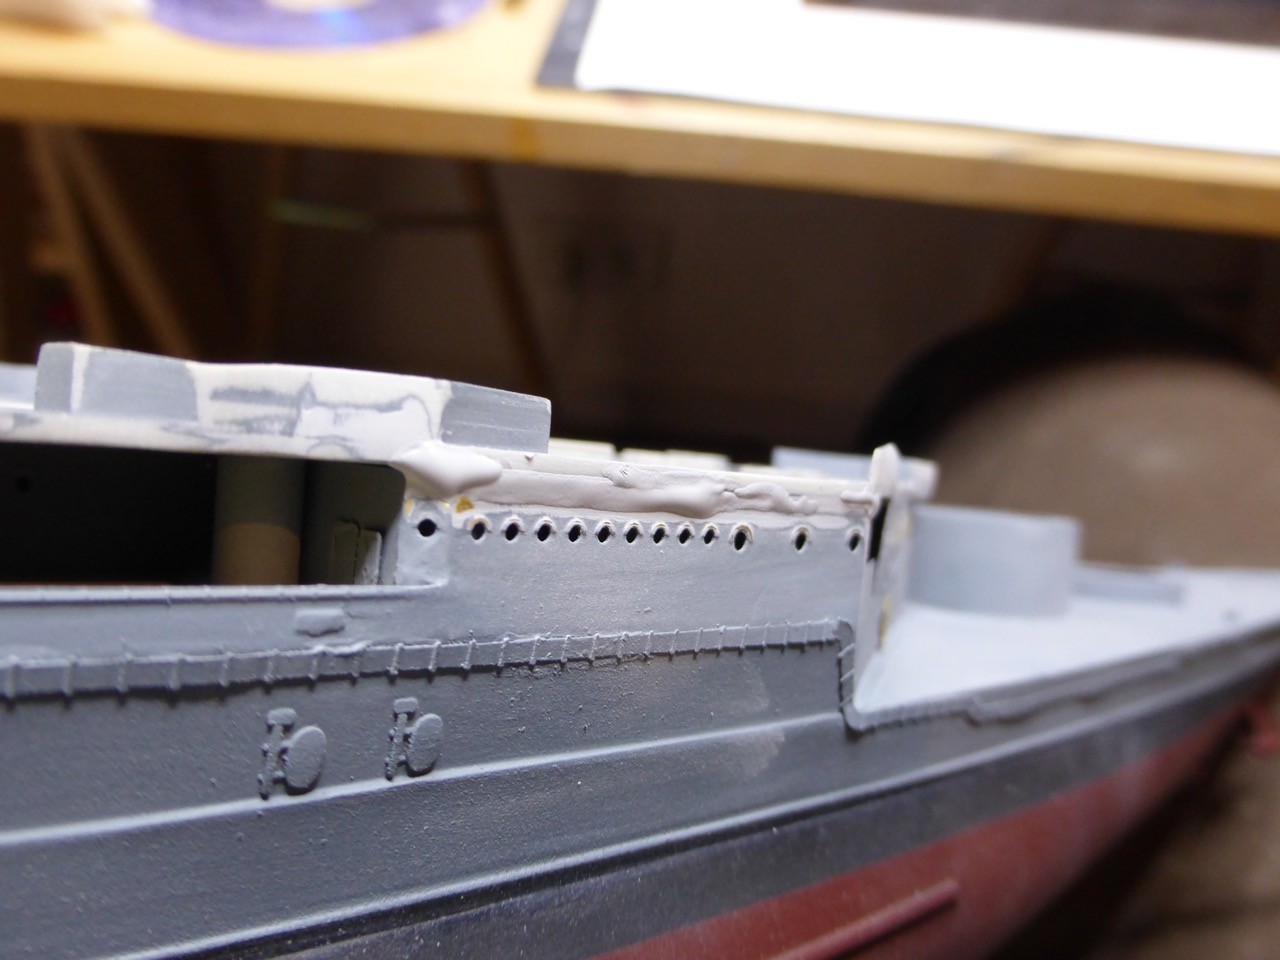
Here are a few of those areas that need re-work:


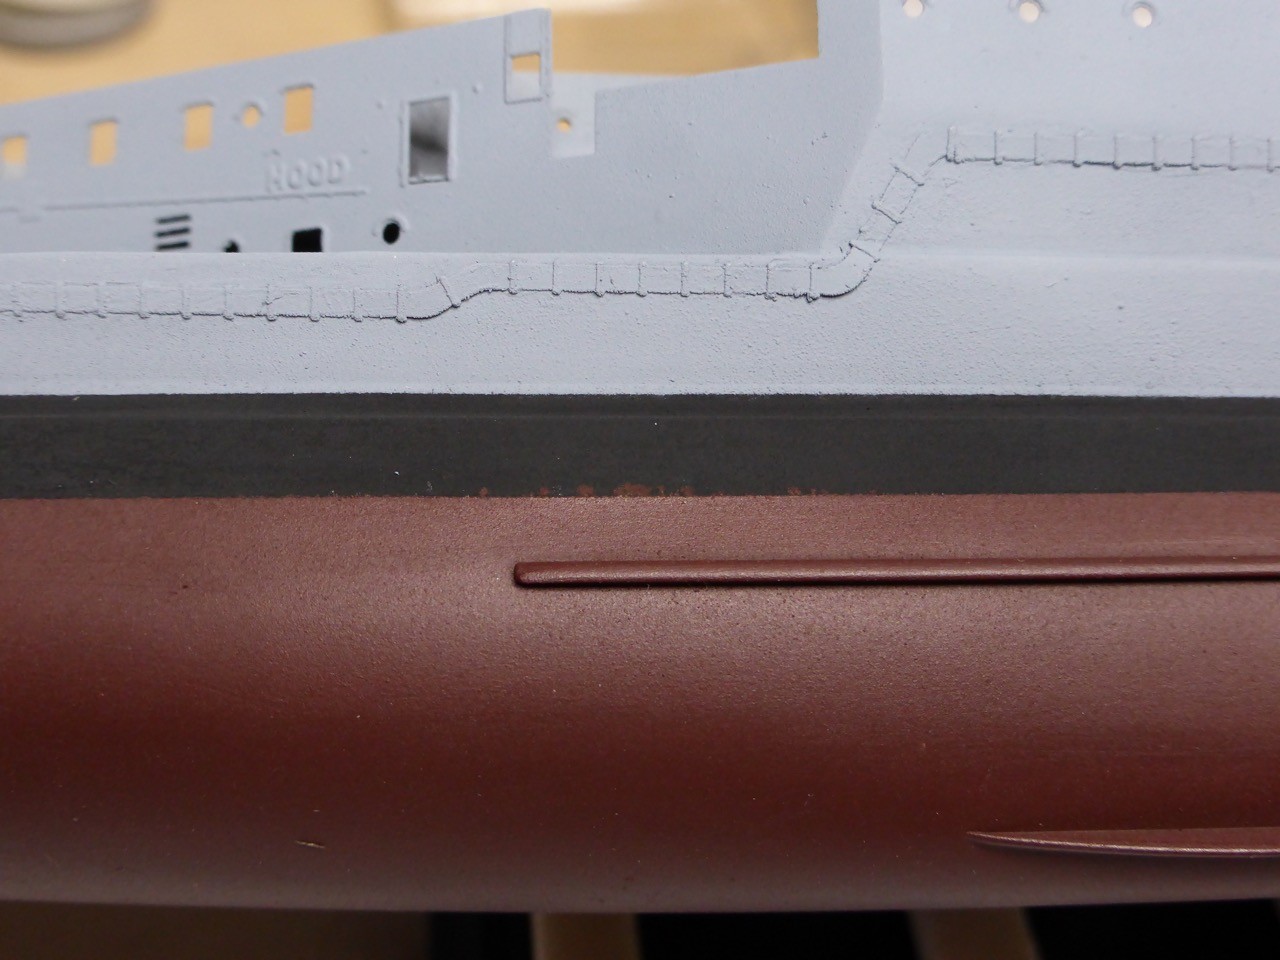
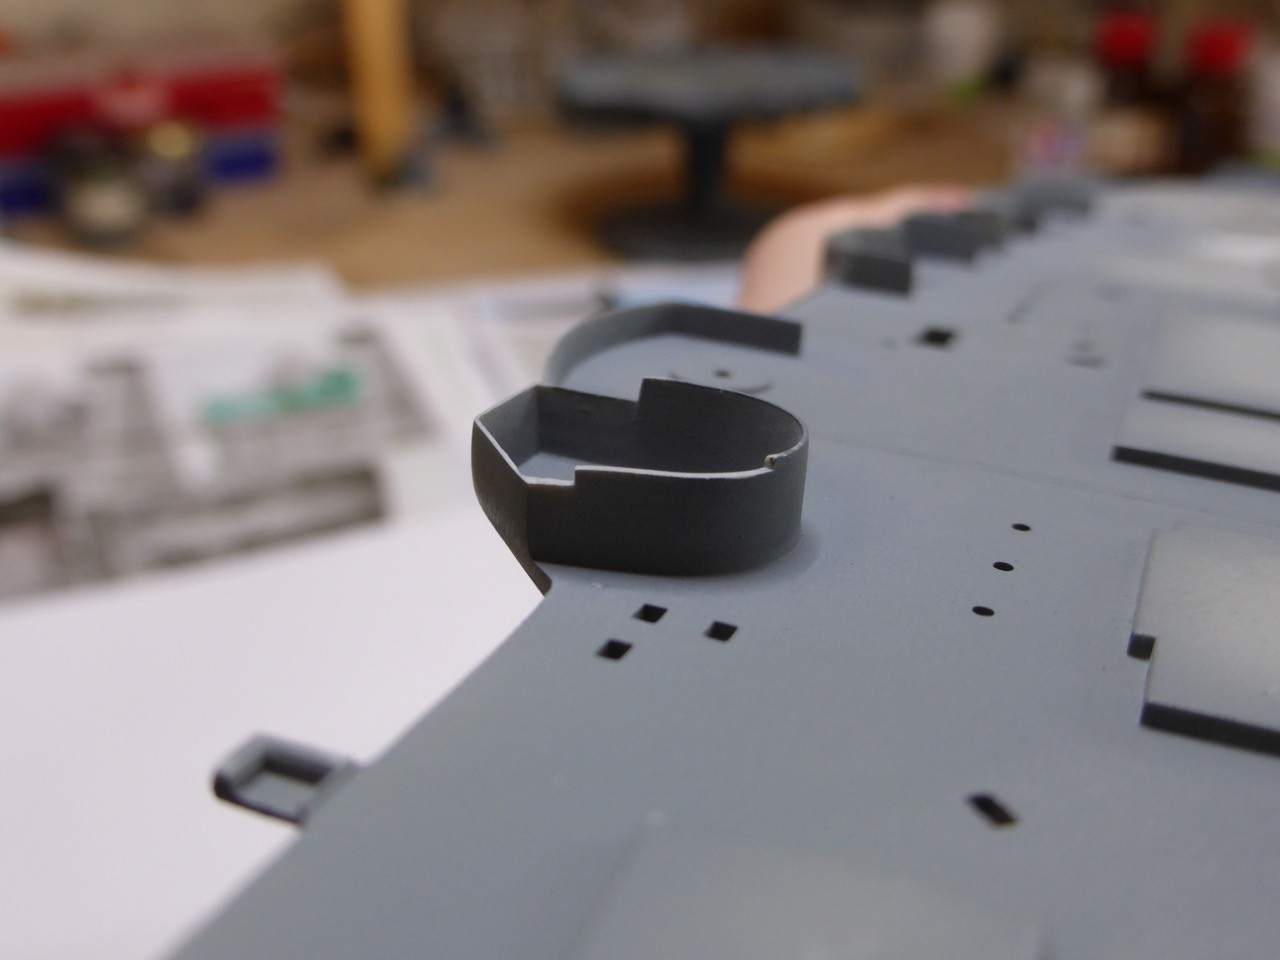
Internal bulkheads installed:


And a little gizmology - some tables in the Admiral's Dining and Day cabins. Initially I was thinking about doing even more, but first trials revealed that you can't actually see all that much through the windows there.


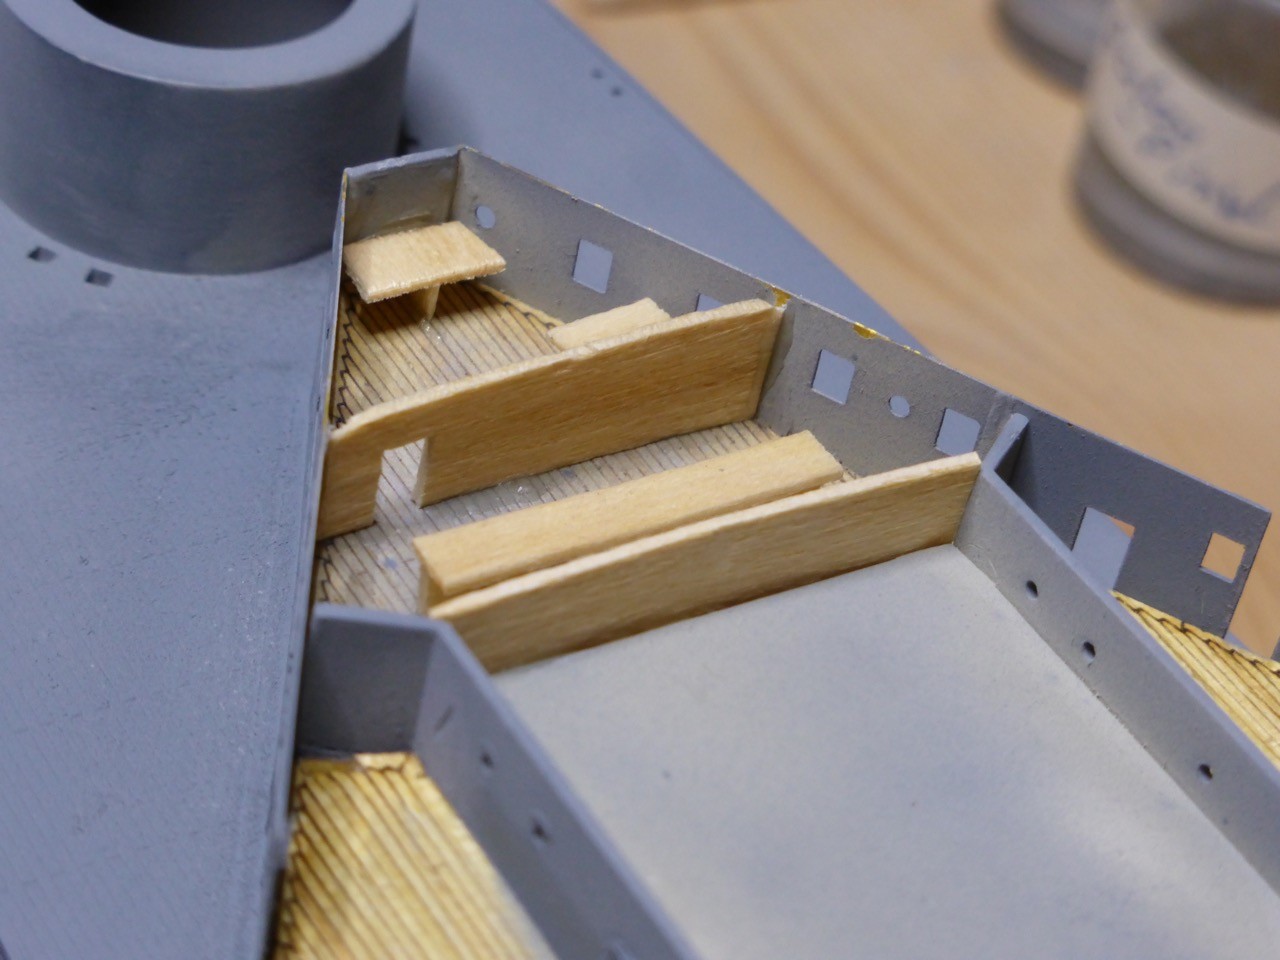
I know it would most likely be dark wood, but:
a) you would not be able to see anything dark in there and
b) I didn't have anything properly dark, so this color will have to do...

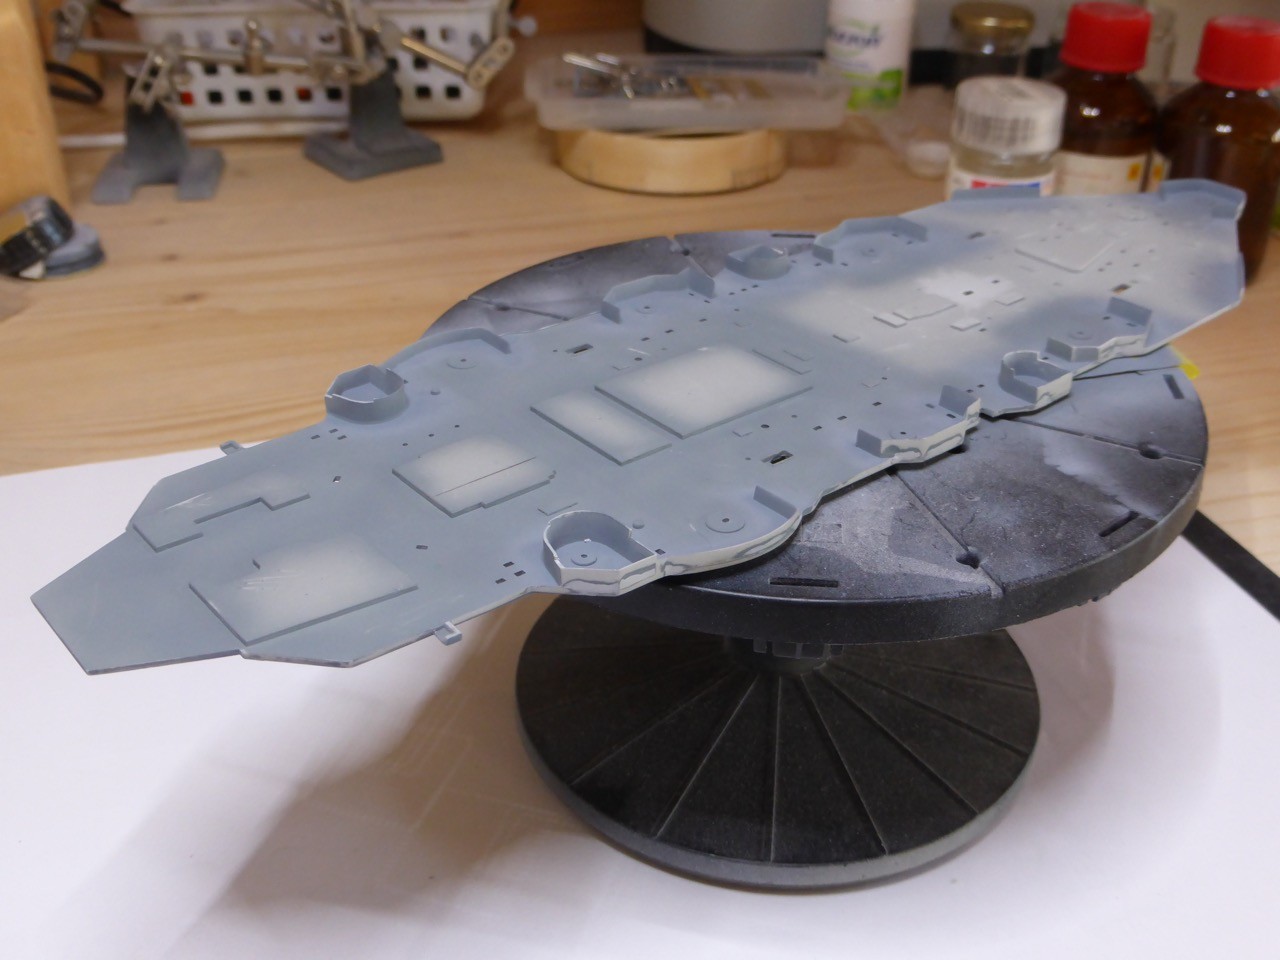
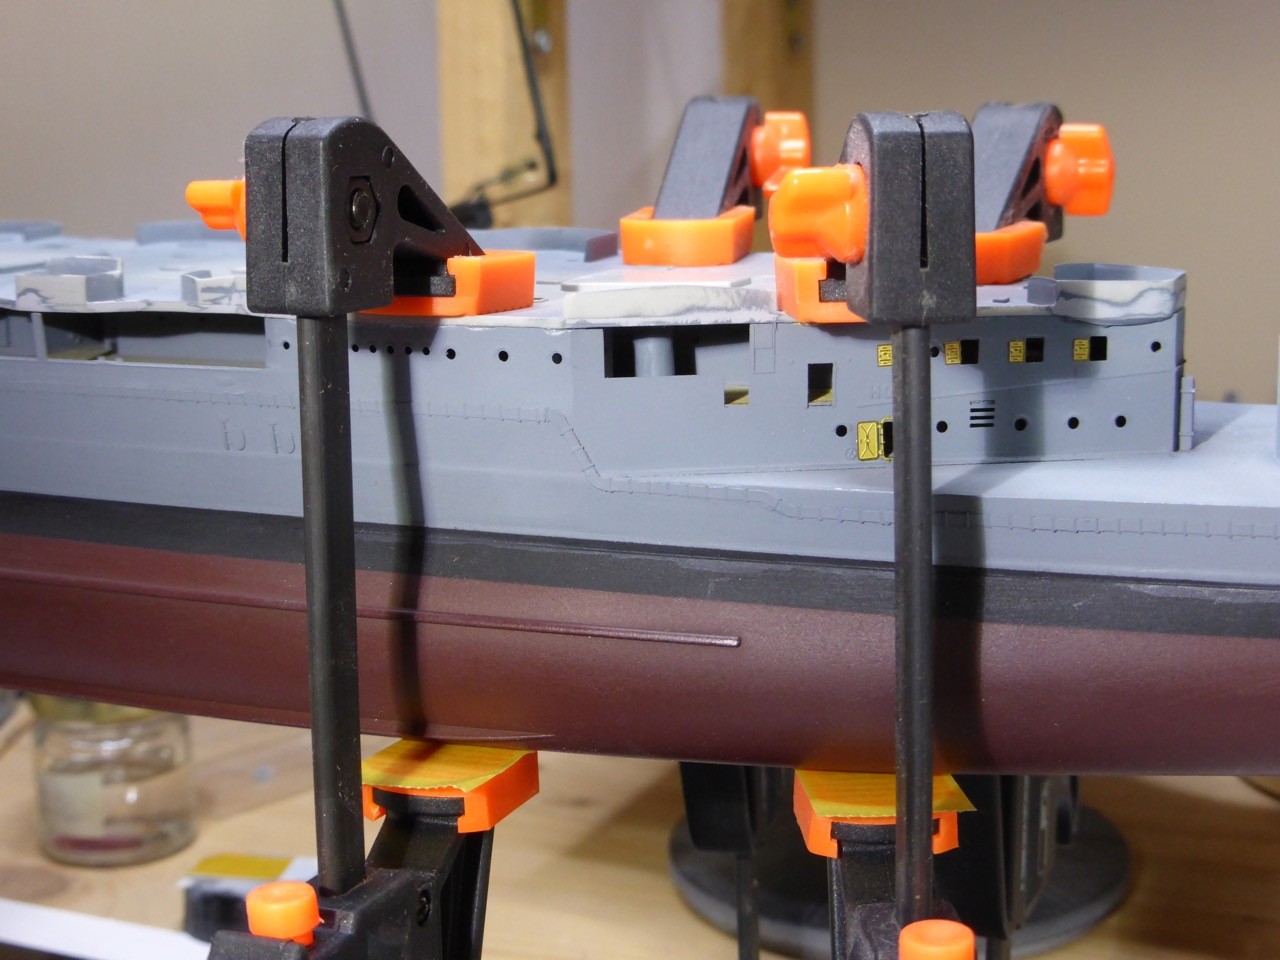
Test fitting the boat deck.


Definitively more work to come, and indeed, that kept my busy the better part of Sunday...
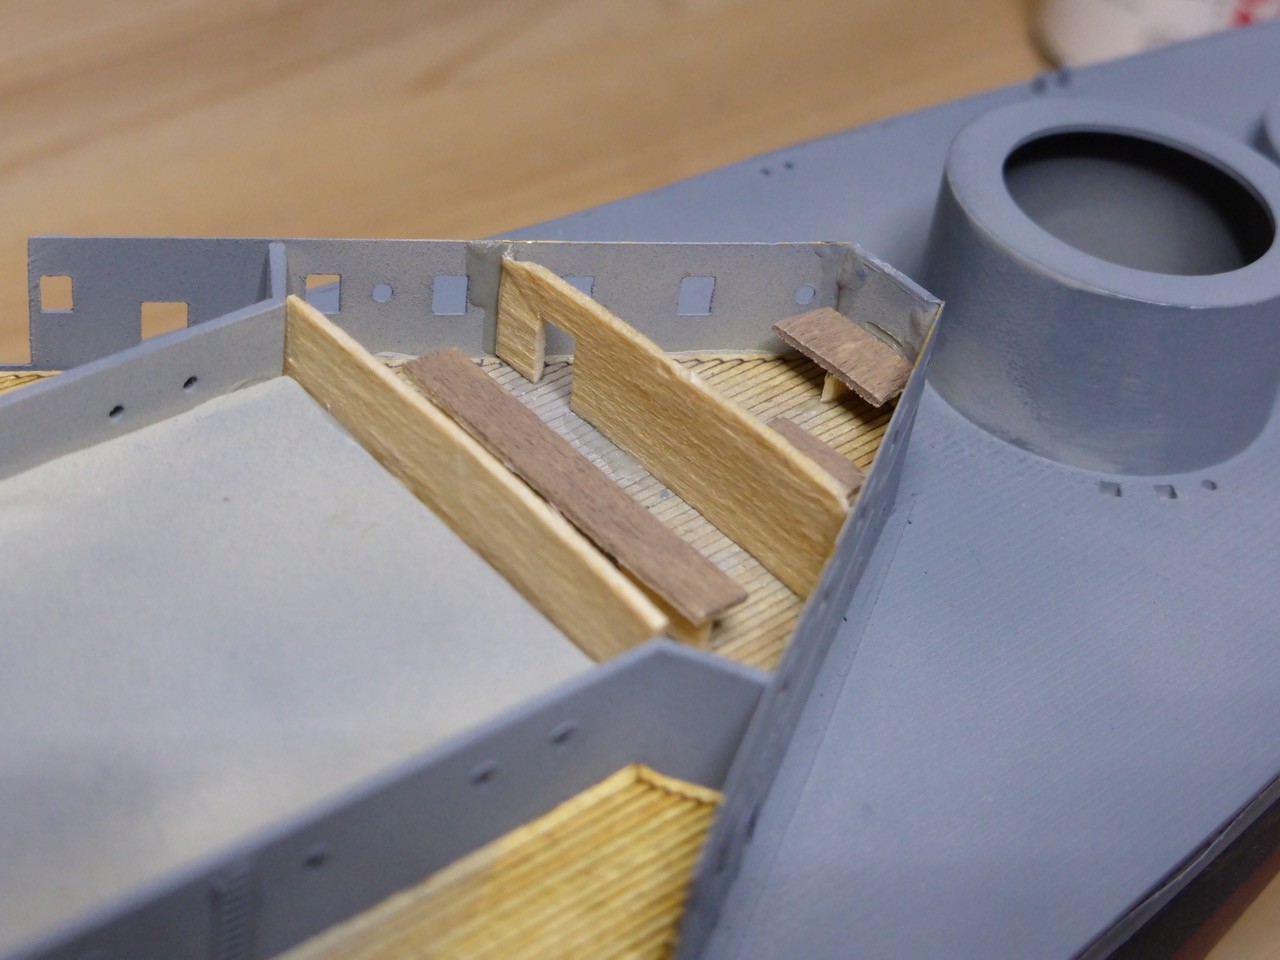
Anyway, I am quite happy with the 'look in'-effects, the wooden deck gives a nice impression, and the bigger openings next to the Admiral's cabin, where inclined ladders will lead up later on, looks pretty good.


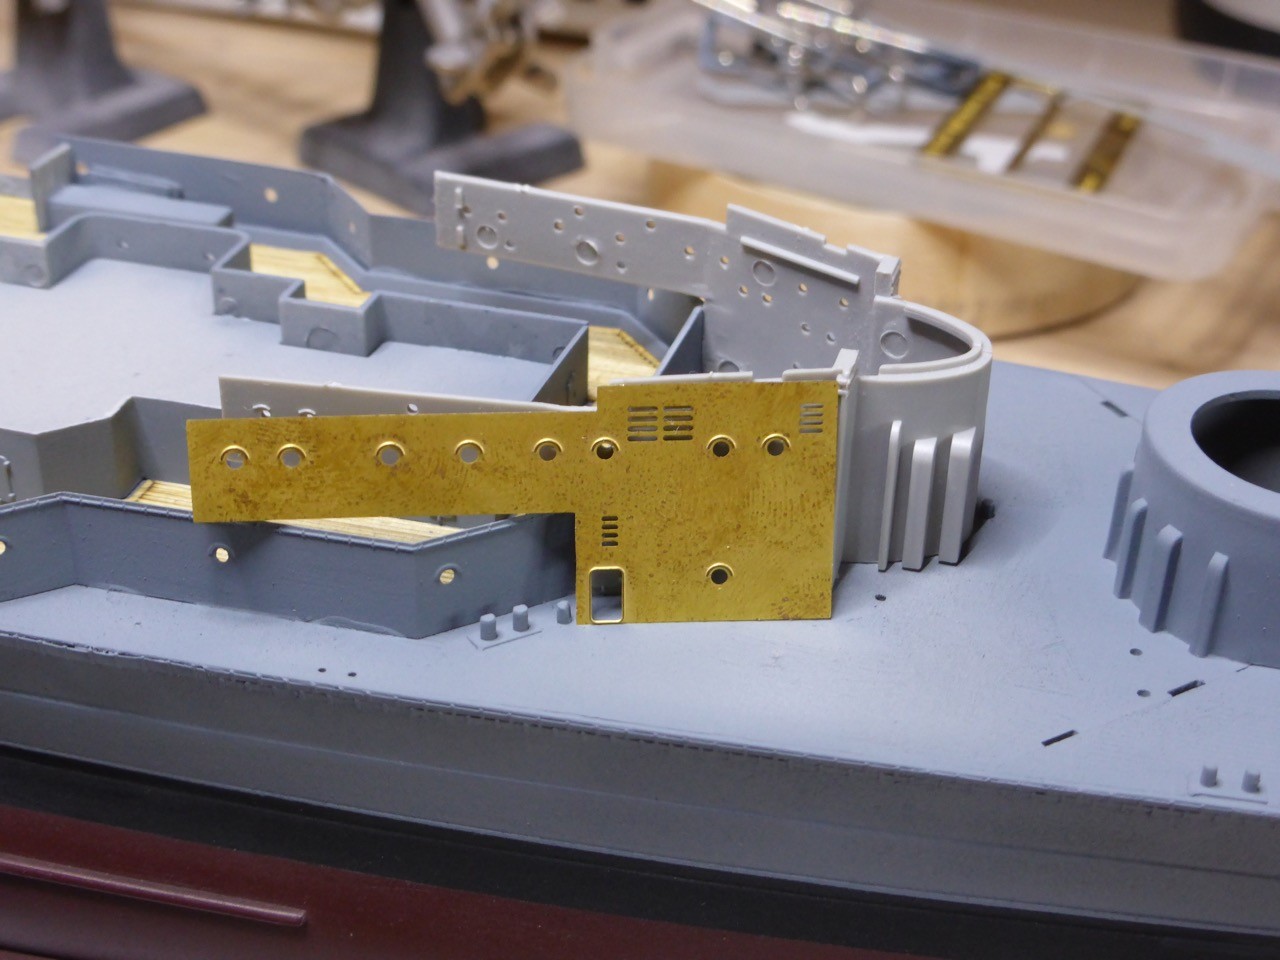
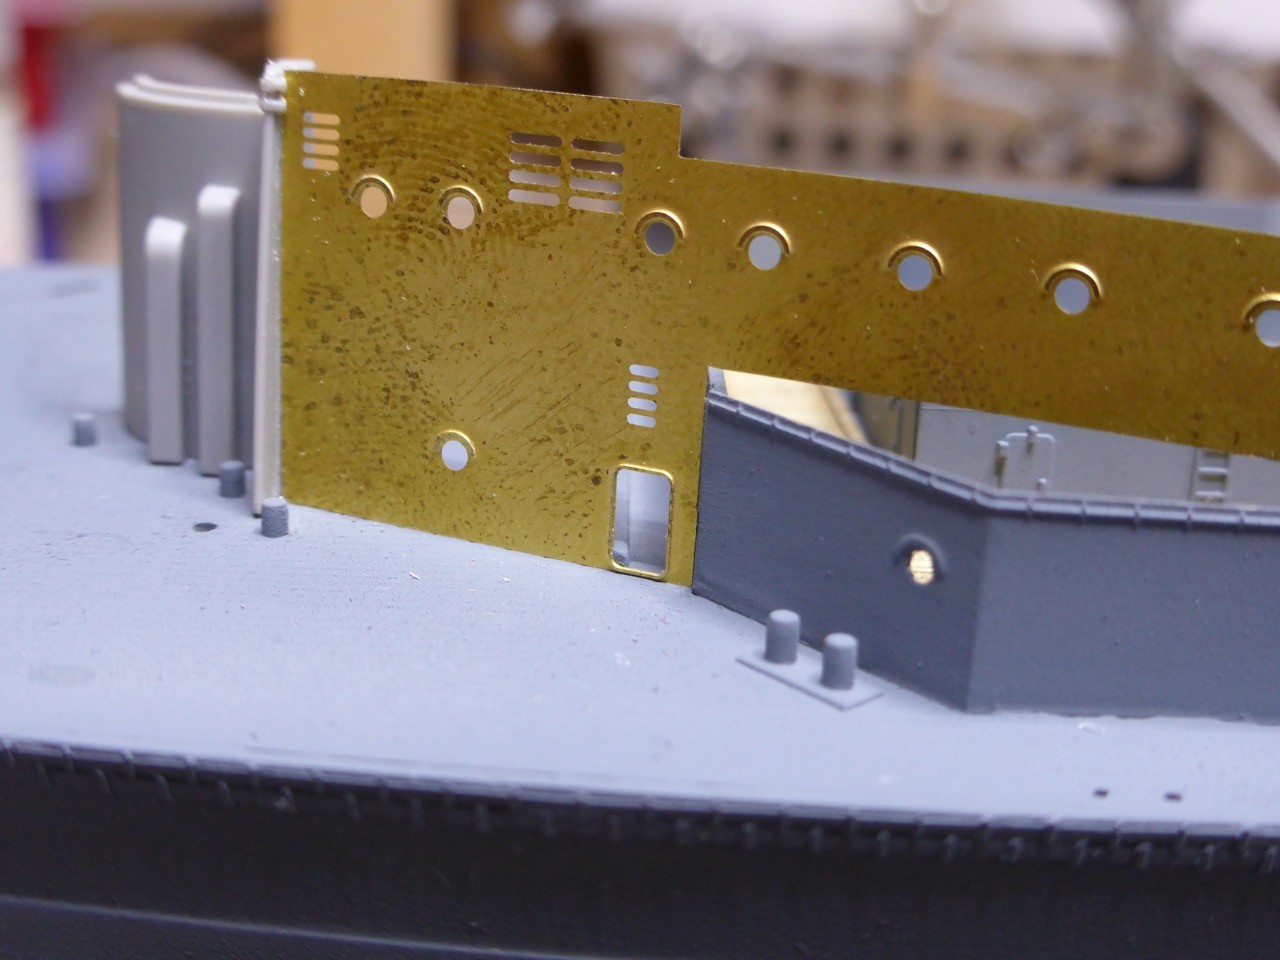
More work coming up forward. A part of the kit's bulkheads will be replaced py PE.


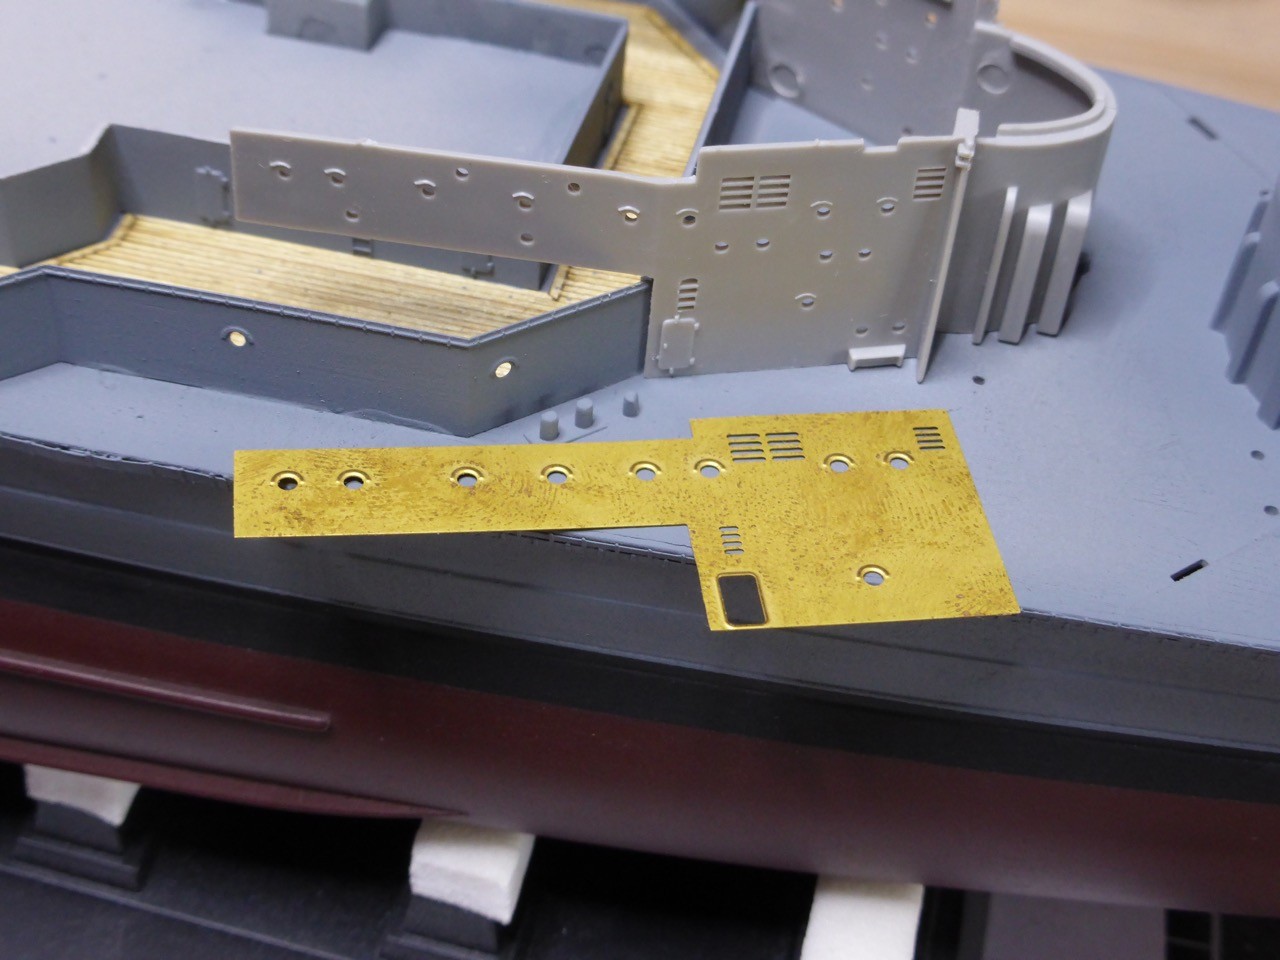
I can see where this is going, however, that needs to be postponed until the boat deck is installed. The wooden deck to the forecastle, too??? Hm. Don't really know yet...


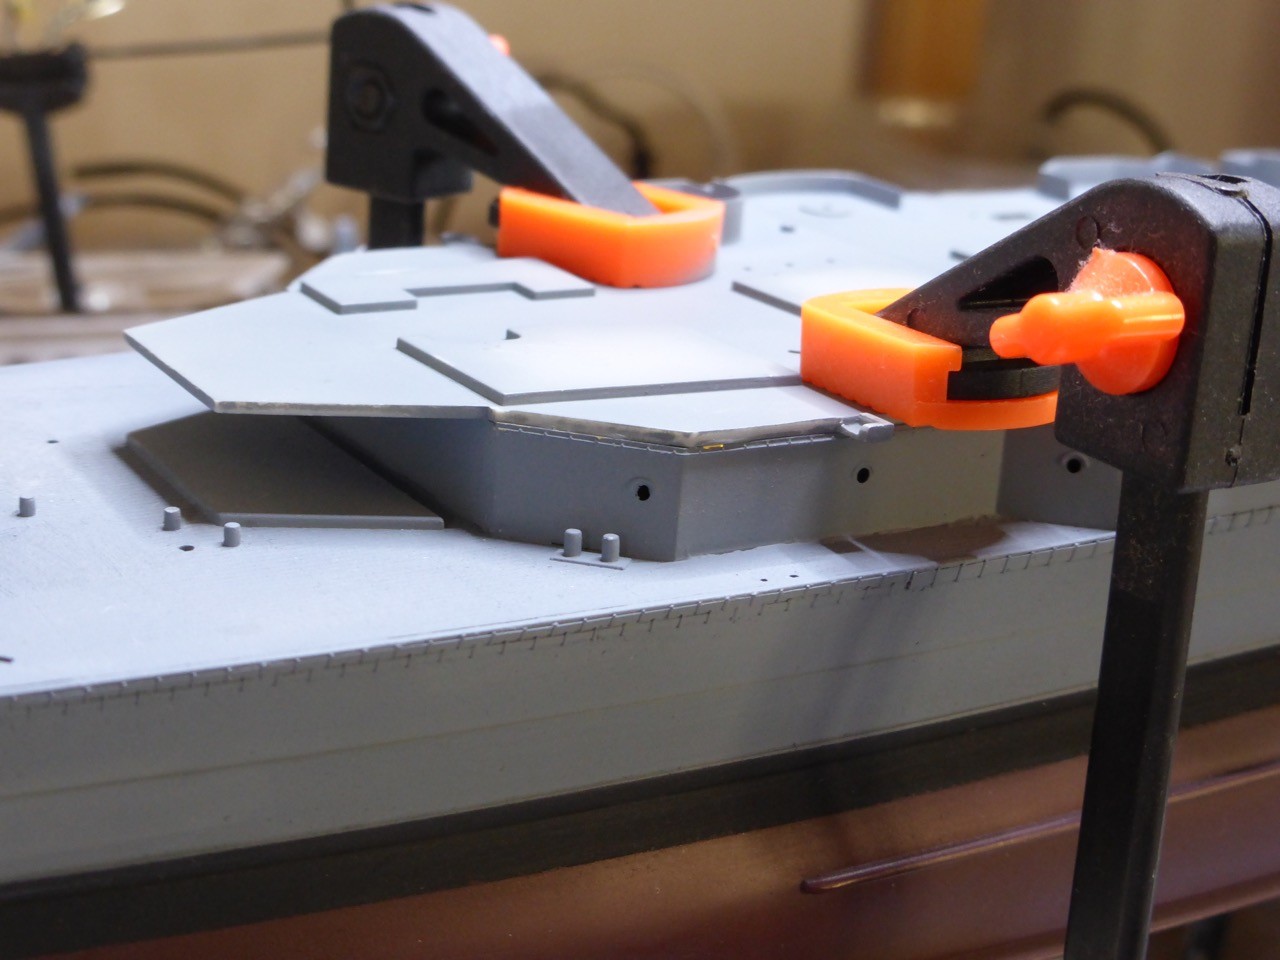
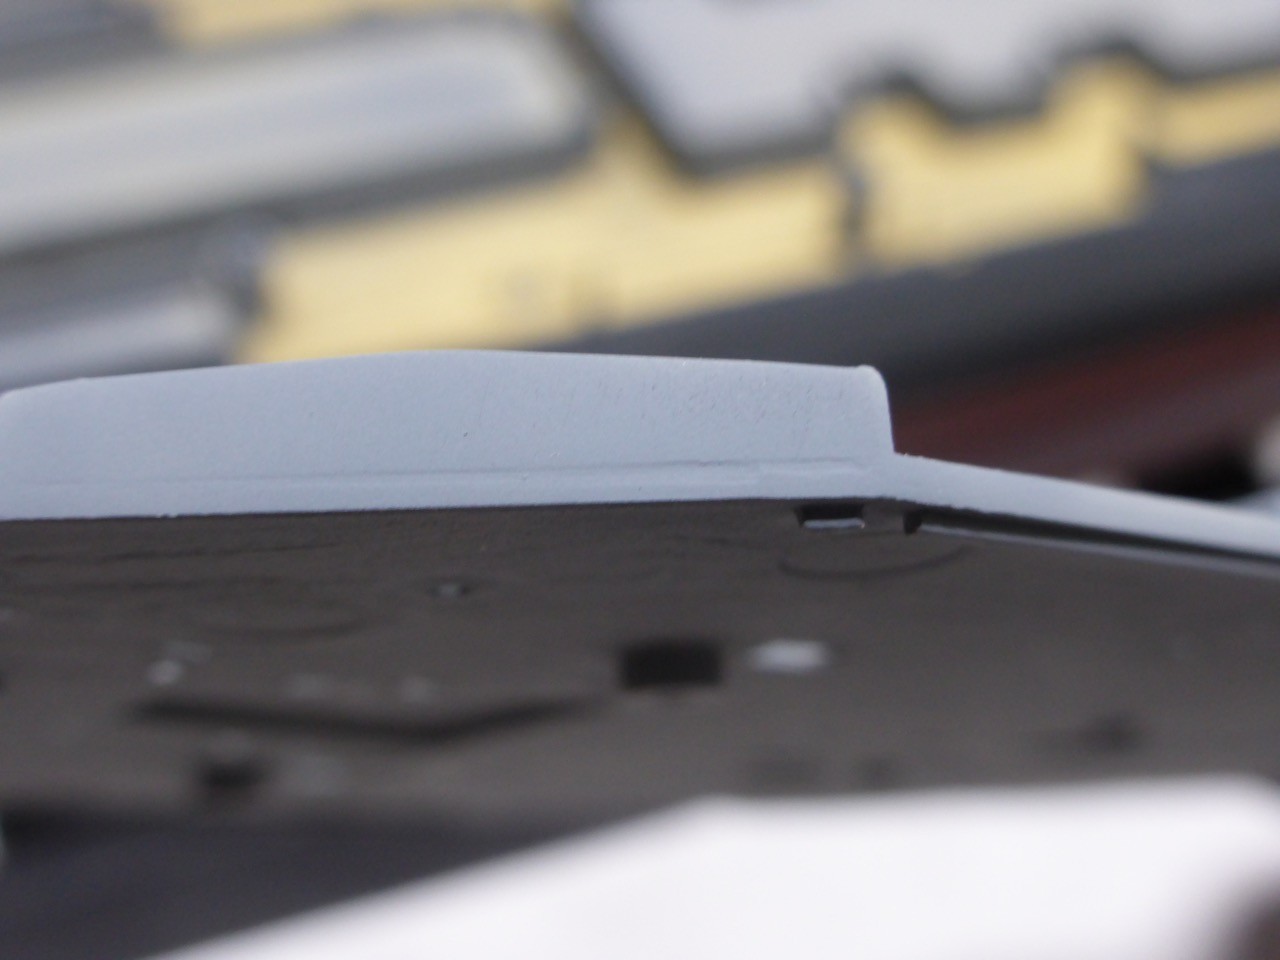
So back to the boat deck. This part required extensive cleaning, the mold is not really sharp on the edges. But - more important - on a closer look I have to work quite a bit on the fit. All the kit's parts that were replaced by brass have a thinner material strength, so there are some fractions of a mm that need to go in several areas. That took me well over an hour only sanding and adjusting...

So I think this will fit - some filling, surfacer and sanding will be required, of course, but it should do.


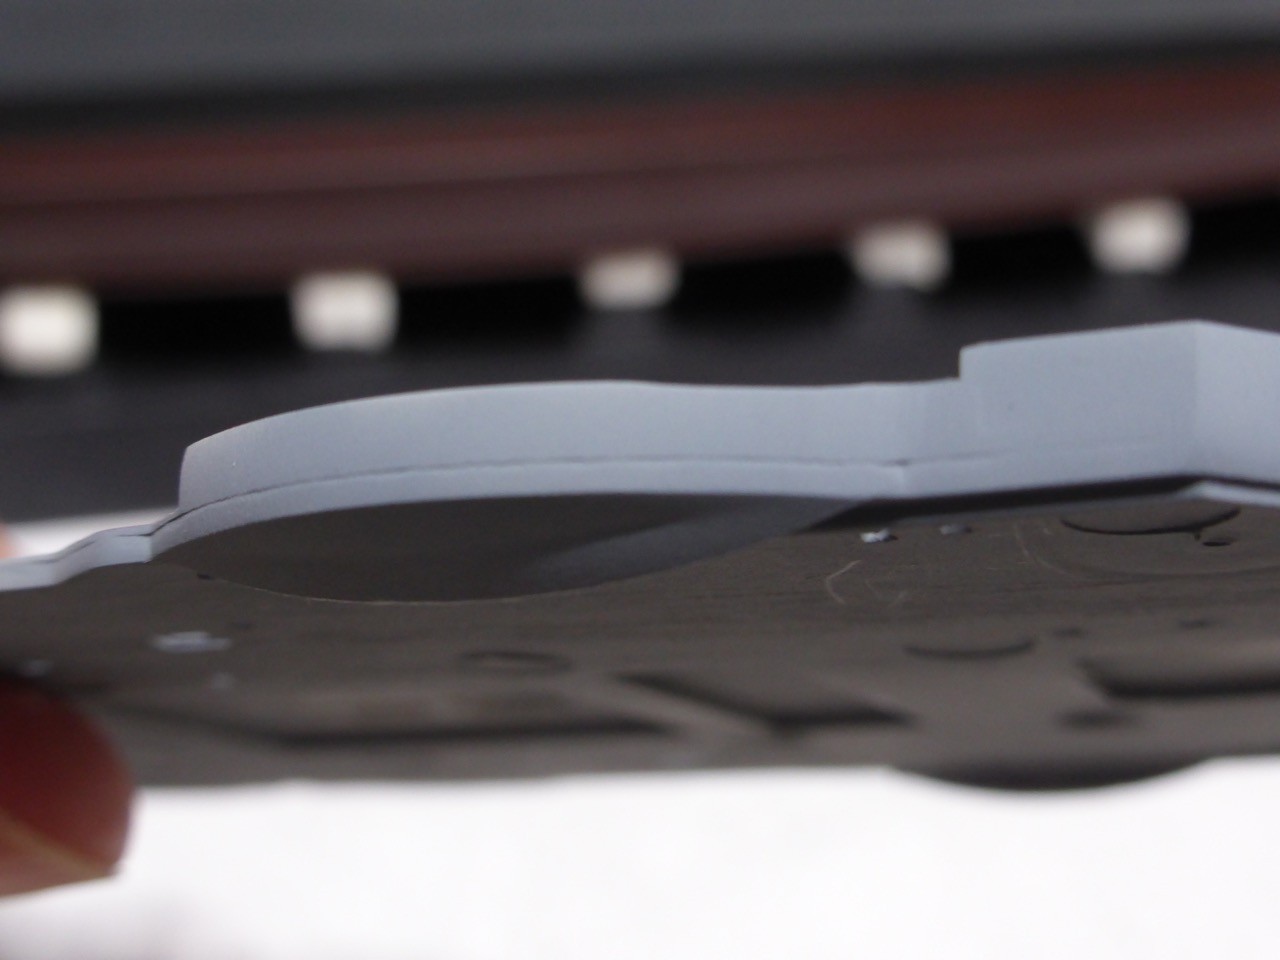
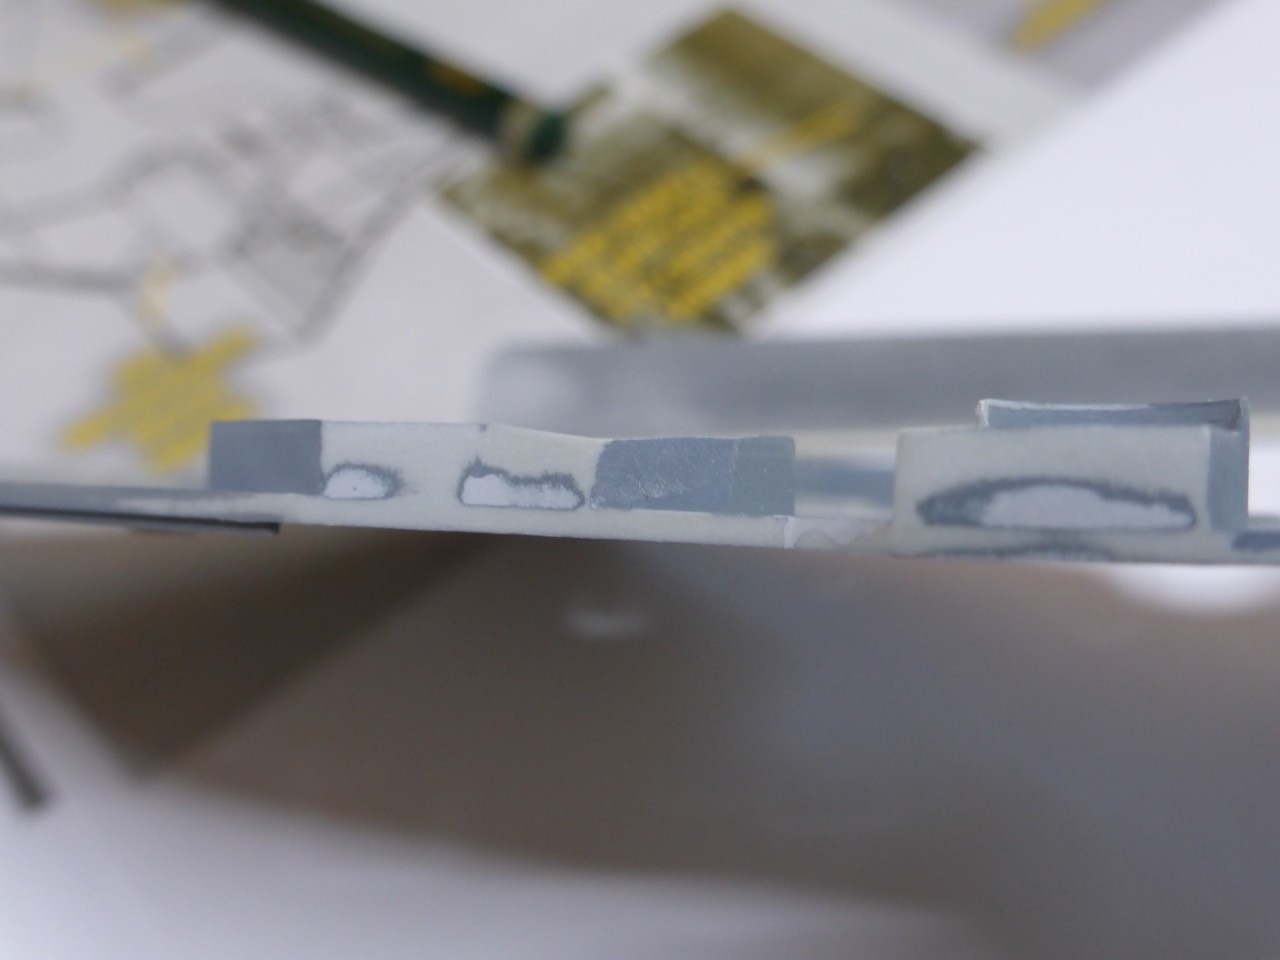
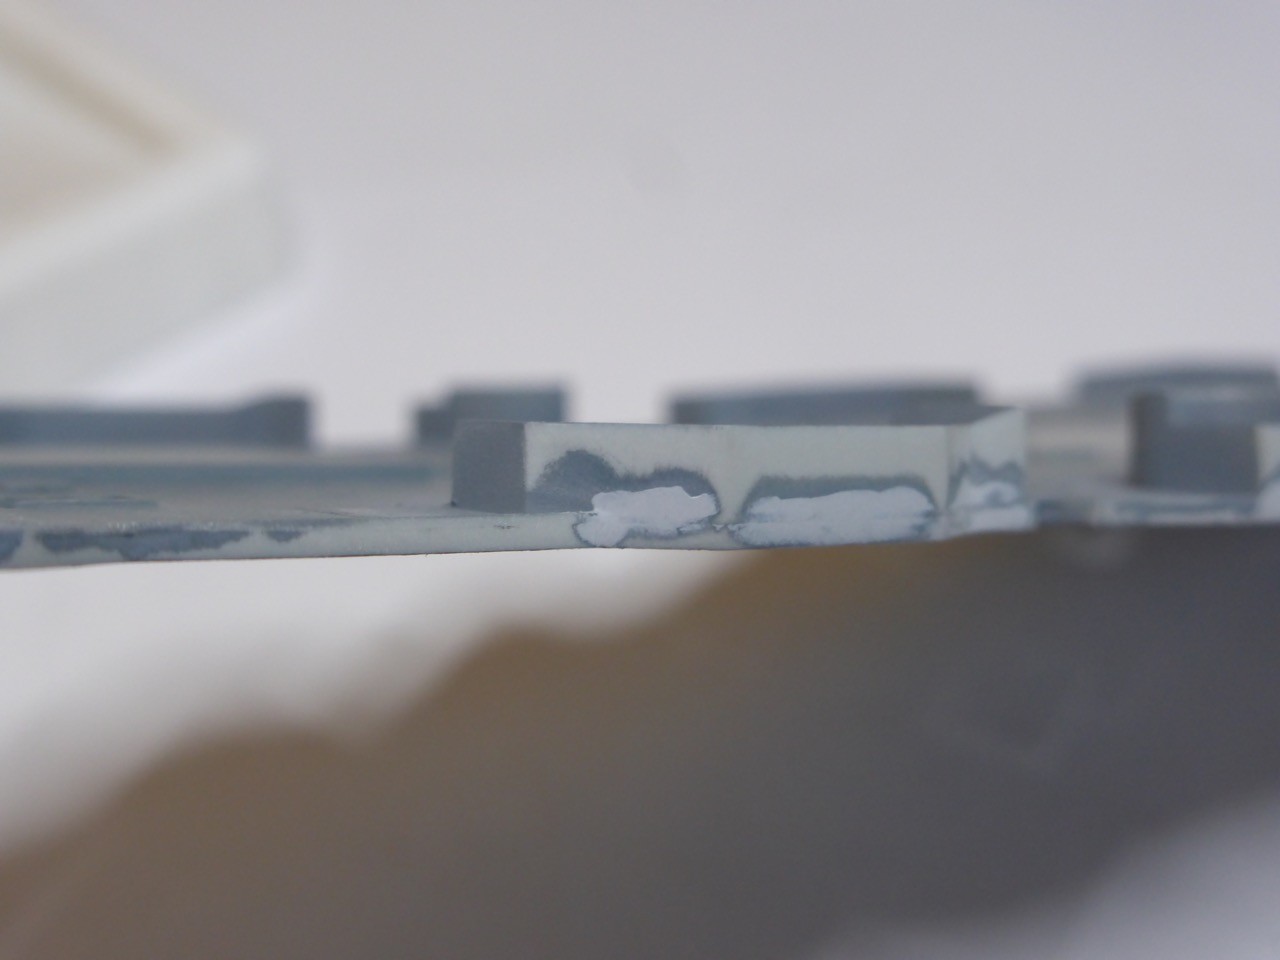
A first coat of color prior to installing -revealed that I was probably getting close with the shape and the fit, but was still falling short with smoothing out the edges of the deck...

Just two of many areas...


So...more of that:


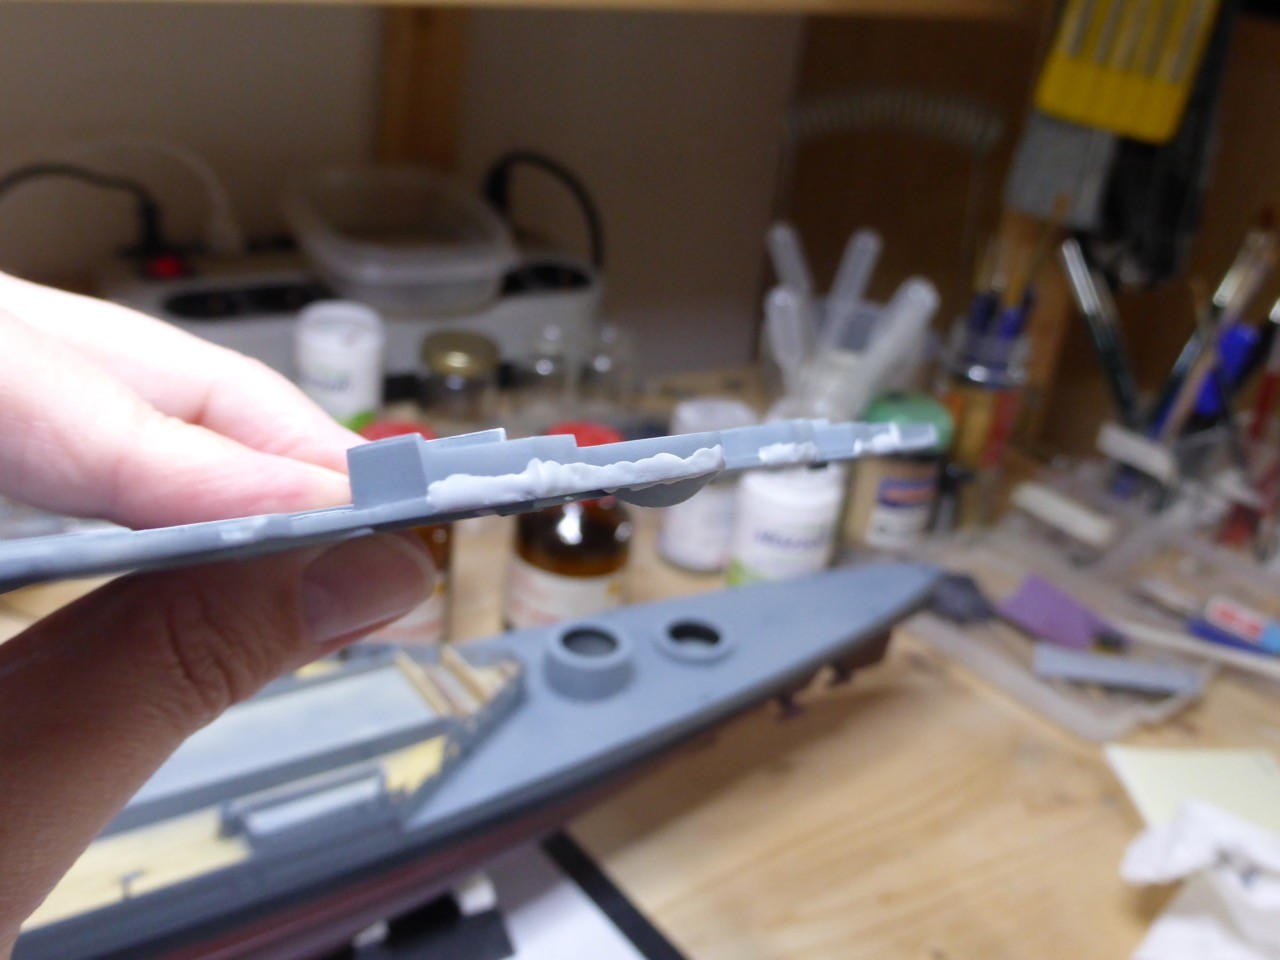
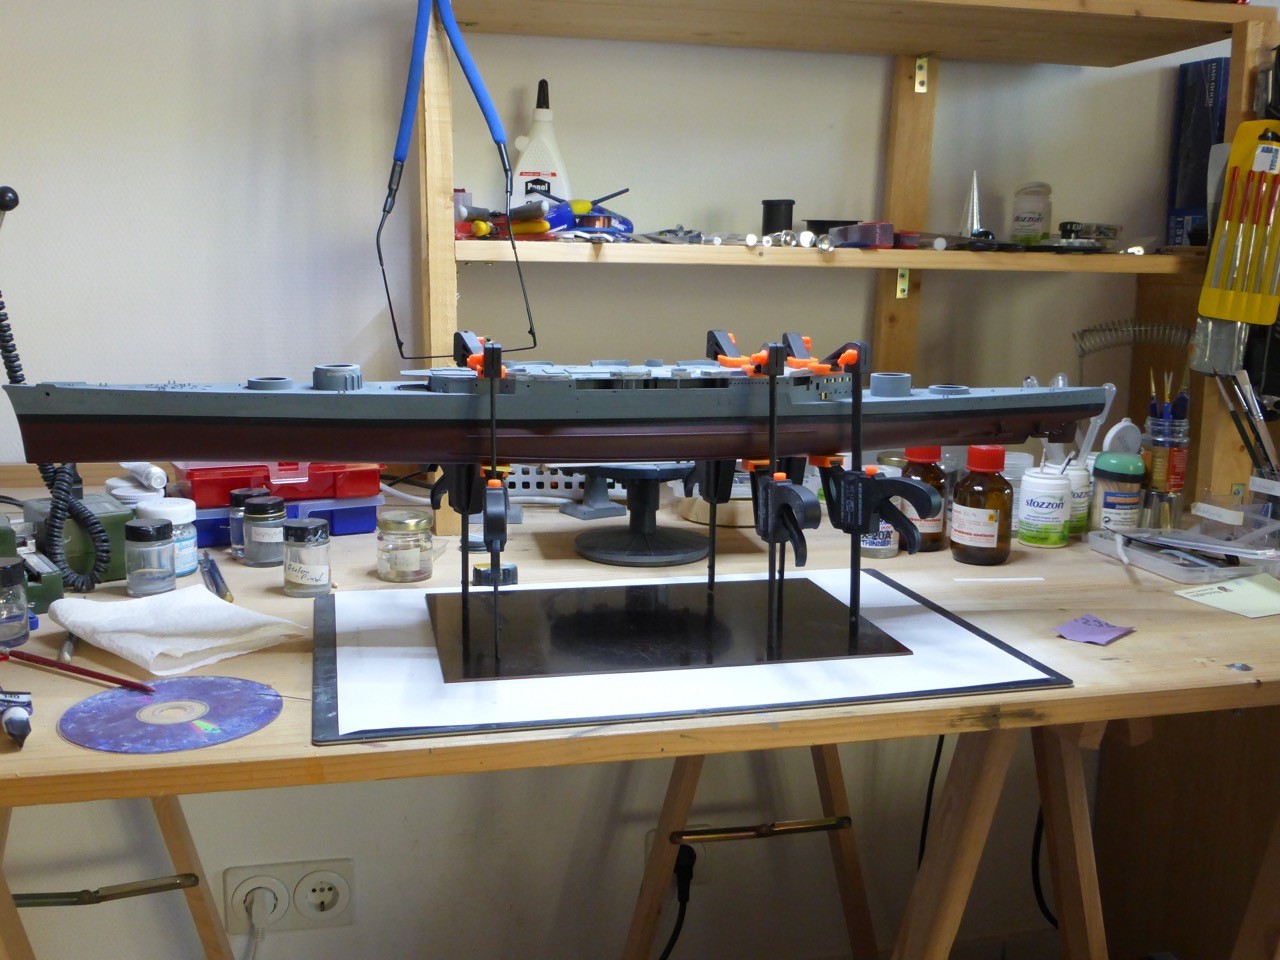
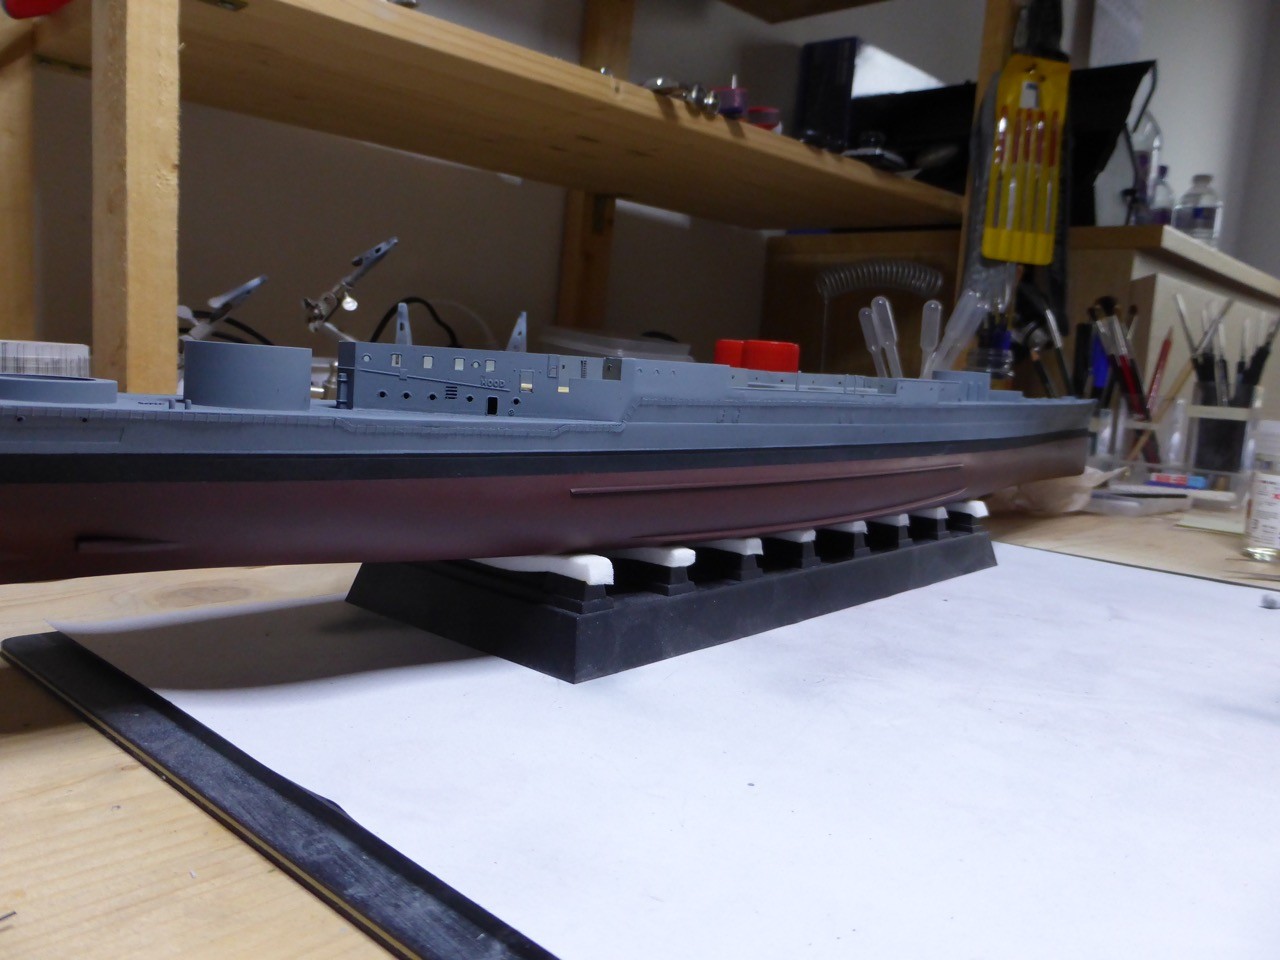
But that will be left for later (needs to cure anyway). At least my HMS Hood now looks like a warship, resting in the upper part of the shipyard and waiting for next weekend.


That's it for now, next update should be here in about a week from now!

Thank you very much for looking in, and as always, all comments more than welcome!!

Cheers,
Jan

FW_Allen
Joined: June 08, 2006
KitMaker: 7 posts
Model Shipwrights: 7 posts
Posted: Sunday, September 18, 2016 - 01:14 AM UTC

Quoted Text


In addition, I will use the Profile Morskie plans...


Hi Jan,

Frank Allen of the HMS Hood Association here. Been a member of this site for many years but somehow never posted anything. Not sure why. Anyway, I just wanted to say that your build is coming along quite nicely. I do have some suggestions though:

1. Do not use Profle Morskie 63 or Kagero...they are nicely drawn, yes, but they have many serious errors. Your other books are most excellent though and we highly recommend them!

2. As someone pointed out, we have very in depth articles on many Hood model kits on the official Hood veterans website. We were also involved in the development of this and the two 1/700 Trumpeter models (but not the new 1/200). We have a pretty good article on the 1/350 kit which you can read at http://hmshood.com/hoodtoday/models/trumpeter/trumpeter350.htm Another key article are the latest painting instructions located at http://hmshood.com/hoodtoday/models/tips/hoodpaint.htm

Please note that not all errors are listed in that article...just big things (for now...we are considering expanding the article to cover even more items). It does change from time to time as we tend to rediscover things about Hood quite often...mainly through previously unpublished photos. So, the article does change periodically.

3. One recent/new change is to ALL UP launcher shields and two of the 4" gun shields on the boat deck (called the "Up Deck" in the kit instructions). For years drawings and models had the shapes slightly wrong. See the following photos for more info: http://hmshood.com/hoodtoday/models/trumpeter/200-40.jpg and
http://hmshood.com/hoodtoday/models/trumpeter/200-3.jpg

4. One more thing to do before you glue the shelter deck/Up deck to the ship: please remember to add the two missing 4" gun supports (the two aft ones abreast the Pom Pom bandstand) they should be visible through the large rectangular openings in the brass screens outside the Admiral and Captain's quarters). You can use tubing that's the same size as kit part E31 (Step 3).

5. Eduard- it's a good set, but it does have a couple of problems....they forgot that Hood had a dual cable around her stern as well as her bow! It was only single from "B" turret to about "X" turret. http://hmshood.com/hoodtoday/models/trumpeter/degausstern.jpg

They also have the foremast starfish shape slightly incorrect. You can see the correct shape in our article.

5. The lower bridge base is too short. It was extended in 1940 to reach to the very end of the curved section of the extended signals deck. Hopefully this news reaches you before you have proceeded too far with the bridge. Please see http://hmshood.com/hoodtoday/models/trumpeter/extension1.png ,
http://hmshood.com/hoodtoday/models/trumpeter/200-13.png and http://hmshood.com/hoodtoday/models/trumpeter/extension4.png

I have a question for you: I love your work on the hawsepipes. That was a good idea to use tubing. What type/size did you use?

With regard to the hawsepipes, remember that Hood only used a cover on her unused hawsepipe...the others were not covered.

rolltide31
#377
Visit this Community
Texas, United States
Joined: June 27, 2010
KitMaker: 1,481 posts
Model Shipwrights: 1,332 posts
Posted: Sunday, September 18, 2016 - 08:51 AM UTC
Jan,

Amazing work. Very impressed with the level of detail and patience you are exercising.

Looking forward to seeing more as you progress.

Dave
Harry_at_BFM
Visit this Community
Colorado, United States
Joined: February 04, 2007
KitMaker: 594 posts
Model Shipwrights: 556 posts
Posted: Sunday, September 18, 2016 - 07:35 PM UTC
Hallo Jan,

Cannot add more to what Dave said except, Ausgezeichnet!!
JJ1973
#345
Visit this Community
Niedersachsen, Germany
Joined: August 22, 2011
KitMaker: 1,835 posts
Model Shipwrights: 1,832 posts
Posted: Sunday, September 18, 2016 - 11:00 PM UTC
Dave and Harry,

thank you so much for your kind comments, much appreciated!!

Cheers,
Jan
JJ1973
#345
Visit this Community
Niedersachsen, Germany
Joined: August 22, 2011
KitMaker: 1,835 posts
Model Shipwrights: 1,832 posts
Posted: Monday, September 19, 2016 - 12:13 AM UTC
Frank -

wow, thats quite a surprise, and an honor, seeing your post in my build log!! Your comments and to know that you're watching makes me blush a little but is even more motivation and incentive to build a - within my abilities - worthy model of the HMS Hood.

Let me first say some general things - I am aware of the HMS Hood Association, and I've been browsing your site. I do have your 'Review and Improvement suggestions for the Trumpeter 1 / 350 kit' printed out and included in my references. And I am closely following your exchange with E.J. Forth and Keumho Kim from Pontos about the 1 / 200 kit and the errors, respectively your suggestions for the Pontos kit.
However, I have to admit that I don't understand each and every detail you are pointing out, but I think once I am working on those particular areas I will understand some more. My take, however, is, that the 1 / 350 kit is a better starting point than the 1 / 200. Many details you are pointing out are correct (more or less) in the older and smaller kit - amazing. So Trumpeter made a step back.

As for the 'Profile Morskie', yes, I have that plan 63. I do not have the Kagero - though I have some of their publications. They are nice to look at, but in the end, they are no reference, since they build their fancy graphics on some source or another and used artists freedom to a degree that I don't know. I have the '63' plan printed out and put on the wall, the basic outline is correct and it helps orientating with this big project. But I am not using it as a source upon which I base my build. So don't worry, I will not build two different sized funnels.

I will take my time with this build - as I do with all my models, and I don't really have as much time to spare for modeling as I would wish to - and I am more than happy if you advise me during my build if I'm going down a wrong direction. Basically, I am not afraid of re-work or correcting things for a better result. And if I am not able to finish in time for the 'Campaign' next May, then be it... However, my capabilities are limited, I am not a scratch builder and I don't have a full set of tools with a lathe or something like that - just a (maybe not too bad equipped) modeler's hobby corner. I will not - and I cannot - strive for a degree of accurateness and excellence as E.J. Foeth is doing with his Hood. That would be pure hubris.

But for some details.

I am aware of the double degaussing cable around the stern - however, I have no means to build it. What I have left in my leftovers from older projects is a WEM degaussing for a KGV, but that's way too small, even smaller than the single WEM cable, so that would look even worse. That's one I choose to accept.
I do think there are more smaller errors, I don't think that all the portholes in the hull are exactly correct, but I accepted that as well.
I have not really started the lower bridge yet (other than cutting the plastic as shown and then put it aside), so I will have a close look at this and try to get it right.

I have to admit you lost me with the 4" supports abreast the PomPom bandstand - do you have any picture or drawing? I could only find two single mountings aft of the PomPom, and two more a little forward of the .5 cal mountings (AOTS, p. 89, E3/14 and E3/13).

Generally, I will not use either the Lion Roar nor the Eduard kits 'as is', but as I think they're useful. I will add more stuff I have not talked about, so e.g. I do like (and plan to use) the .5 cal, PomPoms and 4" era from NorthStar, as well as some other details like winches, anchors etc. And I have an ever growing stock of leftovers that I sometimes use completely different than intended, if the effect is ok.

For your question with the hawse pipe and the tubing, I have to disappoint you: I don't know the size of the tubing, I do know the kind of tubing I used, though:


Simple leftovers - a habit not throwing anything away that could prove useful. Here the tubing was a former protection of a brush. I just tried until I had one that worked...
Thank you for the advise with the cover!

Let me close with saying thank you again for watching this and for commenting and your advice!! If your time allows, I would be honored if you occasionally drop in and give me some hints or point me in the right direction! Within my limits, I will certainly try to incorporate it in my build!

Sincerely,

Jan
RussellE
#306
Visit this Community
Victoria, Australia
Joined: June 27, 2010
KitMaker: 3,959 posts
Model Shipwrights: 2,777 posts
Posted: Monday, September 19, 2016 - 02:33 AM UTC
G'day Jan!

Well, what an update! You're really pushing boundaries on the Hood and it's great to be able to watch your patience and persistence with this kit!

And, who'd have known we have someone like Frank in our midst watching over your build! A veritable encyclopaedia of knowledge! No pressure to get her right now, mate But I'm certain your build will go down as one of the best Hood's here on MSW!

One thing's for sure-if I ever decide to build a Hood, I'll be referencing your blog for all the fixes i need.
JJ1973
#345
Visit this Community
Niedersachsen, Germany
Joined: August 22, 2011
KitMaker: 1,835 posts
Model Shipwrights: 1,832 posts
Posted: Monday, September 19, 2016 - 09:26 AM UTC
Russ,

thank you very much, Mate!! It's finally fun again after some, well, tedious filling and sanding period. Put I see the next of that already on the horizon - the shelter deck will require quite a bit, as will the lower bridge and the armored tower forward, where I have to mate PE parts with kit's parts once more...but hey!
(Maybe I should enter the Bismarck campaign with a basic Revell sub or a FPB, finish it, and then take all the time with the Hood??? But I will consider that in a few months....)

Feel free to copy as many details as you like!!! It's my honor! You are going through the 'How to deal with a Trumpi-kit' school with your Prinz, you should be fit for a Hood!!

Cheers,
Jan
RedDuster
Visit this Community
England - South East, United Kingdom
Joined: March 01, 2010
KitMaker: 7,078 posts
Model Shipwrights: 6,649 posts
Posted: Tuesday, September 20, 2016 - 01:00 AM UTC
Great job Jan,

All that work getting boat deck down will be worth it.

One question, the etched bulkhead is that cladding for the plastic part of base of the bridge structure, or does it replace it?

Keep up the excellent job mate.

Cheers

Si
FW_Allen
Joined: June 08, 2006
KitMaker: 7 posts
Model Shipwrights: 7 posts
Posted: Tuesday, September 20, 2016 - 02:09 AM UTC

Quoted Text

...Let me close with saying thank you again for watching this and for commenting and your advice!! If your time allows, I would be honored if you occasionally drop in and give me some hints or point me in the right direction! Within my limits, I will certainly try to incorporate it in my build!
Sincerely,
Jan


Hi Jan,

I am happy to help out wherever possible. I'm not necessarily a great modeler, but I do know a thing or two about the Mighty Hood, LOL. The most interesting thing about Hood is that although she was famous, some aspects of her configuration weren't well documented during her final year (wartime censorship) or have been lost to time. There were many more changes made to her appearance than we once thought. We find more and more things each time a "new" photo appears. Trumpeter's reps didn't understand this...they appeared to think that famous = well documented. Unfortunately, not.


I'm glad that you are monitoring the Pontos thread on the MW forum. That thread, though about their 1/200 Hood set, also contains information that can be applied to ANY model of Hood really. Several new "finds" have been listed there (I still need to add them to my hmshood.com reviews).

Thanks for the info on the tubing. I did mine the hard way...putty and file. My hawsepipes don't look nearly as good as yours do!

4" gun supports- The ones I was referring to are the last pair of 4" guns on the boat deck. There was "L3/P3" on the port side of the deck and "R3/S3" on the starboard side. Trumpeter didn't realise that these could be seen through the openings in the Admiral/Captains screens. I forgot to notify them at the time. Luckily its something very easy to fix. Here is a photo: http://hmshood.com/hoodtoday/models/trumpeter/3504incols.jpg

All the best,

Frank
RussellE
#306
Visit this Community
Victoria, Australia
Joined: June 27, 2010
KitMaker: 3,959 posts
Model Shipwrights: 2,777 posts
Posted: Tuesday, September 20, 2016 - 02:33 AM UTC

Quoted Text

Russ,

thank you very much, Mate!! It's finally fun again after some, well, tedious filling and sanding period. Put I see the next of that already on the horizon - the shelter deck will require quite a bit, as will the lower bridge and the armored tower forward, where I have to mate PE parts with kit's parts once more...but hey!
(Maybe I should enter the Bismarck campaign with a basic Revell sub or a FPB, finish it, and then take all the time with the Hood??? But I will consider that in a few months....)

Feel free to copy as many details as you like!!! It's my honor! You are going through the 'How to deal with a Trumpi-kit' school with your Prinz, you should be fit for a Hood!!

Cheers,
Jan


G'day mate

I didn't want to mention the flash/bruising on the shelter deck in case I jinxed the rest of the kit, but it looks like you could be in for a "Prinz Eugen" type build of the superstructure-I certainly hope that's not the case though, as the "school of Prinz" sucked a fair bit of fun out of it

I must admit, I gave up enlisting in campaigns a while ago-I'm just totally hopeless meeting deadlines (you may have noticed ) So there'd be no shame in re-thinking your entry to the Bismarck campaign-I thought about entering the Dive campaign with a type XXI (nice easy kit) but then again it would take time away from the Prinz...

Haha, as much as I may be "fit for duty" on the Hood, I might take a break from large Trumpy kits for a while after the Prinz commissions Sometimes I see it on the shelf at my LHS and ogle the box for a while, then i think: Naaah! Better empty the stash a bit first
JJ1973
#345
Visit this Community
Niedersachsen, Germany
Joined: August 22, 2011
KitMaker: 1,835 posts
Model Shipwrights: 1,832 posts
Posted: Tuesday, September 20, 2016 - 09:14 AM UTC
Frank,

thank you very much, that's very kind and your offer to help is most appreciated!! I'll certainly have quite a few questions for you over time - and please feel free to comment or criticize at any time - even though I am fascinated by the mighty Hood and think that I read a good deal about her, I am not a dedicated HMS Hood expert, and I am more than happy to learn as much as possible about that great ship!!

As for the frequent changes and new findings about here last appearance - well, I am dealing with the current German warships for my professional life, and even today - no ship of a class looks like the other, changes are made frequently, and even though it should not be the case, changes are being made without 'official paperwork'. Pretty much every time you give a frigate into dockyards hands for an overhaul, you'll find surprises ("That equipment shouldn't be here according to our plan...?!?"). I would state with confidence, it would not be possible to build an exact model of one of our frigates that was decommissioned only one or two years ago, the stripped hull still sitting in our Arsenal and waiting for the scrapper, at a certain given time throughout her career. And no censorship and as many pictures taken as you could dream of, with digital cameras, tiger cruises, fleet weeks...

4" - got it, I was thinking along a wrong direction. I was looking for removed 4" and some not removed and still visible supports. (Quite common as well - removing equipment 'partially', for reasons of time, convenience of the shipyard, you name it. And then you discover some structure on a picture and wonder - what was that intended for, what is it doing, why is it there? Answer - nothing, it just was not properly removed...I could give you ample examples with our frigates, and I would be amazed if it ever or in any navy had been different.)

Russ,

thanks mate, well - timelines. I very well know what you're saying. I'm trying a different approach - finding workarounds (for the timelines that is)
And I'm still positive regarding the shelter deck and the like - regardless of the kit's piece quality, with so many parts exchanged with brass, I'd think you couldn't expect any better fit. (at least that's what I am telling myself )

We'll see what the coming weekend will bring...

Cheers,
Jan
Harry_at_BFM
Visit this Community
Colorado, United States
Joined: February 04, 2007
KitMaker: 594 posts
Model Shipwrights: 556 posts
Posted: Tuesday, September 20, 2016 - 09:39 PM UTC
Hallo Jan,

Question, did you use epoxy or CA to glue the large PE
JJ1973
#345
Visit this Community
Niedersachsen, Germany
Joined: August 22, 2011
KitMaker: 1,835 posts
Model Shipwrights: 1,832 posts
Posted: Saturday, September 24, 2016 - 09:59 PM UTC
Hallo Harry,

I am using just simple CA gel-type glue. Those big parts were fitting nicely, no tension at all, so there should be no force on the glue.

And here's this weekend's progress. It was shelter deck day, more or less, and luckily Frank Allen dropped in in time to make me aware of the missing 4" supports, so I could incorporate them.

First some impressions of the little bit awkward molding, or better, of the surfacer that remained after sanding, giving a good idea of the unevenness of the plastic part.


Next - modifications along advise from the HMS Hood Association site and their advise to Pontos for the 1/200 Hood. It appears that the splinter shields on the shelter deck are actually pretty accurate, only minor adjustments.

First, a structure in the center of the deck needs to go, there was actually an engine room vent there.


Some PE will fix the open hole later on.

Then the UP tubes, some corrections to the height of the shields necessary.

Before:


And after, a part of the shield cut away.


Port and starboard:


And modifications to the forward UP tubes:


Corrections to the height of middle 4" shields, sanded a little away so that they angle up a little in the front part. Probably not enough, but I didn't want to loose to much total height to the shield. The effect should be visible, though.


I hope I got that at least generally correct, Frank?

Work on the structure, some PE added (almost forgot those parts )


And three additional portholes - I missed them when I fixed that part. I had a picture as a reference that showed only three portholes, but with magnifiers you could make out that there were actually six. Well, they are a little off now, the second group of two should be more forward, and the last single one as well. But that would have been impossible without re-doing the whole part, so I will go with that. Six portholes, two pairs and two single, that must do...


The shelter deck before being fixed to the ship


The additional 4" supports, I hand painted them later on.


And the shelter deck in place:


Fit is quite good, and the additional 4" support is clearly visible, would have been a bigger error without...


And that's it for today.
I don't think I will be able to get an update up next week, so it will probably be two weeks before I can show you some more progress.

Thank you all for looking in and following, and as always, all comments are very welcome!

Cheers,
Jan

RussellE
#306
Visit this Community
Victoria, Australia
Joined: June 27, 2010
KitMaker: 3,959 posts
Model Shipwrights: 2,777 posts
Posted: Monday, September 26, 2016 - 02:53 AM UTC
excellent progress Jan
RedDuster
Visit this Community
England - South East, United Kingdom
Joined: March 01, 2010
KitMaker: 7,078 posts
Model Shipwrights: 6,649 posts
Posted: Tuesday, September 27, 2016 - 12:44 AM UTC
Nice work on the splinter shields around the gun positions Jan.

love to see that attention to detail.

Cheers


Si
rolltide31
#377
Visit this Community
Texas, United States
Joined: June 27, 2010
KitMaker: 1,481 posts
Model Shipwrights: 1,332 posts
Posted: Tuesday, September 27, 2016 - 03:00 AM UTC
Jan,

Amazing work. Your attention to detail is outstanding.

Dave
FW_Allen
Joined: June 08, 2006
KitMaker: 7 posts
Model Shipwrights: 7 posts
Posted: Wednesday, October 05, 2016 - 08:52 PM UTC
Looking good!
JJ1973
#345
Visit this Community
Niedersachsen, Germany
Joined: August 22, 2011
KitMaker: 1,835 posts
Model Shipwrights: 1,832 posts
Posted: Thursday, October 06, 2016 - 09:45 PM UTC
Russ, Si, David and Frank,

thank you so much for stopping by and you kind comments!!

I hope I will be able to get some bench time this Sunday, still underway, but back sometime Saturday evening...so there is hope for a small update in a few days.

Probably more filling and sanding...

Cheers,
Jan
JJ1973
#345
Visit this Community
Niedersachsen, Germany
Joined: August 22, 2011
KitMaker: 1,835 posts
Model Shipwrights: 1,832 posts
Posted: Saturday, October 22, 2016 - 11:31 PM UTC
All right, that was quite an extensive break and quite an unexpected as well - but such is life, and sometimes silly things like work get in the way of modelling.

Anyway, I got something like an update for you. Even though the weekend wasn't as free as I had hoped for (lots of stuff piling to be done, next to the shipyard...), I got several hours of bench time.

I had managed to brush some layers of surfacer on during the last days, just a few minutes in the morning before heading to office.


So I spent the Saturday with meditative sanding and putting some more surfacer on critical areas.


Getting there, but still some work to do. This morning I realised that the surfacer was still not completely cured and was not ready for sanding. So bad - no sanding today...

Anyway, as you might realise, I lost one of the brass window covers from the Admirals area. I spent some time on my knees, pampering and petting the carpet monster, of course without any result. So I gave up and started looking for a suitable way out or a replacement - luckily the Eduard set hast pretty much the same covers, it looked like I could use just one Eduard part without it being visible. Just when I had made that decision the carpet monster gave up - I could suddenly see the tiny golden piece sticking out, undamaged. However, I will not glue it back on before all sanding is finished.

Now I think there is no point in working on the hull before I am happy with the forecastle deck and the joints, so I decided to do a first sub-assembly today: 4" twin mounts from NorthStar.


Nice little kit of its own:


Cast / moulding is excellent and brass parts are as well!


I started with building four mounts (seven needed, of course) and I will build another four.
Bottom line up front: they are excellent!! It almost feels a little bit like cheating, it is so easy to build them!! Parts fit excellent, go together easy and the mounts just look awesome! Best detailed 4" mounts I have come across so far!

There are holes in the breeches to take the brass barrels, but those holes are too small. No big deal, a 0.6mm drill does the job - and the cast-in holes give a perfect lead. Just remembering the modifications I did to the Belfast ones - cutting away the barrels and finding a center to drill a very small hole first, only after that the 0.6 mm drill, hoping to get it into the centre and straight...so easy here!


Barrels go in easy and nicely parallel. The etched geared rim is a really nice touch! The breech is upside down on the pictures to show the geared rim.


It's easily installed into the mounting and the barrels remain trainable.


Etched shields that connect to the splinter shields.


Four mounts ready for painting.


The splinter shields test fitted reveals one flaw - and I would say that is the only flaw I can find on this kit, and it is a pretty stupid one. The splinter shields are a little short.


The mounts look great, but when you look from slightly underneath, you can see it - I have to think what I will do about it, I am not sure yet.


The problem is that the shields should be casted just a mm higher up, so that you can cut them away with some spare material and sand them even. As they are, you can just barely cut them and you are already coming close to the lowest rivet line. 1 mm more material on the cast and all would be solved.


Well, once again, nothing is 100% perfect. Those 4" mountings, in my opinion, come pretty close though!

And that's it for today. I should fall back into a more regular pattern from now on, I think I should have another update sometime in about a week.

As always, thanks for looking in and thanks for your patience!!

Cheers,
Jan