

Great job Jan,
Interior structure looks good. great job sorting out the issues with the etched bulkheads.
Keep up the excellent work
Cheers
Si


Go to modelshipwrights.com for the current dynamic site!
Hosted by Steve Joyce
HMS Hood 1941 - Trumpeter 1/350 + Lion Roar

RedDuster

Joined: March 01, 2010
KitMaker: 7,078 posts
Model Shipwrights: 6,649 posts

Posted: Monday, July 04, 2016 - 02:43 AM UTC

JJ1973

#345

Joined: August 22, 2011
KitMaker: 1,835 posts
Model Shipwrights: 1,832 posts

Posted: Tuesday, July 05, 2016 - 09:17 AM UTC
Thank you very much, Si!! 
Real life is taking over, again - so Hood will have to wait for another week...and that during a period where motivation is really high... I think I have to work on my work-shipmedelling balance
Cheers,
Jan
Real life is taking over, again - so Hood will have to wait for another week...and that during a period where motivation is really high... I think I have to work on my work-shipmedelling balance
Cheers,
Jan

Darktrooper

Joined: November 05, 2004
KitMaker: 581 posts
Model Shipwrights: 18 posts

Posted: Saturday, July 09, 2016 - 03:46 PM UTC
Jan:
Where did you find that ships crest for the Hood? Im looking for a crest of similar size for my build of the HMS Warspite.
Where did you find that ships crest for the Hood? Im looking for a crest of similar size for my build of the HMS Warspite.


LZ32-TX
Joined: December 28, 2015
KitMaker: 34 posts
Model Shipwrights: 28 posts

Posted: Saturday, July 09, 2016 - 05:51 PM UTC
it comes with the lion's roar upgrade set:
JJ1973
#345
Joined: August 22, 2011
KitMaker: 1,835 posts
Model Shipwrights: 1,832 posts
Posted: Wednesday, July 13, 2016 - 09:39 AM UTC
Sorry for my delayed answer AJ, but Marco has already said it all - the crest was part of the Lion Roar kit, I have not seen it anywhere being sold individually.
I should be able to find some bench time the coming weekend, so stand by for another update in a few days 
Cheers,
Jan
I should be able to find some bench time the coming weekend, so stand by for another update in a few days
Cheers,
Jan
RedDuster
Joined: March 01, 2010
KitMaker: 7,078 posts
Model Shipwrights: 6,649 posts
Posted: Thursday, July 14, 2016 - 01:06 AM UTC
Looking forward to it mate.
Cheers
Si
Cheers
Si
JJ1973
#345
Joined: August 22, 2011
KitMaker: 1,835 posts
Model Shipwrights: 1,832 posts
Posted: Sunday, July 17, 2016 - 01:21 PM UTC
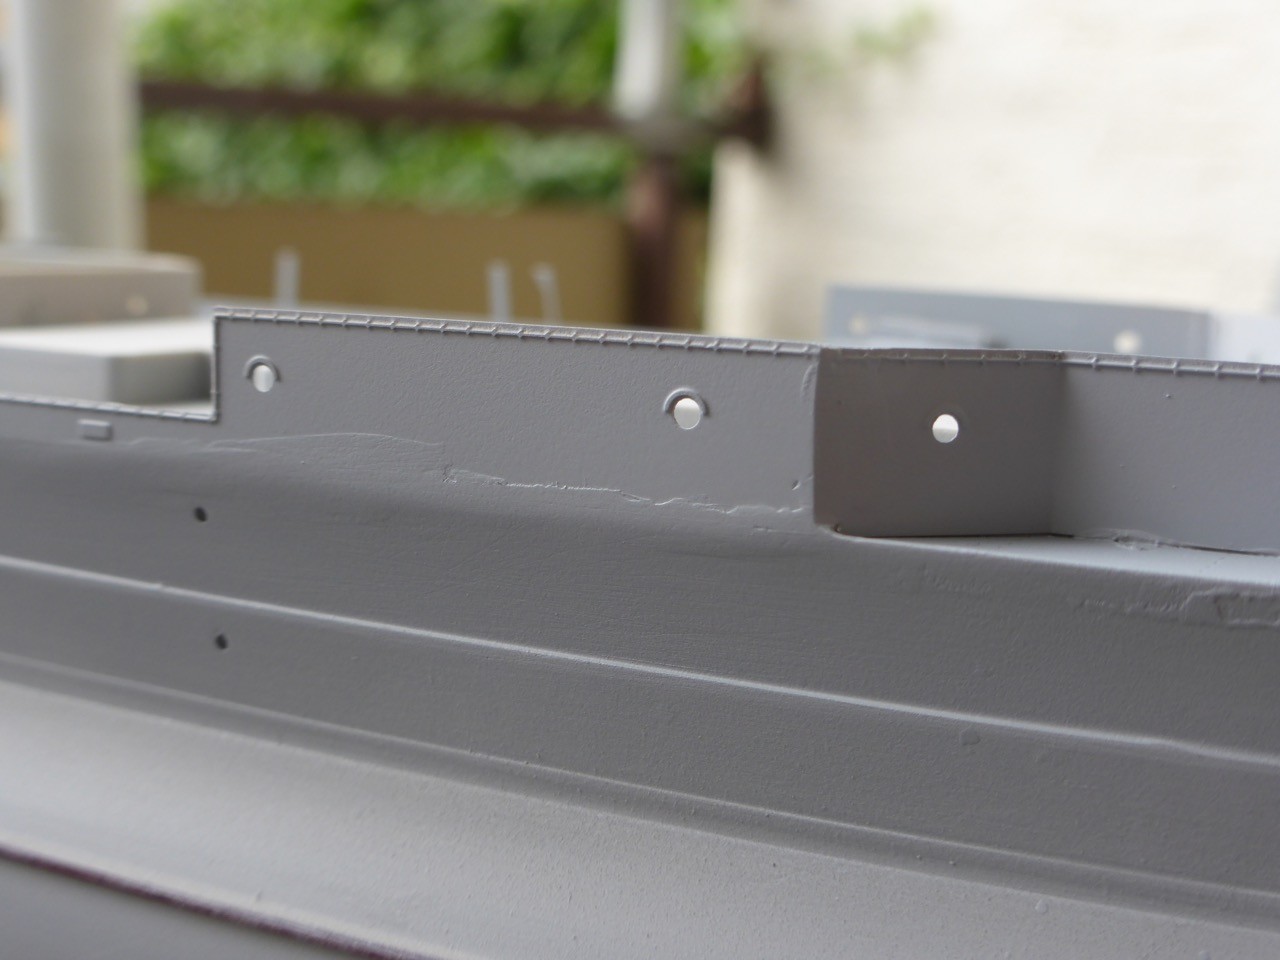
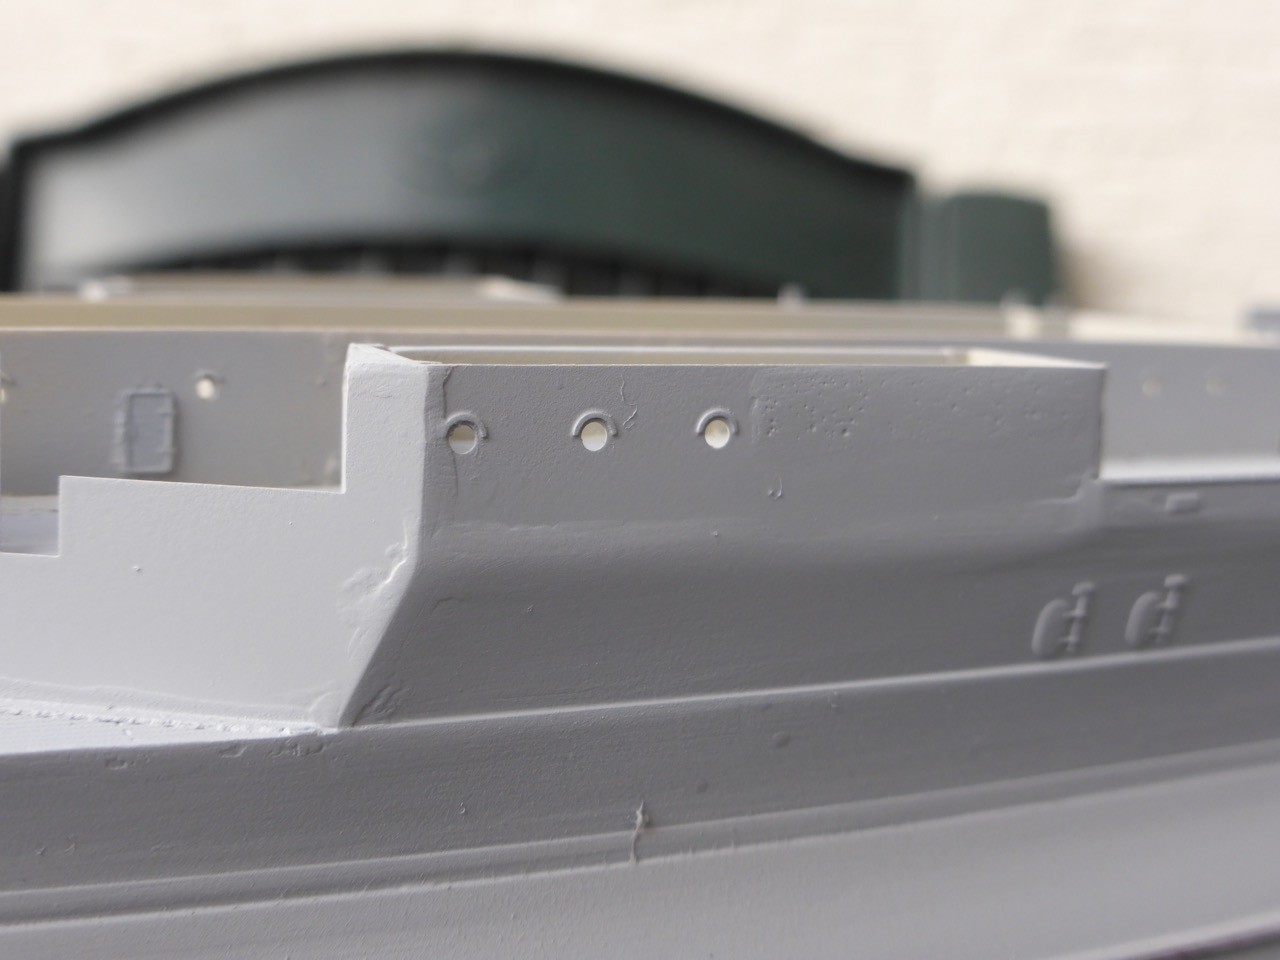
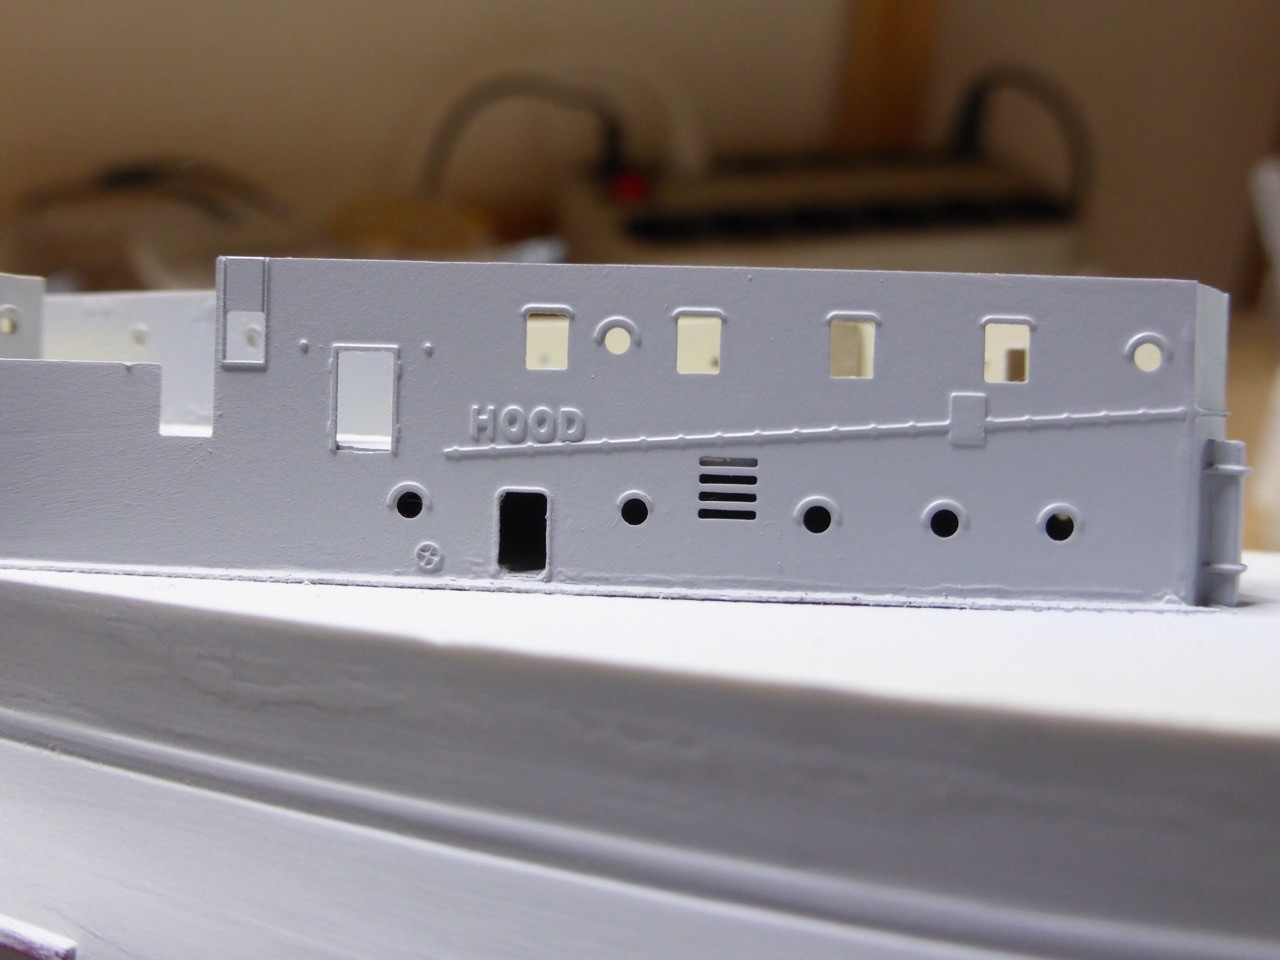
All right, some progress - again, not as much as I was hoping, but some work going on.
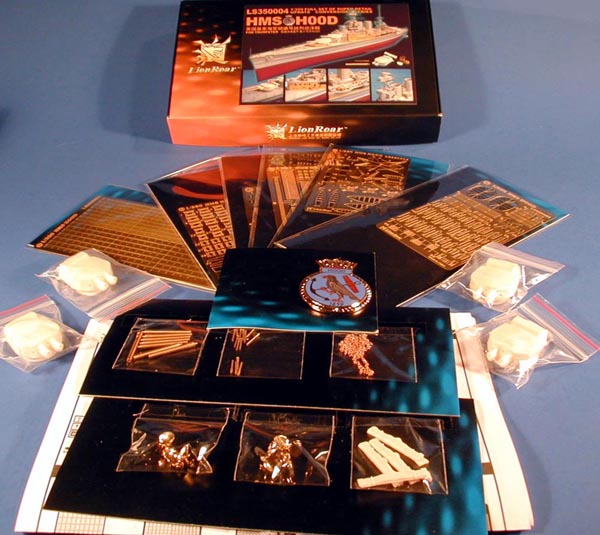
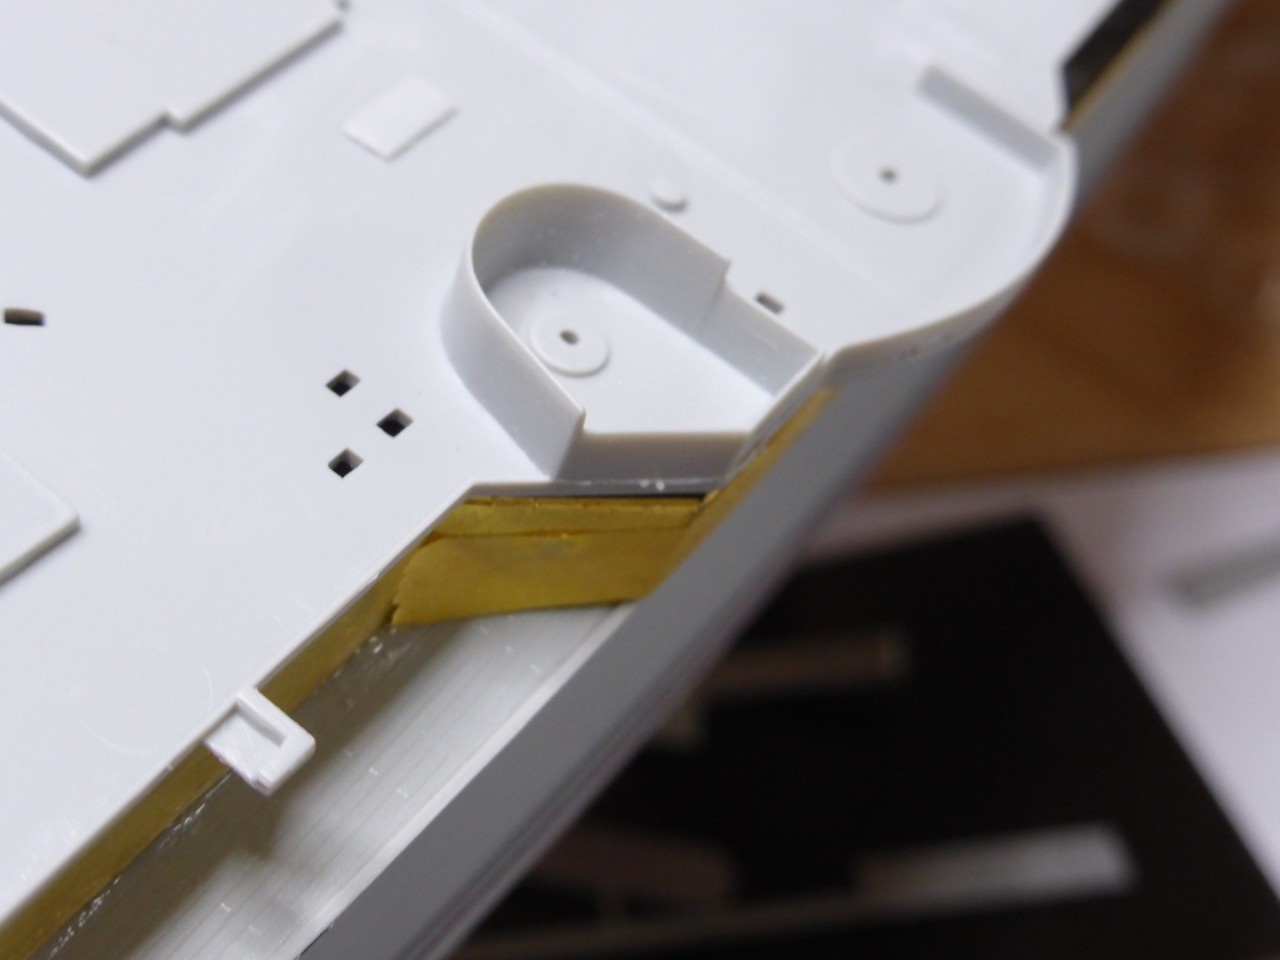
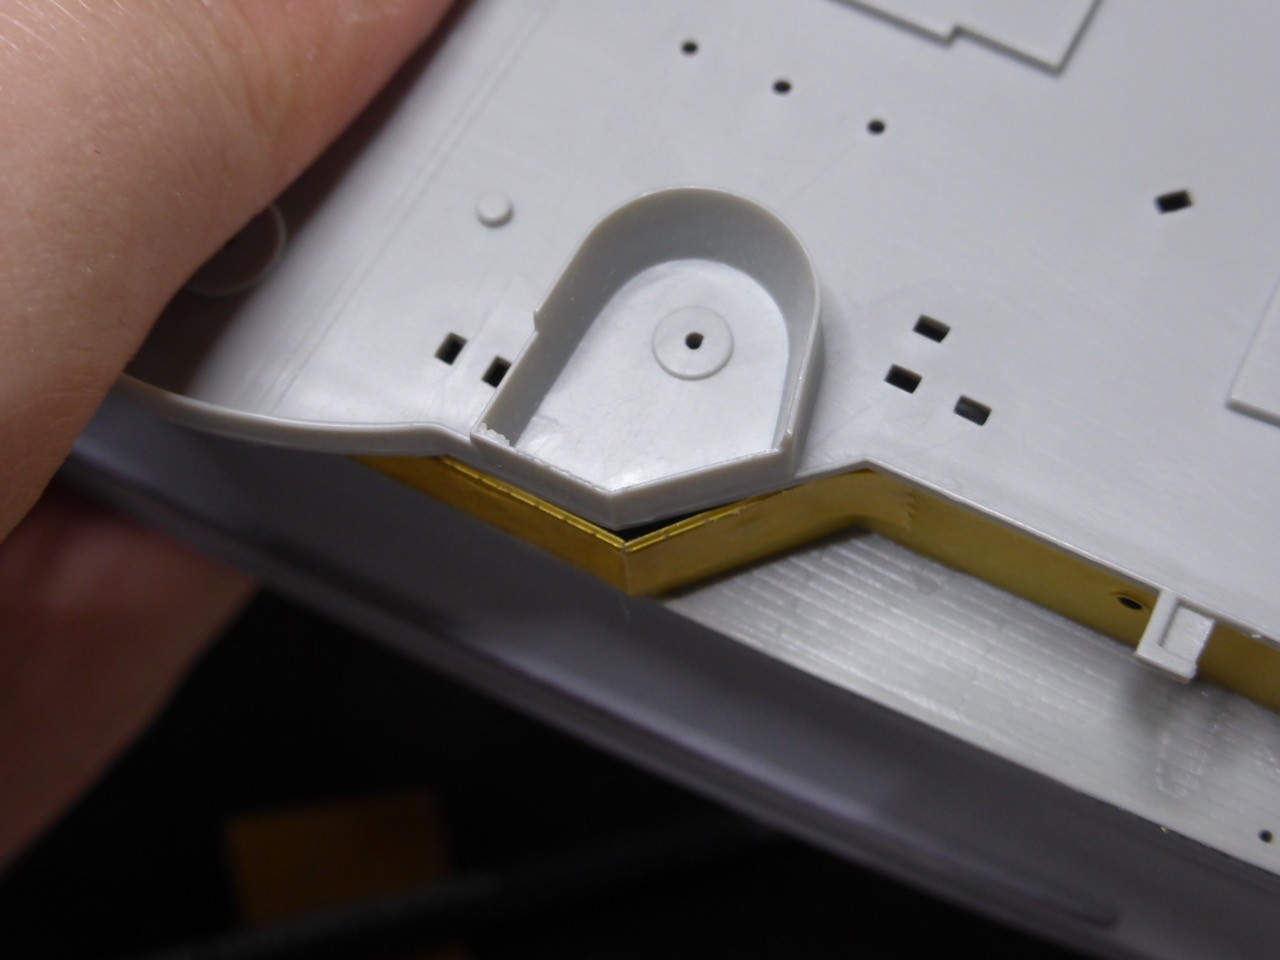
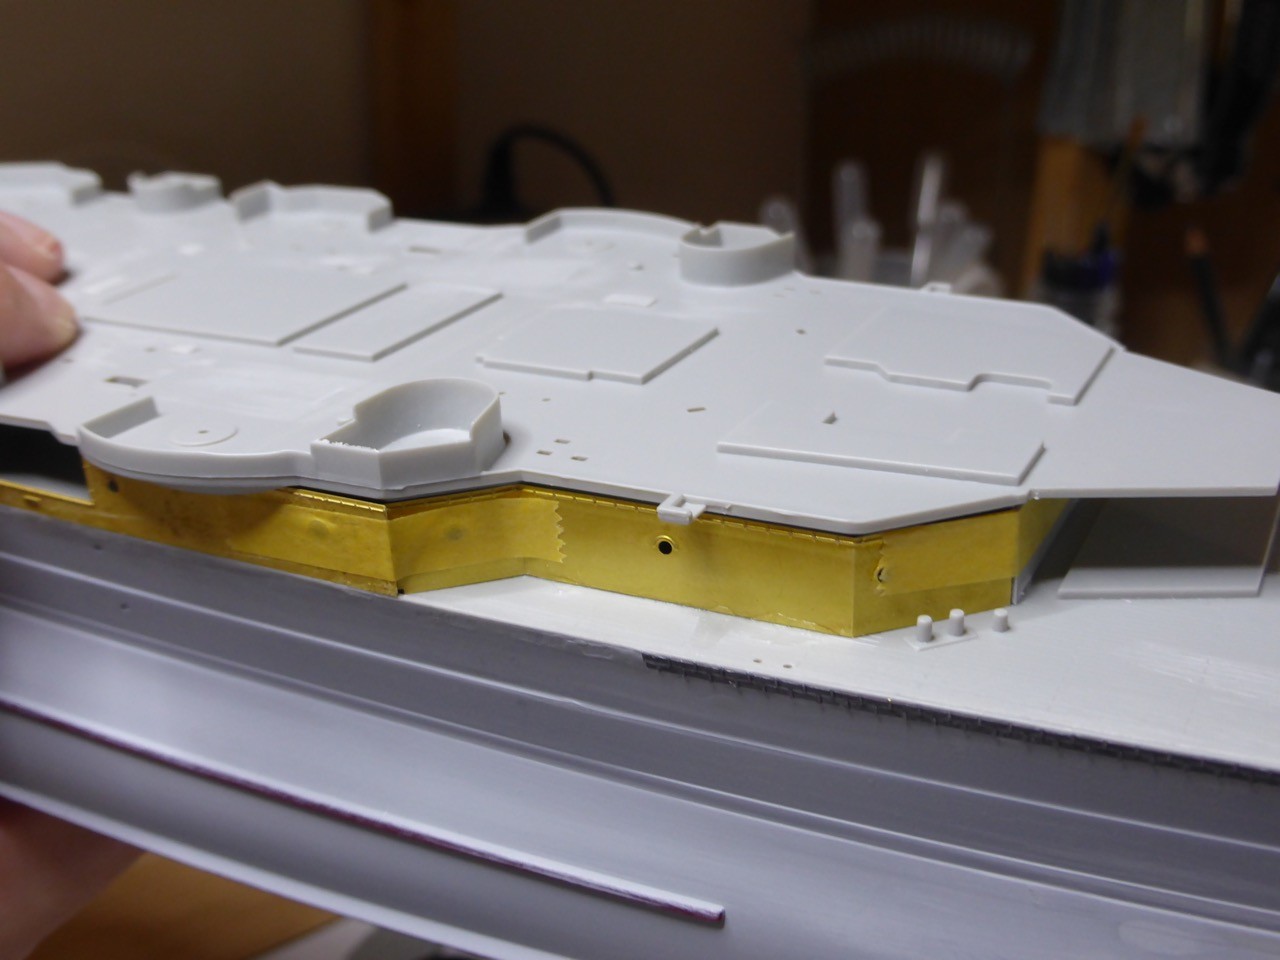
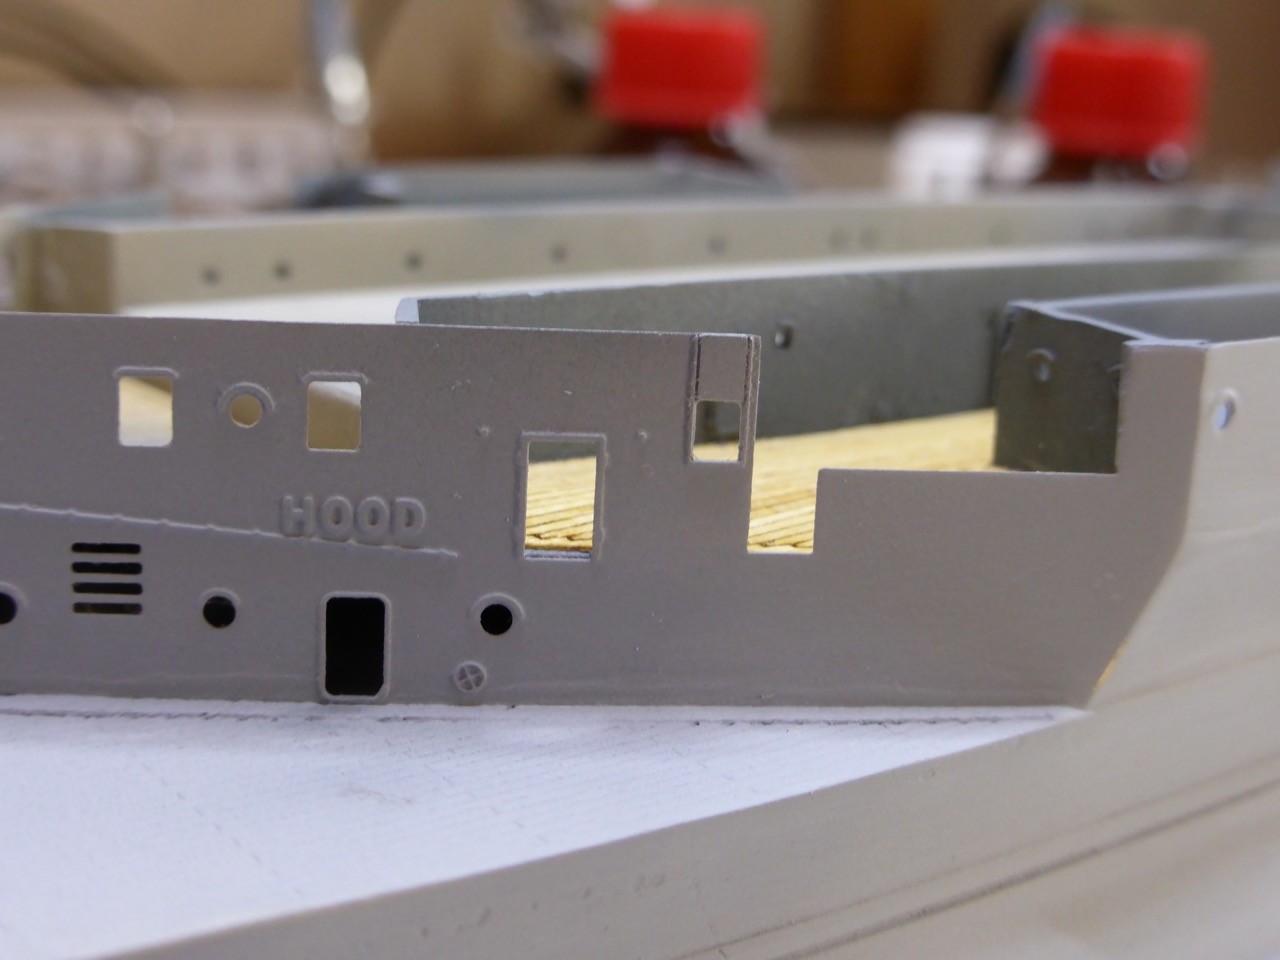
It's mainly brass work, and more filling and sanding. Quite a lot of work needs to go into the hull, since the superstructure kind of 'grows' out of the hull, and later parts of the forecastle deck, the entire area where the 5.5" were installed, are flush with the hull. So some more work before I can re-install the degaussing and start work on the portholes.
First - sanding off the eyebrows on the starboard brass
and filling with putty, some sanding already done.
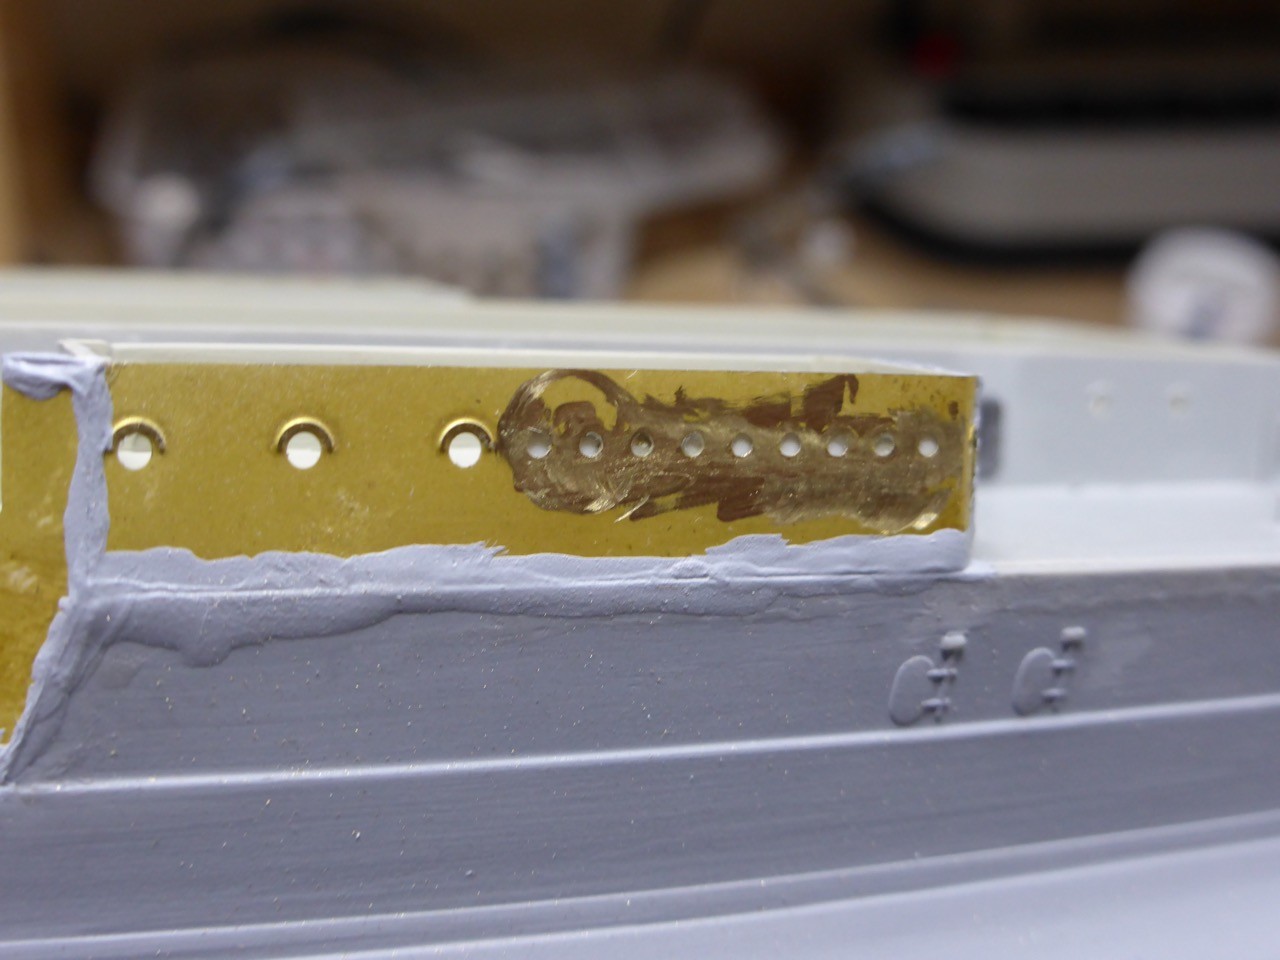
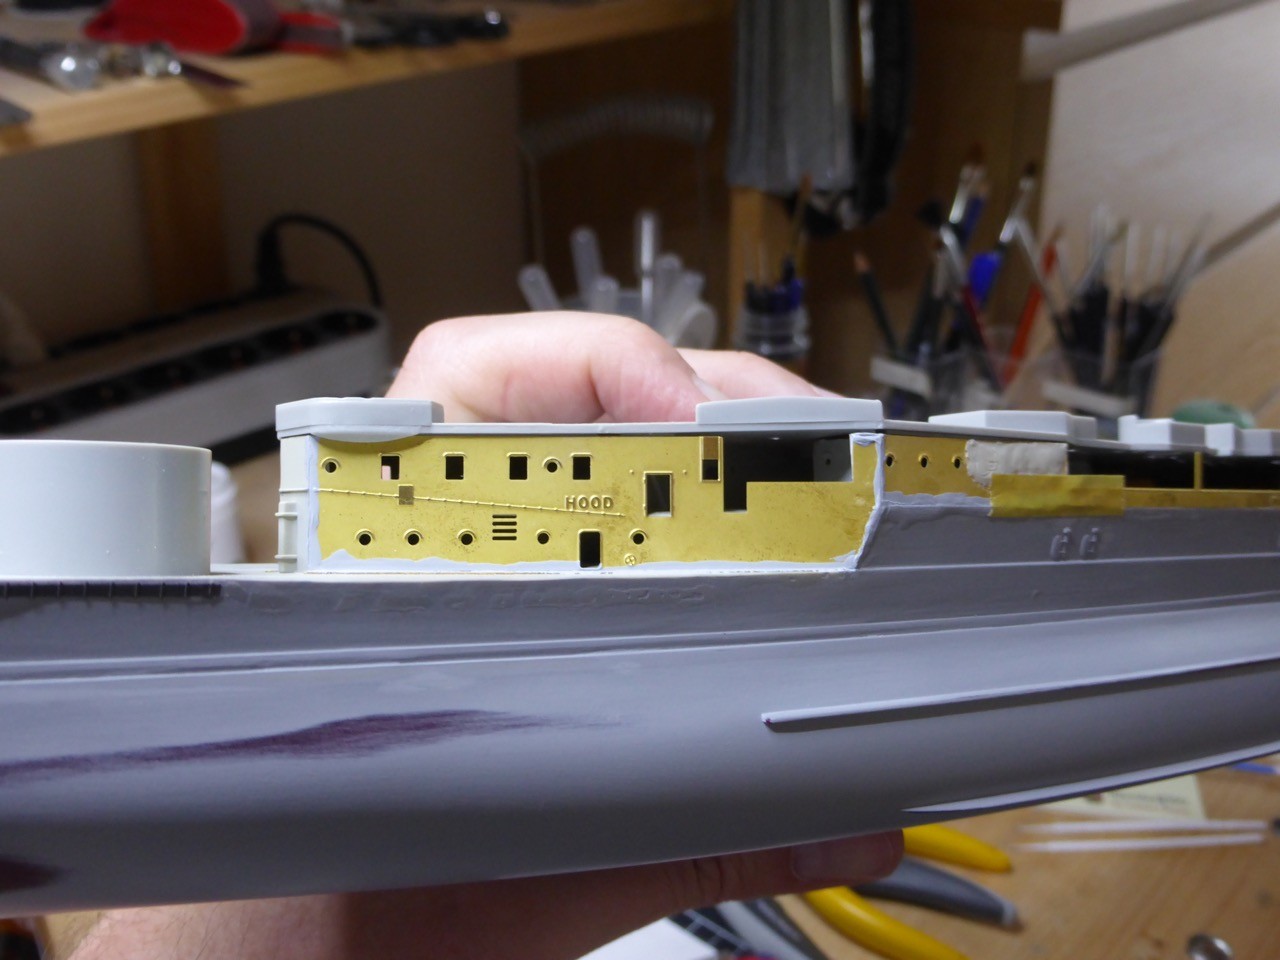
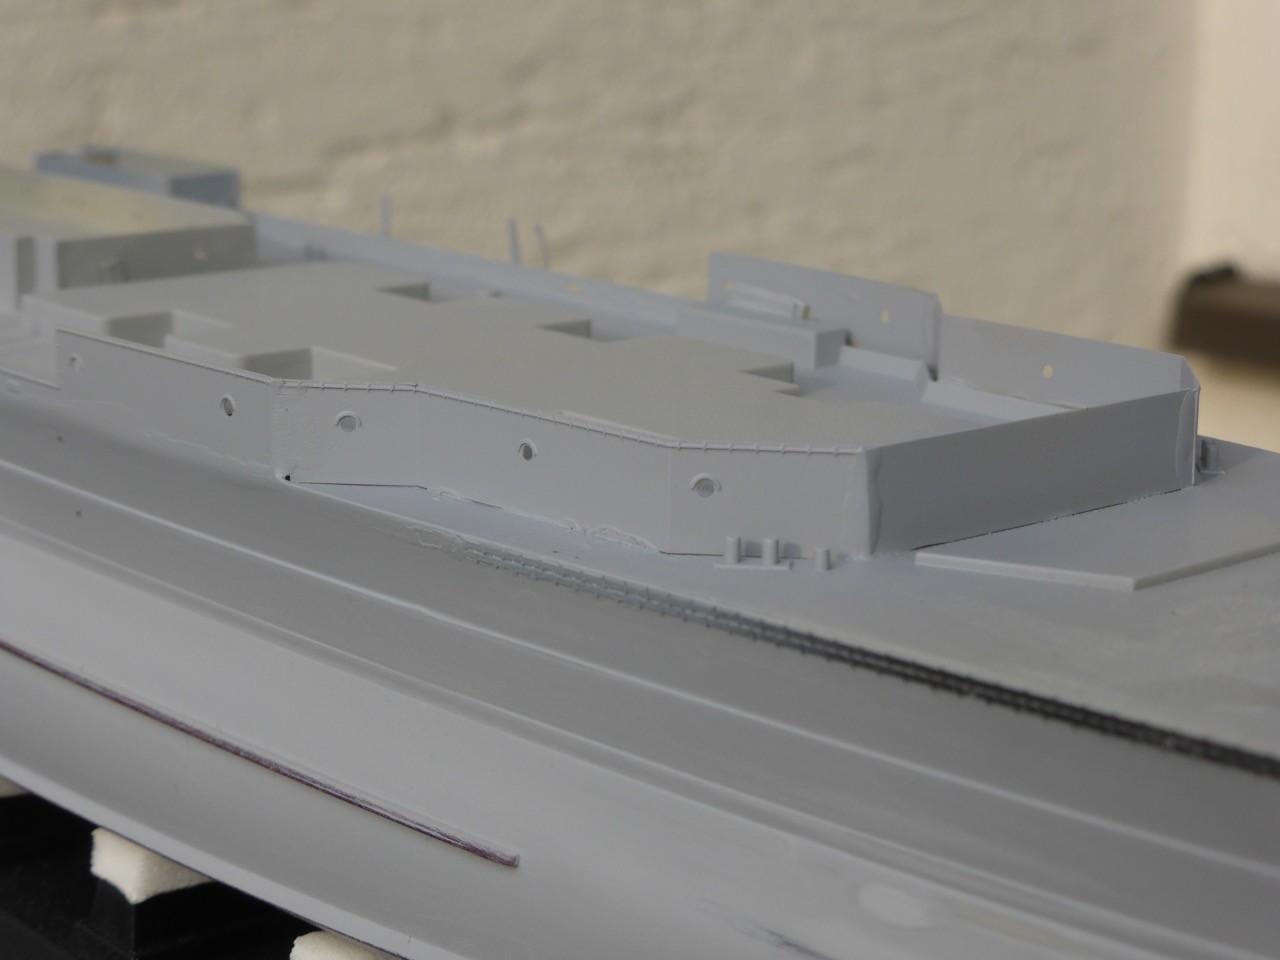
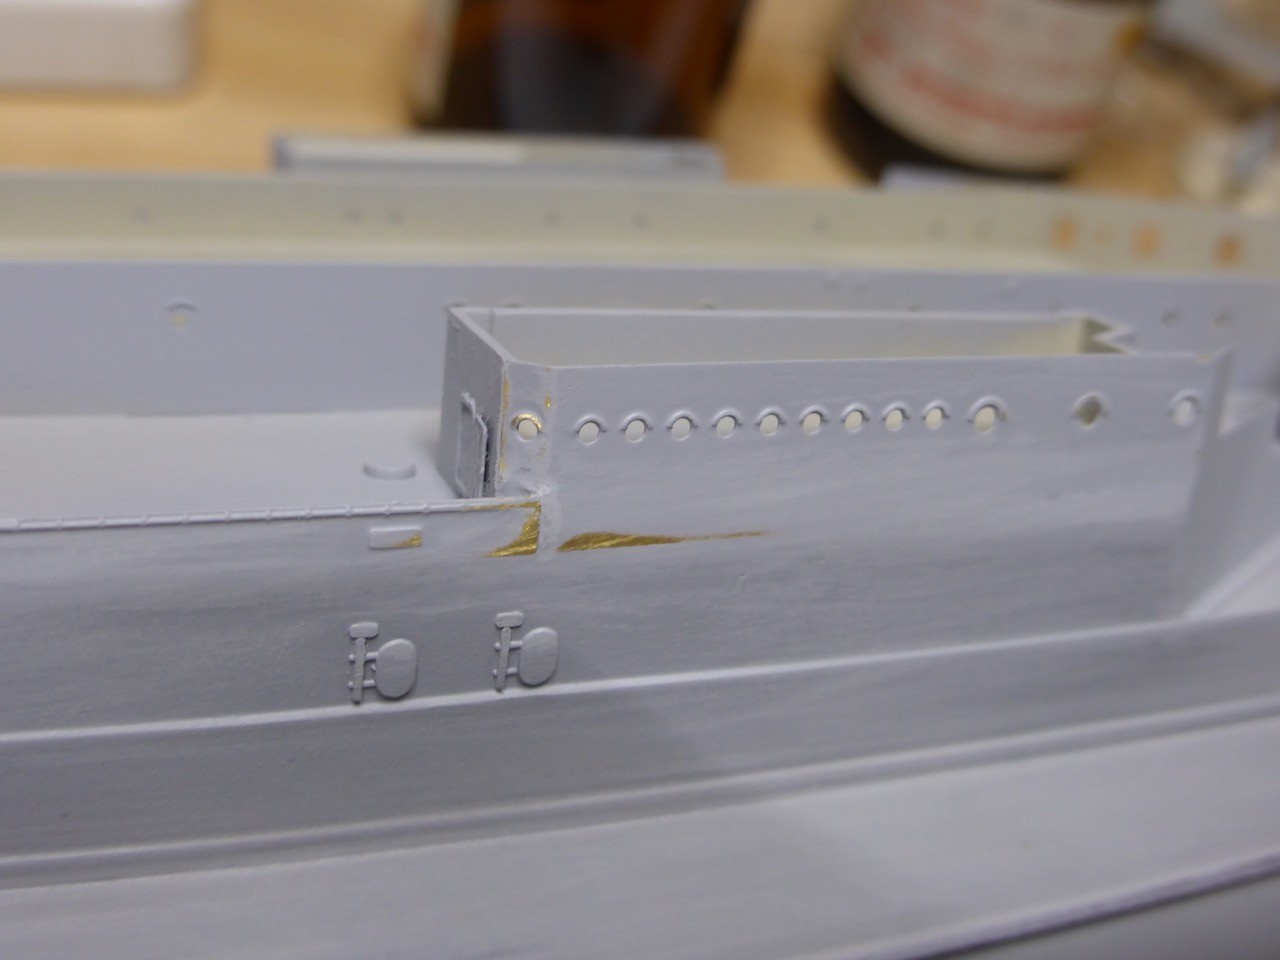
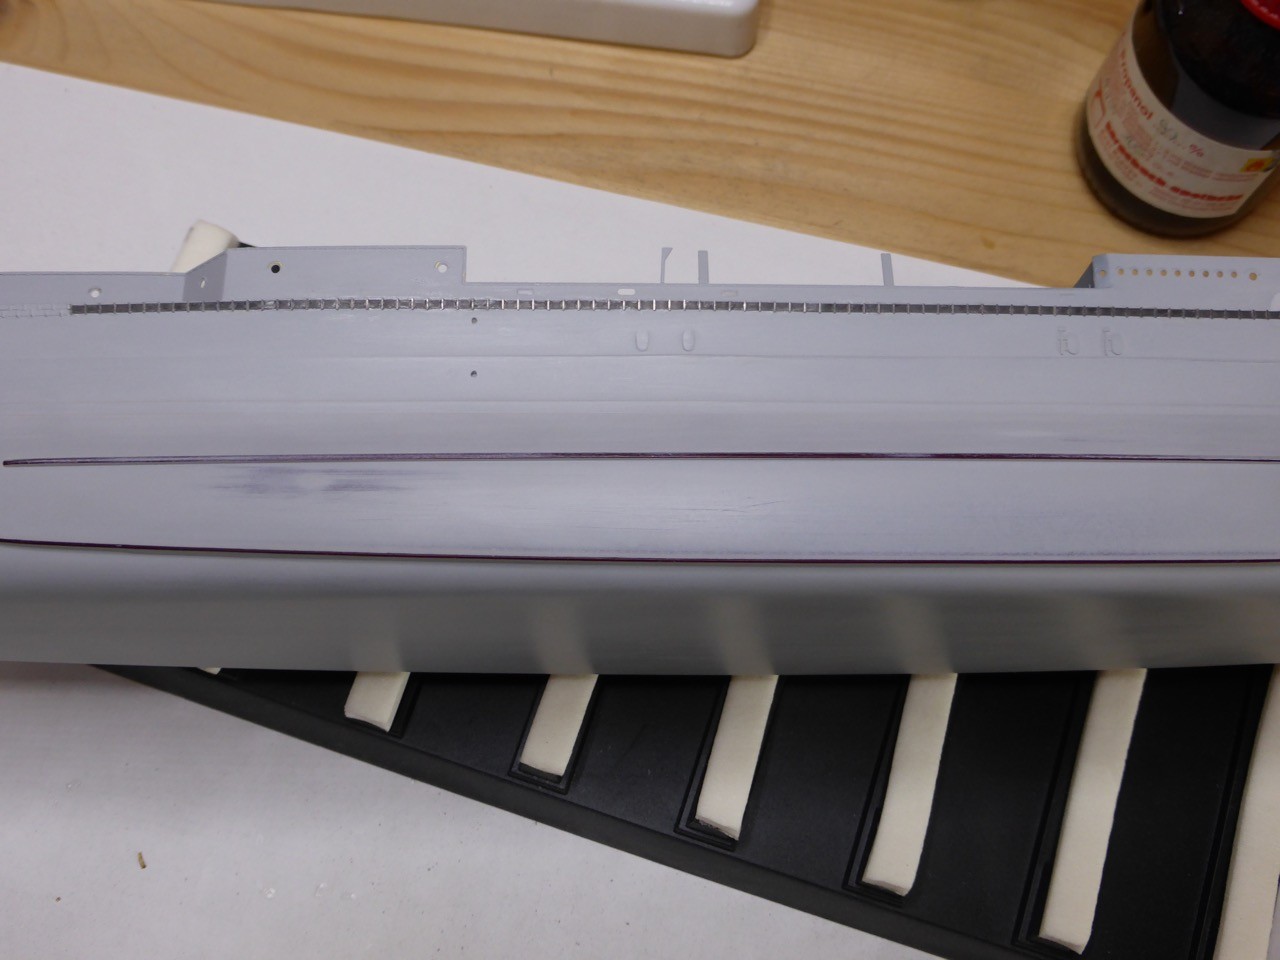
More brass on the forecastle deck:
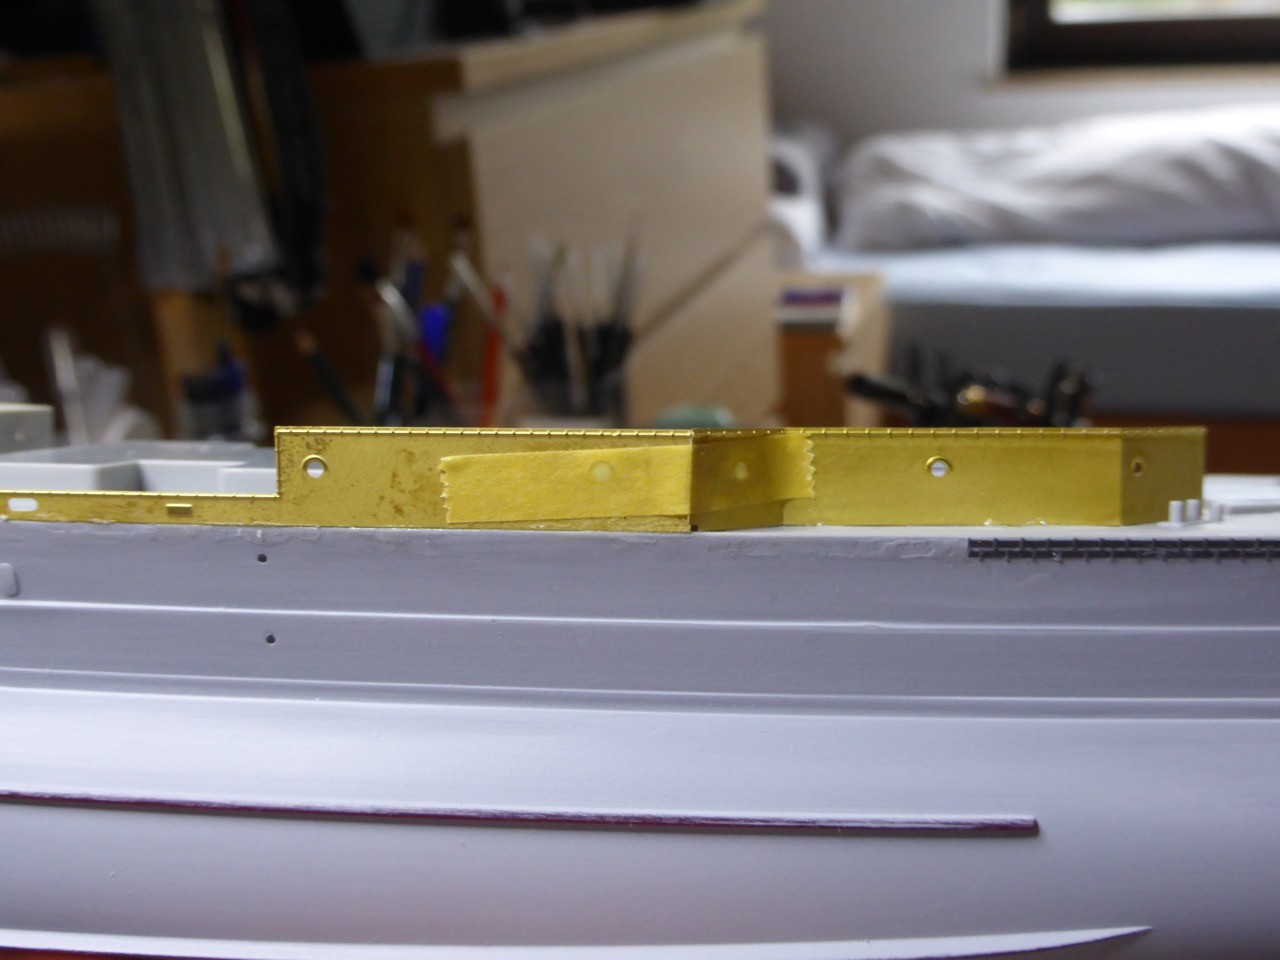
With a few exemptions, fit is surprisingly good for so large aftermarket parts...
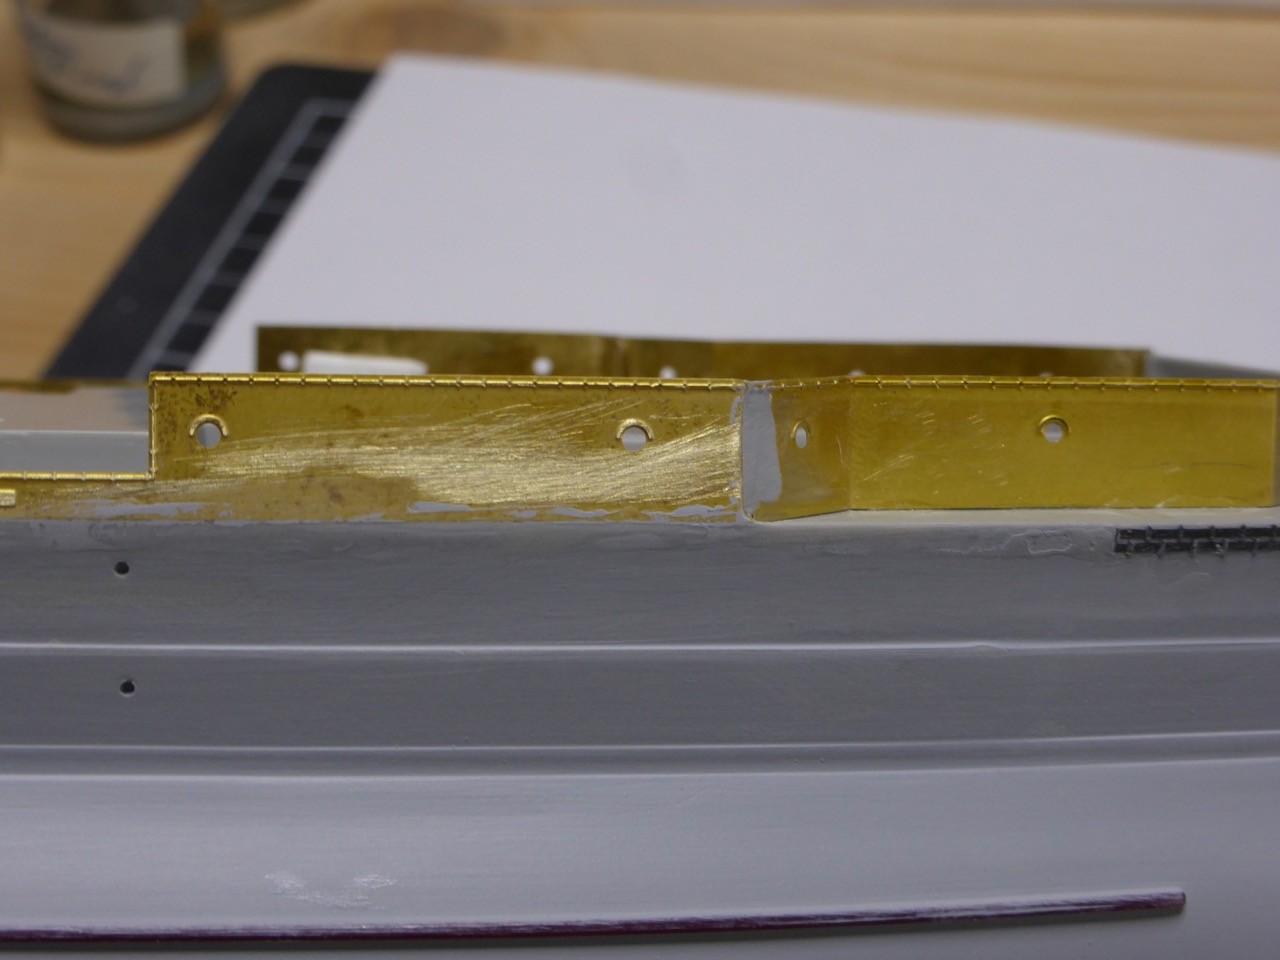
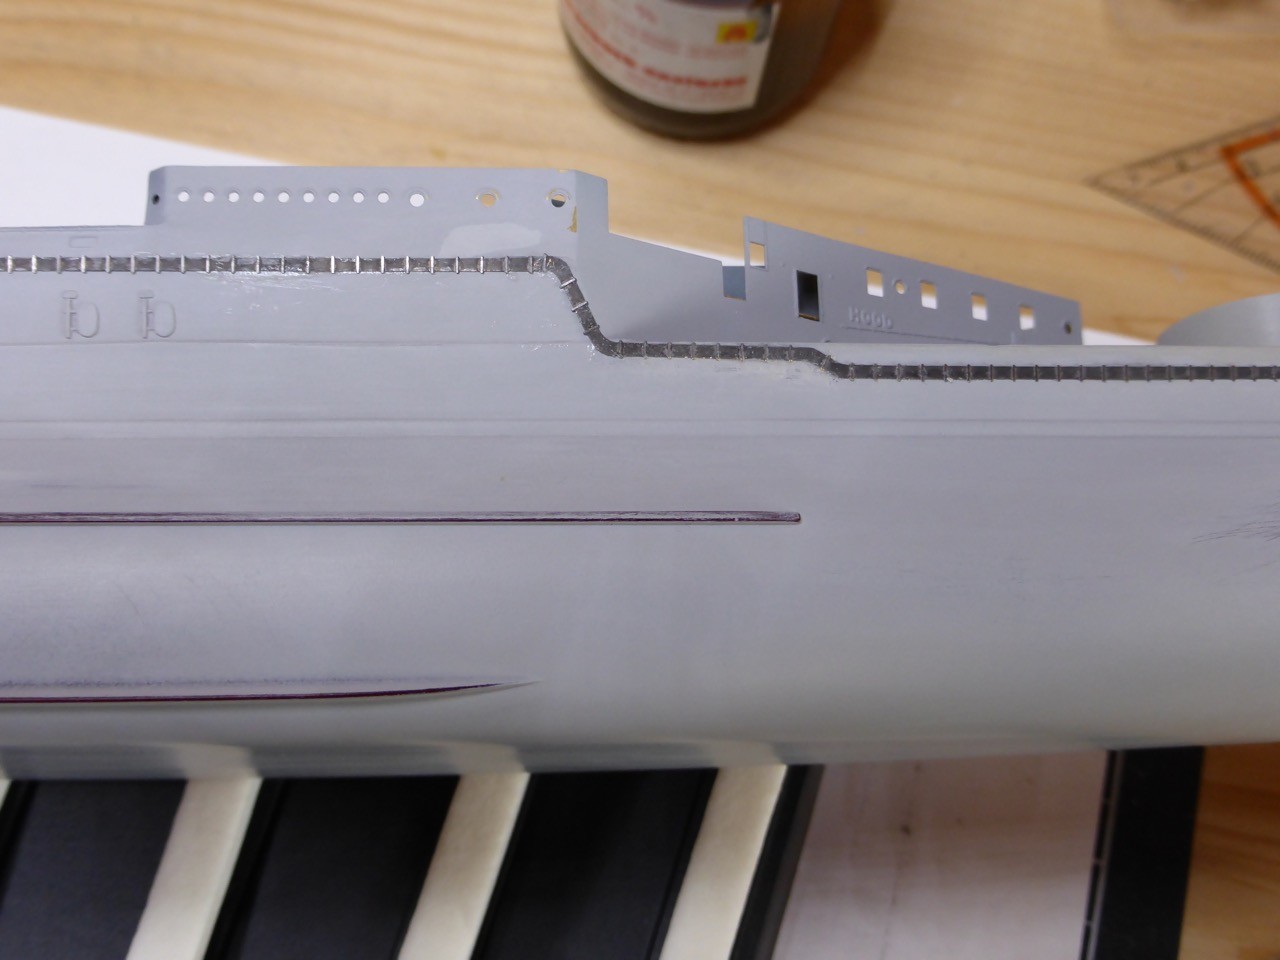
For the misalignment on the starboard side I opened the CA bound and moved the parts a little around, I had to sand of about 1 mm brass in the end, but I think I got it pretty much aligned.
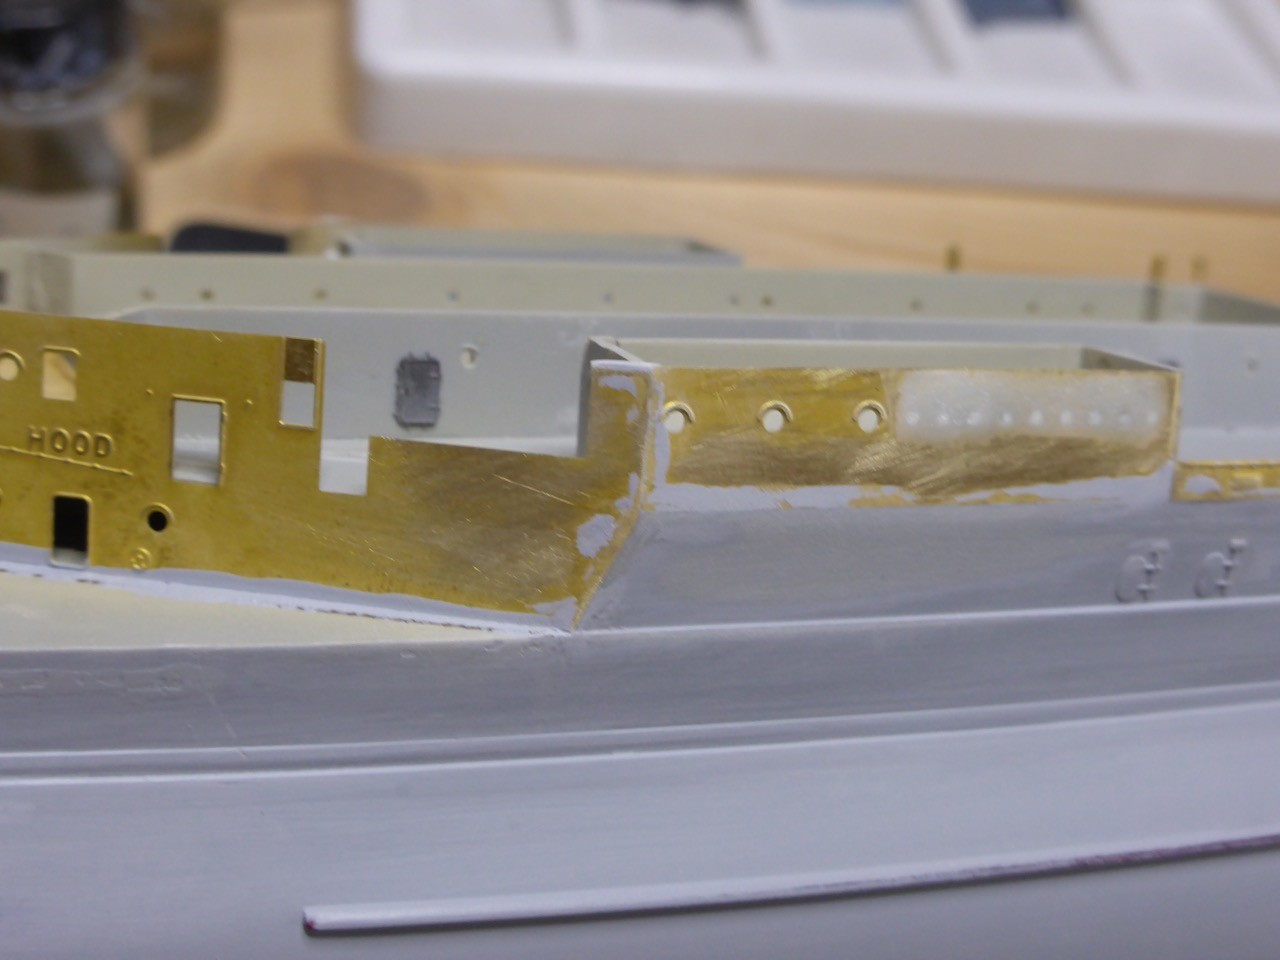
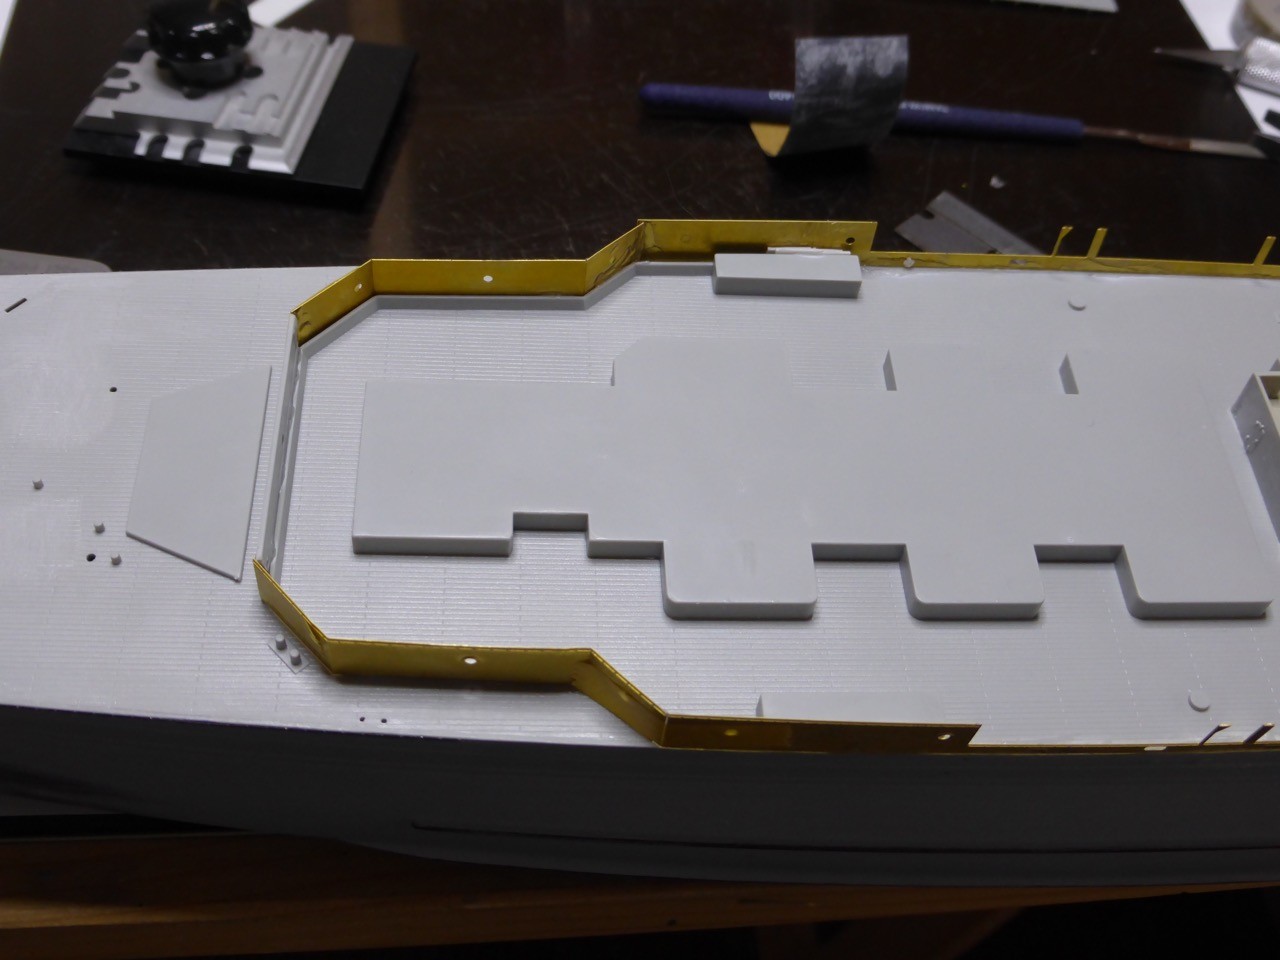
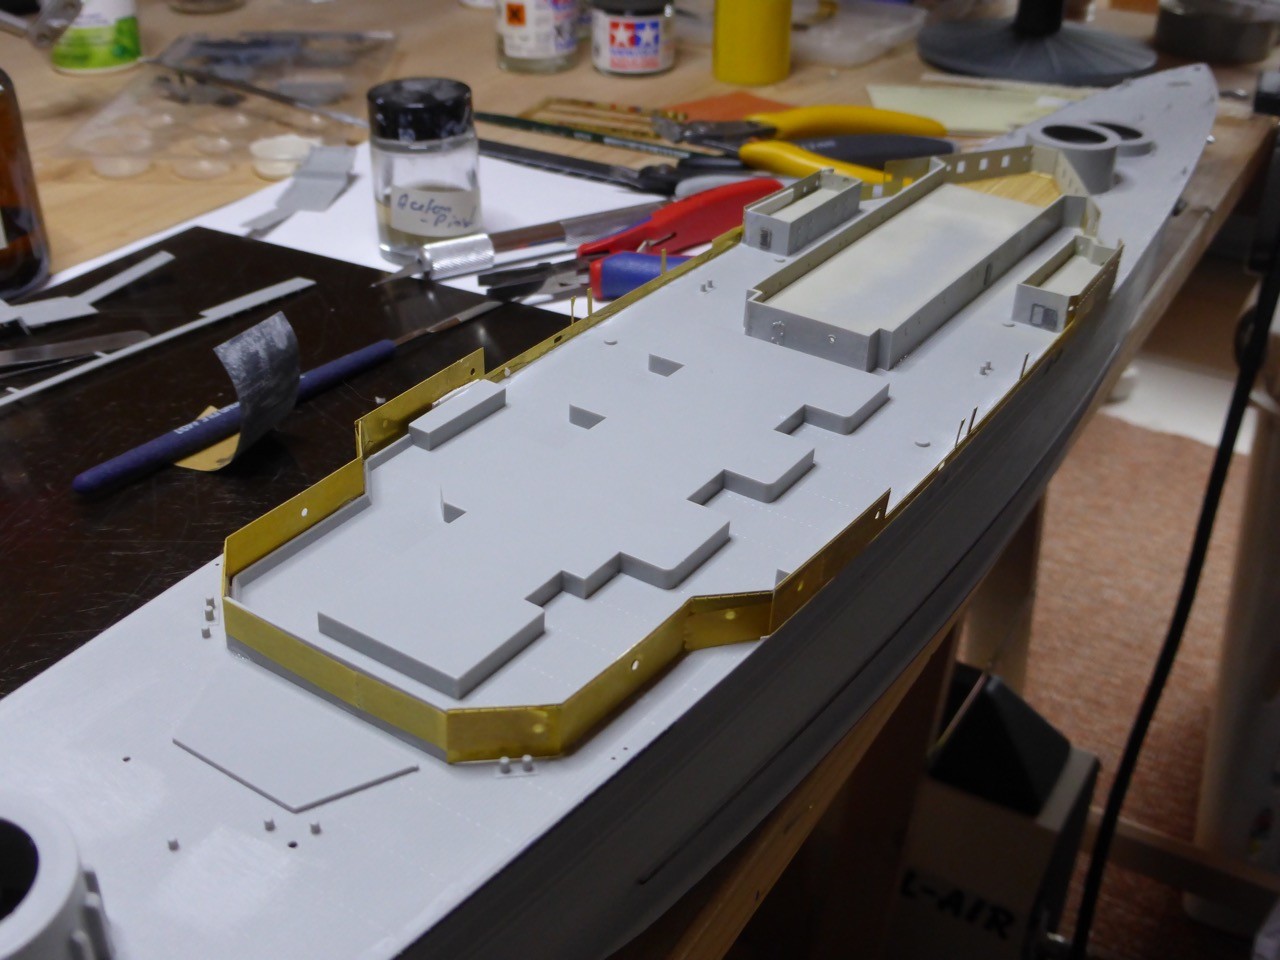
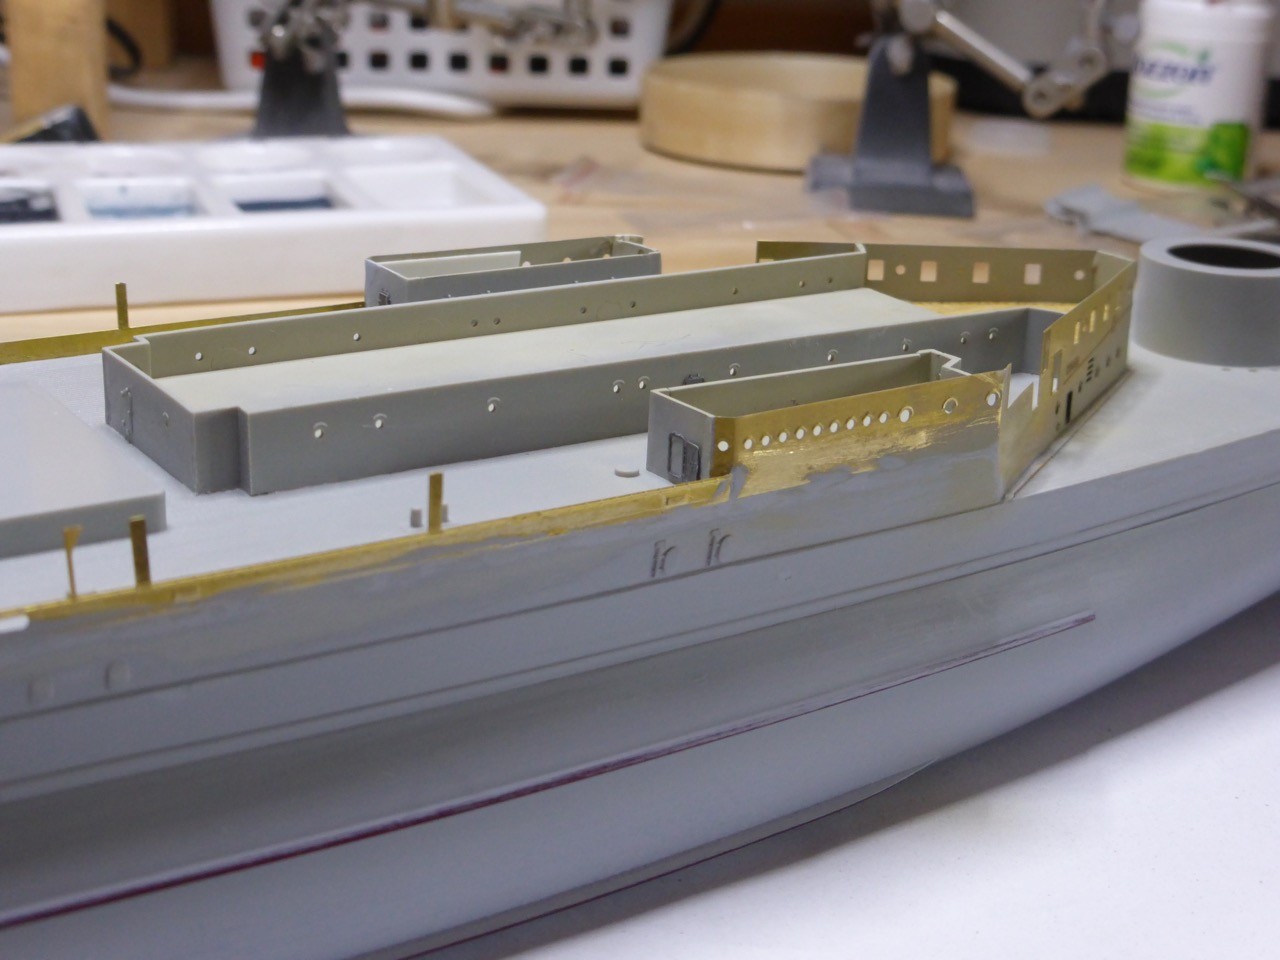
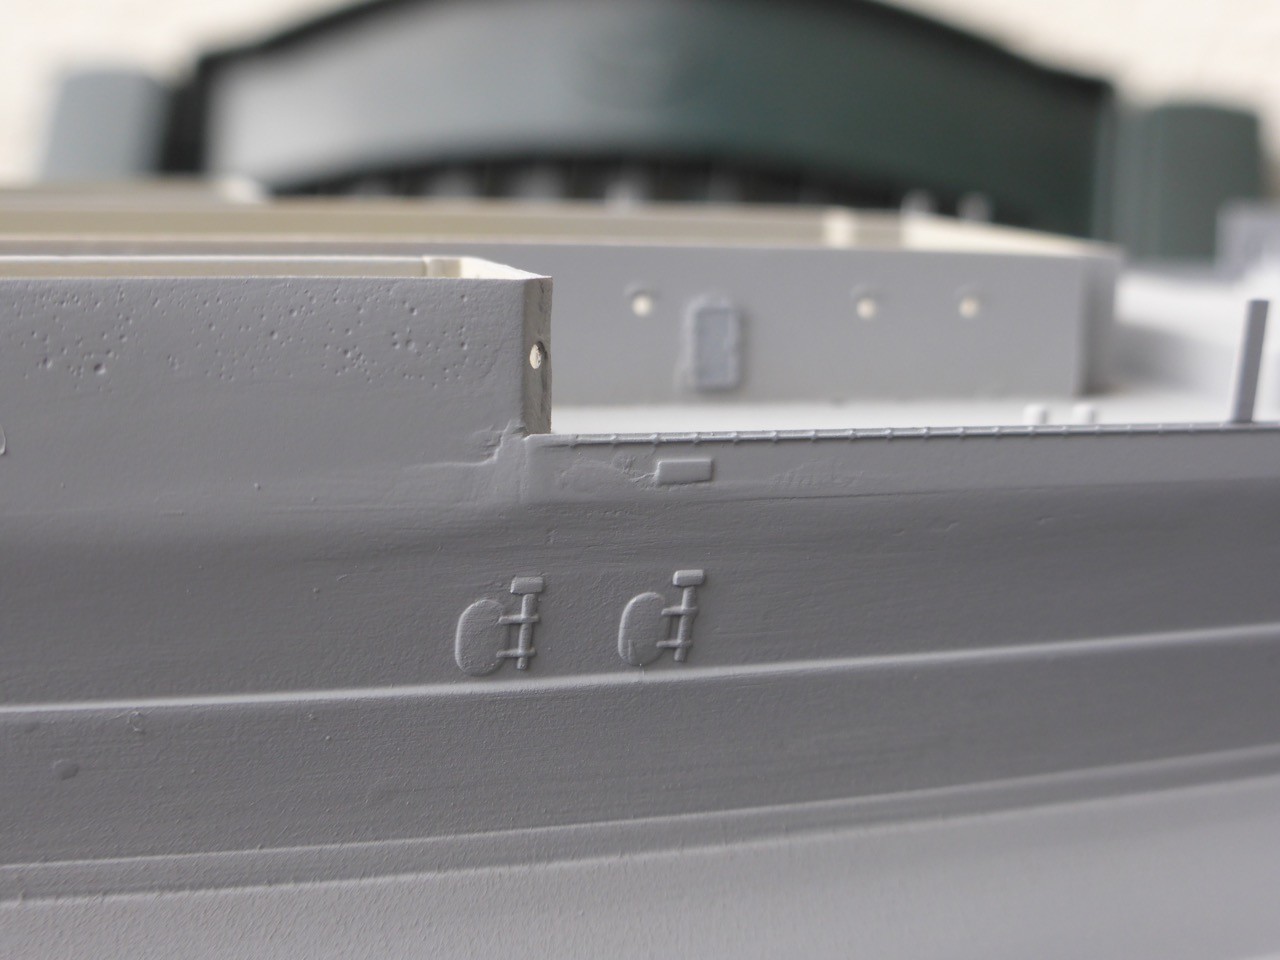
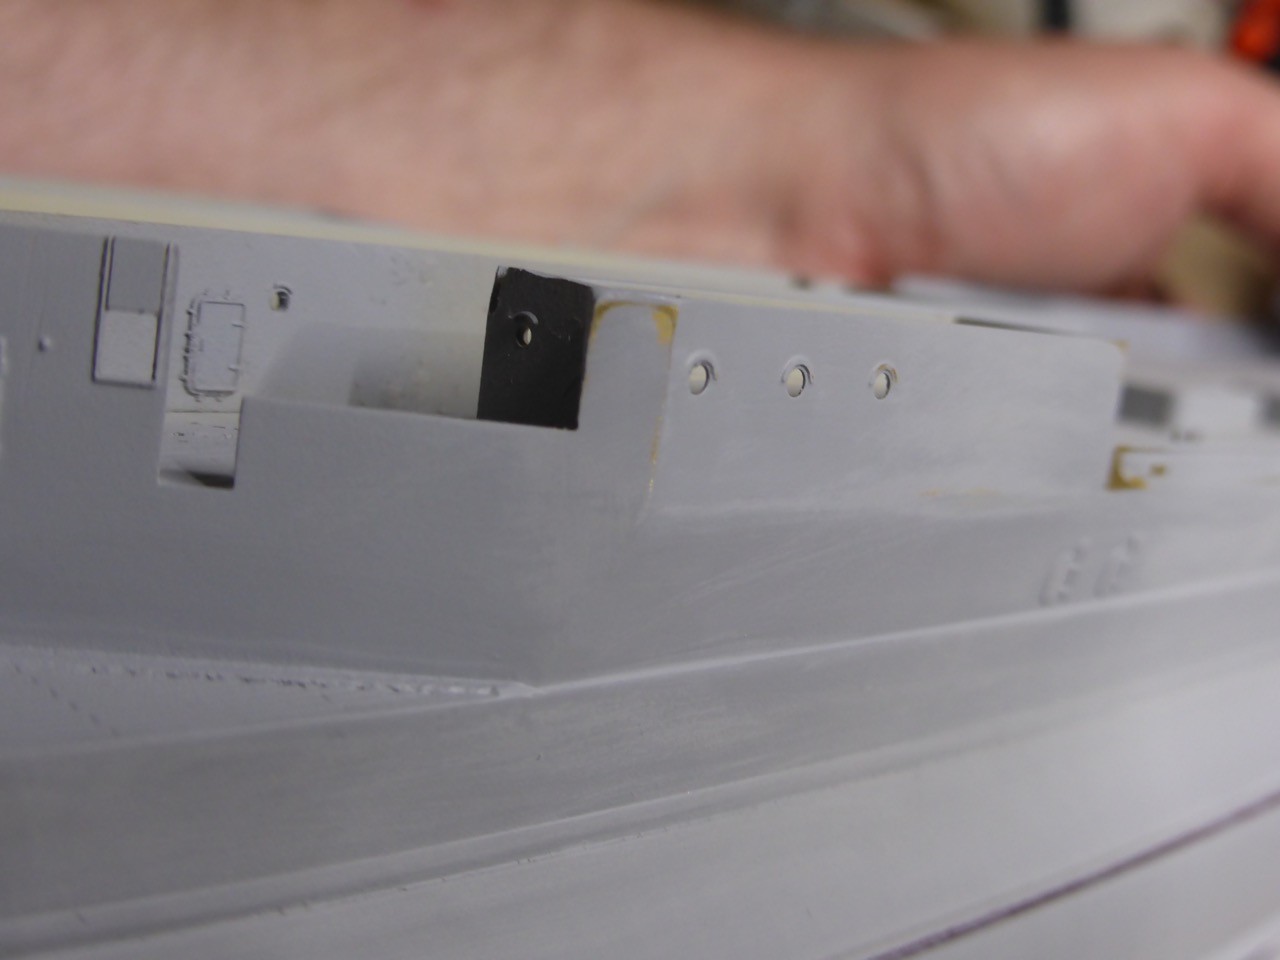
Test-fitting the shelter deck:
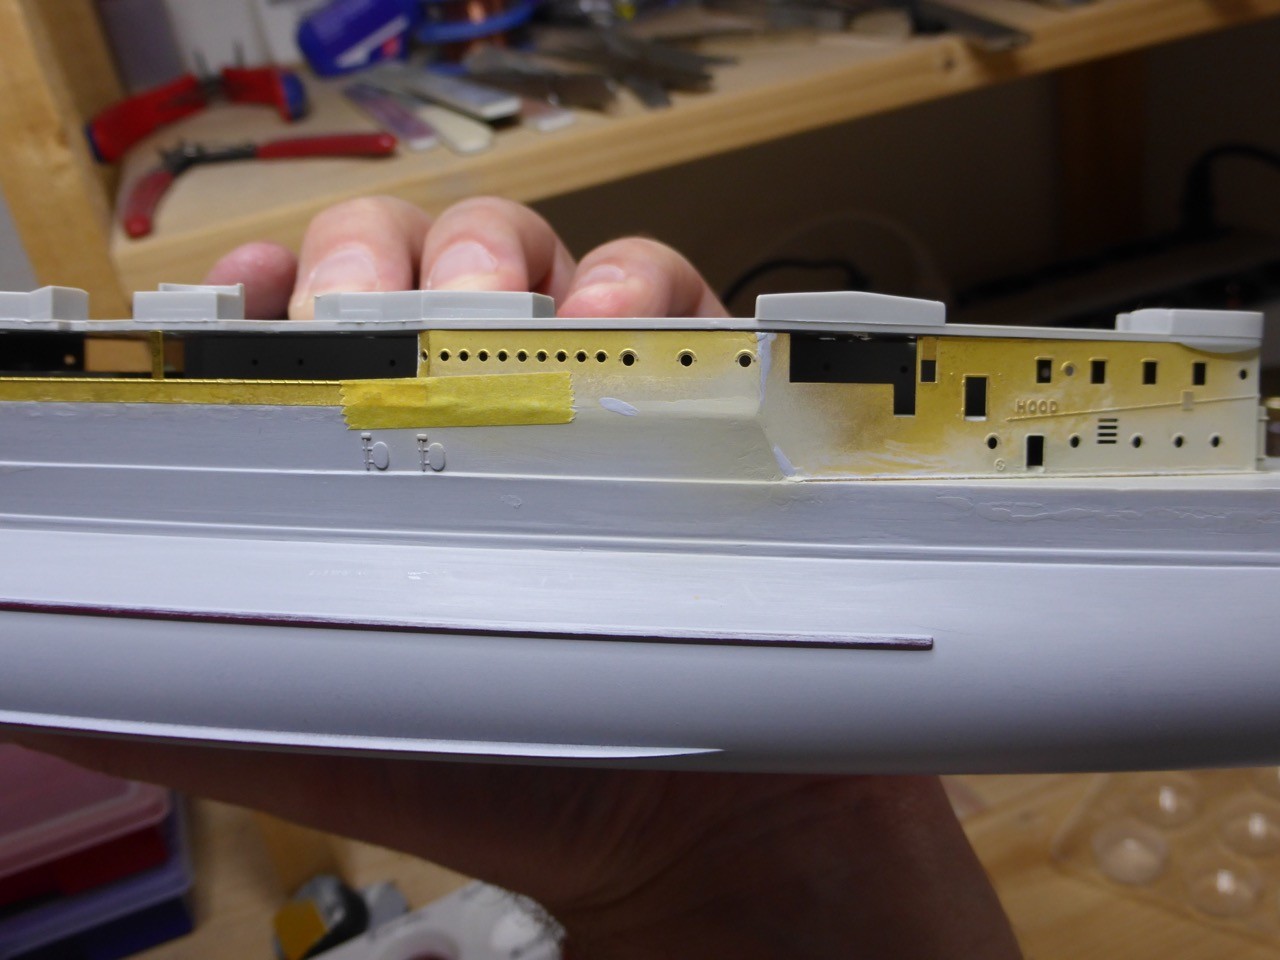
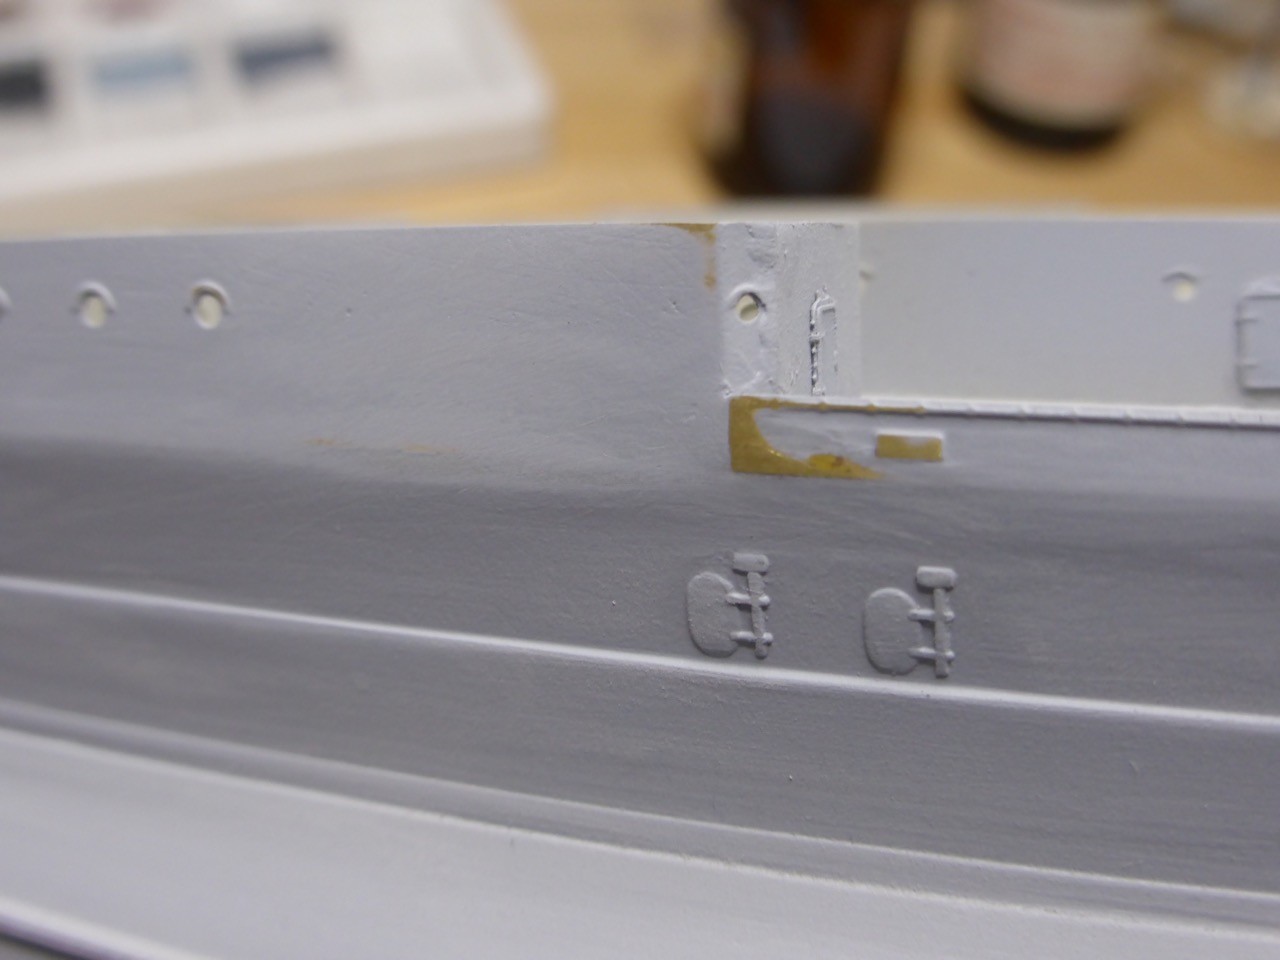
More surfacer and sanding...
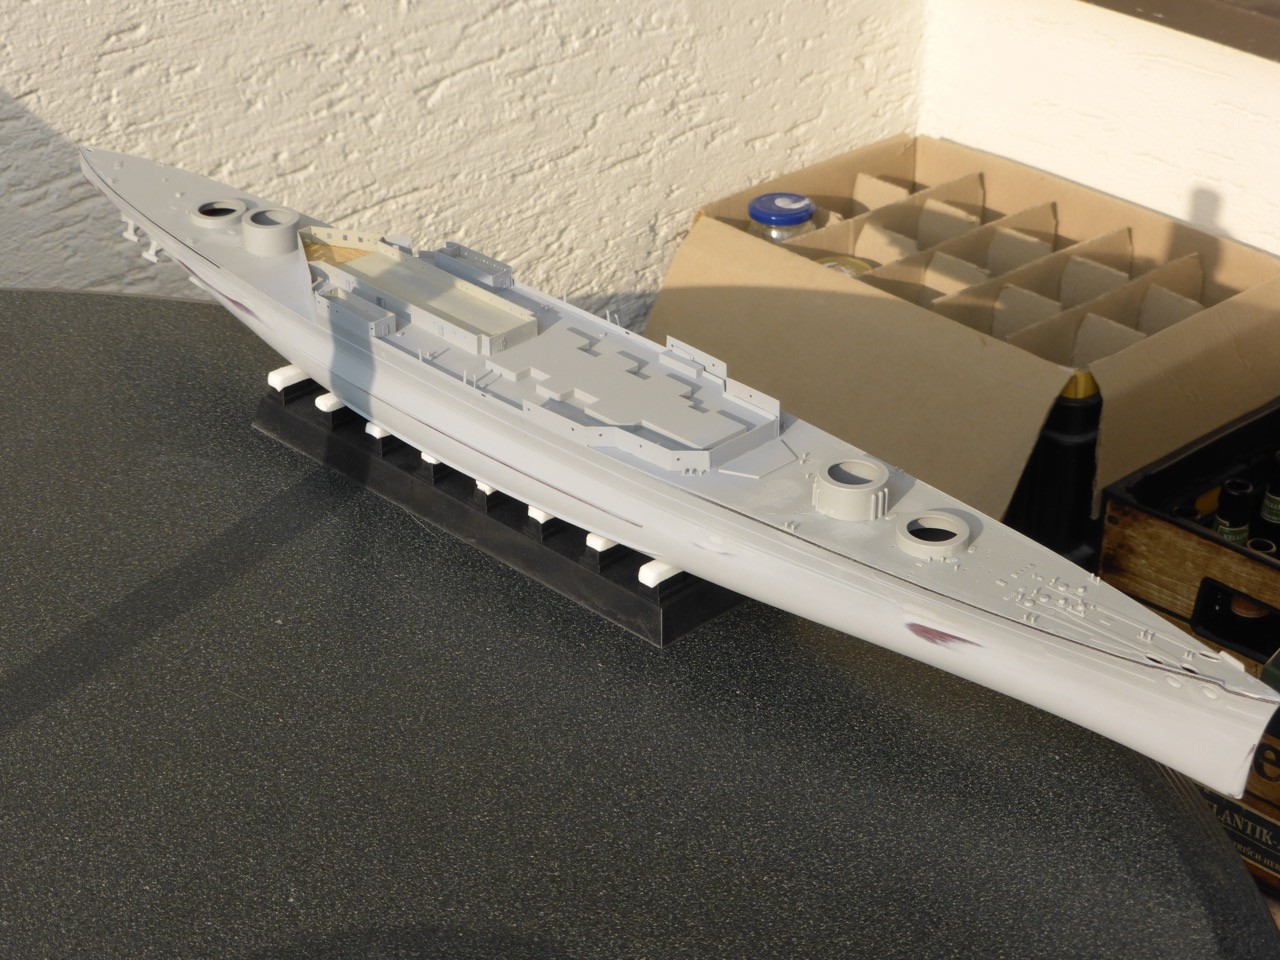
And some quality control: surfacer on with airbrush to bring out all inaccuracies - could be worse, but still lot's to do

And that's all I could accomplish over the weekend. For ship modeling that is...always tricky, when you're away, traveling and stuff over a weekend, than the next 'free' weekend is anything but free - at least for me...
Same thing for next week, I will be away for the weekend and hope to get something done over the last weekend of Juli - likely with similar implications as it was this weekend. And mid-August leave starts - finally!! But again, away from the bench...
But I realized something interesting:
I am following this discussion here on the 1/200 HMS Hood, as probably some of you do, as well.
http://www.shipmodels.info/mws_forum/viewtopic.php?f=16&t=162889
I don't want to dive too deep into that, but to me it appears that at least the shelter deck on the 1/350 Hood is much more accurate than on the 1/200 Hood - many issues mentioned are correct for the smaller Hood...
Cheers and thanks for looking!
Jan

It's mainly brass work, and more filling and sanding. Quite a lot of work needs to go into the hull, since the superstructure kind of 'grows' out of the hull, and later parts of the forecastle deck, the entire area where the 5.5" were installed, are flush with the hull. So some more work before I can re-install the degaussing and start work on the portholes.
First - sanding off the eyebrows on the starboard brass
and filling with putty, some sanding already done.
More brass on the forecastle deck:
With a few exemptions, fit is surprisingly good for so large aftermarket parts...
For the misalignment on the starboard side I opened the CA bound and moved the parts a little around, I had to sand of about 1 mm brass in the end, but I think I got it pretty much aligned.
Test-fitting the shelter deck:
More surfacer and sanding...
And some quality control: surfacer on with airbrush to bring out all inaccuracies - could be worse, but still lot's to do
And that's all I could accomplish over the weekend. For ship modeling that is...always tricky, when you're away, traveling and stuff over a weekend, than the next 'free' weekend is anything but free - at least for me...
Same thing for next week, I will be away for the weekend and hope to get something done over the last weekend of Juli - likely with similar implications as it was this weekend. And mid-August leave starts - finally!! But again, away from the bench...
But I realized something interesting:
I am following this discussion here on the 1/200 HMS Hood, as probably some of you do, as well.
http://www.shipmodels.info/mws_forum/viewtopic.php?f=16&t=162889
I don't want to dive too deep into that, but to me it appears that at least the shelter deck on the 1/350 Hood is much more accurate than on the 1/200 Hood - many issues mentioned are correct for the smaller Hood...
Cheers and thanks for looking!
Jan

RussellE
#306

Joined: June 27, 2010
KitMaker: 3,959 posts
Model Shipwrights: 2,777 posts
Posted: Sunday, July 17, 2016 - 05:09 PM UTC
Wow Jan!
another massive update! and great progress too!
Actually your mention of the 'other site' reminded me of an excellent reference site call HMS Hood Association where they give you very accurate appraisals of all the Hood kits available, plus how to rectify them, which may be of some help/interest?
Meanwhile enjoy the summer, mate, and don't stress too much about getting to the work bench while the weather's good
another massive update! and great progress too!
Actually your mention of the 'other site'
reminded me of an excellent reference site call HMS Hood Association where they give you very accurate appraisals of all the Hood kits available, plus how to rectify them, which may be of some help/interest? Meanwhile enjoy the summer, mate, and don't stress too much about getting to the work bench while the weather's good

JJ1973
#345
Joined: August 22, 2011
KitMaker: 1,835 posts
Model Shipwrights: 1,832 posts
Posted: Tuesday, July 19, 2016 - 09:43 AM UTC
Hi Russ,
thank you very much, mate!!
You're right about summer and enjoying the time - most of the time building my models just means enjoying time, but sometimes it's good to step back a little and just relax without doing anything productive
Thanks for the link - I generally knew about HMS Hood association, but never was on their site (don't know why actually) and their kit reviews are great and really helpful!!
Cheers,
Jan
RedDuster
Joined: March 01, 2010
KitMaker: 7,078 posts
Model Shipwrights: 6,649 posts
Posted: Tuesday, July 19, 2016 - 10:59 PM UTC
Hi Jan,
Very large hecterage brass you have there mate,
Looking good though, great job getting smooth fit.
Cheers
Si
Very large hecterage brass you have there mate,
Looking good though, great job getting smooth fit.
Cheers
Si

Cosimodo
#335

Joined: September 03, 2013
KitMaker: 1,808 posts
Model Shipwrights: 871 posts

Posted: Wednesday, July 20, 2016 - 06:59 AM UTC
Looking great Jan!
I admire your patience in getting that ideal finish for the join between the etch and kit. It will certainly be worth it in the end.
cheers
Michael
I admire your patience in getting that ideal finish for the join between the etch and kit. It will certainly be worth it in the end.
cheers
Michael

TimReynaga
Joined: May 03, 2006
KitMaker: 2,500 posts
Model Shipwrights: 1,830 posts
Posted: Wednesday, July 20, 2016 - 07:35 AM UTC
Jan,
I agree, you are doing a great job with all that structural photo etch brass. It is going about things the long way around, but in the end you would wish you had done it if you decided to just live with the kit inaccuracies. And she's looking sweet already!
I agree, you are doing a great job with all that structural photo etch brass. It is going about things the long way around, but in the end you would wish you had done it if you decided to just live with the kit inaccuracies. And she's looking sweet already!

JJ1973
#345
Joined: August 22, 2011
KitMaker: 1,835 posts
Model Shipwrights: 1,832 posts
Posted: Wednesday, July 20, 2016 - 09:29 AM UTC
Si, Michael and Tim,
thank you so much for following my build and for your kind comments - that's highly appreciated and helps keeping up morale and motivation!!
Indeed I am convinced that all the brass will be worth it in the end, the base 1/350 kit is pretty highly appraised even by the HMS Hood Association as I did find out from Russ' link, and the chance to fixe some (never all) of the remaining bugs by a good PE set should allow to get a real nice model!
However, the filling-sanding-process becomes somewhat tedious over time, and I am not quite there yet, mating brass and plastic over such wide areas is a challenge!!
Thank you again!!
Cheers,
Jan
JJ1973
#345
Joined: August 22, 2011
KitMaker: 1,835 posts
Model Shipwrights: 1,832 posts
Posted: Sunday, July 31, 2016 - 10:49 AM UTC
Just a small sign that I am still alive and work on my HMS Hood is still continuing...but real life was and is and will be getting in the way here, so nothing substantial to report.
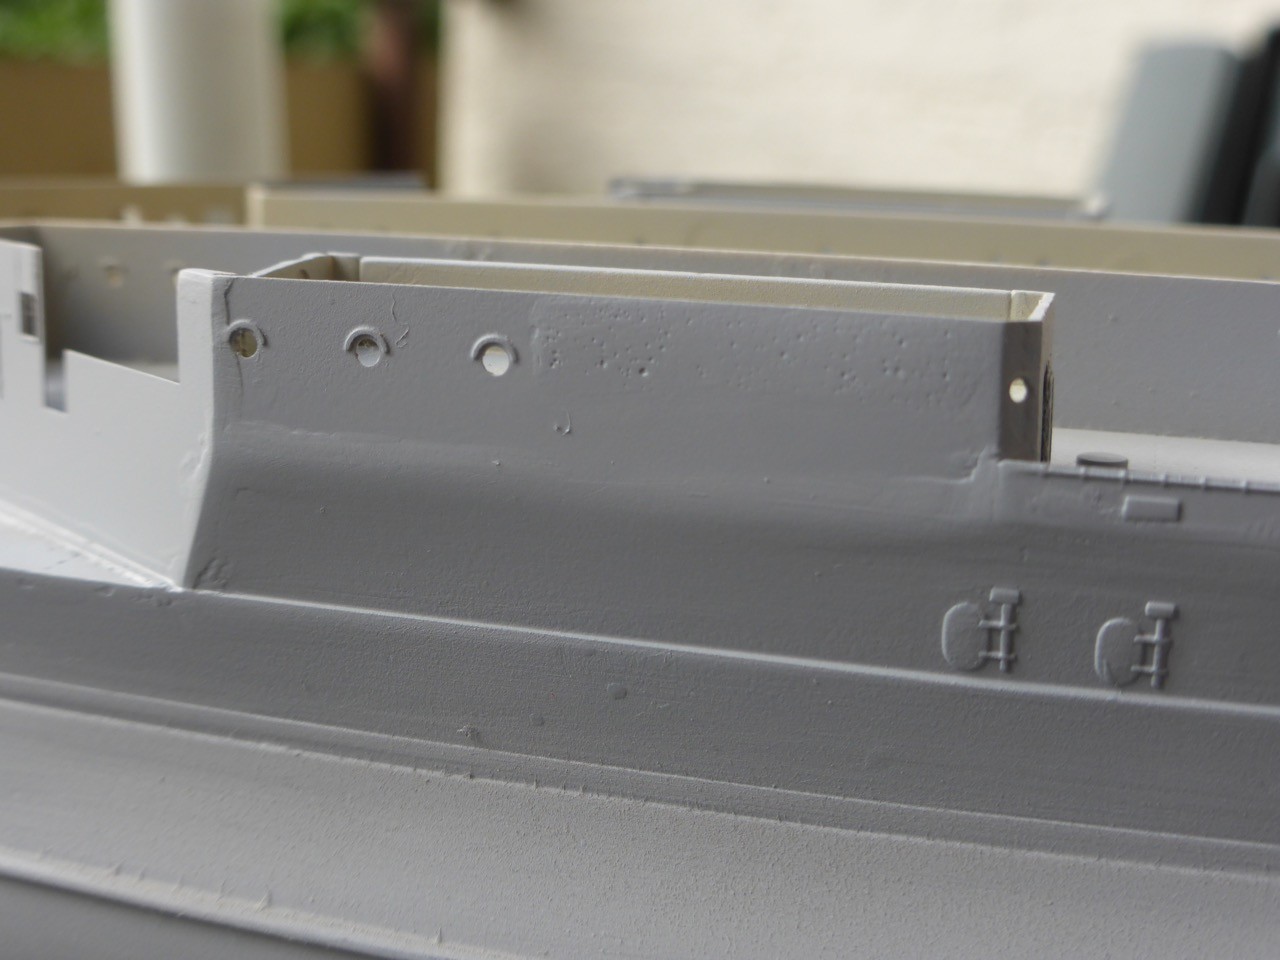
Just more filling and sanding - but at least, I think with the forecastle deck I'm moving in the right direction.
Some sanding and a layer of surfacer
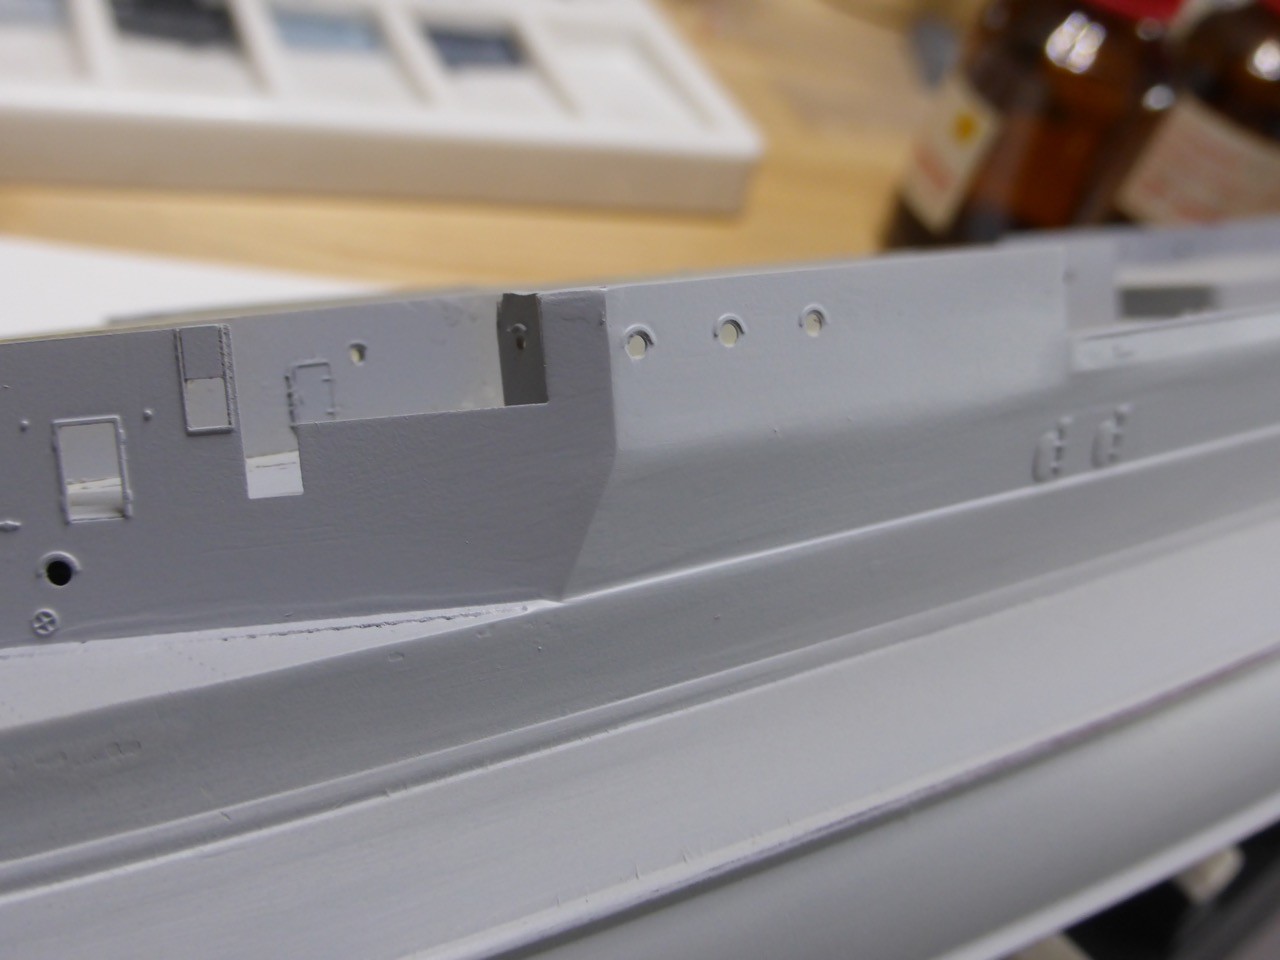

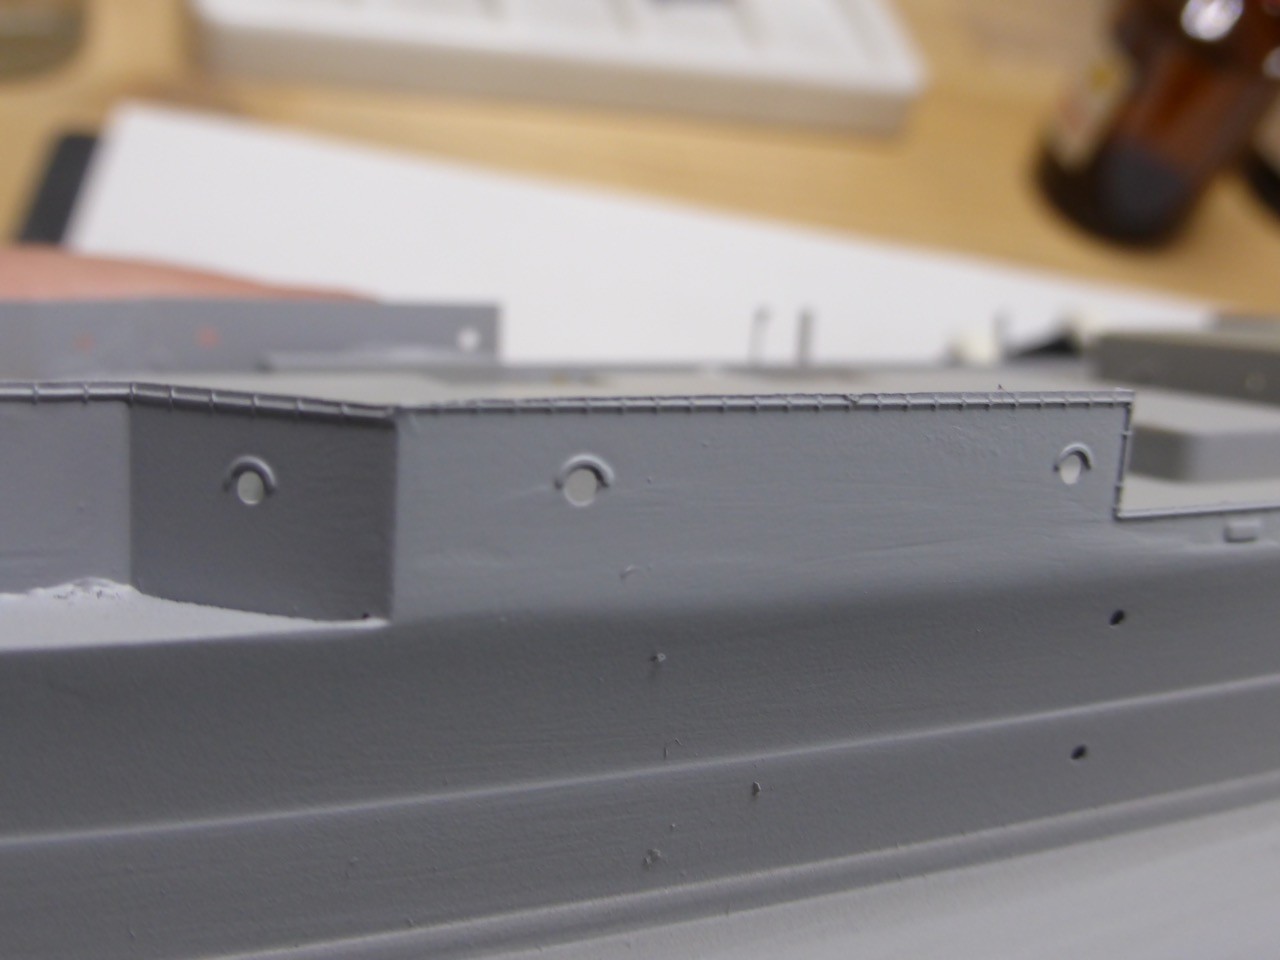
And a mittel more sanding - some minor corrections still required, but overall I am quite happy:
Other than that - trying to do some smaller stuff I realized that was more likely to break some stuff than to build it, so I decided it simply wasn't my day. Rather a little bit progress than disaster...
My Hood will go into some kind of summer hibernation now - next week busy and then some leave, so it will be quiet here. However, comes at a good time, I feel that I am quite tired from sanding, so motivation should be back after my leave! And I should come up with a solid plan how to proceed - issues are becoming rather complex. I think I have to put down parts of the wooden deck before I continue with the internal structure of the forecastle deck...but that's for later.
Thanks for looking and thanks for your patience!!
Cheers,
Jan
Just more filling and sanding - but at least, I think with the forecastle deck I'm moving in the right direction.
Some sanding and a layer of surfacer
And a mittel more sanding - some minor corrections still required, but overall I am quite happy:
Other than that - trying to do some smaller stuff I realized that was more likely to break some stuff than to build it, so I decided it simply wasn't my day. Rather a little bit progress than disaster...
My Hood will go into some kind of summer hibernation now - next week busy and then some leave, so it will be quiet here. However, comes at a good time, I feel that I am quite tired from sanding, so motivation should be back after my leave! And I should come up with a solid plan how to proceed - issues are becoming rather complex. I think I have to put down parts of the wooden deck before I continue with the internal structure of the forecastle deck...but that's for later.
Thanks for looking and thanks for your patience!!
Cheers,
Jan
Cosimodo
#335
Joined: September 03, 2013
KitMaker: 1,808 posts
Model Shipwrights: 871 posts
Posted: Tuesday, August 02, 2016 - 02:48 PM UTC
The progress is great Jan and a good way to head into hibernation. Enjoy your break and I'll look forward to the next update when you return.
cheers
Michael
cheers
Michael
RedDuster
Joined: March 01, 2010
KitMaker: 7,078 posts
Model Shipwrights: 6,649 posts
Posted: Sunday, August 14, 2016 - 10:48 PM UTC
Nice work Jan,
Clean up looks almost complete,
Cheers
Si
Clean up looks almost complete,
Cheers
Si
JJ1973
#345
Joined: August 22, 2011
KitMaker: 1,835 posts
Model Shipwrights: 1,832 posts
Posted: Thursday, September 01, 2016 - 08:35 PM UTC
Thank you very much, Michael and Si, for looking in and for your kind comments!!
Now it's time hibernation of my build comes to an end - back from leave but still kind of busy with all those things that come after leave - from checking back in with friends and family to doing the laundry and cleaning one's place...and catching up with what's going on on MSW.
My shipyard looks all right and ready to go again, so work should commence again tomorrow.
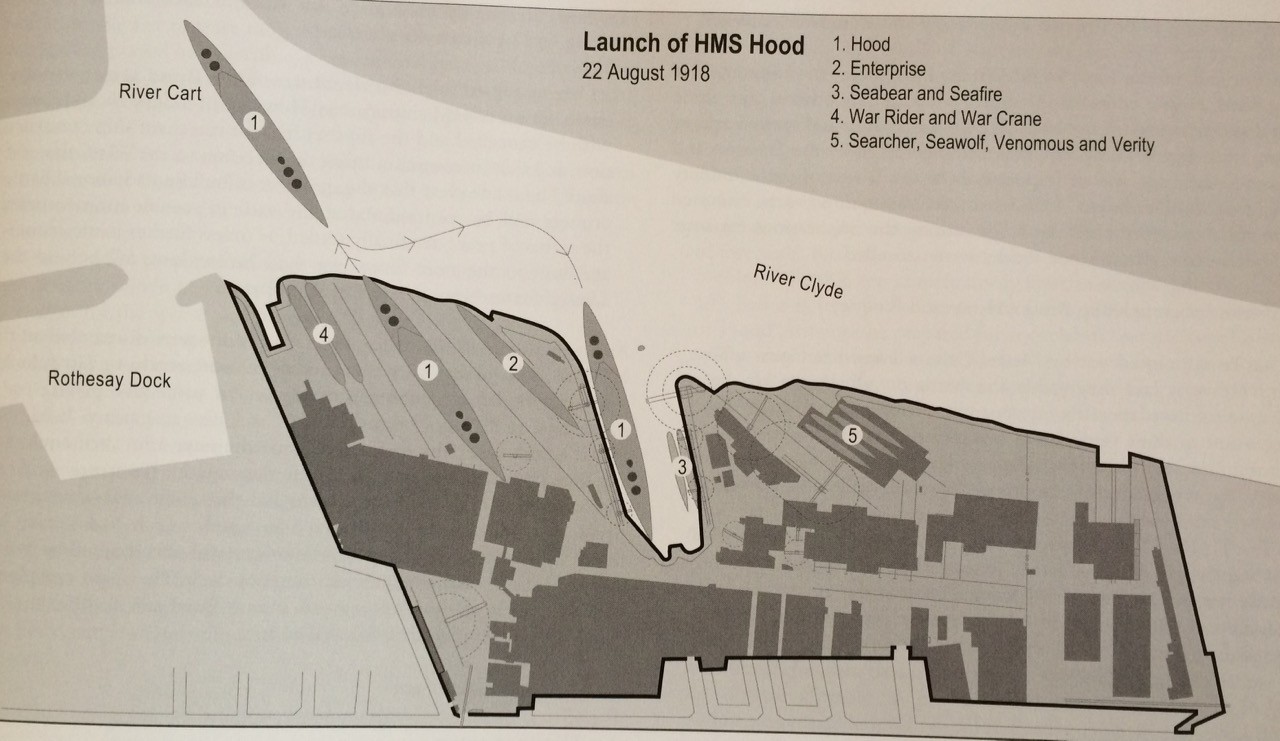
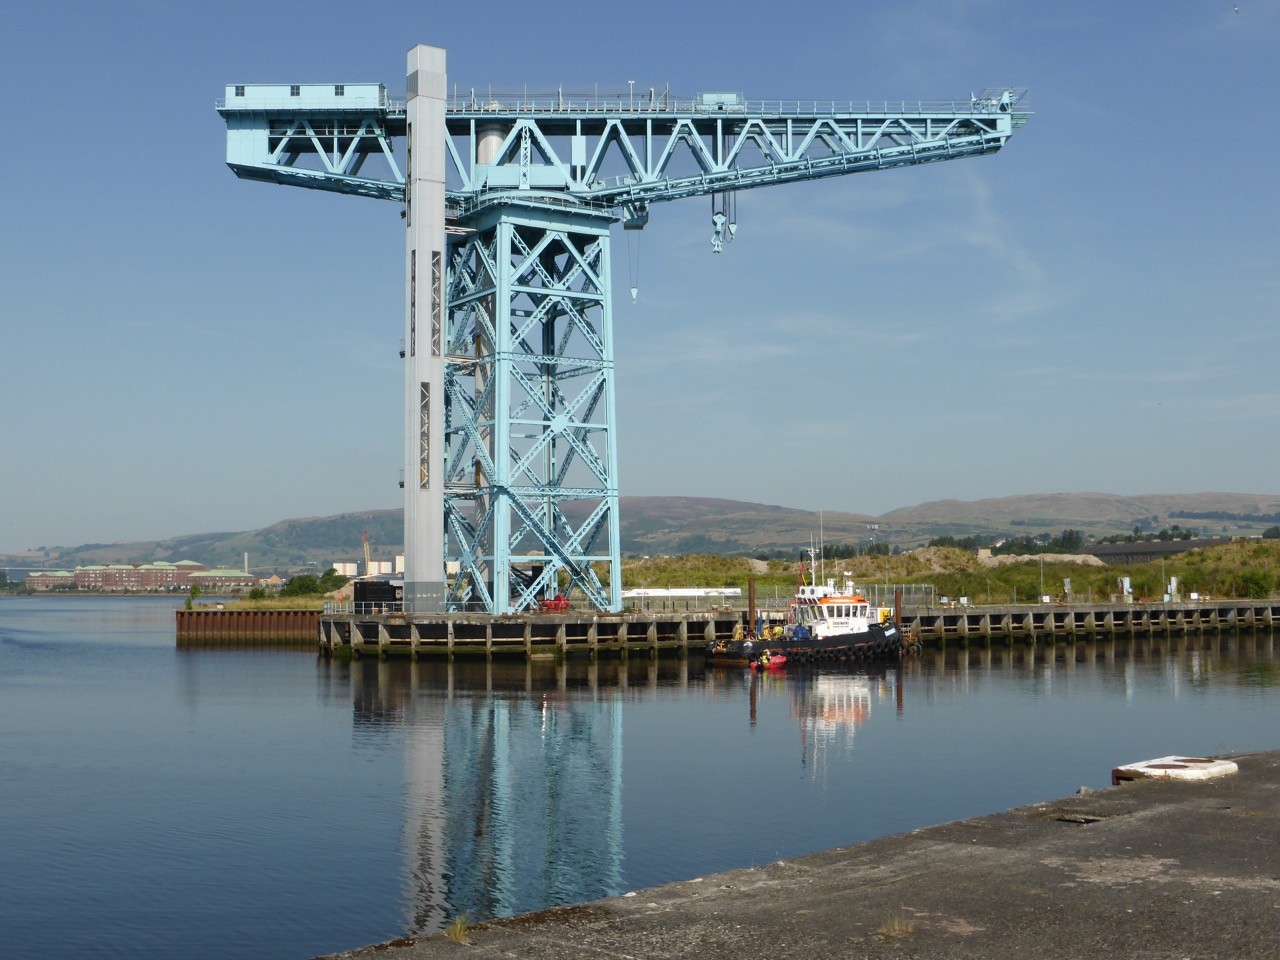
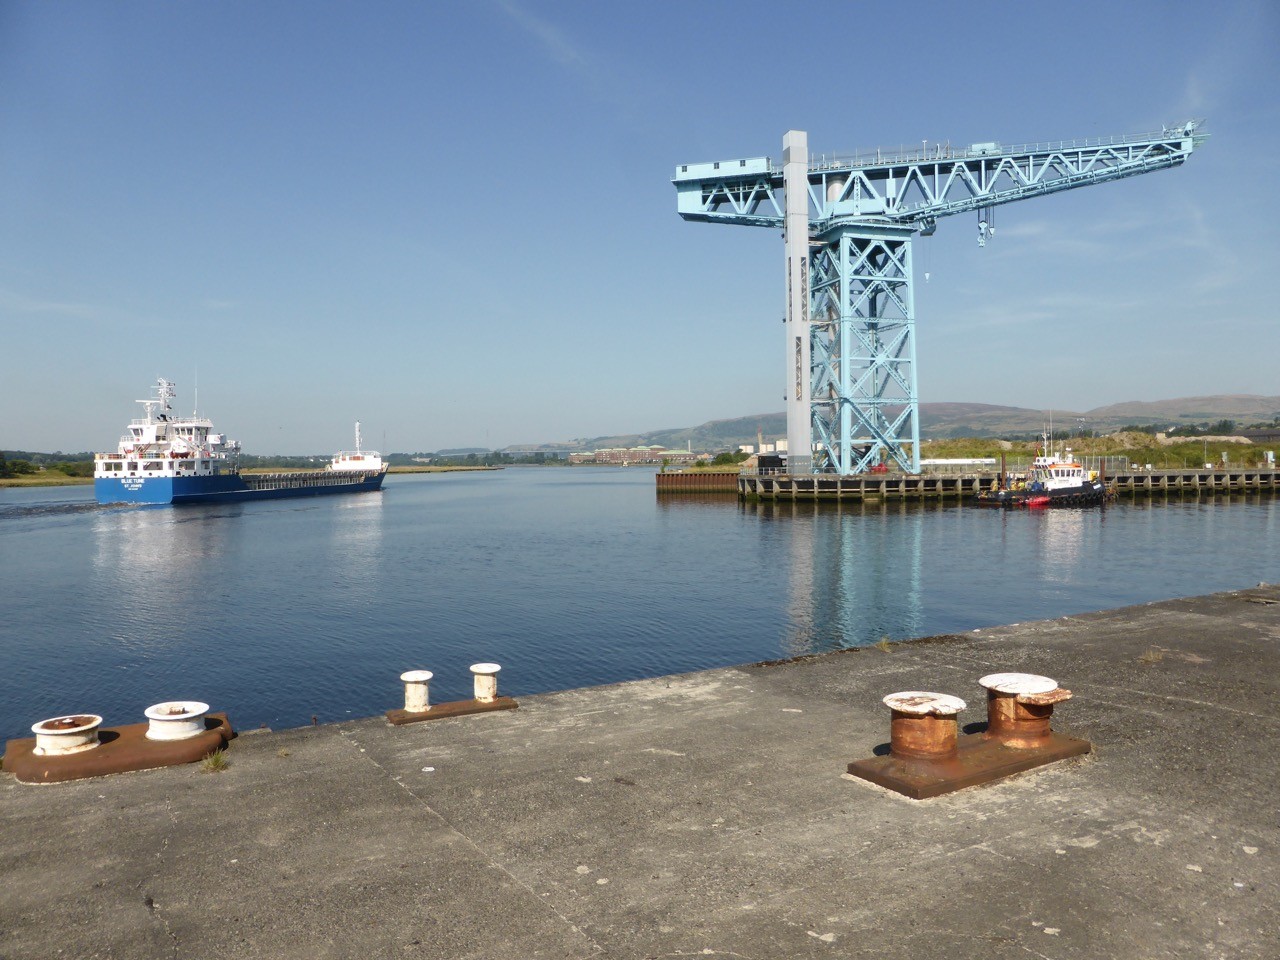
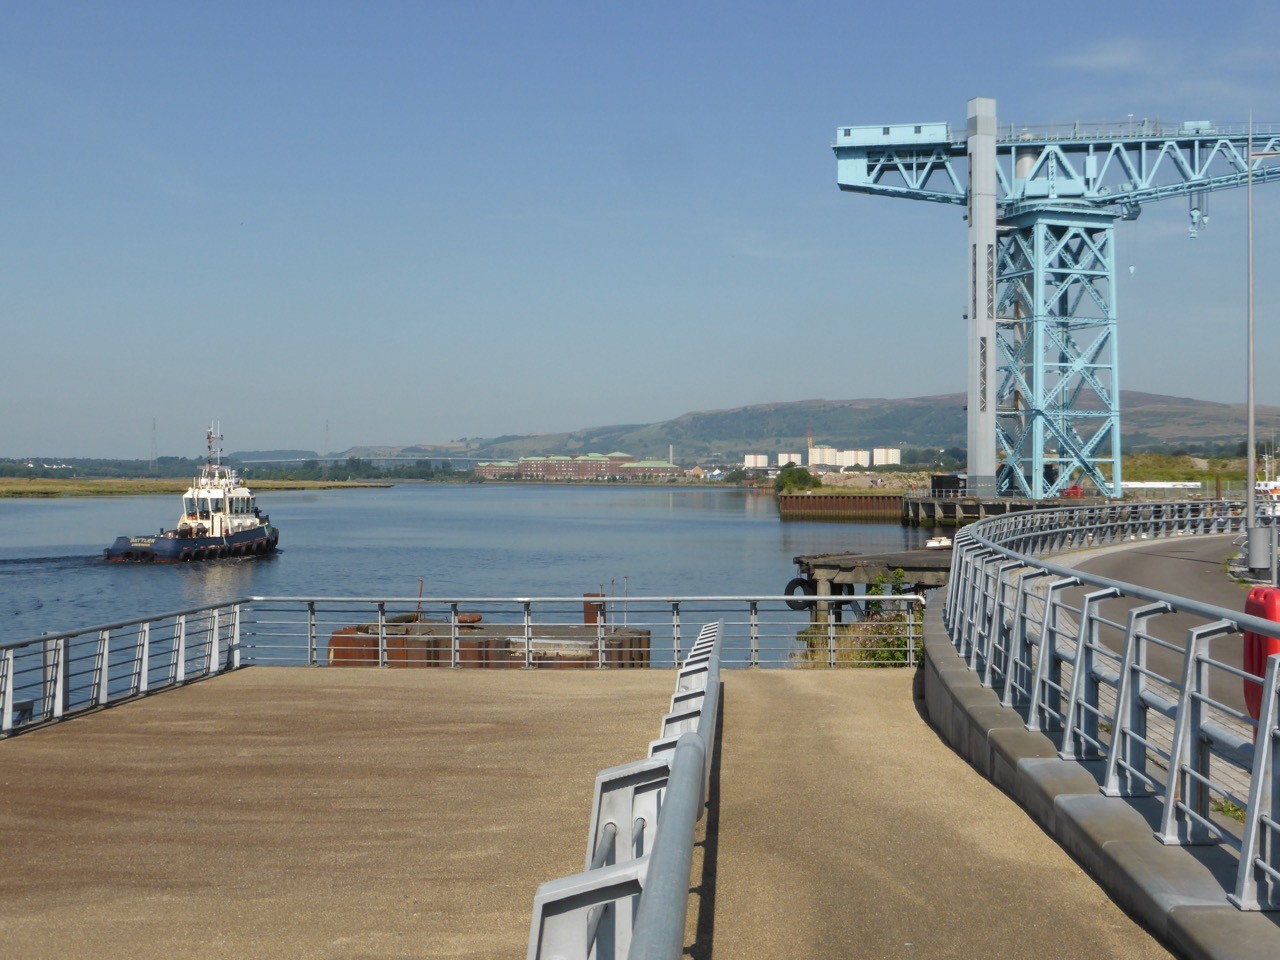
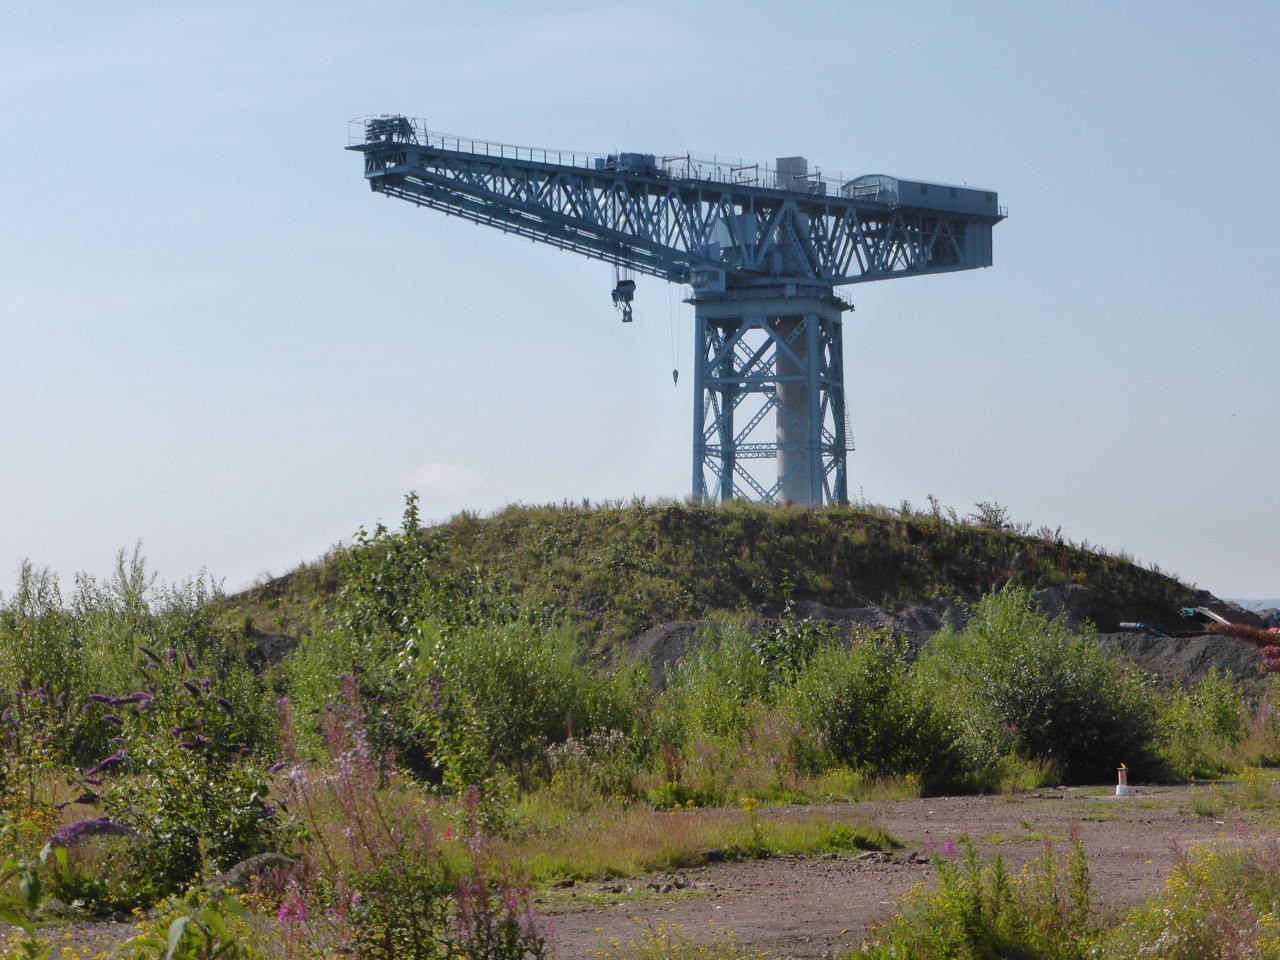
For now - in lieu of a real update, I've something different for you: during my leave, that I spent mostly in Scotland, I visited Hood's birthplace, John Brown's Shipyard (or better, what is left of it).
Most of you will know that the Shipyard itself does not exist any more for quite some time in Glasgow. And apart from the one huge 150 t crane ('Titan'), there really is nothing left. However, with the drawings from Ian Johnston's great book covering "Clydebank Battlecruisers" and google maps you can pin down pretty exactly where the old yard used to be. And going there and looking around, you find some nicely done hints.
So here's the old setup:
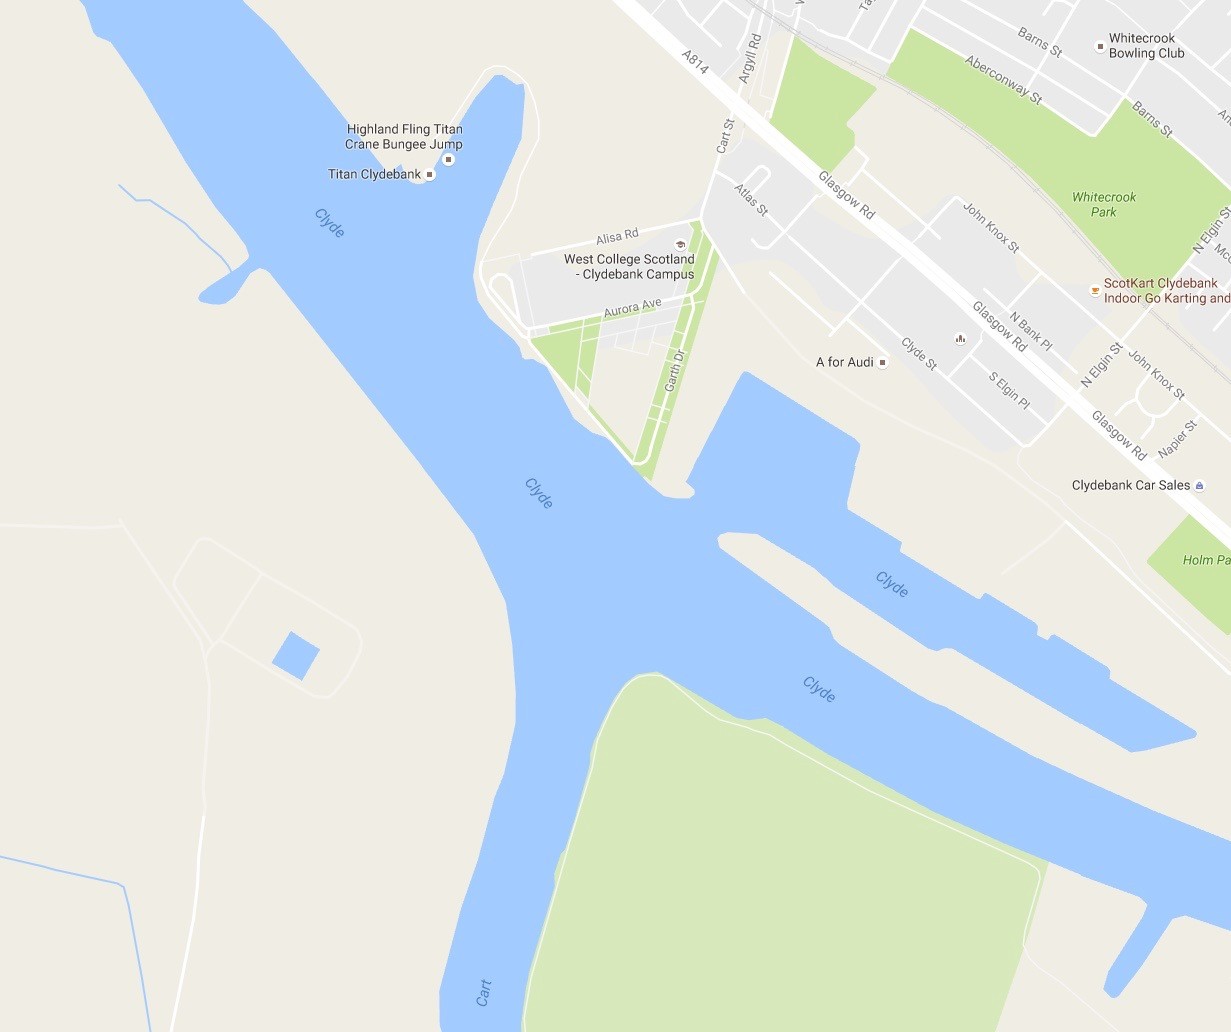
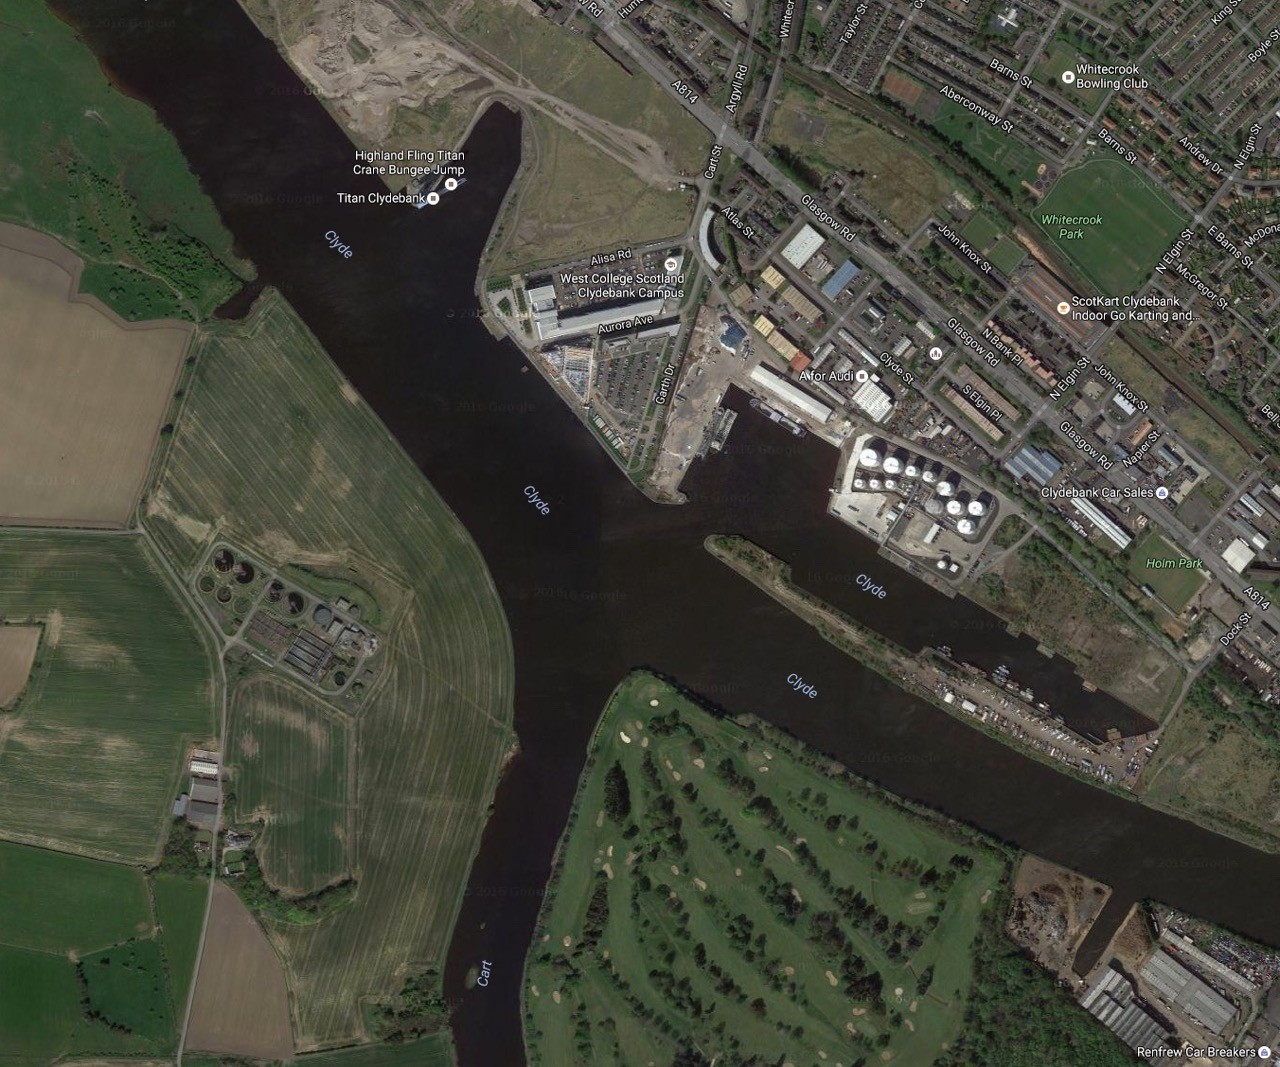
And here's what you find on google:
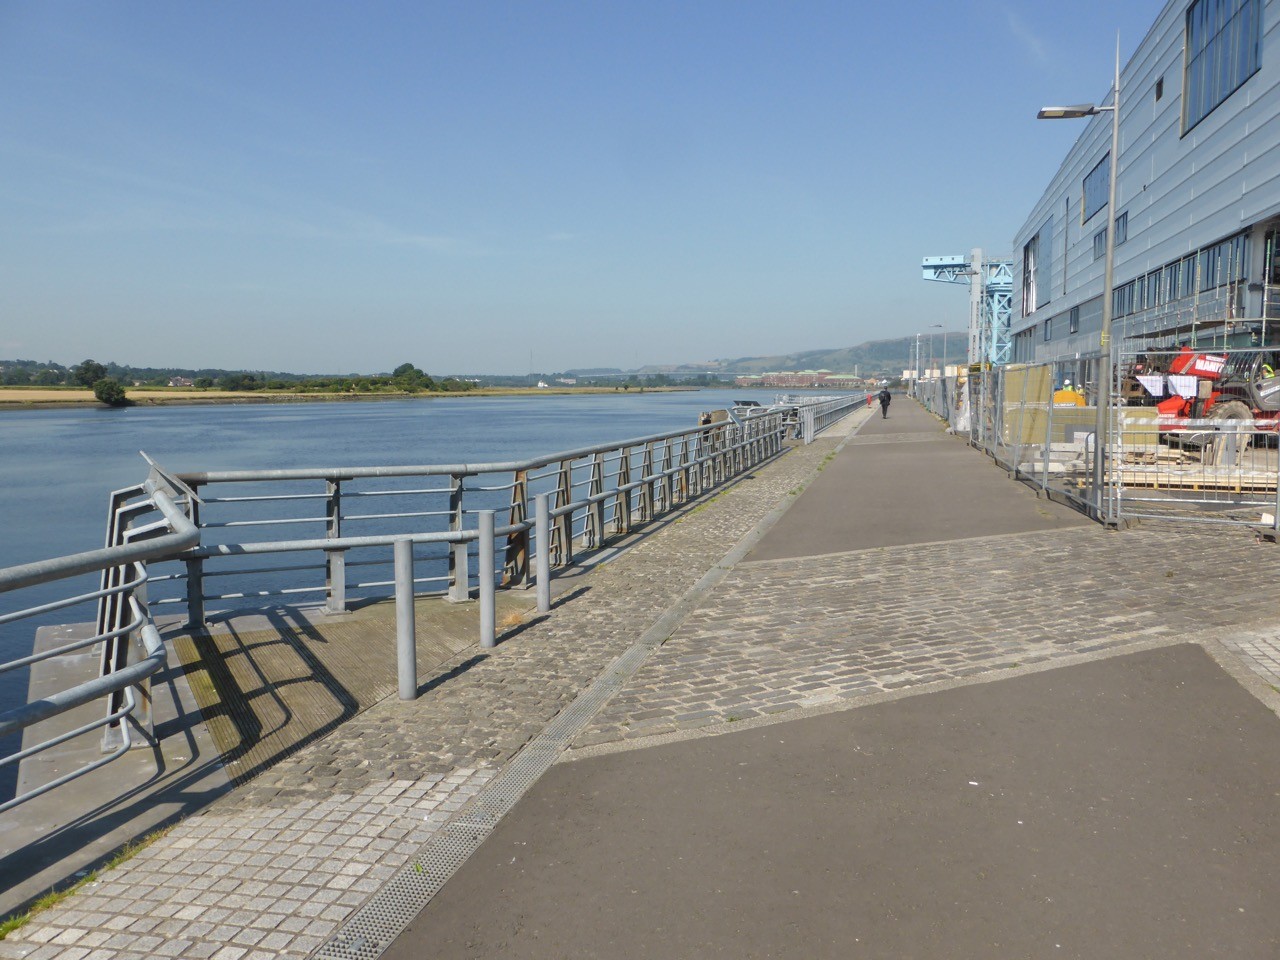
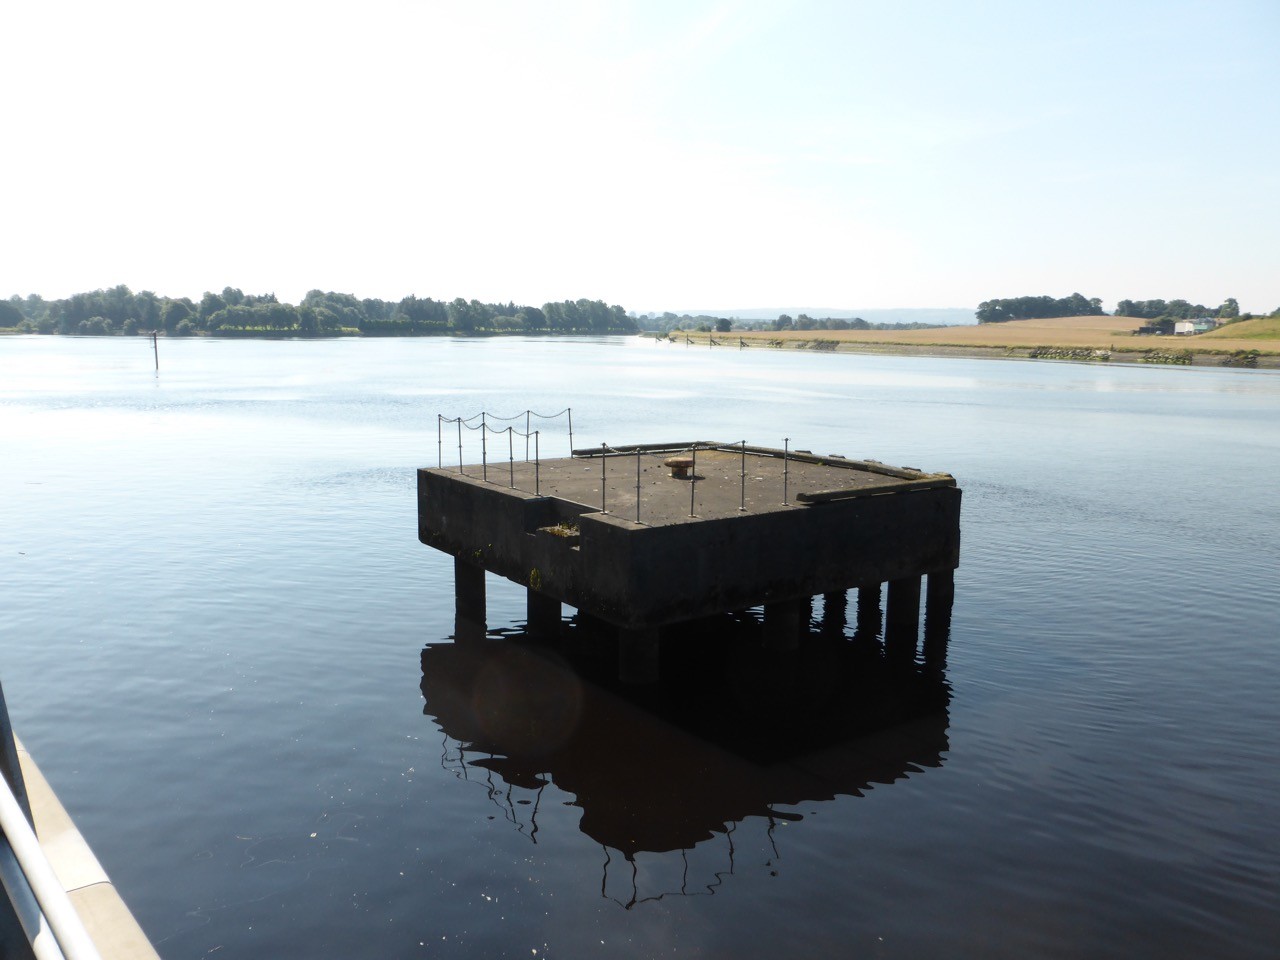
The place is a huge construction area today, there's some kind of college and other facilities being built. But you find - next to the crane, some more marks:
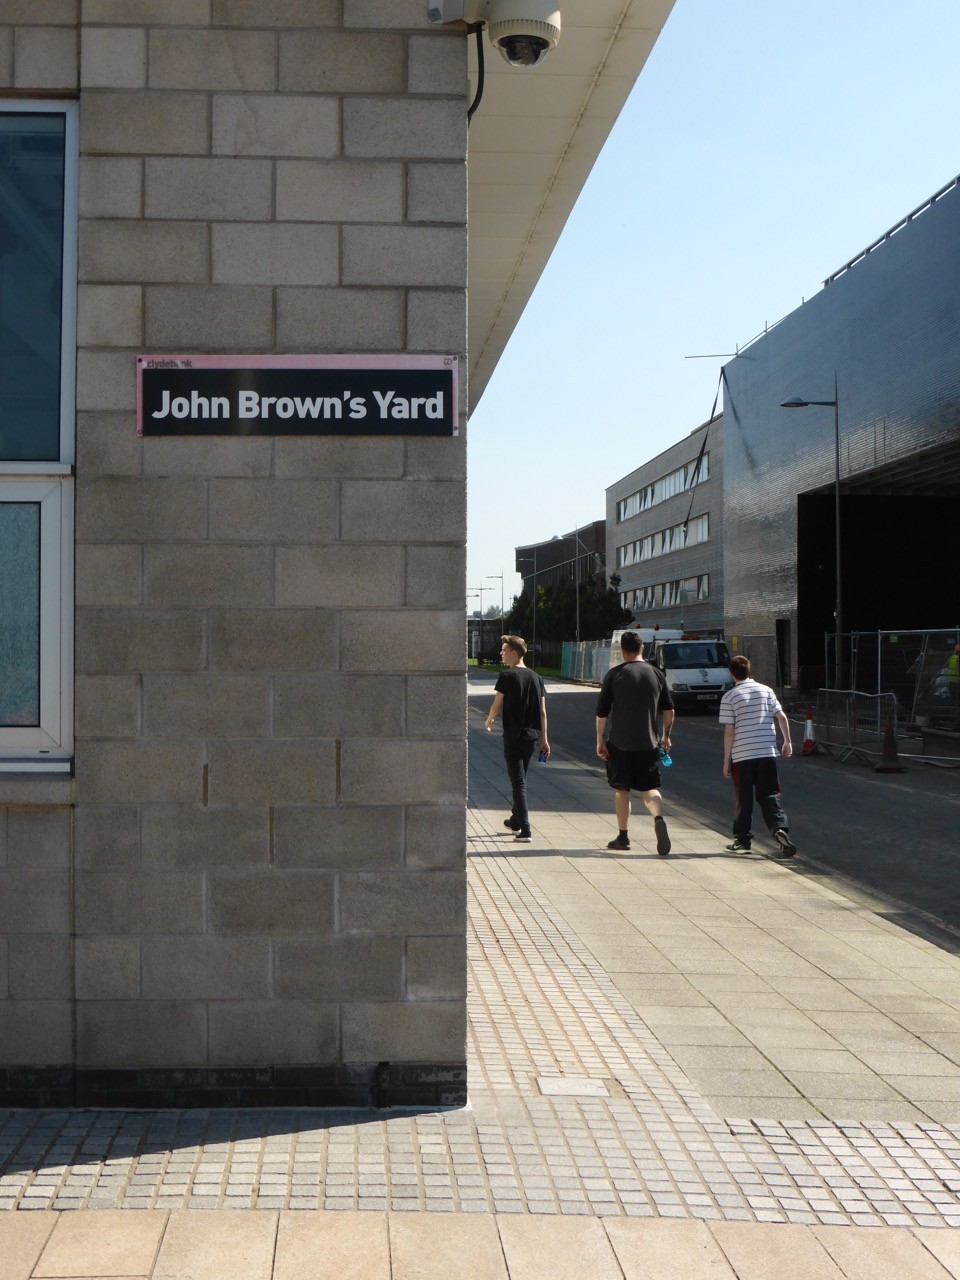

The cobblestones in the tartan road would be pretty much in place of the old slipways:
Looking over the Clyde, the River Cart on the opposite site, where Hood was launched into, can be seen:
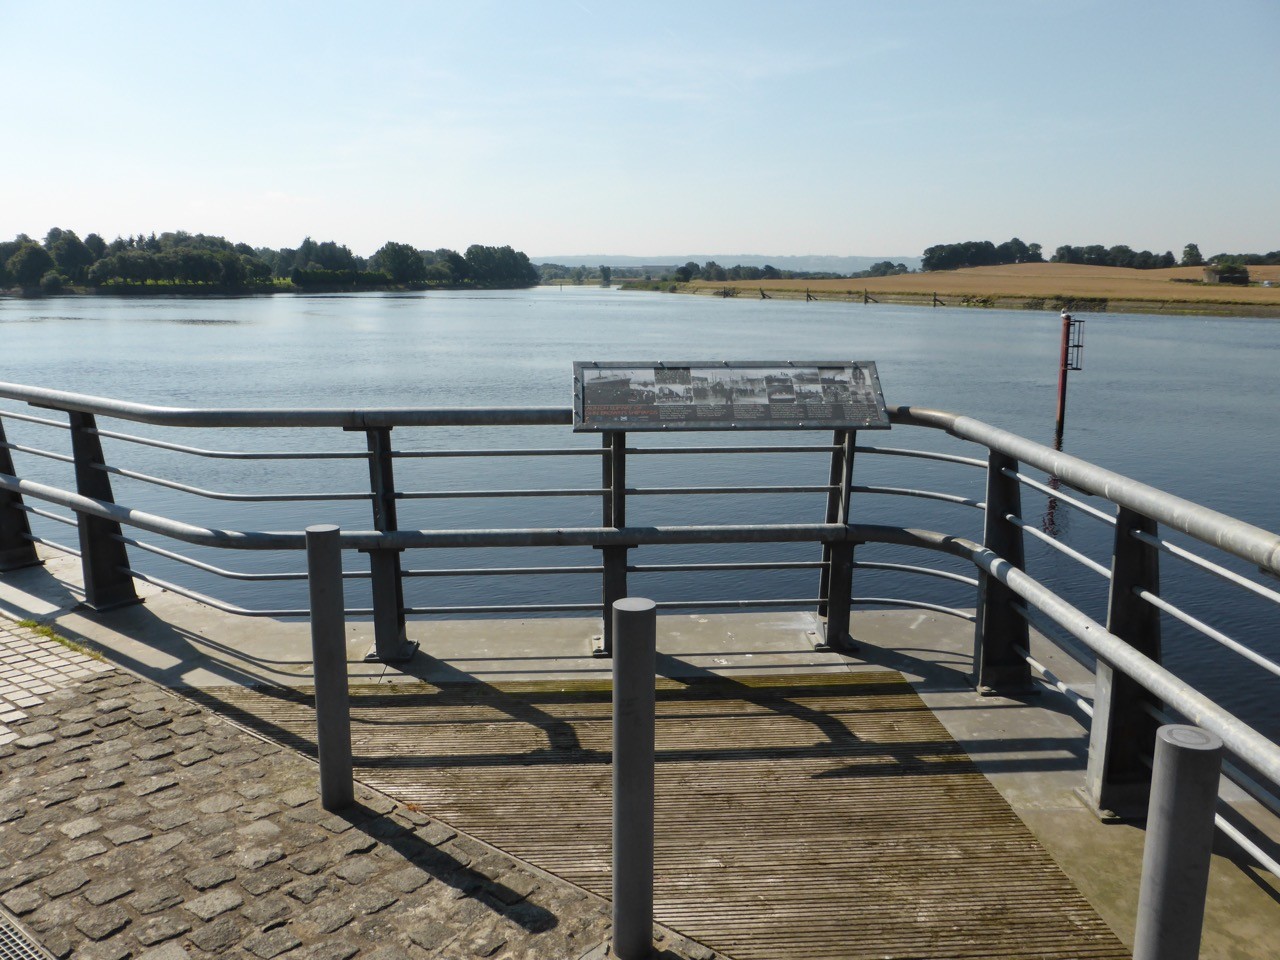
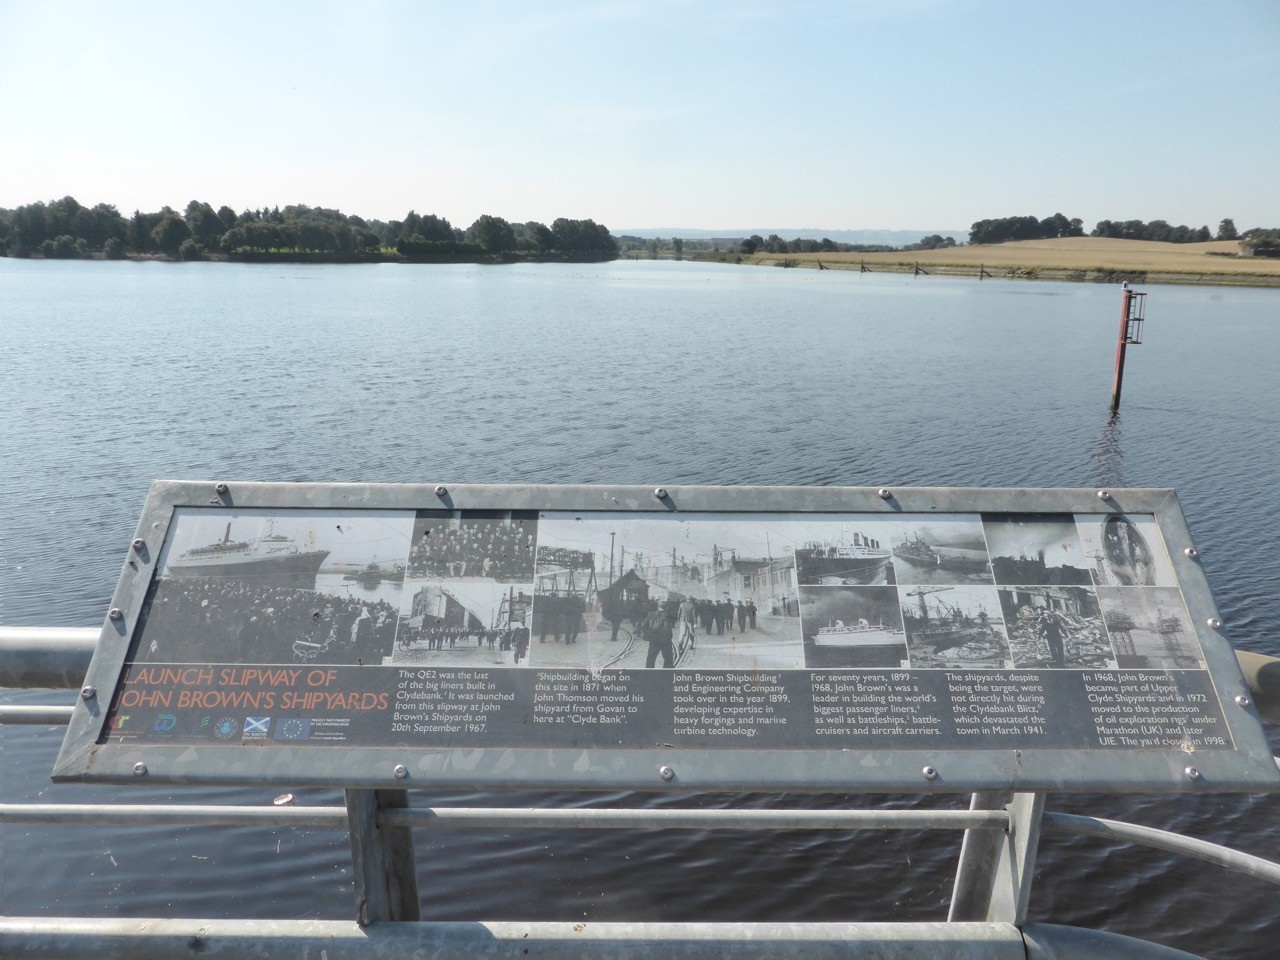
Might that be remainders of an old slipway, maybe the one Hood was built on? It lines up nicely with the River Cart, just as on the drawings.
Some more impressions from the site and the crane, that is used for bungee jumping...
Titan crane on the tip of the old fitting out basin
Now I'll try to catch up with all you gentlemen's work on MSW - and hopefully, I'll have a real update on my Hood by Sunday or Monday...
Cheers and thanks for looking - and your patience during my hibernation!
Jan
Now it's time hibernation of my build comes to an end - back from leave but still kind of busy with all those things that come after leave - from checking back in with friends and family to doing the laundry and cleaning one's place...and catching up with what's going on on MSW.
My shipyard looks all right and ready to go again, so work should commence again tomorrow.
For now - in lieu of a real update, I've something different for you: during my leave, that I spent mostly in Scotland, I visited Hood's birthplace, John Brown's Shipyard (or better, what is left of it).
Most of you will know that the Shipyard itself does not exist any more for quite some time in Glasgow. And apart from the one huge 150 t crane ('Titan'), there really is nothing left. However, with the drawings from Ian Johnston's great book covering "Clydebank Battlecruisers" and google maps you can pin down pretty exactly where the old yard used to be. And going there and looking around, you find some nicely done hints.
So here's the old setup:
And here's what you find on google:
The place is a huge construction area today, there's some kind of college and other facilities being built. But you find - next to the crane, some more marks:
The cobblestones in the tartan road would be pretty much in place of the old slipways:
Looking over the Clyde, the River Cart on the opposite site, where Hood was launched into, can be seen:
Might that be remainders of an old slipway, maybe the one Hood was built on? It lines up nicely with the River Cart, just as on the drawings.
Some more impressions from the site and the crane, that is used for bungee jumping...
Titan crane on the tip of the old fitting out basin
Now I'll try to catch up with all you gentlemen's work on MSW - and hopefully, I'll have a real update on my Hood by Sunday or Monday...
Cheers and thanks for looking - and your patience during my hibernation!
Jan
JJ1973
#345
Joined: August 22, 2011
KitMaker: 1,835 posts
Model Shipwrights: 1,832 posts
Posted: Sunday, September 04, 2016 - 09:57 PM UTC
All right - more excuses
But hey, here's my first update after my leave anyway, even if it is not nearly as extensive as I had hoped - laundry, cleaning, and last but not least the weather (just too warm - sweat running from under the opti visor, and balcony with a cool ale is juts too inviting...)
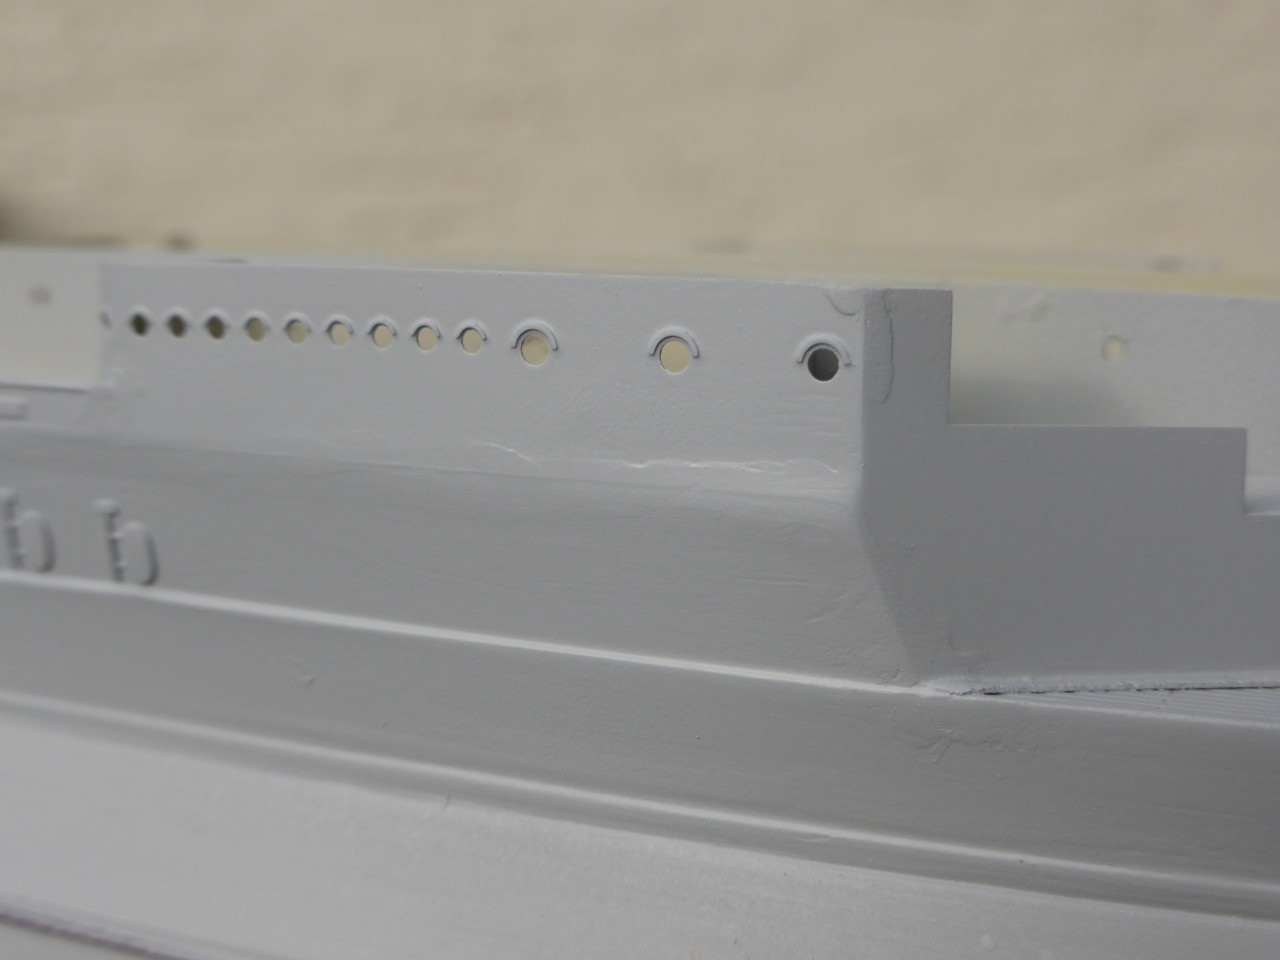
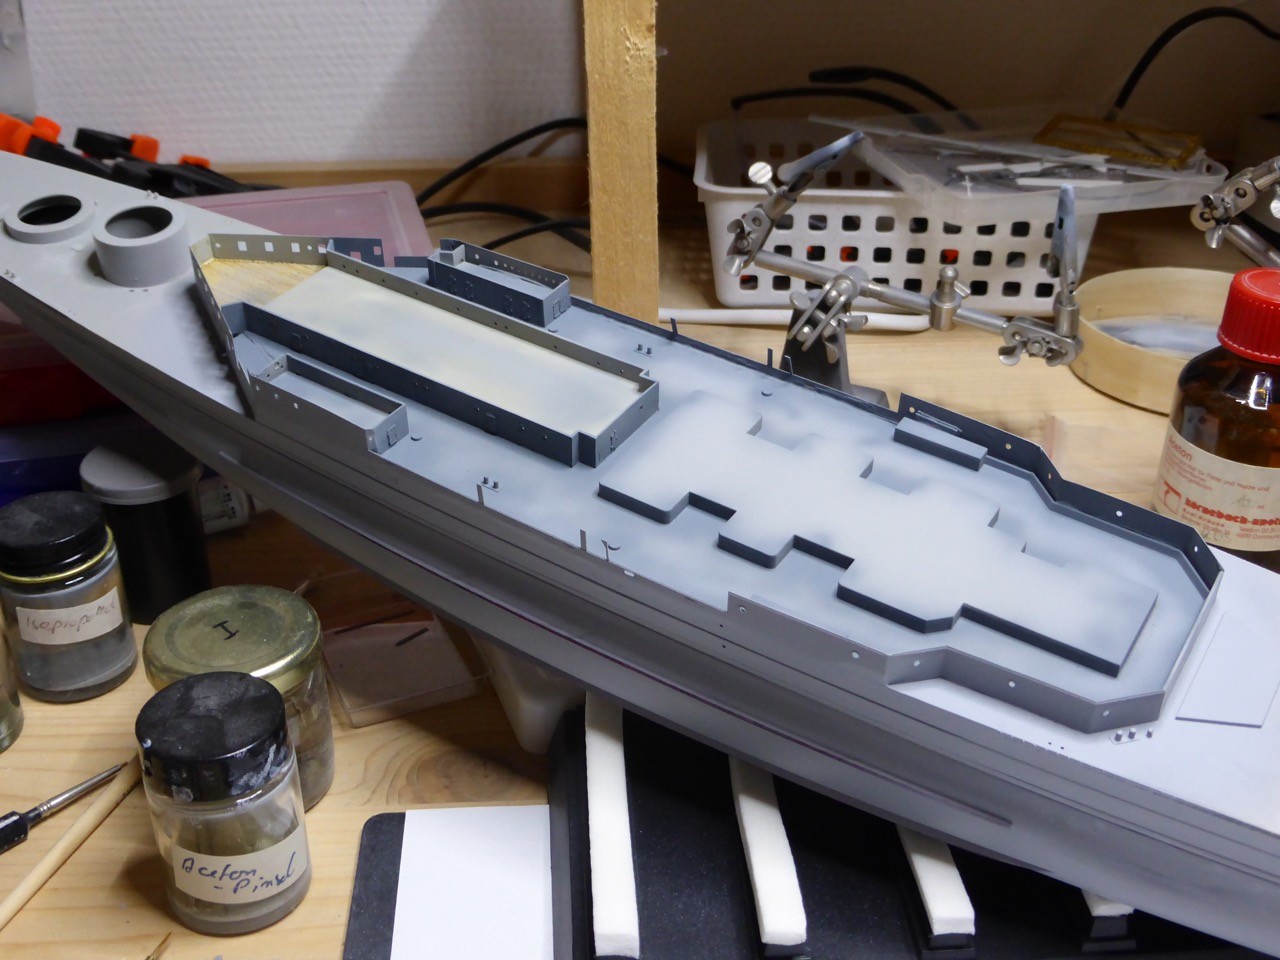
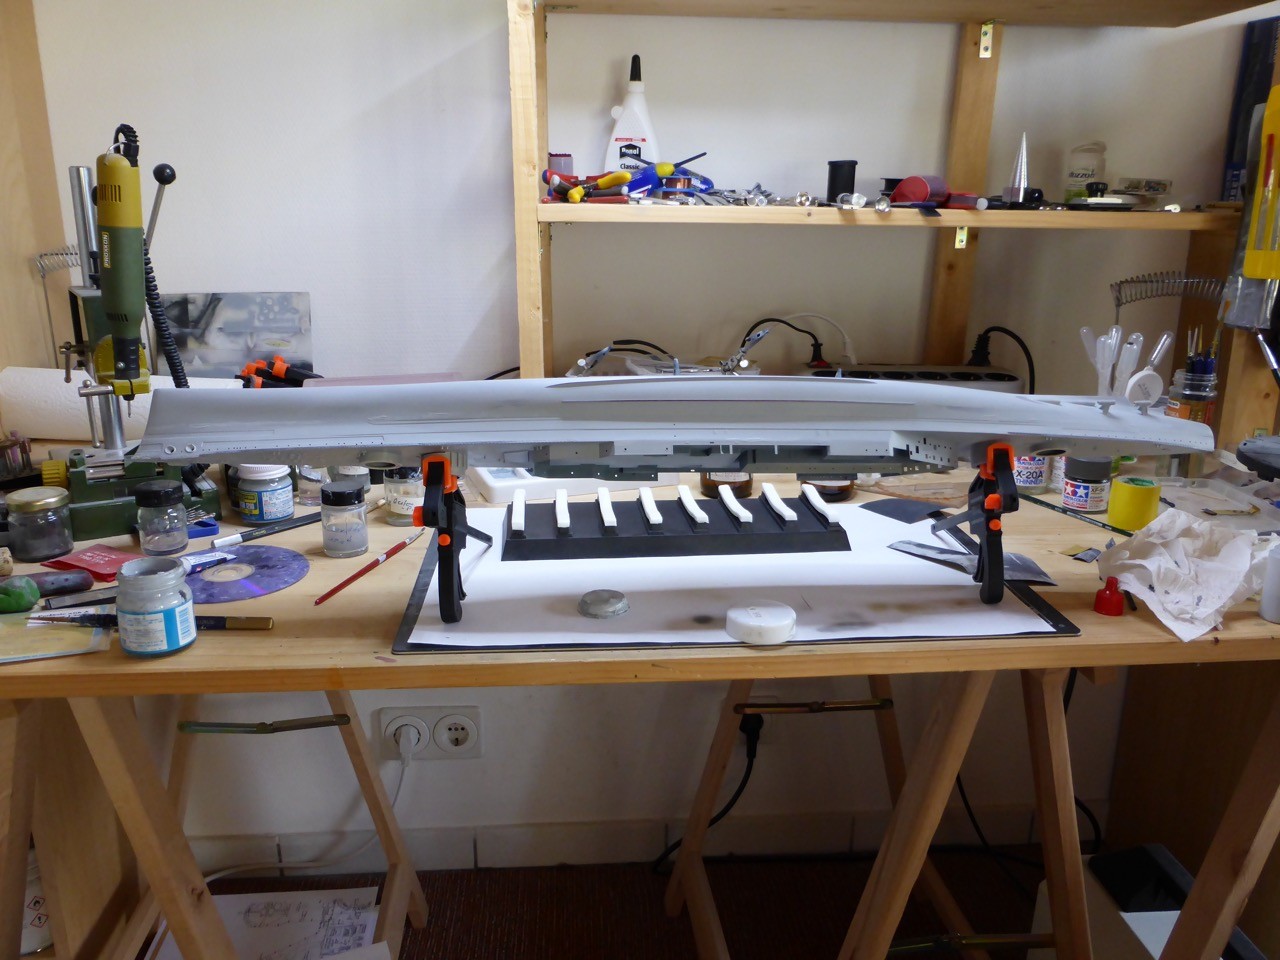
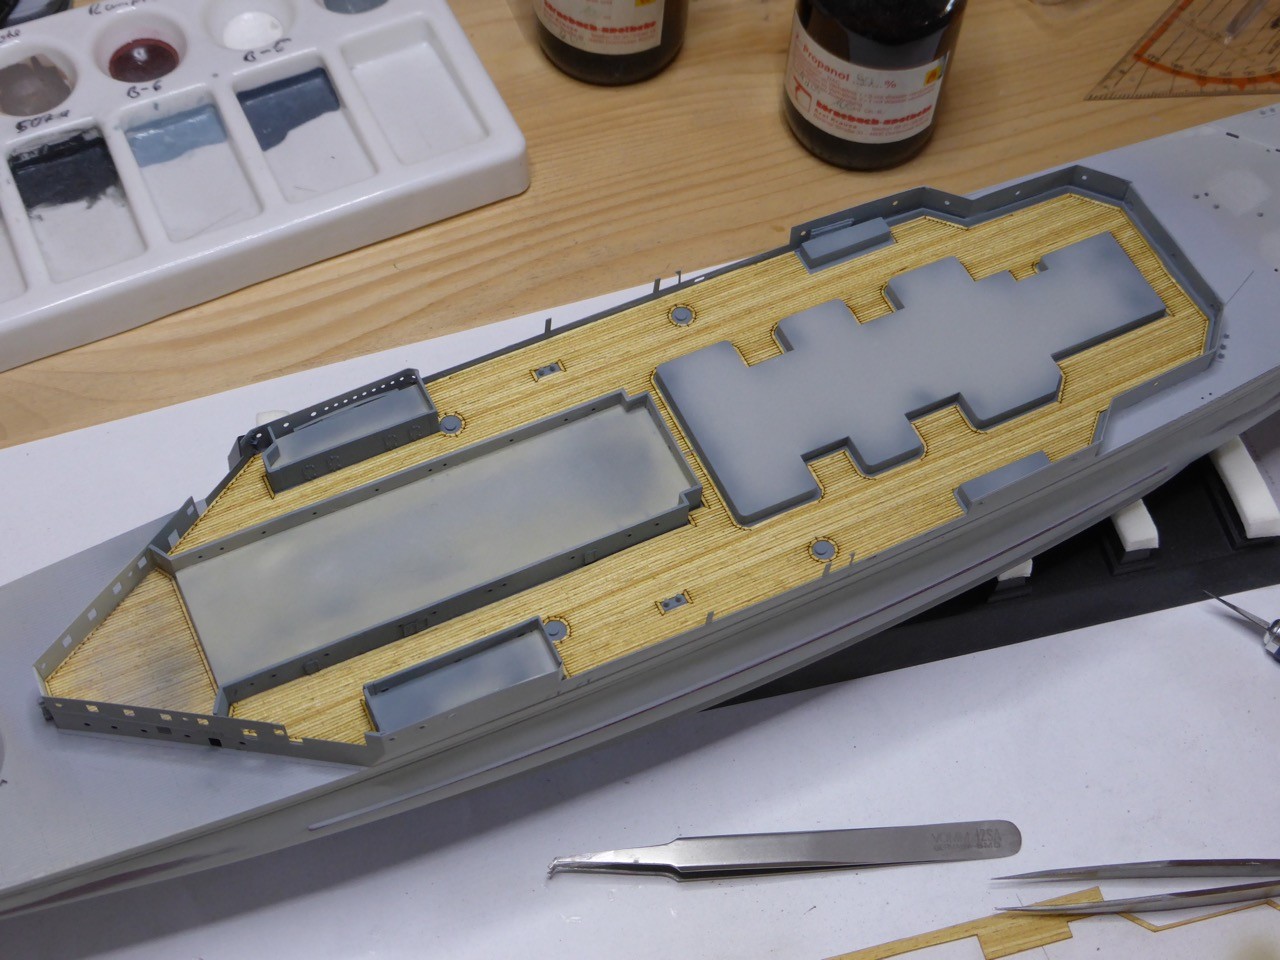
So first color on - seems a little weird, but I decided that it's time to paint the inner area of the forecastle deck, in order to get the wooden deck in. Probably I should have done this even earlier, i.e. before installing the after structure parts, I hope I'll manage. The forward inner structure will follow only after the wooden deck is in place.
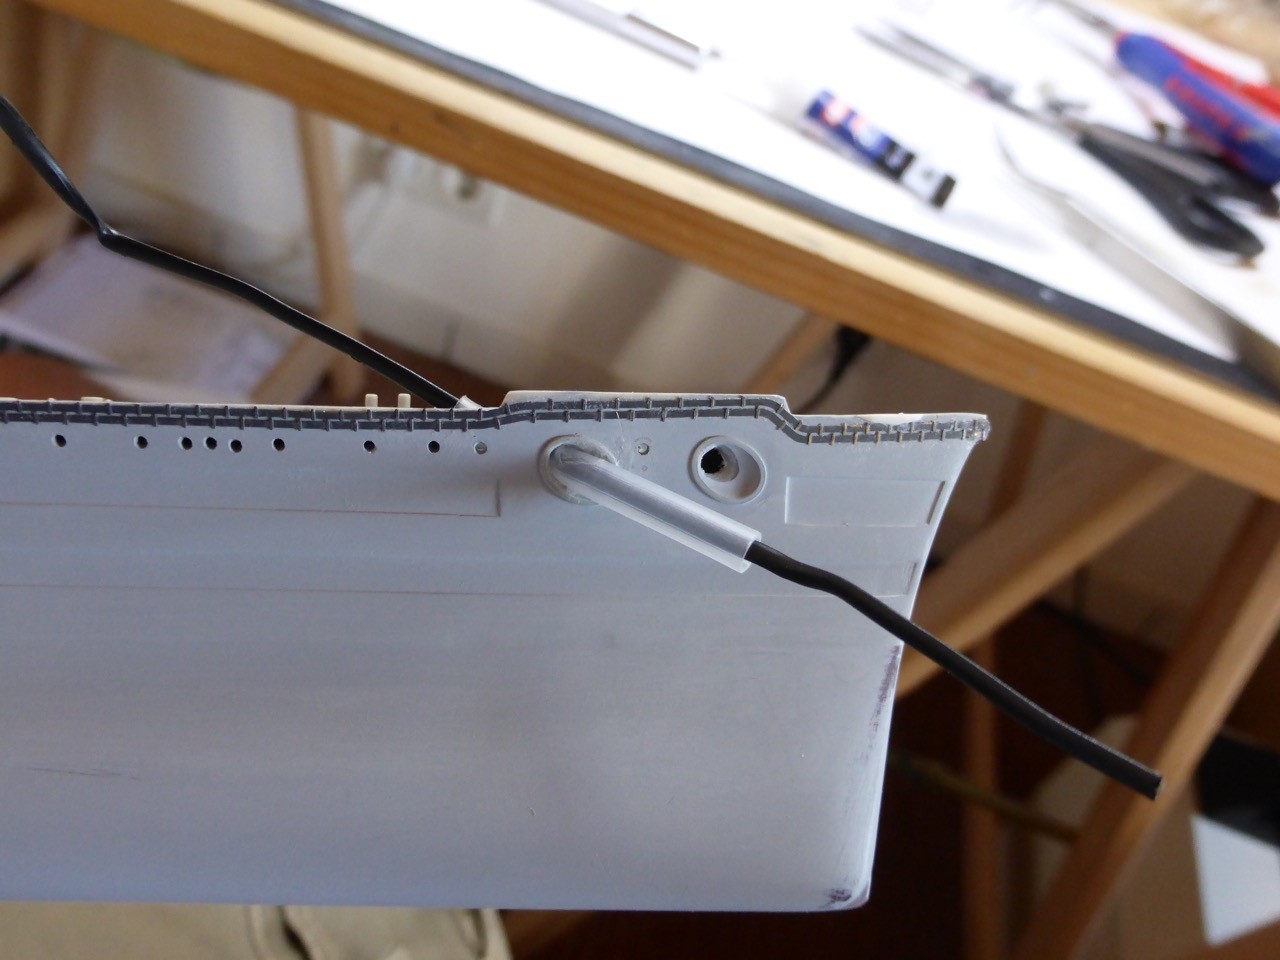
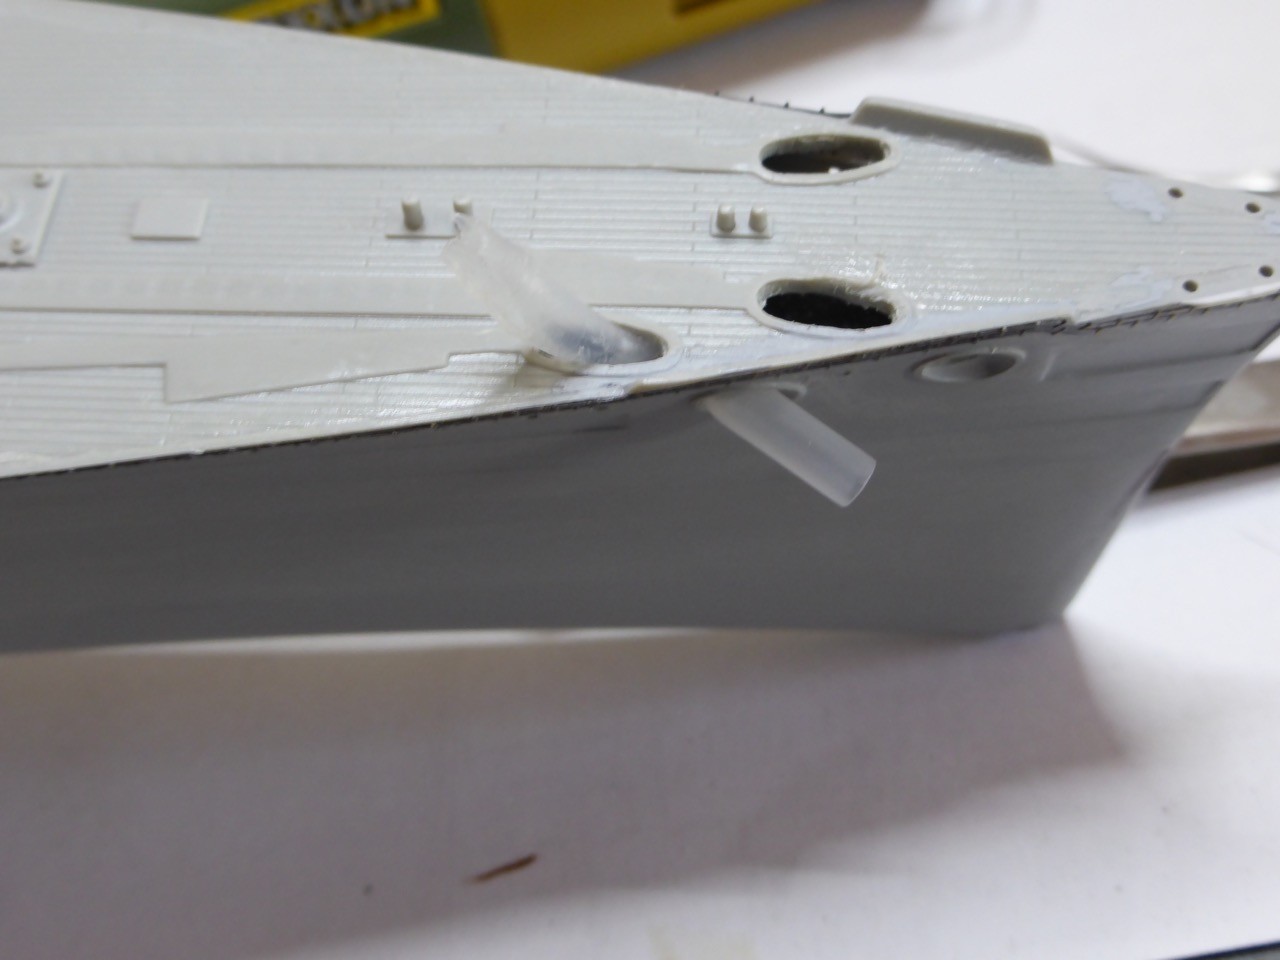
Then I worked on the forward hawsepipes. I opened all three - there will be anchors in the port and starboard forward one, but not the second one on starboard side. So the idea is that I can just open the two where the anchors will go, it should be well concealed that there's no actual pipe there. For the deck, I will put some griddles on top of the forward half of the openings, so that only the chain will go through.
The one without anchor need a pipe - the bare opening would be too obvious. So I took a rather soft piece of plastic piping and a wire:
Wire out:
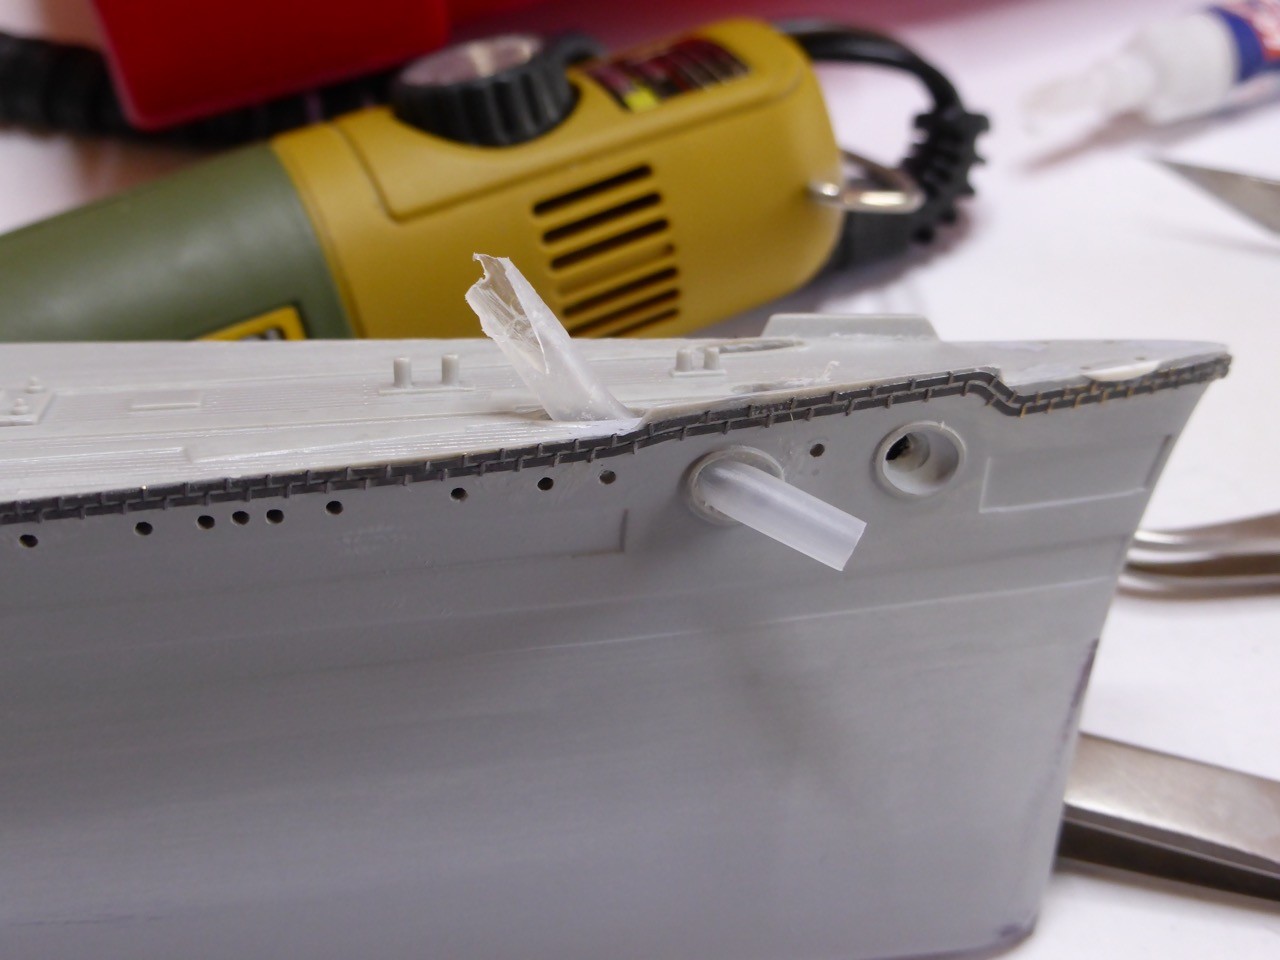
Cut and surfacer on top:
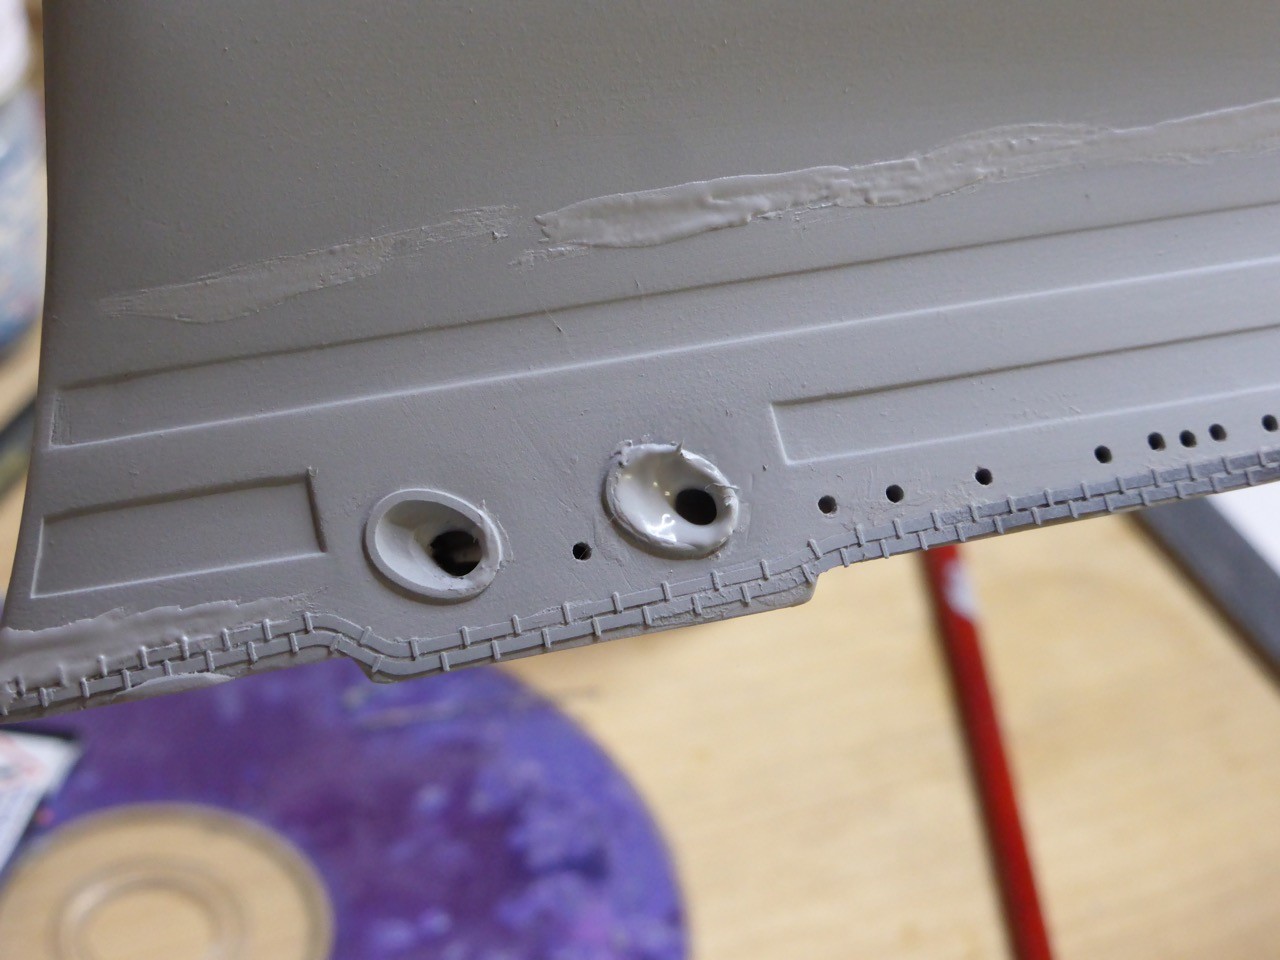
Sanded:
I hope it will stand the test of painting...it looked promising with a cost of surfacer on...
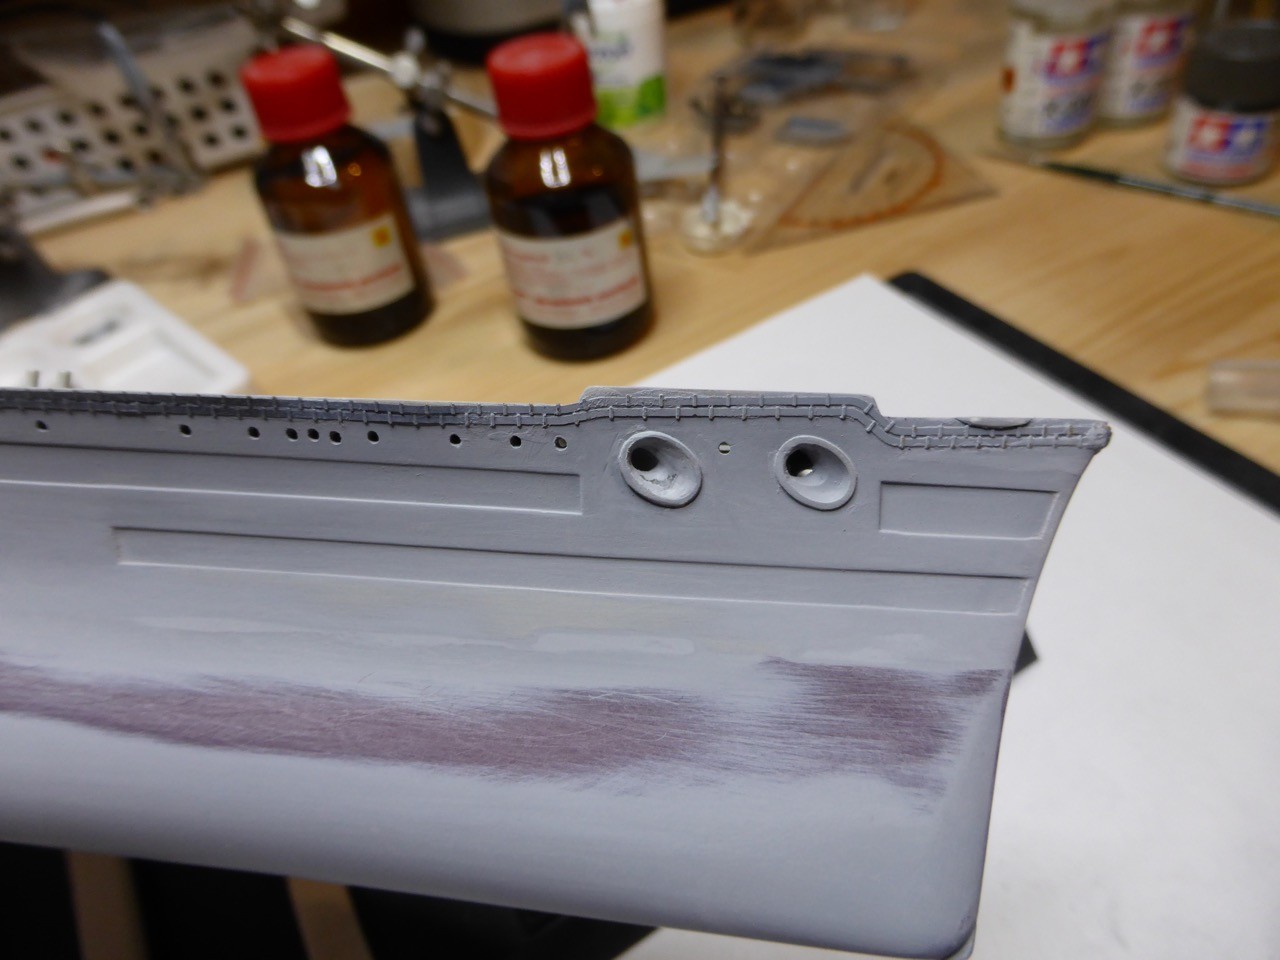
Last layer surfacer, I call this done now (even if I do know that it still is not perfect...but you need to stop at some point). Next will be re-installing the degaussing and then, finally, work should proceed in a more productive way than filling and sanding:
Next update should be here in a week, falling into a more regular pattern now - hopefully.
Thanks for looking!!
Cheers,
Jan
:-H
But hey, here's my first update after my leave anyway, even if it is not nearly as extensive as I had hoped - laundry, cleaning, and last but not least the weather (just too warm - sweat running from under the opti visor, and balcony with a cool ale is juts too inviting...)
So first color on - seems a little weird, but I decided that it's time to paint the inner area of the forecastle deck, in order to get the wooden deck in. Probably I should have done this even earlier, i.e. before installing the after structure parts, I hope I'll manage. The forward inner structure will follow only after the wooden deck is in place.
Then I worked on the forward hawsepipes. I opened all three - there will be anchors in the port and starboard forward one, but not the second one on starboard side. So the idea is that I can just open the two where the anchors will go, it should be well concealed that there's no actual pipe there. For the deck, I will put some griddles on top of the forward half of the openings, so that only the chain will go through.
The one without anchor need a pipe - the bare opening would be too obvious. So I took a rather soft piece of plastic piping and a wire:
Wire out:
Cut and surfacer on top:
Sanded:
I hope it will stand the test of painting...it looked promising with a cost of surfacer on...
Last layer surfacer, I call this done now (even if I do know that it still is not perfect...but you need to stop at some point). Next will be re-installing the degaussing and then, finally, work should proceed in a more productive way than filling and sanding:
Next update should be here in a week, falling into a more regular pattern now - hopefully.
Thanks for looking!!
Cheers,
Jan
:-H
RussellE
#306
Joined: June 27, 2010
KitMaker: 3,959 posts
Model Shipwrights: 2,777 posts
Posted: Monday, September 05, 2016 - 02:16 AM UTC
Welcome back, Jan!
great to see those pics of what's left of John Brown's yard and seeing those 'ghosts' of the past. Not a conventional update for sure, but definitely interesting and adds a level of depth to your build.
The Hood's looking great and it will be good to see some colour go on in the near future!
Maybe move that work bench out to the balcony nearer to the fridge where the ale is kept
Cosimodo
#335
Joined: September 03, 2013
KitMaker: 1,808 posts
Model Shipwrights: 871 posts
Posted: Monday, September 05, 2016 - 05:08 AM UTC
Can't add anything to Russell's comments except maybe to get a chilly bin and bring the beer to the workstation 
cheers
Michael
cheers
Michael
JJ1973
#345
Joined: August 22, 2011
KitMaker: 1,835 posts
Model Shipwrights: 1,832 posts
Posted: Monday, September 05, 2016 - 09:39 AM UTC
Thank you so much for you comments, Russ and Michael!!
Well, the beer thing - as much as I love beer (I have to admit ), after a nice pint or another you think you're doing the greatest work in the world, only to see the next morning, that the work was, well, maybe just the second best work in the world...  Been there, done that
Cheers anyway,
Jan
Well, the beer thing - as much as I love beer (I have to admit
), after a nice pint or another you think you're doing the greatest work in the world, only to see the next morning, that the work was, well, maybe just the second best work in the world... Been there, done that Cheers
anyway,Jan
RedDuster
Joined: March 01, 2010
KitMaker: 7,078 posts
Model Shipwrights: 6,649 posts
Posted: Monday, September 05, 2016 - 02:00 PM UTC
Nice piece on John Brown's Jan,
Occasionally a bit further down the Clyde near Faslane for work, Finnart oil Terminal, but don't get the time to see more of the river.
Greta job on the Hawse pipe, will look neater than my jobs on the Repulse.
Cheers
Si
Occasionally a bit further down the Clyde near Faslane for work, Finnart oil Terminal, but don't get the time to see more of the river.
Greta job on the Hawse pipe, will look neater than my jobs on the Repulse.
Cheers
Si
JJ1973
#345
Joined: August 22, 2011
KitMaker: 1,835 posts
Model Shipwrights: 1,832 posts
Posted: Wednesday, September 07, 2016 - 09:32 AM UTC
Thank you very much, Si!
Actually, apart from the still ongoing construction to the college or whatever they are going to build there eventually, the old yard's becoming a pretty tranquil place. Hard to imagine how that maust have been when the all the big battlecruisers and battleships were built there...
I hope to get some more solid progress on my Hood over the weekend!
Cheers,
Jan
JJ1973
#345
Joined: August 22, 2011
KitMaker: 1,835 posts
Model Shipwrights: 1,832 posts
Posted: Monday, September 12, 2016 - 09:03 AM UTC
Some progress at last - finished re-building the parts that I had to tear apart (degaussing cables) and got a little bit of progress
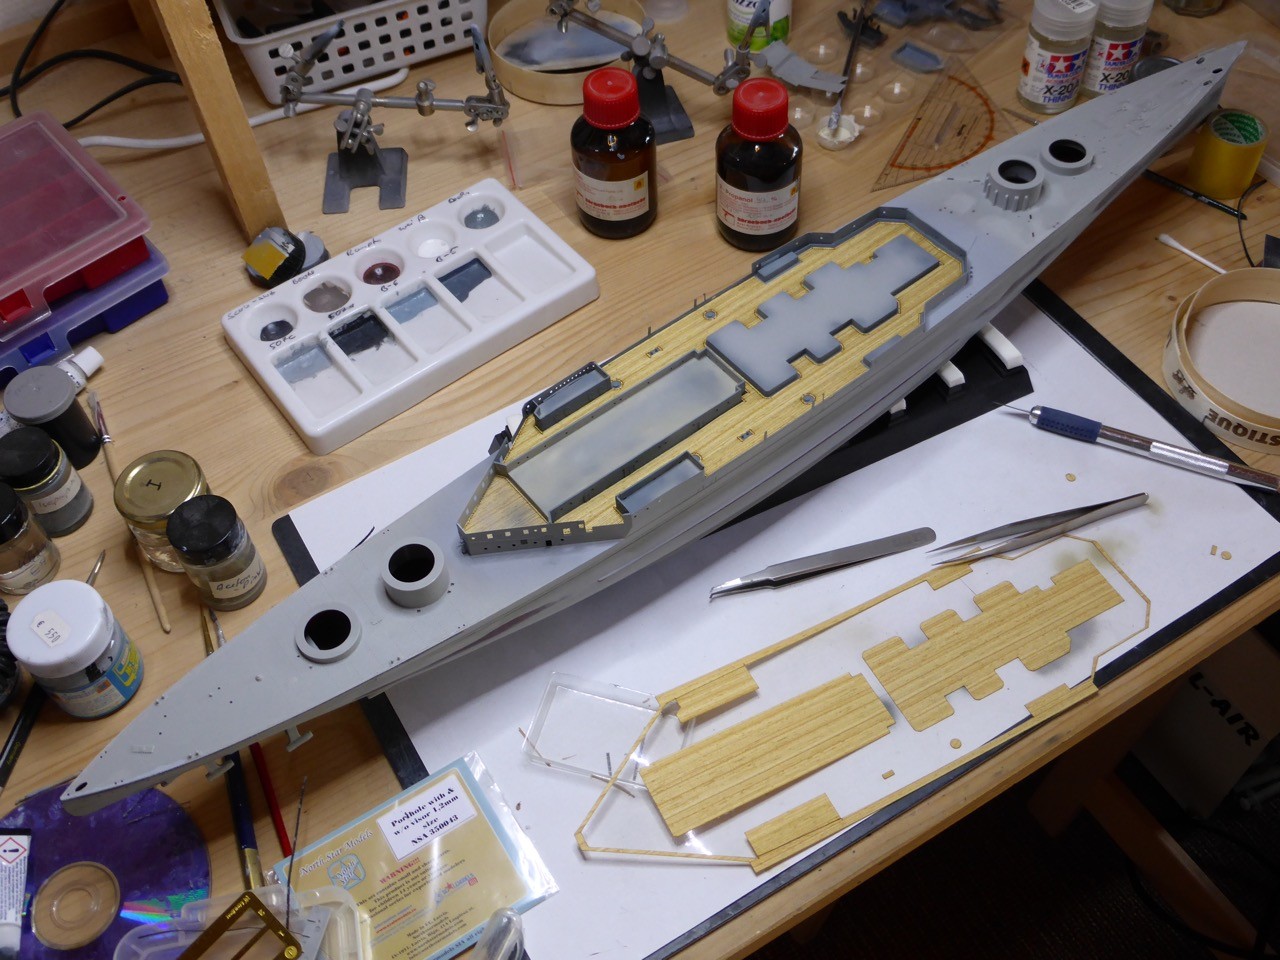
First thing to do however was to get the wooden deck down on the 'inside' areas on the forecastle deck.
Fit was quite good, even though there are lots of modifications from the Lion Roar PE. And then - the areas that don't fit will be entirely out of sight later on!
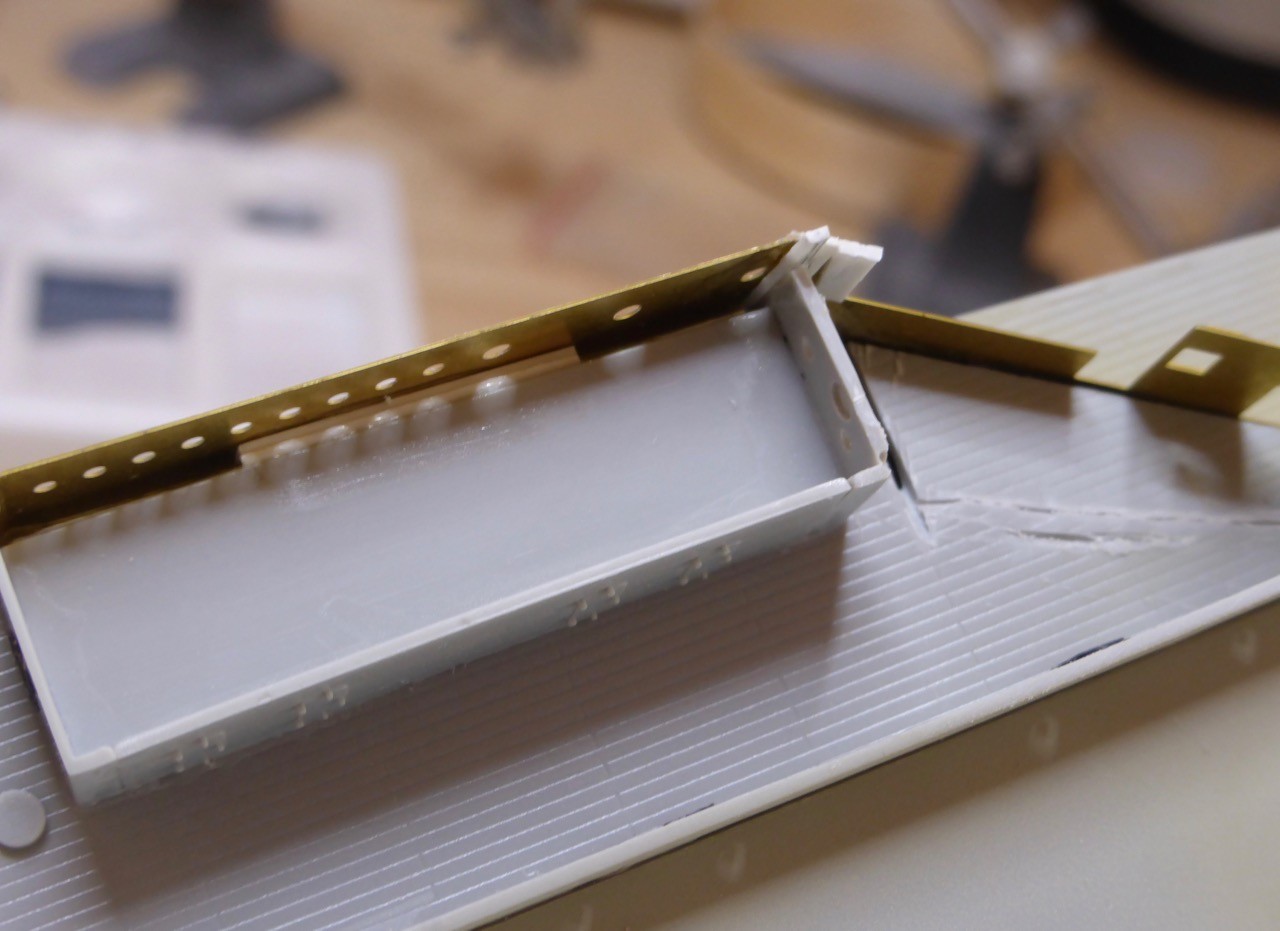
I have to say, I'm extremely happy with the way the wood deck covers my little operation to the deck on the starboard side next to the Admiral's cabin.
Old pics of the cut plastic:

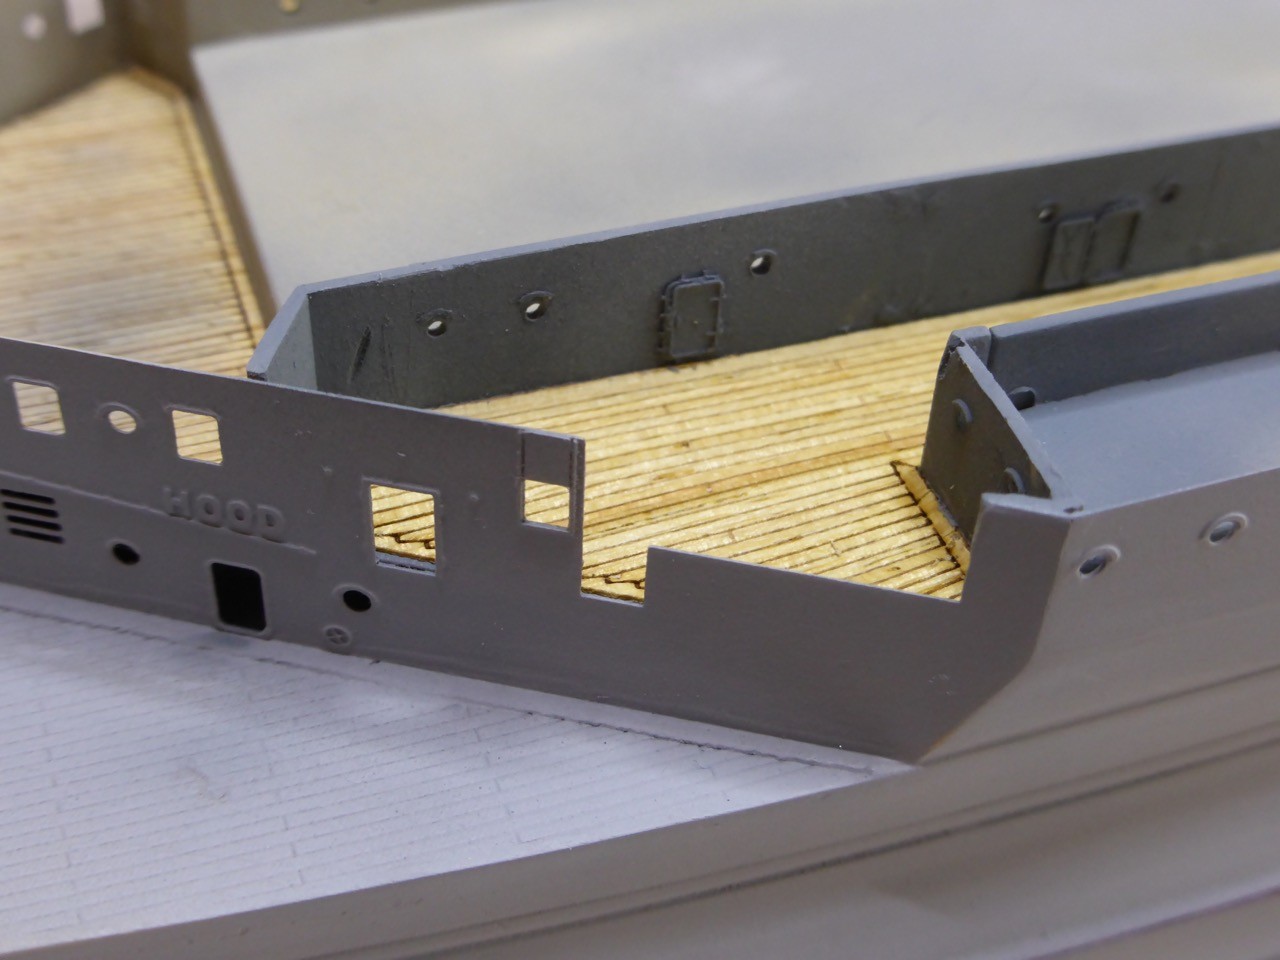
Covered with wood:
The degaussing back on, went one without much hassle.
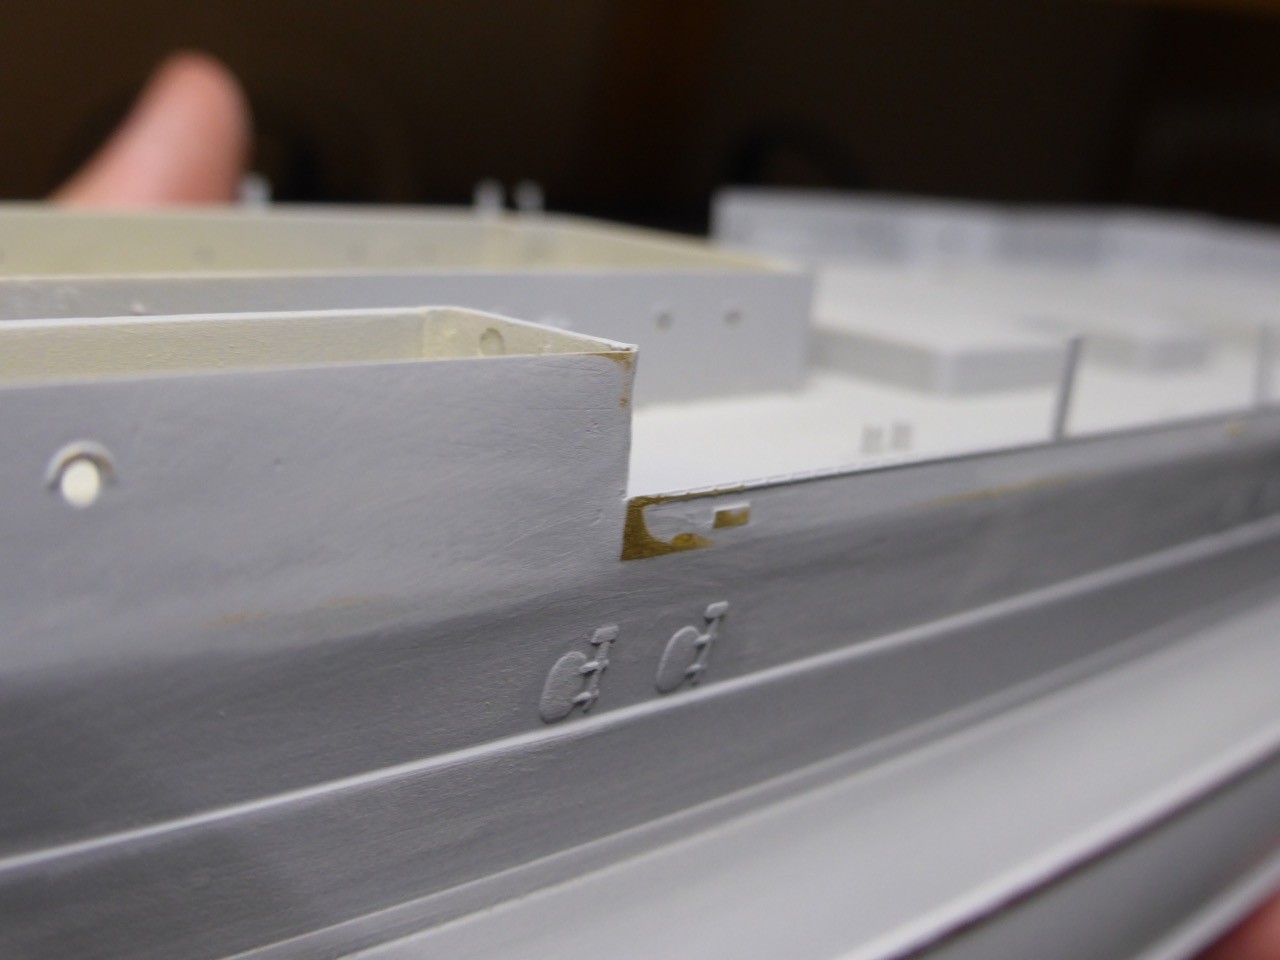
Next step I am not entirely satisfied with, but it'll have to do: while sanding the hull, I removed all the eyelids of the portholes. Now I got some North Star portholes, cut them in half and glued them on as eyelids on the hull.
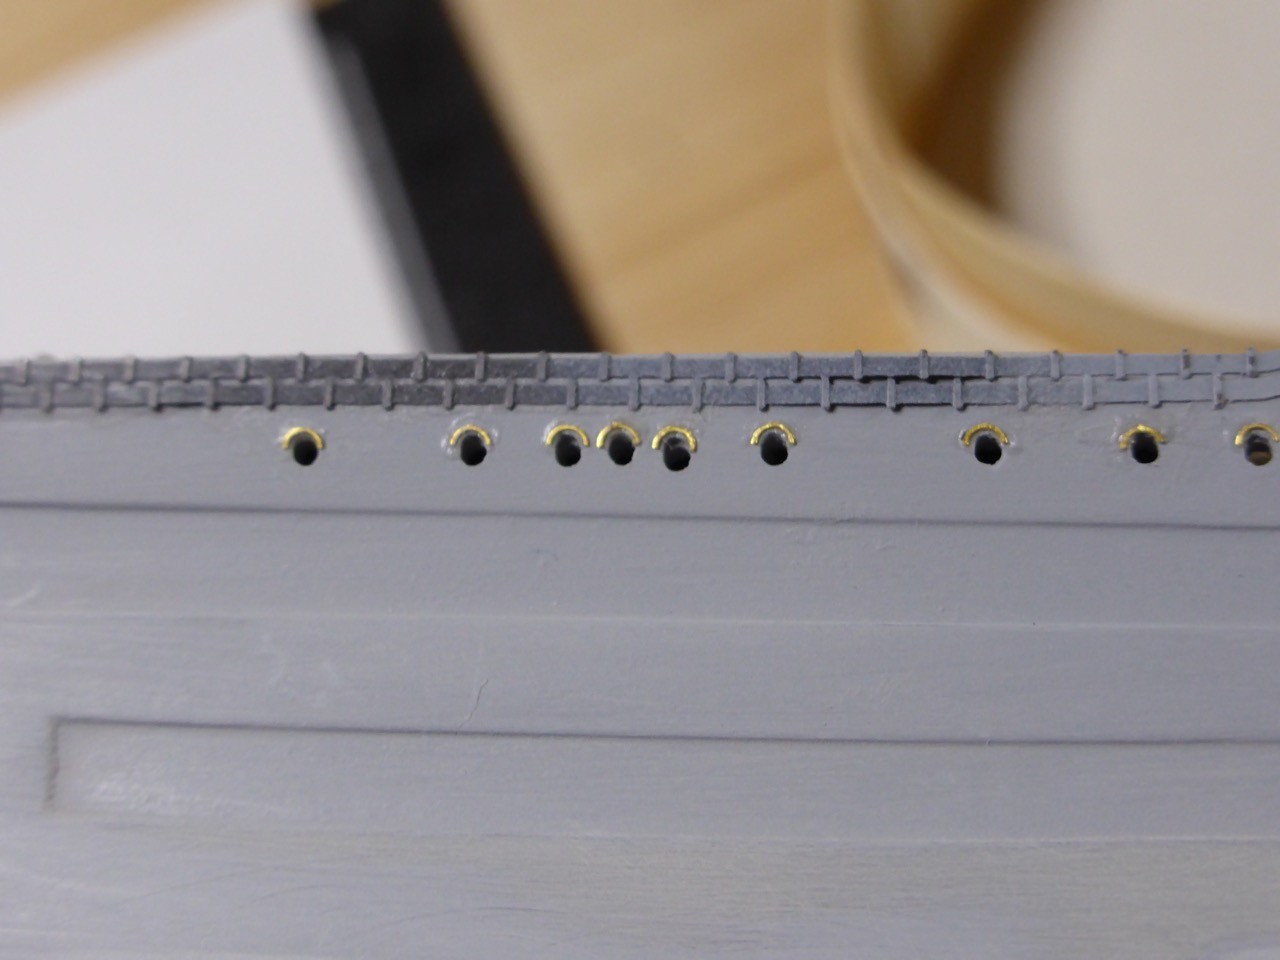
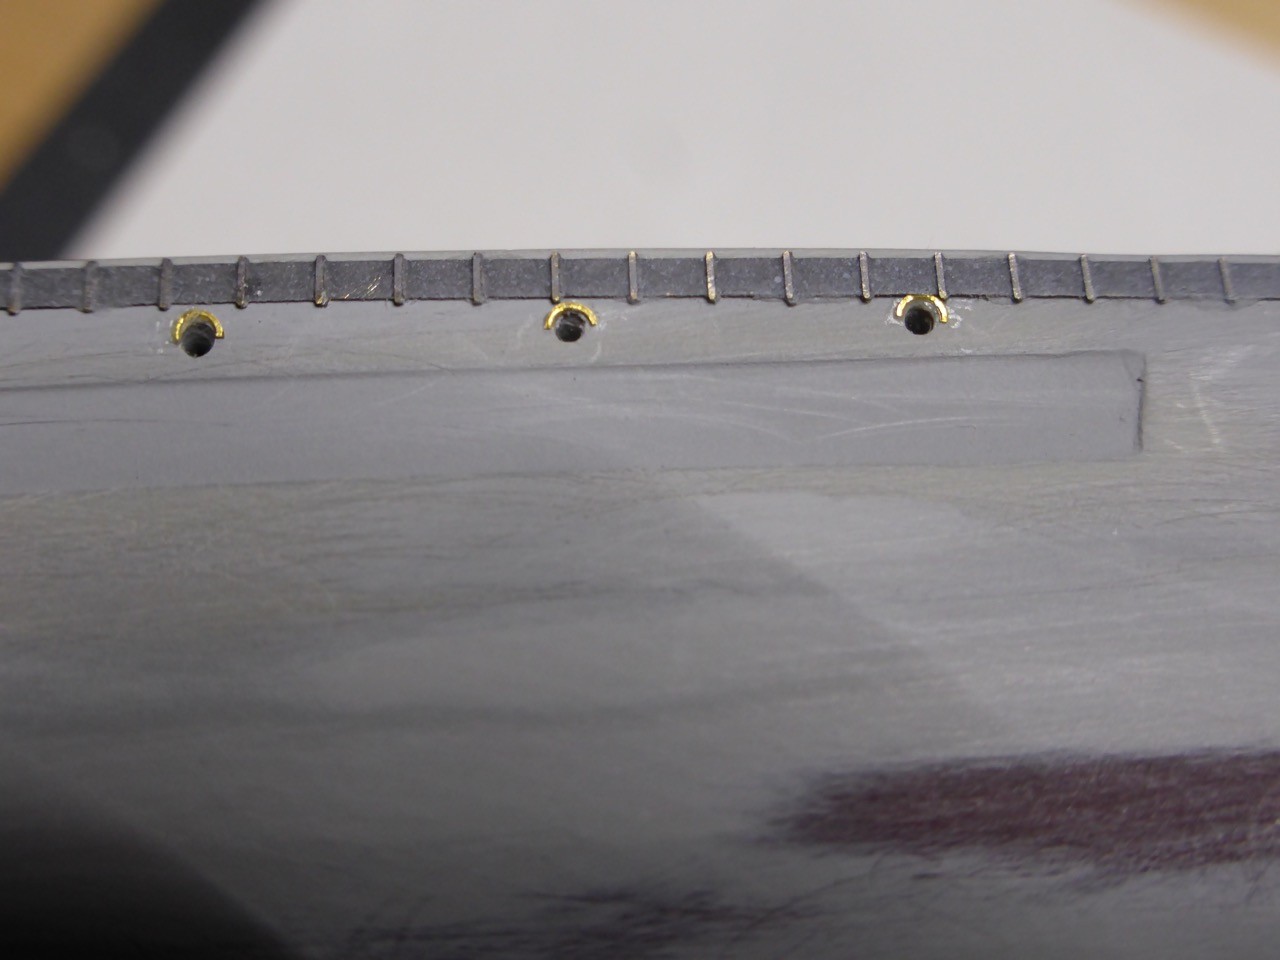
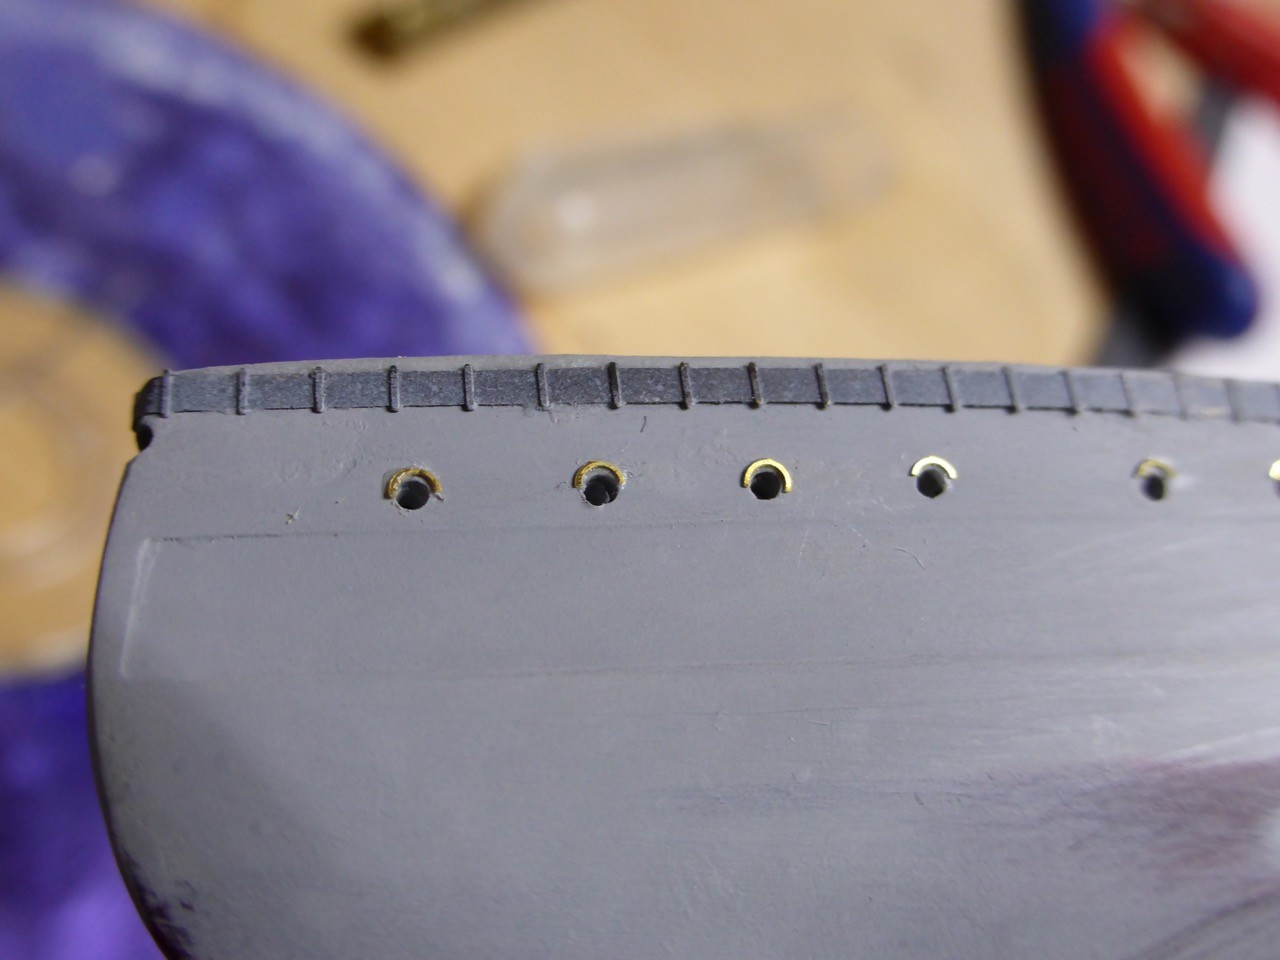
However, they are really thin, so thin that in some places the glue (even though I tried to be REALLY careful with applying glue) is more prominent than the PE part...still looks good on the pictures here, but under a coat of surfacer it become prominent on some of the portholes...
One final coat of surfacer
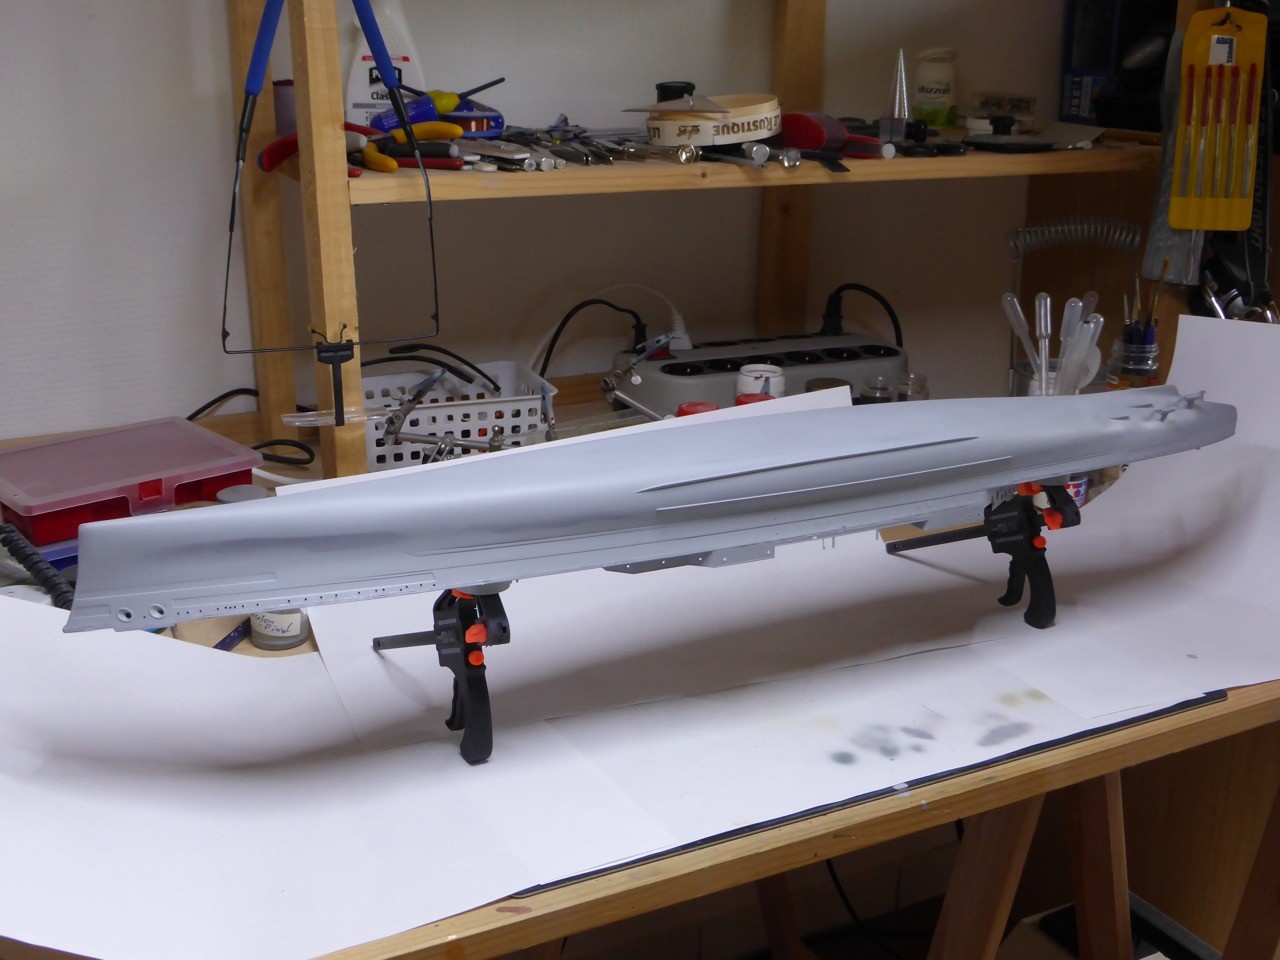
and then it's time for the boot topping. I'm doing that the other way round as most of you here, to me this way is easier: I spray a broad black line all around the hull
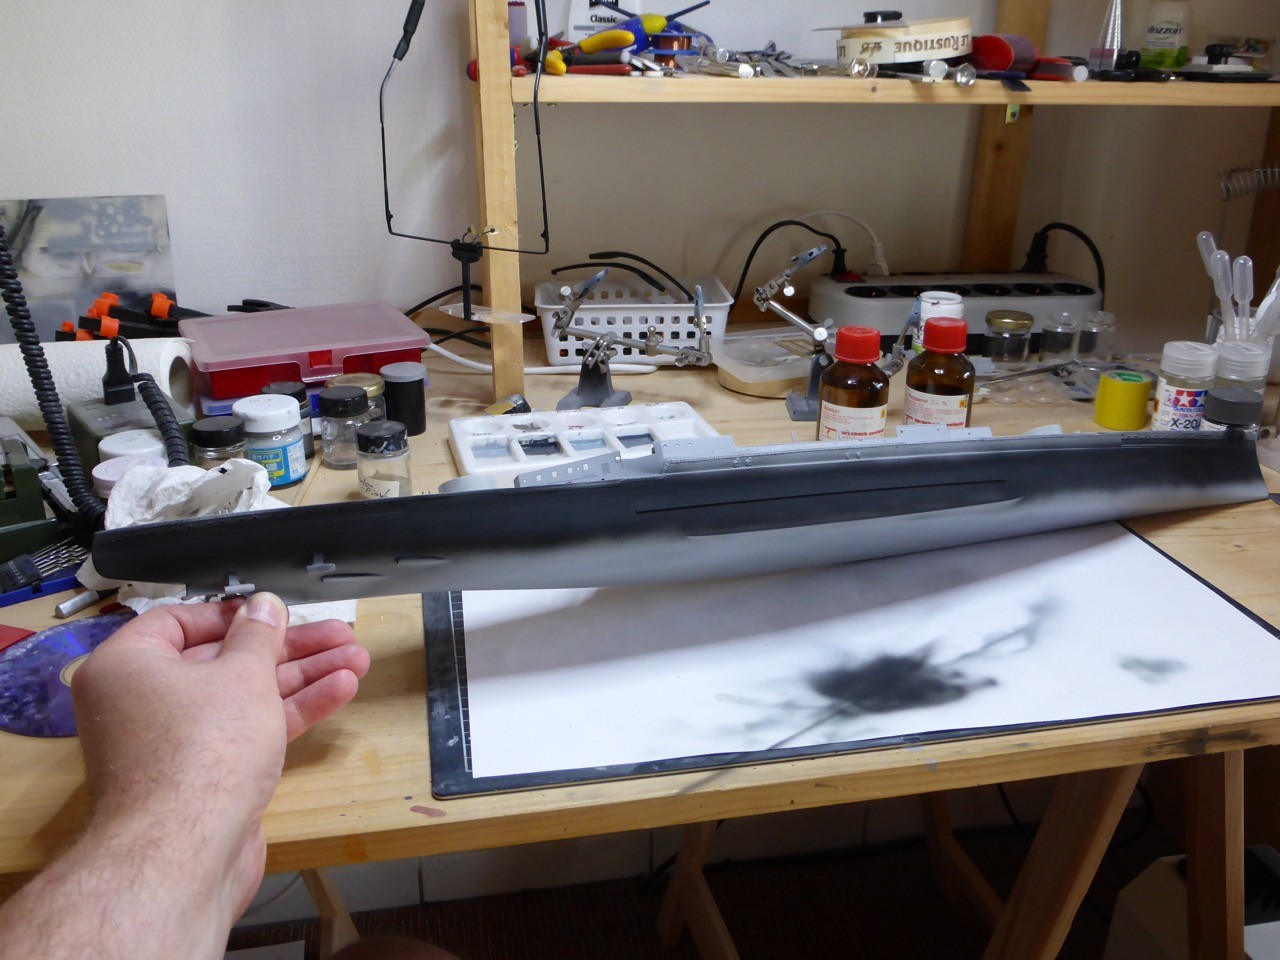
and then add my 'yellow boot topping', which is 6 mm Tamyia masking tape. 6 mm equals 2.10 m in 1/350 scale, and 2 m is about a standard width for those boot toppings on big ships. It was for German ships anyway, and I reckon from pictures that the major RN vessels are not too far away from that.
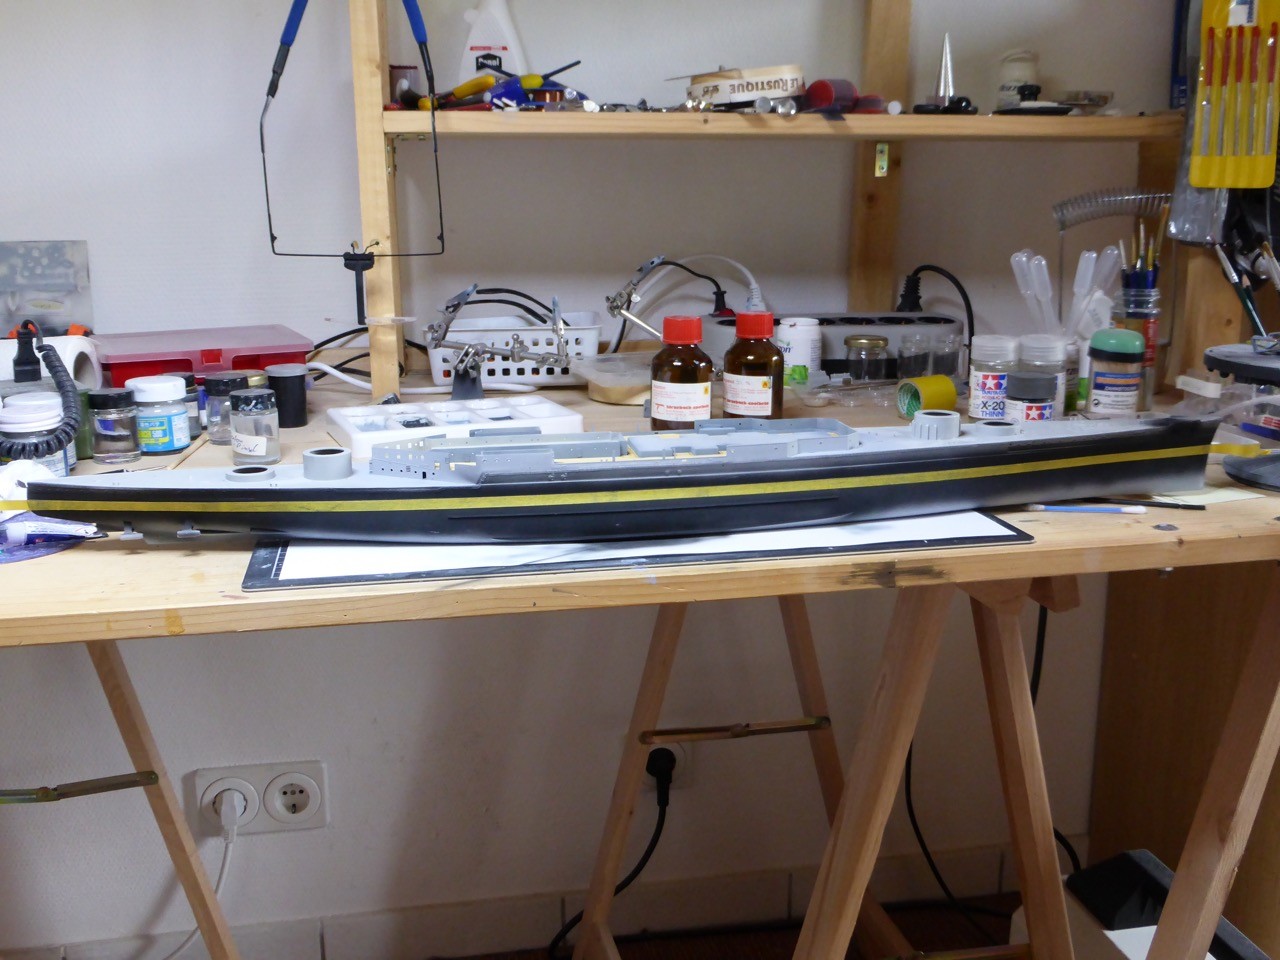
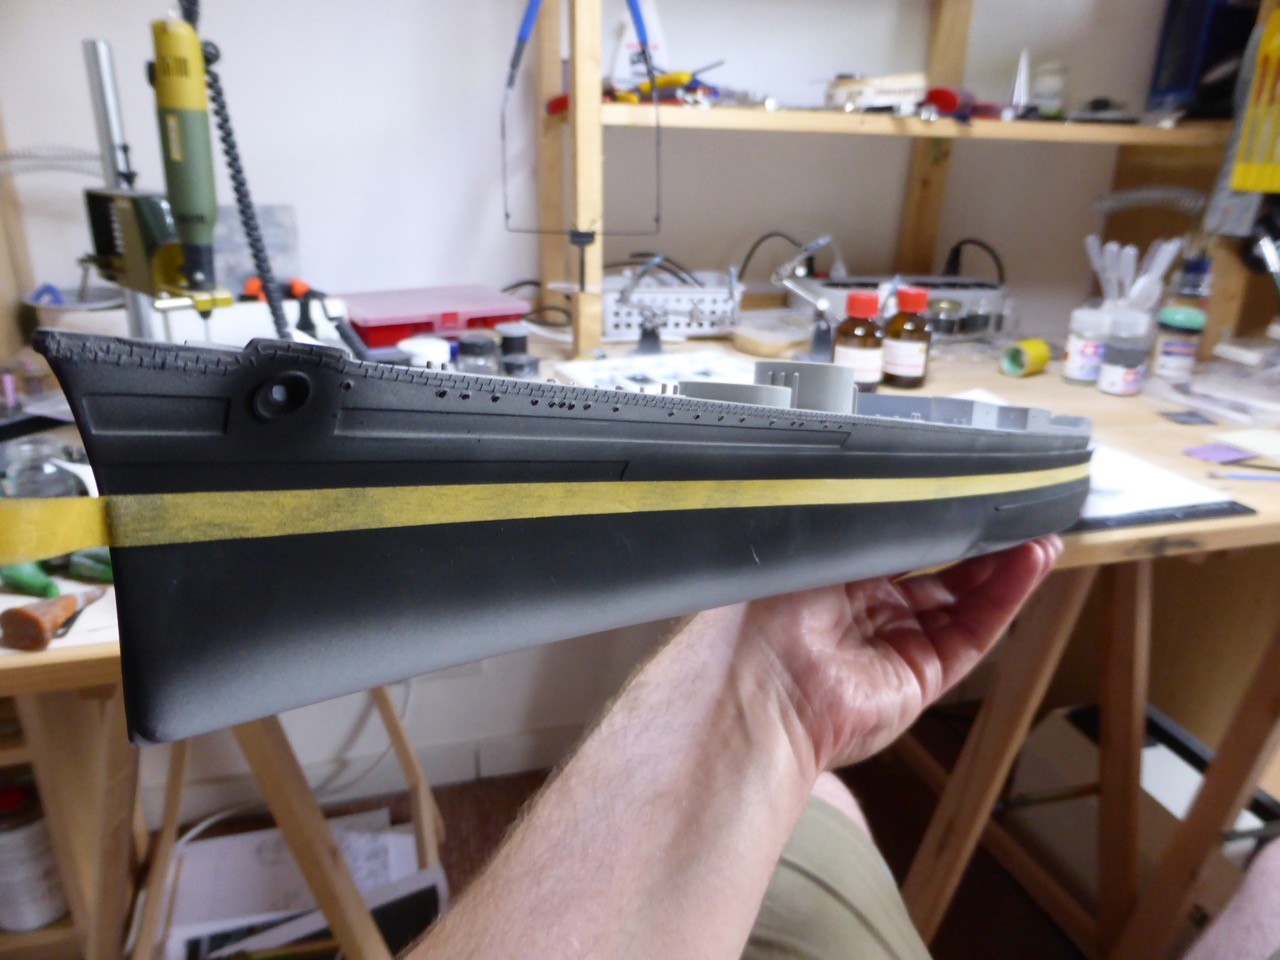
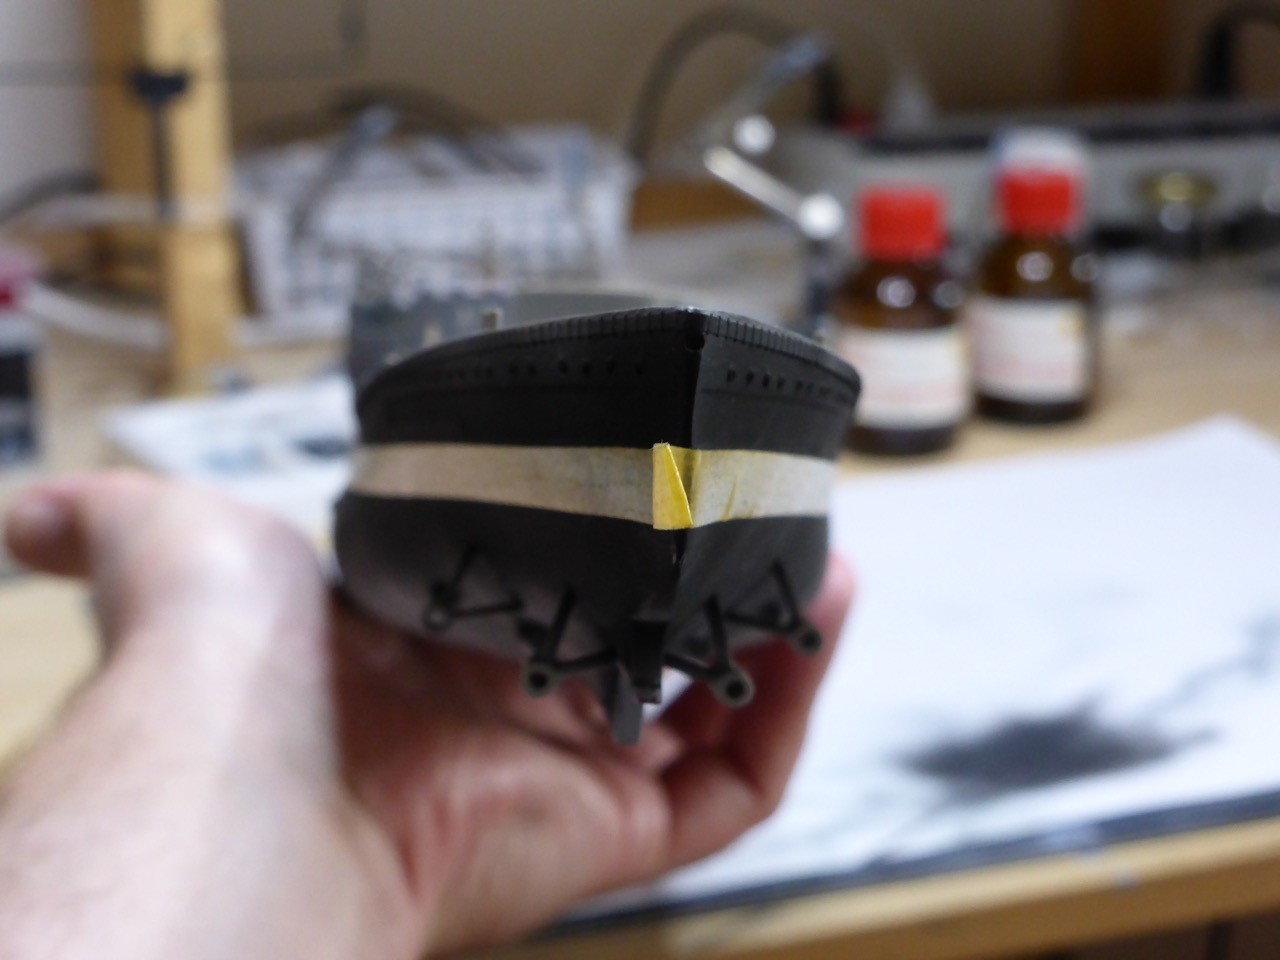
By doing it this way, I get a perfectly even boot topping, and I can correct the masking tape easily until I am satisfied before I go on painting.
Last thing I got accomplished was the dark red hull, with no further masking.
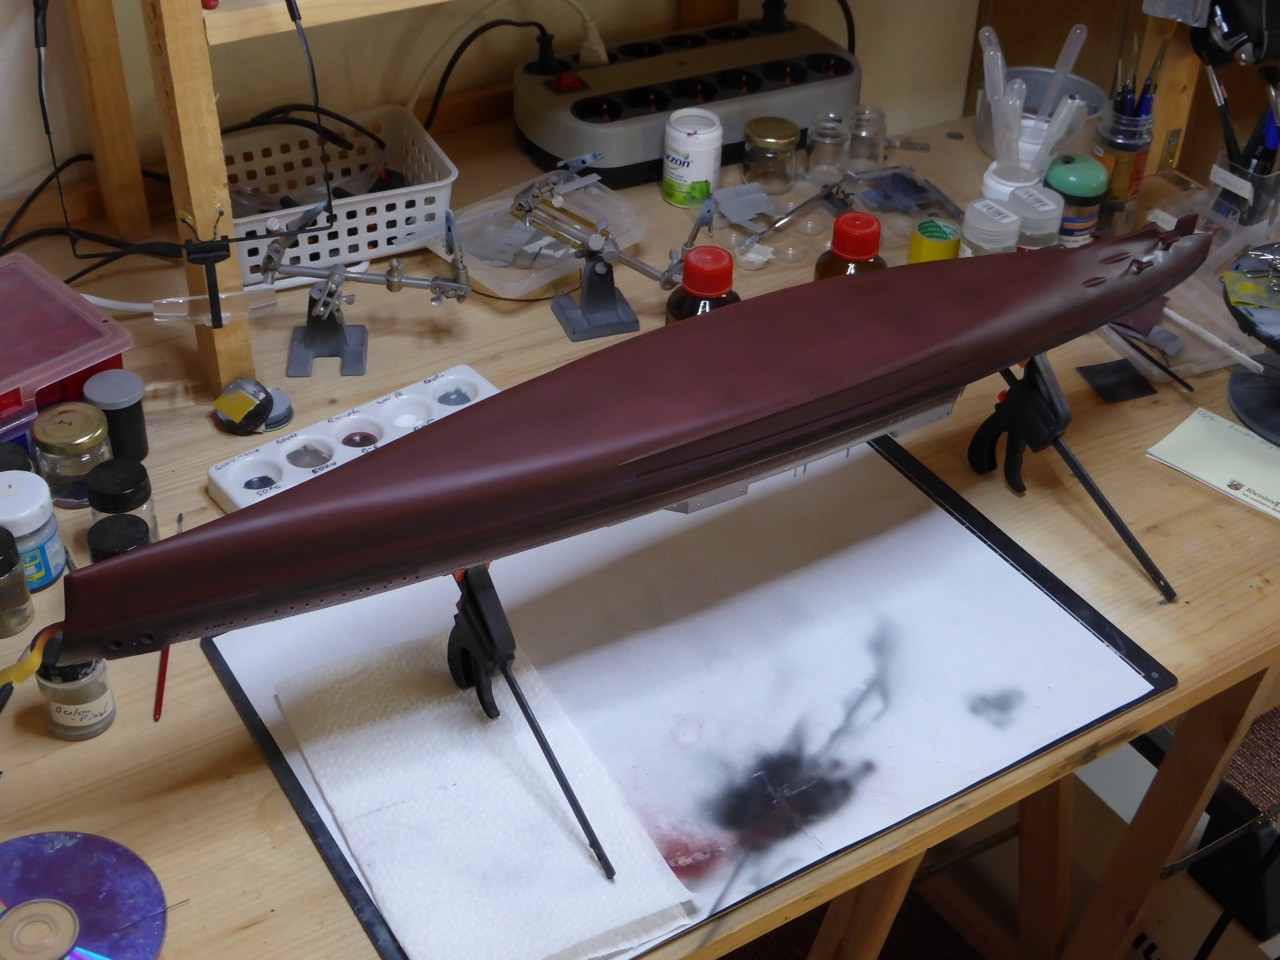
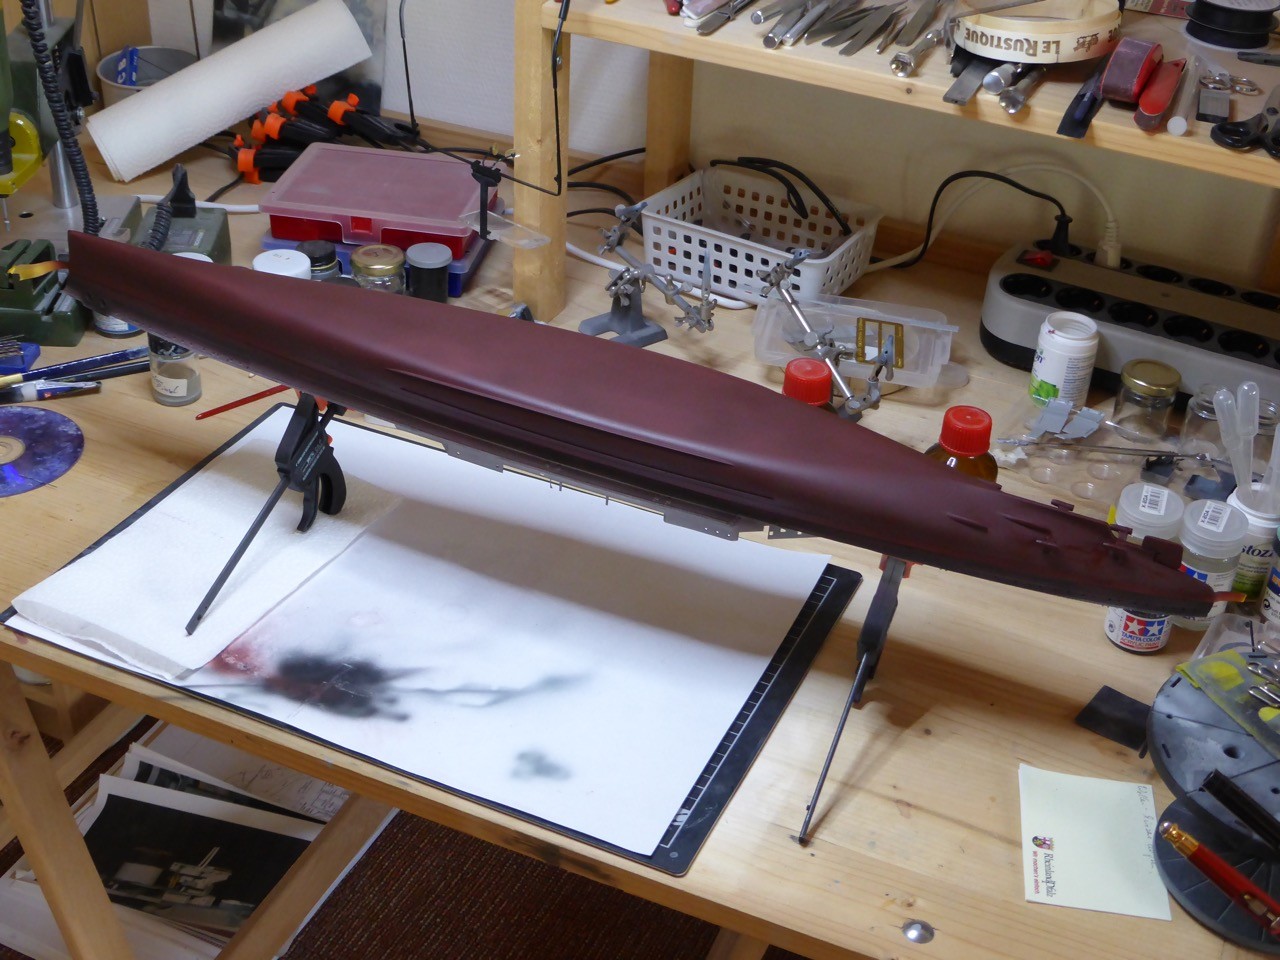
Probably have to fix some smaller inaccuracies - that was quite a huge area to spray and I got a little out of training in working with surfaces big as this - but it looks good for the most part.
Next then will be masking the lower hull, with the masking tape just on top of the 6 mm 'line' of tape, so really not much to worry about straight or even masking. Then the upper hull will be sprayed in RN 507B (or Tamyia XF 66).
So much for today (actually Sunday, but did not find the time to post), thank you very much for looking and the next update should be up in a week!
Cheers,
Jan
First thing to do however was to get the wooden deck down on the 'inside' areas on the forecastle deck.
Fit was quite good, even though there are lots of modifications from the Lion Roar PE. And then - the areas that don't fit will be entirely out of sight later on!
I have to say, I'm extremely happy with the way the wood deck covers my little operation to the deck on the starboard side next to the Admiral's cabin.
Old pics of the cut plastic:
Covered with wood:
The degaussing back on, went one without much hassle.
Next step I am not entirely satisfied with, but it'll have to do: while sanding the hull, I removed all the eyelids of the portholes. Now I got some North Star portholes, cut them in half and glued them on as eyelids on the hull.
However, they are really thin, so thin that in some places the glue (even though I tried to be REALLY careful with applying glue) is more prominent than the PE part...still looks good on the pictures here, but under a coat of surfacer it become prominent on some of the portholes...
One final coat of surfacer
and then it's time for the boot topping. I'm doing that the other way round as most of you here, to me this way is easier: I spray a broad black line all around the hull
and then add my 'yellow boot topping', which is 6 mm Tamyia masking tape. 6 mm equals 2.10 m in 1/350 scale, and 2 m is about a standard width for those boot toppings on big ships. It was for German ships anyway, and I reckon from pictures that the major RN vessels are not too far away from that.
By doing it this way, I get a perfectly even boot topping, and I can correct the masking tape easily until I am satisfied before I go on painting.
Last thing I got accomplished was the dark red hull, with no further masking.
Probably have to fix some smaller inaccuracies - that was quite a huge area to spray and I got a little out of training in working with surfaces big as this - but it looks good for the most part.
Next then will be masking the lower hull, with the masking tape just on top of the 6 mm 'line' of tape, so really not much to worry about straight or even masking. Then the upper hull will be sprayed in RN 507B (or Tamyia XF 66).
So much for today (actually Sunday, but did not find the time to post), thank you very much for looking and the next update should be up in a week!
Cheers,
Jan
Cosimodo
#335
Joined: September 03, 2013
KitMaker: 1,808 posts
Model Shipwrights: 871 posts
Posted: Monday, September 12, 2016 - 12:10 PM UTC
Hi Jan,
Great update on Hood! Nice to get a result with the wooden deck on your earlier surgery. You're probably done with the port hole eyelids but I stuck them to the primer with Tamiya extra thin cement. A very small touch with brush will stick them to the paint so when you put on the topcoats that will seal them on.
Cheers
Michael
 |

WEB HOSTING BY


Copyright ©2021 Model Shipwrights and Kitmaker Network, a subsidiary of Silver Star Enterprises
All Rights Reserved. Please read our Conditions of Use and Privacy Policy.
All Rights Reserved. Please read our Conditions of Use and Privacy Policy.